
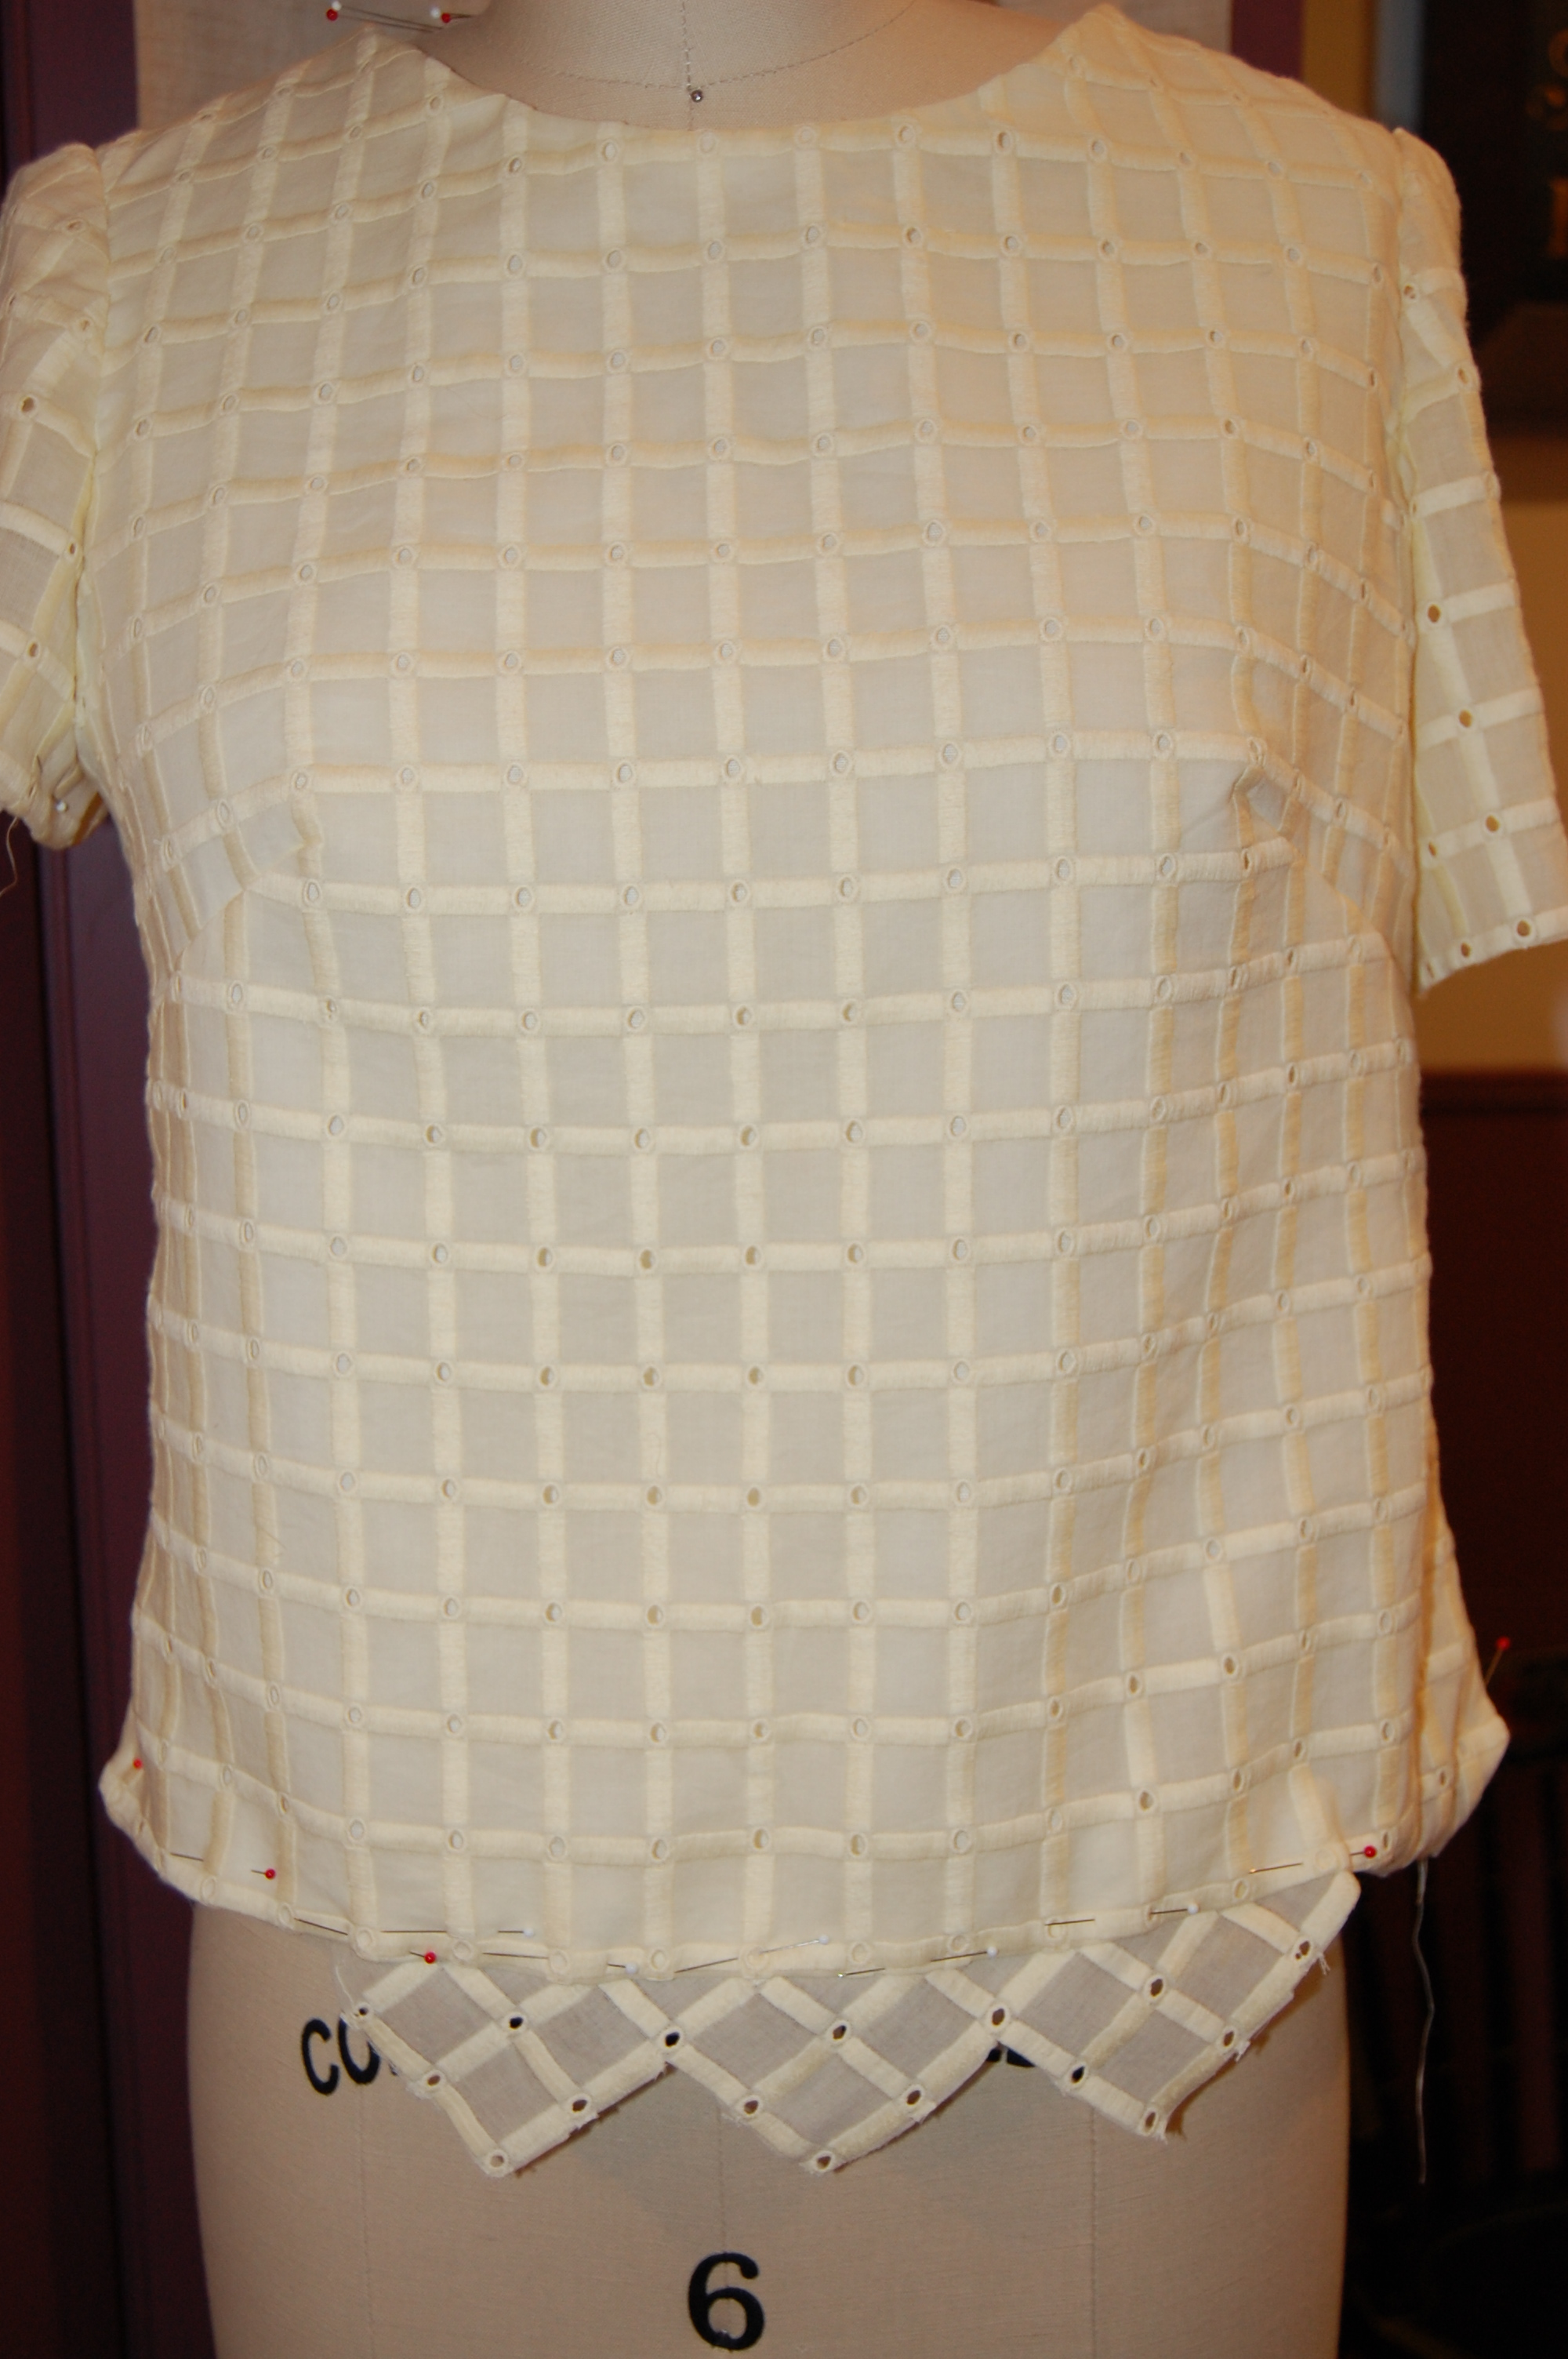
How did I go from this . . .
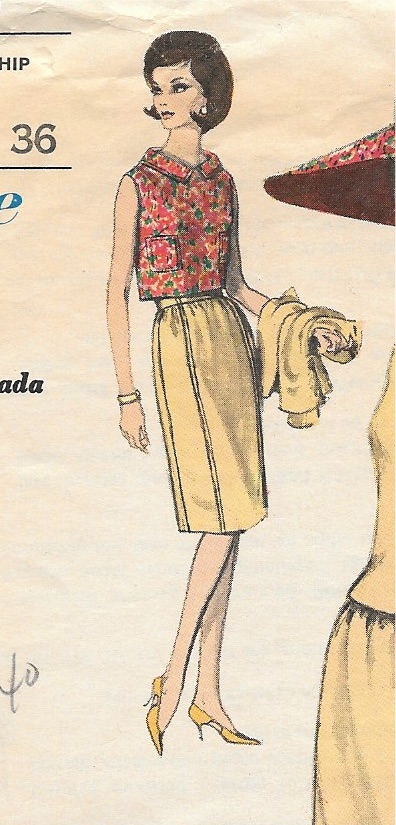
A collared overblouse.
to this?
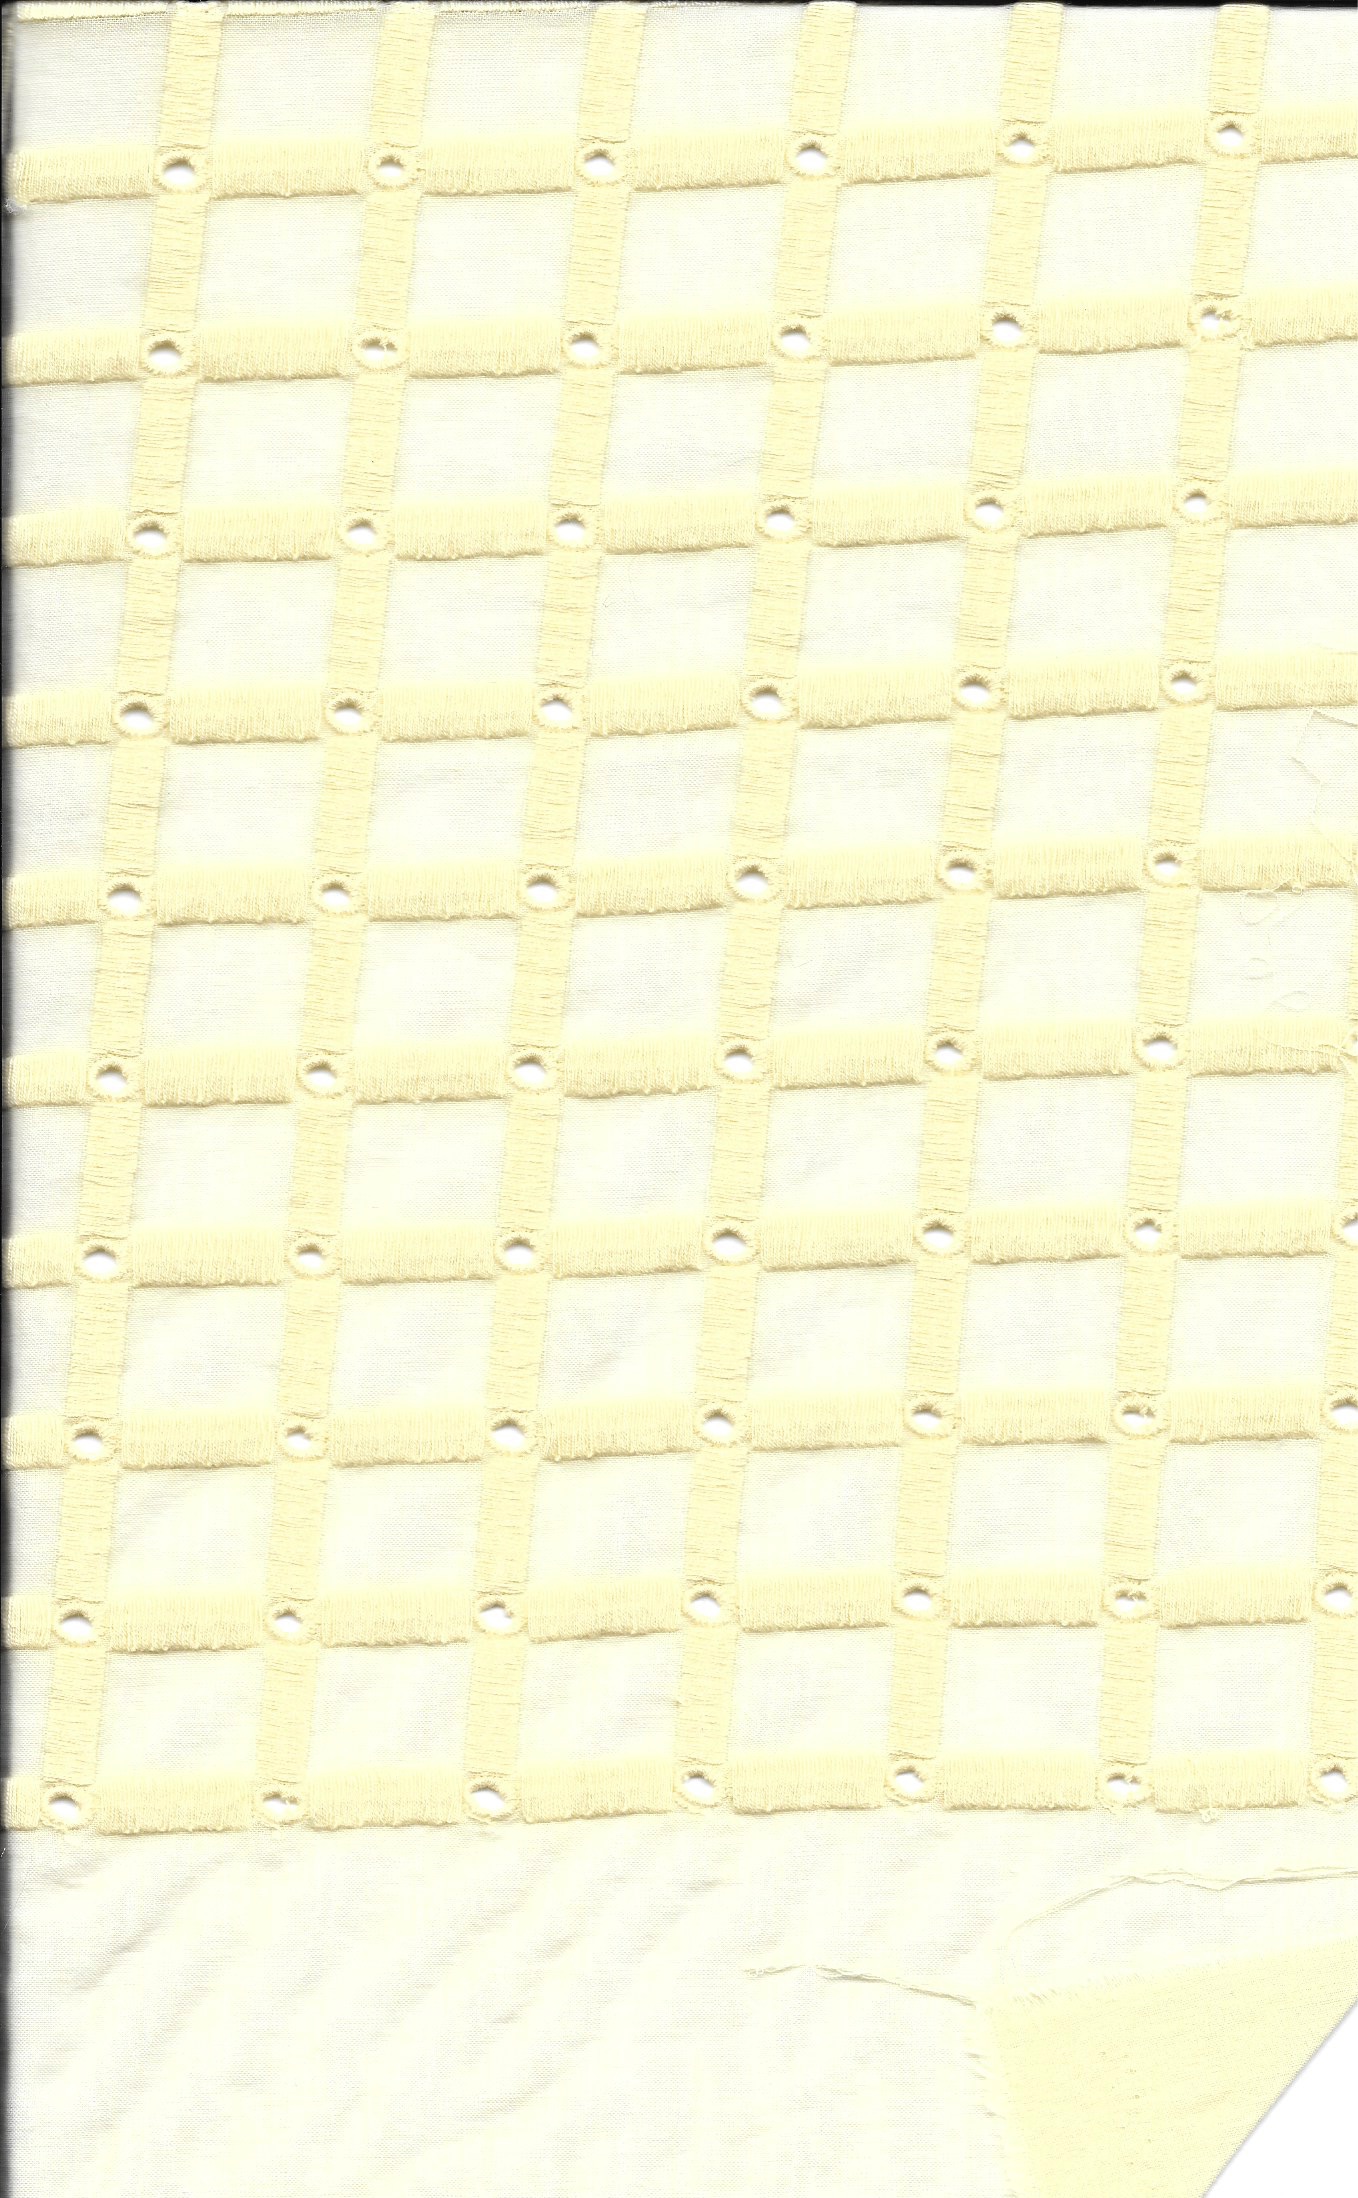
 It all started about a year ago when I saw this fabric – called Devonshire Cream Geometric Cotton Eyelet Batiste on the Britex Fabrics website. I sent off for a swatch and then ordered enough for a “blouse” although at the time, I wasn’t so sure what kind of a blouse it would be. I knew I would want sleeves in it. While the body of the blouse would need to be lined, the sleeves could be unlined to show off the gauzy design in the eyelet.
Inspiration finally struck a short few weeks ago when I got a small catalogue from J McLaughlin clothing company. Pictured in it was this “Lotus Blouse”:
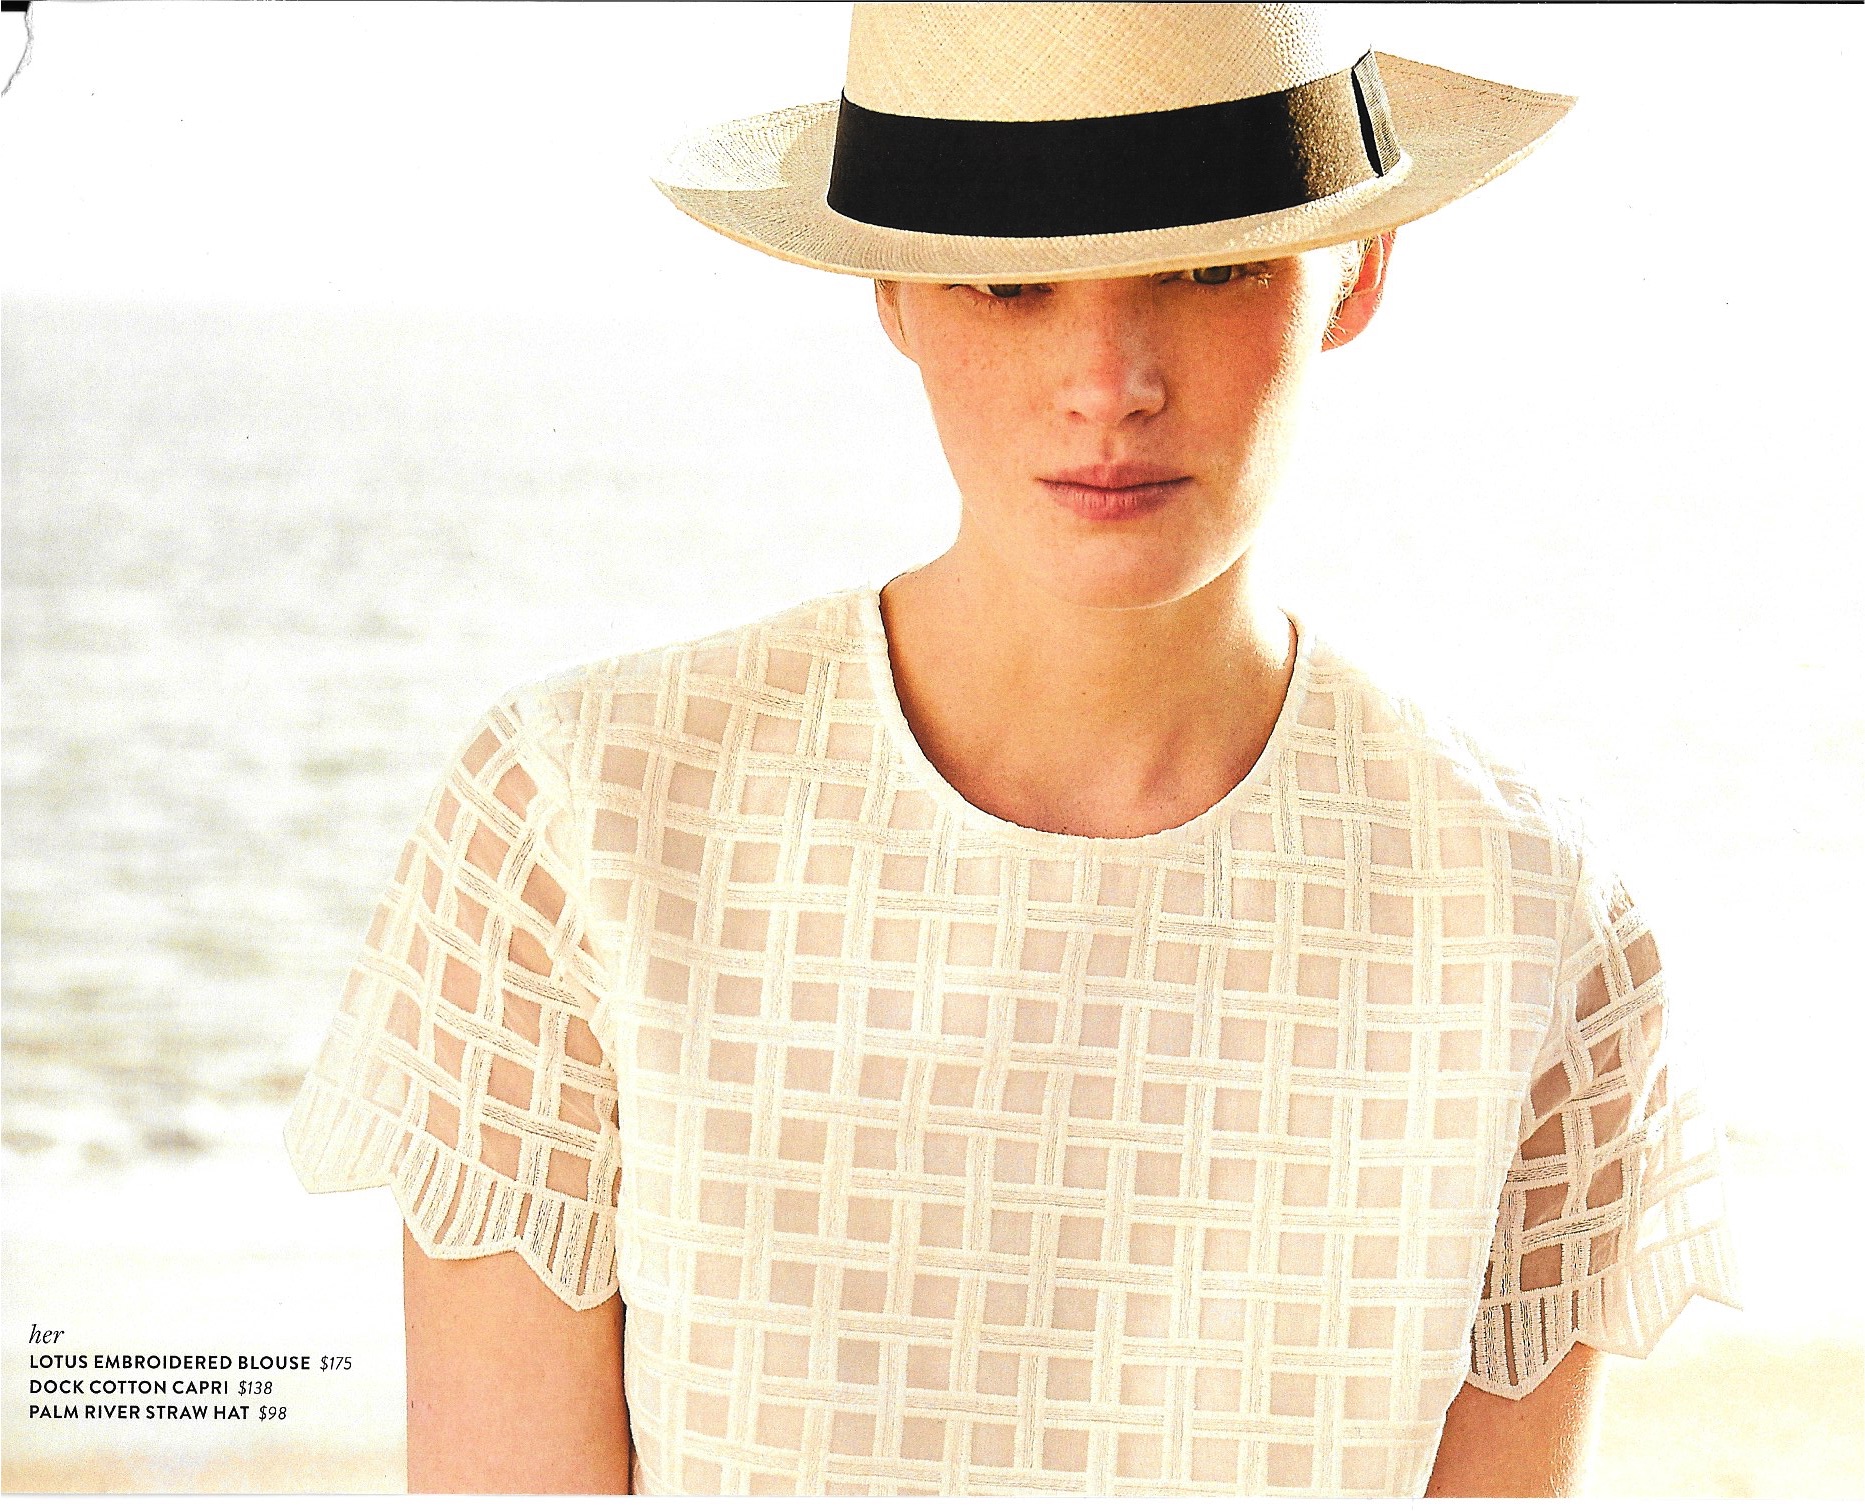
As soon as I saw the “square” design in the fabric, I thought of my eyelet – and then it did not take long for me to decide to make my own version of that blouse. The construction details? Well, I knew I would have to make those up as I went along. I started with the pattern shown above, a classic early 1960s short overblouse that zipped up the back. What could be better? It really didn’t matter that the neckline would be changed, sleeves added, inches added to the length – the basics were there and so I made a muslin/toile.
I cut an underlining for the body of the blouse from a lightweight linen/cotton blend that I always keep on hand. I marked the seam lines of that underlining with waxed tracing paper and then used it as my “pattern” for the eyelet, which allowed me to make sure that all the lines and corners of the eyelet matched across seams. I hand basted the underlining and the eyelet together which made machine sewing the darts and seams very precise.
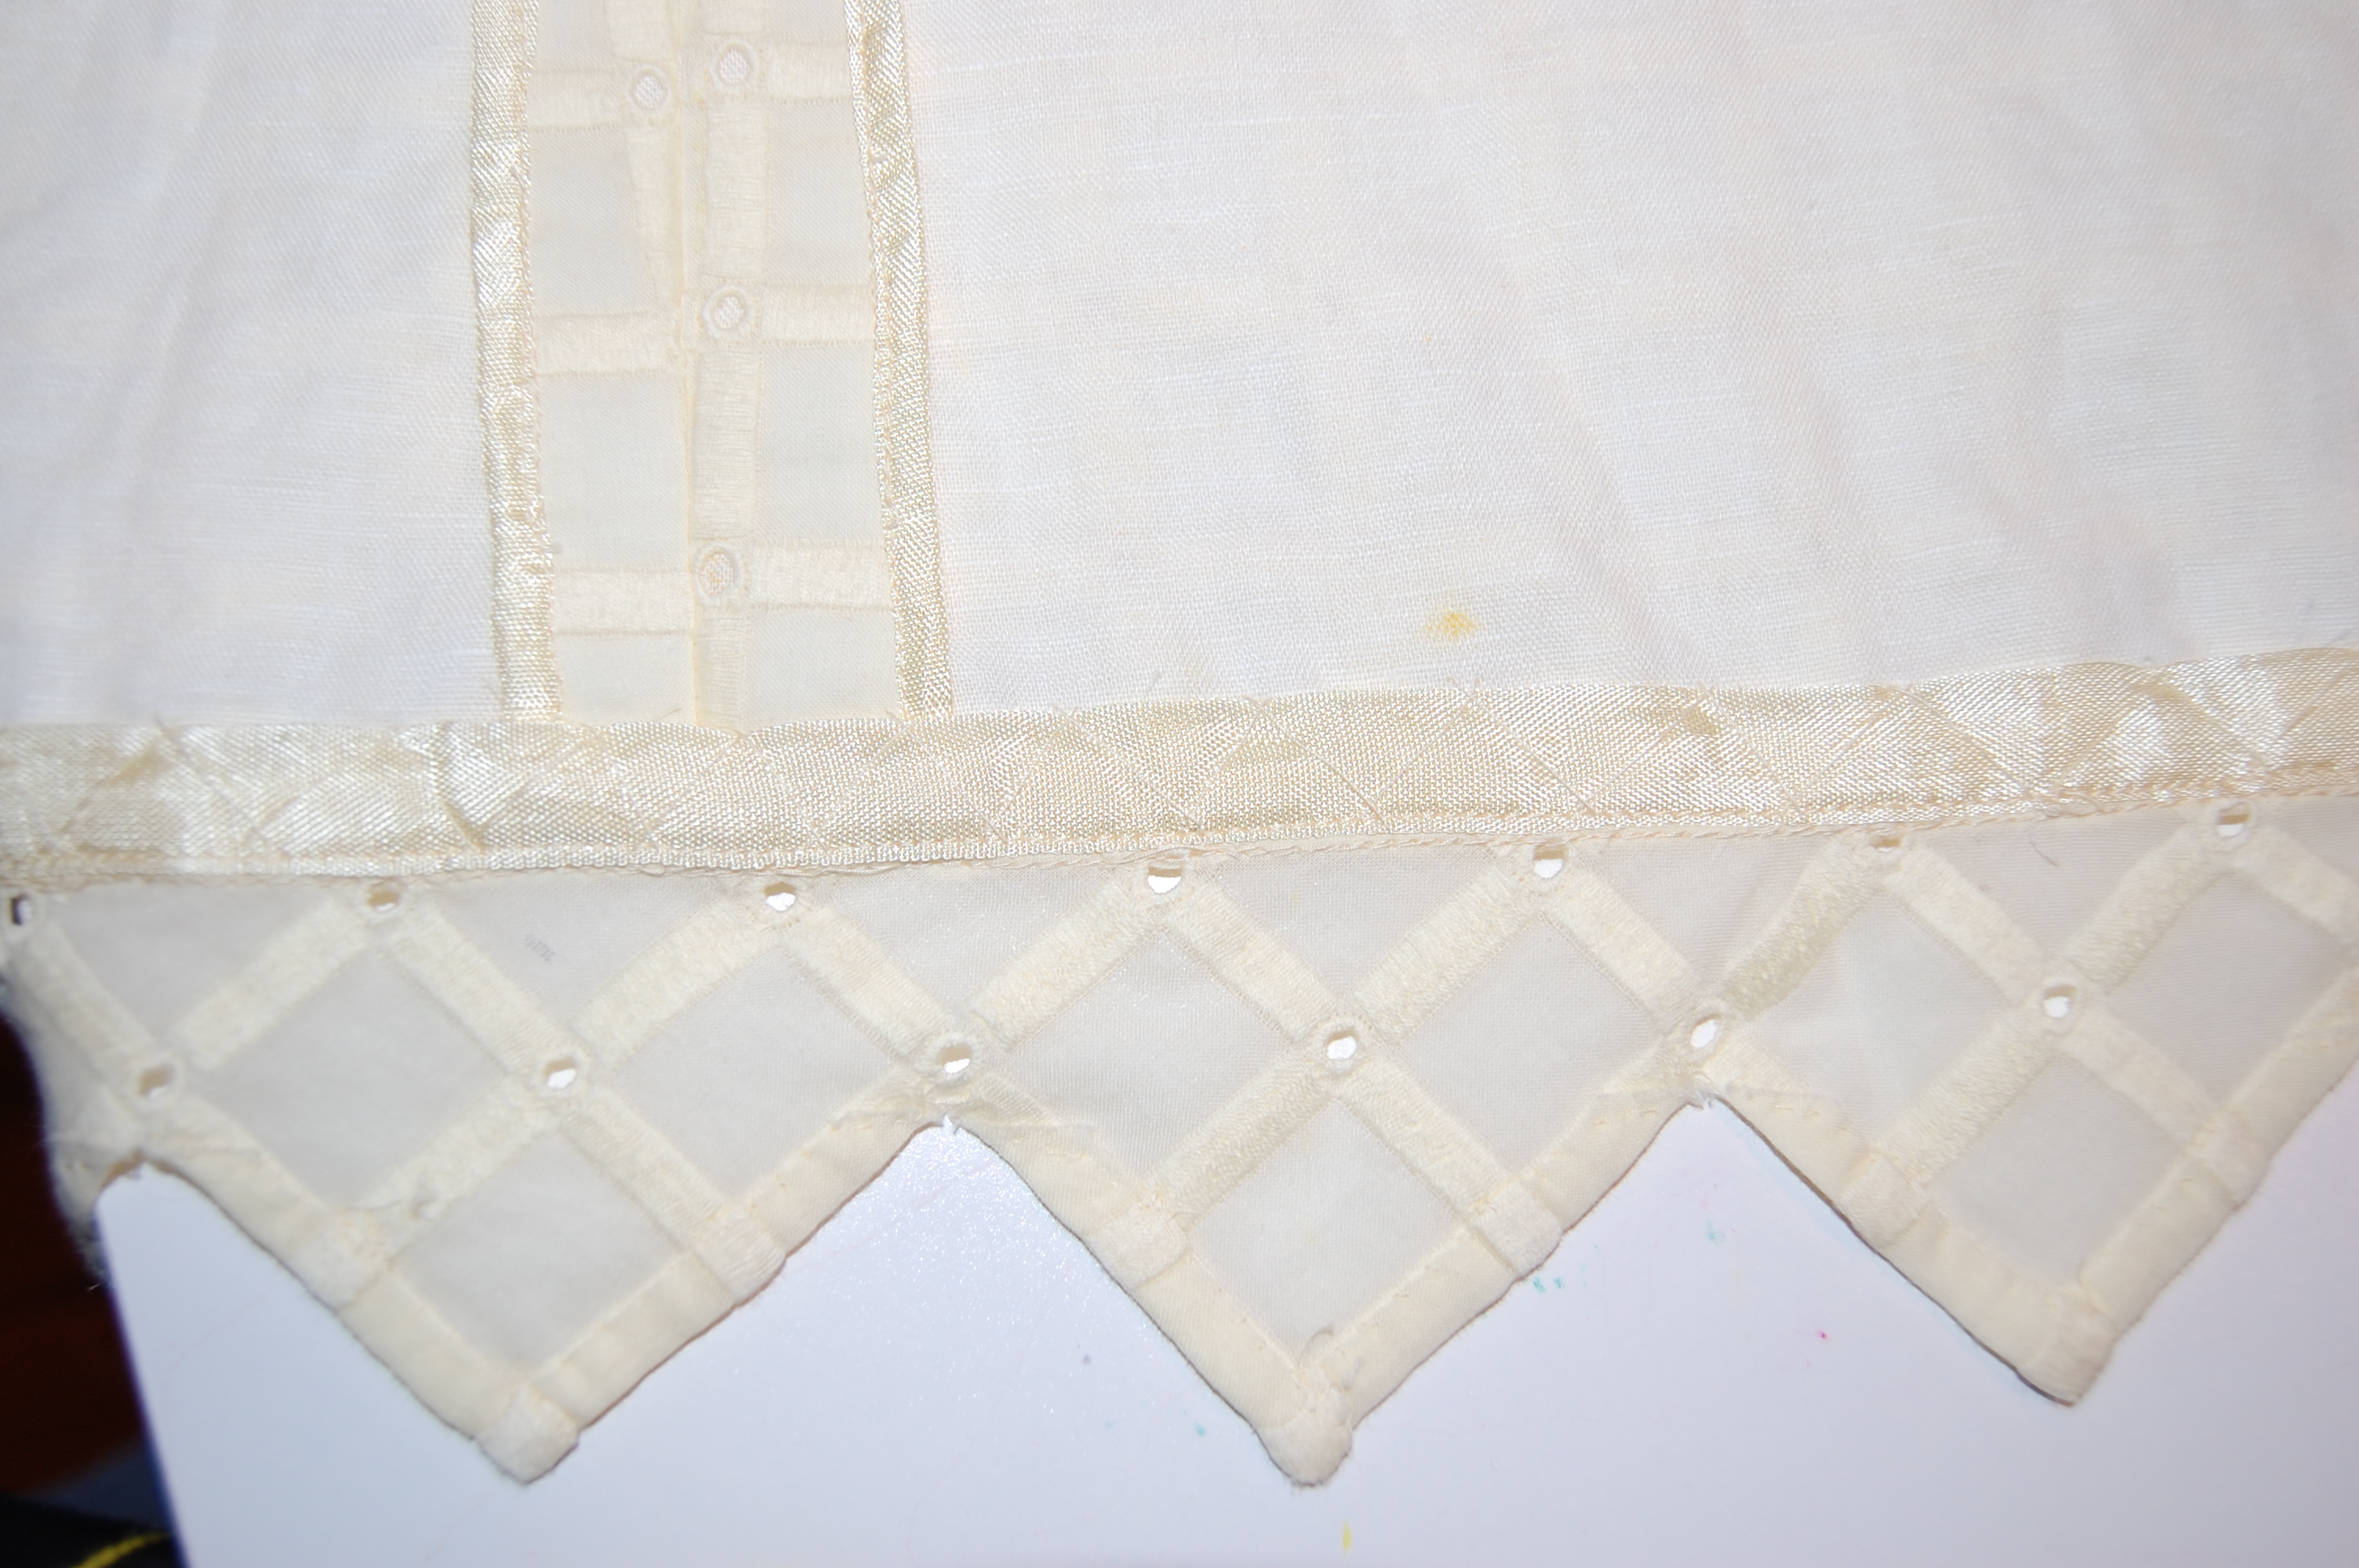
In order to put a sawtooth edge on the sleeves and the bottom of the blouse, I knew I would have to cut fabric on the bias. But first I had to decide how deep to make this self-trim. I did some experimenting to figure that out:

Should it be this narrow?
Or would a wider trim be better?
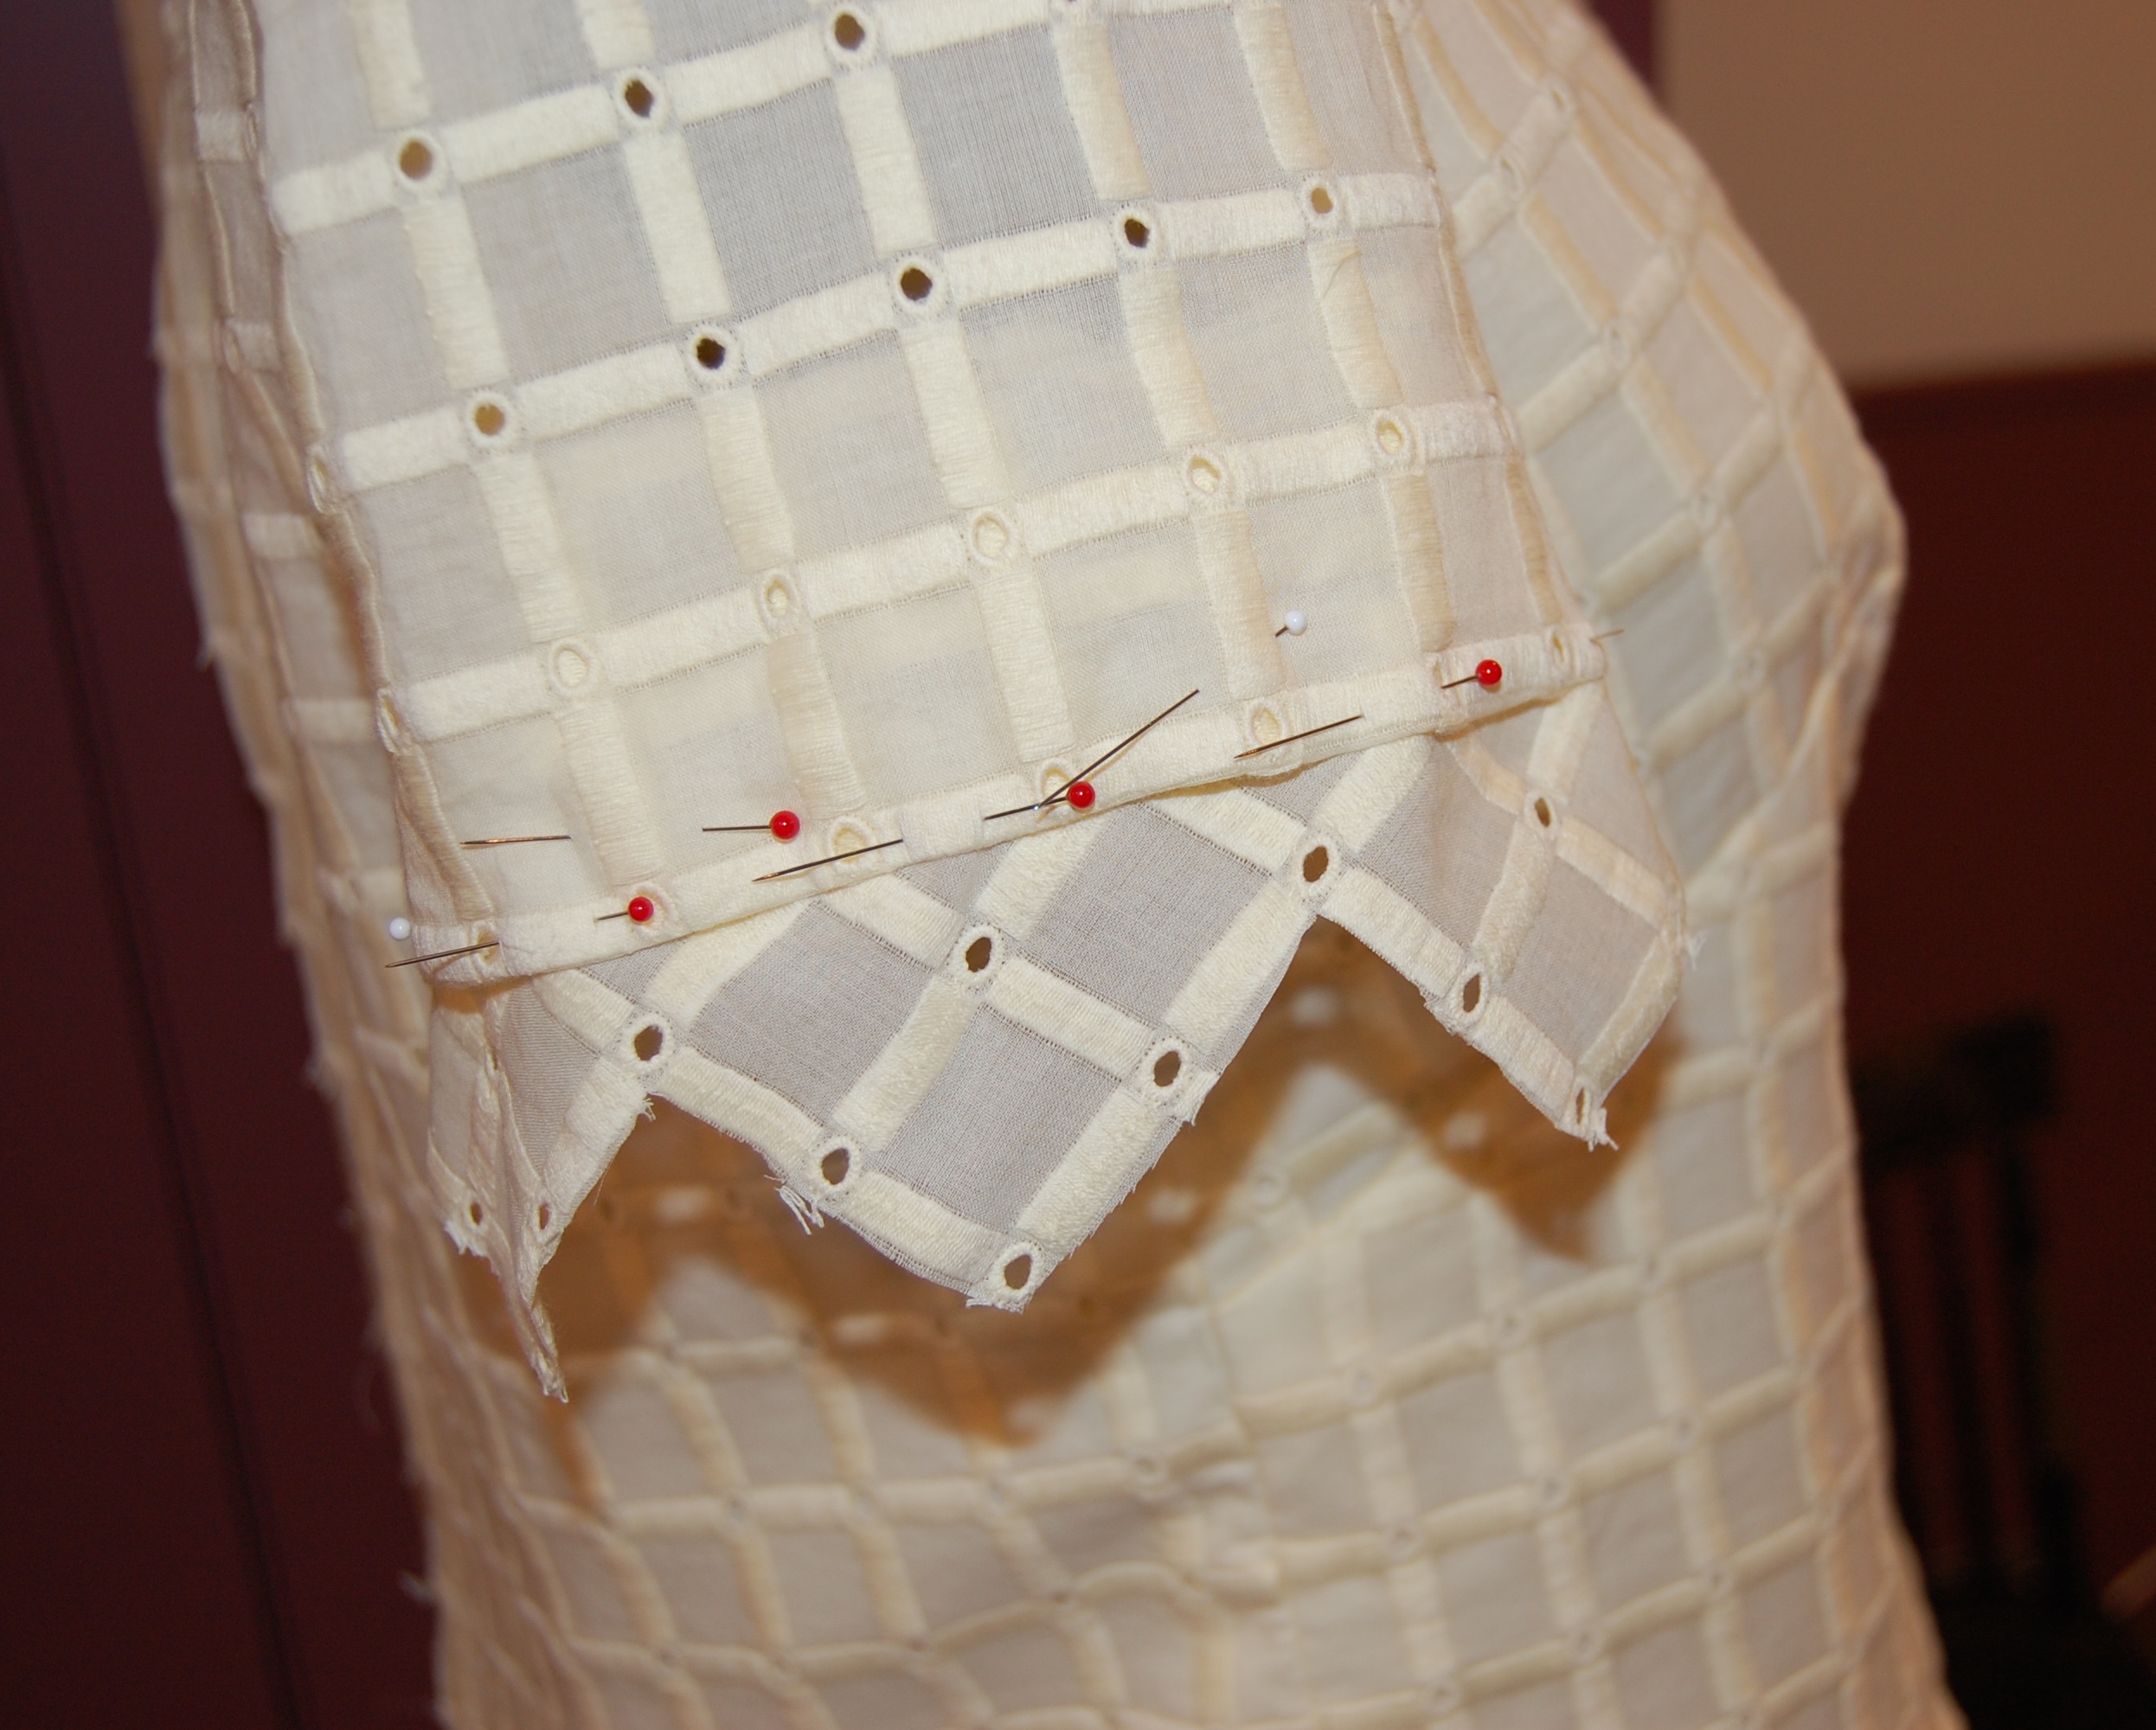
I decided the wider trim was necessary to make the proper impact. Here is a sample of it pinned onto one sleeve.
Once I decided the proper width of the trim, I set about hemming it by hand. Here is a photo of that “hemming” process.
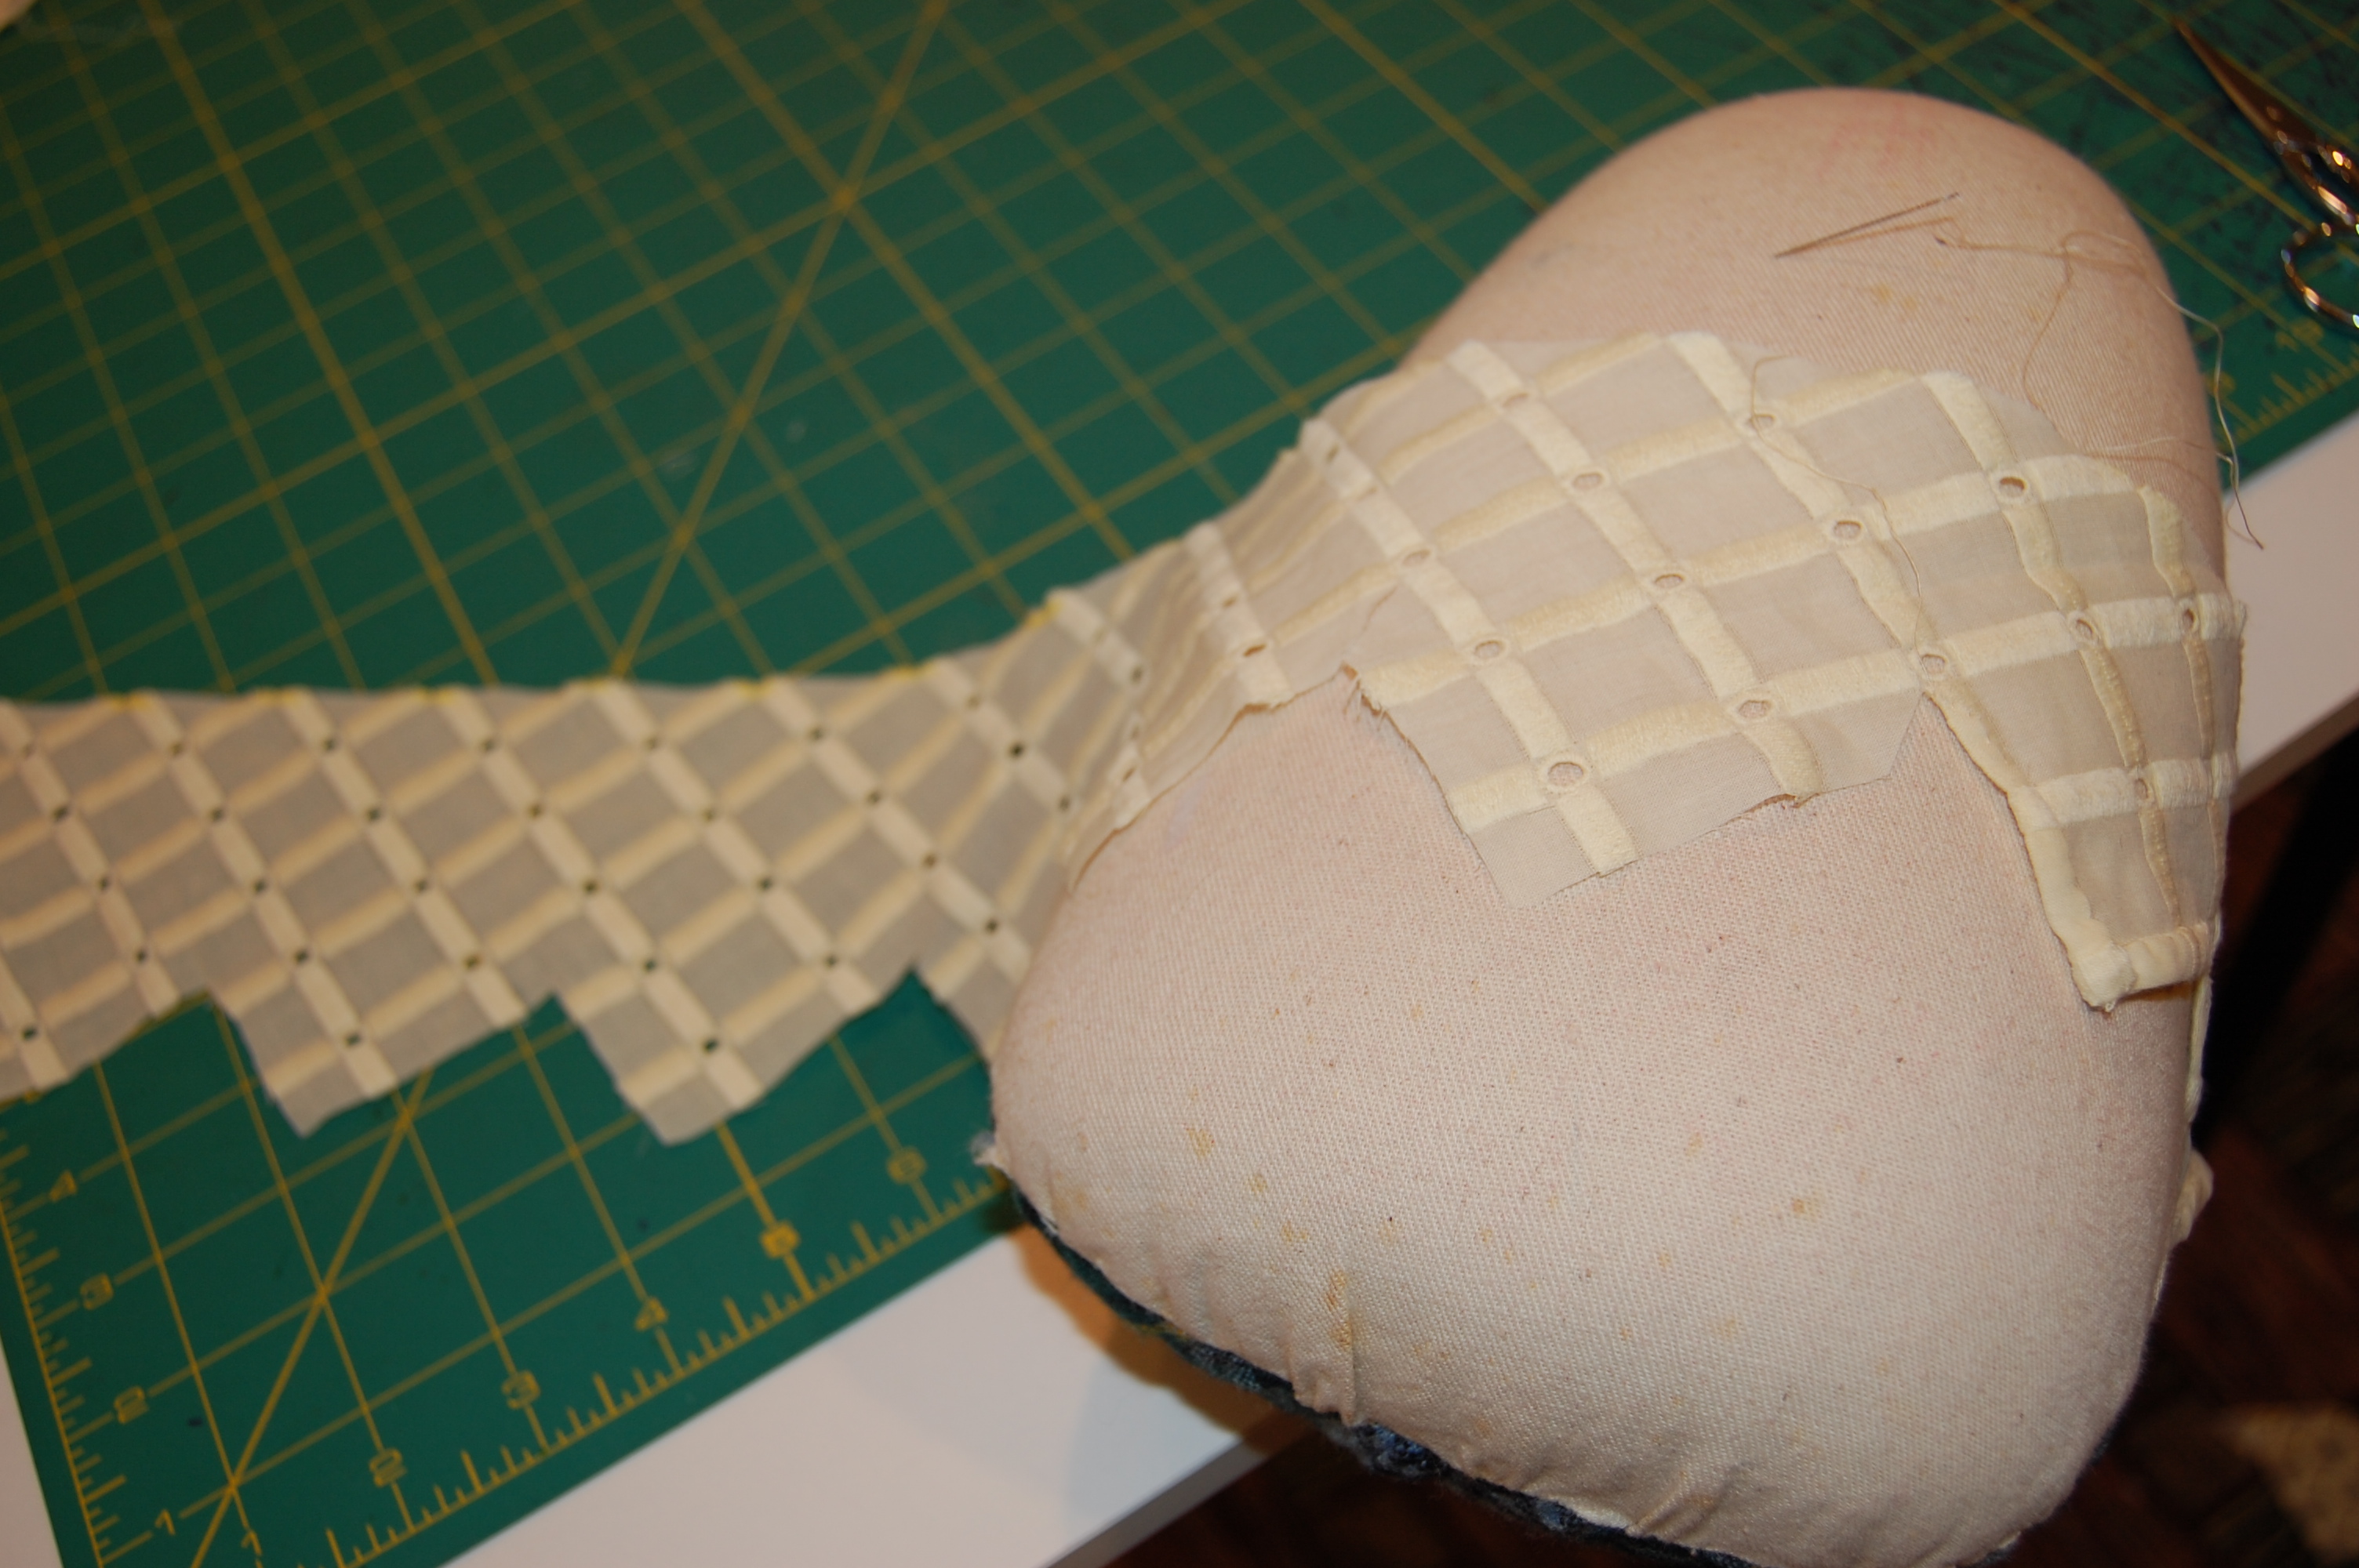
On the right you can see one “peak” already stitched.
Having the trim cut on the bias gave me flexibility in attaching it to the sleeve and bottom edges. Then finishing the inside raw edges provided its own challenge. I had already used Hug Snug rayon tape to finish the interior seams. The soft, non-bulky nature of this wonder tape gave me the idea to use it for finishing the armscyes and the interior sleeve edges.
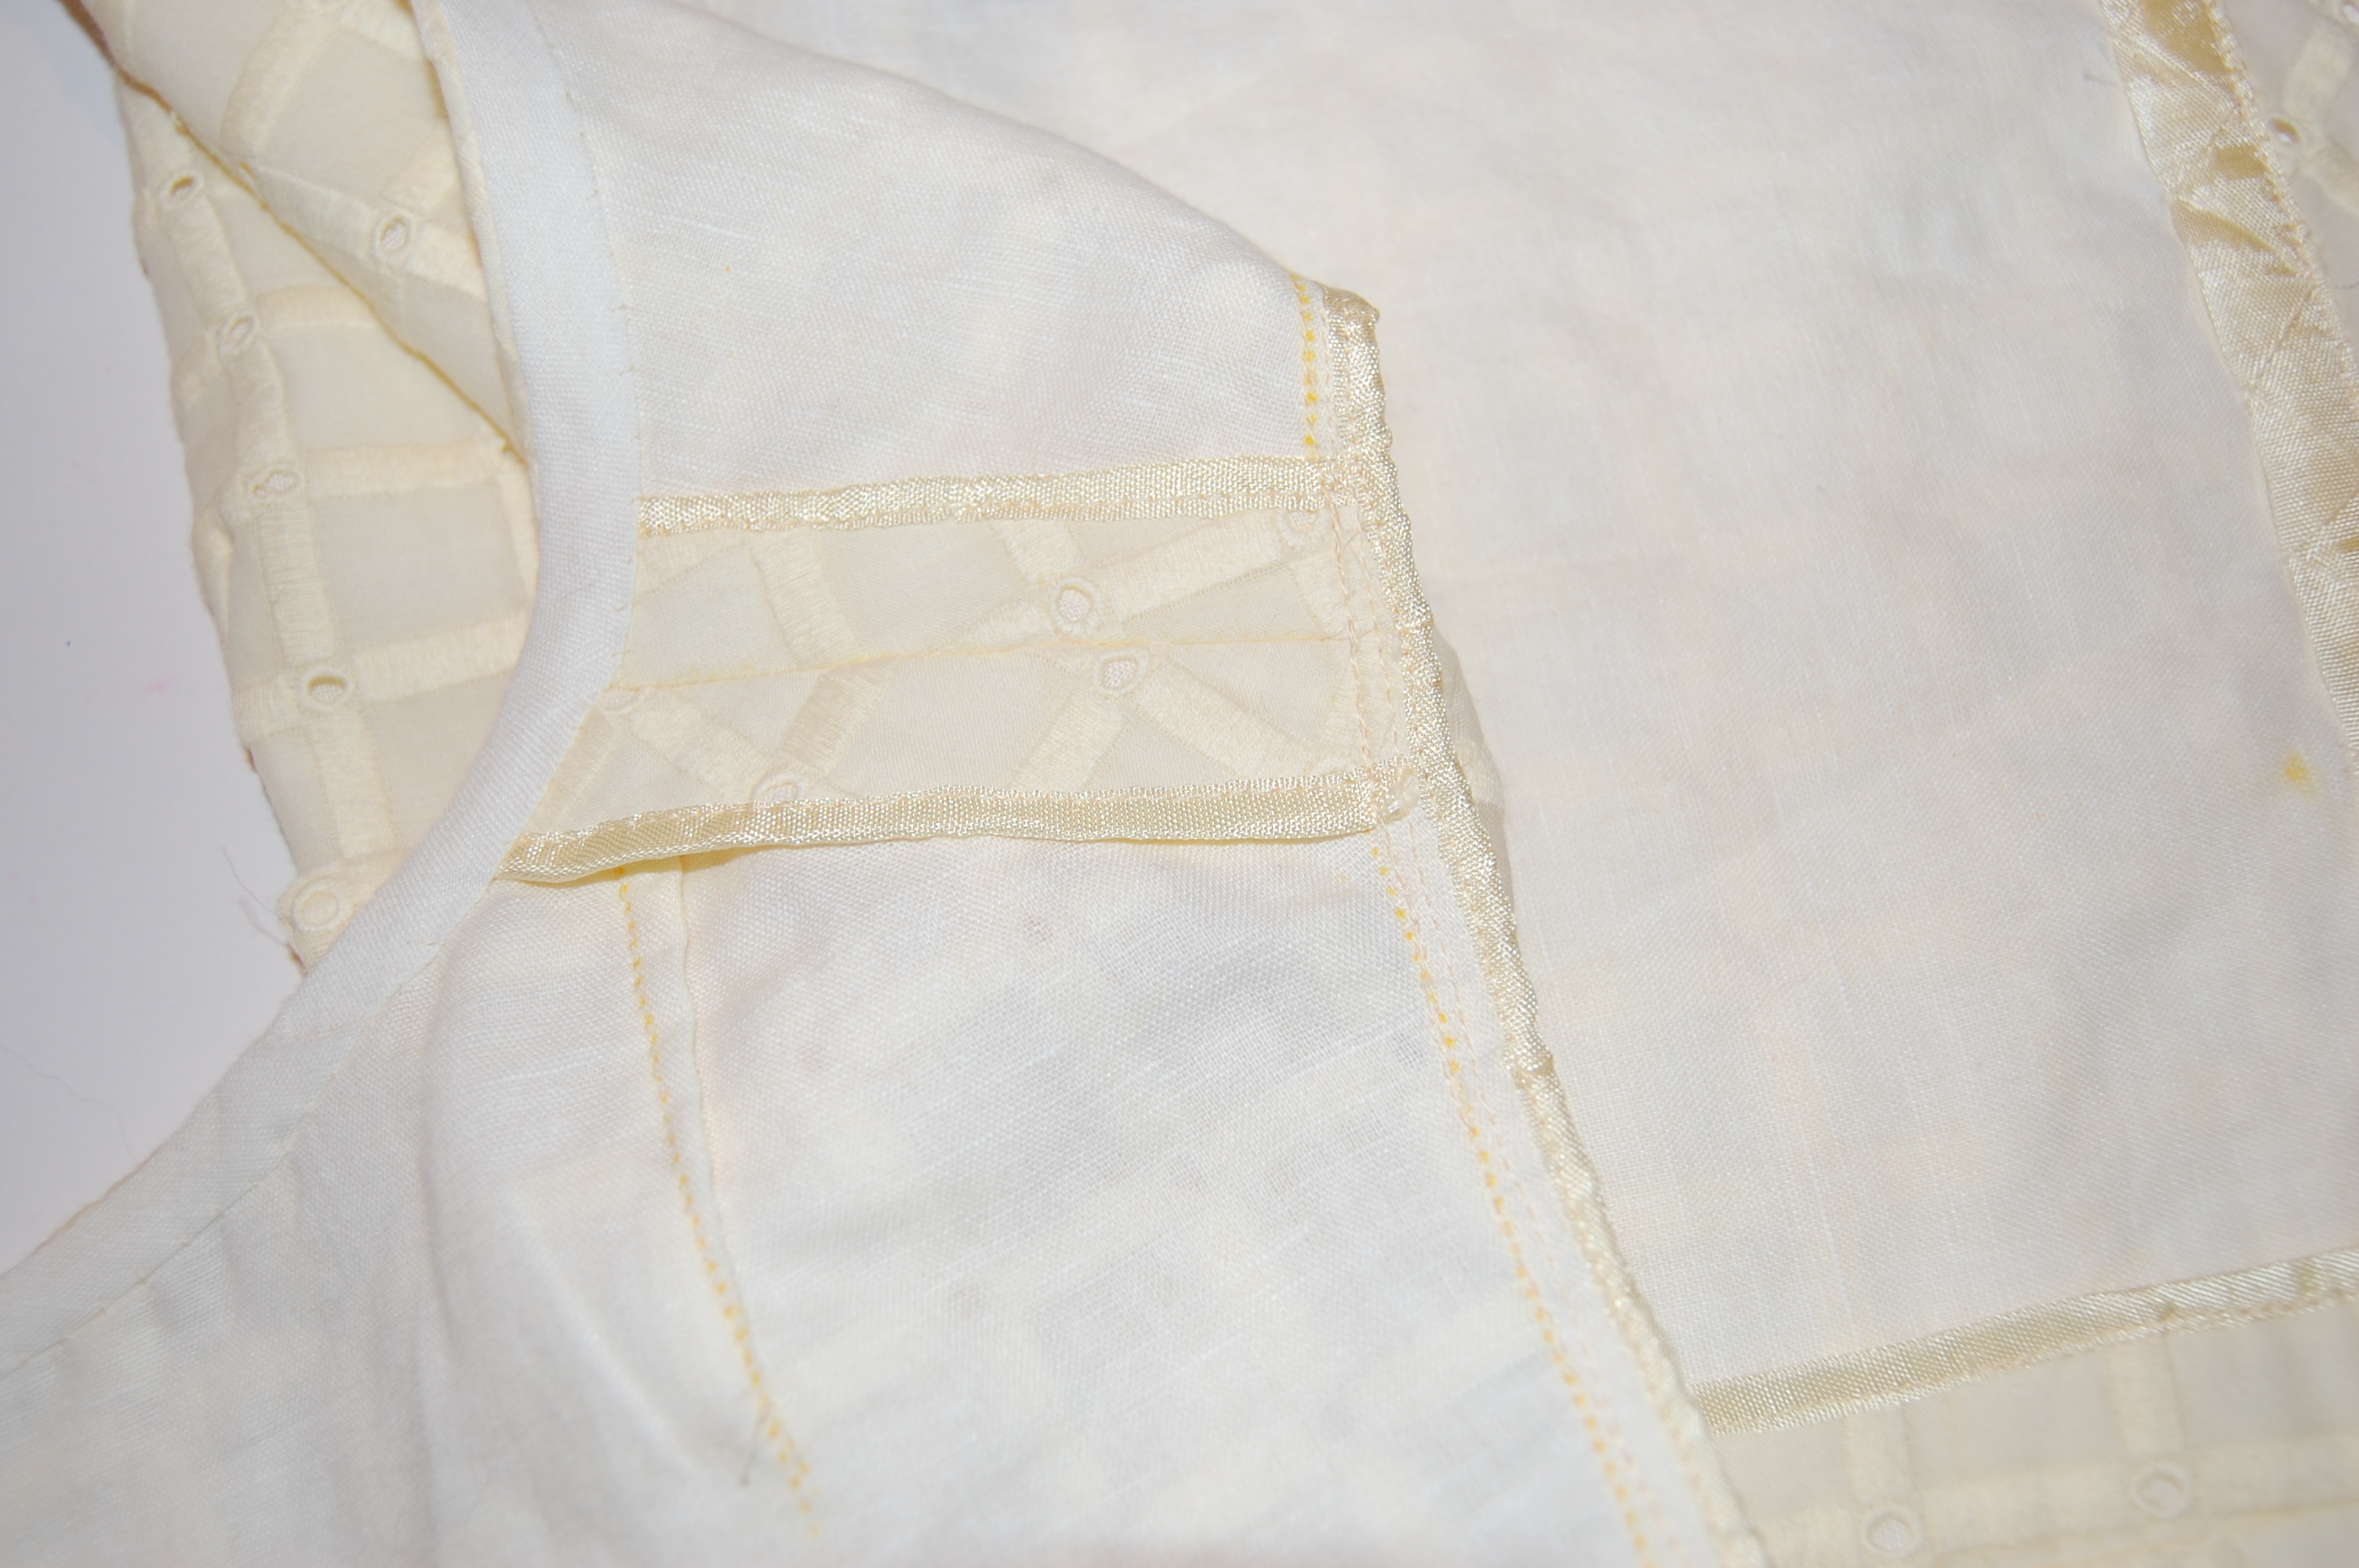
I made a bias tape out of the underling fabric to bind the neck edge. Seam edges are encased in Hug Snug. Click on the photo to see more detail.
The actual hem on the blouse presented me with three edges (the fashion fabric, the underlining, and the bias trim) to control and hold together. I used Hug Snug again, this time flat and sewn with a catchstitch (a fabulous idea I just got from Lilacs and Lace blog, which I will use again and again! Thanks, Laura Mae!)
The catch stitch is done across the width of the Snug Hug tape. It is the perfect technique for this application. Again, click on the photo for more detail.
I had some difficulty finding an 18” separating zipper that was lightweight enough for this blouse. I still think the one I finally ended up using is a bit heavy, but until I find another one, this one will have to do.
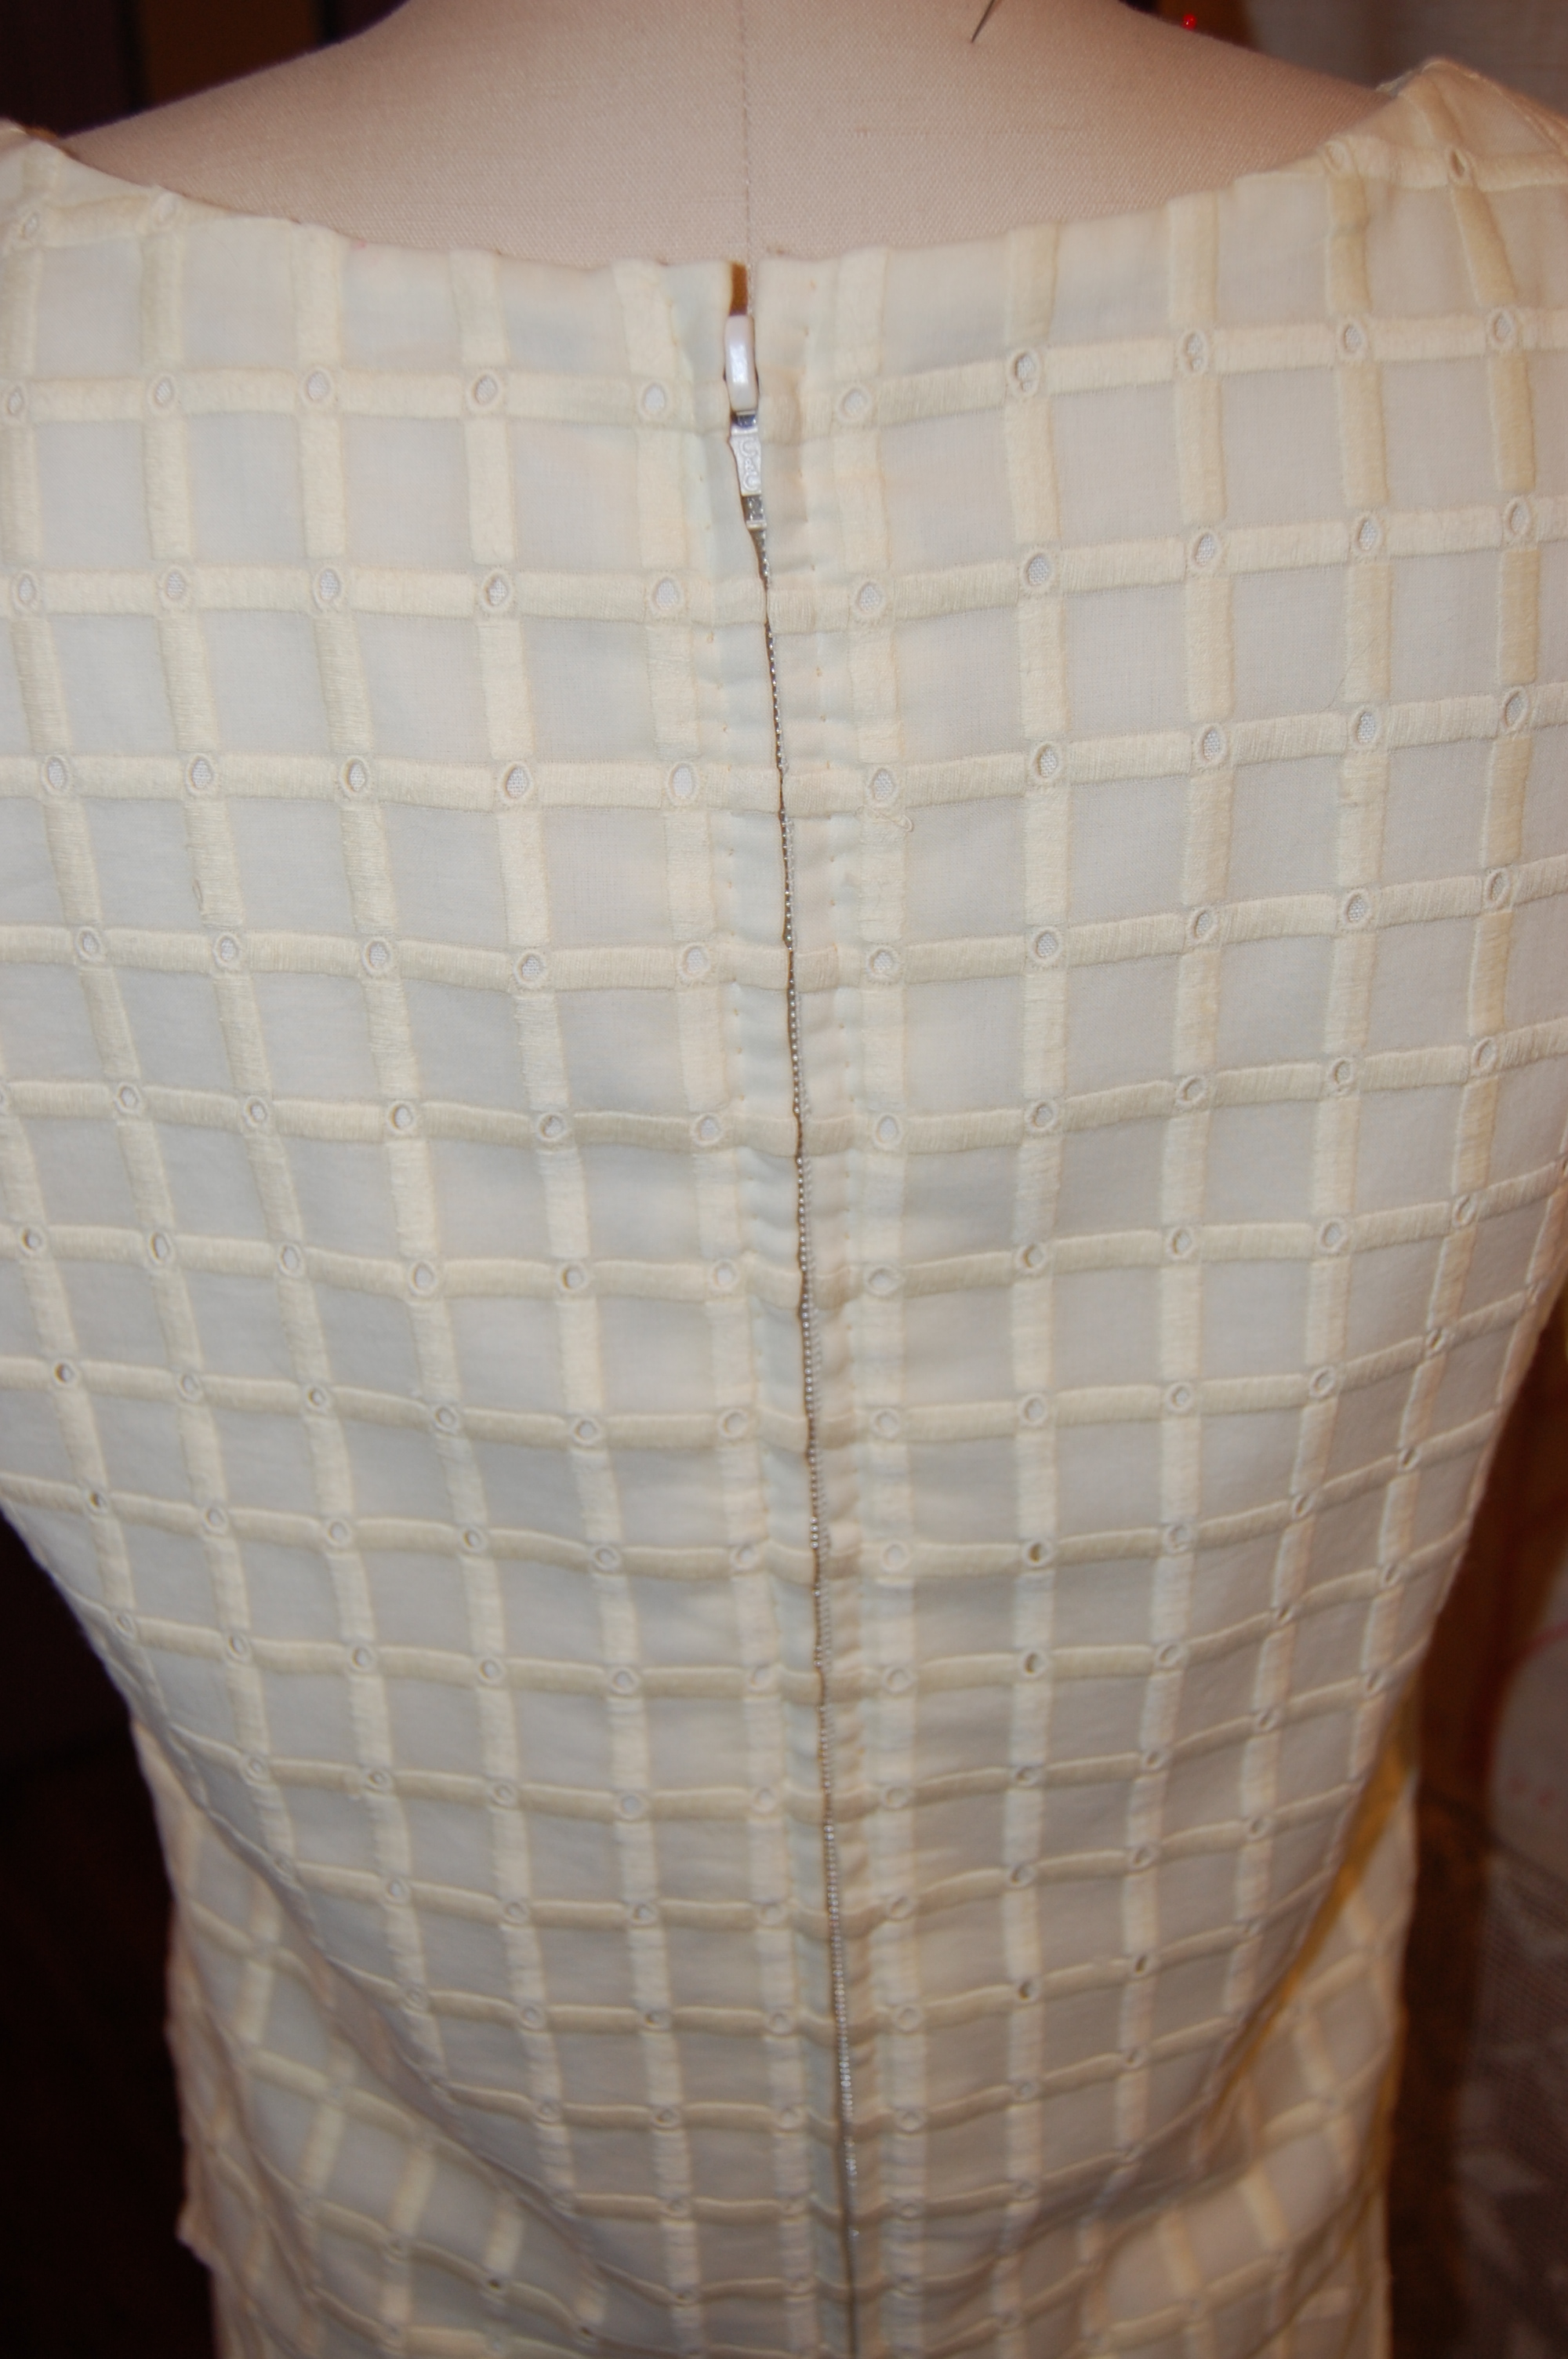
I still need to add a hook and eye at the top!
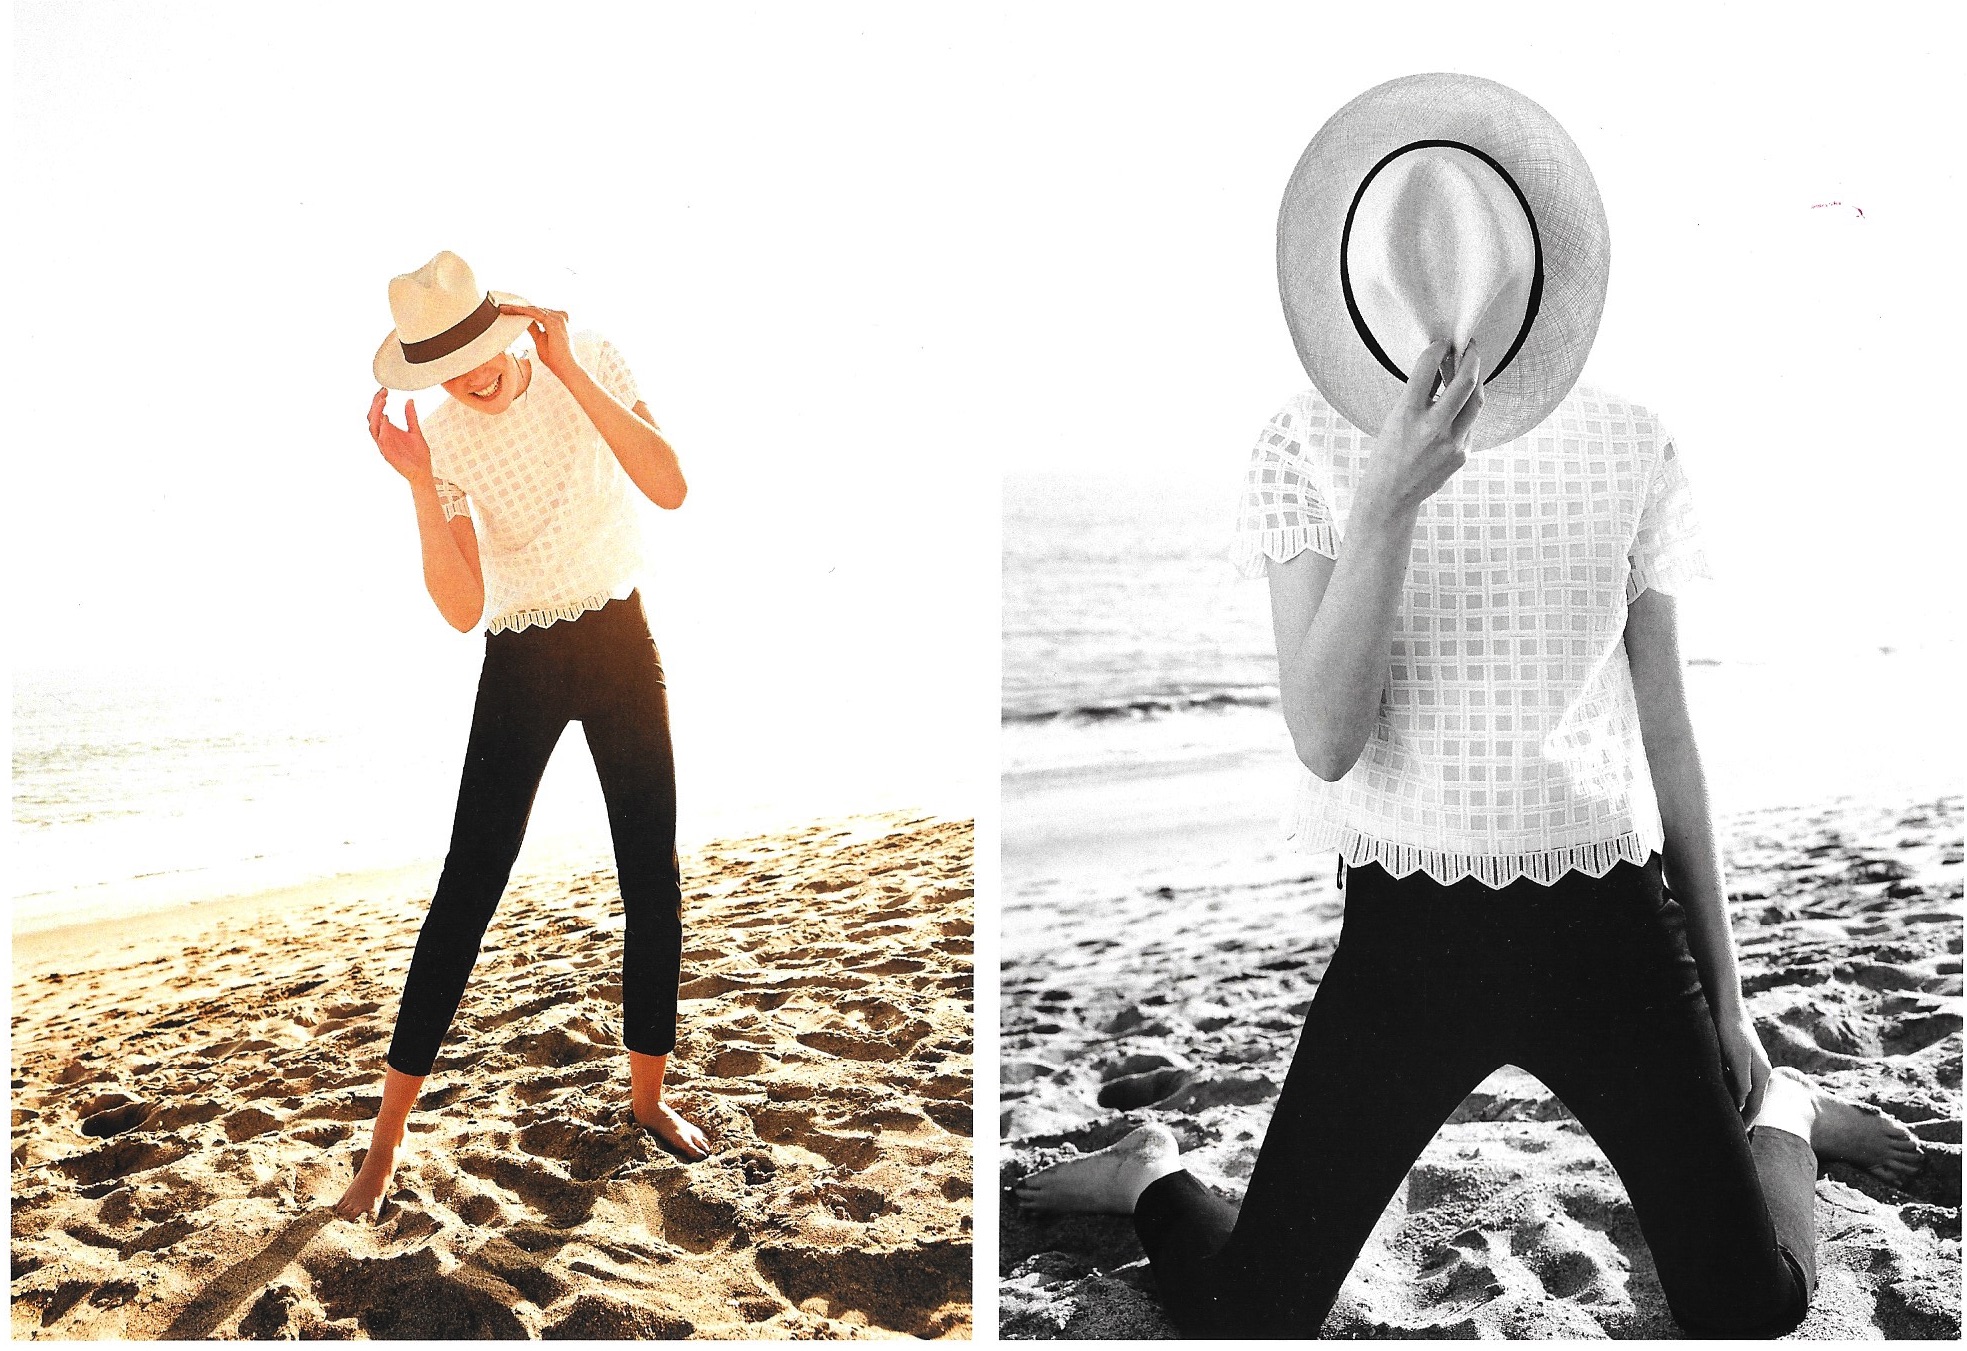
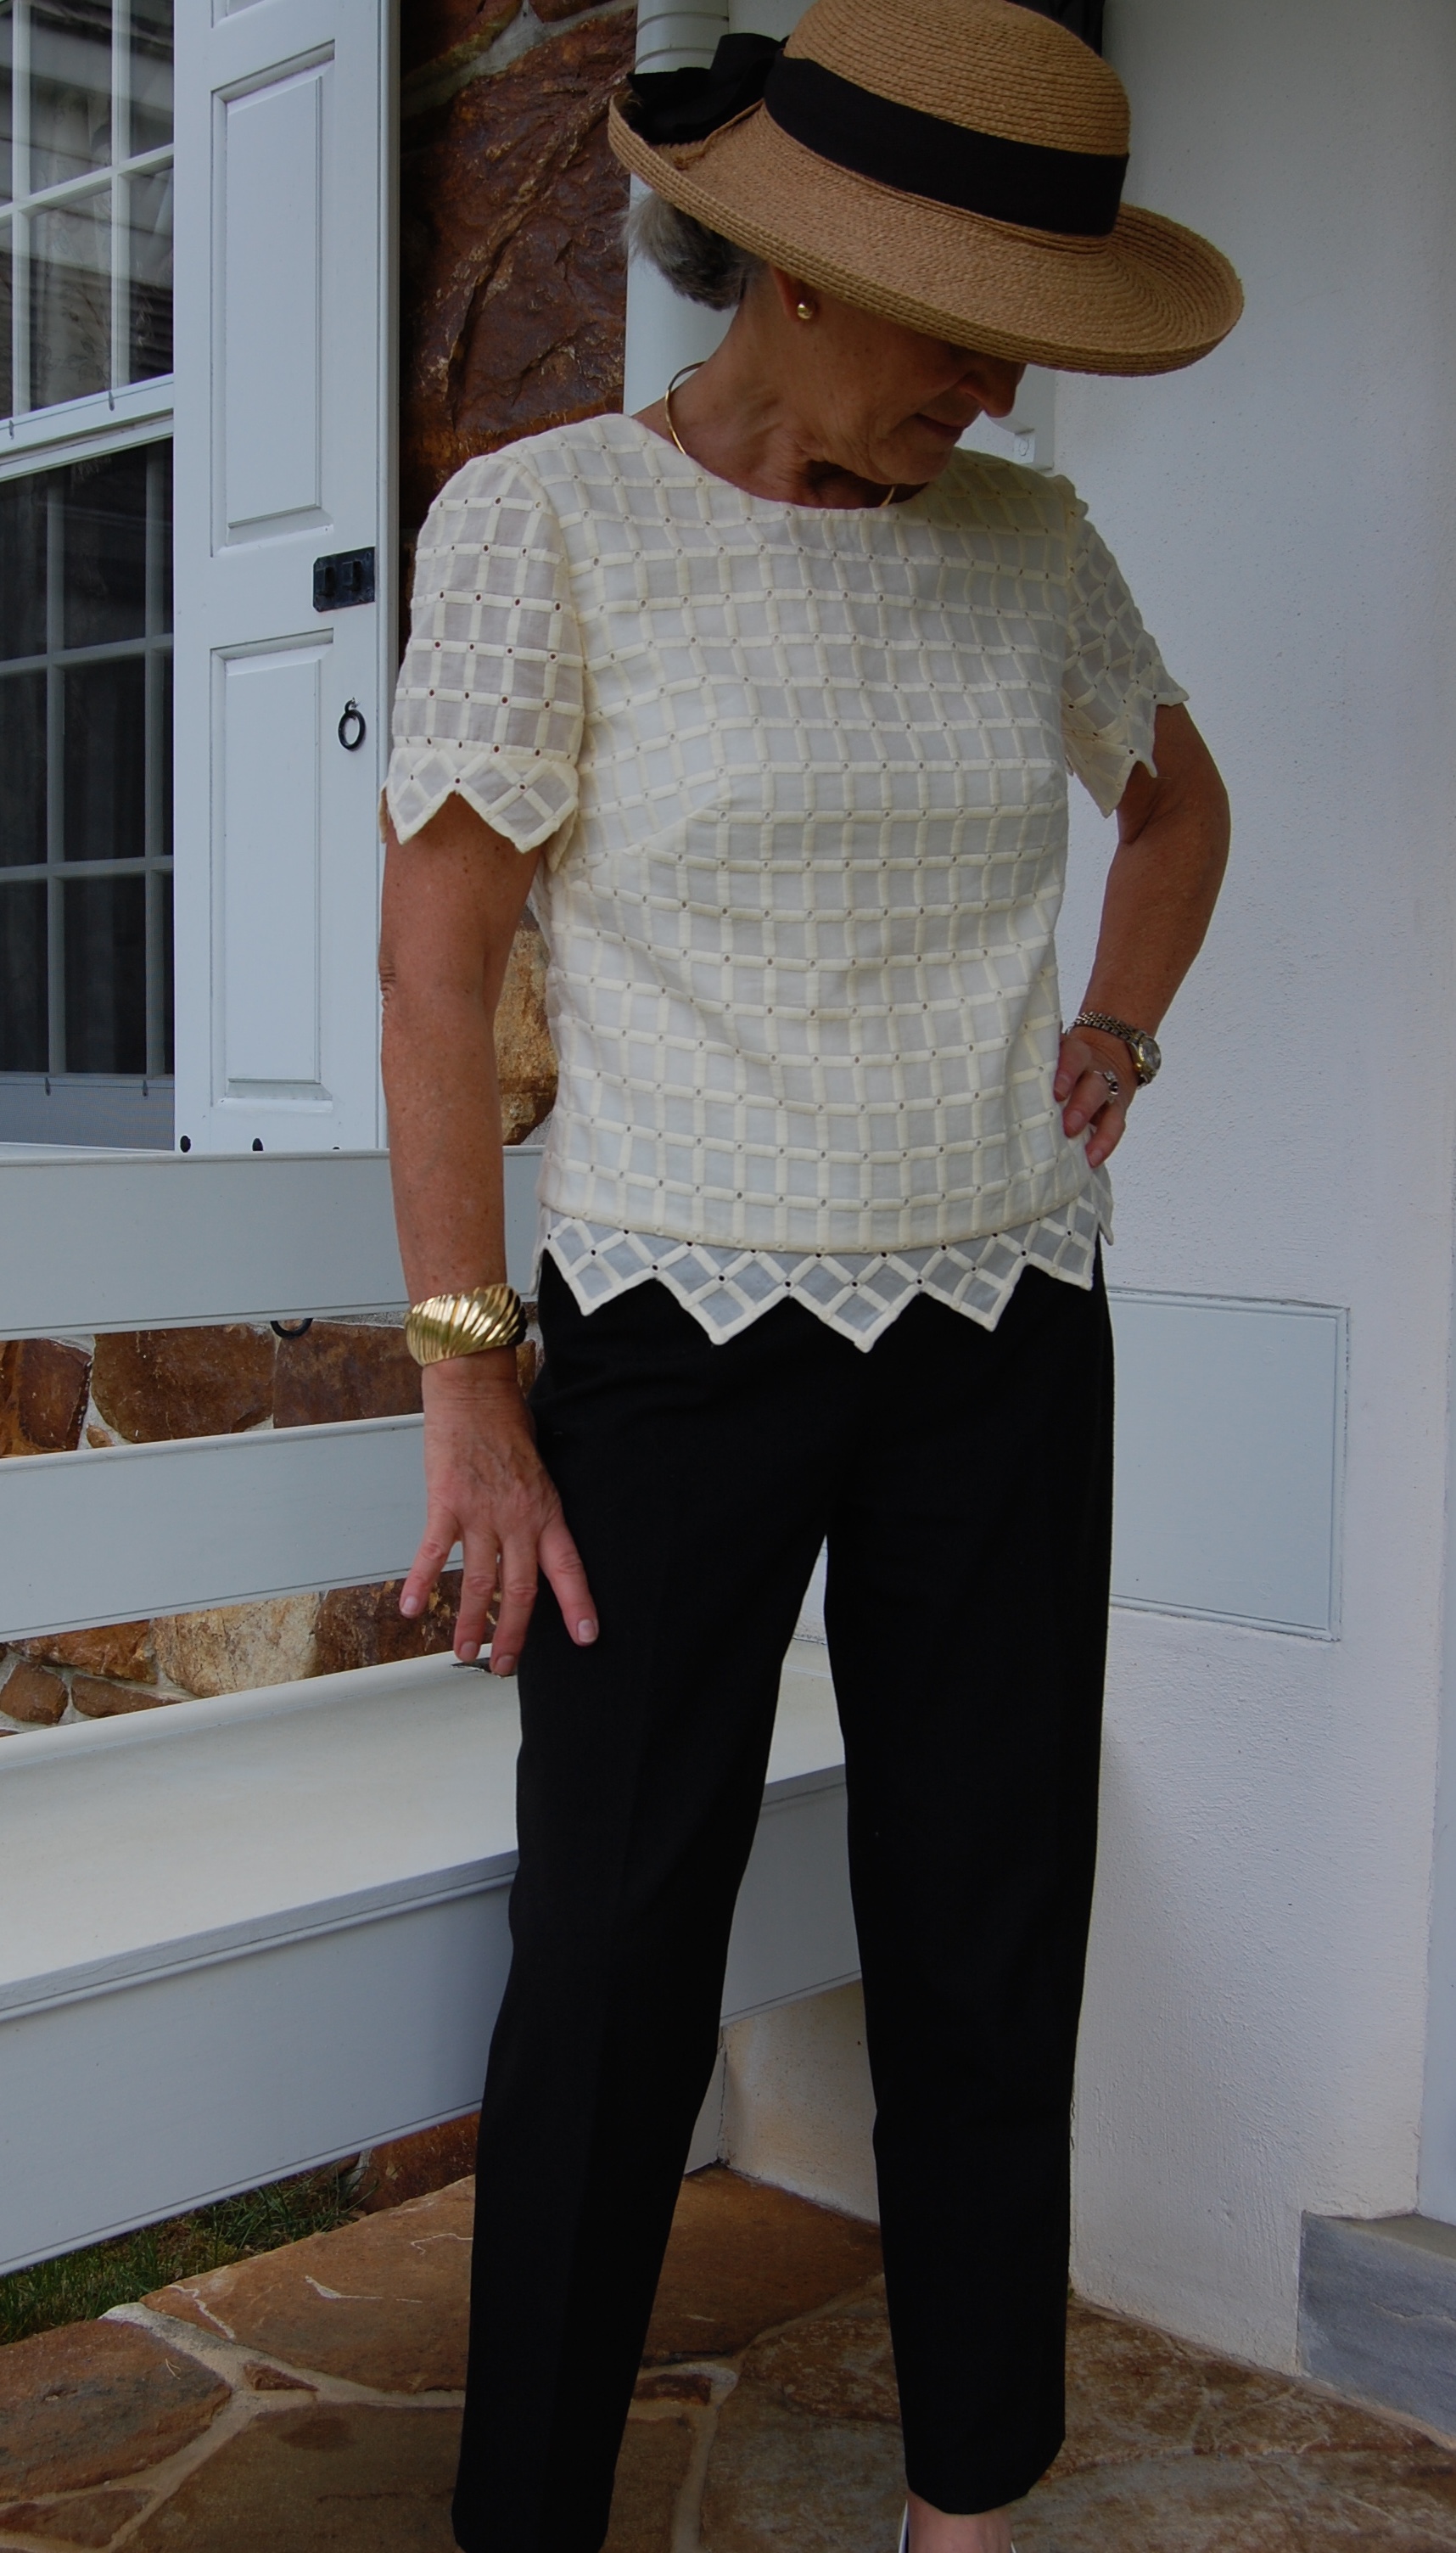
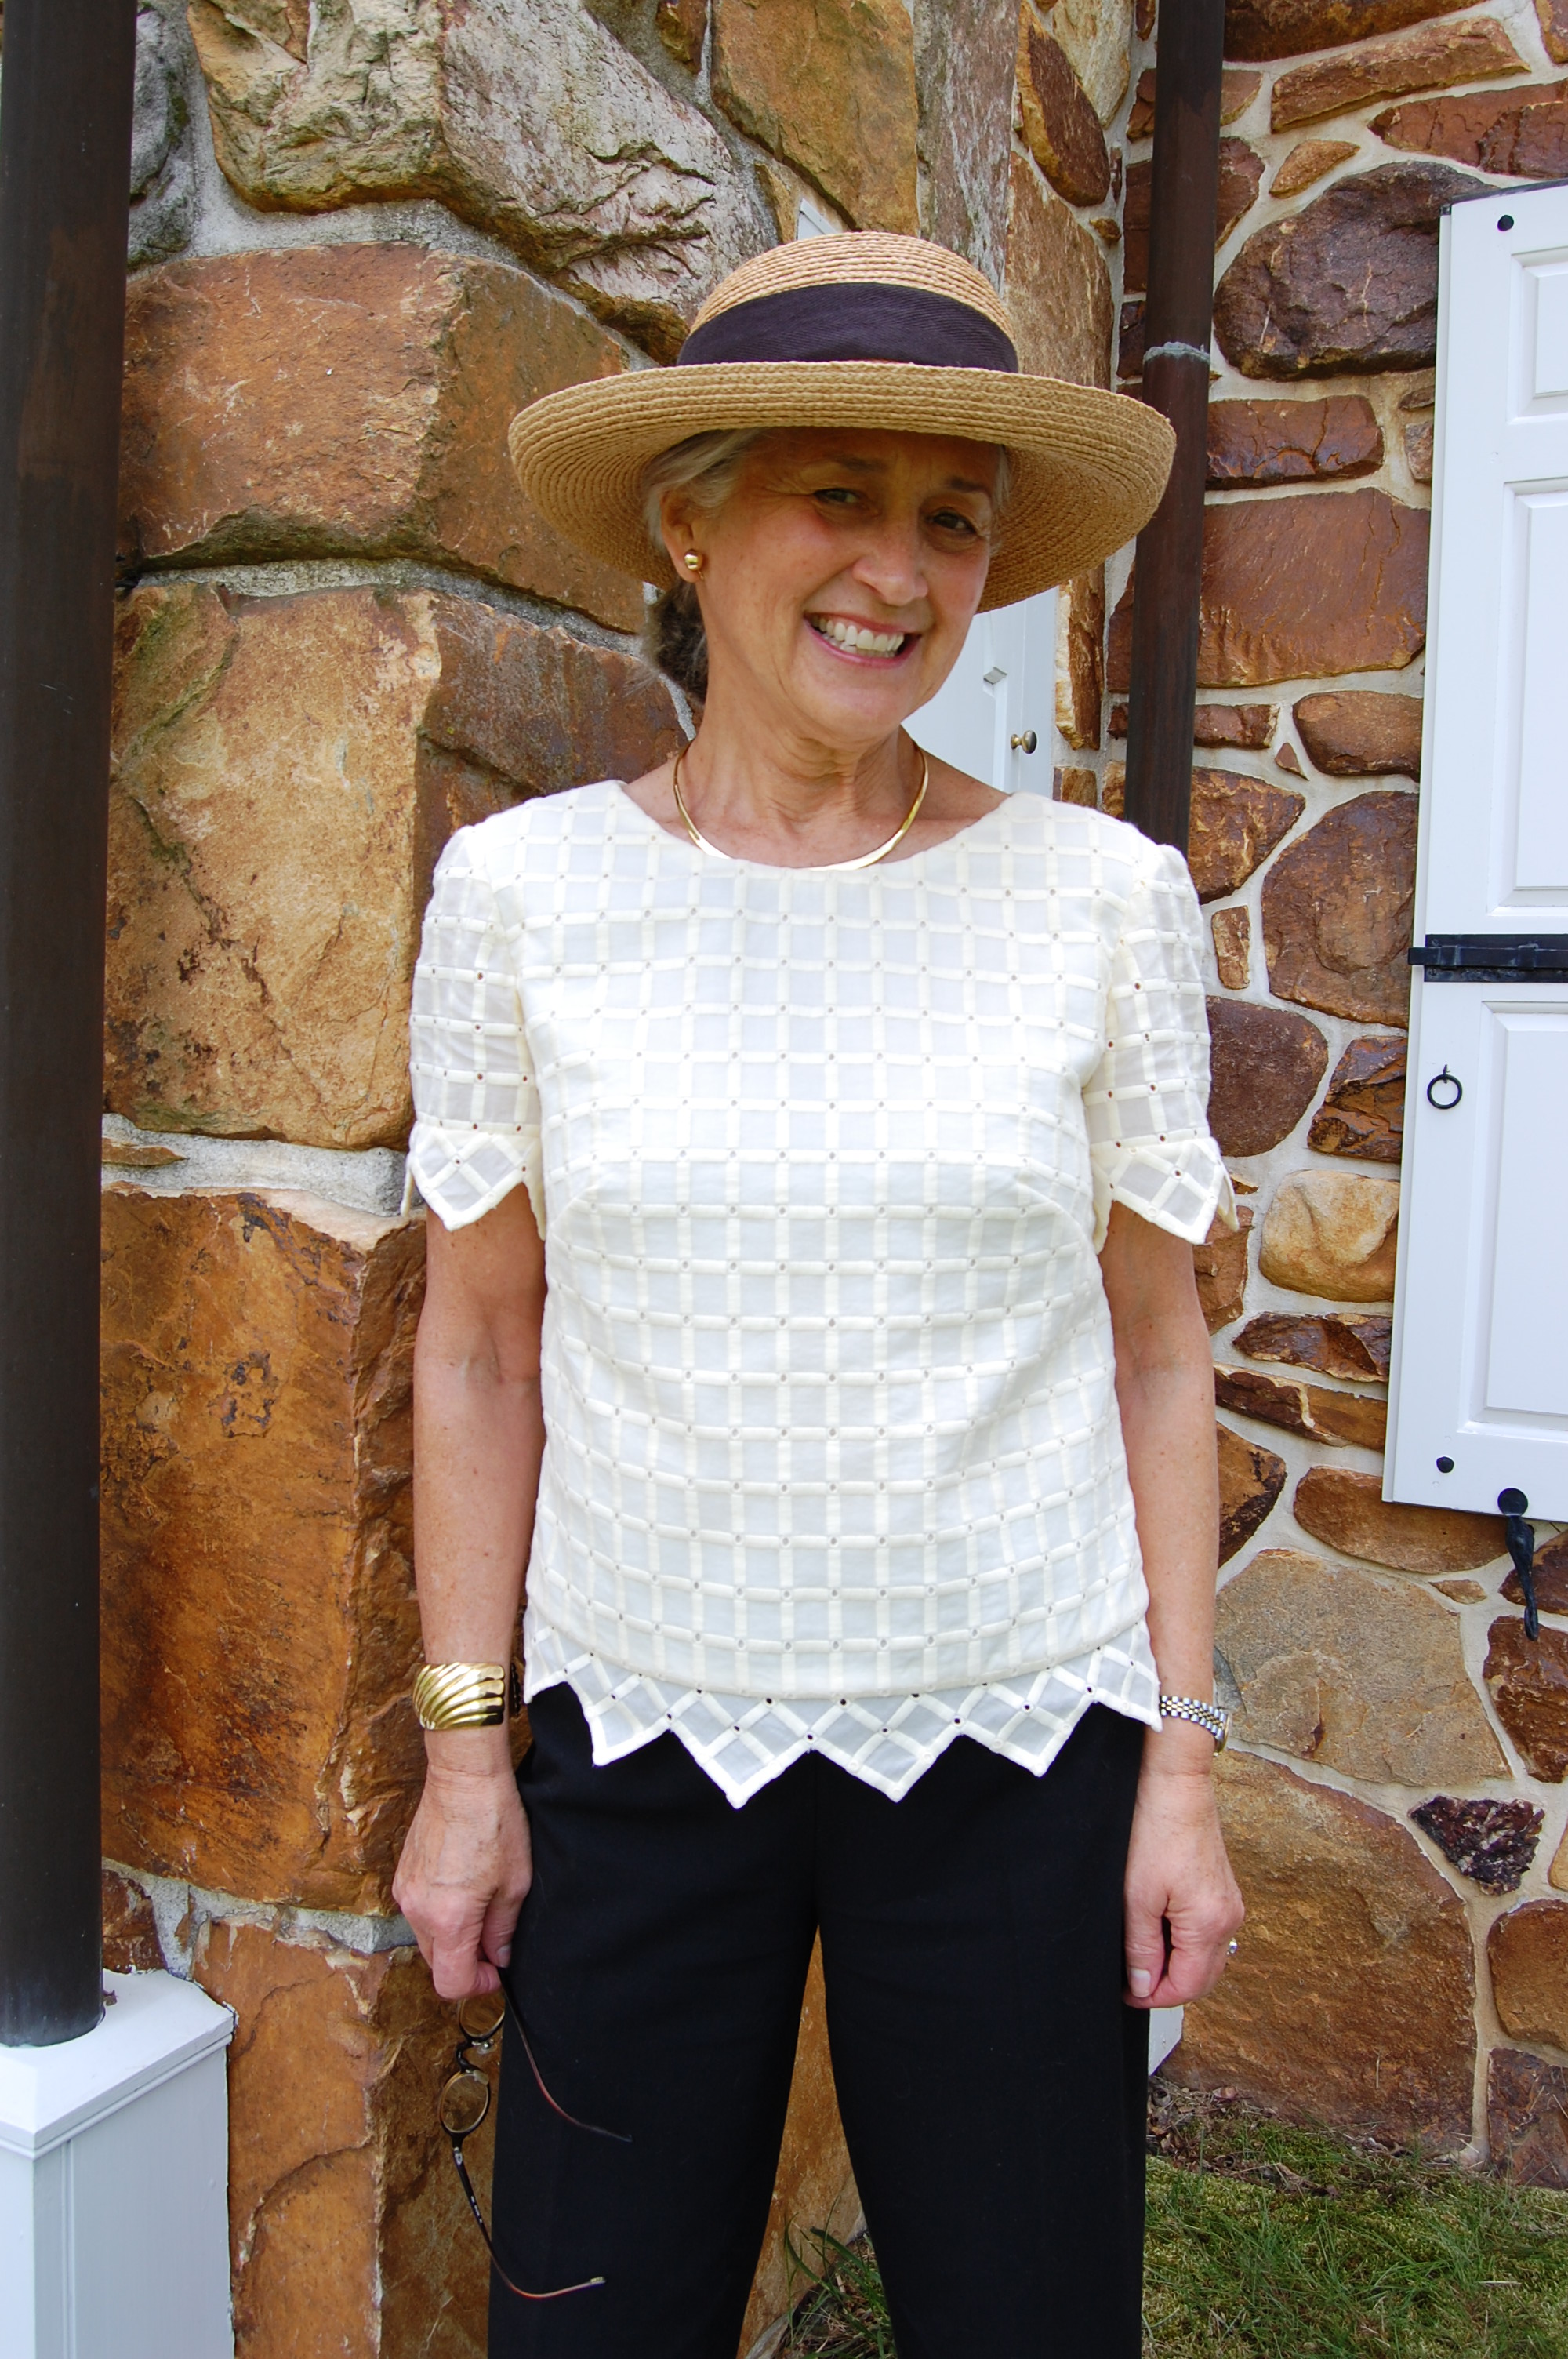
I have always loved overblouses. They are comfortable, classic, versatile, and just a little bit different of a look. I think this one fits that description well – I like it!
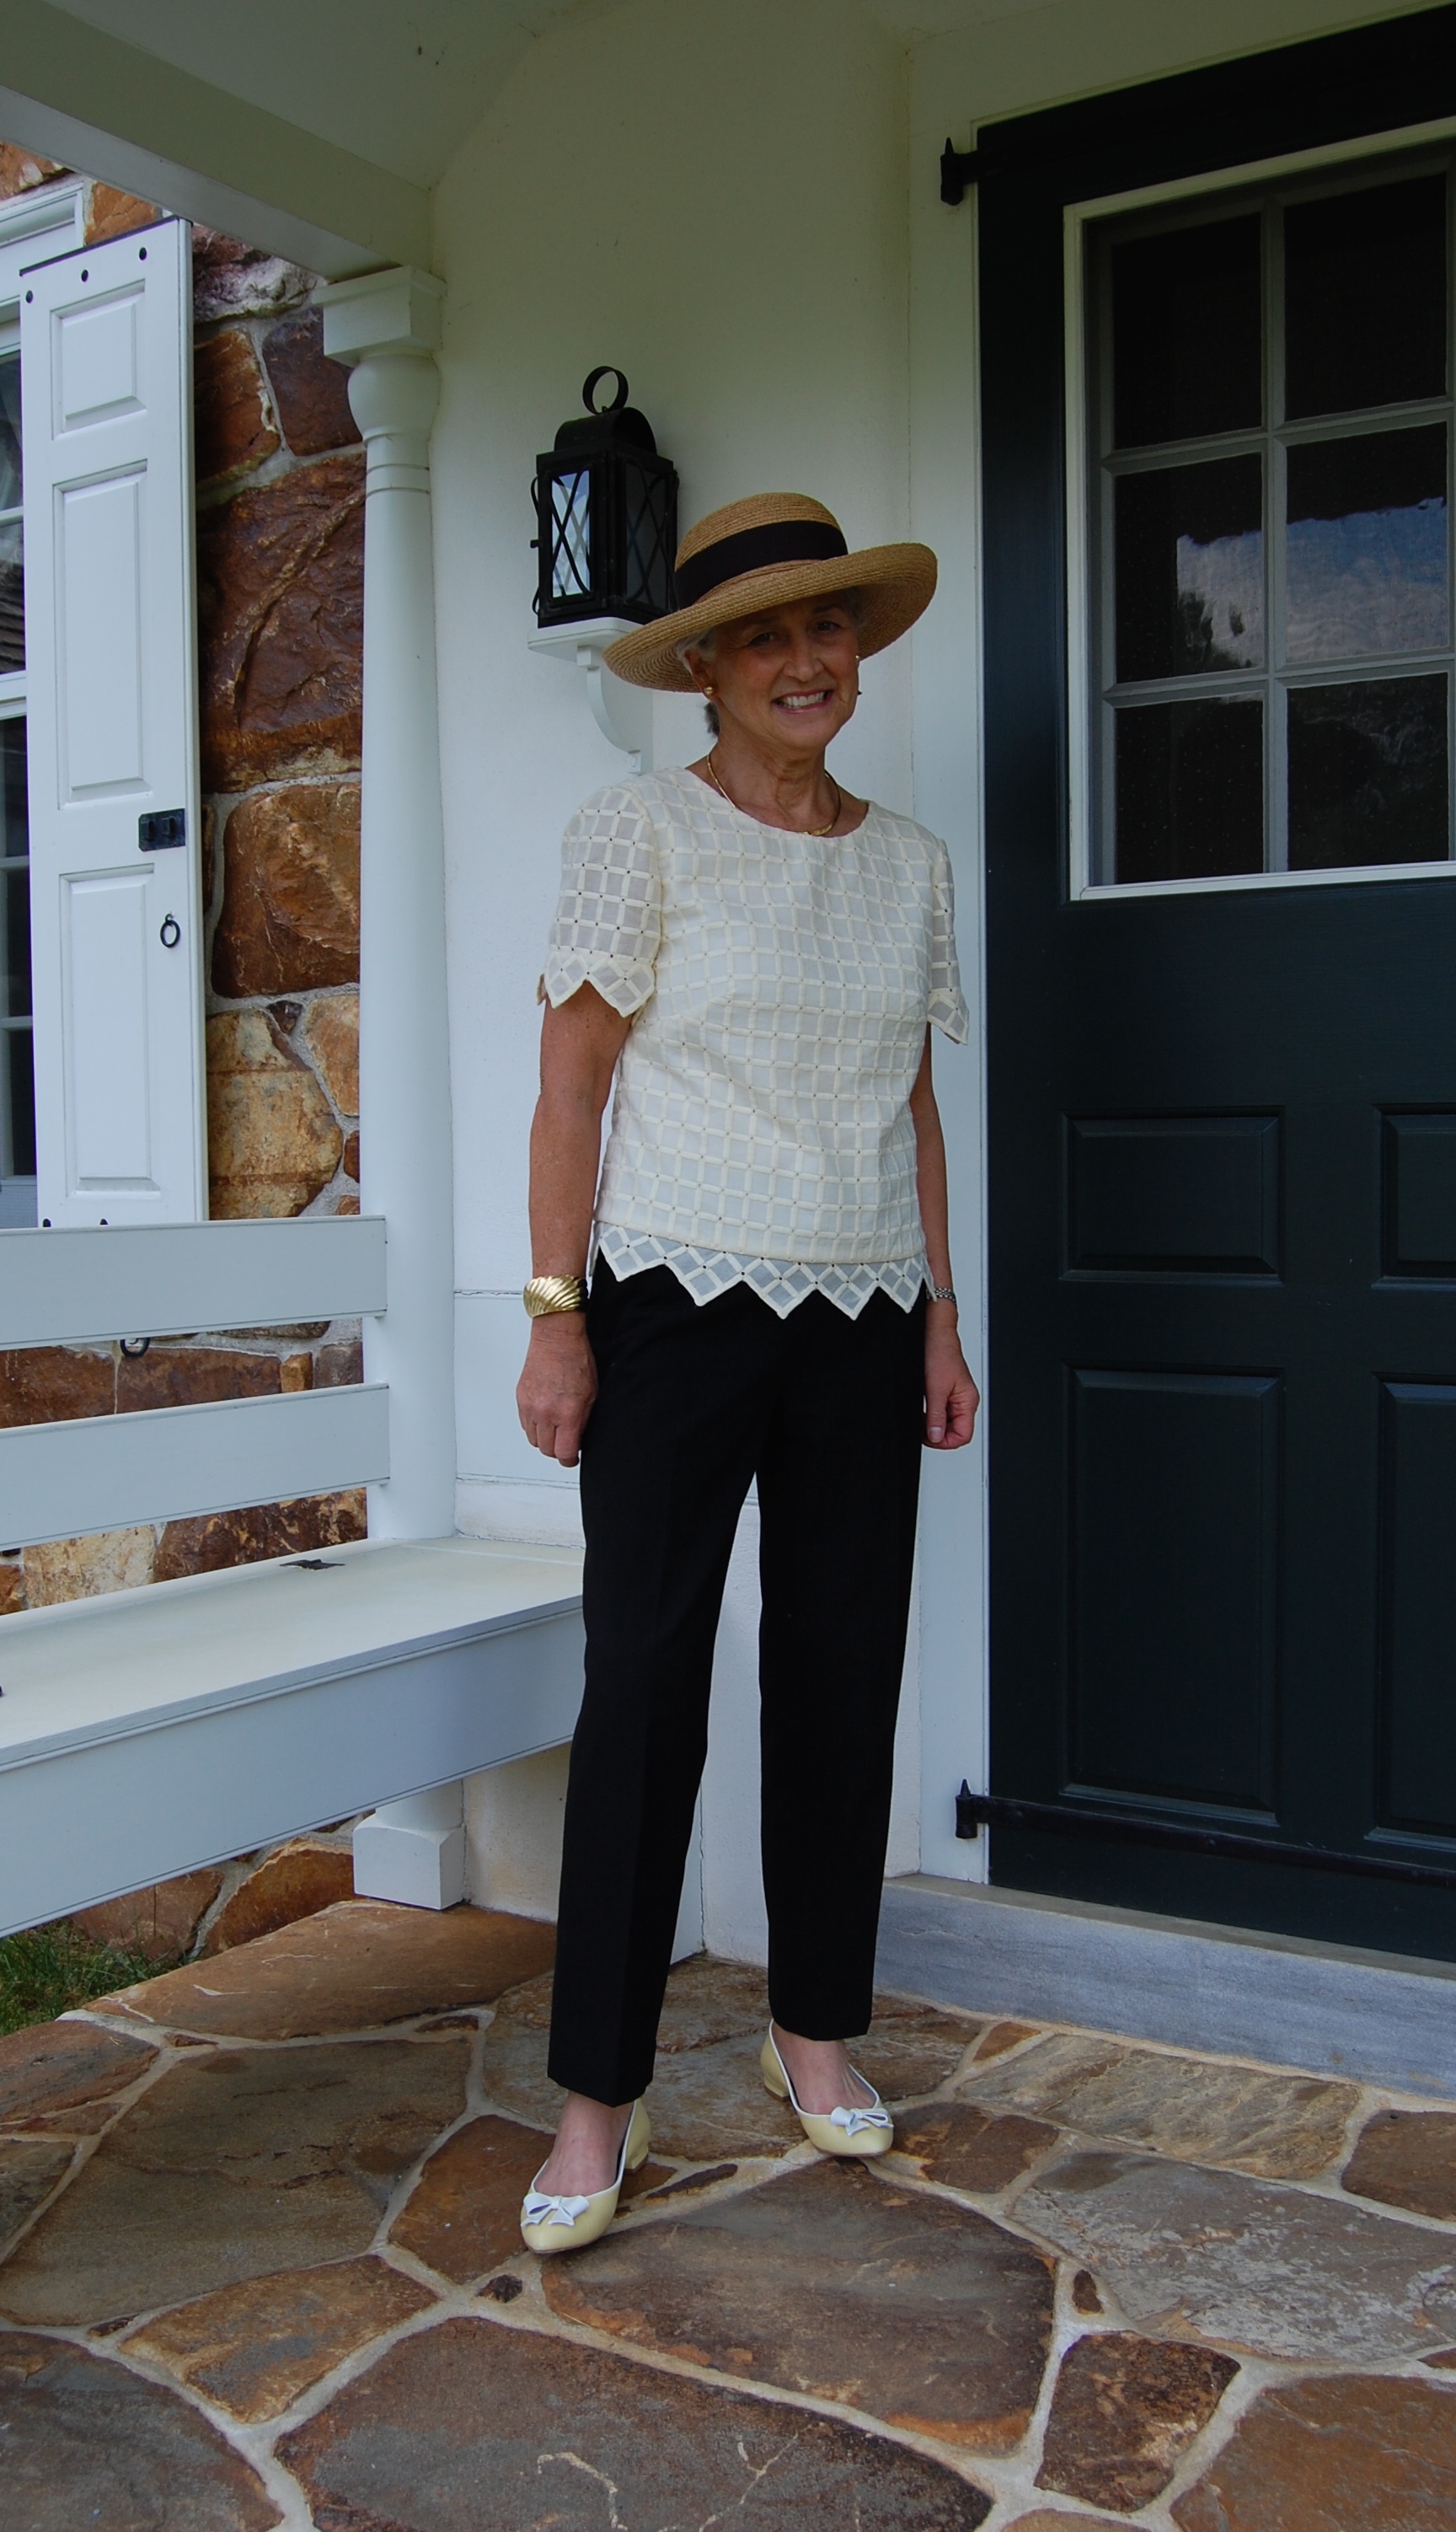
I could not resist styling this blouse with a hat!
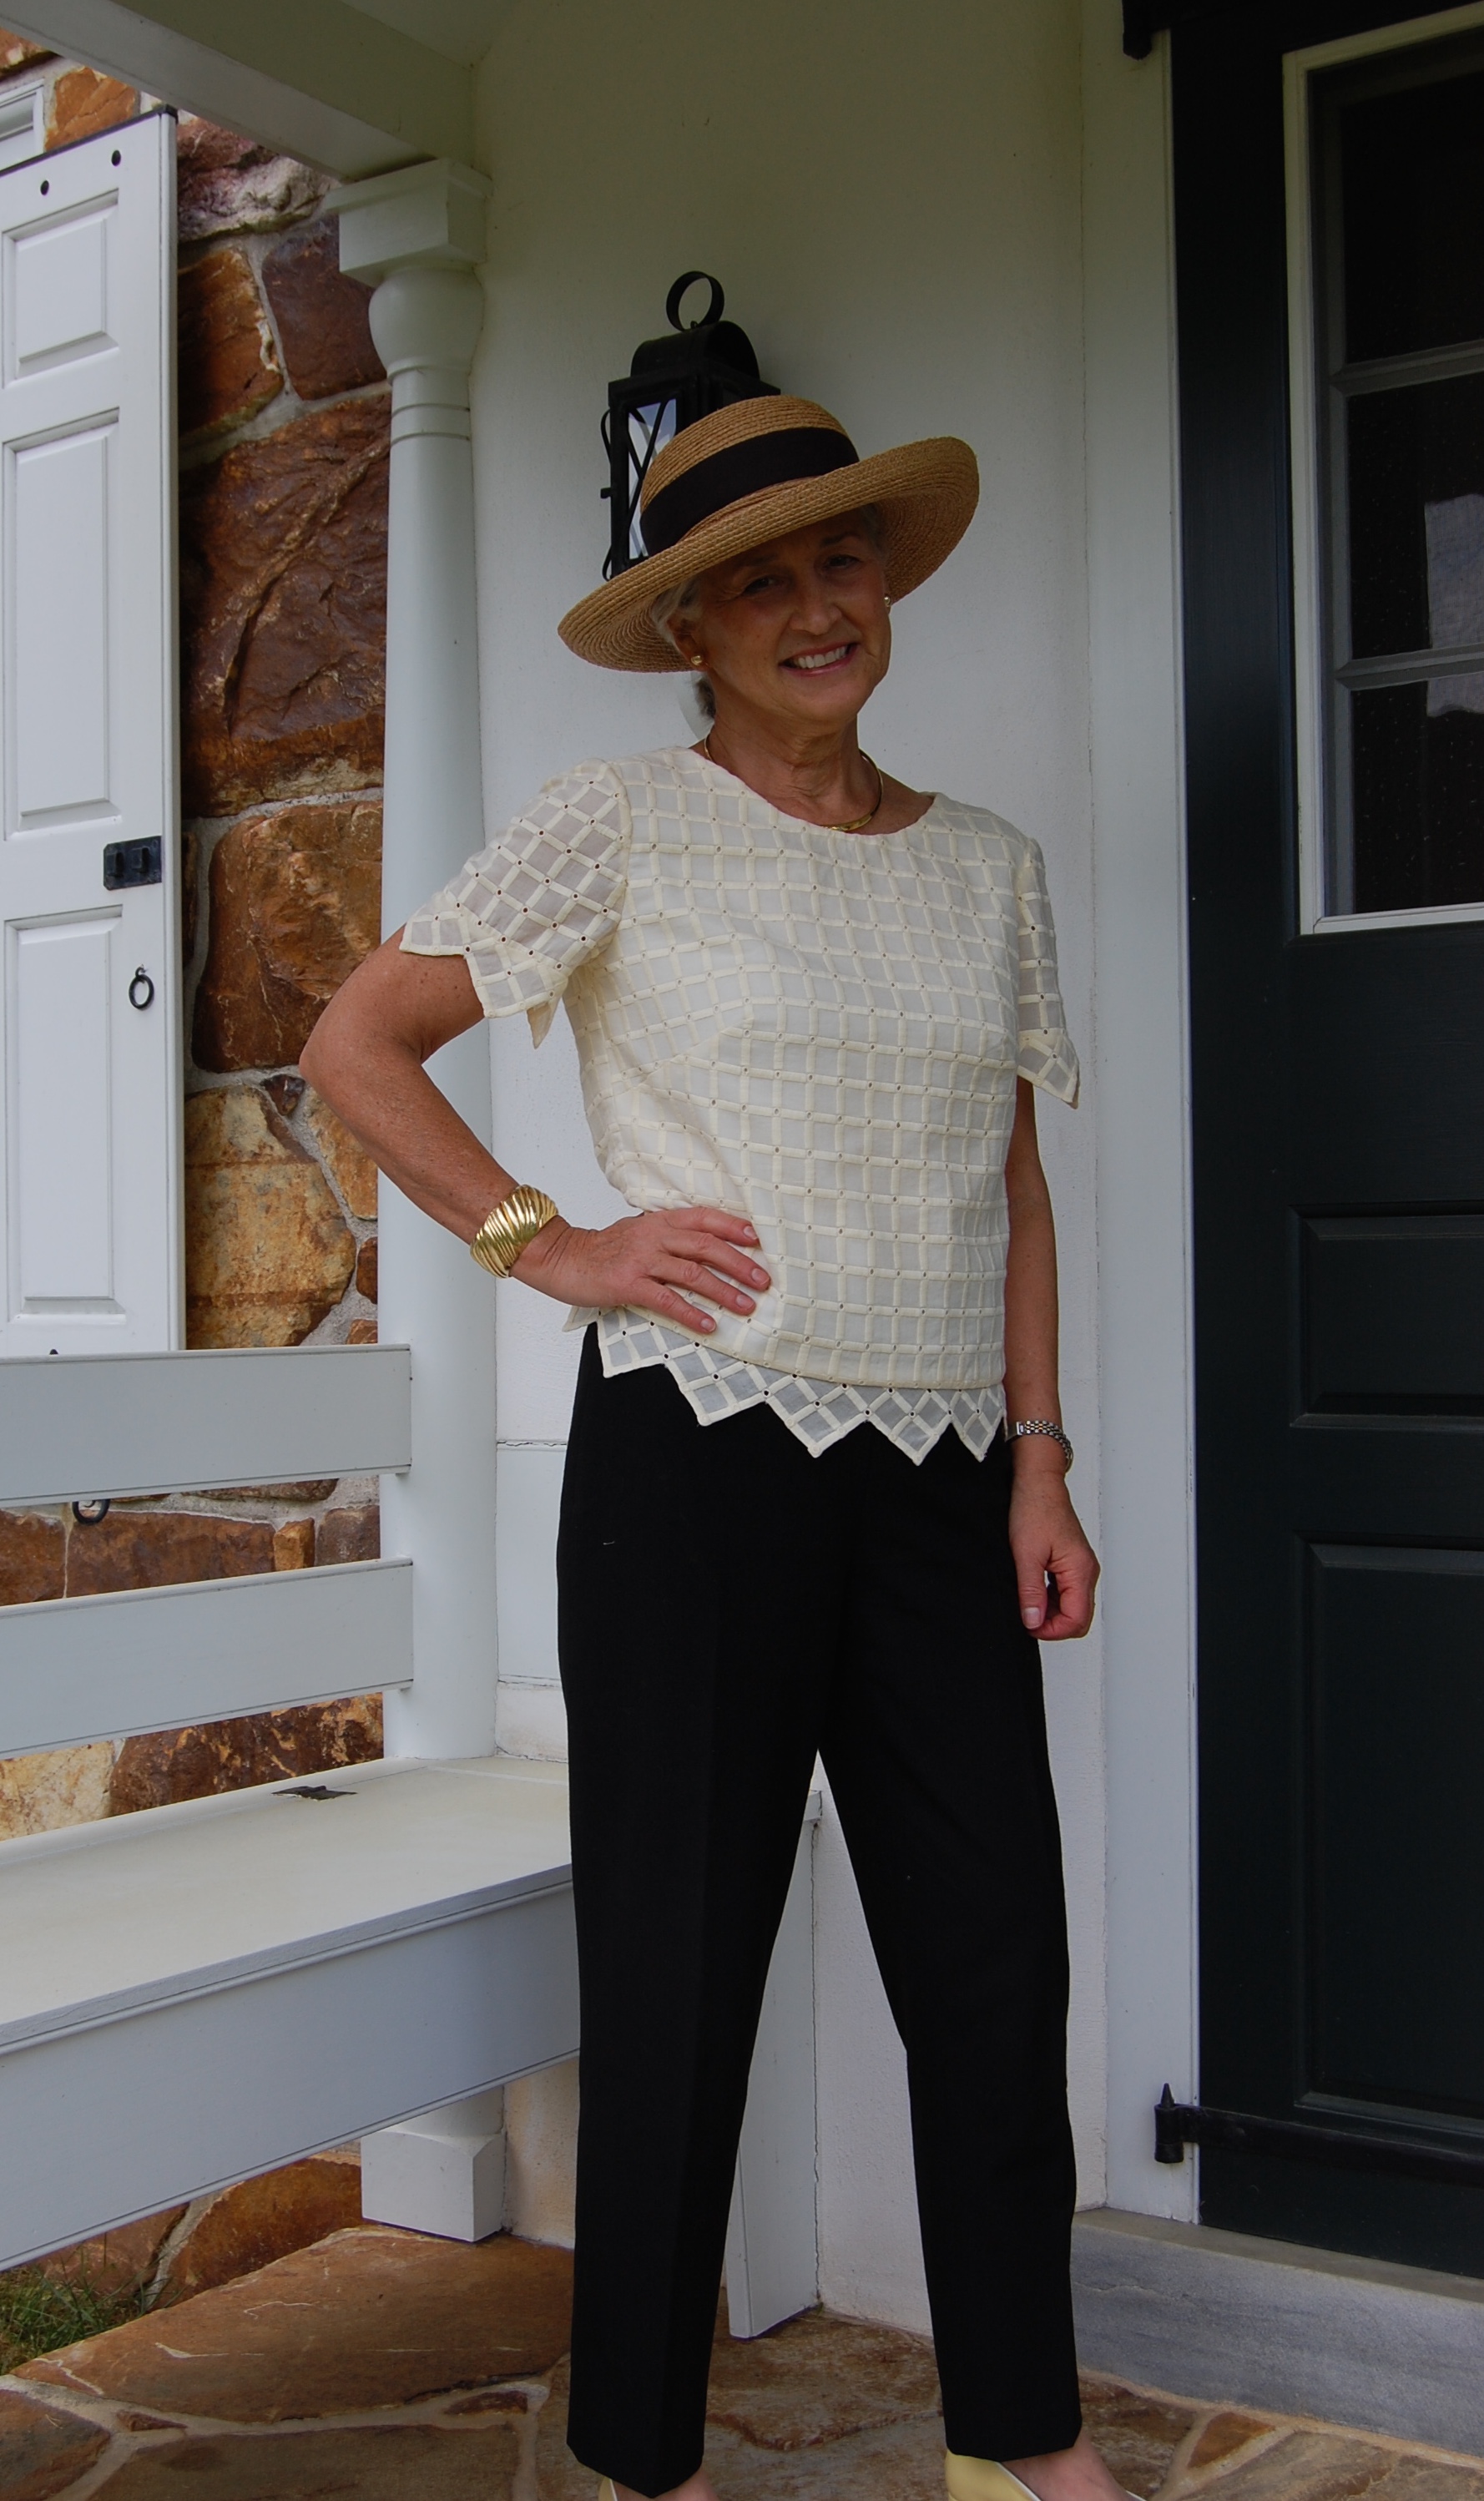
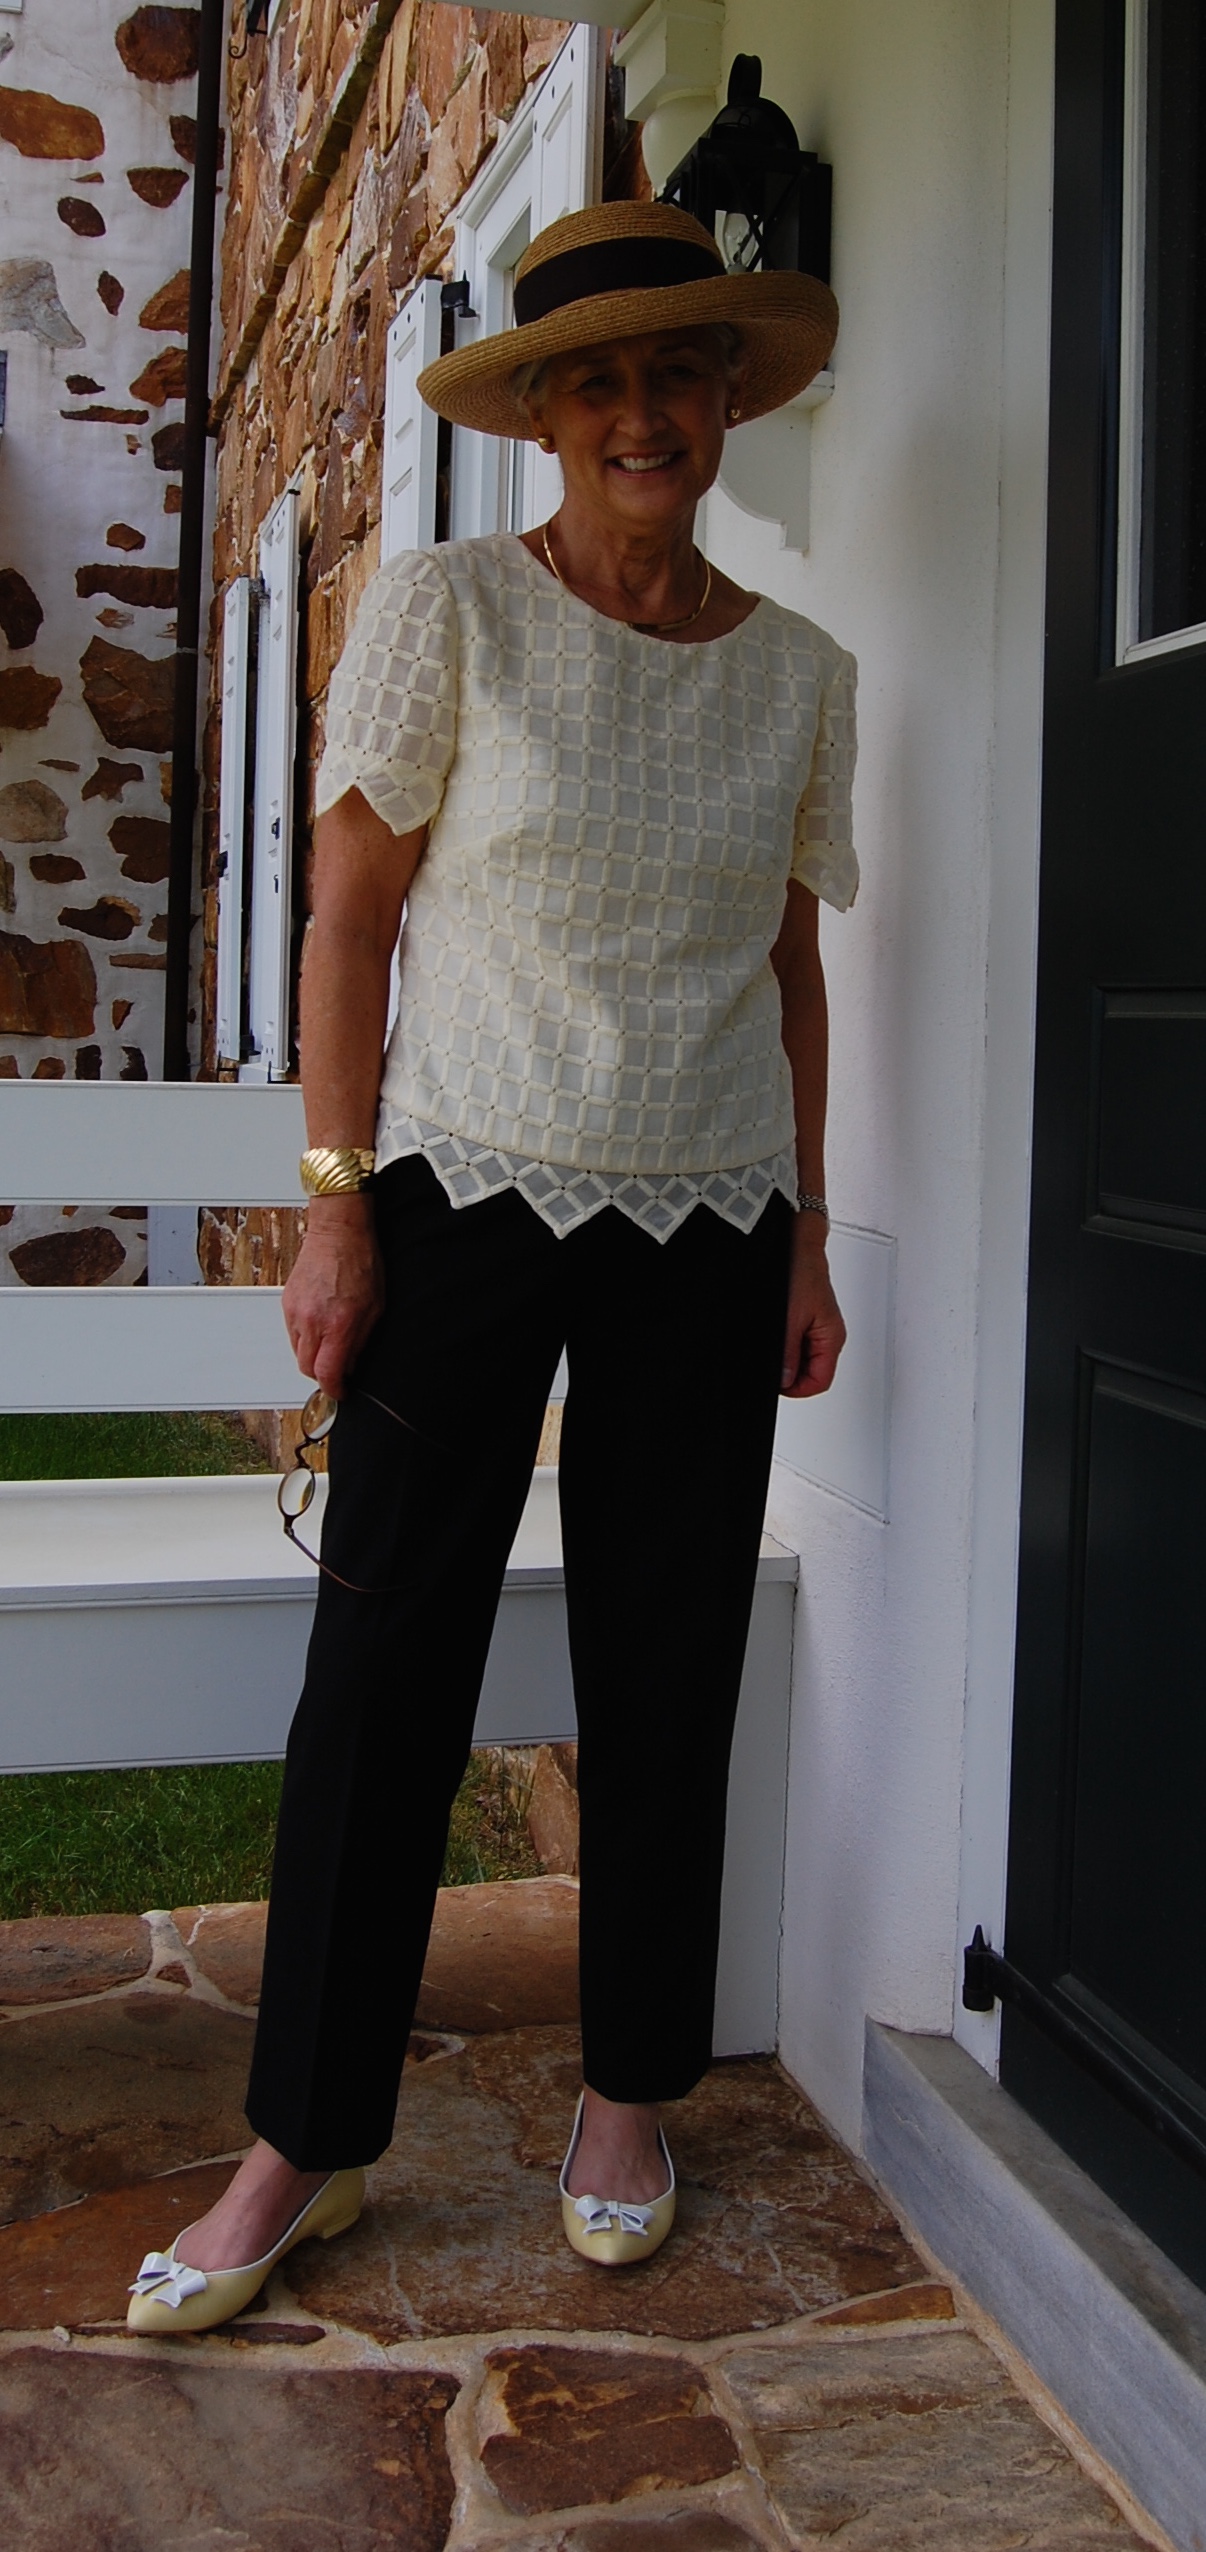
Pale yellow shoes help complete the outfit!
After Mellow Yellow, where do I go? My next project is anything but mellow – or yellow, for that matter. June will find me thinking – and making – fancy, but not frilly. Details soon . . .

This is so pretty! Beautiful job!
Thank you!
Beautiful use of the fabric! Thanks for showing the catch stitch across the width of the tape. I never thought of using the stitch like this!
Thank you, Marianne! I had not thought of doing the catch stitch in this way either until I saw Laura Mae’s tutorial. It’s a great technique!
You look absolutely in this ensemble. Overblouse is beautiful — and so summery looking. But the hat makes the outfit!!
I meant to say “you look absolutely adorable”!
Thanks, Cissie! I haven’t been called adorable in a long time! I love hats and the way they look, but I don’t wear them all that often. Maybe that needs to change!
Beautiful blouse, I forgot how much I liked an over blouse especially with a back zipper.
Thank you, Anne. I think back zippers in blouses are rather rare now, but they used to be quite common back in the ’50s and ’60s. They make a lot of sense, I think! Thanks for your comment!
This is so lovely. Thanks for sharing all your construction ‘secrets’. I must find a source of hug snug in my part of the world.
Thank you! Hug Snug is available on Amazon, if that helps you. It’s a wonderful product!
Oh Karen,
First of all I am a J McLaughlin fan too. Your top is divine and I applaud the application of your sawtooth edge hem. My goodness – what a successful result – Bravo!
On another note – is that a Peter Beaton hat? You look marvelous in it 🙂
Thanks, Sarah! This was a fun and inspired project! The hat is a Helen Kaminsky which I have had for a long time, but don’t wear often enough…
That magazine clipping was a sign that you MUST make this blouse. God bless you for all the hand stitching, but it definitely paid off. Looks fantastic with the hat too!
I think you are correct – I was meant to see that blouse in the catalogue! Thanks so much for your lovely comment!
I love everything about your new blouse, especially the bias trim detail. Fantastic!
Thanks, Lizzie! It took a lot of hand sewing, but it was worth it in the end!
I love your blouse, not to mention your style! Check zippershipper.com you may find a lightweight zipper there. I know they have lightweight zippers, I just can’t remember if they are only invisible zippers that are lightweight.
Thanks for the great zipper tip, Pam. I really love a separating zipper in the back of a blouse, so this will be helpful for future projects (and maybe I’ll replace this zipper if the spirit moves me…)
What an absolutely charming look! Love it all; you really do look adorable!
Thank you, Mary Lynn! Not as adorable as my granddaughters, however!
Beautiful use of the fabric. I love your use of the bias as trim. The ensemble looks so fresh and summery.
Thanks, Mary! I went a little batty cutting all that bias in a sawtooth pattern, but it worked out in the end.
I love the eyelet, the yellow and the trim. It looks like you have a designer original there!
Thanks Linda. I must give credit to J McLaughlin however, as that is where I got the idea.
Very derby! L9ve it.
Perfect for horse-racing season, right?
I agree with everyone else it and you look fabulous. The material really lends itself to this application and your skill has brought it to life.
Thank you, Kim. It’s great to have a vision and then bring it to life. I was so happy this all worked out like I had hoped.
Great over blouse, such a classic look. All your special touches make a stylish impact. Are you able to get the zipper zipped by yourself? I made a top from a vintage pattern which also called for the separating zipper, I used a regular one instead.
Thanks Denise. When I put the blouse on, the first thing I do is put it on backwards just around my waist to get the zipper started. Then I turn it around so the front is forward, slip my arms though the sleeves and reach back to pull up the zipper the rest of the way. Works like a charm.
Love Love Love this – I want to do exactly that design with a scallop edge lace. Thank you for the inspiration .
You are so welcome! And thank you for such a lovely comment!
What a beautiful blouse! Thanks for the great pictures of all the techniques. I have always loved the look of the 60s overblouse with fitted slacks. This silhouette surely is a flattering one on you! I’m always looking for a different but classic summer look and thanks to you, I think I found it.
Thank you, Marguerite! I wore so many overblouses as a young teenager in the ’60s – and it is kind of amazing to me that that style still looks so good!