Category Archives: Hem facings

From Ready-to-Wear to No-Wear

Is a dress really complete if one has nowhere to wear it?  Well, yes, I think it is. Otherwise, I fear, I never would have finished this dress.

Its inspiration came from a ready-to-wear dress I spied on the Halsbrook website.

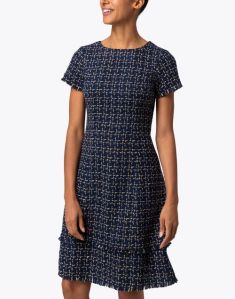
My original intention was to make a wool dress using this vintage royal blue-and-black houndstooth boucle I found several years ago.

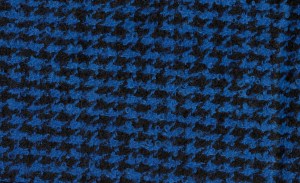
After deciding it was just a bit too hefty to use for a dress, I switched gears and ordered this boucle from Linton Tweeds in England.

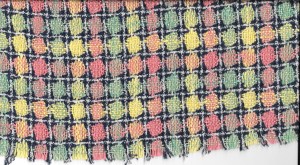
It is a cotton, silk and viscose blend with a lovely hand and a beautiful luster to it.  The colors look like the woven manifestation of Spring, and once it arrived, I was feeling very grateful that I was moving on to some warmer weather sewing rather than being stuck in a Winter project.  Below is the vintage pattern I had chosen to recreate the look of the ready-to-wear dress.

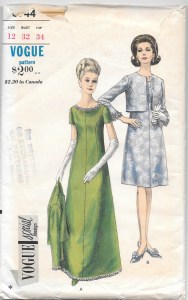
I used this pattern once before and knew it would work beautifully for this purpose.

All was not so merry, however, once I had my silk organza underlining cut out.  While positioning it onto the boucle fabric, I had a rude realization that the boucle, despite its very even grid, was an uneven plaid, in regard to color.  There was no way I was going to be able to balance the colors evenly across the width of this dress.  I had to make a decision how I wanted to treat the center front seam (which helps with the shaping of the dress).  I also had to determine which of the colors was dominant in the grid and then try to fixate on getting that evenly spaced.

After much debate, I decided to use the yellow as the dominant color, and I decided to “railroad track” the center seam, disrupting the even windowpane grid in that spot.

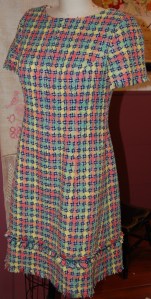
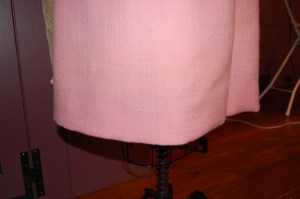
This picture shows how I tried to balance the yellow on the front of the dress, which I was able to do by narrowing the windowpane in the center seam.

I guess I have looked at this dress just a bit too much, as I am still second-guessing myself.  Sometimes it looks okay to me and other times, all I see are the unevenly spaced pink and green grids.

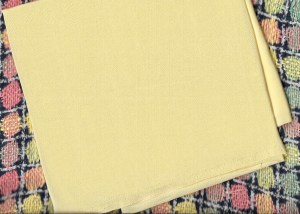
I decided to line the dress in pale-ish yellow crepe de chine, ordered from Emma One Sock Fabrics.

When it came time to finish the inside neck edge with understitiching, I was completely out of matching yellow thread.  Of course, with all the non-essential stores closed (since when I ask, is a sewing supply store considered non-essential?), I had to choose another color for that task.  I went to my supply of vintage buttonhole twist and found coral pink, a nice substitute.

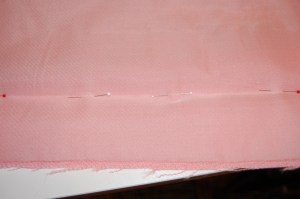
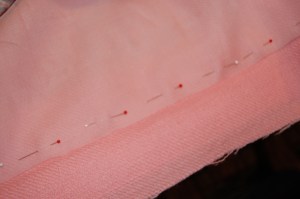
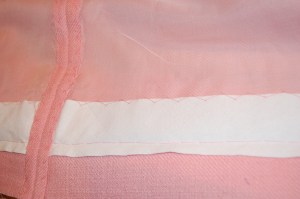
I machine-sewed strips of silk organza interfacings onto the edges of the sleeves and hem, so that I could fray them confidently.   Then I finished the interiors by hand.  Somehow, most vexingly, I lost my pictures of this process.

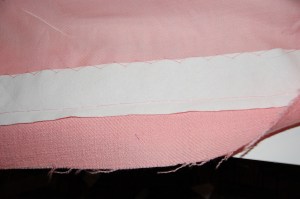
I actually used the reverse side of the fabric for the double-wide fringe several inches up from the hemline.  It gave me another “railroad track” detail which I thought would help make sense of that center front seam.

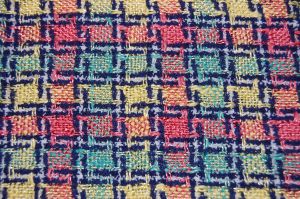
This is the reverse side of the fabric.

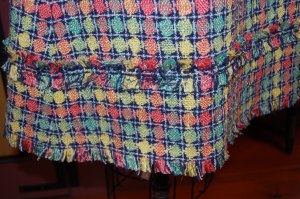
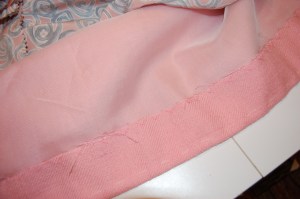
And here is the double-sided fringe attached to the skirt. The “railroad track” motif is visible in the center of the fringe.

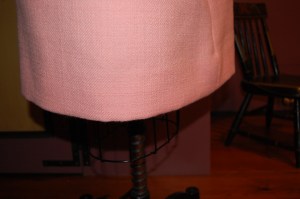
Can you tell I was consumed by this uneven color scheme?  I think it is still playing games with my head, but the good news is, once I did the final try-on of the dress, I thought it looked okay!

I’m not looking back any more on this one!

Well, from Ready-to-Wear to No-Wear to currently No-Where to Wear anything pretty, the only way to go is towards the time, hopefully soon, when we can all be thinking,”So many places to go, so many new dresses to Wear.”


45 Comments

Filed under couture construction, Day dresses, Hem facings, Hems, Linings, Uncategorized, vintage Vogue patterns from the 1960s

Update on The Pink Coat

When is a sewing project really, really, finally finished?  That was the question I was asking myself after I thought I had finished my Pink Coat, but then decided I had more to do.  Or, more precisely, I had things to undo and then redo.

After seeing the photos I posted on this blog, my eye went right to that crinkled hem.

I had not noticed how crinkled the hem appeared until I saw these photos.

I had purposely steamed the hem lightly, not wanting to make it a knife edge, but after seeing these crinkles, I went back and steamed it again.  I still had crinkles. My expectation at this point was that I would probably have to take the hem out and redo it.  This suspicion was confirmed when I sought advice from Susan Khalje.  She oh-so-gently agreed with me!  First she suggested  removing the silk organza from the bottom of the coat up to the fold line of the hem, and lightly catch-stitching it along the fold, which would not show.  I did this after taking out all the stitching along the lining, the facings, and the seam allowances, in order to undo the hem.

The pins mark the fold line of the hem; as you can see, the silk organza underlining extends to the bottom edge of the coat.

I then pinned about a half inch above the hem line, so I was able to remove the silk organza right at the hem fold.  I then used a catch-stitch to secure the silk organza right along the fold line.

Doing this helped, but the hem was still not as soft as I thought it should be. Susan’s next suggestion was to add a bias strip of flannel to the interior of the hem, which I suspected was what I had needed to do from the start.  I went to my trusty Vogue Sewing Book from 1970 to get guidance and found this:

From: The Vogue Sewing Book, edited by Patricia Perry, Vogue Patterns, New York, New York, c1970, page 324.

I used all cotton white flannel, cut 2½ inches wide, the width of the hem.  I positioned it so that ⅝“ was below the fold line, with the remaining above.  I used a catch-stitch on the wider section of flannel, securing it to the silk organza.  Then I did a loose running stitch right on the fold line. After every step, I gently steamed the area.

Obviously I had to take out the catch-stitching along the lower portion of the center back seam, and then I was able to slip the flannel under the seam allowance.

Then I was ready to put the hem back in, and reattach the facings and lining.

None of this was difficult, but it was time-consuming. However, I am much happier with the appearance of the hem now.  It is soft and hangs with more grace.

A much smoother, softer hem!

Susan also suggested that I make an adjustment to the front edges of the collar.  Although I had under-stitiched it, I apparently did not coax the front-edge seams back away from the edge enough, allowing them to show more than they should.  So I took out a majority of the understitching and re–did it, too.

The collar lays flatter now, and I am really happy with it.

Needless to say, I was a bit discouraged that I was facing so much work to correct these problem areas, but I knew it needed to be done.  I considered waiting until next Fall to tackle these fixes, but I decided I would feel less like doing it then than now, so I dug in.  It became a good learning experience, and a good reminder that different fabrics behave in different ways. It is up to the dressmaker to seek out the best solution for a problem area and then do it, or in this case, re-do it.  Hooray, the Pink Coat is finally – really – finished.

22 Comments

Filed under Coats, couture construction, Dressmaker coats, Hem facings, Hems, Uncategorized, underlinings, vintage Vogue patterns from the 1960s