Category Archives: Heirloom sewing for children

It’s a Wonderful Sewing Life

Like so many people in the USA and around the world, my favorite Christmas holiday movie is the 1947 Frank Capra picture, “It’s a Wonderful Life,” starring James Stewart and Donna Reed.  No Christmas season is complete for me without watching it at least once. Bedford Falls, the fictional town where the movie takes place, would have been bereft without the life of Stewart’s character, George Bailey, as he eventually discovers under the benevolent care of his guardian angel, Clarence.  I believe the movie is a good reminder to think about our own lives, the things that make us happy and the talents we have which enable us to do lovely things for others.  And so – I often reflect on how my life would be so much poorer without sewing in it.  I love to sew in all the seasons, but especially at this time of year, I am so grateful that I can sew for my little granddaughters.  It is one of my greatest pleasures to plan and make new dresses for them to wear to all their holiday events.

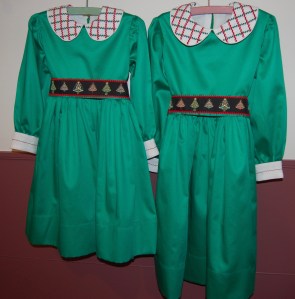
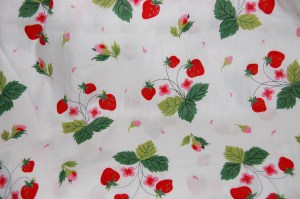
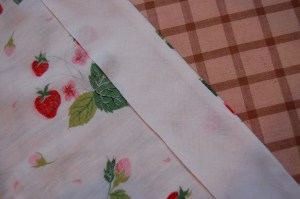
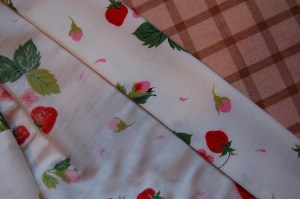
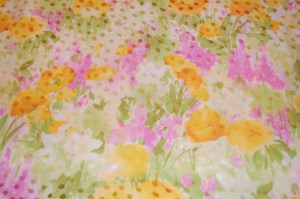
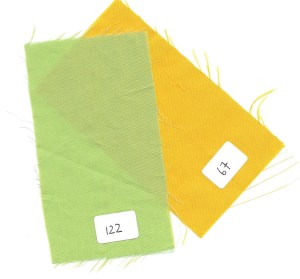
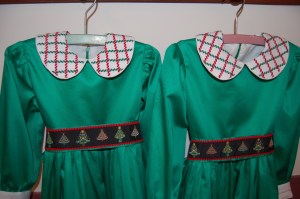
Last year’s dresses were red and white checked flannel, so this year I thought they should have green dresses.  Trying to find a pretty “Christmas green” in a child-appropriate fabric proved to be a challenge.  Thankfully, on a trip to North Carolina in October, I had the good fortune to visit Mulberry Silks in Carrboro.  There I was able to order a lovely green cotton sateen from a swatch book, and have it sent to my home in Pennsylvania a couple of weeks later.

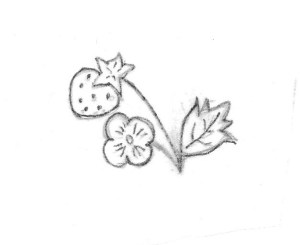
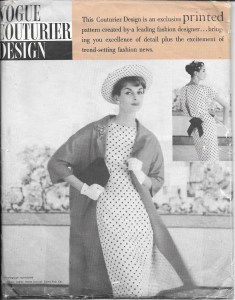
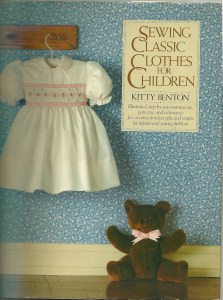
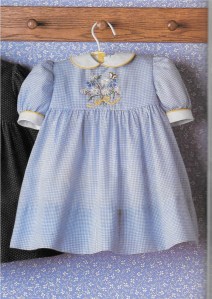
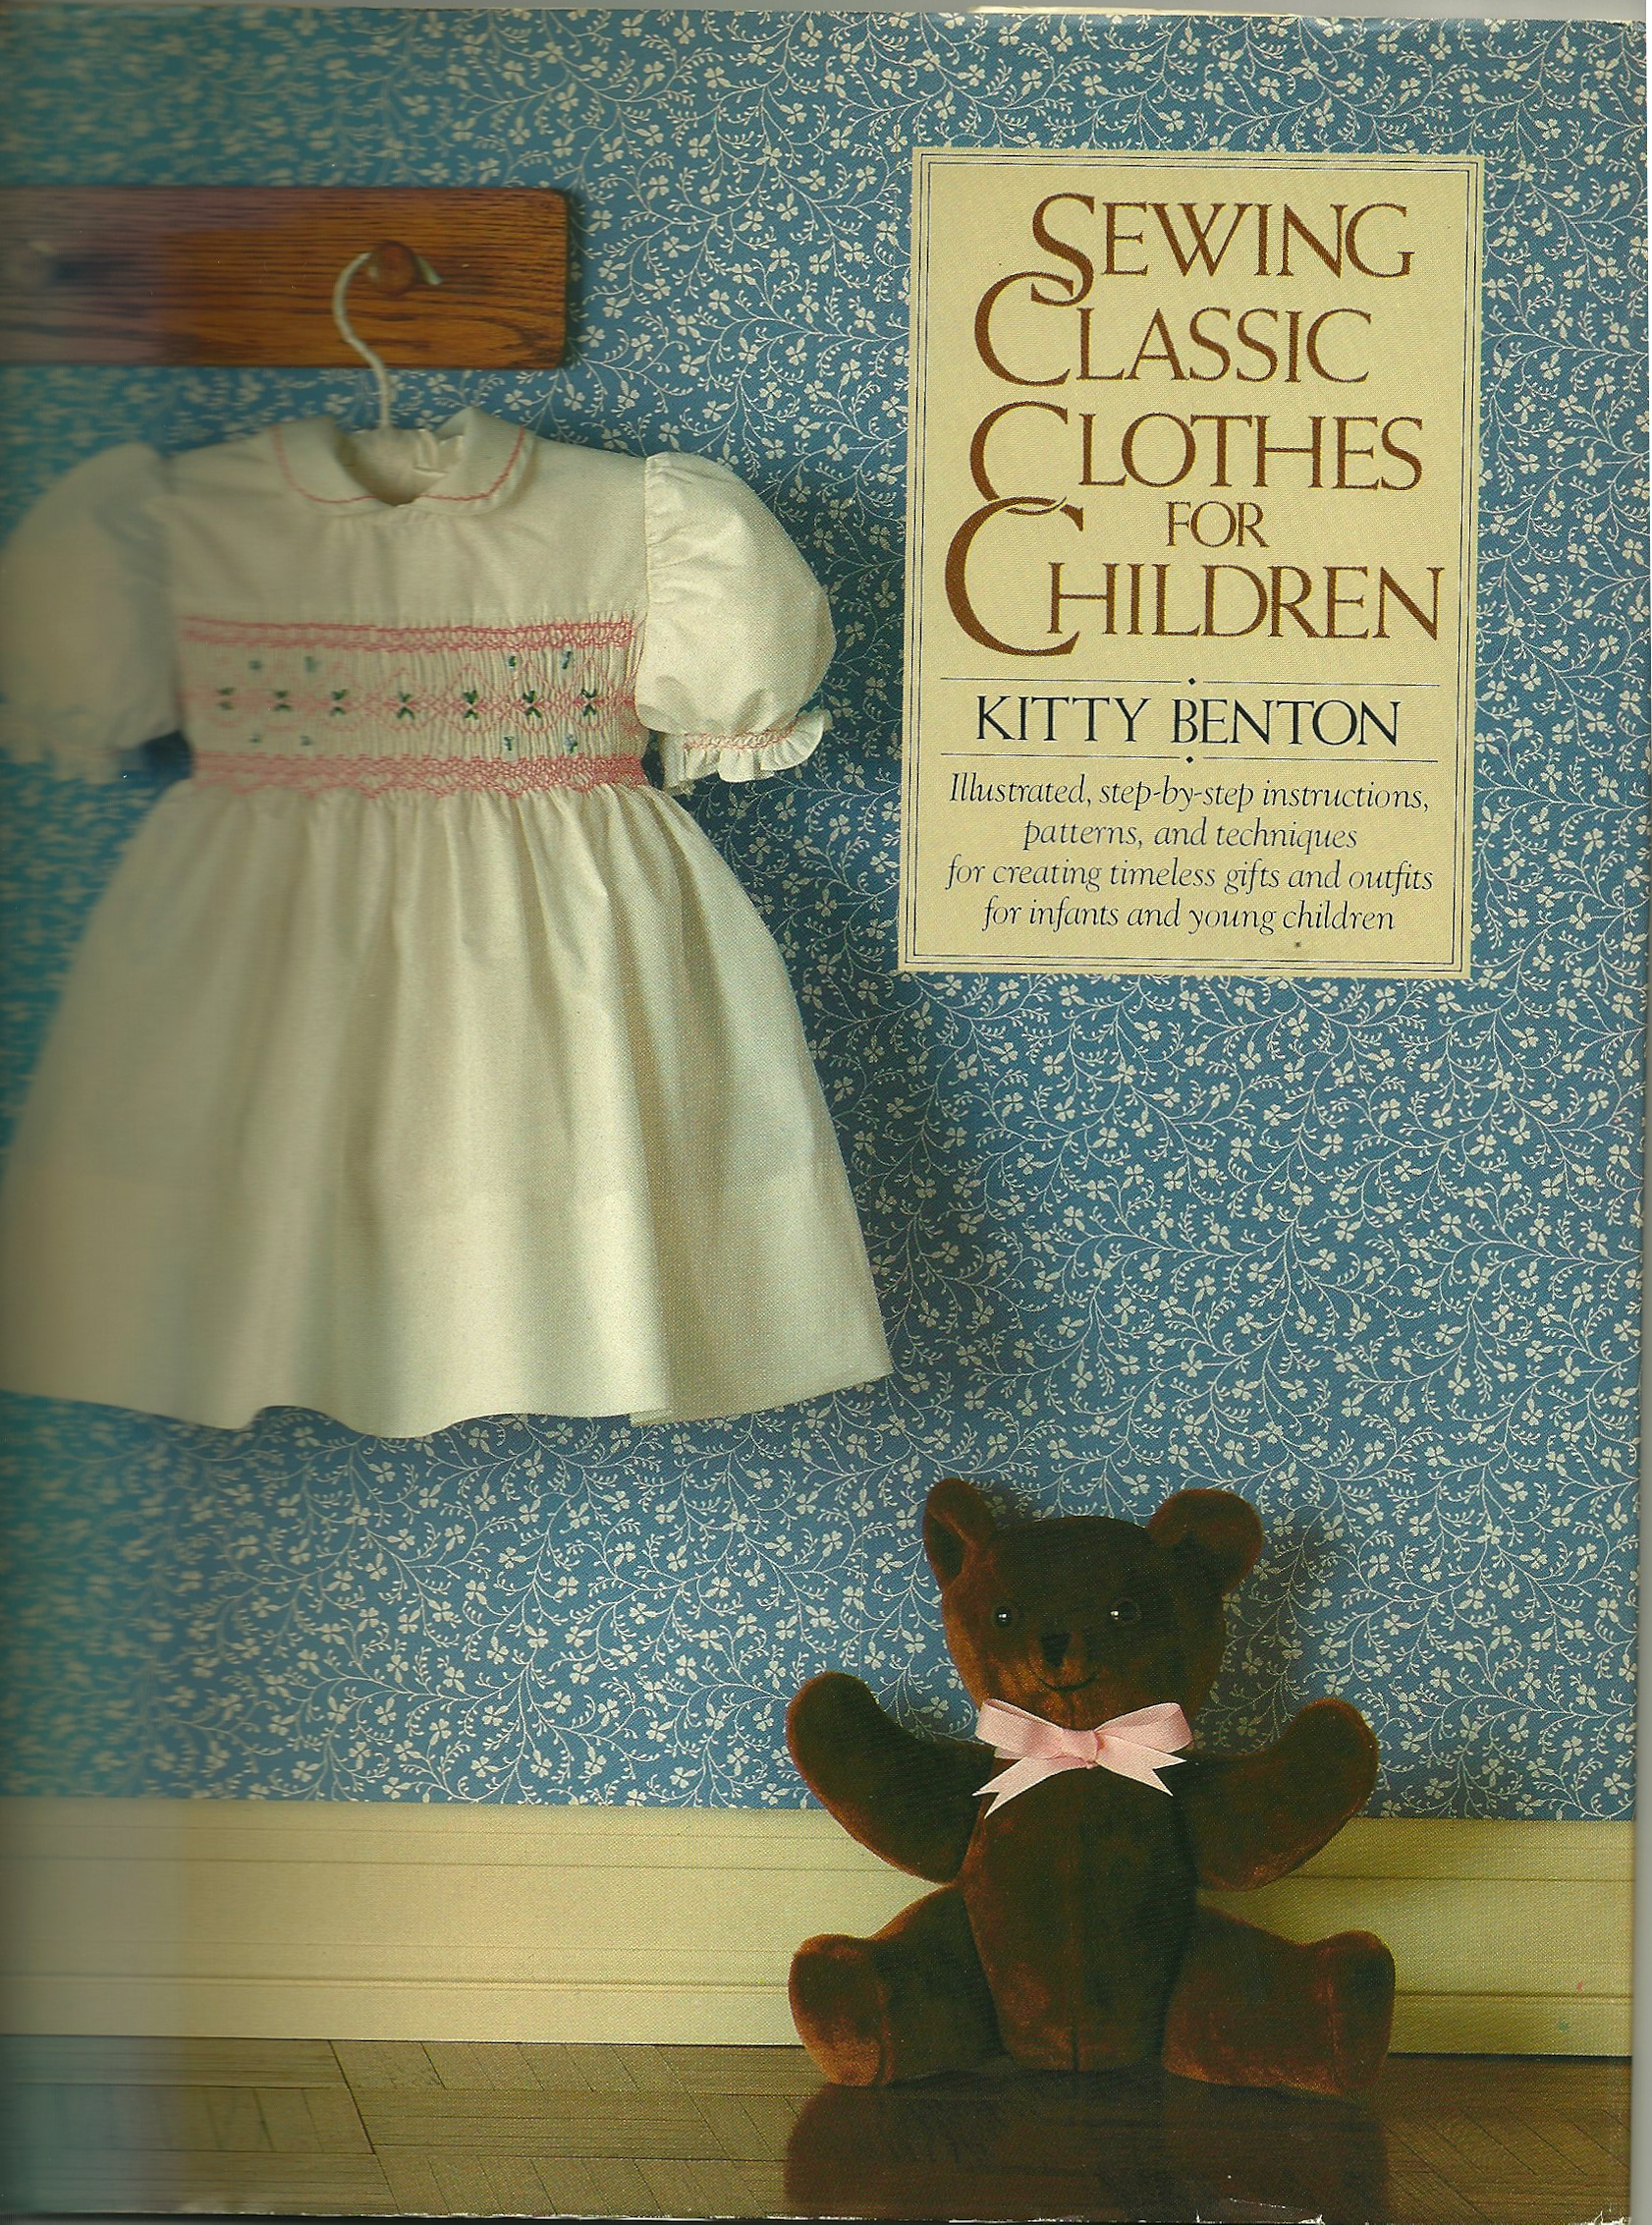
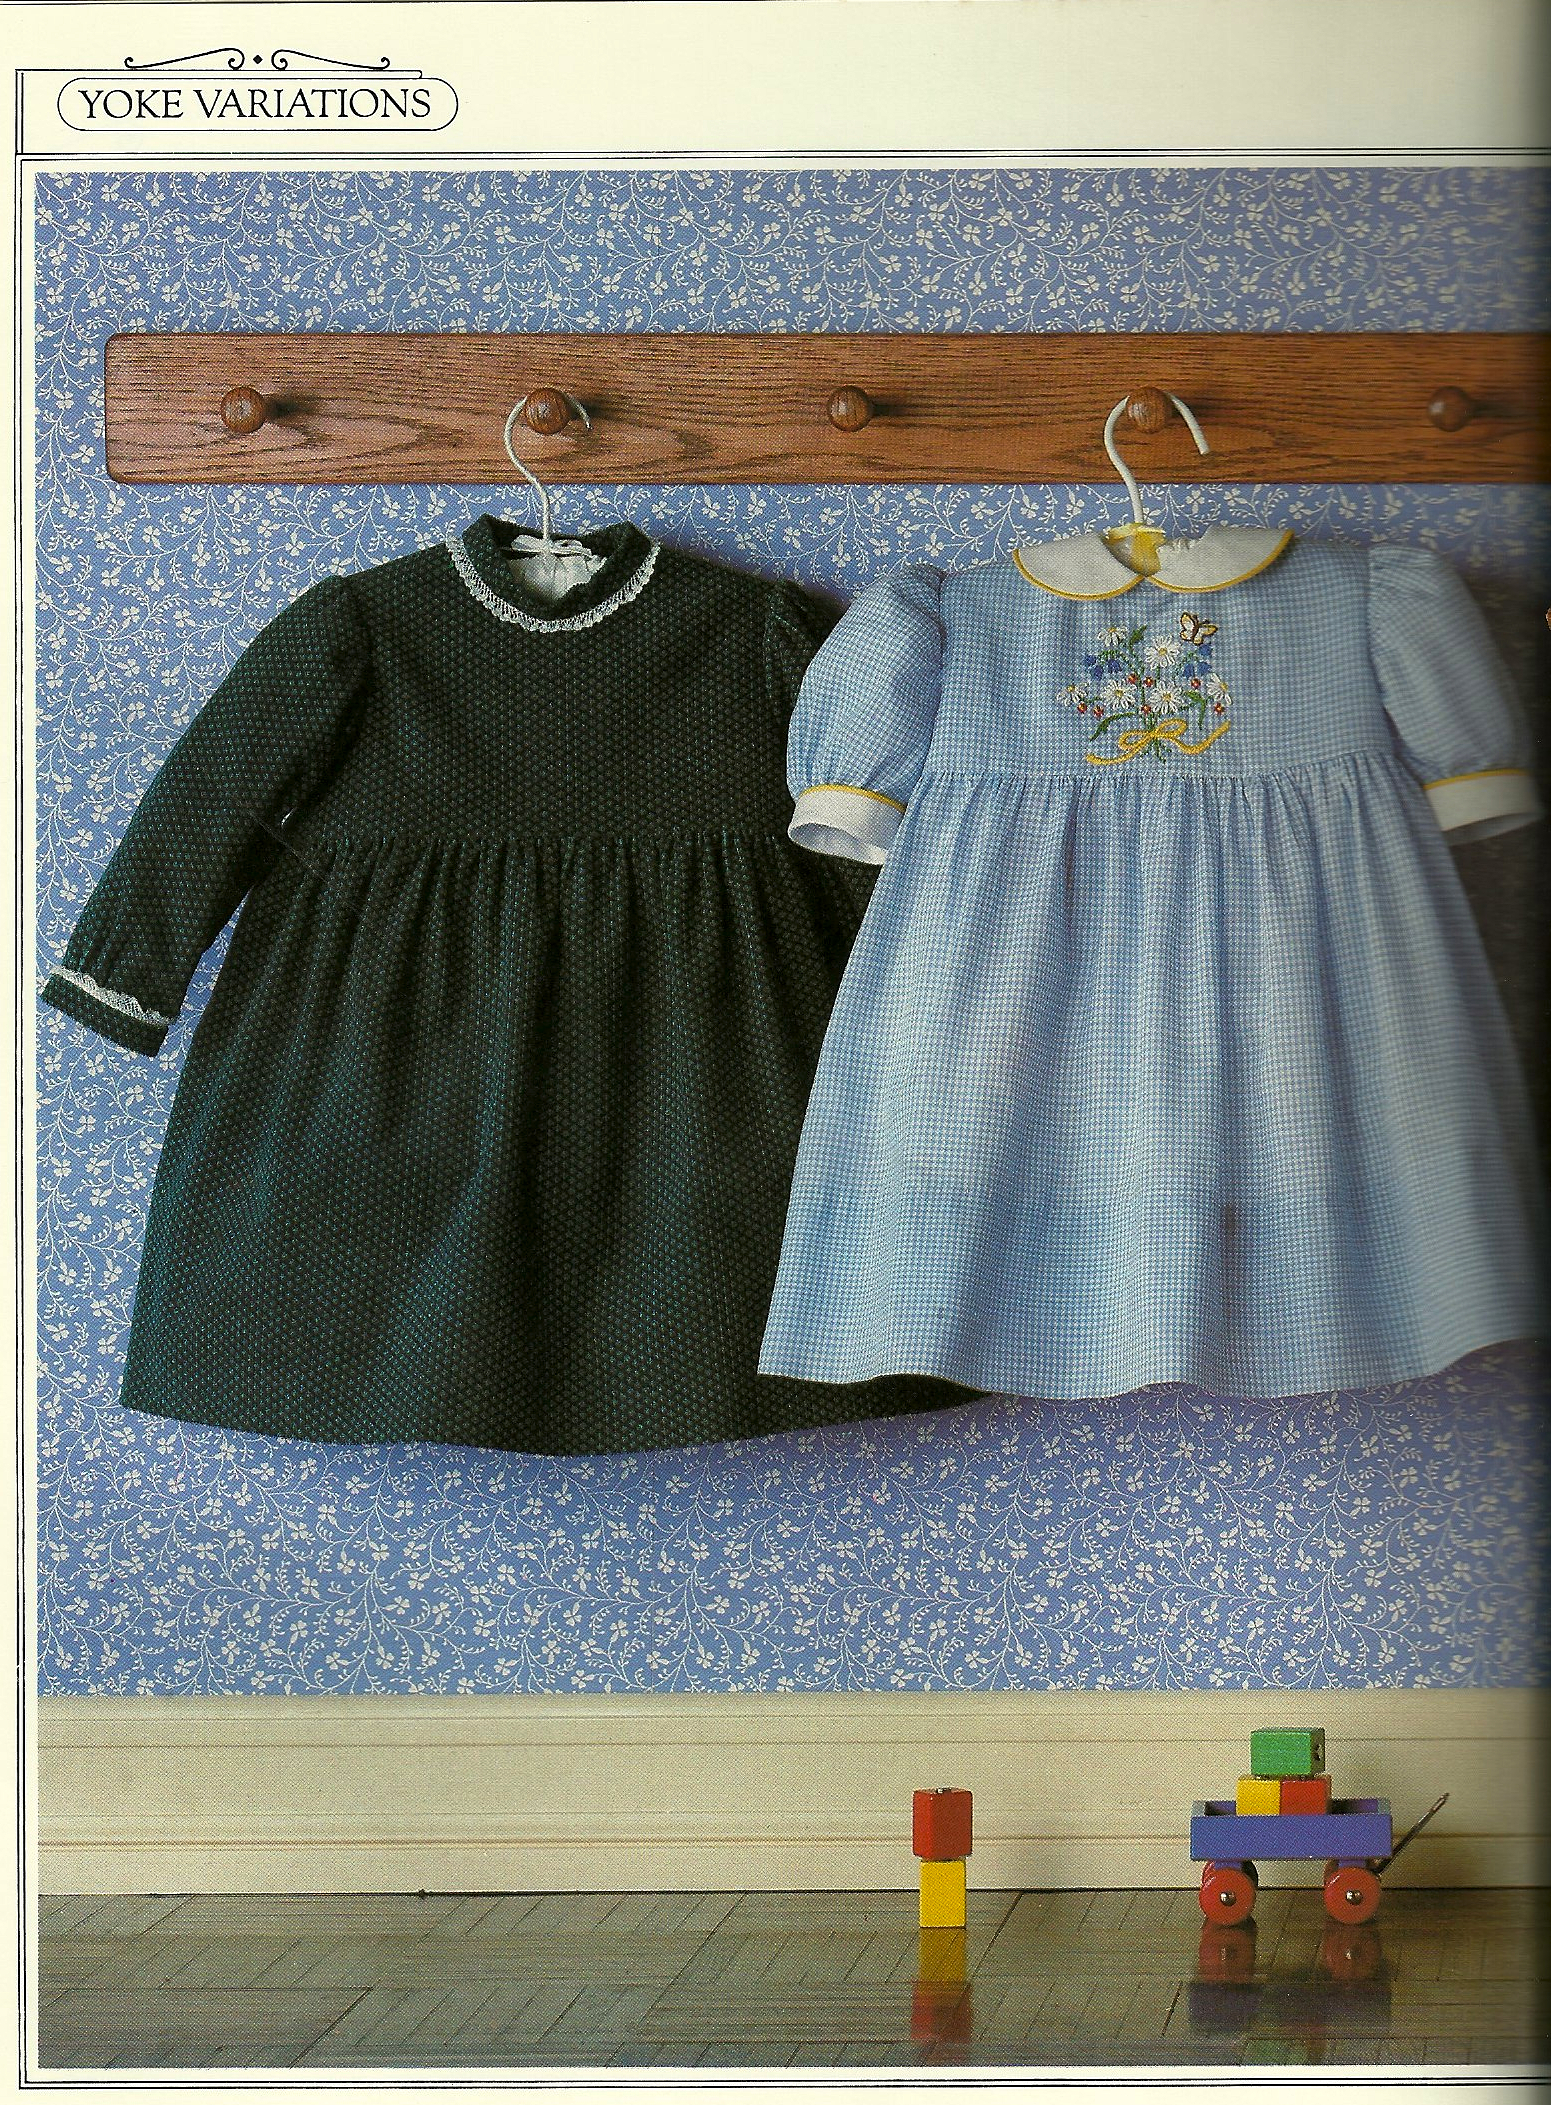
I already had a vision of a way to make these dresses just a little bit special.  My inspiration came from a feature in Classic Sewing Magazine, Volume 3, Issue 3, purchased from Farmhouse Fabrics earlier in the Fall.

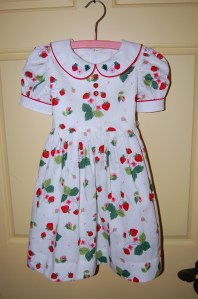
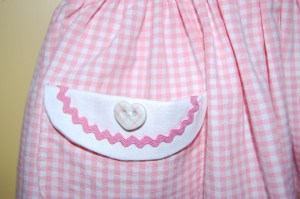
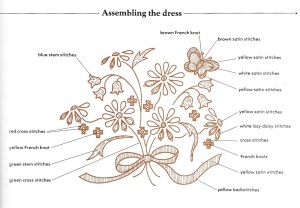
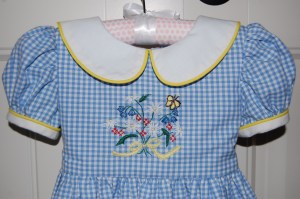
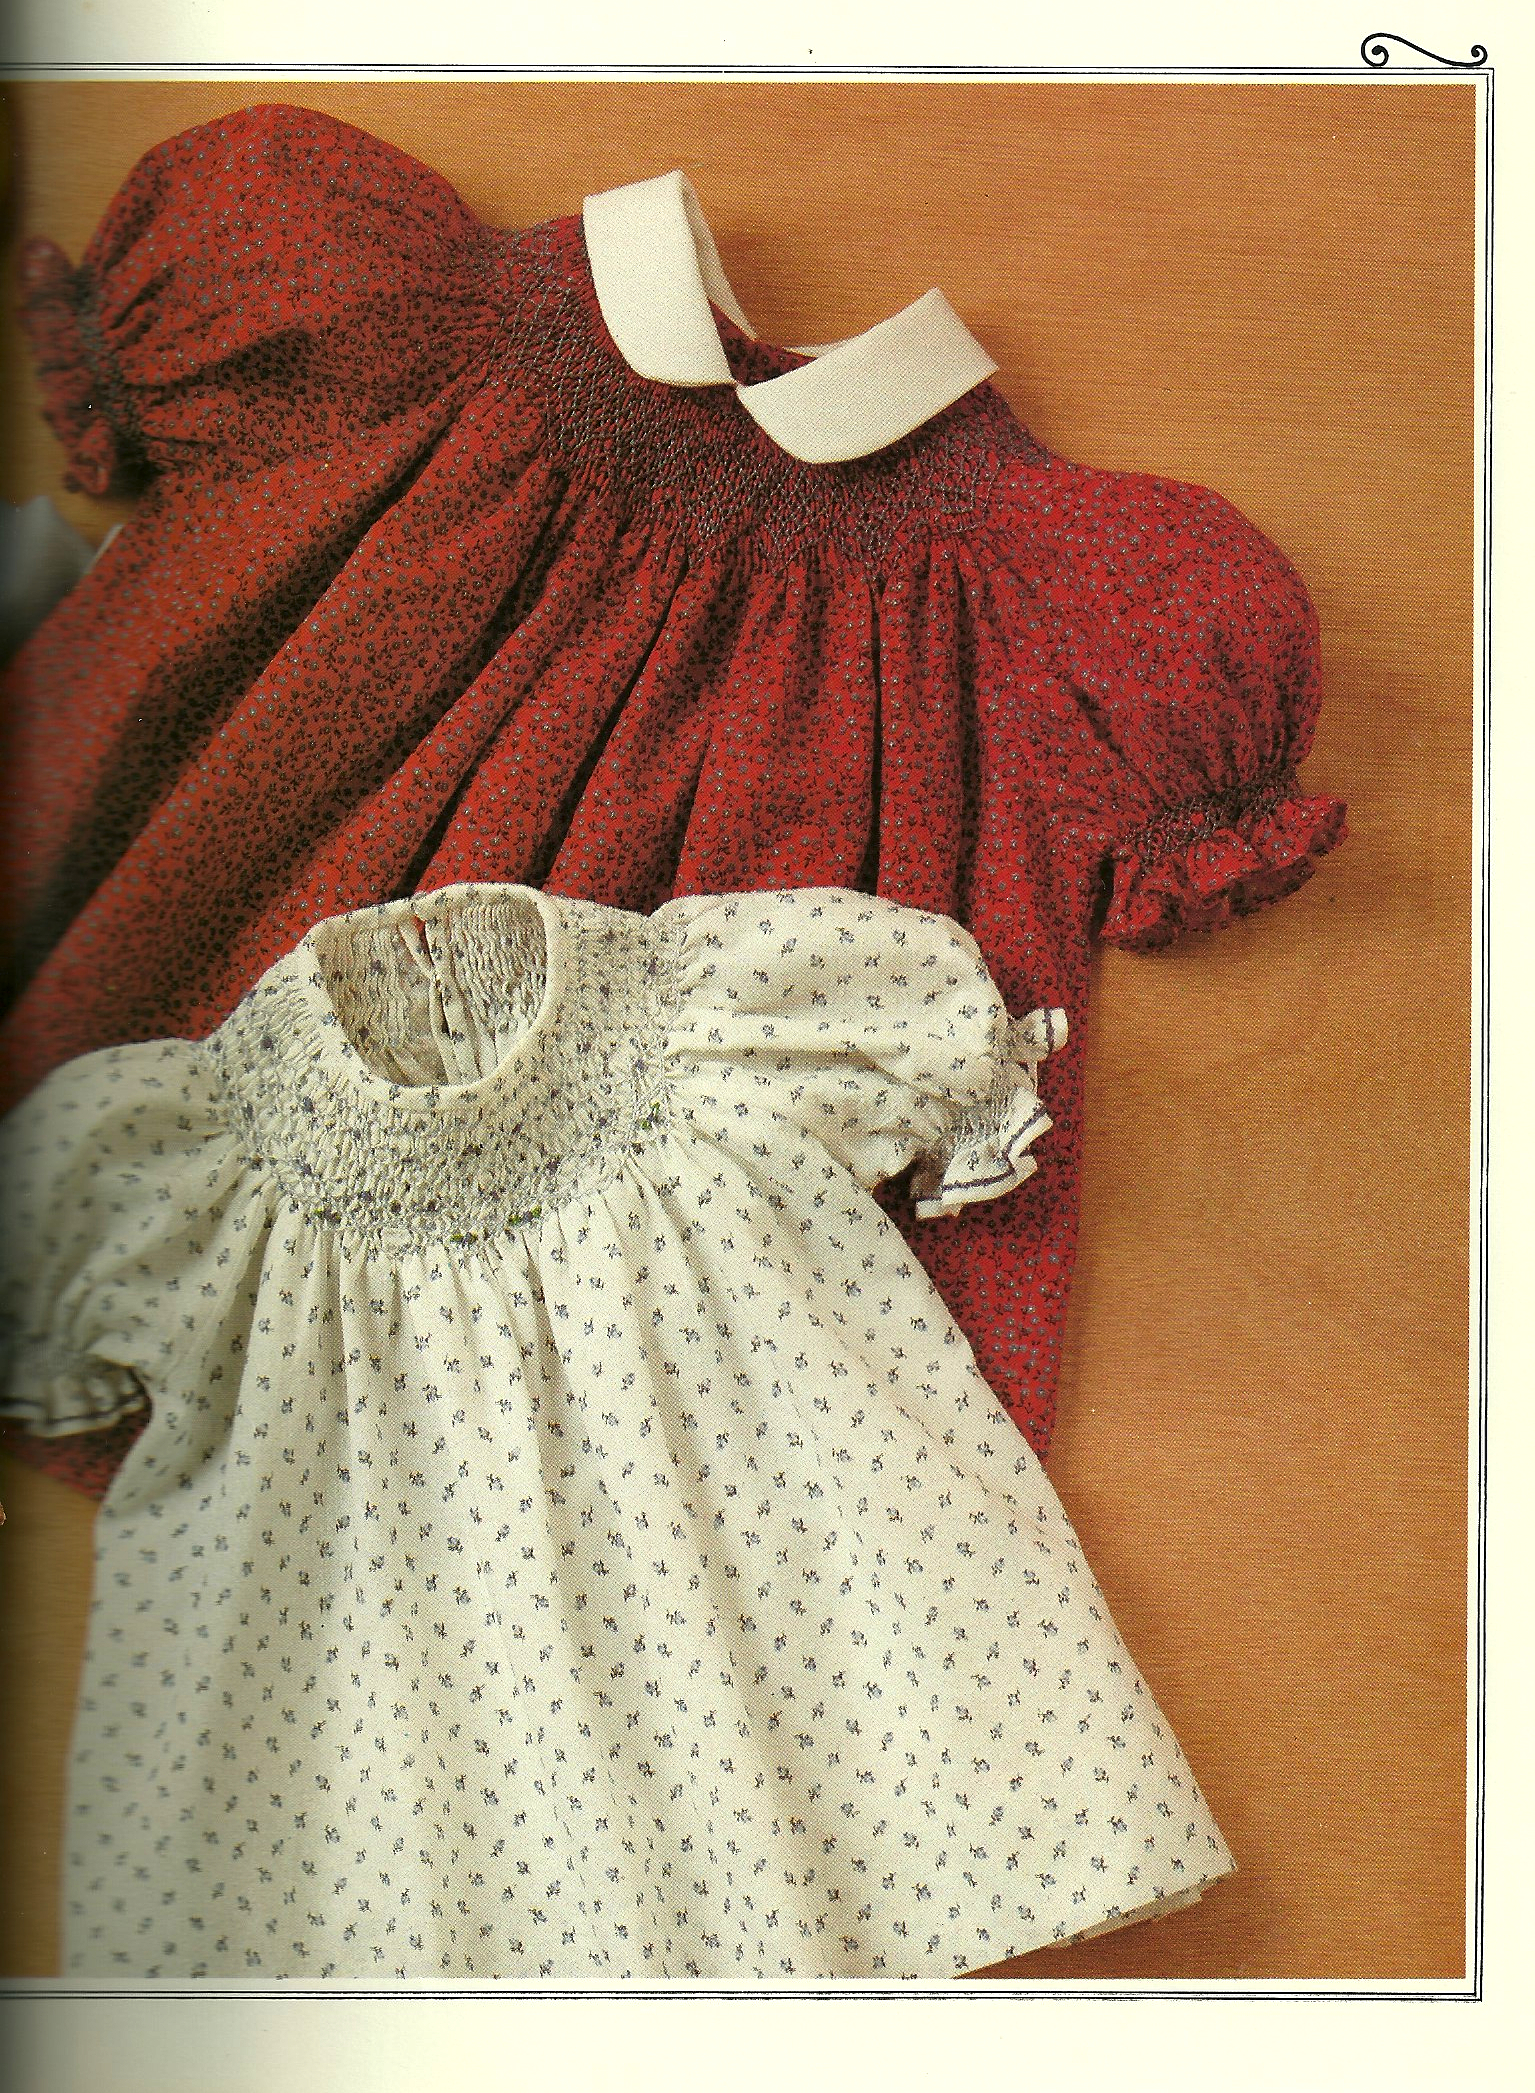
Not only do I love rickrack, I love to embellish it. When I saw this collar and cuffs, I knew I had the inspiration I needed.

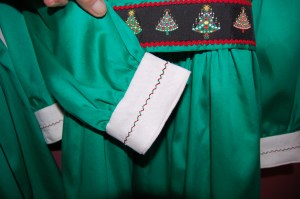
Although I wasn’t planning on smocking these dresses, I knew I could embellish the collars and cuffs in the same manner as the illustrated dress.  Of course, I envisioned red and green rickrack crisscrossed, and red and green detailing on the cuffs.

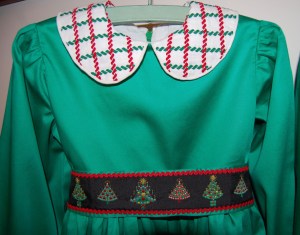
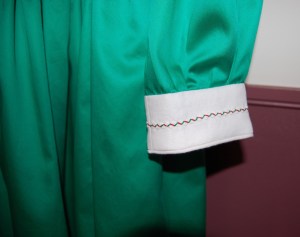
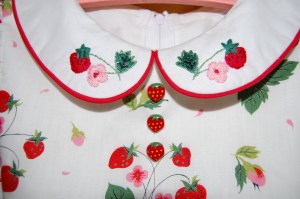
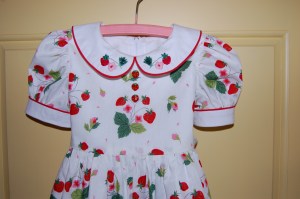
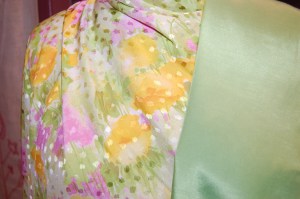
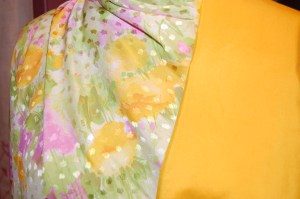
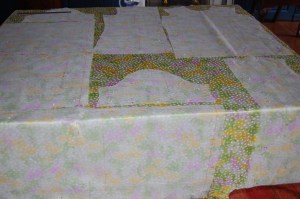
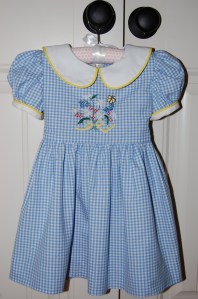
I used lightweight linen for the collars and cuffs, and made self piping for the edge treatment.

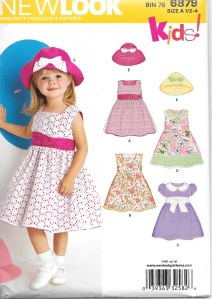
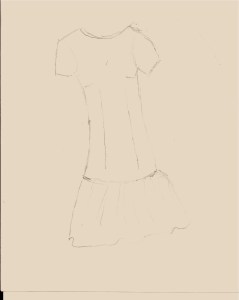
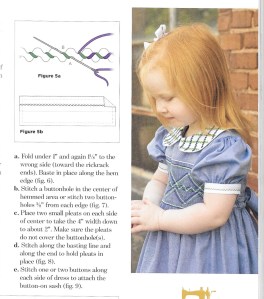
Because my girls had outgrown the patterns I used for previous years, I needed a new pattern to configure in their sizes.  Fortunately, the same Classic Sewing Magazine contained this pattern in sizes 4-8.  I knew I could use the smocked dress pattern, by using the bodice lining template as the actual bodice.

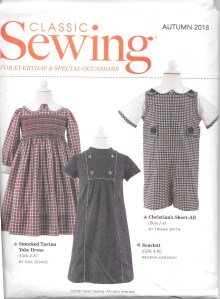
The smocked dress on the left had the correct collar, cuffs and long sleeves which I was looking for.

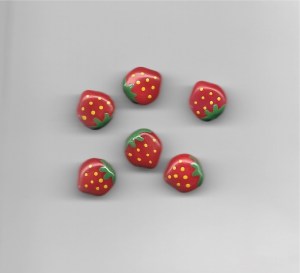
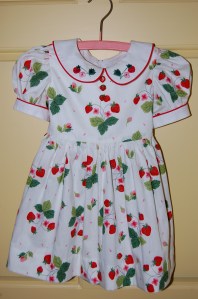
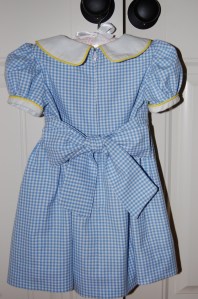
Another feature I wanted to include was this embroidered ribbon which I picked up last year in an after-Christmas sale at a home/design store.

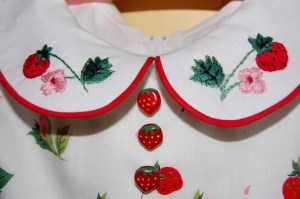
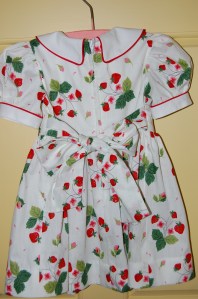
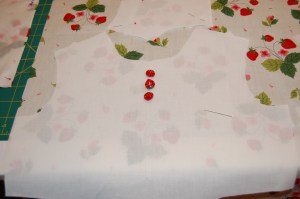
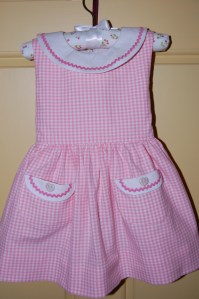
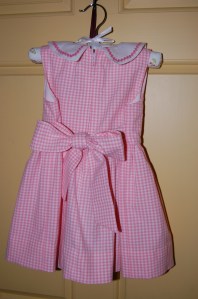
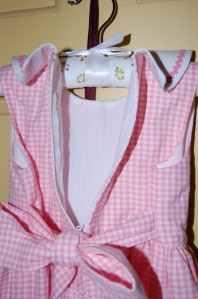
I sewed the ribbon onto a long, unattached sash for each dress.  I have just enough fabric remaining to make plain belts for the dresses in case my daughter thinks the girls can wear them at other times of the year. The pattern called for a buttoned back, but I opted for zippers instead, as a practical alternative.  I thought about adding three little pearl buttons right below the center neckline of the bodices, but then I realized they actually detracted from the design of the collars.

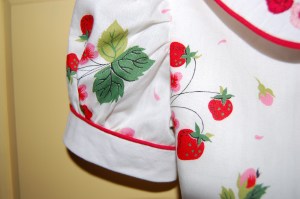
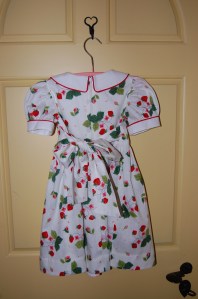
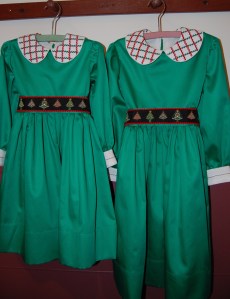
Now it seems every project has some little quirk to it, and this one became apparent to me only when I took photos of the finished dresses.  (I should add here that I was racing the calendar to get these dresses in the mail in early December so they would arrive in New England in time for the Season!)  My photos showed the orientation of the rickrack embroidery was different on the two sets of collars.

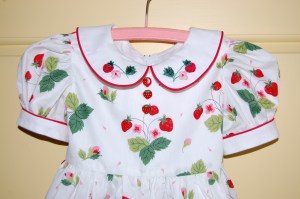
What I don’t understand is the fact that I laid out the grid exactly the same on each collar, but once they were attached to the dresses, they were askew from each other.

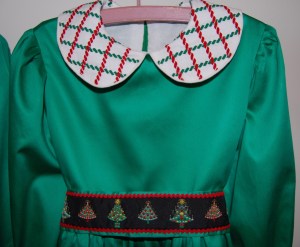
I am still trying to figure out how the grid on this collar ended up on a slant.

Well, at that point it was too late to try to fix this.  Off they went in the mail, with me scratching my head!  Fortunately, when my daughter sent me some photos of the little ladies in their dresses, this mistake was not very apparent.  And best of all, my little girls love their dresses.

As I am wrapping up my sewing for 2019 (in order to finish wrapping presents, for one thing!), I am so grateful for all the resources available to those of us who sew, I am so fortunate to be part of this global sewing community, and I am so grateful to all of you who read my blog.  Thank you so very much!  I wish each and every one of you a peaceful, loving, happy Holiday Season. And may your guardian angels ever keep watch over you and your loved ones.

21 Comments

Filed under Heirloom sewing for children, Sewing for children, Uncategorized

A Detour through the Strawberry Patch

Sewing on more than one project at a time is, I guess, a form of multi-tasking. Although I believe I am like most women in that I am good at multi-tasking, I prefer not to do so with sewing. I like to work on one thing at a time, but sometimes, life just doesn’t lend itself to such discipline. Such has been the case with the hours I have spent sewing, not on my Classic French Jacket, but on two little dresses – birthday dresses! – for my two little granddaughters. I know they won’t always want to wear sister dresses, so I am anxious to sew such things for them while they might still think it is fun. And if that means I need to steal some hours away from my personal sewing, then that’s what happens.

Spring birthdays are lovely as it means I get to sew with cheery cottons and make little puffed sleeve dresses with big sashes in back. I was especially inspired this year with a 5+ yard length of vintage fabric I purchased from an Etsy shop a couple of years ago.

A strawberry print cotton for two little Spring sisters

I knew this fabric was most certainly from the 1950s, as this type of print was prevalent then, as well as the fact that the fabric was only 35” wide. The more traditional width of 45” most of us are used to, did not become commonplace until about 1960. To corroborate my suspicions, I saw this dress on Pinterest:

Sold as a vintage 1950s’ dress, it is edged with rickrack.

Although this fabric would probably have been used for adult fashions in the 1950s, I found it to be perfect for little girls’ dresses in 2017. Not only that, I found these vintage strawberry buttons which just seemed to be made to go with the fabric!

The Etsy store from which I purchased these buttons indicated they are from the 1960s. They are hand-painted and quite small.

I started with a (new) pattern I have used before, and made new copies of the sizes I needed for my two little ones.

I used View C of this pattern last year for another birthday dress, but obviously made some apparent changes to it for these dresses.

I knew I wanted to make the collars and sleeve bands out of white cotton, and pipe them in red. I made my own piping out of cotton kitchen string and some vintage all-cotton bias tape I had in my sewing supplies.

I decided to add a bit of embroidery to the collars just to make these dresses a step above ordinary. I selected a strawberry motif from the fabric and made a drawing, which I then transferred onto the collars.

This is the dress for the 4-year-old.

This is the dress for the two-year-old.

On the back of the dresses, I added snaps to the edges of the collars to make them lay flat. They can be unsnapped for ironing or to wear a sweater, but it certainly makes for a nicer appearance,

When it came to the hems, I found that I had cut the skirt length for my older granddaughter just a little too short. I was pretty irritated with myself until I realized that facing the hem in white bias cotton actually looked better than if I had just turned up the hem. The strawberry print fabric is lightweight and the design would have shown through a hem which was just turned up. You can see this happened in the dress featured on Pinterest.

When it was time to hem the dress for my younger granddaughter, I had enough length, but I decided to underline the hem with white cotton to avoid that “see-through” of the design. So my mistake on the larger dress made for a better outcome with both of the dresses. (It doesn’t always work that way, does it?)

I sewed the bias strip on as if I were facing the hem, then turned it up again. This way, the dress can be easily lengthened if need be.

After doing a light running stitch by hand to secure the bias band inside the hem, I then turned up the hem and sewed it as usual.

Three little buttons at the front were the finishing touches for both dresses.

The larger dress…

…and the smaller one.

The back of the larger dress

And a back view of the smaller dress.

Interestingly, I had to do some strategic planning when laying out the pattern pieces on the fabric. While the design does not have an up-and-down orientation, there are spacing issues that I had to account for. For example, I wanted each bodice front to have a spray of strawberries in the center, with enough space to add the buttons above. In addition, the spacing of the strawberry sprays determined how the patterns for the skirts were arranged on the cloth, as I wanted a balanced appearance of the strawberry sprays, without any cut in half at the waistline.

Here I am trying to find the “sweet spot” for the design on the bodices when arranging the pattern pieces.  It was easier to do on the larger dress.  The bottom button on the smaller dress is a little closer to the strawberry design than I would have liked, but in order for the design to be centered as much as possible, I opted to go this route.

This is the front bodice of the larger dress, with a carefully placed central motif.

And this is the smaller dress, with a tighter fit for the placement of the buttons.

Sometimes it can get a bit boring making the same dress twice, but the quality of this silky soft fabric is such that it was an absolute joy to sew. And, of course, I was inspired by the thought of my two little girls dressed up and looking so cute! They seem to like their strawberry dresses.

39 Comments

Filed under Buttons - choosing the right ones, Heirloom sewing for children, Sewing for children, Uncategorized, vintage buttons, Vintage fabric

The Silky, Shimmery Colors of Spring

Just as with the elusive answer to “Which came first, the chicken or the egg?,” those of us who sew can try to answer “Which comes first, the fabric or the pattern?” The answer, at least as I see it, is “It depends.” And sometimes, even, it is a little of both.

When I saw this fabric on the website of Mendel Goldberg Fabrics last Fall, I really did not stop to think about a pattern. It was a “bolt end,” 1 3/8 yards of 58” wide Italian silk. With that width, I wasn’t particularly concerned about the length being under 1 and ½ yards. I just ordered it as soon as I could.

The colors of Spring

Upon arrival, the fabric was even prettier in person, shimmery with “polka dots” woven in, fluid as only silk can be, and the picture of Spring. At that point, I was up to my ears with my Winter sewing, so I thought about it only casually until just a few weeks ago. I already had this pattern in my collection, and in the back of my mind, I had paired that fabric with the dress in View B on the right.

Oh the things we can learn, no 10

One interesting thing about vintage patterns is the yardage requirements are often given for widths that are narrower than many modern fabrics are produced in. For that reason, it can be difficult to determine exactly how much fabric is needed for a particular design. I’m getting better at sensing what I need, so I just assumed that I would have enough fabric to make that dress.   I had my heart set on it, actually. So much so, that when Britex Fabrics announced an upcoming sale of silk fabrics, I sent off for swatches for coordinating silk for the short jacket (in view A) and lining for the dress.

The green is a lightweight silk/cotton blend. The goldenrod yellow is silk taffeta from Italy, without the stiffness that taffeta so often has.

The green is a lightweight silk/cotton blend. The goldenrod yellow is silk taffeta from Italy, without the stiffness that taffeta so often has.

Dutifully ordered, the fabric arrived from California, and it, too, was even prettier in person! I was in love, and really could not wait to get started, first on the dress, and then on the jacket.

DSC_0036

The green for the lining . . .

The colors of Spring

… and the yellow for the short jacket in View A.

Then reality hit. When I took out the pattern pieces, here is what I found for that unusual flounced skirt:

This skirt piece uses almost a yard in length, and the diagonal shaping on it uses more fabric than normal.

This skirt piece uses almost a yard in length, and the diagonal shaping on it uses more fabric than normal.

My heart sank as I knew immediately I did not have enough fabric. There was going to be no Rumplestiltskin to help me with this one.   I went back to my pattern collection and pulled out two more possibilities.

I love this dress, but I thought it might be too tailored for the fabric. Also, the seaming detail would be lost entirely with the busy design of the silk.

I love this dress, but I thought it might be too tailored for the fabric. Also, the seaming detail which adds so much to this dress would be lost entirely with the busy design of the silk.

I felt like Goldilocks evaluating this pattern for my fabric. Just not right...

I felt like Goldilocks evaluating this pattern for my fabric. Just not right…

With both these dresses I would have to rethink the jacket, as the styles would not compliment each other. I stewed over this, re-measured, re-thought, and left it all in a heap in my sewing room. There was something about that shimmery silk that kept telling me that a dress made from it needed to have some movement to it –  like the flounced half-skirt pictured in the pattern. And then it hit me. If I made the front part of the skirt the same as the back, I could probably just squeak it out.

I did a quick diagram to consider this option.

I did a quick diagram to consider this option.

My completed muslin verified this for me, and, not only that, I loved the look, at least done up in muslin. Once again, using the couture technique of laying out and cutting each pattern piece individually enabled me to manipulate the pieces to make the most of the fabric I had available to me. Fortunately, there was no matching to be done, although there is a specific up and down to the design.

Now this is what is called making the most of one's available fabric!

Now this is what is called making the most of one’s available fabric! This shows my silk organza underlining pieces in place, ready to cut.

As far as the jacket – losing the diagonally shaped flounces on the skirt, makes the effect of the jacket not quite as dramatic, but I think it will still be very flattering – and appropriate. (The jacket has a million pieces to it, so it will be quite the project…!)

Well, I can’t leave this post without sharing another color of Spring, although this one is not silk and not shimmery. Pink cotton gingham is the picture of Spring, especially in a little dress for a little girl! When I made a crib quilt for my younger granddaughter, Carolina, I backed it in pink gingham, appropriately called “Carolina Pink.” I ordered enough so that I would be able to make her a dress for her first birthday (earlier in April) and here it is:

The colors of Spring

The colors of Spring

The bodice is lined in soft white cotton, which makes a lovely finish.

The bodice is lined in soft white cotton, which makes a lovely finish.

In my tins of buttons, I found these little ceramic ones, purchased years ago when Carolina’s mommy was my little girl. (Well, she is still my little girl, but you know what I mean.) How appropriate to use them for one of her daughter’s dresses.

The colors of Spring

These buttons, with their delicate cross-hatch design, were just waiting for this dress.

And with this dress –  the fabric absolutely came first!

17 Comments

Filed under Buttons - choosing the right ones, Formal or fancy dresses, Heirloom sewing for children, Mid-Century style, Sewing for children, sewing in silk, Silk taffeta, Uncategorized, vintage Vogue Designer patterns, vintage Vogue patterns from the 1950s, vintage Vogue patterns from the 1960s, vintage Vogue patterns from the 1970s

A Second Chance

Although I did quite a lot of sewing for my two children when they were young, there were a few particular dresses I had always wanted to make for our daughter. Somehow by the time I had the time to think about making them, she had grown just a bit too old for these dresses better suited for a two, three, or four-year-old. But now I have a second chance to make them, this time for granddaughters. (Lucky me!)

With our oldest granddaughter’s third birthday approaching, I picked one of my favorite “sewing-for-children” books off of my shelf, and went right to the section on what has to be my favorite little girl’s dress of all time.

This beautiful book by Kitty Benton was published in 1981, by Hearst Book, New York. It is extensively illustrated, with explicit instructions for every project. It also has a complete section on Sewing Techniques, including smocking, embroidery stitches, hems, sewing on buttons, etc., etc. The book is an invaluable guide for heirloom sewing. Copies of it are available on Amazon and through a few Etsy shops.

This beautiful book by Kitty Benton was published in 1981, by Hearst Books, New York. It is extensively illustrated, with explicit instructions for every project. It also has a complete section on Sewing Techniques, including smocking, embroidery stitches, hems, sewing on buttons, etc., etc. The book is an invaluable guide for heirloom sewing. Copies of it are available on Amazon and through a few Etsy shops.

And here is the dress I love so much!

And here is the dress I have always loved so much!

The dress in the book is geared towards a two-year-old, so I decided to lengthen the bodice to fall at the waist, better suited for a young lady of three. I actually used this New Look pattern, version C (in lavender), for my pattern.

Obviously, I intended for the sash to tie in the back.

Obviously, I intended for the sash to tie in the back.

I lengthened the sleeves as well, in keeping with the intention of Kitty Benton’s design.

To transfer the embroidery design onto the bodice, I photo-copied it and enhanced the stitching lines with a fine-tipped black marker. Then I held it up to a window, with the blue gingham bodice piece centered on top, and I traced the design lightly with a sharp pencil.

A Second Chance embroidery pattern

A simple and sweet flower bouquet.

I used purchased yellow piping, being fortunate enough to find the perfect color. No need to make more work for myself when what I needed was readily available.

The embroidery on the dress took me longer than I anticipated, but I was able to finish the dress in the nick of time (except for a hook and eye at the back neck; I actually finished much of the hand sewing on it while spending the past 9 days with my daughter and granddaughters while our son-in-law was away on business; I forgot to bring hooks and eyes with me, so on my next visit, I’ll be doing that little addition!)

A Second Chance

I actually hand-picked the zipper! I'll be happy when I can get that neck properly finished with hook and eye.

I actually hand-picked the zipper. I’ll be happy when I can get that neck properly finished with hook and eye.

And a close-up look at what makes this little dress so endearing, besides the little person who will wear it!

And a close-up look at what makes this little dress so endearing, besides the little person who will wear it!

All I had to do was hope that the dress would fit little Aida well, and most importantly, that she would like it! Fortunately, both concerns were quickly dismissed, as she seemed to love the dress from first glance in the box and immediately wanted to put it on.

DSC_1147

A Second Chance

Her birthday party was held on the first day of Spring, and although it felt more like Winter, Aida happily wore her new dress for that special day.

The birthday girl!

The birthday girl!

Aida has already given me more joy than she will ever know – and also a second chance for some “little” sewing!

27 Comments

Filed under Heirloom sewing for children, Sewing for children, Uncategorized

Fifty little dresses!

Can you guess??  It’s a girl!

Our dear daughter and her wonderful husband have given us our first grandchild.  Little Aida was born on March 19th in the middle of a last-day-of-Winter New England snow storm.  She weighed 6 pounds, 12 ounces and was 19.5 inches long.  Of course, she is beautiful and dainty and looks like she will wear little dresses with delight!

Aida - one week old

Aida – one week old

I had the wonderful opportunity to spend three weeks with my daughter, Susanna, son-in-law, Jon, and baby Aida to help them over the initial hospital stay and adjustment to home.  I cooked and baked and cleaned and shopped for groceries and did laundry, and cooked and baked and cleaned and shopped for groceries and did laundry, and cooked and baked and cleaned and . . .   did all the things my daughter could not do.  (Aida was persistently in breech position while in utero and, despite heroic efforts to get her to turn, remained so, necessitating a c-section.) Sewing and blogging went unattended, but such is life in all its sweetness and toil.

I also sang silly songs to Aida, whispered in her ear about Christian Dior and Cristobal Balenciaga and about sewing from pretty Vogue patterns, and we planned tea parties and dolls’ fashion shows.  No time like the present to get these things started, right?

Aida’s birth brought back many memories of the birth of her mommy – my daughter –  almost 32 years ago.  Before Susanna was born, I bought this book as a gift to myself and took it with me to the hospital.

This beautiful book by Kitty Benton was published in 1981, by Hearst Book, New York.  It is extensively illustrated, with explicit instructions for every project.  It also has a complete section on Sewing Techniques, including smocking, embroidery stitches, hems, sewing on buttons, etc., etc.  The book is an invaluable guide for heirloom sewing.  Copies of it are available on Amazon and through a few Etsy shops.

This beautiful book by Kitty Benton was published in 1981, by Hearst Books, New York. It is extensively illustrated, with explicit instructions for every project. It also has a complete section on Sewing Techniques, including smocking, embroidery stitches, hems, sewing on buttons, etc., etc. The book is an invaluable guide for heirloom sewing. Copies of it are available on Amazon and through a few Etsy shops.

Of course, I didn’t know we were having a girl (neither did Susanna and Jon).  Then I found myself so busy and overwhelmed with my growing family (Susanna’s brother was born less than two years later), that somehow I never used the ideas in this book, preferring commercial patterns for all the sewing and smocking I did for my two.  But I never stopped looking at it, and never gave up hope of making some of the lovely clothing and gifts.

The blue gingham dress, adorned with a spray of embroidery flowers, is my favorite dress in the entire book.    Yes, I think Aida would wear this dress well!

The blue gingham dress, adorned with a spray of embroidery flowers, is my favorite dress in the entire book. Yes, I think Aida would wear this dress well!

A red dress with a white pinafore - so cute!

A red dress with a white pinafore – so cute!

Two little bishop dresses.

Two little bishop dresses.

And here is a sampling of some of the timeless gifts, instructions for which are presented in the book.  Even the teddy bear can be home-made!

And here is a sampling of some of the timeless gifts, instructions for which are presented in the book. Even the teddy bear can be home-made!

Could it be that Aida will reap the rewards of this gift to myself from so many years ago?  I hope so, I do hope so.

Little Aida in my arms, with Porter, the Bernese Mountain dog, looking on.  Such blessings!

Little Aida in my arms, with Porter, the Bernese Mountain dog, looking on. Such blessings!

26 Comments

Filed under Heirloom sewing for children, Uncategorized