Category Archives: Ruffles

A Copy of a Copy in Casual Gingham

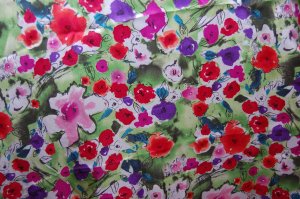
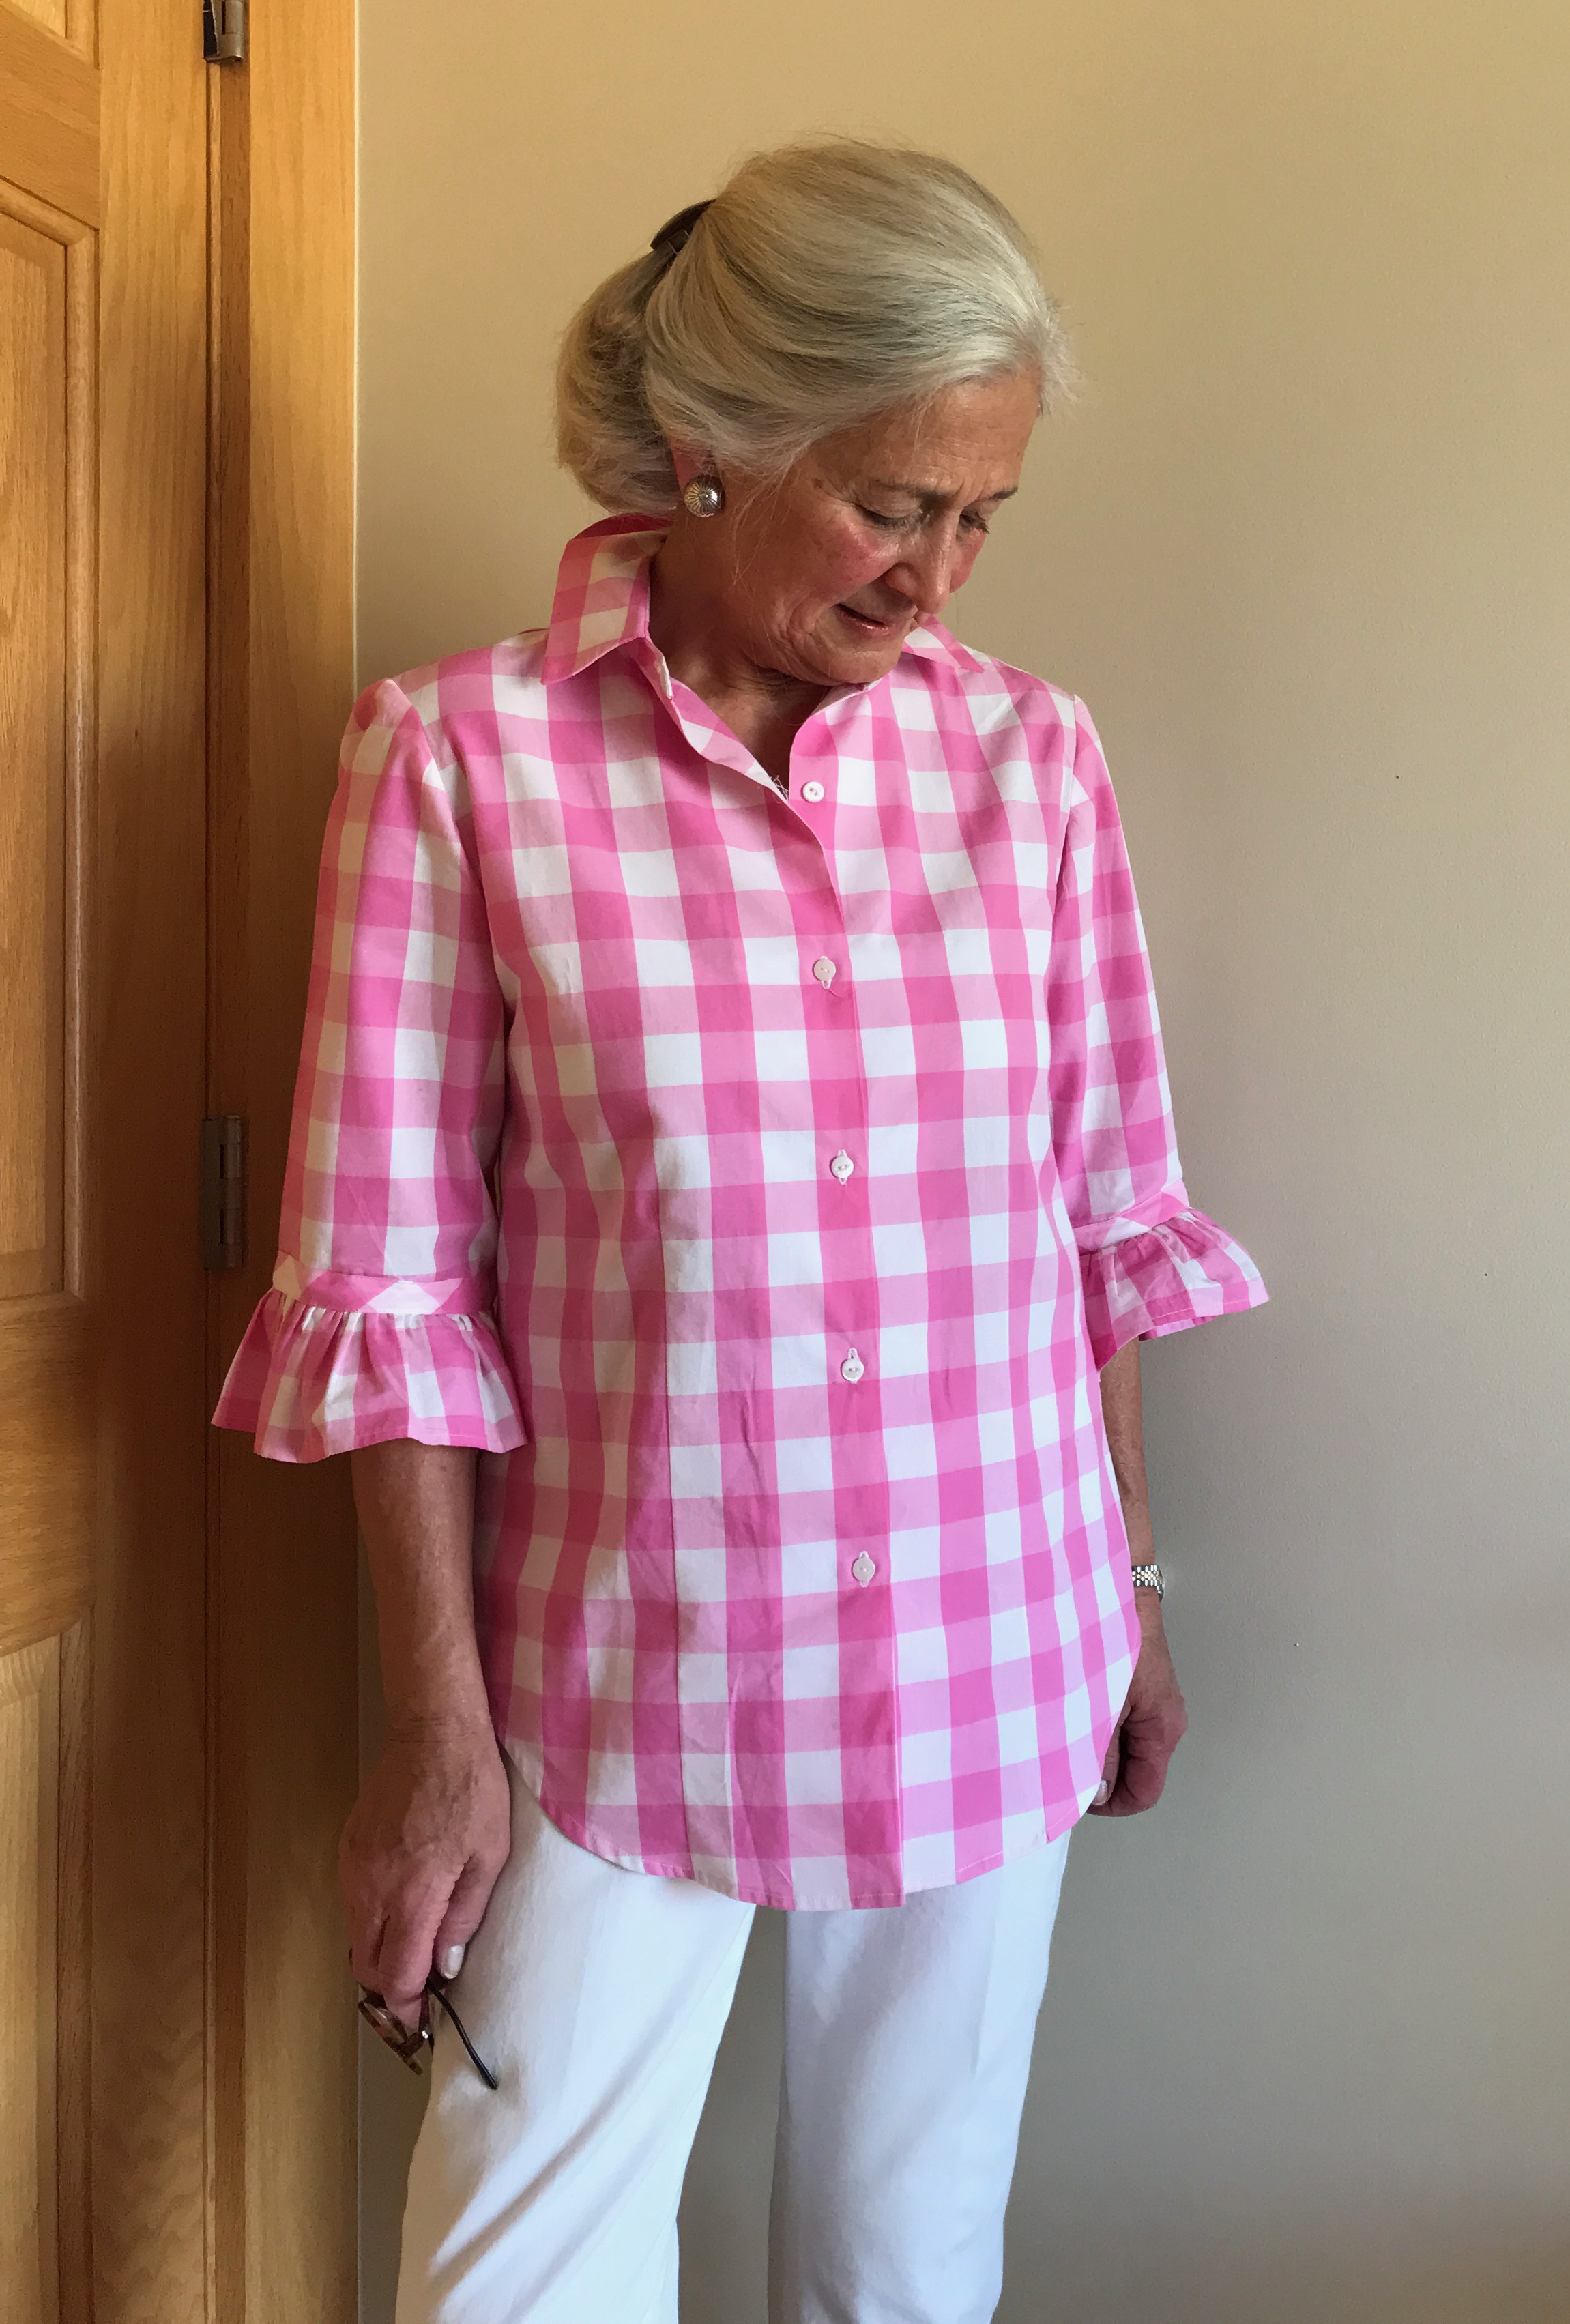
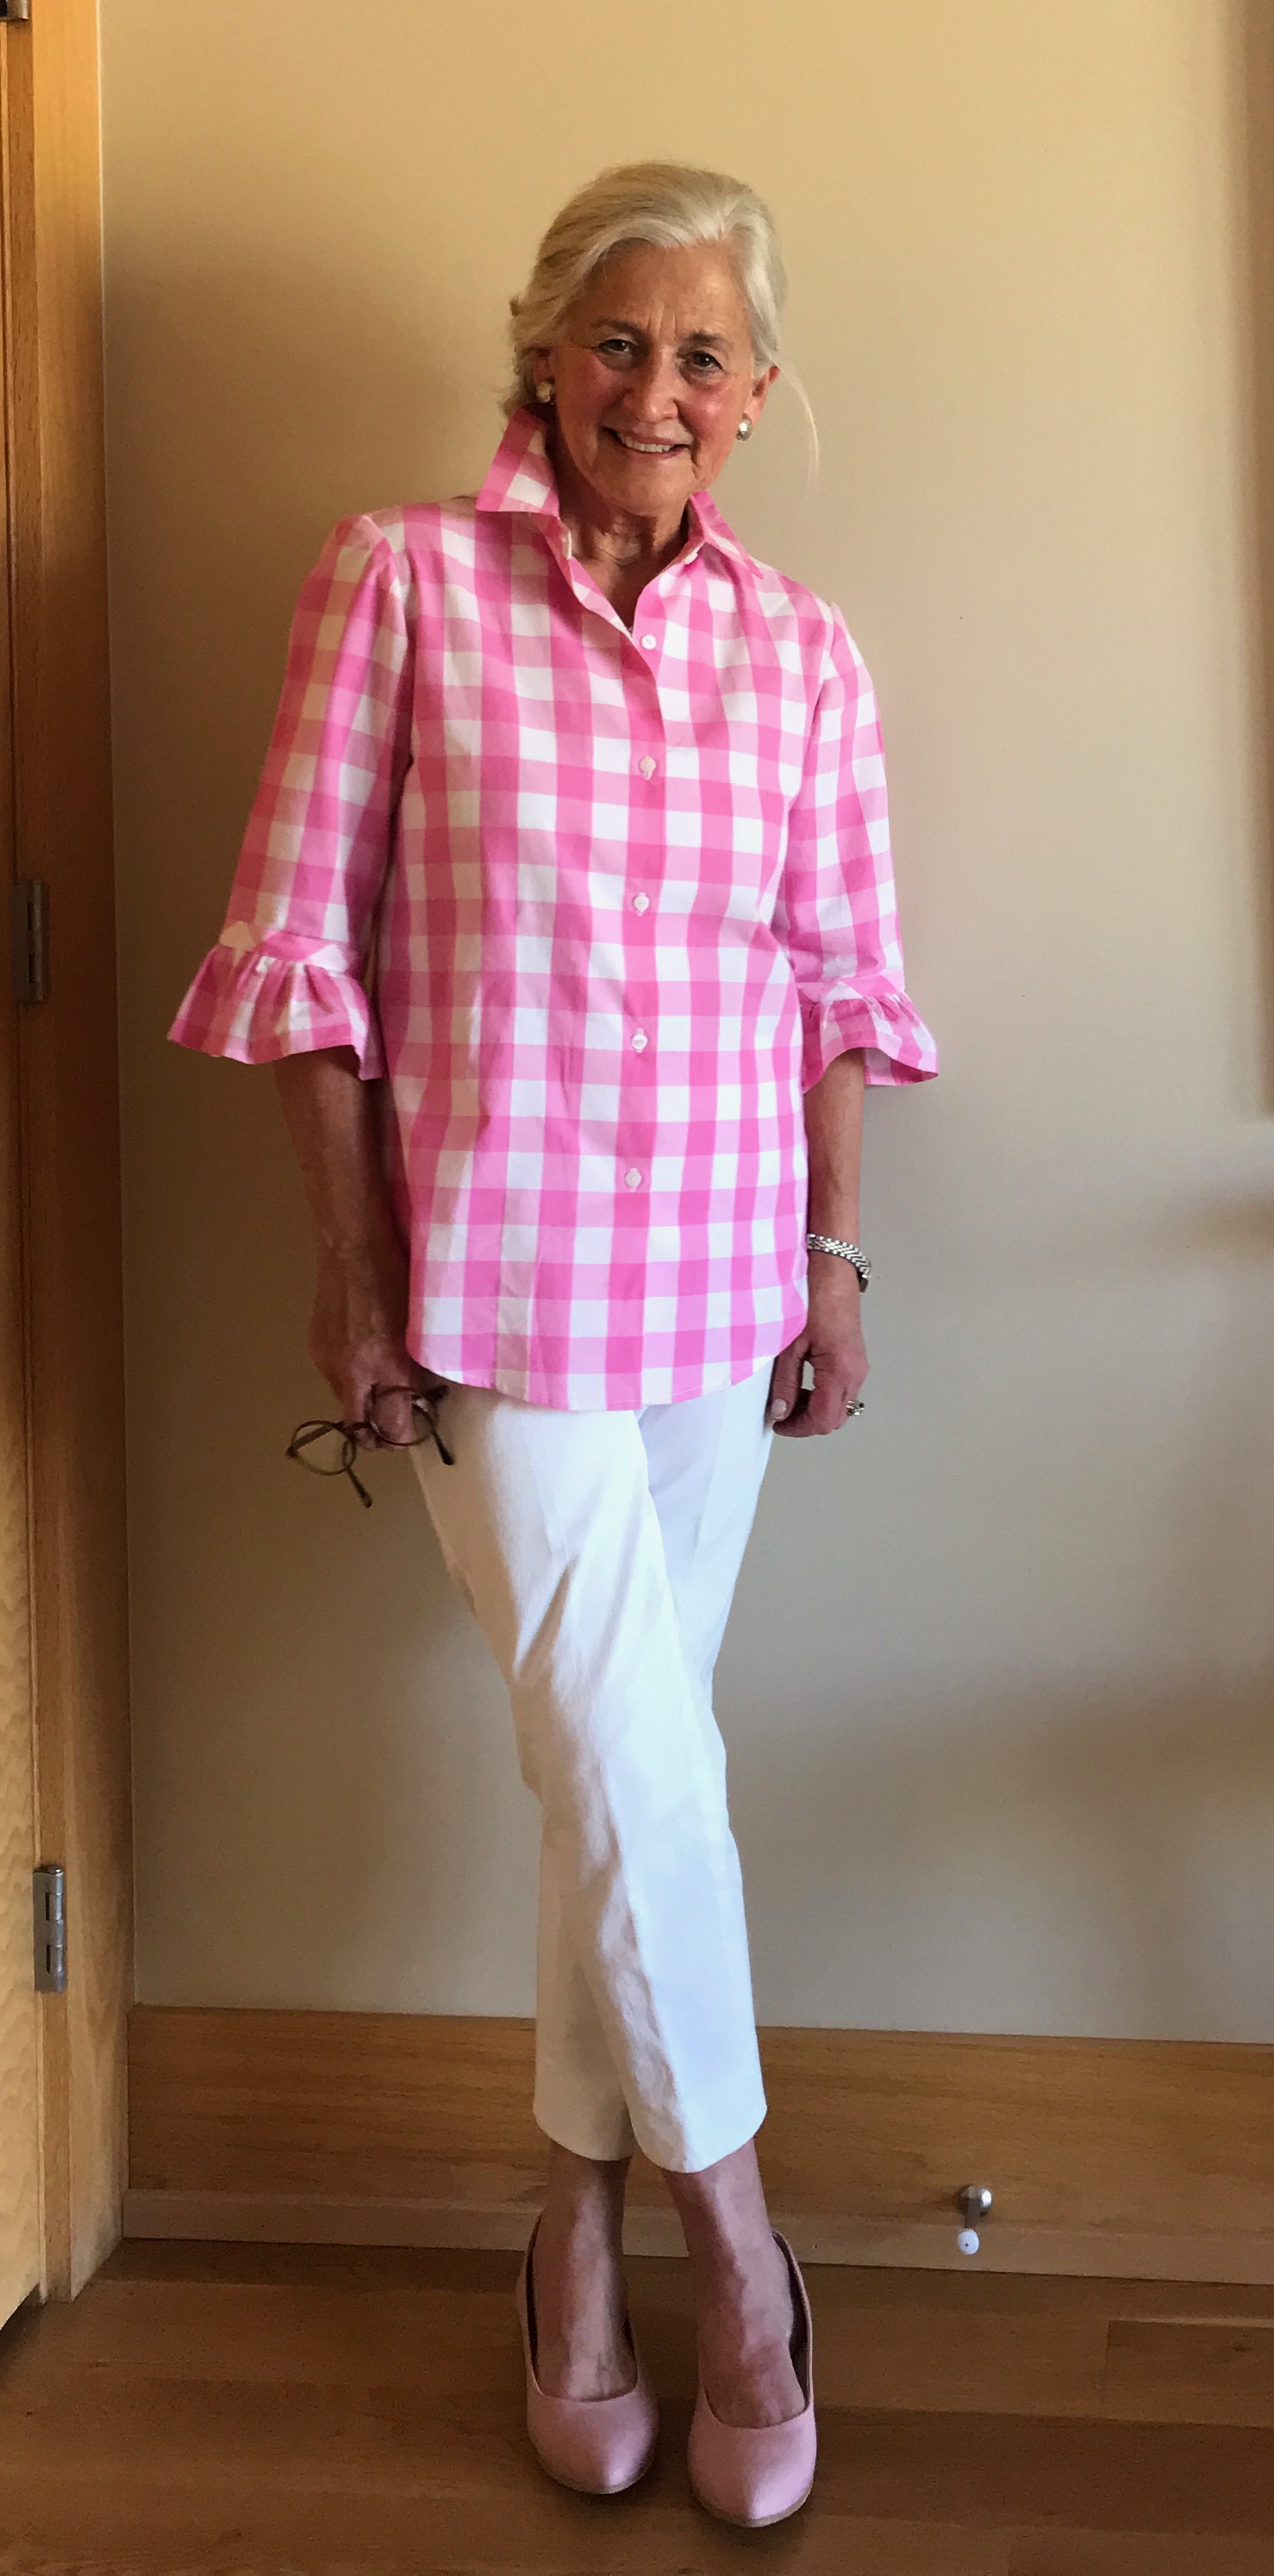
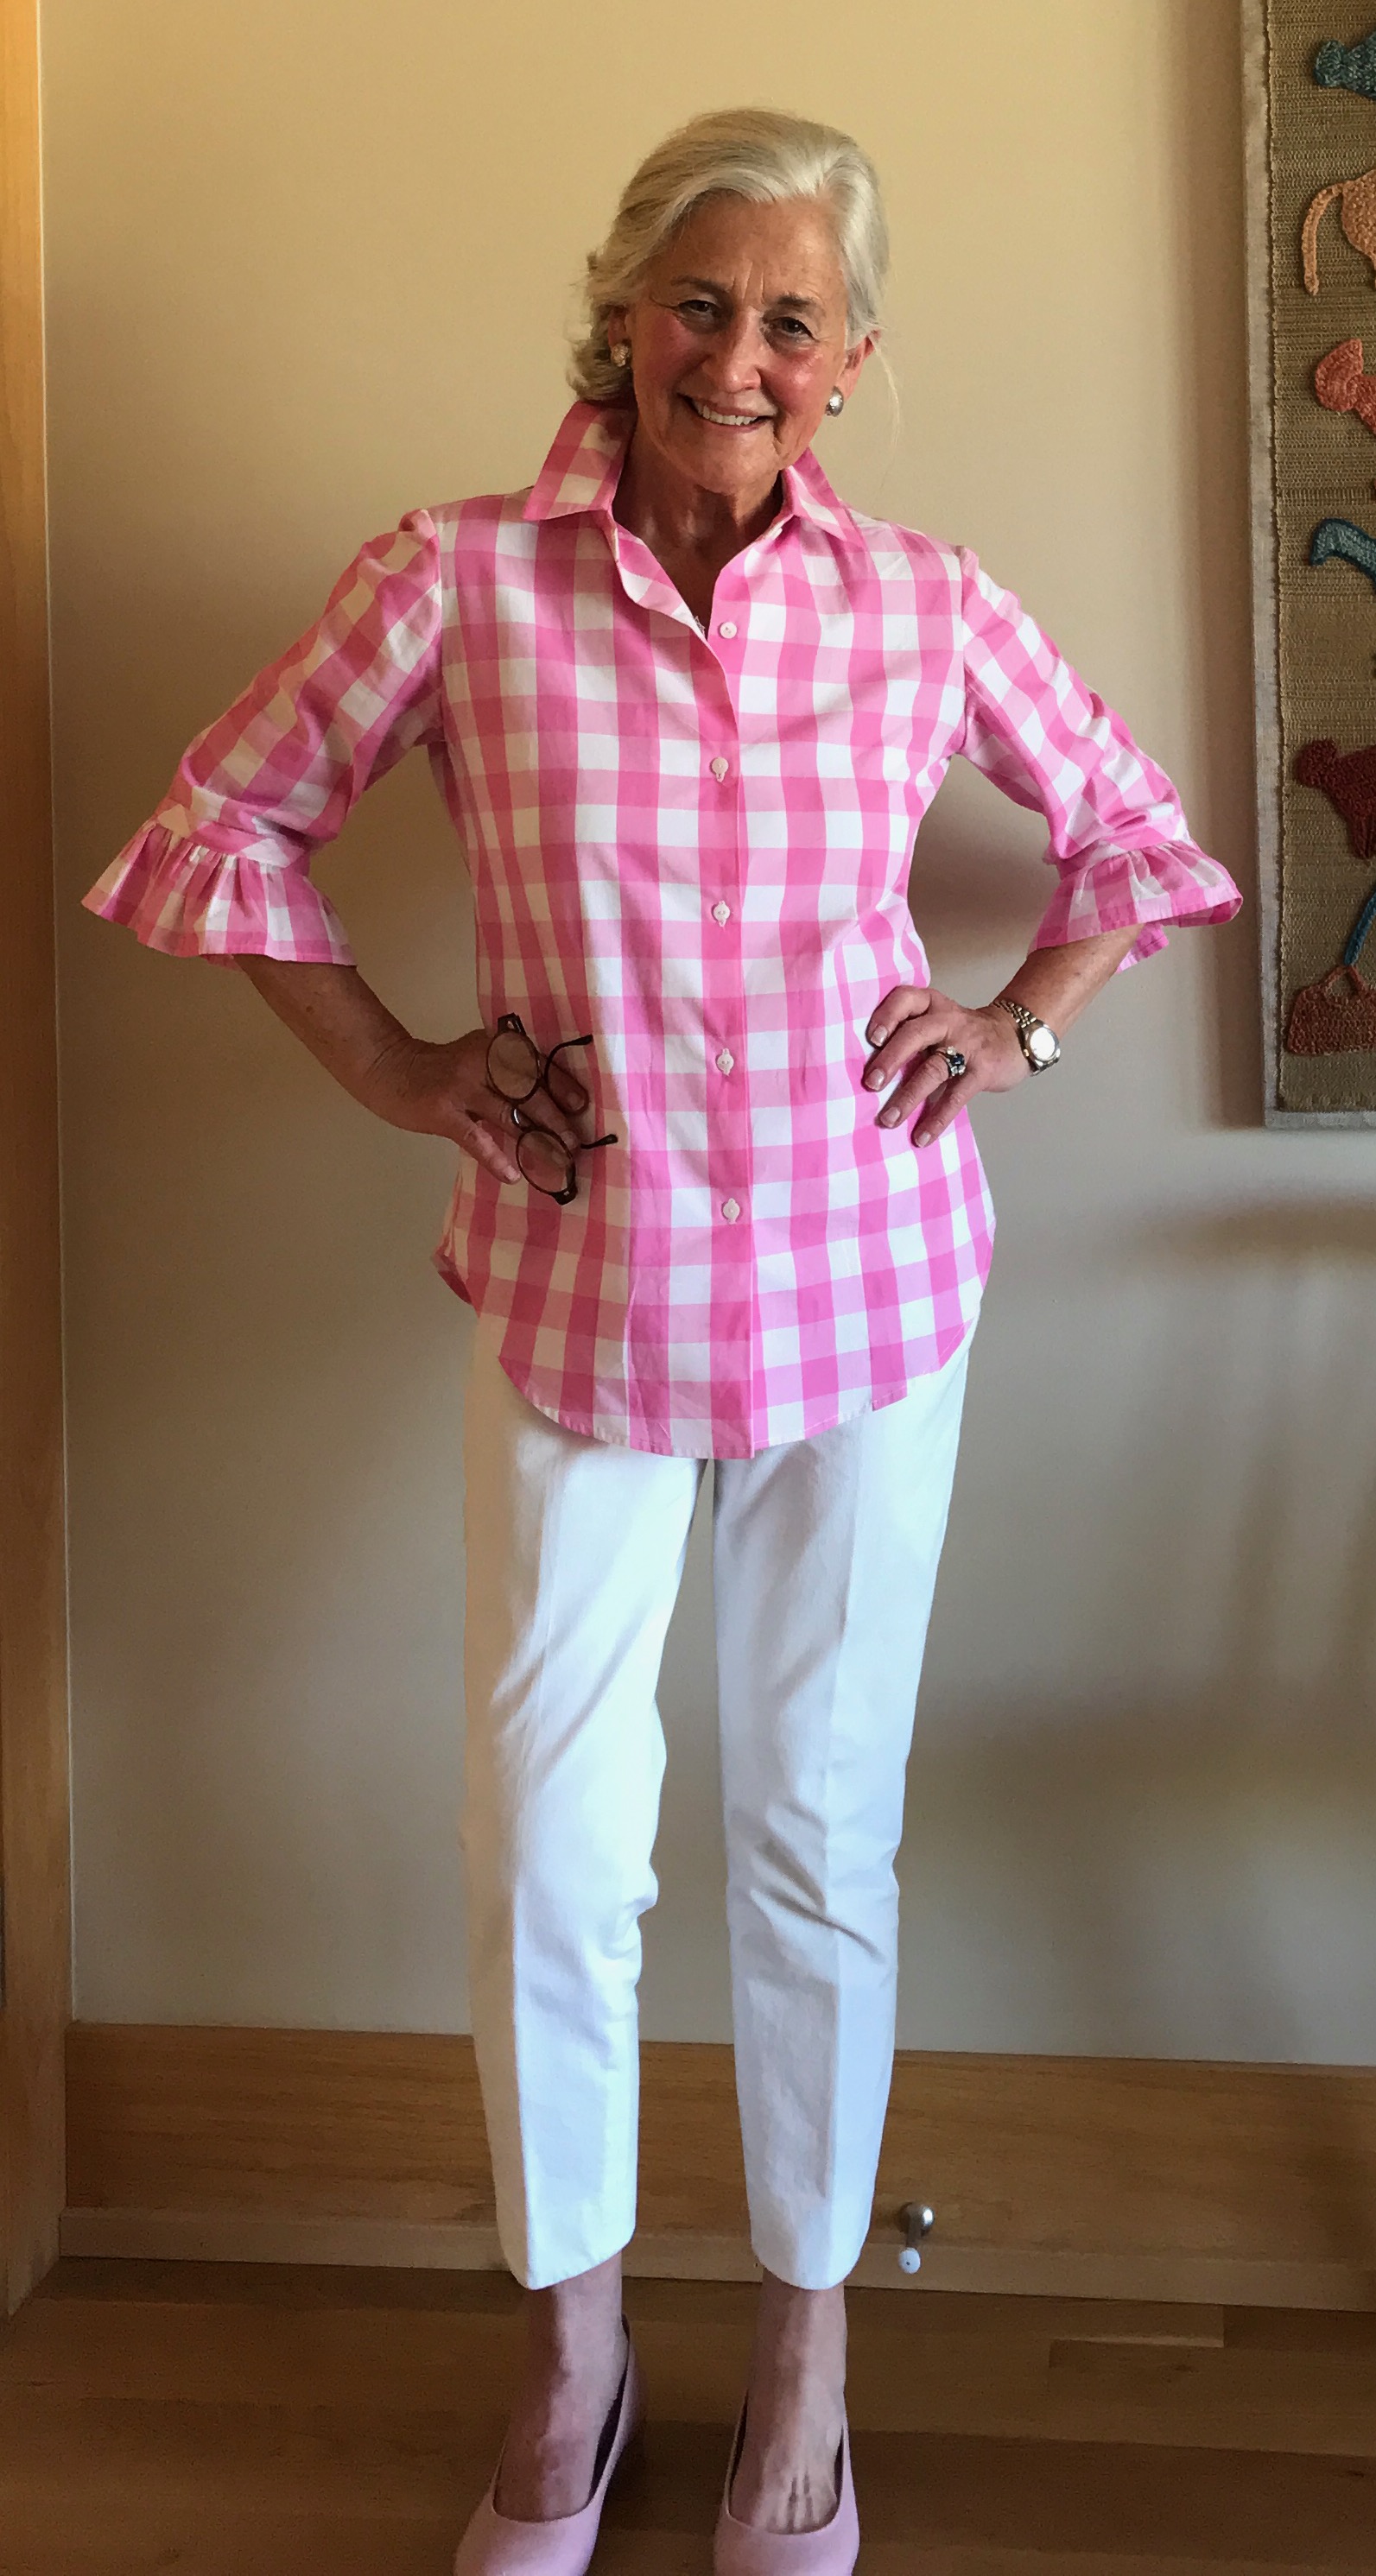
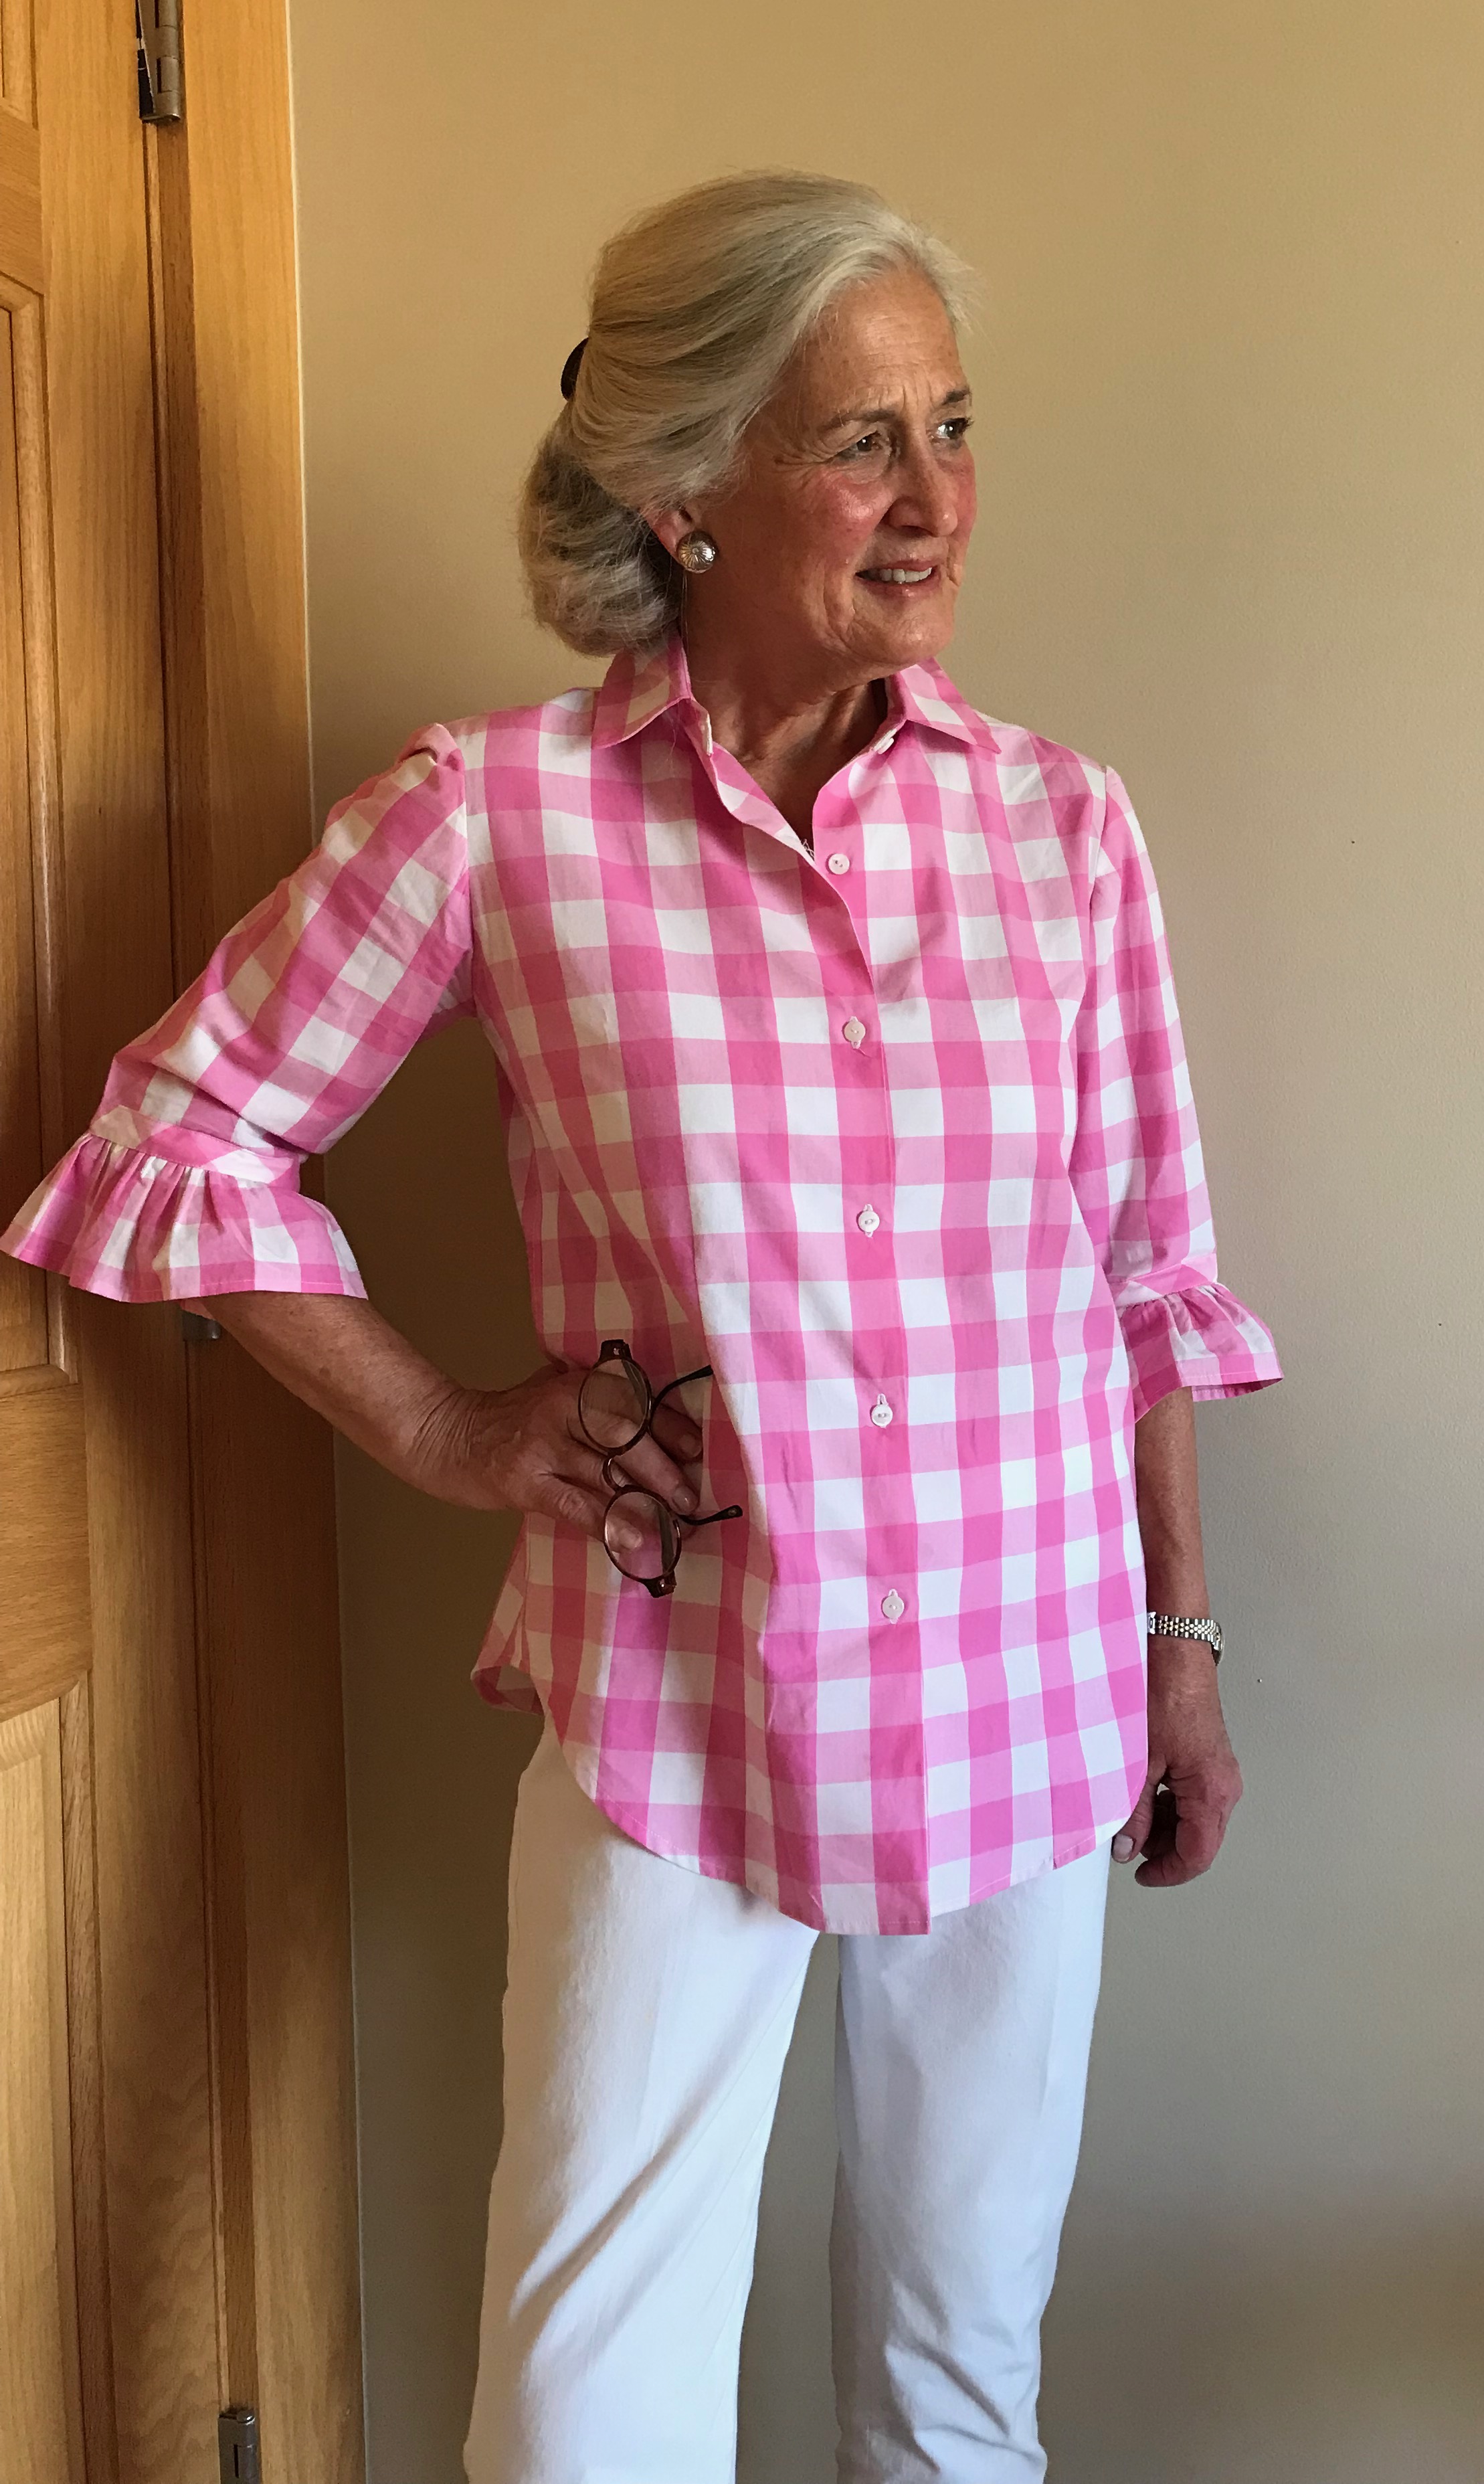
Although I rarely purchase any Ready-to-Wear (RTW) clothing, I often find it to be a great source of inspiration and ideas for me.  (I have written about this before, twice at least).  I know I am not alone as often I will see beautiful products of top-notch fashion sewing inspired by RTW.  A few years ago on my Instagram feed, I saw a post by Julie Starr (co-author with Sarah Gunn of The Tunic Bible and Classic Sewing) featuring a lovely blouse which she made as a copy of a Gretchen Scott design.  I was very taken with it – it was a traditional casual, collared, button-down-the-front blouse, but with a twist.  The elbow length sleeves ended in a graceful ruffle rather than the traditional to-the-wrist buttoned cuff.  She had made hers in a petite windowpane blue check.  It was so fresh and charming, and I kept thinking about it as the months/years went by.  When I found a medium pink, cotton, 1” gingham check this past Spring at Farmhouse Fabrics, I knew the time had come to make my yearning a reality.


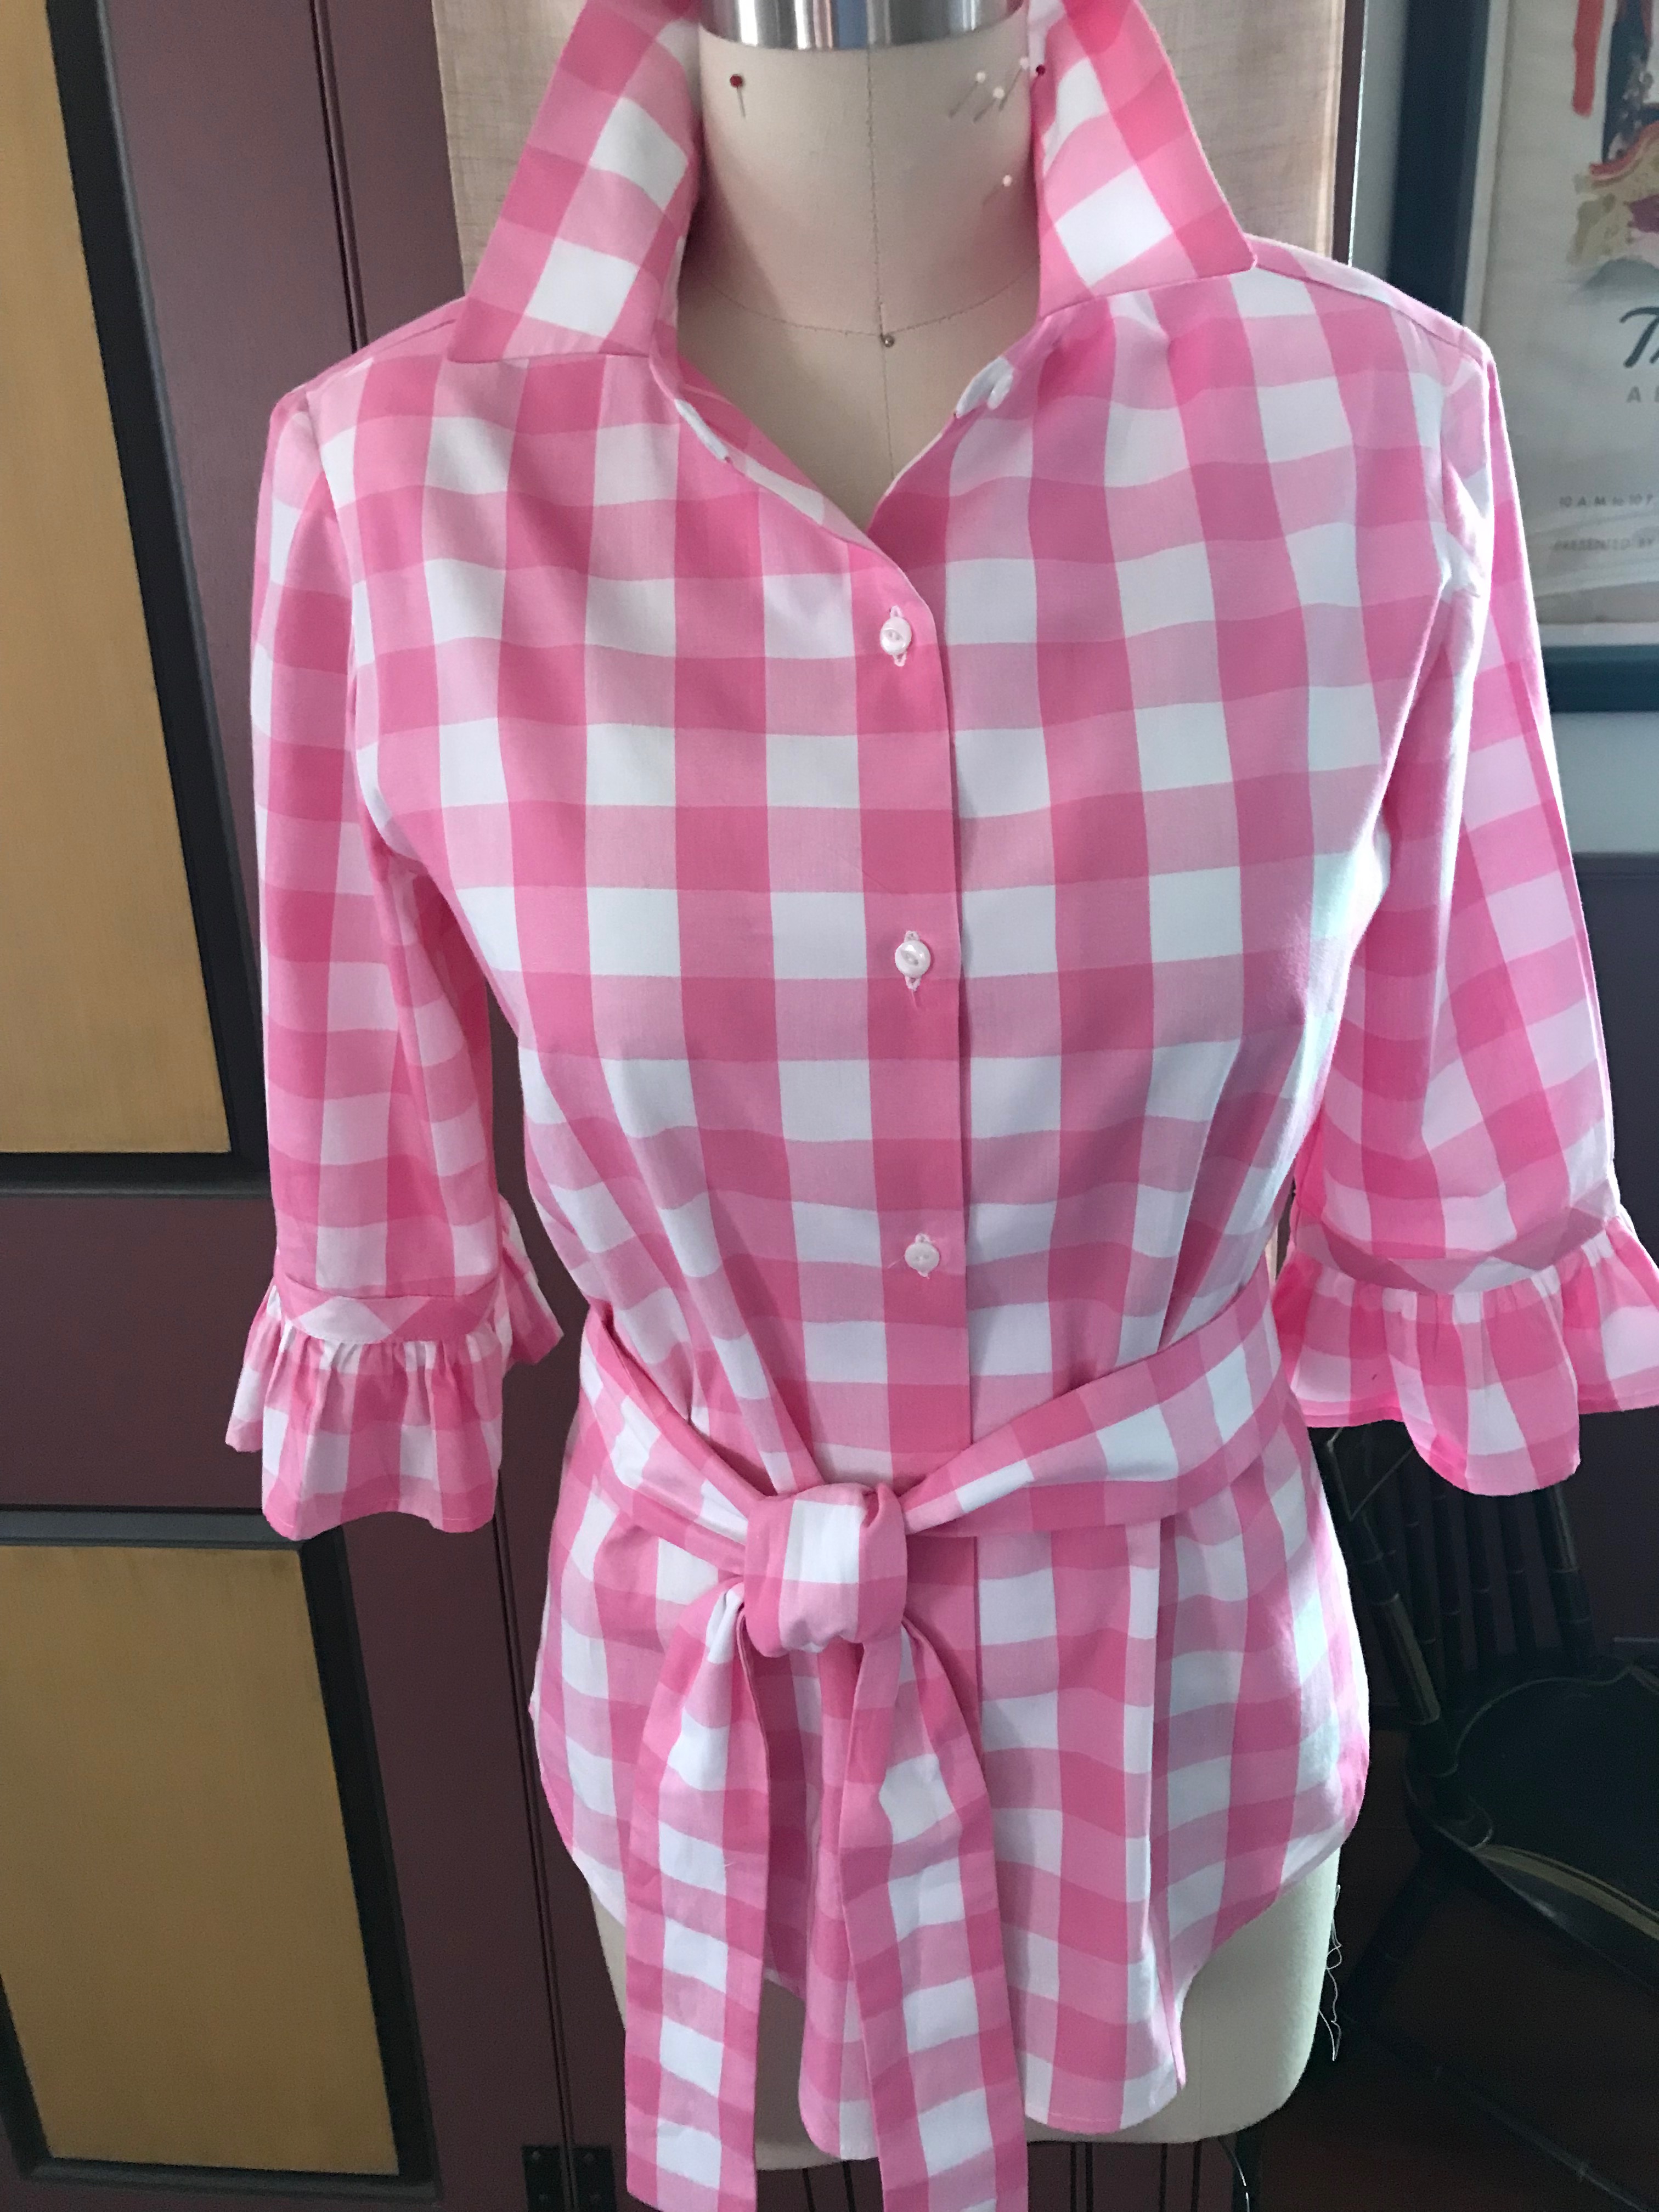
I used my go-to, tried and true blouse pattern as the base for my copy/re-creation, making several changes to effect the look I wanted.

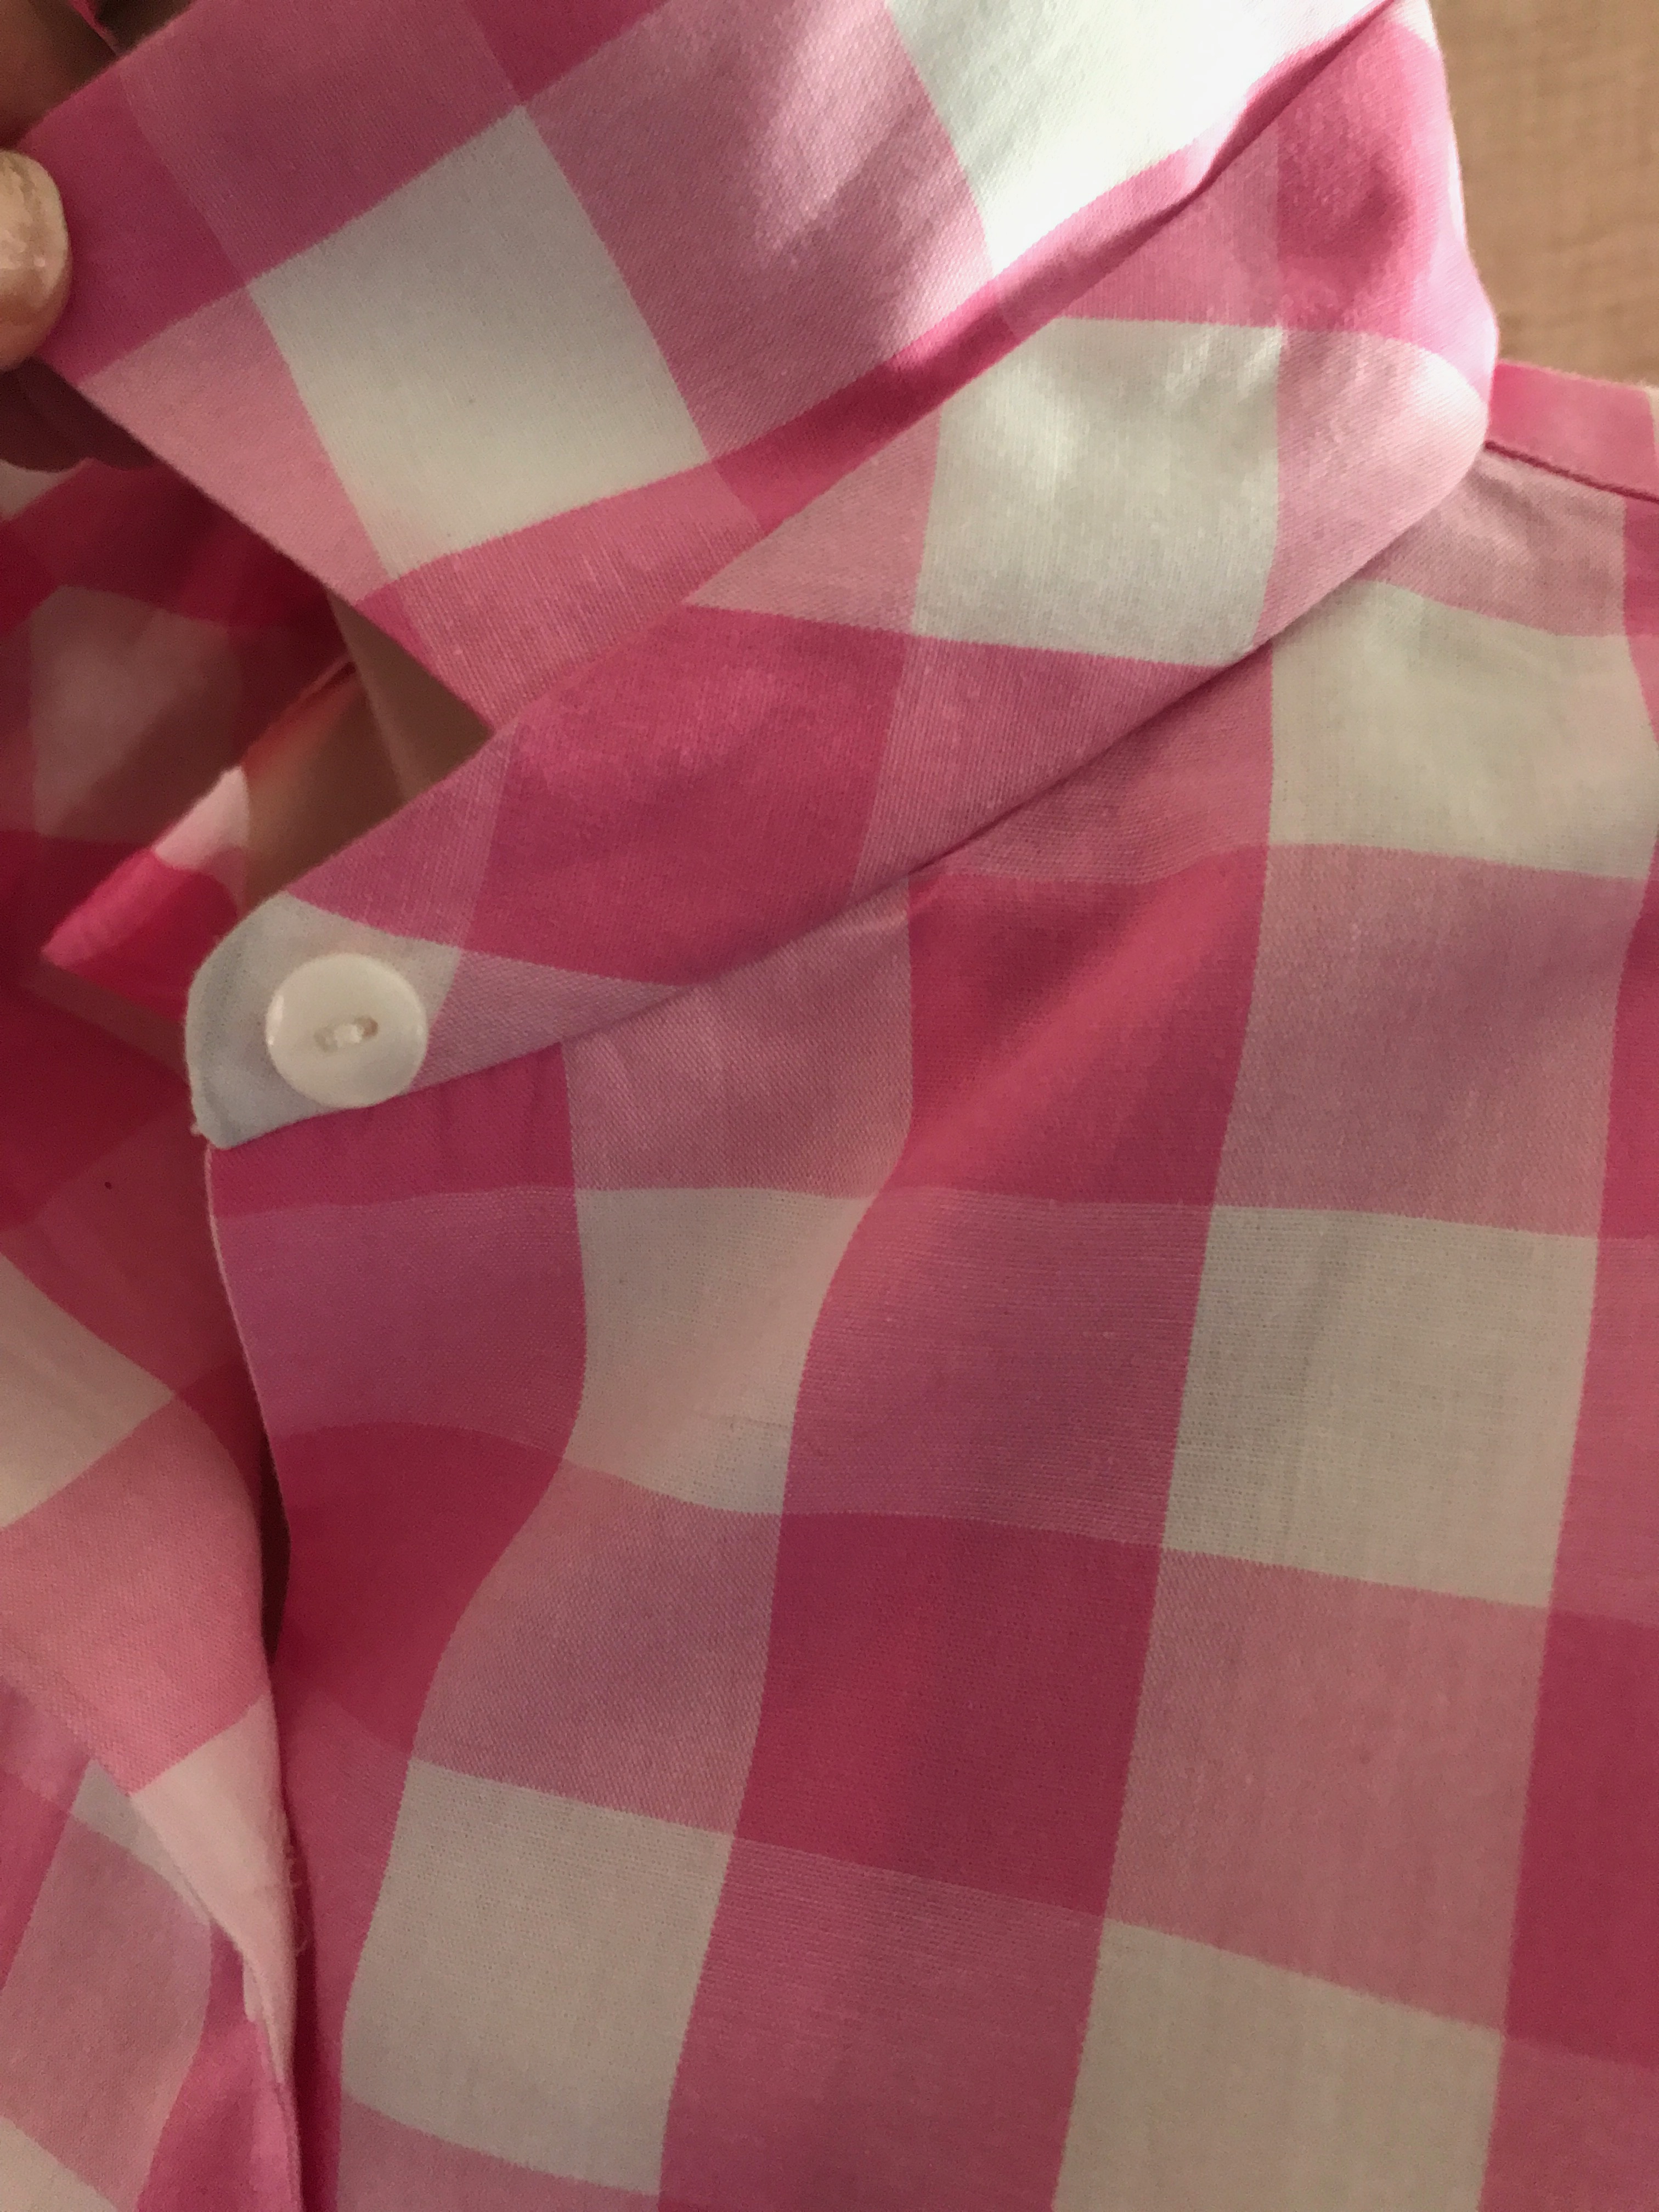
  • I shortened the point and slope of the collar.
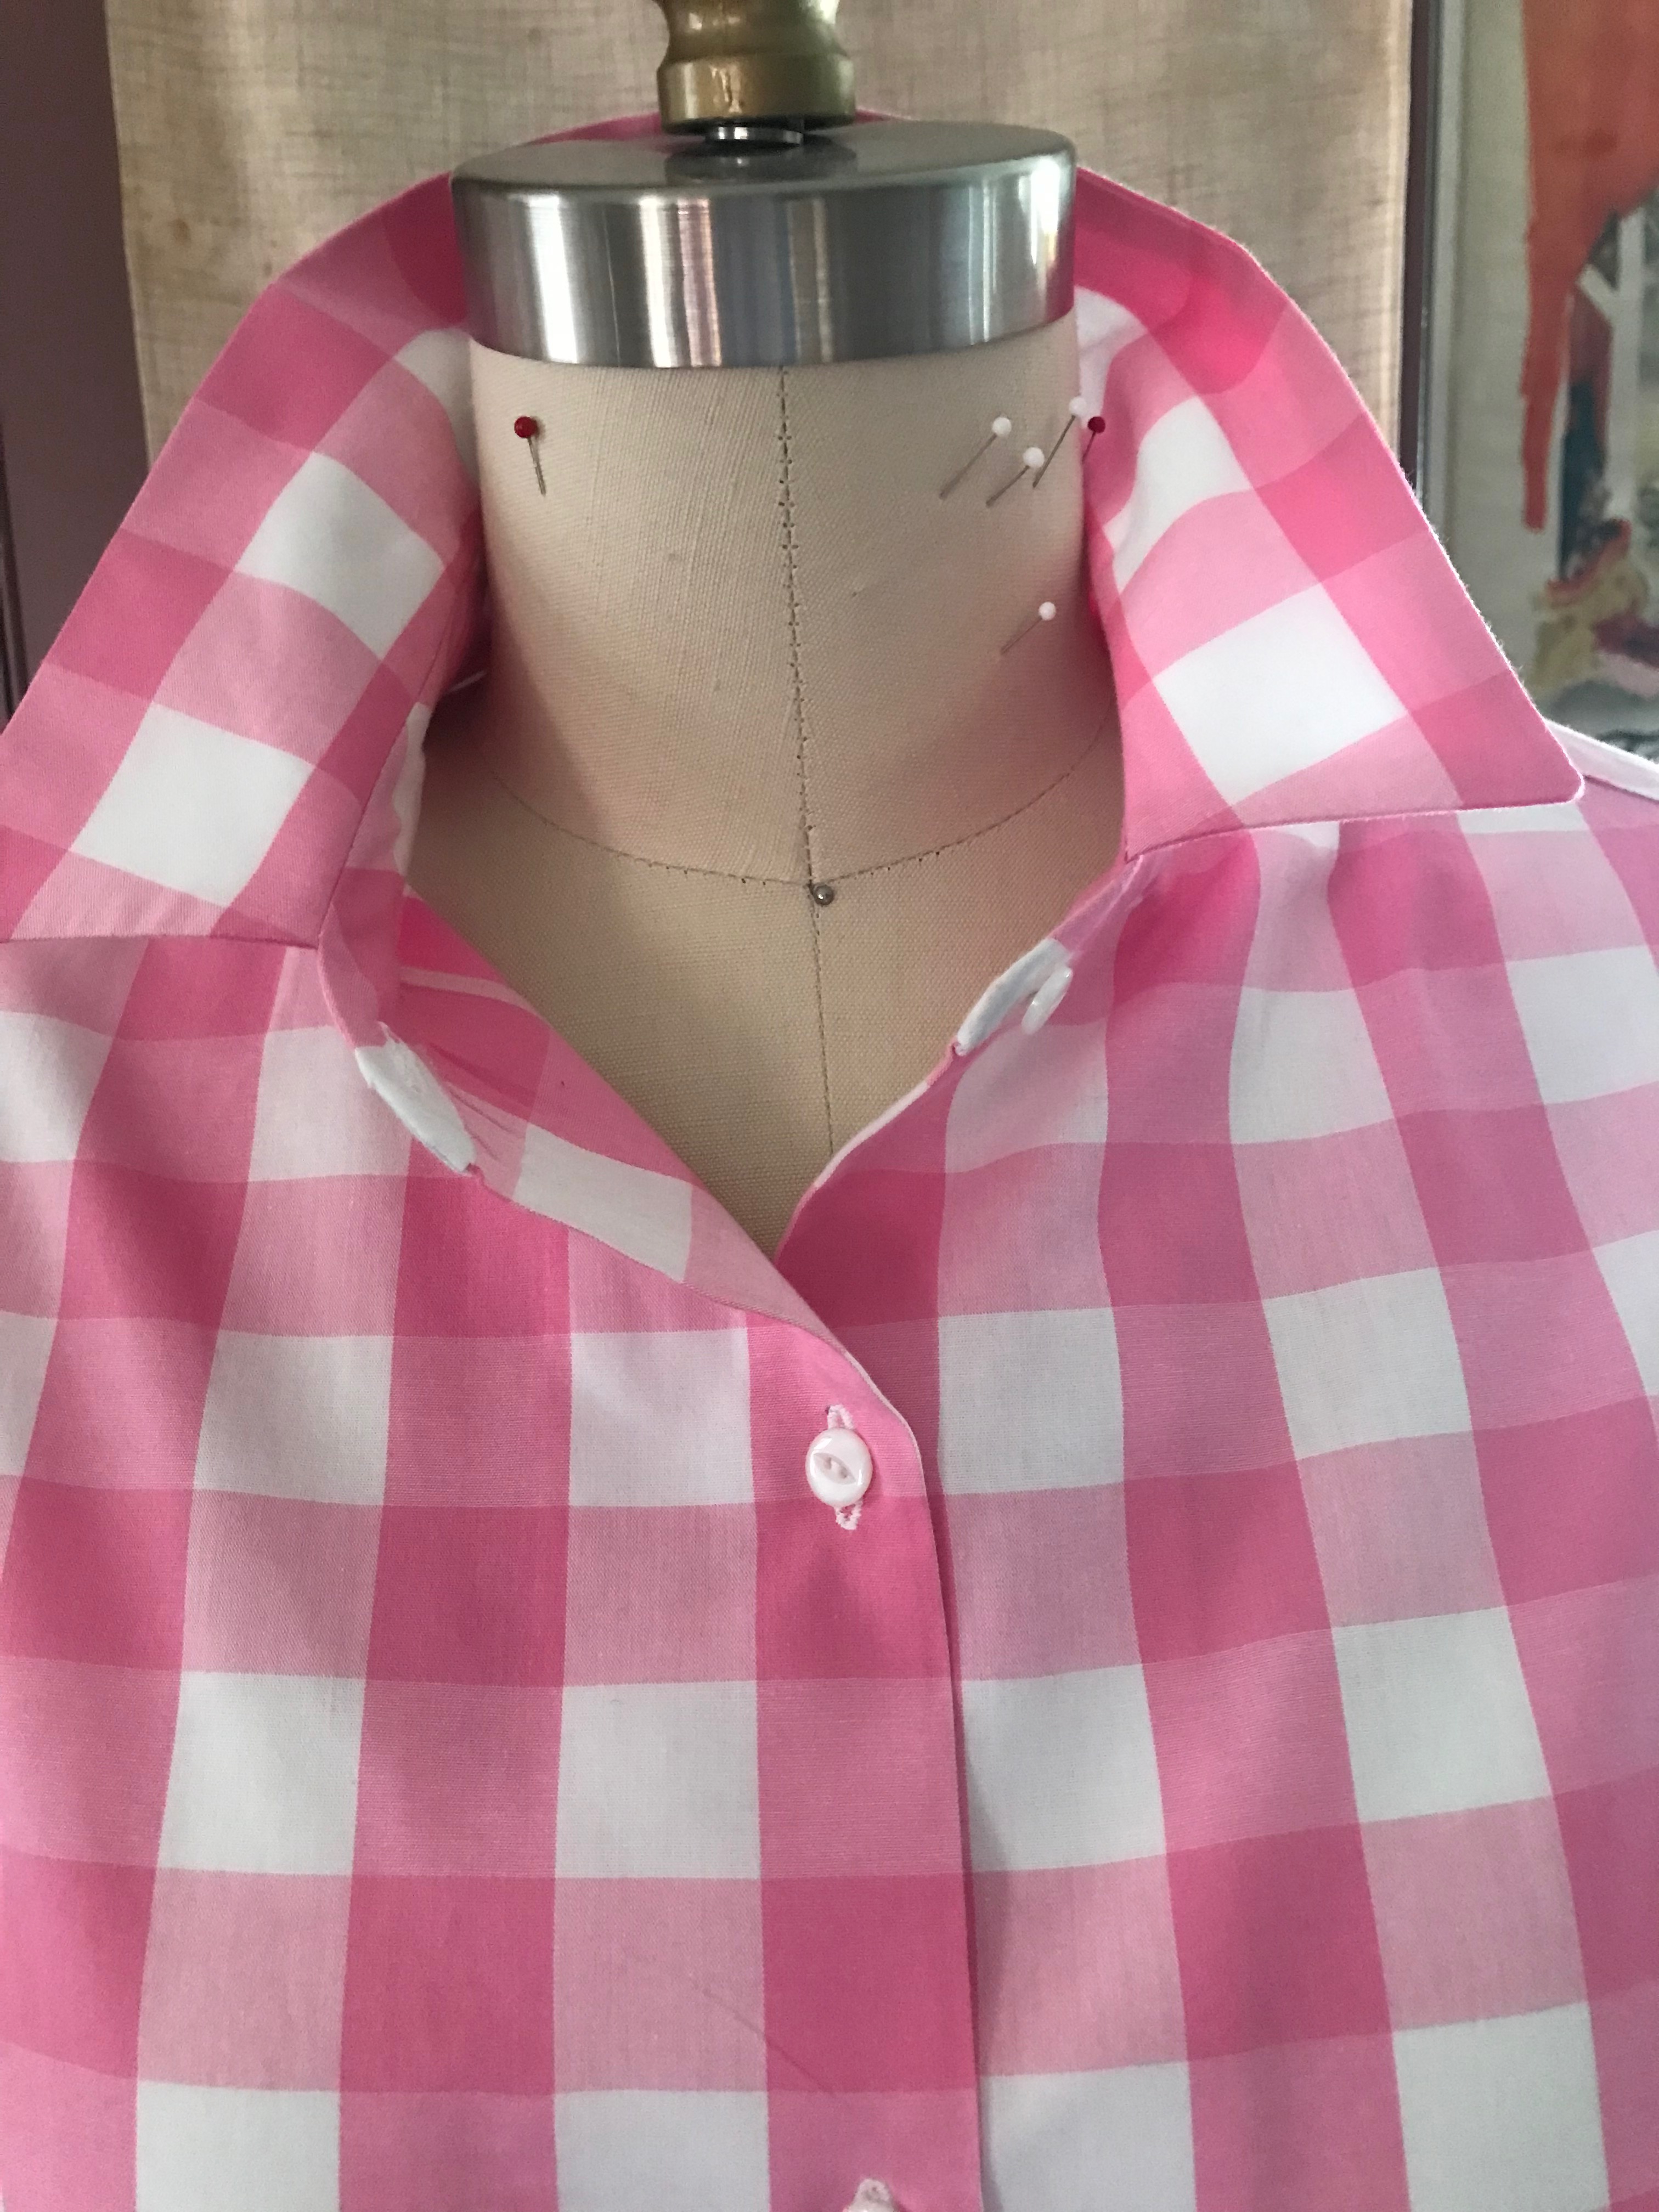
  • I added very narrow darts to the front, beginning a couple of inches below the bust and continuing into the hem.

The darts are faintly visible in this photo. The darts help to define the shape of the front of the blouse.
  • Obviously I shortened the sleeves to accommodate the ruffle.
  • And –

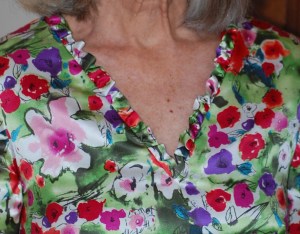
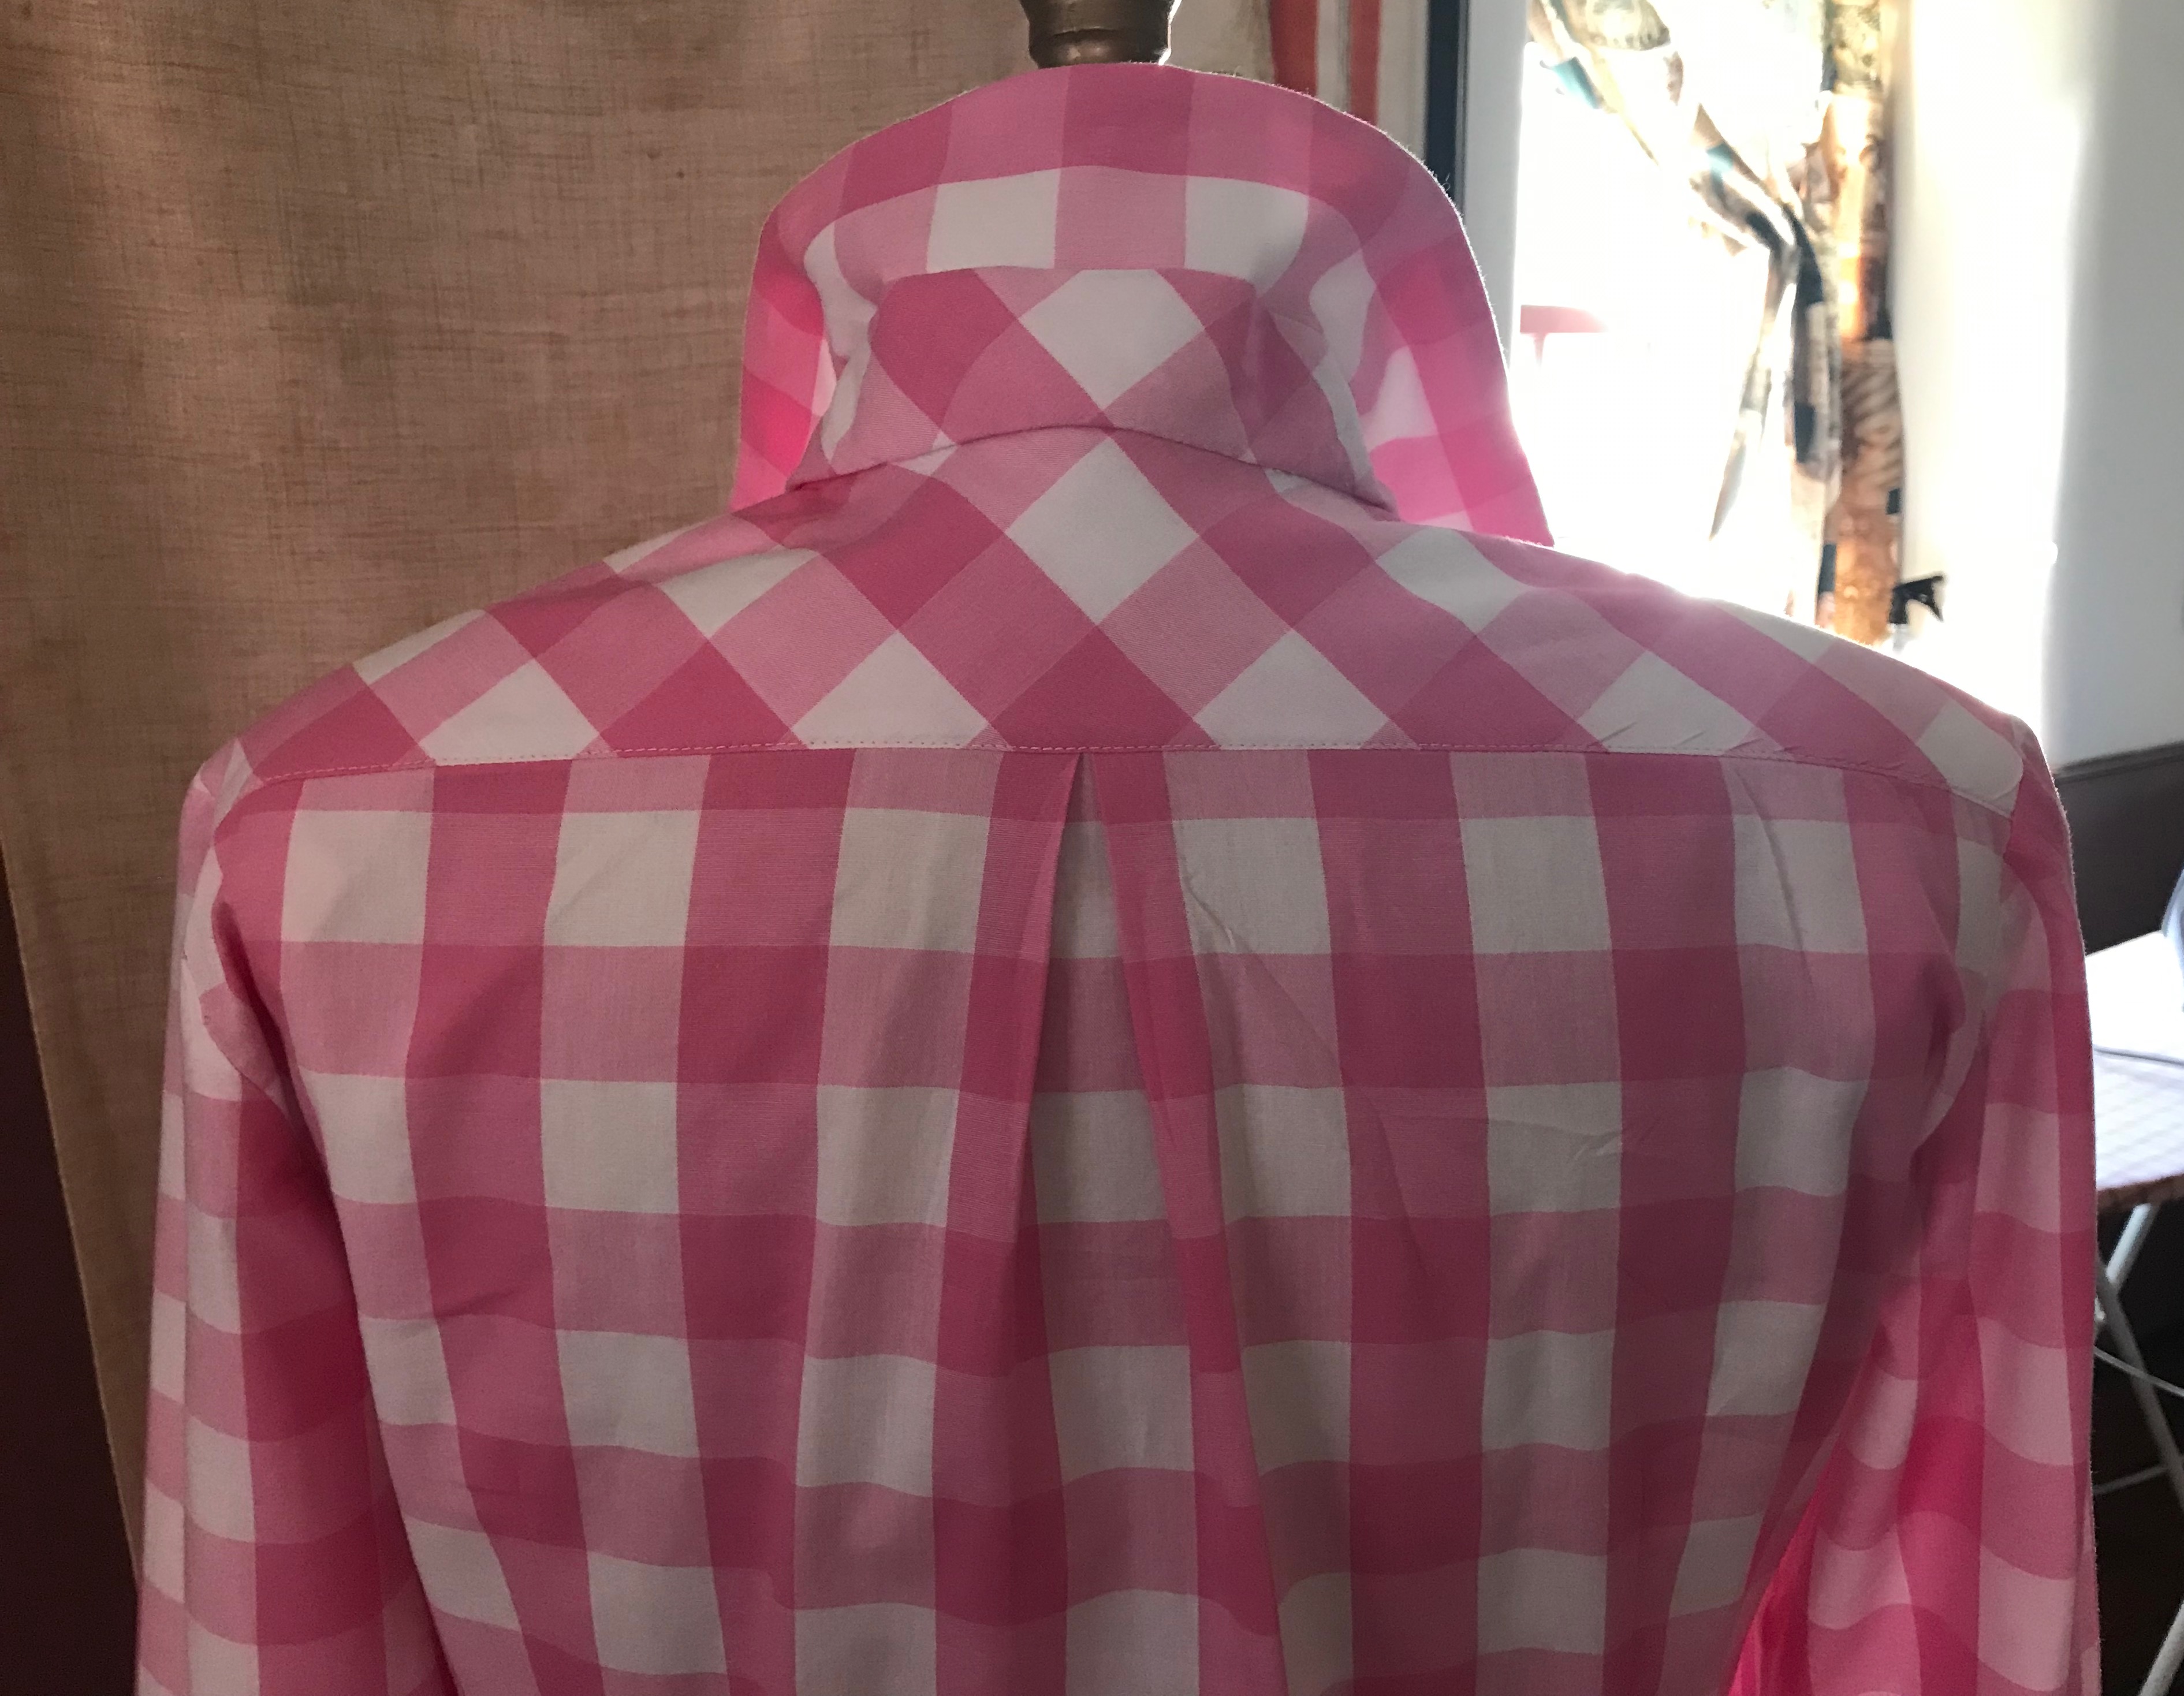
I placed the collar band and the yoke on the bias.  This aligned with the bias band I used to cover the seam where the ruffle meets the sleeve, as seen above.

It was fun to have to think through the changes that were needed and to mix up that pattern a bit.  If I use a pattern over and over, I find it can get a little B O R I N G.  This blouse was not boring.  After I finished it, I was, however, a little conflicted about it.  I don’t wear a lot of ruffles, even casually, and it took a few wearings of this blouse to feel completely comfortable in it.  Now I find it fun to wear.

I made a self sash to wear with this blouse in case it needs to appear a little dressier.

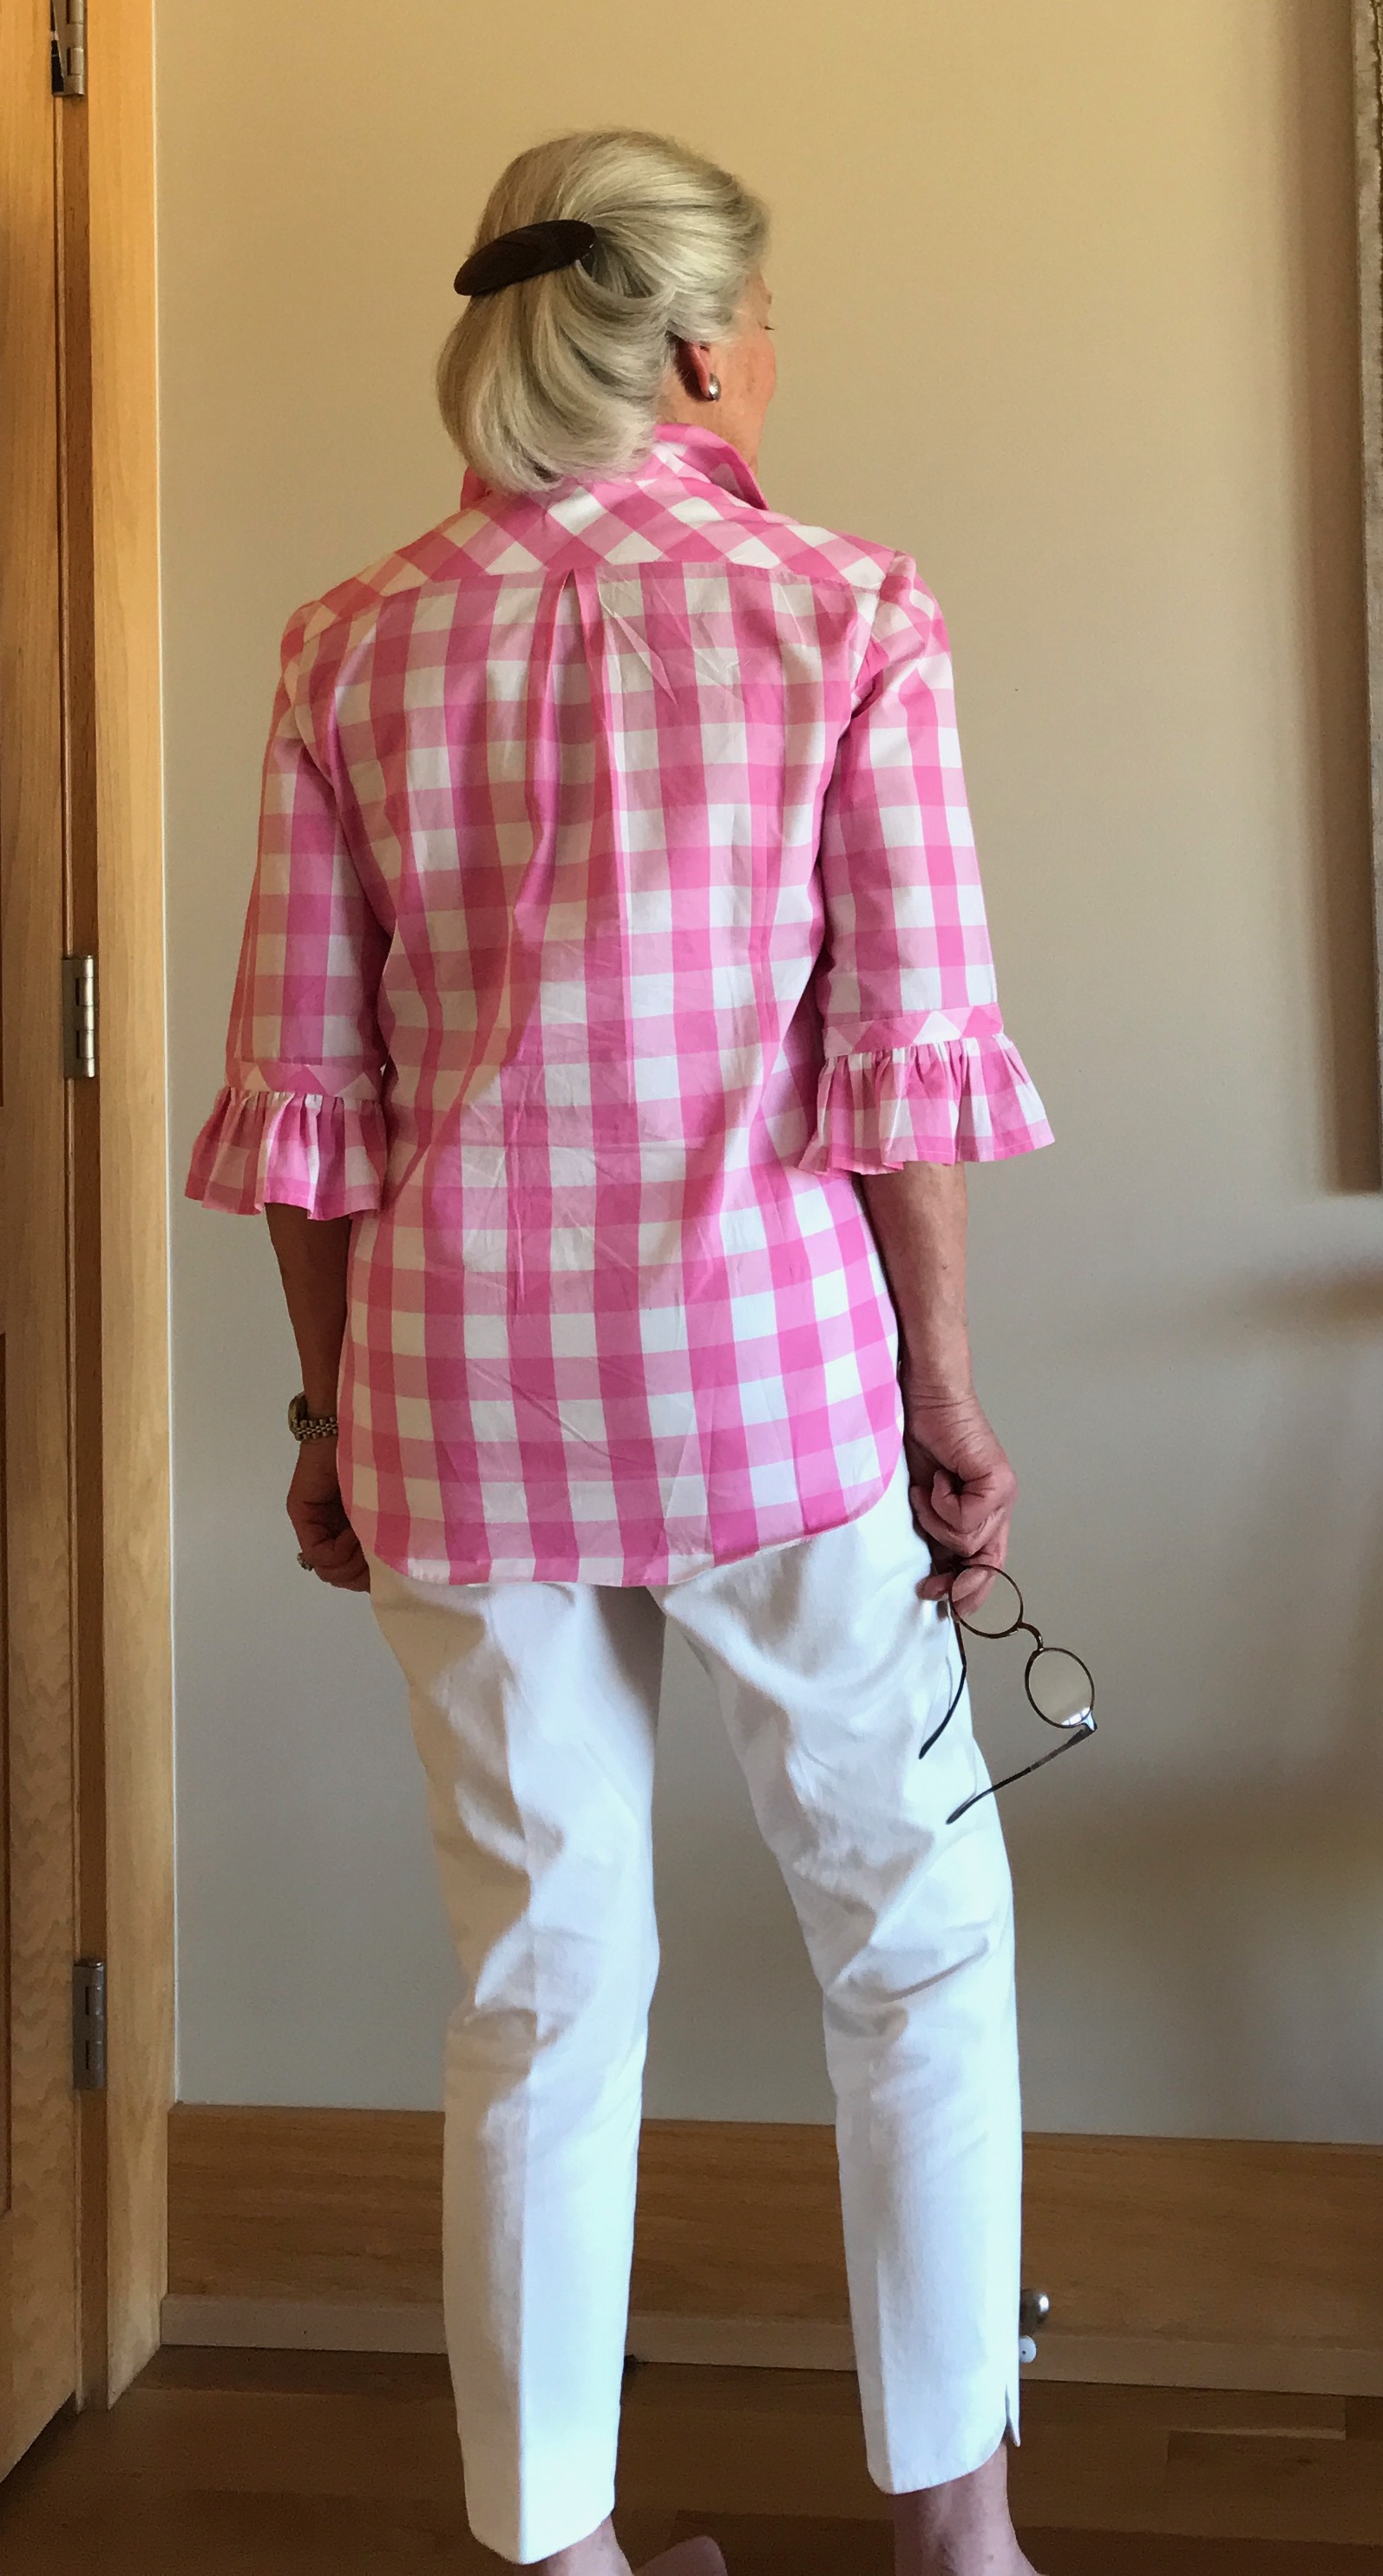
There is one change I will make should I ever make another blouse of the same design.  I think I will taper the vertical seam of the sleeve down to the ruffle gradually by about an inch.  It may not be obvious to anyone else, but I think the diameter of the sleeve where the ruffle is attached is just a bit too wide.

Most of my summer wardrobe needs are for casual attire, whether I like it or not!  I find this blouse has a bit of flair to it, which steps it up a notch while still being casual and easy-to-wear.  I guess you could say this blouse progressed from Ready-to-Wear – to a First Copy – to a Copy of the First Copy – to Easy-to-Wear. Many thanks to Julie Starr for the inspired First Copy.  

43 Comments

Filed under Blouses, Ruffles, Uncategorized

Almost September

What?  It is almost September and time to assess just exactly what I accomplished the last three months.  I have a friend whose late mother always said, “A flurry of activity at the end of the day does not make up for earlier unfocused, unproductive hours.”  I guess the same could be said for the waning days of a month or a season.  However, despite my nagging feeling that I have not accomplished much this summer, I have actually made some progress on my never-ending list.

For one thing, I tackled the alterations on my silk floral dress about which I wrote earlier in the summer.  I took out the hand-picked, lapped zipper to see if resetting it would give me enough ease over the tight bust and uncomfortable back.  There was much to take out and then put back in:  the lining, part of the neck ruffle, the understitching of the neck facing, and of course the entire zipper, in addition to reattaching the silk organza underlining back to the fashion fabric.  Thank goodness for the ample seam allowances which, in true couture fashion, enabled me to add just enough extra across the back.  Yes, it worked, and I am so much happier with the fit and the look of the dress.  Now I can wear it or hope to wear it! (Someday?)  I still think I will tweak the neckline a bit if I make this pattern again, but I do feel I salvaged this dress.

Well,  these are not the shoes I intend to wear with this dress. They happen to be the only heels I have with me this summer.

This dress fits so much better… I’m so happy I did not put off “fixing” this dress until … who knows when!

Several weeks of the summer were devoted to home decorative sewing, including pillows, cushions, and a tailored bed skirt.  I won’t bore you with that! But it was all very time-consuming, as those things tend to be.  More weeks were spent, happily, with welcoming  family for visits and extended stays and even some sewing for my granddaughters. I have never known two little girls who enjoy “playing dress-up” more than my two.  In a weak moment a couple of years ago I purchased this amazing vintage pattern of the Chiquita Banana Señorita’s dress in girls’ size 6-8.

The Chiquita Banana copyright for this costume is from 1947. The pattern is undated, but it is undoubtably from the 1950s.

I knew this was the summer to make these dresses, so I was off to the races on them.  I opted for rick rack rather than bias tape as the decorative trim. I ordered the fabric from Farmhouse Fabrics – a cotton/poly blend which was lovely, and in equally lovely colors.  As the dresses got heavier and heavier as I worked on them, I decided to eliminate the third row of ruffles.  As it turned out, the dresses were amply sized.  My 5-year-old granddaughter reassured me that it was so good to have dresses with room to grow.  And so, these fiesta dresses will serve them for at least a couple of years.

I wanted the girls to have different colored dresses, and I got creative with the colors, as I really think of these as “fiesta” dresses rather than Chiquita Banana. Lots of twirling ensued!

And then last week – yes the last full week of the month – I was finally able to focus on what will be my last make of Summer. Here is the pattern:

This pattern is dated 1957.

And here is the fabric:

I was fortunate to find this vintage piece of Moygashel linen several years ago. It is also from the 1950s.

And so my last minute flurry of sewing activity is well underway.  Happy September!

23 Comments

Filed under hand-sewn zippers, Moygashel linen, Ruffles, Sewing for children, sewing in silk, Sheath dresses, Uncategorized, Vintage fabric, vintage Vogue patterns from the 1950s

Unfinished Business

What happens when an unavoidable interruption takes you away from the depths of a sewing project for more than a couple weeks of time?  Well, if you are me, you forget exactly where you were in the process.  And, when you finally get back to work on it, you assume, incorrectly, certain fitting steps have already happened.  Recipe for disaster?  Well, not quite that bad, because this dress can be saved.  It is just going to take some time.

The dress in question is the one for which I used this colorful floral silk.

Although I was so certain in May I would finish this dress before we departed our home on the East Coast (USA) for our Summer home in Wyoming, it did not happen.  So I brought it with me to finish.  When I finally picked it up again, I needed to reacquaint myself with all the steps yet to be completed.  I had the hand-picked lapped zipper sewn and the sleeves inserted.

I love a hand-picked lapped zipper…

I was working on the narrow ruffle I had decided to add to the V-neck edge.  I consider this to be the focal point of the dress (in addition to the fabric).

I used the same vintage pattern for this dress as I did for a blue silk dress late in 2019. This fabric, to me, was begging for a narrow neck ruffle.

As luck would have it, the most recent issue of Threads Magazine included an article by Susan Khalje on Couture Gathering.  Now, I have done a lot of gathering of fabric in my life, but this article is illuminating in all the tips it offers for an excellent result.  It could not have been more timely.  As it turns out, there is lot more to gathering than I ever considered.

Among the concepts covered in the article are:  gathering ratio, fabric grain, underlining, stitch length, preparation of the piece to be ruffled, forming the gathers and attaching the gathered fabric to the body of the item.  As with so much of couture sewing, each step builds on the one before it.

Three of the tips in the article, so helpful to me in completing this detail, were:  1) cutting the piece to be gathered much wider than I would have thought was necessary.  This gives one much more control than with a narrower strip.  2) using three lines of gathering rather than the customary two, and 3) once the gathers are formed, using an iron to set them in place, stopping just short of pressing the ruffle.

I decided on a 5/8″ wide ruffle. I cut my piece to be gathered 5″ wide, folded to 2.5″. I used three rows of gathering stitches.

For those of you with subscriptions to Threads Magazine, I highly recommend this Essential Techniques article.  It has forever changed the way I will do gathering/ruffles.  And although not all features in Threads are as useful, it is offerings like this which make me a fan of this sewing magazine.  (These are my opinions;  I have no relationship with Threads.)

Well, back to where I left off.  After picking up work on this dress again, I proceeded to go through all the steps necessary to complete it.  When I thought this dress was finally finished, I put it on to take pictures, and to my surprise, it did not fit correctly.  It pulls across the bust and forms drag lines on the V-neck.  Ugh.

The pulling across the bust and at the V-neck is clearly noticeable in this photo.

I can only guess I thought I had tried it on for fit after the zipper was basted, but I must not have done that.  Unknowingly, I proceeded with the finishing of the interior – the facing of the V-neck, the hem, and the insertion of a green crepe de chine lining.

Normally with couture sewing, neck facings are eliminated and the lining is brought right up to the neck edge and then understitched to secure it. However, with a V-neck, a facing is necessary. I then cut the lining about 3/4″ below the neck edge and fell-stitched it into place.

I believe removing the zipper and taking some of the center back seam allowance to add to the width of the back will correct this glaring mis-fit. This is not a dress which I will have occasion to wear  this summer – so do I dig in and make the corrections now, or do I wait?  I have quite a bit in my summer sewing queue, and perhaps a tried and true project like a blouse will put me in a better frame of mind.  Regardless, this “unfinished business” will one day be finished, hopefully successfully.


16 Comments

Filed under couture construction, hand-sewn zippers, Linings, Ruffles, Sheath dresses, silk, vintage Vogue patterns from the 1960s