Category Archives: Chanel-type jackets

Part I:  How Does One Pack for A Trip to Paris in mid-March?  

With considerable thought!

I was a participant on Susan Khalje’s Paris Couture Tour in mid-March.  I dutifully checked the expected weather in central and northern France for that time of year (Mr. Fifty Dresses and I were spending a week in Normandy and Brittany prior to the Paris component, which meant even more thought). Chilly, rainy, breezy were the parameters most often appearing in my weather search.  Add to that the fact I did not want to look too Wintry nor too Springy, and, well, I was quite in a quandary!  

Fortunately, Susan provided us with some guidelines for the type of clothing we would need.  This included day wear for our scooting around Paris to see exhibits, fabric stores, specialty stores, museums, etc.  She indicated that dress in Paris is “noted” so I took that to mean we needed to look “sharp” and “put-together.”  We also would have two days with special visitors and demonstrations in the hotel.  Again we didn’t need to be all dolled up, but we needed to look presentable.  And then there were those special nights out.  For those we would need dressy clothes – for a night at the Ballet at the Palais Garnier, a Gala dinner at a fancy restaurant, and an evening at a fashion show in a private Paris apartment.  

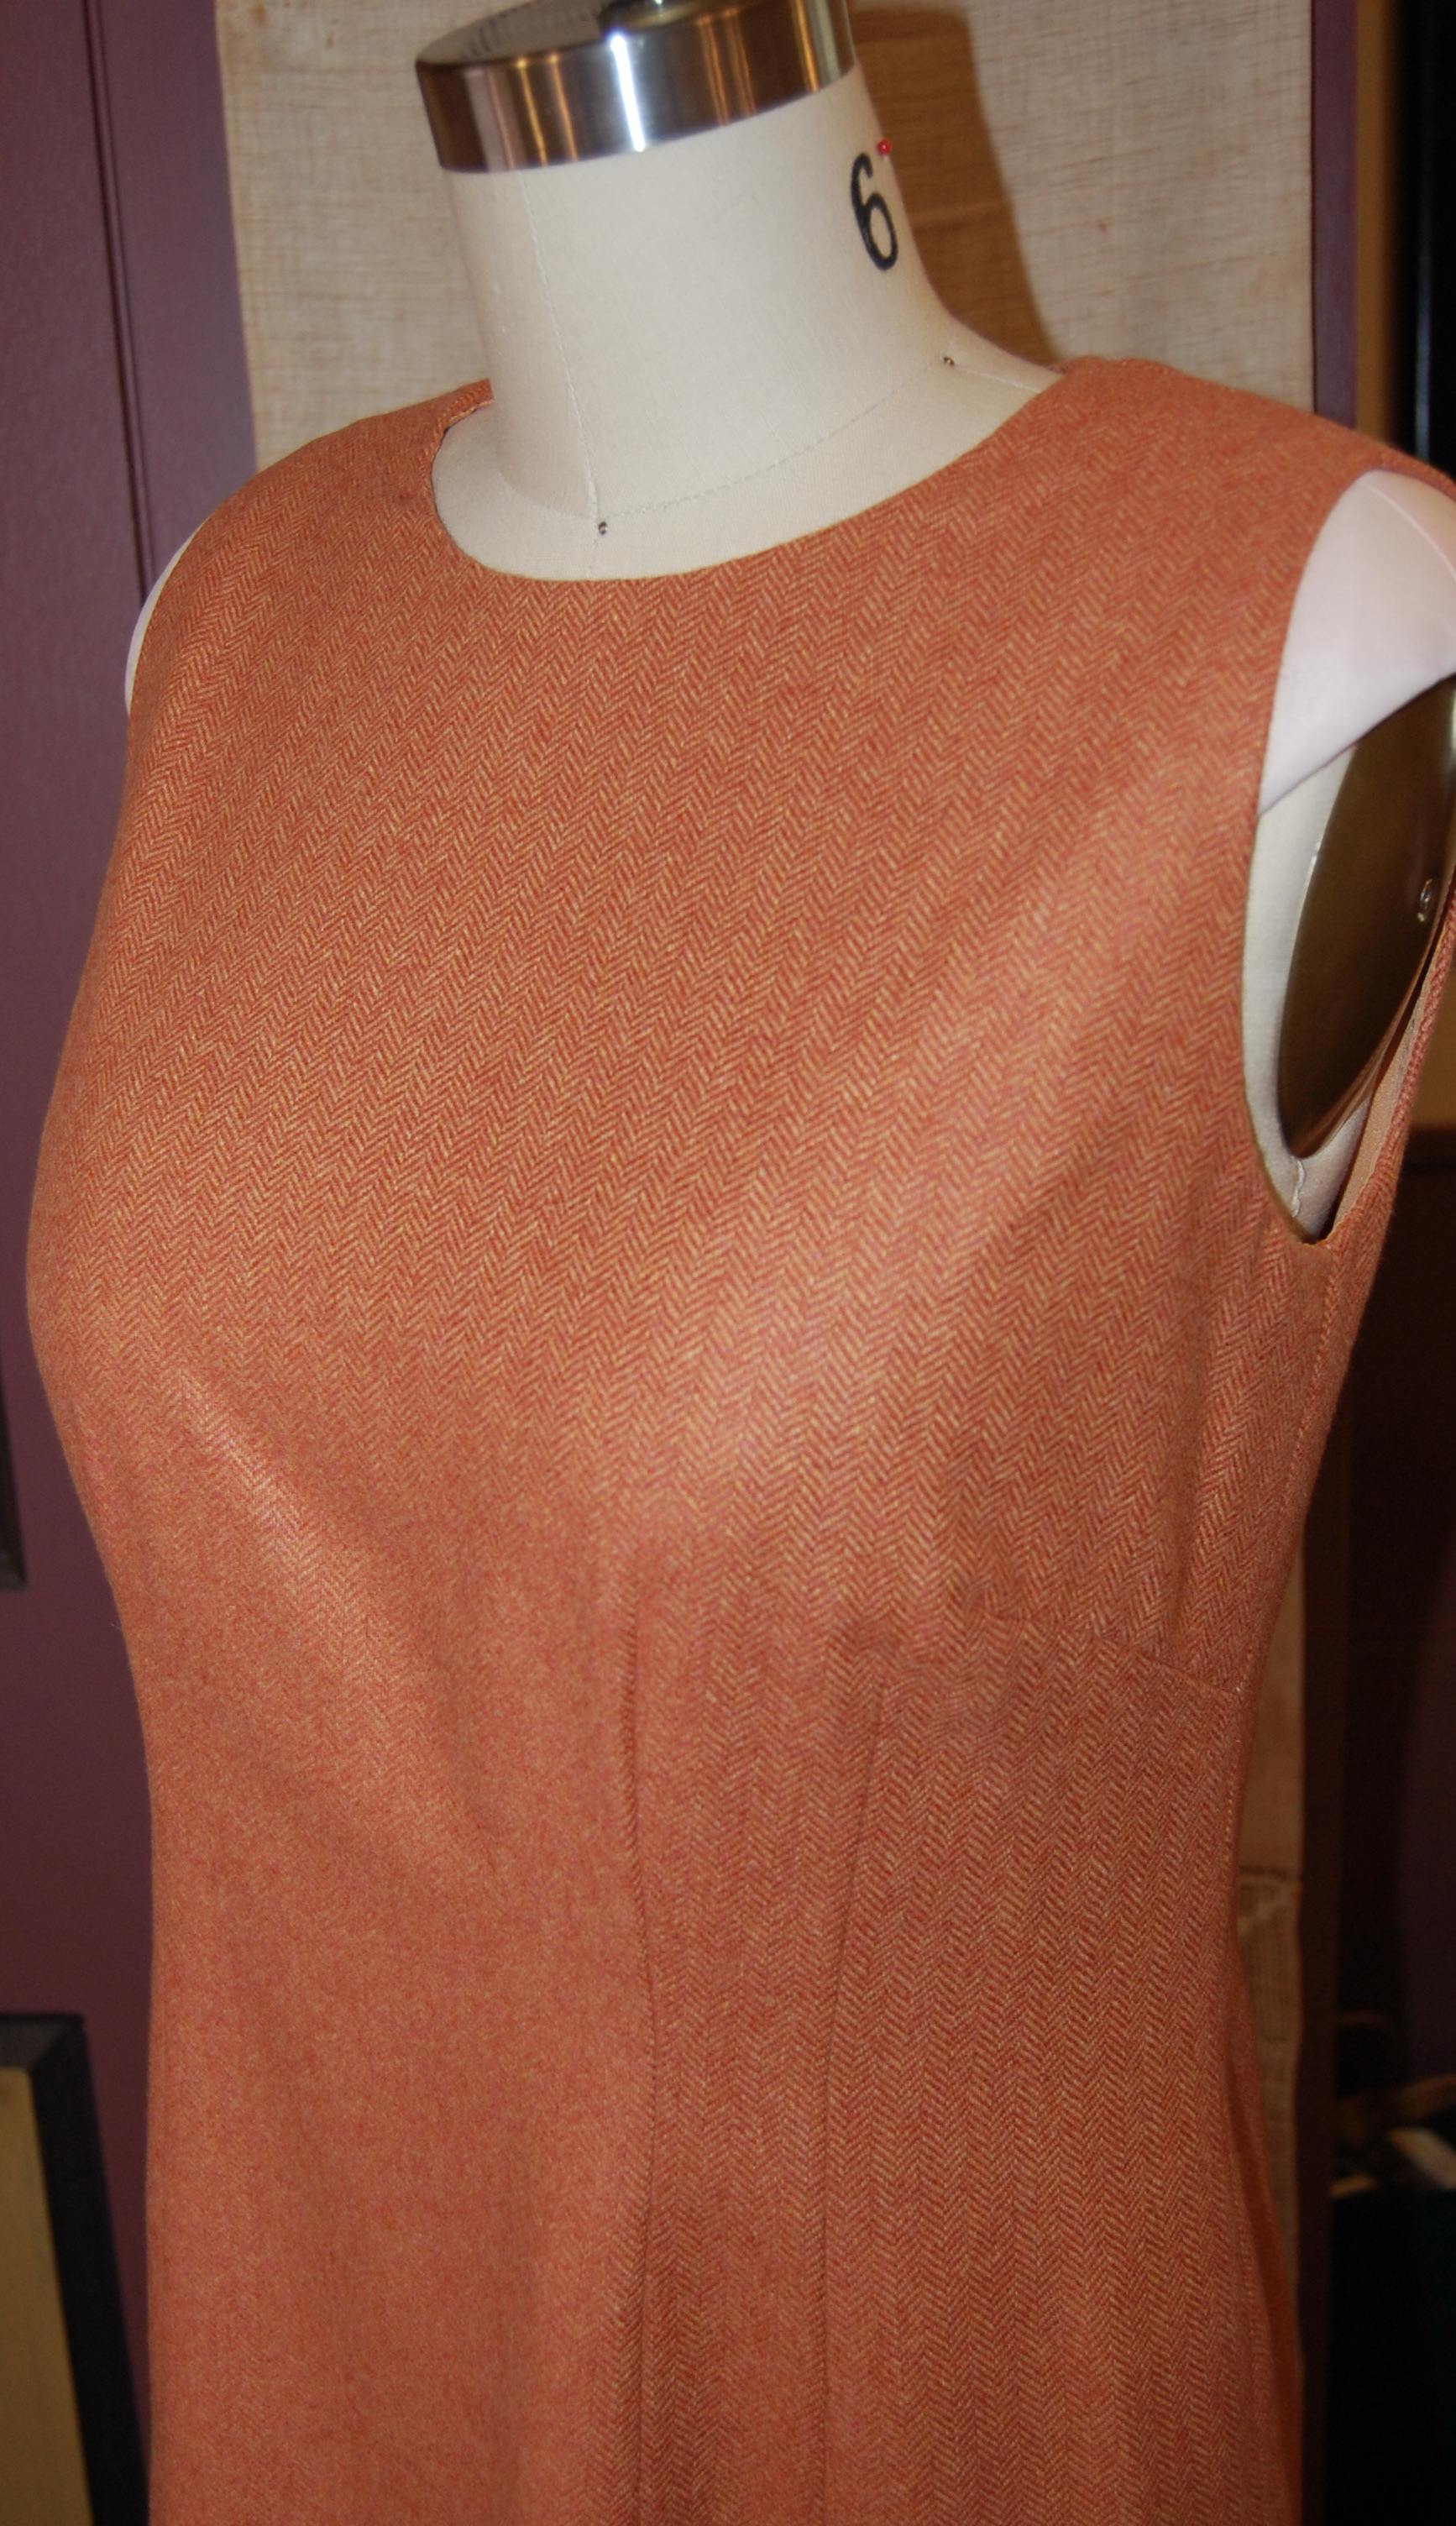
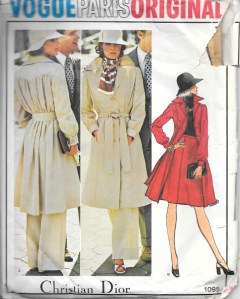
Of course, I decided I needed a least a couple of new things to wear.  And of course, that meant sewing.  I started in mid-January, making a muslin for this dress (pictured in green):

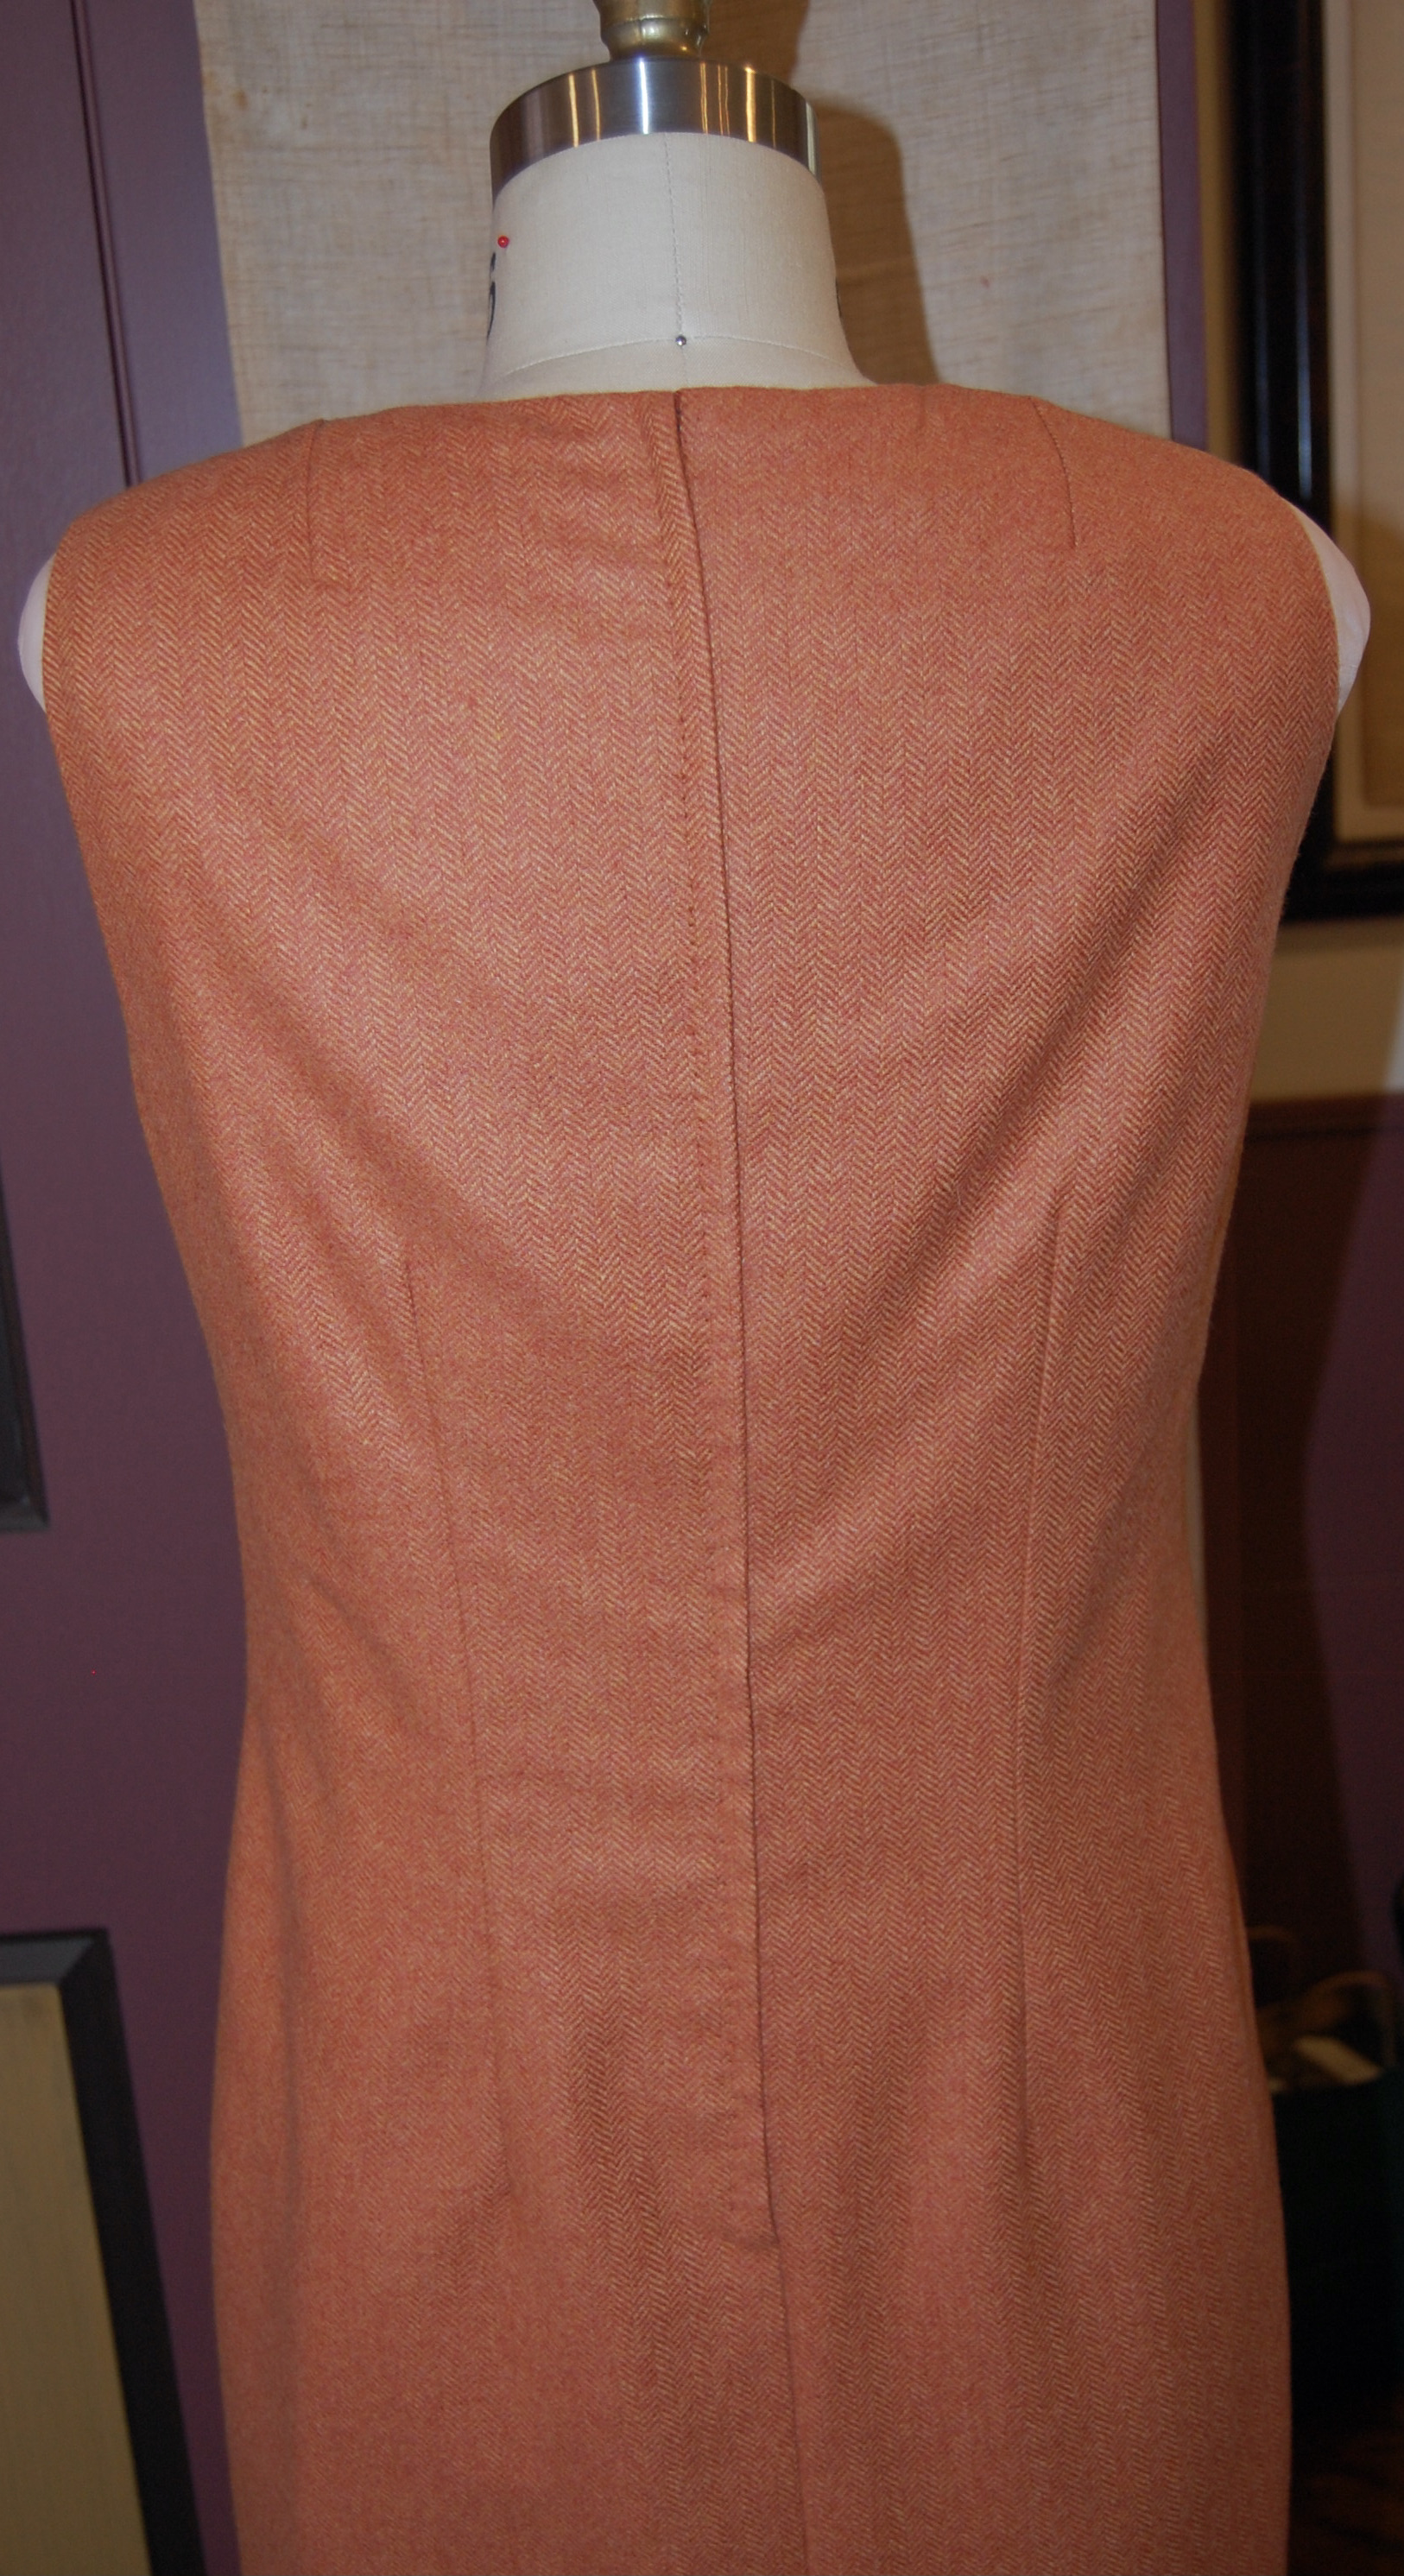
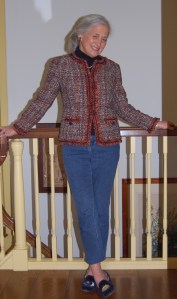
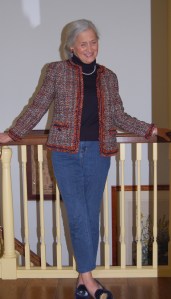
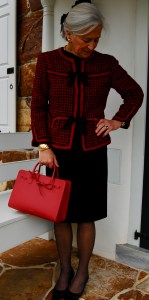
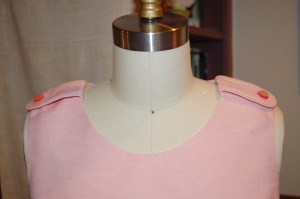
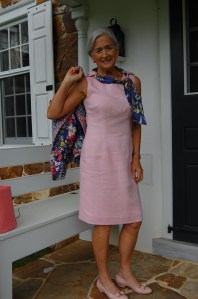
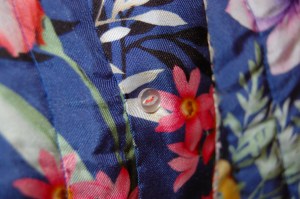
Before I started on the actual dress, however, I thought I would resurrect a pink wool jacket I had purchased 20 years ago.  Made in France, with some amazing details and handwork, the jacket had hung in my cedar closet for over 12 years, unworn.  Its color and weight, however, seemed to be perfect for Paris in March. 

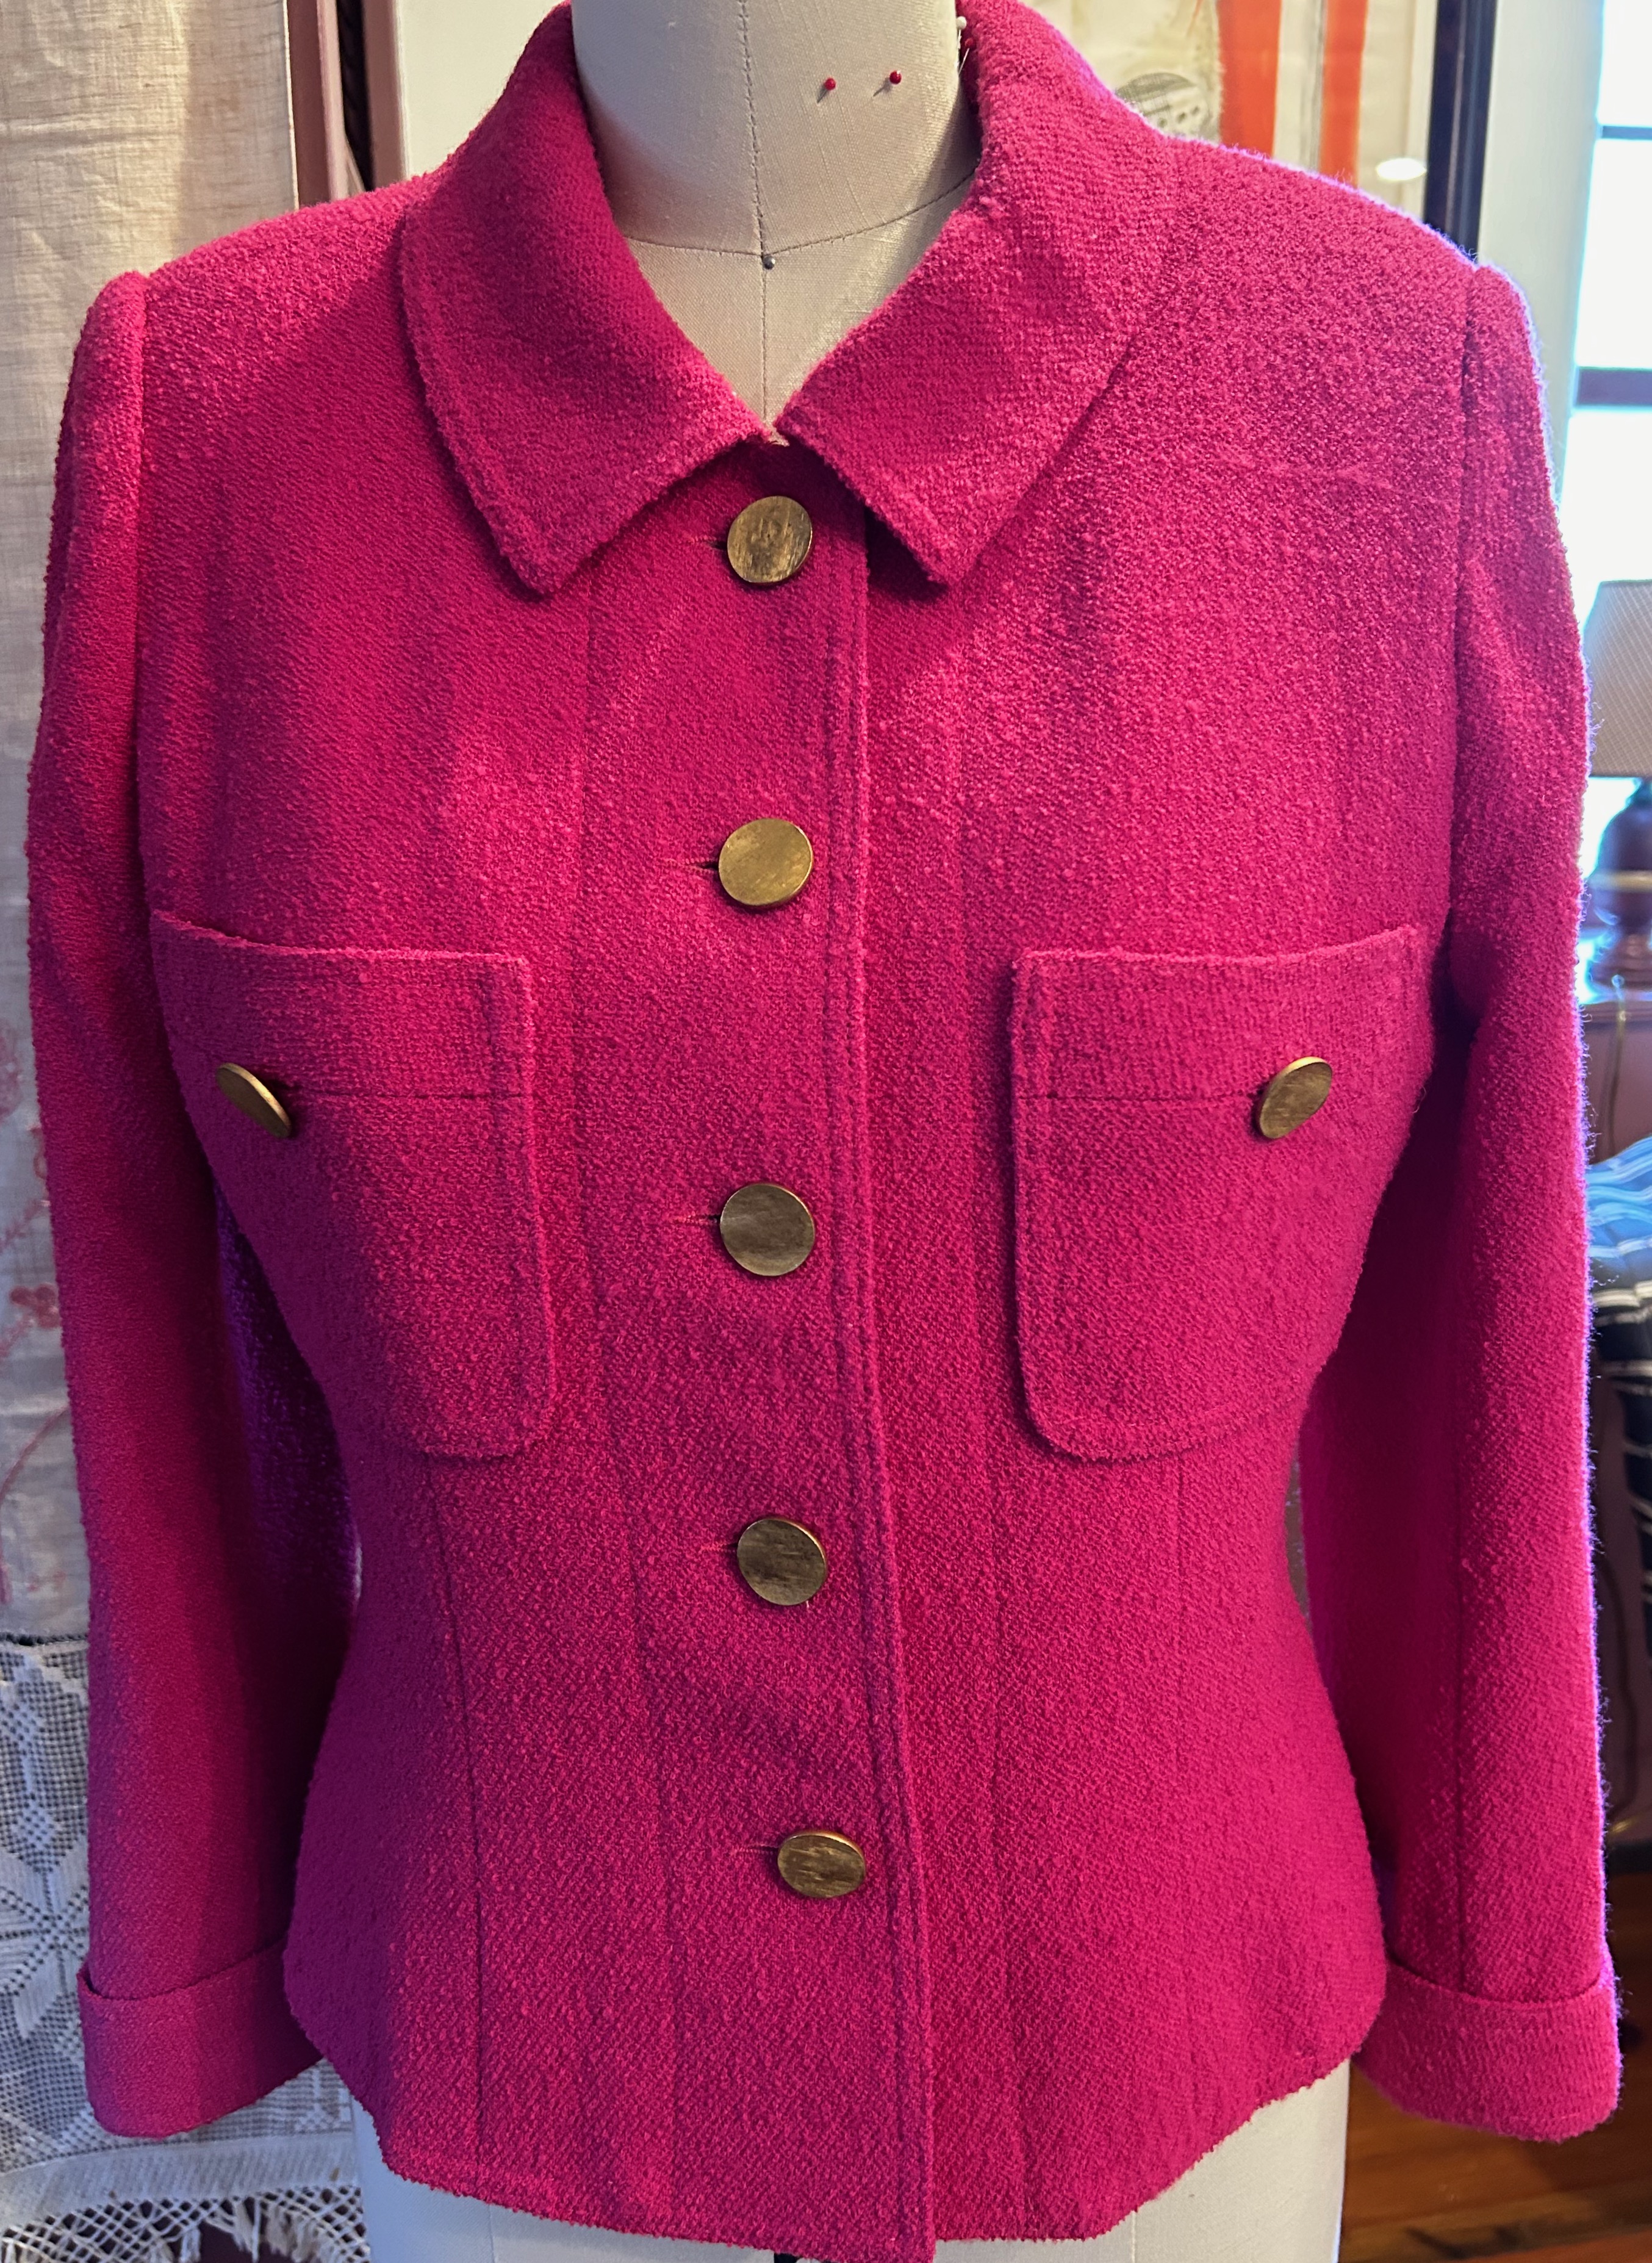
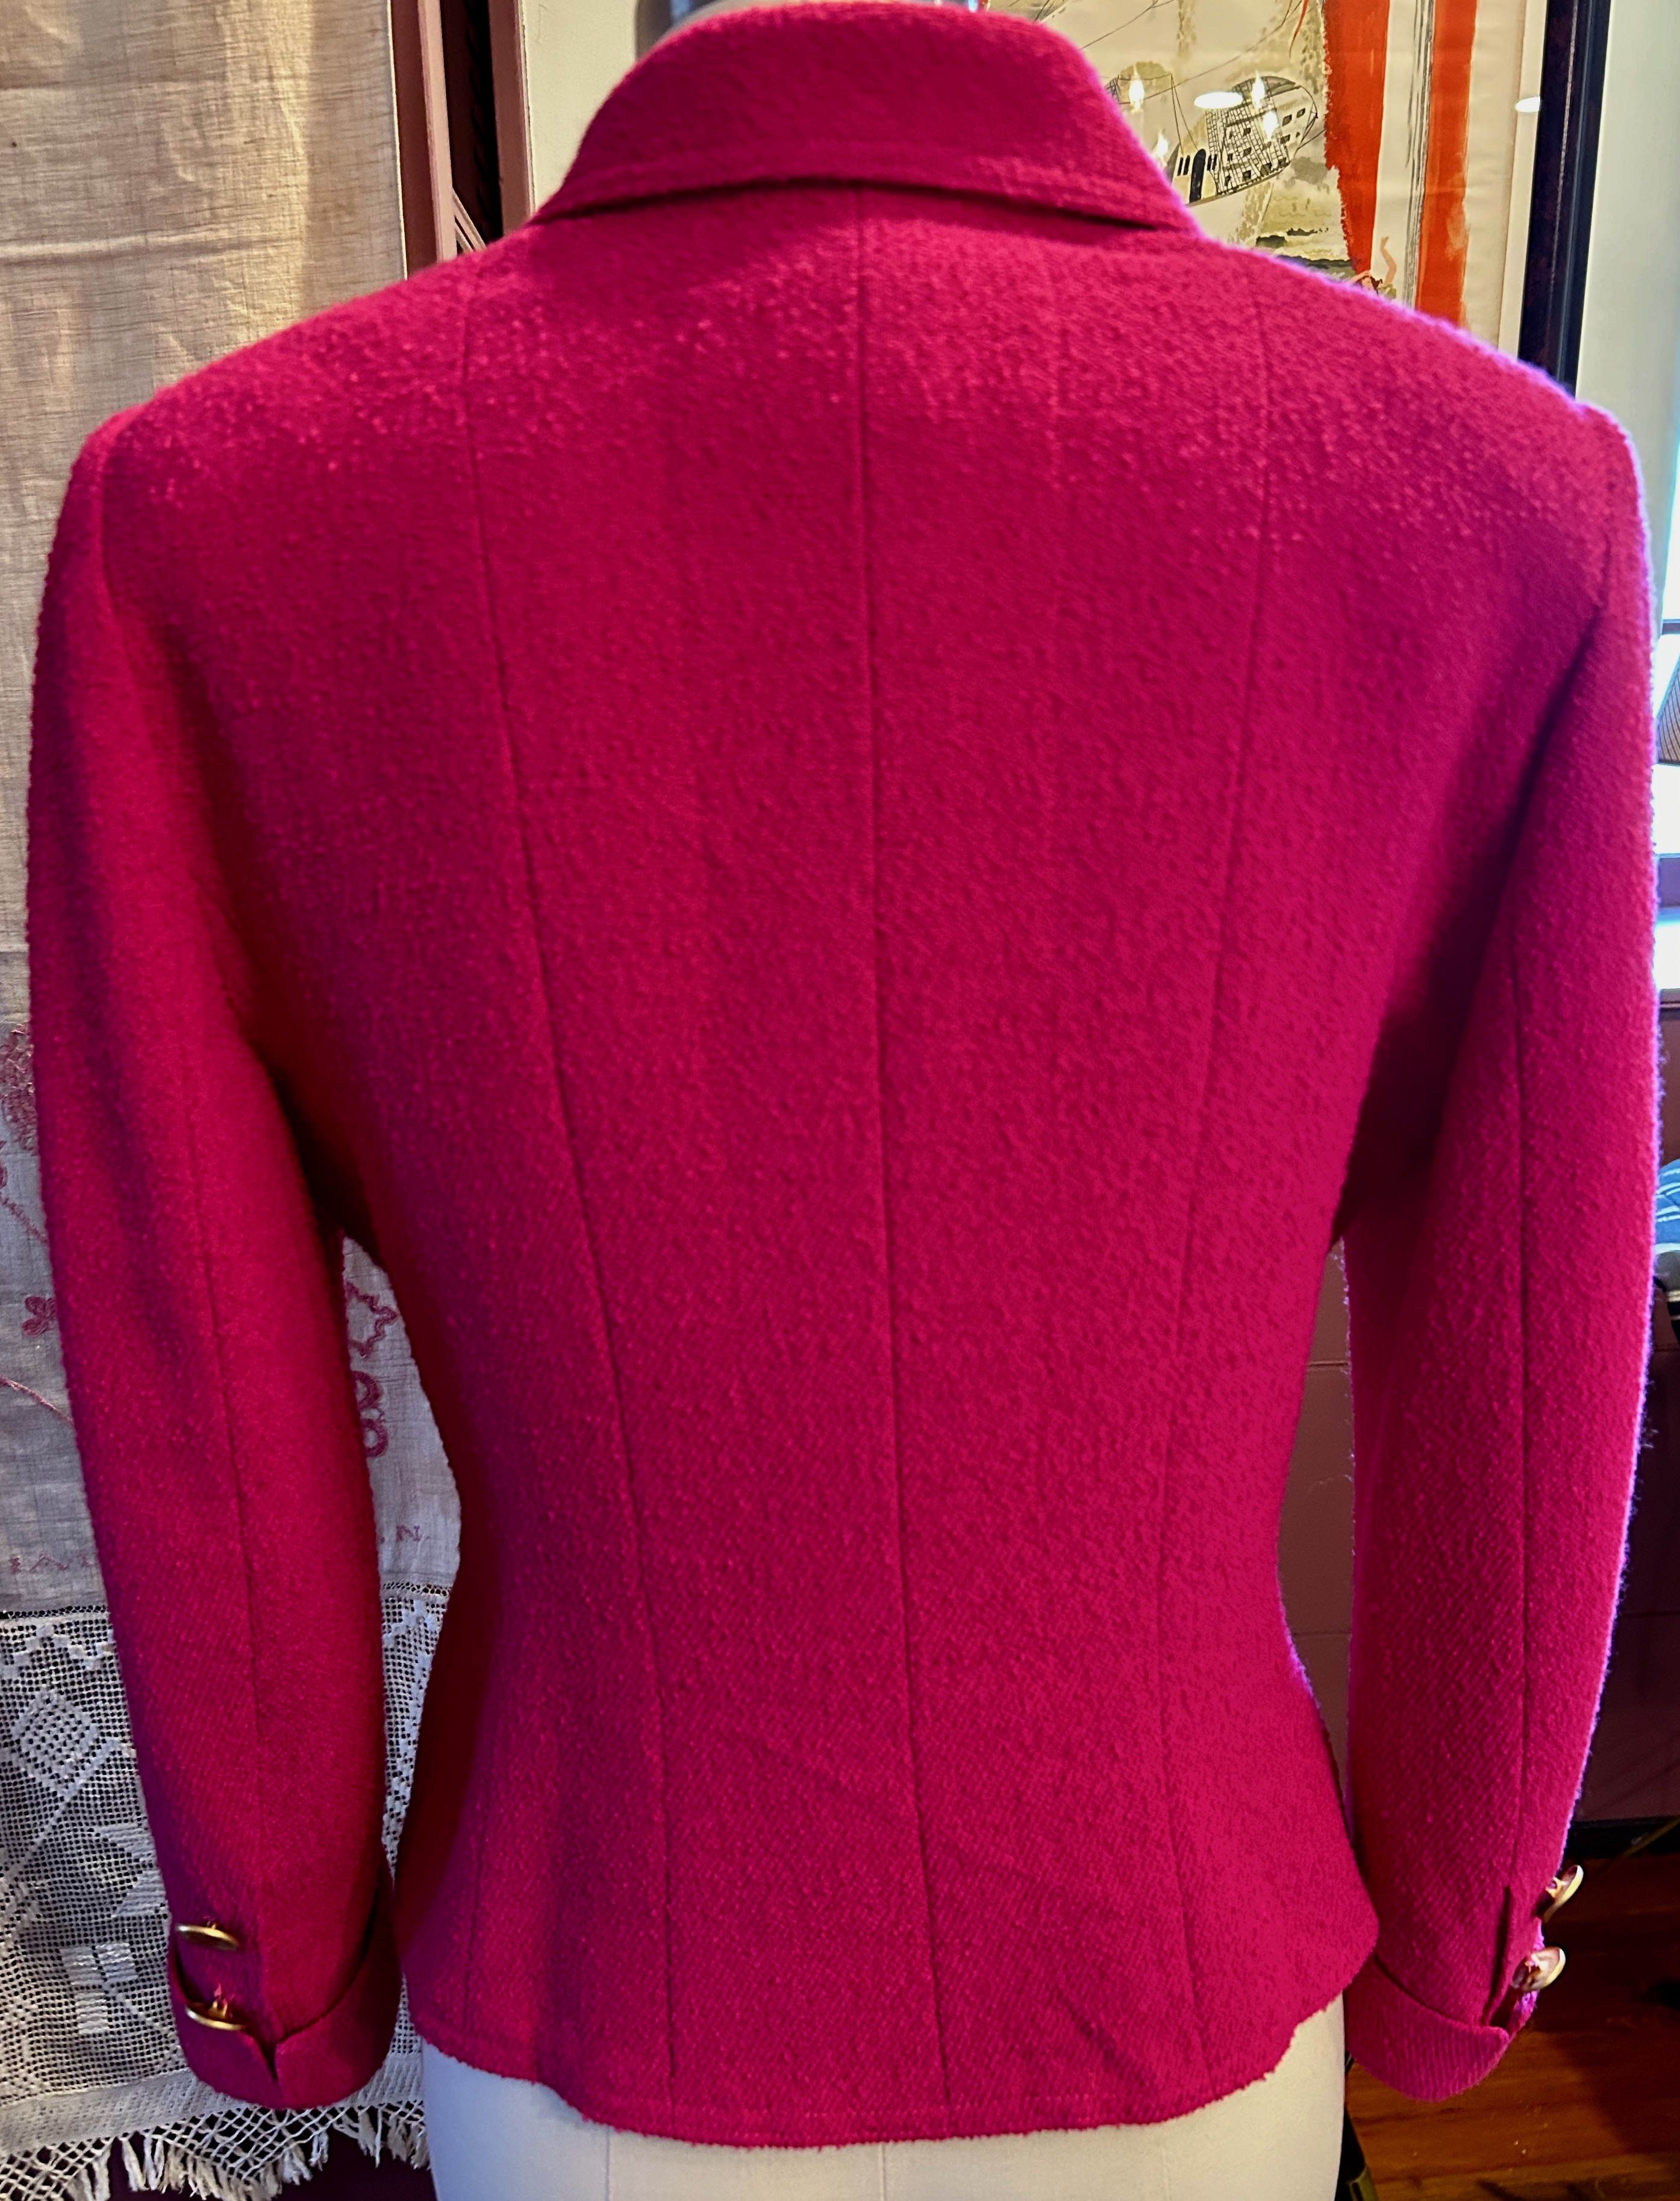
When I tried it on, the shoulders were much too pronounced for today’s sensibilities.  Undaunted, I knew I could easily remove the hand stitched lining from around the top and sides of the shoulder armhole area.  I could see how the shoulder pads were configured and make adjustments.  I plowed forward, expecting this project to take no more than one day.  

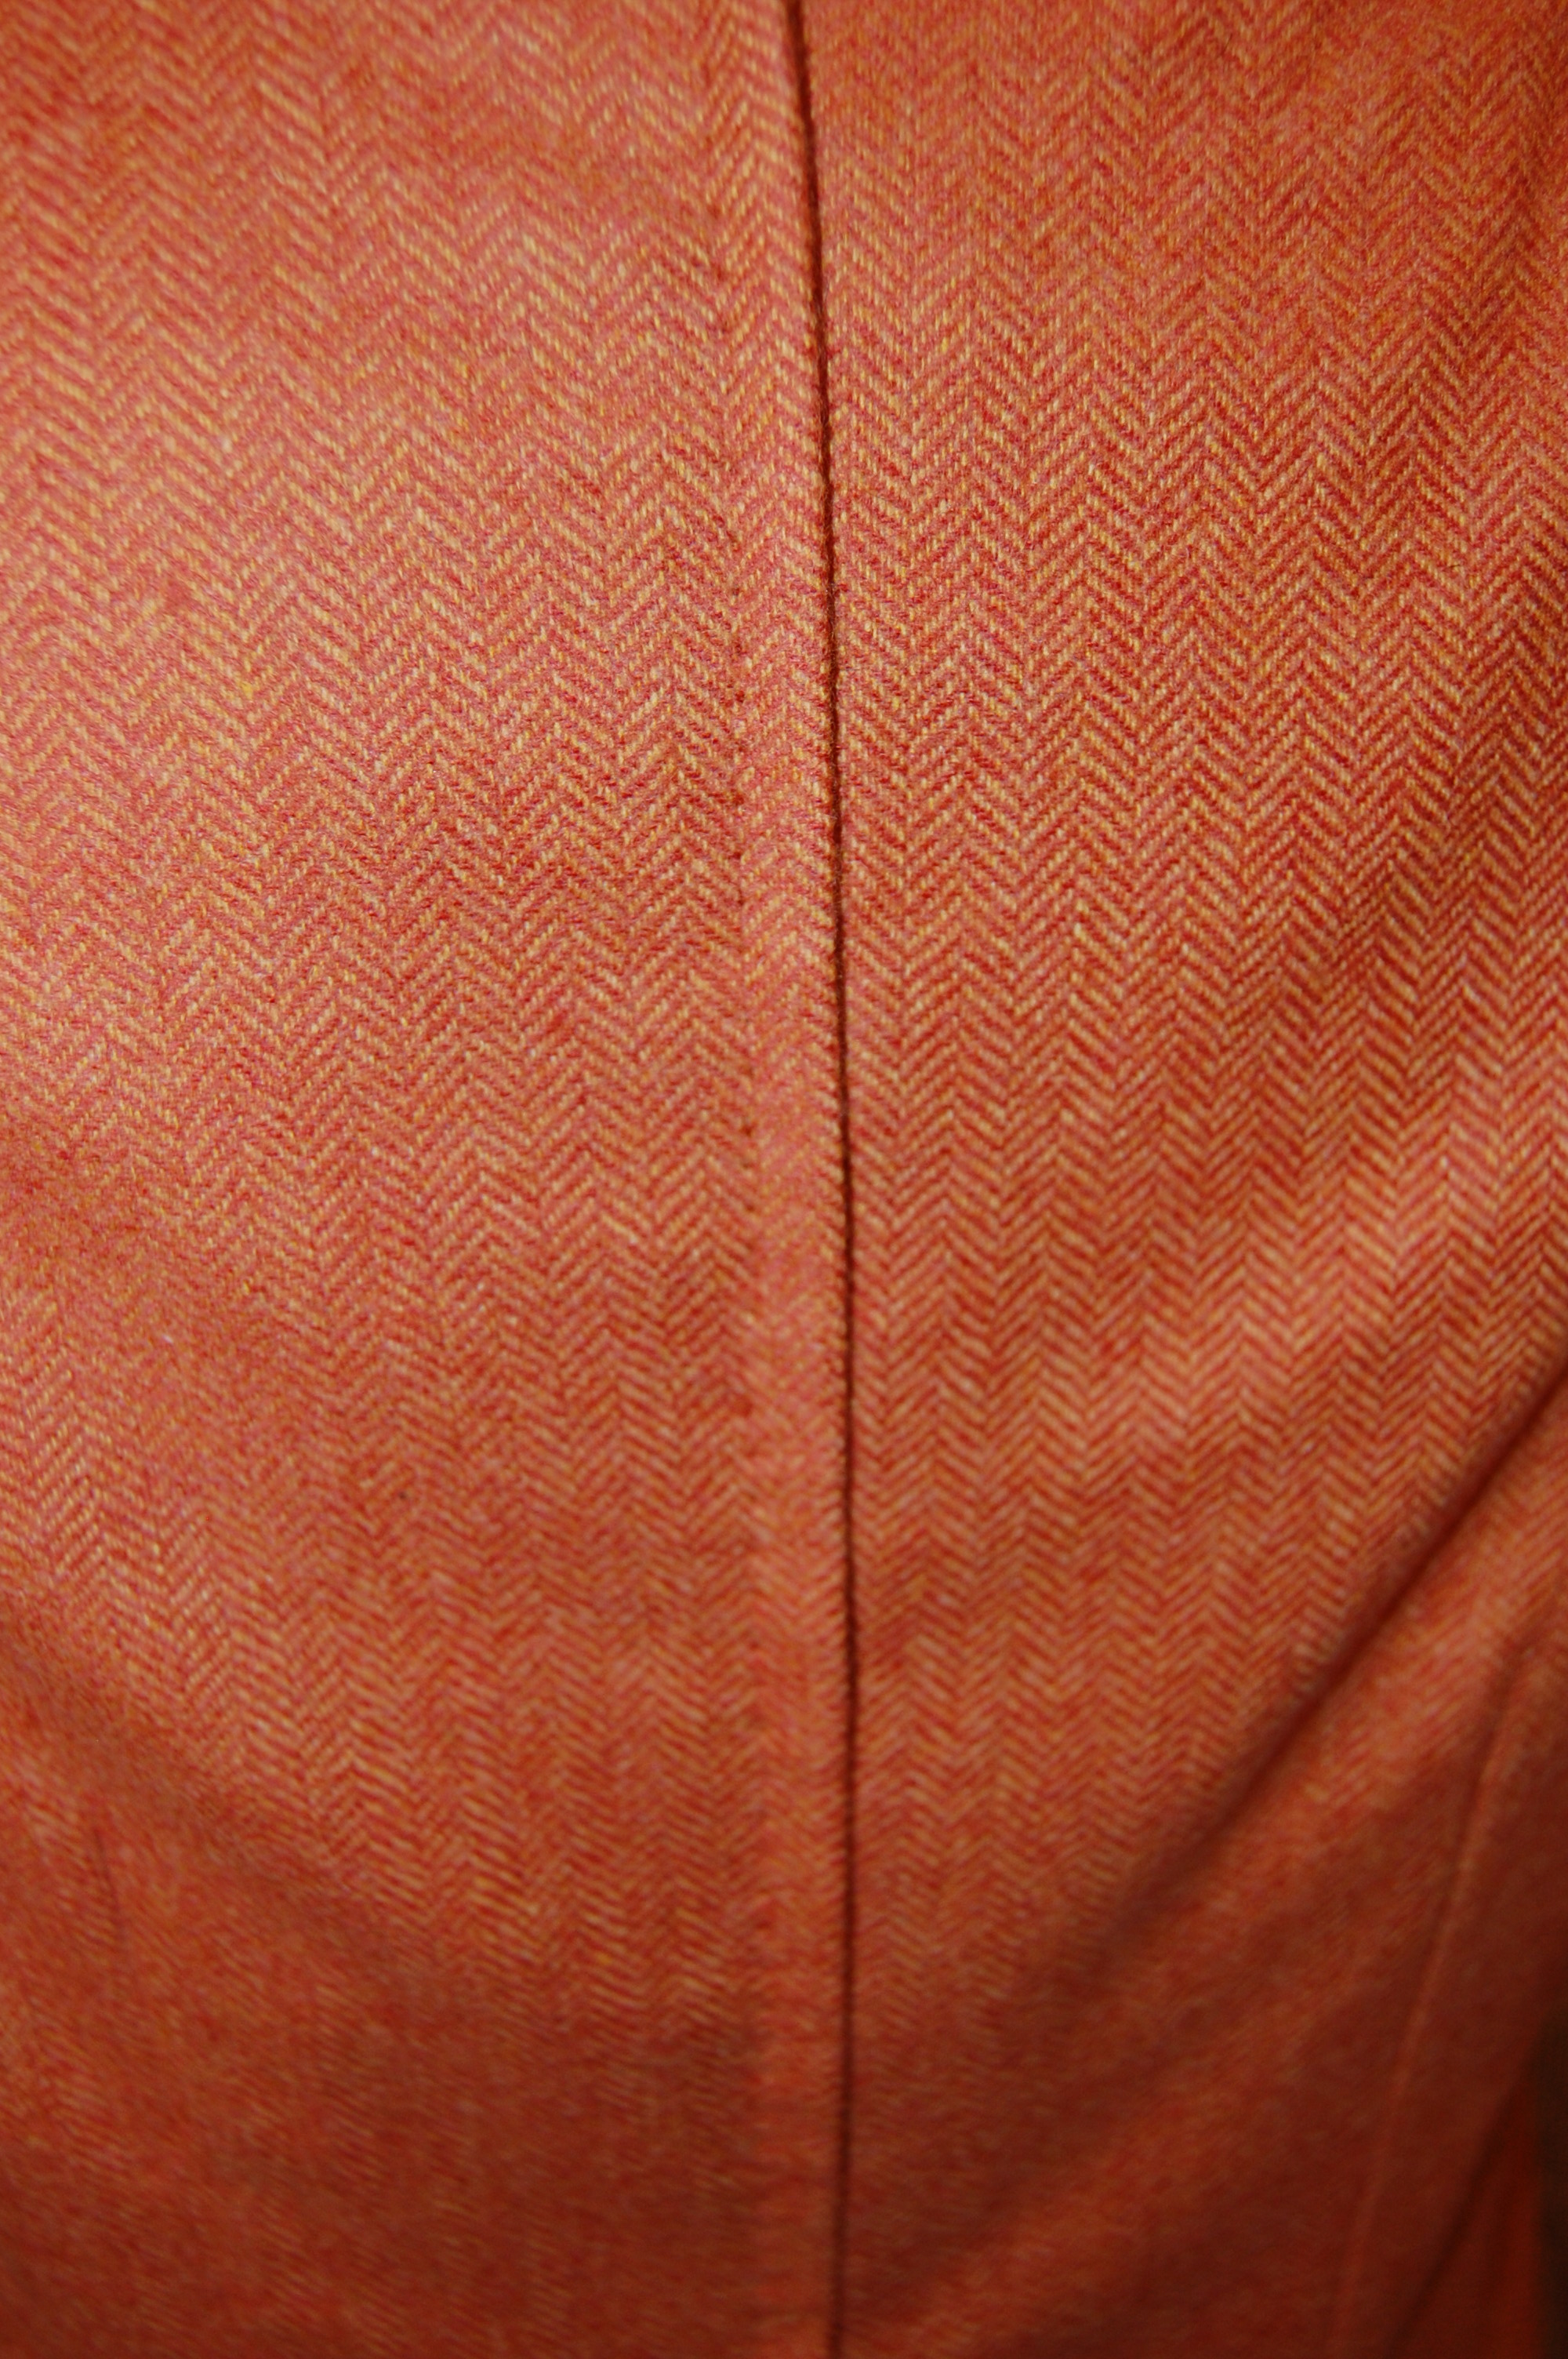
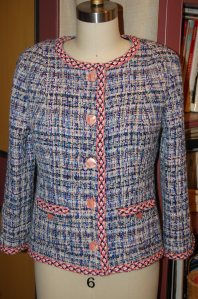
No wonder those shoulders were so pronounced!  There were four layers of padding, all custom cut and applied to each shoulder cap.  I took out three layers for starters.  I knew I needed some definition, and that seemed to do the trick.  If I had been starting from scratch, I probably would have used even less padding, but this was acceptable to me.  

Here are the three layers of padding I removed from each shoulder. They were originally hand-stitched together, with big loopy stitches; I removed that stitching to access the largest of the four layers which I then used by itself for each shoulder.

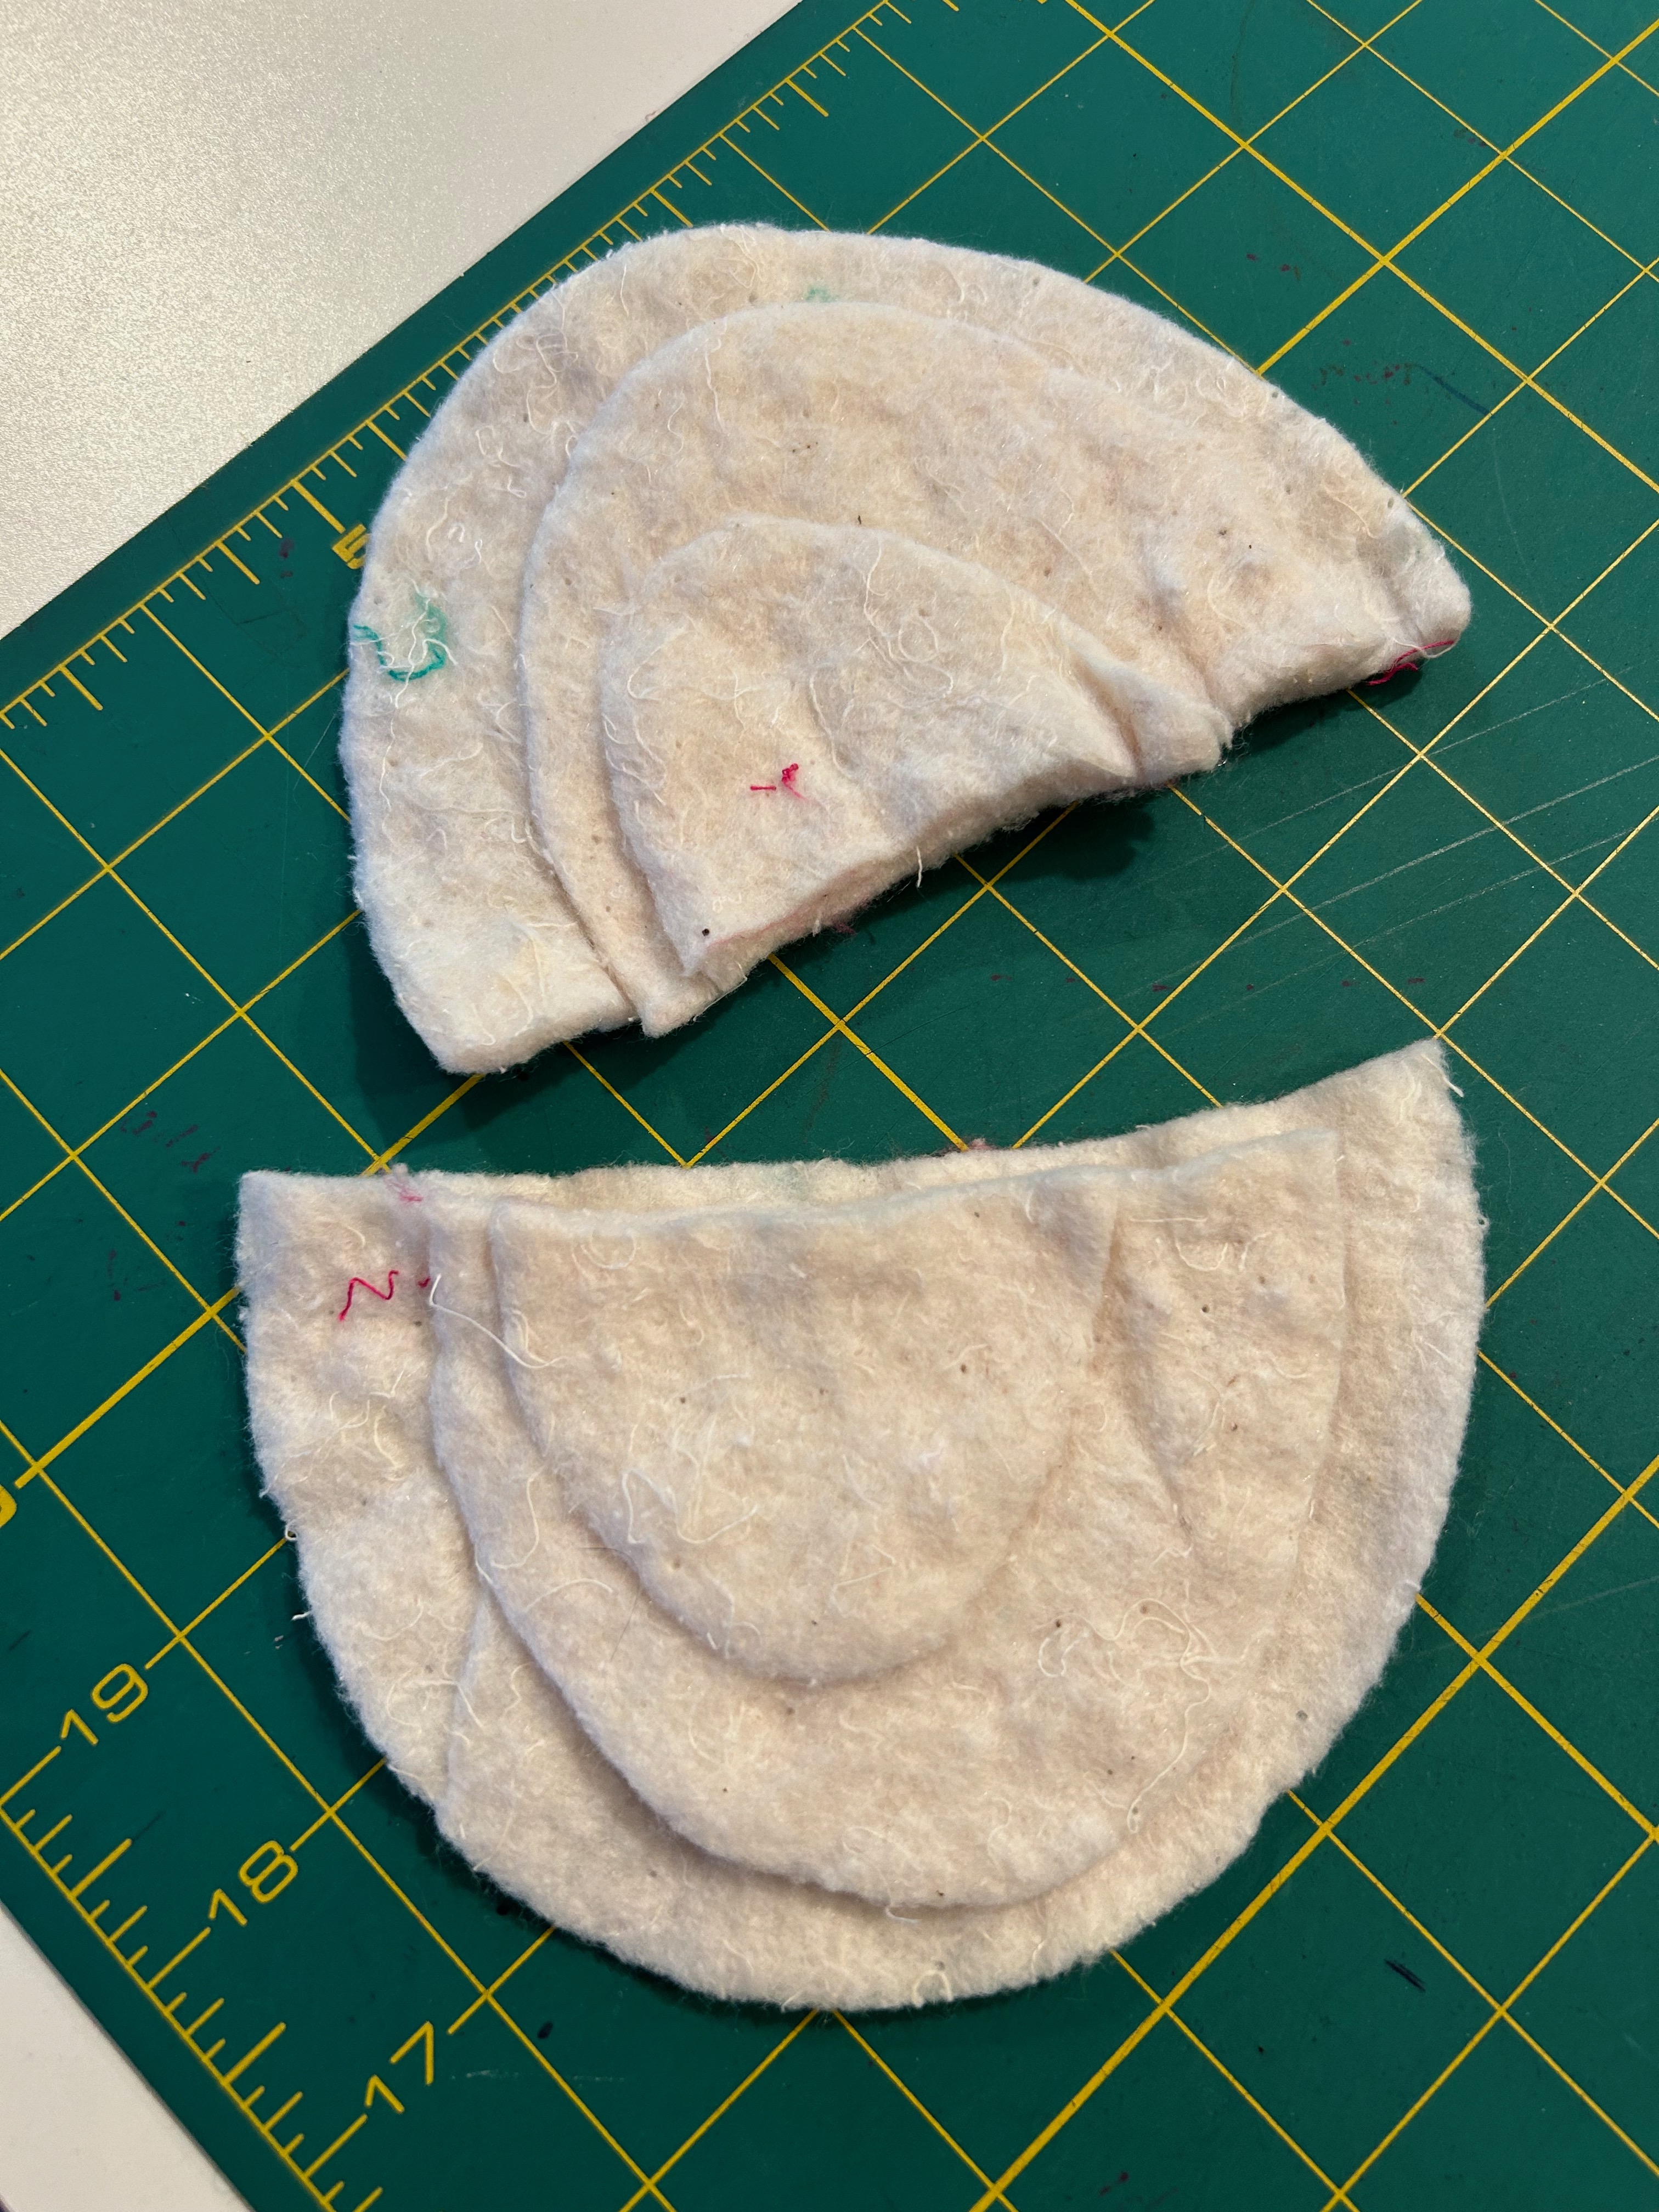
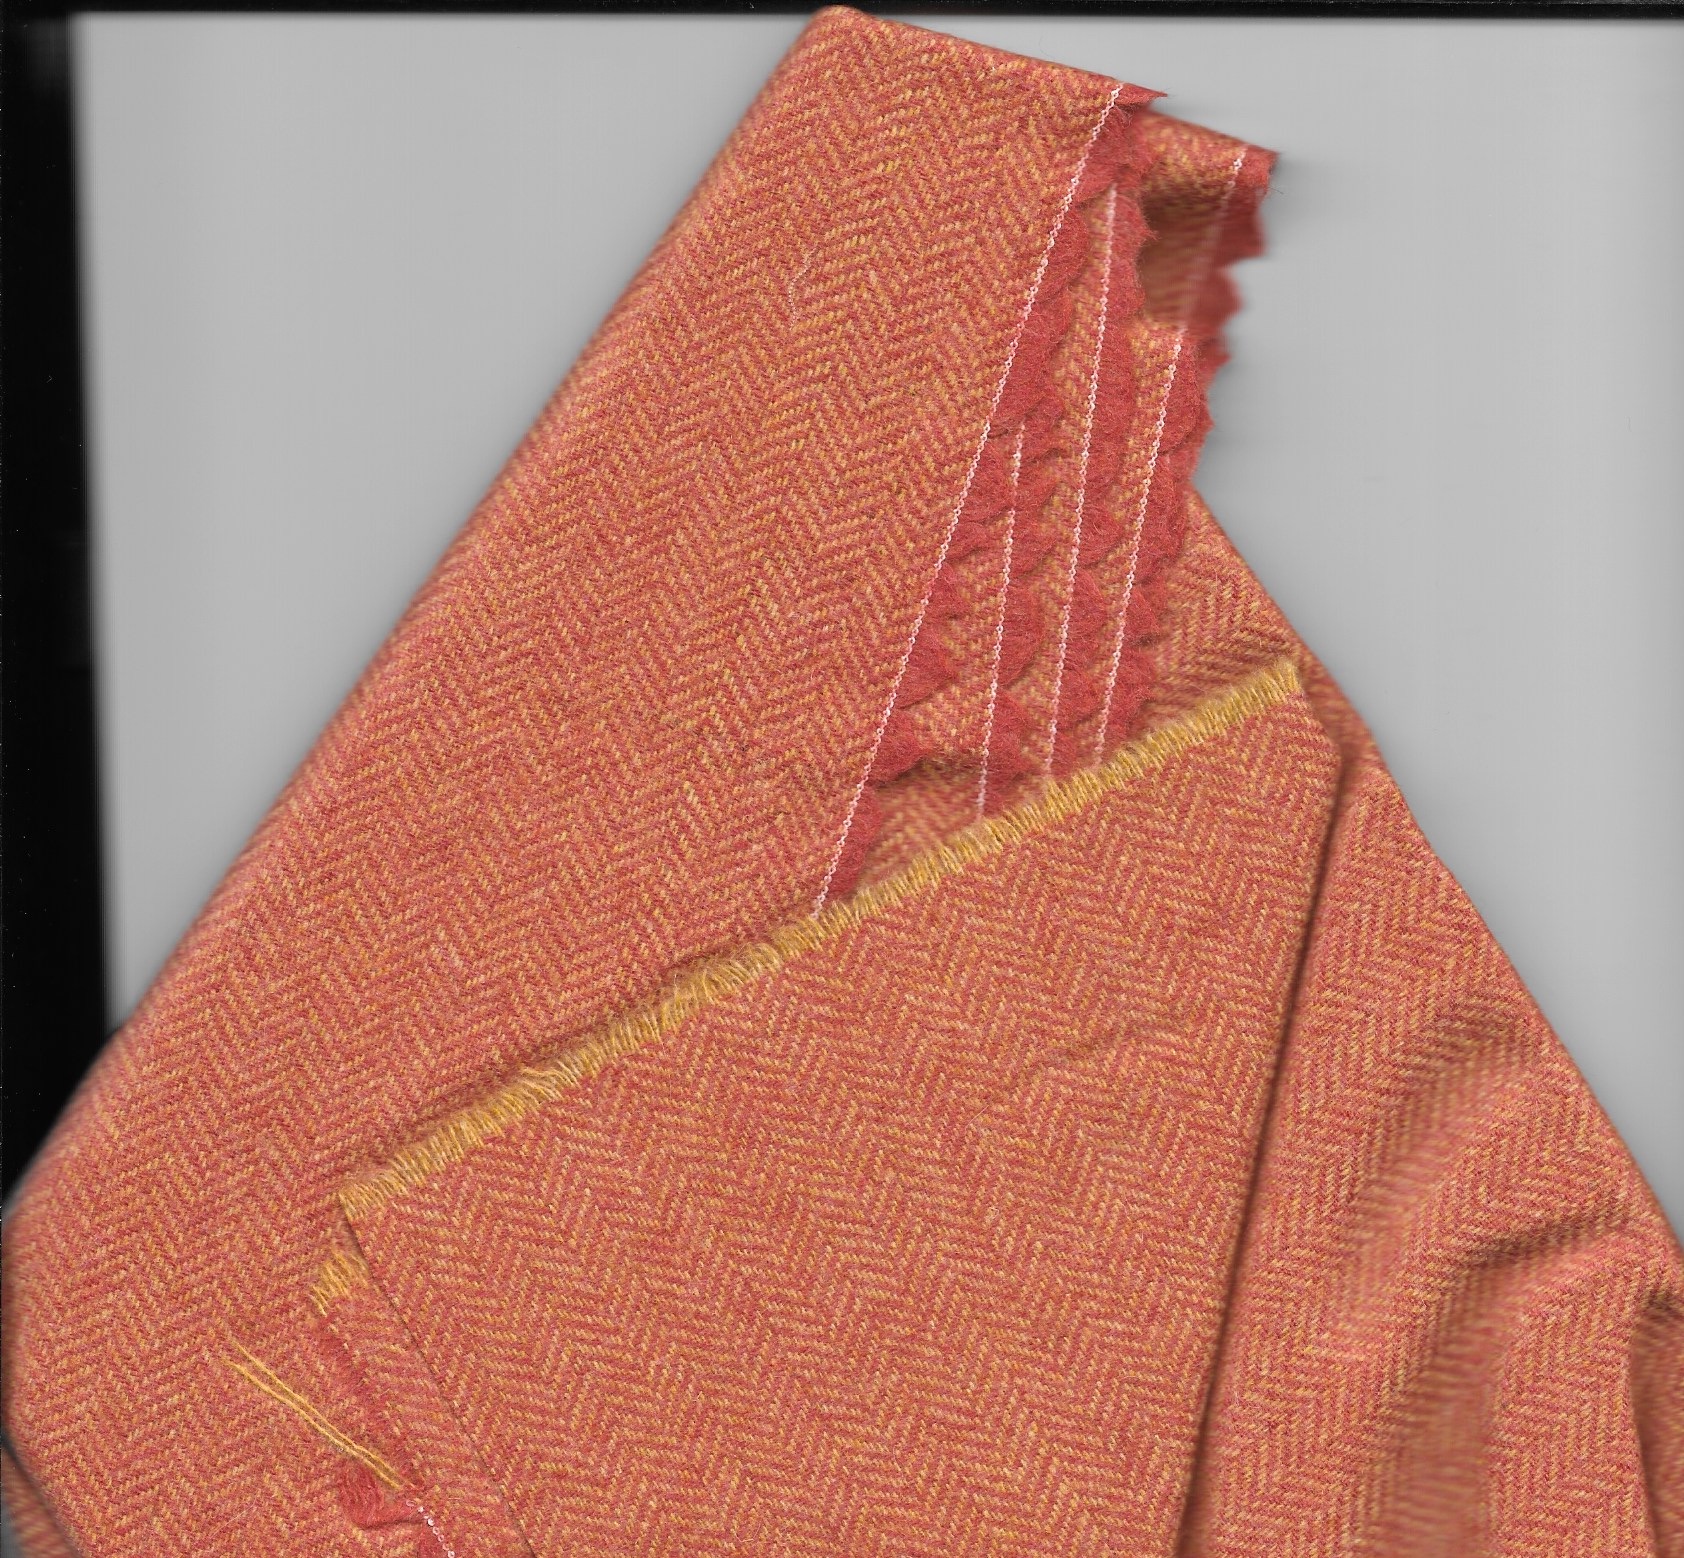
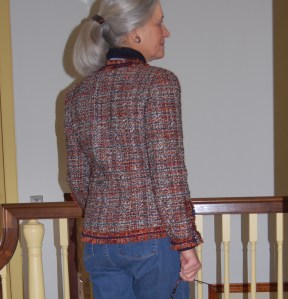
What I had not anticipated was the fact that removing such a depth of shoulder padding had implications for the sleeve length.  There was no way around the realization I was going to have to shorten the sleeves – or not wear this jacket in Paris – or anywhere, for that matter.  Suddenly what promised to be a quick fix had morphed itself something much more time-consuming.    

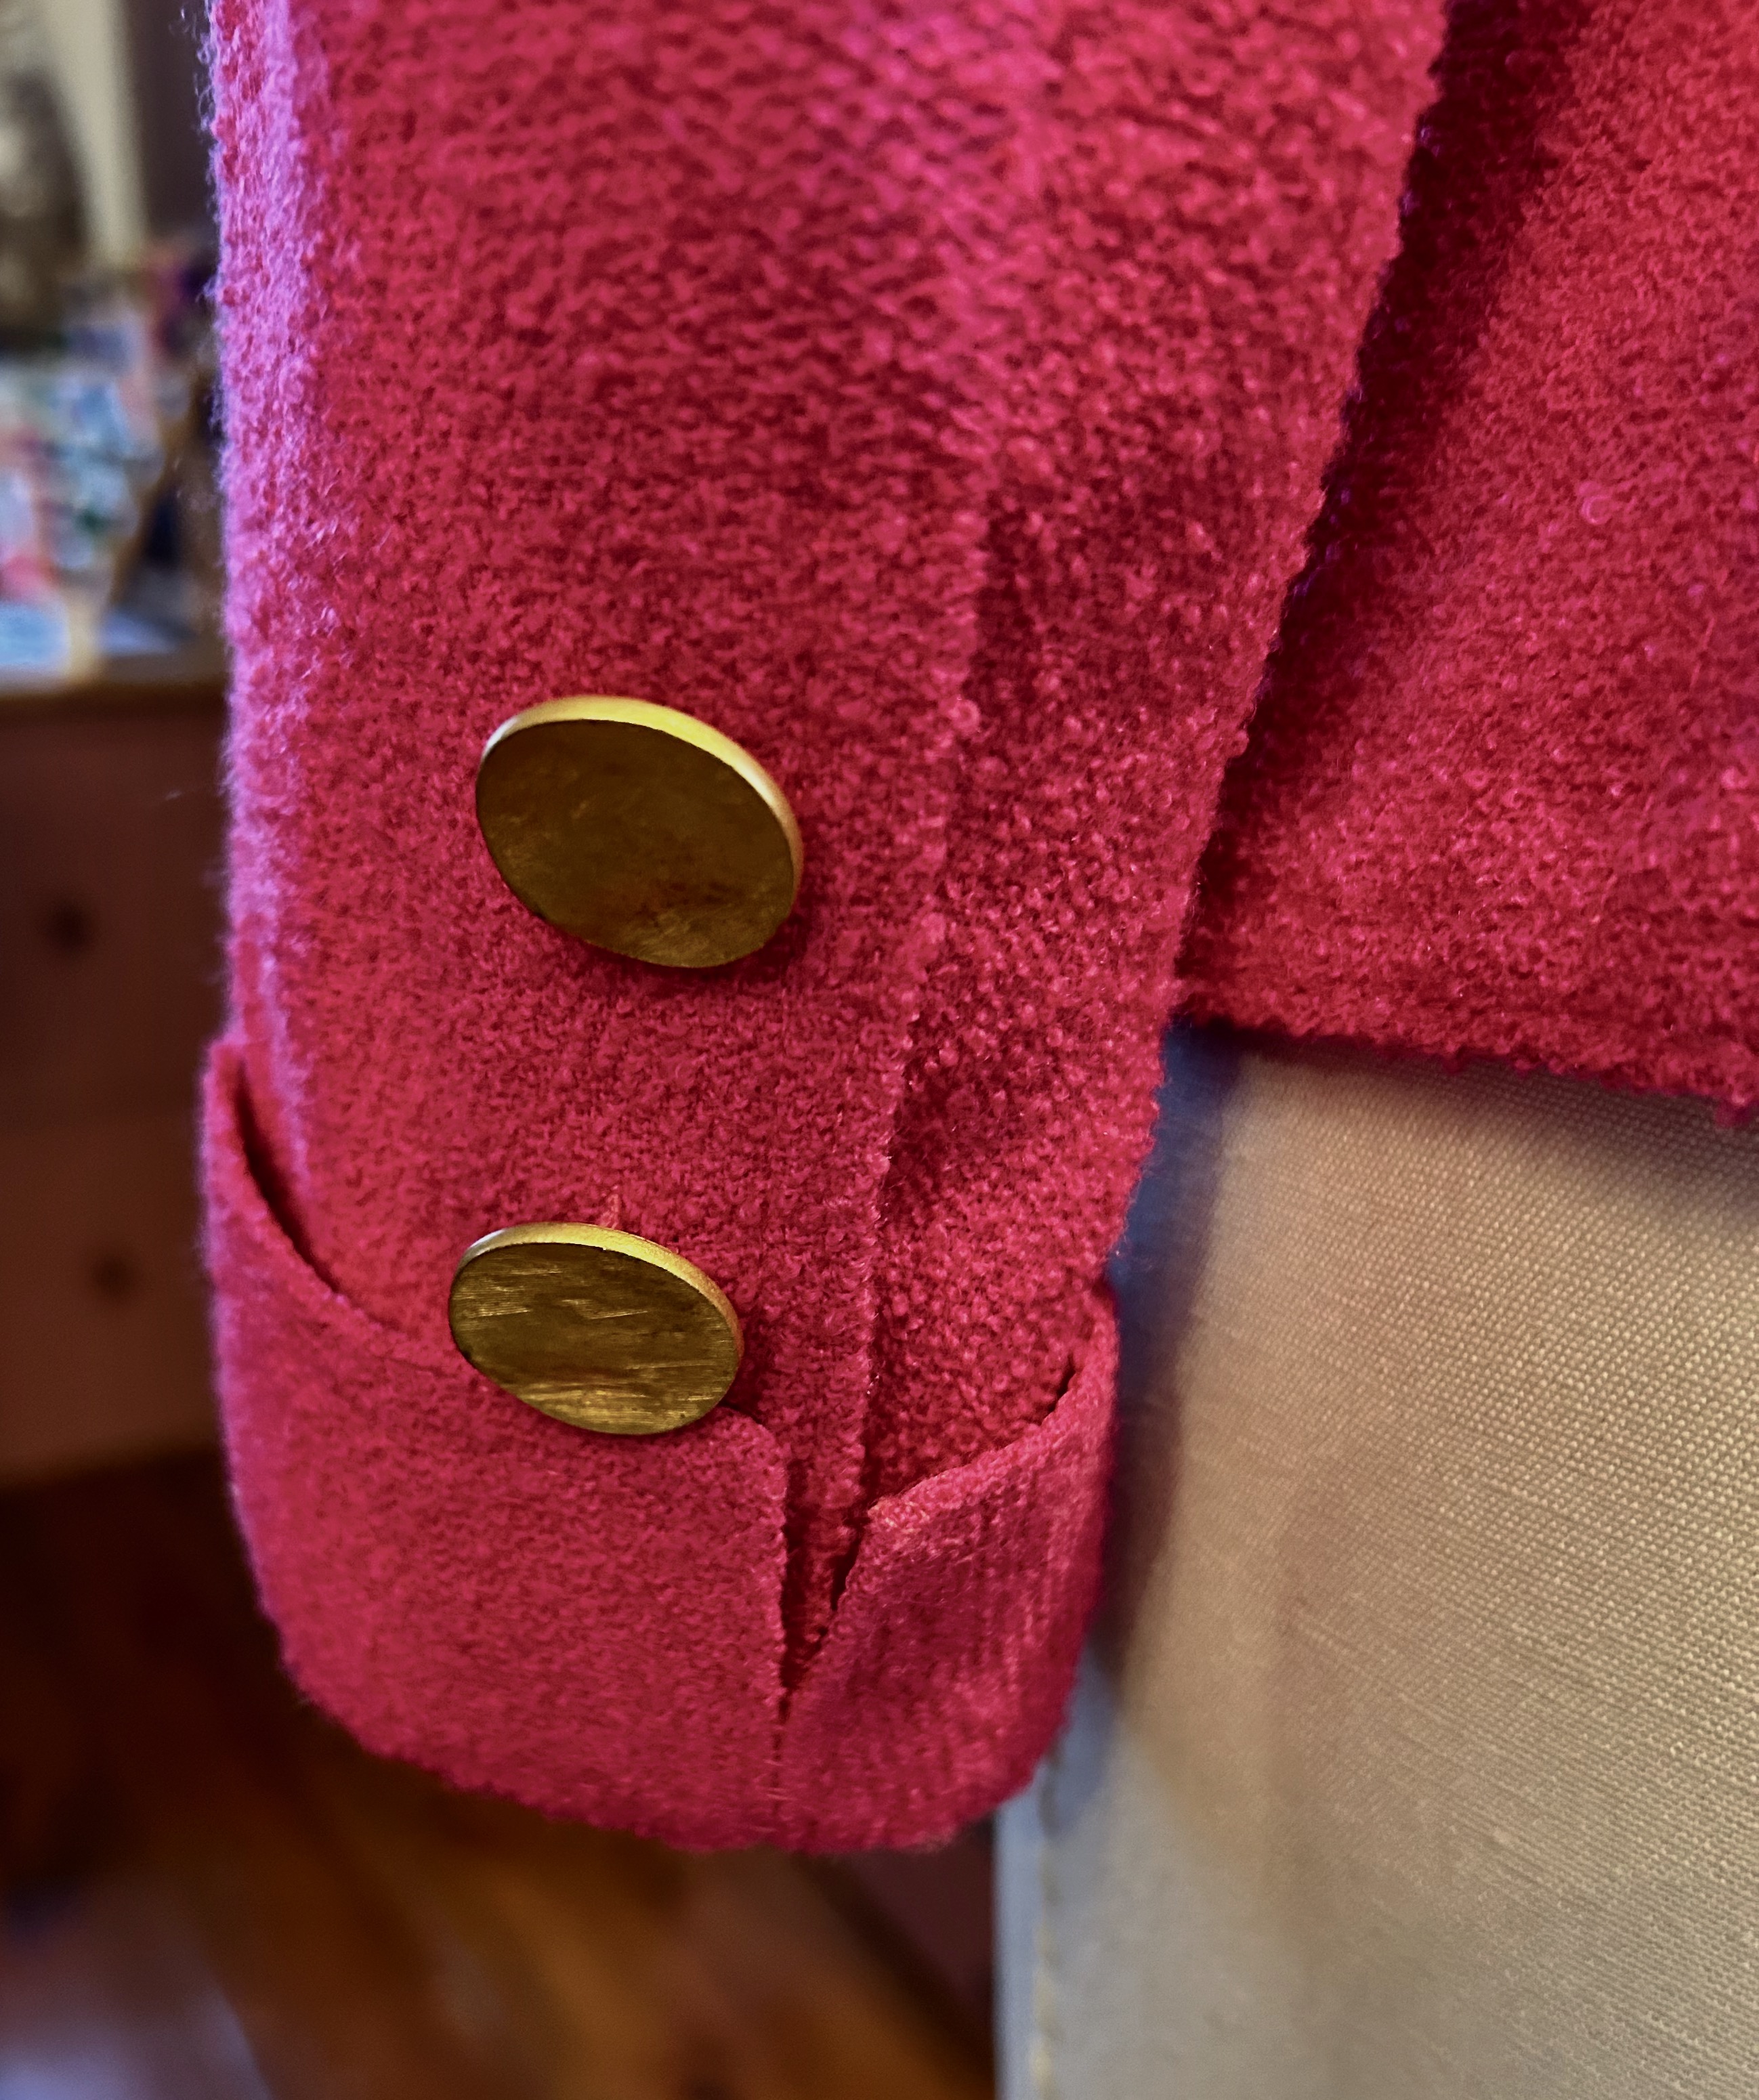
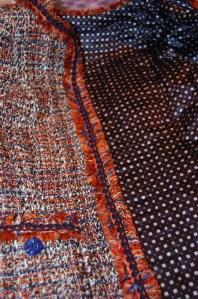
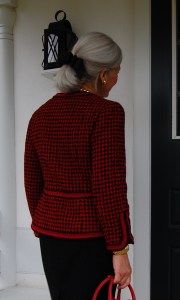
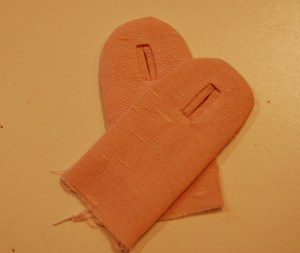
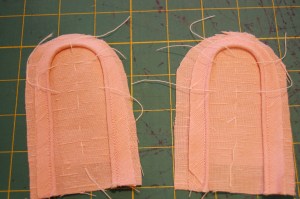
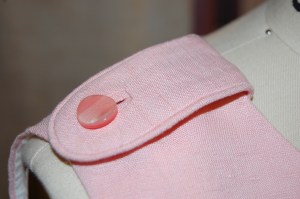
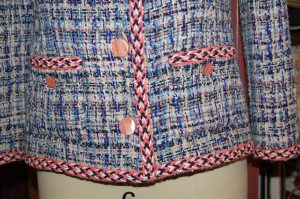
One of the beautiful details of this jacket was the applied tailored cuff on each sleeve.  Shortening the sleeve was going to have to be in two parts.  

If you look closely, you can see how the cuff has been applied to the sleeve.

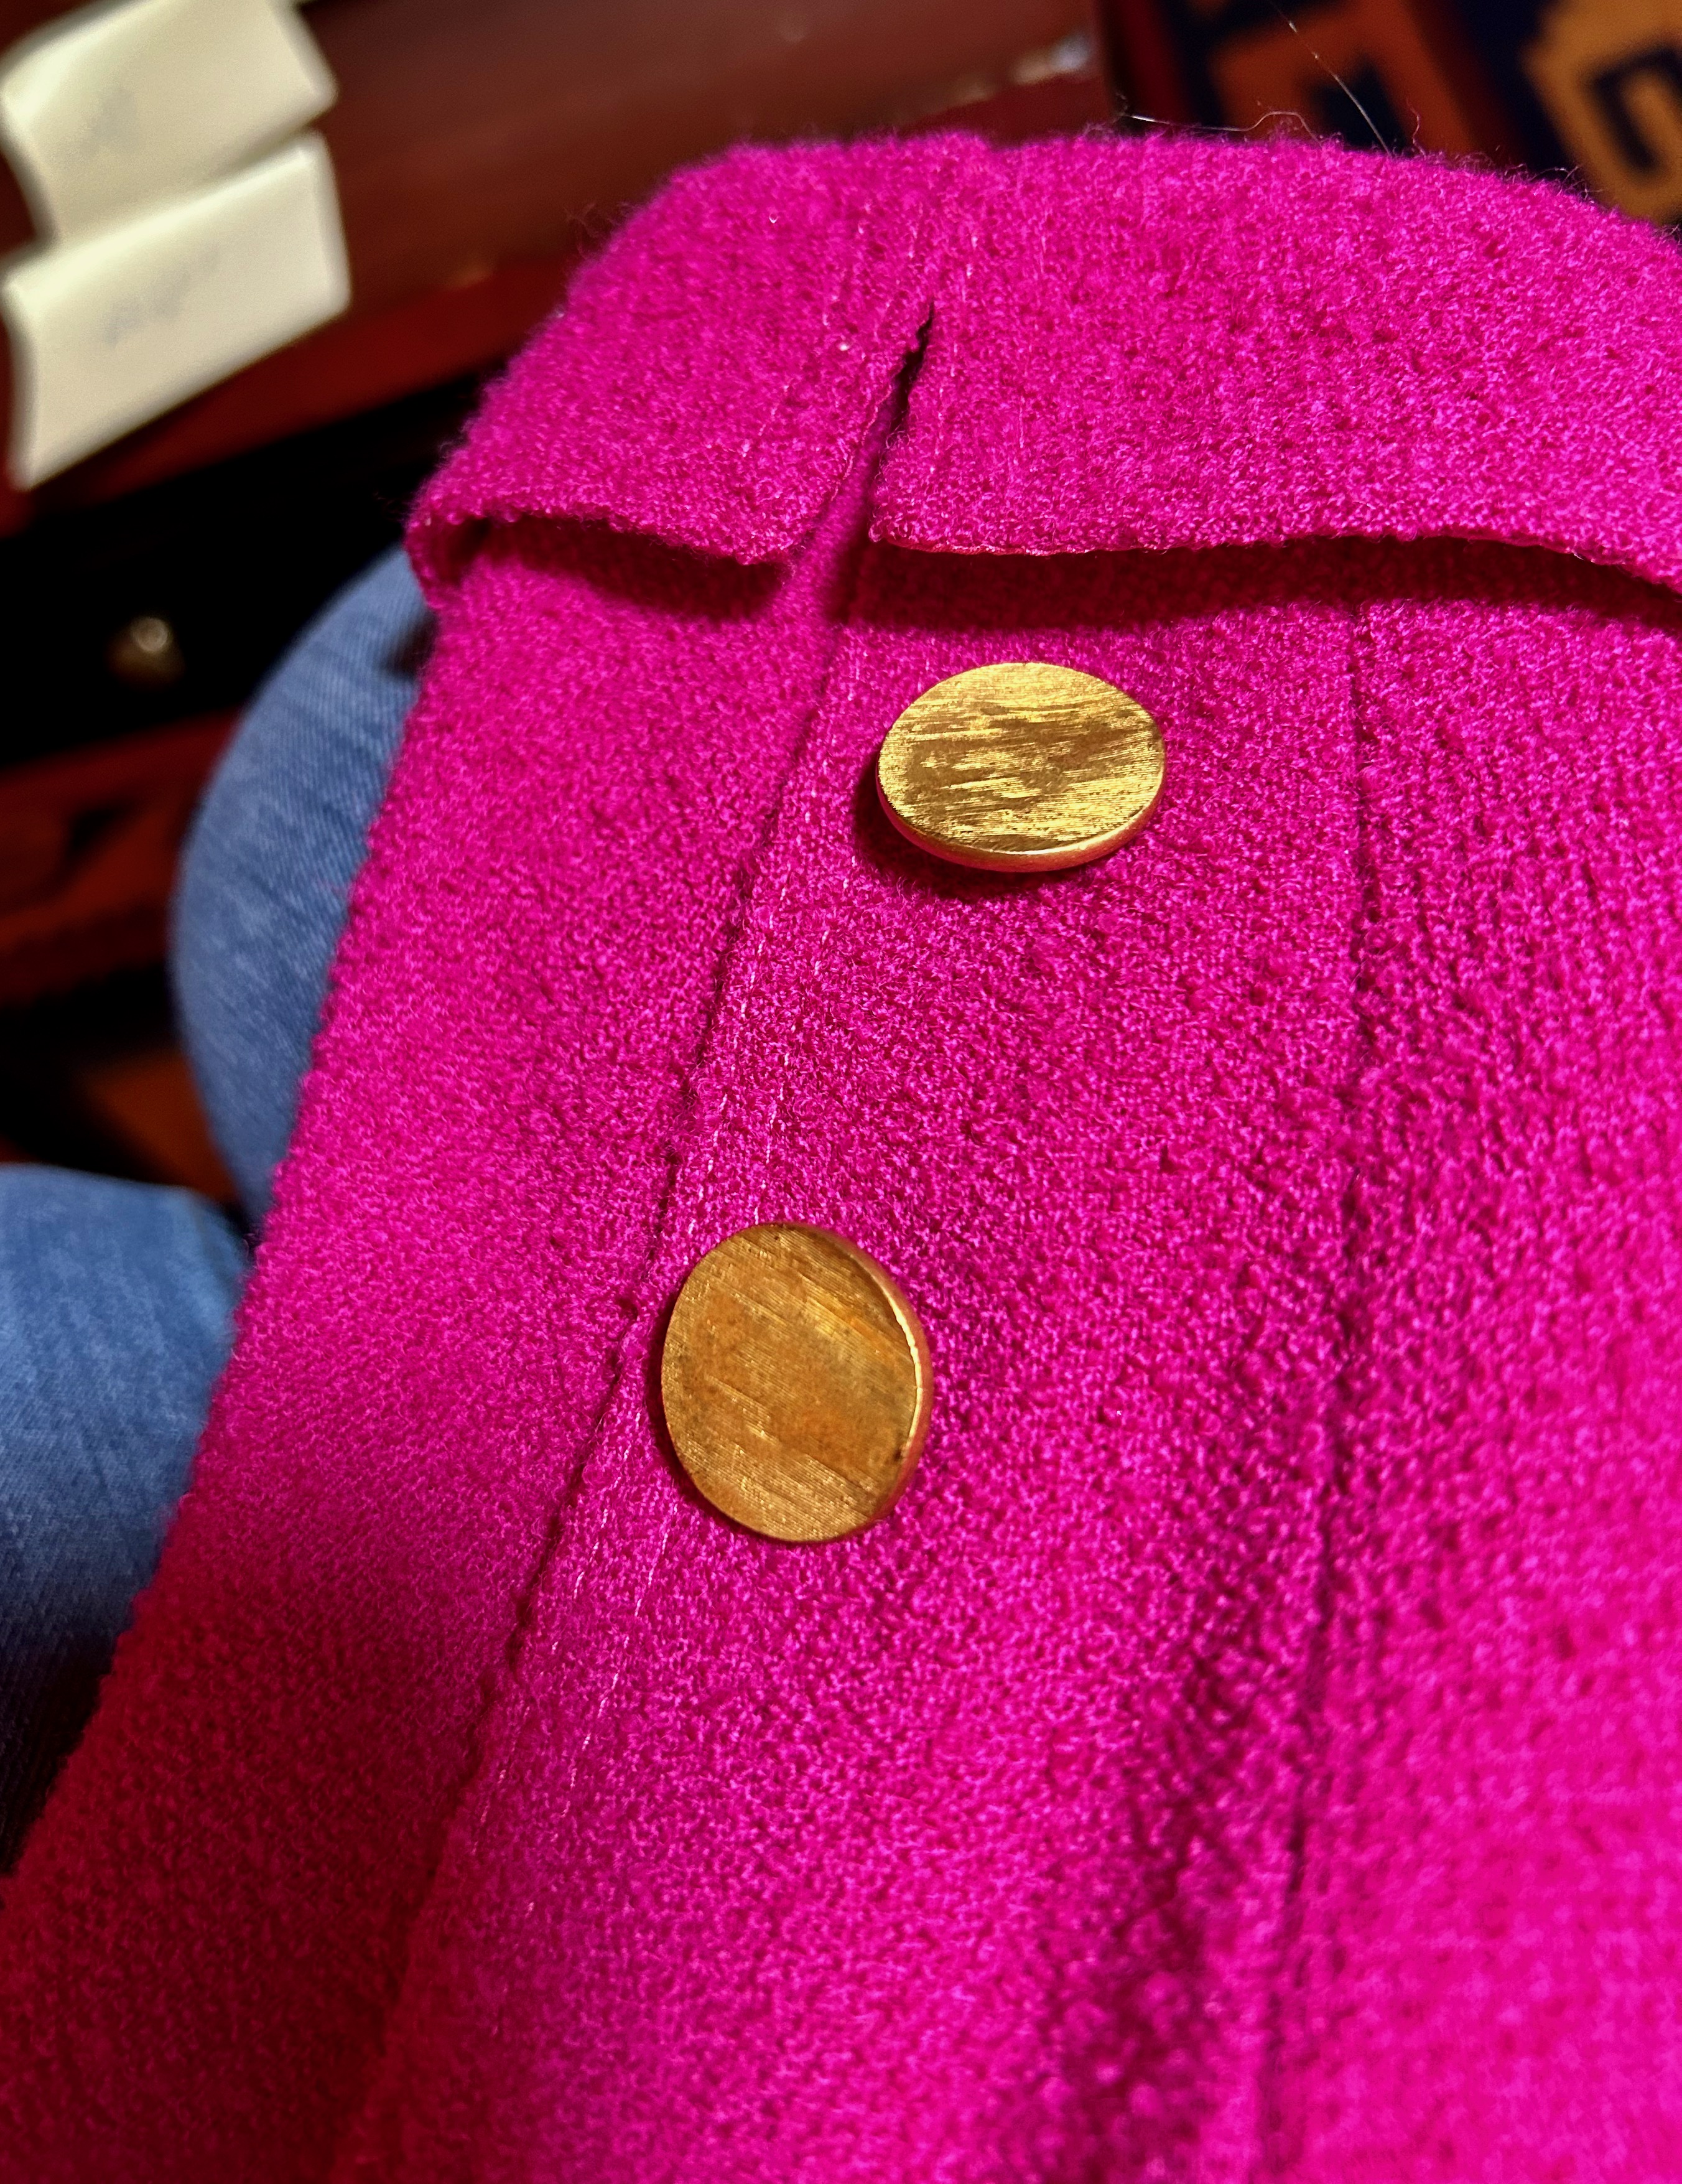
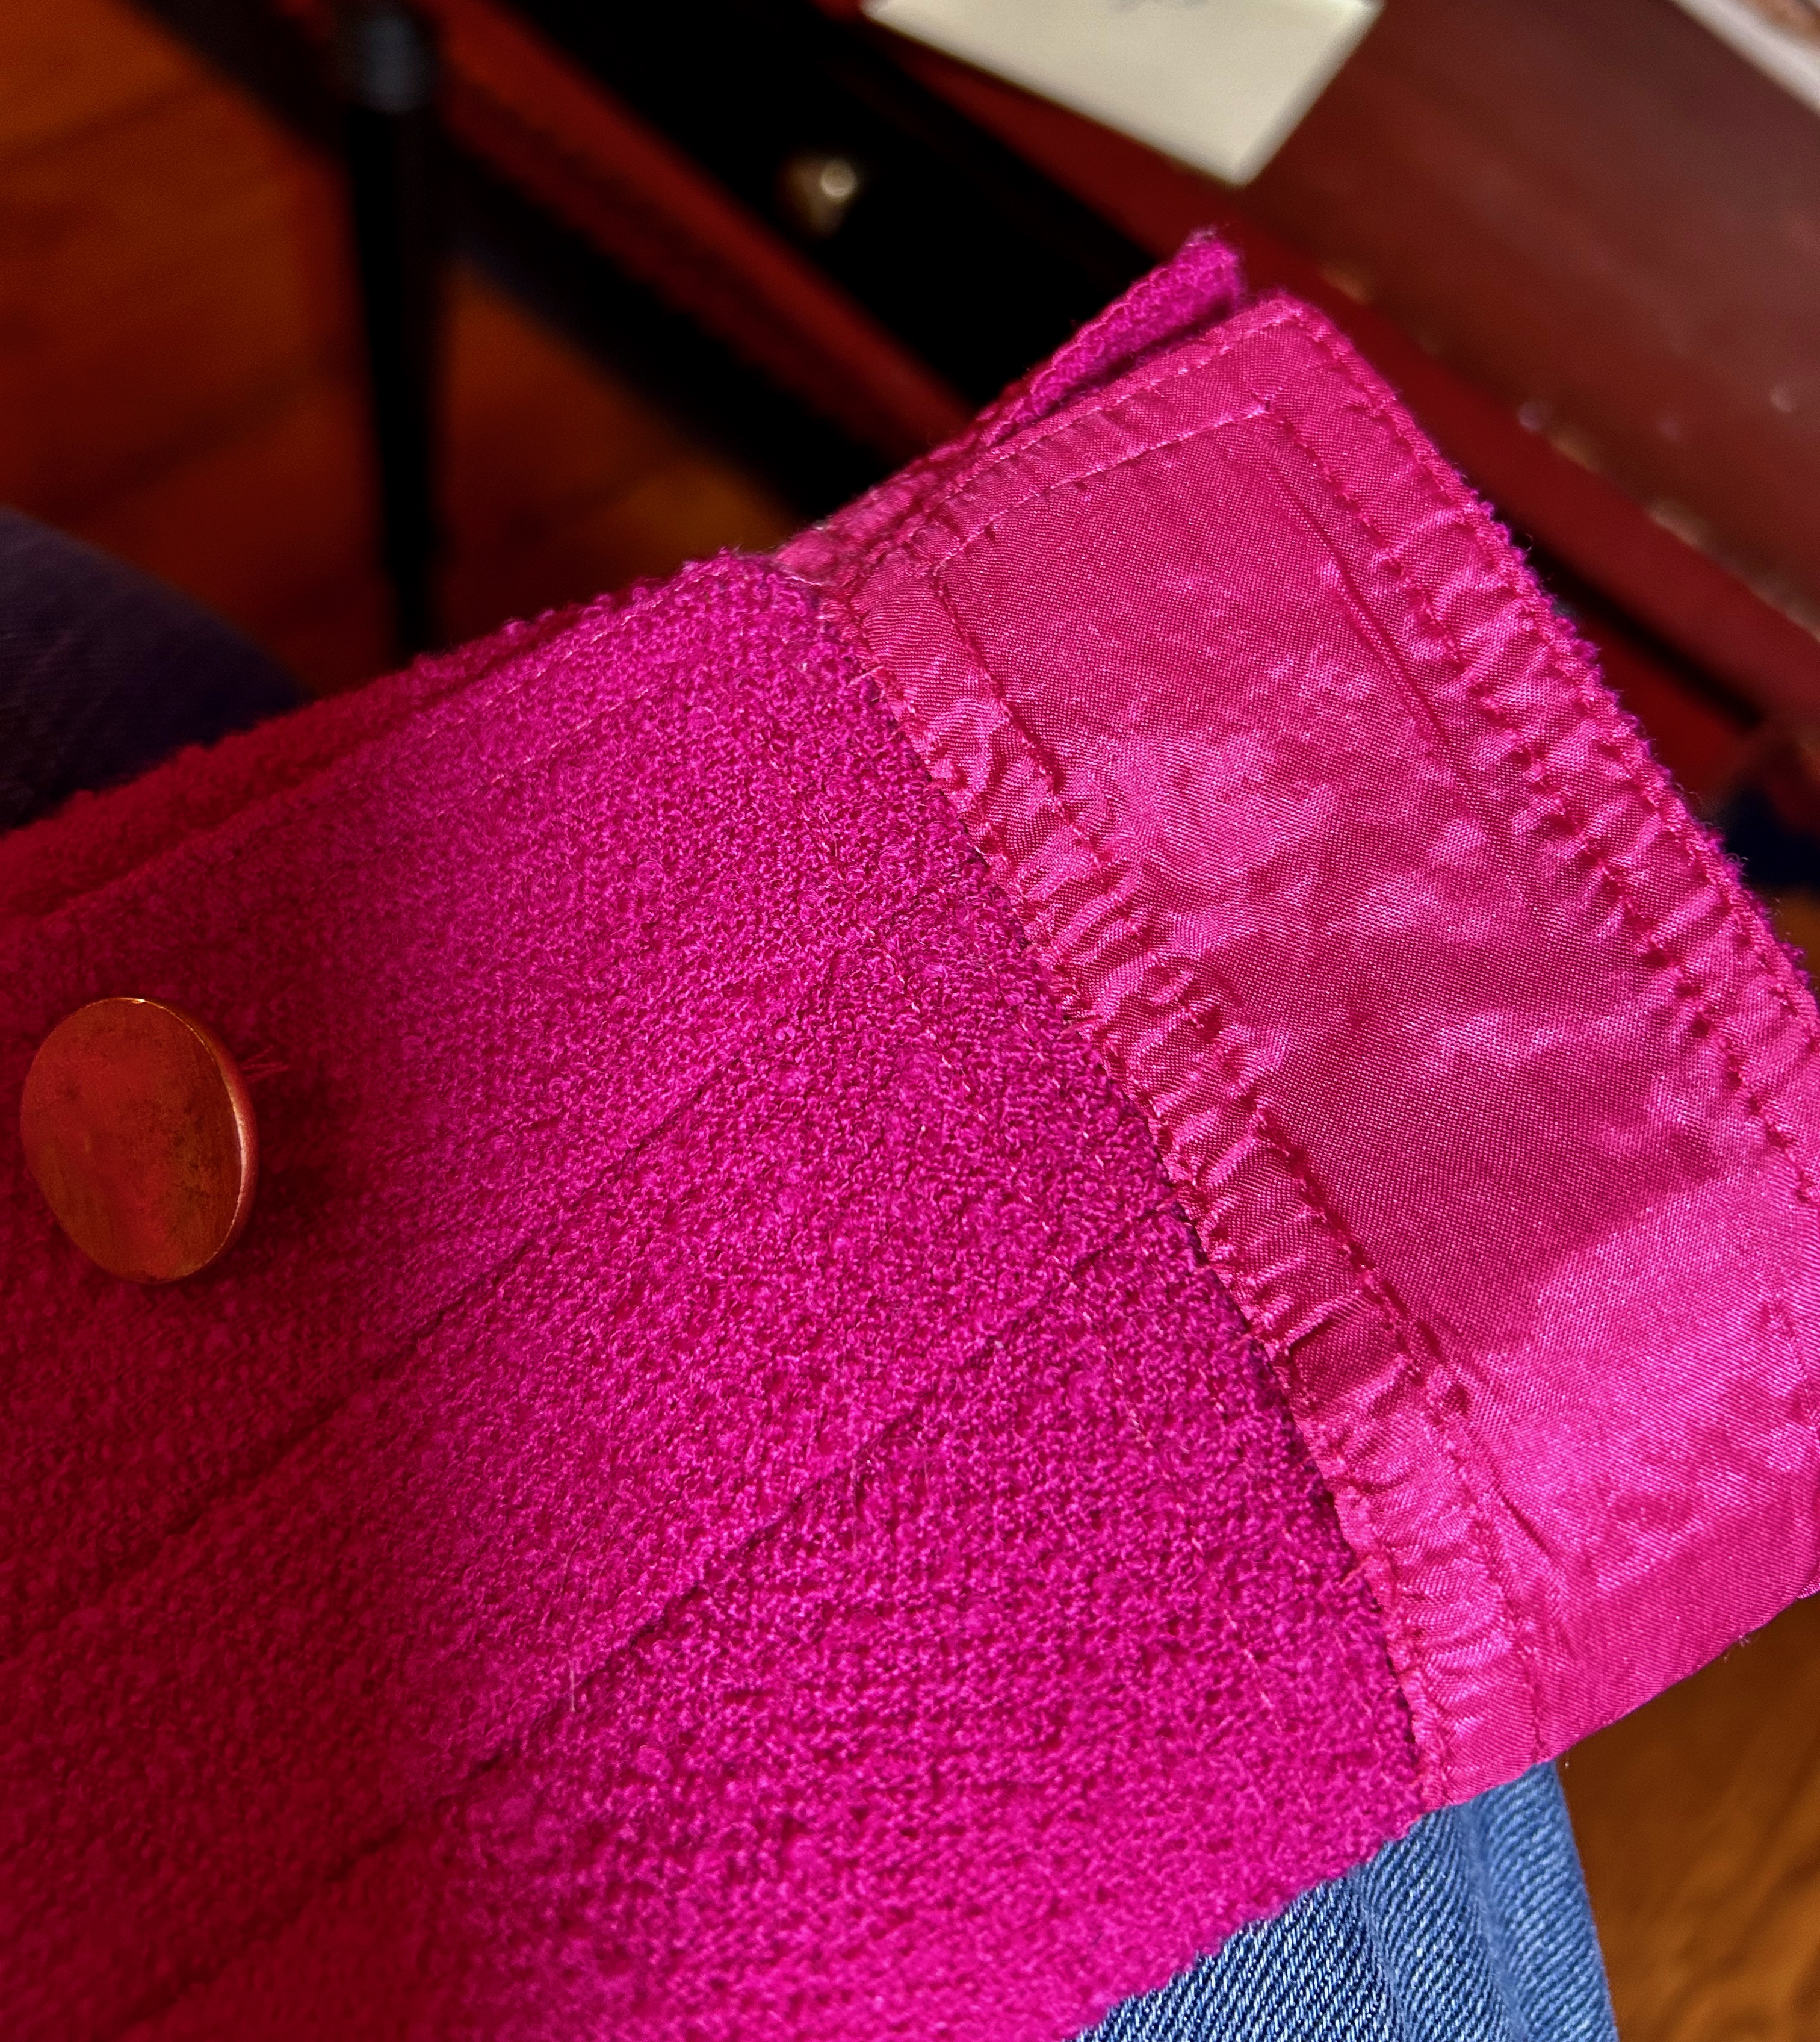
I buckled down and removed the cuff on the first sleeve.  I had determined I needed to reduce the sleeve length by 7/8 of an inch.  I was worried the circumference of the sleeve end might “grow” enough to make the applied cuffs too skimpy.  By now I was asking myself how I got myself into this?  I was spending all sorts of time on this jacket when I had whole garments to sew.  But it was too late to back down at this point.  I  cut off the necessary length from the sleeve and its lining, stitching them back together by hand.  I then had to redo some top-stitching and found some thread which was a close match to the existing thread.   Then I re-applied the cuffs by hand.  Fortunately, they were split cuffs, so they had some “give” and molded nicely to the slightly larger circumference of the sleeve.  

One down and one to go before I could respace the buttons above the cuffs.  

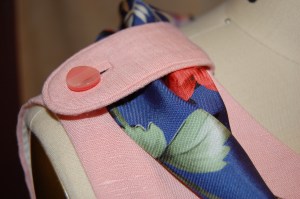
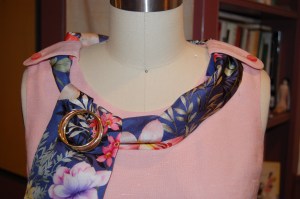
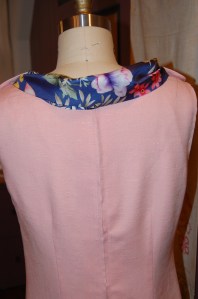
With that jacket ready to go to Paris, I finally was able to turn my attention to that dress I wanted to make.   Some of you may remember seeing this cotton sateen/jacquard fabric mentioned in a prior post.  I had debated whether to make a dress or a long skirt with it, but ultimately decided on a dress as I thought I would get more wear out of it that way.  

I thought this would be the perfect weight and fabric for early spring in Paris – not too heavy and not wintry looking.  I envisioned wearing this to the fashion show which we would be attending one evening at a private apartment.  So much for those plans!  Our schedule that day did not allow us to return to the hotel to change clothes.  We would have to wear our out-and-about day clothes into the evening.  

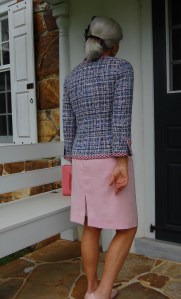
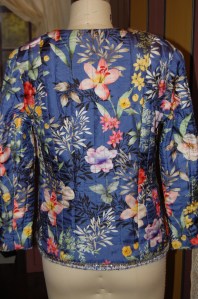
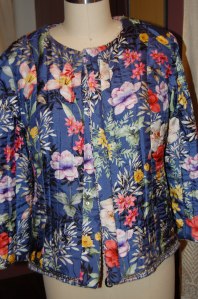
I went to Plan B and wore this jacket I had made several years ago.  I paired it with navy slacks, a pale pink blouse, and a scarf which matched the lining of the jacket. I carried along a change of shoes to look a little dressier and that was that!  

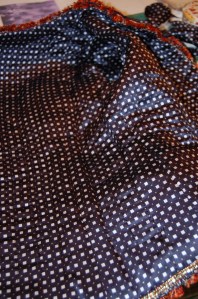
So what about that navy blue polka-dotted dress?  Yes, I did finish it.

It’s still a little wrinkled from being packed!

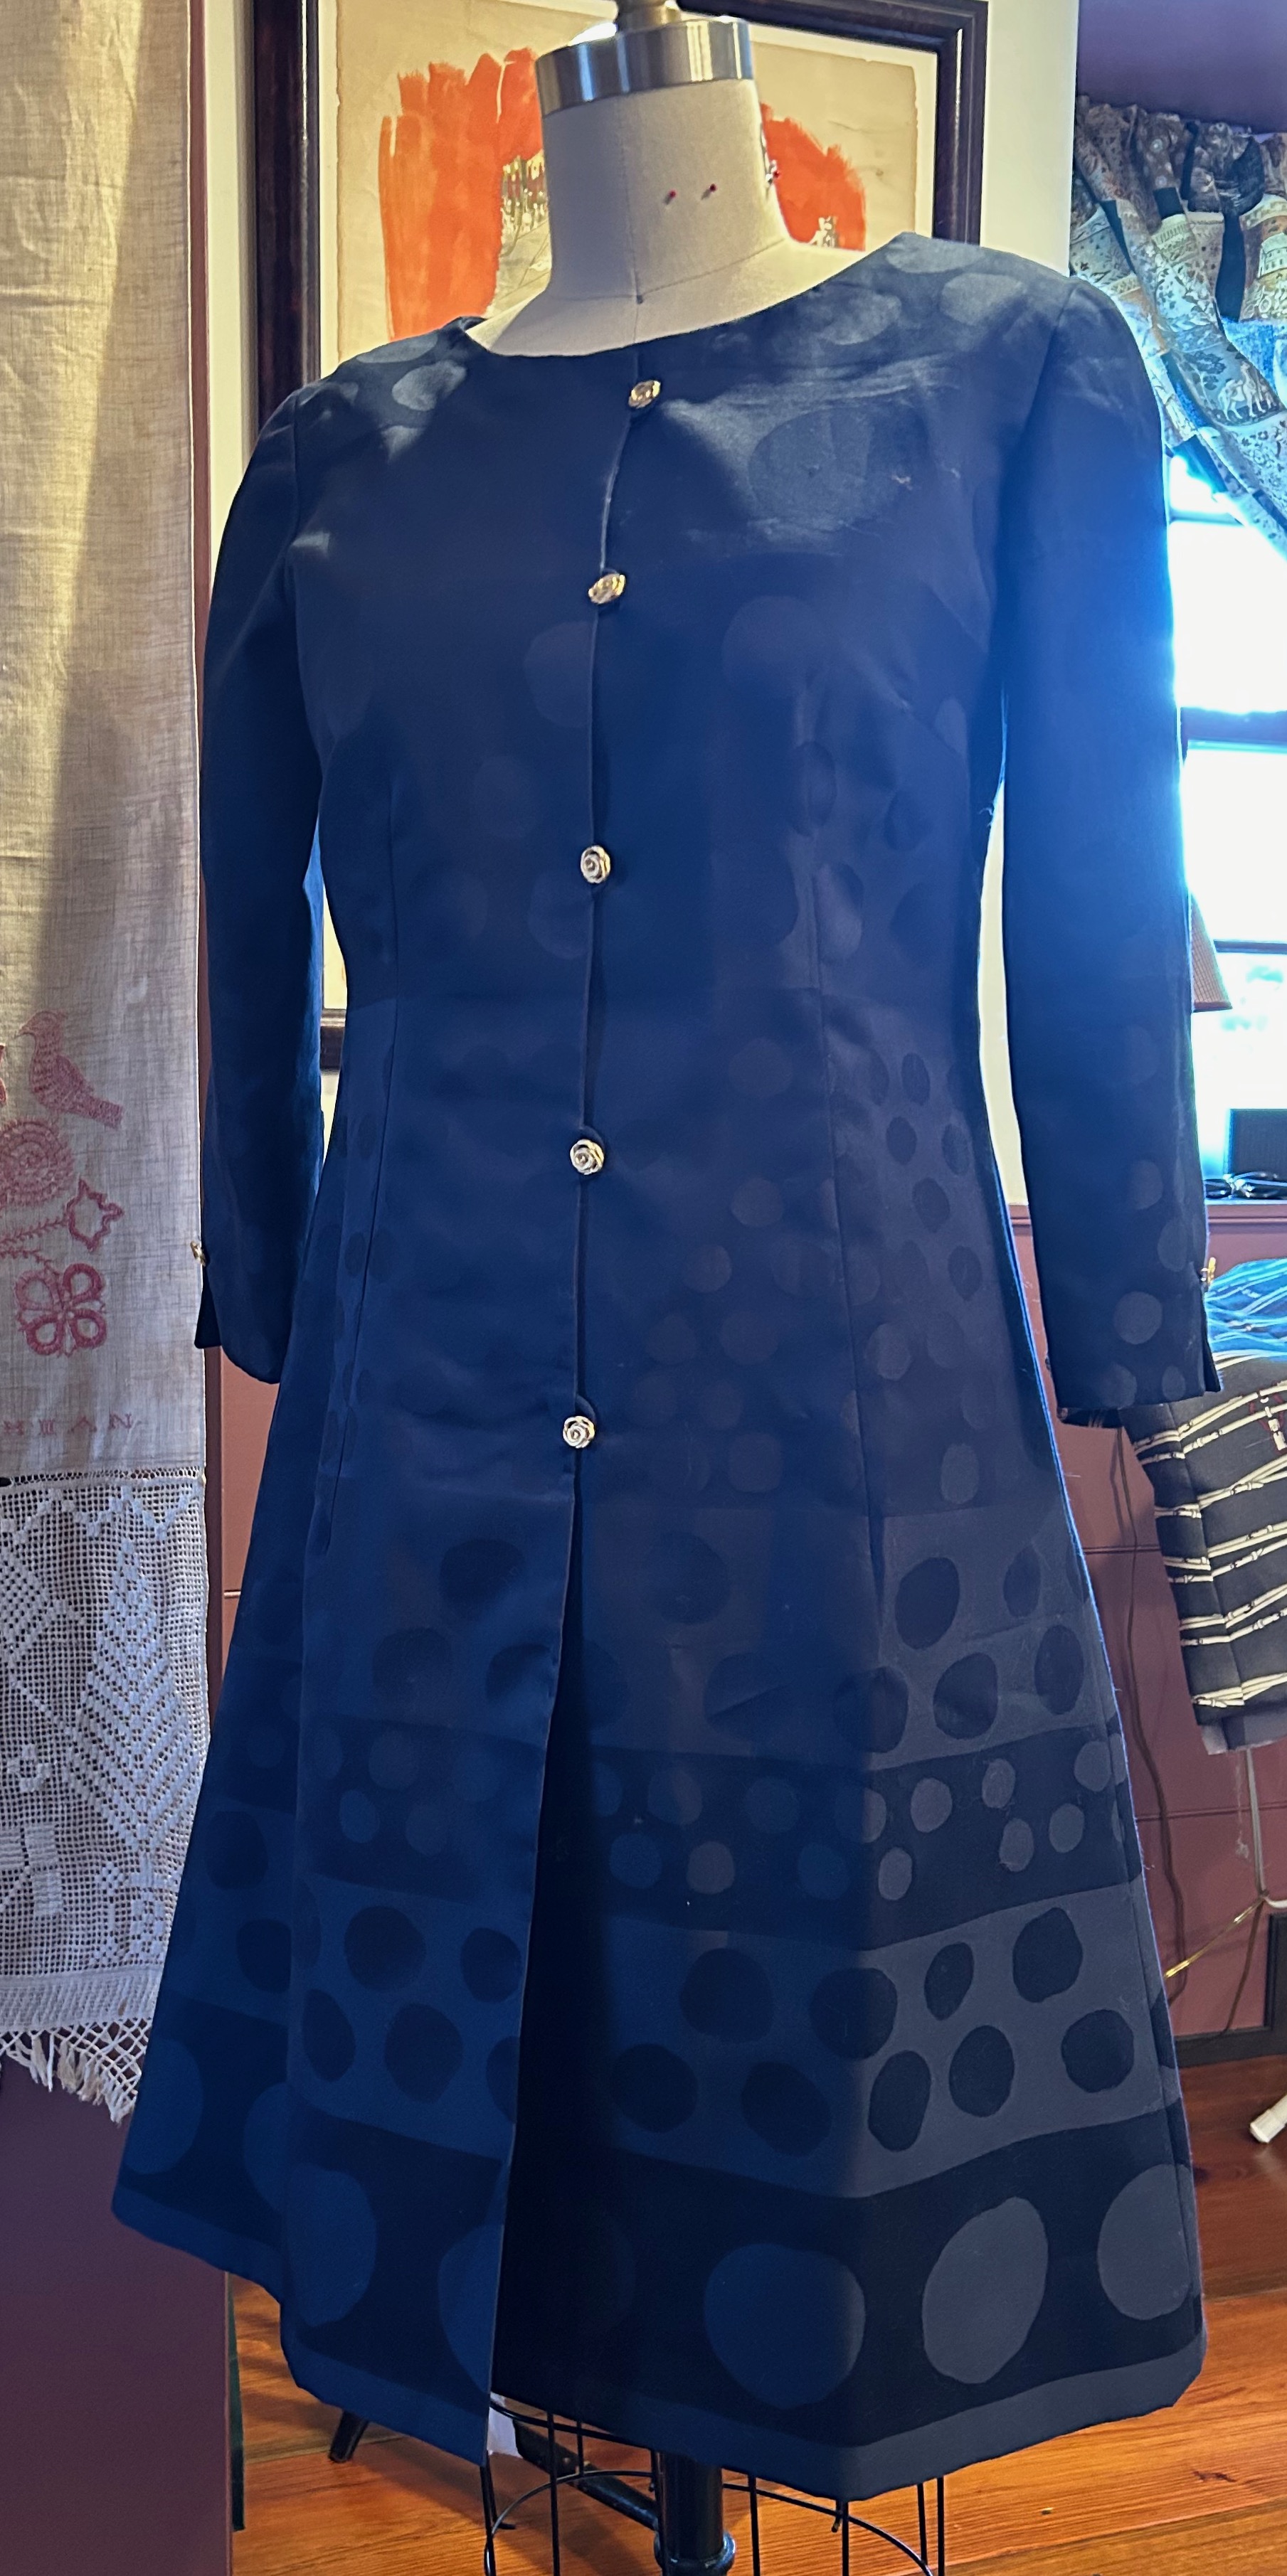
I carried it all the way to France for 15 days and back home again and never wore it…  More about it in a future post.  

29 Comments

Filed under Chanel-type jackets, classic French jacket, Day dresses, Polka dots, Sleeves, Uncategorized, vintage Vogue patterns from the 1960s

Too Late – or Too Early?

This sewing out of season is perplexing.  On the one hand, I am happy to have been able to complete this dress.  But on the other hand, the timing of its completion means it is too late in the season to even think about wearing it – or much too early.  Not that it will matter six months from now. 

After my successful use of a new sheath dress pattern earlier this winter, I was anxious to use it again.  And I just happened to have a piece of cashmere herringbone wool tucked away for such an occasion.  I had been on the hunt for a wool to coordinate with the Classic French Jacket shown, and I was quite excited when I found this selection at Farmhouse Fabrics.  The bonus was the fact that it is cashmere, and oh, so soft.  

Wool is quite possibly my favorite fabric on which to sew.  Christian Dior certainly had kind words to say about wool in his Little Dictionary of Fashion.  “Wool shares with silk the kingdom of textiles…  And like silk it has wonderful natural qualities.  Always before you cut woolen material it has to be shrunk to avoid disappointment afterward.” [I always steam wool fabric heavily before I cut into it for just this reason].  Dior continues, “Wool has the great advantage over all other materials in that it can be worked with a hot iron and molded.” (The Little Dictionary of Fashion, by Christian Dior, Abrams, New York, New York, c2007, Page 122.)  

Additionally, I have always loved the herringbone weave.  The chevron pattern in this particular fabric is achieved by the use of two contrasting colors, yellow and pumpkin, which produces the lovely and soft deep persimmon color.  

The two contrasting colors are apparent in this photo.

Making this sheath dress was very straightforward, its details identical to the sheath dress which preceded it:  lapped zipper, underlined with silk organza and lined with crepe de chine, under-stitched neckline and armscyes, and a real kick pleat.  

I chose this delicate crepe de chine for the lining. I purchased it from Emma One Sock, which has a beautiful assortment of silks suitable for linings.
Oh, how I love this kick pleat.

This jacket and skirt will be perfect for Fall – and I am delighted to have a dress to wear with my jacket which I completed two years ago.  

And now for those of you who like to see the sewing I do for my granddaughters, here are two more dresses which were definitely too early (although on time for Spring birthdays.)  Unseasonably cold Spring weather kept these dresses on their hangers apparently, but I do have pictures of them before they went on their journey across many, many miles to their final destination.

I found the fabric at Emma One Sock last Fall.  It looks and feels like Liberty Lawn but is not.  The bordered eyelet which I used for the collars is from Farmhouse Fabrics, as is the pattern, which I have used before.  (This is the last year for this pattern for my girls, as I used the [largest] size 12 for my very tall and slender eight-year-old!) 

This diagram helps to show the details of the pattern. Notice the narrow darts in the bodice, which gives such a nice degree of shaping. This is the type of detail found on well-engineered patterns, of which this is one.

The buttons are vintage Lady Washington Pearls.  The pale pink rickrack is also vintage – and 100% cotton – which makes it lay beautifully flat, molding itself with the cotton fabric.   


Beautiful vintage buttons like these are a good match for this timeless pattern.
Such lovely eyelet and just the perfect weight for gathering into a collar.

So quickly these weeks turn into months and then into seasons! Whatever the season from whence you are reading this, I wish you dresses which are just right!  One of these days, mine will be, too.

13 Comments

Filed under Buttons - choosing the right ones, Chanel-type jackets, Christian Dior, classic French jacket, couture construction, Eyelet, Sewing for children, Sheath dresses, Uncategorized, vintage buttons, vintage Vogue patterns from the 1960s, woolens

Classic French Jacket – Number 5

Never did I imagine that when I last wrote about the progress on this jacket, it would be an entire month before I could declare it “finished.”  But such is a fact of life with the construction of one of these jackets.  They always seem to take much longer to complete than ever imagined.  (I should remind myself that during that month, I also made a wool skirt and I was away twice on short trips, but still…)

As this is the fifth one I have made, I can safely say that I have developed my own set of tips for working my way through the lengthy construction process.  Of course, it all has to start with a pattern which is a perfect fit.  Fortunately my muslin pattern is from a Jackets Class I had with Susan Khalje over five years ago. With this pattern, I can go right to my boucle and get started.

While it is often recommended to cut out just the body of the jacket, minus the sleeves (the variegated weave of which is then checked with the constructed jacket body before cutting them out), I have developed enough confidence that I cut out my sleeves along with the body of the jacket.  This allows me to make the sleeves first.  For me there are two advantages to doing this: 1) there is a psychological benefit in knowing that the sleeves are lined, linings are fell-stitched in place, trim is on, and the sleeves are as finished as they can be before setting them into the body of the jacket, and 2) I like to trim the sleeves first, as a way of testing the trim I have chosen.  If I do not like it, I only have trim on one, or two, sleeves which must be removed.  It is also much easier to sew trim on a sleeve which is still separate from the jacket.

Another tip I have learned is to use my walking foot not only for the channel quilting of the lining and fashion fabric (a must), but also for all the seams.  I pin profusely, but the walking foot helps to keep the fabric from slipping, crucial when matching all those lines and plaids prevalent in a typical boucle weave.

I chose this navy and white silk charmeuse from Britex Fabrics for my lining fabric. The boucle is from Mendel Goldberg Fabrics.

I really went round and round with the trim for this jacket.  I knew I wanted to use self-fringe, but I also knew it would need some definition added to it.  After trying several colors of velvet and Petersham ribbon in the trough of the fringe, I realized I would have to go to a bright orange as an underlay for the navy twisted braid I wanted to place on top.

The trim was applied in three steps. Here the fringe is attached as the first step. Not too exciting all by itself.

The next step was to apply this bright orange velvet ribbon, also from Britex. It was really a leap of faith to use this very demonstrative color. It looks fairly garish like this! (I sewed each edge of this ribbon separately, so twice around for this part of the trim.)

But once the navy twisted braid is on, step number three, that bright orange underlay is fine.

One thing I have done with all my jackets – and this is a tip from Susan Khalje – is to add about 1/2 inch in length to the center back of the jacket, curving it up gently to the side seams. I love the effect that this little bit of extra curve gives to the back of the jacket.

I always wax and iron the thread which I use for applying the trim.  It adds strength, but also is easier with which to work.  For this jacket, I also carefully ironed each “level” of trim as I applied it.

A detail of the right pocket. Of course, and this is preaching to the choir, the pockets absolutely cannot be cut out until the body of the jacket is completed. Their placement is a visual determination which really depends upon the fit and appearance of the finished jacket.

I found these vintage buttons in one of my button boxes.  I knew I wanted to use dark blue buttons, and I kind of liked the appearance of these.

The only hesitation I had is that they are plastic!  It seems a bit of a sacrilege to put plastic buttons on one of these jackets, but I actually think they look okay.  If I find other navy blue buttons in my future travels, I might switch them at some point.  But right now, they work.

Because I had only 8 buttons, I was limited to two pockets, and three buttons on each sleeve. I probably would not have put four pockets on this jacket anyway, so that was not really a compromise.

I have enough of the boucle left over to make a simple straight skirt, I think.  However, that will not happen this year!  I am so ready to move on to my next project.  In fact, it may be well over a year before I plunge into another one of these jackets.  I have but one other boucle lurking about in my fabric closet right now, and I am content to let it stay there for a while.

It was much too cold for outdoor pictures, so these will have to do!

I like the jacket worn closed …

… or open.

The curve of the back hem is apparent here.

Now it’s time to tiptoe ever so quietly into the lighter shades and fabrics of early Spring, despite the snow that is currently falling. I am so happy to have this jacket in the “finished” column.

40 Comments

Filed under Boucle for French style jackets, Buttons - choosing the right ones, Chanel-type jackets, classic French jacket, couture construction, Linings, Uncategorized, vintage buttons

Something Old is New Again – and Again – and Again . . .

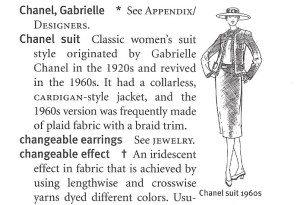
Coco Chanel said it herself, “I am against fashion that doesn’t last.”  Could she possibly have known her Classic French Jacket would become such a lasting icon in the annals of fashion and style?  Would she be amazed at how often her jacket has been imitated and copied – for decades now?  And could she possibly have ever guessed the allure this style has for those of us who sew fashions for ourselves?

I really do not know the answers to these questions.  From what I do know of this enigmatic woman, I can only guess that privately she may have suspected her creation had staying power far beyond most fashions. And certainly, as I have said before, “only Chanel is Chanel,” but what a blueprint she gave to those of us, either as individuals or as fashion companies, to copy and to change and to make her classic jacket into our very own.

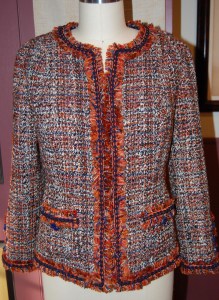
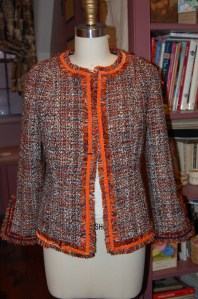
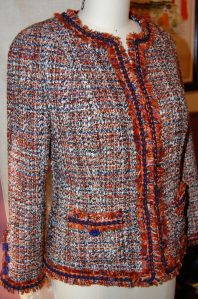
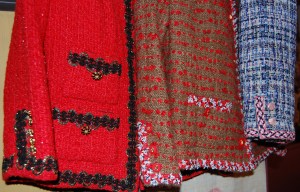
I have been thinking about Coco Chanel quite a bit these days as I work on my fifth Classic French Jacket.    Last Fall,  about the time when I was getting ready to cut out my #5, The Wall Street Journal had this feature article on “Chanel-ish” jackets.

This article appeared in the Weekend Section of The Wall Street Journal, October 27 – 28, 2018. The center caption states: “8 Chanel-ish jackets that aren’t by Chanel, demonstrating the pervasiveness of Mademoiselle Coco’s enduring – and constantly reimagined – tweed jacket design.”

The featured  jackets range in price from a “zara” version at $129 all the way up to a Gucci one at $13,500.  I suspect few, if any, of these jackets are channel quilted as a real Chanel would be, but they all have that familiar, yet varying look that is so recognizable – the tweed or boucle fabric; the embellishment in the form of fringe, trim, and buttons; the boxy or minimally shaped profile; the symmetrical, balanced demeanor; and the ability to be worn casually or dressily.

Just about any women’s fashion catalog you open has examples which relate to Coco Chanel’s jacket. For example, in the span of just three pages of a recent Gorsuch catalog, four jackets have that classic Coco look.

A longer version of the classic jacket, its roots are immediately recognizable.

Another longer jacket which would look equally at home with a lace dress or, as shown, with denims.

And a traditional shorter jacket, shown in two colors. All these examples are in the Gorsuch GETAWAY catalog, Winter of 2019, pages 30-32.

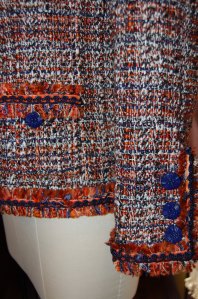
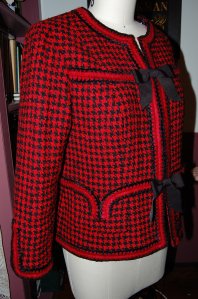
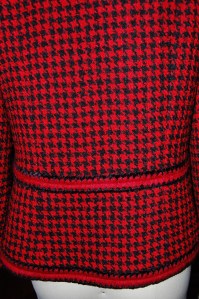
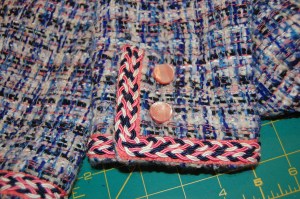
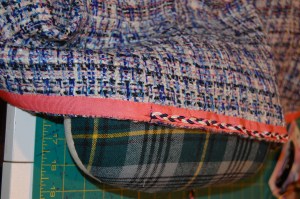
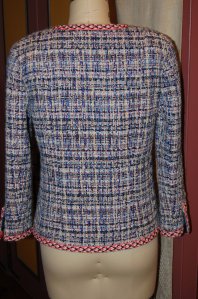
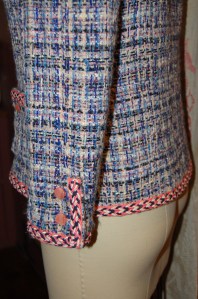
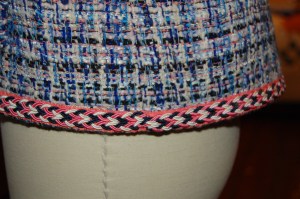
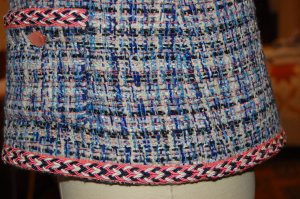
Those of us who make our own Classic French Jackets are privy to the reality of hours of hand-sewing and unusual construction techniques inherent in one of these jackets.   These are not fast projects.  However, the pleasure of taking this classic design and having the stylistic freedom to choose and decide on all the components, while adhering to the “rules” of the basic style, make all those hours worthwhile.

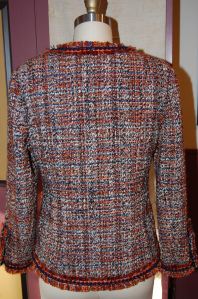
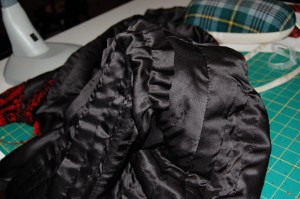
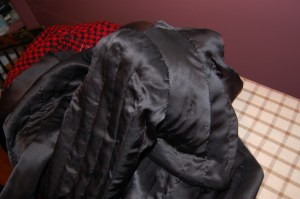
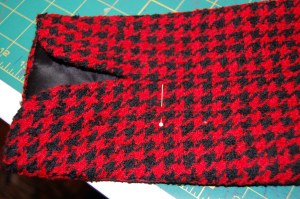
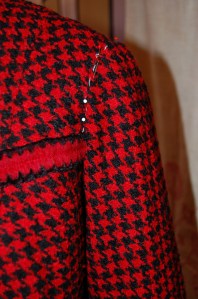
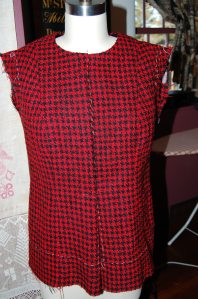
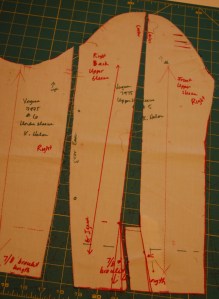
Or so I tell myself! Here is where I am with my #5: quilting completed, lining fell-stitched in place as much as possible, sleeves assembled and ready to sew onto the body of the jacket.

Here the right sleeve is just pinned at the shoulder.

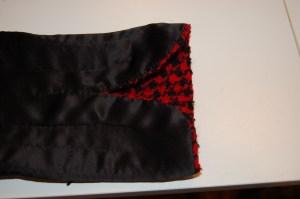
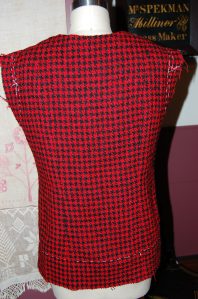
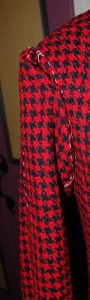
It is always a relief when I am sure the sleeves are going to match the plaid of the body of the jacket.

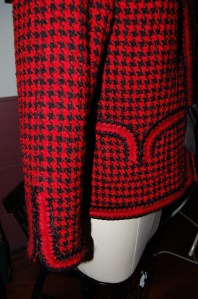
There is something about the shaping of these three piece sleeves, with vent, that is just so lovely.

I am still deciding on trim for this jacket, although I believe there is going to be fringe on this one.  Perhaps a two-sided fringe with a pop of coordinating color between the edges.  It would be fascinating to know what would Coco suggest.  But then, it is such personal decisions which give these jackets their individuality.

I will be deciding on either Petersham ribbon or velvet ribbon as the underlay in the center trough of the fringe. It has been quite a search for the best color to use.

Coco Chanel was also known to have said, ”One cannot be forever innovating.  I want to create classics.”  Well, that she did with her classic jacket.  And we are all the beneficiaries of her genius.  Her idea, hatched in the 1920s, then defined to its current look in 1954, is an old idea which is continually reimagined and reformulated by those of us fortunate enough to sew.  Merci, Mademoiselle Chanel!

23 Comments

Filed under Chanel-type jackets, classic French jacket, Coco Chanel, Fashion commentary, Uncategorized

Classic French Jacket – Number Four

Many of you, no doubt, are familiar with the “10,000 hour” theory. In a nutshell, it purports that to master something, artistically or technically, you must devote at least 10,000 hours to that endeavor (assuming you have a proclivity for it in the first place.) Well, cognitively I know I have a long way to go towards having 10,000 hours devoted to these Classic French Jackets, but it sure seems like I just devoted at least half of those hours to my current, just-finished jacket!

That said, I was aware of an interesting phenomenon as I plugged away on this project. I felt more confident in the process on this one – and more confident in my ability to execute it well. I noticed this especially when I got to the point of inserting the sleeves. The sleeves are, as many of you know, inserted entirely by hand. In previous jackets this has always been my least favorite part. For one thing, you are working within the confined area of the armhole, with lots of very wide seam allowances and “flapping” fabric. It is messy, but precision is necessary to get a beautiful shoulder line and a sleeve that fits well and feels comfortable.   This time it did not feel like an imperfect process; I actually felt like I knew what I was doing!

Getting ready to insert one sleeve.

Voila! It’s in.

Perhaps another of the clues to my feeling more confident in the process of this jacket is the fact that I felt I could take it in a little bit of a new direction. The most obvious departure from the norm is the fact that it has no buttons. Having seen some of the real Chanel jackets in my Pinterest feed that are embellished with bows instead of buttons, gave me the idea to change up this jacket. I really like bows, and I thought using bows would be the perfect foil to this rather regular, non-whimsical hounds-tooth boucle.

I also decided I would eliminate the sleeve extensions and go for curved hems, set off by the trim alone – no bows even for this professed lover of them, as I thought that would be just too much.

Before the trim is applied.

Here is what it looks like on the inside.

Another guiding principle I used for the embellishment of this jacket is the fact that I am planning a matching sheath dress for it. Obviously I want the two pieces to complement each other beyond the shared fabric, so the dress will be trimmed in a manner coordinating with the jacket. (These details will be shared in a future post when I have the dress underway. Eternally optimistic here!) Anyway, envisioning the jacket and dress worn together led me to add both the waistline trim and the trim above the bust (which is across the front only.)

First some details on the waistline trim: I set the pockets to follow this line; the trim is continuous across the top of the pockets (which pick up the curved hems of the sleeves.) I gradually dipped the back edge of the jacket by ½ inch in the center back (a couture technique I picked up from Susan Khalje) and had the waistline trim follow that contour, which I think adds a very graceful look.

I sewed the pocket linings by machine, as that gave the curved dip a better turn. I sewed first along the stitching lines and then cut the curve.

The slightly curved back of the jacket.

Second, I decided I needed the trim across the upper bust as an anchor for the bow I had planned. Obviously I had to set this trim in place before I inserted the sleeves.

The left sleeve pinned in place, the trim already applied.

It was a difficult decision for me to forego a printed lining for this jacket, but I am so glad I did. The black charmeuse has been tiring to work on for my blurry eyes, but it just seems right in this application. And just think – now I have an entire dress to concoct using more black lining!

The boucle is from Mendel Goldberg Fabrics; the trim is from Britex Fabrics, and the black silk charmeuse lining is from Emma One Sock Fabrics.

Until the matching dress is finished, a black sweater and black skirt will have to do.

A red handbag is just what this rather dark and dreary day needs.

I will definitely be ready for some bright Spring colors when this entire ensemble is finished.

46 Comments

Filed under Boucle for French style jackets, Bows as design feature, Chanel-type jackets, classic French jacket, couture construction, Linings

The Essential Coat

How many coats do you own? (Not enough?) How many do you need? (More than you know!) Putting need aside, how many should you have? (Plenty!) In your sewing and in planning your wardrobe, do you give as much thought to your coats as you do to your dresses or pants or blouses? My guess is that you do not.

In our very casual world, coats seem to have taken on the essence of “practical” or “function over form.”   To me, this is such a shame, as I believe coats have an aura to them unmatched by any other garment. They are, after all, so often a significant part of the first impression you make when arriving at an event or party – or anything for that matter. A fantastic coat can also leave a lasting impression when departing such an event.

In her iconic book, What Should I Wear, Claire McCardell devotes an entire chapter to coats. Here is just a small snippet of her thoughts on the impression that your coat can make: “…Remember that a first impression often comes when you are wearing a coat. When you are interviewed for a job, you keep your coat on. Your future employer’s first impression of you may be based on the coat you are wearing.

When you walk down the aisle of a theatre, you are wearing a coat … your audience has already judged you and the most beautiful dress in the world cannot alter that first impression. Coats ride buses and subways and taxicabs…. A coat is not something to be dismissed lightly.”   (The Rookery Press, New York, New York, 2012, pages 61- 62.)

In The Little Pink Book of Elegance: The Modern Girl’s Guide to Living with Style, by Jodi Kahn, she writes: “Many an elegant look is spoiled by throwing on a coat or a wrap that is anything but . . . [I]f you think about the most elegant women you know, or those in the pubic eye, you’ll probably realize they have fabulous outerwear. In the ‘60s, Jacqueline Kennedy asked her designer of the day, Oleg Cassini, to pay special attention to what she wore over her clothes since she was always being photographed coming and going. Even if you don’t have to worry about getting your picture snapped around every corner, a few great coats will transform almost any [look.]” (Peter Pauper Press, Inc., White Plains, New York, c2005, pages 29-30.)

A beautiful coat can also hint at what is beneath it. One of the most elegant looks one can wear (and make for herself) is a matching coat and dress ensemble, where the two pieces are intended only to ever be worn with each other. Such a coat and dress often share similar style lines.   This Vogue Couturier Design by Mattli of London is an example of this:

Another example of a coat and dress with complementary style lines is this Vogue pattern:

And although the style lines of the dress and the coat in this Vogue Paris Original by Madame Gres are not matching, clearly the coat and dress featured in blue on the pattern envelope are intended as such an ensemble:

Here is an example of a formal dress and matching coat, sharing seaming details and clearly designed to go together. Would this dress be anywhere as exciting without its matching coat?

This evening coat makes my heart skip a beat!

Not every coat needs to match a dress, however. Here is a small sampling of coats, both dressy “dressmaker” coats and classy, more tailored coats, the prototypes of which have their rightful place in your coat wardrobe:

This is my original pattern from which I made the featured coat when I was in my mid-twenties. I loved this coat and only wish I still had it!

I am very anxious to make a coat from this pattern.

This is a beautiful example of a dressmaker coat.

Another dressmaker coat.

A coat better suited for everyday wear, but still beautiful.

One of the many catalogs we receive here at our home is the catalog from the J. Peterman Company. It is so creatively conceived and presented, with each entry reading like a mini story, and often evocative of other times and places. The “Owner’s Manual” (as the company’s catalogs are called) arriving during this past holiday season was no exception. Imagine my delight when turning the page to this entry for a “French Coat with timeless Parisian style.”

Click on the image to read its story.

But what really caught my eye was the caption at the top of the page: “I want to know the woman in that coat.” In a nutshell, that sums up the power of a beautiful coat. What fun to know that, as ones who can make our coats, we can also be the woman who made that coat!

And now, in deference to some of my readers who want progress reports on my Number Four Classic French Jacket, here are a few photos – and a short quiz for those of you who have never made one of these jackets, but hope to one day.

Here is the neckline, ready to be stitched.

I call this the “vest” stage. This is the front of the jacket . . .

And this is the back of the jacket.

It is always fun to pin the sleeves on quickly just to see a jacket taking form!

As you can see, all the machine quilting is complete. I’ve finished the interior seams as much as I can at this point. The next step is to insert the sleeves. Then I can complete the finishing work on the interior seams and the hems and get to work on the trim and the pockets.

QUIZ: How much more will I be using my sewing machine to do this work?

  1. a) only for the insertion of the sleeves
  2. b) only to make the pockets
  3. c) both for the insertion of the sleeves and to make the pockets
  4. d) not for anything

Back to Coats:  Are you ready to make one after reading this post? I hope so!

30 Comments

Filed under Chanel-type jackets, Coats, Dressmaker coats, Mid-Century style, Uncategorized, vintage Vogue Designer patterns, vintage Vogue patterns from the 1960s, vintage Vogue patterns from the 1970s

Number Four – But Who’s Counting?

One of my more fortuitous undertakings upon my return to fashion sewing early in the current decade was learning how to make a Classic French Jacket. I traveled to Baltimore, Maryland (USA) to take one of Susan Khalje’s week-long classes devoted to this iconic fashion, and I never looked back. As soon as I had finished my first one, I could not wait to start another one and then another one.

From left to right, my first, second and third jackets. I made a sheath dress out of the charmeuse lining fabric for the first jacket: a blouse for the second jacket, again out of the lining silk; and a coordinating linen dress and silk scarf for the third jacket.

Choosing and applying trim is one of my favorite parts in the process of making these jackets.

Of course, the Classic French Jacket is based on Coco Chanel’s original 1920s’ cardigan jacket, updated and reintroduced as the “Chanel suit” when she reopened her couture house in 1954. A “Chanel suit” usually “consisted of two or three pieces: a cardigan style jacket, weighted with her trademark gilt chain stitched around the inside hem, a simple easy-to-wear skirt, worn with a blouse, the blouse fabric coordinated with the jacket lining.” (The Saint James Fashion Encyclopedia by Richard Martin, Visible Ink Press, Detroit, MI, c1997, page 81.) As I have said before, “Only Chanel is Chanel.” But a classic Chanel jacket is undeniably the prototype for the Classic French Jacket.

What a succinct and perfect “thumbnail” description of a Chanel Jacket. (The Fairchild Dictionary of Fashion, Third Edition, by Charlotte Mankey Calasibetta and Phyllis Tortora, Fairchild Publications, Inc., New York, New York, 2010, page 65.)

It is such a clever design, with some basic building blocks: 1) boucle fabric, the “sponginess” of which is necessary to help hide those quilting stitches which hold it to its silk lining fabric, 2) coordinating charmeuse/silk for that lining, 3) coordinating or contrast trim/trims, 4) usually fasteners of some sort, 5) a weighted chain for the hem, and 6) a pattern which includes three piece sleeves. One of its main charms, particularly for dressmakers, is the opportunity it gives to make a unique, creatively conceived jacket, whose “heritage” is nonetheless instantly recognizable.

As planned, after finishing my “Champagne Dress” in the first half of January, I brought out my red and black houndstooth boucle to get started on my fourth classic French jacket.

I decided to use plain black charmeuse for the jacket lining. I also plan to make a sheath dress out of the boucle to match the jacket. And I am quite excited to have found this trim!

As luck and life would have it, I then ran into a “snag” for three weeks, which I will not go into, but suffice it to say, I have just returned, finally, to serious work on this jacket. So – I am little behind where I wanted to be – but excited to see some progress and enjoying the process very much.

The quilting is complete, and now onto sewing the seams and finishing them.

Because I have written about making these jackets in previous posts, I certainly do not want to bore my readers with more of the same. To help fill the “space,” I plan to do a couple posts about other sewing and fashion subjects near and dear to my heart – and maybe a few updates on Number Four, too!

28 Comments

Filed under Boucle for French style jackets, Chanel-type jackets, Coco Chanel, Uncategorized

A Rosy Sewing Year

It seems that every new sewing year – at least for me – does not start right on time, as I am always finishing up a project from the month of December. Such is the case in this early January of 2018. However, that does not keep me from planning and dreaming about the coats and jackets, dresses and blouses to come. I can’t help but think of the new year at hand as a “rosy sewing year,” because the fabrics that are in my queue right now share a common theme – so many are predominantly red or pink or peach or floral, a bouquet of colors and textures.

First up is this red and black “hounds tooth” boucle which I found at Mendel Goldberg. Yes, it will be a Classic French jacket, with a sheath dress to match.

I am planning some variations in detail and trim for this jacket and dress, about which I am excited. It is a big project, so I hope January gives me lots of sewing time! No doubt this will spill over into February…

As I mentioned in one of my December posts, I hope to make a coat from this vintage purple boucle I am so fortunate to own.

A few years ago I found this silk charmeuse (also at Mendel Goldberg) which I intend to use for a coordinating dress with the coat.

Other silks I would love to concentrate on this year are purchases made several years ago from Britex Fabrics in San Francisco:

This is a French crepe de chine.

This silk helps satisfy my penchant for polka dots.

Then there are two linens I never got to in 2017, one a geometric red and the other a ecru and black floral. I assume they are waiting patiently for me. Add to all this my determination to sew for my two little granddaughters and – there’s the year! (And can I possibly finish another classic French jacket next Fall?  We will see.)

But let me complete 2017 first. Whatever made me think I should start (and could possibly finish) another dress for myself in December I will never know. But that’s exactly what went through my head. I had plans to make taffeta “Cinderella” dresses for my granddaughters for Christmas presents, but thought I would sneak in some personal sewing time before I started on that project. Perhaps it was the pattern that made me do it? Or was it the fabric?

When I purchased this pattern at the end of last summer, I really had no idea when I would be using it; I just did not want to miss the opportunity to own it, knowing that I would surely use it someday. Little did I know that someday would be just a couple of months later.

Now it just so happened that I had draped this fabric, below, over my dress form so I could admire it while I worked on other things. I purchased this silk charmeuse from Mendel Goldberg fabrics in 2016 as an end cut, three yards in length.

I knew with three yards I would be able to use a dress pattern which called for more than normal yardage, and I had found a pattern in my collection which I thought I would use:

My idea was to lengthen the sleeves to three-quarter length.

But something just did not seem right. I could not get excited about that pattern in that fabric, even with three-quarter sleeves. Well, I had one of those proverbial light bulb moments when it occurred to me to use the Guy Larouche pattern for the champagne-colored, floral silk. It seems to be a perfect match. The bodice of the pattern is cut on the diagonal, and the meandering flower and vine motif in the fabric lends itself to both straight of grain and diagonal placement. I made my muslin (with quite a few alterations) and was really quite excited about the draped back, shown here in muslin:

And here is the front, minus one sleeve. The front neckline is a bit unusual and I think it will be flattering.

I got as far as transferring the markings onto the silk organza underlining, cutting out the fashion fabric, and basting the two layers together, all ready to start sewing. Then reality hit like a sledgehammer! I had to get those dresses for my granddaughters finished in time for Christmas (which I did, after some frantic sewing – and they love them, which made it all worthwhile!)

Just in case anyone would like to see these dresses, here they are. Big bows in back, and the sleeves are adorned with little bows. Very girly!

So that’s how I am now at this point, finishing up 2017, with the hope of starting the new sewing year one of these days – with my Guy Laroche dress perched in my closet, awaiting its debut. May the New Year be rosy and kind to all of us, and may it end with many sewing dreams fulfilled!

25 Comments

Filed under Boucle for French style jackets, Chanel-type jackets, Coats, Linen, Moygashel linen, Polka dots, Sewing for children, silk, Uncategorized, vintage Vogue patterns from the 1960s

Jacket AND Dress!

One of the aspects of fashion sewing that appeals to me so much is how projects seem to take on a life of their own. By the time I have it finished, a piece rarely ends up being exactly how I thought it might be when I started it. Most of the time, that’s a good thing. (There are those flops, which are bad things, but thankfully this post is not about a flop.)

When I did the planning and started the construction of my recent Classic French Jacket, I really thought I would be making a pale blue linen sheath to wear with it, using fabric already in my collection. But somehow that pink accent in the weave of the boucle, the trim I selected, and the buttons, all conspired together and changed my mind for me.

Fortunately, I also had a piece of pale pink linen in my fabric collection (at this point, I might ask myself, what color linen do I not have in my collection? But let’s not go there….) By this time I had already decided I needed to figure out a way to show that gorgeous lining silk in my jacket, rather than having it solely hidden inside. Having seen accent scarves paired with Chanel jackets on Pinterest gave me the idea to make a scarf. Then I thought it might be fun to “attach” the scarf to the pink (planned) dress in some fashion.

I came up with buttoned shoulder tabs as a possibility. I had purchased eight small buttons for my jacket – three for each sleeve and one for each pocket, long before I had this idea. You might recall in my last post, that I decided to make the sleeve vents for two buttons instead of three? That’s where I found/got the two buttons I needed for shoulder tabs.

I ended up liking my two button vents!

The first tabs I made just did not look right. First of all, they did not turn well, with a pleasing curve And when I placed them at the neckline of my dress, all I saw were the seams.

I even finished the bound buttonholes before deciding I didn’t like these.

I had to think through lots of possible solutions and finally had a eureka moment when I thought of piping the edges.

Piping makes the sewn curve much easier to turn well.

So much better!

I placed the tabs slightly forward rather than exactly on top of the shoulder seam.

The rest of the dress was very straightforward, as sheath dresses tend to be. It is lined with a lightweight, cotton/linen blend, but I did not underline it, as I like to preserve the washability of most of my linen garments (easier without an underlining.)  It is also cooler without an underlining.

Being a lover of pink, I already had pink pumps that match the dress exactly – and a handbag which brings out the peachy part of the pink in the boucle.

The tabs on this dress give it kind of a ’60s vibe. Unintended, but kind of a nice touch to go with the jacket.

Because these two pieces – and this look – came together from so many sources, I think it is a good idea to give credit where credit is due:

Boucle: Mendel Goldberg Fabrics , NYC, gift from my grown children.

Soutache Braid and Buttons: M & J Trimming, NYC

Pink Petersham Ribbon: Britex Fabrics, San Francisco

Lining and Scarf silk: Britex Fabrics, San Francisco

Pink Linen: vintage Moygashel, 35” wide, purchased on Etsy

Cotton/linen lining for the dress: JoAnn’s Fabrics, purchased in bulk a couple of years ago

Shoes: Ferragamo, old!

Handbag: Kate Spade, also old.

I do love pink!

So that’s it! One major project now residing in my closet rather than in my sewing room. Time to start something new…

33 Comments

Filed under Boucle for French style jackets, bound buttonholes, Buttons - choosing the right ones, Chanel-type jackets, Linen, Linings, Mid-Century style, Moygashel linen, piping, Scarves, Shoes to make an outfit complete, Uncategorized, Vintage fabric

“Secret” Ingredients

Like that extra dash of nutmeg, which makes a dish sparkle in an indecipherable way, Classic French Jackets also have some secret ingredients. Except, they really are not secrets at all. They are, however, a few of the components which help to make these jackets so “classic” and just a step above ordinary.

Before I get to those details, however, let me show you my finished – yes, finished! – jacket.

To start with, one of the main features of a classic French jacket is the three-piece sleeve. The seam placed along the center point of the shoulder and running down along the outside of the arm does two things: it allows for the all-important vent and it provides a gentle curved shaping of the sleeve. The under-sleeve piece, which straddles the underarm area reduces bulk in the lower armscye and also contributes to the shaping of the sleeve.

The depth and width of the extension on the vent is entirely subject to the decision of the dressmaker. I opted to make my vents and their extensions suitable for two buttons. I originally planned on making a three-button vent, but I changed my mind, for reasons you will see in a future post.

Probably the most visible component of one of these jackets is the trim. This is such a personal choice, and the selection of the trim can really change the entire complexion of the jacket. As you all may know by now, I decided to use a layer of Petersham ribbon under the braid I selected. Once the Petersham was on, and I had started applying the soutache braid, I took this picture to illustrate how combining two layers of trim can effect such a different look.

On this jacket I placed my trim right on the outside edges of the parts being adorned, but this is also a personal choice.   Yes, there are “rules” to making these jackets, but the way you trim your jacket is not one of them! I also like to apply my trim after the interior of the jacket is finished, but I have seen a number of very successful jackets where the trim was applied before the edges were finished in the interior.

In the Classic French Jacket Class I took with Susan Khalje a few summers ago (which I cannot recommend highly enough!), she made the point that a lot of couture jackets are hemmed slightly longer in back, allowing for a gentle curve that is flattering and feminine. I love this look and used it again for this jacket. I think it is particularly effective with contrasting trim.

The gentle slope of the back hem is a little more apparent in this side view.

Obviously the trim has to have a starting point and an ending point somewhere on the jacket, right? Common sense tells us it should be in the most inconspicuous place – which, for the most part, happens to be in the side seam under your non-dominant arm. I am right-handed, so I made my starting and ending spot under my left arm.

I decided to make a double continuous loop of the soutache braid in order to reduce the bulk at the beginning and ending spot. Here you can see how I looped it in order to apply it this way.

From a little farther away, it is barely perceptible. By the way, do you see how that pocket is buckling?  I realized I had sewn the button on a little too low, so I had to do that over.  Seems there is always something to “tweak” at the end!

Because the boucle I used for this jacket is more of a lightweight weave, I decided I needed to anchor the buttons in some way. So I sewed them on (with waxed and ironed, double thread, of course), attaching them on the lining side with small white buttons.

While we are looking inside, here are photos of the jacket turned inside out.

I did not make any attempt to “match” the print because I did not think it would have made any difference.

Another key, necessary ingredient to one of these jackets is the chain which weights the jacket and keeps it looking neat and tidy. Sewing on the chain has to follow the Goldilocks rule: not too tight and not too loose.

I chose a silver-toned chain for this color combination.

The lining fabric I used for this jacket is such a lovely silk twill print. It seems a shame to hide such a beauty on the inside, although the interiors of these jackets are one of their most delightful secret ingredients. You will, however, be seeing more of this silk, along with photos of me wearing my jacket – all in a post to come soon!

33 Comments

Filed under Boucle for French style jackets, Chanel-type jackets, couture construction, Linings, Uncategorized