Category Archives: Silk taffeta

Life Isn’t Perfect…

…but Your Outfit Can Be.  I took a picture last summer of this sign at a Western wear store in Pinedale, Wyoming (Cowboy Shop).   I loved the saying, but little did I know how often I would reflect on it this summer, which has had its difficulties.  

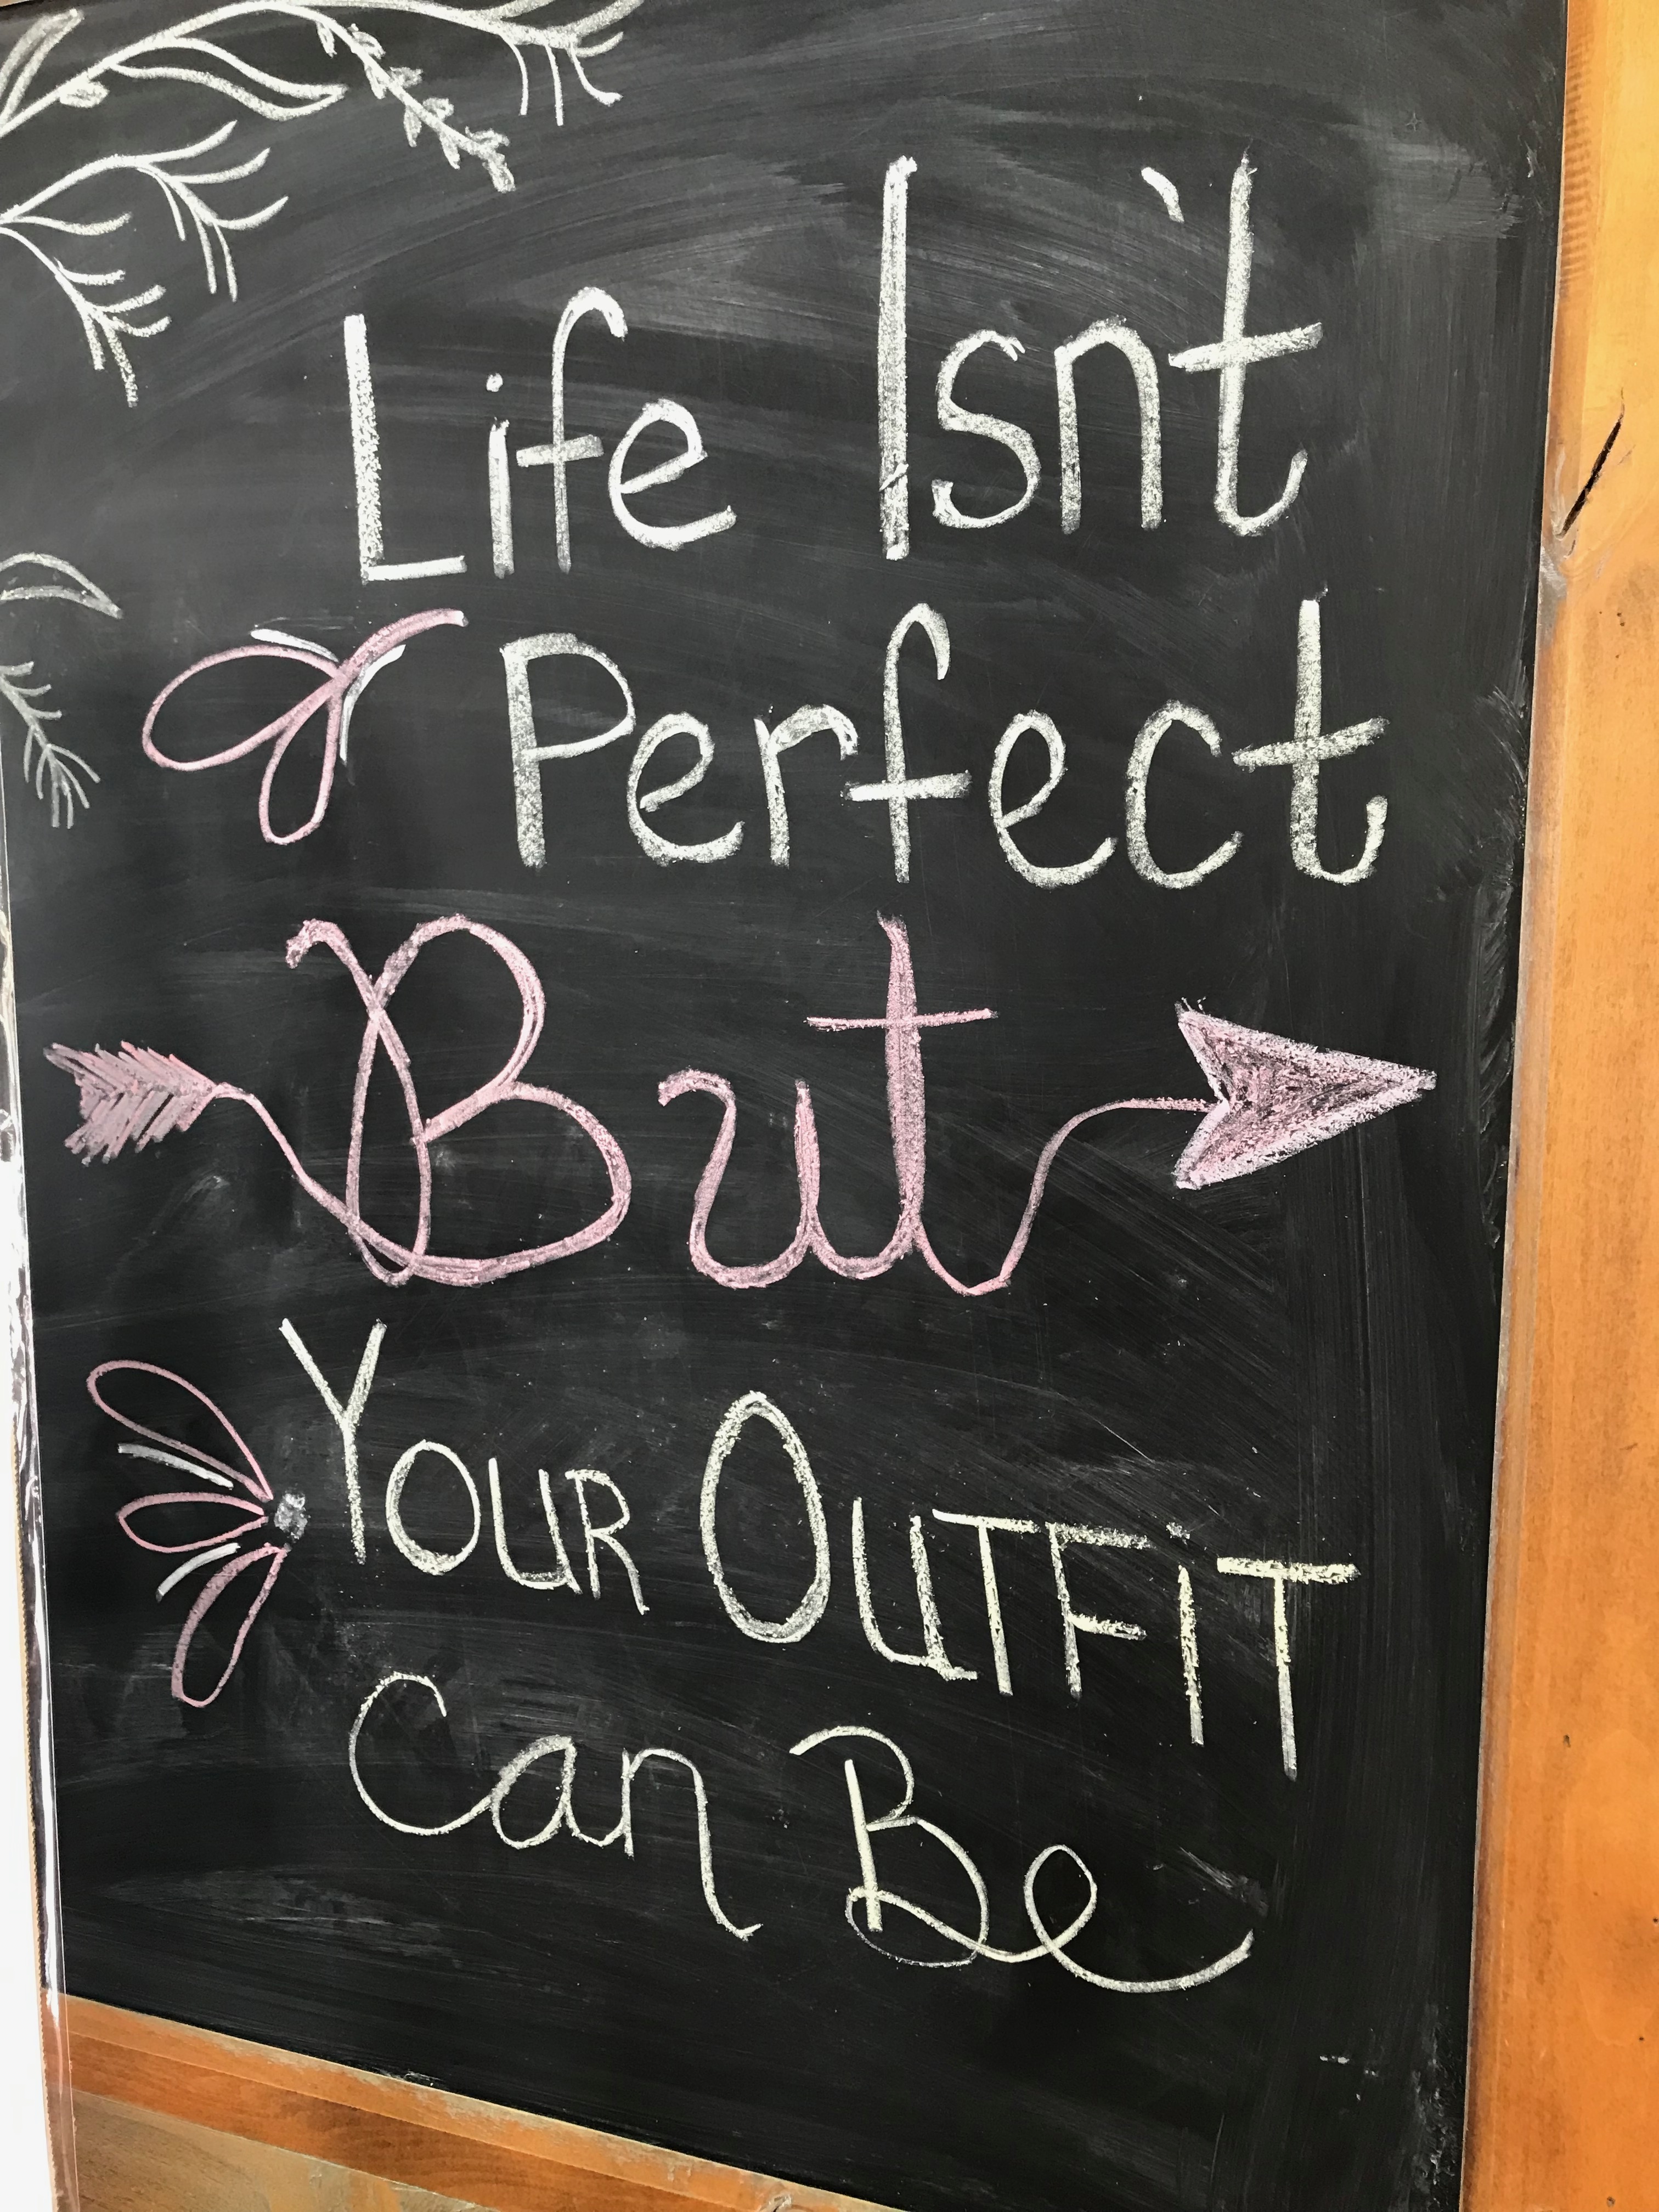
And even when my outfit, like Life, is far from perfect, which has been often, I know there is always Hope, and yes, that is hope with a capital H.  

*******

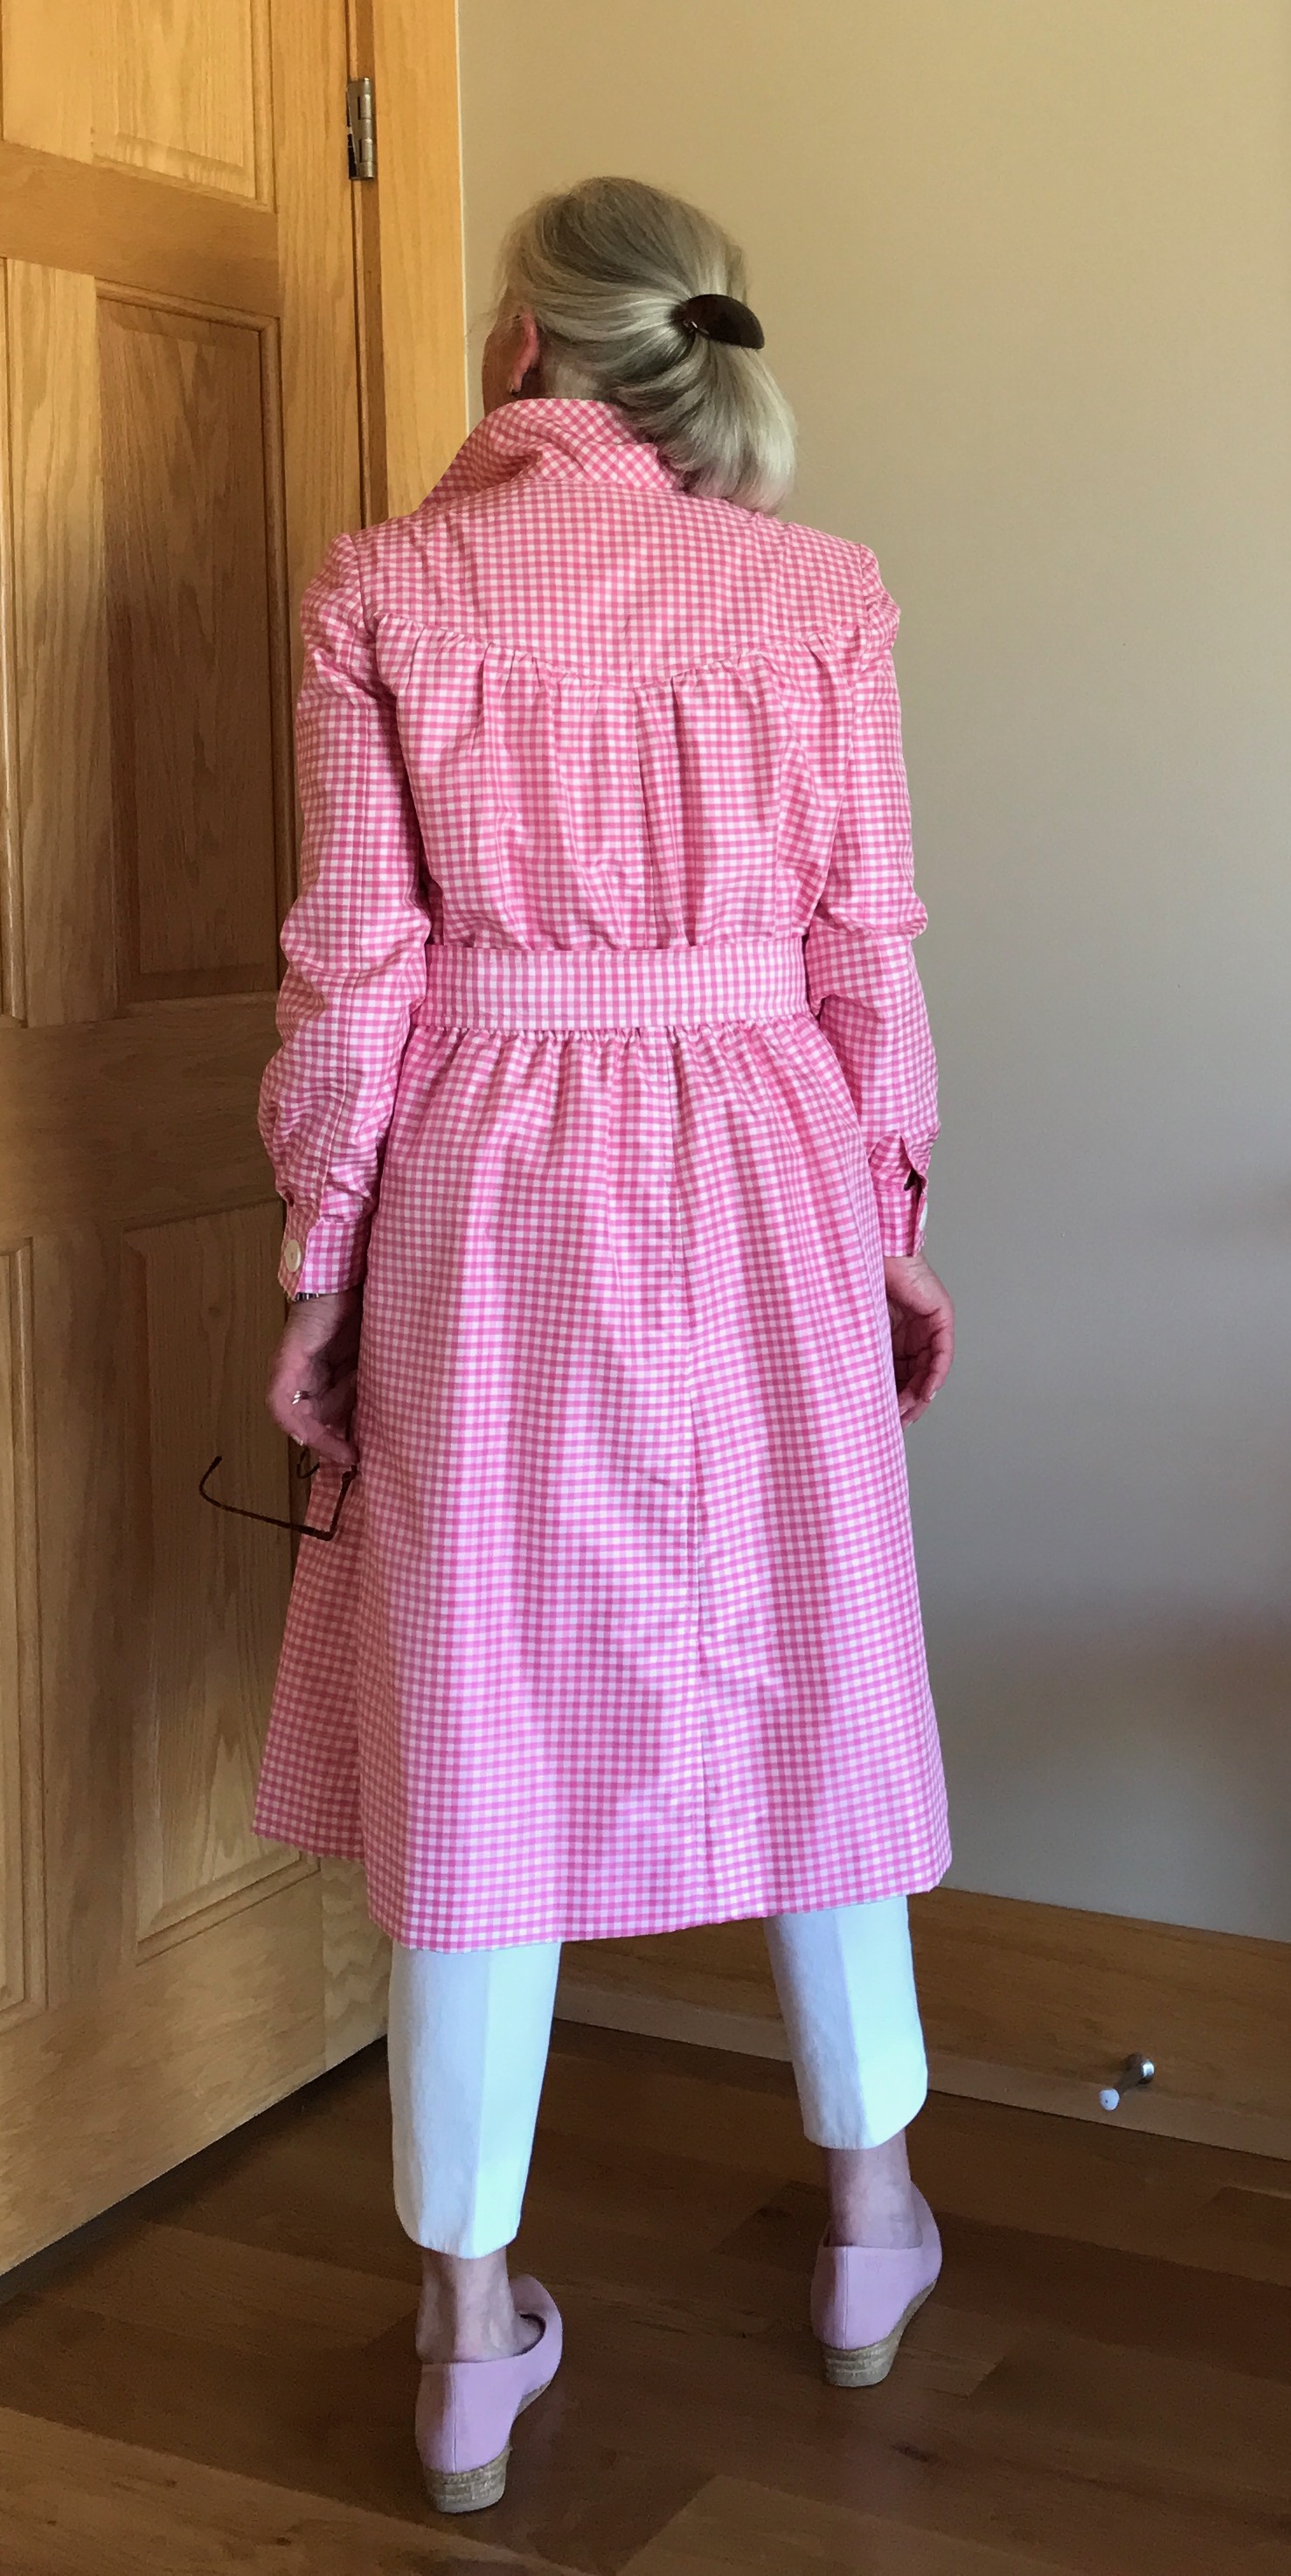
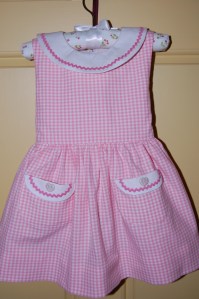
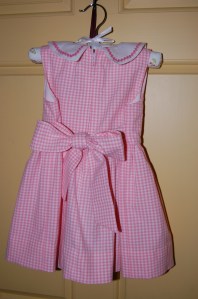
What a long hiatus it has been between my last musings about Trench coats and Dressmaker coats and pink gingham.  The final, finishing  stitch in my pink checked coat was in mid-June, and at this point I can hardly remember what I wanted to say about it.  

I purchased the pink silk gingham from Farmhouse Fabrics several years ago.

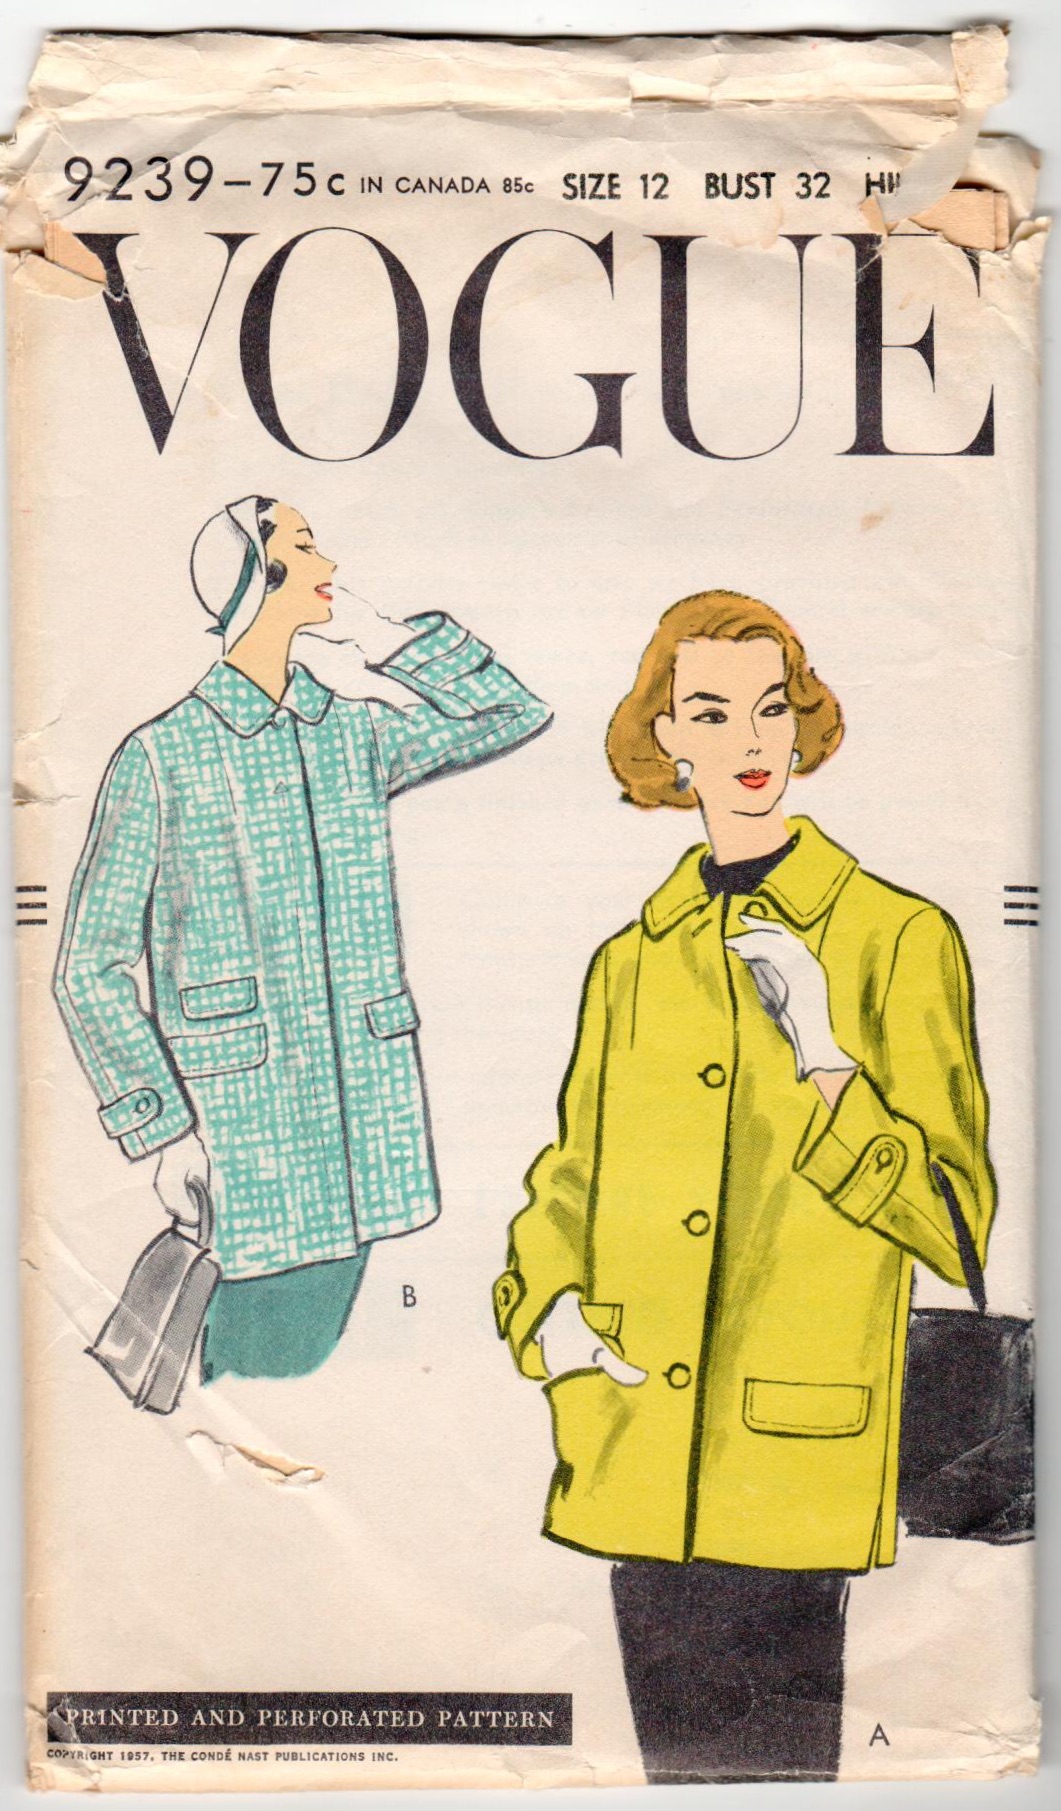
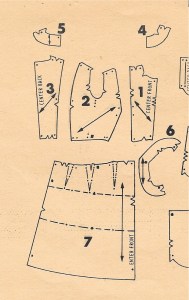
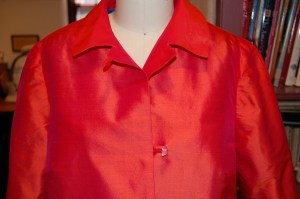
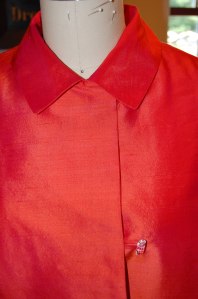
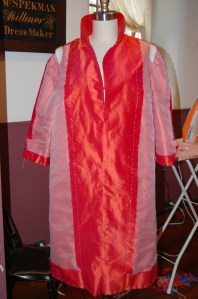
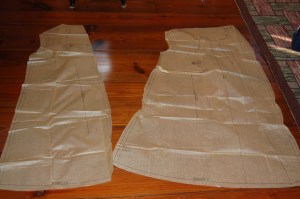
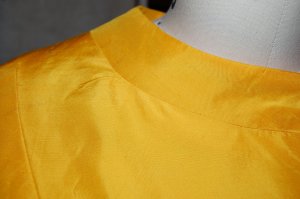
It does seem appropriate to start with the changes I made to the pattern, of which there were two major ones.  The first change was to the size of the collar.  In the 1970s long pointed collars were a trend.  Although I like a pointed collar, one with a more petite profile seemed to be a little more flattering and classic.  To achieve this desired look, I shortened the collar’s points by about an inch on either side.  

For comparison purposes, here is a good look at the original collar.

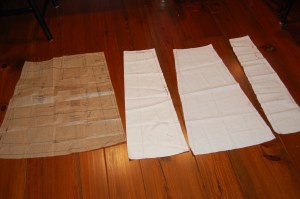
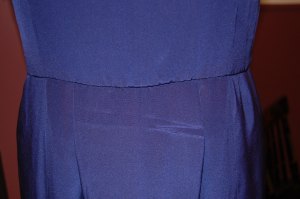
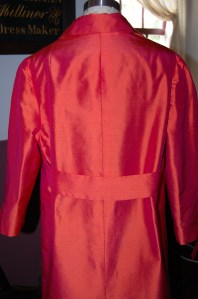
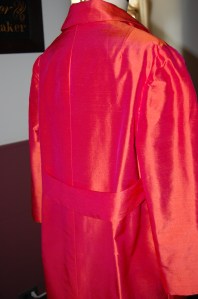
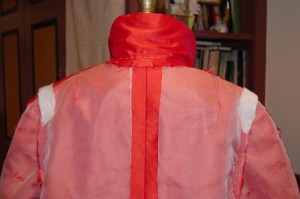
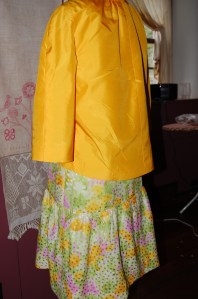
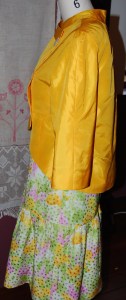
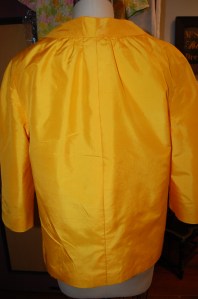
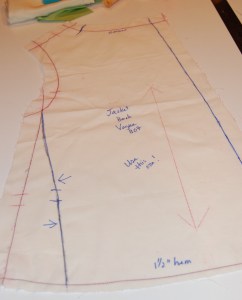
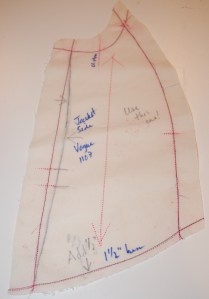
When I made this coat in 1974, I remember being a bit disappointed with the volume of the back of the coat.  I was using a cotton twill, so it was a heavier fabric than the silk taffeta in my new version, making the volume seem even more pronounced.  But even so, I thought I would be happier with a less full back.  I experimented around with my muslin/toile until I got the desired girth.  It turned out I eliminated a total of three inches from the back pattern pieces, 1 ½” from each side back panel.

Again, the image of the 1974 pattern illustrates the volume of the gathering in the original design.

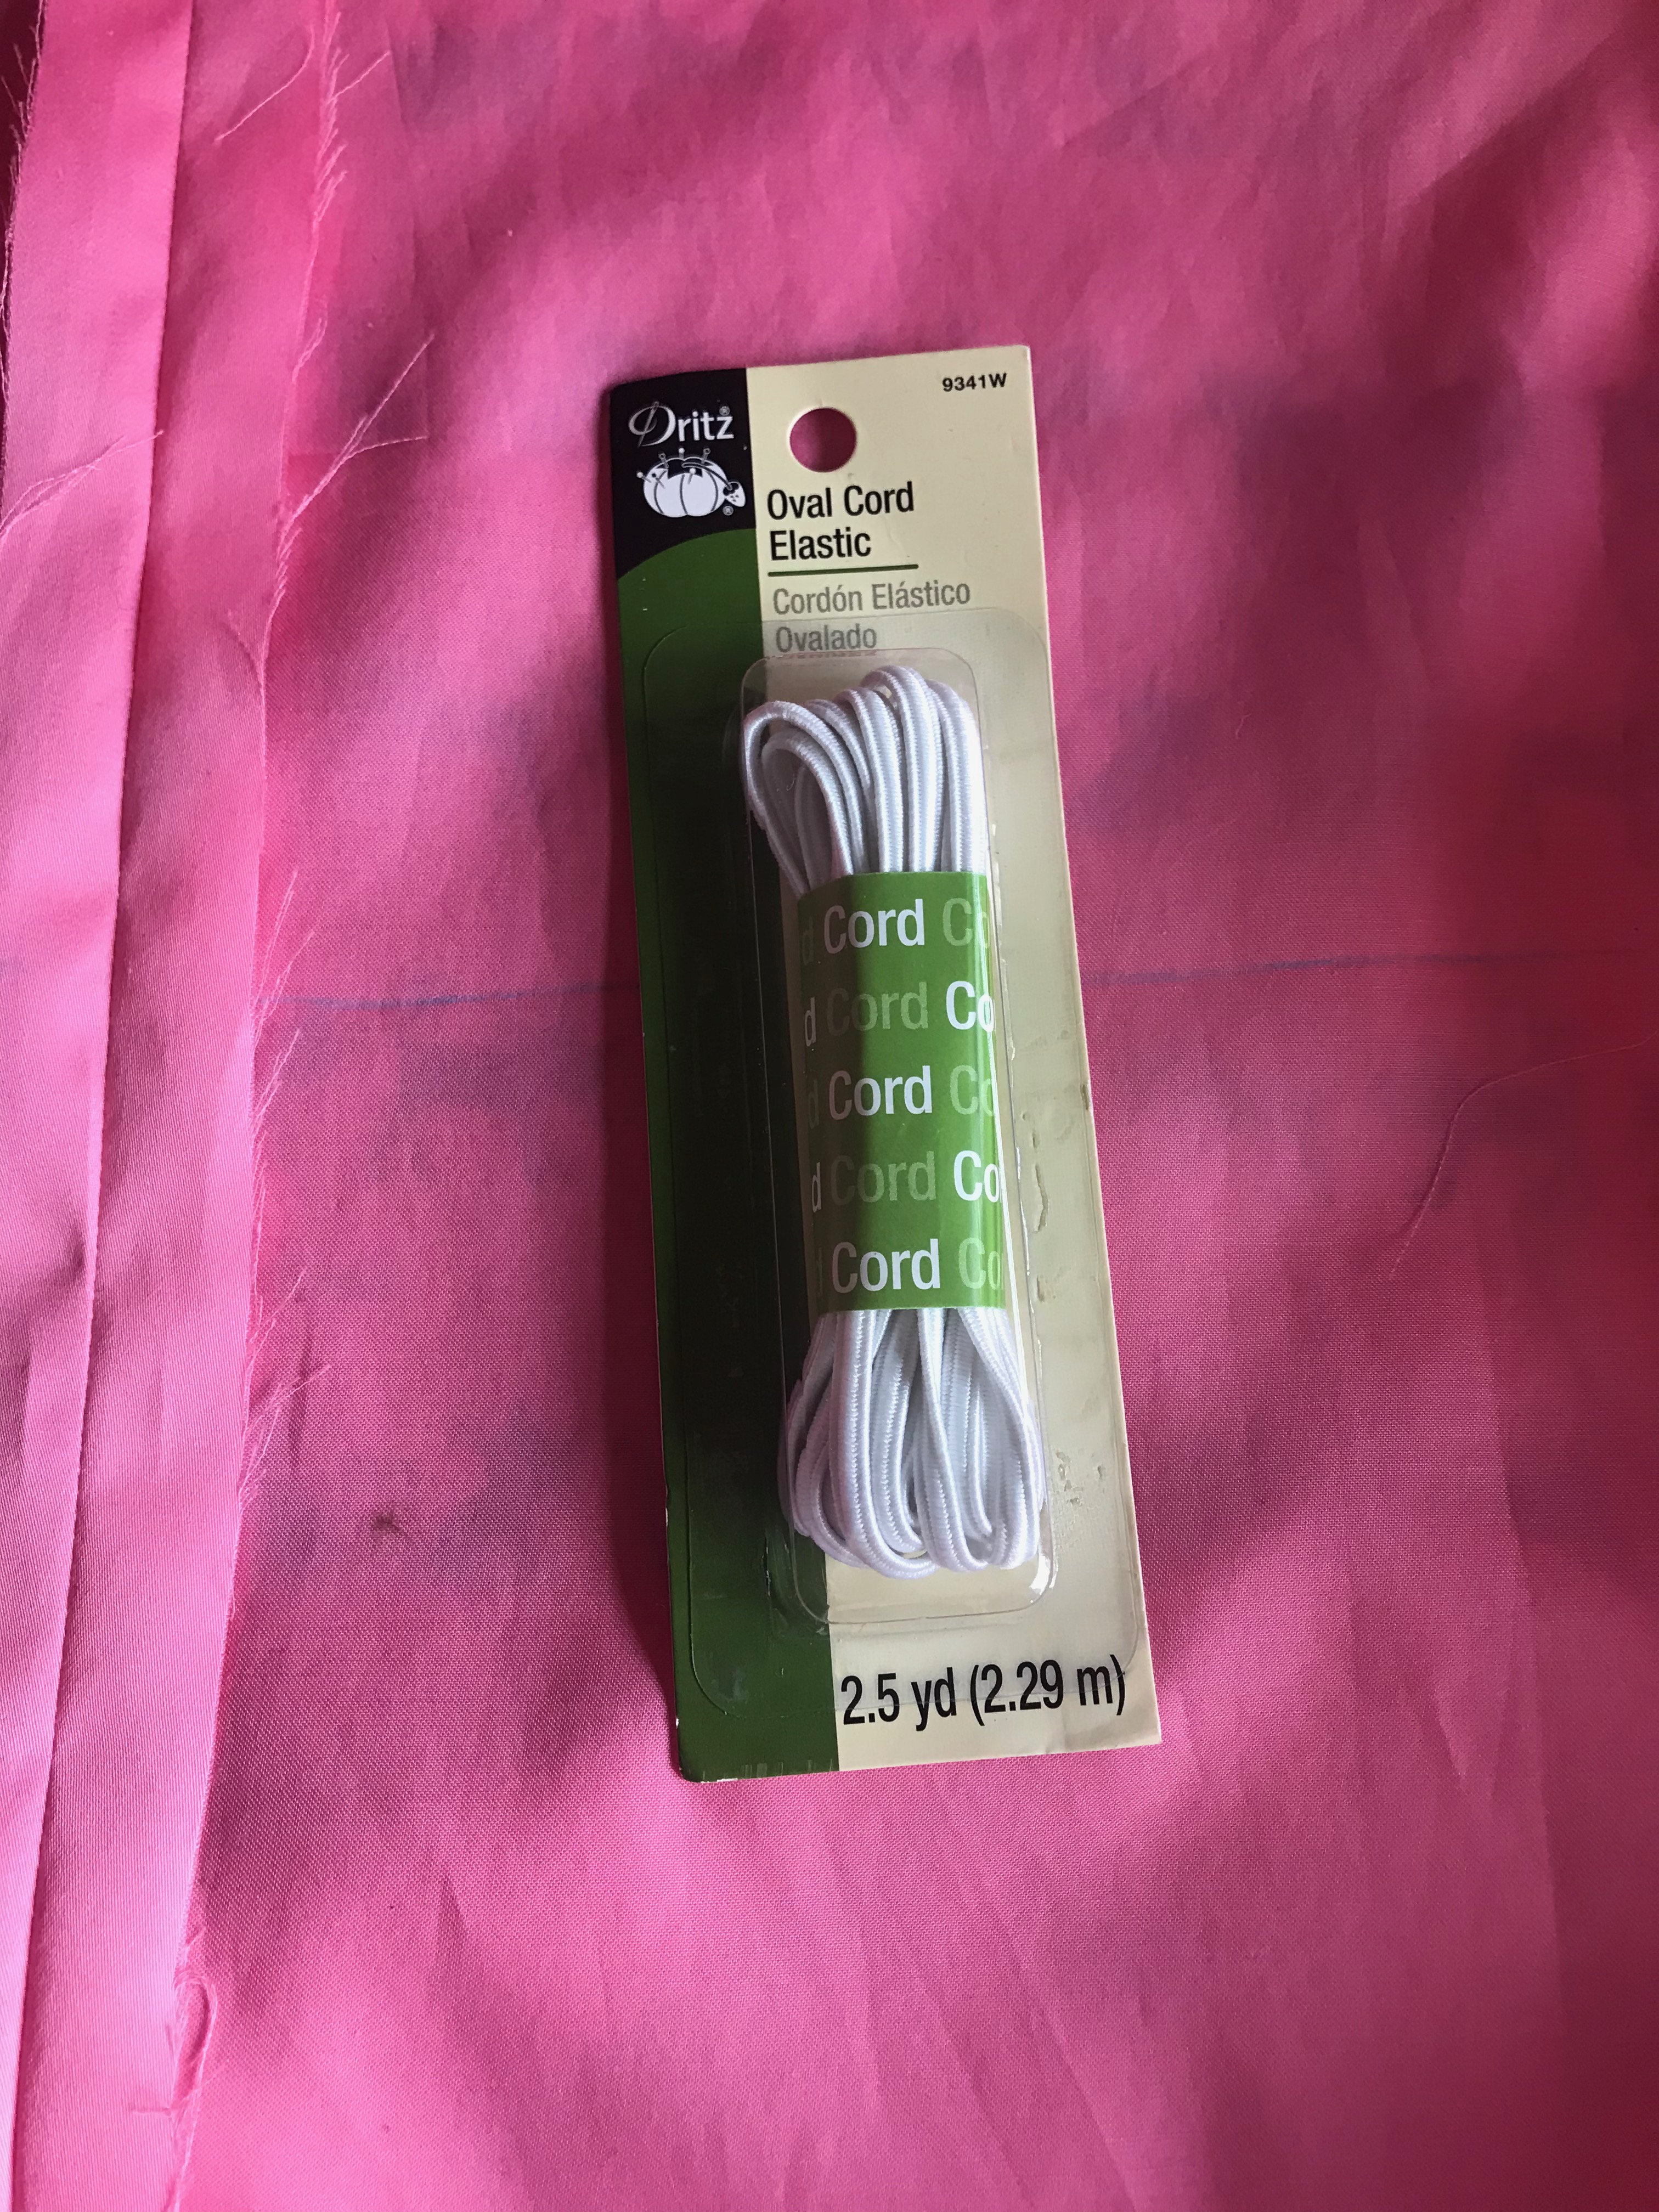
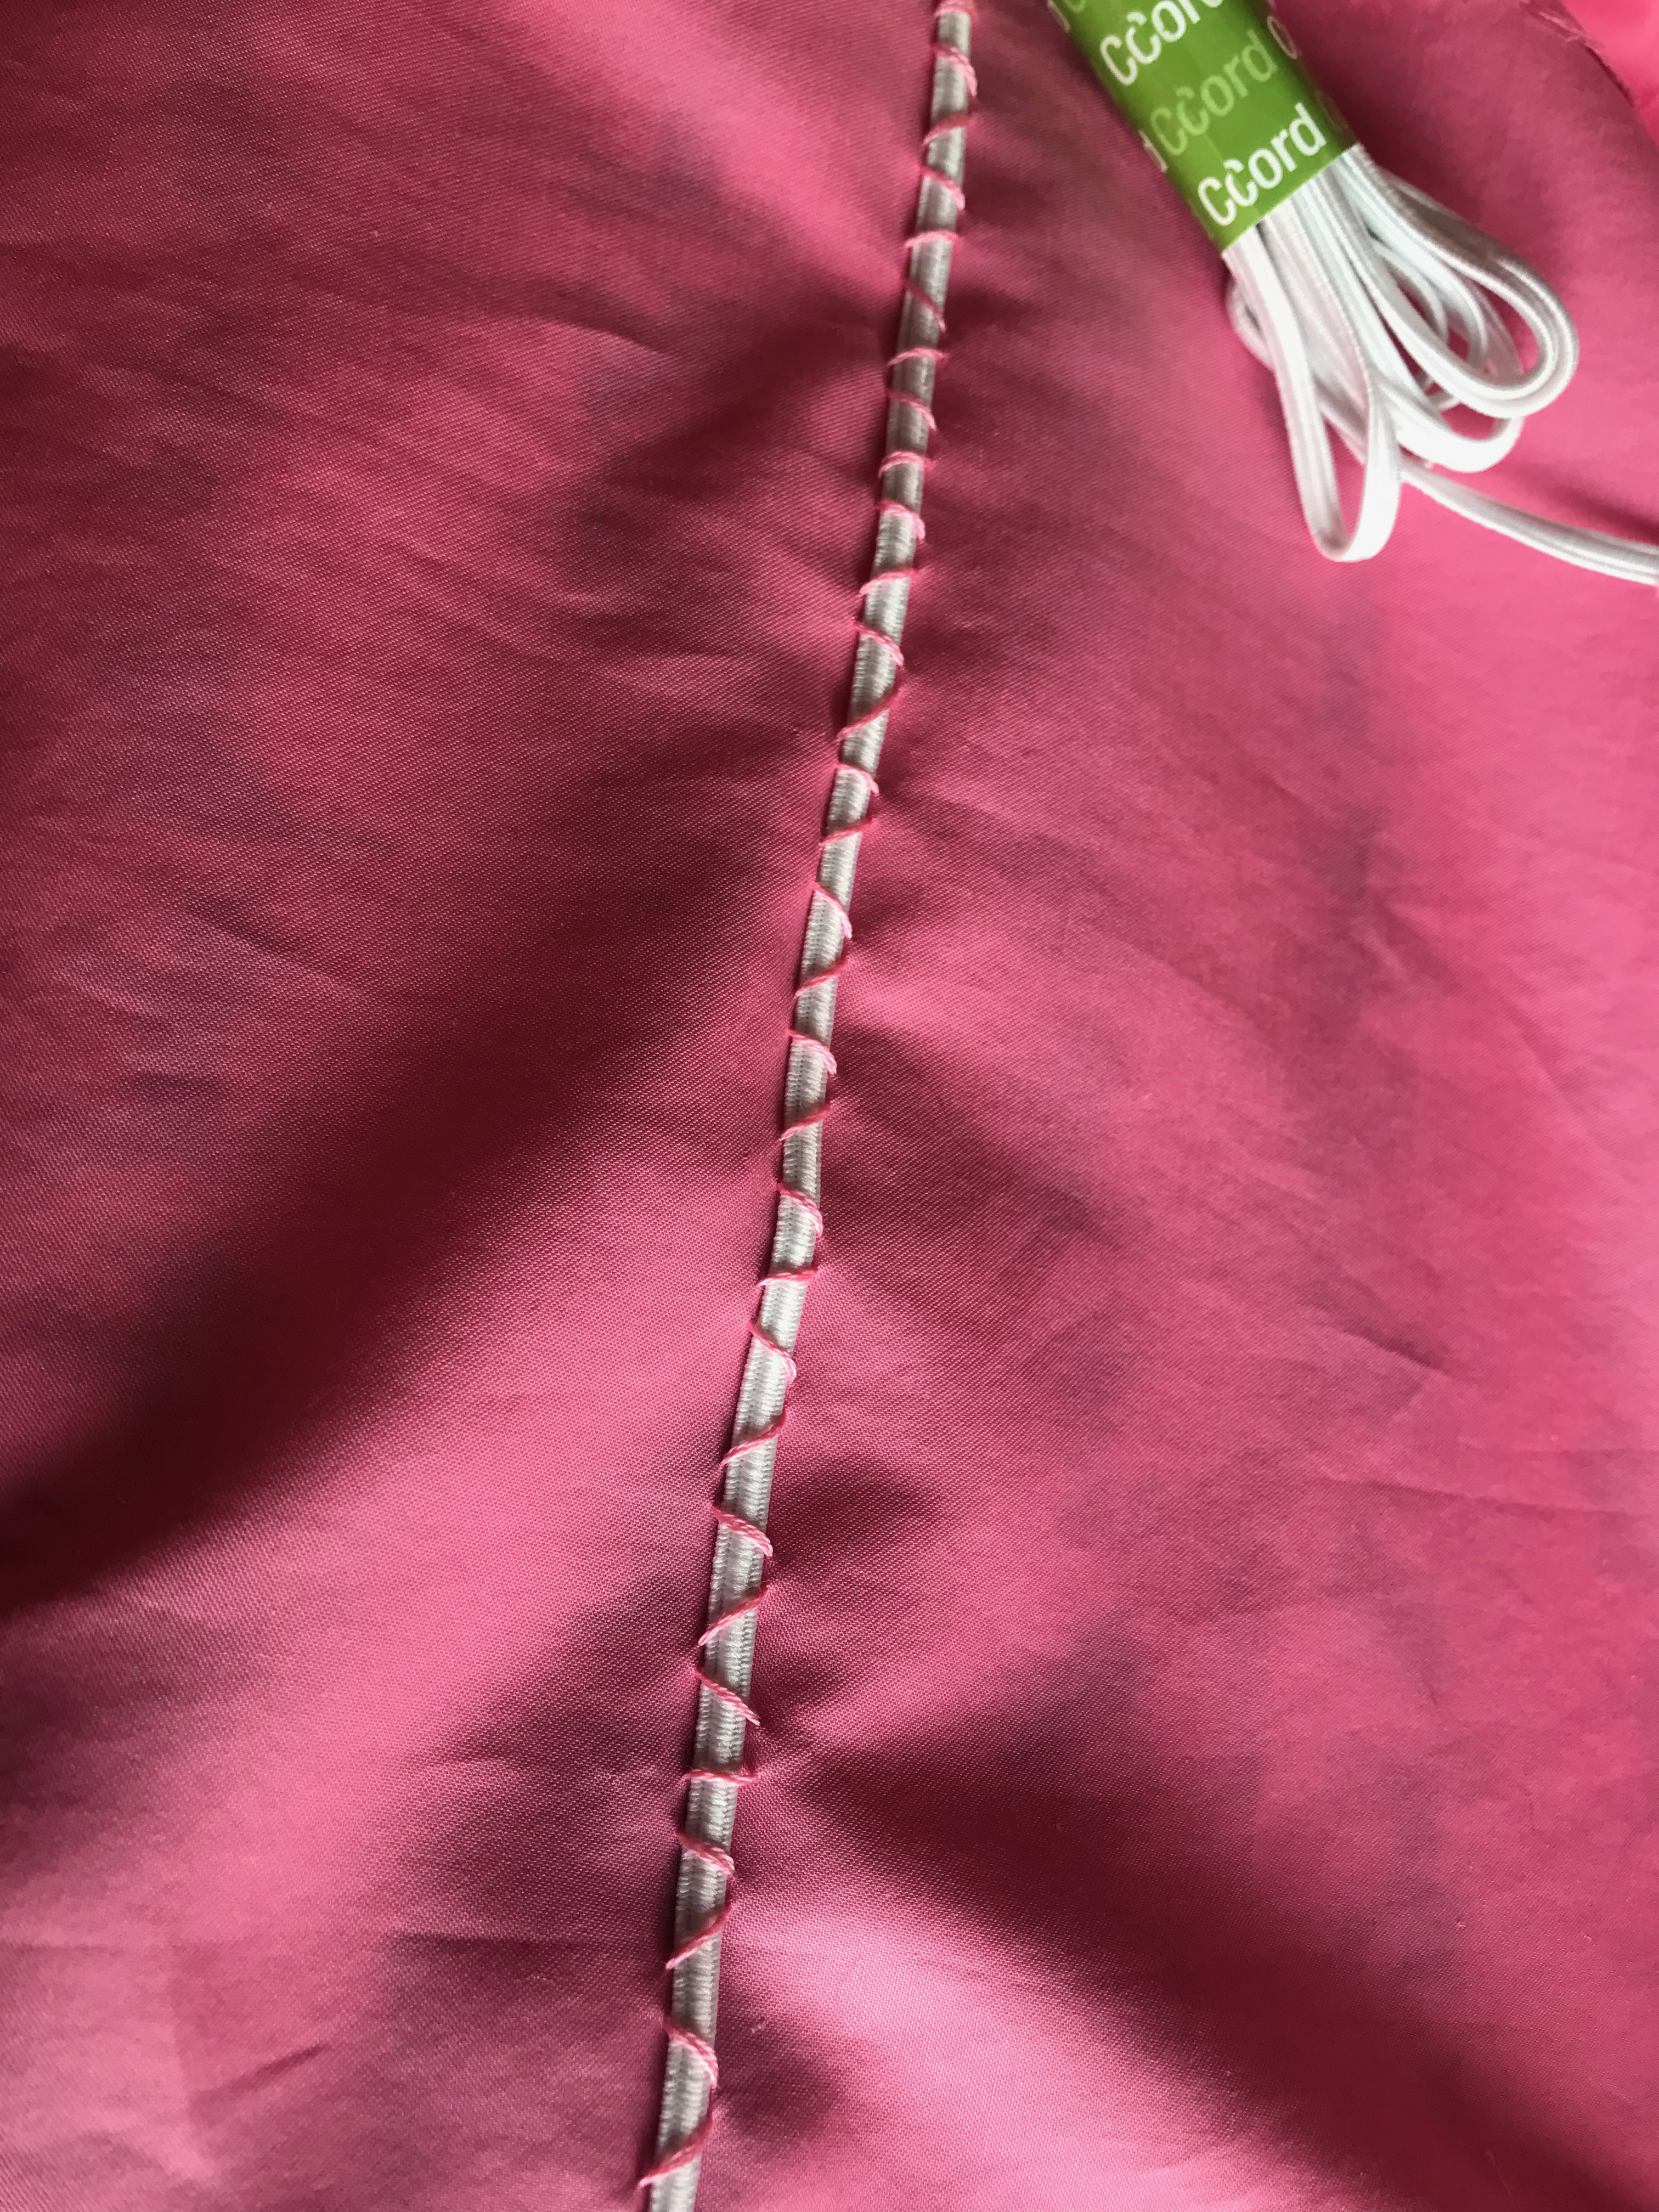
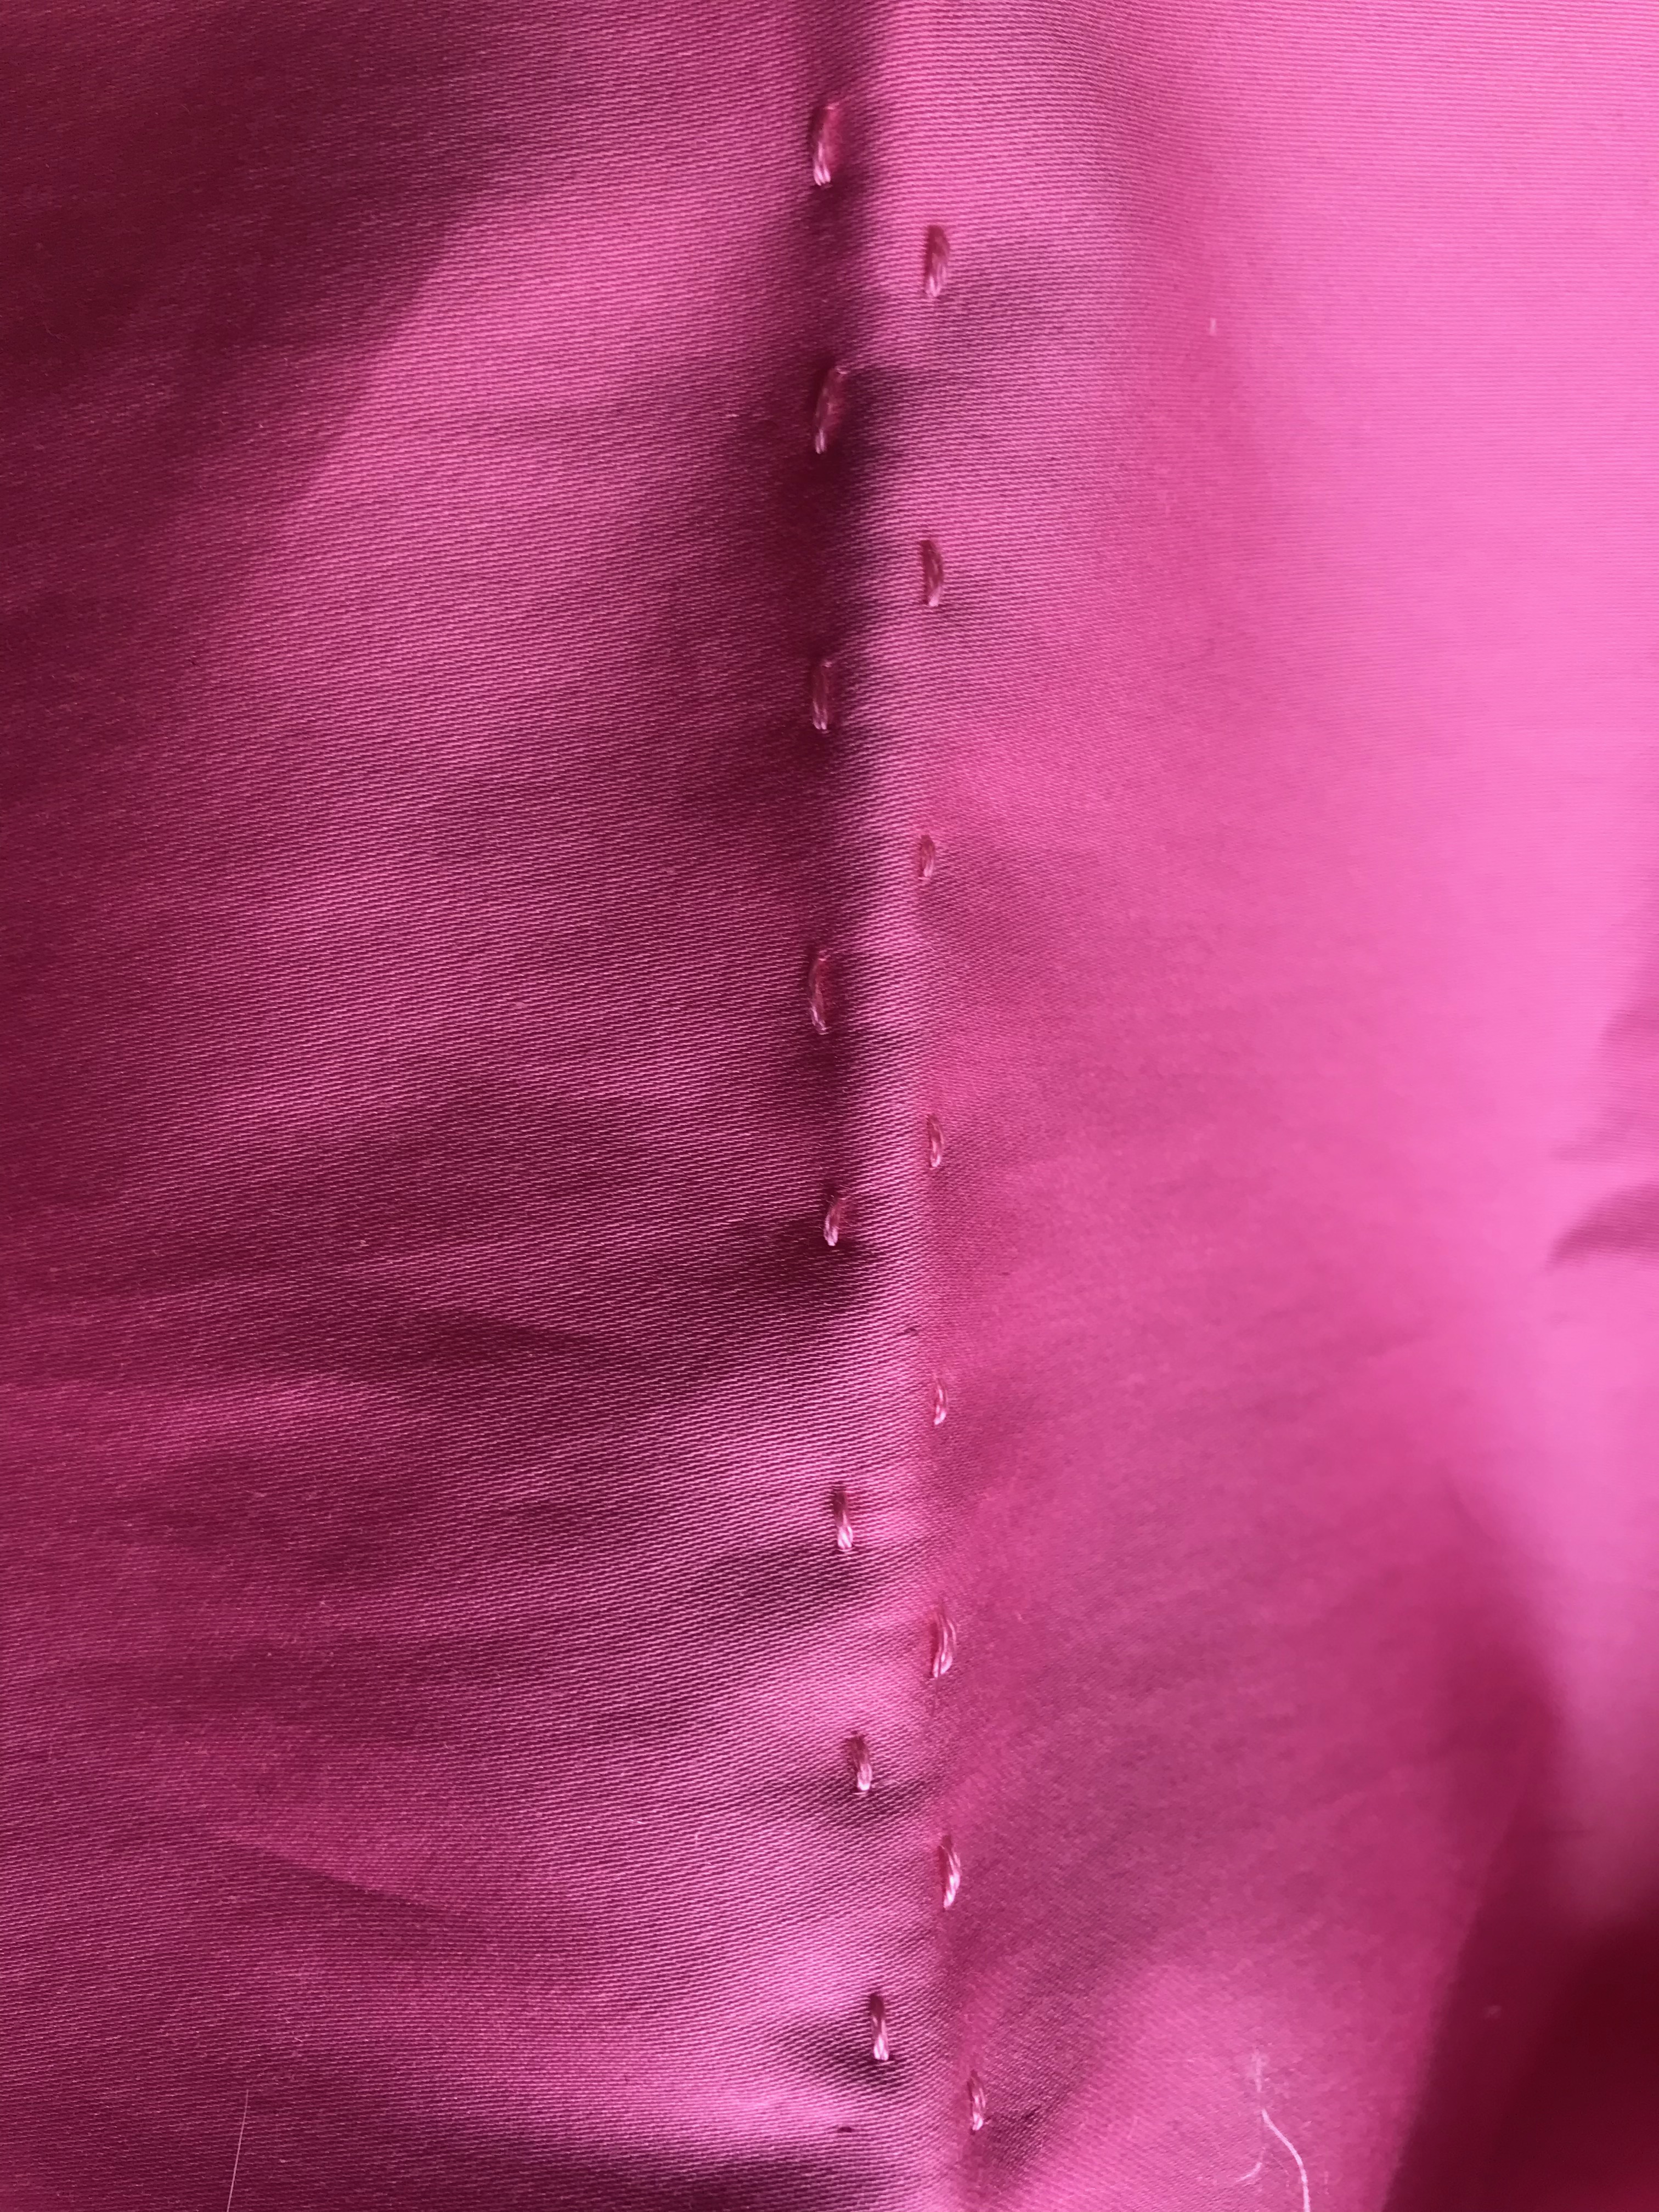
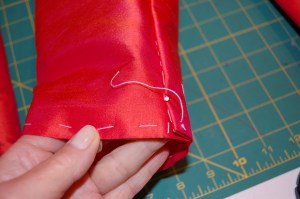
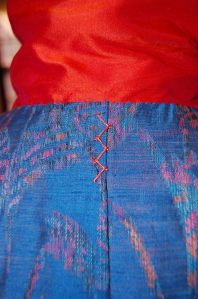
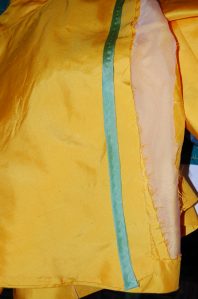
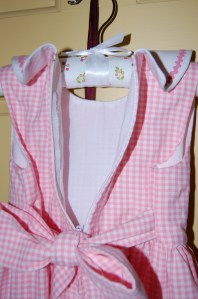
In addition to these alterations, I had a slight construction change.  The instructions for the  gathering of the lining at the back waistline called for using elastic thread.  First of all, I didn’t have any elastic thread, nor did I think it would give the look I wanted even though it would not be very apparent on a lining.  Instead, I had some elastic cord, and I attached it by hand, using embroidery floss in a criss-cross stitch enclosing it the width of the back.  Worked like a charm, and I like the effect it made.

This is the wrong side of the lining, showing the criss cross I achieved with embroidery floss.
And here is what it looks like on the right side of the lining. The lining gathers beautifully with this thread channel for the elastic cord, as is apparent in the image below.

Once I had the coat partially assembled, I decided I would have liked it to be a bit longer than I planned with the muslin.  I was very tight with fabric, so I really could not have cut it longer and still been able to get the coat out of the fabric I had.  So, to gain another inch and a half, I decided to face the hem right to the point where the lining would be attached.    It certainly took extra effort, but I’m glad I did it as I much prefer the slightly longer length.  

The one thing I would change should I ever make this coat again (which I doubt) would be to add about an inch or so to the diameter of the cuffs.  I would like to keep them buttoned and be able to slip my hands through them.  As they are, they are too tight to do that.  This was something I could have determined had I made a muslin/toile with completed sleeves, which I did not.  All I did was check the length.  A good reminder to me to be more thorough in situations like this.  

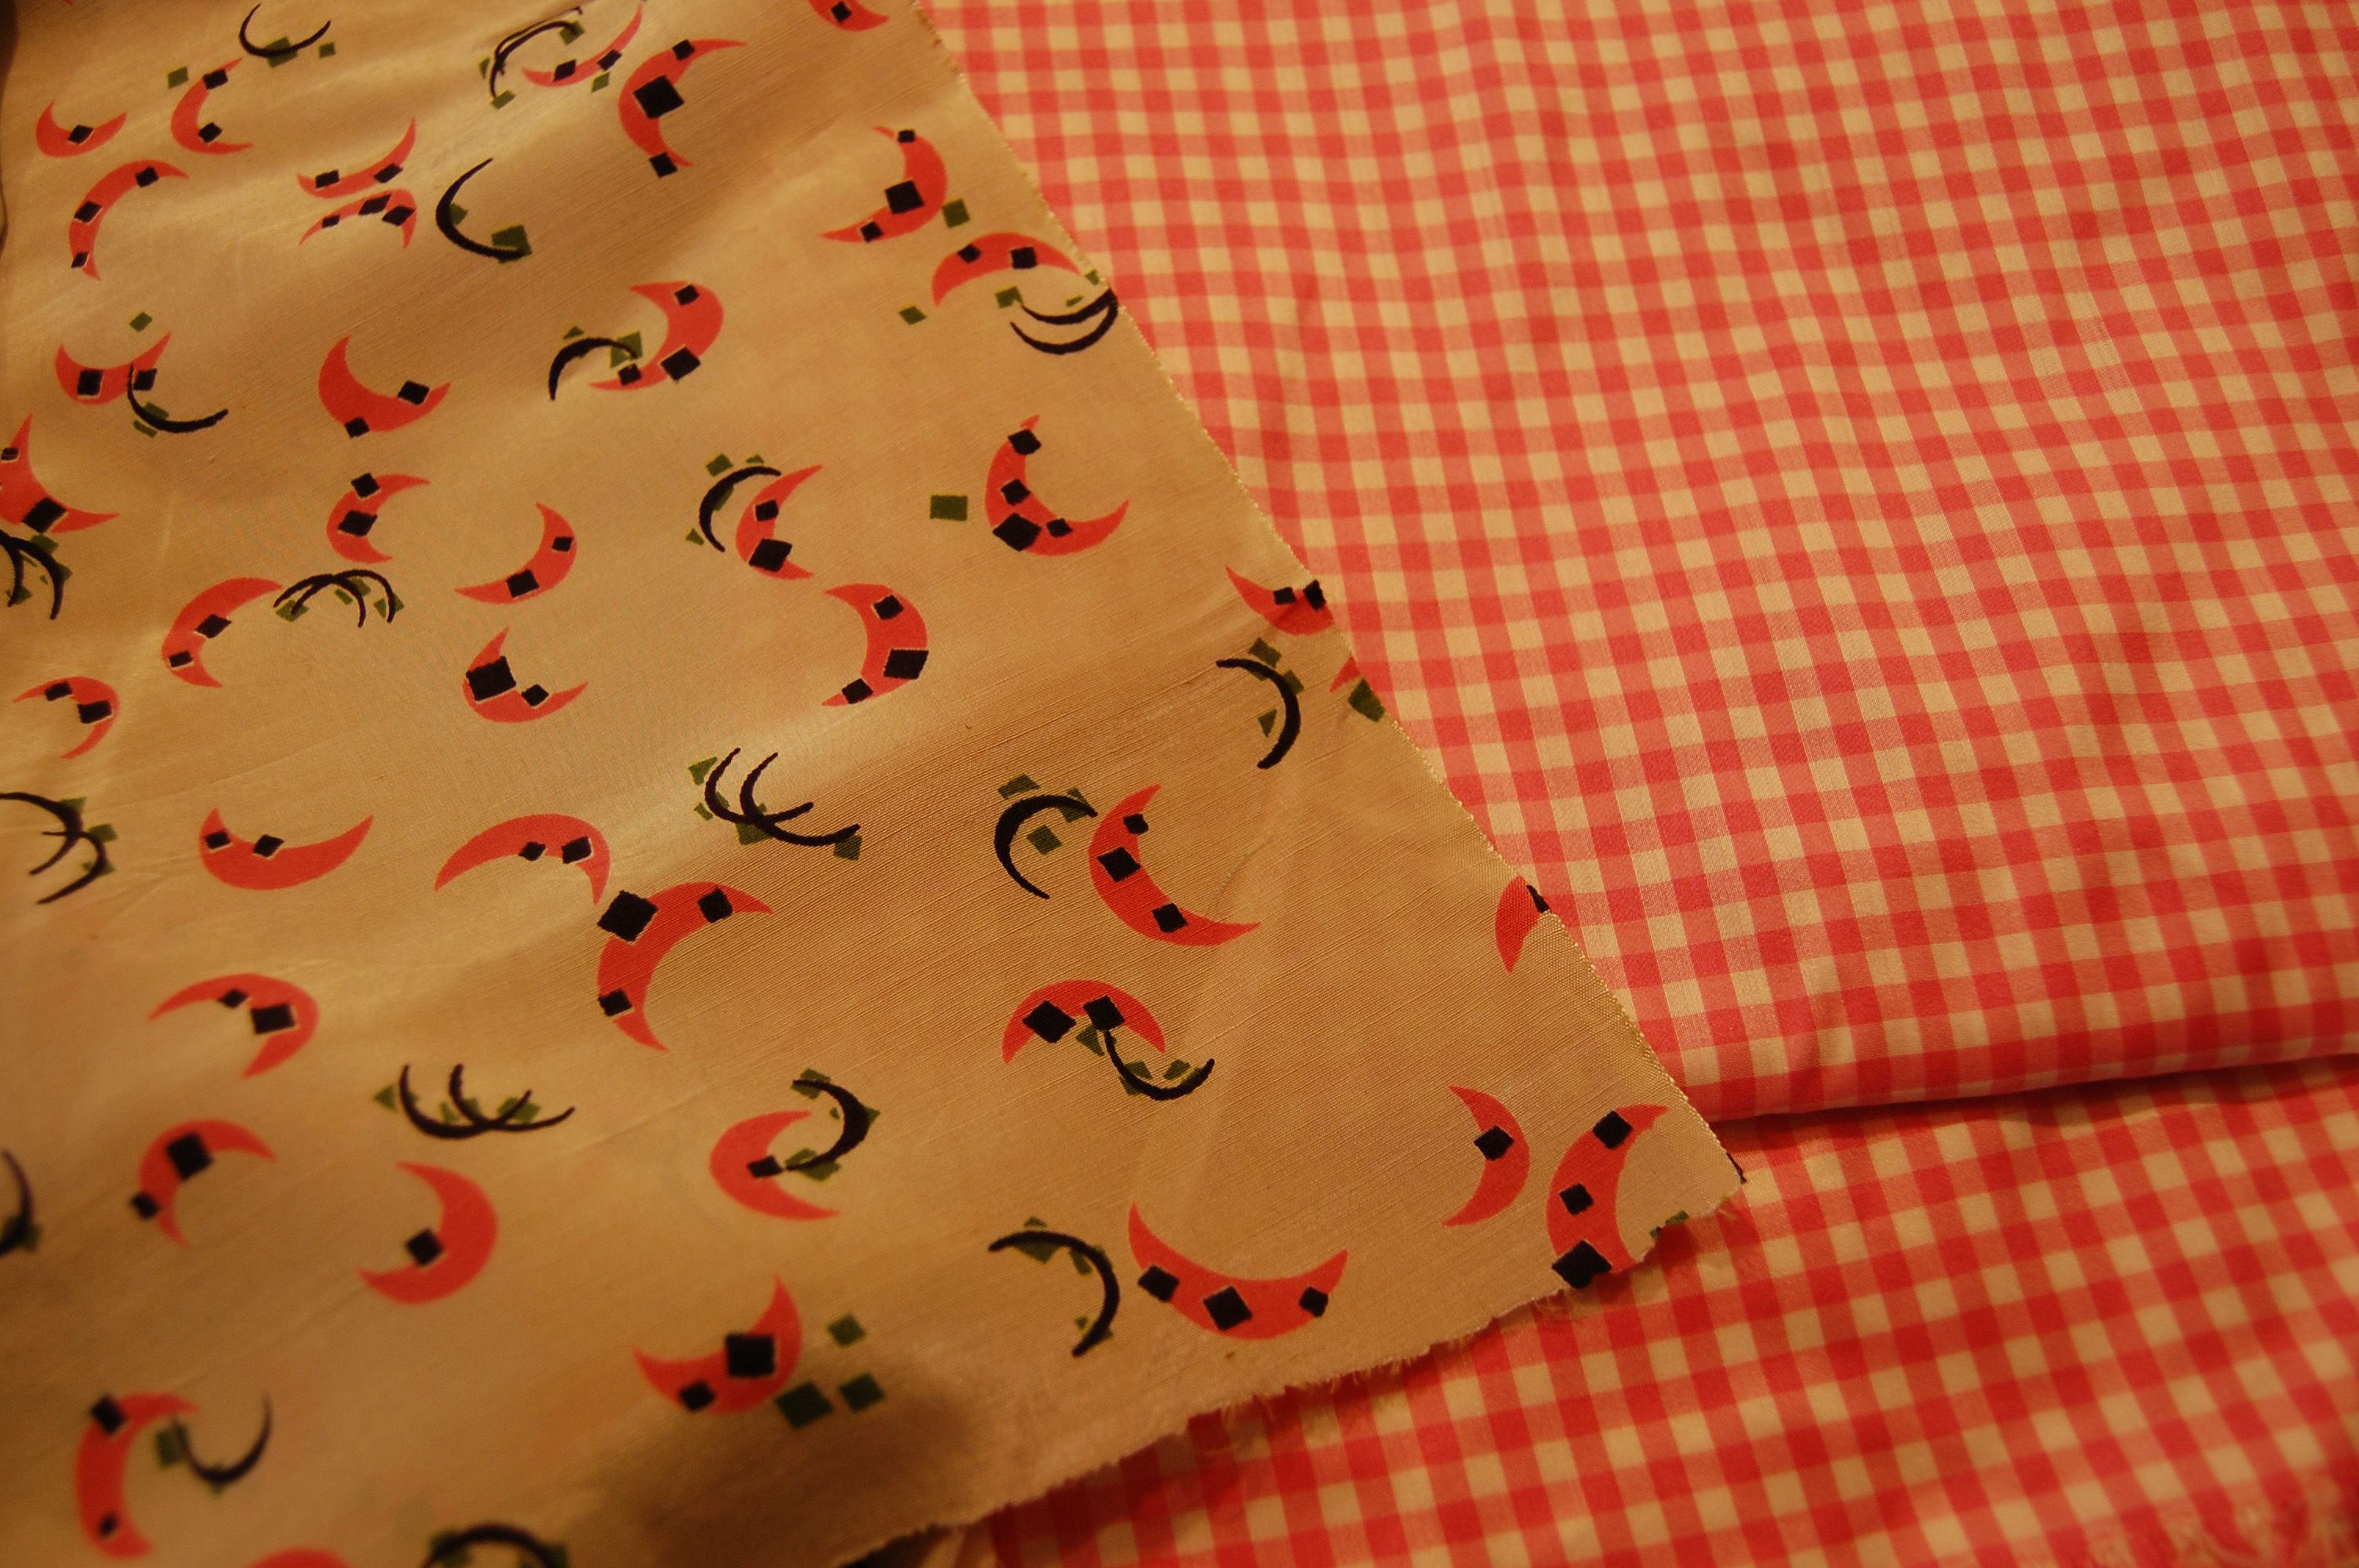
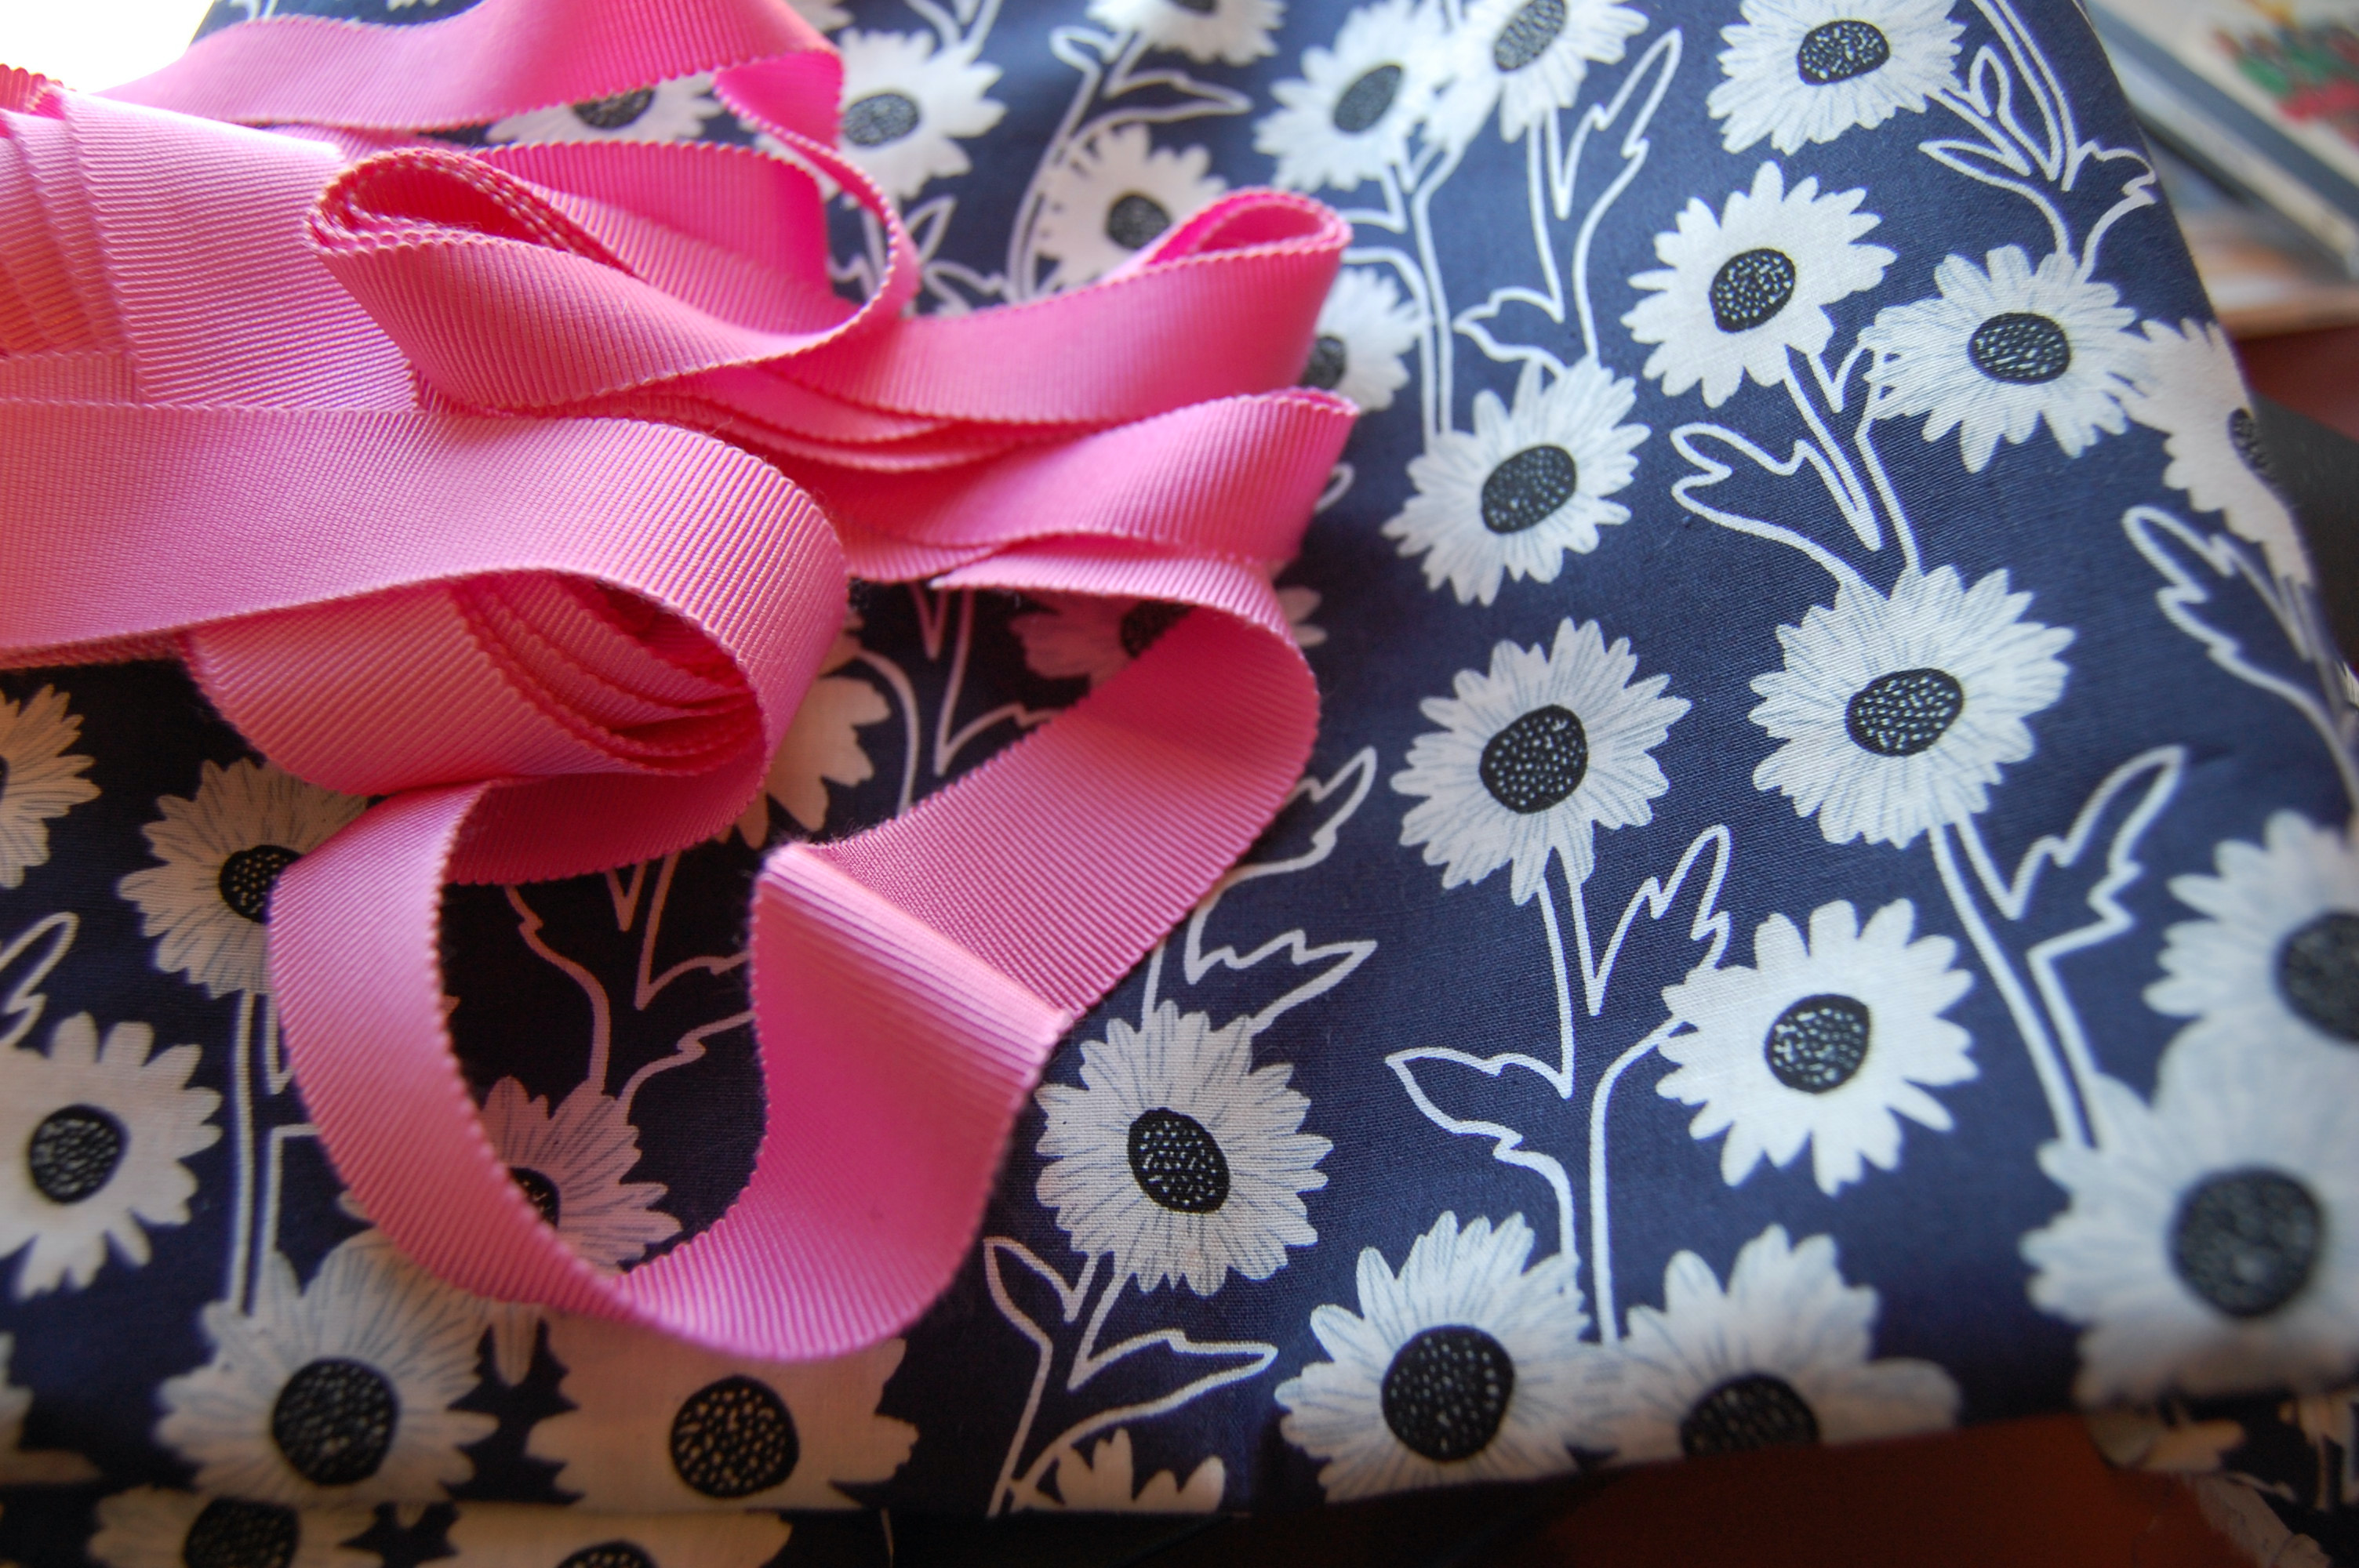
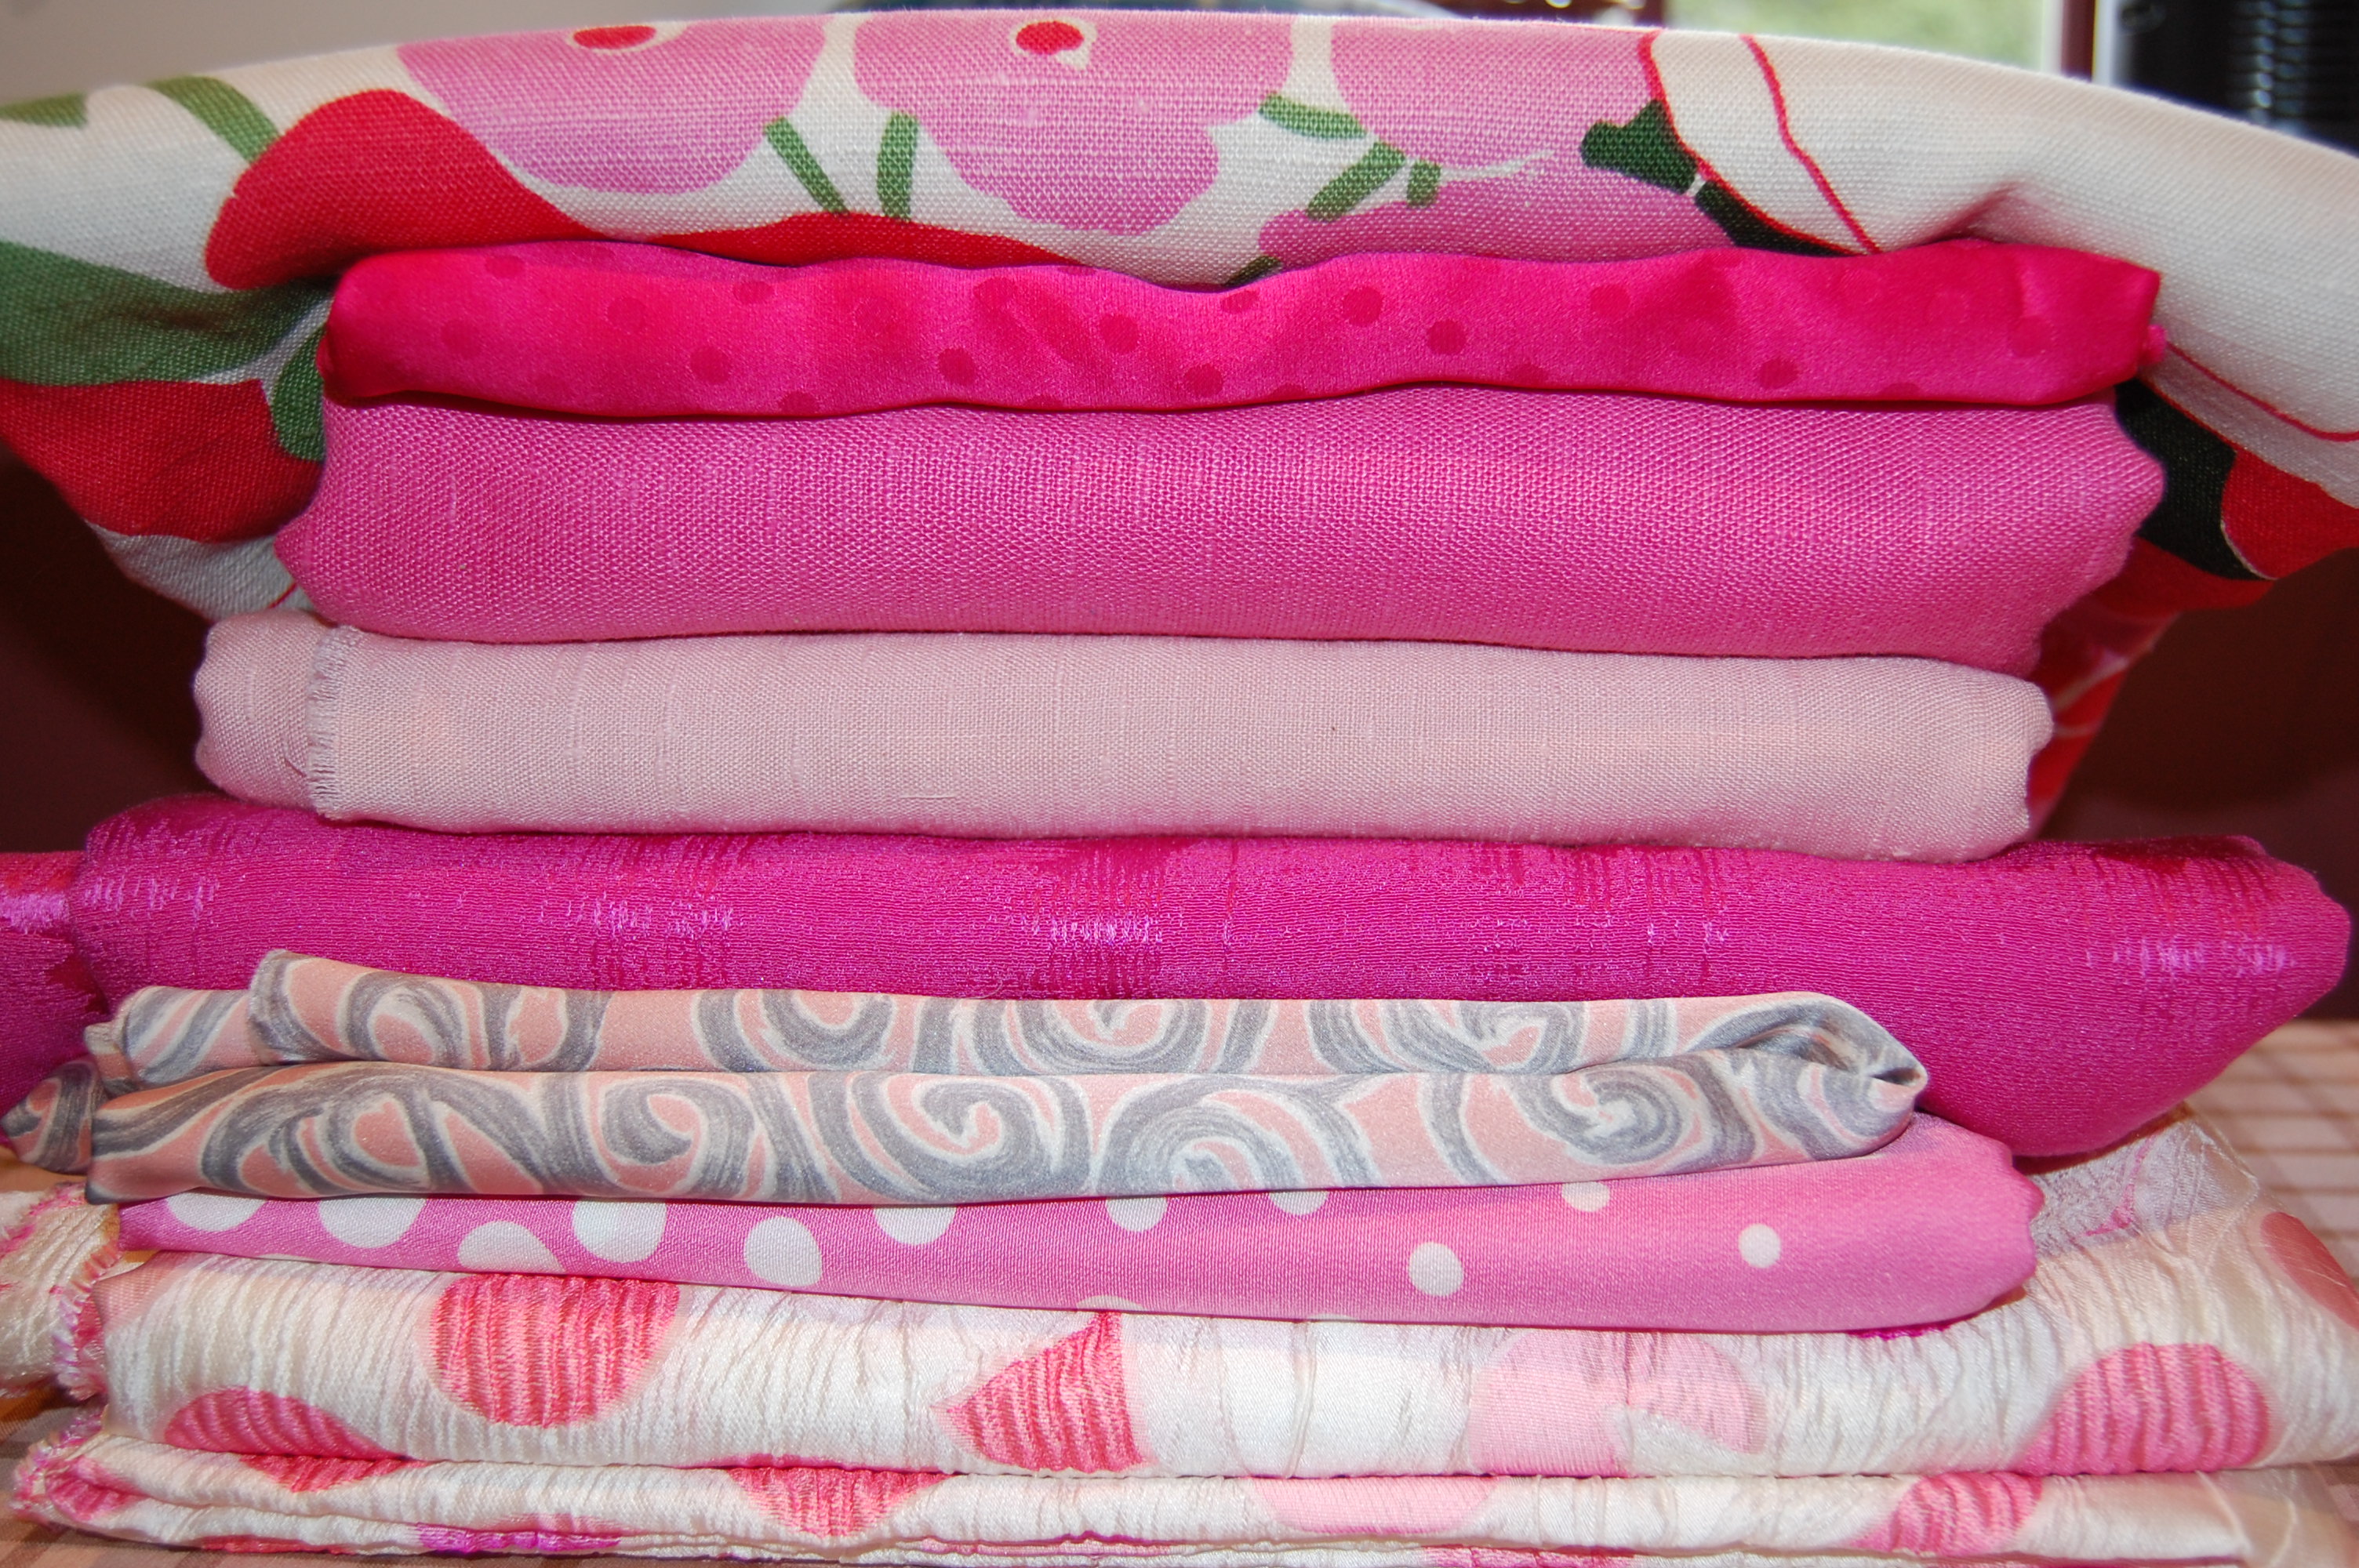
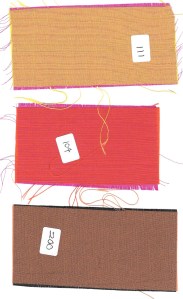
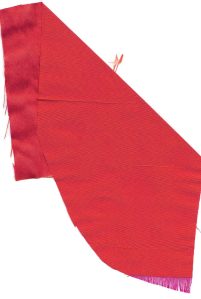
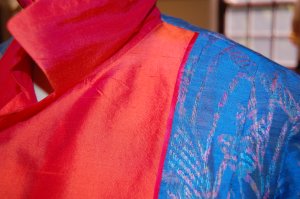
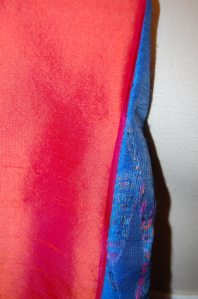
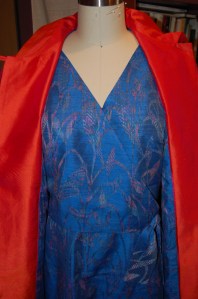
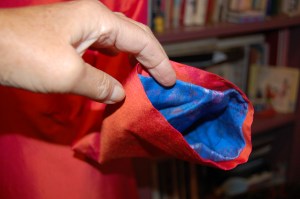
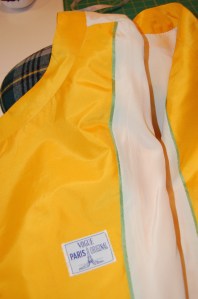
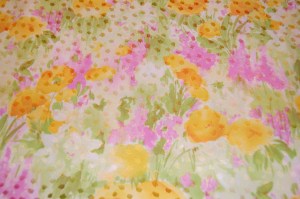
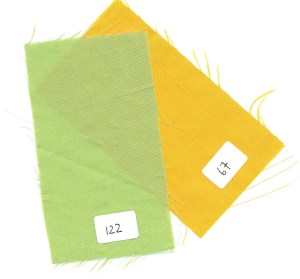
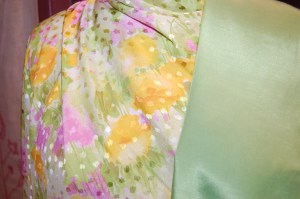
When I was planning this coat, I intended to use this vintage silk fabric for the lining.

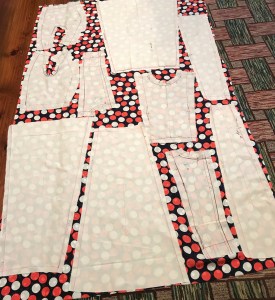
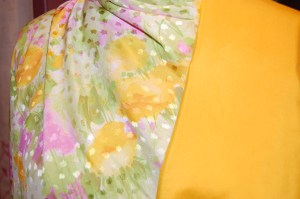
However, even though I underlined the fashion fabric with white cotton batiste, I felt there was a slight “see-through” of the black details in the print of the intended fabric.  In the meantime, I had ordered a piece of polished cotton in “Paris Pink” from Emma One Sock Fabrics.  Although not an exact match, the two fabrics – the pink checked taffeta and the polished cotton – made a pretty pair so I changed course, and the rest is history.

I am quite happy with this pink lining!

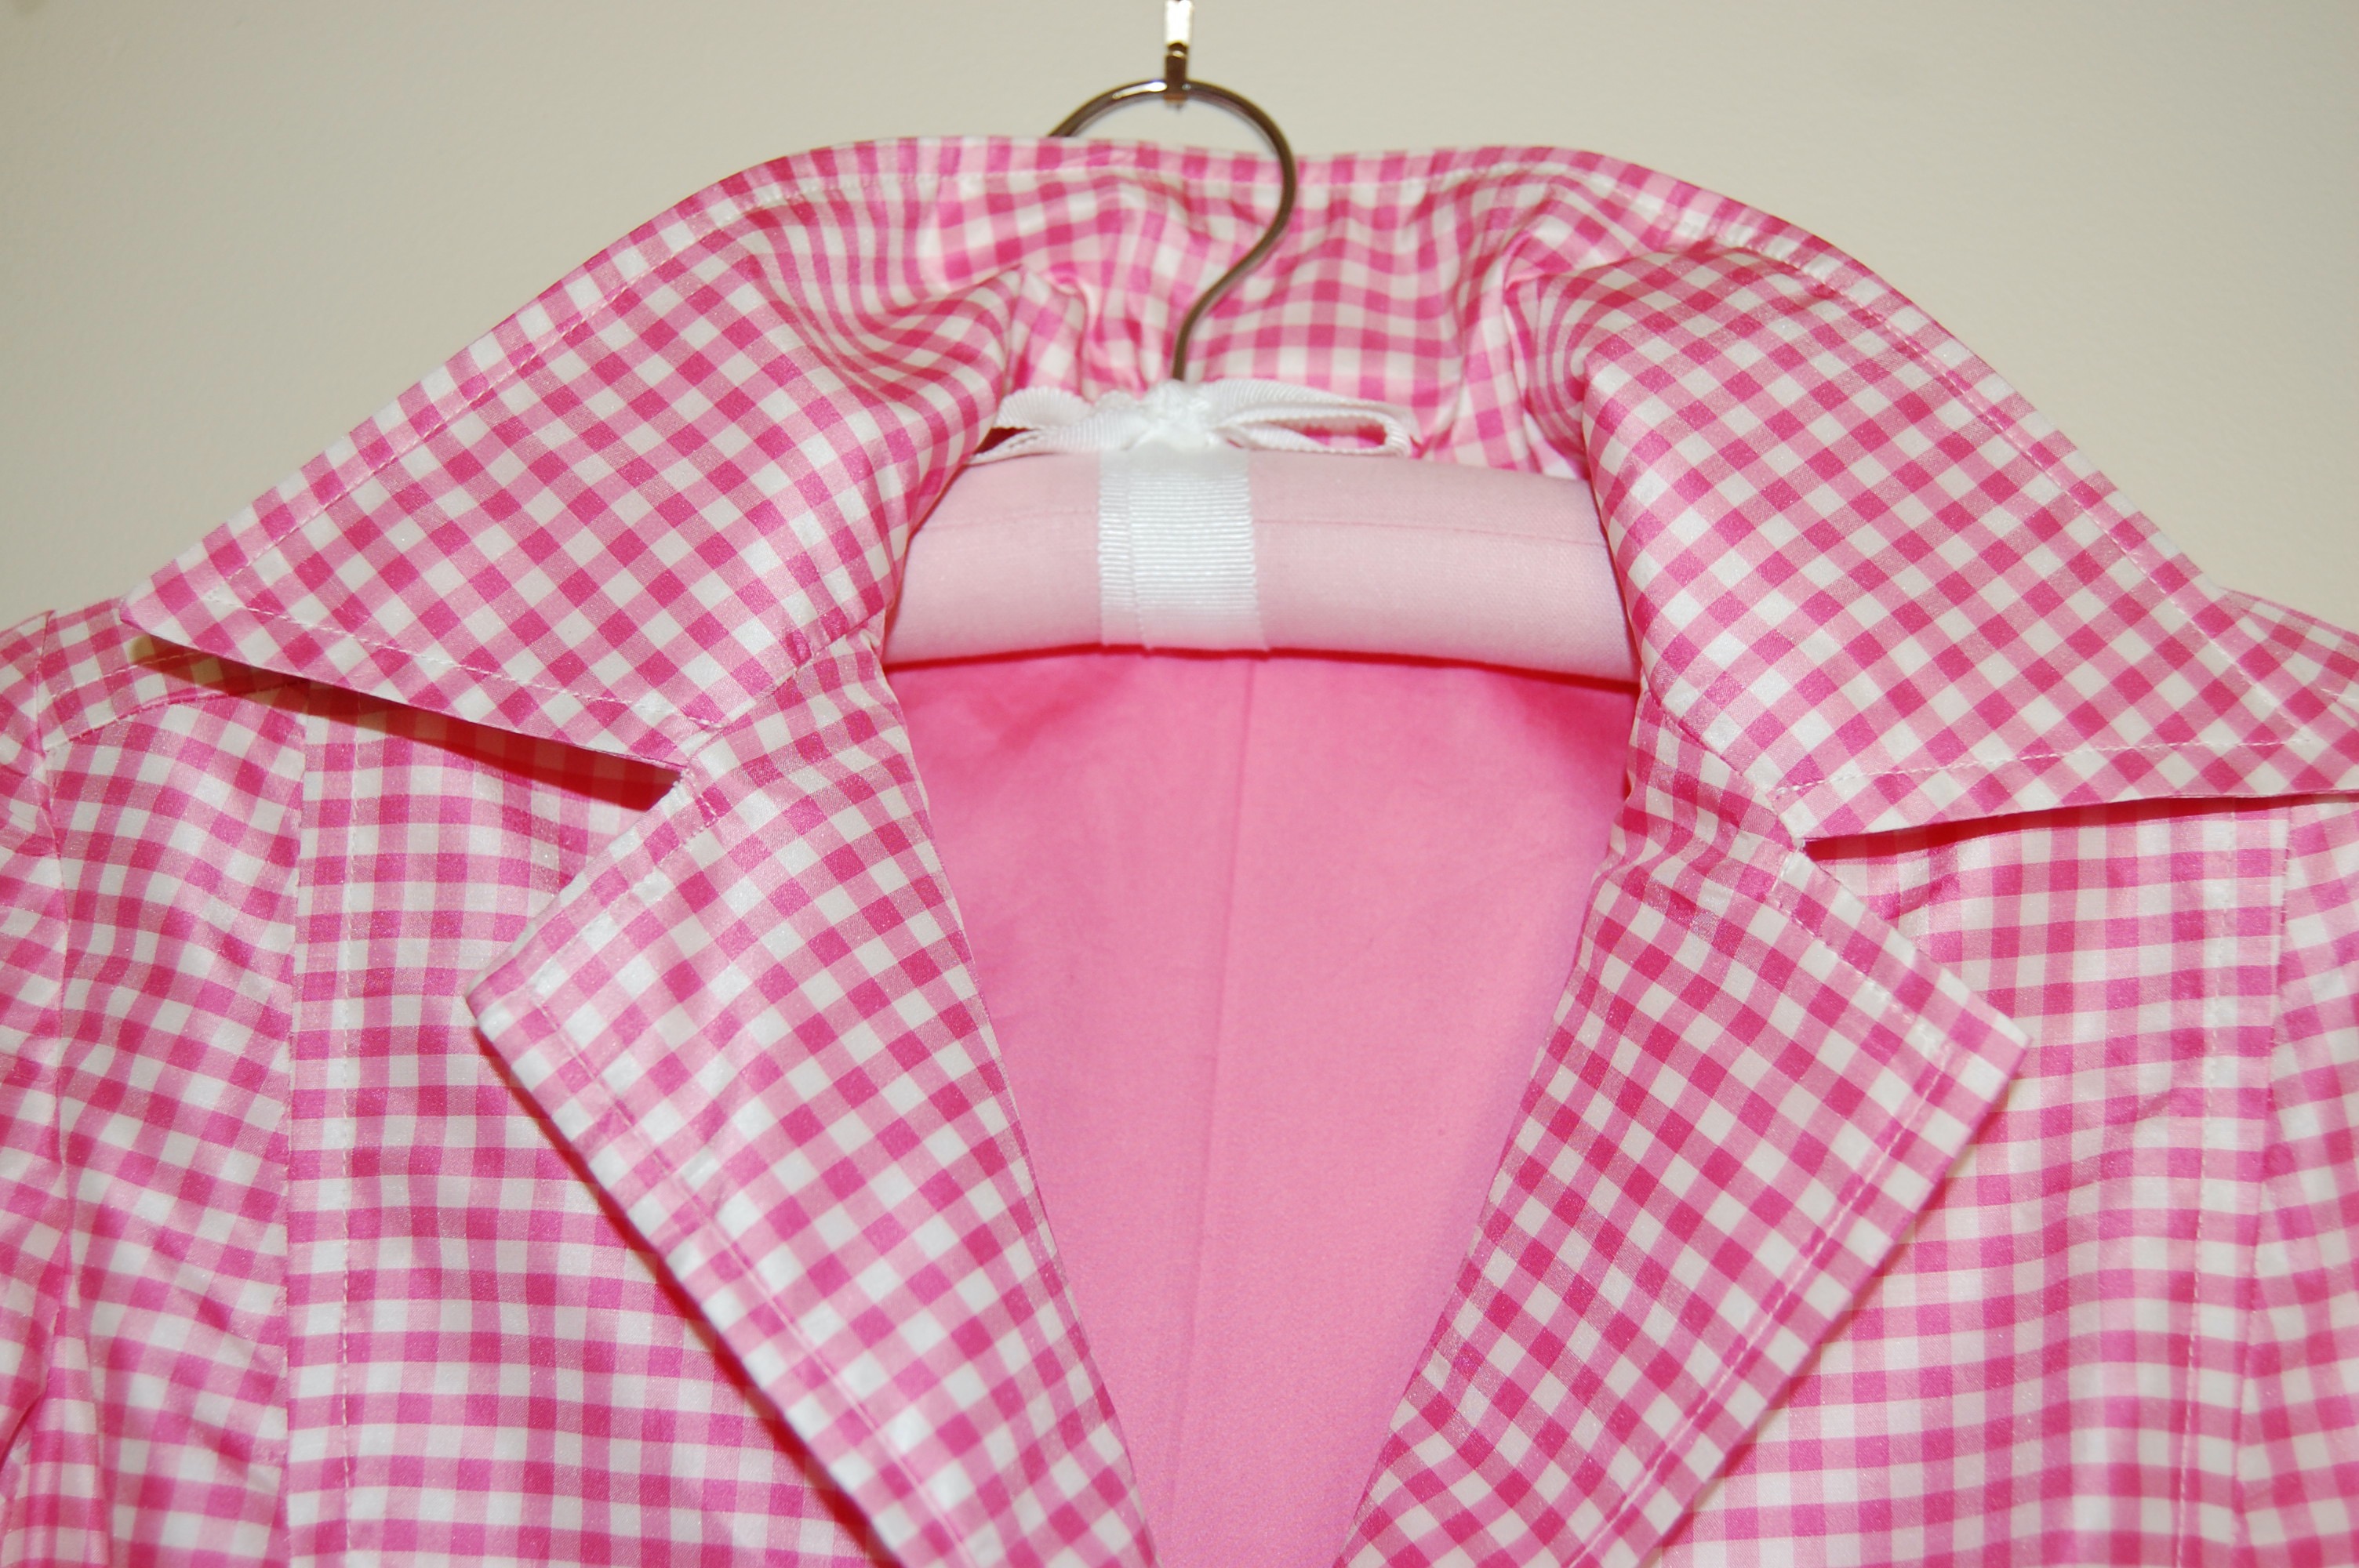
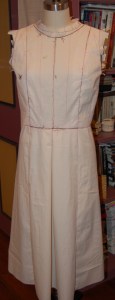
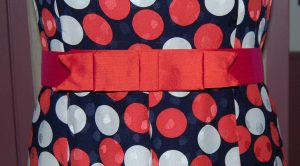
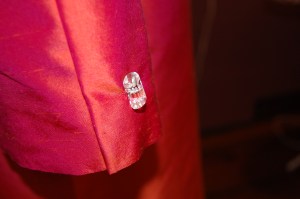
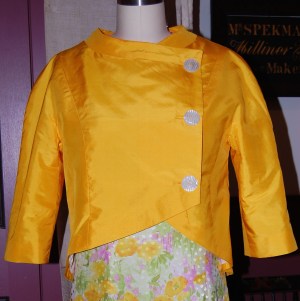
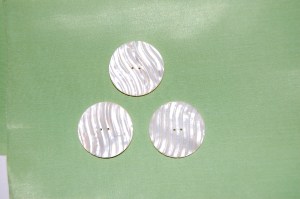
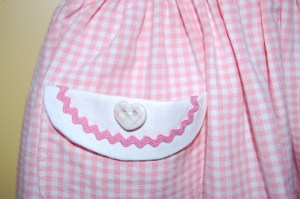
No report on this coat would be complete without mention of the buttons. Again, I went with vintage mother-of-pearl buttons. These have a carved detail in them, which I thought would pair nicely with the gingham.

I chose to do machine buttonholes on this silk coat.

This was an involved, lengthy project.  I was rather in awe of my 24-year-old self for attempting it “back in the day.”  But making it again brought back hidden memories (good ones) and new appreciation for all that I have learned over the ensuing years.  Wearing my new version of this Trench-inspired coat will, I believe, fall into the “nearly perfect“ category.  

44 Comments

Filed under Buttons - choosing the right ones, Christian Dior, Coats, couture construction, Dressmaker coats, Linings, Mid-Century style, Silk taffeta, Uncategorized, vintage buttons, vintage Vogue Designer patterns, vintage Vogue patterns from the 1970s

Is It a Trench Coat – or Is it Not?

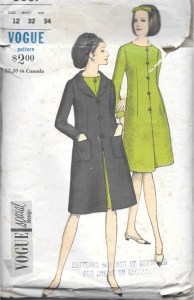
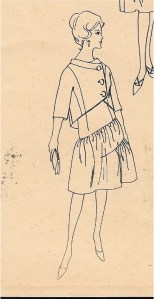
It is not.  However, I am quite sure this classic look from 1974 was inspired by the classic Trench Coat as we know it.  

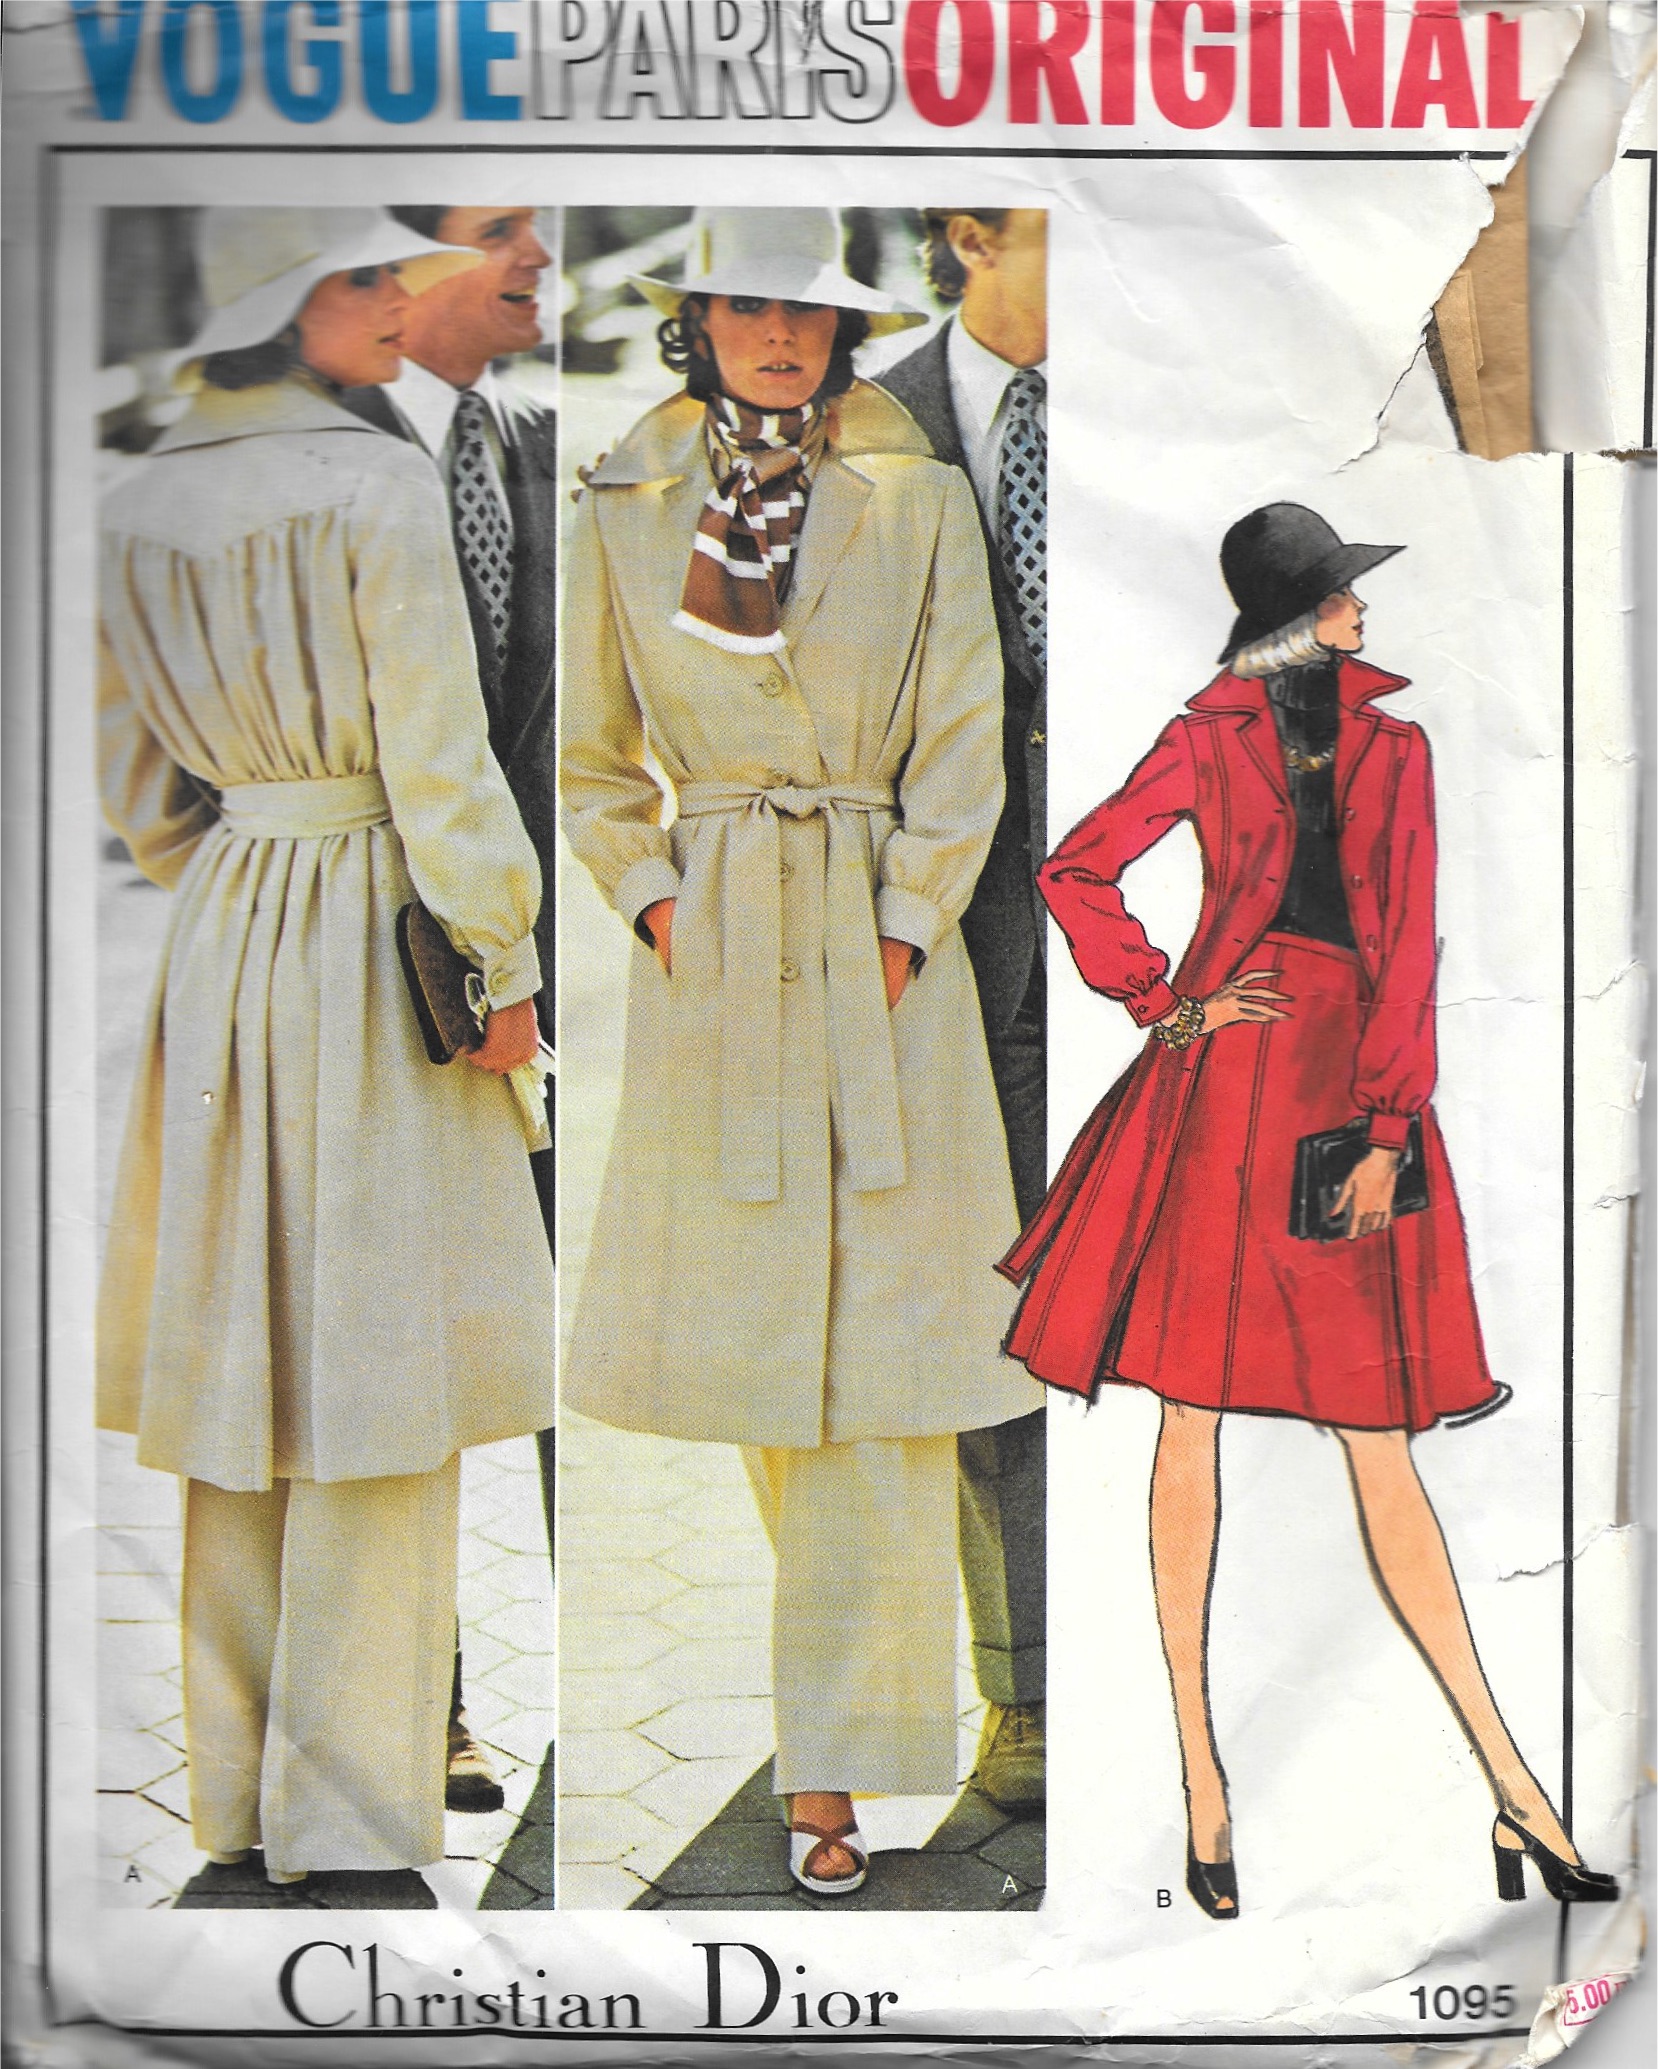
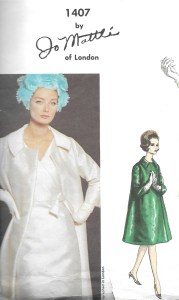
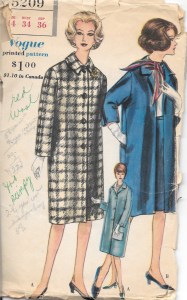
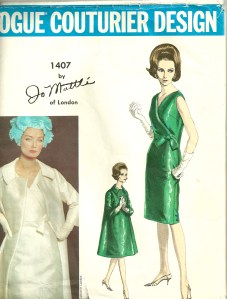
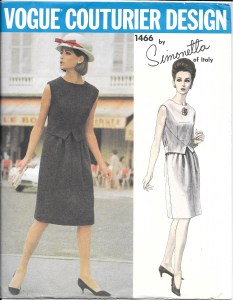
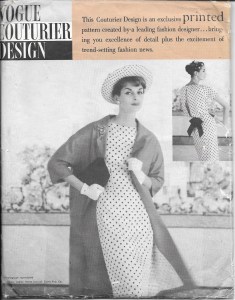
I am certain this Vogue pattern is from 1974, as it is featured in that year’s July/August issue of Vogue Pattern Book Magazine.  It is part of a section entitled NEW ARRIVALS.  

The caption tells me it is made in silk shantung, a little bit of information unknown to me when I decided to make my (new) version of it in silk taffeta.  

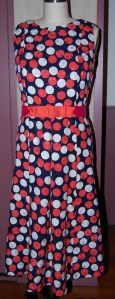
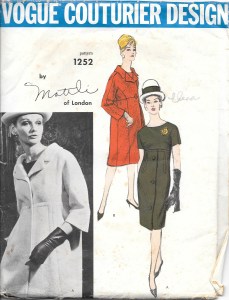
Interestingly, in the same NEW ARRIVALS section, a dress by Patou also is reminiscent of Trench coat style, with its epaulets, slotted pockets with shaped flaps and a belted waist.  It also has a center back inverted pleat.

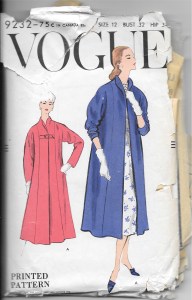
Fast forward two years and here is a very classic Trench in the 1976 September/October issue of Vogue Pattern Book Magazine.  

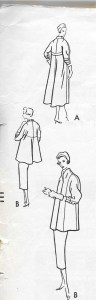
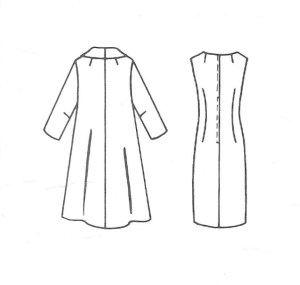
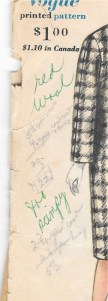
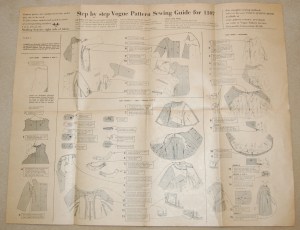
The caption reads: “Come rain, come shine, what more liveable coat than the trench!  All that star reporter elan in epaulets, front & back shields, center back inverted pleat.”  This particular pattern also includes a detachable lining for the coat and additional detachable collar. I believe that is the collar you see in red in the above picture from the magazine.  The thumbnail drawings of the pattern are helpful in seeing these details:

Now, hang onto your hats and fast forward 46 years to 2022.  The Trench Coat, despite being in fashion since the 1940s, is apparently enjoying new attention and reimagination according to an article in the Style & Fashion section of The Wall Street Journal, April 23-24, 2022.  Although I am a little doubtful as to the long-lasting appeal of some of the Trench Coat variations shown and suggested in the article by Katharine K. Zarrella – which include a skirt, pants and a corset (really?) – some of the reflections and thoughts on Trench Coat style by various fashion insiders are worth sharing.  

Michael Kors is quoted as saying:  “A trench coat inherently feels like an old friend that makes you feel very secure…  But you want an old friend to surprise you.”  (Pink checks, anyone?)

Jane Tynan, author of a soon-to-be-released book entitled Trench Coat, says the appeal of the Trench to contemporary women is the “danger and sensuality it conveys.” (Think spies and clandestine meetings.)  However, a certain Loa Patman of Boston, Massachusetts, says, “Anything trench-inspired tends to look somewhat pulled together and professional.”  

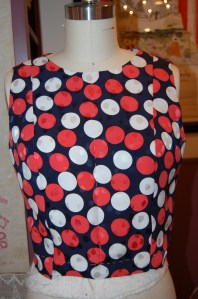
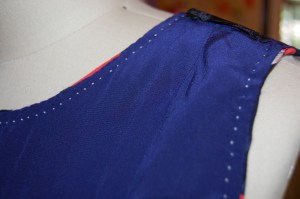
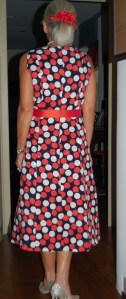
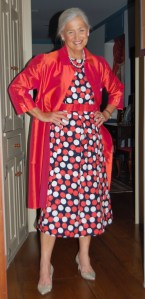
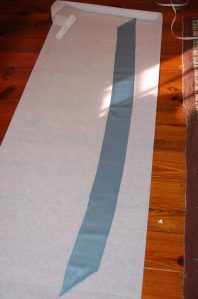
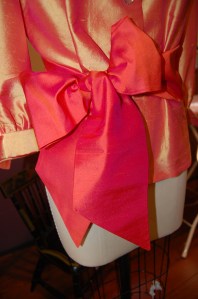
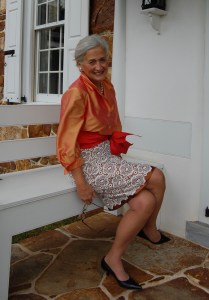
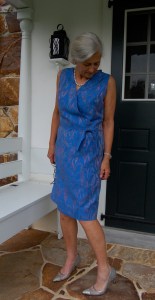
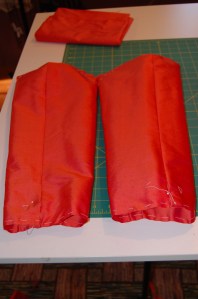
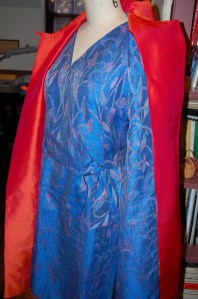
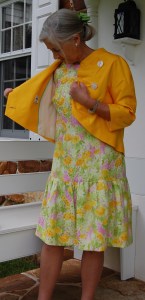
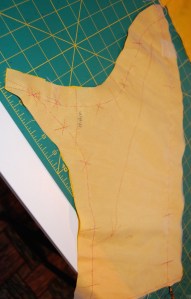
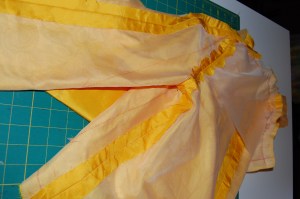
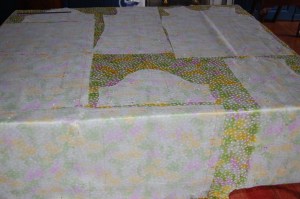
Well, I don’t expect to be doing any sleuthing in my Trench-inspired Christian Dior design from 1974, but I do aspire to feel “pulled together” while wearing it.  Right now it is anything but pulled together, as you can see from the photos of my “work in progress”.  

Thinking further about the origins – and definitional category – of this particular design from the House of Dior, it seems to me to be a cross between a dressmaker coat and a Trench. Perhaps “Dressmaker Trench” might be the best description. As you will recall, if you follow this blog, I have referred to “dressmaker coats” before. Fairchild’s Dictionary of Fashion describes it as: “A woman’s coat designed with softer lines and more details than the average coat. May have a waistline and unusual details, e.g., tucks or pleats.” (p. 92, ibid.)

I’m not sure Dressmaker Coat is a descriptor many use anymore, but it certainly is useful. One thing I am quite certain of, once this Trench-inspired Dressmaker Coat is finished – it promises to stand the test of further time. I anticipate it as a staple in my Spring and early Summer wardrobe.

5 Comments

Filed under Christian Dior, Coats, Dressmaker coats, Fashion commentary, Mid-Century style, Silk taffeta, Uncategorized, vintage Vogue patterns from the 1970s

PINK Plans for 2022

Five days into the New Year seems like a good time to look forward and put down in writing new plans and projects, both personally and in my sewing life.  Occasionally in past years, I have chosen a word to guide me in my thinking, and after a sewing friend (thank you, Debra!) suggested this approach again, I happily went with the first word which popped into my mind.  P I N K.

Pink is undoubtably my favorite color.  I love it in all hues and shades, from the palest pink to deepest fuchia, from bubblegum pink to carnation pink.  I love wearing pink and I love sewing with pink fabrics. Looking at fabrics I have collected over the past few years testifies to this fact.

A few of those selections with “assignments” for 2022 will be scattered amongst this exploration into PINK.

And first up is this length of deep pink cashmere blend (Farmhouse Fabrics), from which I plan to make this jacket:

P:

P of course stands for PINK the color.

P is also a good reminder to keep PERSPECTIVE on the year.  If the last two years have taught us anything, it is to be prepared for the unexpected.  Sometimes things are out of our control, thwarting our plans and timing.  Rolling with the punches (another P-word!) is something I need to become better at.  Which brings me to . . .

P is for PERSEVERANCE.  This is an invaluable asset when it comes to sewing well – and living well.  

I have plans to make a day dress out of this soft and supple dress-weight wool, purchased from Mendel Goldberg Fabrics. I am still deciding on the pattern.

I:

I is for INDULGENCE.  I have decided to indulge my love of coats and dresses and fancy clothes even I don’t need them.  So there!  

I is also for INDECISION.  I am not usually one who has trouble making decisions, but sometimes, a fabric or pattern stumps me.  When that happens, I have to step back and let time make the decision for me.  It always works.

I is for INSPIRATION, which is never in short supply among all the vintage patterns, fashions, buttons, and fabrics in the couture-loving-and-sewing online community.

If you follow my blog, you have seen this duo before. Silk charmeuse for a fancy blouse and silk twill for a floaty skirt, both from Britex Fabrics.

N:

N is for NEW ENDEAVORS, both in sewing and in my personal life – NEW patterns, NEW fabrics (YES! Even new fabrics), NEW commitments, determined by answering these two questions:  What can I let go of?  And, more importantly perhaps, What can I not let go of? 

N is also for NOT feeling guilty about all the time I devote to sewing and fashion and dreaming about both. 

The pink gingham on the right is silk taffeta. When I purchased this fabric from Farmhouse Fabrics, I intended to make a shirt dress, but then it did not seem right to me. A couple of years later, I knew it needed to be a Spring coat instead, lined with the quirky vintage 1950s’ novelty silk. The pattern is below, first used by me in 1974 for a trench coat I sadly no longer have.
I love this pattern now as much as I did when I first made it in my early twenties.

K:

K is for Kindred Spirits – such an amazing camaraderie amongst the global sewing community. I am so grateful to be part of the network of friendships we share.

K is for Keeping Focus, and for the need to Knuckle Down in order to accomplish my sewing and personal goals this year.   

K is finally for Kindness which I hope will guide me throughout this new year.

Even when I choose a color other than pink, somehow pink wiggles its way into the design. When I found this fabric at Emma One Sock Fabrics, I immediately thought of making a tunic and trimming it with pink Petersham ribbon.
A Pink-Lover’s Dream Collection: From top to bottom: 1)vintage Moygashel linen, purchased on eBay 2) silk charmeuse, purchased from Britex Fabrics 3)vintage Moygashel linen, purchased by me in the 1970s 4) linen, possibly Moygashel, purchased on Etsy 5) silk jacquard purchased from Britex 6) silk charmeuse, purchased from Mendel Goldberg Fabrics 7 & 8) coordinating silks, purchased from Mendel Goldberg.

“And now we welcome the new year, full of things that have never been.”  Rainer Maria Rilke

Happy New Year, dear Sewing Friends.  

26 Comments

Filed under Mid-Century style, silk, Silk taffeta, Uncategorized, Vintage fabric

Wearing Dots

From this …


To this…


How did that happen?

After my purchase of that pattern a couple of years ago, I definitely had second thoughts.  While I loved it when it was first available back in the 1970s – and at that time I was of the age when I probably could have actually worn it – I immediately realized it would not be appropriate for a 60-something-year-old! I tucked it away in my pattern file where I knew I would come across it occasionally and indulge a long-ago dream.  Little did I know it would play a major roll in the realization of this polka-dotted dress.

It took almost eight years for me to come up with a plan for this polka dot silk fabric.  I kept envisioning a waisted, sleeveless dress with a “flowy” skirt, but I could not find a pattern I liked, either vintage or new.  I wanted to avoid darts as much as possible (that’s a story in itself for someday), which meant I needed a princess style bodice.  Many princess line bodices have side seams, but I wanted one without side seams, and with princess line seaming on the bodice back as well.  Pondering all this, I again came across my Belinda Bellville pattern above and thought maybe it would work, with a few changes. But then I noticed that the bodice was supposed to be cut on the bias. 

This pattern detailing from the instruction sheet shows the thee bodice pieces at the top of the picture. The bias is clearly marked.

After not having any success in finding any other suitable pattern, I gave it another look.  Why not cut it on the straight of goods?  It was at least worth a try in muslin, so that’s what I did.  The changes I made to it included; 1) lowering the bust line, 2) eliminating the short-waisted front of the dress and restoring it to waist level, 3) placing the front center part of the bodice on the fold, eliminating the center seam, 4) lowering the neckline just a little, 5) making the waist larger, and 6) adding some ease across the back and shoulders.  With all those changes, I had a bodice I really liked.

But then I needed to make a skirt to complement the bodice.  When I looked at the skirt pattern, I knew I needed to divide it in thirds (for one half of the width of the skirt) and match the seam lines to the seams in the bodice.  Here is what I came up with:

On the left is the one-piece tissue pattern for the skirt. Using the dart lines on that pattern helped me determine the angles I needed for my skirt.

It was about this time I got the idea to make this dress in a longer skirt rather than knee-length, which is where I usually wear my dresses.  The only question I had was – did I have enough fabric to do this?  My silk was 45” wide, and I only had two yards.  I spent at least an hour laying out and eyeballing my muslin pieces on the silk, on the floor, just to see if I could possibly accomplish this task.  I found one combination that would allow this, and took a photo so I could remember how to do it!

It literally took an entire week to work out the pattern and perfect the muslin, but then the sewing began!

As soon as I completed the construction of the bodice, including its silk organza underlining, its catch-stitched raw seam edges, with the seam allowances around the neckline and armholes appropriately tacked in place, I knew I had a bodice which was just what I had envisioned.

Somehow the skirt seams all matched up perfectly with the bodice seams and the center front inverted box pleat, which I added, looked wonderful, I thought.  I made the lining out of navy blue crepe de chine, purchased from Emma One Sock Fabrics.

When it came to under-stitching the neckline and armholes, I decided to do it in white.  It mimics the white polka dots in the fashion fabric and also was much easier to see while doing all that handwork.

Instead of a box pleat in the lining, I did two side pleats to reduce bulk in that critical tummy region!

Fortunately, for the belt, I had silk taffeta left over from two previous projects, which turned out to be a perfect match.  I did not want the belt to take away visually from the rest of the dress, so I made it a modest 1.5 inches wide.  I think it is enough to complete the look, but not overpower it. And OF COURSE I wanted to finish it off with a tailored bow.  (I am planning a post on making this tailored bow belt, so I will not go into the details of it right now.)


An oyster-colored clutch helps to complete the look.

This is a very comfortable dress to wear!

No attempt was made to match any dots, as the pattern was completely random. This is the hand-picked zipper. I love the fact that the navy thread shows up on the white and coral dots.

And should I need a dress coat, this one matches the belt!

While this dress was firmly in my queue for summer sewing, at the time I did my planning I was not making it for any special occasion.  However, as good fortune would have it, two unforeseen occasions are now approaching in late summer for which this dress will be perfect.  I am definitely looking forward to wearing these dots!

41 Comments

Filed under Bows as design feature, Cocktail dresses, couture construction, Linings, Mid-Century style, Polka dots, sewing in silk, silk, Silk taffeta, Uncategorized, vintage Vogue Designer patterns, vintage Vogue patterns from the 1970s

A Three Piece Outfit for the Holidays, Part 3: The Sash

The sash started it all. After finishing this silk taffeta coat last year, I was left with about 1 and ½ yards of that luscious coral fabric.

I just could not stand the thought of having that yardage sitting in my fabric closet, unused, as I found it so delightful to sew and to wear. That is when I got the idea to combine this fabric with the Guipure lace, also sharing space in that closet of wonders. However, my first thought was to make a blouse from the fabric and also use it as the fashion fabric for a lace skirt, knowing I would need at least one more yard to accomplish this plan. I contacted Britex Fabrics, from whence the fabric came, and to my dismay, they were sold out, with no more available to special order. Undeterred, I then came up with the idea of coordinating fabrics for the blouse and skirt, and using the coral silk to tie it all together. After receiving swatches of several silks from Britex, I settled on the bronzy brown and the apricot colored fabrics for the skirt and blouse, respectively.

A sash should really be straightforward, right? Well, yes; however, I thought it would be good if the sash had a slight curve to it to follow the curvature over the upper hip. That’s when I went to my closet and pulled out a silk sash that I purchased from J. Crew years ago. I had remembered correctly that it had a slight curve to it:

I often think of the tip in the book 101 Things I Learned in Fashion School, page 86: “When in doubt, look in your closet.” Looking at something that is “Ready to Wear” will often help you with construction methods or design ideas.

The J. Crew sash is 72 inches long. A trial tying of the bow proved to me that I needed to add more length to the sash if I wanted to tie a full bow at the waist, which was my intent. I determined that adding 12 inches would do the trick. Then I used that sash as a template to make a pattern, not quite knowing how sewing that long, slow curve was going to work (the sash has one long seam on the concave side of the curve, meaning that some give would need to be worked into that seam.) As it turned out, ironing was the trick to get it to behave correctly, as is so often the case!

84″ proved to be the perfect length to tie a complete bow.

I had to piece the sash in the center back, but I knew that ahead of time and it really does not bother me.

After trying on this completed outfit for the photos, I know that I need to somehow tighten up the interior waist of the skirt (you many recall from my last post, that I added what turned out to be unnecessary width to the circumference of the waist.) My blouse is not going to stay tucked in if I don’t, and the skirt feels like it is drooping on me. I am going to try adding interior waist elastic to straddle the side seams and see if that might do the trick. I am not about to take the skirt apart and remake it! And the sash should help conceal any bobbles in the waistline.

The “concealed zipper.”

It was cold and blustery when I took these photos! I could not wait to get back inside for a cup of hot tea!

Sewing for the holidays is such an anticipatory activity, and one that I love to do. There is already a festive feeling in the air here in late November, and so much more to sew…

28 Comments

Filed under Blouses, Bows as design feature, Fashion commentary, Lace, Silk taffeta, Uncategorized

Just for the Chill of It

Autumn is a delightful season here in the northeastern part of the United States. One can tell it is on its way when the warm days quickly take on an evening chill once the sun slips below the horizon. It is the time of year when a light coat or sweater is a necessity, especially with a sleeveless dress.

With this scenario, and a September wedding to attend, what better excuse did I need, to make a coat to go with this dress?

The Year of Magical Sewing

If you follow my blog then you probably already know this was my intention all along, when I made the dress two years ago. But it took a while to find the right coordinating fabric for a coat. I was looking for something between a coral and a pink. While the silk taffeta I found at Britex Fabrics looks more like a deep persimmon color when photographed, the fuchsia pink warp is very apparent when being worn.

Taffeta coat - swatch

Once I decided the Jo Mattli-designed coat, part of the original dress pattern, was too voluminous, I went to another pattern. I wanted to keep the “intention” of the original coat, but have it more streamlined.

The "original" coat designed by Jo Mattli.

The “original” coat designed by Jo Mattli.

Taffeta coat - %22too scimpy%22

The coat pattern I settled on.

Somehow along the way, in making my muslin, I got the idea to add a curved belt to the back of the coat. I knew I had used a coat pattern several years ago with a curved belt back detail, so I went through my pattern collection to retrieve this:

This is a 1957 pattern, but look at the belt shown on the back of the envelope, below.

This is a 1957 pattern, but look at the belt shown on the back of the envelope, below.

taffeta-coat-belt-pattern-thumbnail

The belt is only shown in view A.

It took a couple of tries with the muslin to get the placement and angling of the belt correct, but once I did, I knew it was a winner. Dressmaker details like this always give me a thrill!

I anchored the belt in the side seams right under the bust darts.

I anchored the belt in the side seams right under the bust darts.

Just for the Chill of it

The curve of the belt needed to fall at my waistline.

The curve of the belt needed to fall at my waistline.

One of the things I like about this pattern is the two-part sleeve with a center seam. I think this design is always flattering to the shoulder. Here are the constructed sleeves:

Just for the Chill of it

That center seam also provides the opportunity for a faux vent, and since I just happened to have three buttons, which I thought would be perfect for the coat, I happily included vents, as the pattern dictated:

Just for the Chill of It

A small, cylindrical, crystal button!

A small, cylindrical, crystal button!

Although I originally thought I would leave the coat “closure-less,” that third button kept calling to me. While I did not want to have a single bound buttonhole in the center of the chest, I thought a button loop might do the trick. If I didn’t like it, I could remove it fairly easily from the front facing seam.

Just for the Chill of it

I also decided to add a loop at the neck, with a plain flat button under the collar. This way, I could close the collar if I chose to do so.

I pad-stitched the collar, but forgot to take a picture. Pad-stitching is like magic in how it makes the collar roll properly!

I pad-stitched the collar, but forgot to take a picture. Pad-stitching is like magic in how it makes the collar roll properly!

I have to say, I think the coat looks equally good any way it is worn: with the single button at the bust line closed, with both buttons secured and with neither of the buttons secured.

I chose not to add the optional pockets to this coat, but if I make it again in a less formal fabric, I would absolutely include them.

Once I got to the lining, I had to decide if I wanted to add the flat piping detail which I like so much. Of all the bias silk ribbon I have on hand, the only one which looked good was deep pink. Because of that, it doesn’t show contrast all that well, but I still like the subtle finishing look it gives to the lining.

Just for the Chill of it

Just for the Chill of it

Here, by the way, is the coat before I inserted the lining:

I underlined the entire coat with silk organza and added "cigarette" sleeve headings.

I underlined the entire coat with silk organza and added “cigarette” sleeve headings.

I love a center back seam!

I love a center back seam!

I used some vintage silk buttonhole twist to tack the center back fold in the lining at the neck and at the waistline.

Just for the Chill of it

There is no question that the dress and the coat go together once the lining shows!

There is no question that the dress and the coat go together once the lining shows!

Just for the Chill of it

I love that the lining peeks out from the sleeves when I am wearing the coat.

I love that the lining peeks out from the sleeves when I am wearing the coat.

taffeta-coat-full-copy

I was delighted when the photographer at the wedding wanted to take my picture because he "liked my outfit so much." (This is not that photo...)

I was delighted when the photographer at the wedding wanted to take my picture because he “liked my outfit so much.” (This is not that photo…)

Here with my husband - with a coordinating tie, no less (not planned, but makes for a great photo!)

Here with my husband – with a coordinating tie, no less (not planned, but makes for a great photo!)

It may seem a bit frivolous to make a coat like this, knowing that it will not be worn all that often – although I do have two other dress-weight silks in my collection which would look fairly stunning paired with this coat!  However,  it really is the perfect weight and look for an elegant, but chilly, evening out – and it was so much fun to make.

38 Comments

Filed under Buttons - choosing the right ones, Coats, Cocktail dresses, couture construction, Dressmaker coats, Dressmaker details, Linings, Mid-Century style, piping, sewing in silk, Silk taffeta, Uncategorized, vintage buttons, vintage Vogue patterns from the 1960s

“Mrs. Scimpy”

Two years ago I made this dress:

The Year of Magical Sewing

From this pattern:

Perfect Blue - Mattli pattern

Once I had the dress finished, I liked it so much that I decided a coordinating coat, with a lining to match the dress would be wonderful – sometime. I even went so far as to order more of the blue silk blend fabric from EmmaOneSock, while I knew it would still be available.   Tucked away in my fabric closet, it has patiently waited while I searched and searched for the right coat fabric in a coordinating/contrasting color and in silk. I finally found it last Spring, during a online silk sale at Britex Fabrics in San Francisco.

Taffeta coat - swatch

The fabric is lightweight silk taffeta, with the weft in persimmon color and the warp in fuchsia pink, giving it a shimmer which changes color with movement. I decided it would be my first project after we returned from our summer travels – with the intention of having it ready to wear with the dress to a September wedding, which happens to be at a location where a light coat or wrap is advisable.

All along I had intended to use the Jo Mattli coat pattern that is shown with the dress. I liked the idea of no buttons and simple lines.

Taffeta coat - Mattli pattern

The thumbnail diagrams on the back of the pattern envelope.

The thumbnail diagrams on the back of the pattern envelope.

However, when I got the pattern pieces out, here is what I found:

Front and back pattern pieces

Front and back pattern pieces

Yep, that is one voluminous coat! I knew that, even with taking some of the bulk out, I would probably still look like I was wearing a tent. With that slim dress, I am not sure why the coat has to be so full, but I had no qualms about deciding not to go in that direction. However, I still wanted a coat with no buttons or maybe just one button. I dug through my collection and came up with several possibilities, which included this one:

I do like the looped buttons, but I just wasn't convinced this was the right look.

I do like the looped buttons, but I just wasn’t convinced this was the right look.

I have another Jo Mattli coat and dress design which I love, but I think the coat would make up much more attractively in wool rather than silk taffeta, so I ruled this one out:

Taffeta coat - 2nd Mattli pattern

Then I came across this one: View B shows it with no button/buttonholes down the front. I also like the three-quarter sleeves, with the cuff detail.

The pattern description reads: "Striaght coat with or without buttoned closing below notched collar. Long and below elbow length sleeves with button trimmed vent. Optional pocket in side. Slim skirt.

The pattern description reads: “Straight coat with or without buttoned closing below notched collar. Long and below elbow length sleeves with button trimmed vent. Optional pocket in side. Slim skirt.”  I knew this coat would take on an appropriate dressy look when made up in silk taffeta.

Now –  I try to buy vintage Vogue patterns in sizes with a 32” bust and 34” hip measurement; however, that is not always possible, so I will go up or down a size if it is a pattern I really want to have. When I make my muslin (toile) for such a pattern, I try to include adjustments for the size issues so that my final alterations will be easier. However, the handwritten note on the front of this pattern gave me pause: “too scimpy” it reads. She obviously meant “skimpy,” but those two words spoke volumes to me (no pun intended!) Maybe I would just follow the pattern exactly (except for lowering the bust which I always have to do), and see if the size is okay.

Taffeta coat - pencil notes

And that is exactly what happened! Little did Mrs. “Scimpy” know that her simple pattern review, circa 1961, would save me both time and effort in 2016!

It looks like Mrs. Scimpy made her coat out of red wool, with a matching skirt. Her pencil notes on the yardage required indicate such, along with the cost of the fabrics: $22. I certainly hope she figured out that the coat was too skimpy in time to make adjustments, as a red wool coat with matching skirt would be lovely indeed!

8 Comments

Filed under Coats, Dressmaker coats, Messages from past owners of vintage patterns, Mid-Century style, silk, Silk taffeta, Uncategorized, vintage Vogue Designer patterns, vintage Vogue patterns from the 1960s

An Evening Jacket for the Ages

“Very up and coming” for the Fall of 1962, according to Vogue Pattern Magazine, was “the striking medium between a straight line and a bold curve – the gentle convex ‘barrel’ shaping of this coat:”

An Evening Jacket for the Ages - picture

It is from this time period – perhaps a year or two later – that this Designer Pattern comes:

Oh the things we can learn, no 10

I don’t know many of us who want to look like they are in a barrel, so it was my intention to take the best parts of the design of the evening jacket and then adapt it to a more current look, or at least to one that did not scream 1963/64

The details I loved about it were: 1) the shaped, two-part collar, which doesn’t really look like a collar, rather as an extension of the body of the jacket, but with more definition to it:

Evening jacket for the Ages

2) the dipped back hem of the jacket:

Evening Jacket for the Ages

I purchased the yellow silk taffeta from Britex Fabrics, while the dress fabric, also silk, is from Mendel Goldberg.

Evening Jacket for the Ages

3) the below-elbow length, kimono sleeves with their clever built-in gusset, and 4) the prominent, offset buttons:

Evening Jacket for the Ages

The top buttonhole is a slot-seam one, while the other two are bound buttonholes.

Less attractive to me was the fullness of the body of the jacket.

My muslin (toile) showed me that I needed to eliminate quite a bit of that fullness from the pattern pieces. I took 2 inches right out of the back of the jacket, making for much less to be gathered into the collar:

Even with two inches removed from the center back seam, there is still enough to gather nicely into the collar.

Even with two inches removed from the center back seam, there is still enough to gather nicely into the collar.

I also took a large wedge out of the each side of the back:

The dark blue line on the left is my re-drawn seam line. the original seam line is marked in red.

The dark blue line on the left is my re-drawn seam line. The original seam line is marked in red.

Then to add a little more shaping, I re-drew the side seams in the side underarm sections:

Again, the blue line on the left is my re-drawn seam line.

Again, the blue line on the left is my re-drawn seam line.

Because the buttons are such a prominent feature of the jacket, I knew I had to find the right ones. The pattern called for them to be 1¼” in diameter. That is a big button! I also knew they had to be a bit fancy or elegant, and I envisioned mother-of-pearl as the ideal composition. It took a while, but I found these buttons on eBay, and they looked just about perfect to me: right size, beautifully carved mother-of- pearl with a swirl design which I thought would add just the right contrast to the silk taffeta of the jacket. As it turned out, they were also the right price (always a welcome surprise!), and more beautiful when they arrived than I had anticipated:

Evening Jacket for the Ages

These buttons have a substantial heft to them, making them well suited for their application on this jacket.

After getting the body of the jacket together, I tried it on to look at the length of it. Fortunately I had cut my pattern with about an extra half-inch in the length, and I used it, plus another ¼ of an inch, as it just looked better a little longer.

Another plus to lengthening the jacket is that the sleeve length lined up more attractively, something I didn't realize until I saw these photos!

Another plus to lengthening the jacket is that the sleeve length lined up more attractively, something I didn’t realize until I saw these photos.

I did my usual flat applied piping along the edge of the lining:

Here is the piping sewn in place.

Here is the piping sewn in place.

The green piping picks up the green in the dress. I opted for an off-white lining, which is a little boring but that's okay!

The green piping picks up the green in the dress. I opted for an off-white lining, which is a little boring but that’s okay.

And I added the label I had:

Evening Jacket for the Ages

Evening Jacket for the Ages

Evening Jacket for the Ages

A few wrinkles left over from the jacket’s first wearing!

Evening Jacket for the Ages

Evening Jacket for the Agea

Evening Jacket for the Ages

I have to say, I really love this evening jacket. I have decided it is going to have another life – with another dress, this one constructed with the double, slanted flounce on it (see pattern above).  It would look fairly fabulous with a black and goldenrod printed silk – or navy, white and goldenrod printed silk…   I’ll be on the search.

17 Comments

Filed under bound buttonholes, Buttons - choosing the right ones, couture construction, kimono sleeves, Mid-Century style, piping, sewing in silk, Silk taffeta, Slot-seam buttonholes, Uncategorized, vintage buttons, vintage Vogue Designer patterns, vintage Vogue patterns from the 1960s

Those Sneaky Pattern Instructions!

Is anyone else out there in Sewing Land regularly deceived by the conciseness and orderliness of pattern instructions? They look so innocent all neatly delineated on those folded sheets that fit into pattern envelopes. But lying beneath the surface are hours and hours of precise pinning, basting, stitching, and, at times, head-scratching and seam ripping!

The construction of an entire coat or jacket can fit on one side of one sheet of instructions! That which is illustrated and described on this sheet of paper, measuring approximately 19” x 15,” can take hours, days, and even weeks to plow through!

Those sneaky pattern instrucitions

As one who likes step-by-step, clearly delineated and enumerated guidelines, I relish looking at pattern instructions and innocently thinking about how straightforward and “simple” this is all going to be. And I am regularly fooled. A good example of this is my current project, a silk jacket to pair with my recently completed dress.

These small sketches included on the instruction sheets of many vintage Vogue patterns are so helpful in the visual information they provide.

These small sketches included on the instruction sheets of many vintage Vogue patterns are so helpful in the visual information they provide.

I got a good preview of the construction idiosyncrasies when I made my muslin (toile). The pattern piece for the kimono “sleeve back” struck me as unusual.

Here is that sleeve piece in the fashion fabric, with silk organza underlining basted to it.

Here is that sleeve piece in the fashion fabric, with silk organza underlining basted to it.

After reading the instructions, it still did not make sense, until I actually put the sleeve together. That little pointed end works as an underarm gusset, which is quite clever, and as it turns out, I believe it will be very flattering. Putting this part of the jacket together is delineated in steps 6 – 12:

Step 9 deals with this particular pattern piece.

Step 9 deals with this particular pattern piece.

Here is one-half of the jacket as I have it completed at this writing:

Those sneaky pattern instrucitions

It took at least 4 – 5 hours to complete just this part of the jacket, and I still have the other half to do! Granted, I regularly add effort and time onto this type of construction as I catch-stitch all the seams to the silk organza underlining. For this jacket, with all its curved seams, slashed darts, and tight corners, I am not sure it would turn out successfully without the control that catch-stitching those raw seams provides. So – it is time well spent.

But still – how can those “easy to follow guides” be so sneaky?

19 Comments

Filed under couture construction, Dressmaker coats, kimono sleeves, Mid-Century style, Silk taffeta

The Silky, Shimmery Colors of Spring

Just as with the elusive answer to “Which came first, the chicken or the egg?,” those of us who sew can try to answer “Which comes first, the fabric or the pattern?” The answer, at least as I see it, is “It depends.” And sometimes, even, it is a little of both.

When I saw this fabric on the website of Mendel Goldberg Fabrics last Fall, I really did not stop to think about a pattern. It was a “bolt end,” 1 3/8 yards of 58” wide Italian silk. With that width, I wasn’t particularly concerned about the length being under 1 and ½ yards. I just ordered it as soon as I could.

The colors of Spring

Upon arrival, the fabric was even prettier in person, shimmery with “polka dots” woven in, fluid as only silk can be, and the picture of Spring. At that point, I was up to my ears with my Winter sewing, so I thought about it only casually until just a few weeks ago. I already had this pattern in my collection, and in the back of my mind, I had paired that fabric with the dress in View B on the right.

Oh the things we can learn, no 10

One interesting thing about vintage patterns is the yardage requirements are often given for widths that are narrower than many modern fabrics are produced in. For that reason, it can be difficult to determine exactly how much fabric is needed for a particular design. I’m getting better at sensing what I need, so I just assumed that I would have enough fabric to make that dress.   I had my heart set on it, actually. So much so, that when Britex Fabrics announced an upcoming sale of silk fabrics, I sent off for swatches for coordinating silk for the short jacket (in view A) and lining for the dress.

The green is a lightweight silk/cotton blend. The goldenrod yellow is silk taffeta from Italy, without the stiffness that taffeta so often has.

The green is a lightweight silk/cotton blend. The goldenrod yellow is silk taffeta from Italy, without the stiffness that taffeta so often has.

Dutifully ordered, the fabric arrived from California, and it, too, was even prettier in person! I was in love, and really could not wait to get started, first on the dress, and then on the jacket.

DSC_0036

The green for the lining . . .

The colors of Spring

… and the yellow for the short jacket in View A.

Then reality hit. When I took out the pattern pieces, here is what I found for that unusual flounced skirt:

This skirt piece uses almost a yard in length, and the diagonal shaping on it uses more fabric than normal.

This skirt piece uses almost a yard in length, and the diagonal shaping on it uses more fabric than normal.

My heart sank as I knew immediately I did not have enough fabric. There was going to be no Rumplestiltskin to help me with this one.   I went back to my pattern collection and pulled out two more possibilities.

I love this dress, but I thought it might be too tailored for the fabric. Also, the seaming detail would be lost entirely with the busy design of the silk.

I love this dress, but I thought it might be too tailored for the fabric. Also, the seaming detail which adds so much to this dress would be lost entirely with the busy design of the silk.

I felt like Goldilocks evaluating this pattern for my fabric. Just not right...

I felt like Goldilocks evaluating this pattern for my fabric. Just not right…

With both these dresses I would have to rethink the jacket, as the styles would not compliment each other. I stewed over this, re-measured, re-thought, and left it all in a heap in my sewing room. There was something about that shimmery silk that kept telling me that a dress made from it needed to have some movement to it –  like the flounced half-skirt pictured in the pattern. And then it hit me. If I made the front part of the skirt the same as the back, I could probably just squeak it out.

I did a quick diagram to consider this option.

I did a quick diagram to consider this option.

My completed muslin verified this for me, and, not only that, I loved the look, at least done up in muslin. Once again, using the couture technique of laying out and cutting each pattern piece individually enabled me to manipulate the pieces to make the most of the fabric I had available to me. Fortunately, there was no matching to be done, although there is a specific up and down to the design.

Now this is what is called making the most of one's available fabric!

Now this is what is called making the most of one’s available fabric! This shows my silk organza underlining pieces in place, ready to cut.

As far as the jacket – losing the diagonally shaped flounces on the skirt, makes the effect of the jacket not quite as dramatic, but I think it will still be very flattering – and appropriate. (The jacket has a million pieces to it, so it will be quite the project…!)

Well, I can’t leave this post without sharing another color of Spring, although this one is not silk and not shimmery. Pink cotton gingham is the picture of Spring, especially in a little dress for a little girl! When I made a crib quilt for my younger granddaughter, Carolina, I backed it in pink gingham, appropriately called “Carolina Pink.” I ordered enough so that I would be able to make her a dress for her first birthday (earlier in April) and here it is:

The colors of Spring

The colors of Spring

The bodice is lined in soft white cotton, which makes a lovely finish.

The bodice is lined in soft white cotton, which makes a lovely finish.

In my tins of buttons, I found these little ceramic ones, purchased years ago when Carolina’s mommy was my little girl. (Well, she is still my little girl, but you know what I mean.) How appropriate to use them for one of her daughter’s dresses.

The colors of Spring

These buttons, with their delicate cross-hatch design, were just waiting for this dress.

And with this dress –  the fabric absolutely came first!

17 Comments

Filed under Buttons - choosing the right ones, Formal or fancy dresses, Heirloom sewing for children, Mid-Century style, Sewing for children, sewing in silk, Silk taffeta, Uncategorized, vintage Vogue Designer patterns, vintage Vogue patterns from the 1950s, vintage Vogue patterns from the 1960s, vintage Vogue patterns from the 1970s