
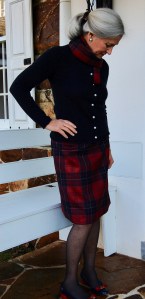
The almost-finished Classic French Jacket hanging on my dress form must be getting a bit impatient with me at this point. I switched gears and decided to give the Jacket (and me) a rest while I took on a “small” project. I had purchased this merino wool from Promenade Fabrics last Fall. It was a “remnant,” but one I knew would be ample enough for me to make a straight skirt.

What better month to have a red and navy plaid wool skirt than February, with its heart-colored hues and chilly temperatures? And after the nubbiness of the French jacket boucle, I was ready for some soft, finely woven merino wool. What is it about merino wool that makes it so lovely? The description in Fairchild’s Dictionary reads: “High-quality wool yarn made from fleece of merino sheep, which has short, fine, strong, resilient fibers, and takes dyes well.” ((Page 326, The Fairchild Dictionary of Fashion, by Charlotte Mankey Calasibetta and Phyllis Tortora, Third Edition, New York, New York, 2010.) Made in England by Butterworth and Roberts, this fabric has all those attributes and more.
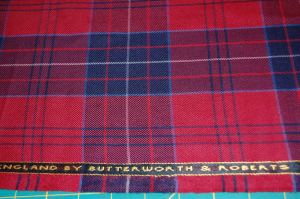
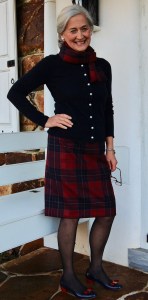
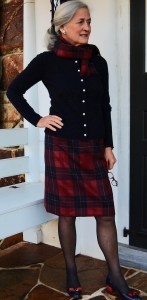
Plaids are always interesting to sew. Obviously the plaid has to be matched, but as important is determining the placement of the plaid, both on your body and on the pattern. Most plaids have a dominant color or block, and this is a good starting point. With this particular piece of wool, I wanted to emphasize the navy rather than the red (even though the red is dominant). I first thought the best way to do this was to place a navy block/stripe down the front middle of the skirt. I quickly discovered this actually emphasized the red instead of the navy. When I placed a red block/stripe in the center, the red receded, and I had the look I wanted.

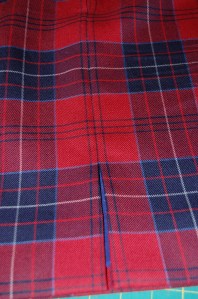
I also wanted the reveal of the plaid on the front center of the skirt to match the reveal of the back center seam. This enabled navy to predominate the side seams of the skirt, framing the front and back. Perfect!
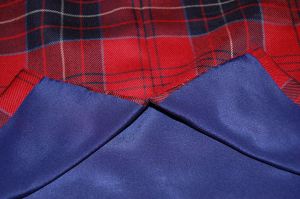
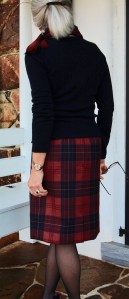
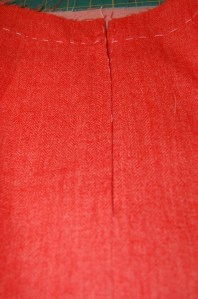
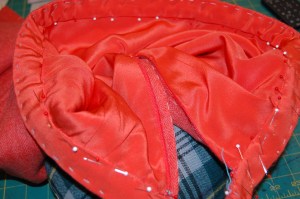
This shows the back vent folded back, but you can see the back seam is sewn so that the front center block and the back center block match.
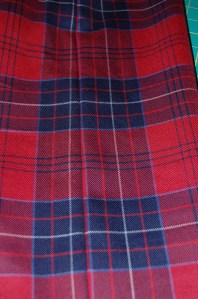
One of the side seams.
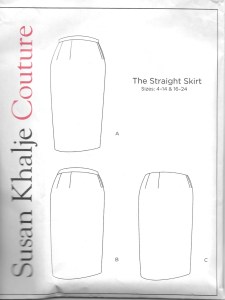
I used Susan Khalje’s straight skirt pattern which I had already used last Fall, and which needed no alterations in my existing muslin. (YAY!) While laying out the muslin pattern, I realized if I was careful, I would be able to save enough fabric to make a matching scarf. That would also mean that practically none of this beautiful wool would be unused.

The scarf is 60″ long and 9″ wide. I fringed the short edges, to make a nice finish.
Here are a few tips I used for sewing this plaid skirt:
1) In sewing the seams together, in order to match the lines of the plaid exactly, I used my walking foot. This helped to keep everything perfectly lined up and eliminated slippage of the fabric as I sewed. (Forked pins are useful in this application, too, but I found the walking foot to be just about foolproof.)
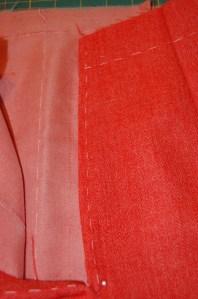
2) Even though the front center of the skirt was easily discernable because of the placement of the plaid, I still marked that line with a running stitch. I find that helps to eliminate mistakes! That was the final bit of basting thread which I removed from the skirt when it was finished.
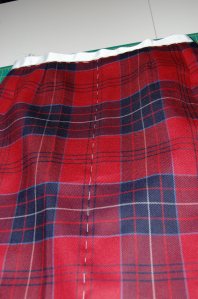
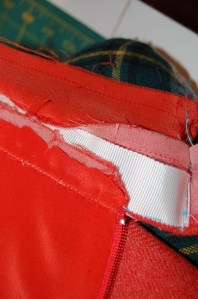
Here is that front center line, marked with a running stitch. You can also see the Petersham ribbon I used to stabilize the waistband.
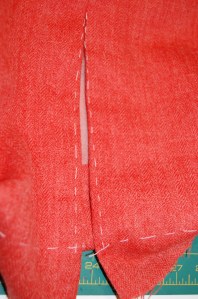
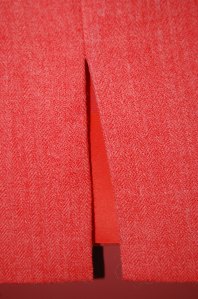
3) I angled the back vent out about 1/4 inch on each side to help it hang straight while being worn.
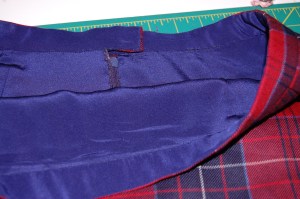
4) I faced the waistband with the lining silk, which makes it comfortable to wear.
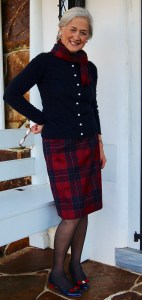
With much of Winter still to come, I suspect I will have numerous occasions to wear this wool skirt. And now I can get back to that French Jacket with at least one thing to show for the year so far!


Completing the Pink Coat Ensemble
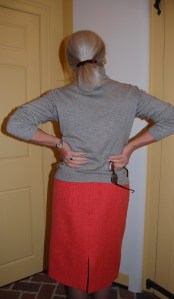
Although I hope to wear my pink wool coat (completed Spring of 2019) with various dresses and skirts, I particularly wanted to make a skirt which would coordinate with it. That way I would have a “planned” ensemble. I envisioned a petite pink-and-gray houndstooth wool, or a mini-checked pink-and-gray wool. After a wide search and coming up empty-handed, I was just about convinced I was not going to find either of those two fabrics, at least not in the time frame I planned. And then I found a lightweight wool and silk blend on the website of Farmhouse Fabrics. It was a variegated gray and oyster-white plaid with a pink pinstripe running through it on the cross-grain. Although it looked lovely on my computer screen, I wasn’t sure it would fit my needs, so I ordered a swatch. From the swatch I could see its beautiful quality – and its perfect colors – so my search was over.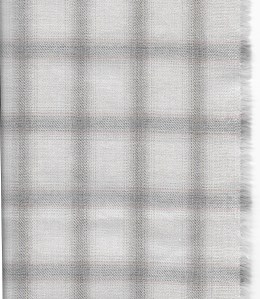
I am so accustomed to using silk organza as my underlining, but the incredible softness and delicacy of this fabric made me think twice. I thought silk organza would undermine the fluidity of the wool/silk blend, so I decided to use a very lightweight cotton batiste instead. Using the Susan Khalje pattern for which I already had a toile (yay!), I made a very simple straight skirt. Just for fun I decided to line it in pink silk charmeuse. I had some in stock as I had used it for the pocket linings in my pink coat. I also lined the waistband, which I like to do when sewing with wool.
The pink charmeuse lining is my unseen homage to this color which I love so much.
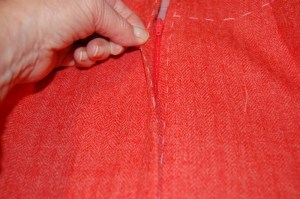
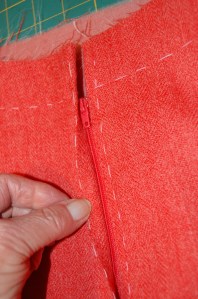
I inserted a lapped zipper by hand in the center back seam.
I angled the center back vent toward the center back seam so that it will hang evenly when I am wearing the skirt.
It is easy to see the angle on the vent with this particular fabric.
One side of the vent folded back.
When I cut out the lining for the coat, I maneuvered the pattern pieces to give me a long narrow length of the silk, which I made into a scarf.
Paired with a V-neck gray sweater, it proves to be the perfect accessory. As Christian Dior said in The Little Dictionary of Fashion, “In many cases, a scarf gives a final touch to a dress.”
It’s a nice combination of colors!
The scarf is a pretty addition to the coat, I think.
It is rewarding to see my vision become reality!
So, now the big question, one which I have been asking myself frequently as of late, “When and where will I be wearing this lovely ensemble?” It seems life is just so despairingly casual now, affording few opportunities to wear pretty dresses and skirts and specialty coats. I try to buck the trend when I have the place and time to do so – and I have yet to feel like I have been overdressed. Of course, Christian Dior had something to say about this, too. “Generally it is very bad to be overdressed, but I think that in certain circumstances it is very impolite and wrong to be underdressed.” I could not agree more and personally prefer to be slightly overdressed than underdressed. How about you? I do hope my pink coat, paired with this gray skirt, will prove to be the perfect dressing for many occasions. I am certain I will enjoy wearing them.
48 Comments
Filed under Christian Dior, Coats, Fashion commentary, hand-sewn zippers, Linings, Scarves, Straight skirts, Uncategorized, underlinings
Tagged as Christian Dior, coats, couture construction, Farmhouse Fabrics, fashion sewing, scarves, Straight skirts