
Added Value…. There is a significant little entry in 101 Things I learned in Fashion School (Alfredo Cabrera with Matthew Frederick, Grand Central Publishing, New York, New York, 2010, page 40). Although aimed at Ready-To-Wear customers and the designers who cater to them, it certainly is meaningful to those of us who sew our own fashions: “Fashion customers often need to be convinced to buy a new garment that, in effect, they already own. … Value added details [my emphasis] are those that are inherently necessary to a garment but are executed in a novel or interesting way…” thus making them attractive to potential customers.
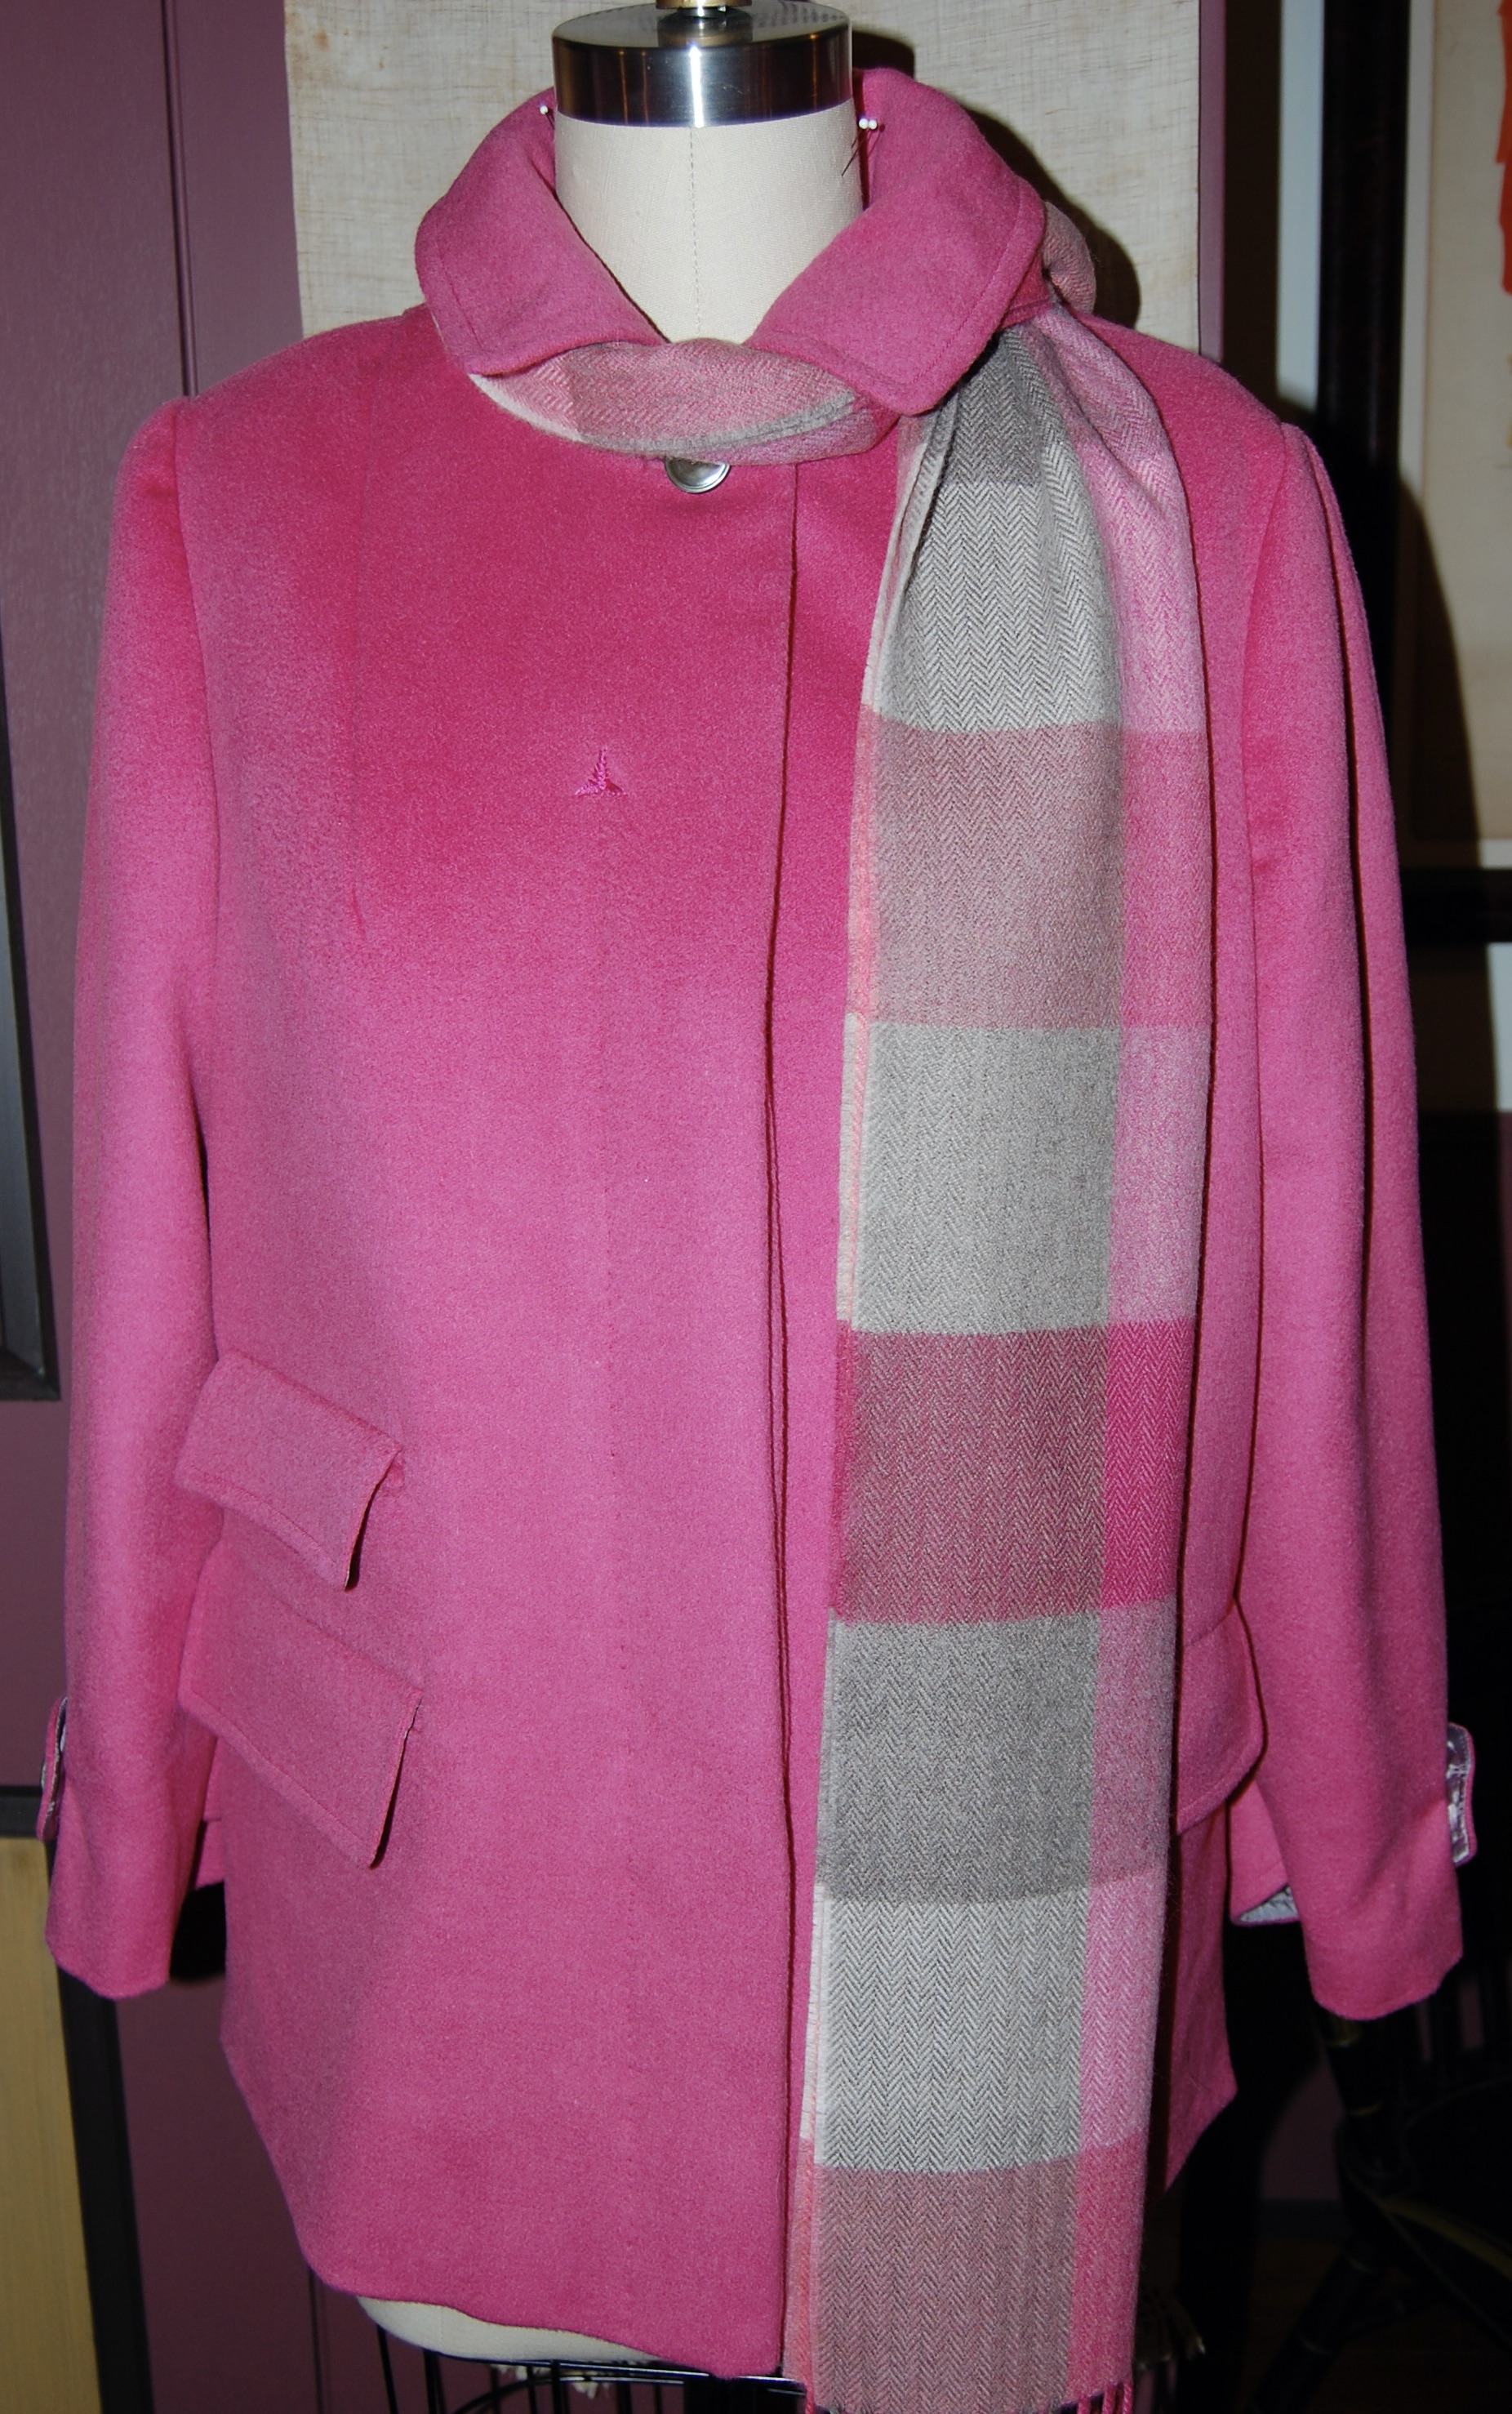
Well, not that I really need convincing to make another coat for myself, but I will freely admit it is the unique little details in a pattern (and gorgeous fabric, of course) which convince me I MUST make THIS coat, even though I might not really NEED it. Such was the case with my very pink coat, which is now finished.

Those details included 1) the three welt pockets with flaps, 2) the concealed front closure, 3) the arrowhead detail accompanying the minimal top-stitching, 4) the sleeve tabs (okay, not really a necessary detail, but a very nice one!), and 5) the opportunity to add a little flash to the lining with edge-piping.
I’ll cover the sleeve tabs first since they were the detail in question in my last post.
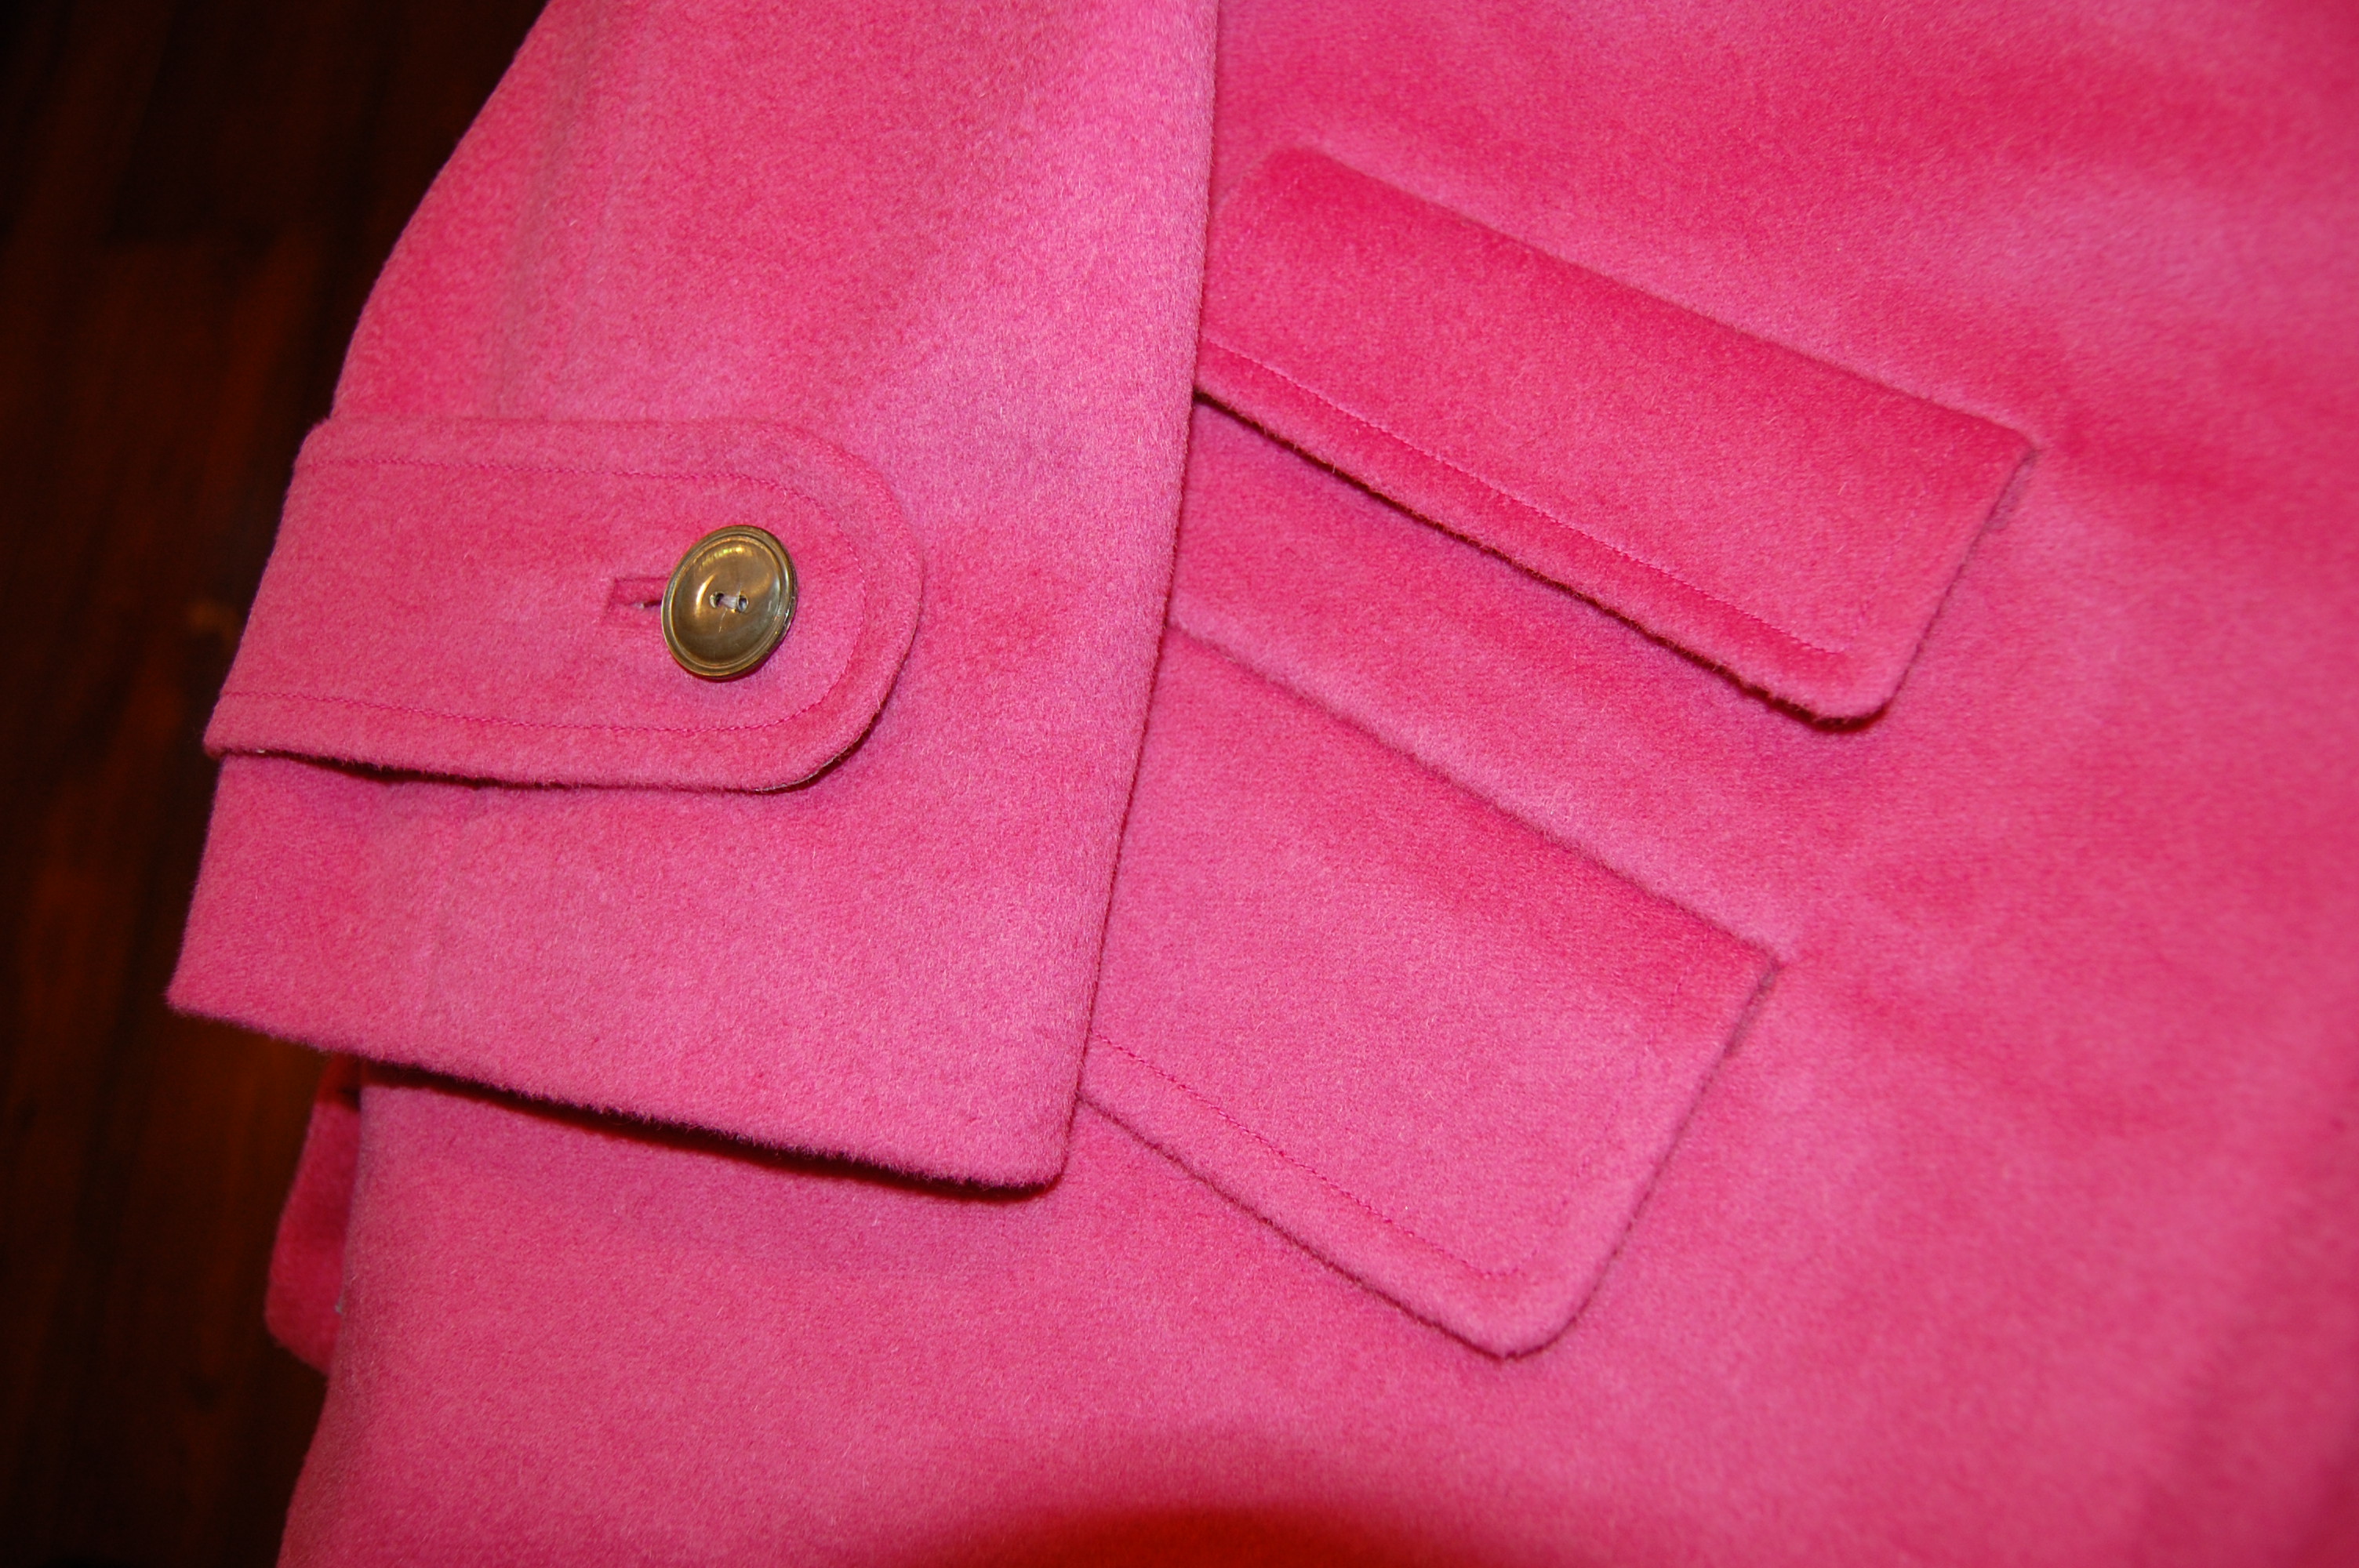
As you can observe, I decided to leave them with the buttons facing forward. Several comments left by readers (thank you – you know who you are and I am very appreciative!) got me thinking anew about the orientation of the tabs. Then I had an aha moment when I realized that the one button which is visible on the front of the coat, at the neckline, might look a bit disconnected without its counterparts showing on the sleeves. Decision made, with confidence! However, I doubt I will ever look at a sleeve tab in quite the same way again.
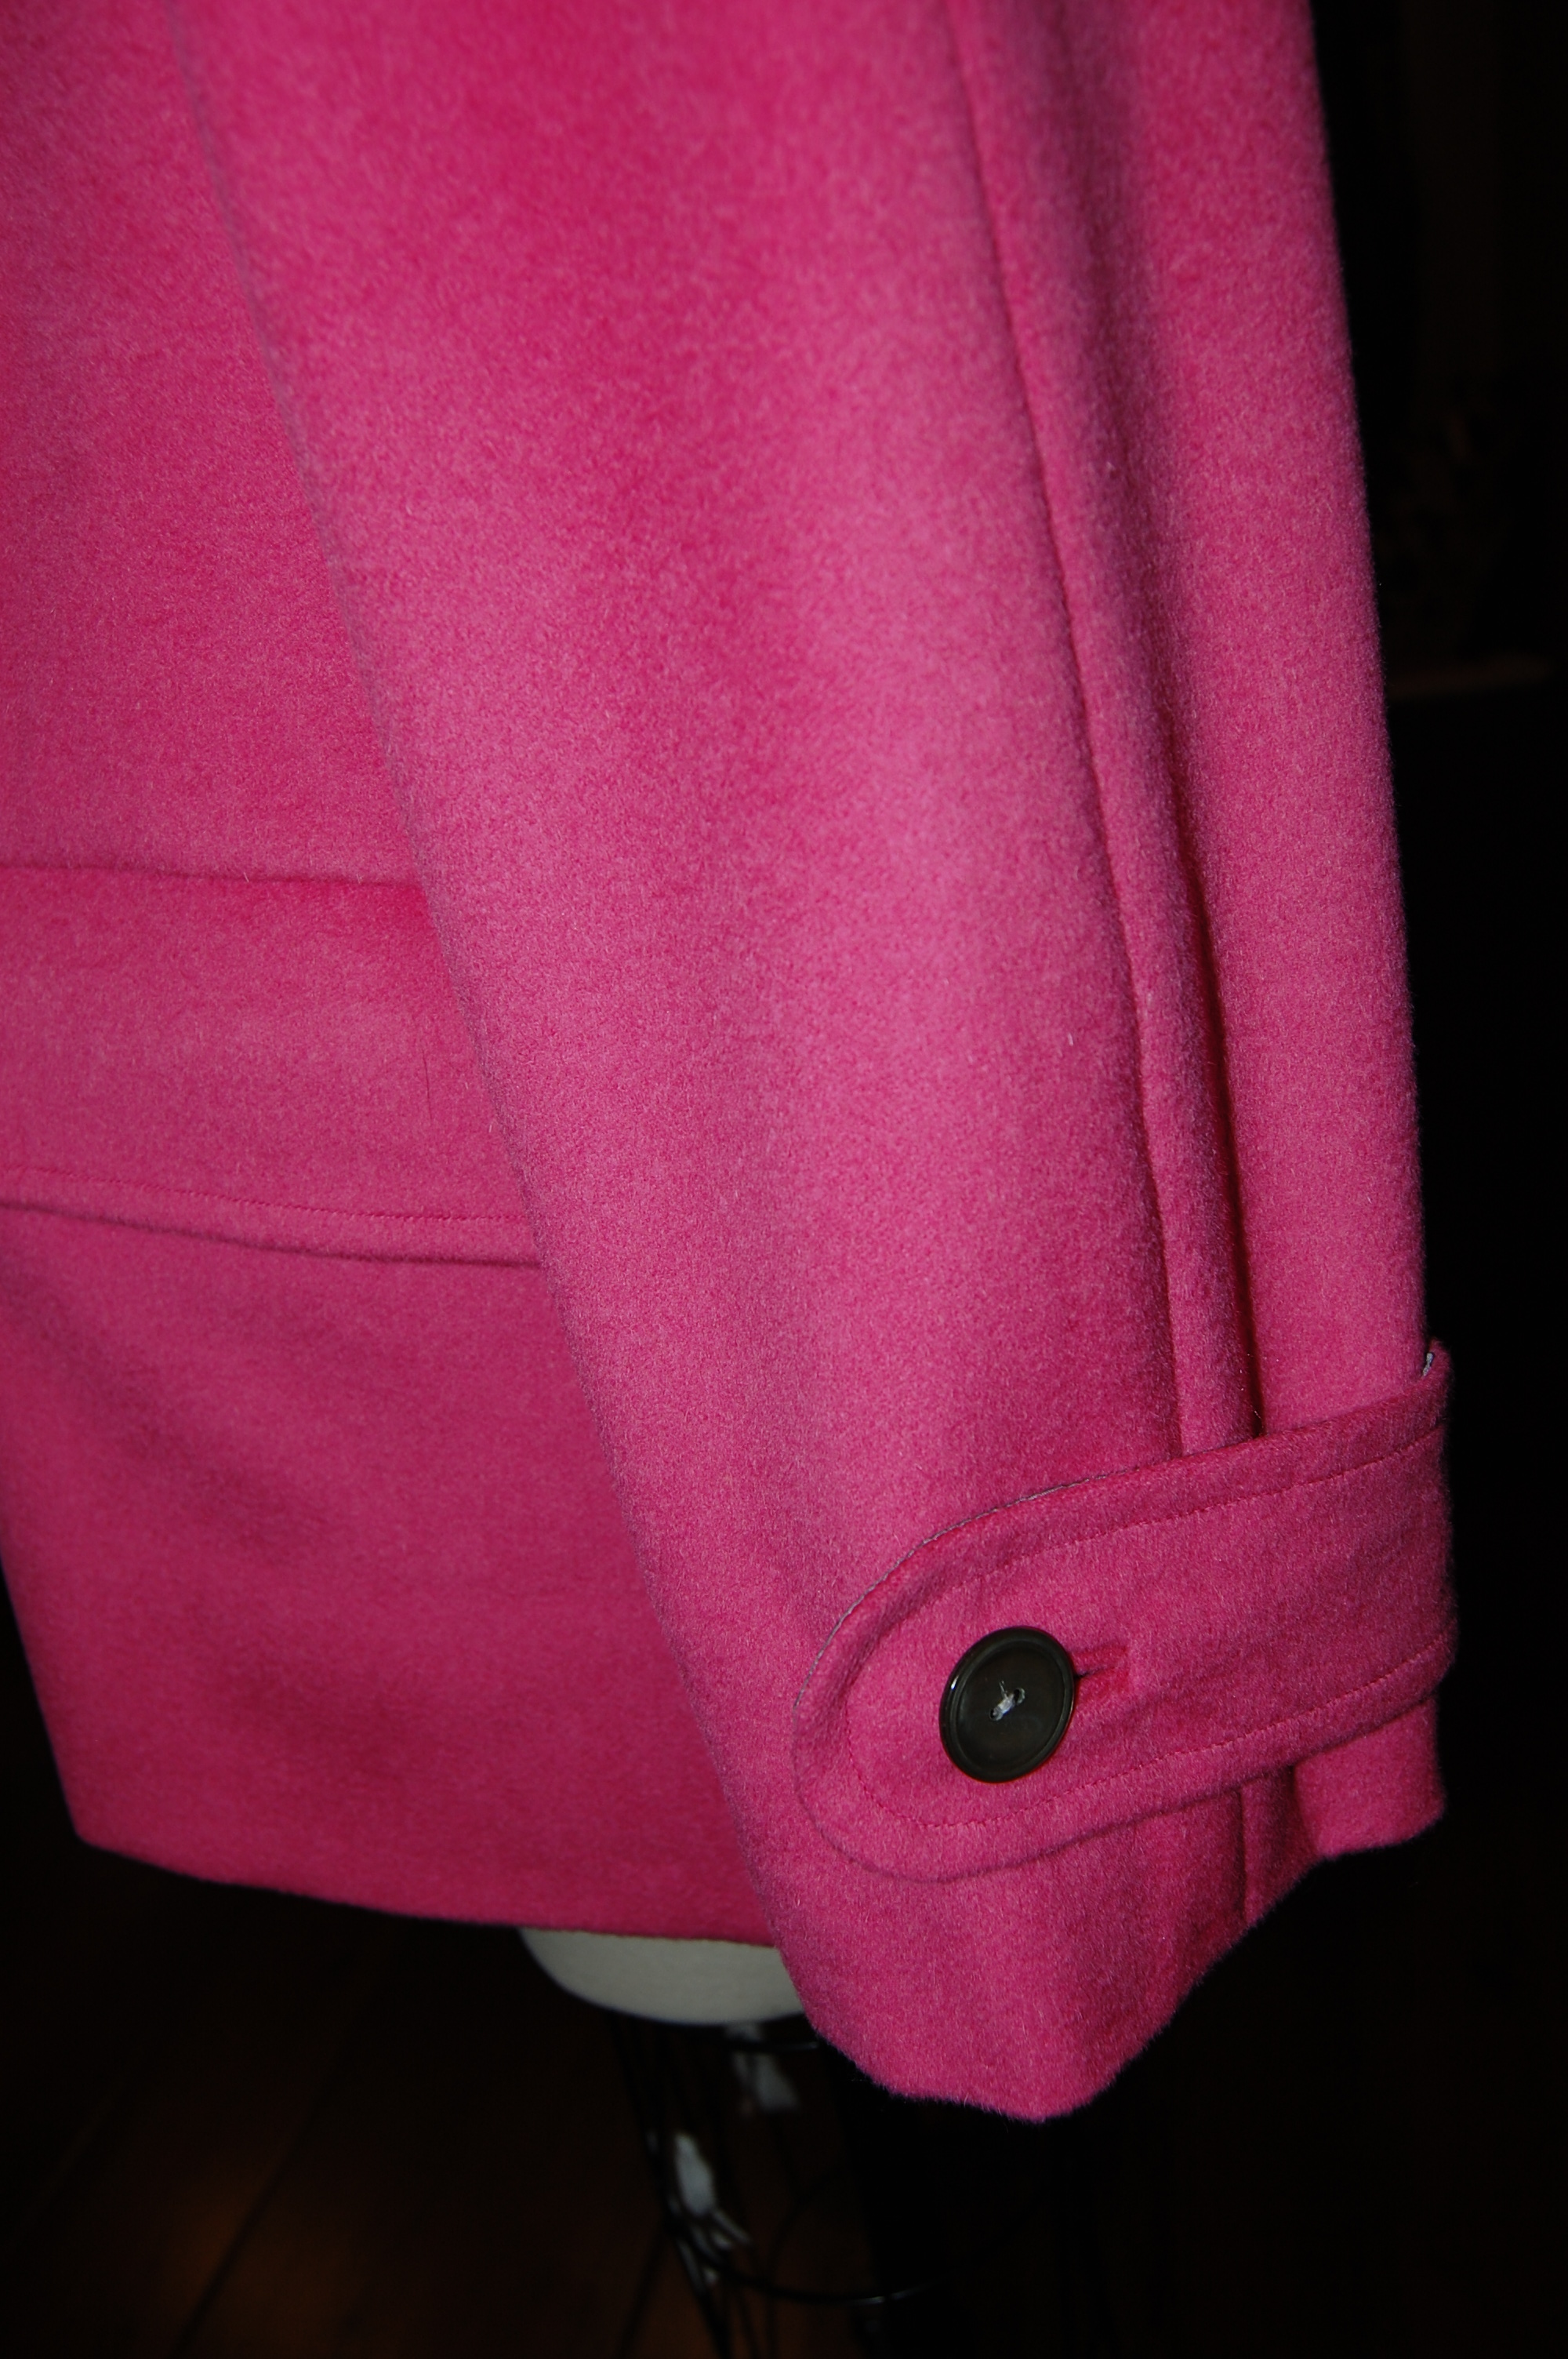
The three welt pockets with flaps are quite likely my favorite detail on this coat. First of all, I like making them. There is a certain feeling of empowerment, although slightly nerve-wracking, to cut those big slashes into the front of the coat and be confident it will all be okay. And this type of pocket is just so pretty when they are done. In addition, while they are utilitarian, they also suggest refinement, elevating a simple car coat to a coat with some sophistication and flair.


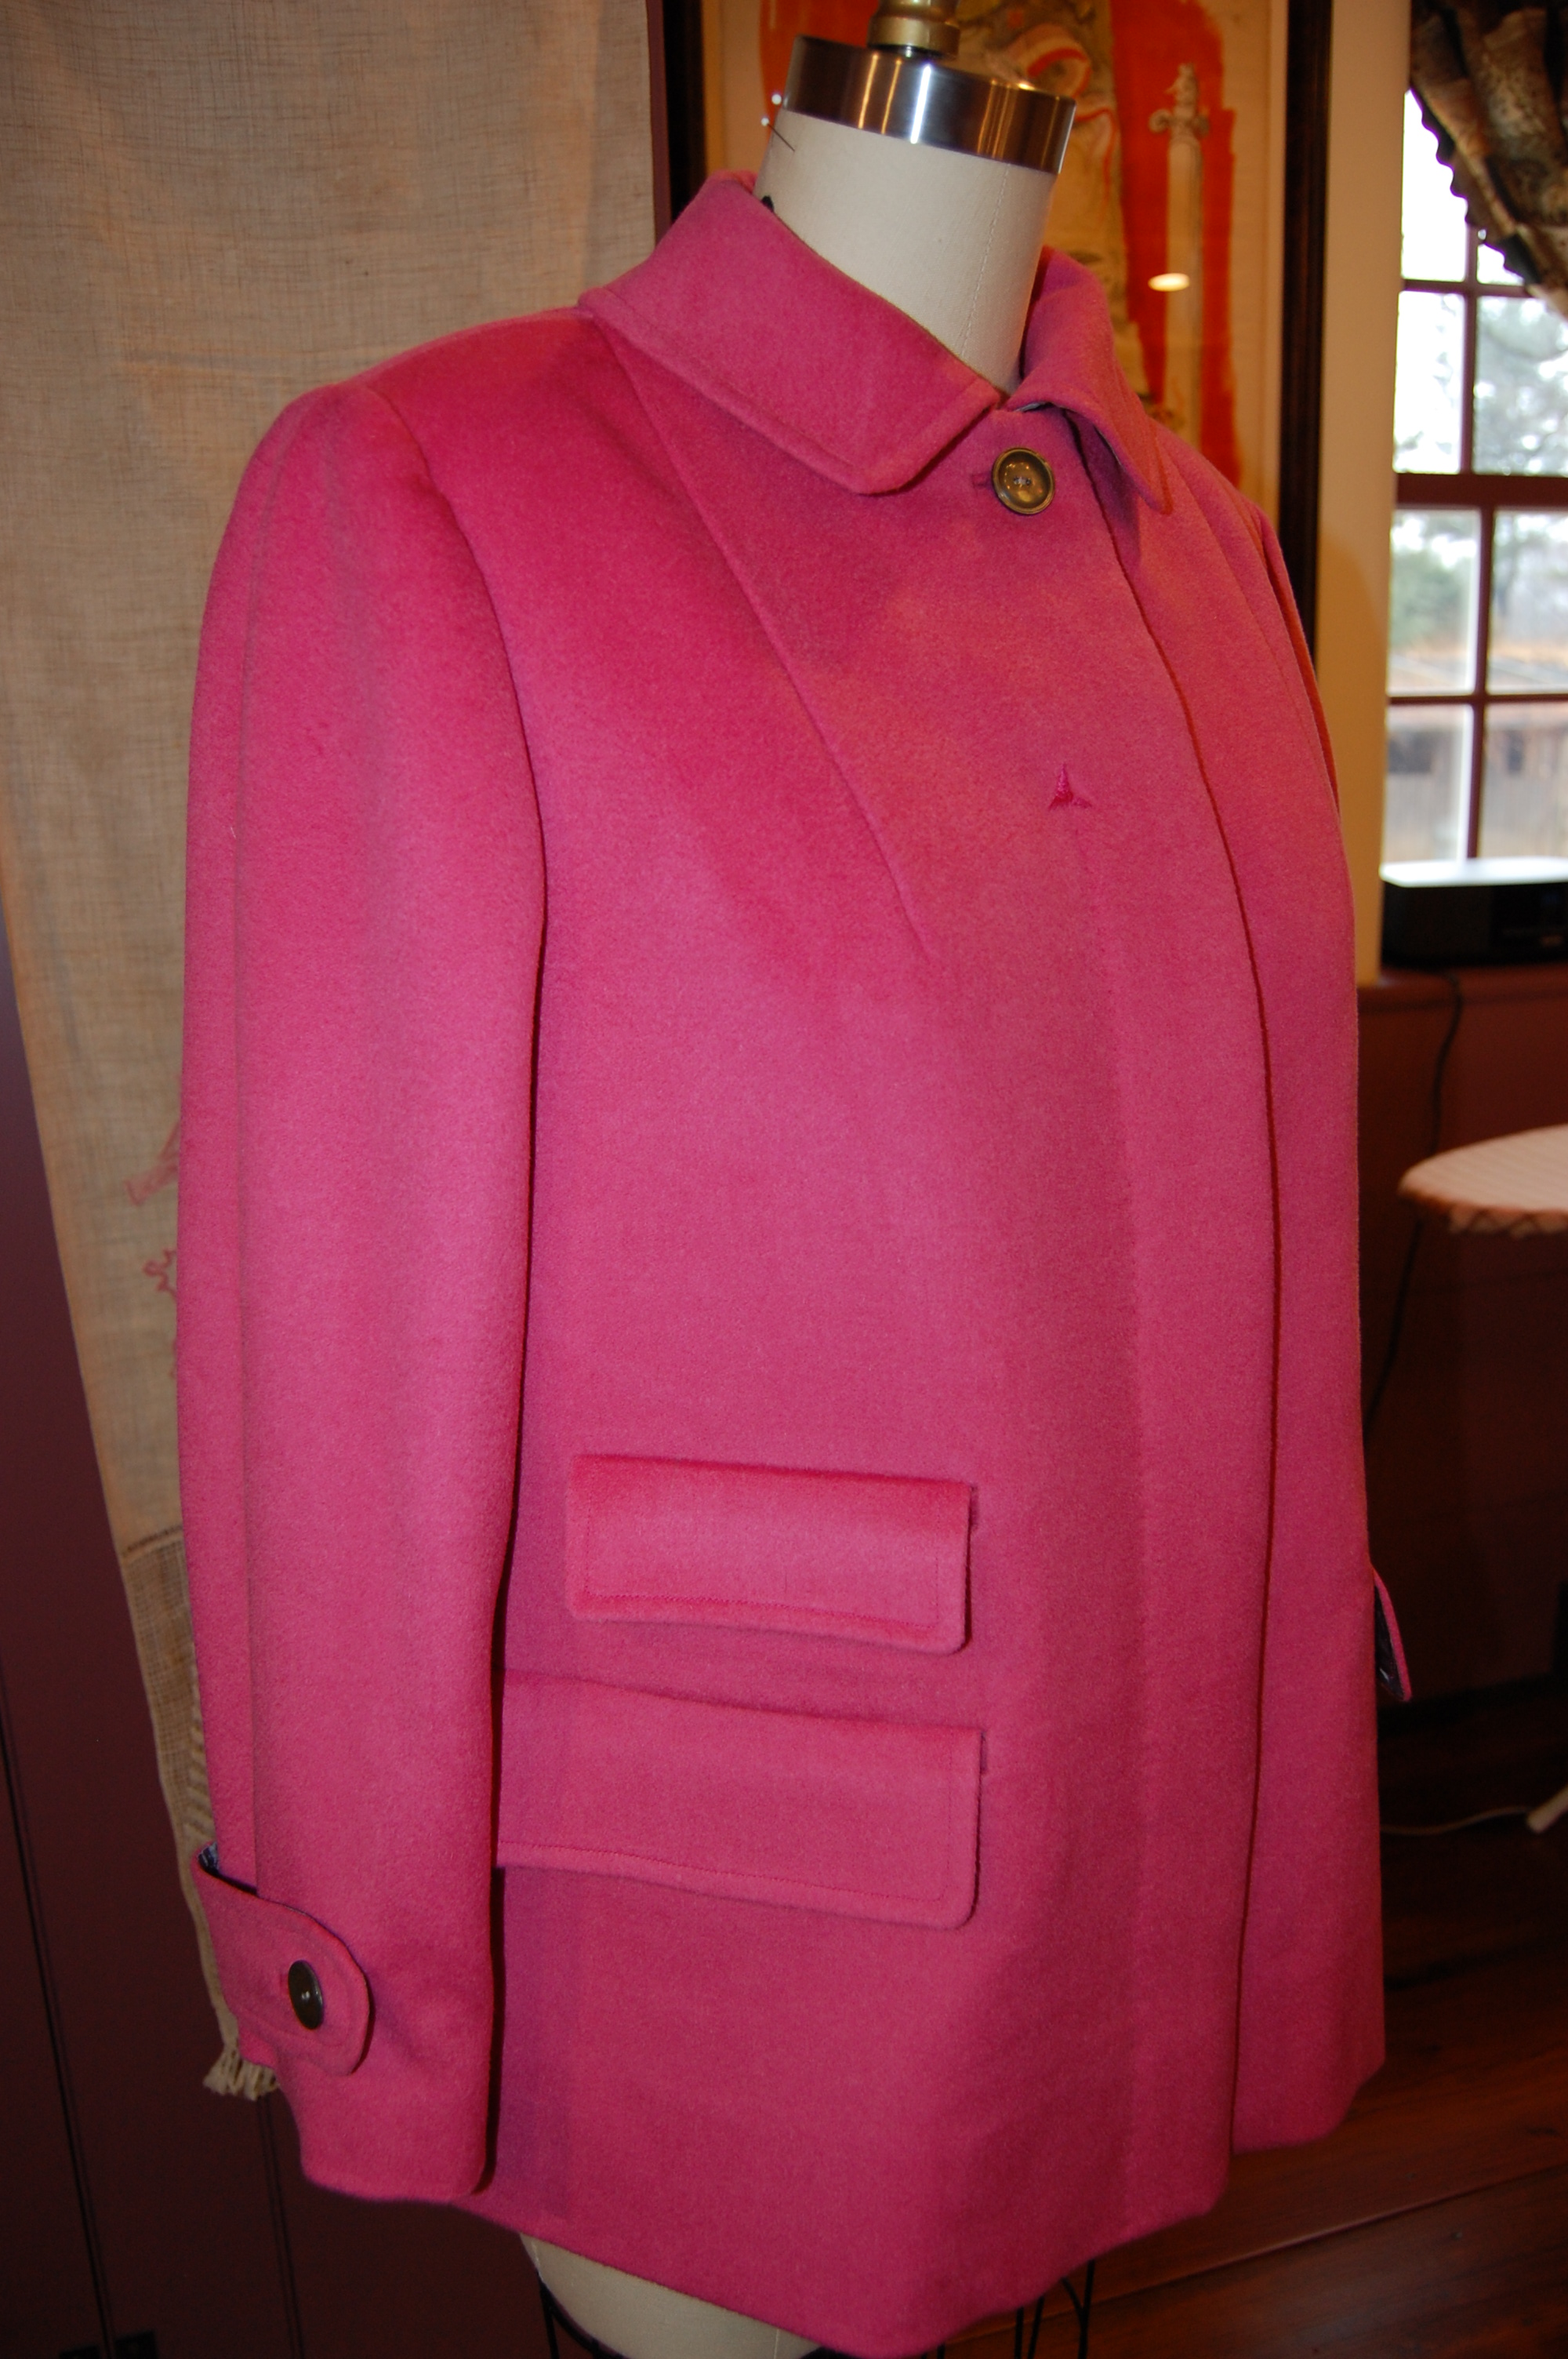
I must have a certain penchant for concealed coat fronts. This is the third one I have made and I can let you know there may be more to come (but not soon.) As I mentioned in my last post, I was able to reduce the bulk of the closure by using my lining fabric for one layer of the buttonhole side of the front flap.

I made three machine buttonholes for this part of the flap, which made everything lay flat and neat.

The gray buttons – 6 of them, which is what I needed – were in my collection, so that was a happy find. They are 1950s’ vintage gray pearl, very appropriate indeed for this 1957 pattern.

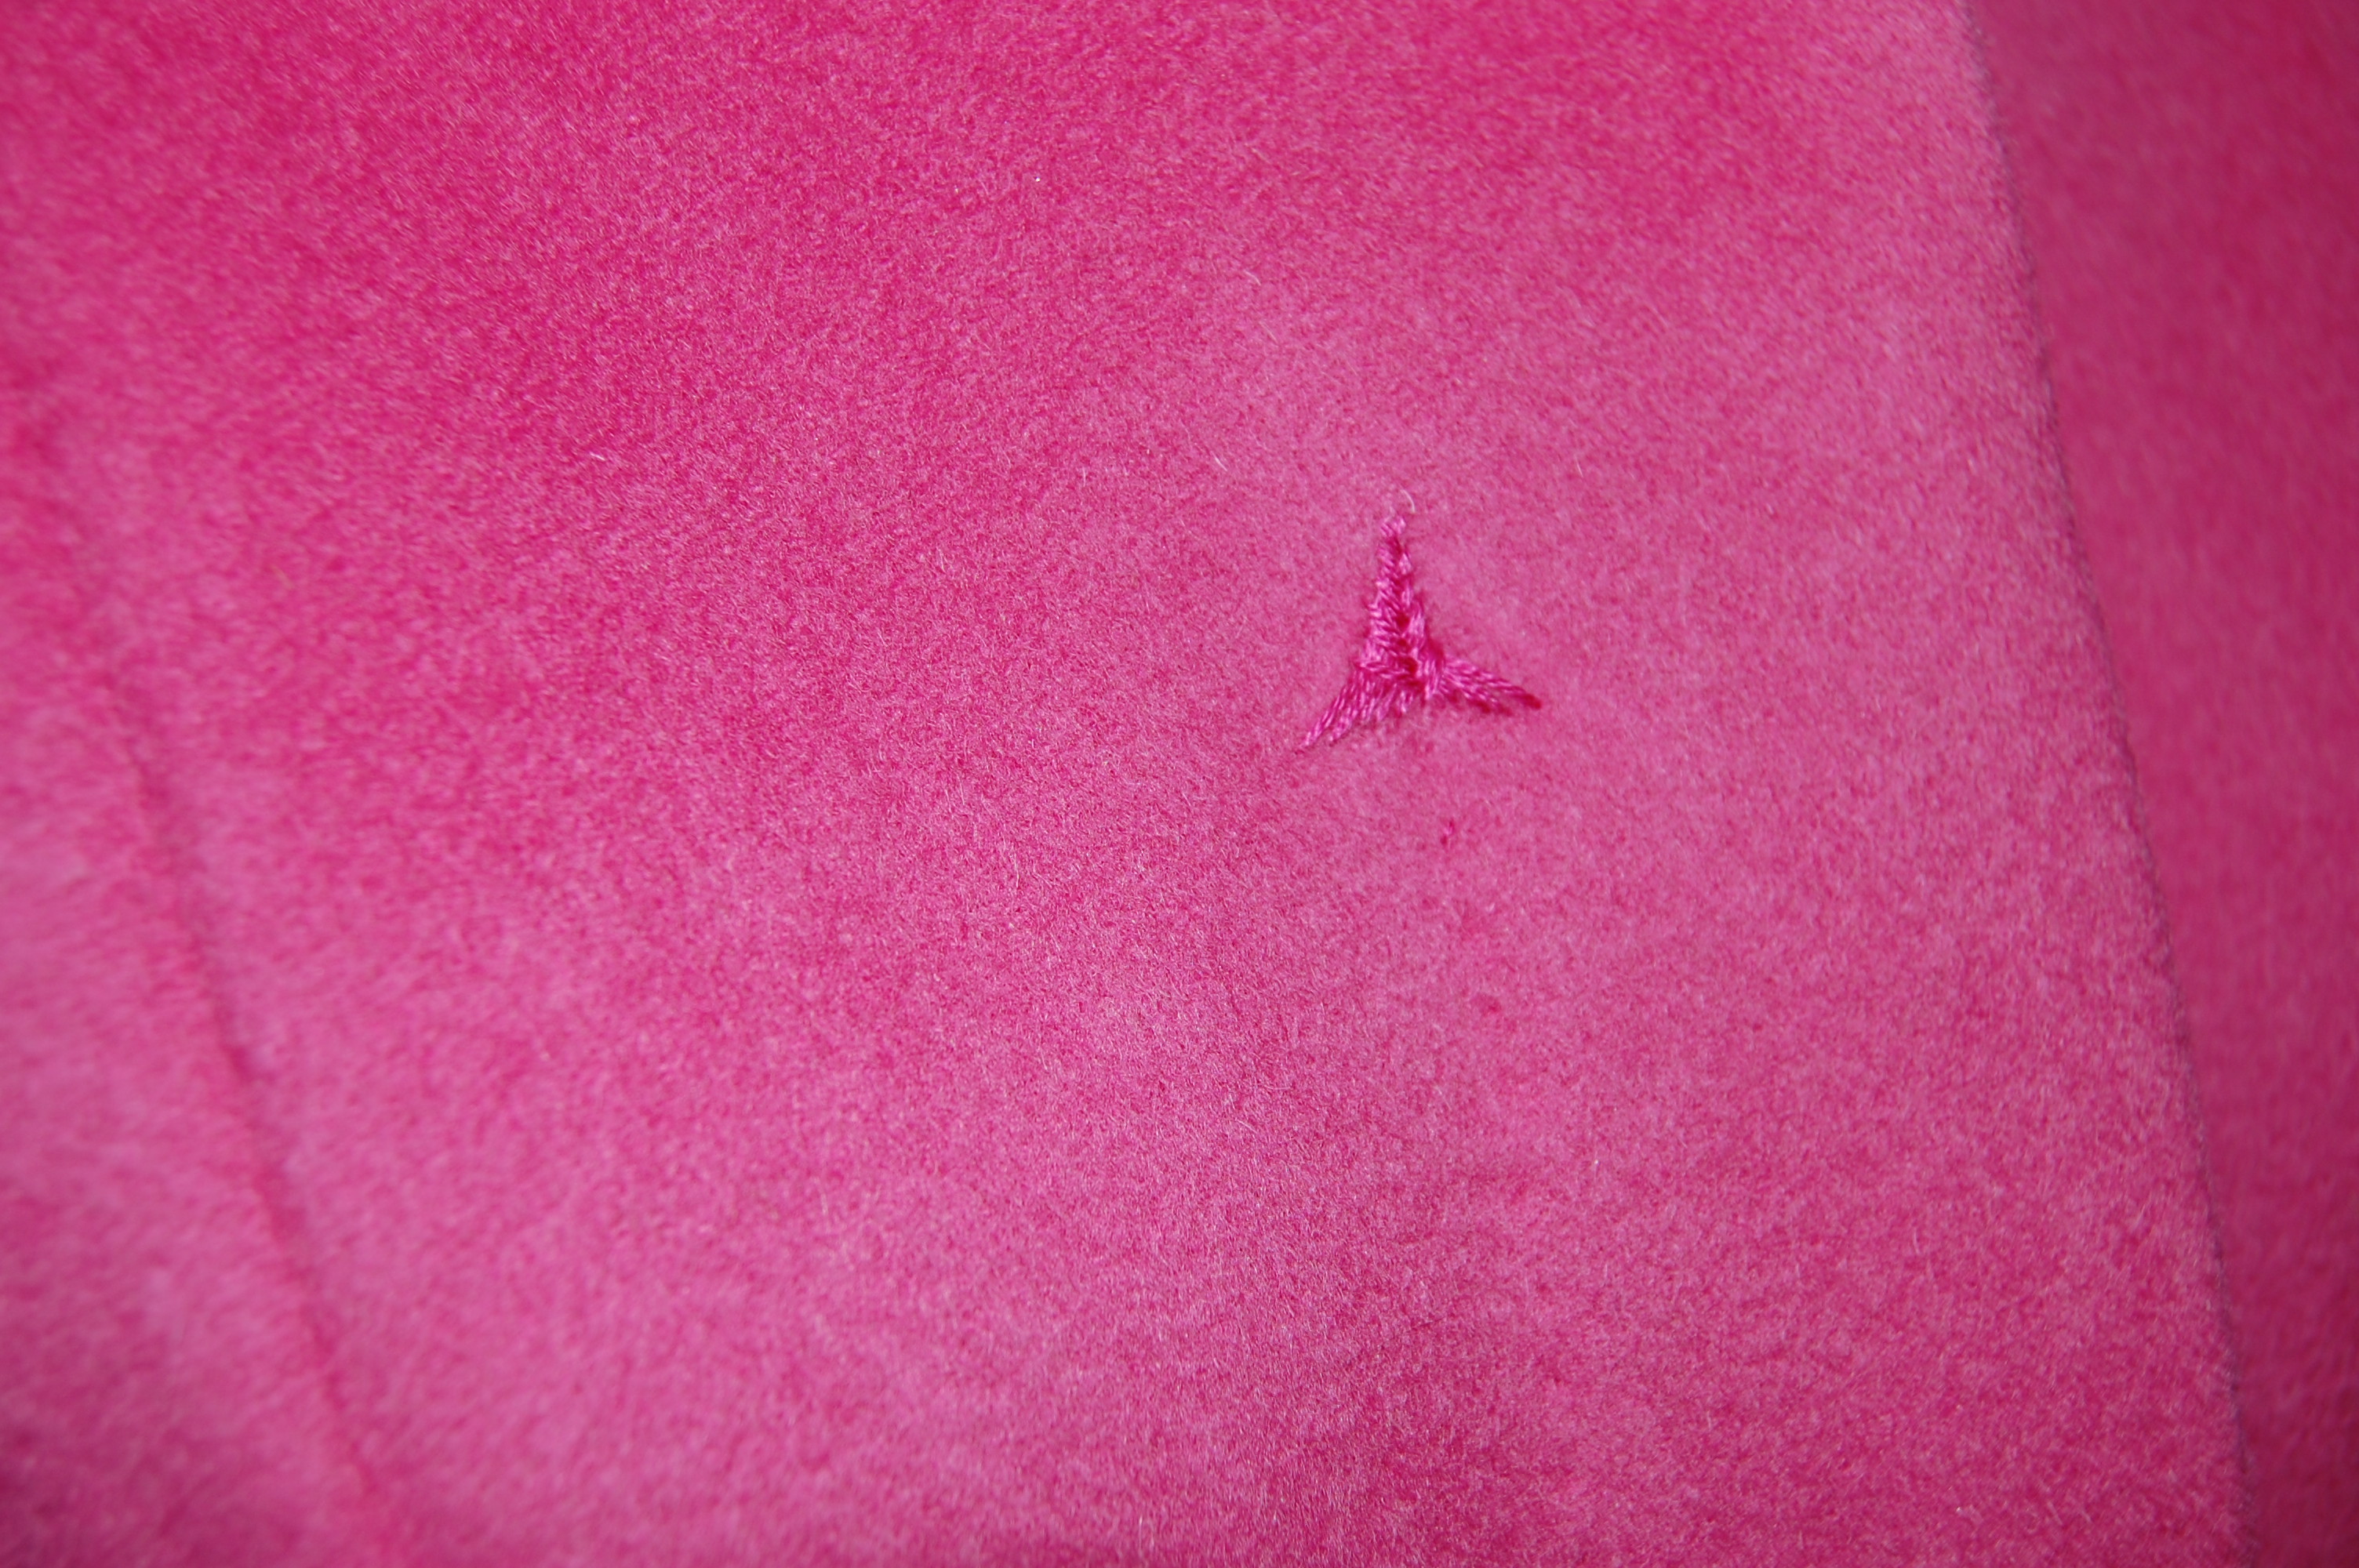
Although this coat pattern called for some topstitching, it was minimal. Just the sleeve tabs, the pocket flaps and the collar, plus the front detail on the right side. I was unhappy with the machine topstitching I did at the front closure. There was enough bulk from the wool and the facing and the fly front, that it interfered with the smoothness of the topstitching. So I took it out. Initially I was going to do without topstitching and the arrowhead detail, but it looked a bit plain and unfinished. So I did my fallback to what I know works – topstitching by hand. Because of the hand-worked arrowhead detail, I felt hand topstitching would not look out of place. Of course, I had never done an embroidery arrowhead before, so I had to practice, practice practice so it hopefully does not look amateurish.

Finally, coat linings lend themselves so beautifully to that extra little treatment – a narrow edge piping.


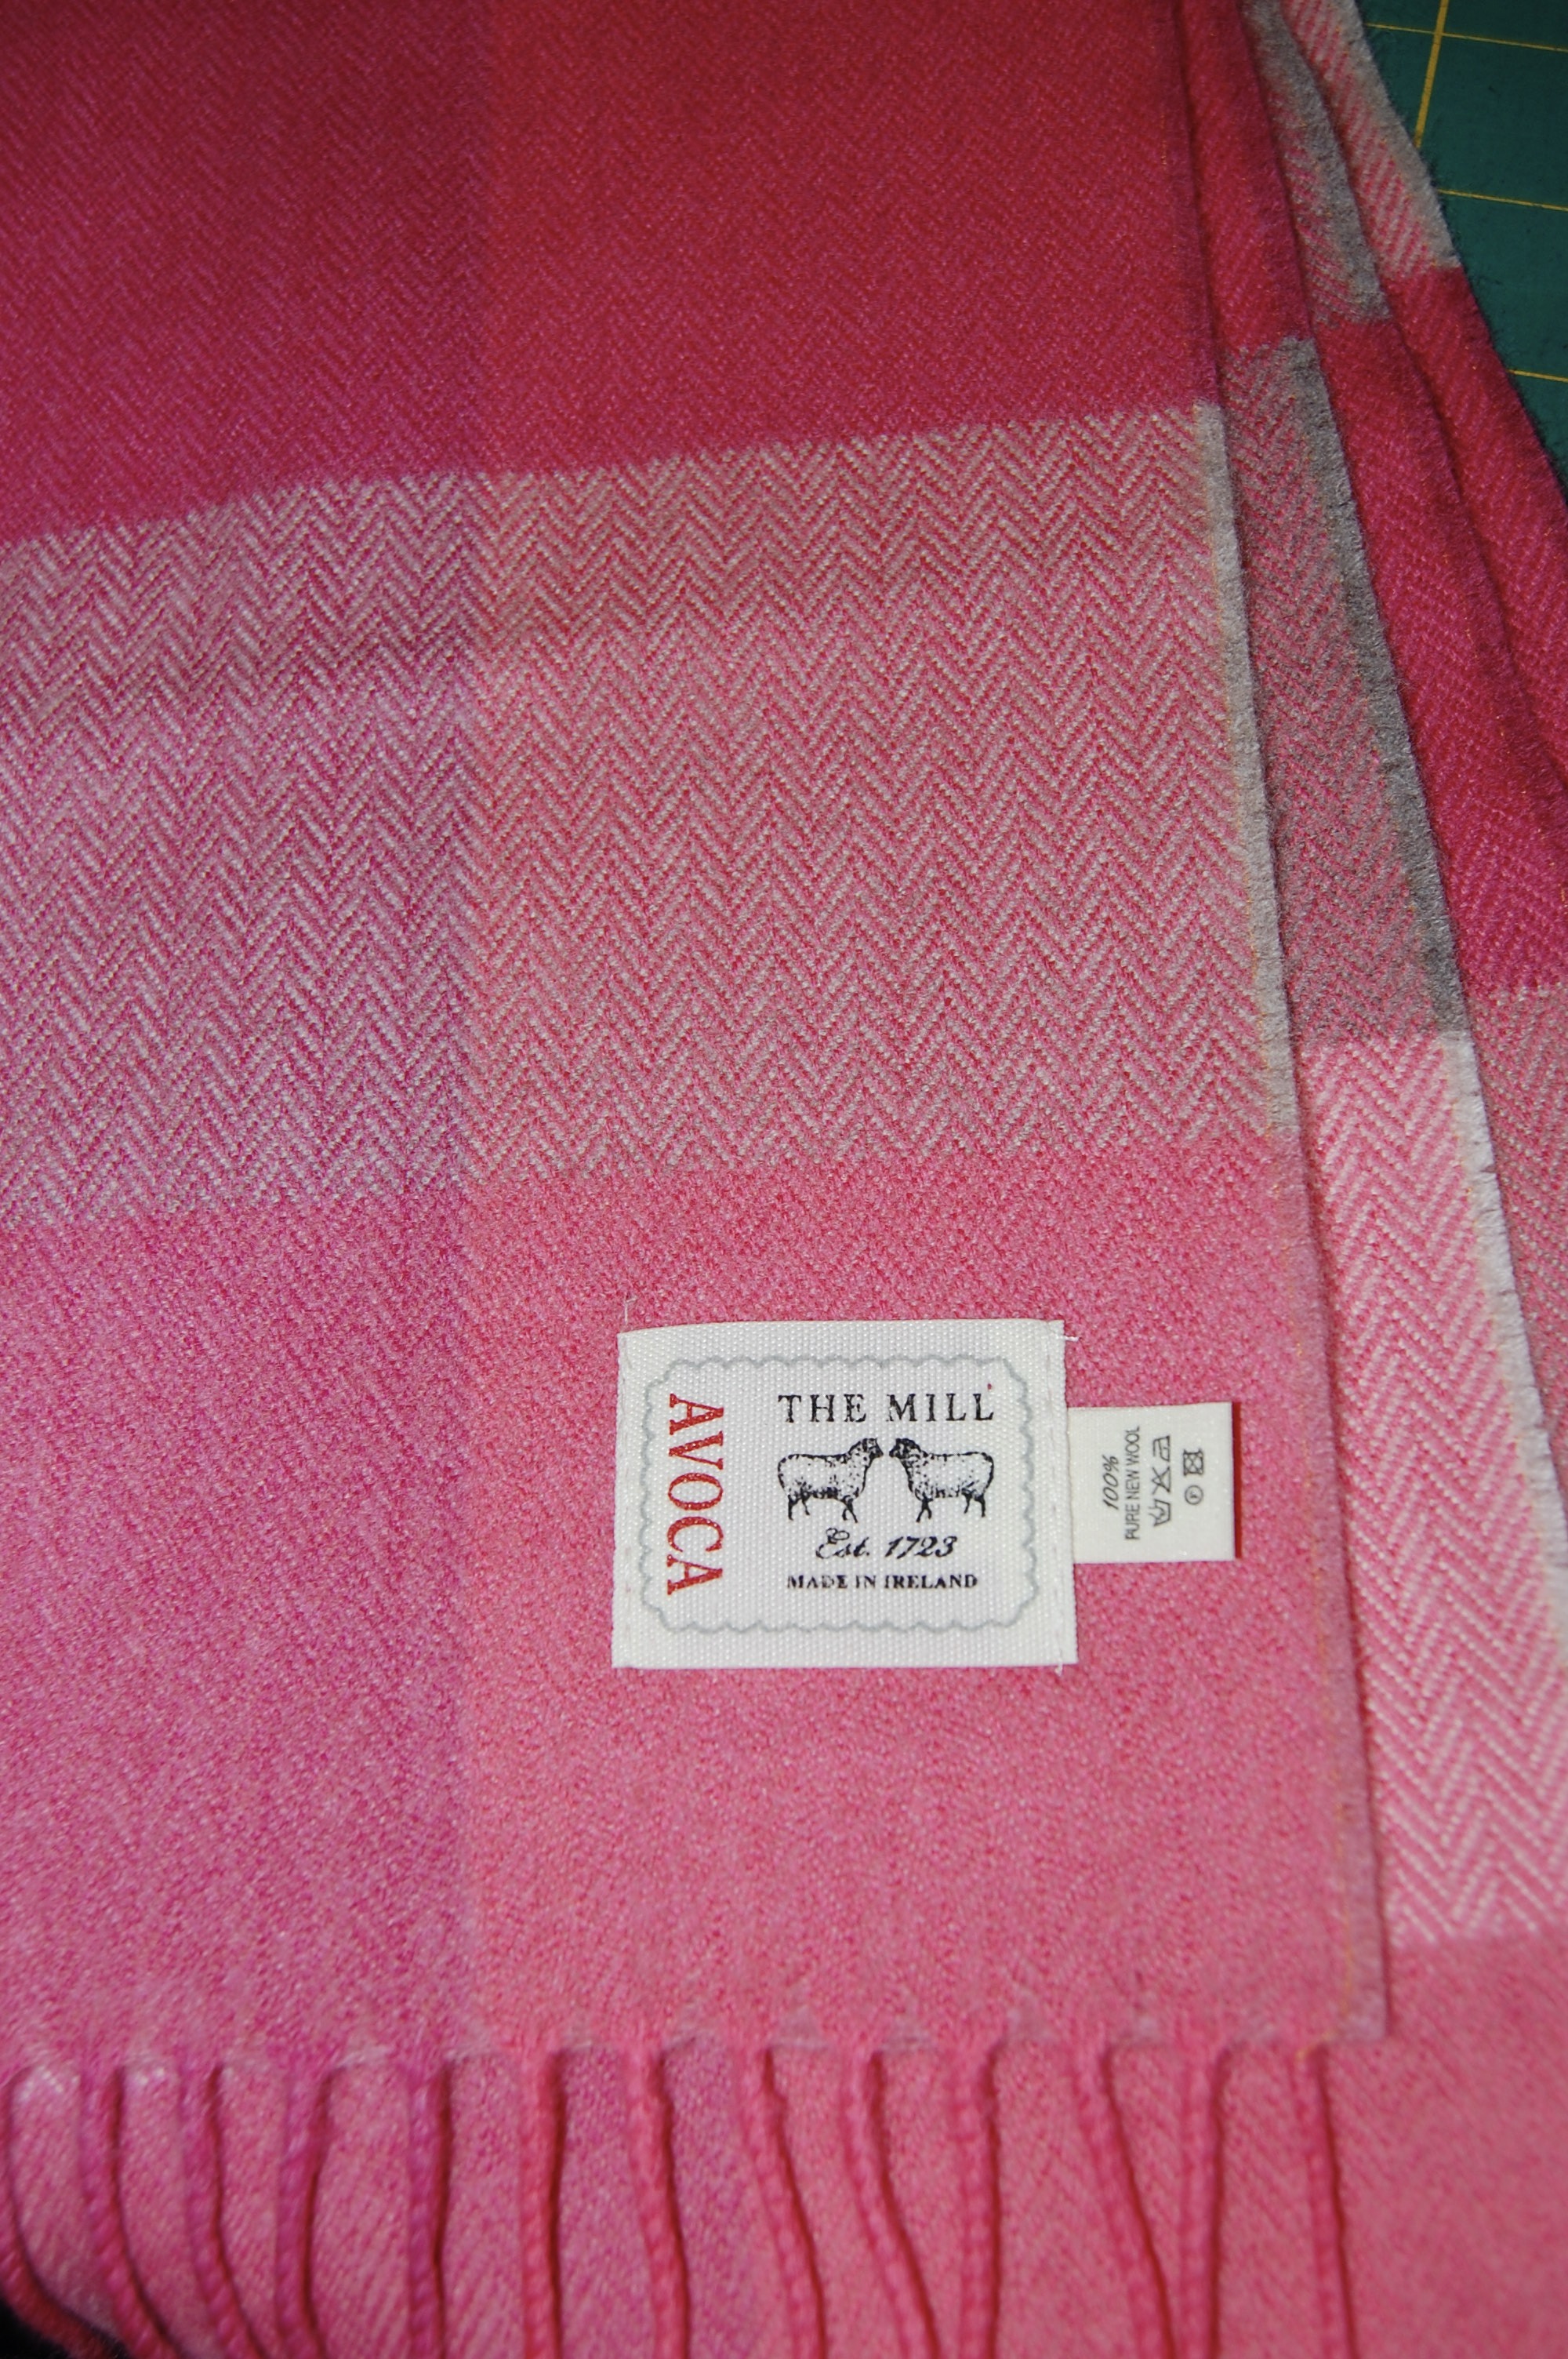
I deviated from my Vogue pattern to add this dressmaker detail, but I am sure they would have approved. My Avoca wool scarf which is such a perfect complement to this coat inspired me to choose checked piping. I “robbed” a small corner from some pink silk gingham (intended for a Spring coat, as mentioned previously here) to make my flat piping.

Well, there you have it. My first major project of 2022 finished. I am happy I chose pink for my theme this year as it has brightened up many a dark day in this troubled world of ours.
