Category Archives: Hems

A Tale of Two Dresses, Part 2

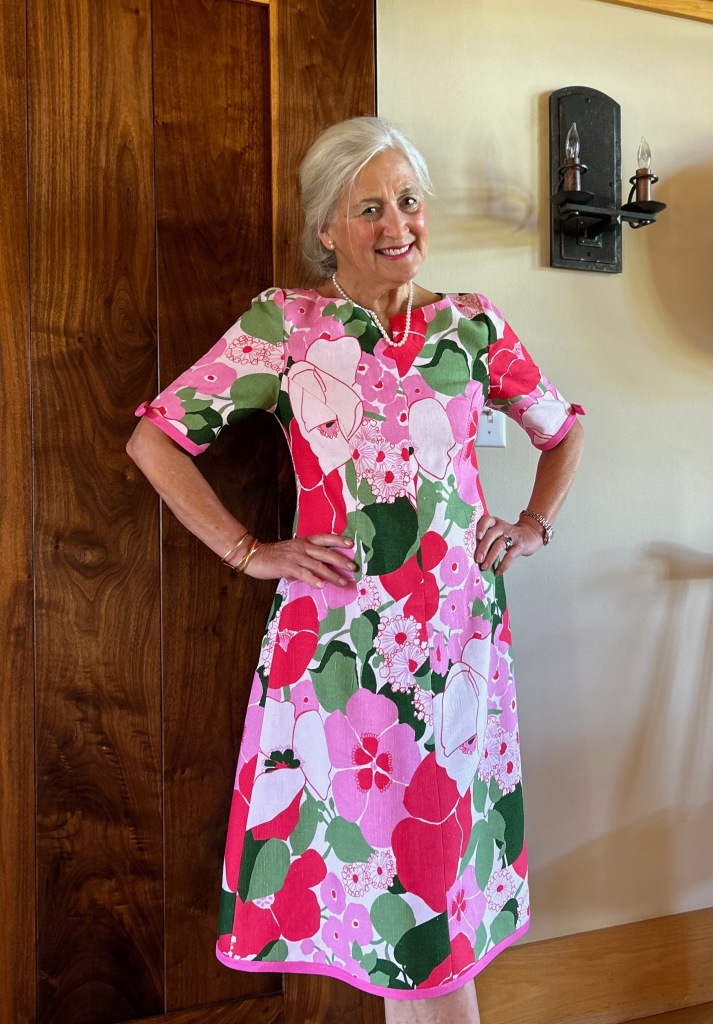
Whenever I am working with vintage fabric, it seems I either have more yardage than I need or, more frequently, less than I need.  I have learned over the years there is usually a way to work around having less fabric than I really need.  I just have to get creative.  And that’s what I did when I made this dress.

I quickly determined there was no way I could get the dress I wanted by placing the pattern on the lengthwise straight-of-grain.  The flare of the skirt, which I wanted to be mid-calf, precluded any notion of such a layout.  At 45” wide, I knew I could just get the dress length I wanted if I laid out the pattern on the cross-grain, from selvedge to selvedge.  Linen is a very stable fabric, so I was confident the cross-grain would work.  In addition, there were no directional limitations in the floral design of the fabric.  Barely fitting my pattern – from shoulder to hem – on the fabric from selvedge to selvedge, however, would leave no extra fabric to turn up for the hem – or even to face the hem.  I decided to worry about that later.  First I wanted to determine how I could get the four pieces for the dress and the two lengthened sleeves placed on the fabric, keeping in mind three important things:  1) although this was not a fabric to be matched per se, the all-over design of the fabric needed to be on the same plane in contiguous seams; 2) I wanted to space out the larger floral motifs so the dress would be balanced as best as possible (looking critically at the dress I made when I was 23, I clearly could have given this more thought!); and 3) I wanted to avoid large demonstrative blooms at the bust.  Then, and only then, would I worry about the hem.  
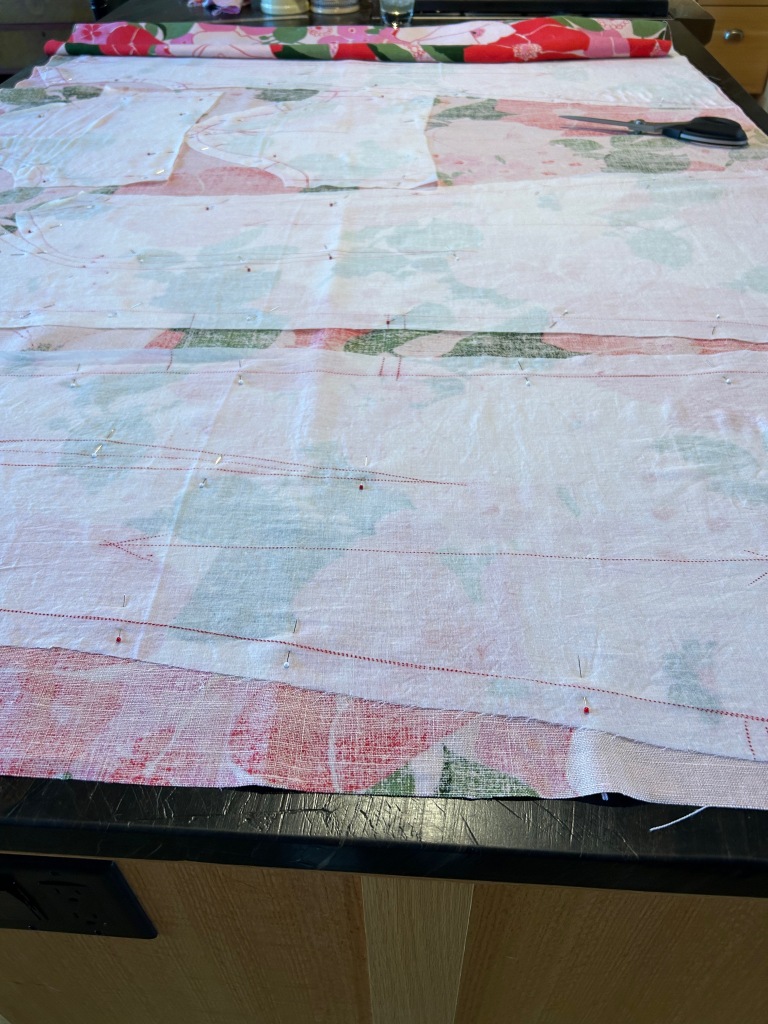
I transposed all the markings from my adjusted pattern onto the cotton batiste, then used those pieces as my pattern. I then basted the two layers together to be treated as one, before sewing any seams or darts.

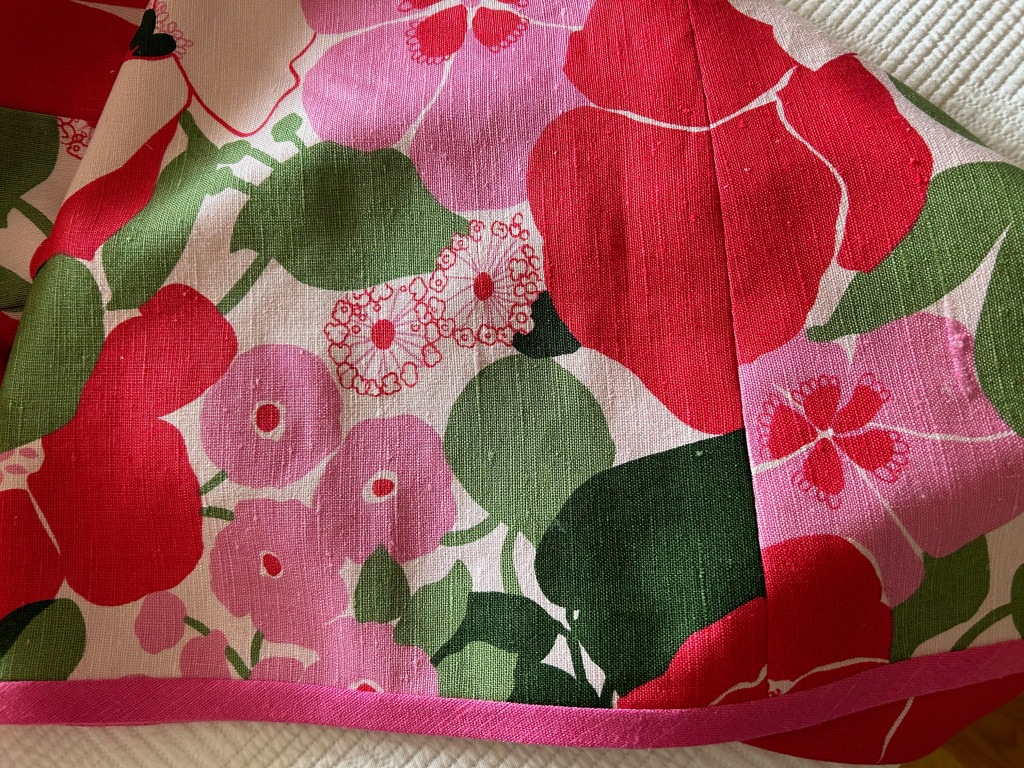
Once I was happy with this placement, I had a eureka moment when I knew I could accomplish two things with a simple bias trim made from the yardage of deep pink linen which coordinated nicely with the floral.  1) I could preserve the full 45” of cross-grain length by applying bias trim to the hem edge instead of turning it under, and I could do the same with the sleeves.  And 2) the trim would add interest to the dress, just as I had vaguely imagined.  (A quick aside here – I have ample yardage of the solid deep pink linen to make a coordinating coat at some point. Every dress needs a coat, right?) 

I underlined this dress in a very lightweight, pre-washed, cotton batiste, then I lined it in Bemberg rayon.  Moygashel linen washes beautifully, as does Bemberg lining, which is why I chose Bemberg over silk for this dress. I eliminated the neckline facing, choosing instead to bring the lining up to the edge of the neckline seam, then under-stitching it to secure that edge in place.  

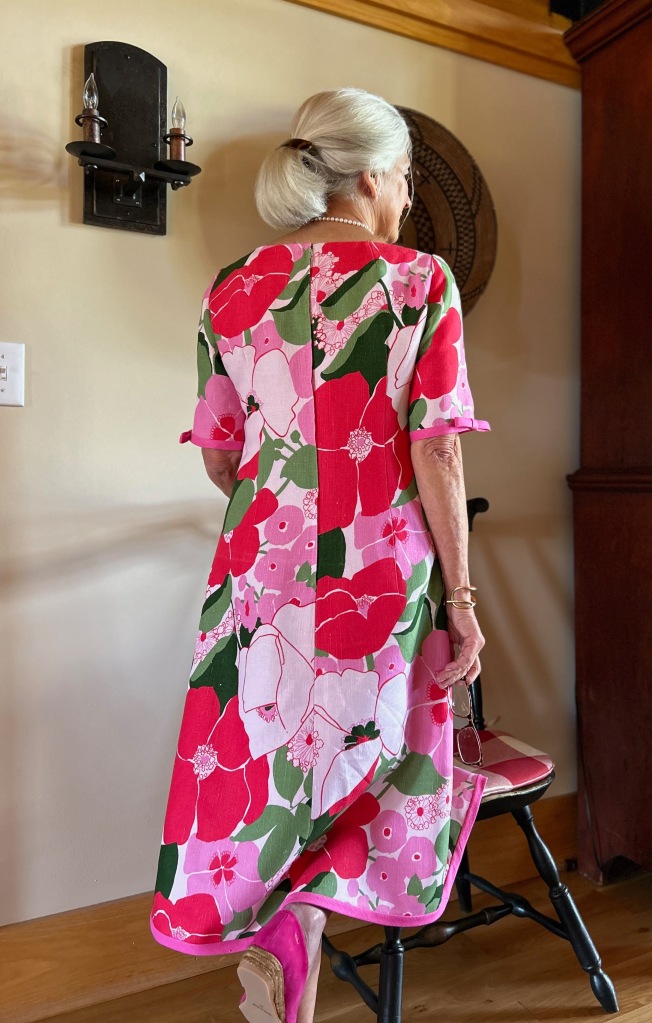
I chose to do a hand-picked, lapped zipper, an application which I think looks so lovely.  Interestingly, I hand-picked the zipper in the dress I made in 1973, although it is a centered application.  

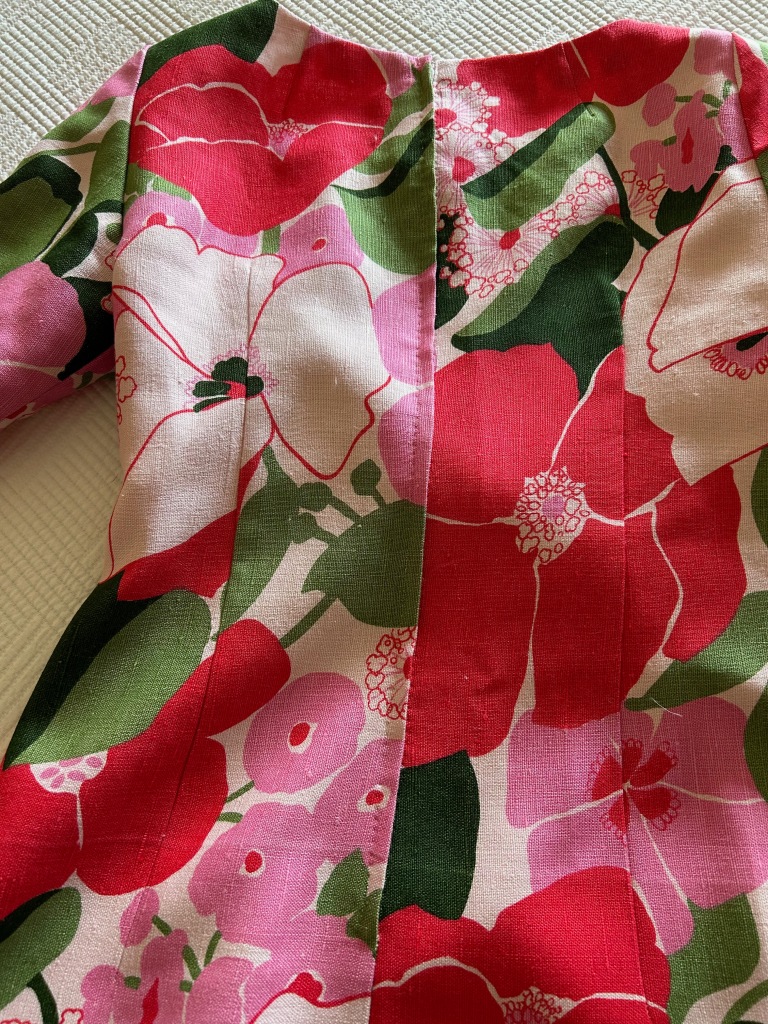
And here is a back view of the 1973 dress. The zipper is metal, which certainly is a telltale sign of a vintage dress.

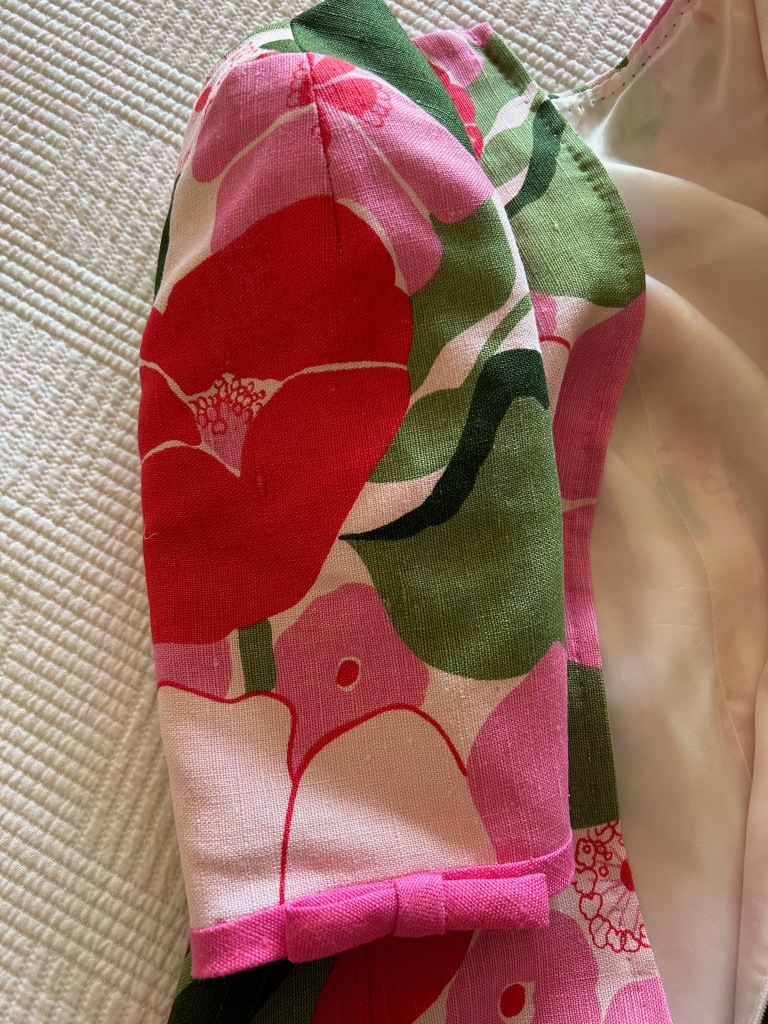
When it came time to apply the bias-cut trim to the hem and sleeves, I had to experiment around a bit.  I didn’t want it too wide, but it needed to be substantial enough to look like it was meant to be and not an afterthought or decision made in desperation!  I finally settled on an exposure of 1/2”.  

Now this is where it gets interesting.  A few weeks ago I saw a vintage dress on a Facebook/Meta post by Xtabay Vintage Clothing Boutique.  It is obviously Moygashel linen (I can tell by its weave and color), but what really caught my eye were the bias strips and low-profile bows adorning its sleeves.  I tucked this idea in the back of my mind for future consideration.  What I didn’t know was that the future was right around the corner!  Yes – I “borrowed” this idea and added a single bias-cut bow to each sleeve.  Somehow, it just seems to finish the dress.  

I never would have thought of adding a bow to each sleeve had I not seen this pretty vintage dress.

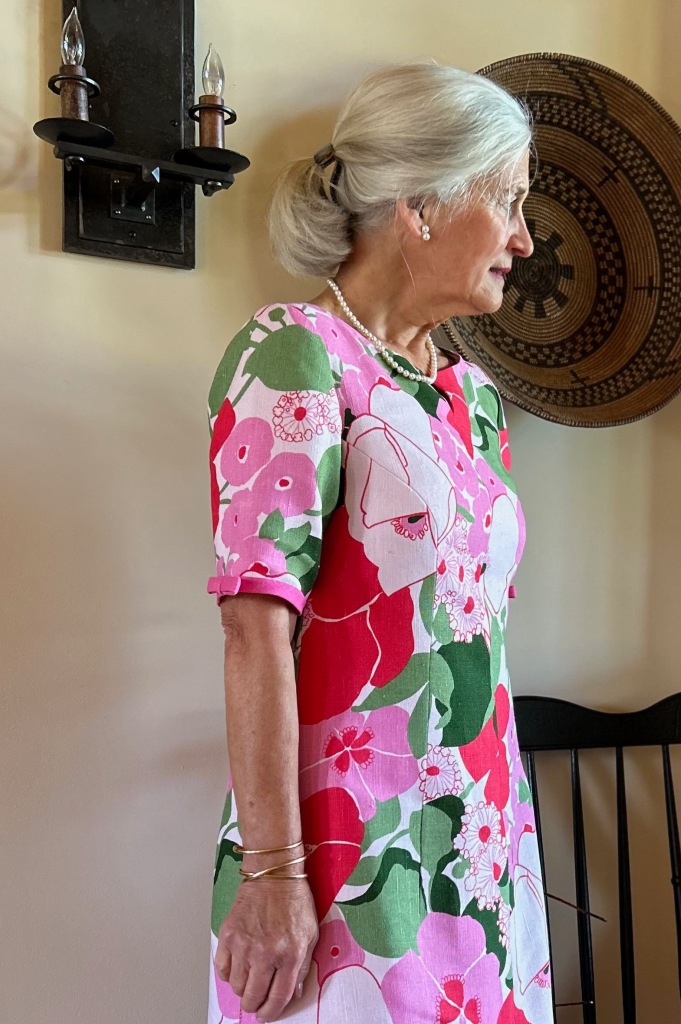
In this view, the princess seam which originates in a dart is visible. This is a nicely engineered, flattering pattern.

Well, you may have guessed by now the reason for making this dress this year.  I will wear it next week when my husband and I celebrate our 50th Wedding Anniversary.  I have changed a lot in those 50 years (and so has my husband!), but I still love pink in all its shades and I still love Moygashel linen (and I still love my husband, too!)  

49 Comments

Filed under Bows as design feature, couture construction, Dressmaker details, Fashion history, hand-sewn zippers, Hems, Linen, Linings, Mid-Century style, Moygashel linen, Sleeves, Summer sewing, Uncategorized, underlinings, Vintage fabric, vintage Vogue patterns from the 1970s

Wool Slacks

Or do you call them pants?  For some reason, I tend to think there are slight differences between pants and slacks.  But not so, according to Fairchild’s Dictionary.  Slacks are listed as “Synonym for pants. Term is usually applied to loose-cut casual pants, not part of a suit.  In the 1930s when women first began wearing pants for leisure activities, these garments were generally called slacks rather than pants.” (The Fairchild Dictionary of Fashion, by Charlotte Mankey Calasibetta and Phyliss  Tortora, Third Edition, Fairchild Publications, Inc, New York, New York, 2003, p. 359-360).  I find this interesting, and a little confusing. I have always thought of slacks as a bit more refined than just pants.  “Slacks and a sweater” conjures up a town-and-country-state of mind for me – rich wool, cable-knit sweater and a string of pearls or simple gold necklace.  Perfect for being comfortable but stylish.  Although it doesn’t really matter what one calls them – pants or slacks – I prefer “slacks” – especially when they are finished!  

This is the pattern I used for the slacks. Notice they are called slacks in the description! There are 8 shaping darts – four in the front and four in the back, and no pockets.

It took so many fittings during the process of making these slacks, and so many minor tweaks, so that when I finally took the last stitch, I was so relieved!  A lot of thought went into them which I will share here.

First of all, the vintage wool I was using (and from which my matching cape is being constructed) is – you guessed it – an uneven plaid.  Fortunately, the dominant colors in the plaid allowed me to “ignore” the uneven aspect and concentrate on what WAS even, if that makes sense.  

This photo from my last post shows the uneven aspect of the plaid. I planned the layout according the the brighter lavender stripe.

Then I had to determine where I wanted those lavender lines to hit my hips, and where I wanted them to run up and down the legs.  These considerations needed to accommodate where I wanted the pants-leg hems to fall in relation to the larger blocks of the plaid.  I generally like to have a hem fall somewhere mid-way between dominant horizontal lines.  I never want a dominant horizontal line to be right at the edge of a hem if I can avoid it. 

Here is the hem on one of the legs, to show where I wanted the lower edge to fall in relation to the plaid.
And here you can see how I placed the vertical stripes on the legs.

I underlined these slacks with silk organza, I lined them with silk crepe de chine (from Emma One Sock Fabrics).  I am lining the cape with matching color silk charmeuse, but I wanted a lighter weight lining for the slacks.  The only exception to this is the facing on the waistband, for which I used silk charmeuse.  The interior of the waistband may occasionally be against my bare skin, and silk charmeuse is just a bit more comfortable in areas which call for a snugger fit. 

I faced the waistband with silk charmeuse.

It was serendipitous that I had a wool sweater, purchased many years ago, which is a perfect complement to the darker purple/eggplant color in the plaid. 

It was quite chilly when I took these photos! Where’s my cape?

 Now I’m excited to make more progress on that cape, which has taken a backseat to holiday sewing and shopping.  It may, indeed, be after Christmas until the cape gets its debut, but life has its priorities, doesn’t it? 

35 Comments

Filed under Fashion history, Hems, Linings, Slacks, Uncategorized, Vintage fabric, vintage Vogue patterns from the 1950s

A Dress That Was Meant to Be – in Vogue

Sometimes the sewing stars align to ensure success (and sometimes they don’t.)  But this story is a success story, although it played out differently than I originally planned.  

I wrote about this vintage Forstmann wool fabric in a previous post.

Having only 1.25 yards of this vintage wool restricted my options to either a simple sheath dress or a skirt.  I opted for the sheath, with all good intentions of using the princess-lined pattern I had recently used for a pink dress in vintage Linton wool.  In fact, one of the reasons I made the pink dress was to see if I would be able to successfully match plaids when I started on the red/green wool.  (The weave of the pink Linton has a plaid woven into it, which I knew would be helpful to me in determining the pattern’s useability for a multi-color plaid.)  Only one problem – when I laid out the pattern pieces on the Forstmann wool, I didn’t have enough fabric.  I should have realized that the 7-panel princess dress would take more fabric than I had – and this time there was no making it work.

SO – I had to find another pattern.  I have, over the years, made several sheath dresses using a newer Butterick pattern, but I really wanted to use a vintage pattern for this wool.  Now, I have a lot of vintage patterns in my collection – and I went through every single one looking for the right sheath dress.  At first I didn’t realize this pattern had the look I wanted.  

I had originally purchased this pattern for that gorgeous shawl collared coat.  But – BINGO – when I took another look, there was the perfect sheath looking right at me.  

Although the pattern was not dated, I knew it was from the early 1960s.  But of course, I thought it would be wonderful to know the year it first appeared.  A lengthy search through old Vogue Pattern Magazines proved to be successful – not only successful, but timely.  This pattern was included in the December 1962/January 1963 issue, and was the featured pattern for a Special Capsule Catalog included in the issue.  Not only that, the caption read: “110 IDEAS TO START THE NEW YEAR IN VOGUE.”  Yes, I thought, that’s what I want to do!  

What a glamorous look!
And here is the entry for this pattern in the capsule catalog.

Of course, starting with a pattern I had not before used meant I had to make a muslin (toile)  and fit it.  That little effort took two days.  But then I got started in earnest, cutting out the silk organza underlining and positioning it right where it needed to be on the fabric.

You will notice that this fabric has a center front, woven to provide a mirror image of the plaid on each side. Really a brilliant way to handle an uneven plaid.

There were two important considerations for placing my silk organza underlining “templates” on the plaid:  1) the orientation of the plaid vertically and 2) the correct placement of the hemline on the grid of the plaid and making this placement work with the position of the waistline and neckline.  

I thought the wider, darker part of each woven “block” on the plaid should be oriented to the bottom of the dress, which I believe is apparent above.  

I find, when working with plaid, it is very important to have the hemline determined before you cut out your fabric.  Visually it is more appealing if the hem does not cut a block of the plaid directly in half or, especially with smaller plaids, end right at the edge of a block.  I think it looks better if there is a bit of a “float” around the bottom of the dress to anchor the bottommost blocks. (Larger plaids have their own considerations. Look at the art on the pattern envelope above to observe this.)

The red “band” at the hemline serves as this “float.”

One of the design features of this dress is the kick pleat, which has its origin in the back seam starting at the bottom of the zipper.  I wasn’t sure how I was going to work the lining around this, but I also thought I could probably figure it out.

The instruction diagram shows the kick pleat quite well.
I angled the raw edges to finish the bottom edge of the seam.
Here is the finished kick pleat.

I loved that fact that this type of kick pleat made the perfect setting for a lapped zipper, shown below.  

The left side is pressed slightly to the middle to accommodate a lapped zipper.

You will notice this dress has two shaping darts on either side of the front panel, in addition to the bust darts.  The back has one shoulder dart and one shaping dart on either side.  

All these darts make for such a lovely fit. In addition, I used a trick I have learned from Susan Khalje. Instead of sewing the bust dart into the side seam, I allowed it to float free, stitching the seam above and below the dart. I did this for both the fashion fabric and the lining. Using this method provides more ease to the bust.

This photo shows what I did with the side seam at the bust dart.

I did lower the neckline by about ½ inch, and I cut the shoulders in by about an inch on either side.  These changes just seemed to look better on me, as determined by my muslin (toile).  

I lined the dress in black silk crepe de chine. (I find almost all my lining silk at Emma One Sock.)  When it came to the kick pleat, I found that a slanted seam below the end of the zipper was necessary to divide the lining between the two sides of the kick pleat. 

Black is so difficult to photograph, but hopefully the angle is apparent.

 I have no idea how to explain what I did to finish the lining in this area.  Just know that whatever I did – worked!  I ended up with no lumps and no restriction on the functionality of the pleat.  

How lovely to have a label for this vintage wool.

This dress was such a fun project.  I loved working with such a beautiful wool and such a beautiful pattern.  There will be more such sheath dresses in my future. 

I now would like to make a black jacket to wear with this dress; I do have a small amount of fabric remaining to use as trim in some way…

So now, how about you?  Have you started the new year in Vogue? I hope so!

52 Comments

Filed under couture construction, fabric labels, Hems, Linings, Mid-Century style, Pattern Art, Sheath dresses, Uncategorized, underlinings, Vintage fabric, vintage Vogue patterns from the 1960s, woolens

From Ready-to-Wear to No-Wear

Is a dress really complete if one has nowhere to wear it?  Well, yes, I think it is. Otherwise, I fear, I never would have finished this dress.

Its inspiration came from a ready-to-wear dress I spied on the Halsbrook website.

My original intention was to make a wool dress using this vintage royal blue-and-black houndstooth boucle I found several years ago.

After deciding it was just a bit too hefty to use for a dress, I switched gears and ordered this boucle from Linton Tweeds in England.

It is a cotton, silk and viscose blend with a lovely hand and a beautiful luster to it.  The colors look like the woven manifestation of Spring, and once it arrived, I was feeling very grateful that I was moving on to some warmer weather sewing rather than being stuck in a Winter project.  Below is the vintage pattern I had chosen to recreate the look of the ready-to-wear dress.

I used this pattern once before and knew it would work beautifully for this purpose.

All was not so merry, however, once I had my silk organza underlining cut out.  While positioning it onto the boucle fabric, I had a rude realization that the boucle, despite its very even grid, was an uneven plaid, in regard to color.  There was no way I was going to be able to balance the colors evenly across the width of this dress.  I had to make a decision how I wanted to treat the center front seam (which helps with the shaping of the dress).  I also had to determine which of the colors was dominant in the grid and then try to fixate on getting that evenly spaced.

After much debate, I decided to use the yellow as the dominant color, and I decided to “railroad track” the center seam, disrupting the even windowpane grid in that spot.

This picture shows how I tried to balance the yellow on the front of the dress, which I was able to do by narrowing the windowpane in the center seam.

I guess I have looked at this dress just a bit too much, as I am still second-guessing myself.  Sometimes it looks okay to me and other times, all I see are the unevenly spaced pink and green grids.

I decided to line the dress in pale-ish yellow crepe de chine, ordered from Emma One Sock Fabrics.

When it came time to finish the inside neck edge with understitiching, I was completely out of matching yellow thread.  Of course, with all the non-essential stores closed (since when I ask, is a sewing supply store considered non-essential?), I had to choose another color for that task.  I went to my supply of vintage buttonhole twist and found coral pink, a nice substitute.

I machine-sewed strips of silk organza interfacings onto the edges of the sleeves and hem, so that I could fray them confidently.   Then I finished the interiors by hand.  Somehow, most vexingly, I lost my pictures of this process.

I actually used the reverse side of the fabric for the double-wide fringe several inches up from the hemline.  It gave me another “railroad track” detail which I thought would help make sense of that center front seam.

This is the reverse side of the fabric.

And here is the double-sided fringe attached to the skirt. The “railroad track” motif is visible in the center of the fringe.

Can you tell I was consumed by this uneven color scheme?  I think it is still playing games with my head, but the good news is, once I did the final try-on of the dress, I thought it looked okay!

I’m not looking back any more on this one!

Well, from Ready-to-Wear to No-Wear to currently No-Where to Wear anything pretty, the only way to go is towards the time, hopefully soon, when we can all be thinking,”So many places to go, so many new dresses to Wear.”


45 Comments

Filed under couture construction, Day dresses, Hem facings, Hems, Linings, Uncategorized, vintage Vogue patterns from the 1960s

Update on The Pink Coat

When is a sewing project really, really, finally finished?  That was the question I was asking myself after I thought I had finished my Pink Coat, but then decided I had more to do.  Or, more precisely, I had things to undo and then redo.

After seeing the photos I posted on this blog, my eye went right to that crinkled hem.

I had not noticed how crinkled the hem appeared until I saw these photos.

I had purposely steamed the hem lightly, not wanting to make it a knife edge, but after seeing these crinkles, I went back and steamed it again.  I still had crinkles. My expectation at this point was that I would probably have to take the hem out and redo it.  This suspicion was confirmed when I sought advice from Susan Khalje.  She oh-so-gently agreed with me!  First she suggested  removing the silk organza from the bottom of the coat up to the fold line of the hem, and lightly catch-stitching it along the fold, which would not show.  I did this after taking out all the stitching along the lining, the facings, and the seam allowances, in order to undo the hem.

The pins mark the fold line of the hem; as you can see, the silk organza underlining extends to the bottom edge of the coat.

I then pinned about a half inch above the hem line, so I was able to remove the silk organza right at the hem fold.  I then used a catch-stitch to secure the silk organza right along the fold line.

Doing this helped, but the hem was still not as soft as I thought it should be. Susan’s next suggestion was to add a bias strip of flannel to the interior of the hem, which I suspected was what I had needed to do from the start.  I went to my trusty Vogue Sewing Book from 1970 to get guidance and found this:

From: The Vogue Sewing Book, edited by Patricia Perry, Vogue Patterns, New York, New York, c1970, page 324.

I used all cotton white flannel, cut 2½ inches wide, the width of the hem.  I positioned it so that ⅝“ was below the fold line, with the remaining above.  I used a catch-stitch on the wider section of flannel, securing it to the silk organza.  Then I did a loose running stitch right on the fold line. After every step, I gently steamed the area.

Obviously I had to take out the catch-stitching along the lower portion of the center back seam, and then I was able to slip the flannel under the seam allowance.

Then I was ready to put the hem back in, and reattach the facings and lining.

None of this was difficult, but it was time-consuming. However, I am much happier with the appearance of the hem now.  It is soft and hangs with more grace.

A much smoother, softer hem!

Susan also suggested that I make an adjustment to the front edges of the collar.  Although I had under-stitiched it, I apparently did not coax the front-edge seams back away from the edge enough, allowing them to show more than they should.  So I took out a majority of the understitching and re–did it, too.

The collar lays flatter now, and I am really happy with it.

Needless to say, I was a bit discouraged that I was facing so much work to correct these problem areas, but I knew it needed to be done.  I considered waiting until next Fall to tackle these fixes, but I decided I would feel less like doing it then than now, so I dug in.  It became a good learning experience, and a good reminder that different fabrics behave in different ways. It is up to the dressmaker to seek out the best solution for a problem area and then do it, or in this case, re-do it.  Hooray, the Pink Coat is finally – really – finished.

22 Comments

Filed under Coats, couture construction, Dressmaker coats, Hem facings, Hems, Uncategorized, underlinings, vintage Vogue patterns from the 1960s