Category Archives: Formal or fancy dresses

Dreaming in Color

Way back in January of this year – which seems like a lifetime ago now – making plans for my 2020 sewing was an exciting exercise.  I was eagerly looking forward to some upcoming events, including one in early May which was going to require at least two new dresses.  One of these dresses would be worn to a “fancy” evening.  In this casual world, what dressmaker does not relish the idea of making a dressy frock?  It was definitely going to be a fun trip and a varied multi-day event.

C         A        N        C        E        L        L        E       D

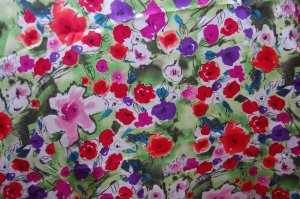
Needless to say, that trip and all its events were cancelled.  Other special occasions were also cancelled, along with many that were not so special.  I looked anew at my sewing plans.  I shifted some things around, eliminated others.  But I kept going back to the thought of that dressy dress.  The fabric was so cheerful, the colors so bright I could not abandon the idea of making it, even without an occasion for its wearing. So in early May I decided to go ahead with my original plans, albeit without a deadline.

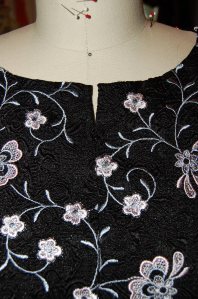
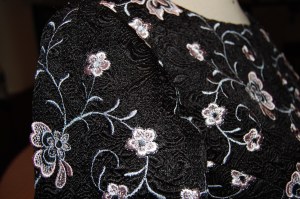
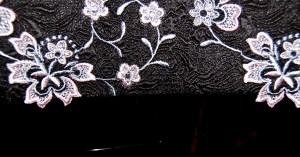
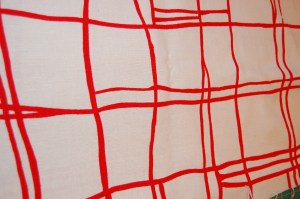
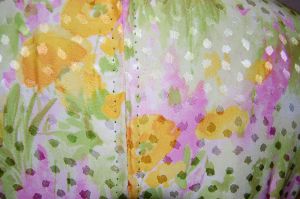
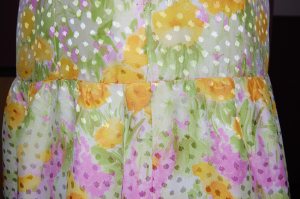
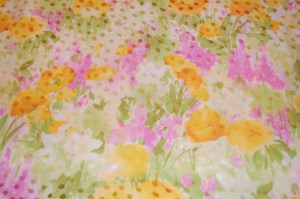
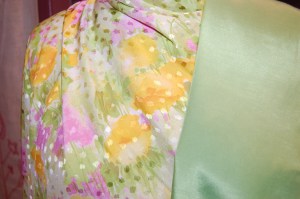
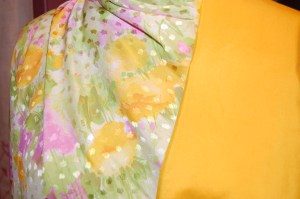
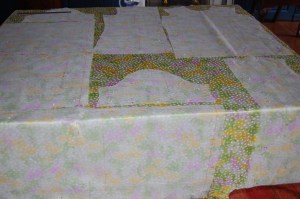
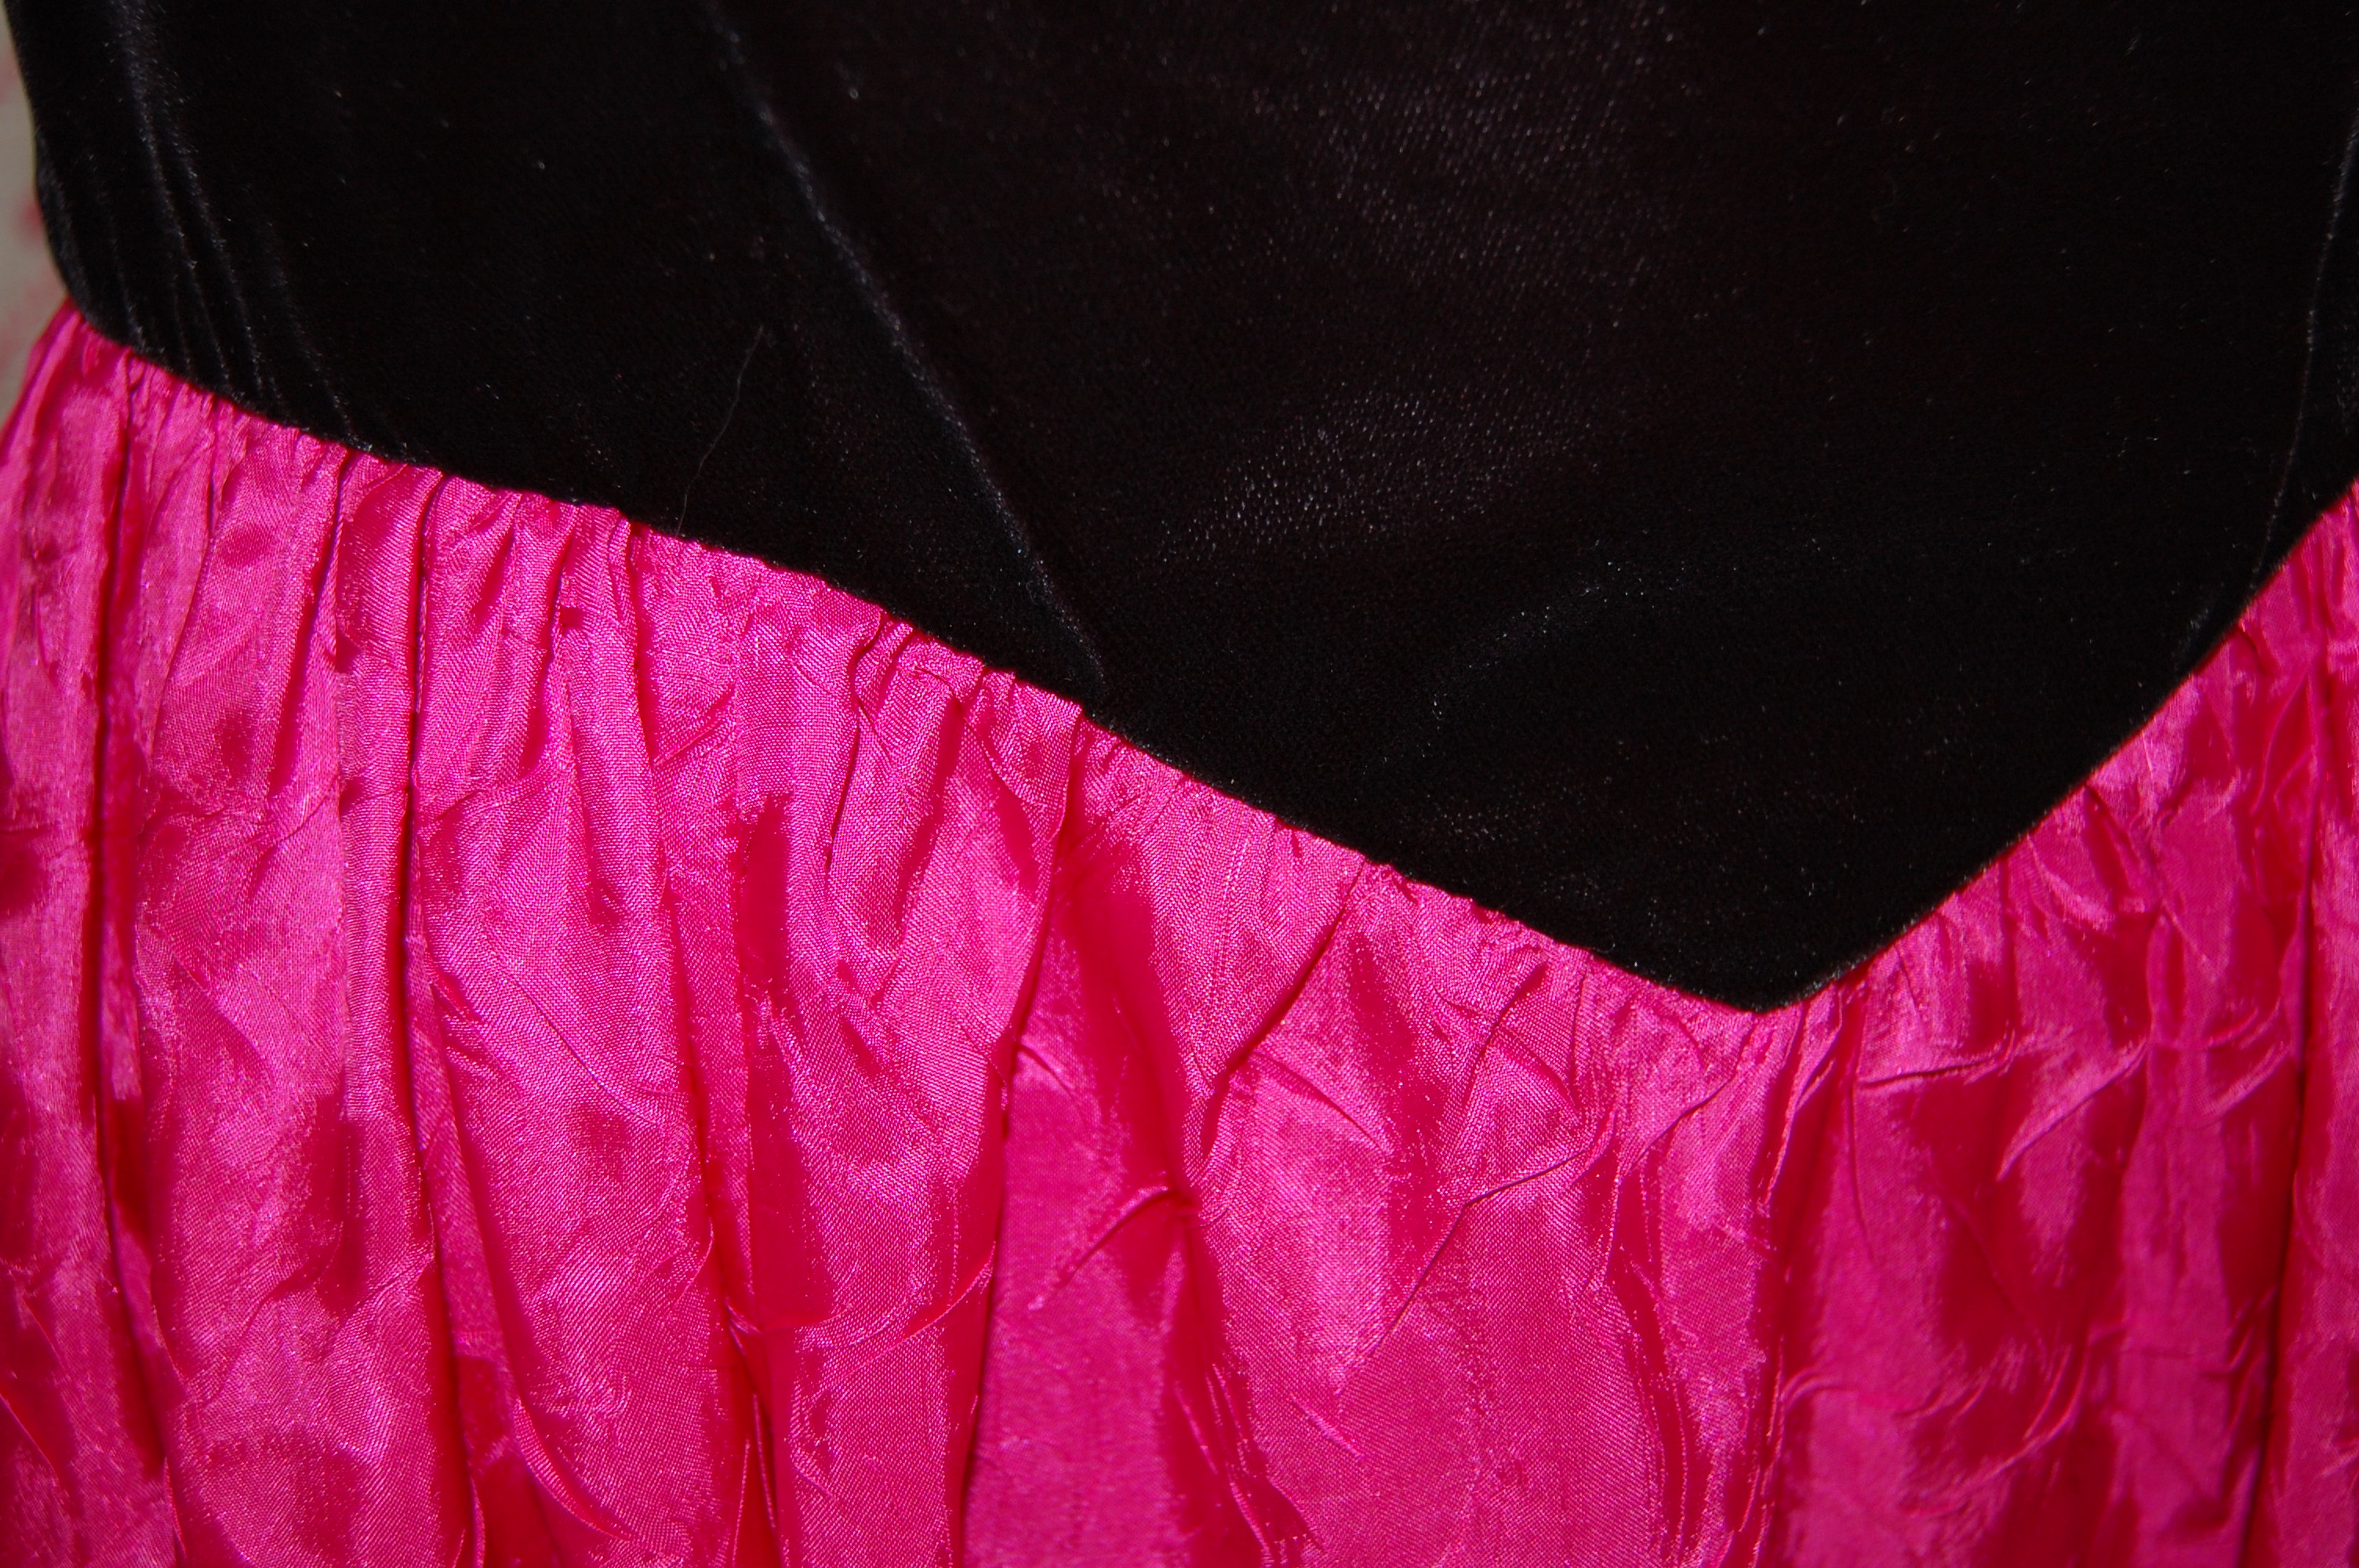
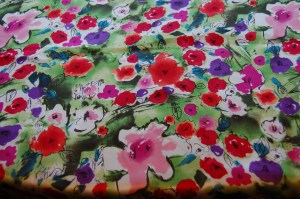
I had purchased this silk charmeuse from Mendel Goldberg Fabrics in New York City several years ago.  It reminded me of fabric which one might see in a design by Christian Dior, due to its “Impressionistic” appearance.

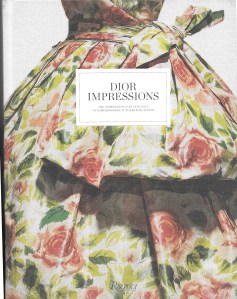
The subtitle for this informative book is The Inspiration and Influence of Impressionism at the House of Dior.

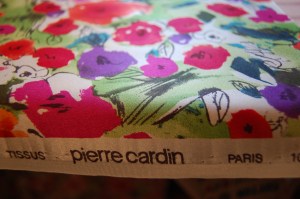
When I unfolded the fabric to give it a press, I saw it was actually a Pierre Cardin design.  It struck me as somewhat unusual for Cardin, so of course I wanted to know if there had ever been any connection between the two couturiers or their fashion houses.  I went to my St. James Fashion Encyclopedia.  Well, yes, as a matter of fact there was:  “From his earliest work for the House of Dior up to the 1950s [my italics],Cardin displays an interest in the sculptural qualities of cut and construction that are still his trademarks in the 1990s.” (p. 87, The St. James Fashion Encyclopedia, Visible Ink Press, Detroit, Michigan, c1997.)

It may be a bit of a stretch to suppose this fabric does indeed have a Dior connection, but still, I wonder.  Could Cardin – now at his advanced age of 97 – and his fashion house still be influenced by those early days with Dior?  Of Dior’s style direction in the early 1950s, Christian Dior himself wrote ”…Colors were inspired by the pictures of the Impressionists and evoked the fields of flowers dear to Renoir and Van Gogh.”  (p. 5, Dior Impressions, Rizzoli International Publications, Inc., New York, New York, c2013.)  It is fascinating to ponder.

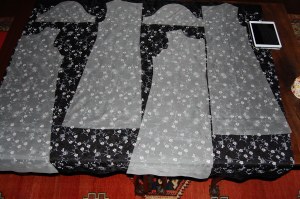
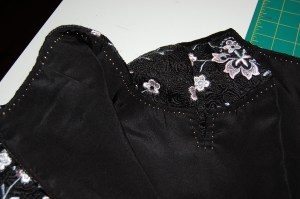
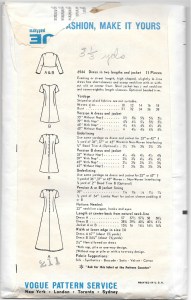
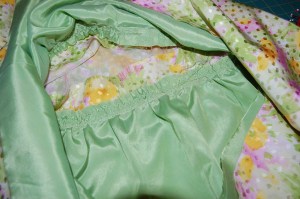
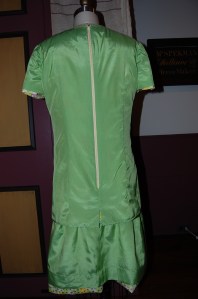
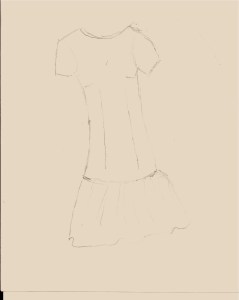
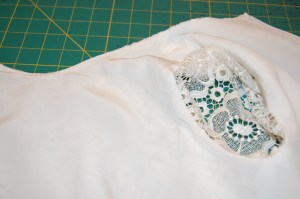
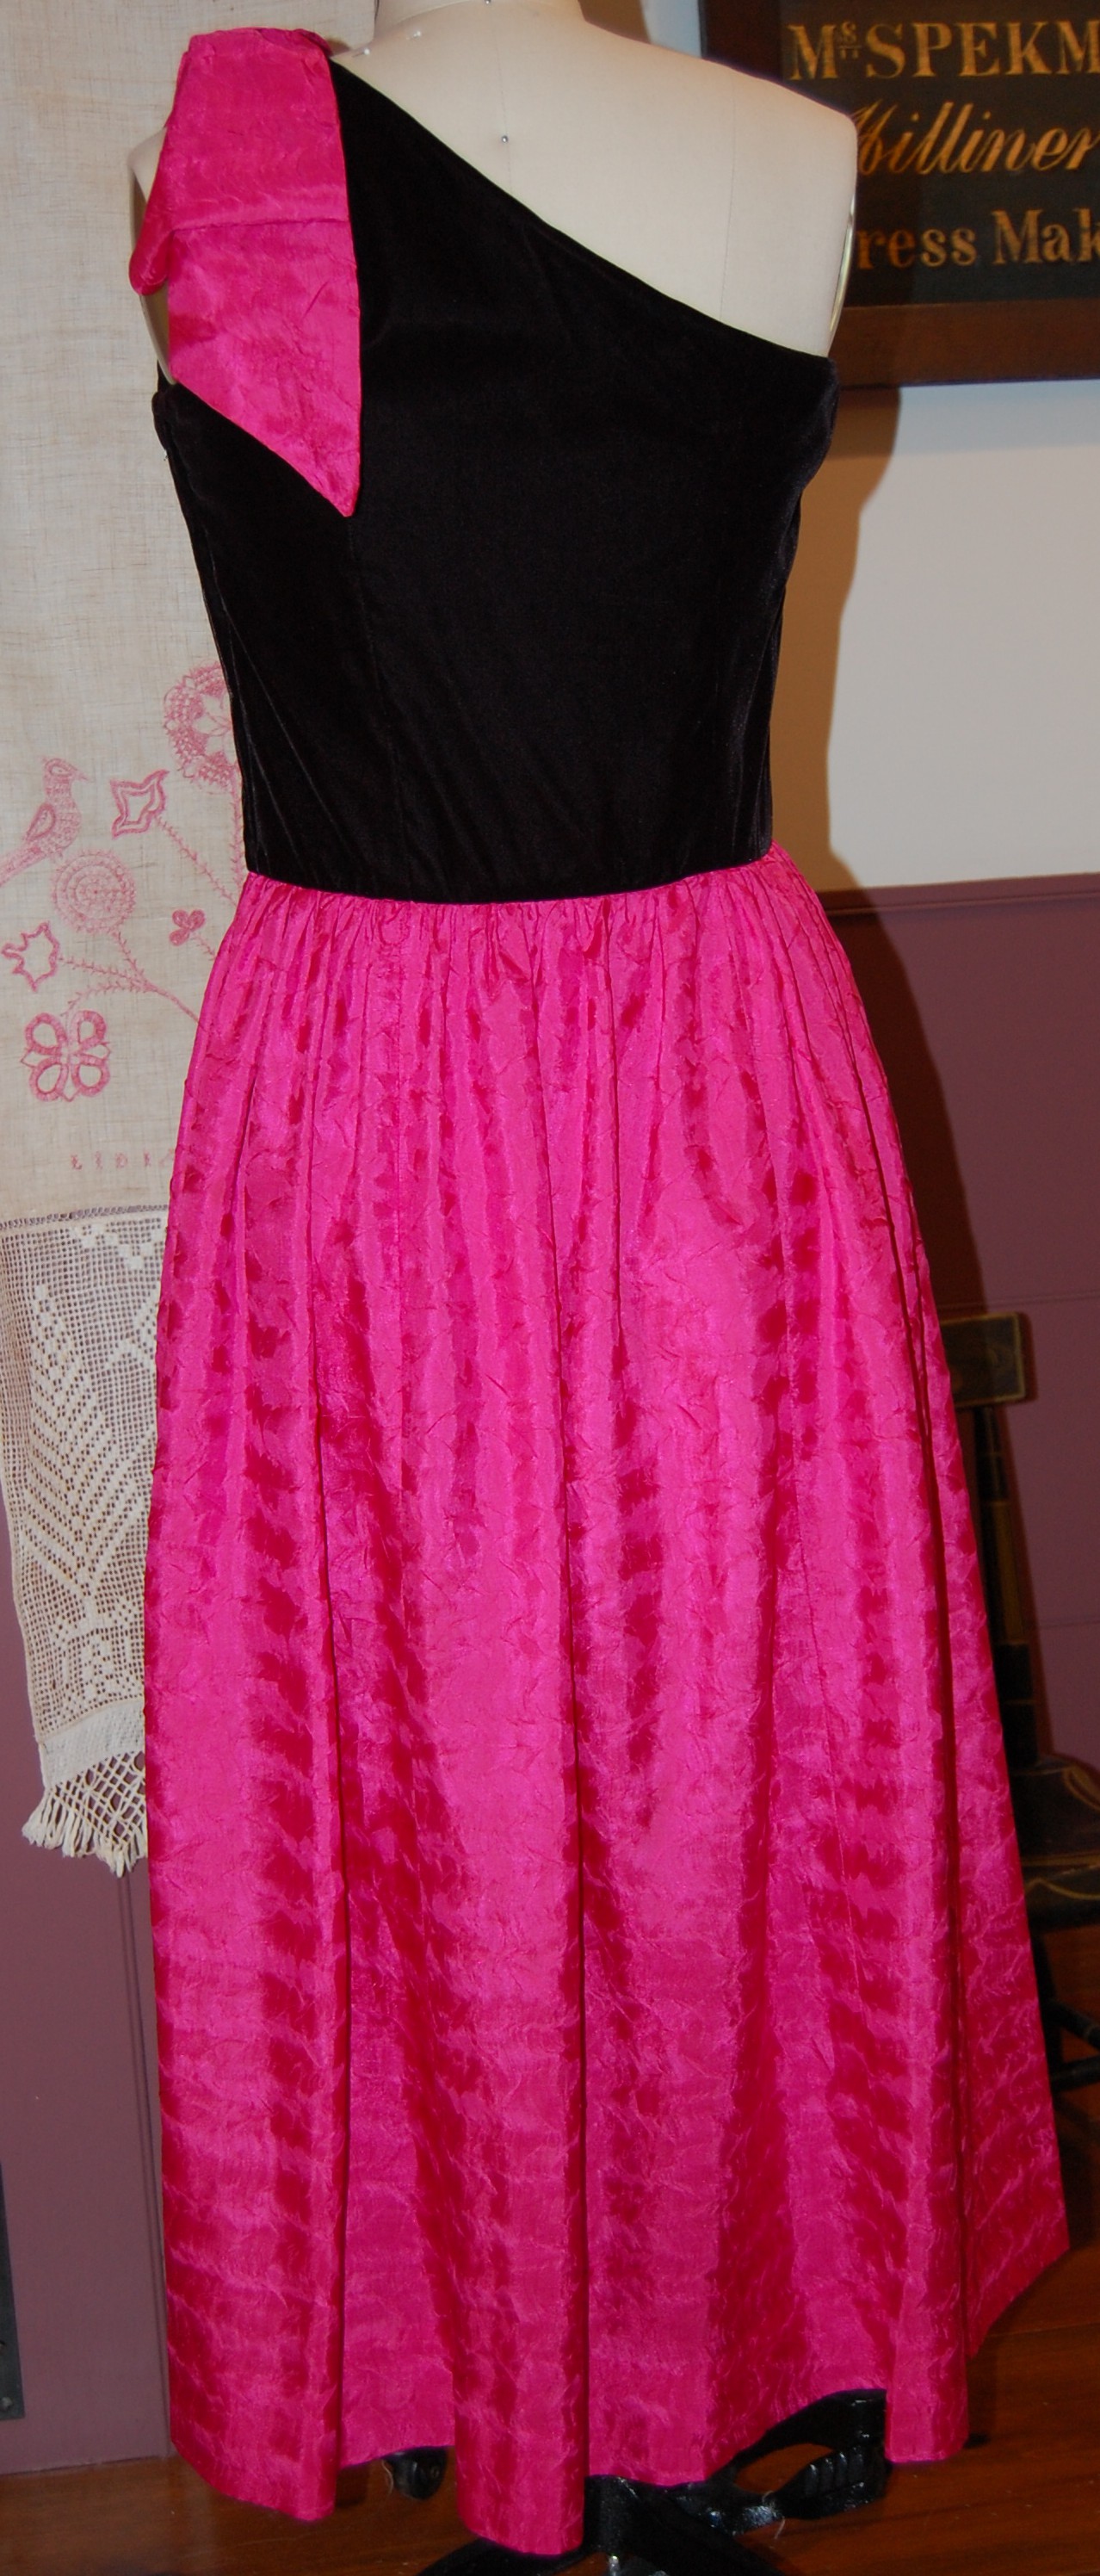
Now back to topic:  I started my dress.  I got the silk organza underlining marked and cut, I cut out the fashion fabric, I basted the two layers together, ready to start the actual construction.  Then I had a bad day.  It had nothing to do with my progress or the process, which was going along fine.  I just had this dismal feeling this was all for naught.  Why would I need such a lovely silk dress?  Where would I wear it?  Were all these hours I was spending in my sewing room just a waste of time? What purpose do all these pretty clothes serve without any social gatherings and occasions to which to wear them?  I think it is fair to say I was having a serious existential sewing crisis.  It was dispiriting and discouraging to say the least.  It made me question my otherwise passionate commitment to couture sewing.

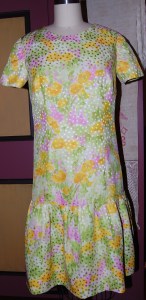
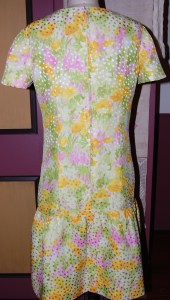
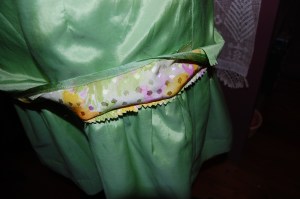
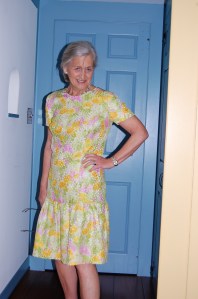
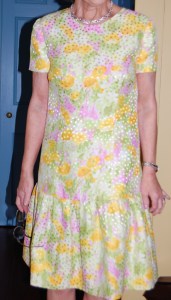
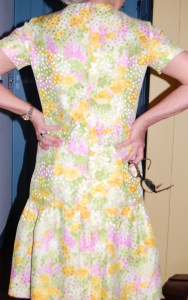
That night I had a dream – in vivid color.  I saw myself in a fancy restaurant which was bustling with people – and I was wearing the very dress I had started – now completed and quite notable in its floral print of bright greens, and pinks and reds and purple.   I was seated at a table with three friends and we were lunching. (Not sure this dress is quite the thing I would wear to a midday lunch, but that’s dreams for you.)   The four of us were having the best time. We were laughing and totally engaged in our conversation and in our friendship. It was lovely and it was memorable.

And there was not a facemask in sight.

23 Comments

Filed under Christian Dior, Fashion history, Formal or fancy dresses, Love of sewing, sewing in silk, silk, Uncategorized

An A-Line Cocktail Dress

The A-Line silhouette is certainly a very recognizable and common style.  Although there is nothing spectacular about it, it does have a rather interesting origin in modern fashion history.  I had lots of time to think about this style as I worked through my most recent project, and I was surprised with what I discovered.

This entry in Fairchild’s Dictionary of Fashion gives a succinct history:

“Apparel styled close and narrow at the shoulders or waist and flaring gently away from the body to the hem in a line resembling the letter A.  Introduced in 1955 by Paris couturier Christian Dior, the term is used as an adjective in describing a wide variety of apparel with this shape, including coats, dresses, jumpers, and skirts.” (The Fairchild Dictionary of Fashion, by Charlotte Mankey Calasibetta and Phyllis Tortora, Third edition, Fairchild Publications, Inc., New York, New York, c2003, page 11)

A further entry adds “…Usually made with narrow shoulders, [and] a high neckline…” (Ibid, page 11)

Dior’s “A-Line” collection in the Spring of 1955 featured a “fingertip-length flared jacket worn over a dress with a very full, pleated skirt.” (“A-Line dress,” by Susan Ward; Encyclopedia of Clothing and Fashion, by Valerie Steele; Thomson Gale, Detroit, Michigan, pages 35-36) Fairchild’s Dictionary has a depiction of this very dress which was called “the most wanted silhouette in Paris.”

Obviously the A-Line shape then evolved into a less dramatic, and more ubiquitous style during the 1960s and ‘70s, much closer to  what we recognize today as A-Line.

When I was contemplating which pattern to use for my dress (I had purchased the fabric, 1½ yards, 54” wide,  from Mendel Goldberg Fabrics in April of this year), I wanted a style which would showcase the fabric. Although I originally thought I would go with a sheath dress silhouette for this fabric, when I found this pattern, it struck a chord.

The line drawing for the shorter length shows more detail of its seaming and darts. The description on the pattern envelope reads: “Evening or street length, high shaped, slightly A-line dress has short sleeves and scoop neckline with or without slit at center front…”

I liked that center front seam with its notched neckline, even though I knew it might be a little tricky to match the embroidered vines and flowers.  However, I thought  the semi-attached appliqués would be lovely overlapping the seams.

The small slit in the center front neckline.

It took me a full week to finish my muslin.  The bust needed to be dropped so those princess-seamed darts needed a lot of adjustment.  In the shoulder area I had some gaping in the front, and I also needed to reshape the top of the shoulders.  Instead of easing the sleevecaps to fit the armscye, I decided to replace that ease with a shaping dart to the top of the sleeves.  I really liked the fluid look that gave to the shoulder line. I drafted three-quarter sleeves as I was contemplating that change to the original pattern.

It is difficult to see in this black fabric, but this is the top of the sleeve with its shaping dart.  If you look closely, you can see some loose edges of the larger appliqués.

Can you guess what is coming next?  As is often the case when I purchase fabric first and then choose a pattern, I created a challenge for myself.  It was almost immediately obvious to me that I would not be able to work on the lengthwise grain of fabric, as I could not begin to fit the pattern pieces onto the fabric and do any matching whatsoever. As luck would have it, I preferred the appearance of the meandering of the vines and flowers on the crossgrain, and I figured out how to stagger the pattern pieces to both fit the fabric, and match the seams.  But those three-quarter length sleeves?  No way were they going to happen!  I could just fit in the original short sleeves, so short they were going to be!

Here are the silk organza underlining (pattern) pieces laid out on my fabric. I had to stagger the four main pieces to fit it on the fabric. Fortunately I was still able to match the pattern of the vines and flowers. Whew! (I took pictures on my iPad to help with the matching.  You can see it in the upper right corner.)

I ended up basting by hand every single seam on this dress.  Even with great care, it was incredibly easy to catch corners of those loose appliqués by mistake, so it was much easier to make adjustments in basting rather than in the finished machine-sewn seams.  The basting also showed me I needed to take out a small bit of the width of the skirt from the waist down, about an inch total.  When is an inch more than an inch?  In this dress!  That one inch made a huge difference in its final appearance.

Because I was sewing this dress using couture techniques, the neck facing was eliminated, with the black crepe de chine lining fell-stitched to the edge of the neckline.  When I under-stitched the lining to secure it in place, I used an off-white silk buttonhole twist. It was so much easier to see light thread on the black lining, and also, I think it looks pretty.

I hand picked the zipper, which virtually disappears in this dark jacquard embroidered fabric.

I was able to arrange the hem of the skirt so the larger of the semi-attached appliqués would hang just beneath the fold-line.

This shows two of the appliqués at the hemline.

I love the graceful flow of this dress.

The simple look of this dress belies the hours and hours I spent on it!

And I am so pleased that I was unable to make three-quarter length sleeves. These short sleeves are just perfect!

I am quite happy with the way this dress turned out.  I do think its simple lines show off the fabric well – no need for anything too fussy when the fabric is so incredibly lovely!  I love that I can wear this 1960’s A-Line style and somehow feel – and hopefully look – very current.


30 Comments

Filed under Cocktail dresses, couture construction, Fashion history, Formal or fancy dresses, hand-sewn zippers, Mid-Century style, Uncategorized, underlinings, vintage Vogue patterns from the 1960s

A Sewing Draught

The weather outside is frightful, as the popular Christmas song goes.  It has been too hot and too wet here in eastern Pennsylvania (USA) this summer.  Our family travels, however, took us to areas that were both too hot and much too dry. It was exactly those lengthy travels which helped determine the atmospheric conditions in my sewing room during the past weeks.  There has been a definite draught in that part of the house.  The sewing machines have been huddled under their covers, the fabric has lain folded and fallow, there has not been even a bubble of moisture from the steam iron, nor the slightest snip from the scissors.  It has been a place undisturbed and quite barren.

So, finally, it is time to change all that!  Now I am faced with the question – Do I try to squeeze in the making of one more summer dress (it certainly still feels like summer) – or do I forge ahead with a project which has a mid-October deadline?

If I go with one more summer dress, it will be one made from this vintage Moygashel linen, which has been in my queue for quite some time – and somehow never made it to the top.

Realistically, it would probably be wiser to focus on that mid-October dress, which is going to be a cocktail dress made from this amazing fabric, a lightweight brocade, embroidered and with with lace appliqués.  One of the perks of attending Susan Khalje’s Couture Sewing School in Baltimore (which I did last April) is the opportunity to see and purchase fabric from Mendel Goldberg Fabrics.  Alice Wildes, the proprietress, arrives at the beginning of each week-long class with a car full of her gorgeous, carefully selected yard goods, and that is where I purchased this piece.

The embroidered flower stems are a light gray, and the flowers themselves are a pale pink.

Getting this brocade was actually a last minute decision, as I already had one cotton piece selected – and I was trying to be circumspect in buying more fabric (remind me again of why I ever think this will work?) Anyway, I’m so glad I succumbed as I love it and have determined which pattern to use for its construction:

I will be making the shorter dress, without the jacket.

I like the notched neck detail on the shorter dress. I may make below elbow length sleeves – still to be determined.

Although this dress appears to be a simple silhouette, I have plans to change it up a bit, which will add to its complexity, so it certainly cannot be rushed.

With any luck, the weather will start to change for the better no matter which project I embark on.  The only question is – which one will get the nod?

13 Comments

Filed under Cocktail dresses, Formal or fancy dresses, Lace, Linen, Moygashel linen, Uncategorized, Vintage fabric, vintage Vogue patterns from the 1960s

Wedding Ready

Why is it that we so often think every wedding to which we are invited means we need a new dress? Sometimes it is warranted; maybe we really do need a new dress! Maybe what we already have in our closet isn’t right for the season or the “ambience” of the wedding site. Maybe the couple getting married is very dear to us, and it just seems right to celebrate this event with something new and special. Maybe the wedding season is busy enough that we really cannot wear the same dress to multiple events where we will probably see many of the same friends and people. But maybe, just maybe, a wedding invitation is exactly the perfect excuse we need to indulge our love of fancy, dressy clothes.

Fortunately, I have not only a wedding to attend, but also, the following weekend, another elegant evening of “cocktails, dinner and dancing,” so it just seemed appropriate – necessary even! – to make a dress/ensemble that could suffice for both. Well, the dress is done, but not the jacket.

Front . . .

Front . . .

. . . and back

. . . and back

Wedding Ready

This is, of course, the pattern I had to alter in order to fit it onto my available fabric.

Oh the things we can learn, no 10

I made a couple more small changes to the dress. I broadened and lowered the neckline by a small amount, to make it more pleasing on me. I eliminated the neck facing and used the couture method of finishing that edge, with the dress lining brought up to the edge, fell-stitched in place, and secured with small back stitches. I also decided to make the center back zipper a focus when I found a vintage spool of green silk buttonhole twist in my collection. Using an idea I had seen one of my readers do (thank you, Cissie!), I pick-stitched the zipper with the twist, leaving a little trail of bright green dots along the center back.

In the Department of “Nothing is Easy,” I ran into a problem with the fullness of the “half-skirt” on the front of the dress. You may recall from my last post, that I doubled one of the back skirt sections to use for the front skirt (replacing the diagonally shaped flounces as shown on the pattern which required more fabric than I had.) When I made my muslin (toile), I did not realize that the front skirt was fuller than the two back skirt sections. I had all three sections of the fashion fabric sewn together, with the seams all catch-stitched, and the lining attached too (in order to treat both pieces as one in the ruffling process.)  I was half way through basting the skirt onto the body of the dress when I realized there was too much fullness in the front. I had to take it all apart, and figure out where I had made the mistake. It turned out that the front section of the dress was narrower than the two back sections sewn together. So I had to do some calculations, coming up with the fact that I had to take 4.5” off the width of the front skirt. That took a whole afternoon of sewing to take care of that adjustment!

The skirt was attached to the bodice in an rather unusual way as you can see in this photo and the instruction sheet below.

The skirt was attached to the bodice in an rather unusual way as you can see in this photo and the instruction sheet below.

Wedding ready - instruction sheet

I also had to figure out how to line the top part of the dress. I finally decided to leave the top part of the lining hanging loose inside the dress – and it actually works beautifully!

Wedding ready

The skirt lining is not attached to the bodice lining at all.

The skirt lining is not attached to the bodice lining at all.

Two small interesting design notes on this pattern are worth noting. First, if you look at the pattern envelope, you see small neckline darts on the back of the dress.

Wedding ready - pattern thumbnailWhen I studied the pattern, those darts were not there! Either the artist made a mistake, or the darts were eliminated when the pattern was drafted.

Another interesting design aspect is the center back seam in the skirt. Usually center back seams are there because there is an opening that the seam needs to accommodate. That is not the case in this dress, as the zipper does not extend into the skirt. However, even though it is very subtle, it just looks better to have a seam in the skirt that matches up with the center back seam of the bodice section.

That center back seam which is picked up in the skirt.

That center back seam which is picked up in the skirt.

It has been rainy and cold all week so no photos outside. I need a dress like this to remind me that it is actually May.

It has been rainy and cold all week so no photos outside. I need a dress like this to remind me that it is actually May.

Wedding Ready

Wedding Ready

Wedding Ready

Another back view

Another back view

Wedding Ready

I have decided I am “wedding ready” even without the jacket. However, if I get the jacket finished, I’ll be very happy!

27 Comments

Filed under Cocktail dresses, couture construction, Formal or fancy dresses, Mid-Century style, sewing in silk, Uncategorized, vintage Vogue Designer patterns, vintage Vogue patterns from the 1960s

The Silky, Shimmery Colors of Spring

Just as with the elusive answer to “Which came first, the chicken or the egg?,” those of us who sew can try to answer “Which comes first, the fabric or the pattern?” The answer, at least as I see it, is “It depends.” And sometimes, even, it is a little of both.

When I saw this fabric on the website of Mendel Goldberg Fabrics last Fall, I really did not stop to think about a pattern. It was a “bolt end,” 1 3/8 yards of 58” wide Italian silk. With that width, I wasn’t particularly concerned about the length being under 1 and ½ yards. I just ordered it as soon as I could.

The colors of Spring

Upon arrival, the fabric was even prettier in person, shimmery with “polka dots” woven in, fluid as only silk can be, and the picture of Spring. At that point, I was up to my ears with my Winter sewing, so I thought about it only casually until just a few weeks ago. I already had this pattern in my collection, and in the back of my mind, I had paired that fabric with the dress in View B on the right.

Oh the things we can learn, no 10

One interesting thing about vintage patterns is the yardage requirements are often given for widths that are narrower than many modern fabrics are produced in. For that reason, it can be difficult to determine exactly how much fabric is needed for a particular design. I’m getting better at sensing what I need, so I just assumed that I would have enough fabric to make that dress.   I had my heart set on it, actually. So much so, that when Britex Fabrics announced an upcoming sale of silk fabrics, I sent off for swatches for coordinating silk for the short jacket (in view A) and lining for the dress.

The green is a lightweight silk/cotton blend. The goldenrod yellow is silk taffeta from Italy, without the stiffness that taffeta so often has.

The green is a lightweight silk/cotton blend. The goldenrod yellow is silk taffeta from Italy, without the stiffness that taffeta so often has.

Dutifully ordered, the fabric arrived from California, and it, too, was even prettier in person! I was in love, and really could not wait to get started, first on the dress, and then on the jacket.

DSC_0036

The green for the lining . . .

The colors of Spring

… and the yellow for the short jacket in View A.

Then reality hit. When I took out the pattern pieces, here is what I found for that unusual flounced skirt:

This skirt piece uses almost a yard in length, and the diagonal shaping on it uses more fabric than normal.

This skirt piece uses almost a yard in length, and the diagonal shaping on it uses more fabric than normal.

My heart sank as I knew immediately I did not have enough fabric. There was going to be no Rumplestiltskin to help me with this one.   I went back to my pattern collection and pulled out two more possibilities.

I love this dress, but I thought it might be too tailored for the fabric. Also, the seaming detail would be lost entirely with the busy design of the silk.

I love this dress, but I thought it might be too tailored for the fabric. Also, the seaming detail which adds so much to this dress would be lost entirely with the busy design of the silk.

I felt like Goldilocks evaluating this pattern for my fabric. Just not right...

I felt like Goldilocks evaluating this pattern for my fabric. Just not right…

With both these dresses I would have to rethink the jacket, as the styles would not compliment each other. I stewed over this, re-measured, re-thought, and left it all in a heap in my sewing room. There was something about that shimmery silk that kept telling me that a dress made from it needed to have some movement to it –  like the flounced half-skirt pictured in the pattern. And then it hit me. If I made the front part of the skirt the same as the back, I could probably just squeak it out.

I did a quick diagram to consider this option.

I did a quick diagram to consider this option.

My completed muslin verified this for me, and, not only that, I loved the look, at least done up in muslin. Once again, using the couture technique of laying out and cutting each pattern piece individually enabled me to manipulate the pieces to make the most of the fabric I had available to me. Fortunately, there was no matching to be done, although there is a specific up and down to the design.

Now this is what is called making the most of one's available fabric!

Now this is what is called making the most of one’s available fabric! This shows my silk organza underlining pieces in place, ready to cut.

As far as the jacket – losing the diagonally shaped flounces on the skirt, makes the effect of the jacket not quite as dramatic, but I think it will still be very flattering – and appropriate. (The jacket has a million pieces to it, so it will be quite the project…!)

Well, I can’t leave this post without sharing another color of Spring, although this one is not silk and not shimmery. Pink cotton gingham is the picture of Spring, especially in a little dress for a little girl! When I made a crib quilt for my younger granddaughter, Carolina, I backed it in pink gingham, appropriately called “Carolina Pink.” I ordered enough so that I would be able to make her a dress for her first birthday (earlier in April) and here it is:

The colors of Spring

The colors of Spring

The bodice is lined in soft white cotton, which makes a lovely finish.

The bodice is lined in soft white cotton, which makes a lovely finish.

In my tins of buttons, I found these little ceramic ones, purchased years ago when Carolina’s mommy was my little girl. (Well, she is still my little girl, but you know what I mean.) How appropriate to use them for one of her daughter’s dresses.

The colors of Spring

These buttons, with their delicate cross-hatch design, were just waiting for this dress.

And with this dress –  the fabric absolutely came first!

17 Comments

Filed under Buttons - choosing the right ones, Formal or fancy dresses, Heirloom sewing for children, Mid-Century style, Sewing for children, sewing in silk, Silk taffeta, Uncategorized, vintage Vogue Designer patterns, vintage Vogue patterns from the 1950s, vintage Vogue patterns from the 1960s, vintage Vogue patterns from the 1970s

Festive Attire

This time of year is not called The Festive Season without good reason. Replete with parties and holiday events, December is like no other month of the year. Particularly delightful are the parties which are given in someone’s home – and they deserve special attention to attire. I firmly believe it is a compliment to your host and/or hostess to dress up according to the season – which means Festive Attire.

When I am considering what to make (and wear) for a Christmas Party, I keep these things in mind:

1) It should be feminine – as in a party skirt or dress (not pants, with my apologies to those of you who prefer them).

2) If possible, all or some of it should be silk, that luxurious and elegant fabric which always makes a statement.

3) It should be fancy which leaves open many possibilies.

4) Something about it should be colorful – preferably red, the perfect hue for a bright holiday look.

So, how did I do?

Festive Attire

The lace for the overblouse is from Mendel Goldberg Fabrics. I found it online this past summer. Although at the time, I did not know what I was going to make, it was an end-cut, so the yardage was ample. I figured I’d make that decision later. The red fabric for the skirt is a silk faille. I purchased it several years ago and had it in my fabric storage closet. Now I can’t remember what I intended to use it for; I remember when it arrived, I thought it was too stiff for whatever that was. I kind of despaired that I’d never find a suitable use for it, until I got the idea for this outfit.

I used the same overblouse pattern that I worked from this past summer for an eyelet blouse – and set to work on this incredible lace.

I made lots of changes to this overblouse pattern, but it gave me the basics I needed.

I made lots of changes to this overblouse pattern, but it gave me the basics I needed.

With two scalloped “selvedge edges,” the lace is very versatile. I underlined the body of the blouse with a lightweight cotton/linen blend, and then I lined it with silk crepe de chine.

Festove attire - lace

Perhaps you can see the lovely detail in this small segment of the lace.

Here is an interior look at the silk lining sewn carefully to the armscye.

Here is an interior look at the silk lining sewn carefully to the armscye.

I used a tired and true skirt pattern for the red silk faille.

From Vogue's Designer series, ca 1970.

From Vogue’s Designer series, ca 1970.

Because of the stiffness of the fabric, I added about 1/8 of an inch to the side seams to give me a little more flexibility in movement, but now that it is finished, I really don’t think that was necessary. Even though the fabric is stiff-ish, it’s flexible – and I love the sheen it has.

With no construction photos to show you (too busy sewing to take pictures!), I have to be content showing you just the finished product.

DSC_1002

DSC_1000


DSC_1011

DSC_1013

Somehow I was able to cover all my “festive” criteria with this outfit: feminine, silk, fancy and colorful. I must remember this recipe for next year’s Festive Season.

33 Comments

Filed under Formal or fancy dresses, Lace, sewing in silk, Uncategorized

Shopping in My (Cedar) Closet – Again!

Some dresses – and patterns – just keep giving and giving. As the date approached for a “black tie/ masquerade” ball which my husband and I planned to attend, I decided I had better start to think about what I was going to wear. I reluctantly admitted that the fancy dress I made this past Summer was really too summery to wear to a mid-October event, so I went into my cedar closet in search of another party dress. Still looking like the day I made it 22 years ago was this dress, made from a Butterick pattern:

DSC_0904

And here is the pattern.

Here is the pattern.

The thumbnail drawings shoe the process lines in the bodice. The description explains the construction of the skirt. I made it in the ankle length version.

The thumbnail drawings show the princess lines in the bodice. The description explains the construction of the skirt. I made it in the ankle length version. And yes – it has a side zipper.

Although I have actually made just one dress from this pattern, I have used the bow pattern (or some “sized-up” or “sized-down” variation of it) again and again. My most recent use of it was for the waist bow on my Summer dress:

 I enlarged the pattern a bit to make this bow.

I enlarged the pattern a bit to make this bow.

With a black velvet bodice, the dress from my cedar closet is definitely more suitable for cooler weather, and I didn’t think it looked too dated to wear.

GD Ball 3

I like the dropped front waistline – a detail not often seen in current patterns – at least to my knowledge.

Black and pink fancy dress

The pink fabric is polyester, although it certainly resembles silk. I never forgot the “name” of this fabric – it was called “Eyelash”! It has a crinkled effect to it, but is soft and wrinkle resistant.

This is a view of the back of the dress.

And, as luck would have it, several years ago I made a mask to wear to some other event, the purpose of which now is lost to the ages! Fortunately I had used some left over fabric from my “cedar closet” dress – so it matched perfectly.

Mask Pink

I love a mask on a stick – it doesn’t muss one’s hair! I added that vintage flower to give it extra allure. The stick is just that – a skinny dowel which I covered with ribbon.

Those are sequins around the eyes!

Those are sequins around the eyes!

When I made the dress back in the 1990s, I found this evening bag to use with it, so, of course, I wanted to use it again. How times do change! I tried every which way to fit my smartphone in it, and no amount of “schmushing” or angling allowed me to do so. Fortunately, my husband’s tux has lots of pockets, so he toted my phone for me!

Black and pink fancy dress

The final touch to my outfit was long black velvet gloves. I adore long gloves; they are elegant, fetching and … warm! I did not see another pair of formal gloves the entire evening, which to me is a little sad. Accessories like that add so much to our attire and to our “presentation” and unfortunately are one of those fashion niceties being lost in an increasingly casual world.

GD Ball 1

Click on the photo for a closer look…

GD Ball 2

Some of the people in attendance at the Ball were in costume, but I loved the fact that I could get one more wearing out of a formal dress made so long ago. Back into the cedar closet it has gone – sharing space with other out-of-season or “too sentimental-to-give-away” pieces. It is anybody’s guess whether I will ever have another opportunity to wear it. But those gloves? I am keeping those handy!


26 Comments

Filed under Bows as design feature, Formal or fancy dresses, side-placed zippers, Uncategorized