Monthly Archives: May 2017

“Secret” Ingredients

Like that extra dash of nutmeg, which makes a dish sparkle in an indecipherable way, Classic French Jackets also have some secret ingredients. Except, they really are not secrets at all. They are, however, a few of the components which help to make these jackets so “classic” and just a step above ordinary.

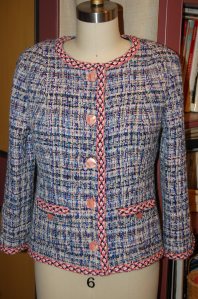
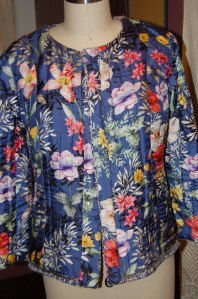
Before I get to those details, however, let me show you my finished – yes, finished! – jacket.

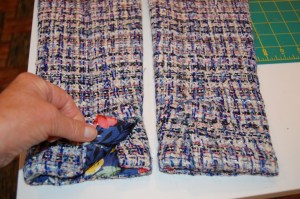
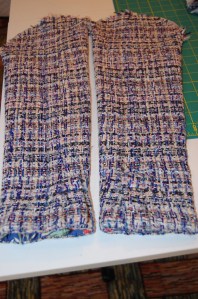
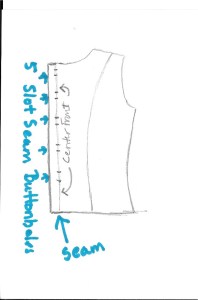
To start with, one of the main features of a classic French jacket is the three-piece sleeve. The seam placed along the center point of the shoulder and running down along the outside of the arm does two things: it allows for the all-important vent and it provides a gentle curved shaping of the sleeve. The under-sleeve piece, which straddles the underarm area reduces bulk in the lower armscye and also contributes to the shaping of the sleeve.

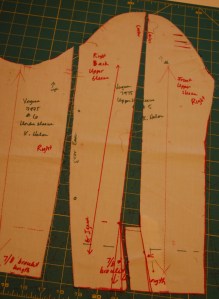
The depth and width of the extension on the vent is entirely subject to the decision of the dressmaker. I opted to make my vents and their extensions suitable for two buttons. I originally planned on making a three-button vent, but I changed my mind, for reasons you will see in a future post.

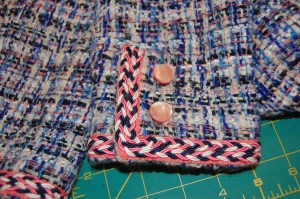
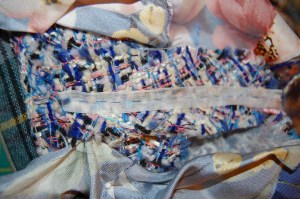
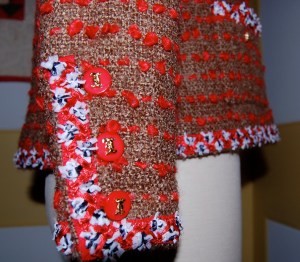
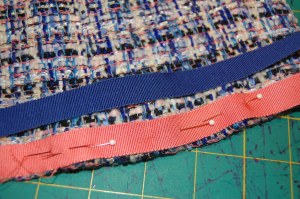
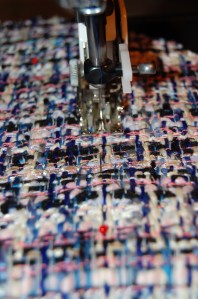
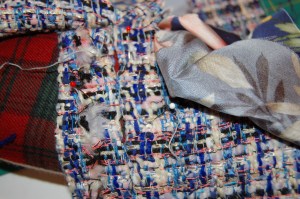
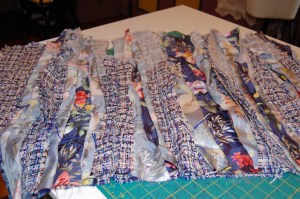
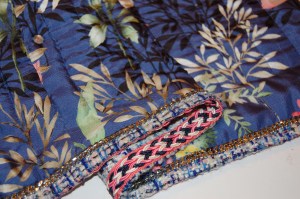
Probably the most visible component of one of these jackets is the trim. This is such a personal choice, and the selection of the trim can really change the entire complexion of the jacket. As you all may know by now, I decided to use a layer of Petersham ribbon under the braid I selected. Once the Petersham was on, and I had started applying the soutache braid, I took this picture to illustrate how combining two layers of trim can effect such a different look.

On this jacket I placed my trim right on the outside edges of the parts being adorned, but this is also a personal choice.   Yes, there are “rules” to making these jackets, but the way you trim your jacket is not one of them! I also like to apply my trim after the interior of the jacket is finished, but I have seen a number of very successful jackets where the trim was applied before the edges were finished in the interior.

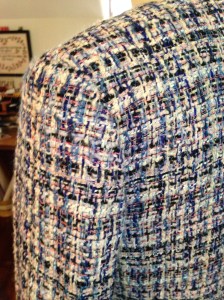
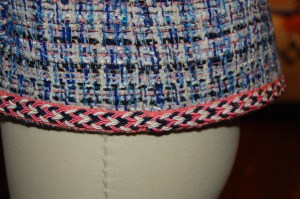
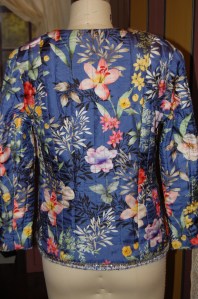
In the Classic French Jacket Class I took with Susan Khalje a few summers ago (which I cannot recommend highly enough!), she made the point that a lot of couture jackets are hemmed slightly longer in back, allowing for a gentle curve that is flattering and feminine. I love this look and used it again for this jacket. I think it is particularly effective with contrasting trim.

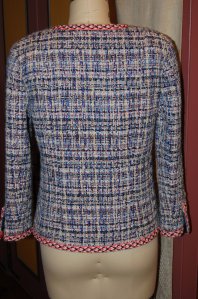
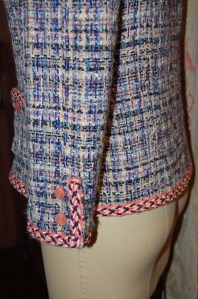
The gentle slope of the back hem is a little more apparent in this side view.

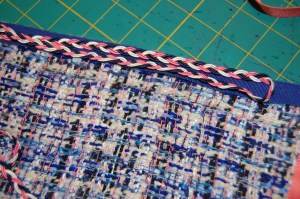
Obviously the trim has to have a starting point and an ending point somewhere on the jacket, right? Common sense tells us it should be in the most inconspicuous place – which, for the most part, happens to be in the side seam under your non-dominant arm. I am right-handed, so I made my starting and ending spot under my left arm.

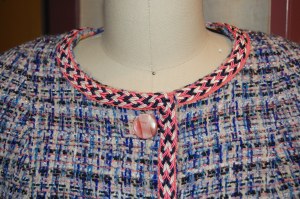
I decided to make a double continuous loop of the soutache braid in order to reduce the bulk at the beginning and ending spot. Here you can see how I looped it in order to apply it this way.

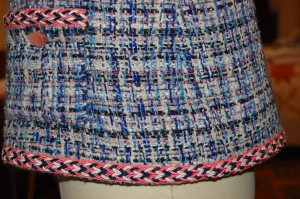
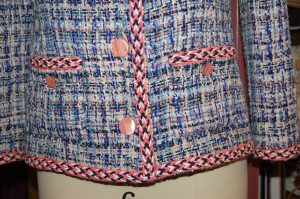
From a little farther away, it is barely perceptible. By the way, do you see how that pocket is buckling?  I realized I had sewn the button on a little too low, so I had to do that over.  Seems there is always something to “tweak” at the end!

Because the boucle I used for this jacket is more of a lightweight weave, I decided I needed to anchor the buttons in some way. So I sewed them on (with waxed and ironed, double thread, of course), attaching them on the lining side with small white buttons.

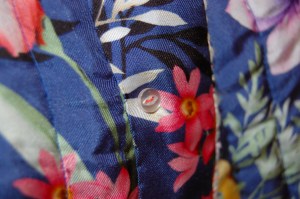
While we are looking inside, here are photos of the jacket turned inside out.

I did not make any attempt to “match” the print because I did not think it would have made any difference.

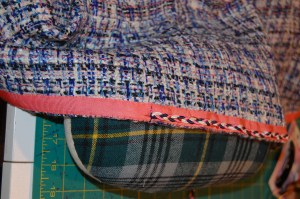
Another key, necessary ingredient to one of these jackets is the chain which weights the jacket and keeps it looking neat and tidy. Sewing on the chain has to follow the Goldilocks rule: not too tight and not too loose.

I chose a silver-toned chain for this color combination.

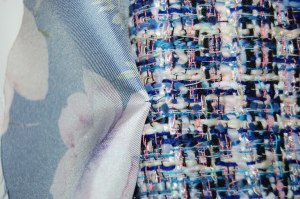
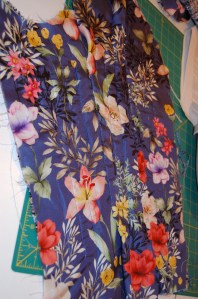
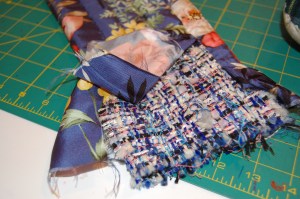
The lining fabric I used for this jacket is such a lovely silk twill print. It seems a shame to hide such a beauty on the inside, although the interiors of these jackets are one of their most delightful secret ingredients. You will, however, be seeing more of this silk, along with photos of me wearing my jacket – all in a post to come soon!

33 Comments

Filed under Boucle for French style jackets, Chanel-type jackets, couture construction, Linings, Uncategorized

More on Making a Classic French Jacket

What more can be said about the process of making a classic French jacket? Well, actually, quite a lot! These jackets look deceptively simple (and elegant) when finished, but their looks belie the hours involved in their construction.

One of their sneaky little secrets is the sewing of the sleeves onto the body of the jacket. The shoulder seam is one of the few areas of the jacket which requires interior reinforcement. The selvedge edge of the lining fabric can be used for this, but I prefer to use a selvedge edge of silk organza.

The strip of organza is sewn on the seam line by hand.

Once that is in place, the sleeve is ready to be inserted – all by hand! Pinning the sleeve in place accurately is so important, as the grainline of the boucle needs to hang perfectly both vertically and horizontally (and match, too, of course.) The top half of the sleeve is sewn from the outside with small, tight fell stitches. Then the lower half of the sleeve is sewn on the inside with small backstitches, both segments using waxed, double thread. If done correctly, the cap of the sleeve will curve nicely.

Looking at the sleeve head from the back of the jacket

And from the front.

Finishing the sleeve insertion is, for me, the last big hurdle to get over before the really fun part starts. That, of course, is the trim. I deliberated quite a bit over the trim for this jacket. I originally thought I would emphasize the blue in the boucle, using pink as a small accent. When I could not find a “demonstrative, stand-alone” trim I liked, I determined to use an underlay of Petersham ribbon, with a coordinating, narrower trim on top.

For those of you who are not familiar with Petersham ribbon, take a look at this cover from Threads Magazine, May 2016.

In the accompanying article by Susan Khalje, one of her suggestions is to use Petersham ribbon to frame a trim.

I used Petersham ribbon on my last French Jacket, and was really delighted with the effect.

Red Petersham ribbon under the frilly trim gives it more dimension.

The more I looked at the blue, the more I thought it did not give the effect I wanted. I then decided to try Petersham ribbon in a pink hue.

There are actually two pinks in the weave of the boucle, one peachy and one clear pink. Doing the trim this way brings out both hues, which I really like.

The Petersham ribbon is peachy, while the soutache trim has a clear pink intertwined with white and navy blue. The buttons take either hue!

Of course, this application of trims means four times around the perimeter of the jacket by hand to apply first the Petersham and then the double row of soutache trim. I never make things easy. Is it any wonder this jacket isn’t finished yet?

19 Comments

Filed under Boucle for French style jackets, Chanel-type jackets, couture construction, Uncategorized

Out of the Chaos …

It is not all that unusual for a big sewing projects to begin in some sort of controlled chaos, whether it is unwieldy pattern pieces, or slippery fabric, or complicated instructions – or no instructions! But nothing quite comes up to the chaos that making a classic French jacket creates.

Two main things contribute to the chaos. The first is the nature of boucle fabric, which is the building block of the jacket. Boucle is, by nature, a loosely woven, sometimes wildly variegated fabric. The loose weave is what gives it the ability to be quilted “invisibly” to its lining. But, it is also what makes the fabric fray so easily, demanding careful handling throughout the construction process.

Then there is that quilting process. To say that the construction of this type of jacket is unconventional is an understatement. Once one has her fashion fabric (boucle) pieces thread traced and cut out, the lining is cut to conform to the shape of each individual jacket and sleeve piece. Then, the lining is quilted onto the boucle following  guidelines (selected by you!), but dictated by the boucle.

A ruler and pins help me determine where my quilting lines should be, generally about an inch apart from each other and set in an inch from the side seams.

Quilting with a walking foot.

The ends of the quilting lines stop a couple of inches from the top and bottom of the marked seam lines, and the loose threads are fished into the inside and tied off, each one with three loops to secure the knot.

Although it is difficult to see, here is the tying off of one quilting line in-between the two layers.

How strange is this? Then the edges of the lining are hanging loose while you proceed to sew the seams of the boucle. I pin the edges of the lining back in order to make this process a little more orderly, but it is still kind of a mess.

One of the sleeves, quilted, with its lining pinned back.

I have a great advantage in making this jacket, in that I have a muslin pattern which I know fits me well. Knowing this allows me the option of finishing the sleeves before I do the main part of the jacket, and that is what I have done.

I have finished off two of the three sleeve seams here before sewing the final, third seam.

All the sleeve seams are now sewn, and I am about to finish attaching the lining at the cuff ends of the sleeves.

I also decided once again to make slot-seam buttonholes on the sleeves and at the center front.

Here is the extension on the sleeve cuff. Normally cut as one with that section of the sleeve, I make it a separate piece so that I can leave two openings for the buttonholes. If you look closely at this photo, you can see the slots for the buttonholes.

This shows the extensions for the buttonholes.

Two finished sleeves, except for the trim, of course.

Now, here is a diagram of what I do to make the slot-seam buttonholes for the front of the jacket.

It is important to know how much width you need for your trim and buttons before deciding the width of that extra extension piece sewn onto the front. In this case, I determined I needed a piece with a finished (not including seam allowances) width of 1¼“. Then I proceeded to sew the seams together.

The body of the jacket really looks like chaos here!

Gradually the chaos will begin to be tamed as I hand-stitch the edges of the lining in place.

Perhaps the eventual control of such chaos is what helps to make the construction of these types of jackets so appealing. It is a good thing to remember that the creative process can be messy and tedious and very time-consuming. Sometimes, as in life, you just have to see it through to the other side to be able to appreciate the journey.

24 Comments

Filed under Boucle for French style jackets, Chanel-type jackets, couture construction, Slot-seam buttonholes, Uncategorized