
Isn’t a good pattern worth its weight in gold? When I purchased this jacket pattern several years ago, I just liked it, no plans in place, and thought the day might come when I could use it. The more I studied it with my Pendleton blanket in mind, the more I thought it was perfect for my project. First task, of course, was to make a muslin toile and check the fit and size.
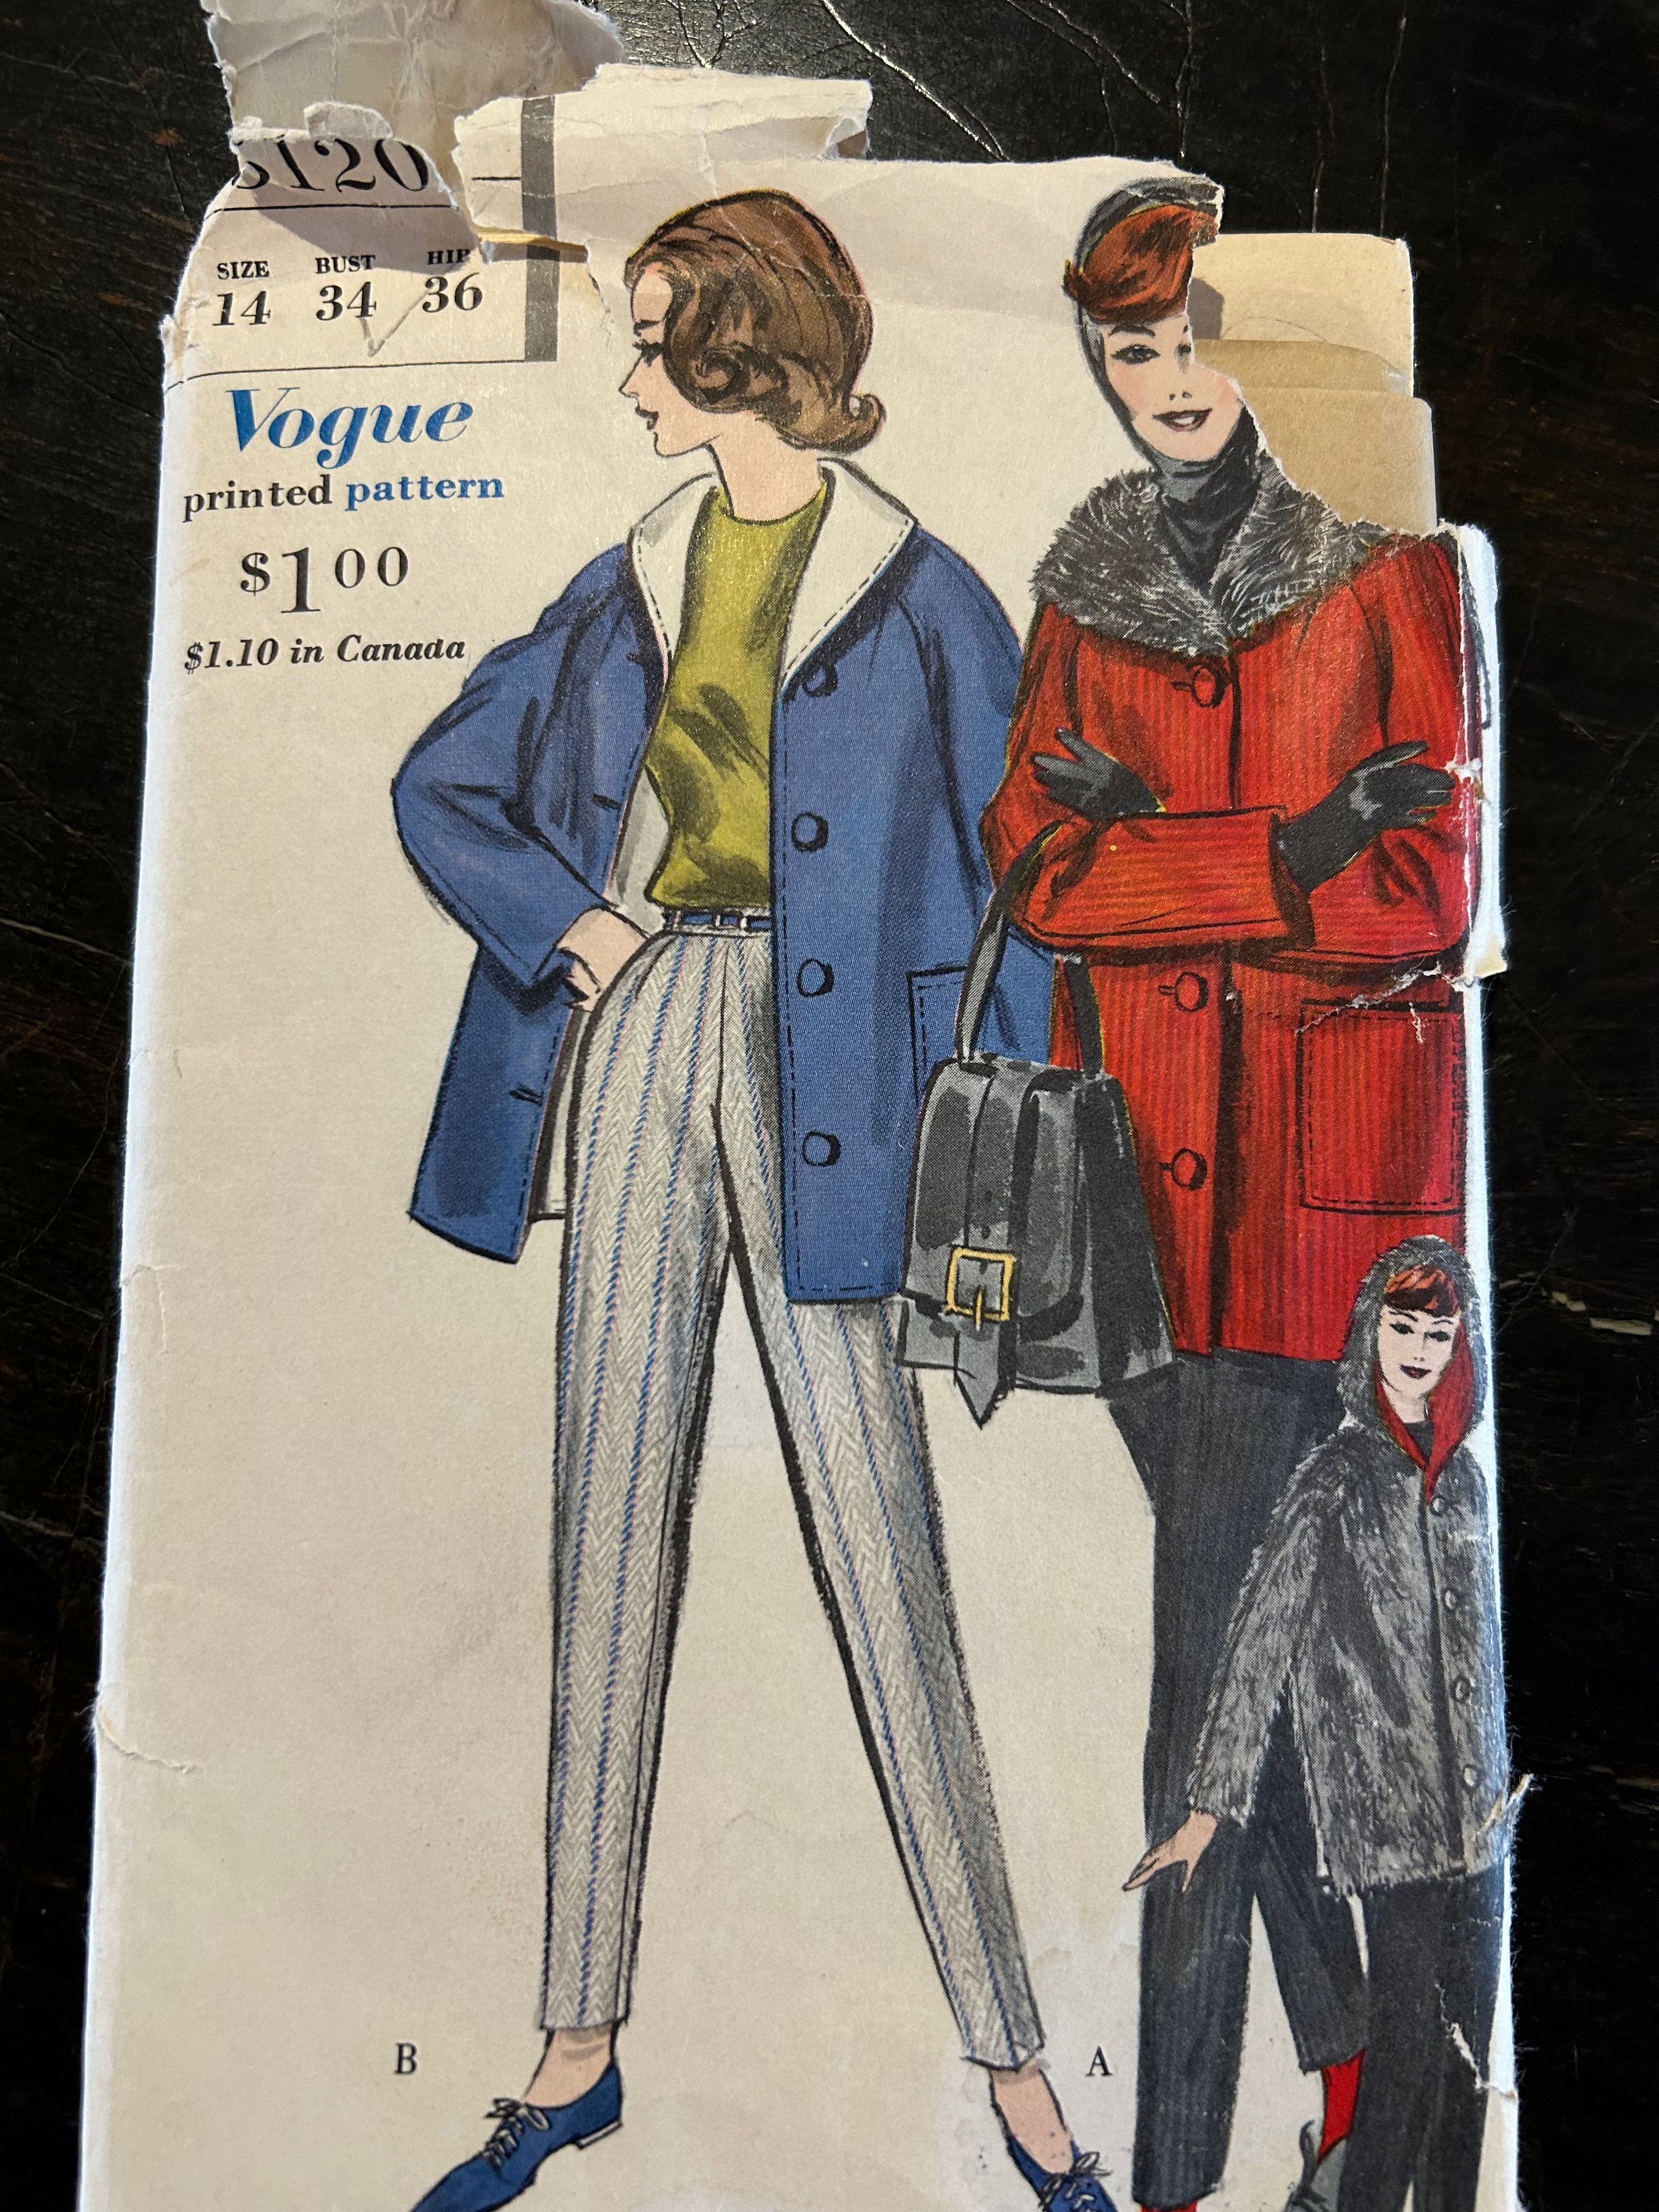
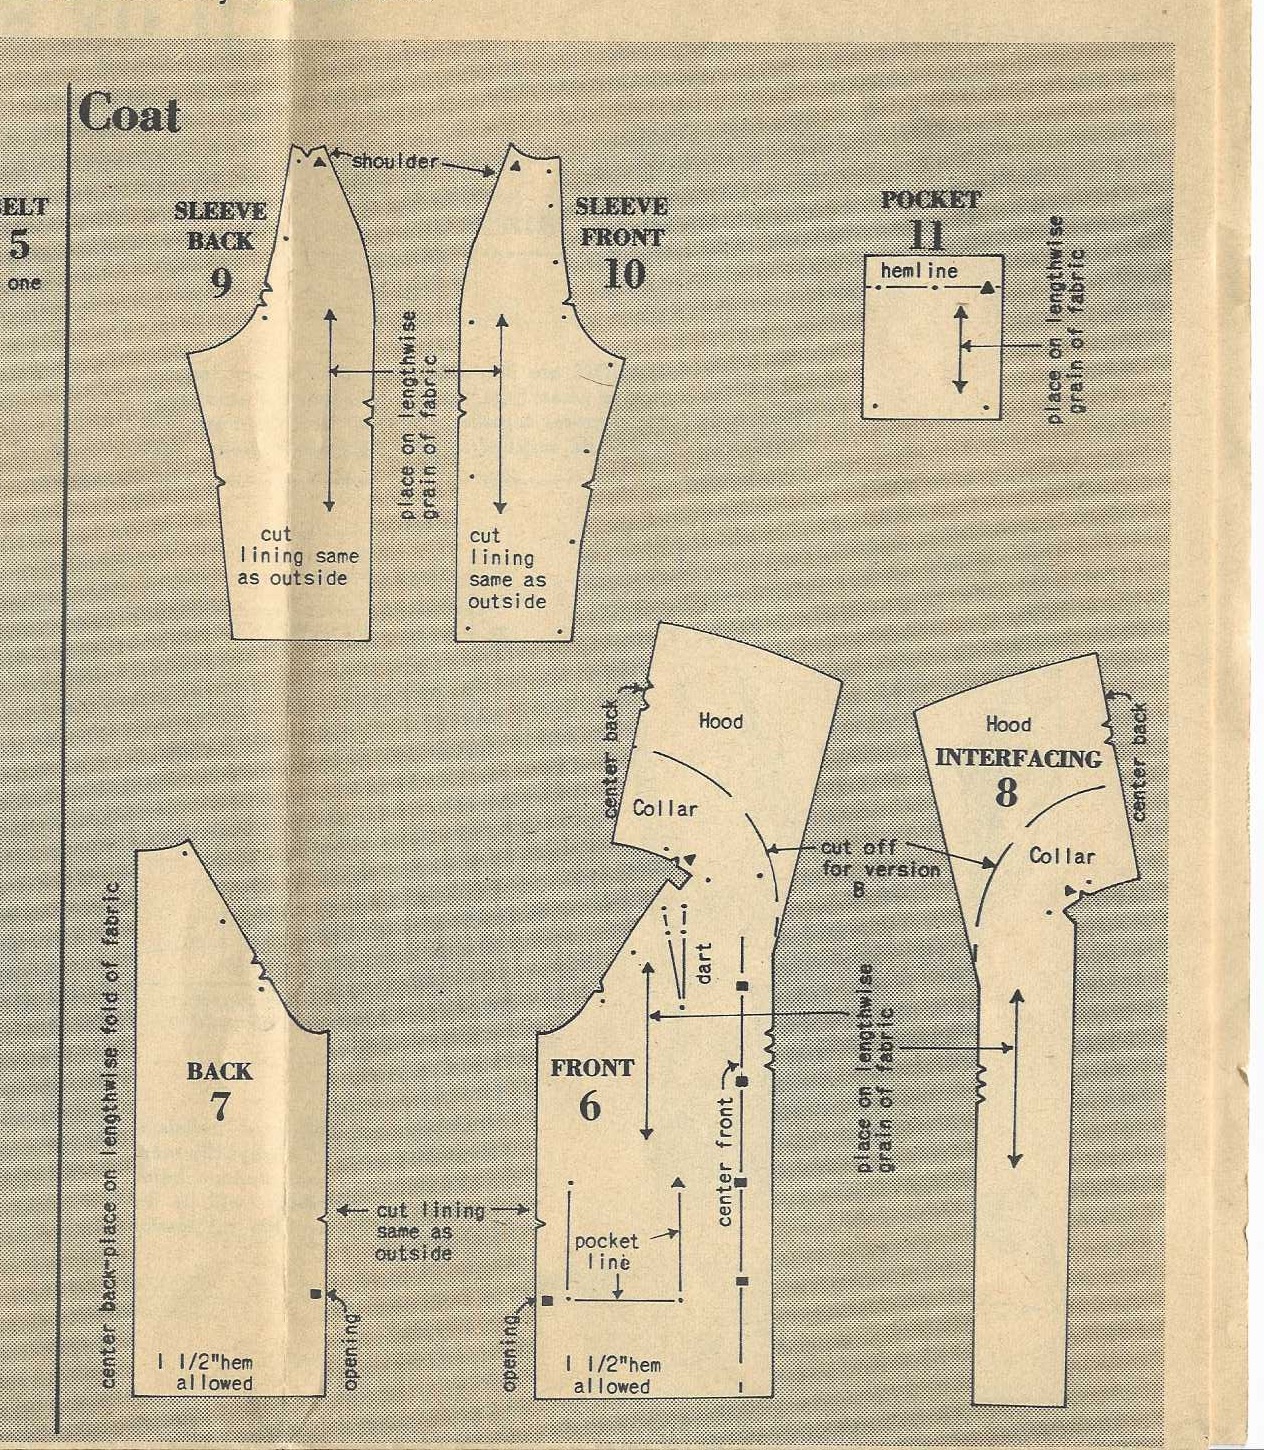
By now, November and early December had passed with my life taken over by bathroom renovations and holidays looming on the horizon. We headed back to Wyoming for Christmas, and then the new year of 2026 dawned, with all its promise and things unknown. January was the perfect time to get back to my project. The jacket as designed was to be fully lined, either with fleece, contrasting fabric, or self-lined. I determined I would need to line the sleeves, while the rest of the jacket should remain unlined. However, I needed a facing for the shawl collar and front edges. Because there was a pattern piece for interfacing the collar and front edges, I thought I could use that for my facing. My toile confirmed that for me.
The coat muslin seemed very large overall on me, requiring a lot of alteration. It can be tricky with coats, as enough ease must be allowed for wearing a heavier sweater or layers underneath. Also, the thickness and relative non-fluidity of the blanket dictated a looser fit. I spent a few days perfecting my toile. Then the real test was upon me.
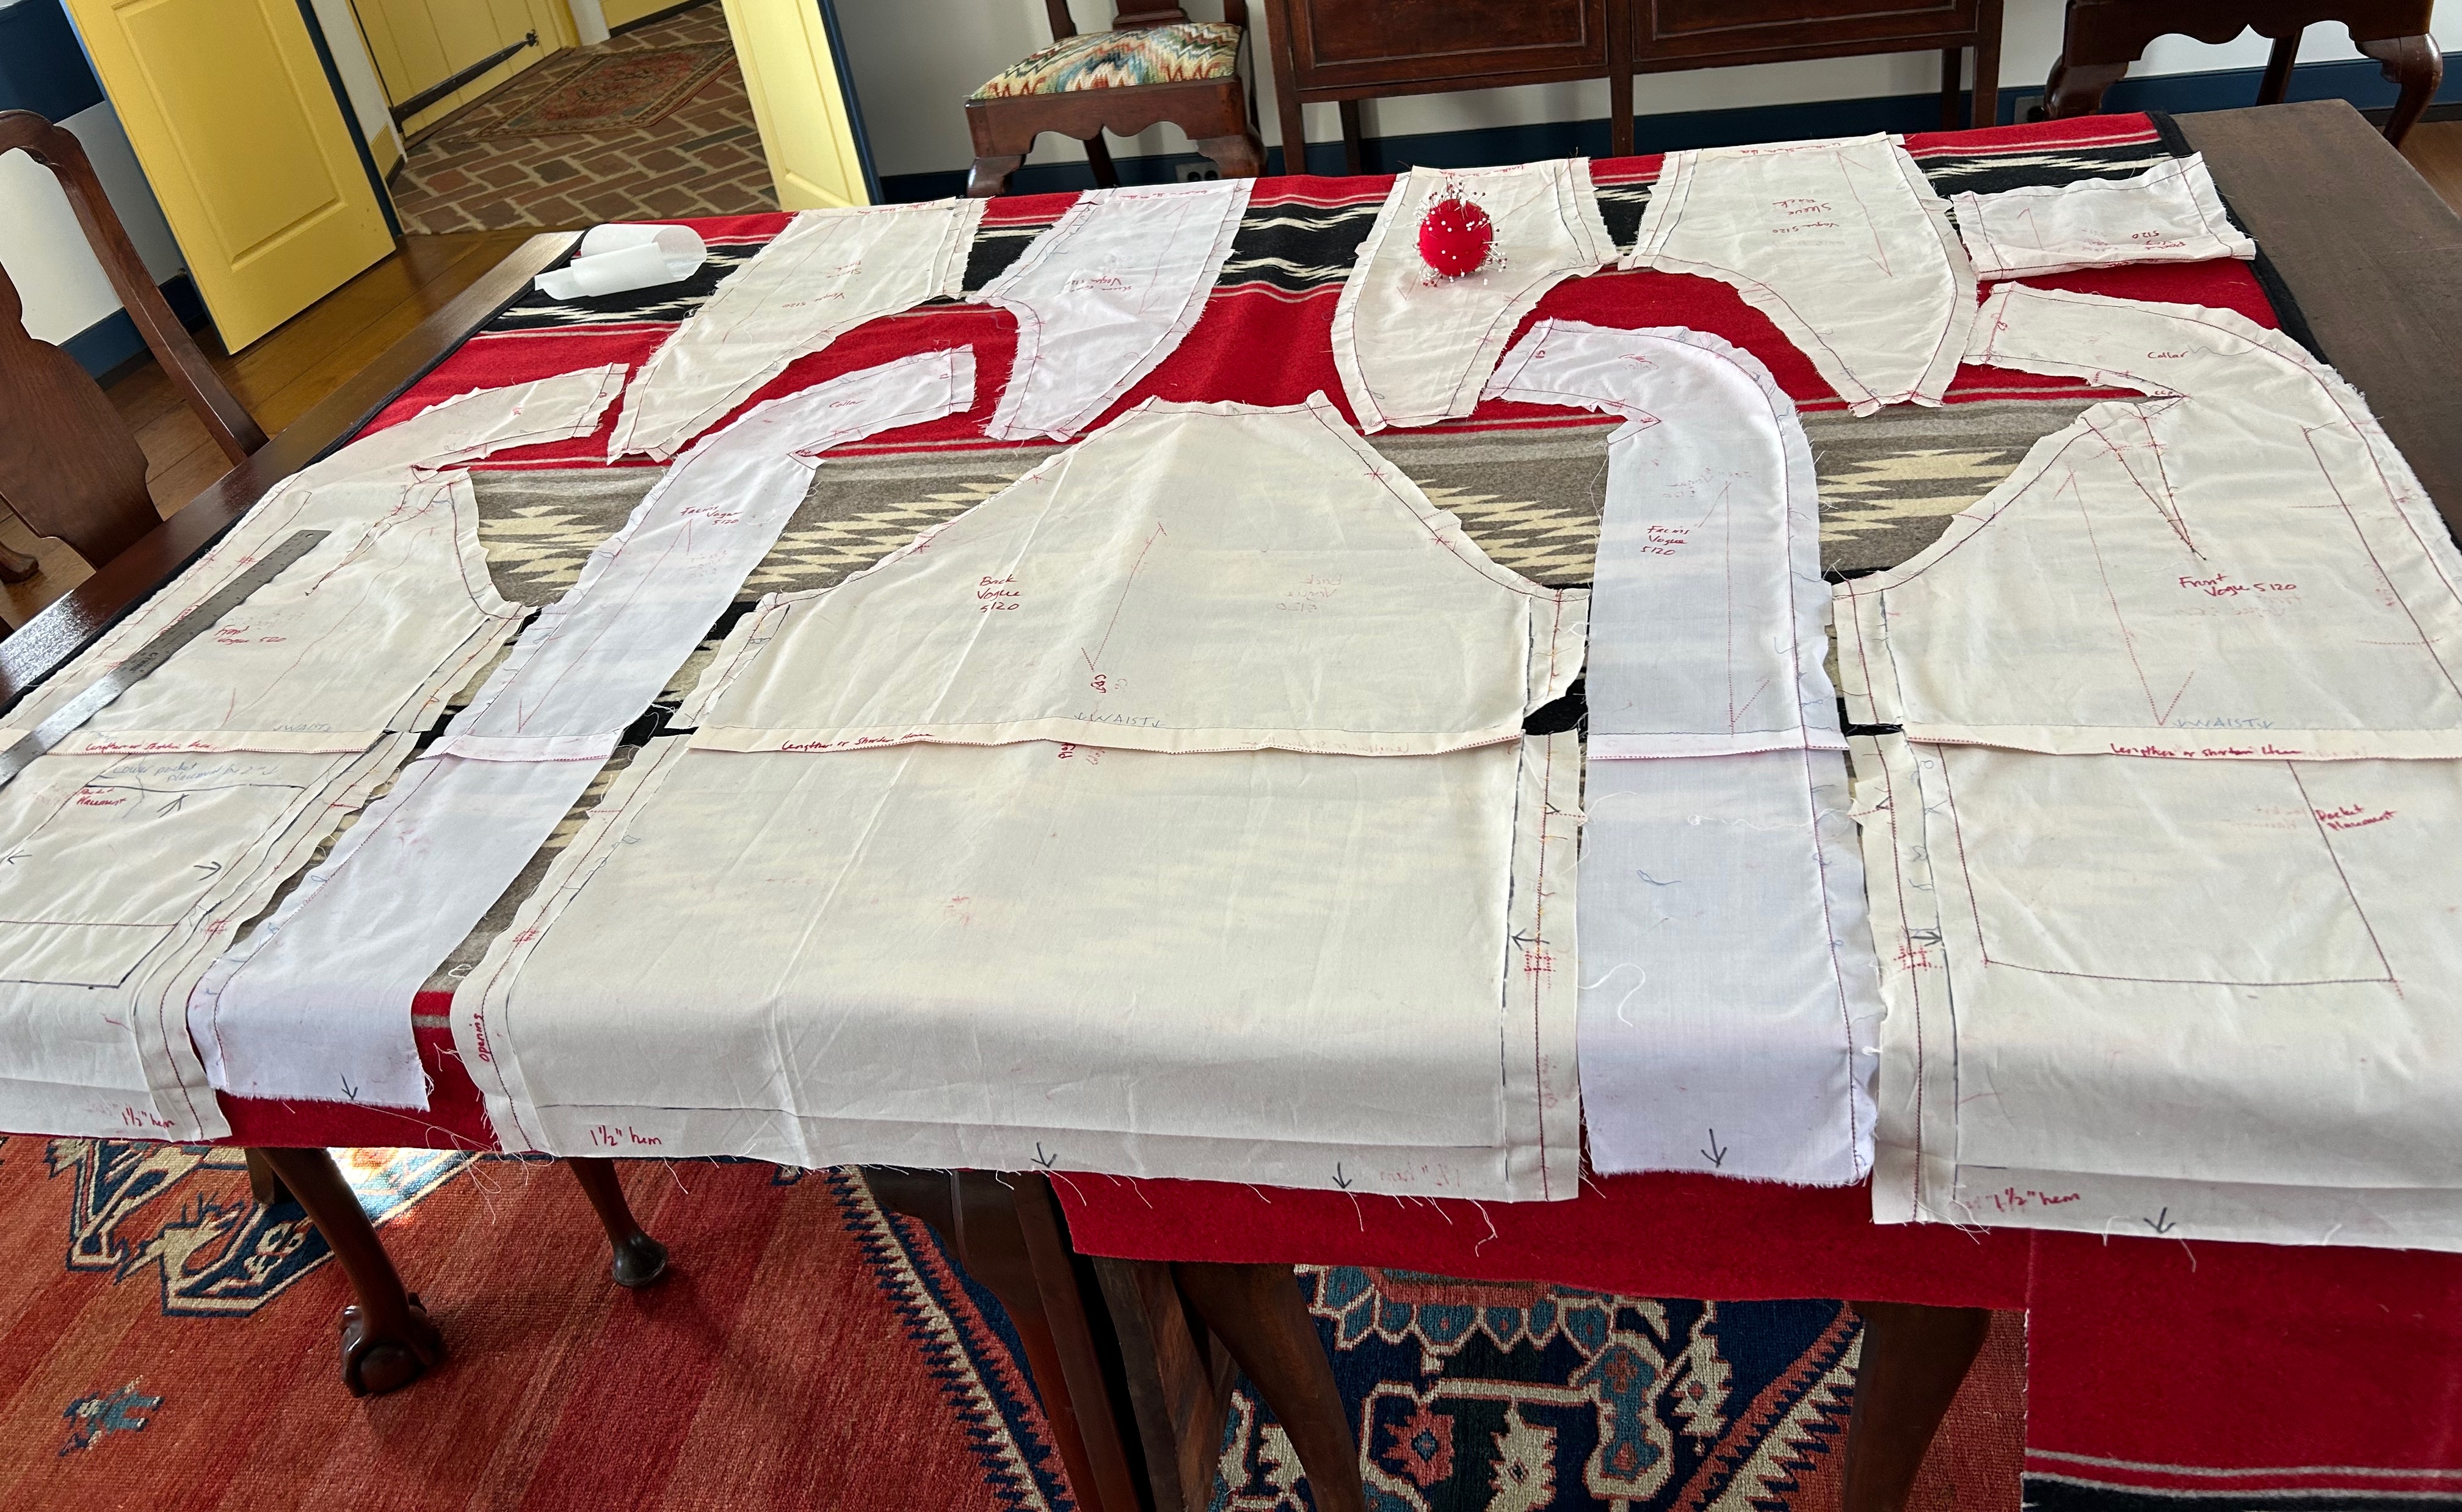
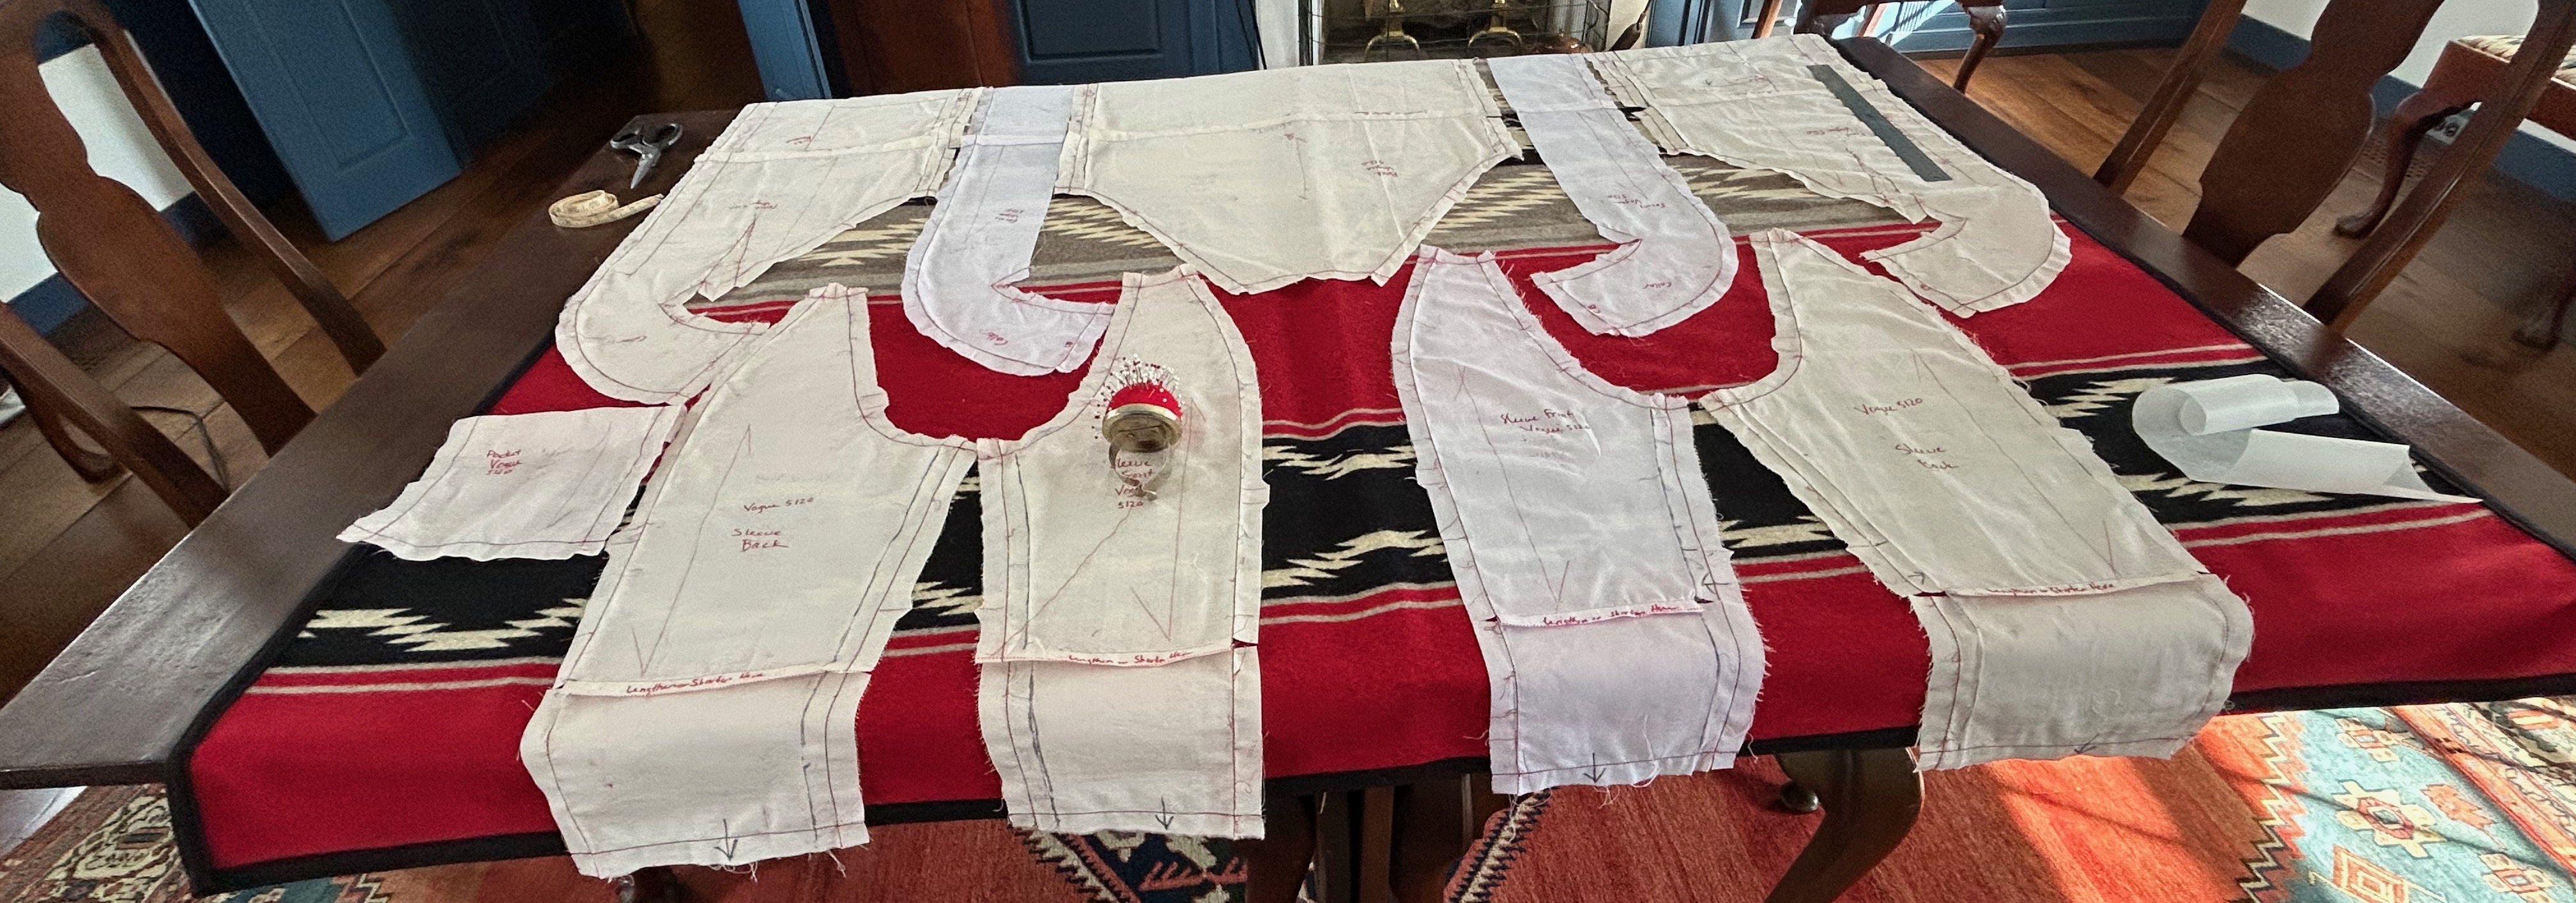
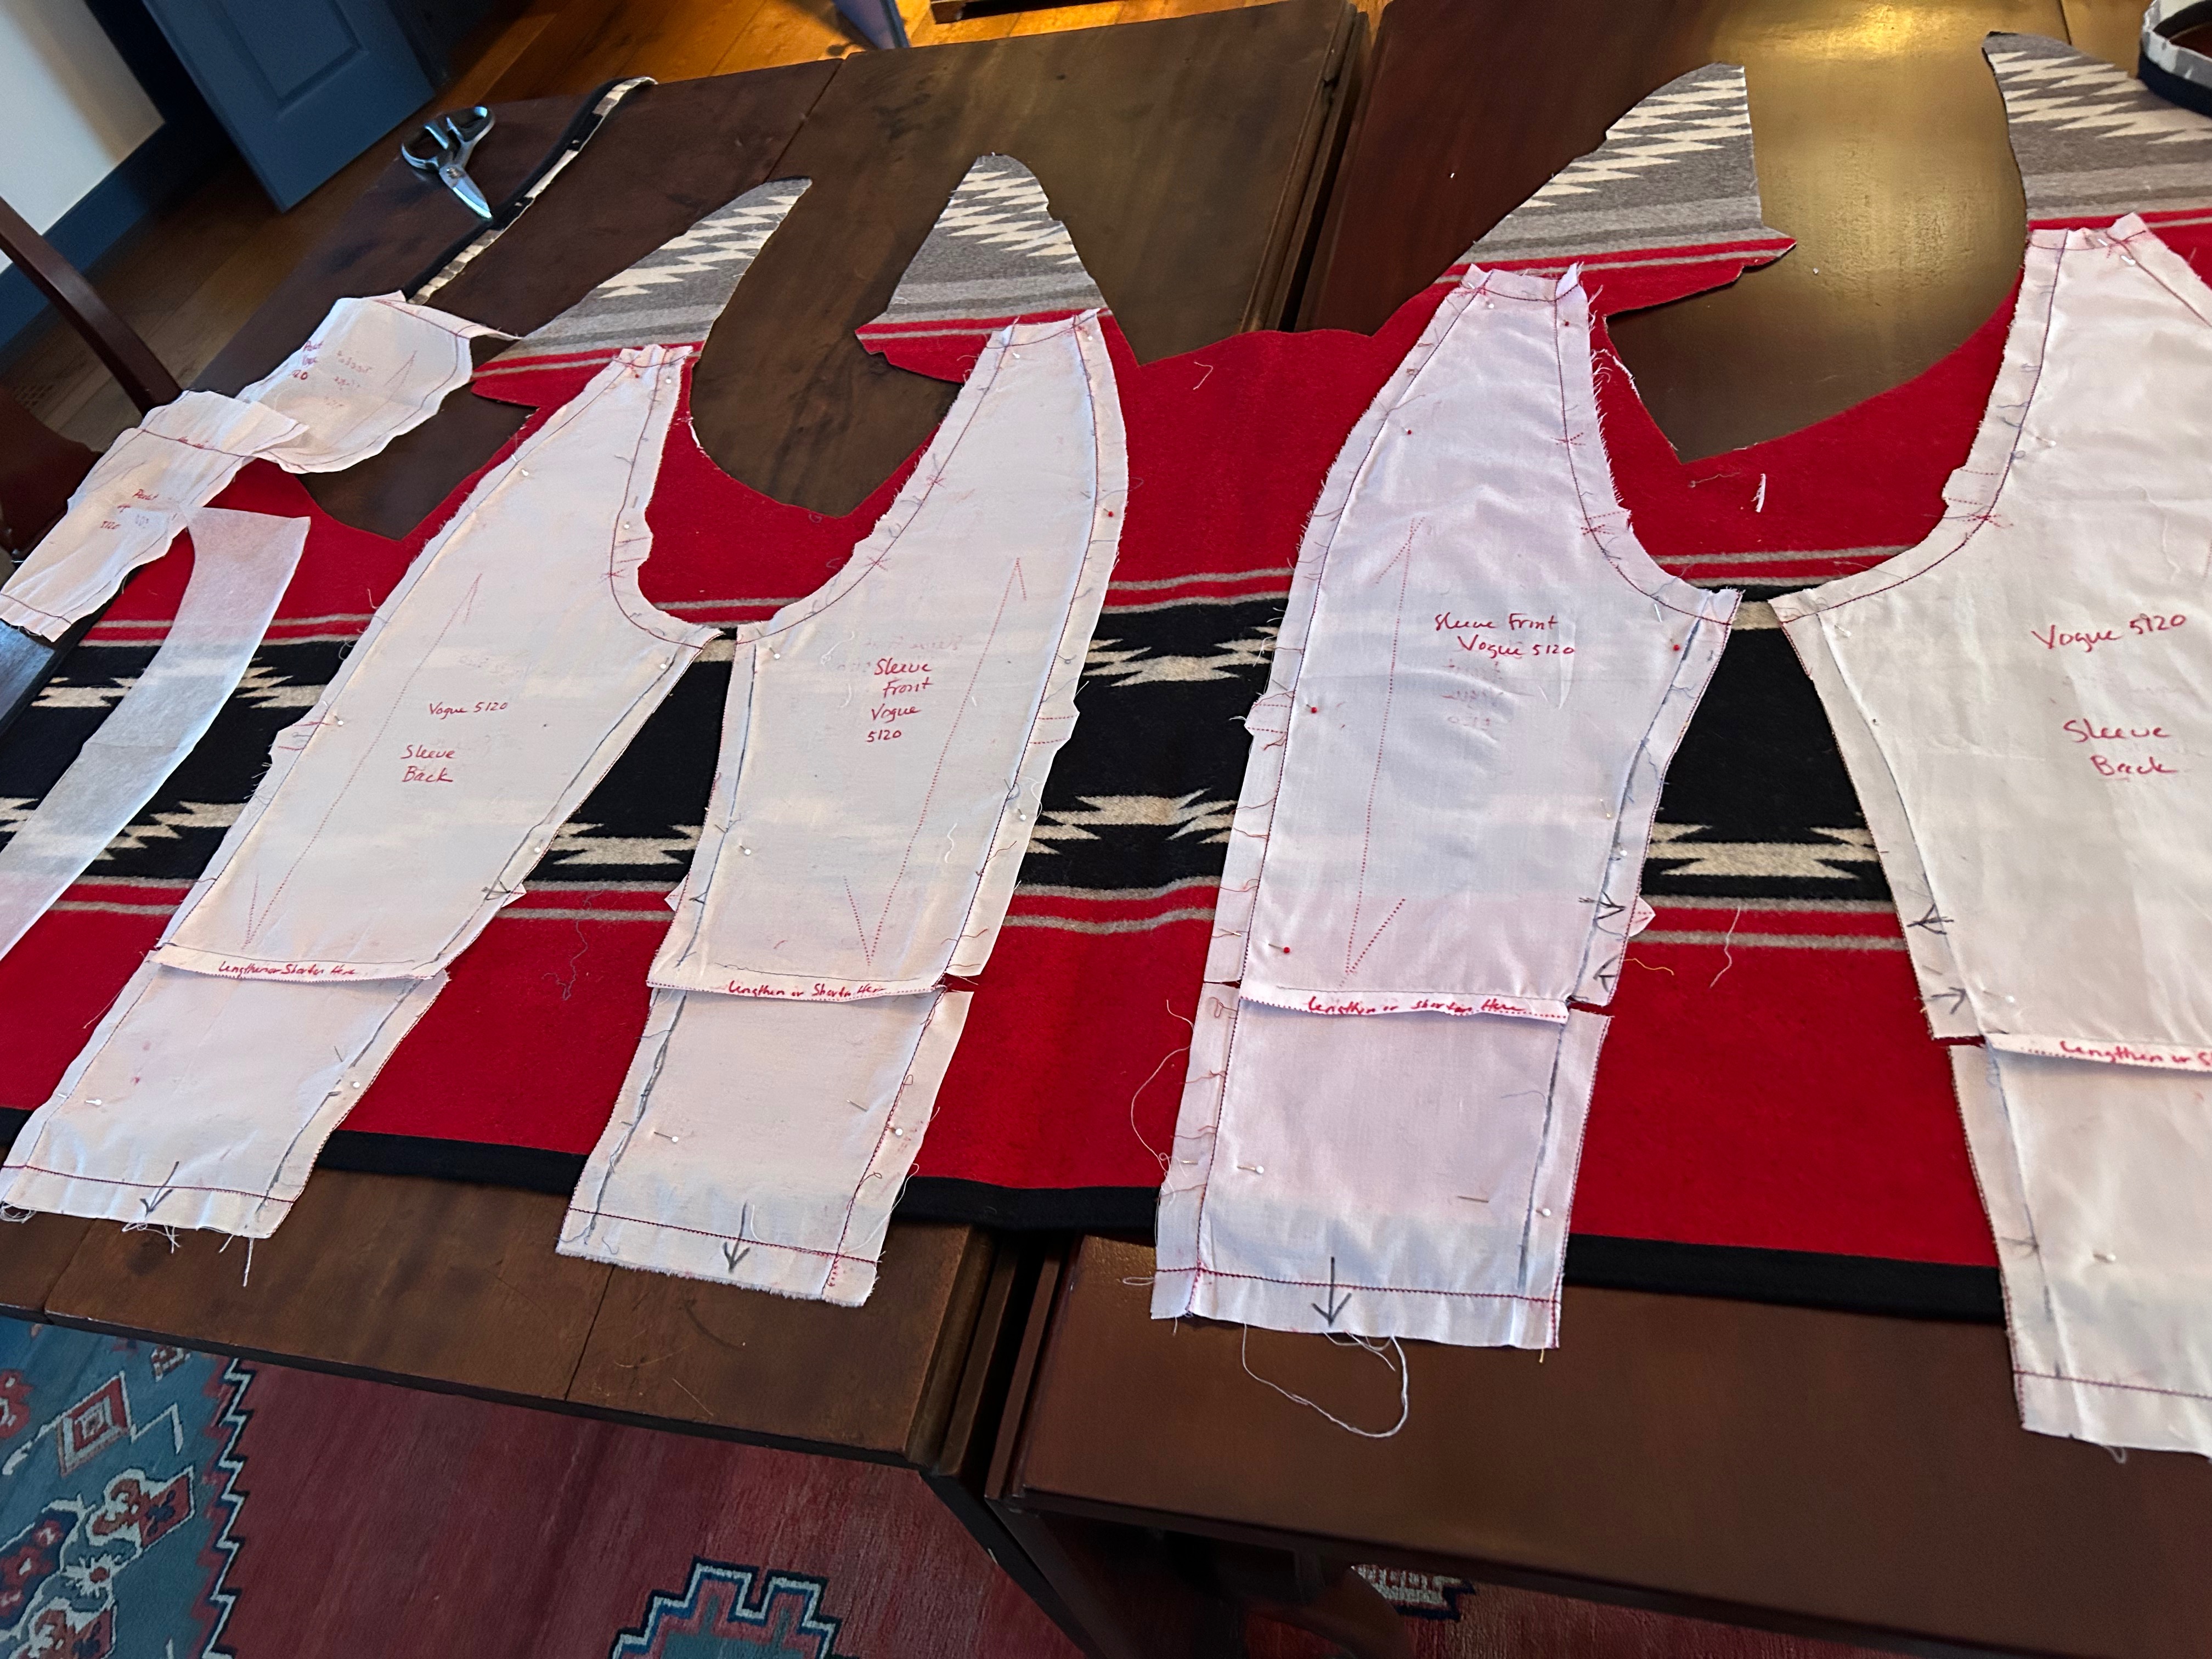
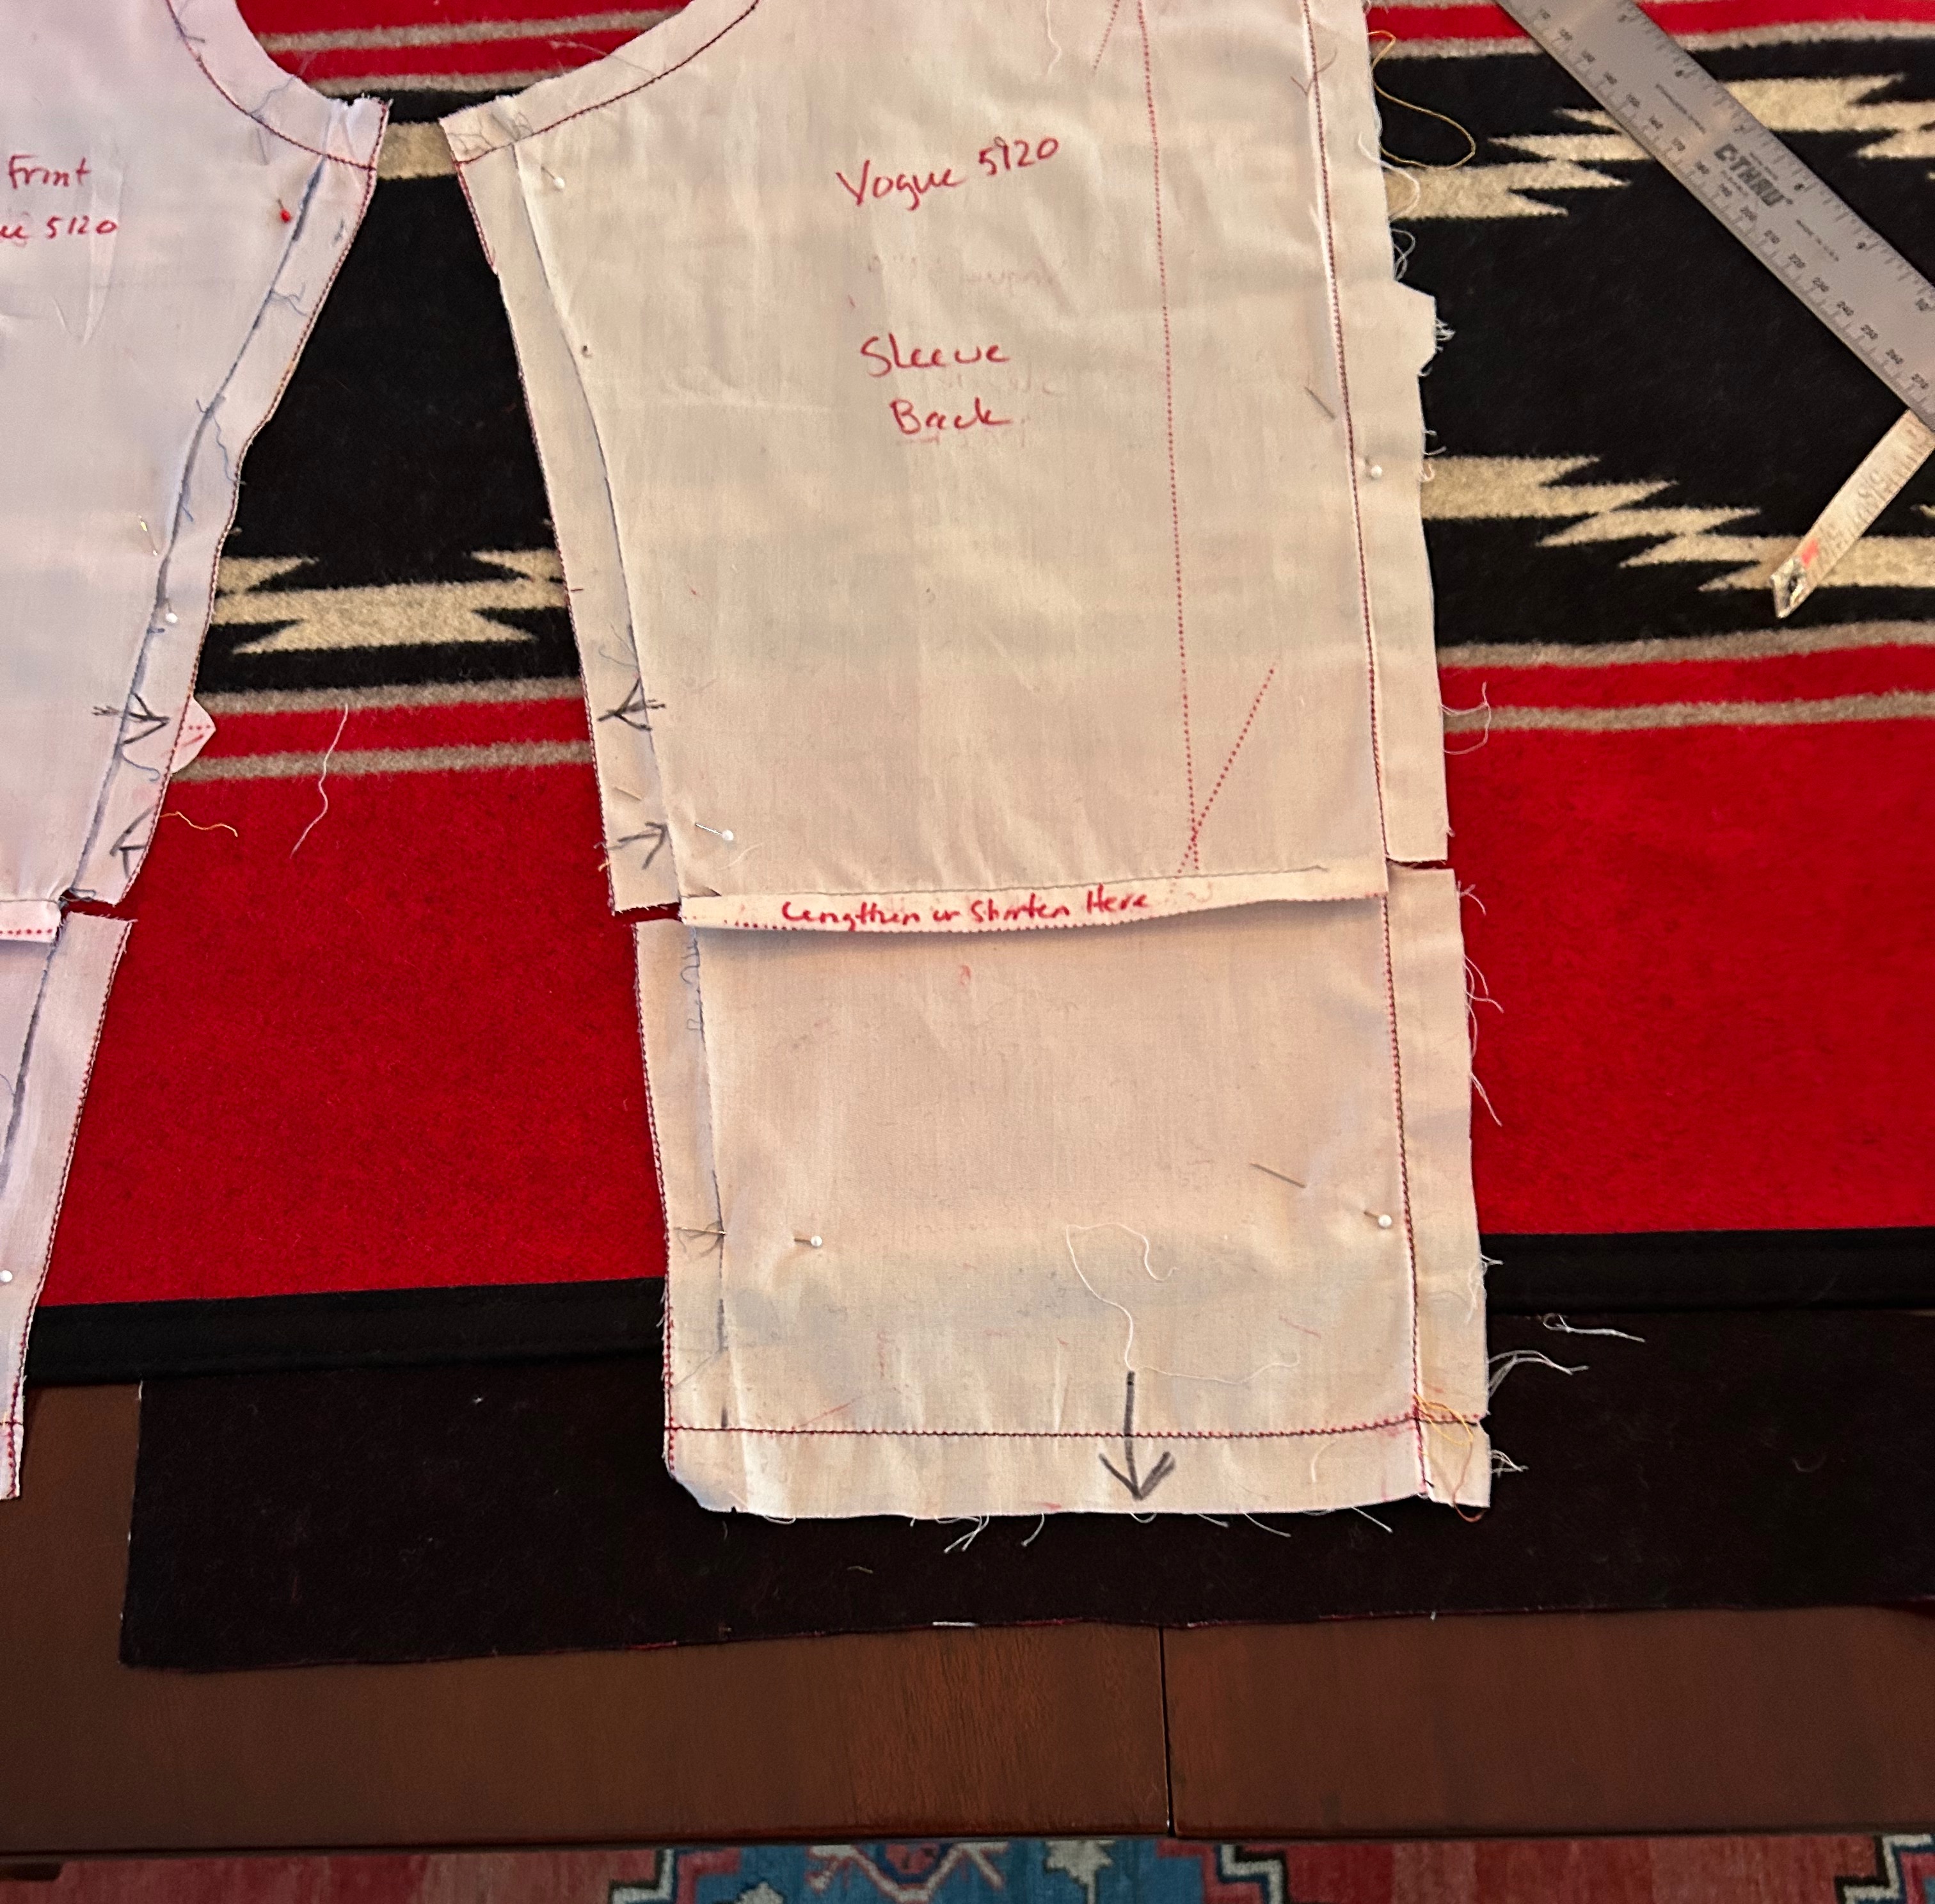
I took my muslin apart, producing pattern pieces to fit onto my fabric/blanket. Was making this jacket out of what I had left of the blanket even going to be possible? If so, how would the placement of the pattern pieces on the very graphic and large design work out?
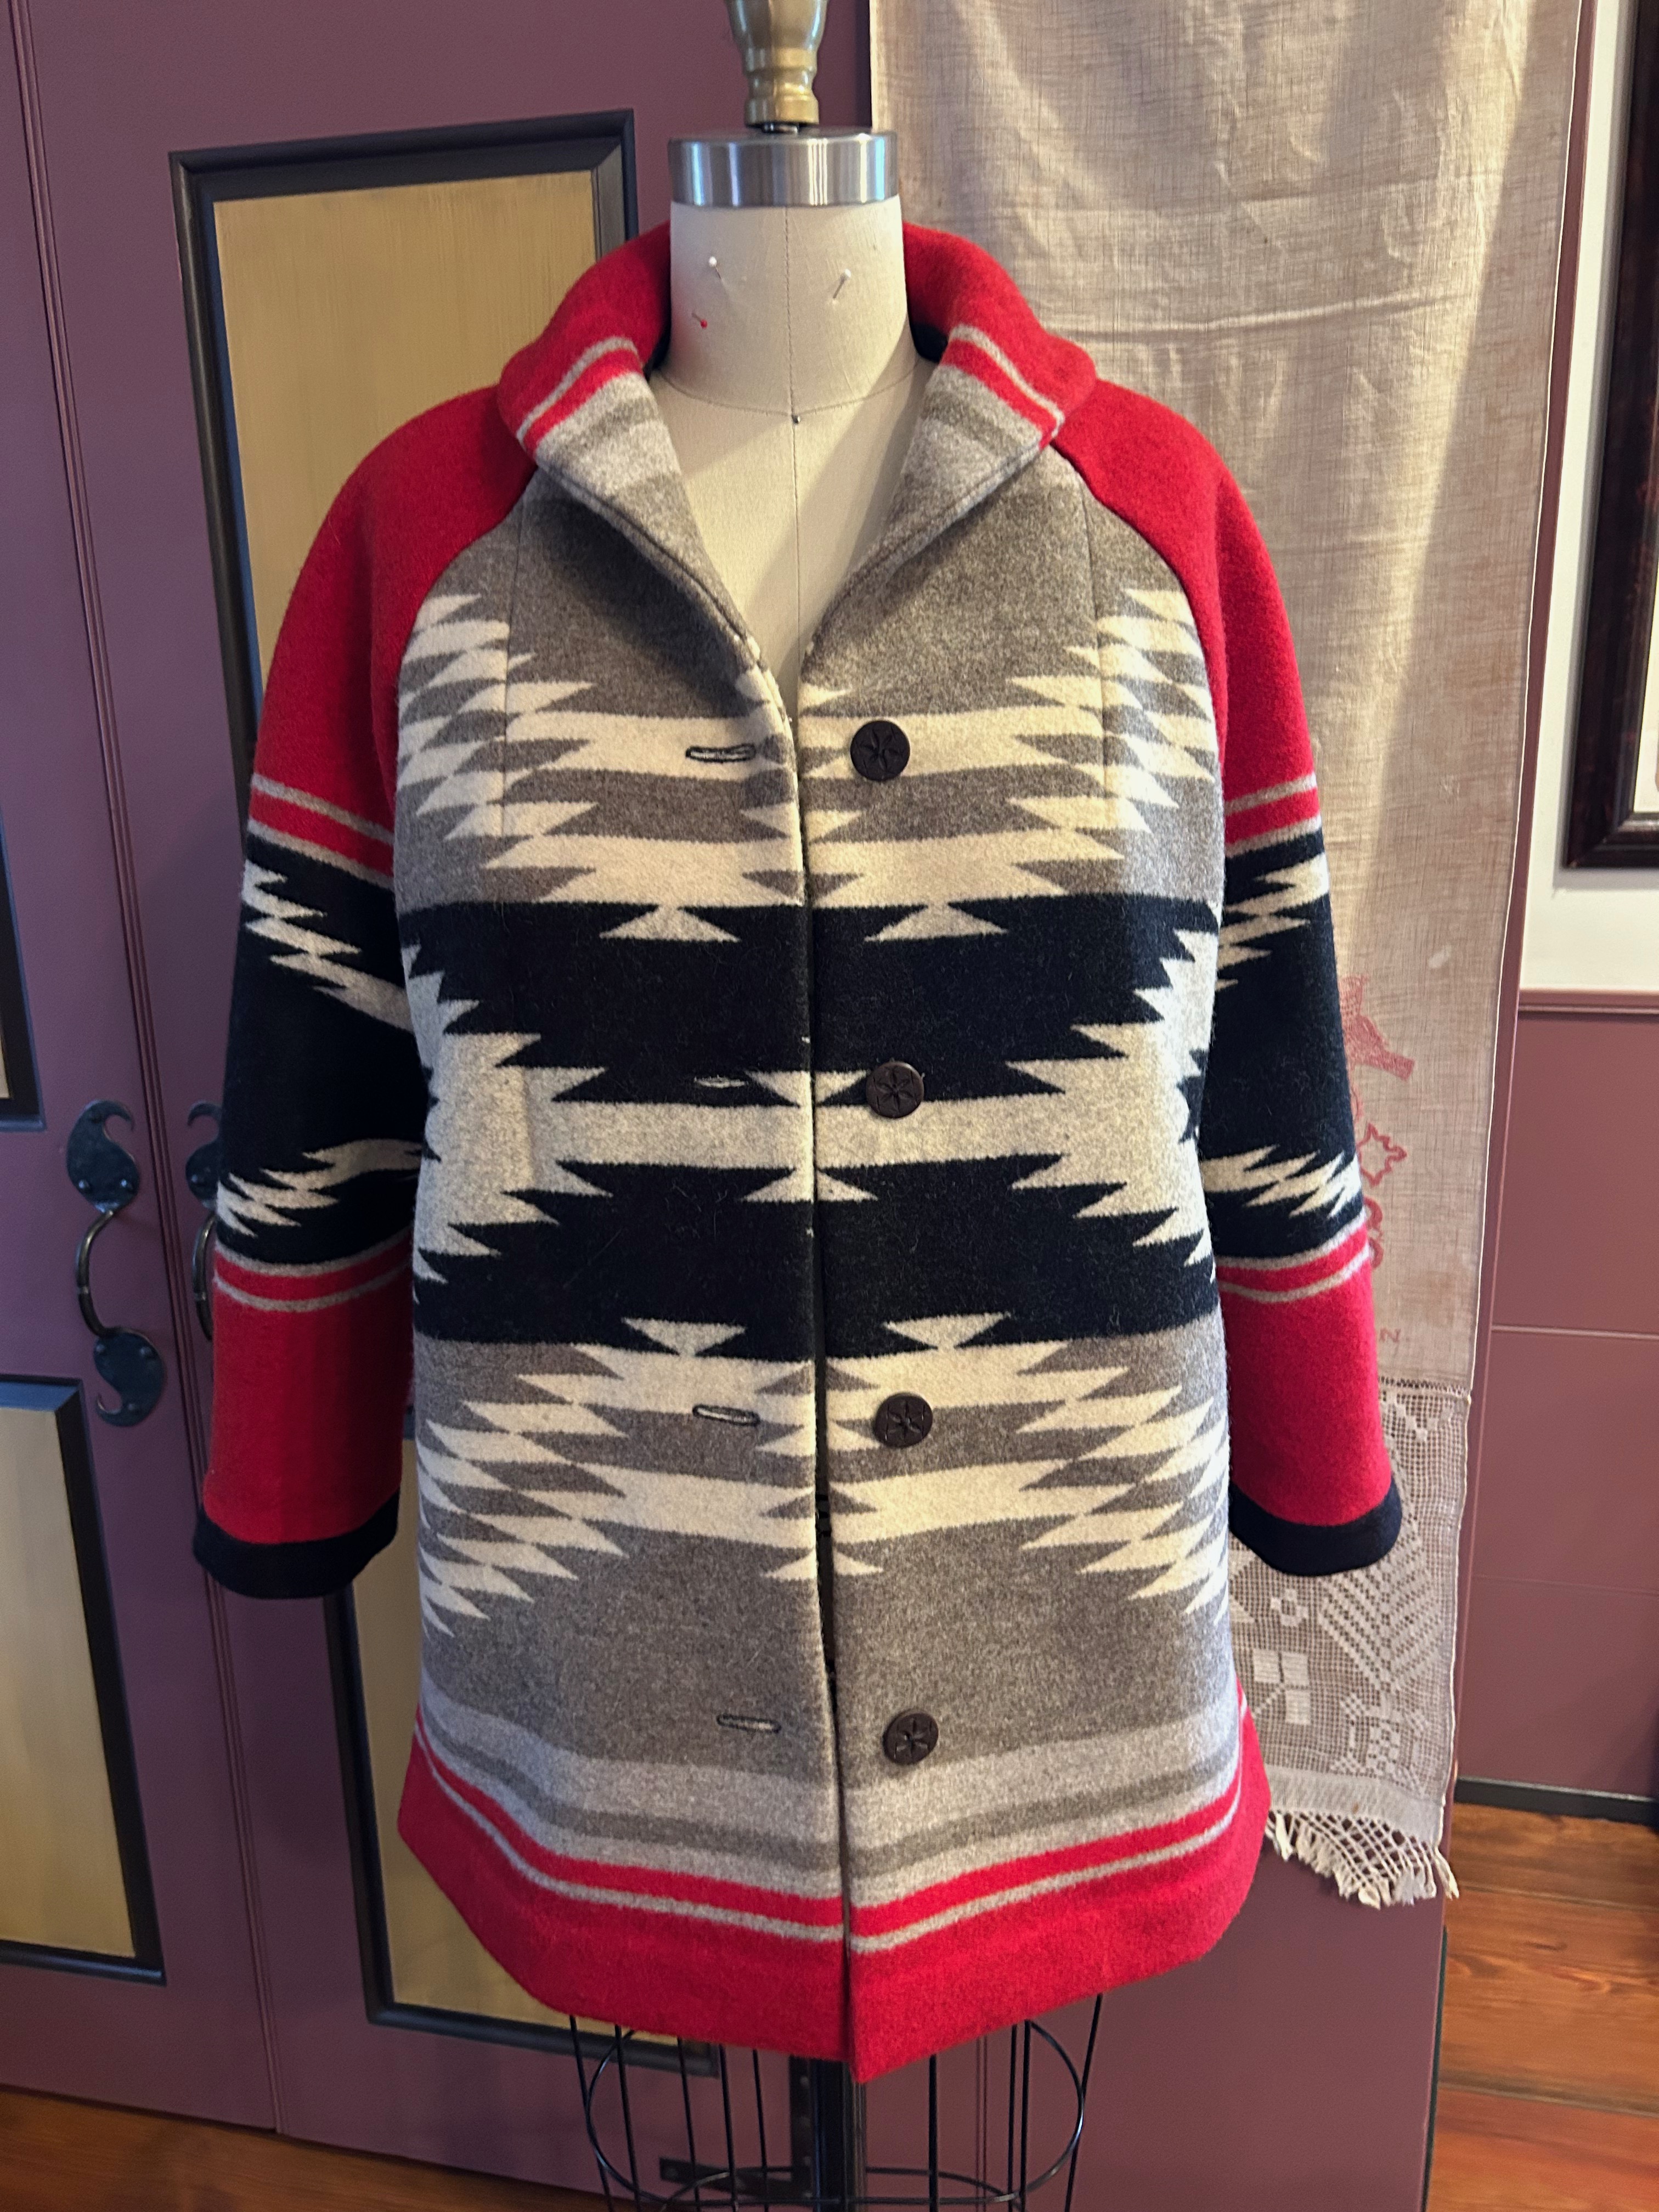
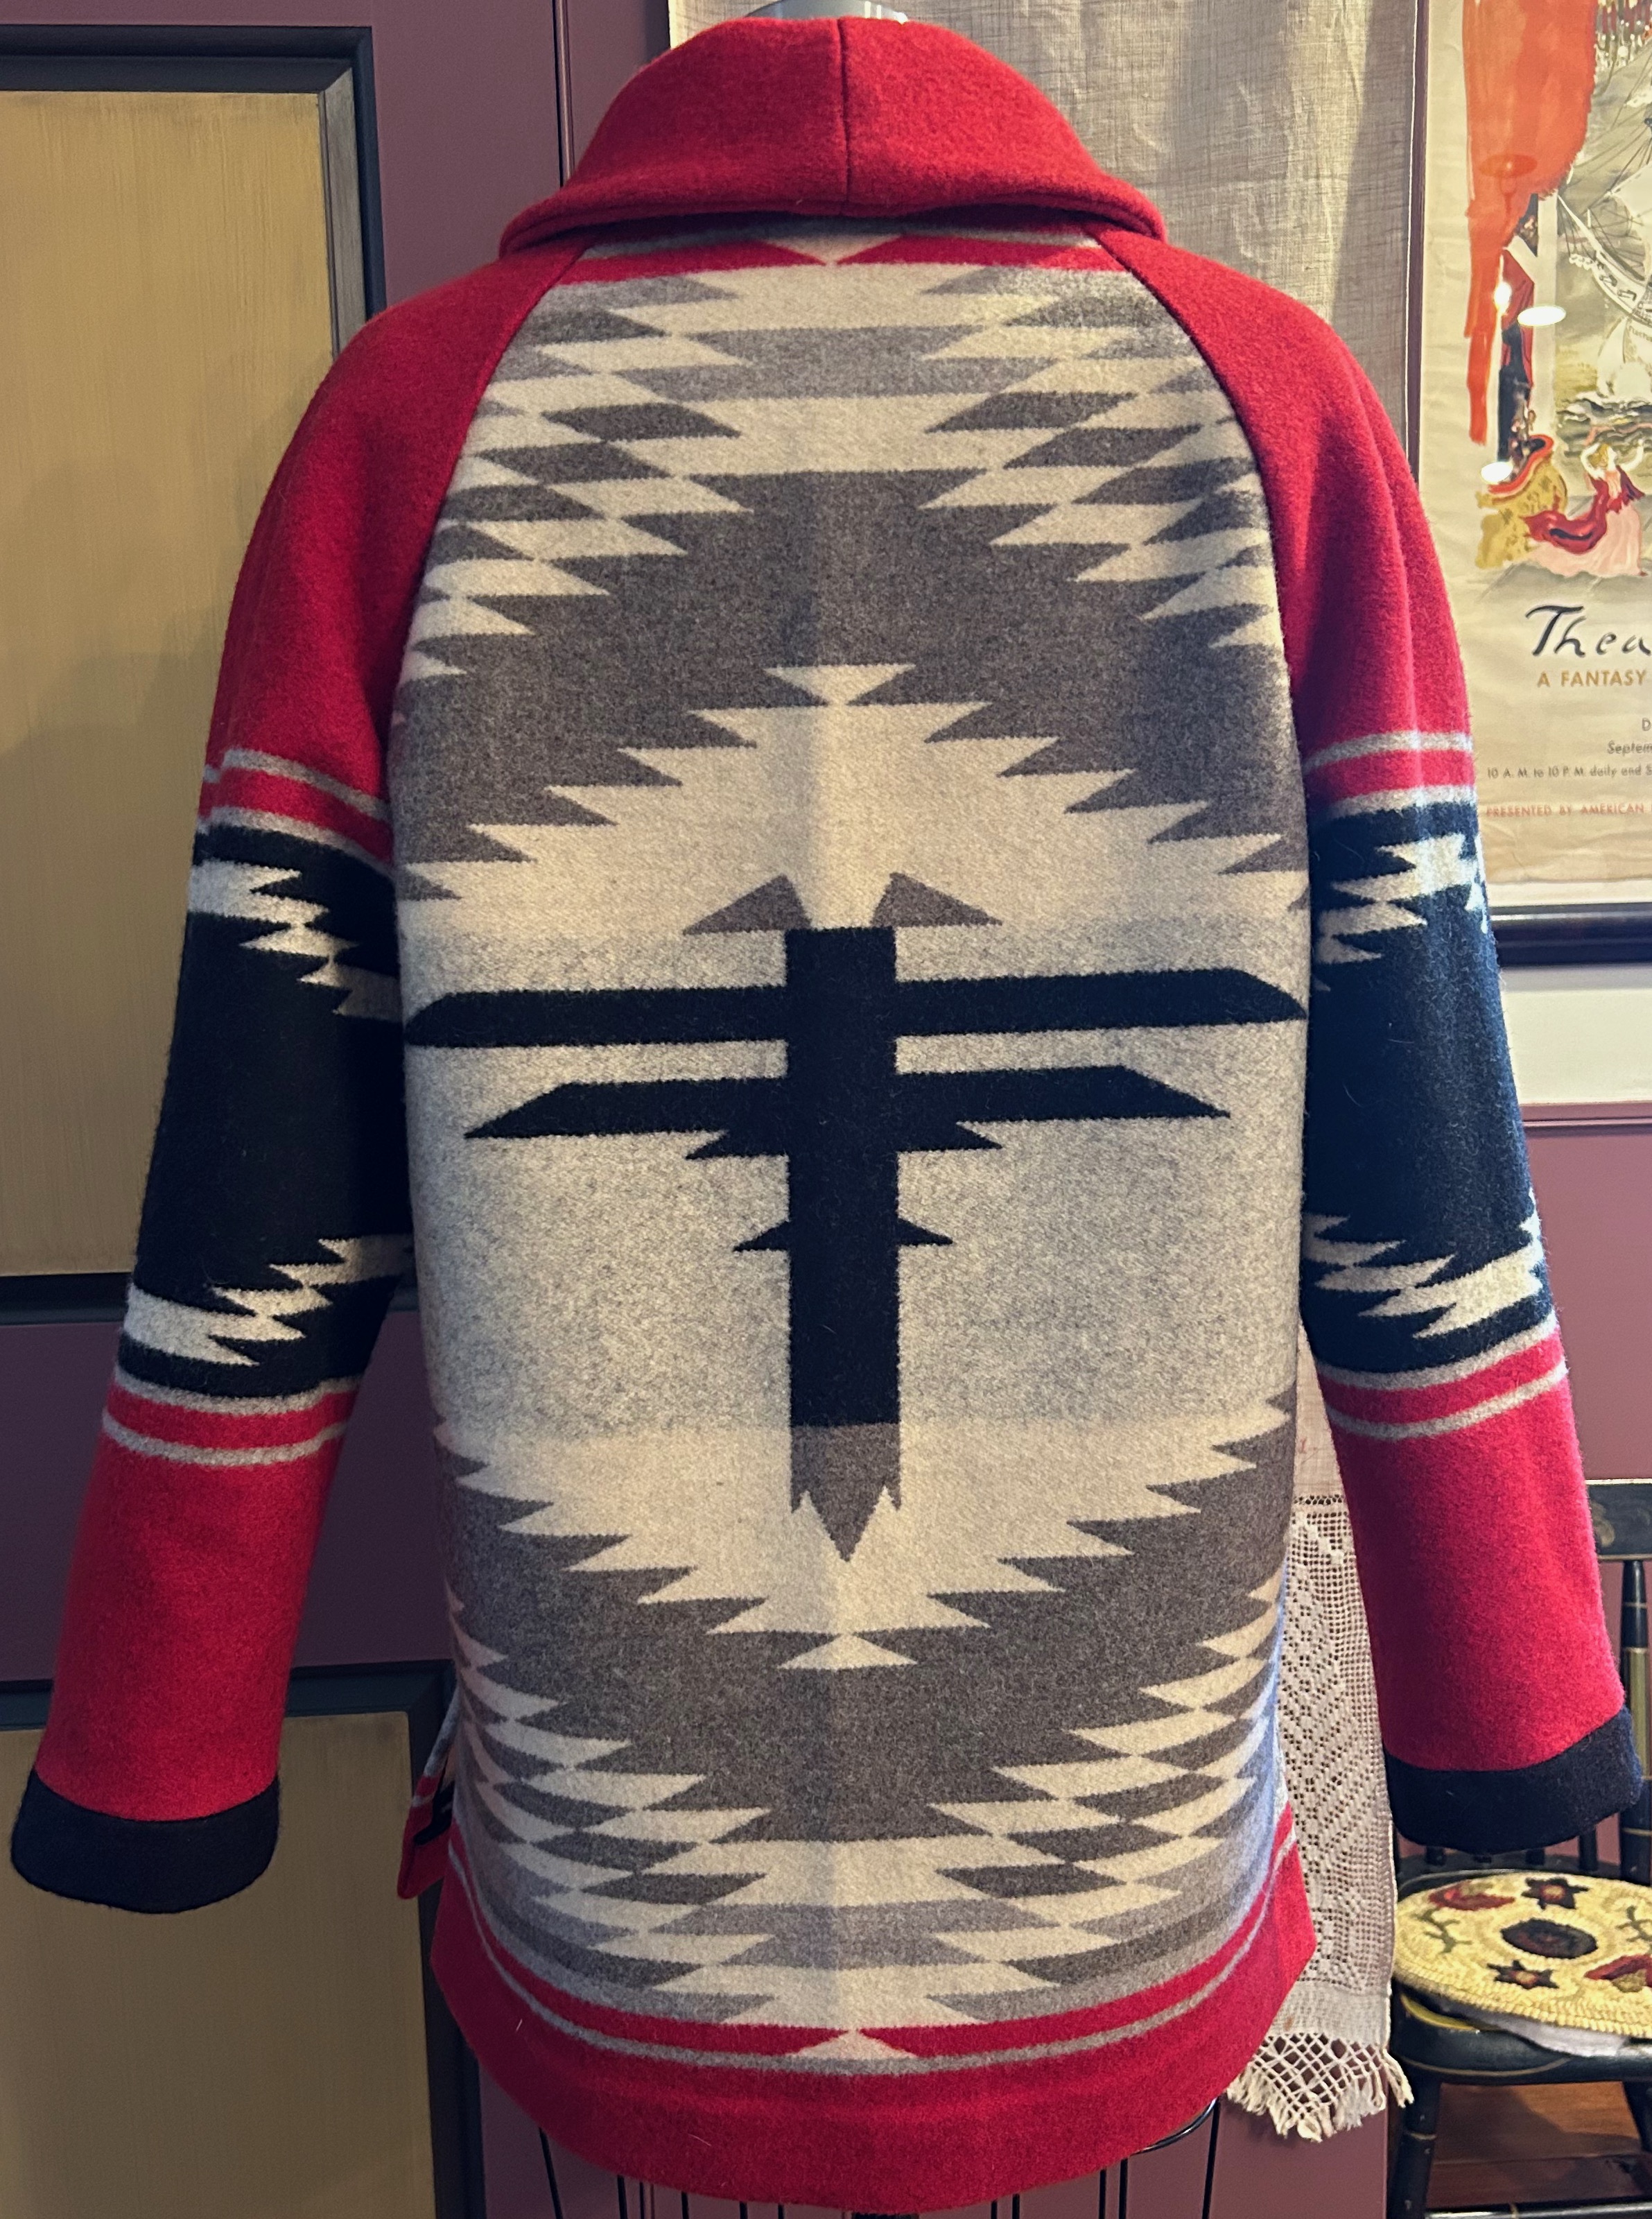
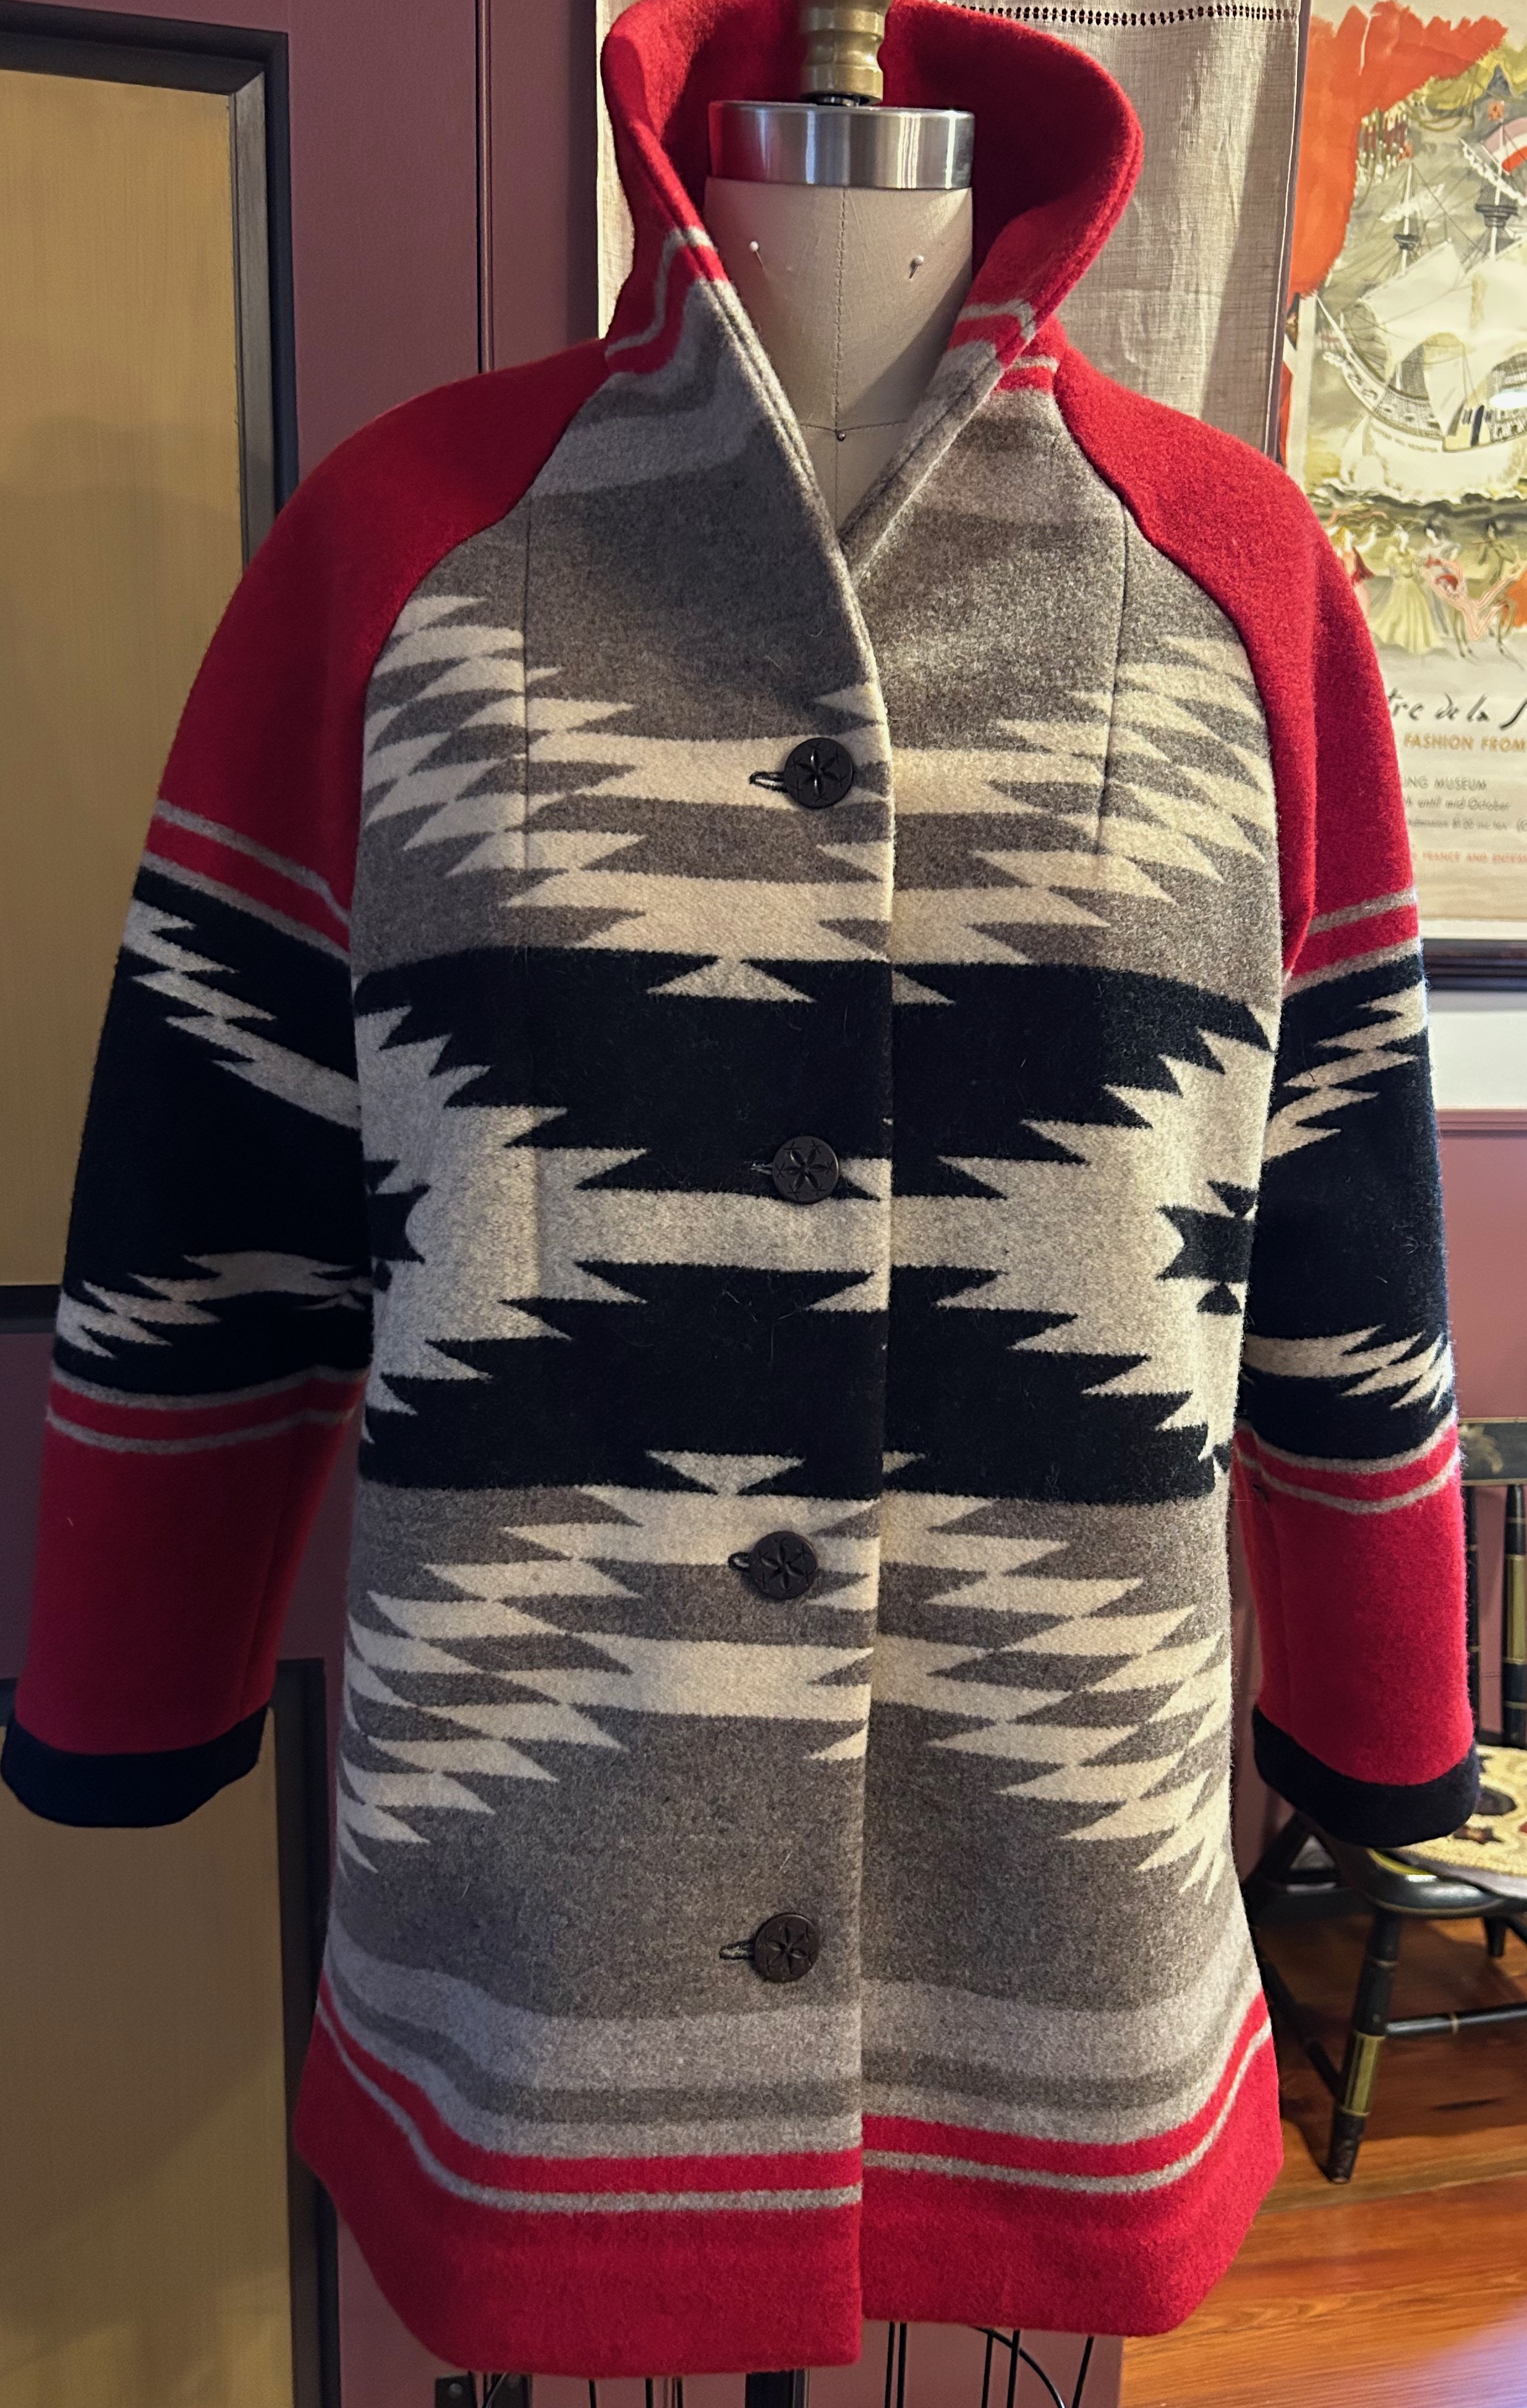
I got to work with everything spread out on my dining room table, starting with two main objectives: 1) The large “dragonfly” motif on the blanket would be centered on the back of the jacket, and 2) I wanted the “portrait” or neckline area of the shawl collar to feature the dominant color of red.
From there the fabric told me what I could do and what I could not do, and the best way to explain my decisions is to show you the finished coat.
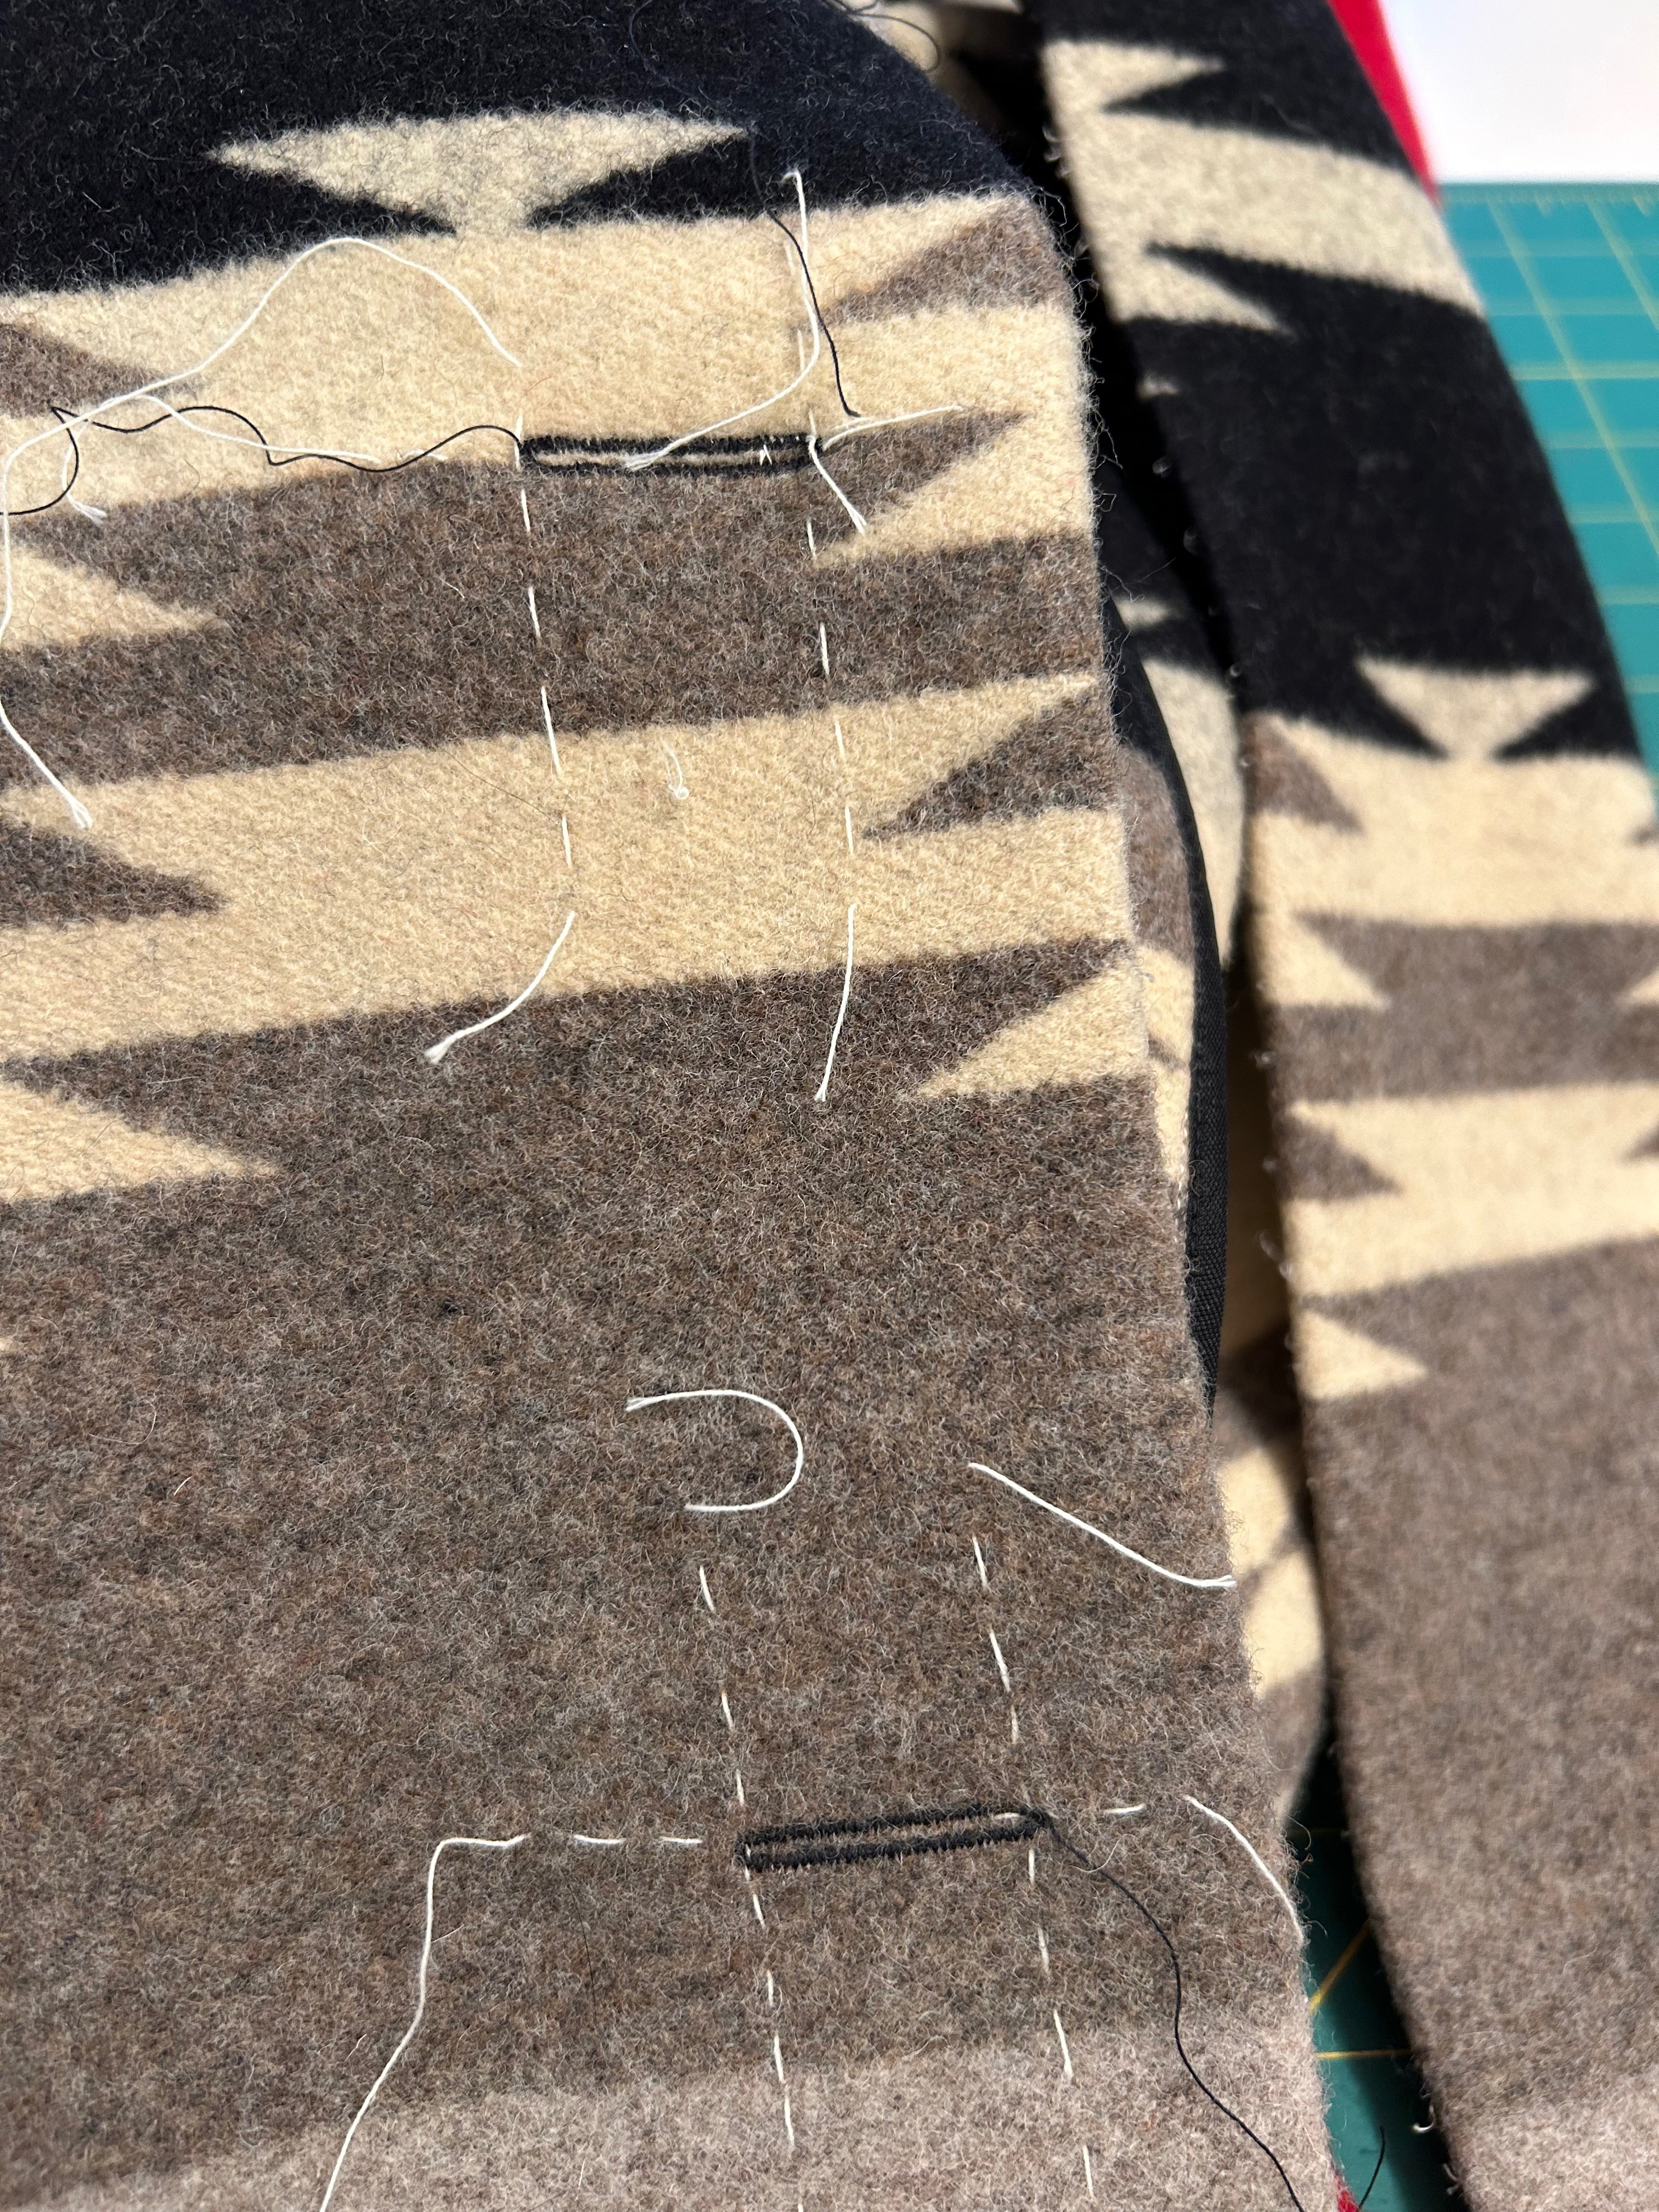
I thought it would be “easy” after getting to this point. Easy is not a word I should ever use while sewing. I should know that by now. Every seam had to pressed with loads of steam, followed by a clapper to help set it, usually more than once. Every exposed seam edge needed to be encased with rayon tape. I split the two vertical darts and needed to hand-stitch the raw edges to prevent fraying. Every seam needed to be basted together before machine sewing in order to keep the horizontal lines in the design matched.
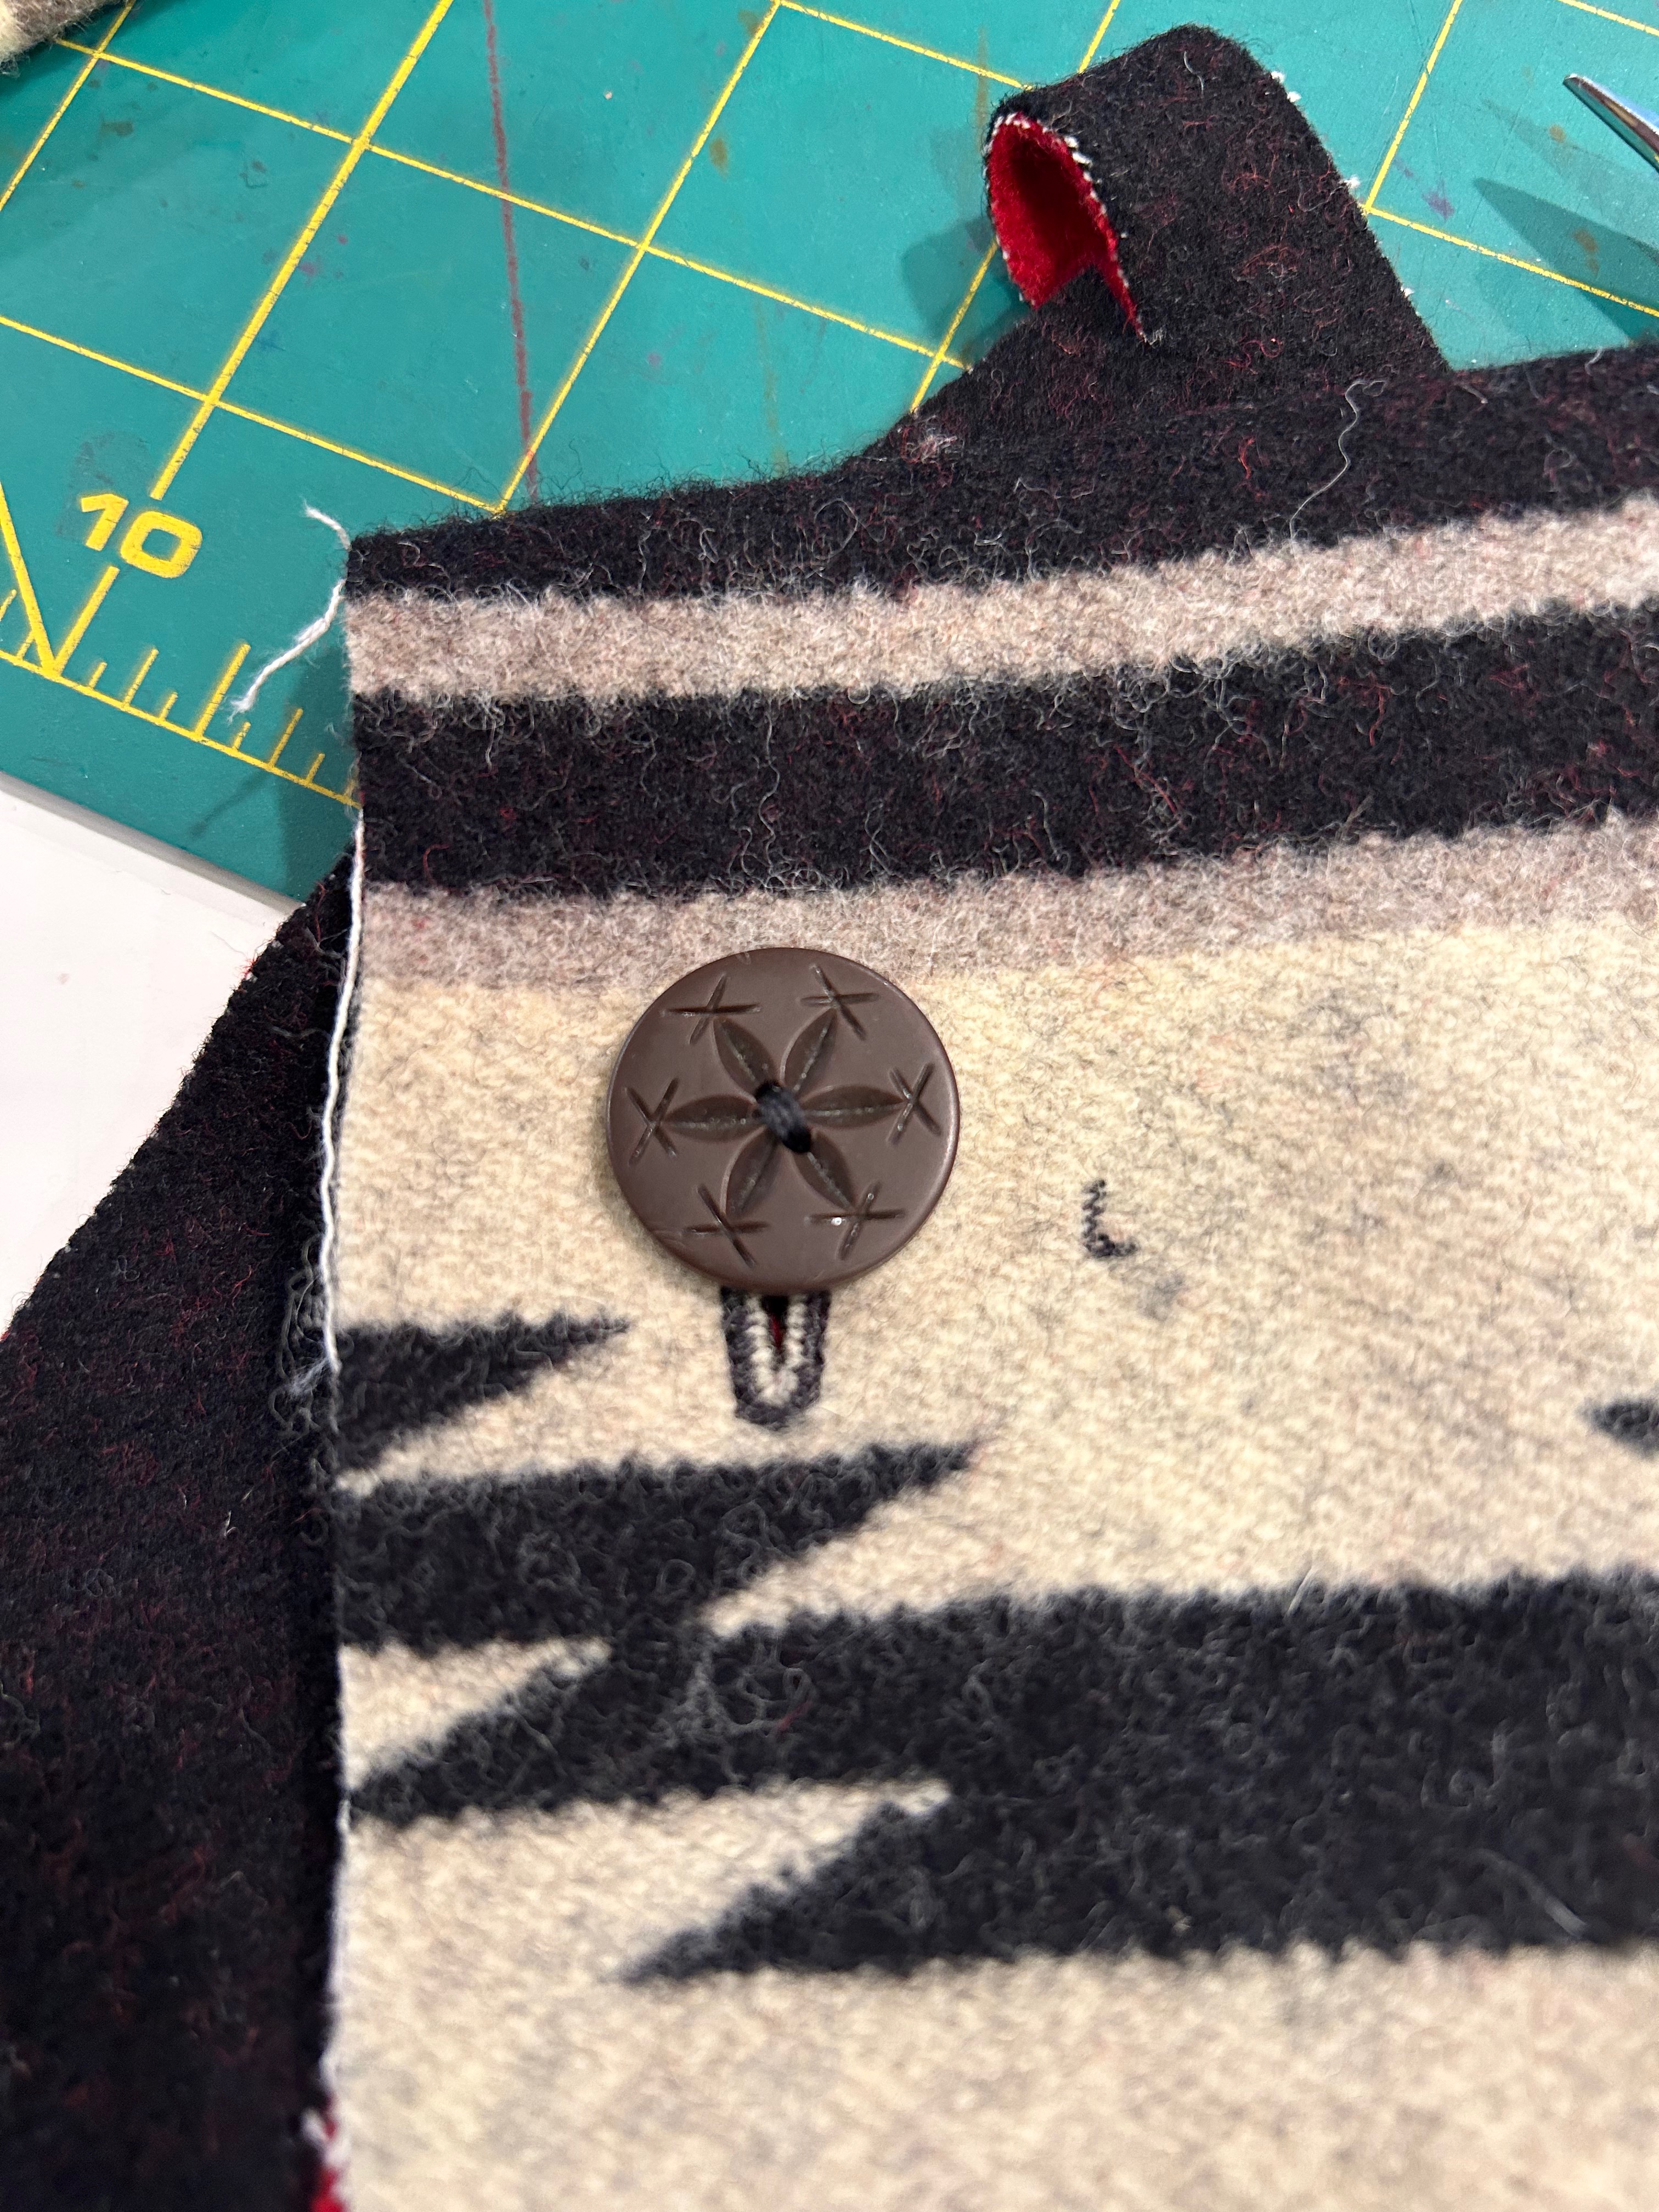
I had found a set of taupe-colored vintage buttons in my collection which, at first glance, did not look like they would work. But after auditioning black buttons and red buttons, I was convinced those taupe ones would be perfect. However, I had no idea how I was going to do buttonholes in that thick fabric. I fiddled around with fabric scraps to make practice bound buttonholes, using a lightweight fabric for the “lips.” They looked awful. I thought of using large snaps and just securing the buttons on the coat front for effect. That did not appeal to me at all. So I went to my two failsafe sewing maxims: 1) I’ll figure it out later, and 2) Plan B – it BETTER work.
The jacket was practically finished before I found a method to make those buttonholes. Because the fabric was so thick, I could successfully only do a machine buttonhole on one layer of it. I experimented around and discovered if I made the buttonhole on the front of the coat, I could then line up the facing and use a straight machine stitch through both layers around the buttonhole. I used very small stitches to make it secure. Then I sliced them open. It worked!
Are you still reading at this point? Or did I lose you back at the dining room table?
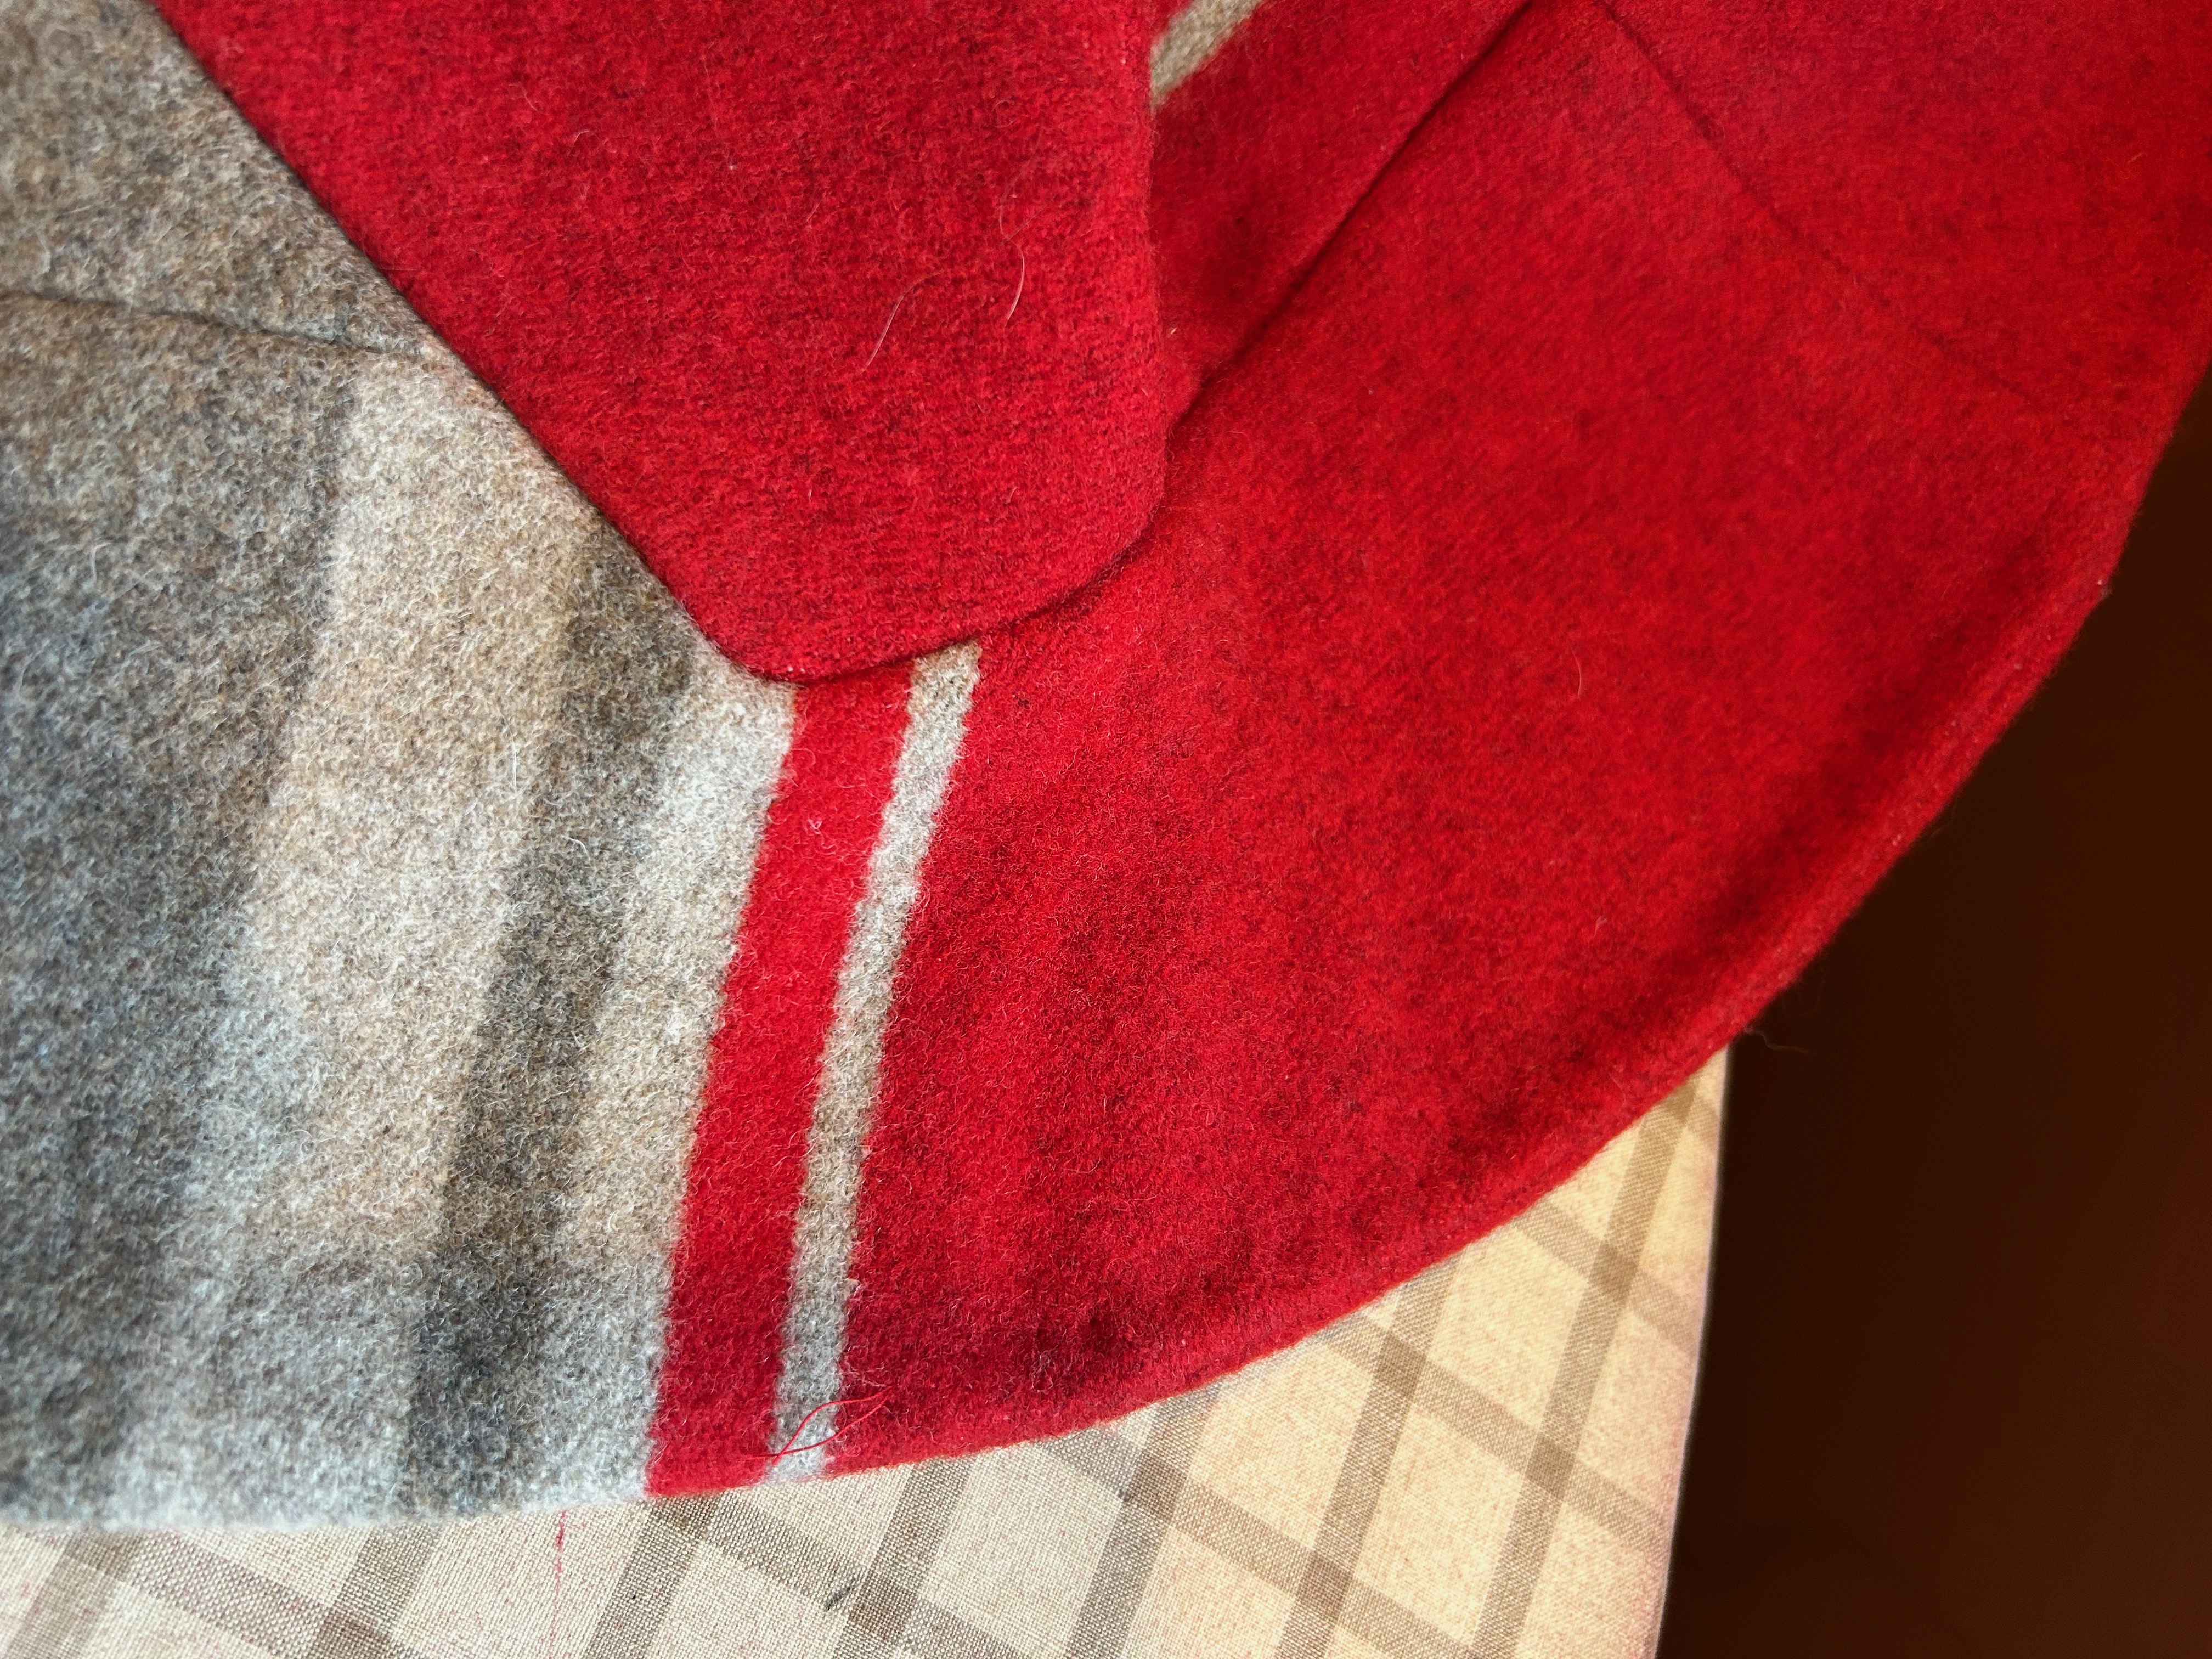
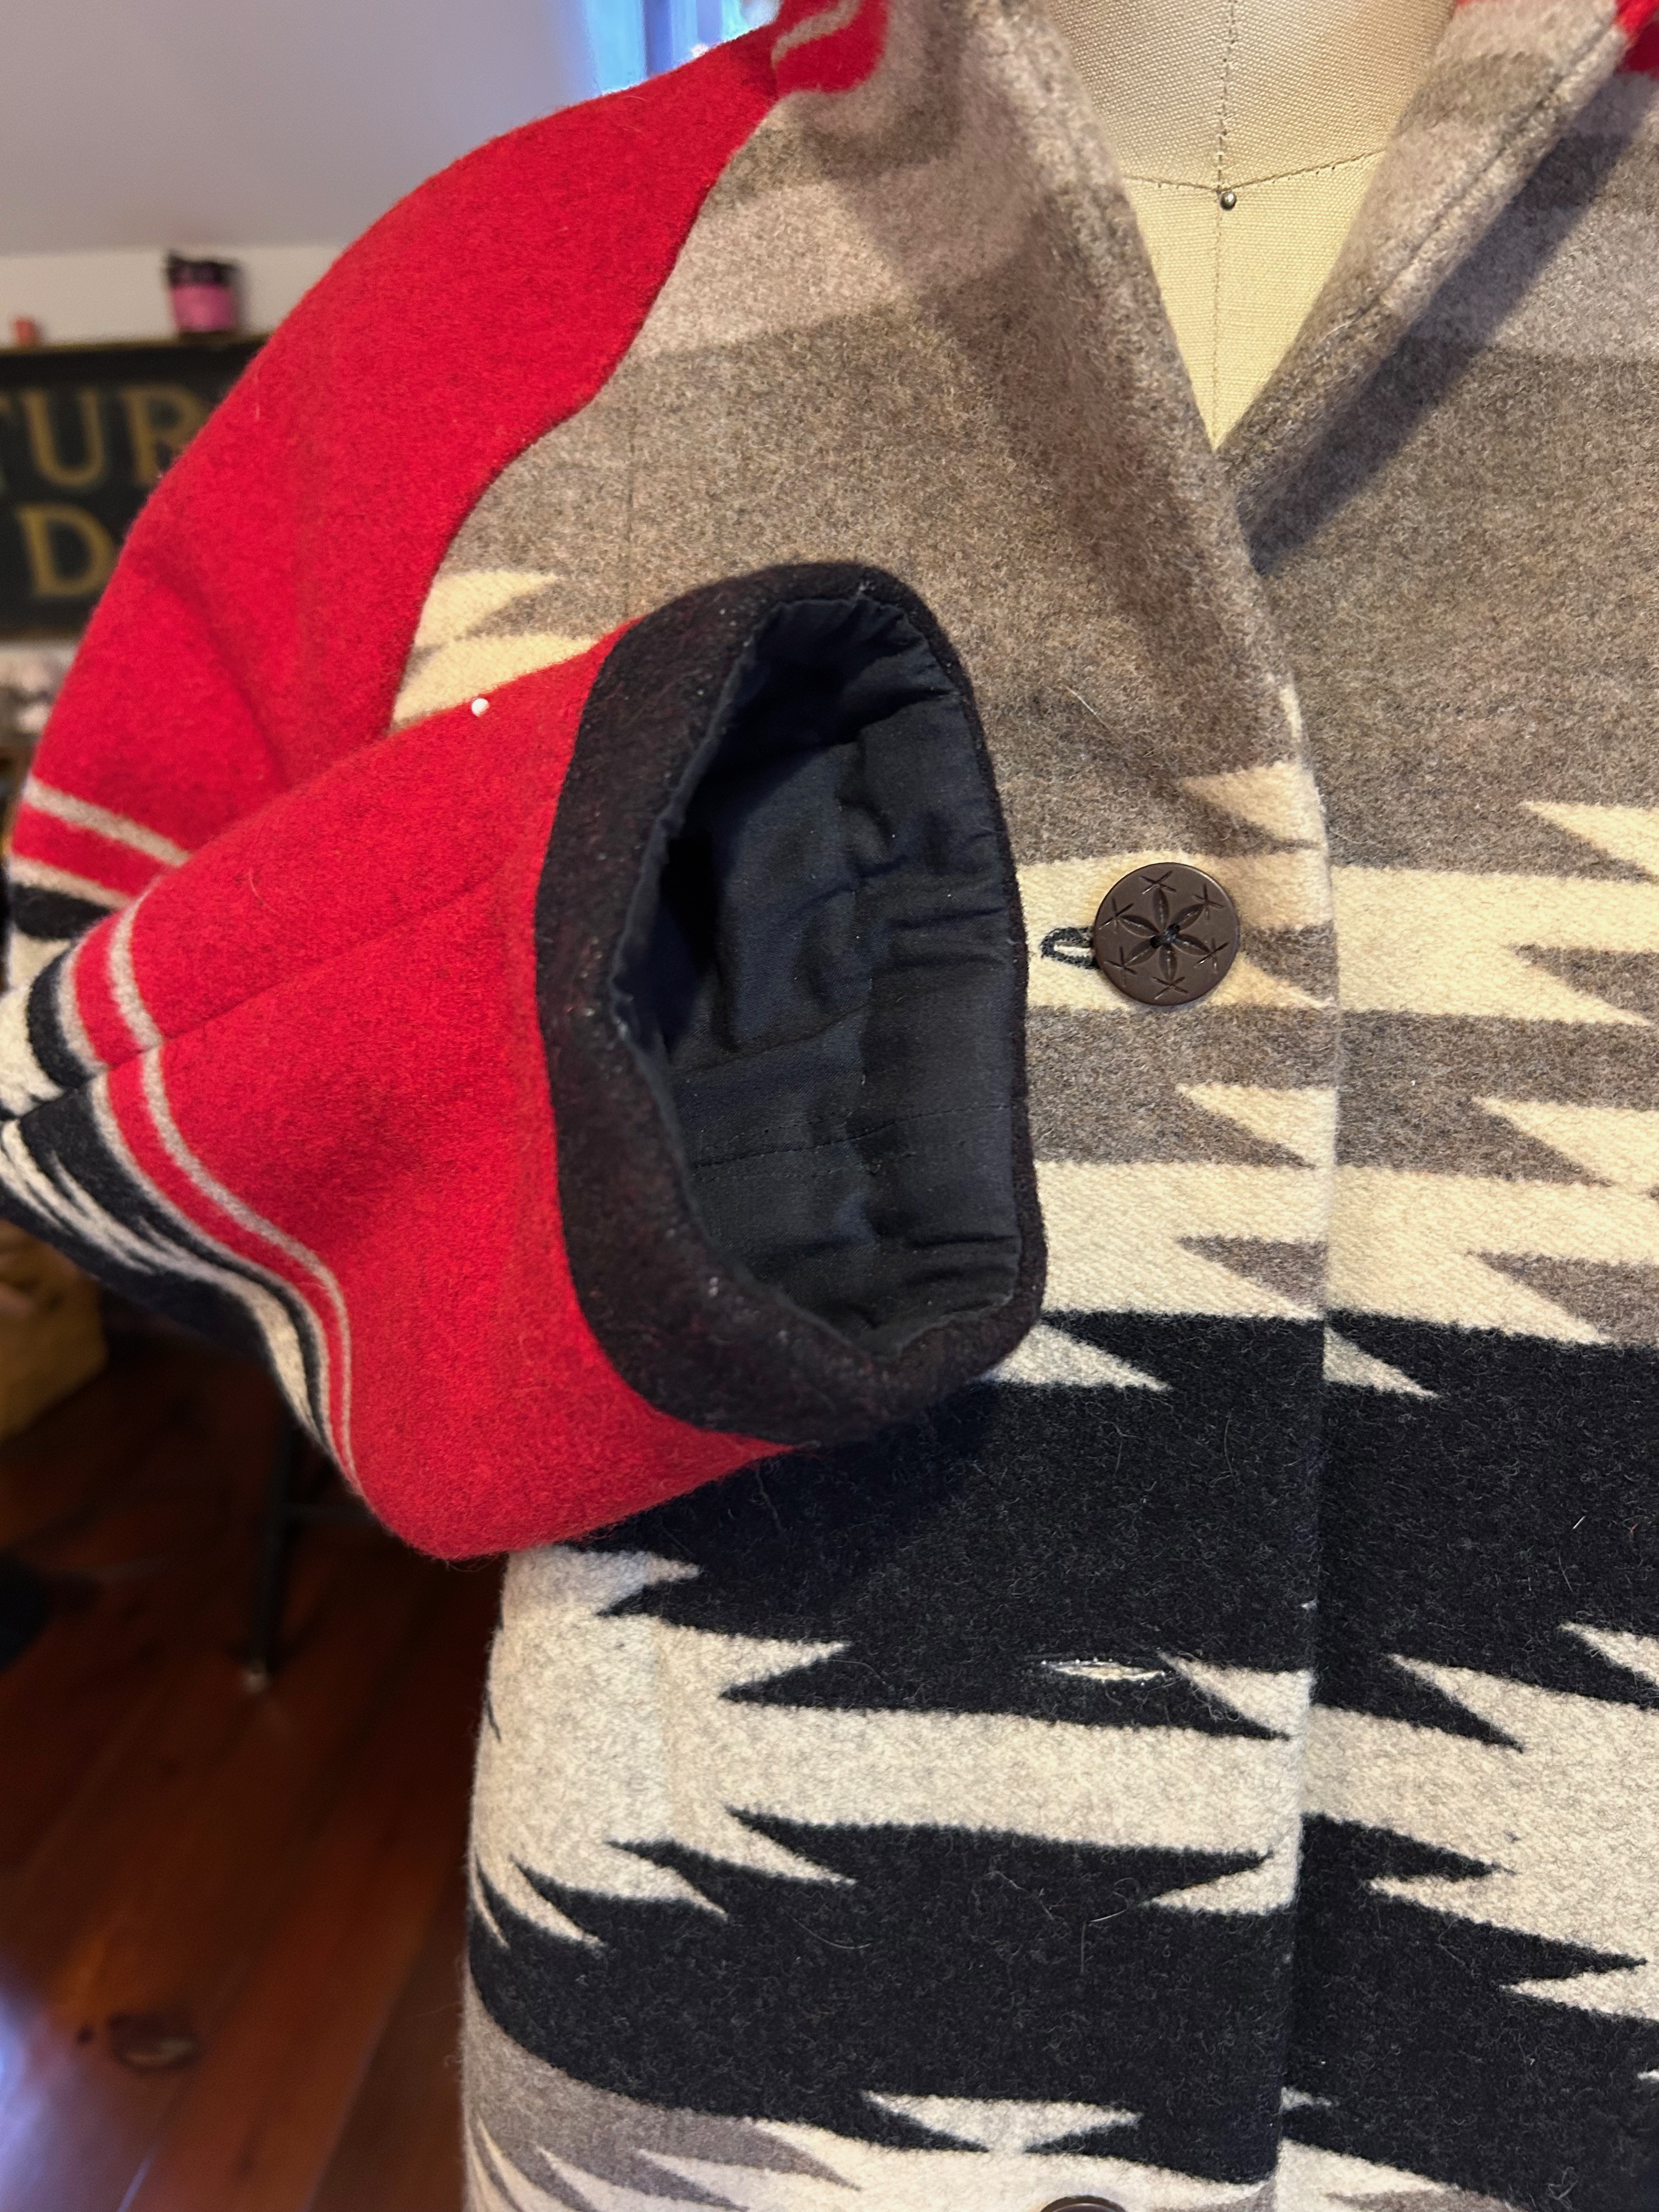
Almost finished! The final touches on the coat involved under stitching the collar to hold the turn in place, and securing the sleeve lining to the underside of the black “cuffs.”
What do you think of the black cuffs? I had no choice but to do them this way; hopefully they look intentional rather than contrived.
I have to say I was pretty thrilled with how my jacket turned out, considering the parameters facing me.
Now I do indeed match my chair! More importantly, however, I have a very classic, one-of-a-kind, Pendleton wool, western-style jacket which is going to be fun – and warm – to wear.

You did a fantastic job, overcoming all the challenges of using the pattern on the blanket it totally creative ways! Your jacket looks warm and wonderful and unique!
Thank you so much, Julie! I’m looking forward to wearing it next Fall/Winter. It seems I am always finishing projects out of season…. And then I have to wait to wear them. My daughter wants me to enter this in our old-fashioned county fair this summer. I may do that.
Karen,
You are always a stunning woman. In this jacket, you will be a uniquely stunning woman. I love to follow the problem solving of your process: such a gift you have.
Elizabeth Laurent
Elizabeth, thank you so much for this very kind and, frankly, memorable comment. I am so appreciative. Would love to catch up with you sometime!
Absolutely gorgeous! You are a wizard.
Thanks, Dana. I love to problem solve with fabric and patterns. Maybe more tenacious than wizard!!
The coat turned out really beautiful! I like your solution to the machine buttonholes, which are otherwise impossible on thick fabric. I wouldn’t give up on pockets – if you carry around a small swatch of the grey portion of the blanket you may find a solid gray wool fabric to use for patch pockets. Also the black cuffs look perfectly fine.
Thank you so much for your thoughts and approval of the black cuffs! I had enough plain “red/reversible to black” fabric scraps for pockets, but they would have interrupted the design of the front too much. So, no go. I really appreciate hearing from you.
Exquisite. I am always blown away by your skills and your eye for design.
Thank you, Ruth. That is so kind and very appreciated.
Absolutely stunning – this coat will be perfect in Wyoming! I continue to be more and more impressed by your sewing skill. And love the step-by-step about the construction of all your garments. Thank you for sharing this with all of us!
Thank you, Betsy! This is definitely a Wyoming coat! I might turn some heads wearing it in Pennsylvania, but for the wrong reason!!
Brilliant! I will never achieve anything like this. But you are still an inspiration for my much more modest endeavors. Thanks!
Never say never, Anne! Even modest endeavors have their challenges, and it is exactly in that way we learn to do more than we could ever imagine! It’s lovely to hear from you…
Gorgeous coat! I loved reading about all the constraints and how you were able to solve them so beautifully. Thank you for sharing!
Thank you, Cynthia! I always hope I’m not boring my readers with so many details. I’m so glad you enjoyed the post.
This woman can match a pattern! PSent from my iPad
Thanks, Pamela!!
You have not dissapointed me at all with this amazing saga of your perservence and skill. I think your black cuffs look perfect and I never could have made what you made. My never-ending admiration keeps growing when I read about your creative skills when it comes to making something wonderful and your determination when overcoming obstacles.
You always make my day with your comments, Peggy! Thank you, and I’m so glad to have endorsement on those black cuffs.
Fantastic!
Thank you, Gayle!
What a beautiful coat. The cuffs look intentional. You were so lucky that there was no change in colour where it was covered by the binding. I’ve seen old wool blankets, but in much more worn state that had changed colour and the fabric under the binding was much darker.
Hi Susan, that’s interesting thought about the binding. Fortunately a discrepancy in color was not an issue! That extra small length was a game changer for me! Thank you for your comment.
It’s amazing. Perfect the way it is. I get excited about pockets, but don’t think you cover up the pattern!
Thank you, Nadine. Pockets are generally something to get excited about – except when they detract from the design. Hopefully I will find wearing the coat just fine without them.
Wow! So beautiful! What a journey! I like the Black touch on the cuffs. Thanks for all the details. How about a small matching handbag or “fanny pack” from scraps? Closet Core Patterns – or Core Fabrics – has a free pattern, and hardware bundles if that works for you.
Thank you, Heather, for these ideas! I have a red handbag which I think will be nice addition to this coat. I’m actually thinking about making a couple of hot mats from the few scraps I have left over!
What an amazing construction of a very difficult pattern matching exercise and on such dense fabric. You can be very proud of a job beautifully executed – those buttonholes must have been agonising to consider! Congratulation!
Thank you, Shelley! Those buttonholes kept awake at night a couple of times, but in the end they worked out! Whew!
Wonderful job. Good to hear from you after all this time. I had a similar conundrum about pockets on a coat and made an internal pocket like on a man’s coat, just an idea
It’s so interesting you mention that, Susan, as I have thought about adding a small internal pocket to the facing. I may still do that. I so appreciate hearing from you. Thank you.
Wow! I was waiting for episode #2 and it did not disappoint. How many superlatives can there be? The engineering and problem solving that went into this masterpiece is beyond inspiring. Here’s to wearing it for years to come.
Thanks, Duane! We love our coats and jackets, don’t we? I will NEVER make a coat as exquisite as one of your creations, but I sure enjoyed the process on this one.
Cool.
Sent from the all new AOL app for iOS
Thanks!
First time I’ve seen a hood and collar both in the main pattern piece, sometimes I’ve seen the collar included. Fabulous piece of engineering making that pattern! Love the blanket print and what you’ve done with it. It’s looks like lots of work but is so worth it!
These vintage patterns are always filled with surprises! That’s one of the reasons I love using them. So nice to hear from you, Linda!
Absolutely! 🤩 and thank you!
it’s absolutely magnificent! You should be very proud.
I think the strong visual effect of the horizontal stripe matching completely outweighs the small lack of symmetry across the centre front is. I didn’t even notice it until I read the text.
Thank you very much! I’m very glad to get your input on that front which gave me pause…
Oh my! This is gorgeous! Nice work. I feel like when I put in this kind of effort I did get rewarded. But oh, my, it takes patience. I love the cuffs – looks right.
Sewing definitely takes patience! It’s always good to be rewarded when so much time goes into something. Glad you like the cuffs! So do I!
Just fabulous! You thought through this so carefully and it is a total success! Congratulations!
Thank you for both your comments, Kathy. I have thought of you often and miss your posts. I hope all is well with you and your family.
I suspect I will, at some point, wear this coat into our Pendleton store in Jackson. It will be interesting to see their reaction!!
I would love to be a mouse in the corner when you go to the Pendleton shop! I had to move my blog to a new address, so you can find me here: https://sewingetc2.wordpress.com/
Karen, your work is stunning, you have a unique jacket to treasure. Good brain workout also solving all the problems!
Regards Patricia
Thank you, Patricia! I love the problem solving. I think I’m an engineer at heart – so much of sewing is really complex. It’s good to use one’s brain!