Category Archives: Blouse patterns from the 1950’s

Not Just an Everyday Blouse

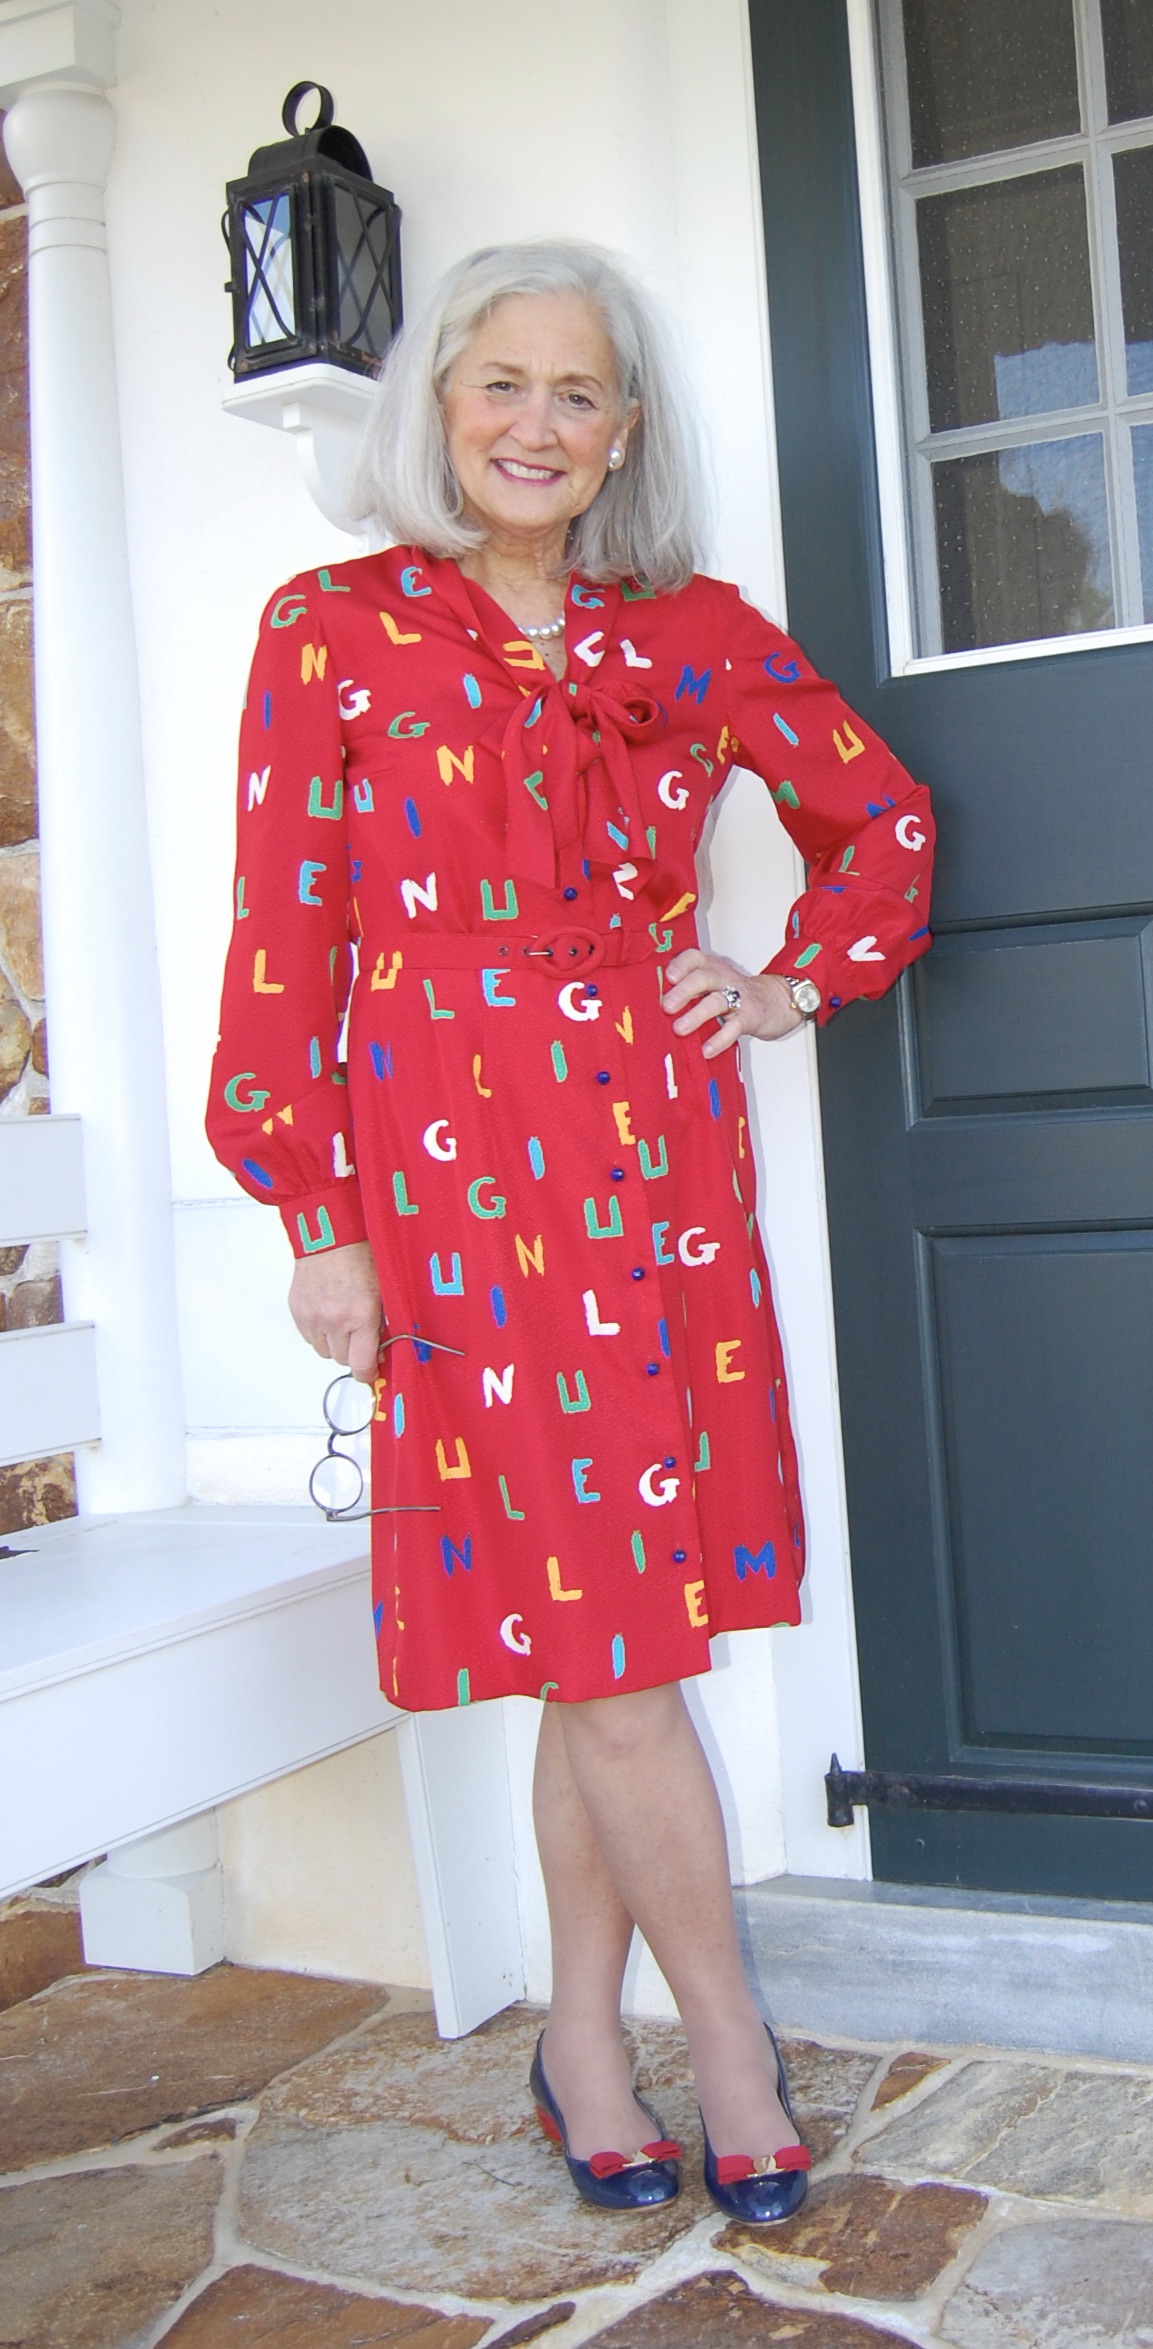
Some blouses are worn A LOT.  Those are everyday blouses, and I have quite a few of those (with more to come, I am sure!)  And some blouses are worn infrequently, but equally loved for their unique properties.  These would include exceptional fabric, refined or formal appearance, limited wearing opportunity, or their ability to make a statement.  The blouse I most recently completed has all those properties. 

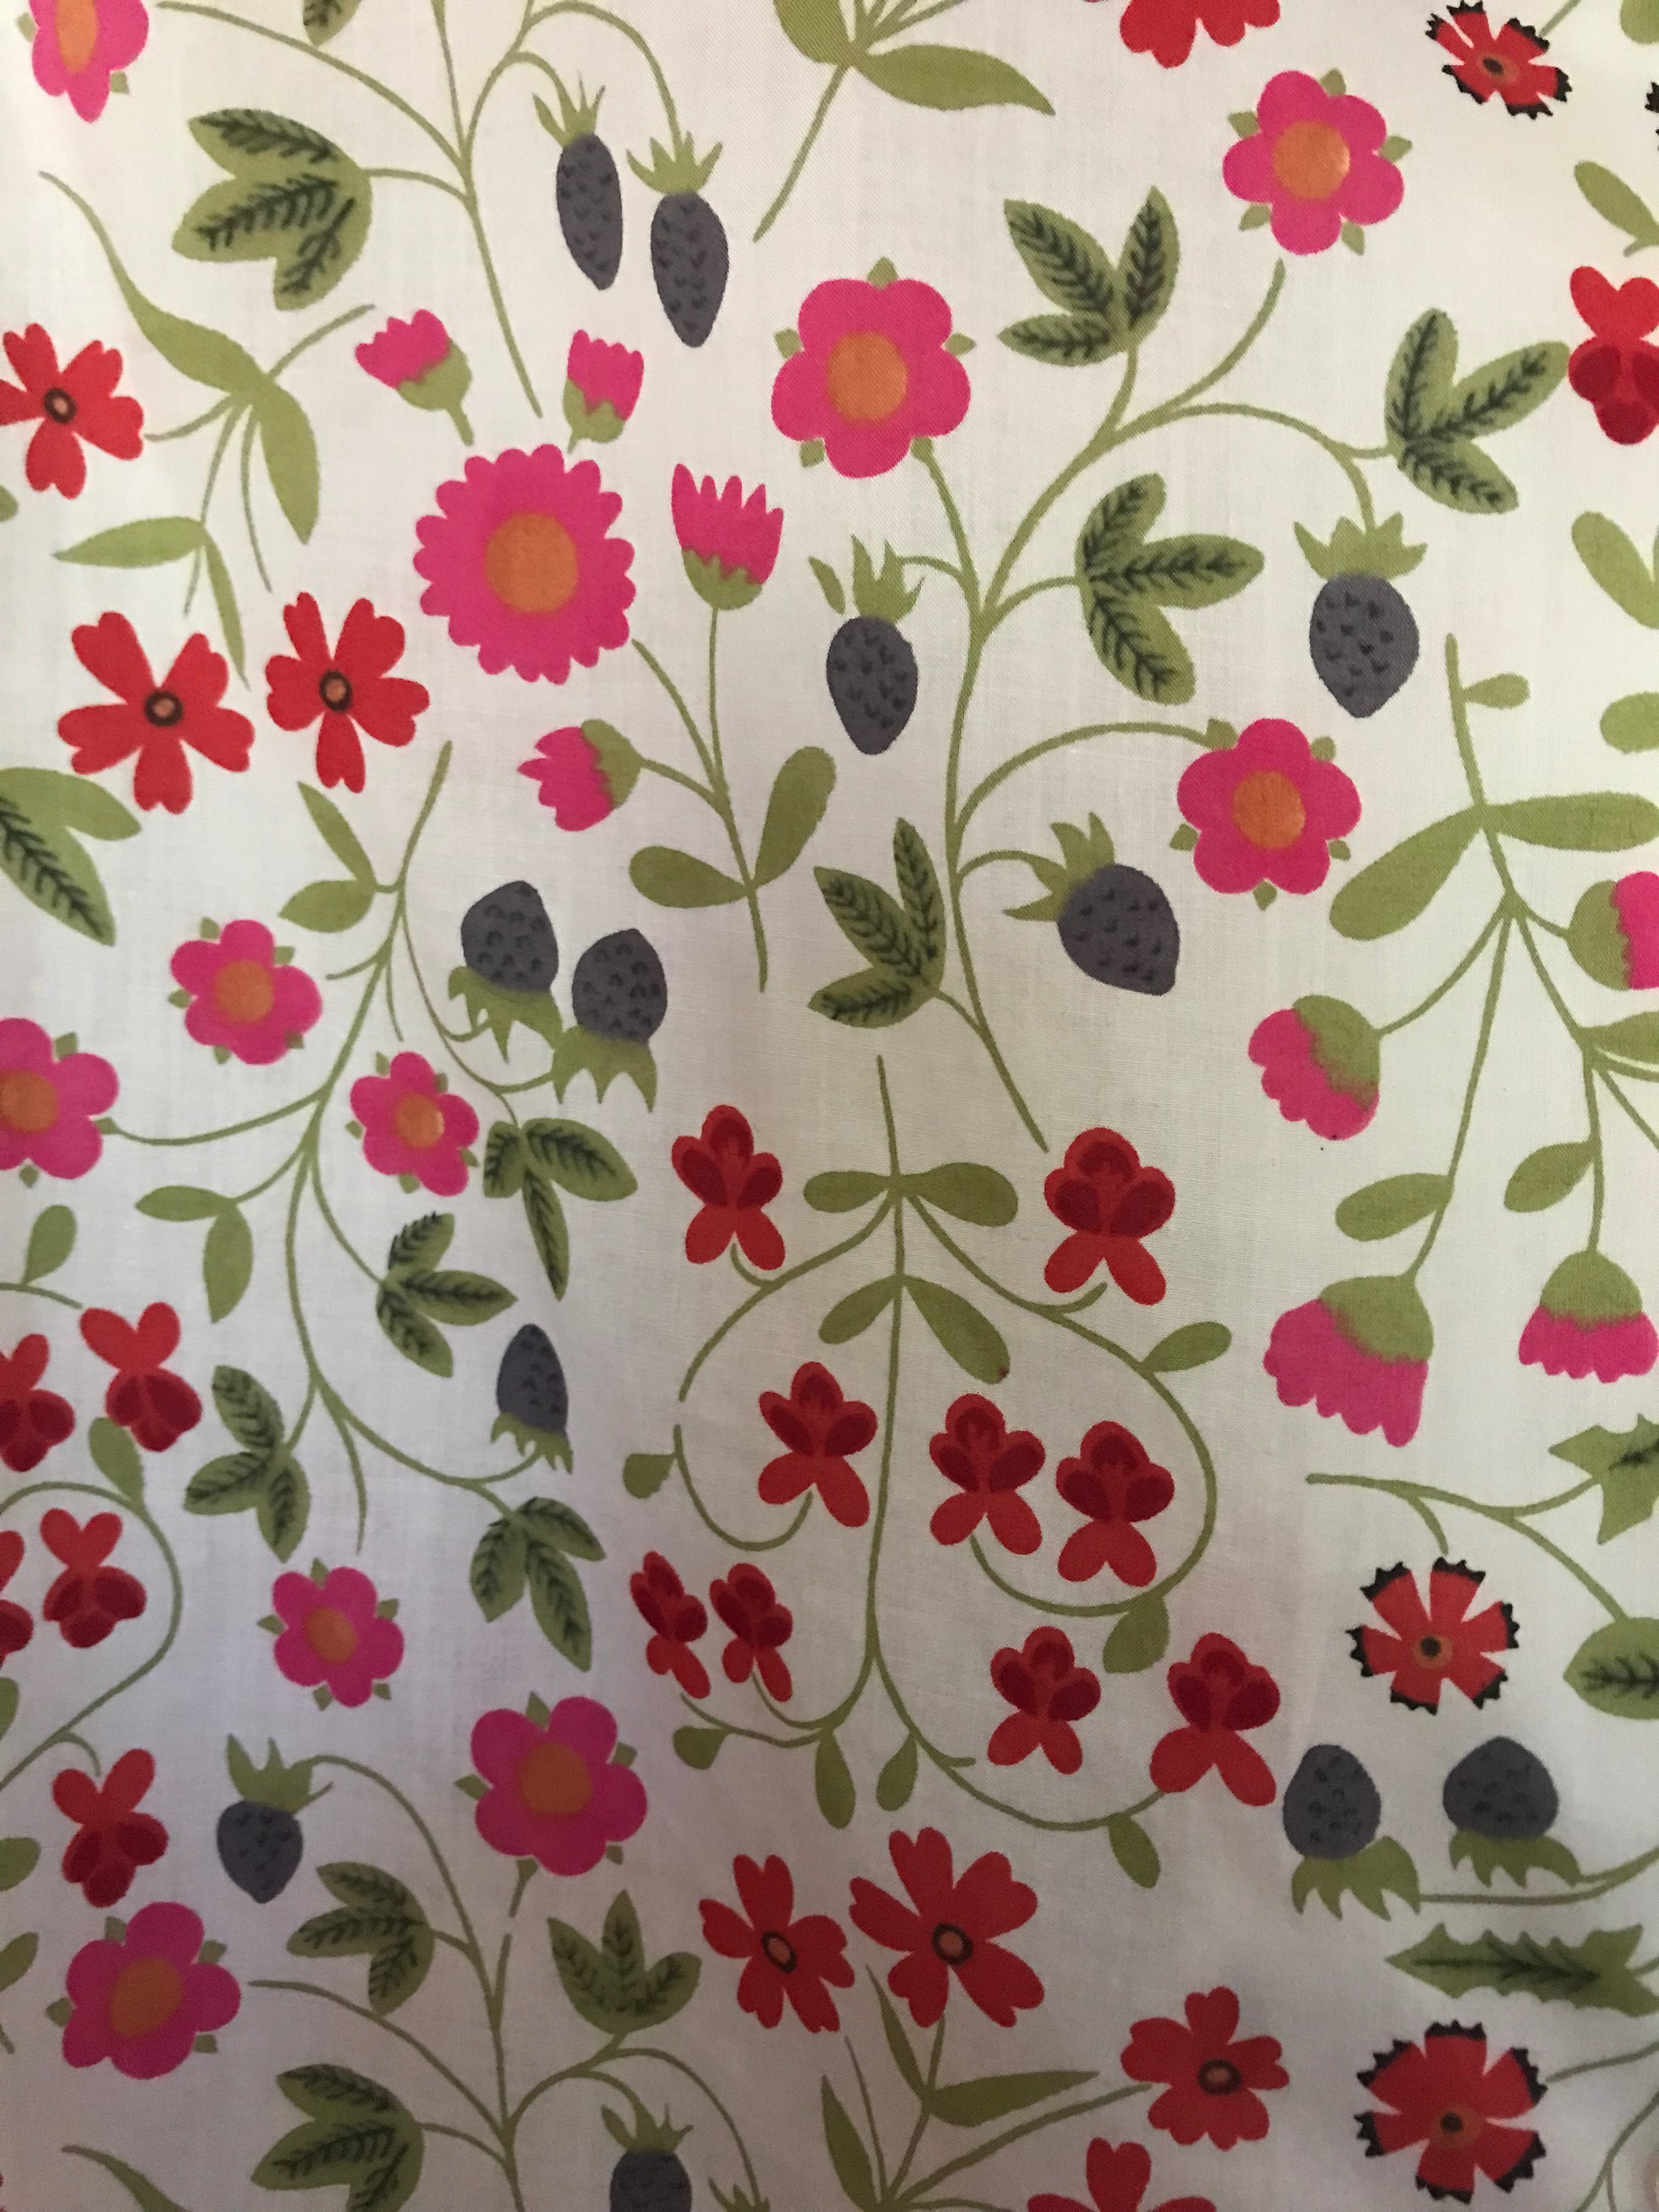
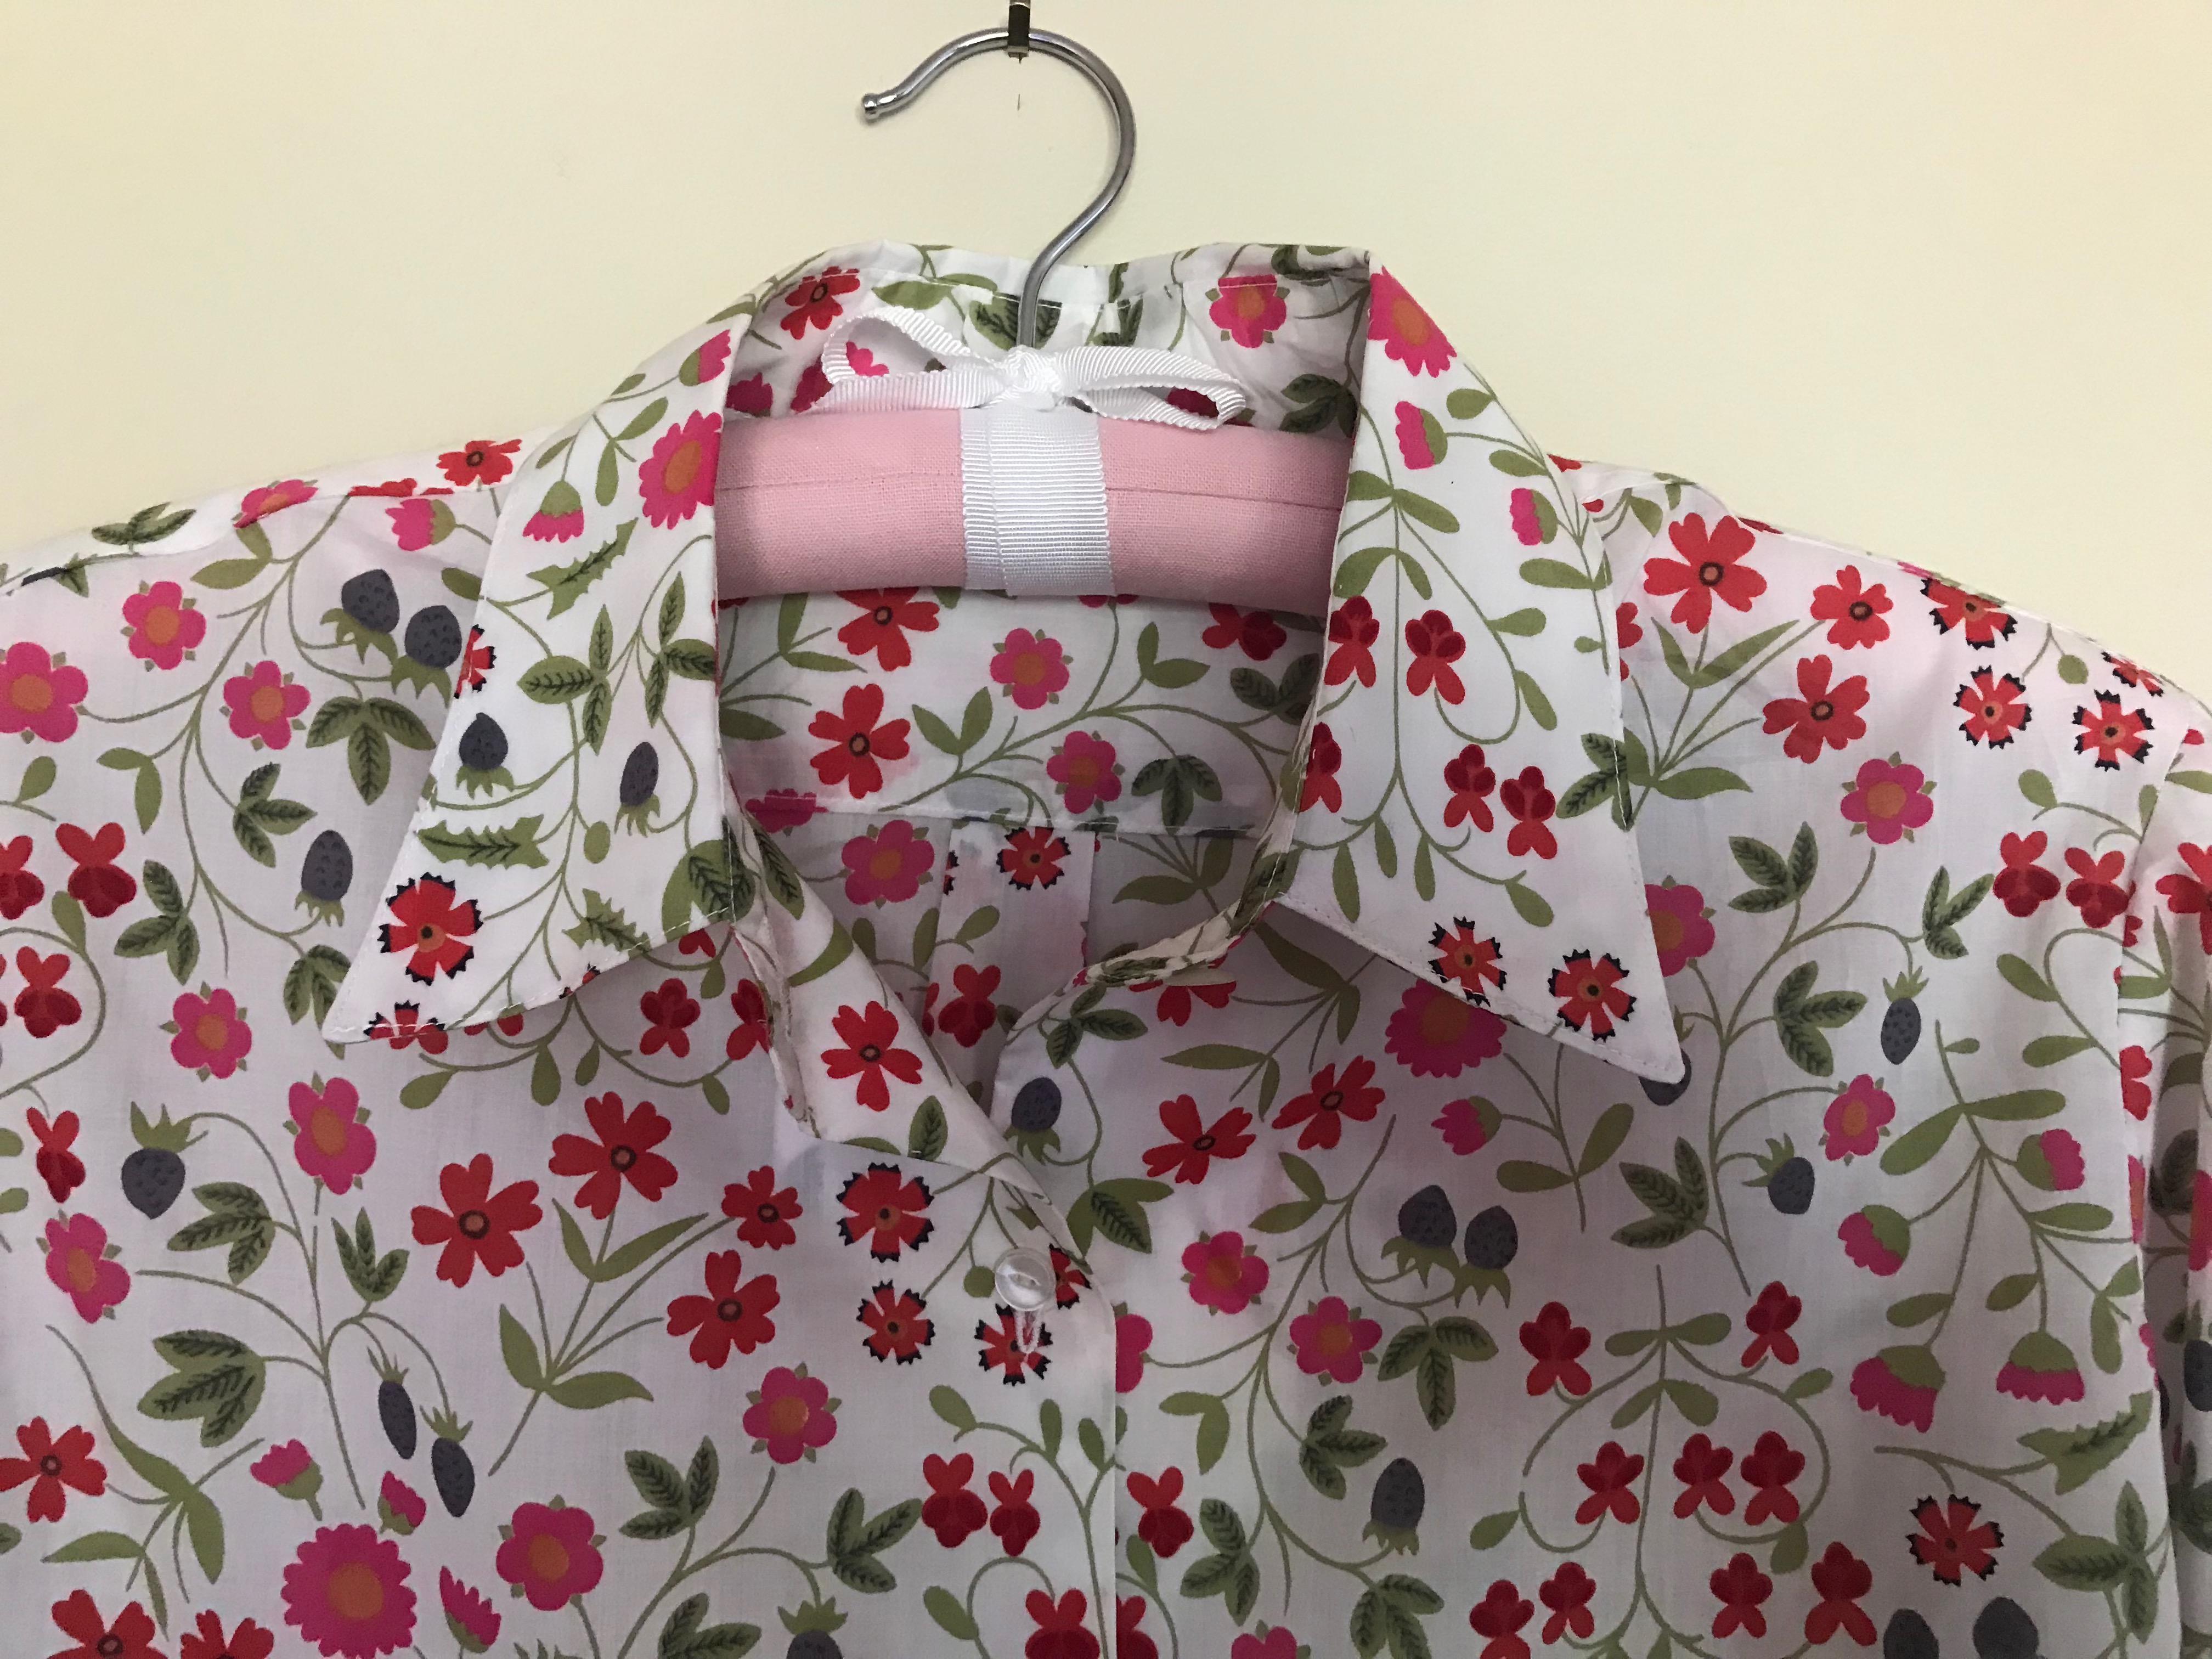
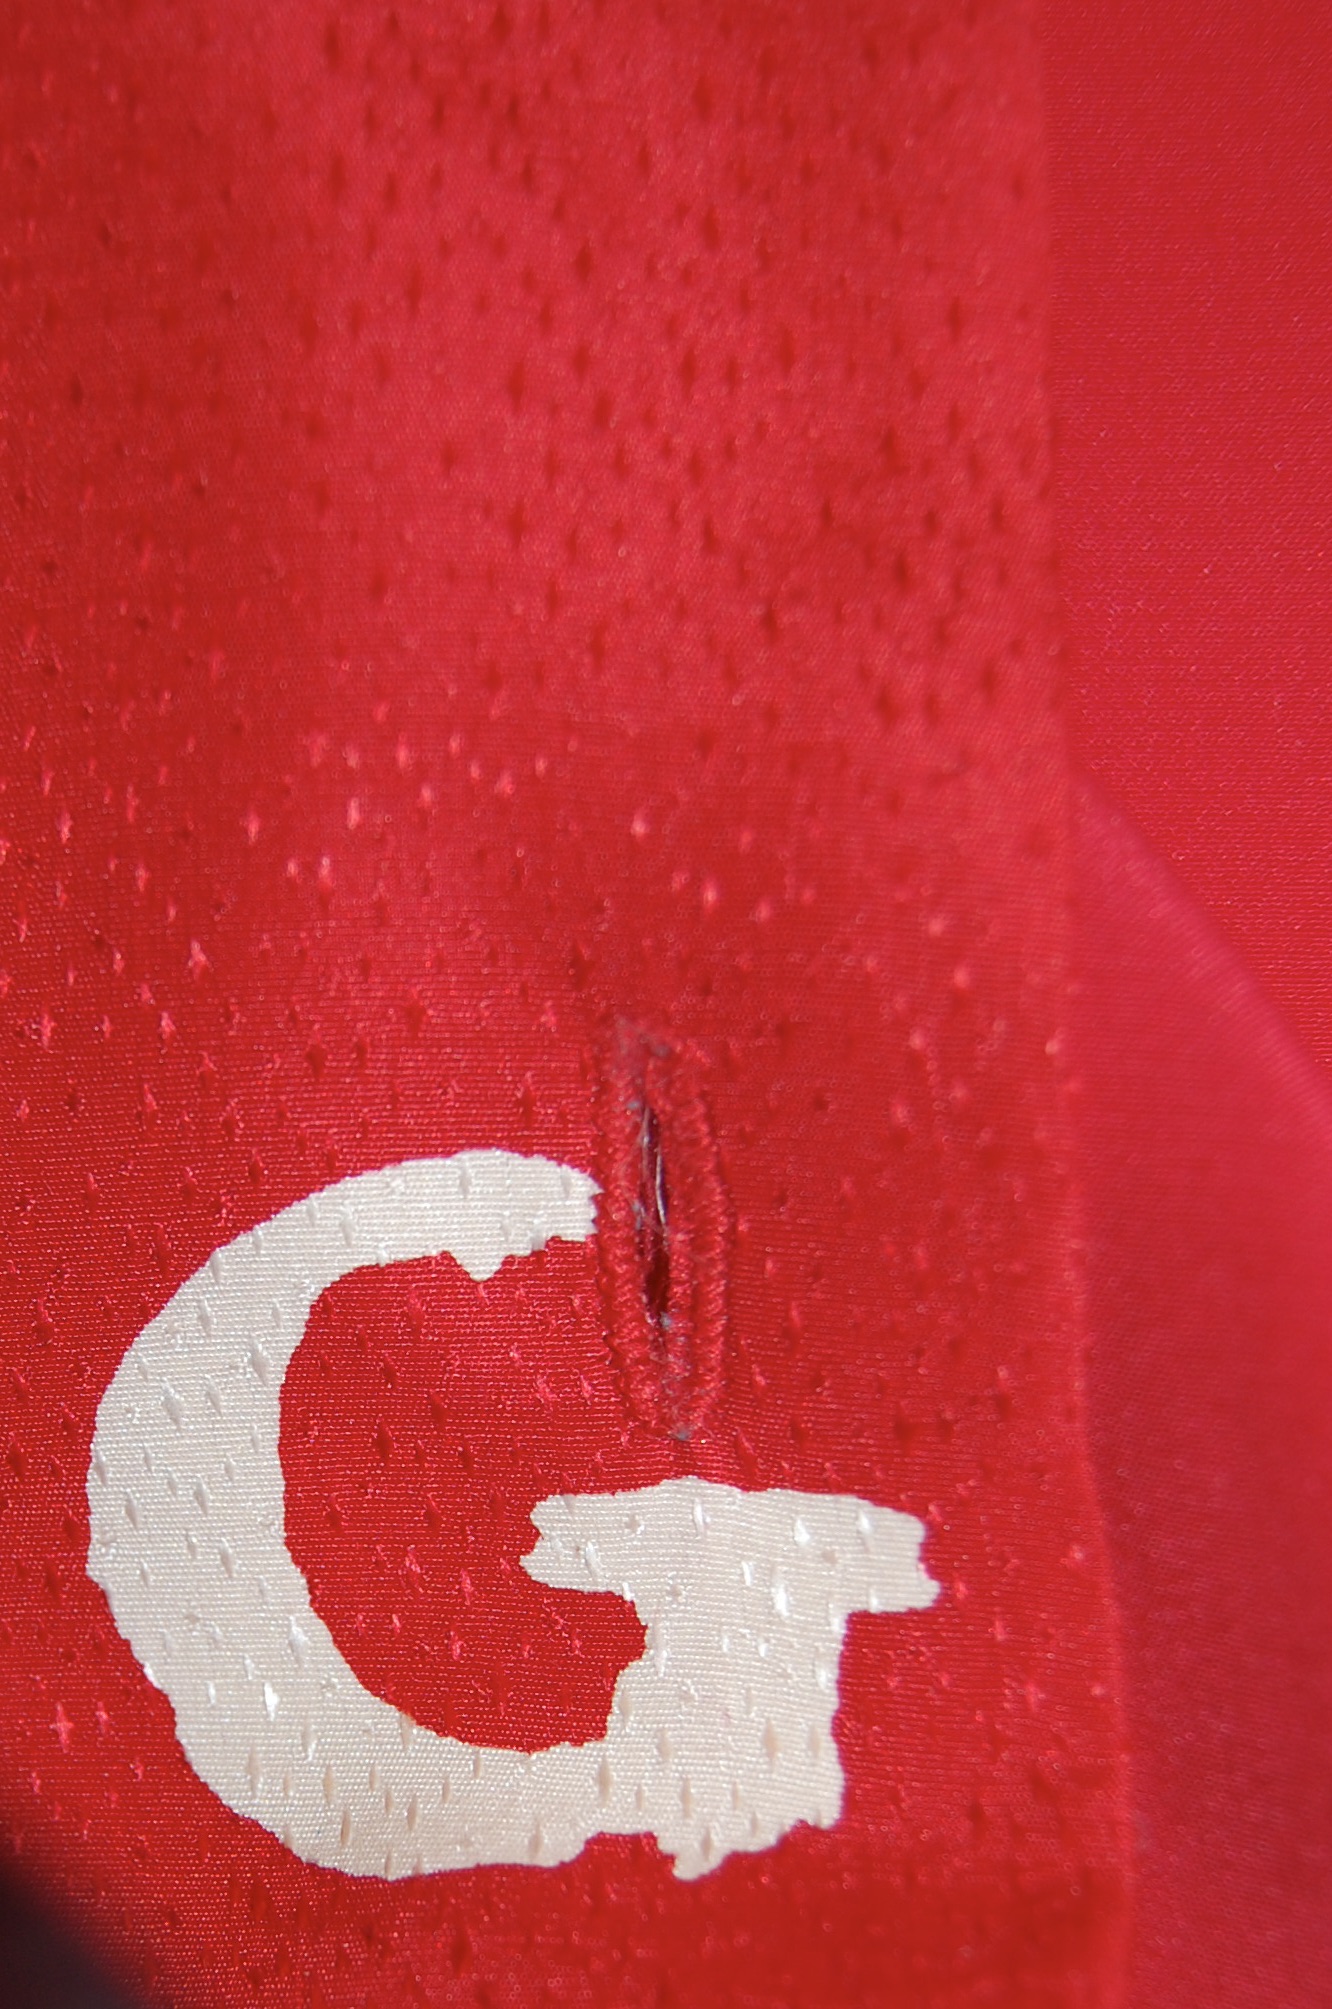
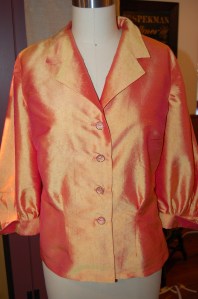
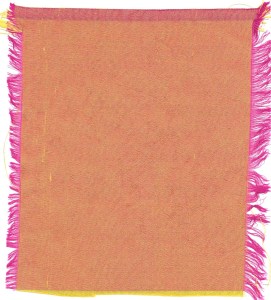
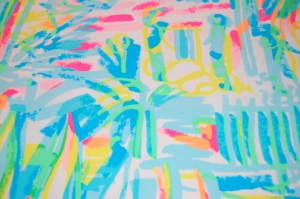
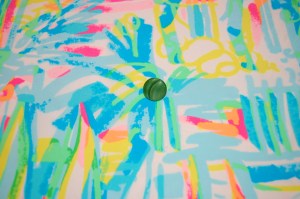
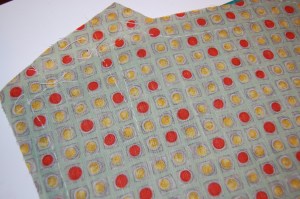
This deep pink silk charmeuse Jacquard has been in my fabric closet for over ten years, having been purchased at Britex Fabrics when I started sewing for myself again, way back when.  Its color, and the polka dot woven motif, both personal favorites, drew me to it.  A couple of years ago, after purchasing another piece of silk – a printed silk twill – I paired the two fabrics together and added them both to my sewing queue.  The skirt may have to wait until next year, but the blouse earned a spot in 2022’s sewing agenda.

Two fabrics meant for each other!

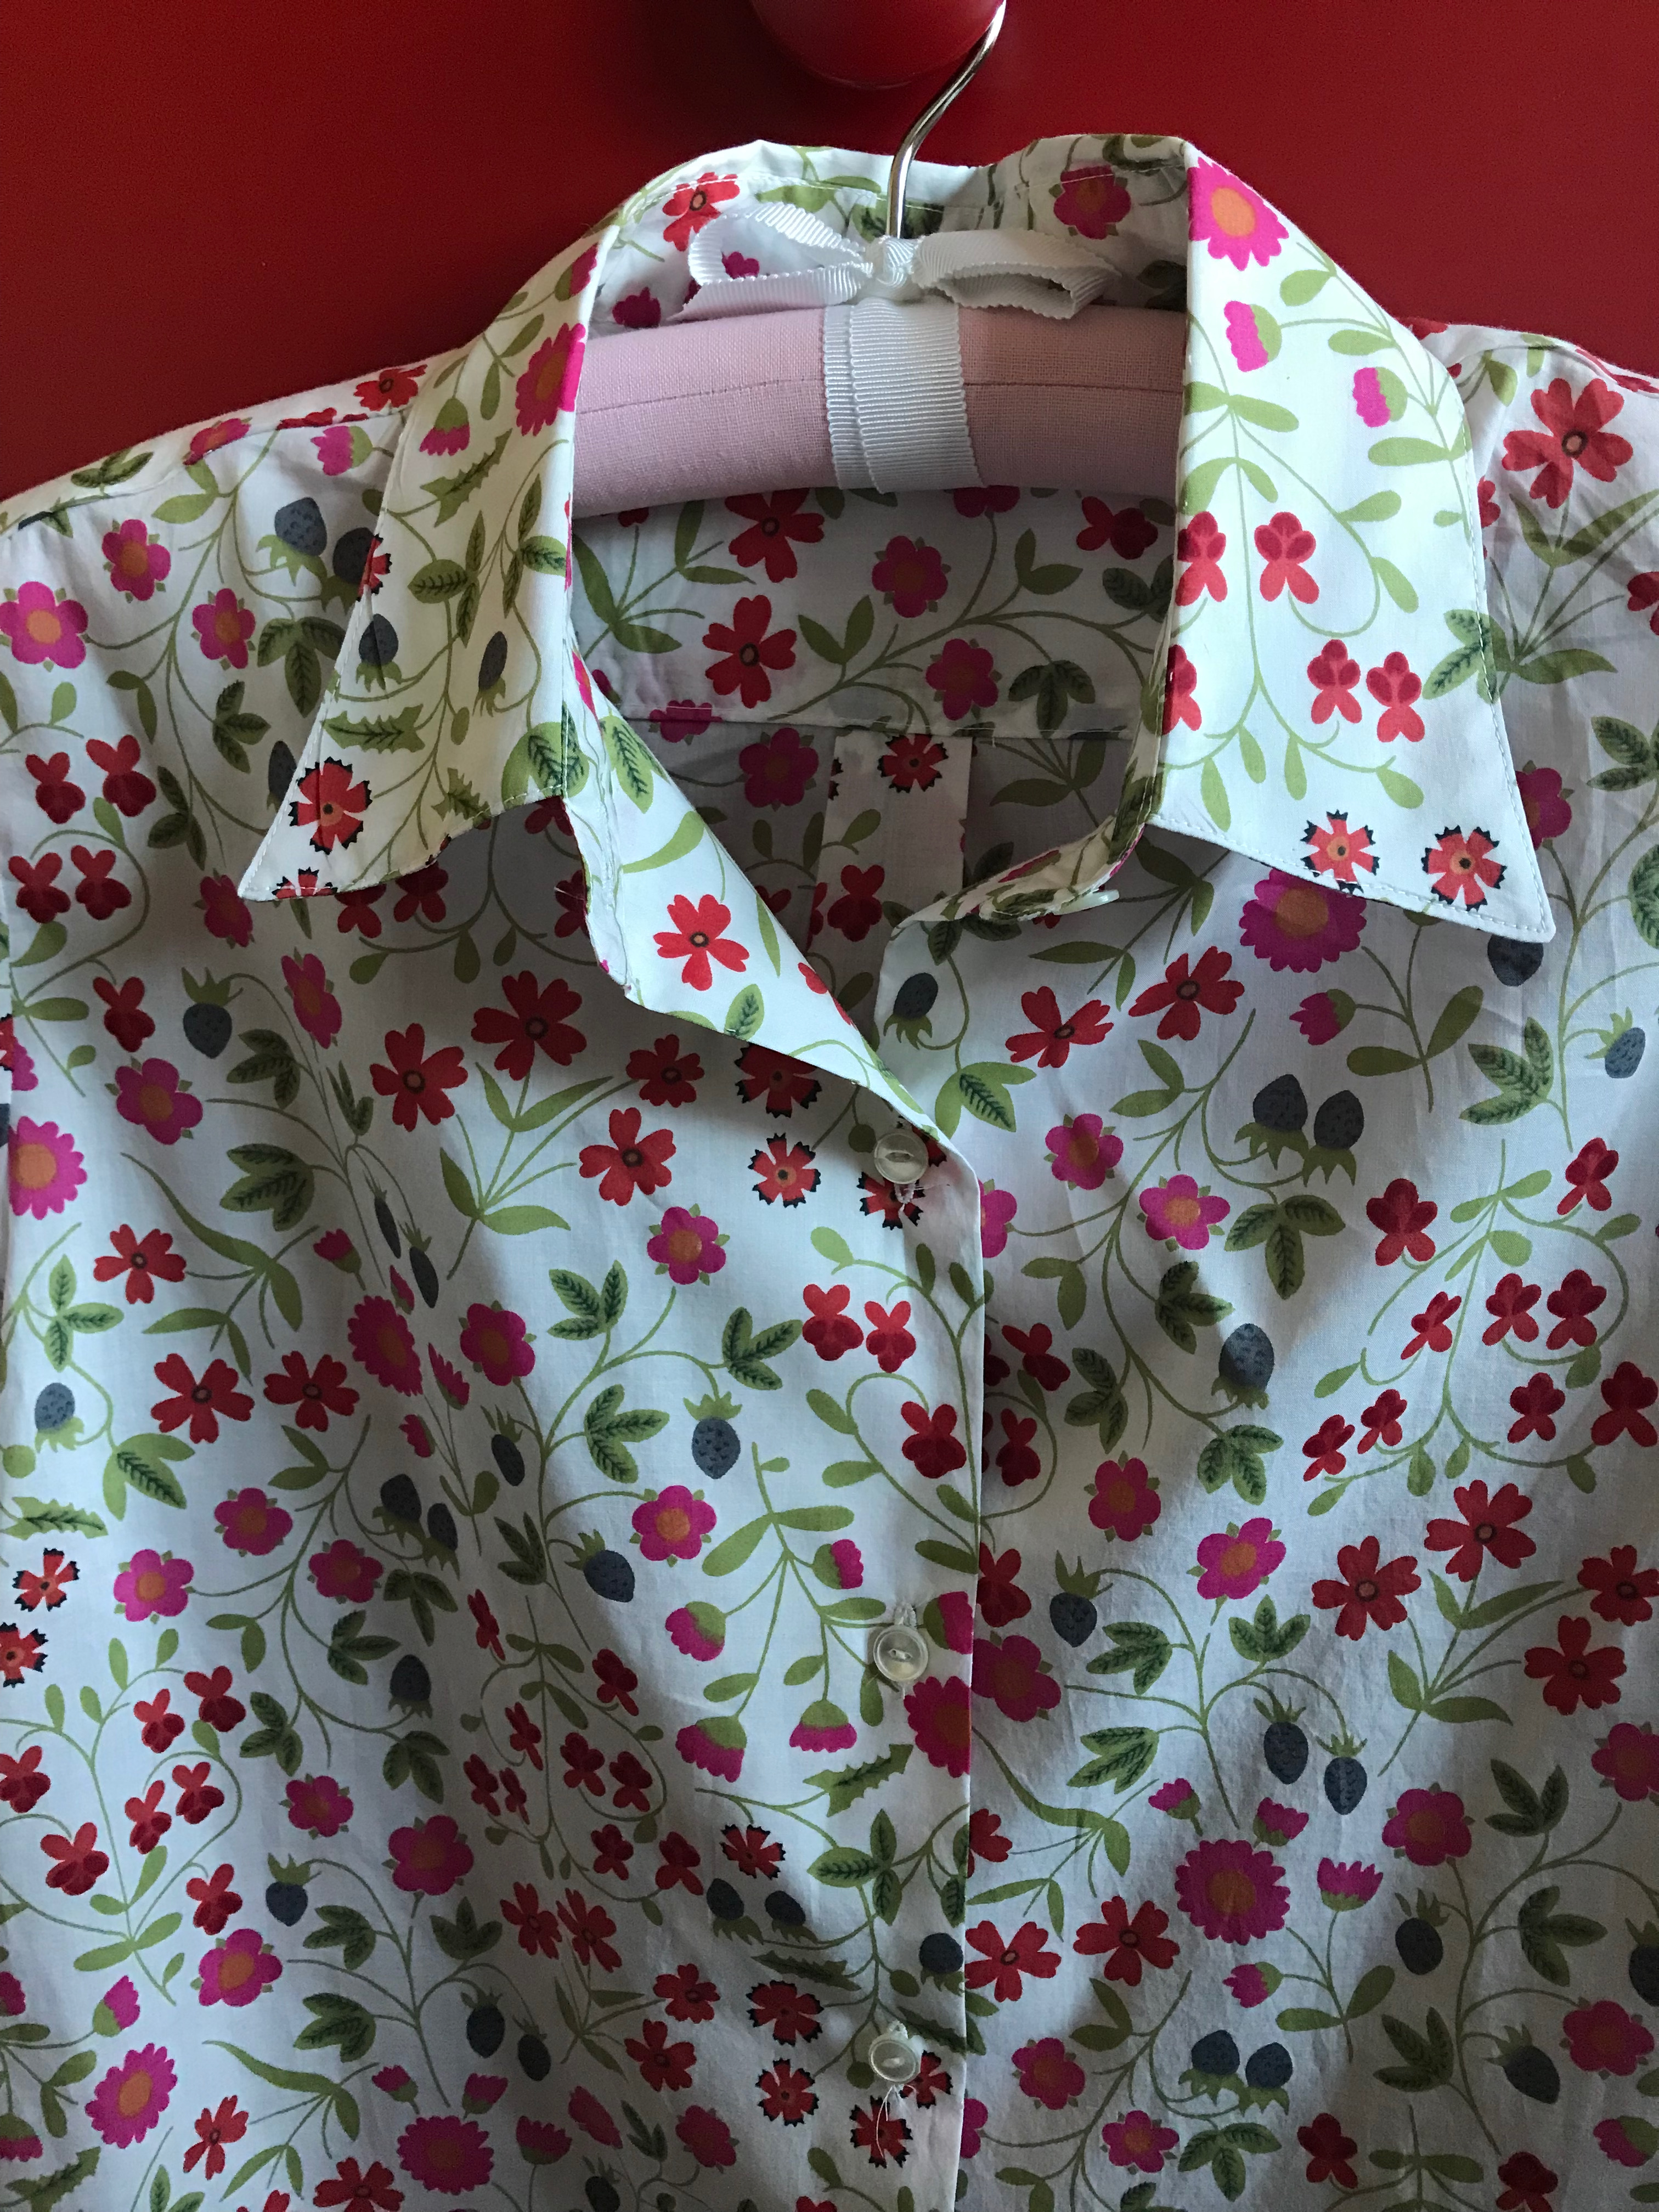
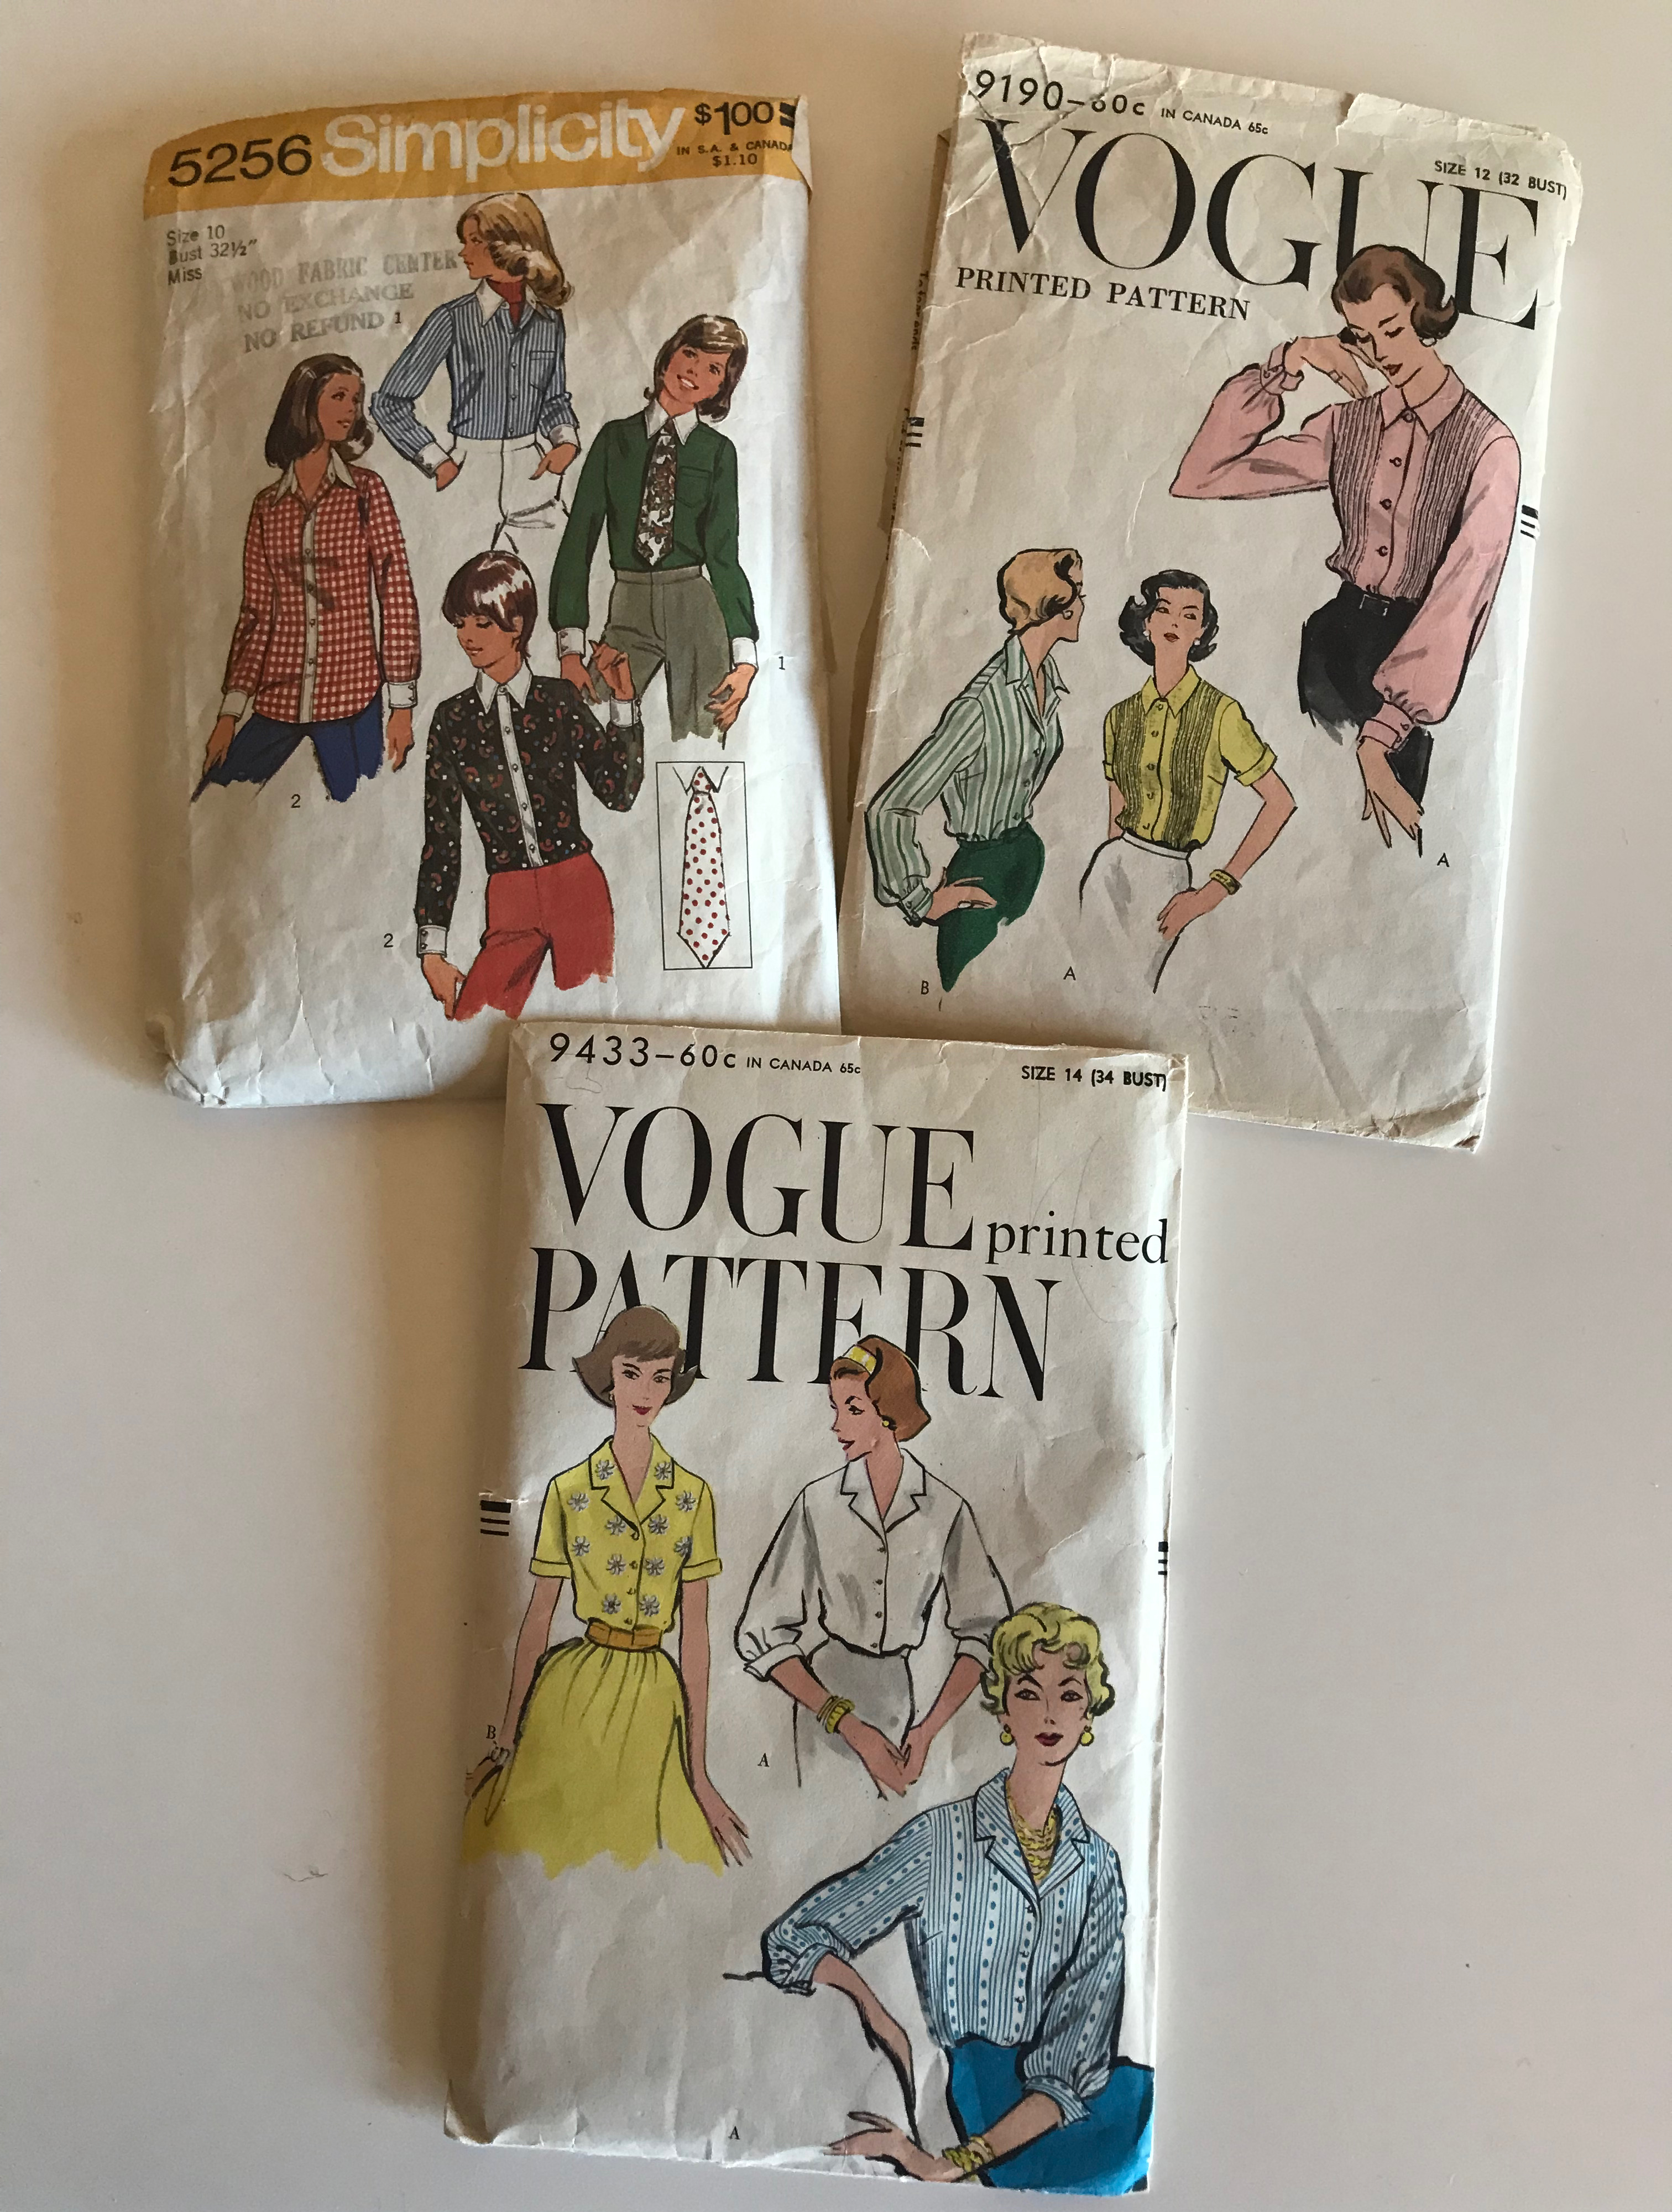
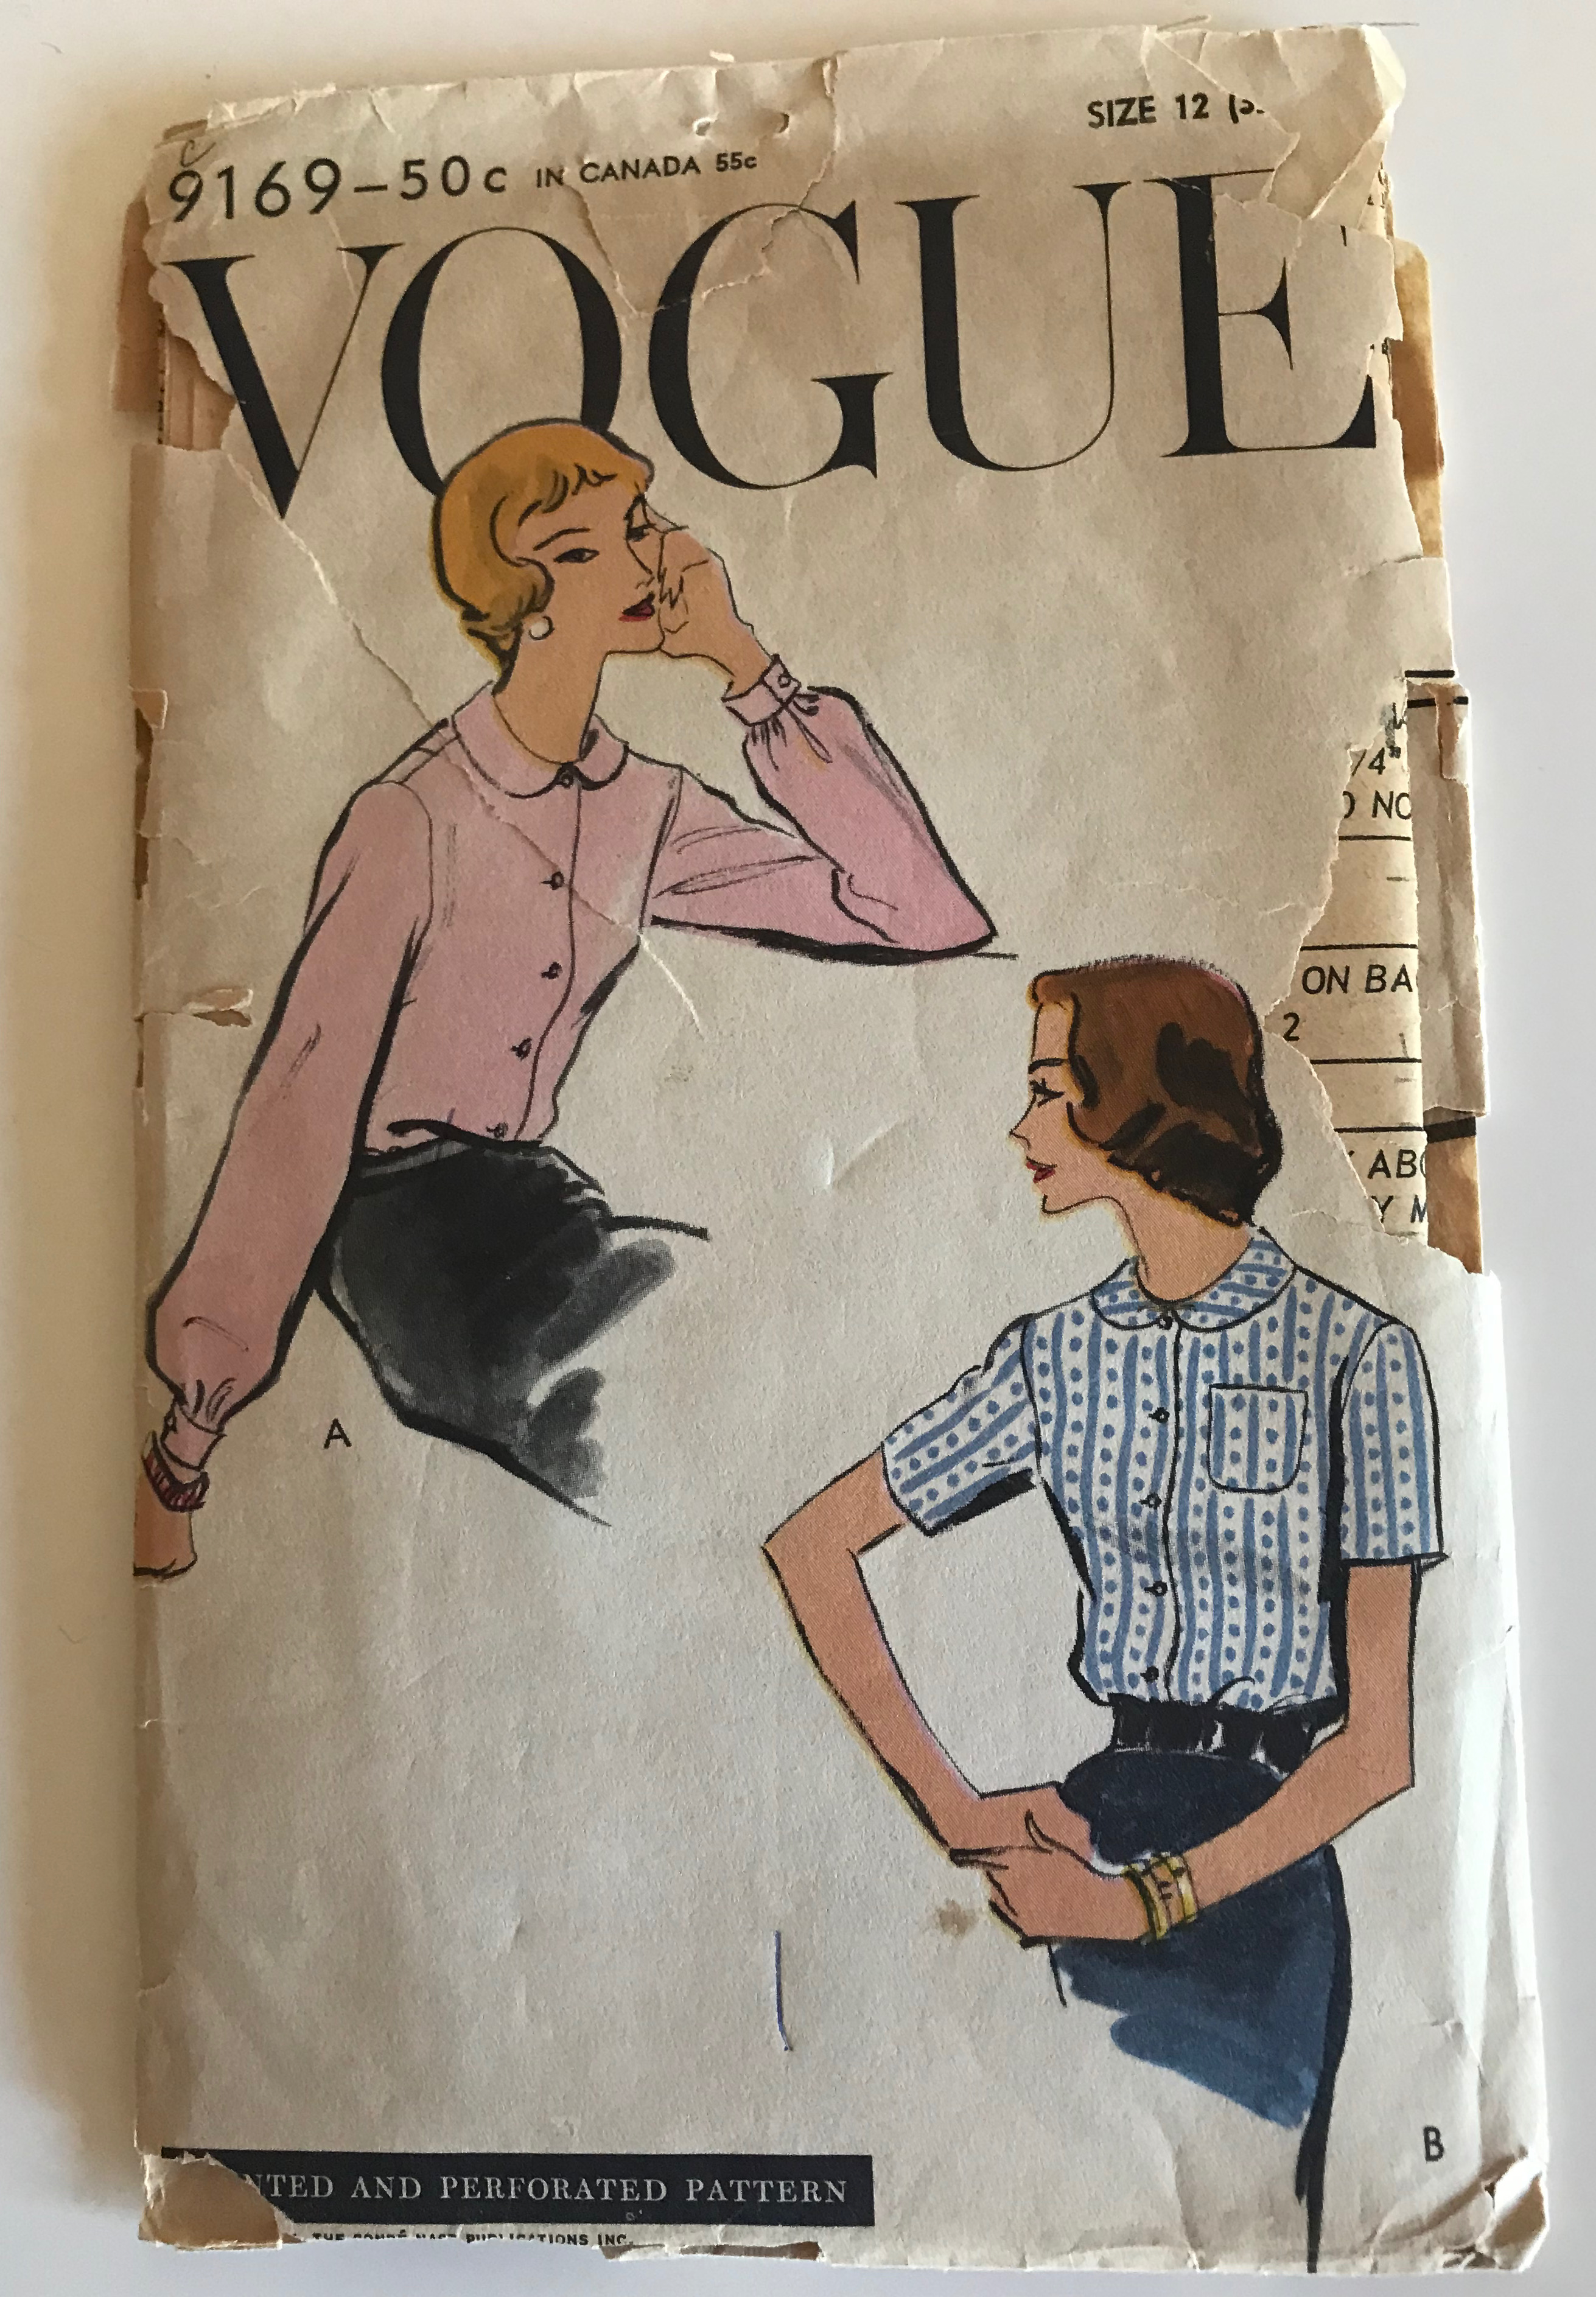
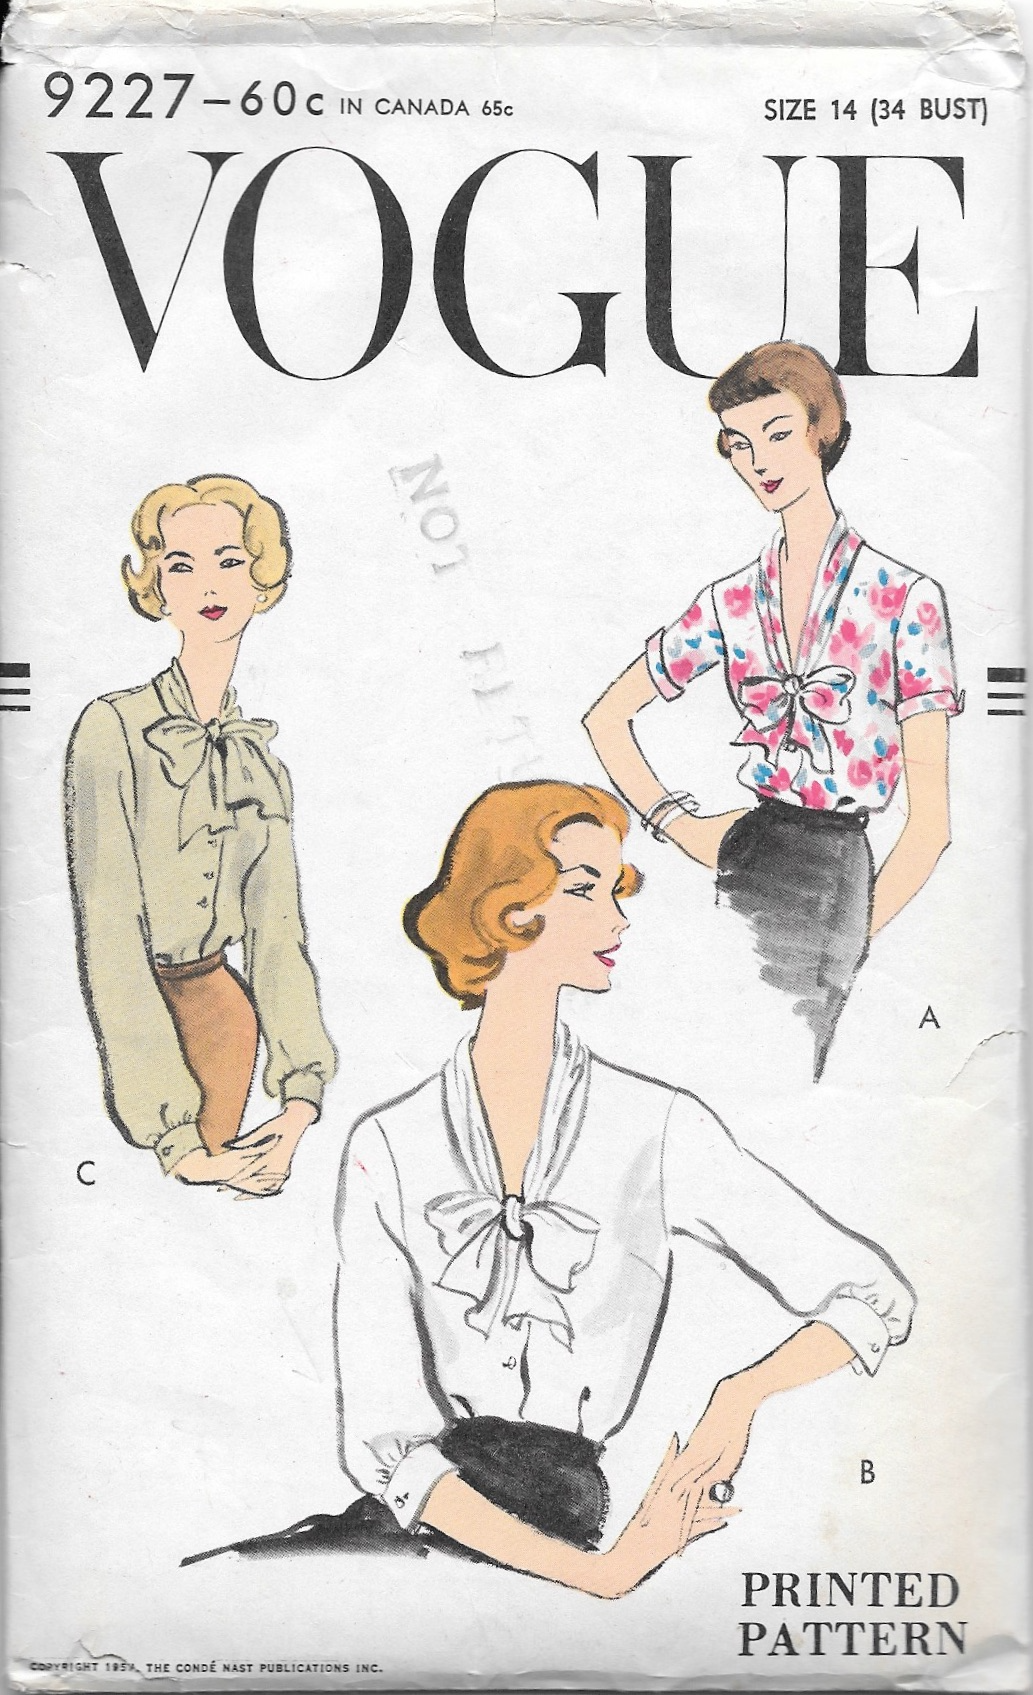
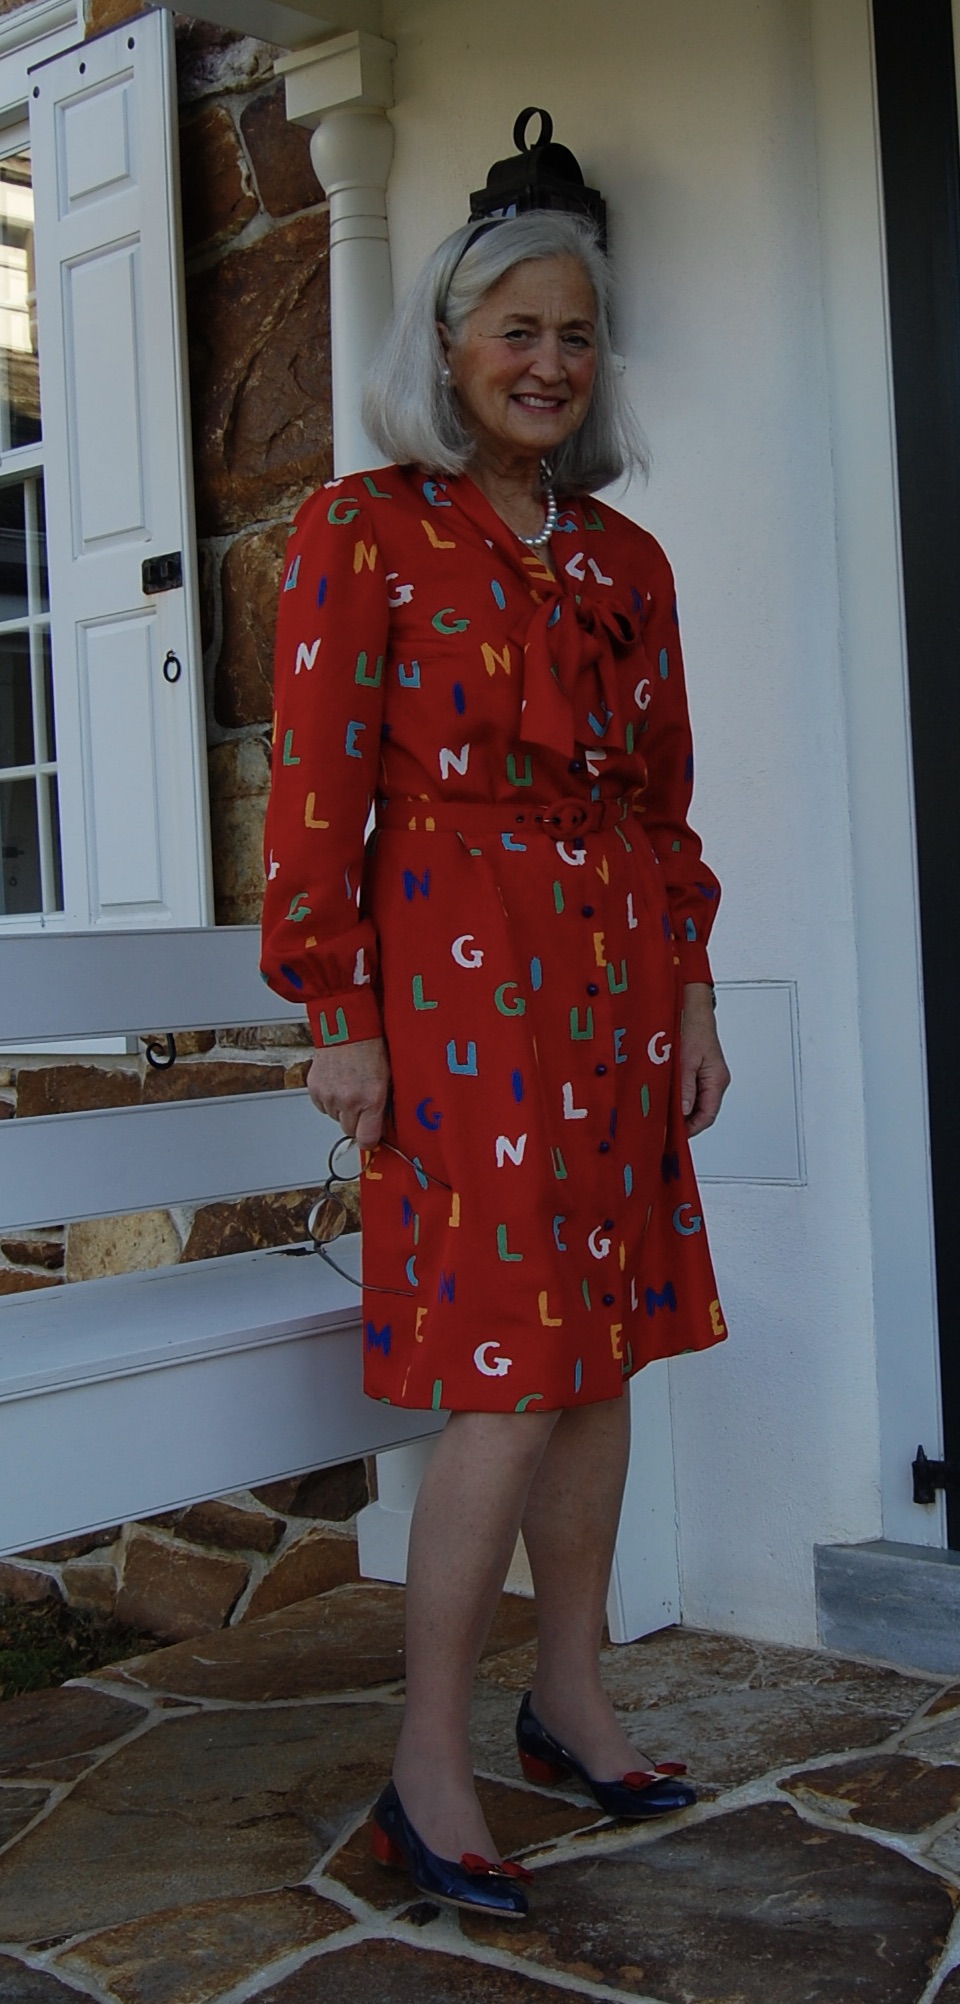
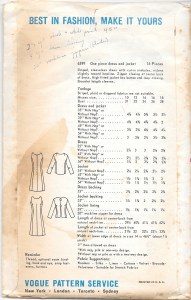
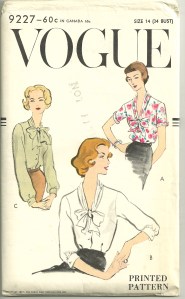
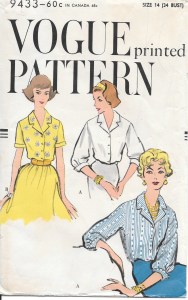
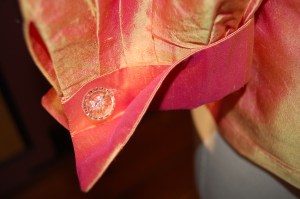
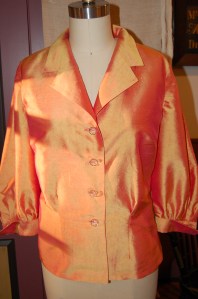
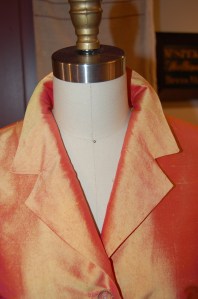
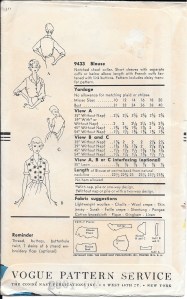
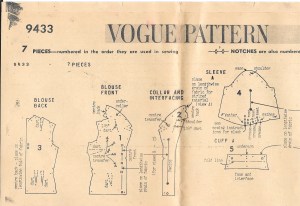
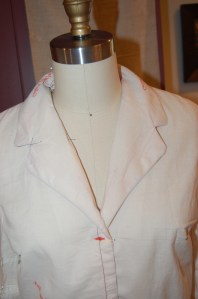
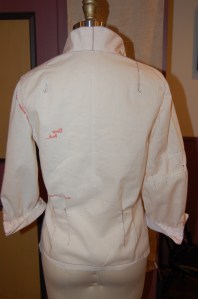
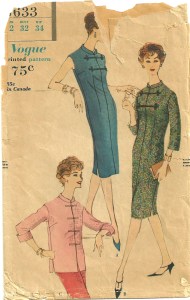
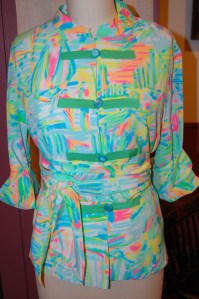
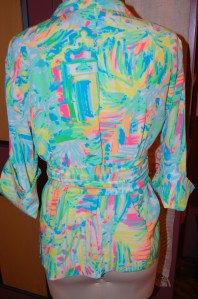
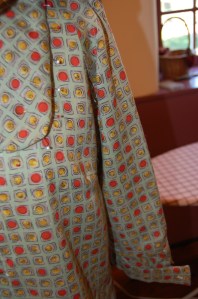
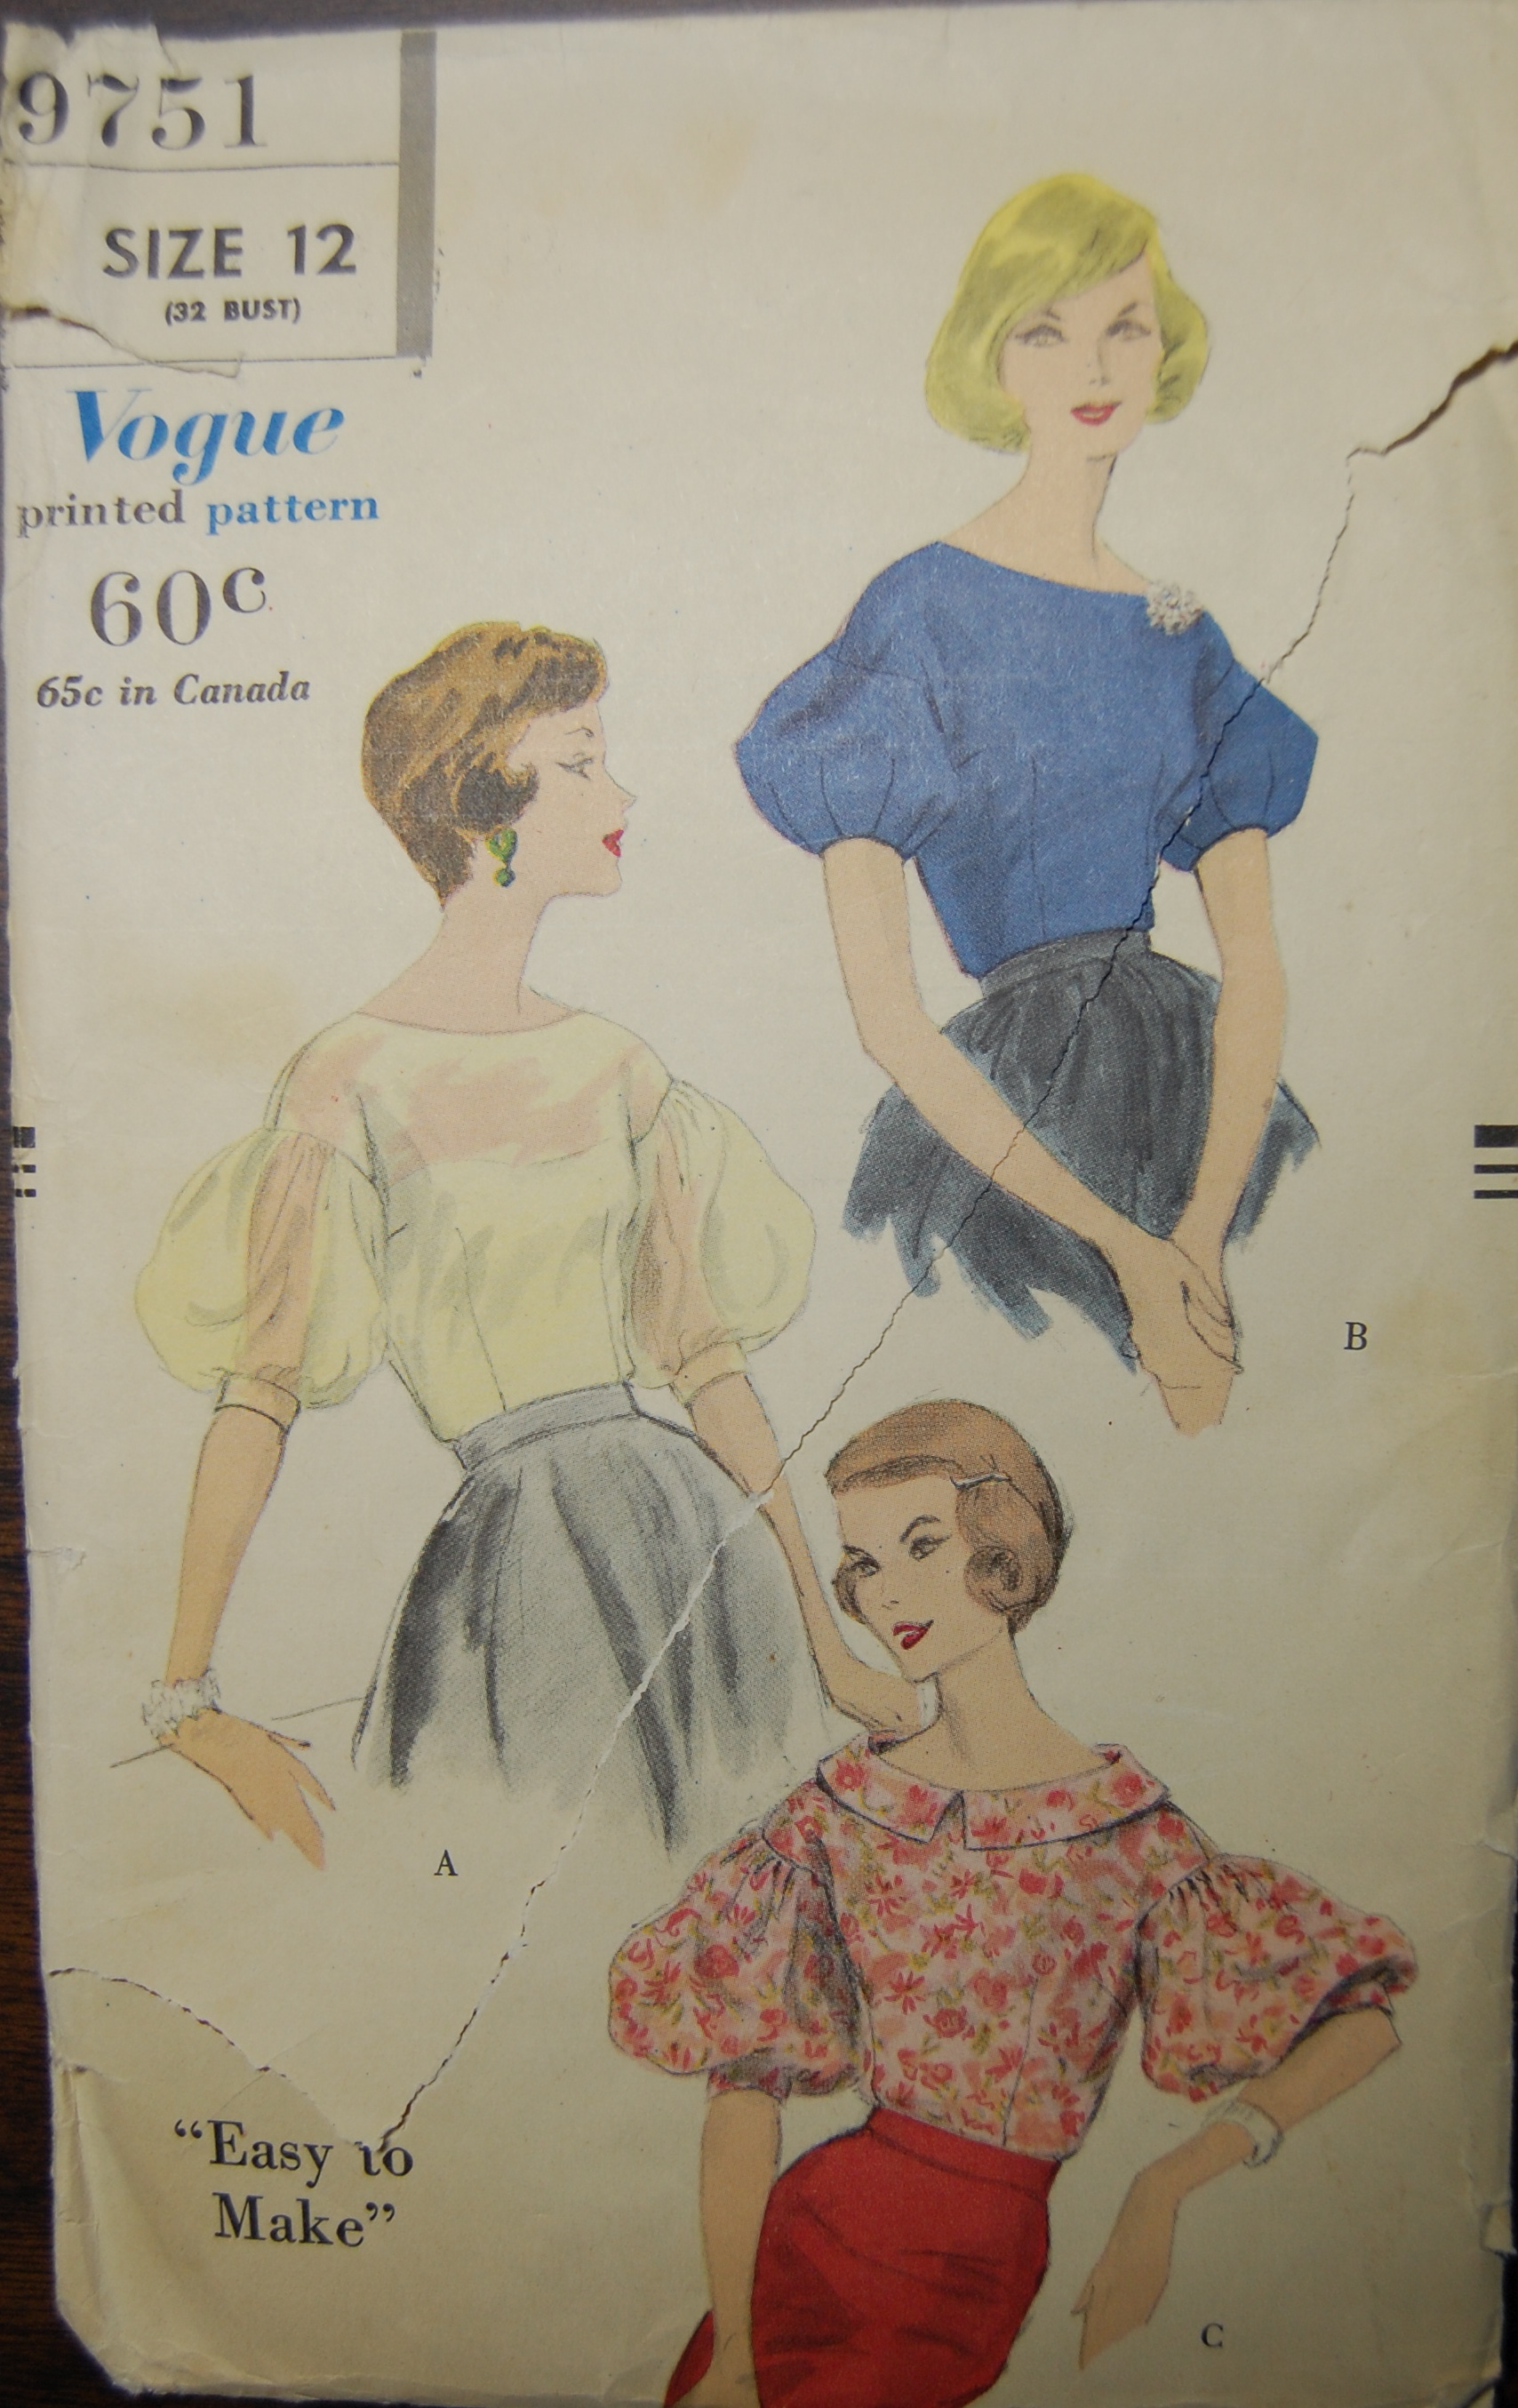
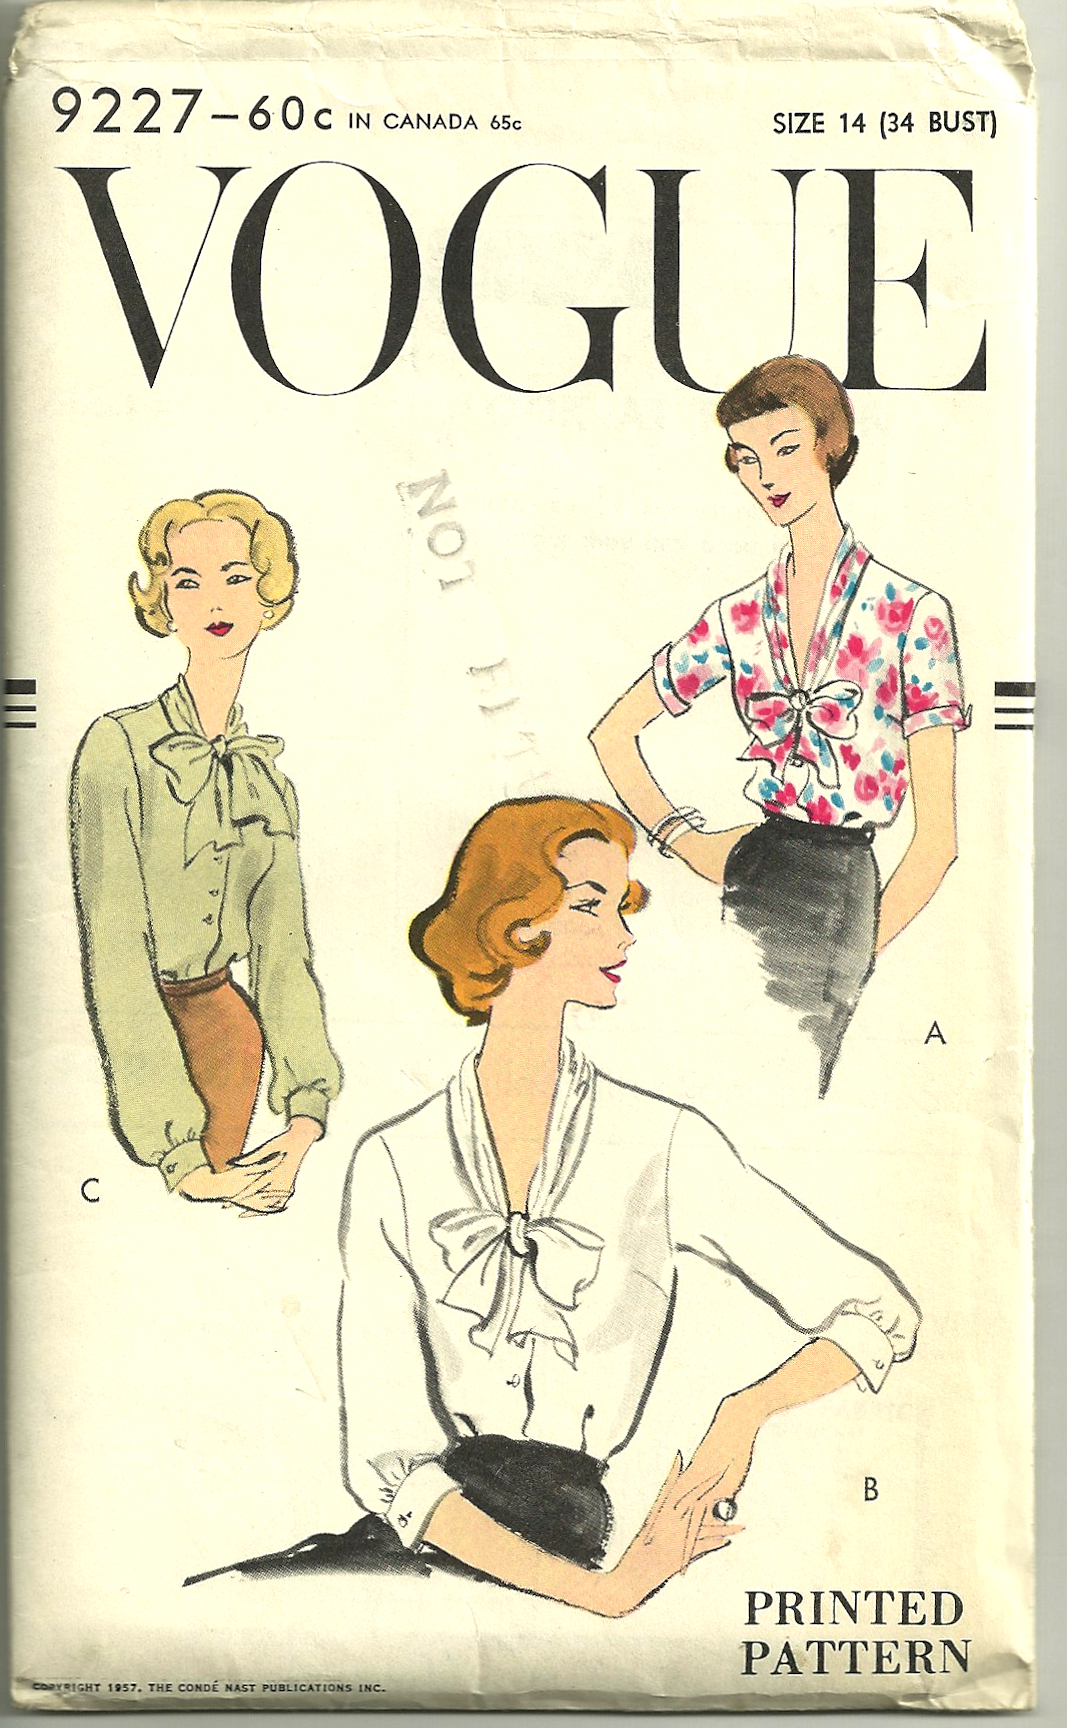
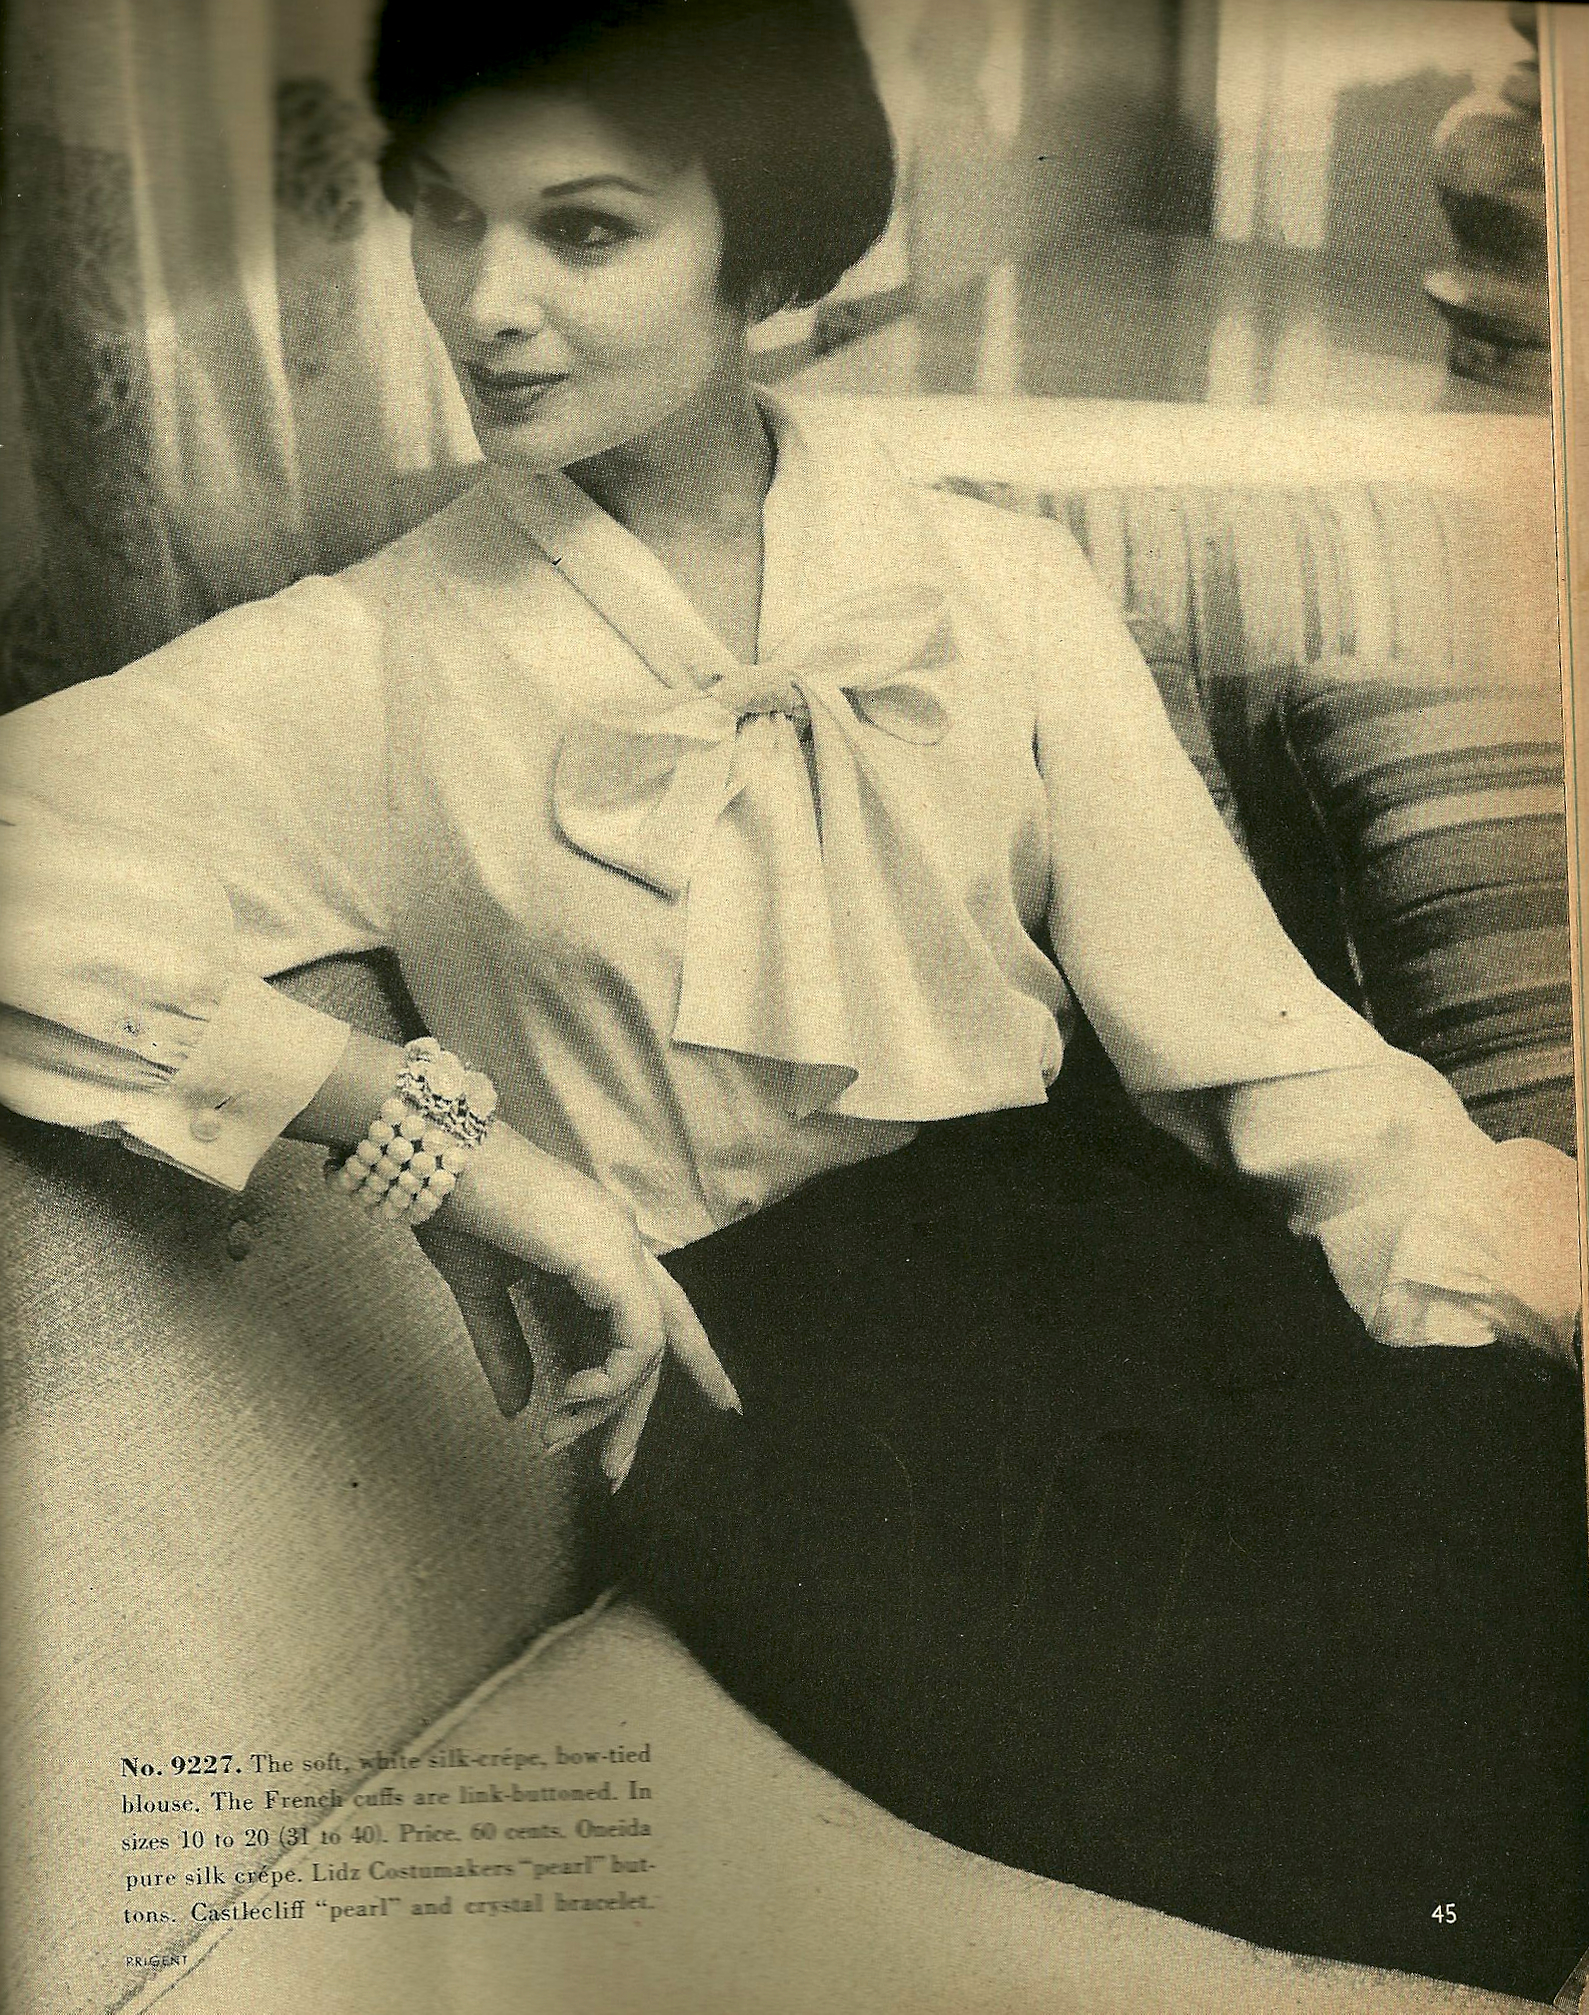
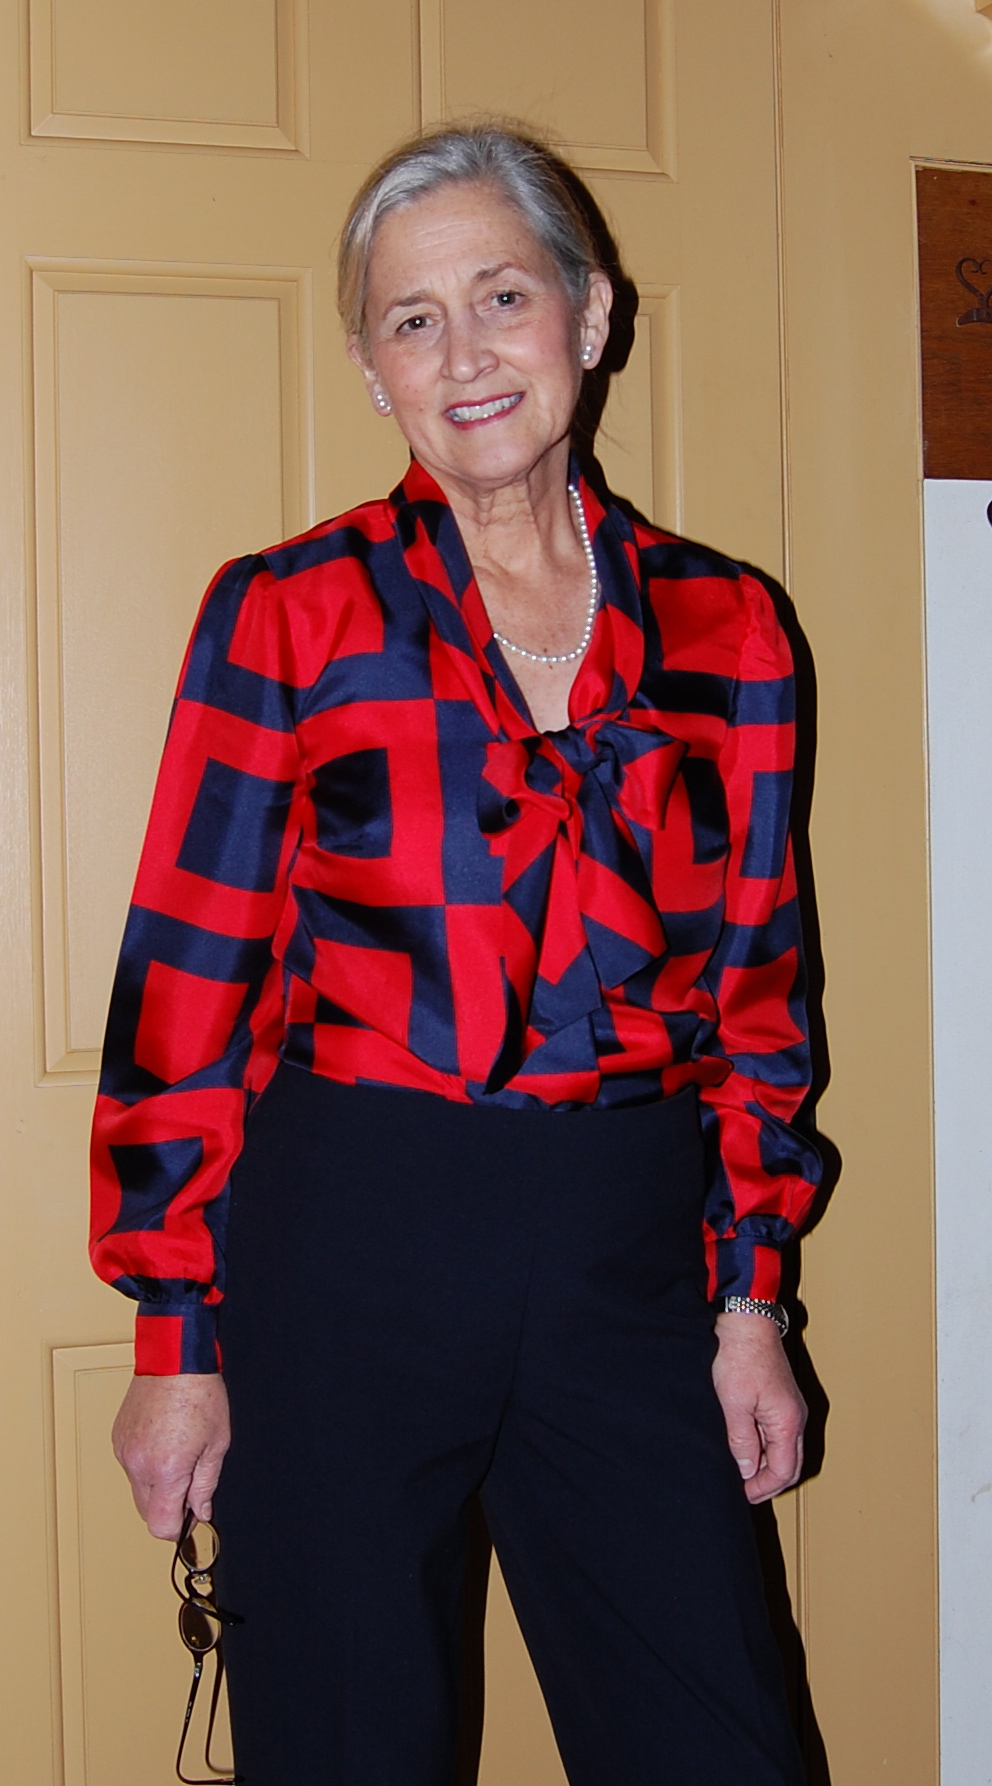
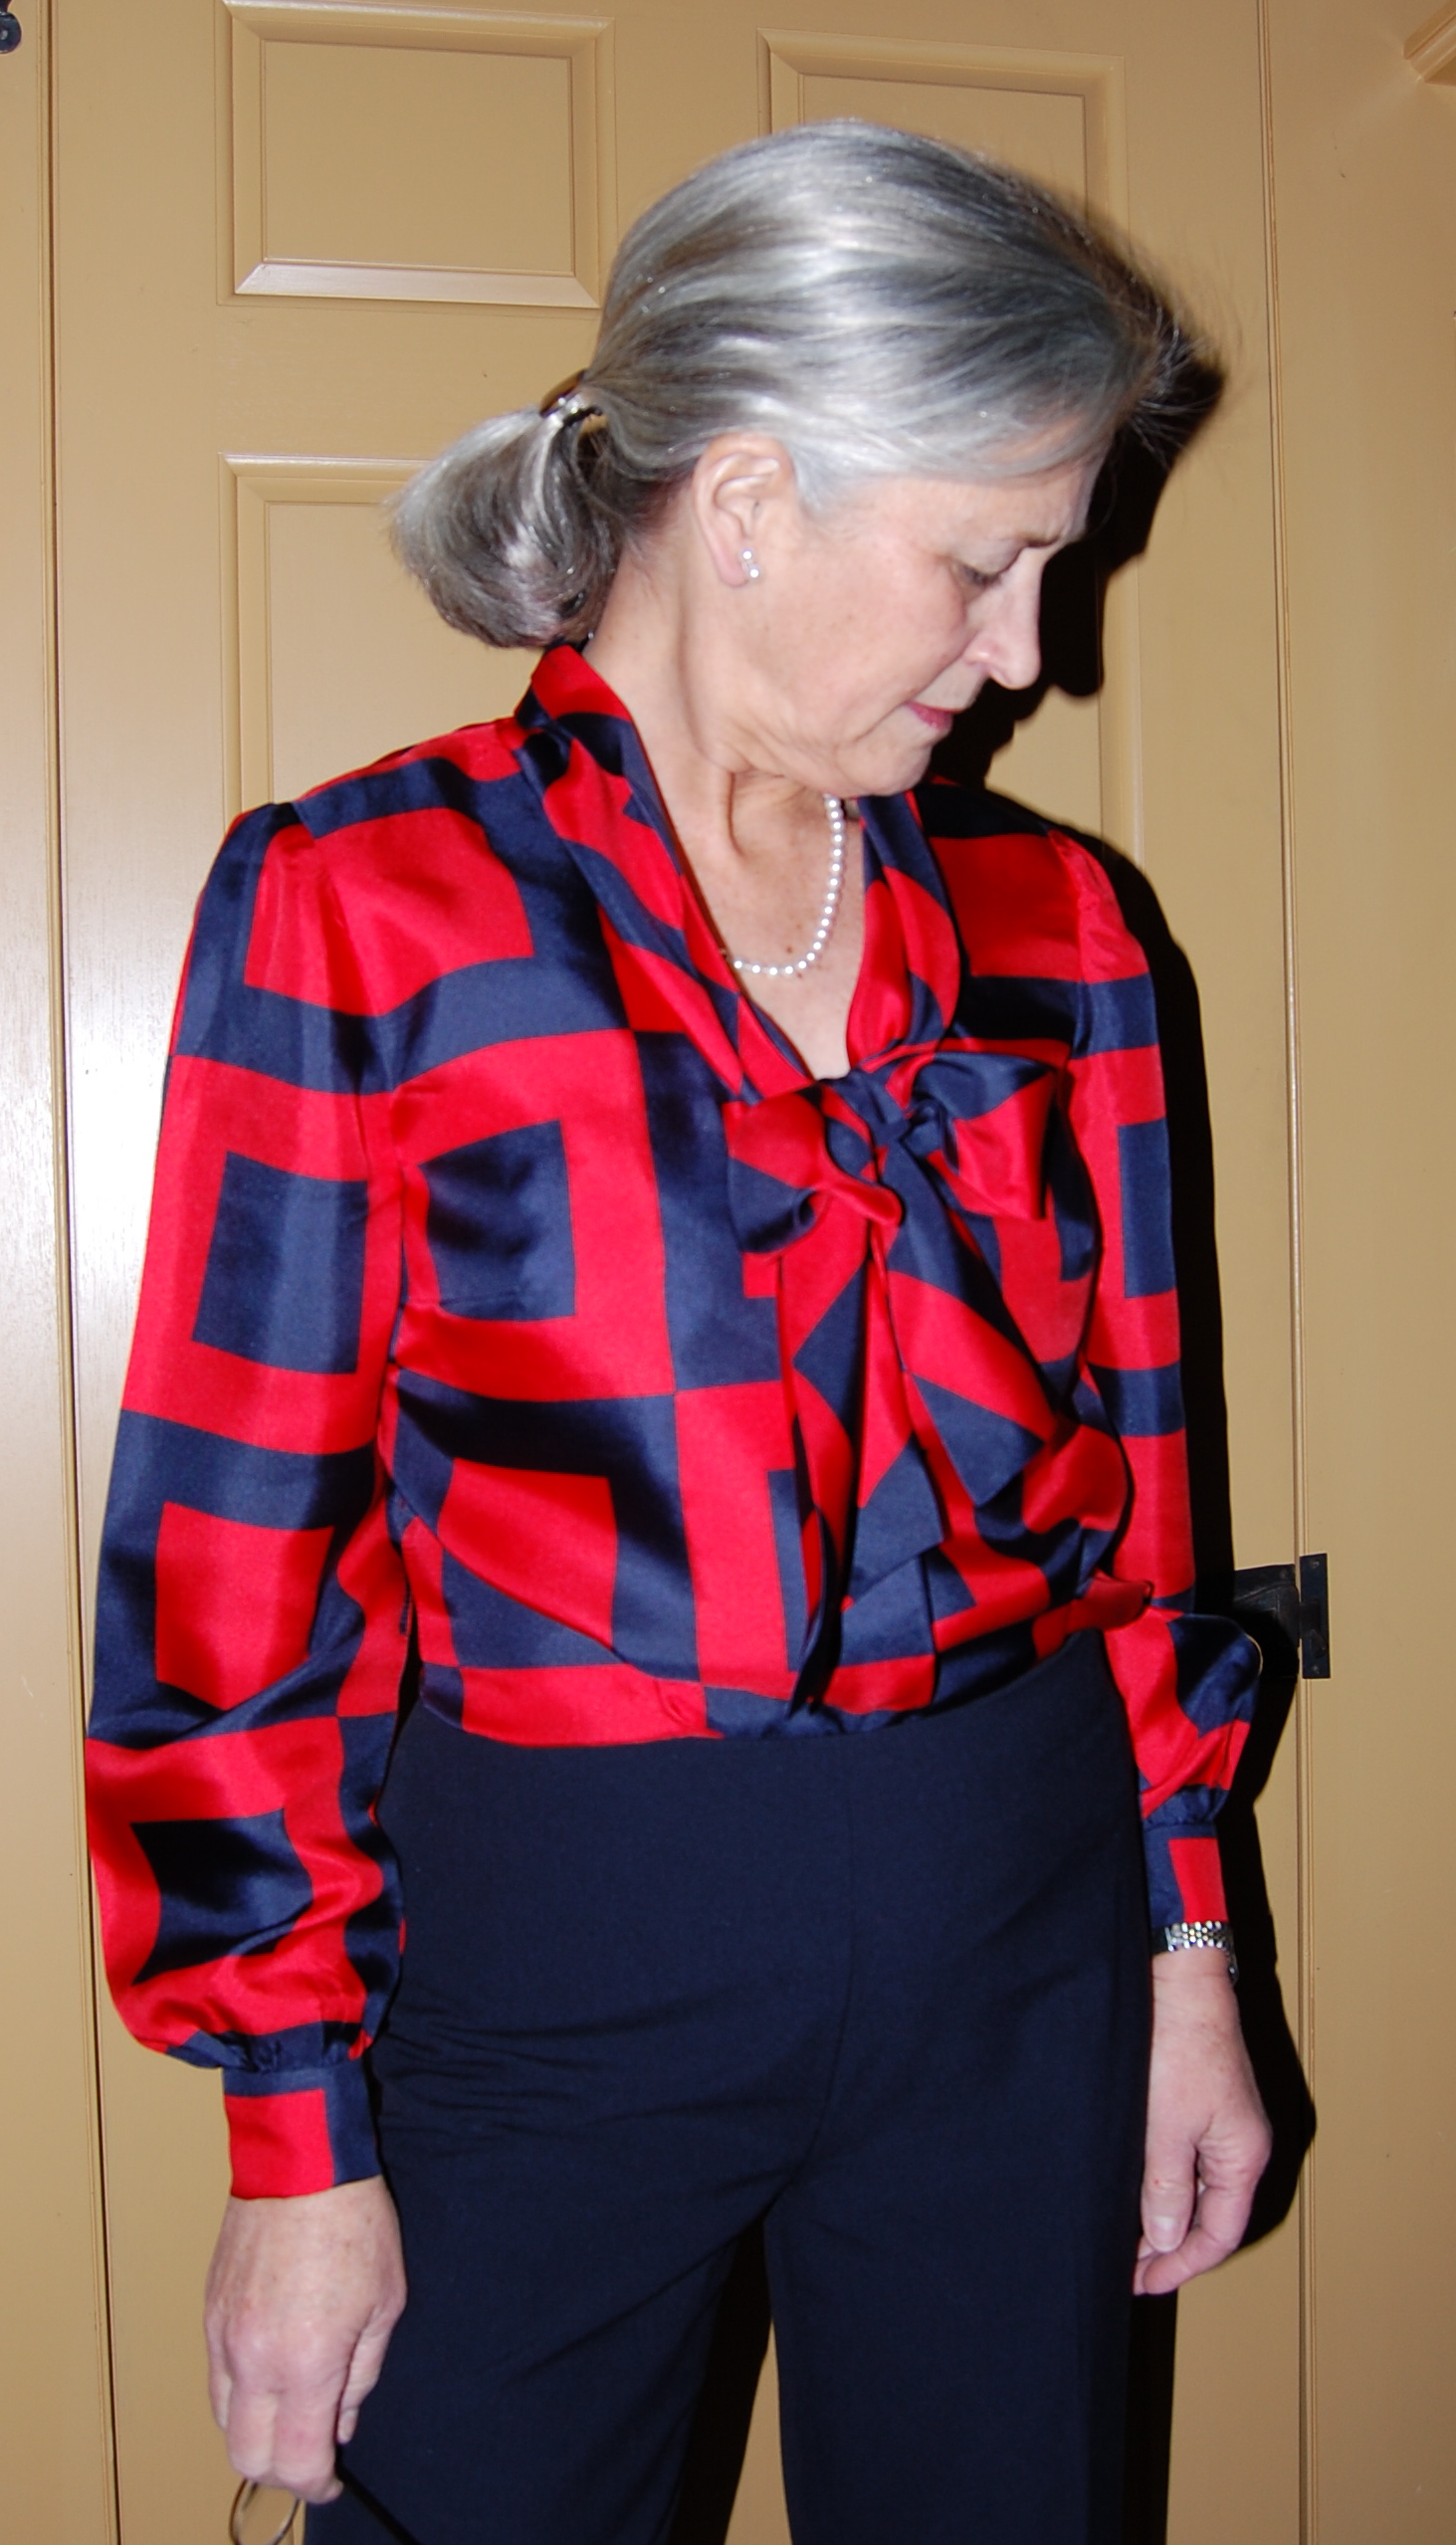
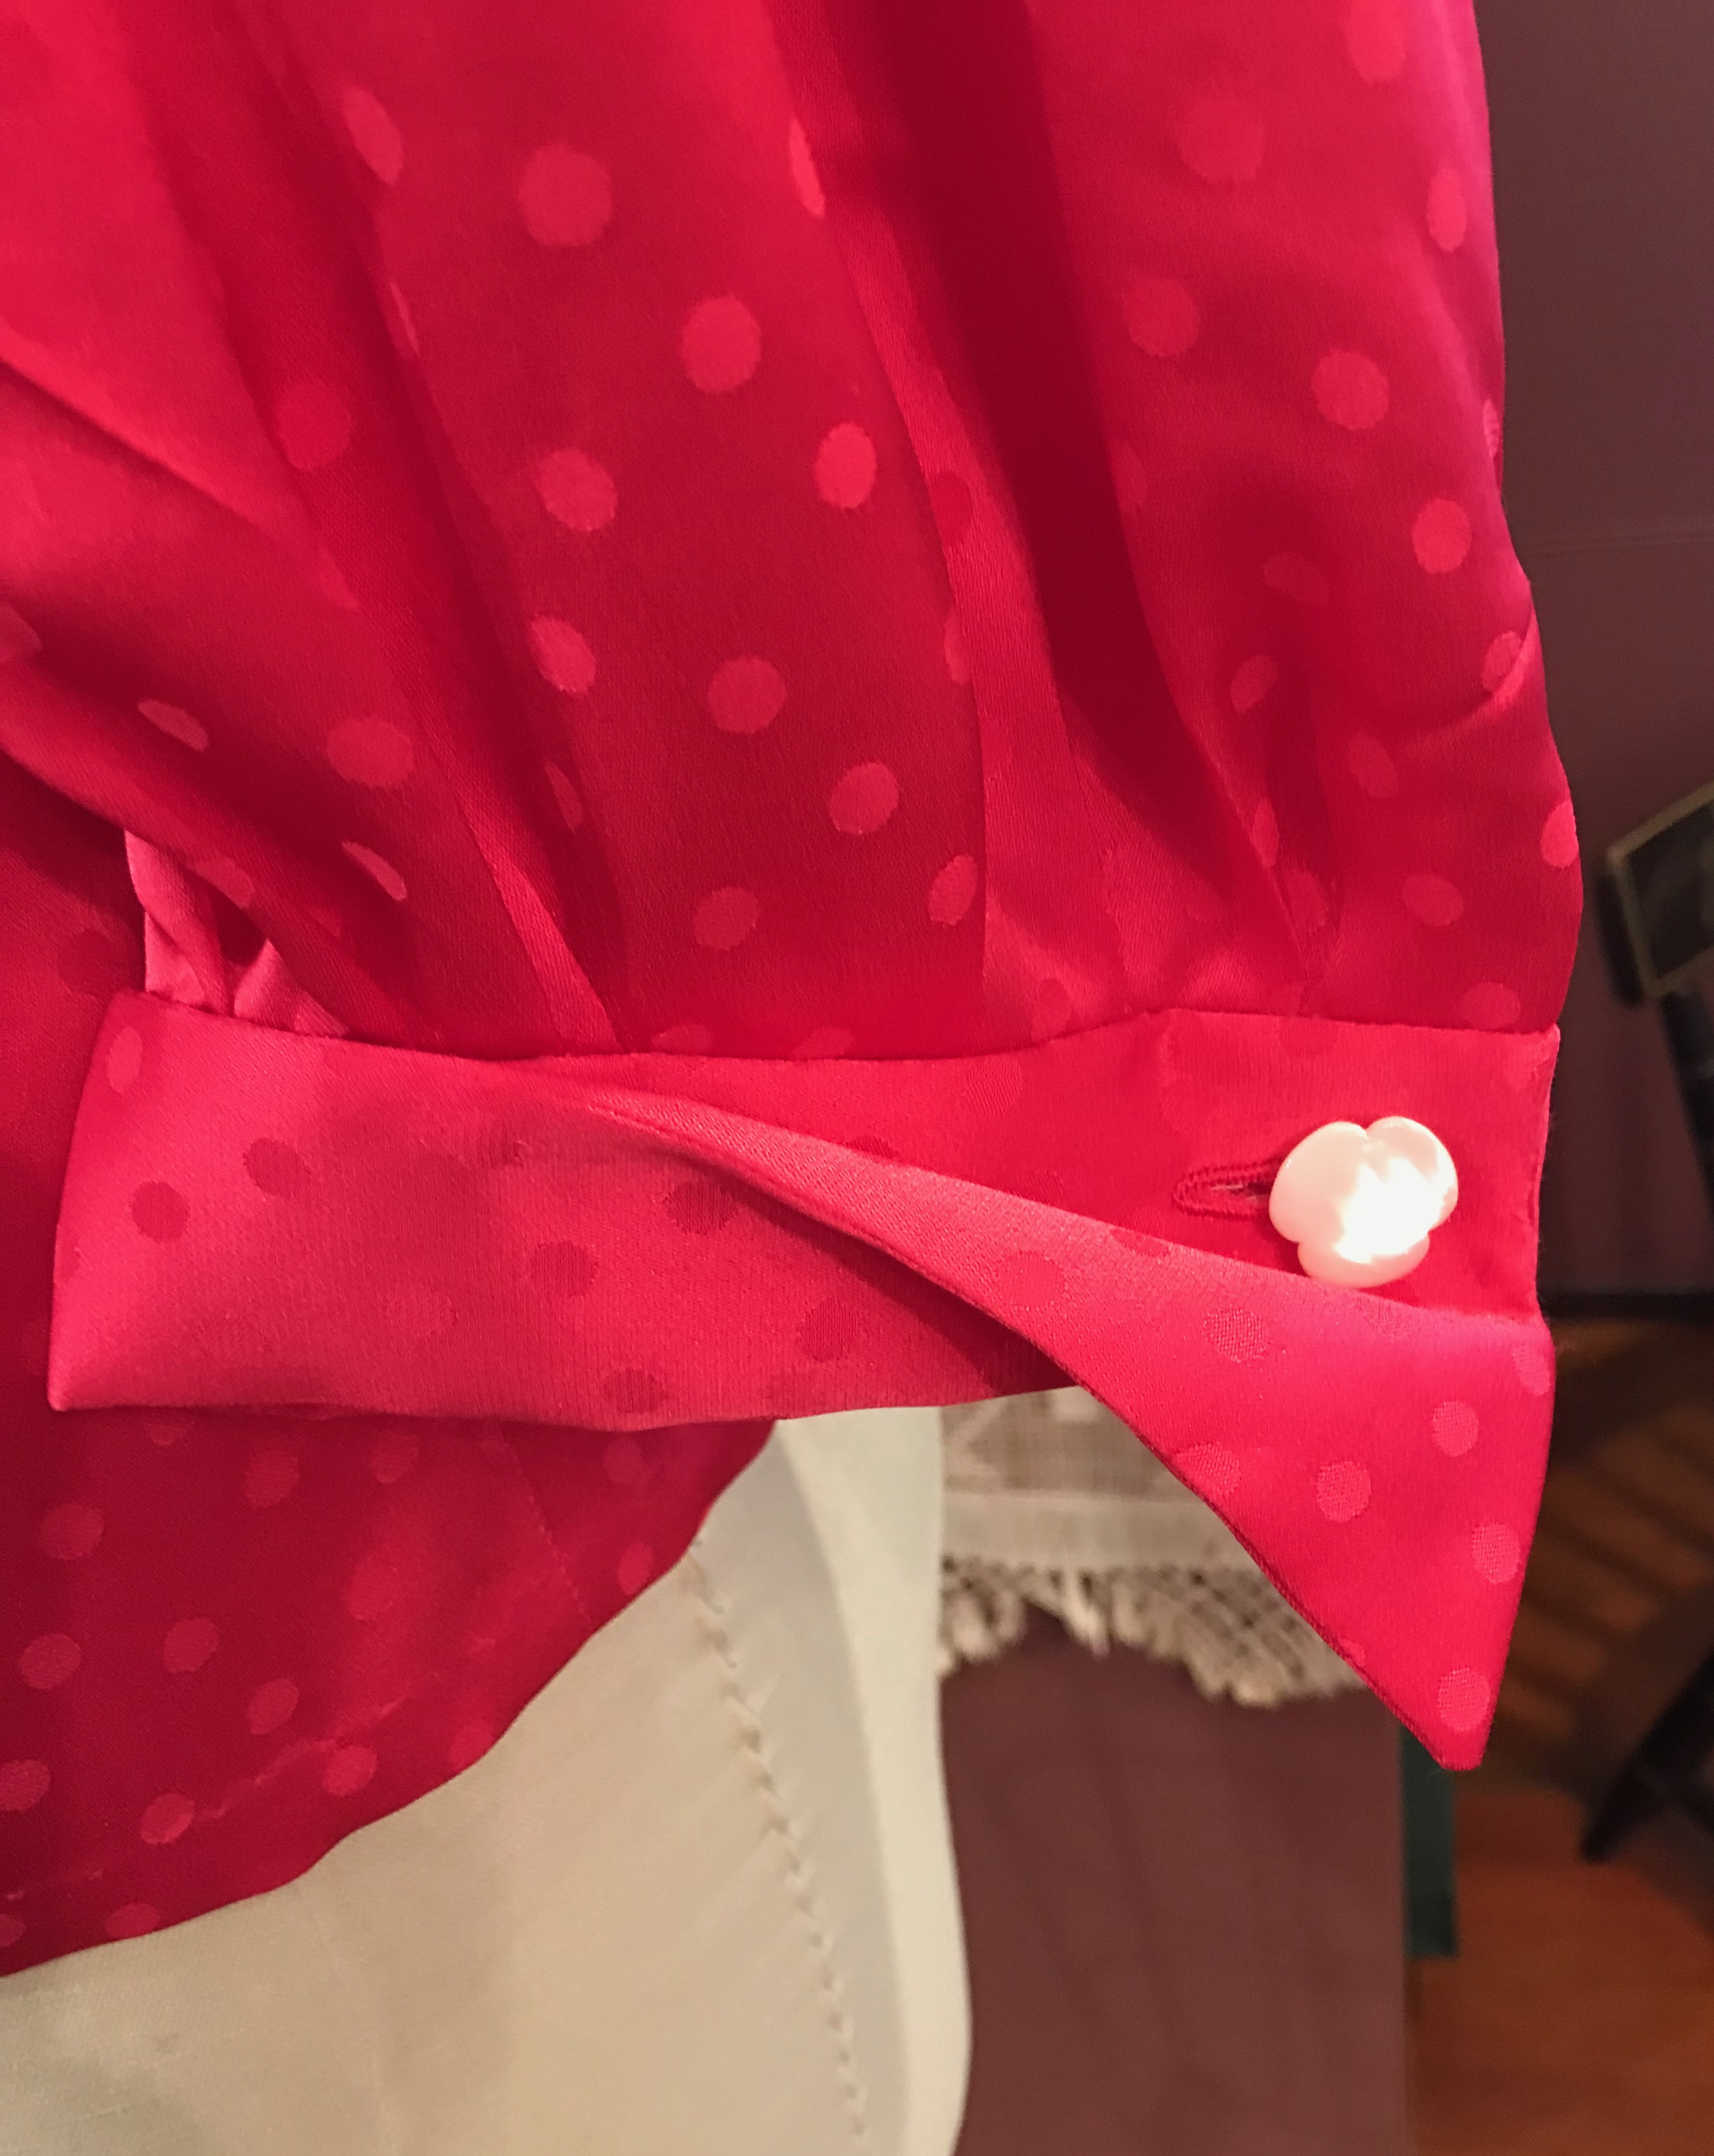
I used a blouse pattern which I have made once before.  From 1957, this pattern is timeless with its elegant collar (which looks good lying flat or propped up around the neck), petite French cuffs and feminine three-quarter length sleeves.  I suppose in 1957, this style blouse may have been considered a casual piece, which the illustrations on the pattern envelope suggest.  I saw this blouse as dressy, however, and that is how I have interpreted it. 

The collar on this blouse is beautifully engineered.
Here is the first blouse, in silk dupioni, I made from this pattern.

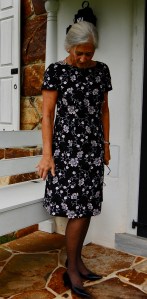
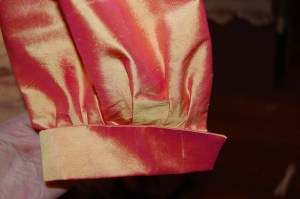
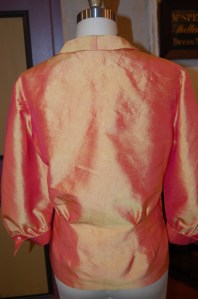
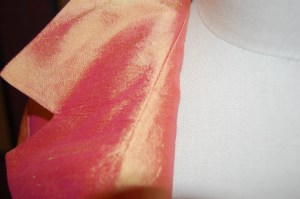
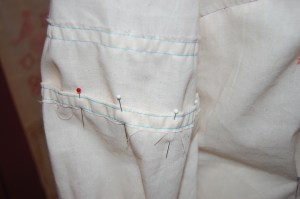
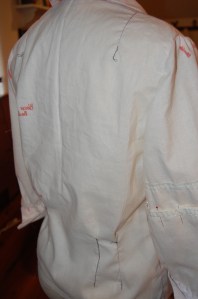
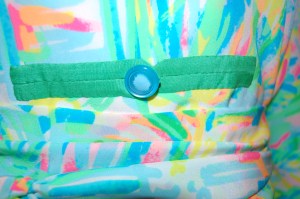
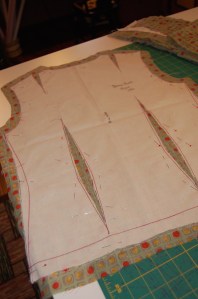
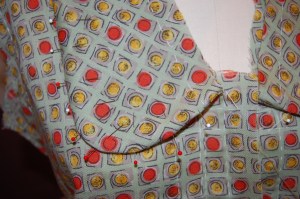
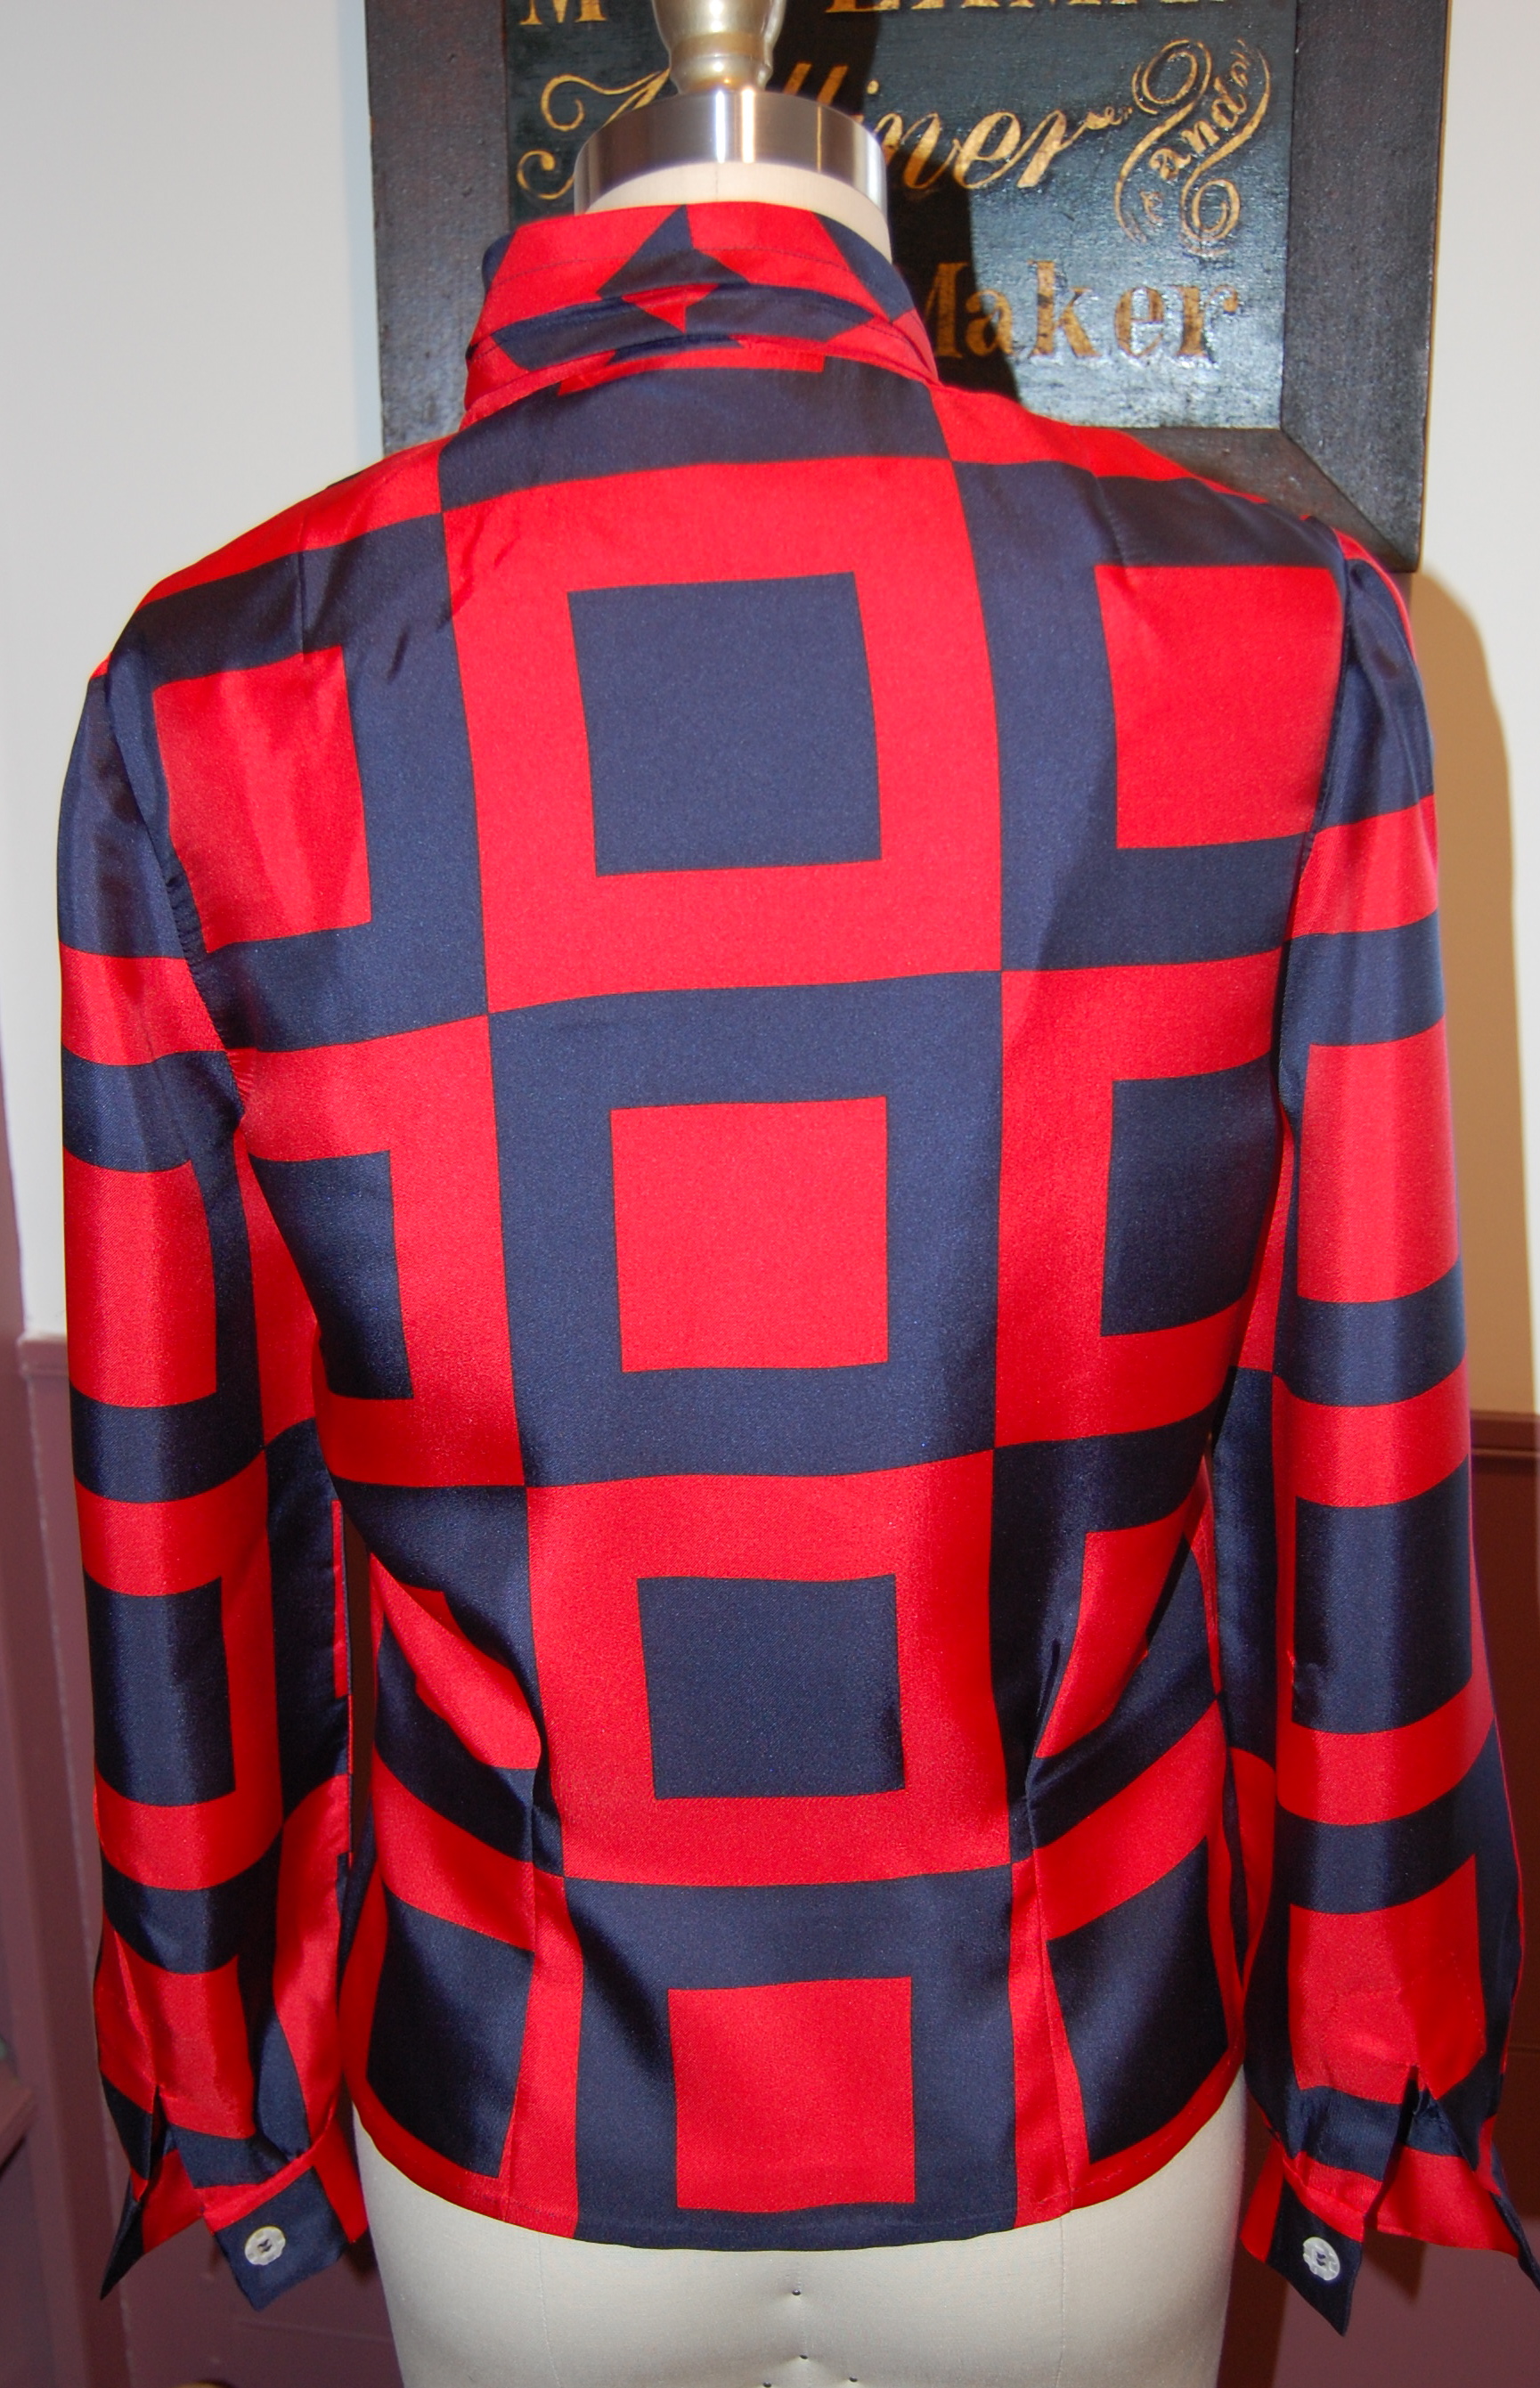
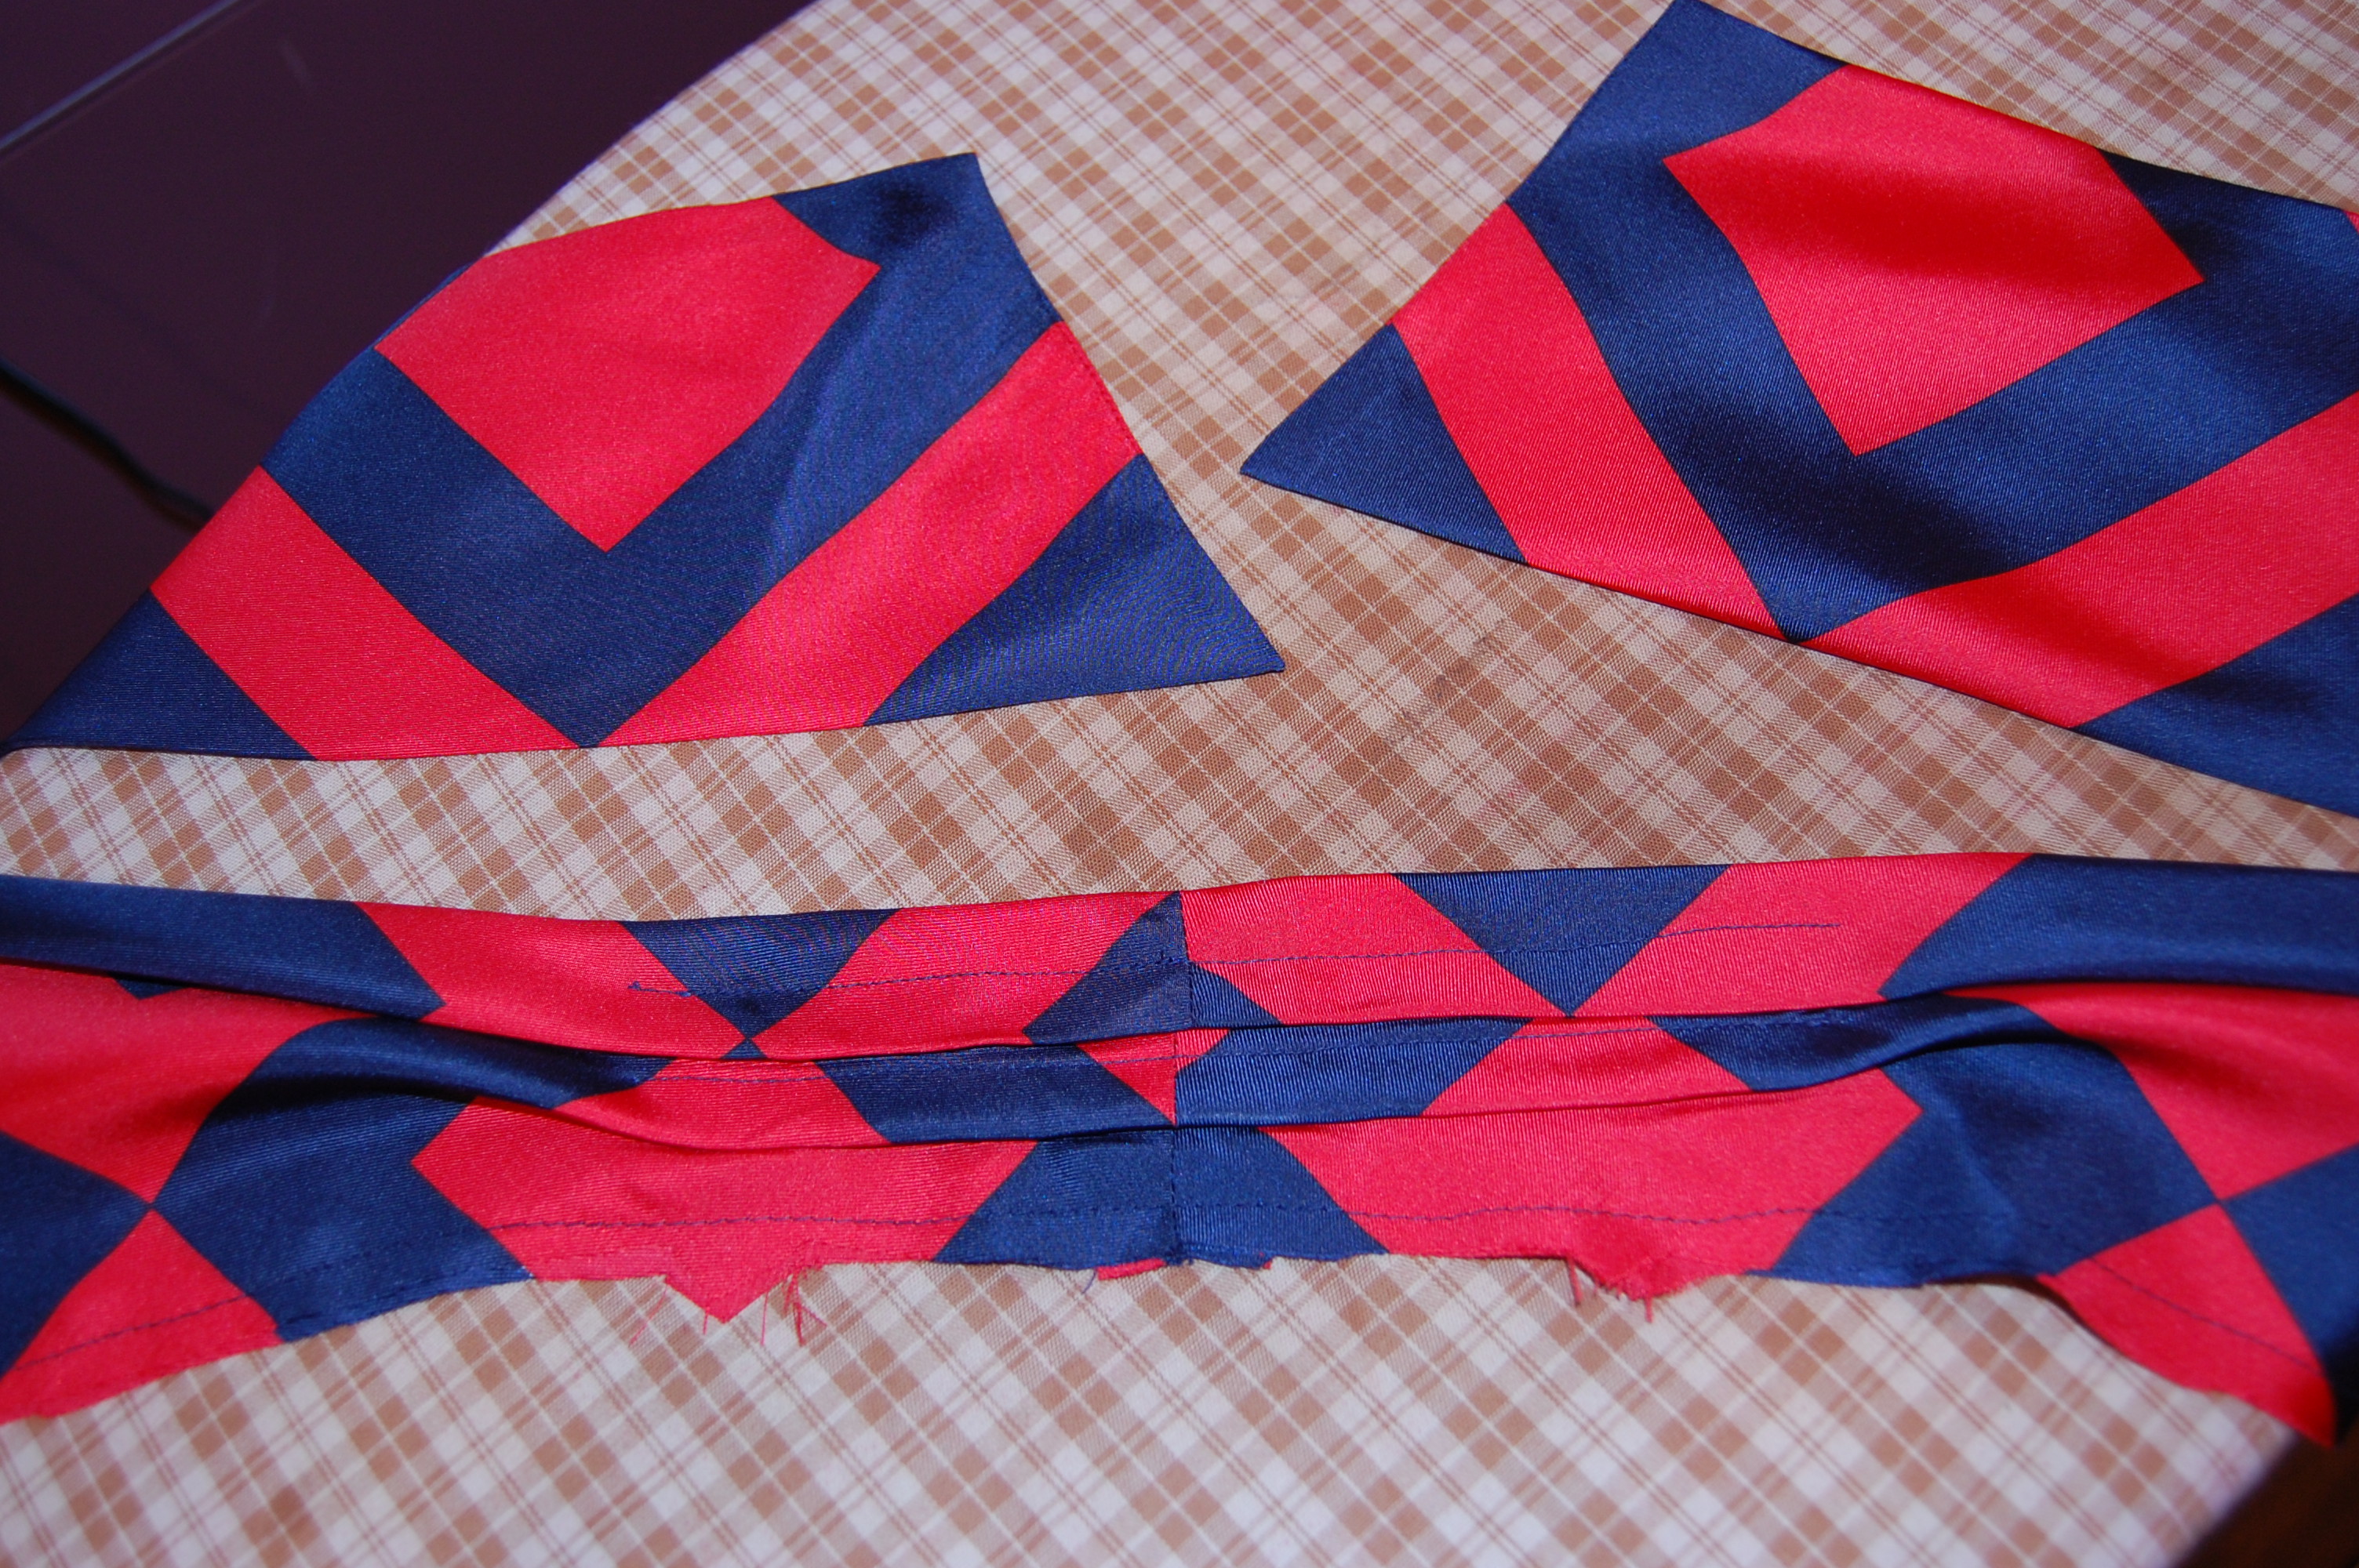
One of the details which make this blouse so flattering to wear is the waistline open-ended darts, easily visible above.  They minimize the bulk when the blouse is tucked inside its skirt and add a lovely billow effect above the waist. I made these darts a bit shallower than the pattern indicated.  When making these darts, I secured their upper edges by pulling the thread tail on one side to the other side so that I had the ability to knot those threads with three tight loops.  For those of you who have made a classic French jacket, this is the same method used to secure the quilting stitches at the end of the columns. The photo below helps to show this.

The darts are secured by knots done by hand both top and bottom.
Those open-ended darts are featured on the back of the bodice, too.

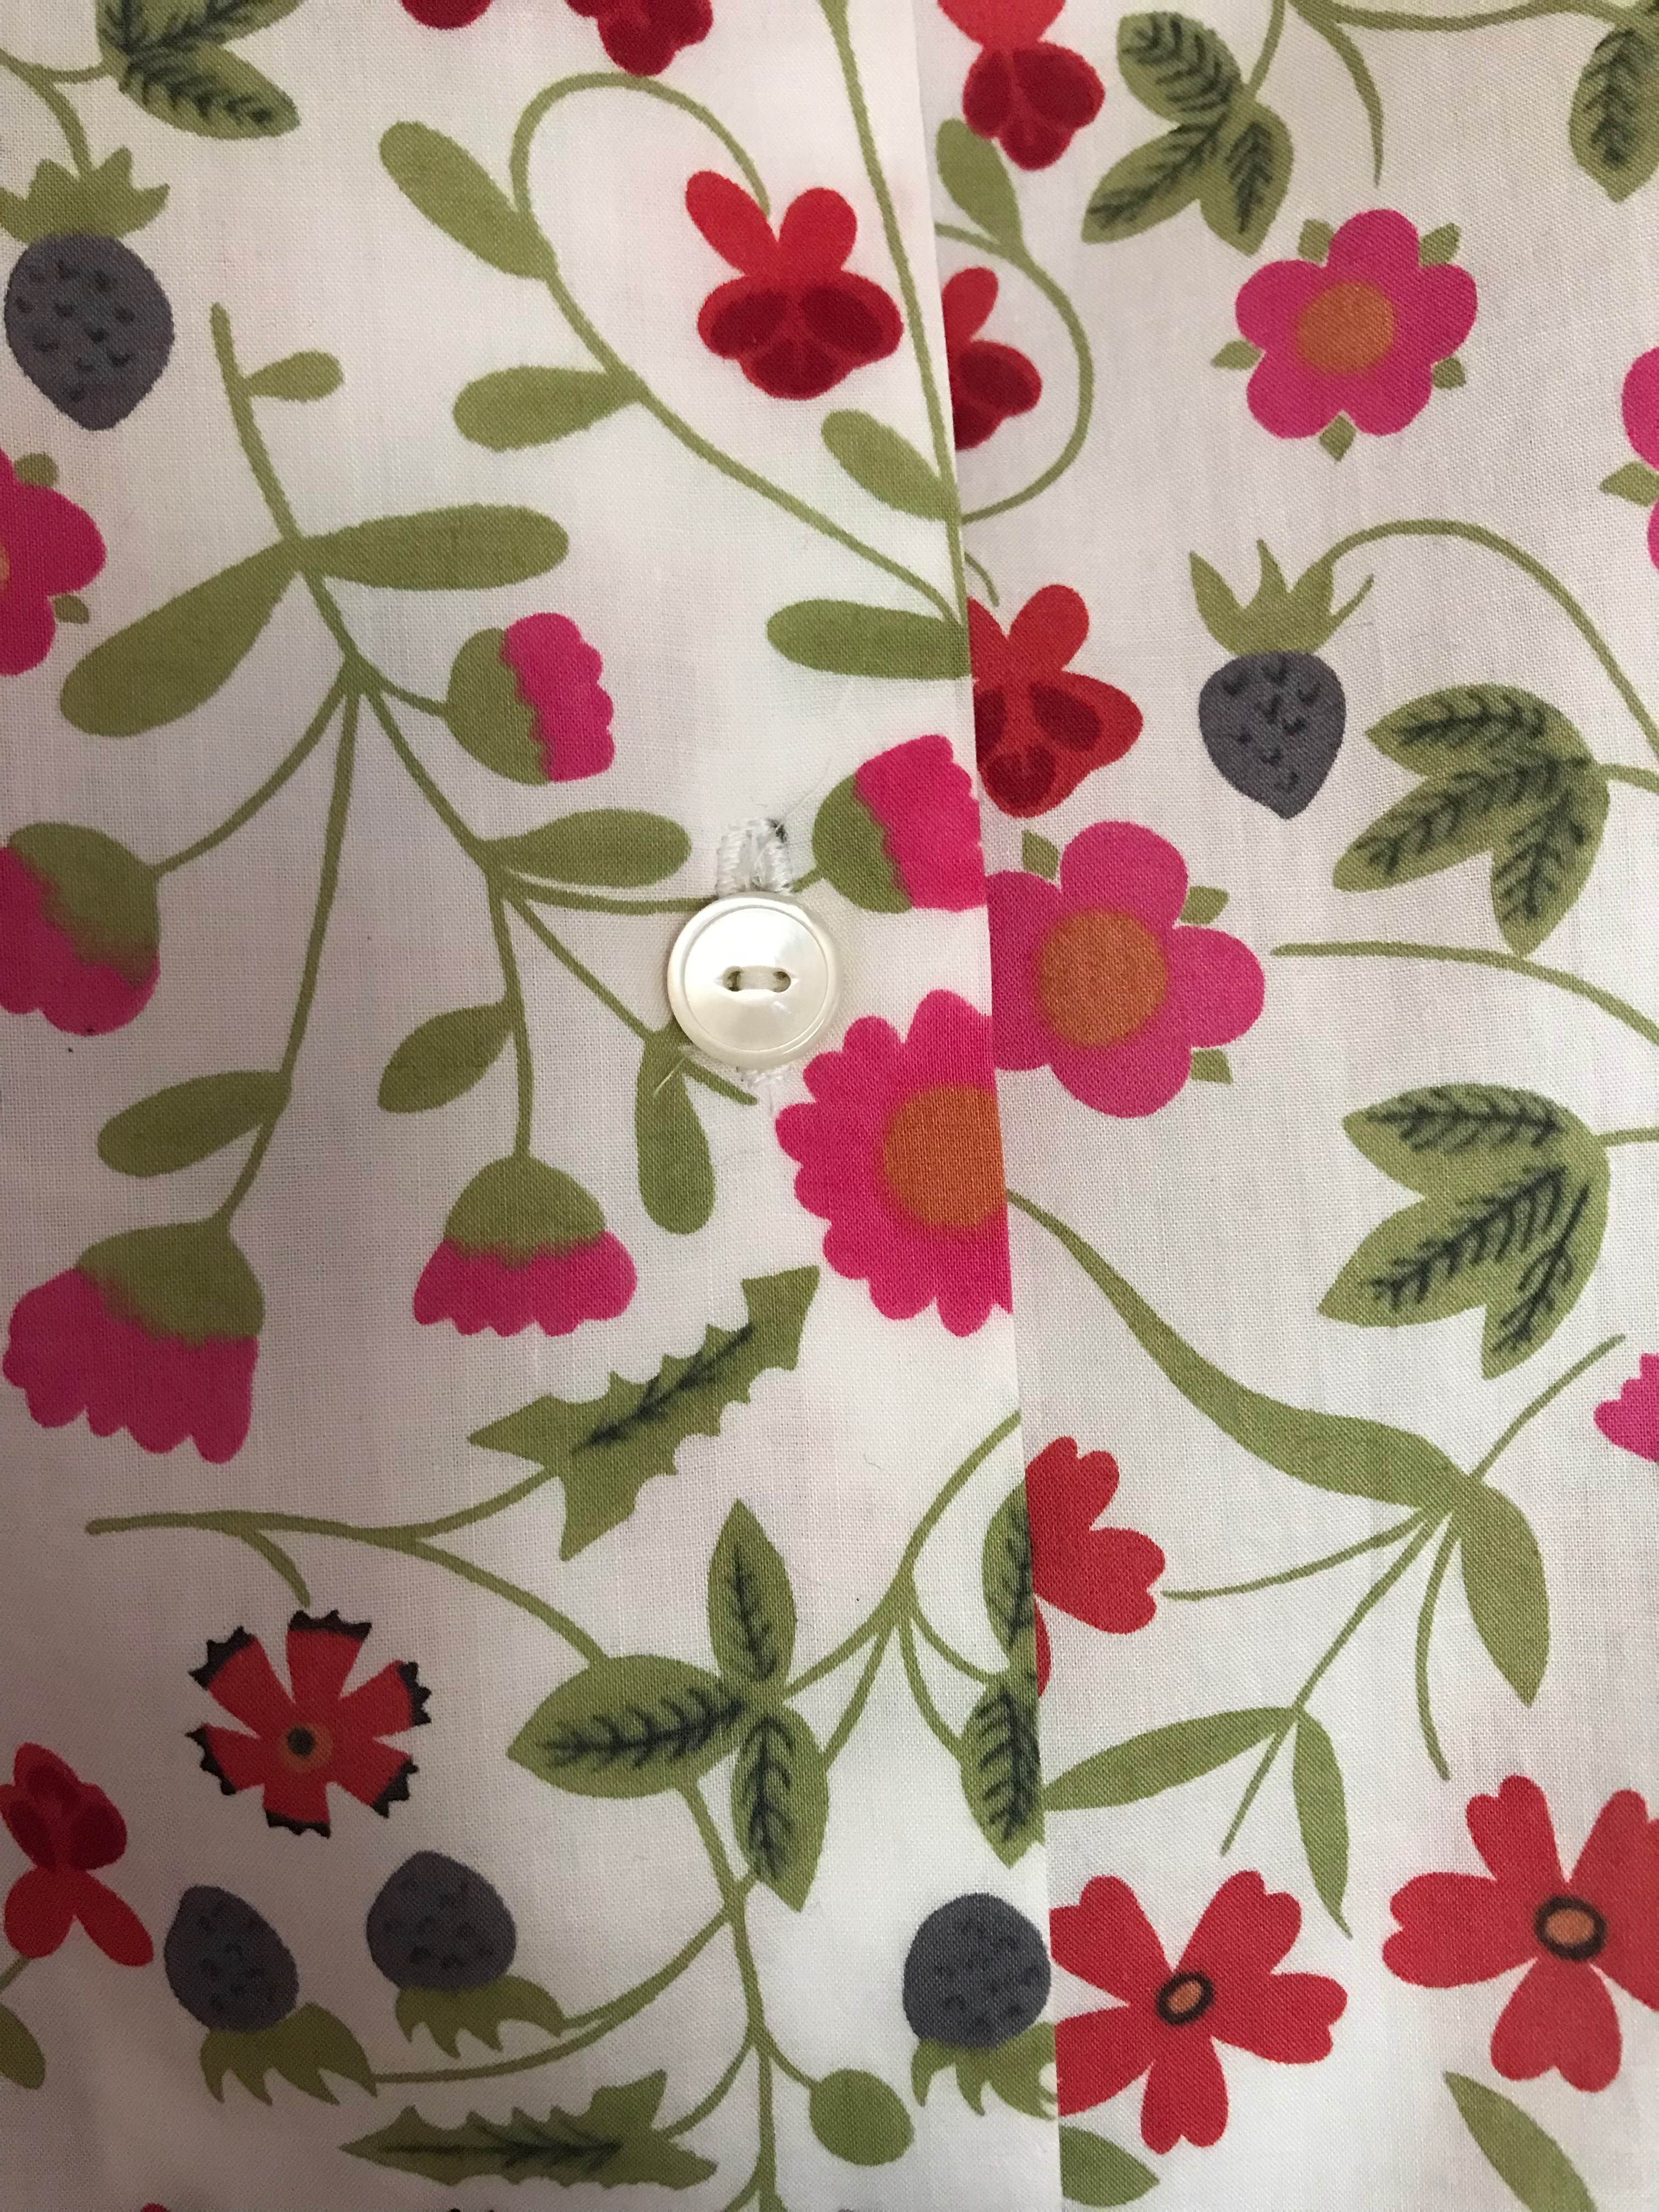
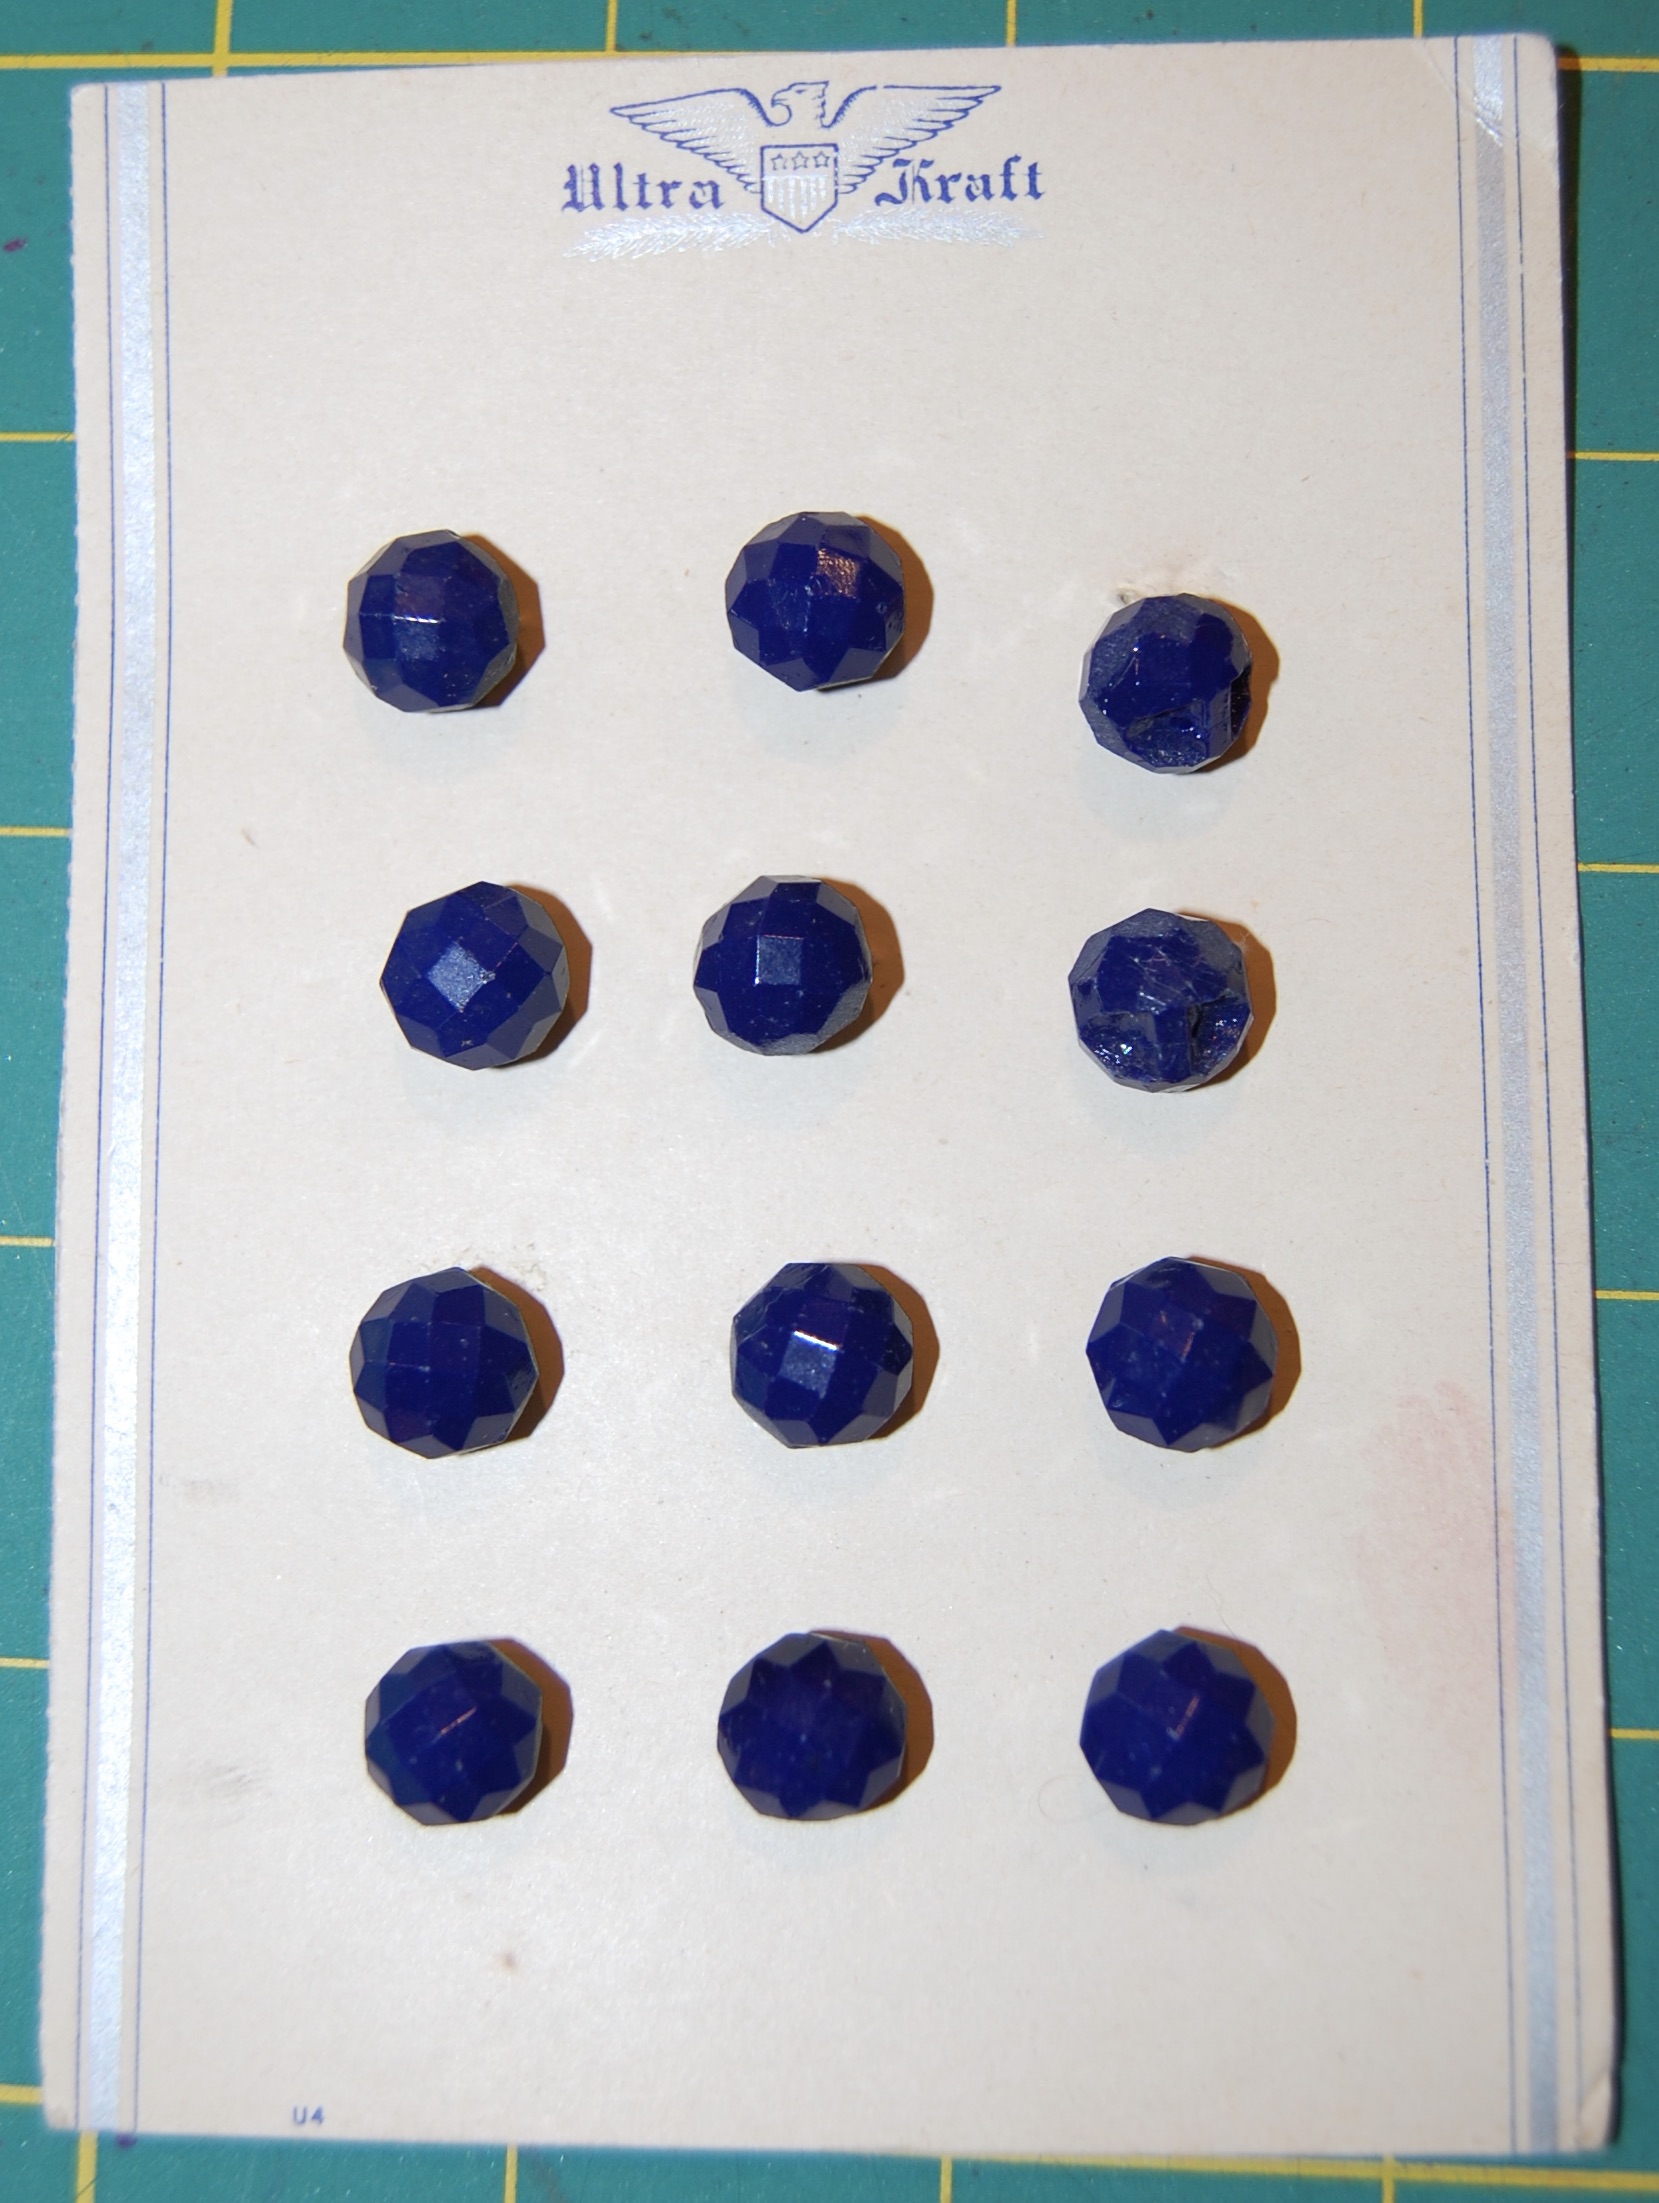
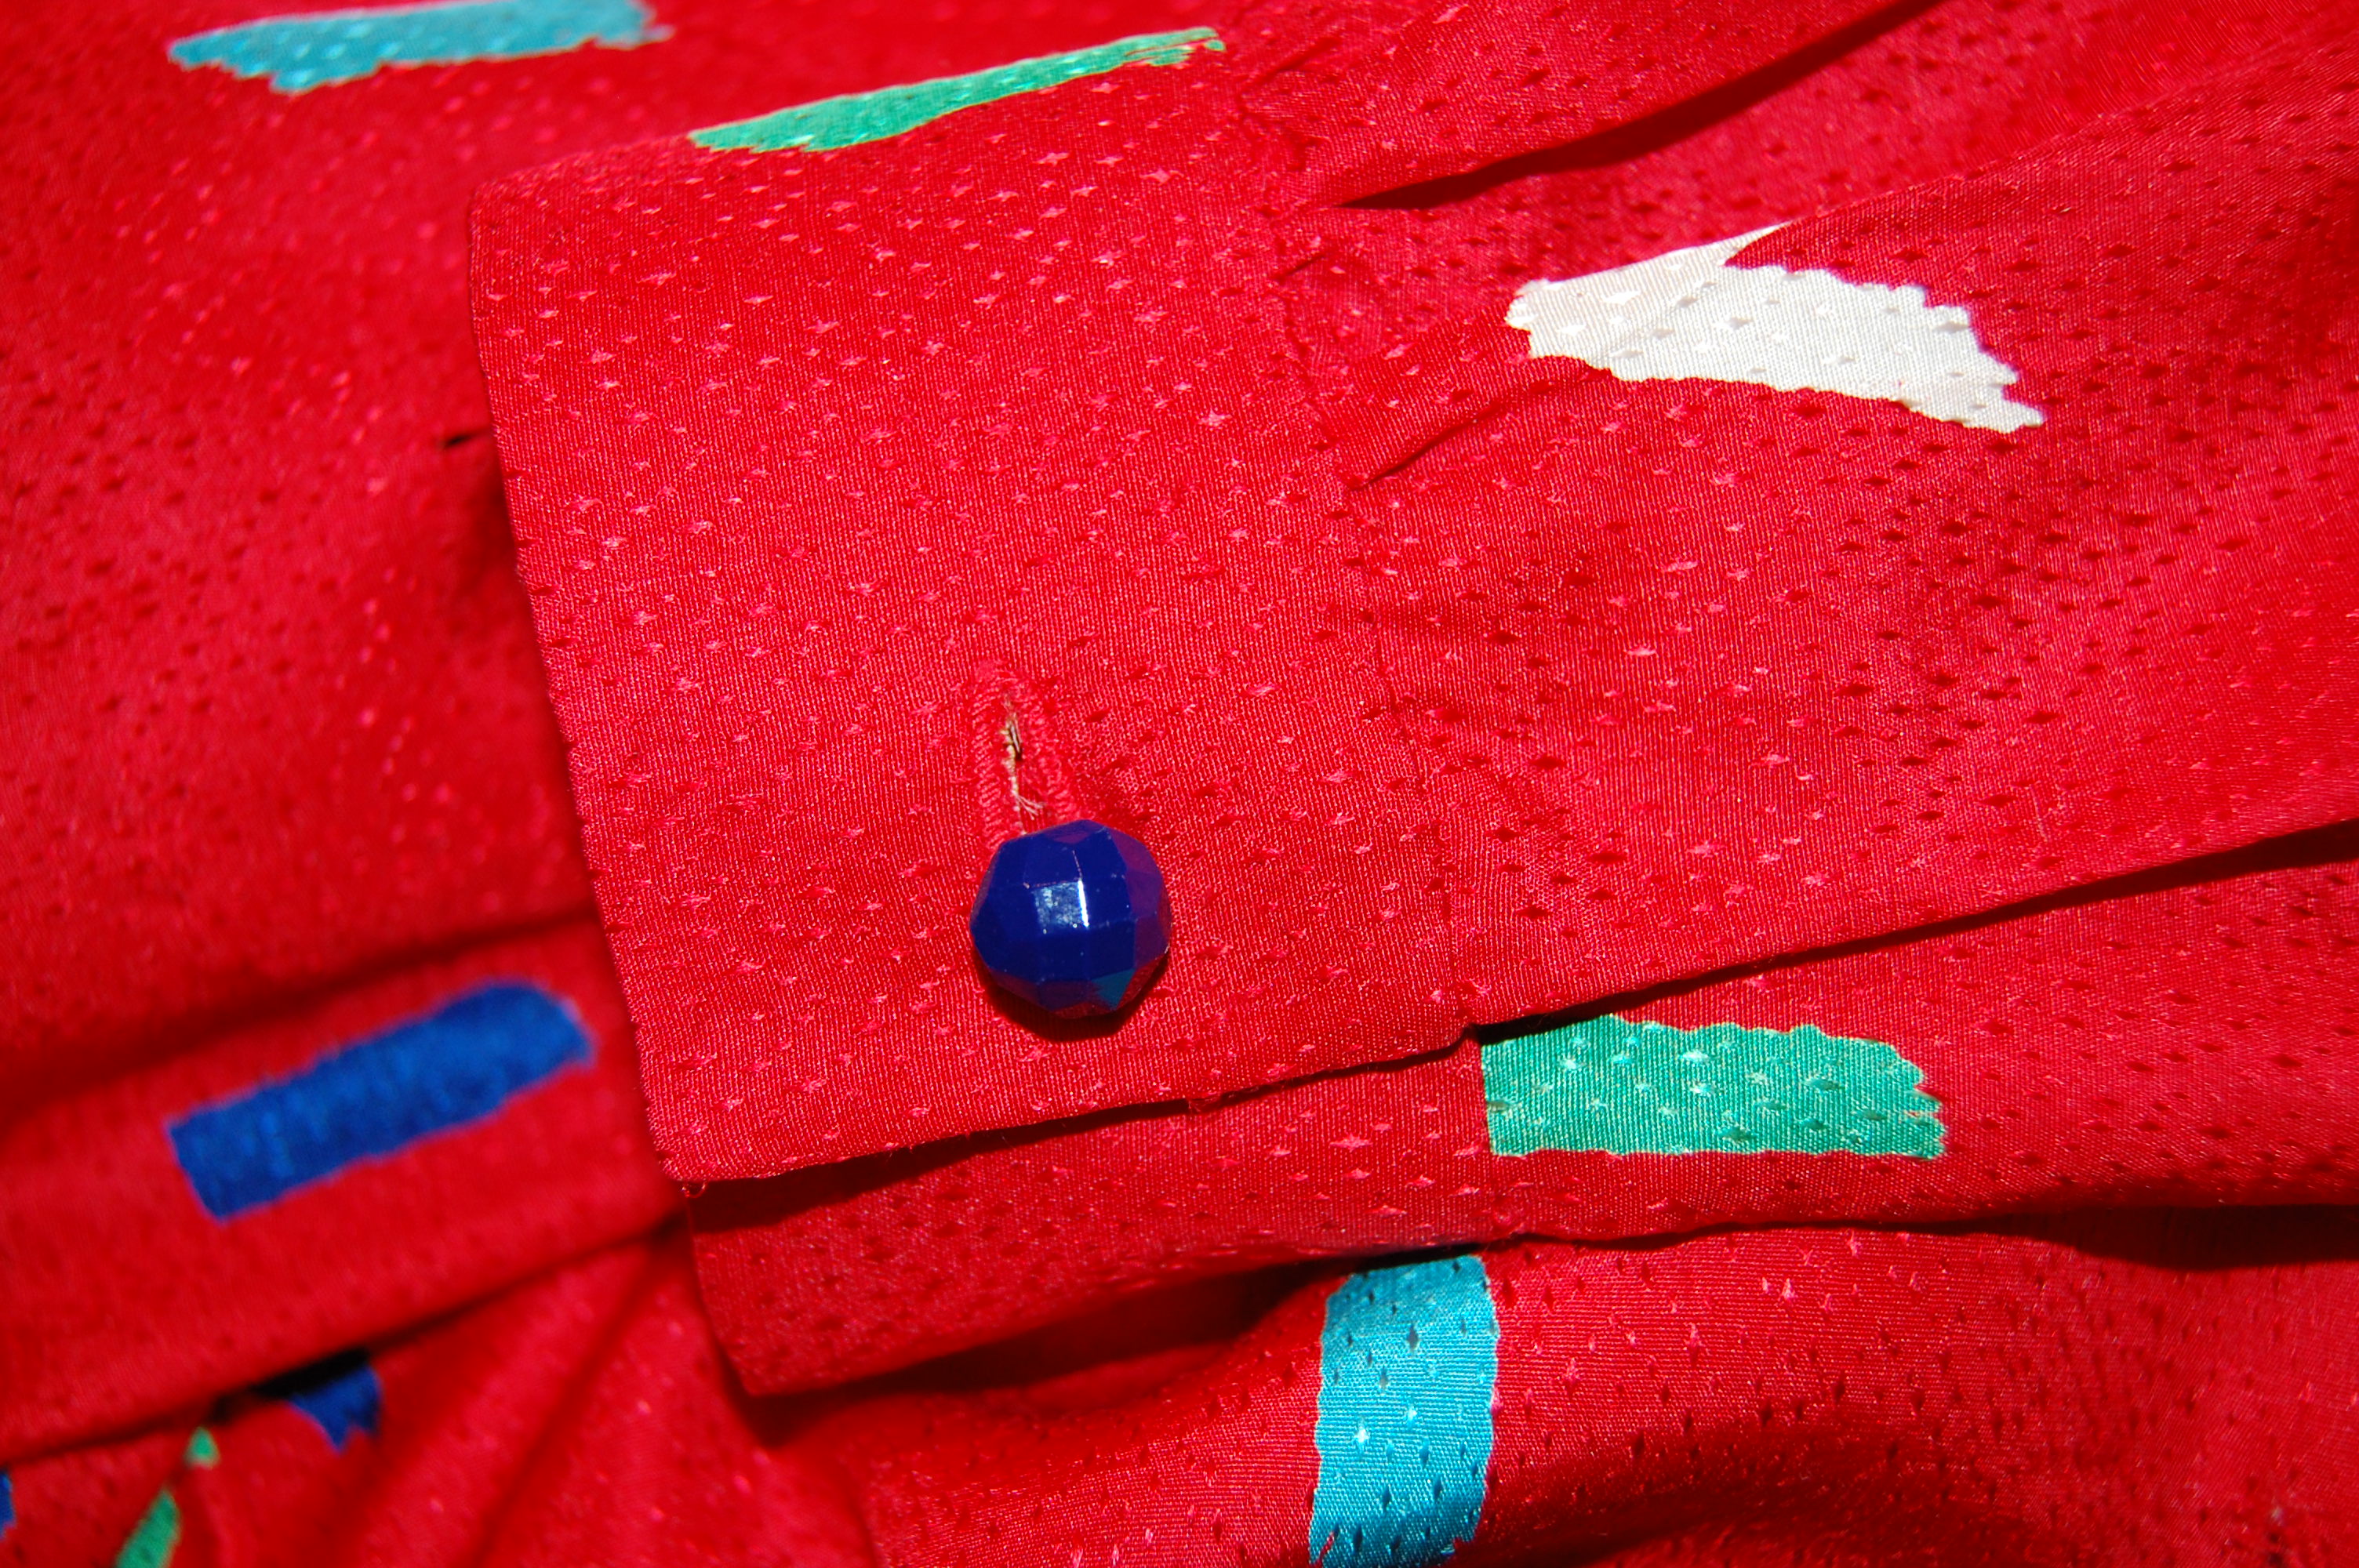
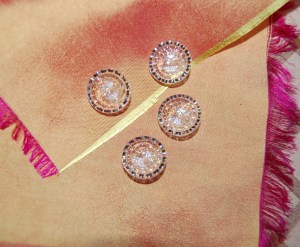
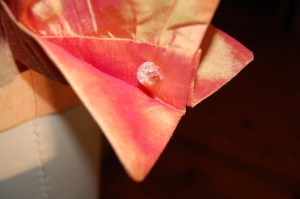
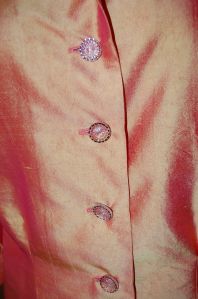
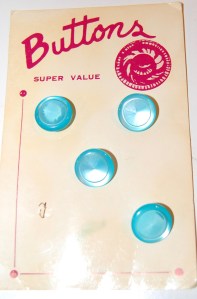
Buttons are such fun to select for a blouse like this.  I have had these vintage white pearl buttons for some time, and no doubt they were waiting for this project.  When the skirt is made at some point, the three-lobed profile will play off the designs in the silk twill.  But, more than that, I needed something to act as a foil for the polka-dotted field.  More “round” would have been fine, but not exciting.  Additionally, these buttons are a bit bigger which helps them hold their own on that deep, rich, pink silk.  

The French cuffs are secured by buttons both front and back.
Love those buttons!

Being the ‘statement” blouse that it is, I doubt I will be wearing this blouse casually. But I’m betting/hoping I will find good reason to wear it not infrequently to one or another tony event.  

25 Comments

Filed under Blouse patterns from the 1950's, Blouses, Buttons - choosing the right ones, Mid-Century style, Polka dots, sewing in silk, Uncategorized, vintage buttons, vintage Vogue patterns from the 1950s

Tuesday is for Ironing

One might get the idea I love to iron should they take stock of how many cotton blouses I have made over the past few years. Now I do love a crisp cotton blouse, and I find them to be imminently wearable, neat and tidy, and versatile.  So I keep making them.  But do I love to iron?  Not really, although it is not my most dreaded household chore.  (I think that might be grocery shopping – or more precisely, lugging everything home and putting it all away.  I don’t like that.)  

Even wearing a pretty blouse, like this – my most recent make, to the grocery store doesn’t make that chore more bearable!

One advantage to having lots and lots of cotton blouses is that the ironing can pile up, yet I will still have blouses to go to in my closet, so there’s that.  I think – no, I know – another reason I keep making casual cotton blouses is that I love to sew with beautiful quality cotton (of course Liberty comes to mind!) The selection of quality cotton prints, checks, plaids, stripes, and solids available online is astoundingly diverse, making the temptation great to make “just one more blouse.”

And then there are the buttons. If you follow my sewing life through this blog, you know my fascination with and pursuit of vintage buttons to use on my blouses and other projects.  Yes, a white plastic button can perform the same function, but a beautiful pearl button adds a touch of class to a simple blouse like no other detail can.  

A simple pearl button, circa 1960, BGE Originals, “First in Fashions”

It also helps that I have a set of blouse patterns which fit well due to many alterations and tweaking over several years’ use.  It is a lovely feeling to start a new project, knowing I don’t have to fit the pattern and make a muslin before I can get started on the fashion fabric.  

Three of my favorite blouse patterns, for which I have fitted muslins.
And one which I feel sure will become a favorite once I make and fit a muslin for it! View A is a classic look and the sleeves are so elegant.

I had been eyeing this Liberty cotton lawn on the Farmhouse Fabrics website for quite a while when I decided last Spring to go ahead and indulge.  Having a floral among my blouse selections is something just a bit different for me, as I already have numerous ginghams, plaids, and stripes.  

Liberty Lawn is lovely to sew and lovely to wear.
These colors make me happy.

So – is Tuesday really for ironing?  There used to be a proscribed schedule for all those household chores – and it went like this:

Monday: Wash Day

Tuesday:  Ironing Day 

Wednesday:  Sewing Day

Thursday:  Market Day

Friday:  Cleaning Day

Saturday:  Baking Day

Sunday:  Day of Rest

Well, times have changed. Now, every day is Sewing Day.

16 Comments

Filed under Blouse patterns from the 1950's, Blouses, Buttons - choosing the right ones, Liberty cotton, Mid-Century style, Uncategorized, vintage buttons, vintage Vogue patterns from the 1950s, vintage Vogue patterns from the 1970s, Vogue patterns

Red Letter Day-Dress

Red Letter Day:  “A day that is pleasantly noteworthy or memorable.”  (Cambridge Languages)

Day Dress: “The perfect all-in-one outfit, a day dress is a versatile and fashionable way to look chic and stay comfortable at the same time.”  

Any day I finish a lengthy project (successfully) is definitely a “red letter day.”  This dress just happens to be red, adorned with letters, and “back in the day,” as they say, it would have been considered a “day-dress,” although the apt description above is actually from a current website. (DavidJones.com)  

I found this silk at Britex Fabrics in San francisco.
I used this blouse pattern from 1957 as the basis for the dress, opting for long sleeves and the lower bow. I did not have enough buttons to make French cuffs, so I did plain cuffs.

I go into a little bit of how this dress evolved in my last post.  But of course there were many more decisions to be made along the way.  I had to decide: 

  • Do I underline this crepe de chine? 
  • If I underline it, what do I use for my underlining fabric?
  • Do I also line this dress?
  • If I line it, do I also line the sleeves?
  • The blouse pattern has floating, released darts at the waist.  Do I use that technique for this pattern transformed into a dress?
  • What color and type of buttons will most enhance the fabric?
  • Do I make bound buttonholes or machine-stitched ones?

So, let’s start at the beginning.  Because this was a very soft, fluid, lightweight crepe de chine, I thought it best to underline it.  My normal go-to for underlining – silk organza – would have reduced the fluidity of the silk, so I ruled that out.  Cotton batiste just did not seem the way to go.  When I found a silk batiste on the website for Farmhouse Fabrics, I knew I had my solution.

I believe you can, in this photo, see how lightweight and lovely this silk batiste is.

However, even with the ethereal nature of the silk batiste, I decided not to underline (or line) the sleeves.  I wanted them to retain their uninhibited flow.

I clipped the armscye seam carefully and pressed it to the interior of the dress. Then I fell-stitched the lining to the interior edge.

Once I had the underlining basted to the fashion fabric, I weighed whether or not to line the body of the dress.  I went with my gut feeling about this and decided to line it with a soft and lightweight red silk crepe de chine – almost a perfect match in color, as is evident in the above picture – which I purchased from Emma One Sock Fabrics.  

In doing so, I eliminated the front and neck facings which were replaced with the solid red lining. 

I eliminated the facings and used the red crepe de chine lining fabric to finish the interior of the body of the dress. Here is the right front edge.

I had worked out the floating dart question in my muslin/toile and decided to use them for the dress.  This left above the waist “blousy” and made it more fitted below the waist.  

This shows the released darts on the back of the dress.
Here is a side released dart on the front of the dress.
The released dart on one side of the dress front.

Buttons are always one of my favorite parts of a project.  I simply love looking for buttons – and I really love finding the perfect ones.  In this case, I knew I needed a large quantity – at least 10, depending on the size I found.  I did not think red buttons would do anything to enhance the dress, and I thought white pearl buttons would be too much of a contrast.  But then I found these buttons on eBay:

They are probably from the 1940s, cut glass, made in Czechoslovakia.  The card held 12 buttons, a good quantity for my purpose.  I think of these buttons as “small, but mighty.”  They provide the right contrast, and the faceted surface picks up the shimmer from the slight jacquard weave in the fabric.  I think they are perfect!

I used ten buttons for the front of the dress. These buttons are small so I was able to space them closely together to get the effect I wanted. I always know I have found the right buttons when they look like they “belong” – they do not steal the show nor are they too weak.
The right top neck edge, with a snap to keep things tidy under the tied bow.
The lone button on the sleeve, showing a bit of shimmer to match the shimmer in the fashion fabric.
The importance of the buttons shows off well in this photo, I think.

And finally, bound or machine-made buttonholes?  I did a sample of each.  I have recently started using my automatic buttonholer for my 1951 Singer Featherweight, and I must say, it is an engineering marvel.  It makes such amazing, precise buttonholes.  And although I do love bound buttonholes, I decided in this instance I would be happier with machine-made ones.  

I haven’t even mentioned the belt! I wanted a self belt, so I knew I would have to make it myself. I found a belt-making kit from the 1960s on eBay and used it for the buckle and the belt canvas.

So that about sums it up.  I had just barely enough fabric to eke out this dress (which seems to be a theme with me!), so I think it was meant to be.  Here’s to Red Letter Days – and the dresses which make them happy.  

36 Comments

Filed under Blouse patterns from the 1950's, Bows as design feature, Buttons - choosing the right ones, Day dresses, Linings, silk, Uncategorized, underlinings, vintage buttons, vintage Vogue patterns from the 1950s

Dressmaking in 2020 and Beyond

Every January when I sit down to do some planning for the new year at hand, I usually start by doing three things:

  • Looking at what I accomplished on my list from the past year, and moving those unfinished items onto my new list,
  • Going through my fabrics and deciding what looks inspiring – or in desperate need of action – and
  • Assessing what my wardrobe needs will be for the year.

This year, I am adding #4 to that list:  What patterns do I want to try for the first time, and which ones do I want to make again.

Number 1 looks like this:

This is my list for 2019, perhaps the third iteration of it. Things and priorities change during the year. My list for 2020 is still being planned!

Number 2 is shocking to me.  I have so many beautiful fabrics.  I could easily just concentrate on what I have stored away and be totally occupied with those for not just this year, but for several years to come.  However, I know from experience that I will buy new fabrics (and already have since January 1!), and I will be glad I did.  So there.  I am admitting I am a hopeless case when it comes to fabric.  There are too many dreams tied up in some fabrics for me to resist their purchase.  I always just hope that the fabrics used from my existing collection slightly outnumber the new ones I buy.  Usually this is the case.  Hopefully it will be this year.

Number 3 is not always apparent.  I do know I will need some dressier things for Springtime events.  I do know my summer will be very casual.  And usually Fall and early Winter require some dressier apparel.  I have a big birthday (gulp!) coming up this year, and I think it deserves something special, but I’m not sure what that is yet.  But I would be willing to bet it will demand a new dress, at the least.

And my new Number 4 – now here is a category that really inspires me.  I have so many amazing vintage patterns to try, but I also have so many I have made once (or more) and love so much that I never tire of making them.   I believe my patterns will guide my sewing this year to a large degree.

Here are a few I have never used, but have hopes for in 2020:

This pattern is out of print, but I don’t really consider it vintage. However, it looks like a great shirtwaist dress pattern. I especially like Views A and D. My hope/plan is to make at least two, and perhaps three, shirtwaist dresses this year. In fact, View A is my current project.

I love everything about the design of this dress: it has a two-piece look, but the skirt is attached to a camisole under the over-bodice. I love the buttoned back and the front seaming detail. I particularly like the long-sleeved version.

Here are the back views of this dress.

Here is another take on a princess-lined dress, with jacket. It is not suitable for striped, plaid or diagonal fabrics, which eliminates quite a few of my choices, but I would love to try it. Even better would be to make a dress and jacket…

The line drawings on the envelope back show the seaming details and dart placement. It looks really, really lovely.

I came across a piece of deep pink cashmere last year, and if I decide to make a coat I think it will be View B of this classic coat pattern.

And here a few patterns I have used and want to use again.  Most have been fitted correctly (although I always seem to tweak one or two little things) – and most are versatile and classic and have simple, but elegant, lines to them.

I will definitely be making this pattern again this year at least once.

I know for certain I will be making the short version of this dress again. I have a dress planned for Spring using it.  My first use of this pattern resulted in the dress below,  selected for inclusion in the Gallery of A Stylish Guide to Classic Sewing, by Sarah Gunn and Julie Starr.

I would love to make another bow blouse this year. This classic look from 1957 is about as lovely a bow blouse as one can find.

A bow blouse would be the perfect pairing with another Parisian Jacket.  A silk blouse with a Parisian Jacket made from vintage Moygashel linen?

Finally, ever since I used this pattern years ago, I have wanted to make it again, in a short-sleeved version.  I am hoping this will be the year!

I think I could make either view of this dress over and over and not get tired of it.

Much has been said this year about the start of a new decade.  It does seem prescient, doesn’t it?  Full of hope and anticipation, the new decade will, nevertheless, do what it will.  Dressmaking will be just a part of the new  continuum, but my days and months and years will be measured in no small part by what I put on my list, and then the placement of those happy checkmarks when I have accomplished that which I set out to do.

Welcome 2020!  No doubt you will be gone in a flash, so may we all make the most of your wondrous days, the dressmaking ones and all the others, too.

19 Comments

Filed under Blouse patterns from the 1950's, Coats, Day dresses, Uncategorized, vintage Vogue patterns from the 1950s, vintage Vogue patterns from the 1960s

A Three-Piece Outfit for the Holidays: Part One, The Blouse

“Today blouses are not worn quite as much as they used to be and I think it is a pity.” So said Christian Dior in 1954. With that in mind, hopefully he would have approved of this Vogue blouse pattern from 1958:

You have already seen my toile of this blouse, where I worked out all the “kinks.” I liked it made up in muslin and now I am quite thrilled with it made up in silk dupioni, purchased from Britex Fabrics.

The iridescent quality of silk dupioni woven with two contrasting colors, such as this one, makes it an excellent fabric to use for “fancy” attire. The only reservation I had was whether it would be too stiff for use in a blouse. It is by nature rather “papery” in composition. I was a little concerned it might not have enough drapeability for this blouse, where a major focus is on the softly pleated sleeves. I did a little research, and of course, the first guideline I found was an admonishment not to wash dupioni! Doing so would diminish that papery nature. Well, that was exactly what I wanted to do – soften it a bit. Further research led me to an article in Threads Magazine from a few years back, where, indeed, a reader had successfully washed dupioni in her quest to make it suppler. Off to my washing machine I went with a large swatch for a (successful) trial run. Soon the entire two yards were gently swashing around in cold water on the delicate cycle. It took quite a bit of heavy steam to wrestle out the wrinkles, but I was left with a soft, drapeable fabric for my blouse.

Quite apparent in this image are the two contrasting threads, one fuchsia and the other bright yellow, which, woven together made a shimmery apricot color.

Buttons for a blouse such as this one are an important element. I knew they needed to be special, and what could be more special than vintage glass buttons from France? I found these listed in an Etsy store (YumYum Objects).

These glass buttons have silver accents, adding just a bit more depth to their appearance.

The listing was for a set of 6, and I needed 8 for this blouse. The French cuffs required two buttons each. These buttons were too perfect to pass up, however, so I decided I could use two buttons of another style for the rear-facing part of the cuff. I found a set of little, clear glass, ball buttons in my button box, which seemed appropriate and a good compromise!

The ball button on the back.

For some reason I always like to make sleeves first, so that is what I did. The French cuffs, by their very nature, of course, call for two buttonholes with two buttons looped together to thread through those openings, one on each side. However, I placed a buttonhole on the front part of the cuff only. I then sewed the two buttons together, back to back through the back part of the cuff, with the fancy button meant to thread through that single buttonhole and the other button to be stationary. I liked the idea that this method would hold the two sides of the cuff more tightly together.

The fancy glass button on the front.

This view shows the three pleats in the sleeve. In addition, there is a small amount of gathering which adds to the blouson effect of the lower sleeve.

Being a pattern from 1958, the instructions called for bound buttonholes, of course. However, due to the nature of the fabric, I decided machine buttonholes would make a nicer finish, so that is what I did (with a little hand-finishing on each one…)

The rest of the blouse was quite straightforward.

I took this picture with the sun streaming in one of my sewing room windows. It really shows the luminosity of the fabric.

I am so happy I decided to keep the released darts at the waistline. I think they will work beautifully with the skirt I have planned.

I gave my usual attention to hand-finishing the hem and facings (it just looks nicer!) and marveled again at the finesse added to this notched shawl collar by that small dart in the collar crease. Hopefully you can see this detail here:

That dart makes the collar turn beautifully.

Next up is a guipure lace skirt! I wonder what Christian Dior would have to say about that?

11 Comments

Filed under Blouse patterns from the 1950's, Blouses, Buttons - choosing the right ones, sewing in silk, silk, Uncategorized, vintage buttons, vintage Vogue patterns from the 1950s

Prepping for the Next Project

Sewing is a little bit like house painting in that successful end results are often dependent upon good prep work. Well, I don’t know about you, but I’d much rather be making a muslin (toile), tedious as it sometimes is, than sanding, spackling, and cleaning walls or woodwork. And sometimes, a pattern reveals unknown charms as its toile comes to life.

Such has certainly been the case with my next project, a three-part ensemble, the first of which is a blouse, to be made out of lightweight and shimmery silk dupioni. This is to be a dressy blouse in which I want to emphasize the fabric and some amazing French buttons I found for it. Because I love a notched collar which can be raised up at the back of the neck and frame the neck and face in the front, I looked for a pattern which had that feature, but also some feminine sleeves. Among the possibilities in my pattern collection was this Vogue pattern from 1958.

Of course, View A is my version of choice.

After studying the pattern pieces, I determined it had just about everything I was looking for, even though the pattern art doesn’t make this look like a particularly fancy blouse.

The back of the pattern envelope often gives important information, such as placement of darts. This one also told me that the collar has a center back seam, which is a stylistic detail I like.

I was especially intrigued by the small diagonal darts you can see here on the “blouse front” and “collar and interfacing” diagrams. The instructions were to graduate the dart down from 1/8 of an inch at the center point to nothing at both ends. I discovered that little bit of shaping makes a huge difference in the way the collar turns, allowing it to emphasize the neckline.

Click on the image for enlargement.

I show the collar flat here, but I intend to wear it with the back of the neck standing up.

The sleeve pattern called for three tucks (also visible above on the pattern diagram) as well as gathering at the cuff, which I knew would add a gentle feminine silhouette, especially in dupioni. And the cuffs are French cuffs, but very petite ones, with a small angled turn-back, which is just such a lovely feature. The only thing I could not determine was if the sleeves were too short for my “vision.” Of course, that is what muslins/toiles are for, and indeed, the first sleeve was too short. I added a three-inch extension to the next sleeve, knowing I could always take it up. I finally settled on lengthening the pattern by 1.5 inches.

Here is the blouse with the original sleeve on the right (as you are looking at it, actually the left side of the blouse), and the sleeve with an extension of 1.5 inches opposite.

I believe the longer sleeve looks less like 1958 and more like 2017. I love using vintage patterns, but I don’t want to look vintage!

The toile also told me that the top button needed to be lowered, and I needed to add a bit of width around the hips. I originally thought I might not want to use the released darts at the waistline, but I love the effect they make.

It’s not often that I stand back and admire a muslin, with its loose threads, its uncut seam allowances and lumpy corners. I am usually anxious to tear it apart so I can quickly proceed to use its pieces for my working pattern. Of course, I will be doing that, but until then, I will marvel at all the design secrets it has revealed to me in its humble cloth.

19 Comments

Filed under Blouse patterns from the 1950's, Blouses, Pattern Art, Uncategorized, vintage Vogue patterns from the 1950s

A Lesson from Lilly

Have you ever purchased a piece of fabric on a whim – and then regretted it? That’s exactly what happened to me, here in the midst of July. I saw this piece of Lilly Pulitzer silk fabric offered on eBay, and without giving it too much thought, I bought two yards.

I have always loved most of the Lilly prints and color combinations, and something about this silk just looked fresh and summery to me. I have long wanted to make the pattern pictured below again, and with its Asian flare, I thought the multi-colored, abstract printed Lilly silk would pair well with it.

The date on this pattern is 1958. I made the blouse/tunic a few years ago and still enjoy wearing it. I would like to make view B sometime…

I had several scraps of solid green silk, one of which I thought would be good as a contrast fabric for the button details on the front of the blouse. (The pattern calls it a tunic, but it looks more like a blouse to me.) As it turned out, I used a scrap of green silk out of which I had made a blouse to go with a purchased Lilly skirt way back in the 1970s! I still have the skirt, but not the blouse…

Anyway, I am digressing. When the fabric arrived – in an itsy-bitsy package that weighed about an ounce – I knew I had made a mistake. Yes, it was silk, but it was so flimsy and slippery I wasn’t very sure it could be sewn with any sort of finesse. (Now I know that assessment was correct.) I contemplated saving it for a lining for something sometime, although truly, it would make a flopsy lining.  Deep down, I knew if I didn’t make it right now, I would never, ever use it. And that would be a waste of money for sure.

Well, now I am going to digress. I find that if I purchase a piece of fabric of impeccable quality, I can hold onto to it for months or even years without ever fearing it will never be used. In fact, the better quality the fabric is, sometimes the longer I wait to use it. That allows me time to think about and search for the perfect pattern, time to explore possible dressmaker details for it, and time to savor its beauty. When it comes to silk in particular, I have found that high quality, fine silk, even very lightweight silk, has a substance to it and a hand to it that makes sewing with it a pleasure.

Let me tell you, this was not a pleasure. I slipped and slid the whole way through the construction of this tunic/blouse. My pins would not stay in place, falling out willy-nilly. Clipping and trimming was a nightmare, as the fabric kept sliding in the way of my scissors. I contemplated spraying the entire thing with hairspray to stabilize it! Then, once I had enough of the tunic/blouse sewn that I was able to visualize my green silk accent strips on it, I realized that the green buttons I had planned to use were going to look – awful.

The green of this button is too deep for the colors of this fabric.

Happily, my luck changed just a bit. I went to my button box and found this card of four buttons.

One button was missing, but that was okay, as I only needed four.

They had been a “bonus” addition in an order of buttons from an Etsy shop, and I really thought I would never have any use for them. But guess what? They were just right for this tunic/blouse. At least this one thing was easy!

The blue of the button seems to work well with the solid green.

As you can see, I persevered and finished this monster.

I made an Obi-style sash to wear with it, which I think improves its appearance.

The back of this blouse has a center seam, which allows for some really nice shaping. I haven’t had a chance to get any self-modeled photos made yet, for which I apologize.

Here it is without the sash. In order to keep the slippery sleeves folded up, I had to add a snap on the inside seam of each sleeve.

I haven’t worn it anywhere yet. We shall see if I get any favorable comments; if I do, then perhaps I will eventually enjoy wearing it. At the least, it will stand as a lesson to me – never, ever again to buy any fabric on a whim.

30 Comments

Filed under Asian-inspired dress designs, Blouse patterns from the 1950's, Blouses, Buttons - choosing the right ones, sewing in silk, Uncategorized, vintage Vogue patterns from the 1950s

A Practical Decision

A practical decision, made out of desperation, that is! It is a rare occurrence that I stop working on a project before it is completed, but that’s what I decided to do with my cashmere coat, skirt and blouse ensemble. Quite simply, life got in the way, without asking me first! Robbed of sewing time for one reason or another, I had to make a decision: should I quietly and gently fold my unfinished skirt and blouse away for a summer sleep, and get busy on my Spring sewing? Or should I plow through and continue work on this wool ensemble as the allure and charms of Spring sewing beckoned me on? Well, Spring’s charms won, especially as I am now facing middle-to-late May deadlines for a silk dress to wear to a wedding and another fancy event.

But I had promised photos of my coat, so before everything goes in the cedar closet until next September, I thought I should share the progress I did make. Even on a cool Spring day, this Cashmere coat felt glorious to wear, even briefly.

A Practical Decision

A Practical Decision

I am very happy with the lining!

I am very happy with the lining!

A Practical Decision

A Practical Decision

This coat is very warm and buttery soft.

This coat is very warm and buttery soft. These photos confirm for me that I need to reset the working buttons, making longer thread shanks, to accommodate the bound buttonholes.

The skirt is a six-panel slight A-line style.  Because the fabric is heavier than I would normally use for a skirt, I wanted to eliminate darts and a waistband, to help control the bulk. I decided to make a waist facing made out of wool challis (used for the coat lining and the blouse), and attach it to a skirt lining made of Bemberg rayon. The skirt is completed except for the hem.

This shows the waist facing, with the Bemberg lining attached to it.

This shows the waist facing, with the Bemberg lining attached to it.

Making a blouse out of wool challis demanded some special considerations. The fabric is finely woven and lightweight, making me hesitant to use waxed tracing paper to make any markings on it. So, I decided to thread trace all the seam lines and markings. This is, of course, the process one uses for the construction of a classic French jacket, so I am comfortable with it. It sounds time-consuming, but it goes fairly fast, and is fool-proof.

This shows my muslin pattern, cut on the seam lines, and with the darts cut out, so that I could tread trace along all sewing lines.

This shows my muslin pattern (with the changes I made to it), cut on the seam lines, and with the darts cut out, so that I could tread trace along all sewing lines.

Click on this for a close-up look at the thread tracing of seam lines and darts.

Click on this for a close-up look at the thread tracing of seam lines and darts.

I got as far as having both sleeves completed, the body of the blouse put together, and the collar pinned in place. I am feeling good about my progress, and I know I can pick this up again, knowing that I really am in the home stretch on this particular project.

The pinned collar, placed along the neckline.

The pinned collar, placed along the neckline.

One of the sleeves pinned in place.

One of the sleeves pinned in place.  The sleeves are three-quarter length.

Good-bye to Winter and Hello to Spring!  Right now it feels wonderful to be focusing on silks and linens, bright colors and feminine fancy things. I am “desperately” happy with my decision!

21 Comments

Filed under Blouse patterns from the 1950's, Blouses, Coats, couture construction, Dressmaker coats, Mid-Century style, Uncategorized, Vintage fabric, vintage Vogue Designer patterns, vintage Vogue patterns from the 1960s, woolens

Panic and Patterns

Being away, as “on vacation” (or “on holiday” as many express it), can take its toll on sewing projects. If I have to leave a project in mid-stream, it seems to take even longer to get back to it and pick up where I left off. A recent trip to the western state of Wyoming necessitated that I abandon my current “Fall” dress at precisely the time of year when I need to complete it! And now I’ve run into some complications with it.

I guess you could say that panic has set in. Here is what the dress bodice looks like on my dress form:

Panic and patterns

I am using vintage Vogue pattern 2718 for this dress.

The fit seems okay. The neckline will need a little adjustment, but nothing out of the ordinary. The sleeves look good, and I am pleased with the piping so far. So what is the problem? When I try the bodice on, it looks awful. It pulls across the bust, it doesn’t want to move with me at all, and the front seems too short-waisted even though it measures perfectly for me when on the form. Worse still, this fabric is too dear (as in expensive) to put it aside or to think about abandoning this dress.

I think I know what is wrong, and it will take a great deal of effort to try to correct it – and hopefully it will be correctable! I insisted on using an underlining on this stretch silk fabric. I thought I could accommodate the stretch by cutting the underlining on the bias. Guess what? It doesn’t work. The bias pulls from underneath, restricting the stretch of the silk. What this means is that I am going to have to remove the underlining. It is not going to be fun to remove black underlining from black fabric, sewn together with black thread, is it?

I have consoled myself with the thought that I can salvage this project by making a skirt instead of a dress, which may be what I end up doing. Needless to say, I am fighting my discouragement, and trying to stay focused so I can finish this and move on to something more fun.

While traveling is not conducive to sewing, it doesn’t put a damper on looking at more patterns and fabrics online! Sometimes I go weeks without finding a pattern and then I’ll find several all bunched together in the space of a few days. You might be guessing that such was the case during the last few weeks. So while I am struggling with vintage Vogue 2718 right now, I look at my new acquisitions to give me encouragement for the future. Here are some of my “new” finds:

I was delighted to find this DvF pattern in my size, at a reasonable cost!  This one should see some fabric next Spring or Summer.

I was delighted to find this DvF pattern in my size, at a reasonable cost! This one should see some fabric next Spring or Summer.

DSC_0303

This one was too good to pass up, although I don’t have any plans for it right now. This looks like a dress, but it is really a skirt and top, paired with the jacket.

DSC_0304

What can I say? I love coats.

DSC_0305

I have been on the search for this pattern for a long time. I hope I’ll have some reason to make this dress sometime soon…

DSC_0306

The sleeves on the blue version of this blouse are so pretty!

In addition to these new patterns, I just ordered two Marfy patterns, which should either add to my current sewing anxiety or help alleviate it. I hope it is the latter!

17 Comments

Filed under 1980's dress patterns, Blouse patterns from the 1950's, Coats, Cocktail dresses, piping, Uncategorized, vintage Vogue Designer patterns, vintage Vogue patterns from the 1950s, vintage Vogue patterns from the 1960s, vintage Vogue patterns from the 1970s, Wrap dresses

The Necessary Blouse

Fashion sewing is an interesting combination of inspiration, aspiration, indulgence and necessity, manifested singly or collectively.  My newly completed bow blouse is an example of a bit of all of these motivations rolled into one.  This is the blouse I made to go with my No. 2 Chanel-inspired jacket, made from the same red and navy blue geometric print silk with which I lined the jacket.

The Necessary Blouse Inspiration came from several sources.  I was mostly inspired by the pattern, which is copyright 1957 by The Conde Nast Publications, Inc. (Vogue Patterns) – so much so, that I purchased it in a size larger than I usually wear, as that was what was available – and with vintage patterns, one is never sure to find a favorite one again soon – or ever.

Looking at blouses 1957

Some of the aspects of the pattern which appealed to me are: 1) the “dropped” bow shown in views A and B; 2) the various sleeve lengths; 3) the shaping in the body of the blouse – soft and understated, but very feminine.  Just for fun, I looked through a few of my Vogue Pattern Book Magazines from 1957 and 1958, to see if I could find examples of this blouse pattern.  That was easy!  Here is one sketch and one photograph of Vogue 9227:

The blouse was featured in the December/January 1957-58 issue.

The blouse was featured in the December/January 1957-58 issue.

Part of a feature entitled "A new era for the soft BLOUSE."  In the August/September, 1957 issue of VPB.

Part of a feature entitled “A new era for the soft BLOUSE.” In the August/September, 1957 issue of VPB. 

After making a sheath dress to coordinate with my Chanel-inspired jacket No. 1, I aspired to pair my Jacket No. 2 with a suitable companion, too.  A bow blouse seemed to be a versatile and useful solution.  And then it became a necessity!   I decided my Jacket No. 2 would not be complete until I finished this blouse.

Back view

Back view

Step number one was to make a muslin (of course), knowing that I would need to alter the pattern to fit me correctly.  Sure enough, I needed to take out the bagginess in the bust and body of the blouse, and I needed to shorten the sleeves.  I went to my favorite book on making alterations which guided me through the correct changes:

I highly recommend this book.

I highly recommend this book.

My muslin showed me that the sleeves were also a little too full for me and for current 2014 styles, so I removed some girth from them as well.  I was skeptical of the bow (cut on the diagonal) when I looked at the pattern and then the muslin.  Would it be too full?  Made up in muslin it seemed a little overwhelming.  But, my silk was so lightweight and fine, that I decided it might just be okay, using the original dimensions.

Here is the bow/collar ready to be attached to the body of the blouse.

Here is the bow/collar ready to be attached to the body of the blouse.

This blouse went together quite as planned, although I worked on one side where the bow/collar joins the corner at the front facing for hours, until I had it inserted correctly.  I kept making the same mistake over and over, which was a little irritating.  I also added some extra hand-sewing, understitching the facing by hand and hand-stitching the hem.

Hand understitching looks just so much nicer than machine stitching!

Hand understitching looks just so much nicer than machine stitching!

When I started the blouse, I had not yet picked out buttons, thinking I would use some that I have in my vintage collection.  But then I was on Waechter’s website and found these buttons, which seemed just about perfect:

The Necessary Blouse - button

These buttons measure 5/8″. 

(Sadly, Waechter’s is closing their business in Asheville, N. C., to my great dismay.  This makes me even more grateful for Britex Fabrics in San Francisco, from which I purchased all the fabric for this blouse and my Jacket No. 2.)

Sewing with vintage patterns is such a pleasure in so many ways.  For example, the sleeve vents had their own separate pattern piece:

The instruction sheet from the pattern . . . .

The instruction sheet from the pattern . . . .

The vent sewn on . . . .

The vent sewn on . . . .

. . . . and the finished vent.

. . . . and the finished vent.

Another classic vintage aspect is the proscribed use of snaps  – in this pattern, at the waist and below, which takes bulk away from the “tuck-in” part of the blouse.

And that bow?  Once I had it made up, was it too much?

I think the bow is just about perfect.

I think the bow is just about perfect.

I am very glad I didn't tinker with the size of the bow!

I am very glad I didn’t tinker with the size of the bow!

Shown with the jacket.  I really like how the collar on the blouse shows a bit when i have the jacket on.

Shown with the jacket. I really like how the collar on the blouse shows a bit when I have the jacket on.

The Necessary Blouse

A comfortable fit.

The Necessary Blouse

Would be nice with a navy skirt as well …

The Necessary Blouse

Whew!  Blouse and jacket turned out as I had hoped!

Whew! Blouse and jacket turned out as I had hoped!

I am feeling quite good about indulging in the extra fabric and extra time needed to make this blouse.  Now that my No. 2 Jacket is complete, I can indulge in my other current project – my color-blocked coat –  which might add a new word to the vocabulary of fashion sewing – obsession!

16 Comments

Filed under Blouse patterns from the 1950's, Blouses, Buttons - choosing the right ones, Chanel-type jackets, sewing in silk, The Conde Nast Publications, Uncategorized, vintage Vogue patterns from the 1950s, Vogue patterns