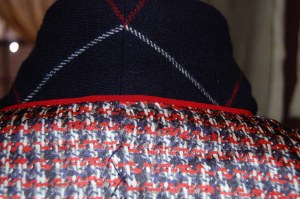
Category Archives: piping

A Very Pink Coat, Part 3

Added Value….  There is a significant little entry in 101 Things I learned in Fashion School (Alfredo Cabrera with Matthew Frederick, Grand Central Publishing, New York, New York, 2010, page 40).  Although aimed at Ready-To-Wear customers and the designers who cater to them, it certainly is meaningful to those of us who sew our own fashions:  “Fashion customers often need to be convinced to buy a new garment that, in effect, they already own.  …  Value added details [my emphasis] are those that are inherently necessary to a garment but are executed in a novel or interesting way…”  thus making them attractive to potential customers.  

Well, not that I really need convincing to make another coat for myself, but I will freely admit it is the unique little details in a pattern (and gorgeous fabric, of course) which convince me I MUST make THIS coat, even though I might not really NEED it.  Such was the case with my very pink coat, which is now finished.  

Those details included 1) the three welt pockets with flaps, 2) the concealed front closure, 3) the  arrowhead detail accompanying the minimal top-stitching, 4) the sleeve tabs (okay, not really a necessary detail, but a very nice one!), and 5) the opportunity to add a little flash to the lining with edge-piping.

I’ll cover the sleeve tabs first since they were the detail in question in my last post. 

 As you can observe, I decided to leave them with the buttons facing forward.  Several comments left by readers (thank you – you know who you are and I am very appreciative!) got me thinking anew about the orientation of the tabs.  Then I had an aha moment when I realized that the one button which is visible on the front of the coat, at the neckline, might look a bit disconnected without its counterparts showing on the sleeves.  Decision made, with confidence!  However, I doubt I will ever look at a sleeve tab in quite the same way again. 

The three welt pockets with flaps are quite likely my favorite detail on this coat.  First of all, I like making them.  There is a certain feeling of empowerment, although slightly nerve-wracking, to cut those big slashes into the front of the coat and be confident it will all be okay. And this type of pocket is just so pretty when they are done.  In addition, while they are utilitarian, they also suggest refinement, elevating a simple car coat to a coat with some sophistication and flair. 

Here is the underside of one of those pockets, with the slash” clearly visible.
As you can see, I used lining fabric (Bemberg from Emma One Sock Fabrics) for the facing on the flaps. And here’s a fun fact – that small pocket on the right side is called a “ticket pocket,” small and shallow, perfect for a printed ticket. As printed tickets go the way of the dinosaurs, this little pocket may become obsolete – but I sincerely hope not. It adds so much to the visual pleasure of this coat and other similar garments.
A good view of the small “ticket pocket.”

I must have a certain penchant for concealed coat fronts.  This is the third one I have made and I can let you know there may be more to come (but not soon.)   As I mentioned in my last post, I was able to reduce the bulk of the closure by using my lining fabric for one layer of the buttonhole side of the front flap.  

I made three machine buttonholes for this part of the flap, which made everything lay flat and neat. 

The gray buttons – 6 of them, which is what I needed – were in my collection, so that was a happy find. They are 1950s’ vintage gray pearl, very appropriate indeed for this 1957 pattern.

Although this coat pattern called for some topstitching, it was minimal.  Just the sleeve tabs, the pocket flaps and the collar, plus the front detail on the right side.  I was unhappy with the machine topstitching I did at the front closure.  There was enough bulk from the wool and the facing and the fly front, that it interfered with the smoothness of the topstitching.  So I took it out.  Initially I was going to do without topstitching and the arrowhead detail, but it looked a bit plain and unfinished.  So I did my fallback to what I know works – topstitching by hand.  Because of the hand-worked arrowhead detail, I felt hand topstitching would not look out of place.  Of course, I had never done an embroidery arrowhead before, so I had to practice, practice practice  so it hopefully does not look amateurish.  

I purchased matching embroidery floss for the arrowhead detail and the hand top-stitching.

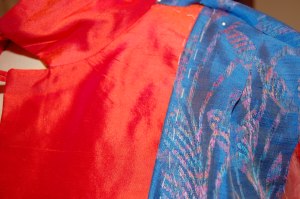
Finally, coat linings lend themselves so beautifully to that extra little treatment – a narrow edge piping.

  I deviated from my Vogue pattern to add this dressmaker detail, but I am sure they would have approved.  My Avoca wool scarf which is such a perfect complement to this coat inspired me to choose checked piping.  I “robbed” a small corner from some pink silk gingham (intended for a Spring coat, as mentioned previously here) to make my flat piping.  

I purchased the pink cashmere wool for this coat from Farmhouse Fabrics.

Well, there you have it.  My first major project of 2022 finished.  I am happy I chose pink for my theme this year as it has brightened up many a dark day in this troubled world of ours. 

24 Comments

Filed under Buttons - choosing the right ones, car coats, Coats, couture construction, Dressmaker details, Mid-Century style, piping, Scarves, Uncategorized, vintage buttons, vintage Vogue patterns from the 1950s, woolens

A Coat For Many Reasons

When I started planning this coat, I could not then have known the many reasons why I am now so happy to have made it.

The journey – and yes, it has been a journey – started with the fabric, offered for sale to me by a reader several years ago.  Simply the provenance of the fabric  – a piece of stamped Ernest Einiger wool, from one of the great mid-century American wool manufacturers, now sadly long gone – was reason enough to give it some extra thought.  I knew I had to wait for the right time to put pattern and scissors to it. When the Pantone Color of 2018 – “Ultraviolet” – an orchid shade of purple – was announced, I knew the time had arrived!

In the meantime, I had given it much thought and the more I looked at it, the more I thought I would be wise to get some construction advice on it.  Happily I was able to go to Baltimore in mid-April for one of Susan Khalje’s week-long Couture Sewing Schools, during which everyone works on their own project.  Usually one is expected to arrive with a pattern selected, and a marked muslin (toile) of her project ready for fitting.  This time was no different, which meant that all my thinking about the best pattern to use for this coat was ready to come to fruition.

Because the fabric is a very heavy coat-weight boucle, I originally looked for a pattern which either did not include buttons and buttonholes (traditionally more difficult to do well on a fabric of this weight), or had slot-seam buttonholes. I thought I had the perfect pattern in this Vogue from 1962. However, when I actually opened out the pattern pieces, I realized it was not going to work.  The kimono sleeves would surely produce drag lines in this heavy fabric, and a double layer of the wool in the shawl collar could be quite bulky.

Then I pulled out two more patterns which I thought were possibilities:

The single slot-seam buttonhole in the Mattli pattern was ideal, but all the intersecting seams could be a problem to do well, so I eliminated that one.  The simple lines of the Christian Dior design were lovely, but then there were more buttons, in addition to my evolving thought that this fabric would work well with a pattern which did not have such a narrow silhouette. It was then that I went to a pattern which I had already used:

View A with the longer sleeve for this coat, although I originally made it with the shorter sleeve here.

I love the simple lines of this coat and its well-turned collar, and I especially love my addition of a half belt to the silk coat I made.  I still wasn’t sure what I would/could do about buttons and buttonholes.  Advice from Susan would be very valuable!  As it turned out, she helped me determine that I could do bound buttonholes even on this very substantial wool.  Another fortuitous finding was that this pattern lent itself to showing off the interesting windowpane weave of the boucle, which became much more apparent the further away from it we got.

Other of Susan’s recommendations included:

1) Making the coat dress length rather than coat length.  The intensity of the color, used with this pattern, looks better in a shorter length.

2) Cutting the belt on the bias.  This was brilliant and gives a nice subtle focus to the back of the coat.  She also recommended that I line the belt with the silk charmeuse lining fabric rather than using the boucle .  It reduces bulk and makes the belt lay much more nicely.  I sewed one side of the belt by machine and then hand-stitched the other side, making for a nice crisp turn of the charmeuse to the underside.

My addition of a belt to this pattern is an excellent example of what is known as a “dressmaker detail.”

Here the bias cut of the belt is quite apparent.

The entire coat is underlined in silk organza, including the belt, shown here with one side sewn by machine.

And here is the silk charmeuse belt lining almost ready to be applied by hand.

3) Underlining the collar with charmeuse (again to reduce bulk) and then under-stitching the underside, to make it turn beautifully.

The collar on this pattern is beautifully designed to sit perfectly on the neck.

4) Clipping the long back center seam, even though it is on the straight of grain.  Clipping it reduces strain on that seam and allows a much more fluid movement of the back of the coat.  (I’m sorry I forgot to take a picture of this, but it is certainly not rocket science, just common sense.)

5) Tips for matching the woven windowpane design in the wool, the weave of which was difficult to see close-up.  Forked pins and a walking foot  helped to keep the layers – even basted ones – from shifting.

Other procedures I used to help “tame” this fabric were:  lots of judicious trimming of seams and corners; clipping, clipping and more clipping; lots of steam and pressing; lots of basting of seams.

I even trimmed the edges of the bound buttonholes to reduce bulk down the front of the coat. I am not completely happy with the buttonholes (which were difficult to do on this fabric), but once I finished them, they looked better than I thought they would.

I found these buttons in an Etsy store. From the 1960s, they are a nice fit with the fabric and the pattern. And I like their wobbly edges!

By the time I returned home from my class, I had the coat about half finished, but I felt completely confident in my ability to finish it competently.   Here are a few more details:

The sleeves feature a turned- back vent which is secured by a button through all layers.

I used the pockets for this version of the coat (which I had eliminated for my silk version.)

The belt is attached to the side seams just about an inch below the armhole. This placement allows it to fall right at the center back waist.

It is always rewarding to get to the point in the construction of a coat when you are ready to put the lining in.  And to make it just a little more fun, I added flat silk piping on the inside front facings – which will match one of the dresses (still to be made) I intend to wear with this coat:

I ended the piping at the shoulder seam on either side. (I see a basting thread which is peeking out from the piping!)

So my “coat for many reasons” allowed me 1) to use treasured fabric which had been in my collection for a few years; 2) to take advantage of the focus of this beautiful purple color during the year of  “Ultraviolet;” 3) to use a coat pattern which I really wanted to use again after making it once; and 4) to have experience in working – successfully – with such a heavyweight wool.

But the most important reason?  I need another coat. I always need another coat.

33 Comments

Filed under Buttons - choosing the right ones, Coats, Dressmaker details, Mid-Century style, piping, Uncategorized, vintage buttons, Vintage fabric, vintage Vogue patterns from the 1960s, woolens

Déjà vu

After completing my “Classic French Jacket” and its coordinating sheath dress, I wanted something easy – and relatively quick – for my next project. I didn’t think it was going to be another bathrobe, but that’s what it has turned out to be, to my great surprise.

Because we had such a chilly Spring, I was wearing my newly constructed Winter bathrobe into June. But, suddenly, Summer arrived in the middle of that month, with its humidity and often beastly temperatures. It was then I pulled out my old, lightweight Summer robe – you know, the one with the missing button – and the small tear – and the tea stain which somehow became a permanent fixture. Not such a pretty sight.  Having become used to my new Winter robe which makes me happy whenever I put it on, I decided maybe it was time to replace my Summer robe, too.

I already had a three-yard length of “water-color-designed cotton lawn” from Britex Fabrics.

I forgot to get a photo of the fabric before I cut into it.  This is a partial view of the back of the robe.  I purchased this Italian-produced, fine cotton during one of the online sales at Britex Fabrics in San Francisco.

At 56” wide, I thought it would be enough to make a robe, using the same wonderful pattern I had used for my Winter robe.

This pattern from 1959 is so well engineered, with subtle details which give it a polished appearance.

My only reservation was that the fabric makes quite a statement. I wondered if perhaps it was going to be too, too much in an ankle length robe. Truthfully, though, how many people see me in my bathrobe? I figured I’d go for it.

Once again, laying out the pattern was quite the task, done entirely on the floor. Although the pattern matching didn’t have to be quite as precise as working with an orderly plaid, I did have to pay attention to the large squares and where they would end up in relation to each other and in relation to the dimensions of the front and back of the robe.

The front of the robe, sans its sash.

And a back view. Without lining up the “watercolor blocks” in some relation to each other, the effect would really have been chaos!

The fineness of the fabric is apparent if you look closely at the collar, where there is some fade-through of the design. (The interfacing is attached to the under section of the collar.)

I did not have enough fabric to “match” the designs on the sleeves, but I rather like them not exactly alike.  Also, I shortened the sleeves to below elbow length, more appropriate for a Summer robe, but also necessary to save fabric!

I used flat felled seams for the body of the robe.

After just barely managing to get the two fronts, one back, the sleeves and collar and front facings placed on the fabric, I knew I was not going to have enough fabric left to match the pockets to their underlaying design. I did, however, have two fabric blocks featuring those quirky little birds, enough to make two pockets. The birds could even face each other.

But I knew they would look a little “lost in space” unless I set them off somehow. That’s when I went to my tried and true solution for all kinds of sewing fixes – piping! Yellow seemed to delineate the pockets the best – beating out green, red, pink and purple, all of which I “auditioned.”

I quite like those little birds, looking cheery and chirpy on the front of my robe.


Ready for its debut!

The fabric is so lovely, almost diaphanous in its effect. And that bold, colorful pattern which had given me pause? It has an exotic flair to it, quite acceptable for a summer robe. I just hope it doesn’t panic the cat.

31 Comments

Filed under Bathrobes, Mid-Century style, piping, Uncategorized, vintage Vogue patterns from the 1950s

Jacket AND Dress!

One of the aspects of fashion sewing that appeals to me so much is how projects seem to take on a life of their own. By the time I have it finished, a piece rarely ends up being exactly how I thought it might be when I started it. Most of the time, that’s a good thing. (There are those flops, which are bad things, but thankfully this post is not about a flop.)

When I did the planning and started the construction of my recent Classic French Jacket, I really thought I would be making a pale blue linen sheath to wear with it, using fabric already in my collection. But somehow that pink accent in the weave of the boucle, the trim I selected, and the buttons, all conspired together and changed my mind for me.

Fortunately, I also had a piece of pale pink linen in my fabric collection (at this point, I might ask myself, what color linen do I not have in my collection? But let’s not go there….) By this time I had already decided I needed to figure out a way to show that gorgeous lining silk in my jacket, rather than having it solely hidden inside. Having seen accent scarves paired with Chanel jackets on Pinterest gave me the idea to make a scarf. Then I thought it might be fun to “attach” the scarf to the pink (planned) dress in some fashion.

I came up with buttoned shoulder tabs as a possibility. I had purchased eight small buttons for my jacket – three for each sleeve and one for each pocket, long before I had this idea. You might recall in my last post, that I decided to make the sleeve vents for two buttons instead of three? That’s where I found/got the two buttons I needed for shoulder tabs.

I ended up liking my two button vents!

The first tabs I made just did not look right. First of all, they did not turn well, with a pleasing curve And when I placed them at the neckline of my dress, all I saw were the seams.

I even finished the bound buttonholes before deciding I didn’t like these.

I had to think through lots of possible solutions and finally had a eureka moment when I thought of piping the edges.

Piping makes the sewn curve much easier to turn well.

So much better!

I placed the tabs slightly forward rather than exactly on top of the shoulder seam.

The rest of the dress was very straightforward, as sheath dresses tend to be. It is lined with a lightweight, cotton/linen blend, but I did not underline it, as I like to preserve the washability of most of my linen garments (easier without an underlining.)  It is also cooler without an underlining.

Being a lover of pink, I already had pink pumps that match the dress exactly – and a handbag which brings out the peachy part of the pink in the boucle.

The tabs on this dress give it kind of a ’60s vibe. Unintended, but kind of a nice touch to go with the jacket.

Because these two pieces – and this look – came together from so many sources, I think it is a good idea to give credit where credit is due:

Boucle: Mendel Goldberg Fabrics , NYC, gift from my grown children.

Soutache Braid and Buttons: M & J Trimming, NYC

Pink Petersham Ribbon: Britex Fabrics, San Francisco

Lining and Scarf silk: Britex Fabrics, San Francisco

Pink Linen: vintage Moygashel, 35” wide, purchased on Etsy

Cotton/linen lining for the dress: JoAnn’s Fabrics, purchased in bulk a couple of years ago

Shoes: Ferragamo, old!

Handbag: Kate Spade, also old.

I do love pink!

So that’s it! One major project now residing in my closet rather than in my sewing room. Time to start something new…

33 Comments

Filed under Boucle for French style jackets, bound buttonholes, Buttons - choosing the right ones, Chanel-type jackets, Linen, Linings, Mid-Century style, Moygashel linen, piping, Scarves, Shoes to make an outfit complete, Uncategorized, Vintage fabric

Just for the Chill of It

Autumn is a delightful season here in the northeastern part of the United States. One can tell it is on its way when the warm days quickly take on an evening chill once the sun slips below the horizon. It is the time of year when a light coat or sweater is a necessity, especially with a sleeveless dress.

With this scenario, and a September wedding to attend, what better excuse did I need, to make a coat to go with this dress?

The Year of Magical Sewing

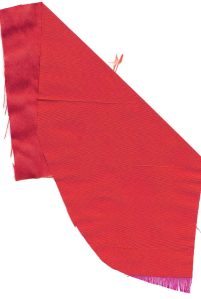
If you follow my blog then you probably already know this was my intention all along, when I made the dress two years ago. But it took a while to find the right coordinating fabric for a coat. I was looking for something between a coral and a pink. While the silk taffeta I found at Britex Fabrics looks more like a deep persimmon color when photographed, the fuchsia pink warp is very apparent when being worn.

Taffeta coat - swatch

Once I decided the Jo Mattli-designed coat, part of the original dress pattern, was too voluminous, I went to another pattern. I wanted to keep the “intention” of the original coat, but have it more streamlined.

The "original" coat designed by Jo Mattli.

The “original” coat designed by Jo Mattli.

Taffeta coat - %22too scimpy%22

The coat pattern I settled on.

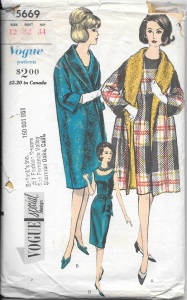
Somehow along the way, in making my muslin, I got the idea to add a curved belt to the back of the coat. I knew I had used a coat pattern several years ago with a curved belt back detail, so I went through my pattern collection to retrieve this:

This is a 1957 pattern, but look at the belt shown on the back of the envelope, below.

This is a 1957 pattern, but look at the belt shown on the back of the envelope, below.

taffeta-coat-belt-pattern-thumbnail

The belt is only shown in view A.

It took a couple of tries with the muslin to get the placement and angling of the belt correct, but once I did, I knew it was a winner. Dressmaker details like this always give me a thrill!

I anchored the belt in the side seams right under the bust darts.

I anchored the belt in the side seams right under the bust darts.

Just for the Chill of it

The curve of the belt needed to fall at my waistline.

The curve of the belt needed to fall at my waistline.

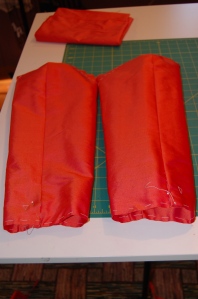
One of the things I like about this pattern is the two-part sleeve with a center seam. I think this design is always flattering to the shoulder. Here are the constructed sleeves:

Just for the Chill of it

That center seam also provides the opportunity for a faux vent, and since I just happened to have three buttons, which I thought would be perfect for the coat, I happily included vents, as the pattern dictated:

Just for the Chill of It

A small, cylindrical, crystal button!

A small, cylindrical, crystal button!

Although I originally thought I would leave the coat “closure-less,” that third button kept calling to me. While I did not want to have a single bound buttonhole in the center of the chest, I thought a button loop might do the trick. If I didn’t like it, I could remove it fairly easily from the front facing seam.

Just for the Chill of it

I also decided to add a loop at the neck, with a plain flat button under the collar. This way, I could close the collar if I chose to do so.

I pad-stitched the collar, but forgot to take a picture. Pad-stitching is like magic in how it makes the collar roll properly!

I pad-stitched the collar, but forgot to take a picture. Pad-stitching is like magic in how it makes the collar roll properly!

I have to say, I think the coat looks equally good any way it is worn: with the single button at the bust line closed, with both buttons secured and with neither of the buttons secured.

I chose not to add the optional pockets to this coat, but if I make it again in a less formal fabric, I would absolutely include them.

Once I got to the lining, I had to decide if I wanted to add the flat piping detail which I like so much. Of all the bias silk ribbon I have on hand, the only one which looked good was deep pink. Because of that, it doesn’t show contrast all that well, but I still like the subtle finishing look it gives to the lining.

Just for the Chill of it

Just for the Chill of it

Here, by the way, is the coat before I inserted the lining:

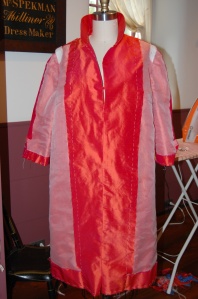
I underlined the entire coat with silk organza and added "cigarette" sleeve headings.

I underlined the entire coat with silk organza and added “cigarette” sleeve headings.

I love a center back seam!

I love a center back seam!

I used some vintage silk buttonhole twist to tack the center back fold in the lining at the neck and at the waistline.

Just for the Chill of it

There is no question that the dress and the coat go together once the lining shows!

There is no question that the dress and the coat go together once the lining shows!

Just for the Chill of it

I love that the lining peeks out from the sleeves when I am wearing the coat.

I love that the lining peeks out from the sleeves when I am wearing the coat.

taffeta-coat-full-copy

I was delighted when the photographer at the wedding wanted to take my picture because he "liked my outfit so much." (This is not that photo...)

I was delighted when the photographer at the wedding wanted to take my picture because he “liked my outfit so much.” (This is not that photo…)

Here with my husband - with a coordinating tie, no less (not planned, but makes for a great photo!)

Here with my husband – with a coordinating tie, no less (not planned, but makes for a great photo!)

It may seem a bit frivolous to make a coat like this, knowing that it will not be worn all that often – although I do have two other dress-weight silks in my collection which would look fairly stunning paired with this coat!  However,  it really is the perfect weight and look for an elegant, but chilly, evening out – and it was so much fun to make.

38 Comments

Filed under Buttons - choosing the right ones, Coats, Cocktail dresses, couture construction, Dressmaker coats, Dressmaker details, Linings, Mid-Century style, piping, sewing in silk, Silk taffeta, Uncategorized, vintage buttons, vintage Vogue patterns from the 1960s

What Color is Your Lining?

Linings seem to be coming out of the (fabric) closet and finally getting the recognition they deserve! I have been thinking a lot about linings lately, as I have been working on a coat, the lining for which was its inspiration.

I made a cocktail dress out of the blue fabric and purchased enough to use as the lining for a coordinating coat.

I made a cocktail dress out of the blue fabric and purchased enough extra yardage to use for the lining of a coordinating coat.

As luck would have it, the current issue of Threads Magazine has an article on techniques to achieving “A Smoother Jacket Lining,” which states “the secret is installing it by hand.” I always appreciate an illustrated step-by-step approach to techniques such as this, and this article by Daryl Lancaster does not disappoint. While I am well versed in sewing in linings by hand, it is always good to read a refresher article such as this. (Obviously, the alternative to sewing in a lining by hand is to bag the lining, effectively sewing the lining in by machine.) I also always seem to gather one helpful tip, such as “Easy access to the armhole seam: Reach through the openings at the front hem to support the sleeve lining while you’re hand-sewing the armhole seams.” But what I really liked about this article was the section on “Fabric Guidelines.” In a nutshell, the author lists them as: “a low-friction surface; a supple hand; opacity; durability; and design compatibility.”

Design compatibility! This means, according to the author: “The lining should complement the garment. It can match or contrast. Lining offers the opportunity to subtly show the wearer’s creativity.” EXACTLY!

Many of us, I think, grew up or learned to sew with the idea that linings should match the color of the outer garment as closely as possible. And while that is still appropriate in many instances, there is also a case to be made for linings of contrasting or coordinating colors, and/or figured designs. In fact, I believe a lining has the potential to turn your garment from ho-hum into tres chic.

One of the best examples of the power of a lining is the classic little French jacket.   Pictured here are the two I have made for myself (with two more planned.) Imagine the one on the left being lined in a plain black or red charmeuse, and the one on the right lined in a solid light brown. Neither would be nearly as attractive even though the lining does not show when the jacket is being worn. As it turned out, I made a sheath dress, which matches the lining of the red jacket, and a blouse to match the lining of the jacket on the right. This makes the lining an integral part of the all-over design of the ensemble.

What color is your lining?

Likewise, this Pucci silk sat in my fabric collection for a few years until I found the right pattern for it. Then I became obsessed with somehow working out a way to line the jacket and make the dress out of the scant existing yardage I had.

Defying the passage of years

An inside look at the jacket with its matching lining.

An inside look at the jacket with its matching lining.

The nice thing about this jacket is that it does not have to be paired with the dress, looking equally as nice with a plain pink skirt. Which leads me into the next thought: sometimes it is more appropriate for your lining to be subtle in order to make your garment more versatile. When I made a linen coat last year, I would have loved to use a deep pink lining silk to match the linen dress I knew I would be wearing with it. I chose, instead, to match the lavender of the coat, making it easier to wear with other dresses or pants, which might not have any pink in them. To make it a little extra special, however, I added flat silk piping to the front edges of the lining. Because coats come off and on, and sometimes find themselves flung over chair arms, this little detail is often seen by more than just the wearer.

Fitting finish

Then there are the linings which truly are only seen by the person wearing the garment – you or I. Is it worth the time and/or expense to create a special lining in something like this? Every situation should be evaluated on its own merits, but I believe this is where the privilege of being your own dressmaker is in full flower. Why not add a little detail or use a beautiful, contrasting color to coordinate with your fashion fabric?

I used a gray Bemberg lining for this dress, but accented the neck edge with green piping. Obviously, no one sees this but me!

I used a gray Bemberg lining for this dress, but accented the neck edge with green piping. Obviously, no one sees this but me!

Here is the dress with its hidden lining detail.

Here is the dress with its hidden lining detail.

Who would guess that under this dress is . . .

And who would guess that under this dress is . . .

. . . this lining?

. . . this lining?

In sewing (as in life) it is often the hidden treasures or small gestures which add depth and enjoyment to the process and product. May your hidden or not-so-hidden linings be beautiful every time!

12 Comments

Filed under Dressmaker details, Linings, piping, Uncategorized

An Evening Jacket for the Ages

“Very up and coming” for the Fall of 1962, according to Vogue Pattern Magazine, was “the striking medium between a straight line and a bold curve – the gentle convex ‘barrel’ shaping of this coat:”

An Evening Jacket for the Ages - picture

It is from this time period – perhaps a year or two later – that this Designer Pattern comes:

Oh the things we can learn, no 10

I don’t know many of us who want to look like they are in a barrel, so it was my intention to take the best parts of the design of the evening jacket and then adapt it to a more current look, or at least to one that did not scream 1963/64

The details I loved about it were: 1) the shaped, two-part collar, which doesn’t really look like a collar, rather as an extension of the body of the jacket, but with more definition to it:

Evening jacket for the Ages

2) the dipped back hem of the jacket:

Evening Jacket for the Ages

I purchased the yellow silk taffeta from Britex Fabrics, while the dress fabric, also silk, is from Mendel Goldberg.

Evening Jacket for the Ages

3) the below-elbow length, kimono sleeves with their clever built-in gusset, and 4) the prominent, offset buttons:

Evening Jacket for the Ages

The top buttonhole is a slot-seam one, while the other two are bound buttonholes.

Less attractive to me was the fullness of the body of the jacket.

My muslin (toile) showed me that I needed to eliminate quite a bit of that fullness from the pattern pieces. I took 2 inches right out of the back of the jacket, making for much less to be gathered into the collar:

Even with two inches removed from the center back seam, there is still enough to gather nicely into the collar.

Even with two inches removed from the center back seam, there is still enough to gather nicely into the collar.

I also took a large wedge out of the each side of the back:

The dark blue line on the left is my re-drawn seam line. the original seam line is marked in red.

The dark blue line on the left is my re-drawn seam line. The original seam line is marked in red.

Then to add a little more shaping, I re-drew the side seams in the side underarm sections:

Again, the blue line on the left is my re-drawn seam line.

Again, the blue line on the left is my re-drawn seam line.

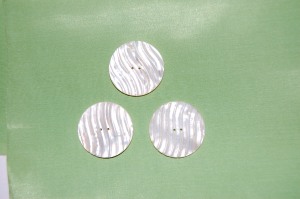
Because the buttons are such a prominent feature of the jacket, I knew I had to find the right ones. The pattern called for them to be 1¼” in diameter. That is a big button! I also knew they had to be a bit fancy or elegant, and I envisioned mother-of-pearl as the ideal composition. It took a while, but I found these buttons on eBay, and they looked just about perfect to me: right size, beautifully carved mother-of- pearl with a swirl design which I thought would add just the right contrast to the silk taffeta of the jacket. As it turned out, they were also the right price (always a welcome surprise!), and more beautiful when they arrived than I had anticipated:

Evening Jacket for the Ages

These buttons have a substantial heft to them, making them well suited for their application on this jacket.

After getting the body of the jacket together, I tried it on to look at the length of it. Fortunately I had cut my pattern with about an extra half-inch in the length, and I used it, plus another ¼ of an inch, as it just looked better a little longer.

Another plus to lengthening the jacket is that the sleeve length lined up more attractively, something I didn't realize until I saw these photos!

Another plus to lengthening the jacket is that the sleeve length lined up more attractively, something I didn’t realize until I saw these photos.

I did my usual flat applied piping along the edge of the lining:

Here is the piping sewn in place.

Here is the piping sewn in place.

The green piping picks up the green in the dress. I opted for an off-white lining, which is a little boring but that's okay!

The green piping picks up the green in the dress. I opted for an off-white lining, which is a little boring but that’s okay.

And I added the label I had:

Evening Jacket for the Ages

Evening Jacket for the Ages

Evening Jacket for the Ages

A few wrinkles left over from the jacket’s first wearing!

Evening Jacket for the Ages

Evening Jacket for the Agea

Evening Jacket for the Ages

I have to say, I really love this evening jacket. I have decided it is going to have another life – with another dress, this one constructed with the double, slanted flounce on it (see pattern above).  It would look fairly fabulous with a black and goldenrod printed silk – or navy, white and goldenrod printed silk…   I’ll be on the search.

17 Comments

Filed under bound buttonholes, Buttons - choosing the right ones, couture construction, kimono sleeves, Mid-Century style, piping, sewing in silk, Silk taffeta, Slot-seam buttonholes, Uncategorized, vintage buttons, vintage Vogue Designer patterns, vintage Vogue patterns from the 1960s

“Do What You Can…”

“Do what you can, with what you have, where you are.” – Teddy Roosevelt

I had never seen nor read this quote before three weeks ago, seeing it for first time carved into the slats of this rustic bench:

DSC_0652

There is a lot of wisdom in those few words, especially meaningful to many people in many different walks of life, I am sure, but especially pertinent to those of us who sew. Why so, do you ask?

Do you, as I do, plan sewing projects which are transportable when you travel? Can you quite imagine being without needle and thread – or at the least, a book or magazine on sewing or fashion? What do you do when you can’t (gasp!) bring along your sewing machine when traveling far from home? Well, you do what you can, with what you have, where you are….

What I knew I could do before we left our home in Pennsylvania three weeks ago for a month in Wyoming – was plan to do hand-sewing on two or three projects. What I had for a “first-project-to-finish” before I departed home (sans sewing machine) – was the unfinished pink-flowered linen dress, started what seems like a lifetime ago.

Big, bright daisies with lavender centers.

Big, bright daisies with lavender centers.

And where I was going to be – had possibility and promise and “best plans” written all over it. The possibility and promise have come in bucketfuls, with days and weeks of family fun: hiking; wildlife-sightings; story times with little granddaughters; diaper changing and laundry; shopping a la Western style; cocktail hour every evening; magnificent mountain peaks, valleys, lakes and rivers; grocery shopping and more grocery shopping; and the list goes on and on. I realized a week into our stay that all my planning for some strategic hand-sewing tucked into these busy days was, well, quite simply, not going to happen – at least not while grown children and little grandchildren took loving precedence!

And then suddenly, all too soon, the house was much too quiet, the toys were put away, and while hiking and wildlife sightings are happily still commonplace, my sewing – and my pink linen “not-quite-a-dress-yet” dress – came out to give me a different type of focus.

I was scrambling before I left home to get it to the point where I had only the hand-sewn finishing to complete. The first challenge I had was with the layout of the sheath dress pattern on that large floral print. The linen is a piece of vintage Moygashel, dating to the late 1960s. By this date, Moygashel was being produced in 45” width, rather than 35”. I have found that it is not uncommon to find center crease lines in the linen from this era, where decades of storage have caused the fabric dye to rub off enough to leave a faint pale line.

The fold line - and subsequent faint white line showing dye loss is visible in this photograph.

The fold line – and subsequent faint white line showing dye loss is visible in this photograph.

This left me with only one option: I had to place the dress front and the two side backs on either side of the center line of fabric, to avoid that pale line. But I also had to think about the placement of those large daisies. I wanted to try to match the fabric design as much as possible along the center back seam. To accomplish both these goals, I had to line up the front of the dress and one of the side backs, one above the other. (I forgot to take a photo.)  It turned out I was a couple of inches short of the length I needed to do this. So – I knew I would need to face the hem.

I was fairly successful in matching the flower design along the back seam . . .

I was fairly successful in matching the flower design along the back seam . . .

Then on to the machine sewing of darts, seams, seam finishings. With those completed, I turned my attention to the lavender piping I wanted to put around the neck edge. I used the same cotton kitchen string I had used on my “ghost dress” to use as the filler for the piping. The heavier weight of the linen made the piping more substantial, which is exactly what I wanted.

I added piping only to the neck edge.

I added piping only to the neck edge.

With the piping sewn in place, I could proceed to the zipper. Even though I would be hand-picking the zipper, I wanted to complete it, to double-check the fit before I left on our journey. Then I realized that I had purchased the wrong length zipper! I had picked up a 20” zipper, forgetting that I was adding a V to the back neck. I needed a 16” zipper and had no time to make the trip to JoAnn’s to get a new one. In desperation I searched through my notions drawers and found every color and length of zipper under the sun except a 16” white one. (I’m exaggerating, of course.) Then I looked through a bag of zippers I had gotten from my mother, and lo and behold, there was a 16” white metal zipper, still in its original wrapper. Well, why not? A vintage metal zipper would be perfect for vintage linen. Crisis averted.

As it turns out, I found this ad for metal versus nylon coil zippers in a 1964 Vogue Pattern Book Magazine. If you read the copy, they recommend using metal zippers for fabrics like cotton and linen which require a hot iron. The quality of nylon coil zippers is now such that they can be used for these fabrics without a worry.

As it turns out, I found this ad for metal versus nylon coil zippers in a 1964 Vogue Pattern Book Magazine. If you read the copy (click on the photo for easier reading), they recommend using metal zippers for fabrics like cotton and linen which require a hot iron. The quality of nylon coil zippers is now such that they can be used for these fabrics without a worry.

Before I turned my attention to making the lining for the dress, I wanted to address that faced hem. With no time to think about making a facing from the lining fabric, I went back to my notions drawer. Once again, sewing hand-me-downs from my mother came to the rescue! I found this package of white cotton hem facing, which would be perfect for my needs.

Look at the price on this! Also, now I am quite sure the hem facing would be a cotton blend rather than 100% cotton.

Look at the price on this! Also, now I am quite sure purchased hem facing would be a cotton blend rather than 100% cotton.

The faced hem, plus a view of the seams which I finished with Hug Snug seam binding.

The faced hem, plus a view of the seams which I finished with Hug Snug seam binding.

Once the lining was sewn, I gathered all the tools and notions I would need to finish the dress by hand. Off it all flew to Wyoming, where finally I finished this flower-powered dress under the expansive Western skies.

The front of the dress. No time to get photos of me in it yet, unfortunately!

The front of the dress. No time to get photos of me in it yet, unfortunately!

This full photo of the back of the dress shows some more of the pattern matching.

This full photo of the back of the dress shows some more of the pattern matching.

I did what I could, with what I had, where I was.

20 Comments

Filed under Linen, Moygashel linen, piping, Uncategorized, Vintage fabric

The Domino Effect

Being totally smitten with this bold floral linen, purchased within the past year, I have had my heart set on making it into a day dress this Summer.

Big, bright daisies with lavender centers.

Big, bright daisies with lavender centers.

Not long after I purchased it, this small article on “Signs of Spring 2015 On New York Runways” appeared in the September 10, 2014 Wall Street Journal.

"Memorable moments included bold floral daytime dresses from Carolina Herrara..."

“Memorable moments included bold floral daytime dresses from Carolina Herrera…”

And then in November of 2014, more of Carolina Herrera’s Spring/Resort collection for 2015 was featured in Town & Country magazine.

Perennial daises on two lovely Carolina Herrera dresses.

Perennial daises on two lovely Carolina Herrera dresses.

It seems this vintage Moygashel linen from the late 1960s, with its bold daisy design is very much in vogue currently, both for its size and its floral motif. (The bodice of my recent fancy dress also featured a “daisy” motif in the silk embroidered organza):

The Allure of silk, pt 1

Although I am of the mind that daisies are always in vogue, nevertheless, this seems like the perfect year to fashion a dress from this linen. Such a demonstrative print begs for a simply-styled dress, such as – you guessed it – a sheath dress.   The fabric will make this dress, not the pattern. How could I, I wondered, do something a little different and still keep it simple? The answer to that question began to take shape when I found a length of pale lavender Moygashel linen this past Spring. Suddenly I envisioned a V-back to a sheath dress with a rounded neck, detailed with piping made from this lavender linen.

Then it began to get complicated. With just a few inches over 3 yards of the 35” wide lavender fabric, I knew I would have to calculate carefully when I cut bias strips for the piping, if I wanted to fashion another garment out of the lavender. And of course, I do! Actually, when I looked at the lavender fabric, and paired it with any number of my other fabrics and/or dresses, it seemed the only thing to use it for was a “Spring” coat. But would I have enough fabric for both a coat and bias strips for piping?

Obviously, I would have to find a coat pattern and lay it out leaving enough space for bias strips, to see if I could manage this minor miracle. Of all my coat patterns, this Madame Gres design is the one I decided had the best chance of working, both for my limited yardage and for the pattern’s simple, uncluttered lines:

The short version of the coat is on the left.

The short version of the coat is on the left.

The fact that it is featured with below elbow length sleeves and in a shorter version – perfect for pairing with coordinating dresses – worked in my favor. The entire coat has only 5 pattern pieces: front, back, collar, undercollar, and front facing. First I positioned the tissue pattern pieces on my fabric, strewn out on the floor selvedge to selvedge. I was heartened enough by this exercise to go ahead and make a muslin, so I could have a “real” pattern to work from. All this time, the pink flowered daisy linen lay folded, awaiting her turn.

One of the most unusual features of the coat design is the front dart, which serves both as a bust dart and as a side-shaping dart. As is so often the case with these vintage patterns, the dart sewn as indicated on the pattern was too high for me. In addition, it pulled and stretched the kimono shoulder in all the wrong ways. I lowered the apex of the dart and re-sewed it, trying to preserve its curve, and suddenly it fit like a charm.

The newly drawn dart is in orange, while its original position is in red.

The newly drawn dart is in orange, while its original position is in red.

Now that I had a workable pattern, I knew I could just eke out the coat if I “pieced” the left front facing. I could live with that! And, just as important, I would have enough of the fabric to cut bias strips for piping for my daisy sheath. Whew!

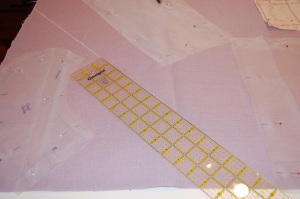
This see-through ruler helped me find a corner from which to cut the bias strips for the piping.

This see-through ruler helped me find a corner from which to cut the bias strips for the piping.

So now, the pieces for the coat, with their silk organza underlinings pinned in place, are taking their turn waiting for further attention. One project started another and now both are lined up like a circle of dominoes, ready to go down in an orderly fashion, albeit in slo-o-o-w motion.

13 Comments

Filed under kimono sleeves, Linen, Moygashel linen, piping, Uncategorized, Vintage fabric, vintage Vogue Designer patterns

The Evolution of a Suit Dress – Part 3: Finished Jacket

It is a fairly well-known fact that making a classic French “Chanel-like” jacket takes about (or at least!) 70 dedicated hours of sewing time. I did not keep track of the hours I spent on my Jo Mattli-designed jacket, but I am guessing that it rivals – in time spent sewing – both of the classic French jackets I have made. However, I am not complaining. I would commit to it all over again. And just think – I still have to make the coordinating dress for this jacket!

Mattli jacket But it is finished, and happily so. One of the true joys of sewing is the ability it gives us to make some stylistic changes, add embellishments if desired, and use our heads to determine what works and what doesn’t work for the fabric we are using and the intended usage of our garments. While I did not make any stylistic changes to this jacket, I did add my own “dressmaker details” while stitching my way through this project. But first a few more regular details, picking up where I left off in my last post.

1) To finish the underside of the bound buttonholes, I used organza patches. I have started using this method all the time, as it makes such a neat, fool-proof finish.

The silk organza patch is sewn onto the right side.  After cutting and clipping the corners - carefully! - you turn the organza and you have a perfectly finished opening to back up to your bound buttonhole.  then it is easy to sew the two sides together very neatly.

The silk organza patch is sewn onto the right side. After cutting and clipping the corners – carefully! – you turn the organza and you have a perfectly finished opening to back up to your bound buttonhole. Then it is easy to sew the two sides together very neatly.

2) Even though the entire jacket is underlined with silk organza, I added another layer of silk organza “interfacing” to the hemline, as directed in the pattern instructions.

Mattli jacket

I always like to baste the hem along the bottom edge to stabilize it until the jacket is complete.

I always like to baste the hem along the bottom edge to stabilize it until the jacket is complete.

3) I used black “cigarette” which I purchase from Susan Khalje’s store for the sleeve headings. I doubled and graduated the two layers to achieve the correct amount of sleeve–cap cushioning. Unfortunately, no photos were able to pick up the details in this – too much black and navy blue and not enough contrast!

This is what the "cigarette" looks like.

This is what the “cigarette” looks like.

One of the interesting construction details in this design is the notched collar. Most notched collars are seamed at the “notch,”,joining the upper collar and the front facing and forming a “V”.

This diagram from The Vogue Sewing Book. c. 1970, Butterick Division, New York, New York, shows a classic notched collar.

This diagram from The Vogue Sewing Book. c. 1970, Butterick Division, New York, New York, shows a classic notched collar.

However, the collar in this Mattli design is formed by extensions of the front facing, with a center back seam on the upper-collar portion of the facings.   Hopefully these photos will explain better than words can:

You can see there is no seam at the "notch."

You can see there is no seam at the “notch.”

Here is the seam at the back upper collar.

Here is the seam at the back upper collar.

While I was contemplating the lining for the jacket, I thought it would add just a really special touch if I did a interior bias piping to set off the lining where it joins the jacket along the front edges and around the neck. Normally this is made out of silk, but I did not have any light-weight silk which was the correct color of red. However, I did find some scraps left over from a red wool challis maternity dress I made for myself over 34 years ago. (Yes, you read that correctly!) Very light in weight – and the exact color I needed – made it the perfect fabric for this detail.

I cut a bias strip one inch in width and folded it in half.  I guess this proves it pays to save scraps!?

I cut a bias strip one inch in width and folded it in half. I guess this proves it pays to save scraps!?

This is such an easy flourish to do, and it adds such a professional touch.  Adding this flat “piping” is quickly becoming a standard for me when I make jackets or coats. Once you have your bias strip cut, folded in half and pressed, all you need to do is baste it in place along the line where the lining will be hand-stitched to the jacket interior.

The bias "piping" basted in place.

The bias “piping” basted in place. Click on the photo to see it close-up.

And here’s what the finished lining looks like:

Mattli jacket

Here is the back neck edge.

Here is the back neck edge.

I really like this extra flourish.

I really like this extra flourish.

Now – true confessions!  After top-stitching the sleeve edges, the collar and most of one front, I decided I did not like it.  I thought it detracted from the windowpane of the fabric, so I took it all out.  NO top-stitching – for me – on this jacket!

Finally, I made a small change to the back hem of the jacket. Can you figure out what it is? (A previous photo of the jacket back will also give you a clue.)

Mattli jacket I used a trick I learned from my French Jacket class with Susan Khalje: I added a slight curve to the hem and lengthened it by about a half-inch, graduating it back to the prescribed hemline at the side back seams. I love this graceful detail. I believe it will be especially effective when it is paired with the dress. (This photo also shows that all the hours I spent on the layout, making sure I had matched the plaid, was time well spent!)

Speaking of the dress (and matching more plaid) . . .   I never imagined I wouldn’t have this entire ensemble completed by about now. So – it looks like I’ll still be sewing on wool when Spring arrives. Hopefully by the time Spring departs I will have moved on to something more seasonal!

26 Comments

Filed under bound buttonholes, couture construction, Dressmaker details, piping, Suit dresses, Uncategorized, underlinings, vintage Vogue Designer patterns, vintage Vogue patterns from the 1970s, woolens