
If I had known how lengthy a process it is to make a couture Guipure lace skirt, I would have chosen to make it before the blouse. Here I thought I was getting the more complicated part finished first. Well, I could not have been more mistaken! However, it certainly feels good to have both finished, although I may be in “skirt recovery” for a while!
The Guipure lace I used was some that I had purchased a couple of years ago. I liked the fact that the color from my fashion fabric – that coppery brown silk – would be a good contrast to the white lace. However, I did not consider if it was really the best choice for a Guipure skirt, due to the fact that part of the allure of these skirts is camouflaging the seams and darts. The light weight nature of this Guipure – and its very regular pattern – made it somewhat difficult to use for this purpose.
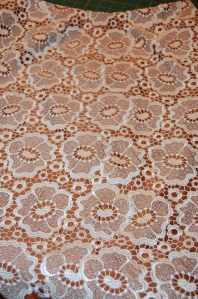
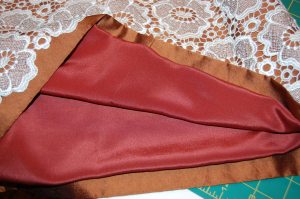
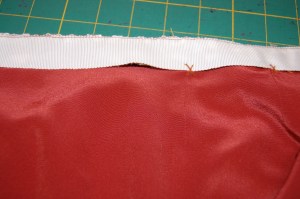
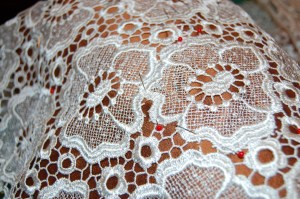
One of the first things I did was determine what selvedge edge of the lace I wanted to use for the hem. Once I had settled that, I had to decide how much of the fashion fabric to leave showing on the hem edge.
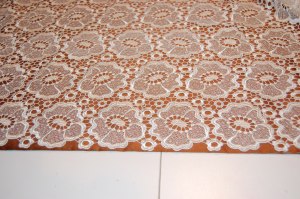
This selvedge edge is marked by some of the small daisy-like flowers in a horizontal line with the larger motifs.
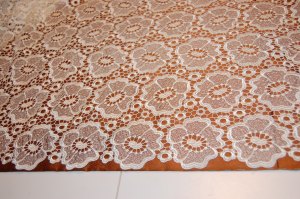
And here the larger motifs are more prominent.I preferred this one, but I moved it up a bit to show more of the fashion fabric, in order to “ground” the lower edge.
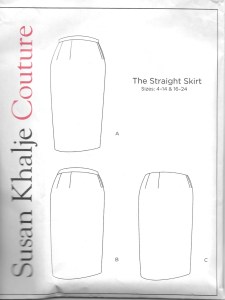
From then on, I followed the Craftsy Class presented by Threads Magazine, with Susan Khalje teaching. Here are some pictures taken along the way:

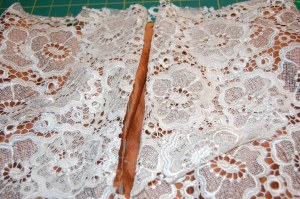
Pinned in place, ready to stitch part of the lace covering the back seam.
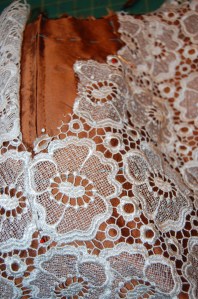
In trying to camouflage the zipper, I chose to have a fairly substantial flap of lace on the left, to be snapped in place on the right. It would have been better to have smaller overlays across the zipper, which are much easier to handle.
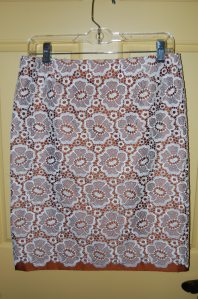
The back of the skirt with all the lace attached and snapped in place.
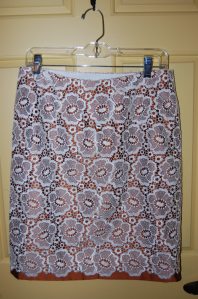
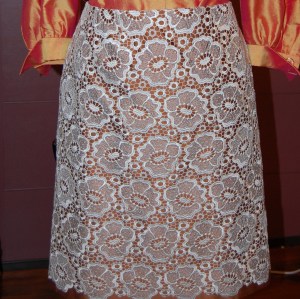
All in all, the back of the skirt looks okay, I think.
And the shaping over the darts is almost imperceptible on this view of the skirt front.
I have one tip to add: when I was ready to insert the silk lining, there were many fuzzies and threads clinging onto the cotton underlining. I really did not want them encased in my skirt forever, so I quickly removed them all with a lint roller. Then the lining went in just as intended, followed by the Petersham ribbon inner waist band.
Here is the lining with its built-in drop pleat for ease of wearing.
View of the interior Petersham ribbon waist “facing.”
All in all, I am fairly pleased with how this skirt turned out. I learned so much from taking this course and making this skirt, and it probably isn’t surprising that I have a list of things to do differently the next time.
1) choose a heavier weight – or more substantial – Guipure, with a more intricate pattern. This should make it easier to hide the snaps and manipiulate the motifs in the lace to conceal all which must be concealed!
2) use a lighter weight cotton for my underlining. I felt the one I used was just a little heavier than needed. (It was some I found in my stack of quilting cottons.)
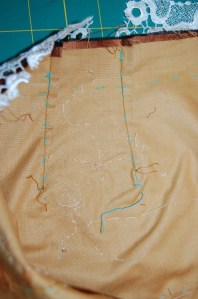
The underlining cotton. A little lighter in weight would be preferable.
3) leave 1/2” distance from the top of the zipper to the line for the Petersham ribbon. I left about 3/8” and I think the zipper is a little squashed at the waistline.
4) when I tried on the skirt midway through to doublecheck on the fit, I thought the waist was a little snug, so I added 3/8”. But once the skirt was finished, I found I really did not need the extra fullness. So next time, I’ll keep my original measurement! Hopefully I won’t need suspenders to keep the skirt from falling down.
5) next time I will definitely use a more exciting lining. I think this one is dull.
Now I have one more small thing to make for this outfit (with full pictures to come.) But I have small on the brain right now as I need to do some sewing for my little granddaughters, making for a fierce competiton in my sewing room. I believe multi-tasking will be on the agenda.


A Three Piece Outfit for the Holidays, Part 3: The Sash
The sash started it all. After finishing this silk taffeta coat last year, I was left with about 1 and ½ yards of that luscious coral fabric.
I just could not stand the thought of having that yardage sitting in my fabric closet, unused, as I found it so delightful to sew and to wear. That is when I got the idea to combine this fabric with the Guipure lace, also sharing space in that closet of wonders. However, my first thought was to make a blouse from the fabric and also use it as the fashion fabric for a lace skirt, knowing I would need at least one more yard to accomplish this plan. I contacted Britex Fabrics, from whence the fabric came, and to my dismay, they were sold out, with no more available to special order. Undeterred, I then came up with the idea of coordinating fabrics for the blouse and skirt, and using the coral silk to tie it all together. After receiving swatches of several silks from Britex, I settled on the bronzy brown and the apricot colored fabrics for the skirt and blouse, respectively.
A sash should really be straightforward, right? Well, yes; however, I thought it would be good if the sash had a slight curve to it to follow the curvature over the upper hip. That’s when I went to my closet and pulled out a silk sash that I purchased from J. Crew years ago. I had remembered correctly that it had a slight curve to it:
I often think of the tip in the book 101 Things I Learned in Fashion School, page 86: “When in doubt, look in your closet.” Looking at something that is “Ready to Wear” will often help you with construction methods or design ideas.
The J. Crew sash is 72 inches long. A trial tying of the bow proved to me that I needed to add more length to the sash if I wanted to tie a full bow at the waist, which was my intent. I determined that adding 12 inches would do the trick. Then I used that sash as a template to make a pattern, not quite knowing how sewing that long, slow curve was going to work (the sash has one long seam on the concave side of the curve, meaning that some give would need to be worked into that seam.) As it turned out, ironing was the trick to get it to behave correctly, as is so often the case!
84″ proved to be the perfect length to tie a complete bow.
I had to piece the sash in the center back, but I knew that ahead of time and it really does not bother me.
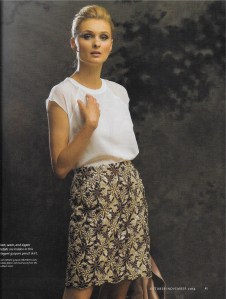
After trying on this completed outfit for the photos, I know that I need to somehow tighten up the interior waist of the skirt (you many recall from my last post, that I added what turned out to be unnecessary width to the circumference of the waist.) My blouse is not going to stay tucked in if I don’t, and the skirt feels like it is drooping on me. I am going to try adding interior waist elastic to straddle the side seams and see if that might do the trick. I am not about to take the skirt apart and remake it! And the sash should help conceal any bobbles in the waistline.
The “concealed zipper.”
It was cold and blustery when I took these photos! I could not wait to get back inside for a cup of hot tea!
Sewing for the holidays is such an anticipatory activity, and one that I love to do. There is already a festive feeling in the air here in late November, and so much more to sew…
28 Comments
Filed under Blouses, Bows as design feature, Fashion commentary, Lace, Silk taffeta, Uncategorized
Tagged as Blouses, Britex Fabrics, fashion sewing, Sashes and bows, silk