Monthly Archives: March 2016

The ABCs of D-R-E-S-S-M-A-K-I-N-G, Part I

Those of us who do fashion sewing sometimes have difficulty identifying what we do in a single descriptive word. A “sewer” (not those stinky things that go underground that happen to be spelled the same way) can be one who sews many different things, right? The term “sewist” is a somewhat new word, made up of sew + artist, which really doesn’t describe anything specific to my way of thinking. Most of us are not “designers” (and not all designers can sew), although most of us use some design techniques in our fashion sewing.   Some of us may be “sewing professionals,” a term which covers a broad range of endeavors, such as being a custom clothier, a sewing teacher, a writer about sewing, or even a retailer involved in the sewing industry. The term “seamstress” implies one who sews on a machine, as in a factory; although this person may be very talented in certain techniques, her job does not leave room for innovation or creativity. And that is why I like the term “dressmaker” so much. In one word it expresses many things explicit and implied. And although it is a term much used until the 1960s and not much since then, I consider myself a Dressmaker; maybe you do, too?

This wonderful Vogue book, copyright 1957, still used the term "Dressmaking" in its title.

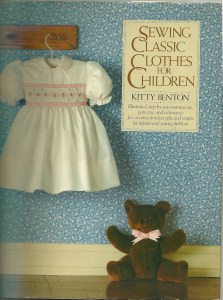
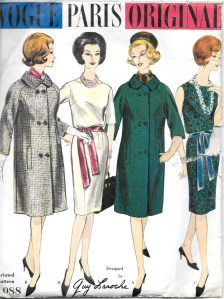
This wonderful Vogue book, copyright 1957, still used the term “Dressmaking” in its title.

A dressmaker is one who makes custom clothing for women (oneself included.) She usually works from a commercial pattern, and then uses all her creative, design, and technical skills to create a one-of-a-kind dress, blouse, skirt, coat, etc. I have devised this ABCs of DRESSMAKING to define some of the important aspects and practices of dressmaking, especially in the couture sense.

D is for Design. This seems like it should be common sense, but it cannot be said too often that you should choose a design that is going to work for you. Unlike ready-to-wear that we get to try on, when we sew, we are working from patterns that we think will be flattering, but we really will not know until it is finished (a muslin takes some of the guesswork out of this, but not entirely.) Most of us have our own personal style that we know is flattering to us. Even if you want to diverge a bit from it (which is fine), it’s probably best not to go too far afield. Also, beware of trends that may not be flattering. (An example of this from a couple of years back is the revival of the peplum, a look that not too many of us can wear very successfully.)  When it comes to Design, choose one that is “smart for [many] seasons” rather than “one that’s soon outdated.”

The first page of the book pictured above tells the reader why she should be using Vogue patterns, but it also suggests some of what it means to be a "Dressmaker."

The first page of the book pictured above tells the reader why she should be using Vogue patterns, but it also suggests some of what it means to be a “Dressmaker.”

R is for Risk. Let’s face it, fashion sewing can be risky. We can be sewing with really expensive or “difficult” fabric or vintage fabric, which is now no longer available – or sewing with a complicated design/pattern – or making something for a very special occasion – and the outcome is entirely in our hands! It takes bravery, confidence in one’s skills, patience, and a willingness to take a risk to grow in our dressmaking, but the rewards are manifold.

One of the Dressmaking signs I have hanging in my sewing room.

One of the Dressmaking signs I have hanging in my sewing room.

E is for two things: Engineering and Embellishment. I have said this before, but it bears repeating – sewing is engineering. I love to read pattern instruction sheets, especially for something that is complicated, and I bet many of you do, as well. It’s fascinating to see how patterns go together, how different fabrics demand specific approaches to that process, how the pattern pieces need to be manipulated to fit one’s particular form. A well-engineered pattern is a beautiful thing, and it takes a sewing-engineer’s mind to know how to best bring that pattern to life in a stylish and successful fashion. It takes a dressmaker.

Another one of my signs, the first one I purchased and still my favorite!

Another one of my signs, the first one I purchased and still my favorite!

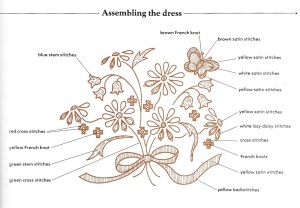
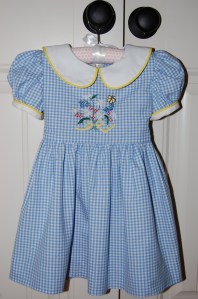
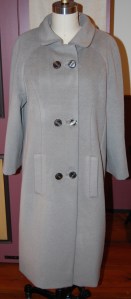
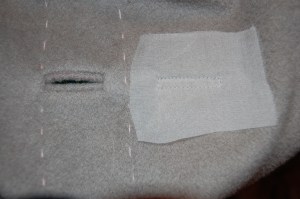
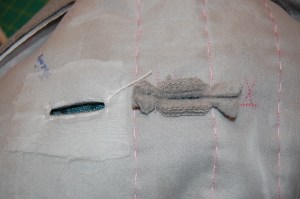
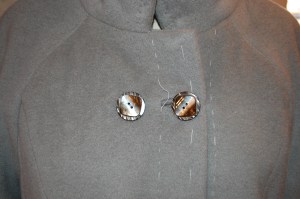
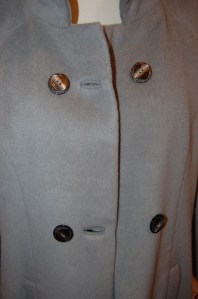
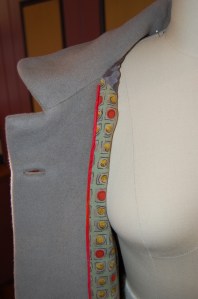
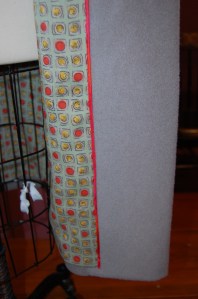
Embellishment is almost synonymous with the term dressmaker. “Dressmaker Details” include such things as ruffles and frills, ribbon, or braid, but also those little touches that add so much to a successful garment, such as well-chosen buttons, interior trims, non-boring linings, covered snaps, bound buttonholes (when appropriate), and the creative manipulation of, or addition to, a pattern to get the effect you want. A creative dressmaker can start with something basic and make it unique – and couture – by adding just the right embellishments or details.

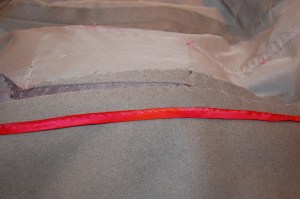
S is for Seams. This is about as basic as it gets, but those seams must be sewn well and finished well for a successful finished garment. One of the techniques I learned in the couture sewing classes I have taken with Susan Khalje is, for me, the method to achieve successful seams. That is – thread basting along seam lines to use as your sewing guide, rather than relying on the seam allowance markings on one’s sewing machine.   This is the building block for successful dressmaking.  And then, finish those seams on the inside to control bulk and add to the wearability and durability of your garment.

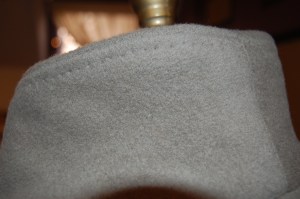
S is also for Steam. As in ironing. A good steam iron is worth its weight in gold! Steam is useful in so many ways – here are just a few:   1) When sewing with wool or most dry-cleanable fabrics, a good place to start is steaming your fabric before you begin to lay out your pattern pieces. Even if you have pre-washed cotton or linen fabrics, a good initial steaming of your yardgoods will insure a better outcome. 2) Steam newly sewn seams flat to set your stitches before spreading the seam open for its second pressing. 3) Contours can be set beautifully with steam, especially when using a pressing ham and/or a seam roll, or draping your work-in-progress on a dress form.

Te Vogue Dressmaking Book has an entire section on pressing, with guidelines still appropriate almost 60 years later. Click on the image to read the page.

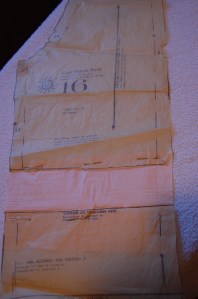
The Vogue Dressmaking Book has an entire section on pressing, with guidelines still appropriate almost 60 years later. Click on the image to read the page.

And then, S + S  is for Sewing Sense, which is what every successful Dressmaker must develop. This subject is so vast it warrants its own blog post sometime in the future!

So now I am halfway through the ABCs of D-R-E-S-S-M-A-K-I-N-G. Part II is yet to come…

17 Comments

Filed under couture construction, Dressmaker forms, The Conde Nast Publications, Uncategorized, Vogue patterns

A Second Chance

Although I did quite a lot of sewing for my two children when they were young, there were a few particular dresses I had always wanted to make for our daughter. Somehow by the time I had the time to think about making them, she had grown just a bit too old for these dresses better suited for a two, three, or four-year-old. But now I have a second chance to make them, this time for granddaughters. (Lucky me!)

With our oldest granddaughter’s third birthday approaching, I picked one of my favorite “sewing-for-children” books off of my shelf, and went right to the section on what has to be my favorite little girl’s dress of all time.

This beautiful book by Kitty Benton was published in 1981, by Hearst Book, New York. It is extensively illustrated, with explicit instructions for every project. It also has a complete section on Sewing Techniques, including smocking, embroidery stitches, hems, sewing on buttons, etc., etc. The book is an invaluable guide for heirloom sewing. Copies of it are available on Amazon and through a few Etsy shops.

This beautiful book by Kitty Benton was published in 1981, by Hearst Books, New York. It is extensively illustrated, with explicit instructions for every project. It also has a complete section on Sewing Techniques, including smocking, embroidery stitches, hems, sewing on buttons, etc., etc. The book is an invaluable guide for heirloom sewing. Copies of it are available on Amazon and through a few Etsy shops.

And here is the dress I love so much!

And here is the dress I have always loved so much!

The dress in the book is geared towards a two-year-old, so I decided to lengthen the bodice to fall at the waist, better suited for a young lady of three. I actually used this New Look pattern, version C (in lavender), for my pattern.

Obviously, I intended for the sash to tie in the back.

Obviously, I intended for the sash to tie in the back.

I lengthened the sleeves as well, in keeping with the intention of Kitty Benton’s design.

To transfer the embroidery design onto the bodice, I photo-copied it and enhanced the stitching lines with a fine-tipped black marker. Then I held it up to a window, with the blue gingham bodice piece centered on top, and I traced the design lightly with a sharp pencil.

A Second Chance embroidery pattern

A simple and sweet flower bouquet.

I used purchased yellow piping, being fortunate enough to find the perfect color. No need to make more work for myself when what I needed was readily available.

The embroidery on the dress took me longer than I anticipated, but I was able to finish the dress in the nick of time (except for a hook and eye at the back neck; I actually finished much of the hand sewing on it while spending the past 9 days with my daughter and granddaughters while our son-in-law was away on business; I forgot to bring hooks and eyes with me, so on my next visit, I’ll be doing that little addition!)

A Second Chance

I actually hand-picked the zipper! I'll be happy when I can get that neck properly finished with hook and eye.

I actually hand-picked the zipper. I’ll be happy when I can get that neck properly finished with hook and eye.

And a close-up look at what makes this little dress so endearing, besides the little person who will wear it!

And a close-up look at what makes this little dress so endearing, besides the little person who will wear it!

All I had to do was hope that the dress would fit little Aida well, and most importantly, that she would like it! Fortunately, both concerns were quickly dismissed, as she seemed to love the dress from first glance in the box and immediately wanted to put it on.

DSC_1147

A Second Chance

Her birthday party was held on the first day of Spring, and although it felt more like Winter, Aida happily wore her new dress for that special day.

The birthday girl!

The birthday girl!

Aida has already given me more joy than she will ever know – and also a second chance for some “little” sewing!

27 Comments

Filed under Heirloom sewing for children, Sewing for children, Uncategorized

A Fine February Finish

Leap Year, with its extra February day, seemed to be custom made for my sewing schedule. I had hoped to have my gray cashmere coat finished by the end of the month, and thanks to those extra 24 hours, I managed to do just that – barely! I will confess to taking out basting stitches, steaming, and adding two bar tacks to the lining on March 1st (gasp), but now my coat is finished.

A Fine Feb Finish

A Fine February Finish

Photos of me in this coat will be in a future post…

Like Claire McCardell, who said “I believe in a collection of coats,” and coats are “revealing, a clue to your taste, and your knowledge of Fashion,” I also believe that one should not “make a coat too basic.” The unique aspect of fashion sewing is that one can start with a basic (or not-so-basic) coat pattern and then make it her own.

The first owner of this Vogue Designer Original pattern, designed by Guy Laroche, which I used for my coat, had obviously used it. (This isn’t always the case – many vintage patterns are still “factory-folded” and in their unused condition.)

When I purchased the pattern, I had already decided to lengthen the sleeves, which are shown on the pattern envelope as “below-elbow” or bracelet-length. I wanted full-length sleeves as a practical matter. Much to my delight, the original owner had decided the same and had added tissue paper inserts into the sleeve pattern pieces. As it turned out, the length she had decided upon was also exactly right for me.

What a nice surprise to find the sleeves already lengthened!

What a nice surprise to find the sleeves already lengthened!

There are really only a few details I chose for this coat which serve to make it “not basic.” Besides the bound buttonholes (which used to be basic but are not so much anymore!), I put emphasis on the buttons, the lining and a couple of the finishing details.

First the buttonholes and buttons: because the cashmere fabric is coat-weight, I needed to make the “lips” of the buttonholes a bit wider than normal. Once again, I used an organza patch on the underside of the buttonholes, which makes a very nice interior finish:

The line of basting stitches is the fold line - the organza patch is on the facing part of the front edge.

The line of basting stitches is the fold line – the organza patch is on the facing part of the front edge.

Here is the patch ready to be sewn onto the back of the buttonhole.

Here is the patch ready to be sewn onto the back of the buttonhole.

I found these vintage buttons in an Etsy shop. Although they appear to be gray mother-of-pearl, they are actually plastic. The iridescent strip through the middle of each one, along with the square detail on the tops, gave me the idea to arrange them on an angle. I think they add just the right amount of interest to the front of the coat.

The "square" detail on the buttons picks up the design in the lining fabric.

The “square” detail on the buttons picks up the design in the lining fabric.

A Fine February Finish

Using the printed wool challis for the lining certainly elevates this coat to a notch above ordinary. The sleeves are lined with gray rayon Bemberg for practicality’s sake.

An inside out view, trying out the lining.

An inside out view, trying out the lining.

This photo shows a good look at the finished buttonholes, too.

This photo shows a good look at the underside of the finished buttonholes, too.

Of course the detail I love the most is the flat piping I added to the front interior edges of the lining.  As I have said before, doing this is so easy and adds so much.

A Fine Feb Finish

A Fine February Finish

Here is the flat piping stitched in place - so easy!

Here is the flat piping stitched in place – so easy!

The final small detail, which helps the collar to keep its shape, is under-stitching (by hand) on its underside.

A Fine February Finish

So what else did Claire McCardell say about coats? To quote from her book, What Shall I Wear, page 69, “… you can take another step and get a coat and dress that go together—never to be separated, never to be worn with any other dress or any other coat, and always with a special feeling of satisfaction. If you take a little trouble, you may be able to manage a heavy fabric skirt to go with the coat.”  I plan to take that little bit of trouble – a skirt out of the gray cashmere, and a blouse from the printed challis – to complete the outfit, and I will hope for that “special feeling of satisfaction.”

30 Comments

Filed under bound buttonholes, Buttons - choosing the right ones, Coats, couture construction, Dressmaker coats, Mid-Century style, Quotes about sewing, Uncategorized, vintage buttons, Vintage fabric, vintage Vogue Designer patterns, vintage Vogue patterns from the 1960s, woolens