
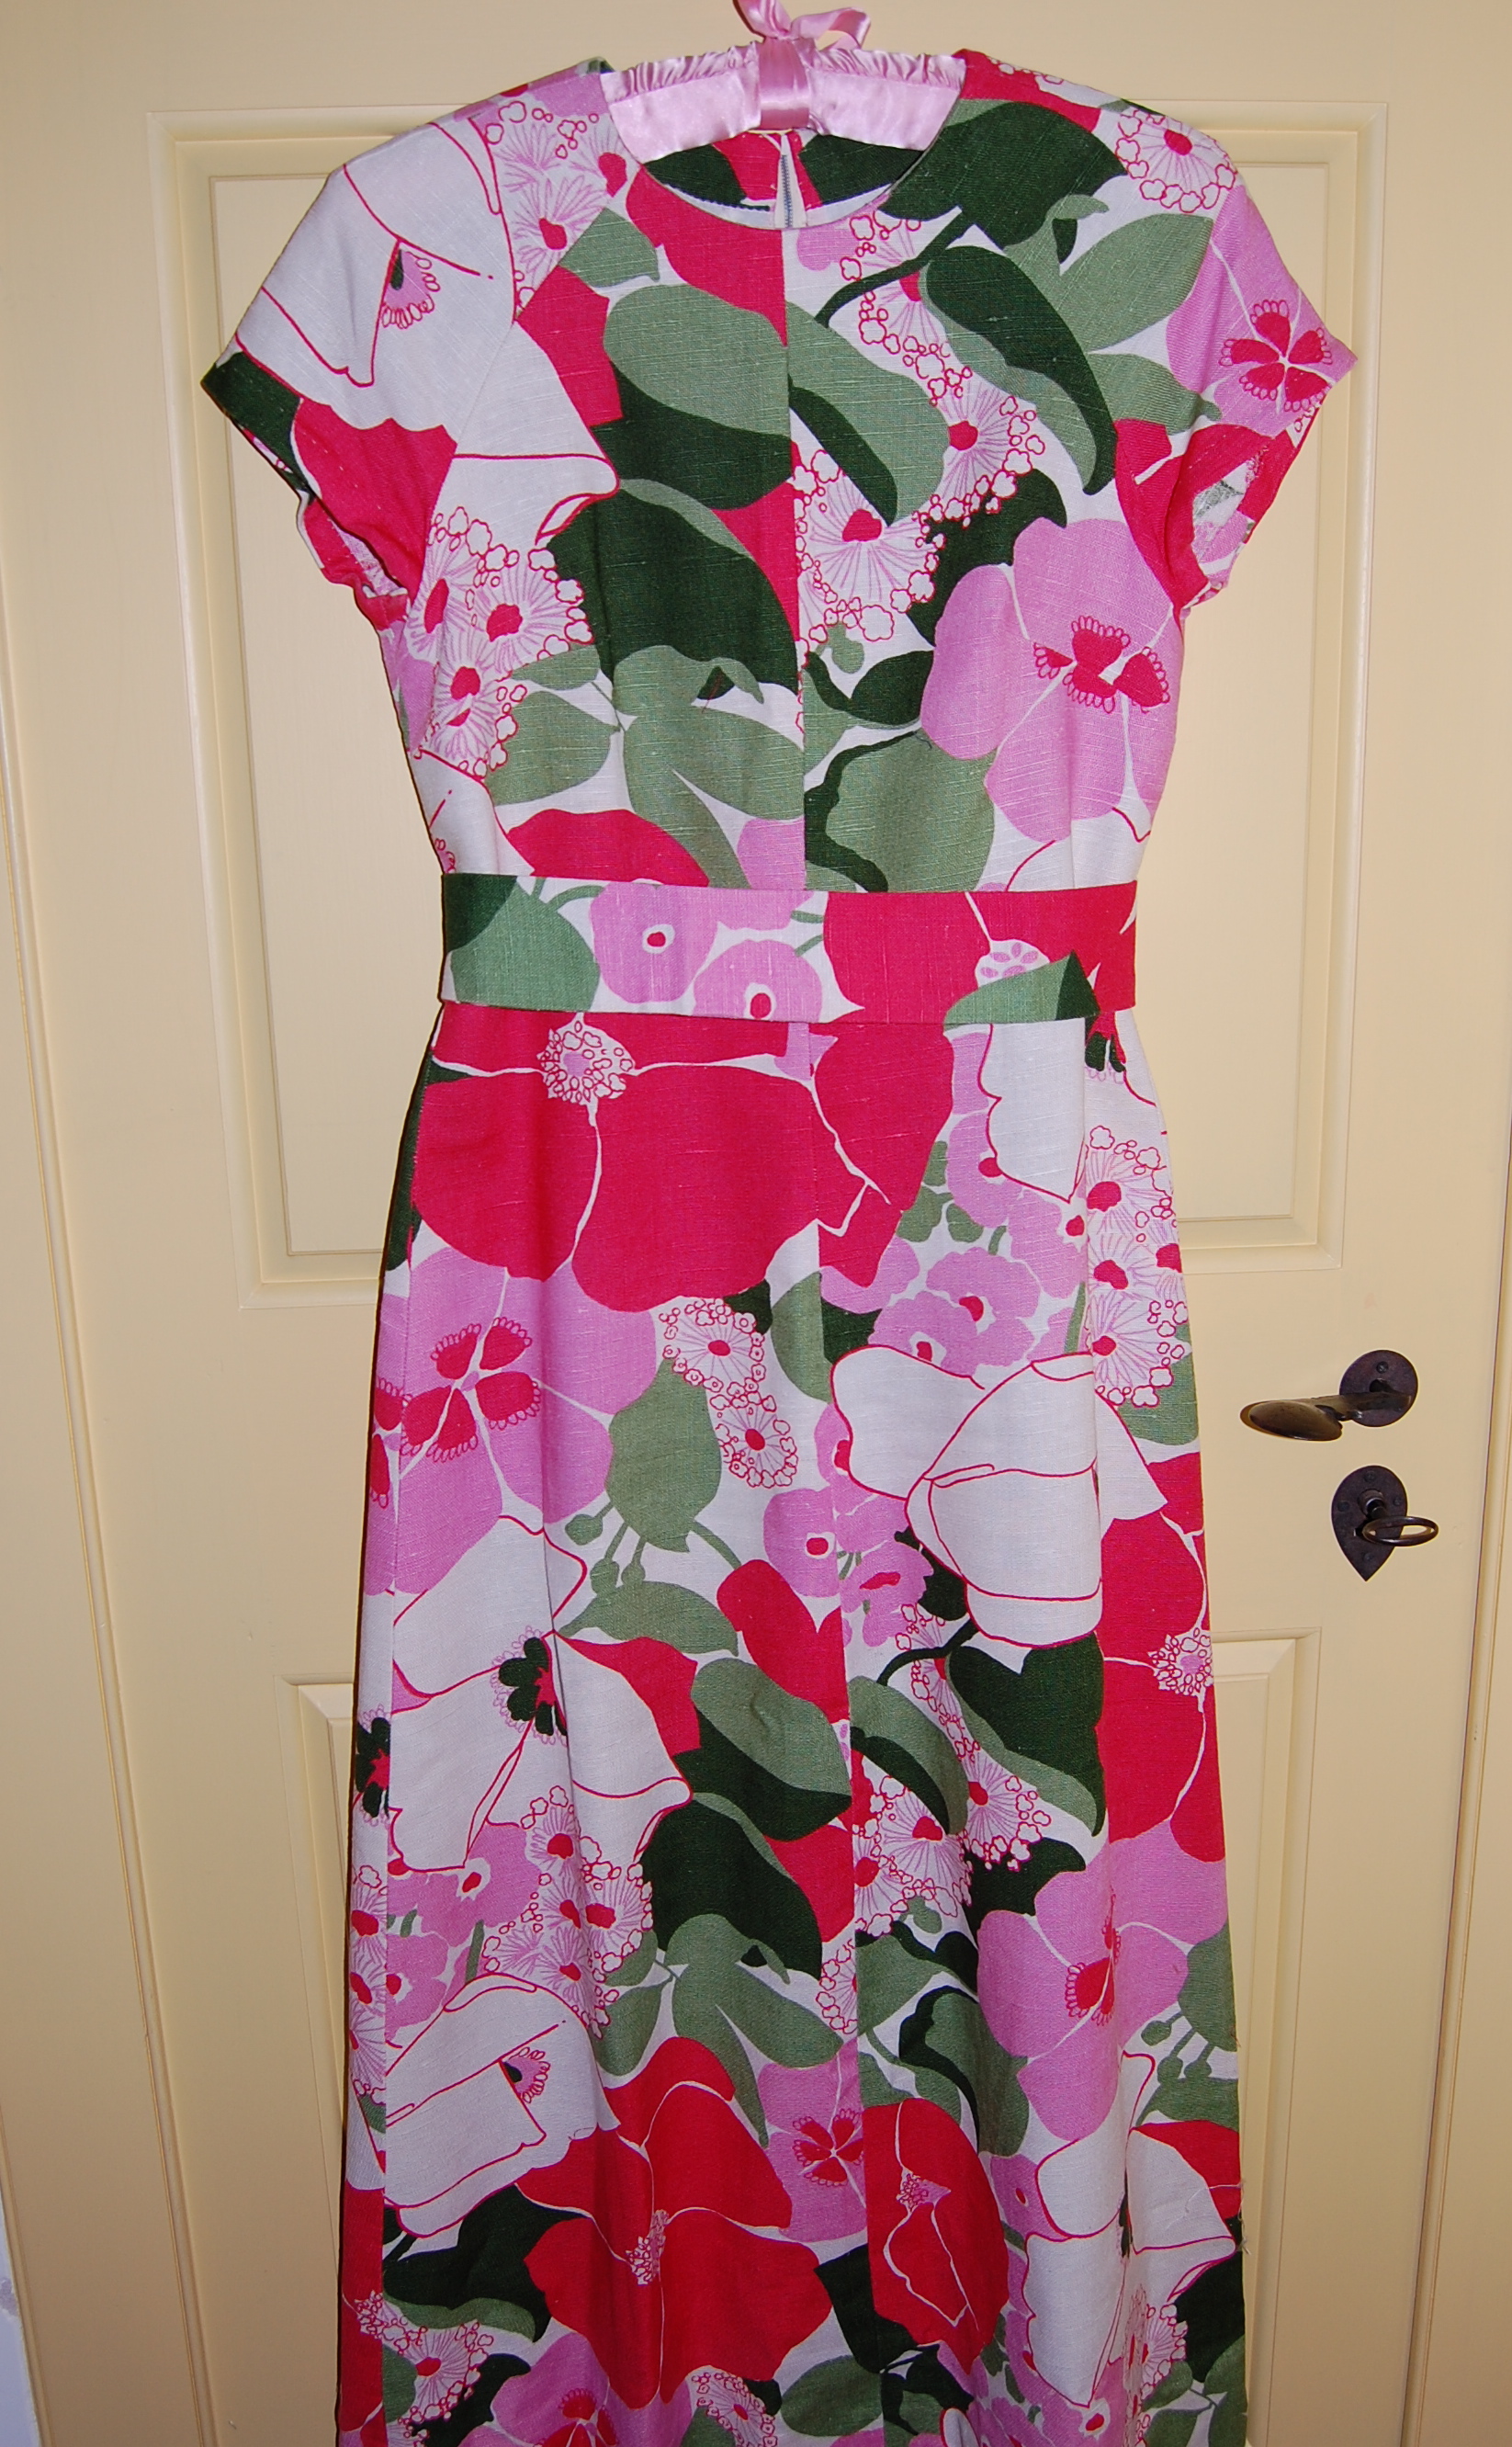
Whenever I am working with vintage fabric, it seems I either have more yardage than I need or, more frequently, less than I need. I have learned over the years there is usually a way to work around having less fabric than I really need. I just have to get creative. And that’s what I did when I made this dress.
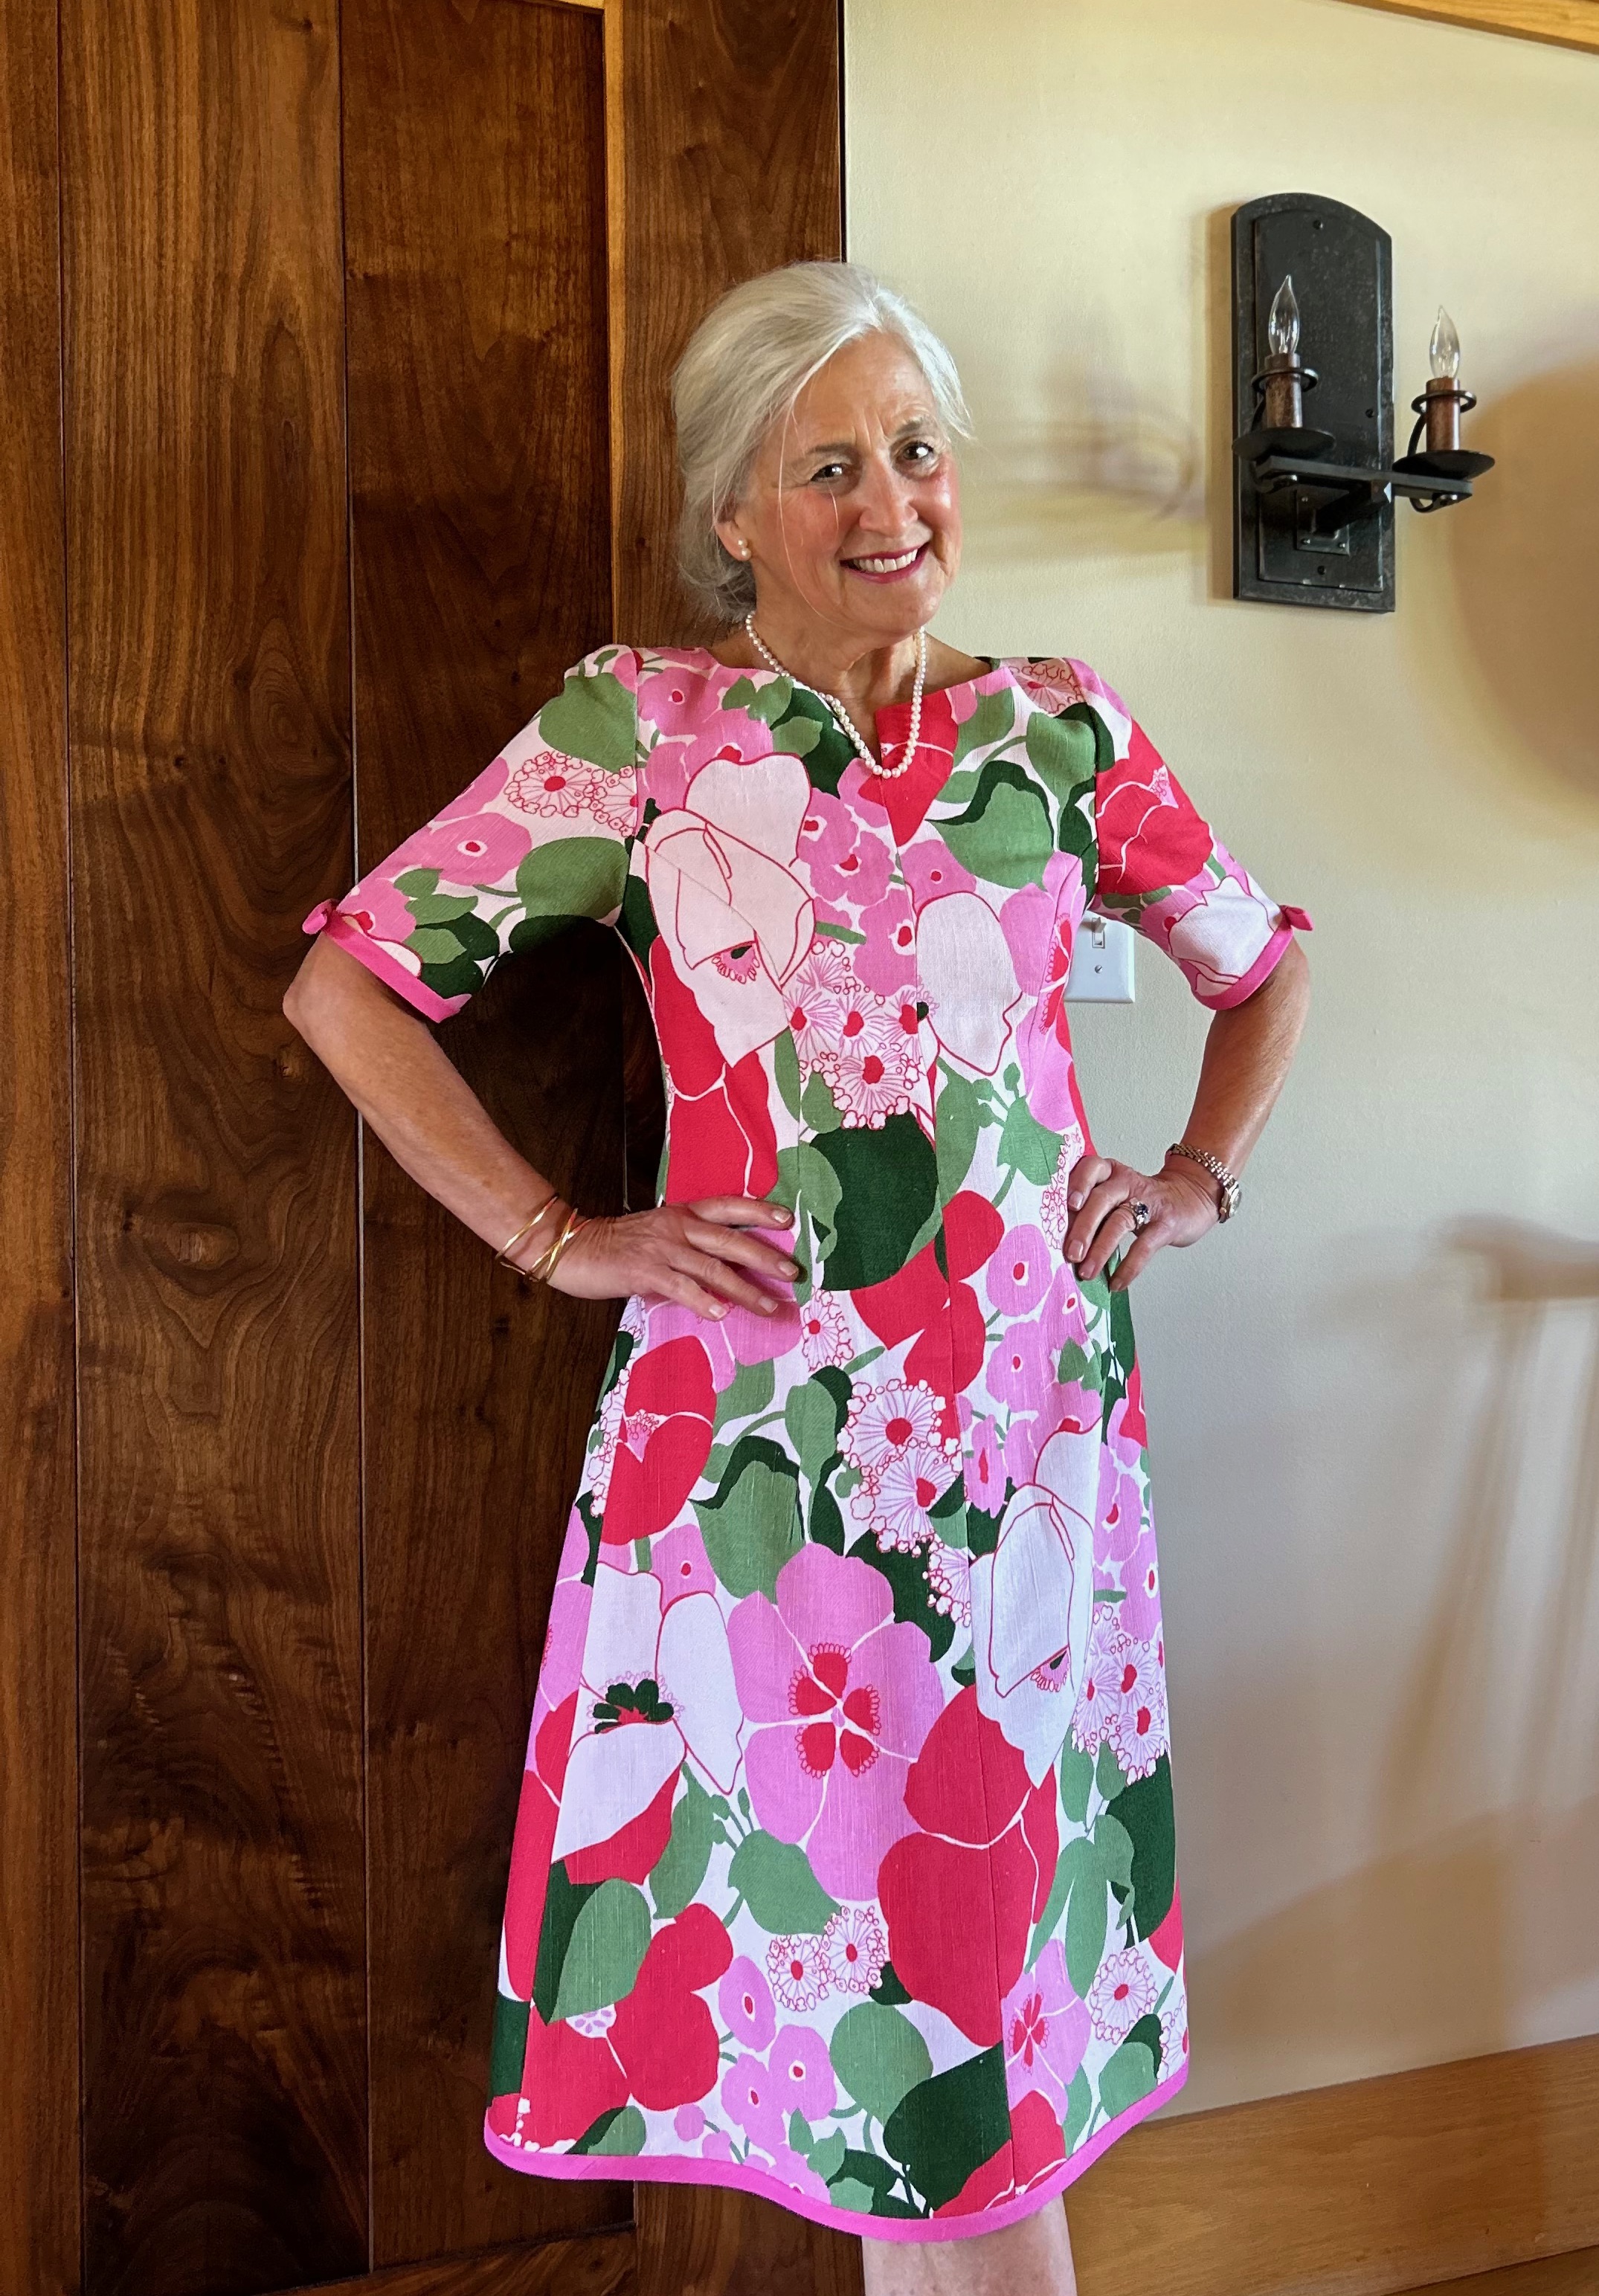

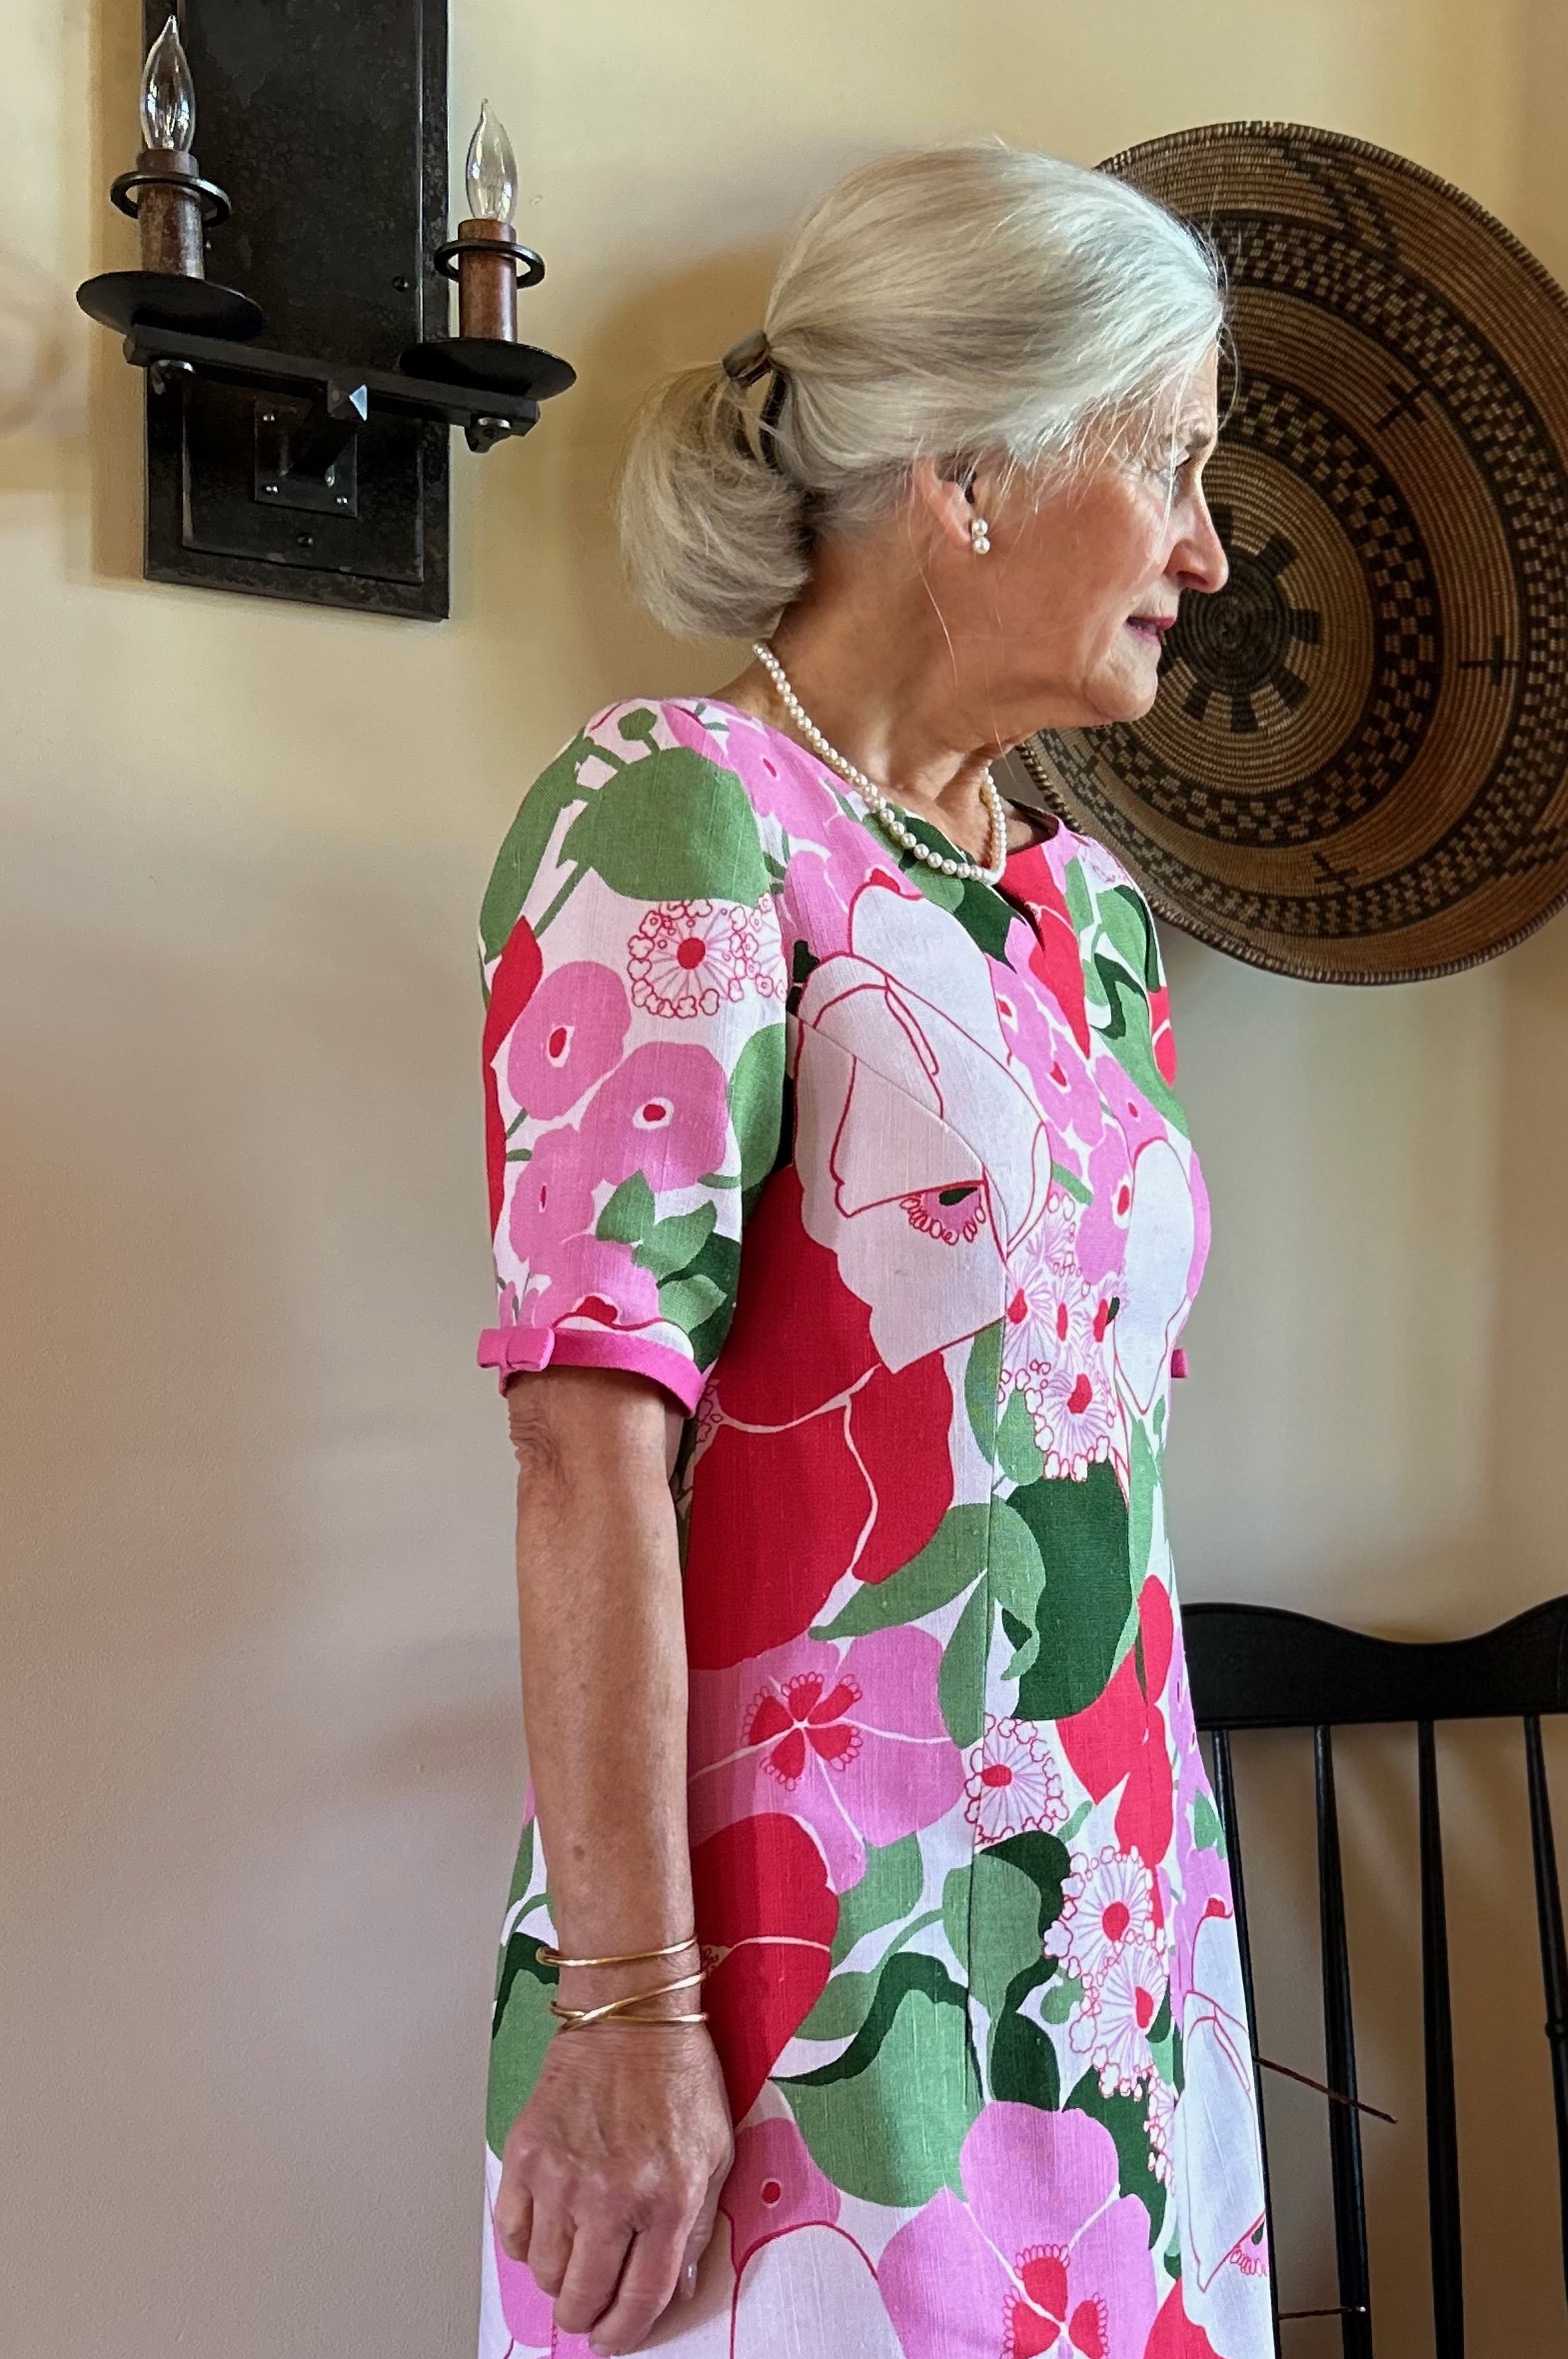
I quickly determined there was no way I could get the dress I wanted by placing the pattern on the lengthwise straight-of-grain. The flare of the skirt, which I wanted to be mid-calf, precluded any notion of such a layout. At 45” wide, I knew I could just get the dress length I wanted if I laid out the pattern on the cross-grain, from selvedge to selvedge. Linen is a very stable fabric, so I was confident the cross-grain would work. In addition, there were no directional limitations in the floral design of the fabric. Barely fitting my pattern – from shoulder to hem – on the fabric from selvedge to selvedge, however, would leave no extra fabric to turn up for the hem – or even to face the hem. I decided to worry about that later. First I wanted to determine how I could get the four pieces for the dress and the two lengthened sleeves placed on the fabric, keeping in mind three important things: 1) although this was not a fabric to be matched per se, the all-over design of the fabric needed to be on the same plane in contiguous seams; 2) I wanted to space out the larger floral motifs so the dress would be balanced as best as possible (looking critically at the dress I made when I was 23, I clearly could have given this more thought!); and 3) I wanted to avoid large demonstrative blooms at the bust. Then, and only then, would I worry about the hem.
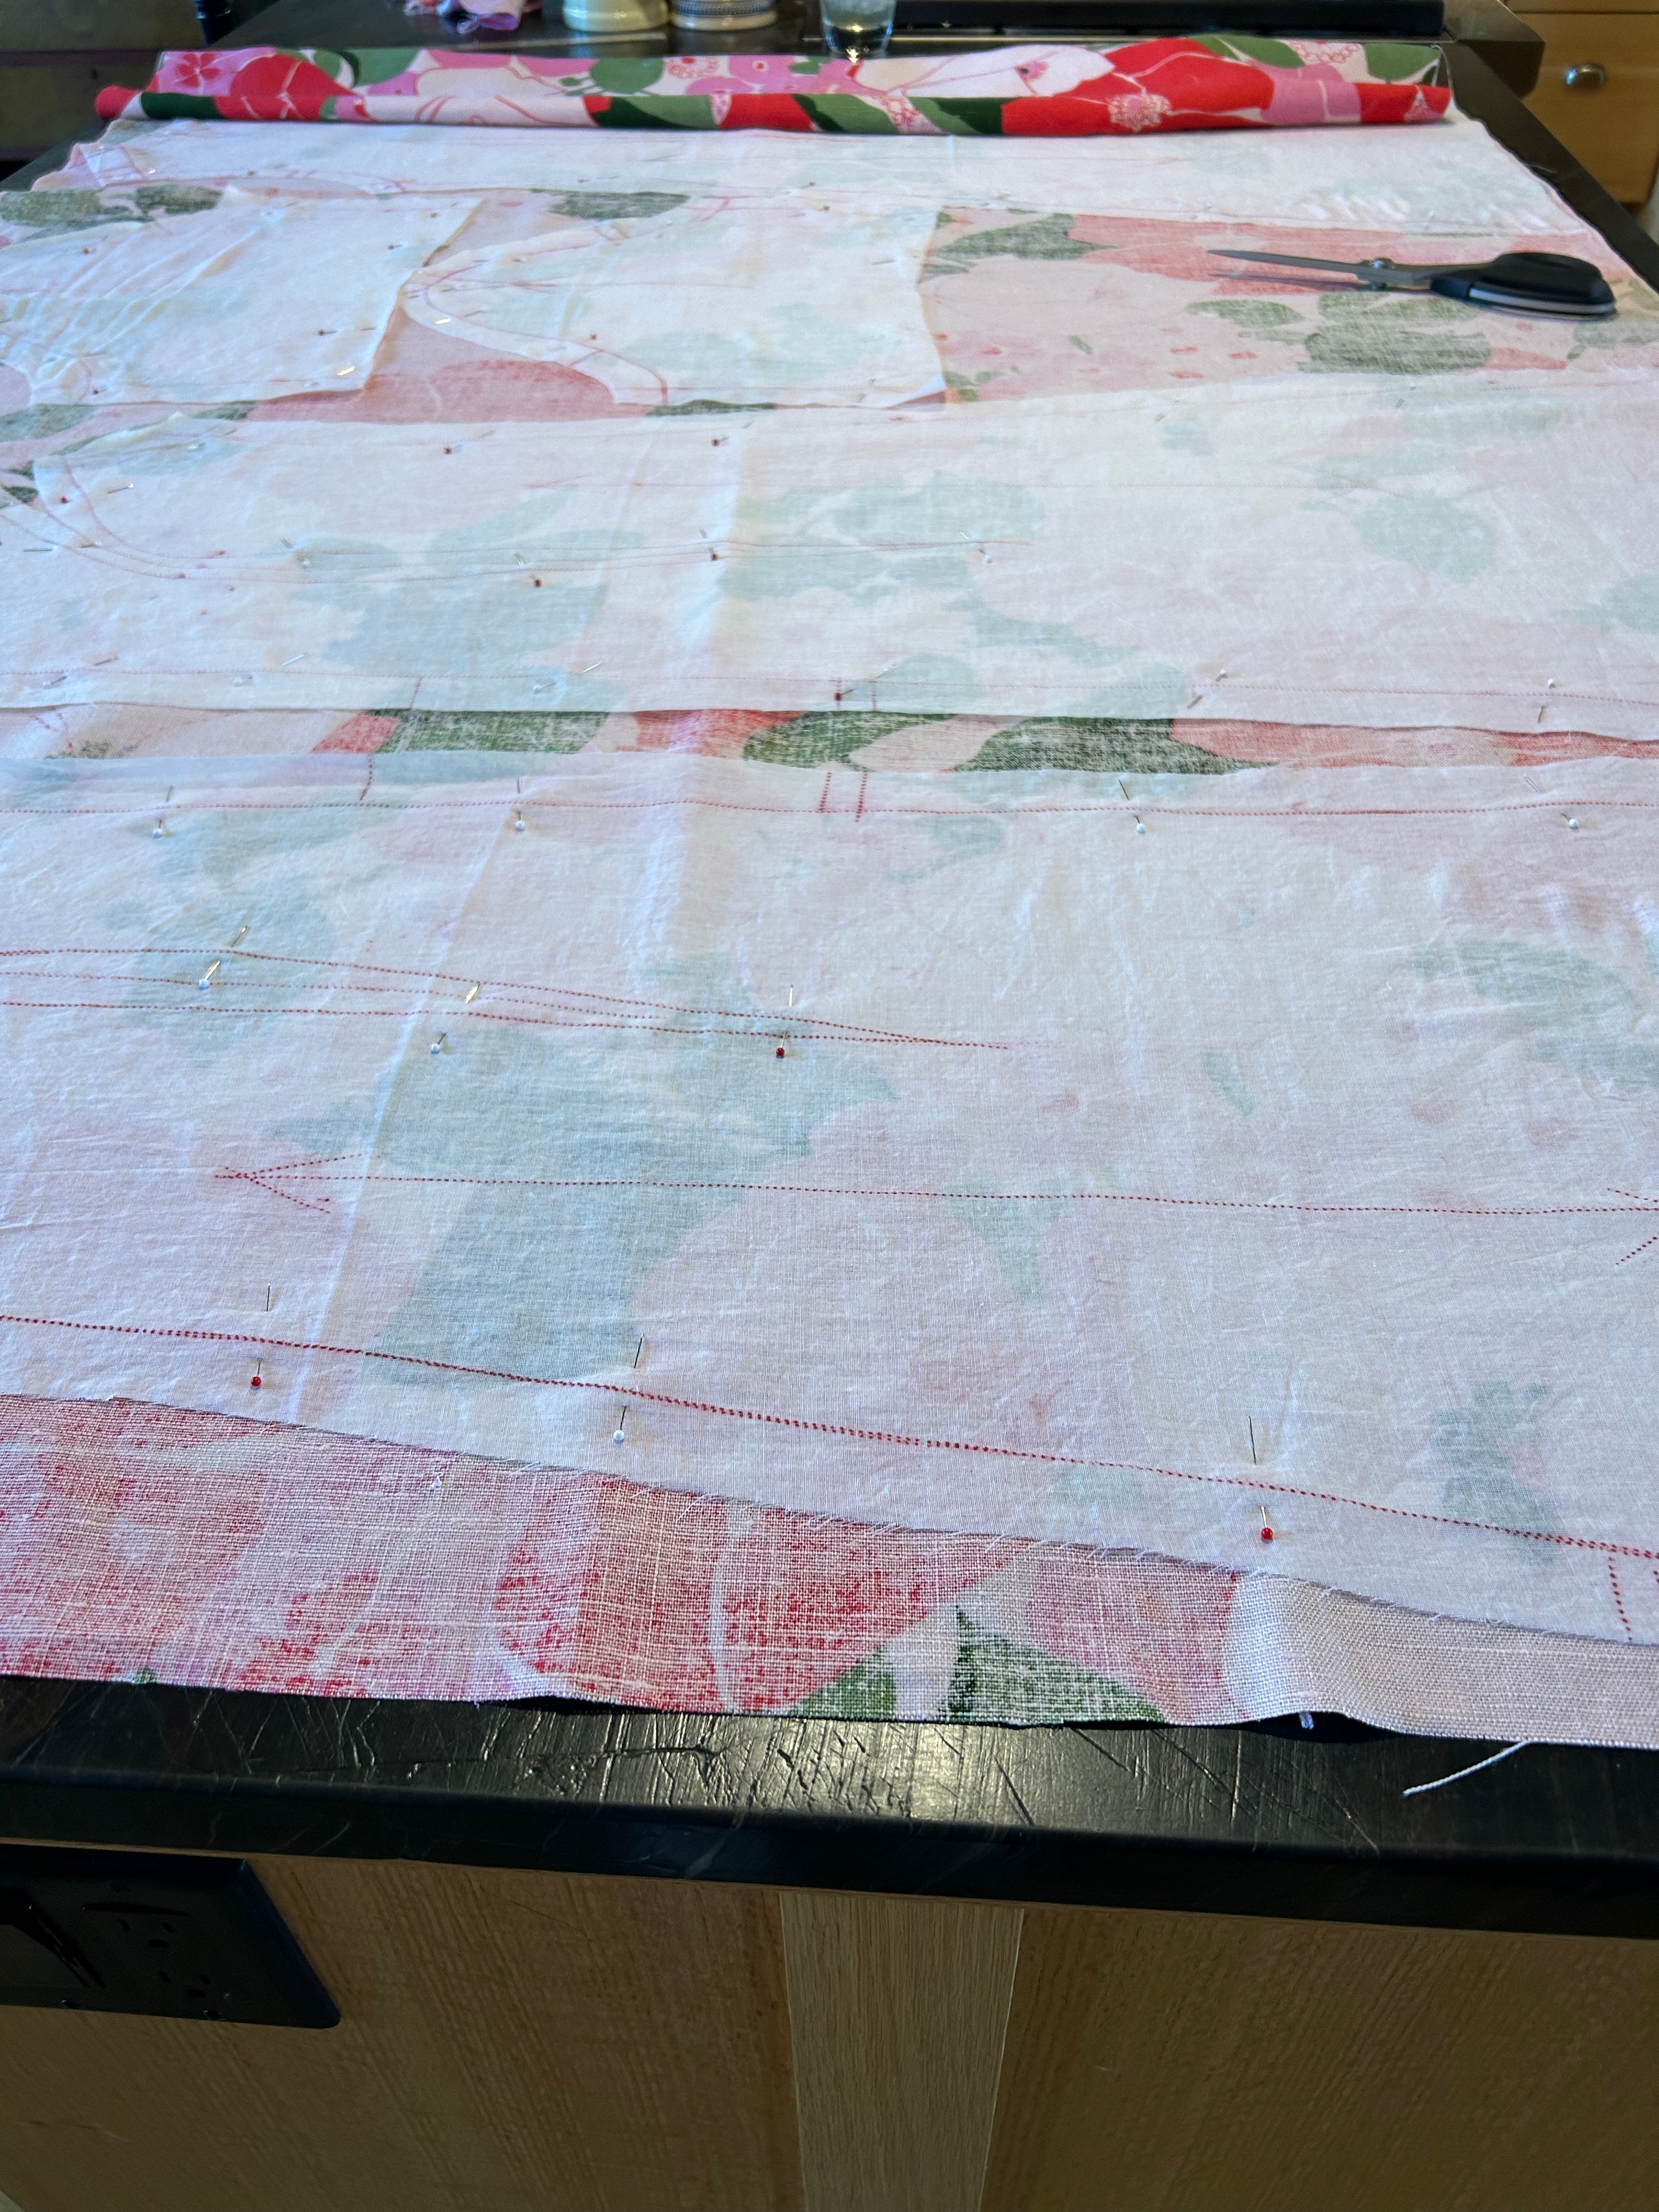
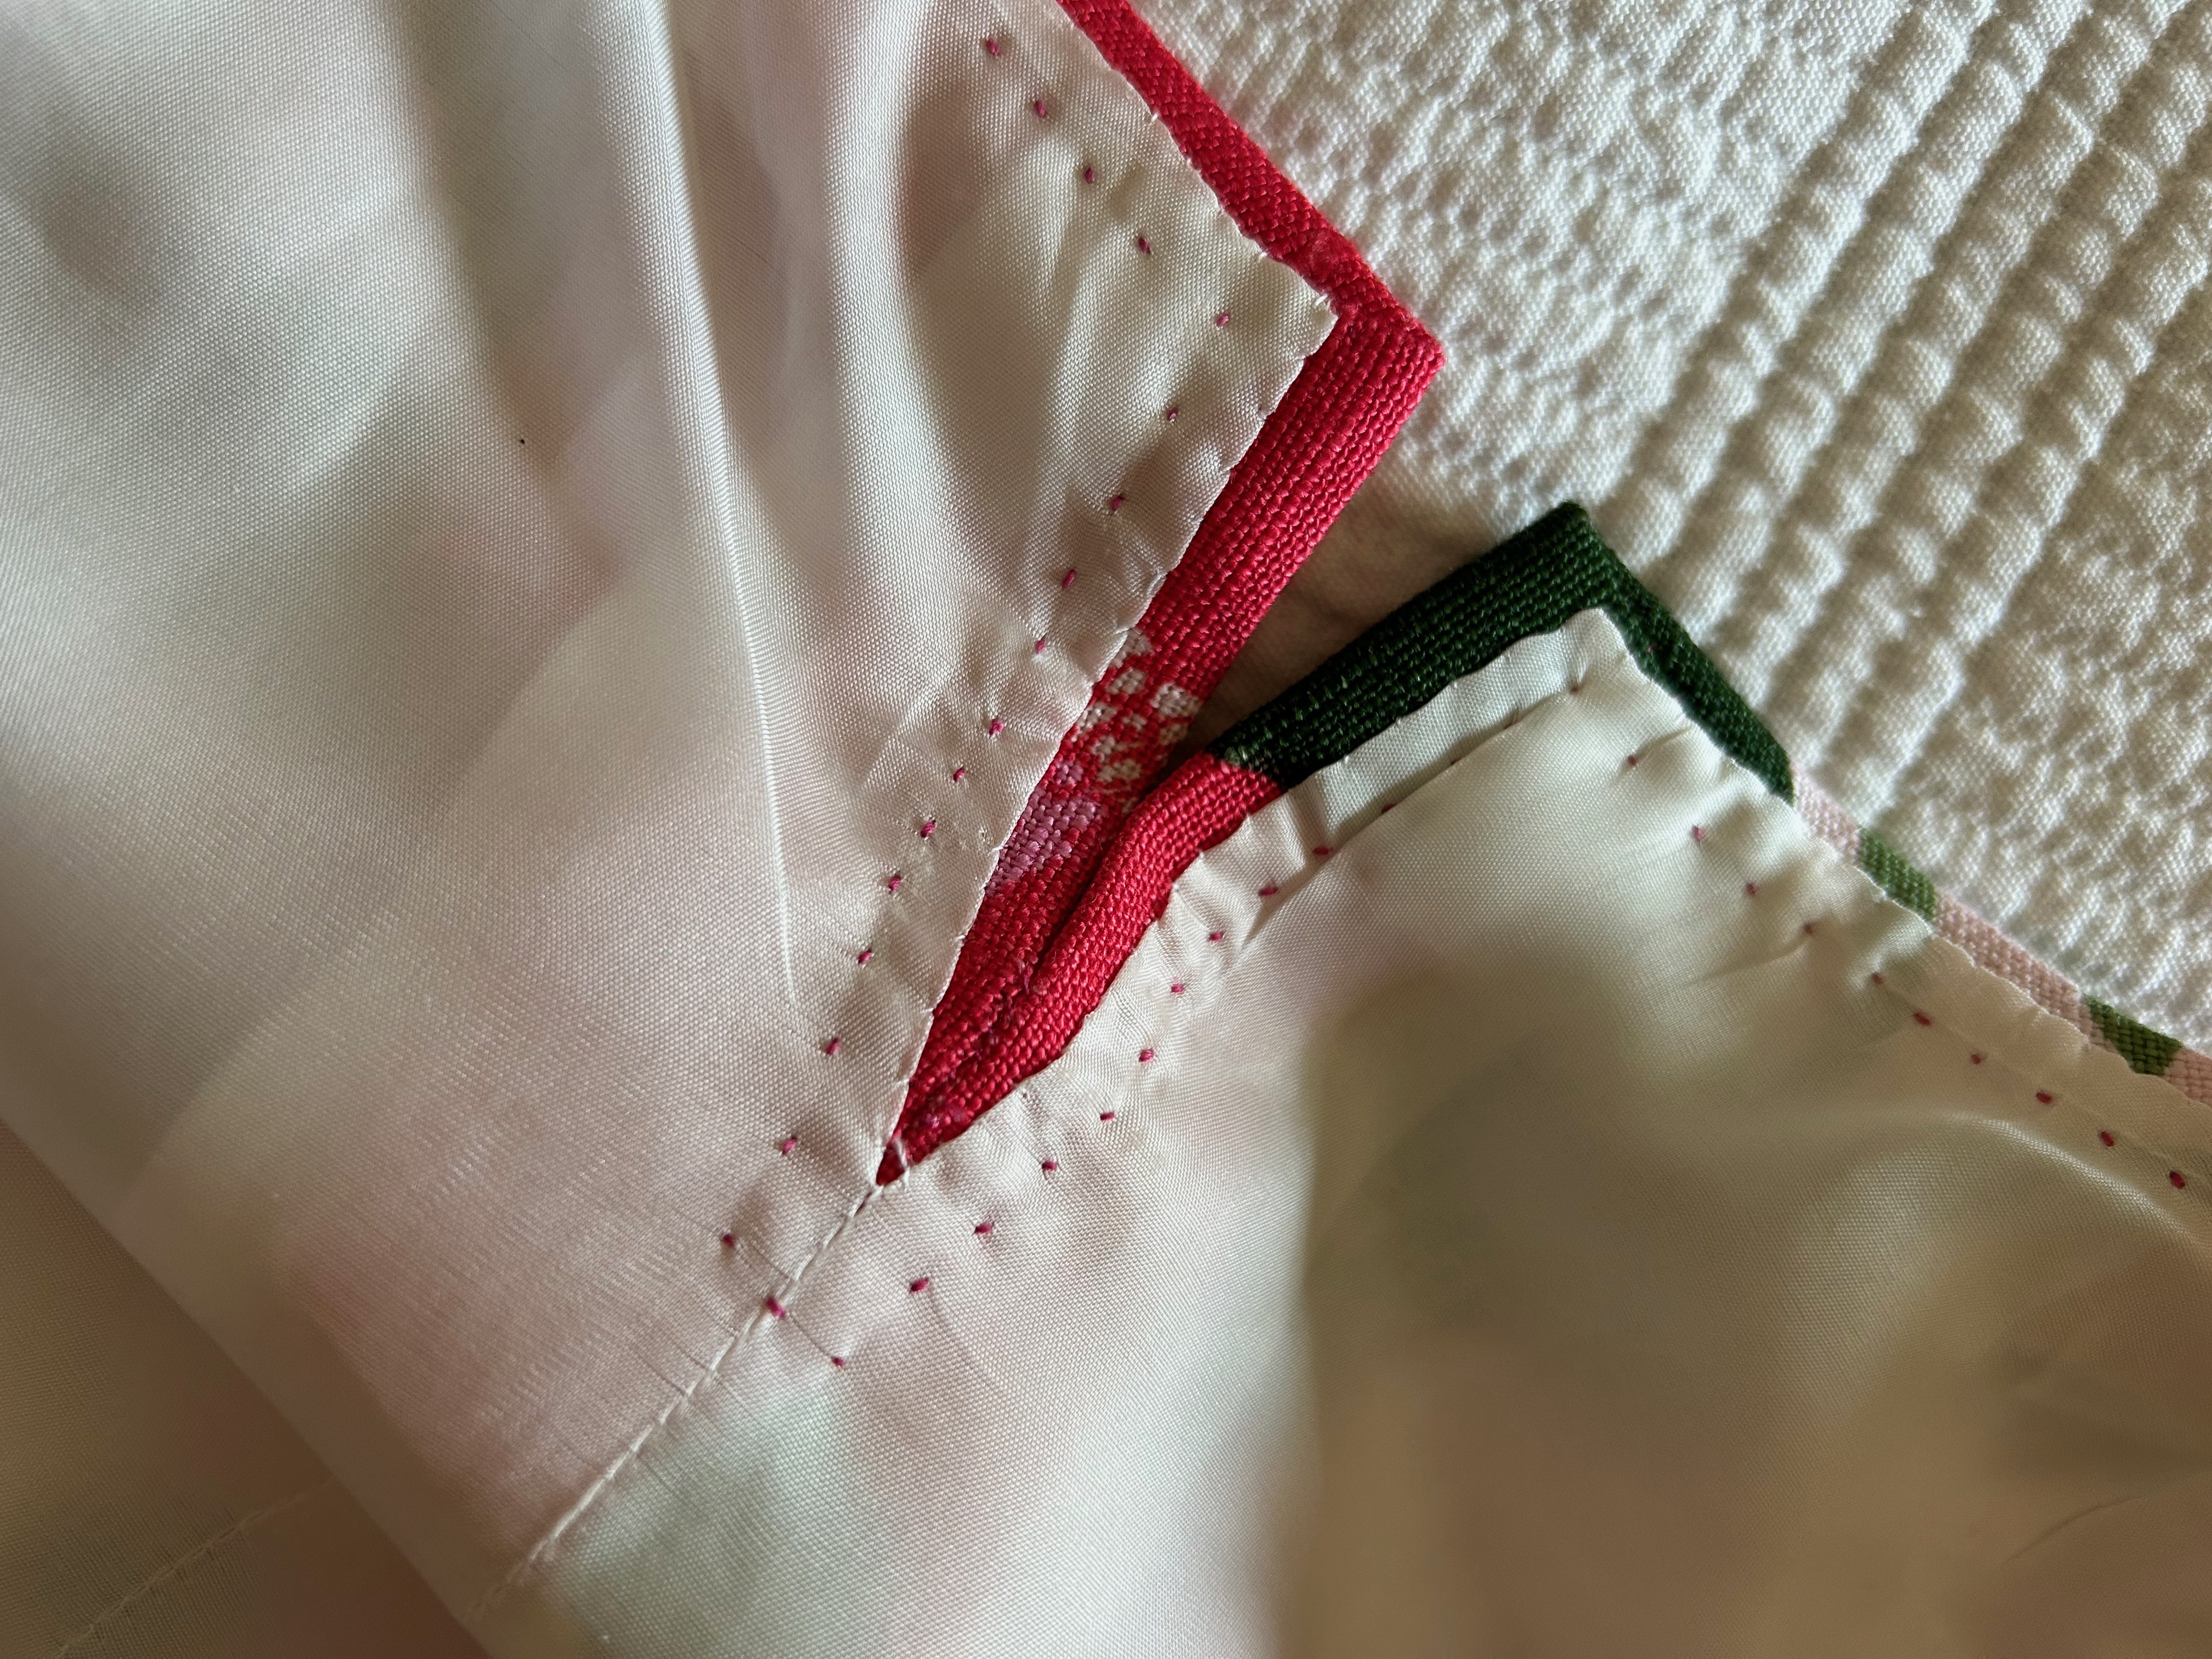
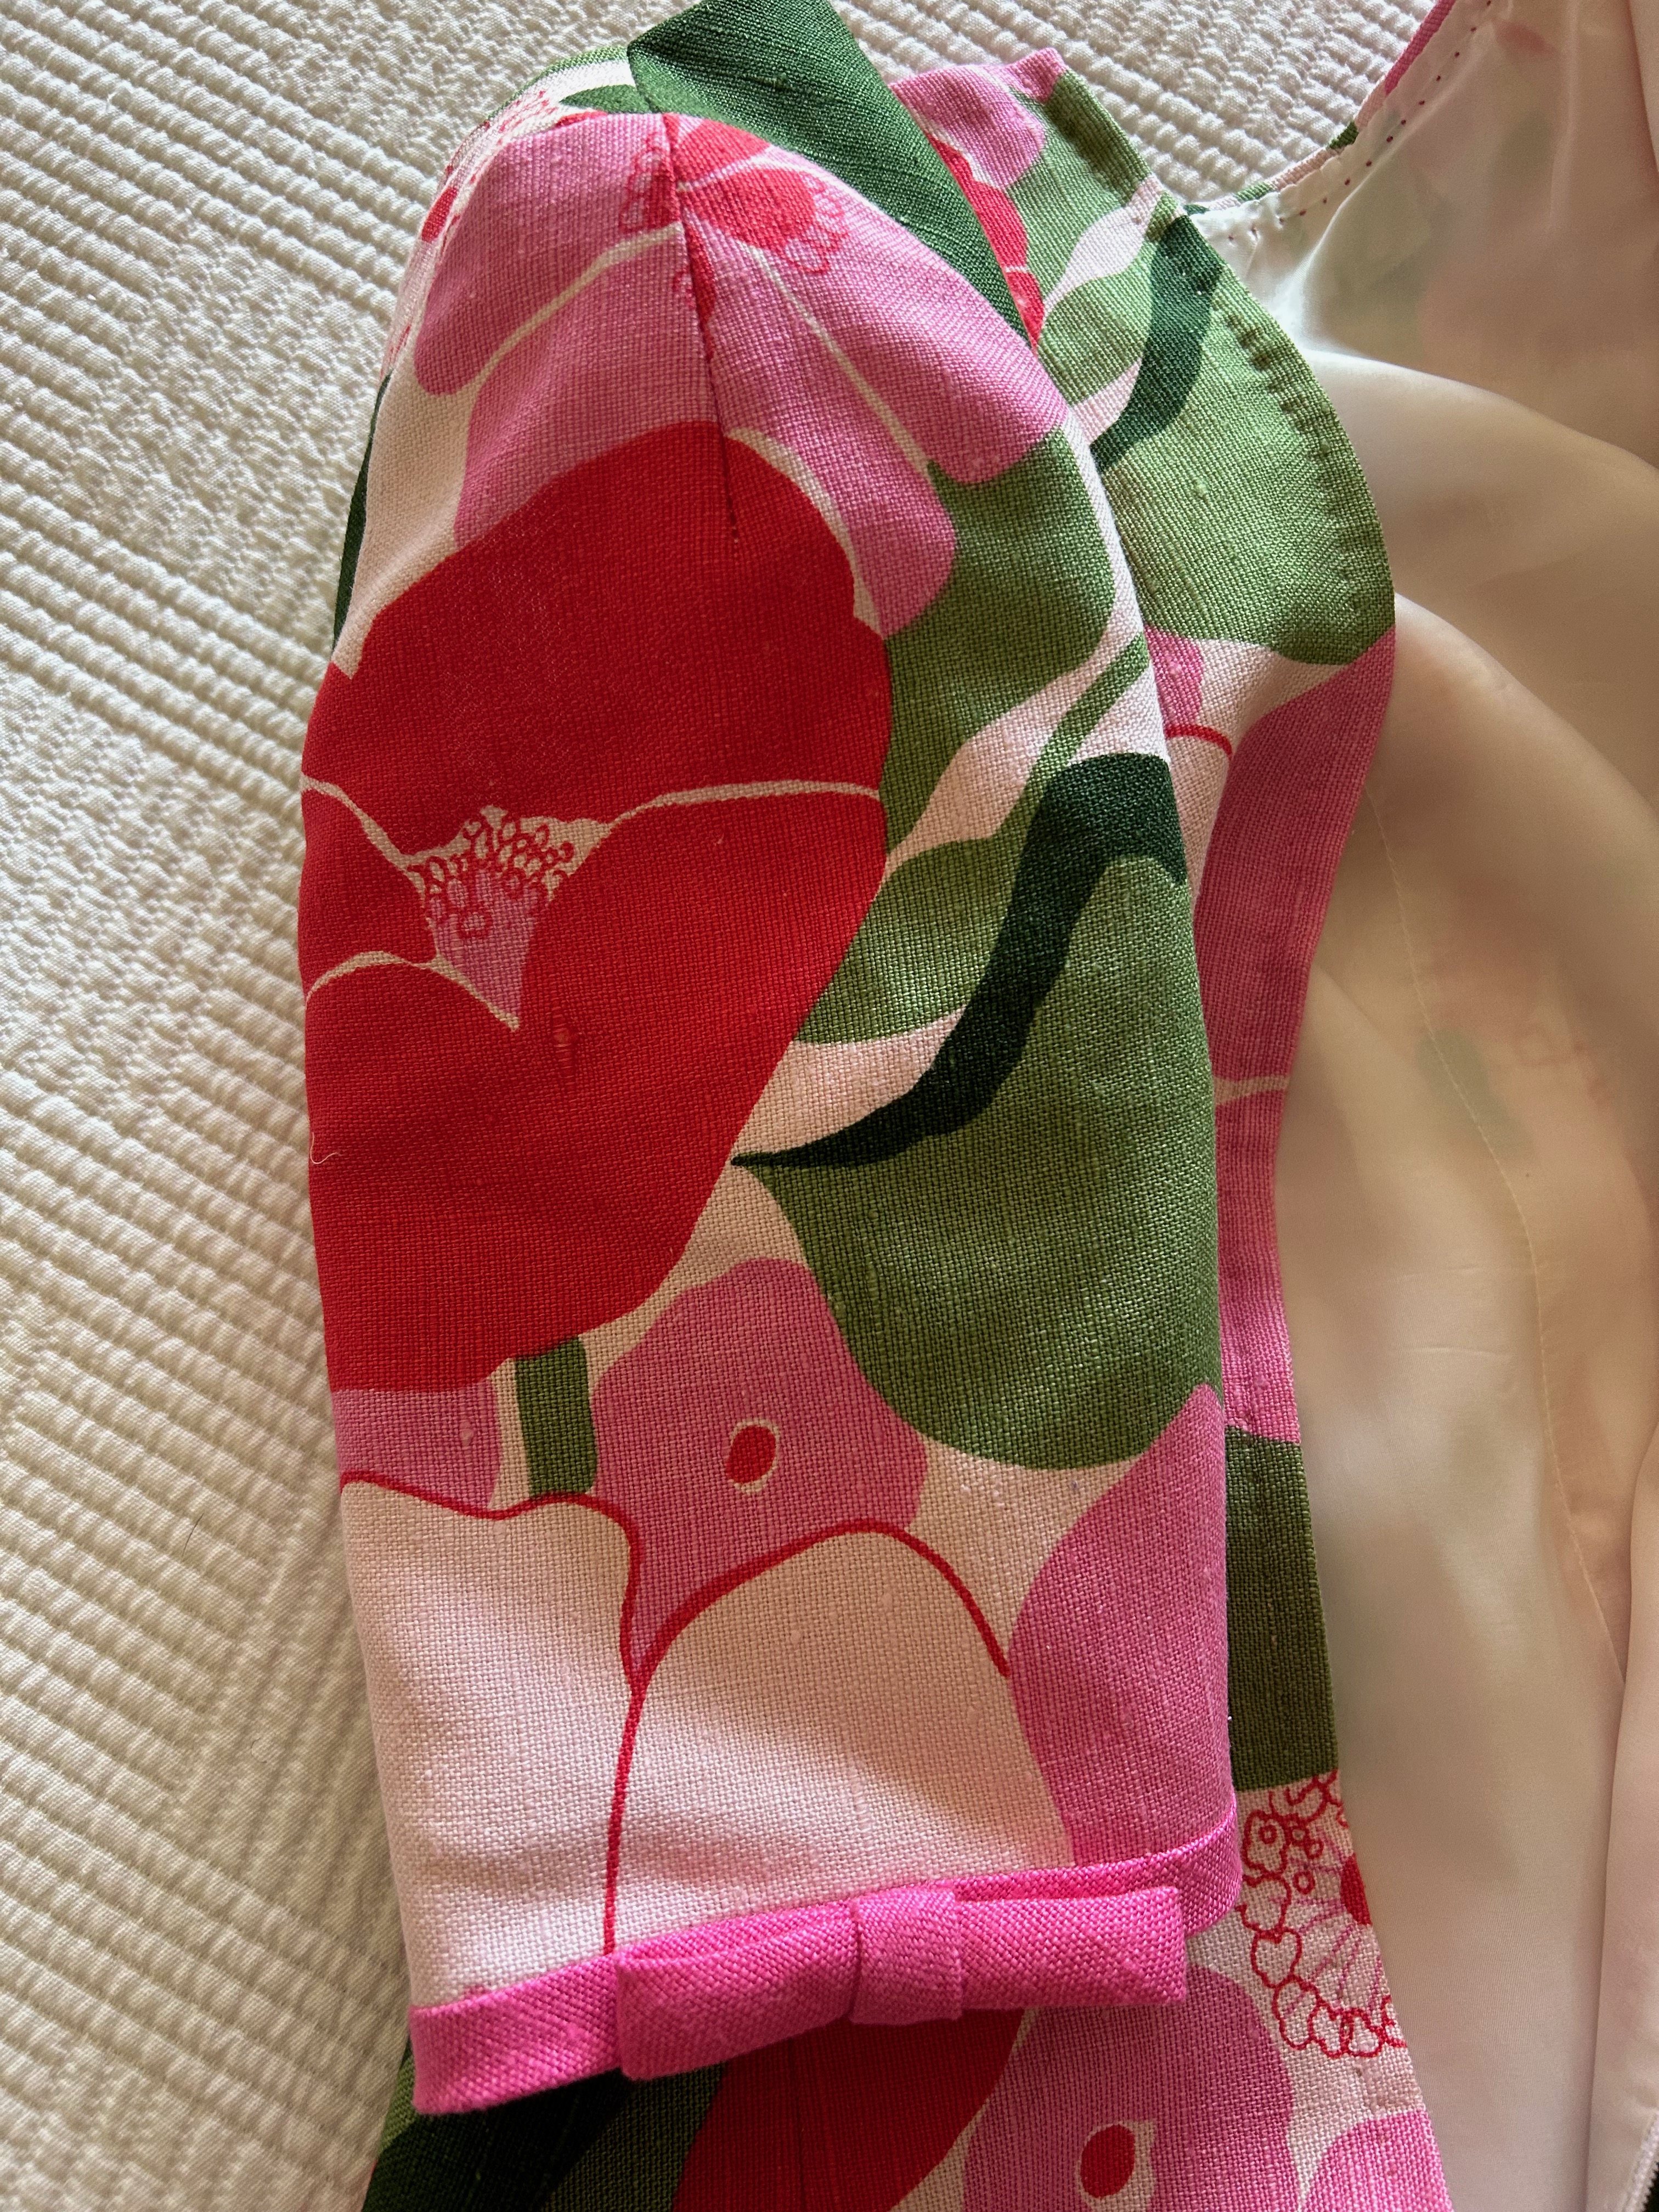
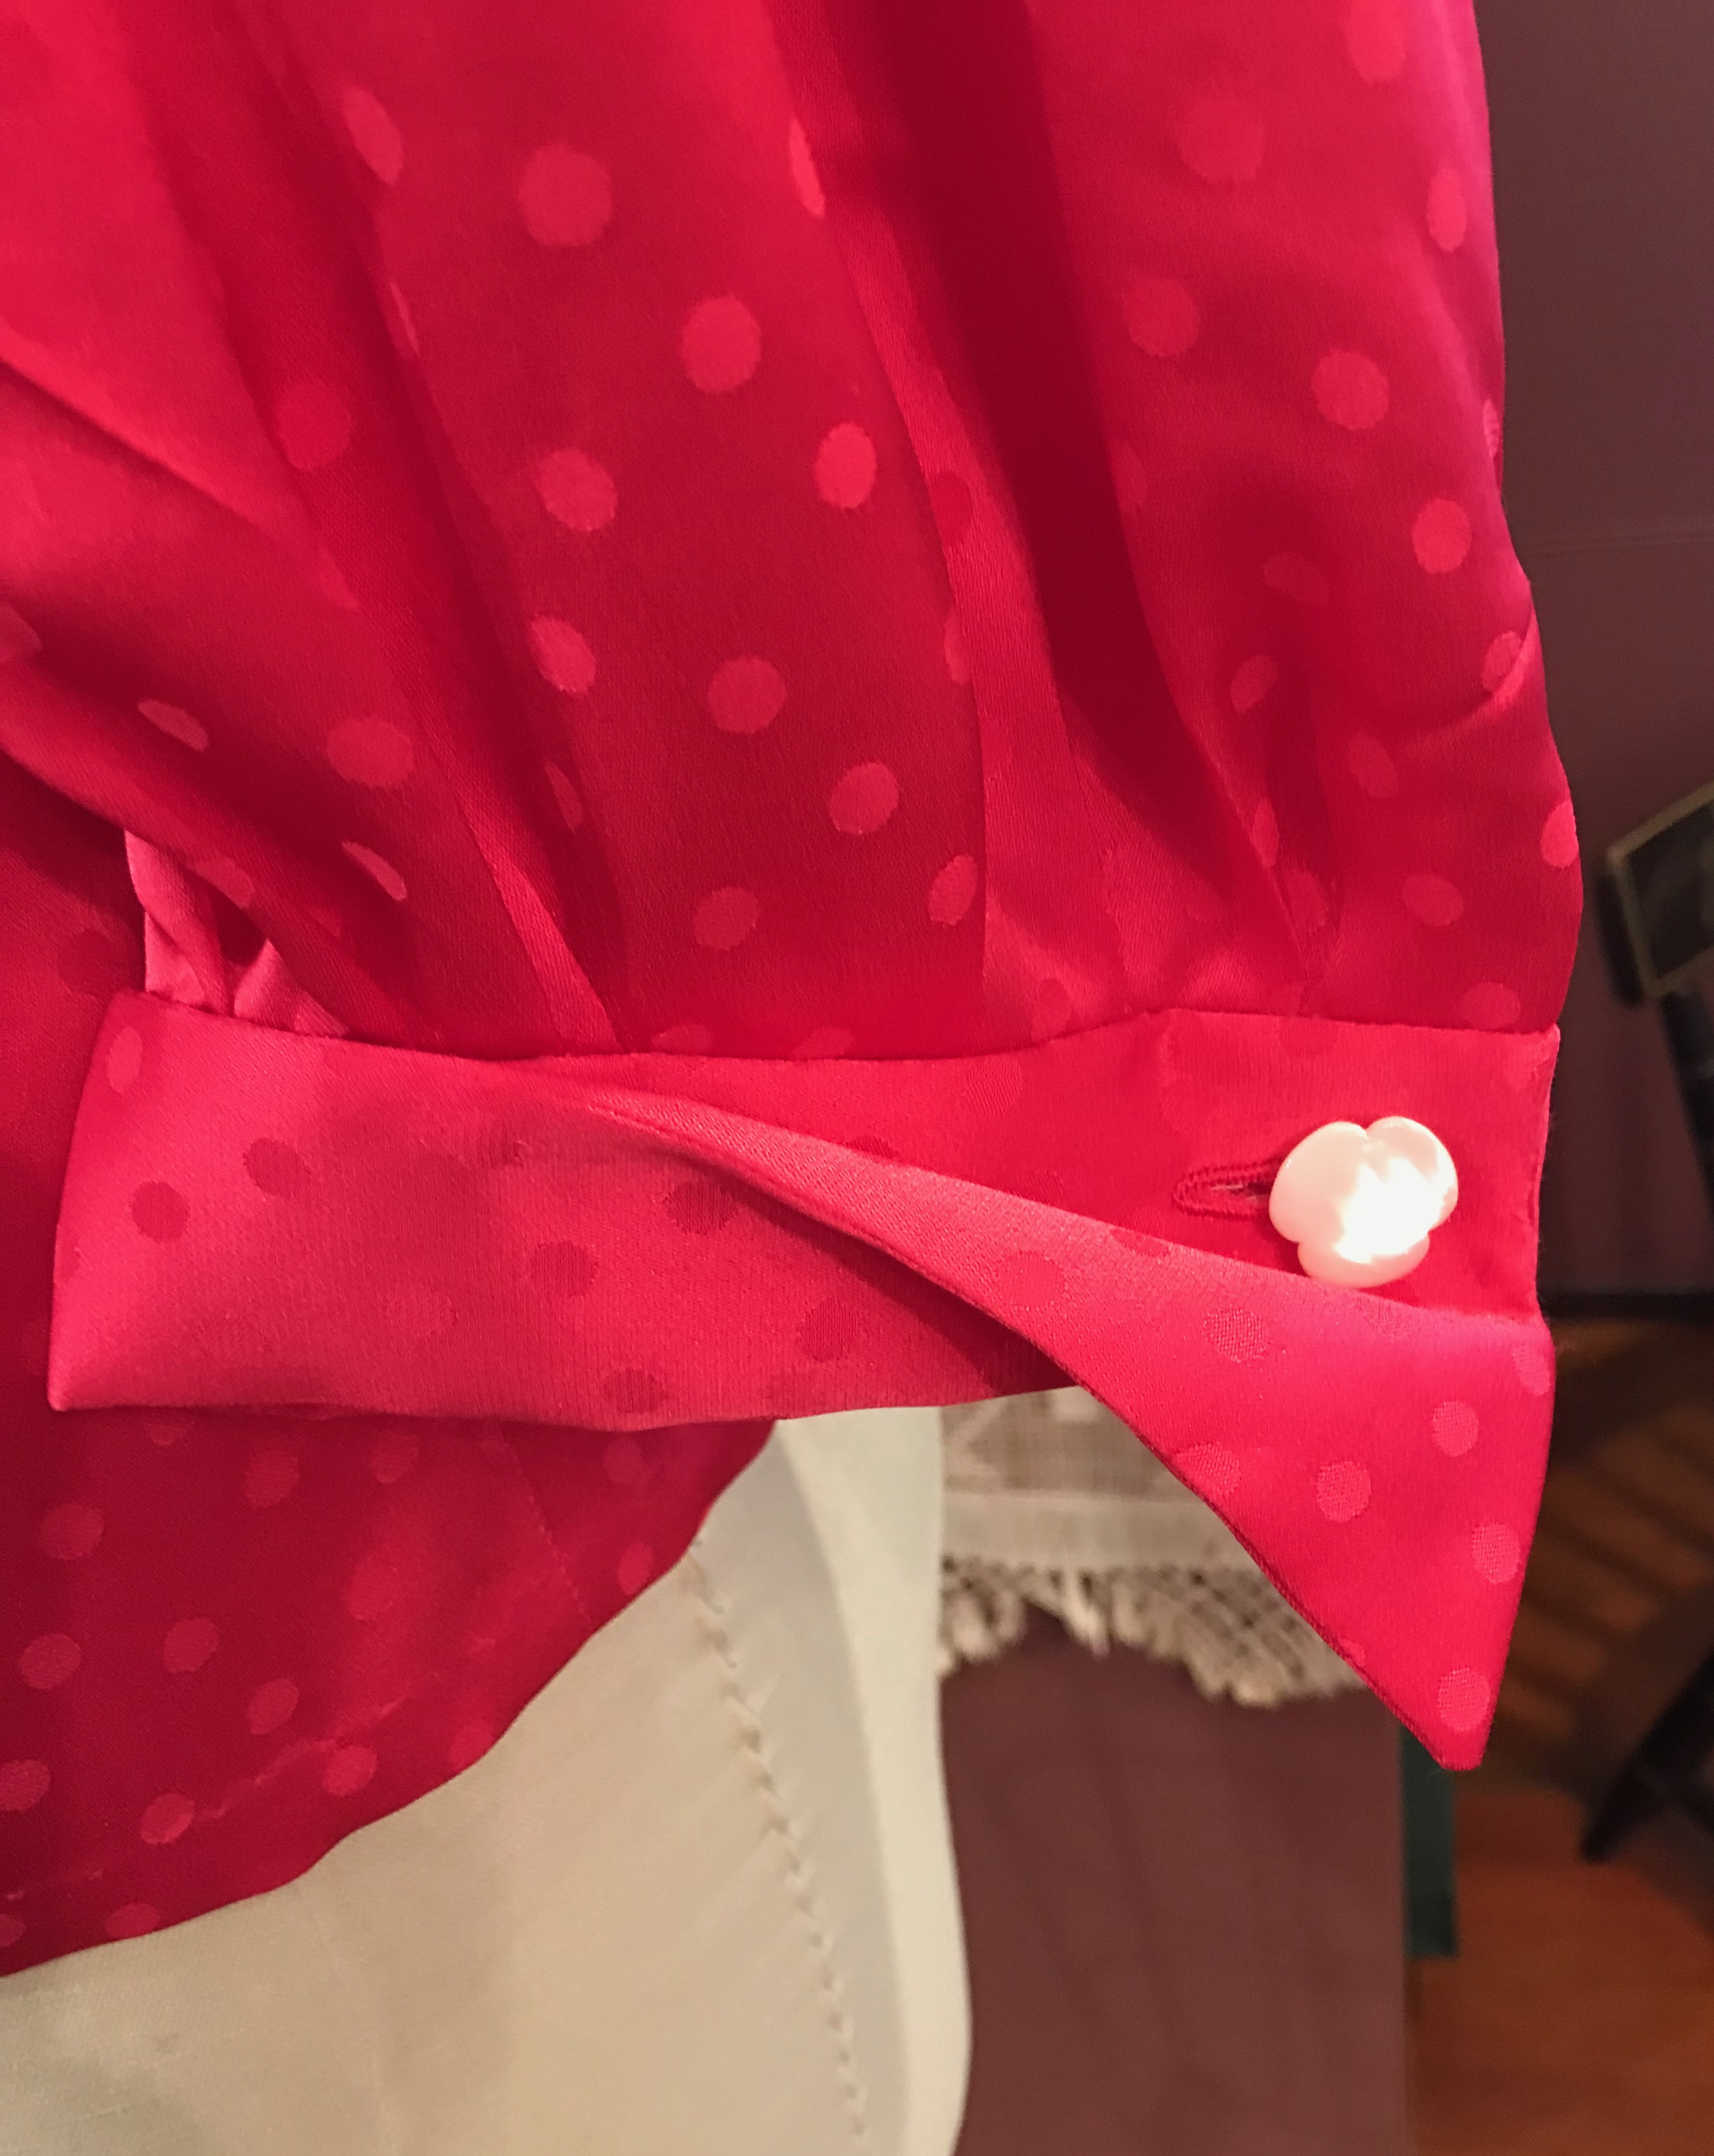
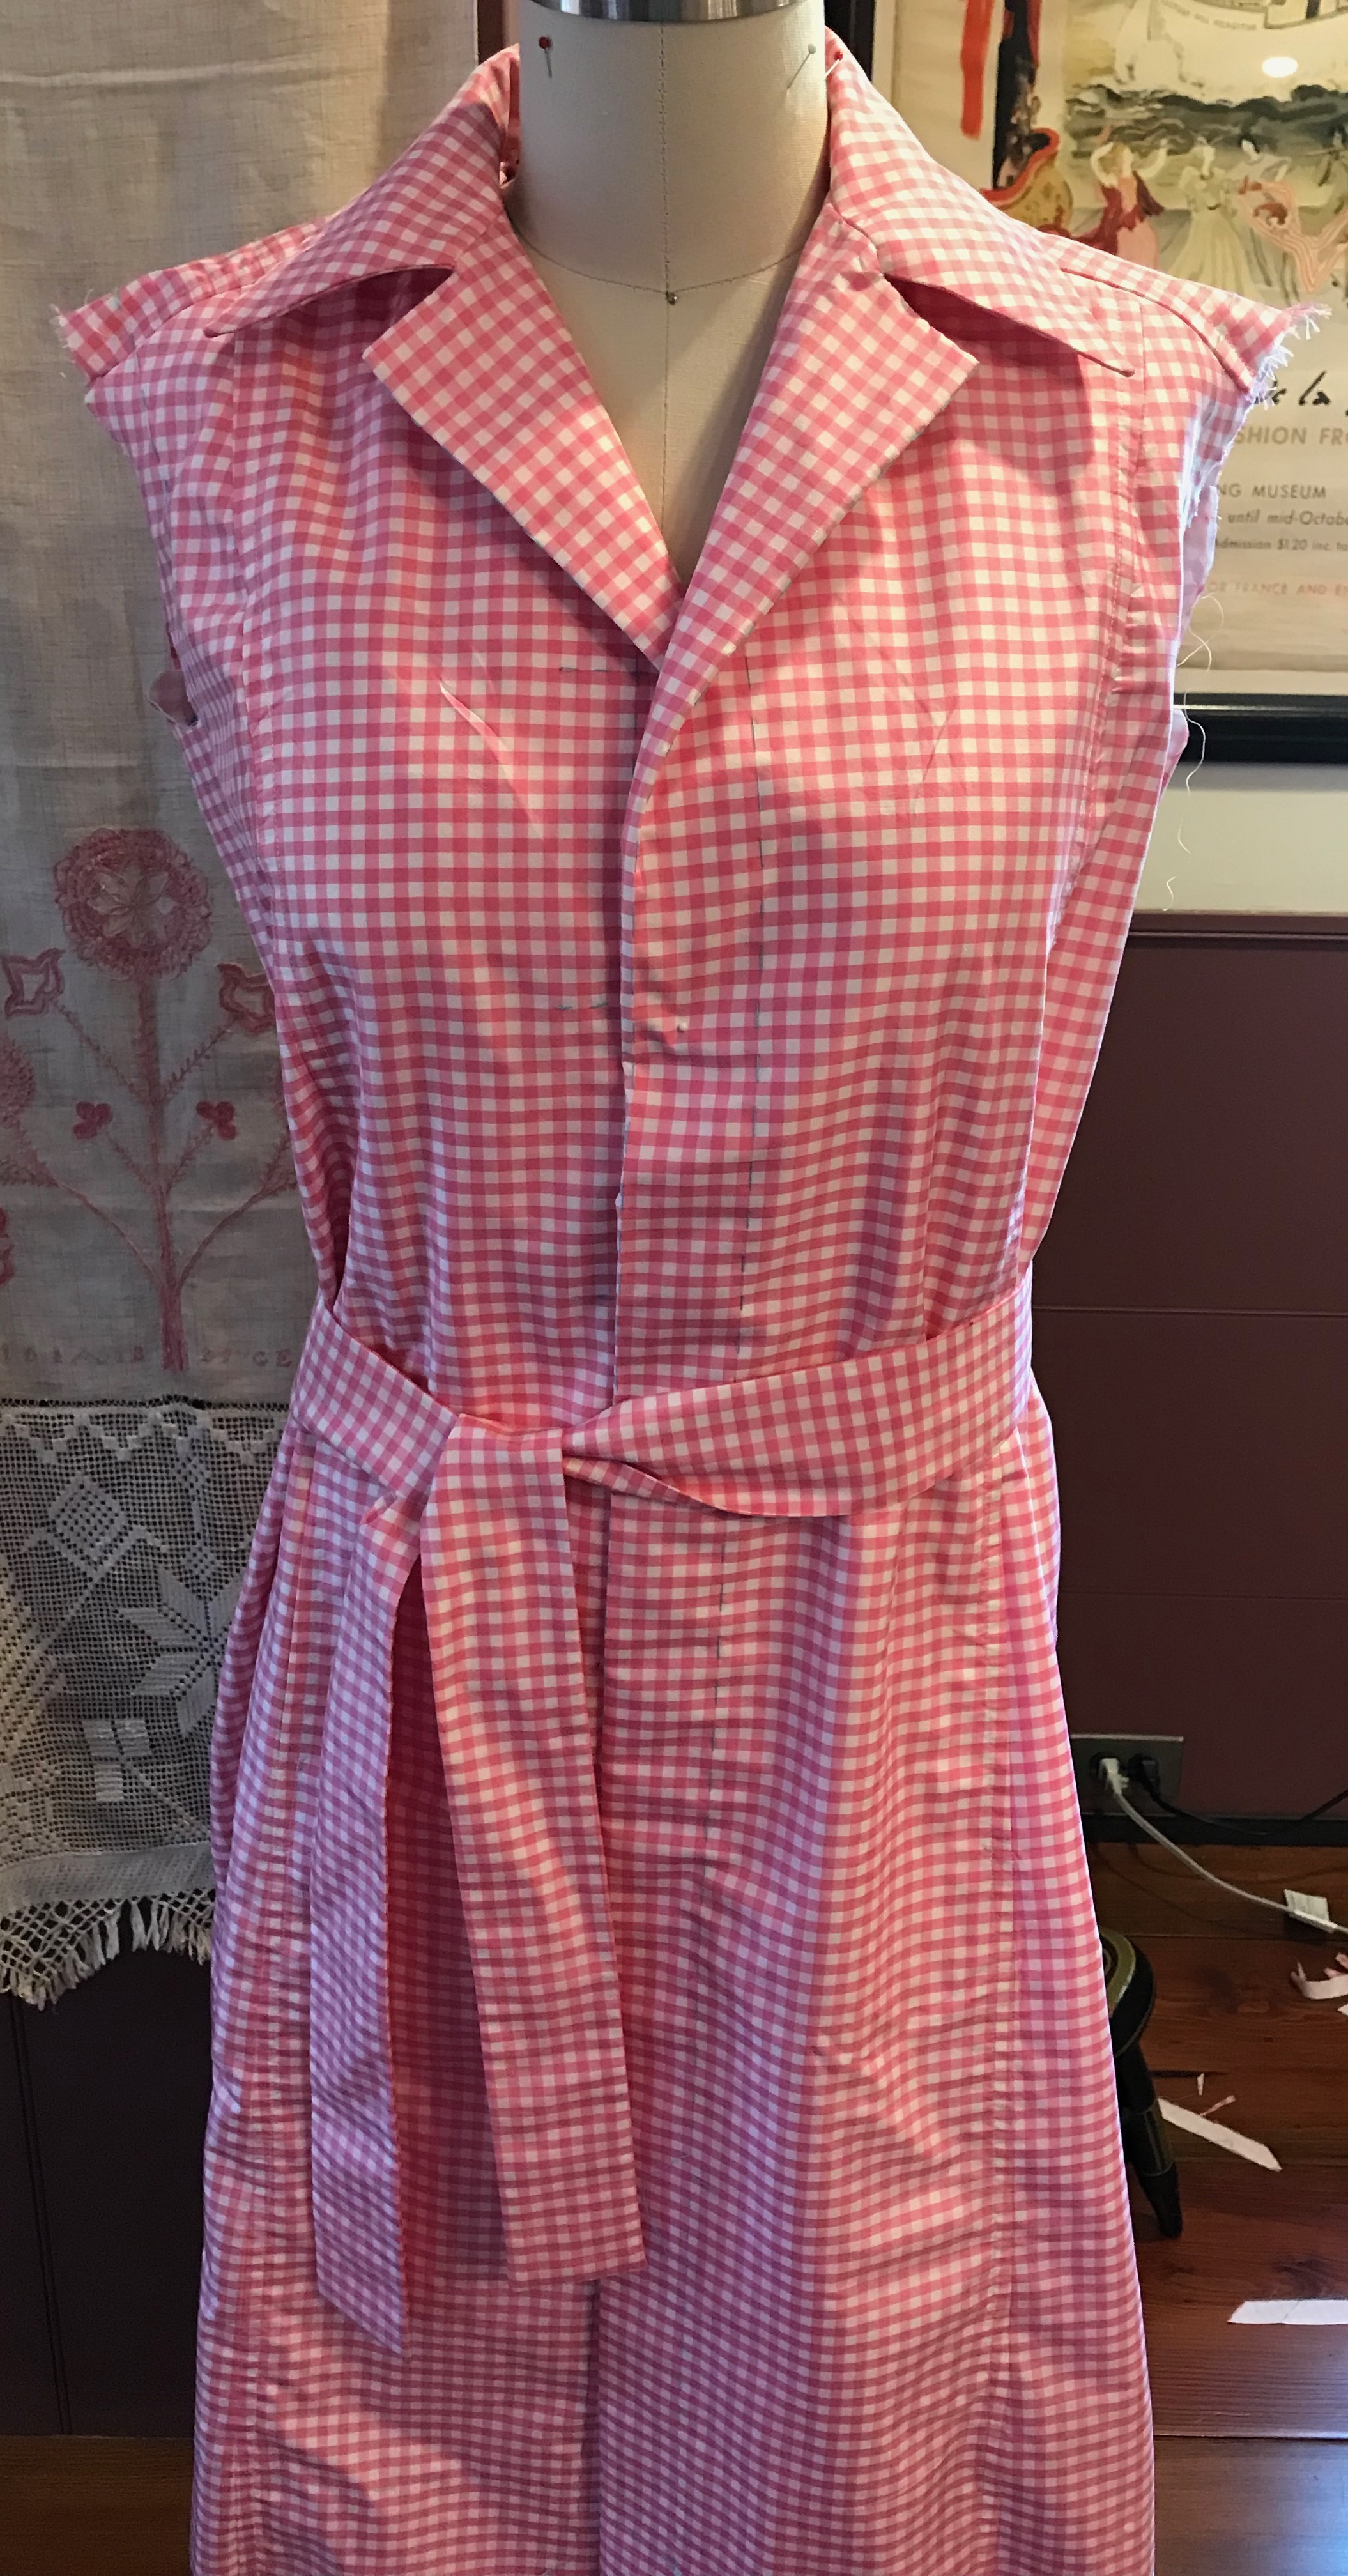
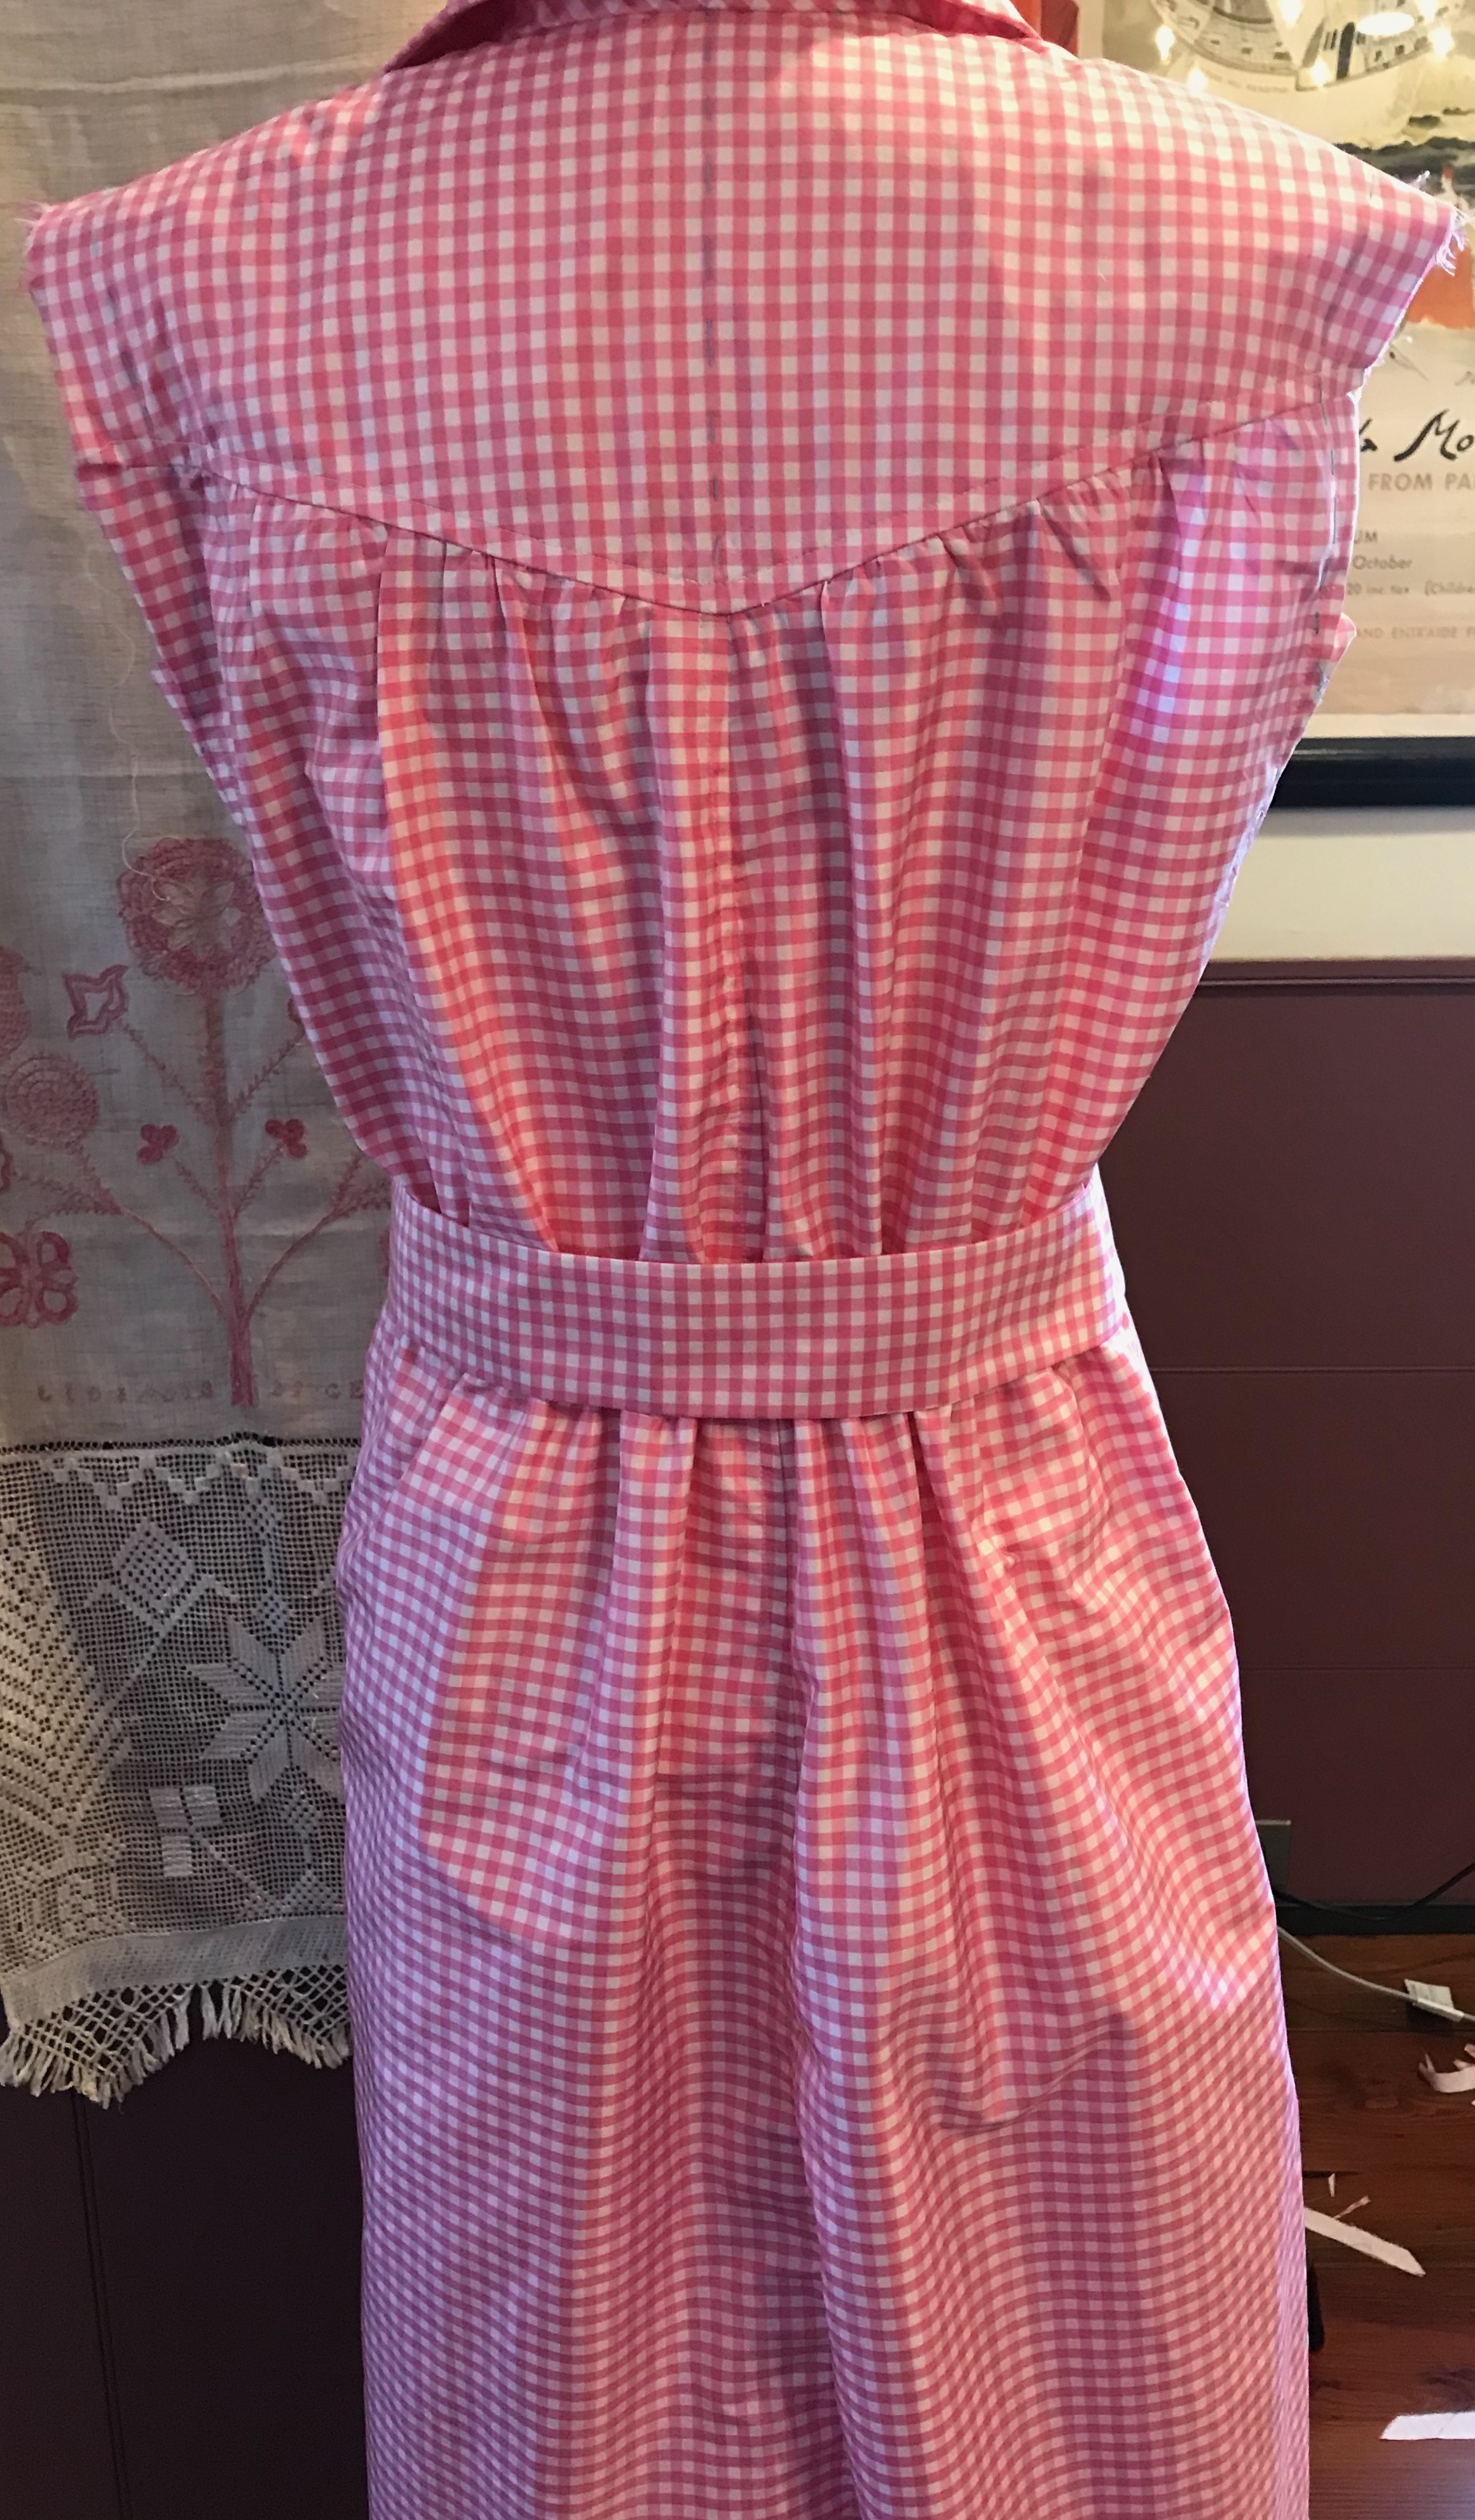
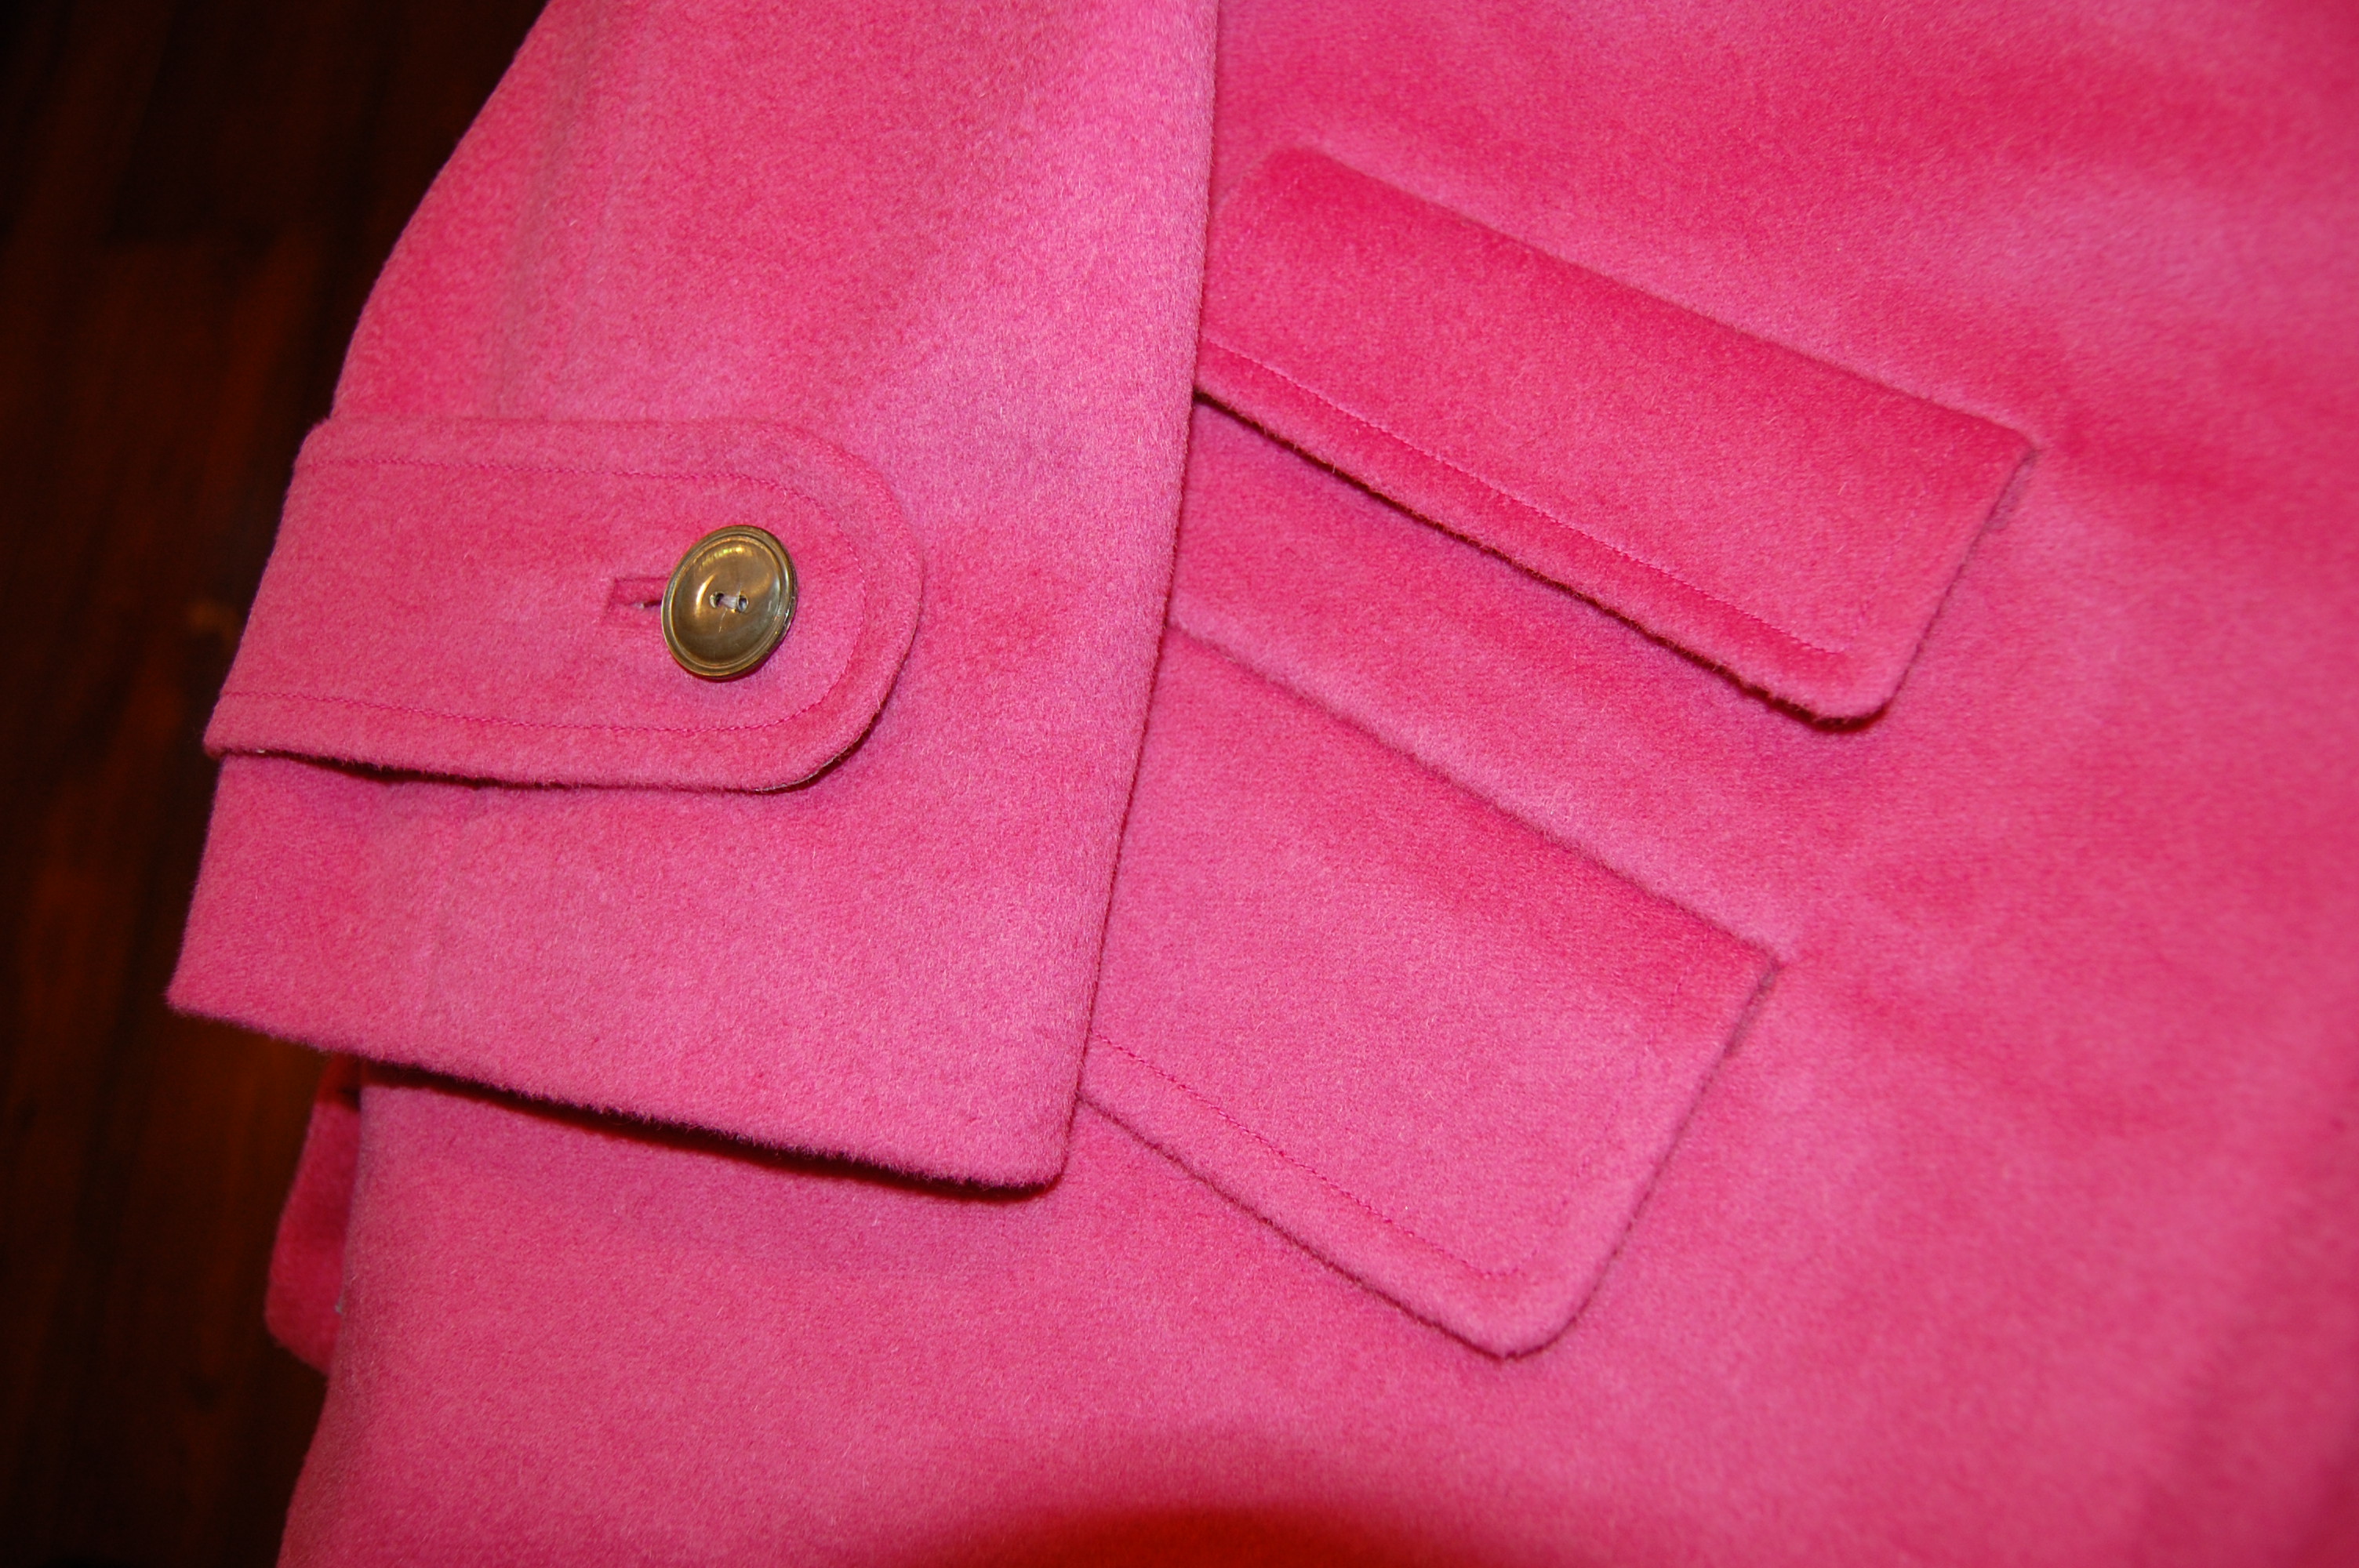
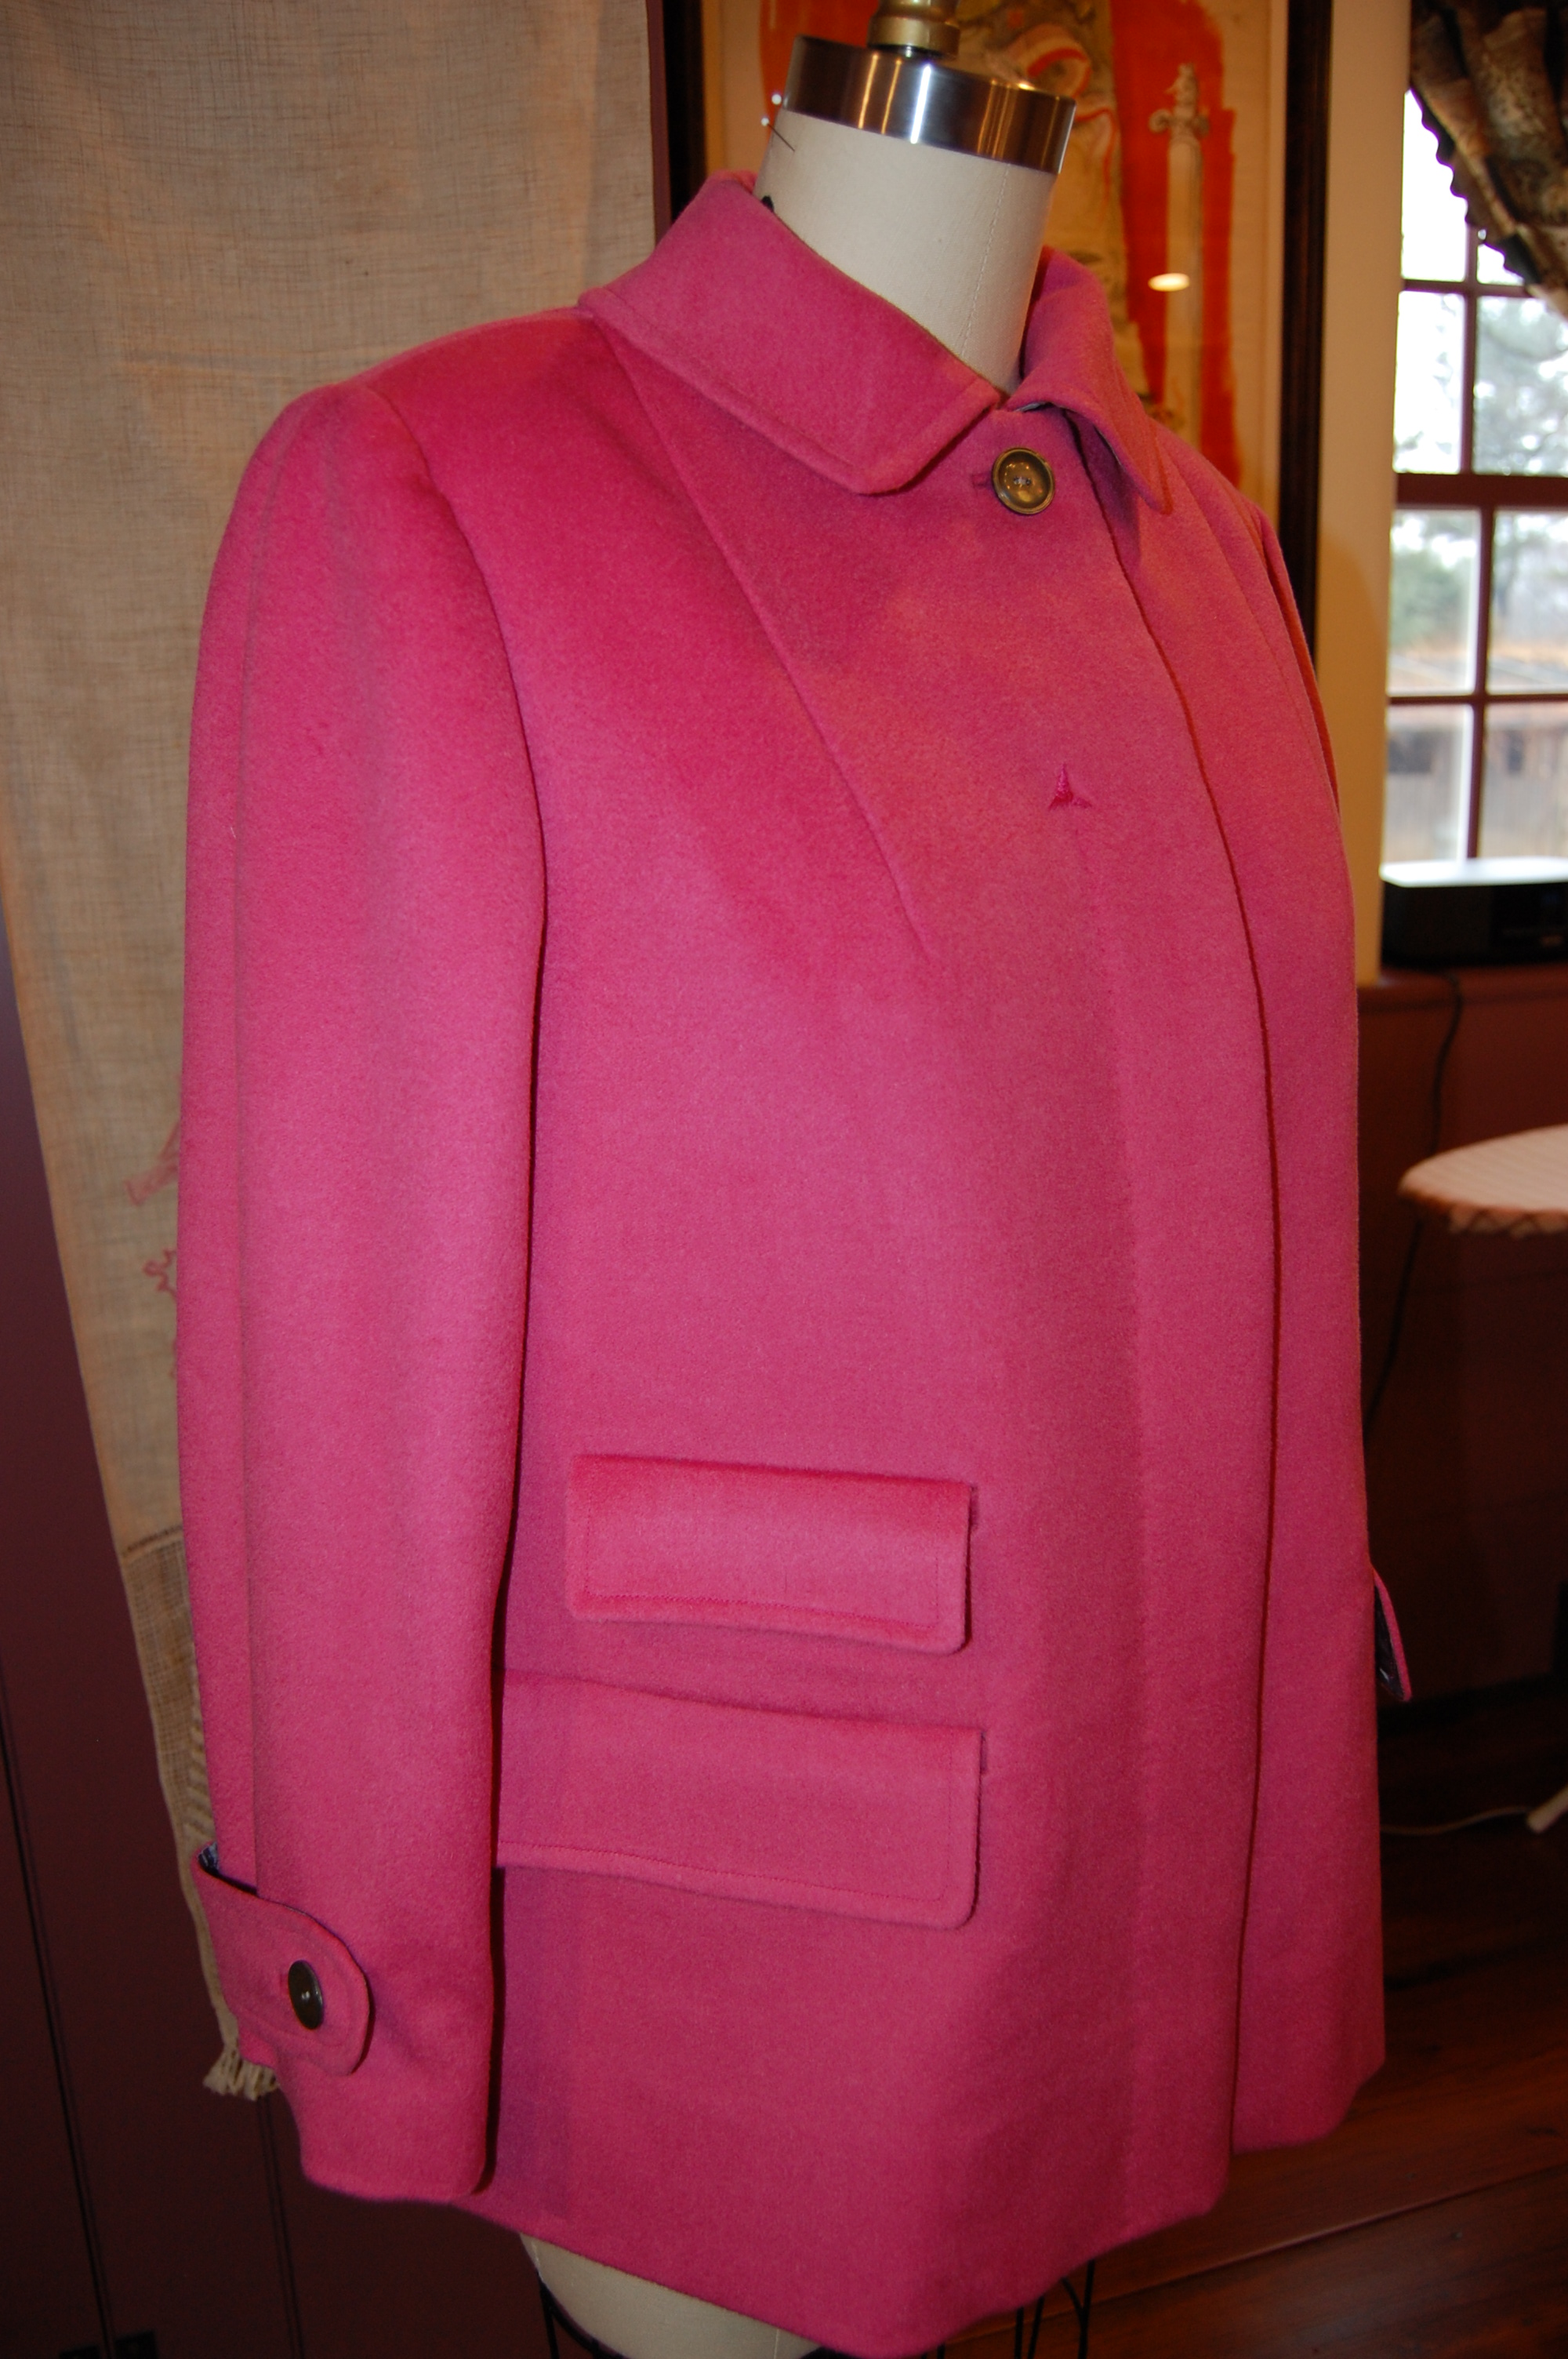
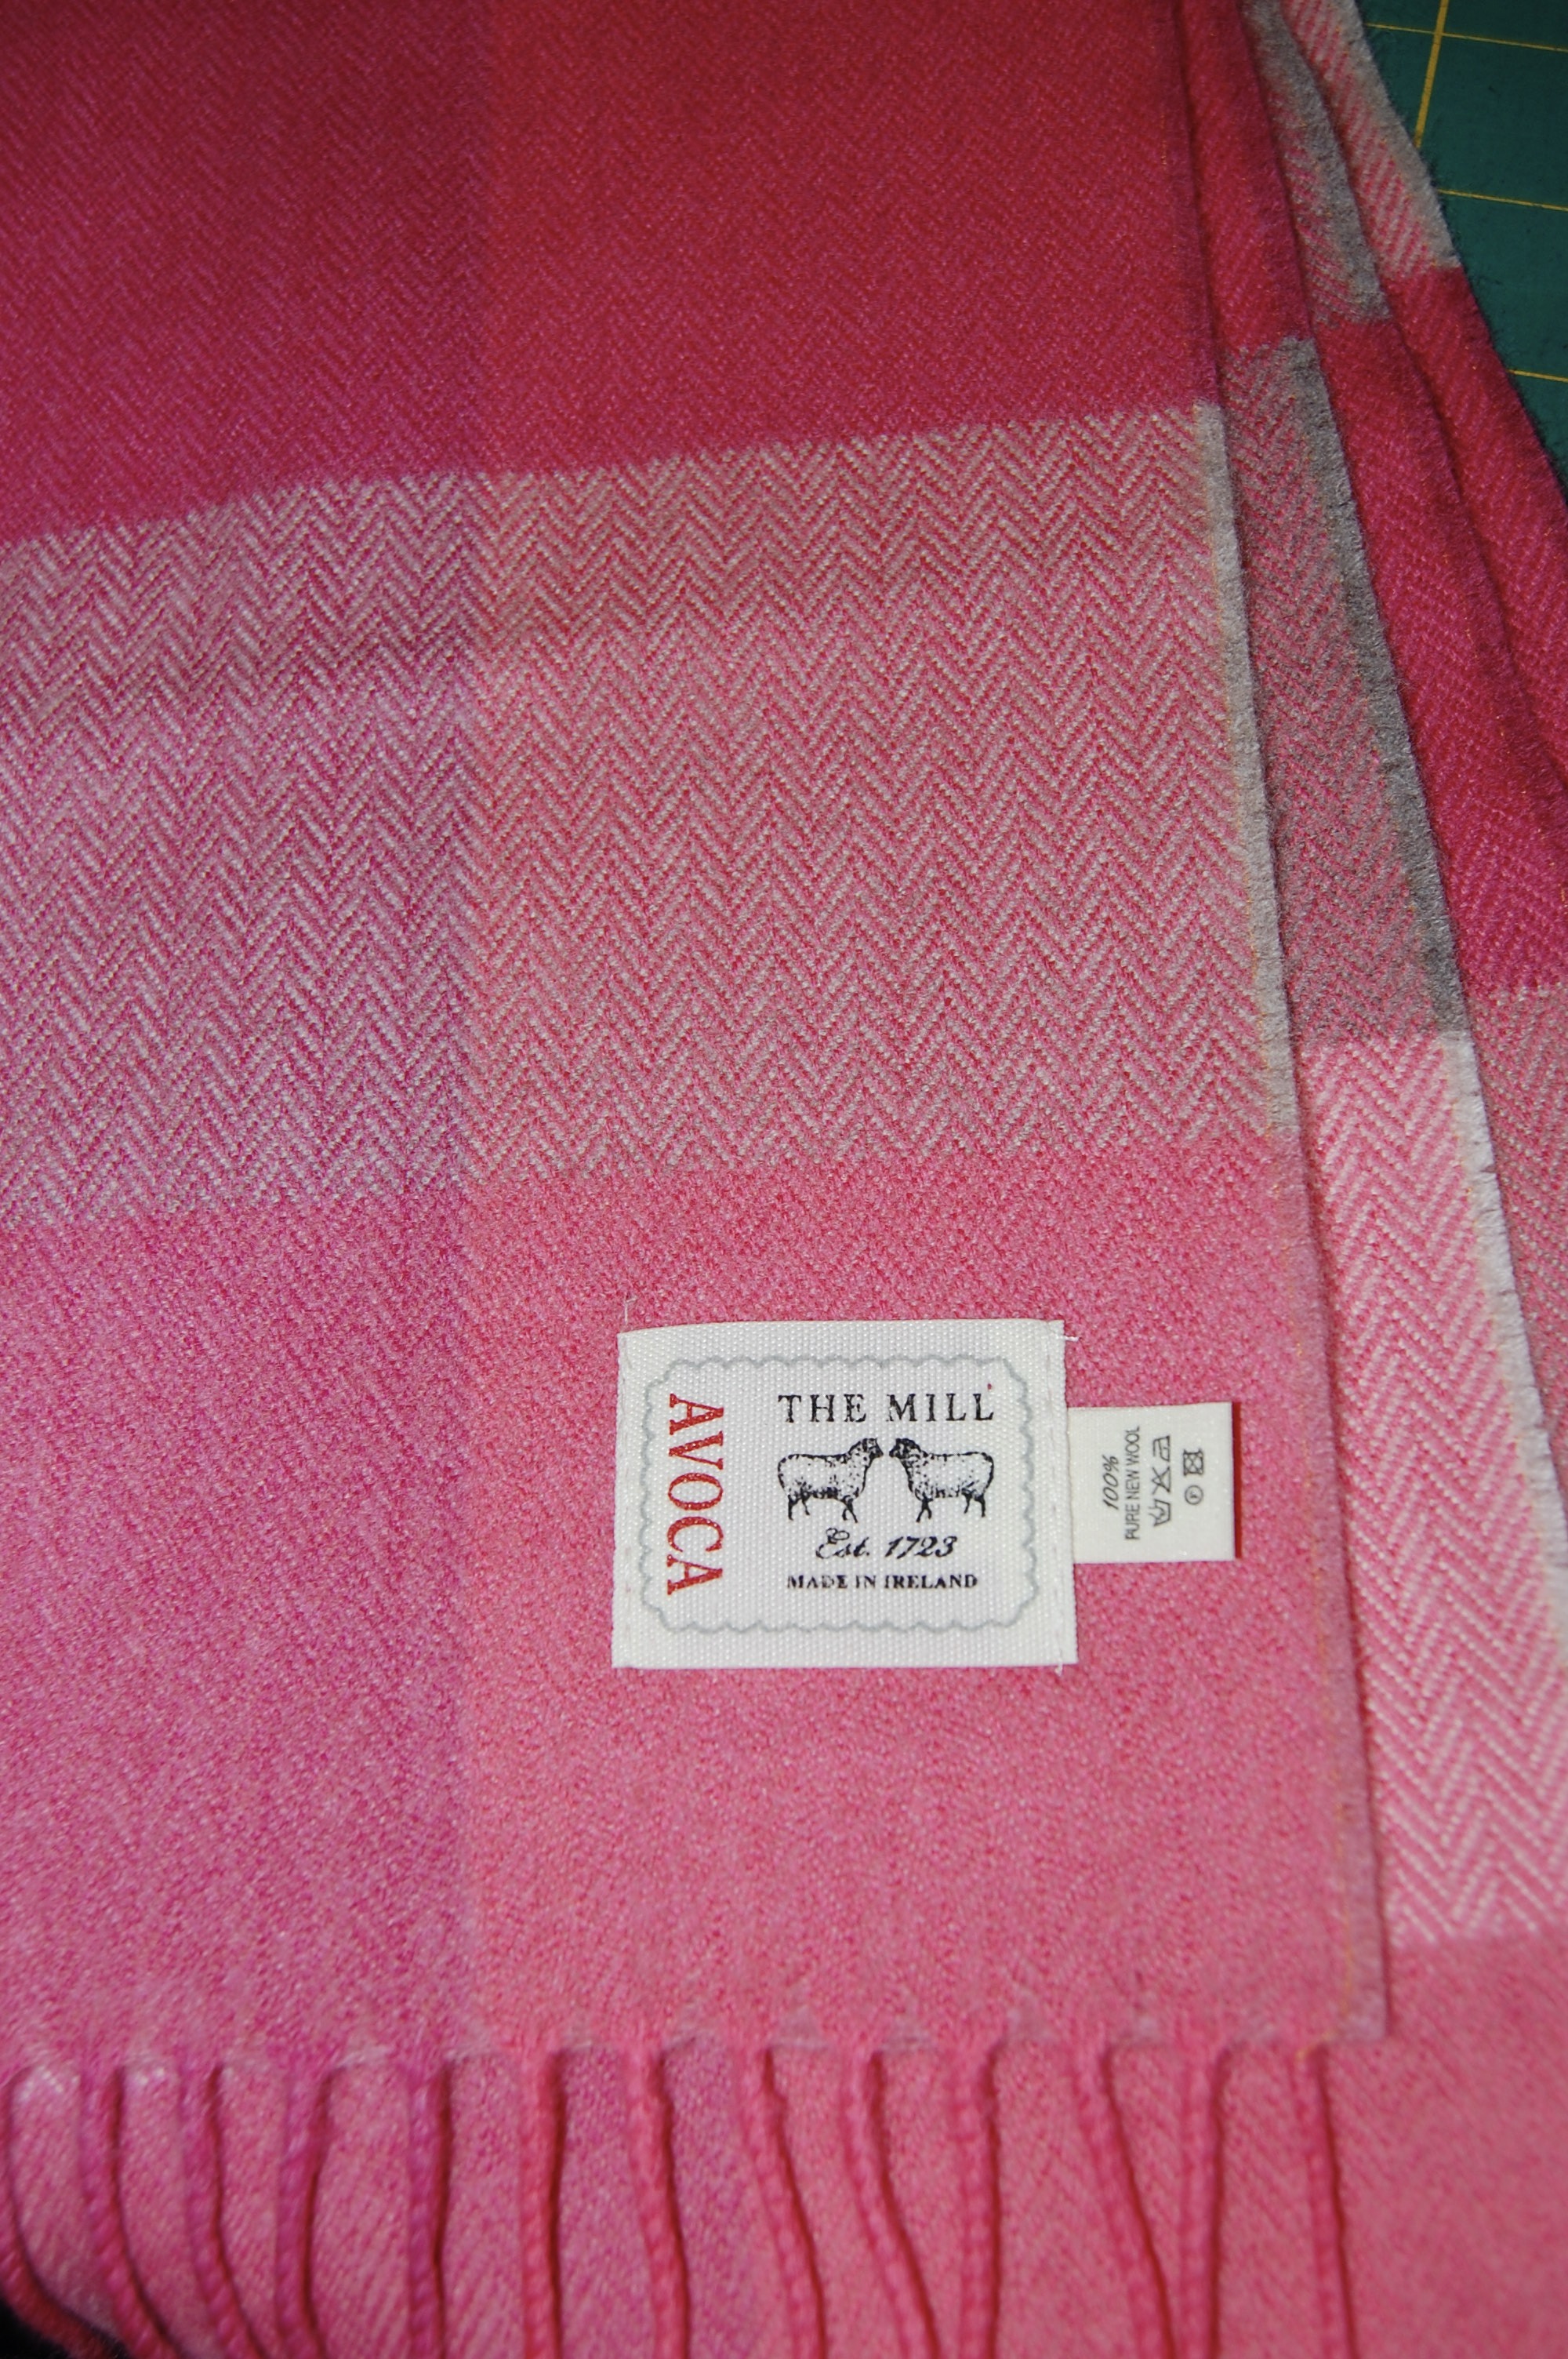
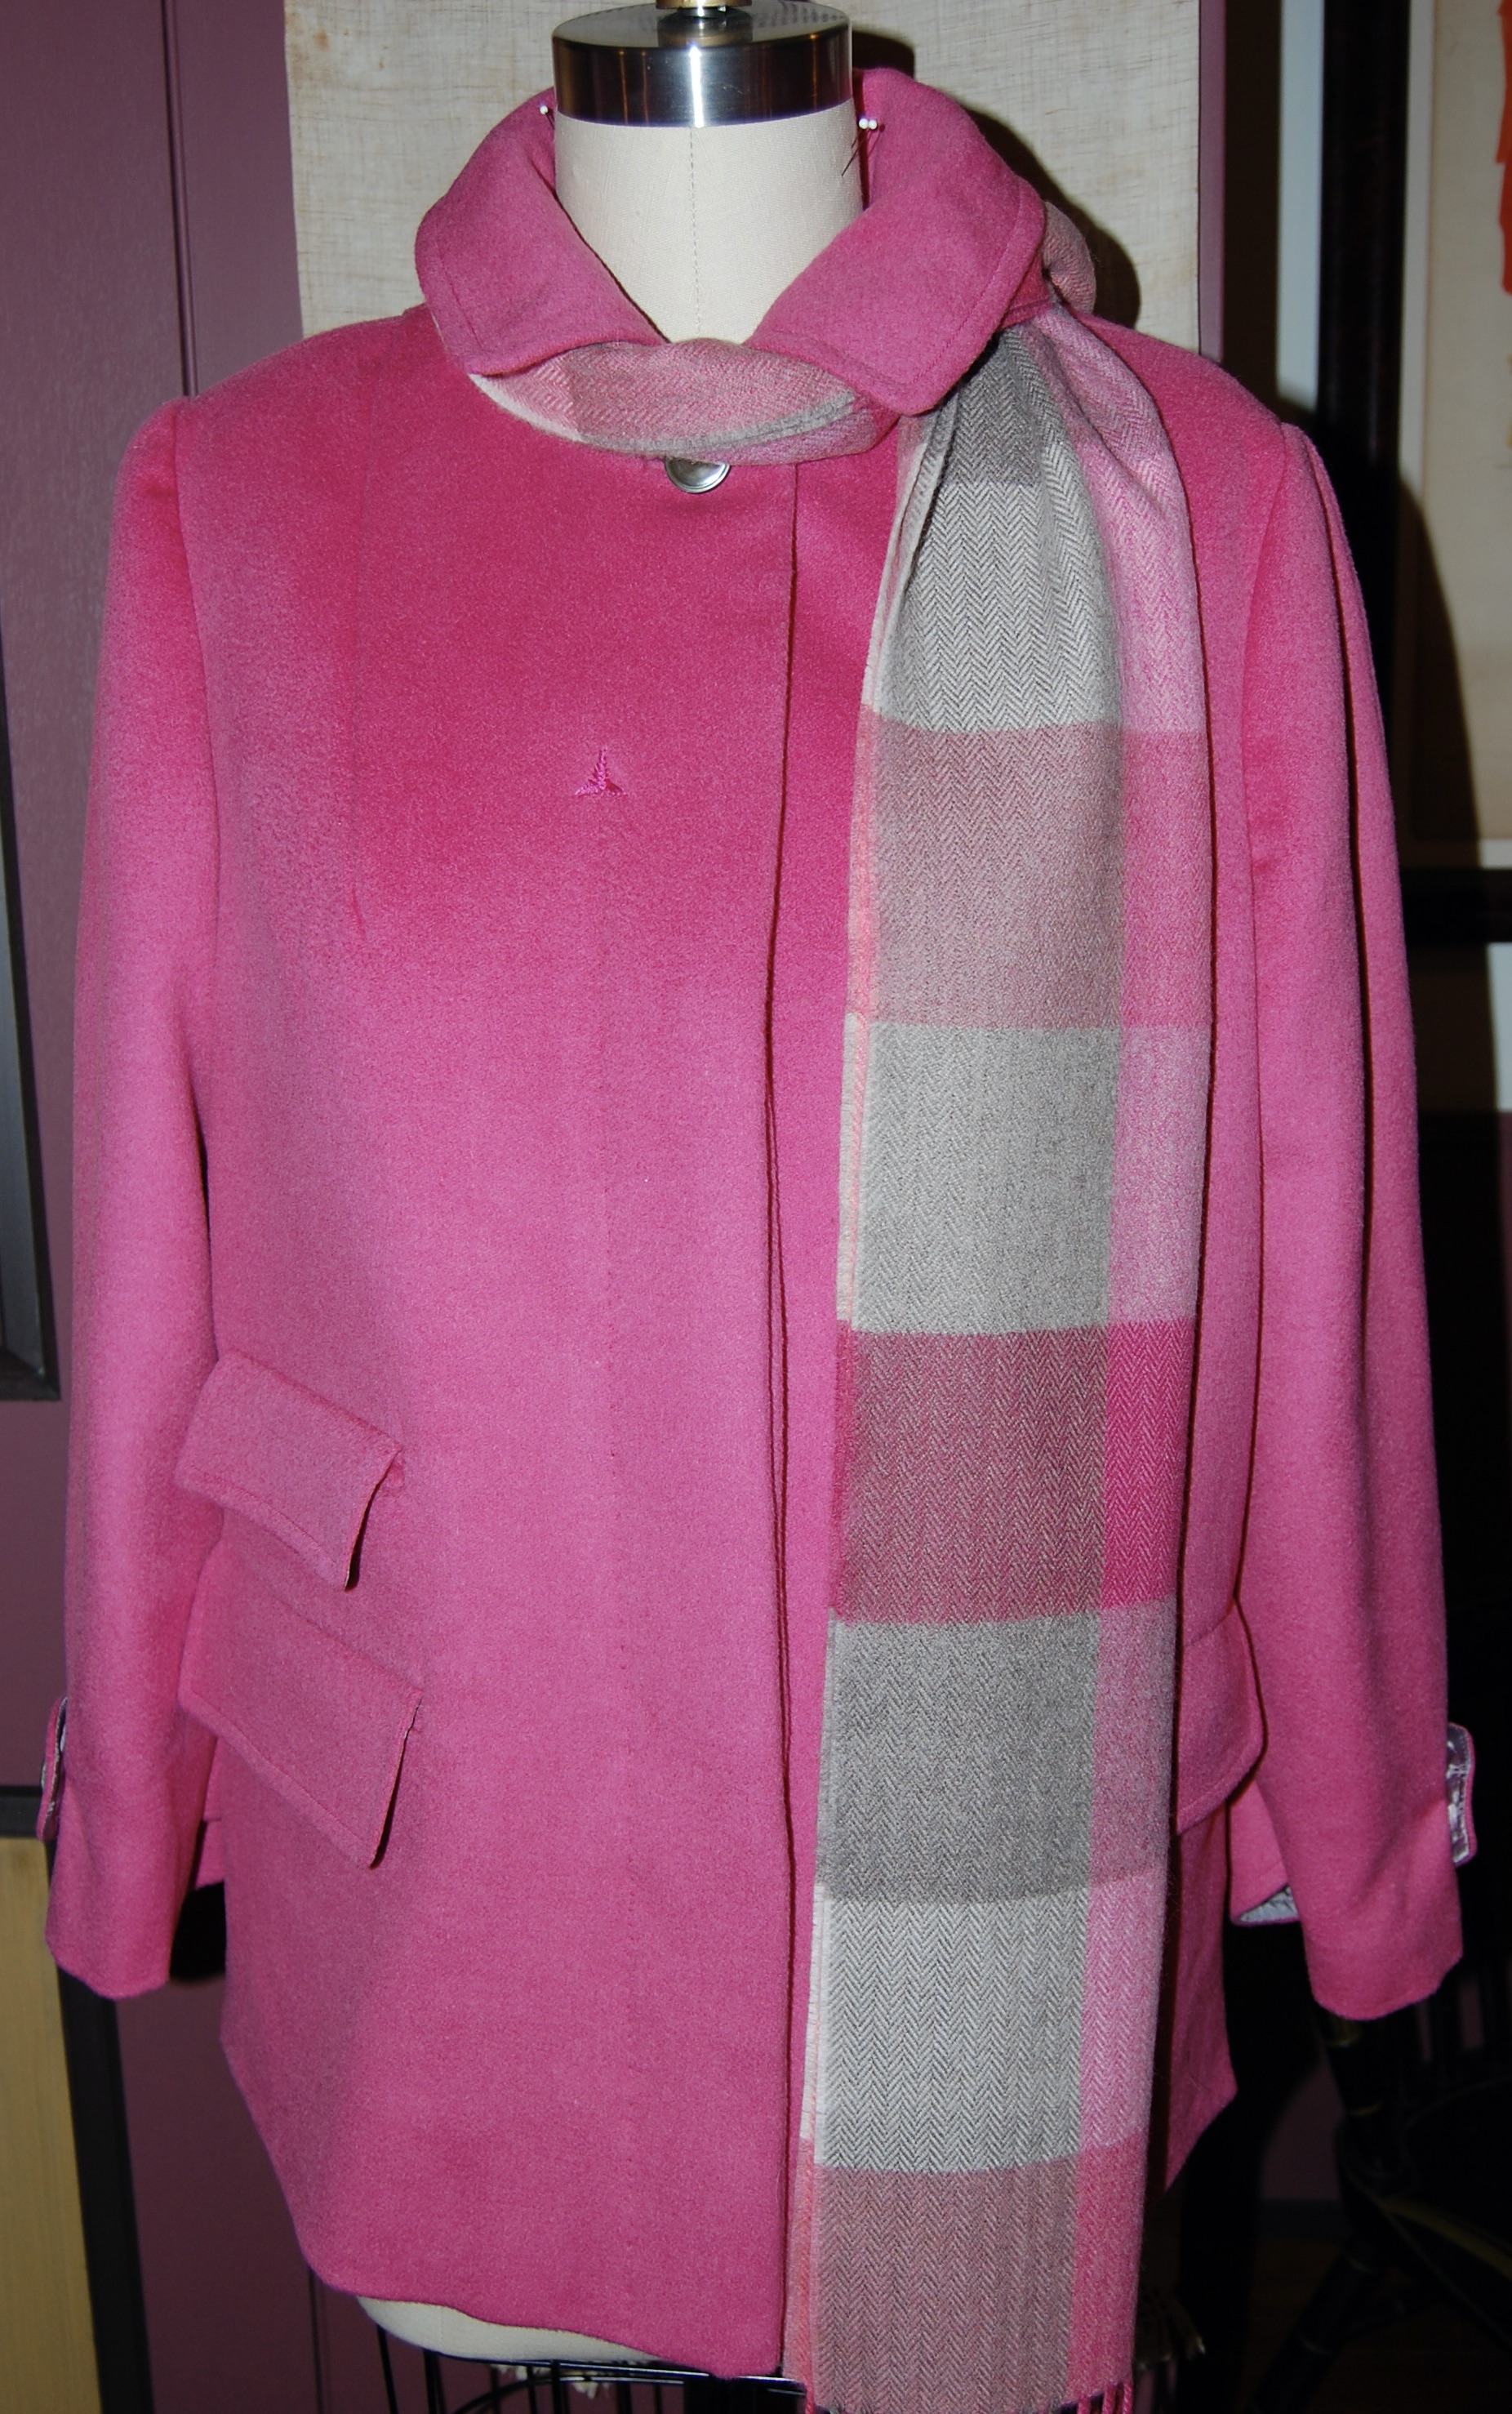
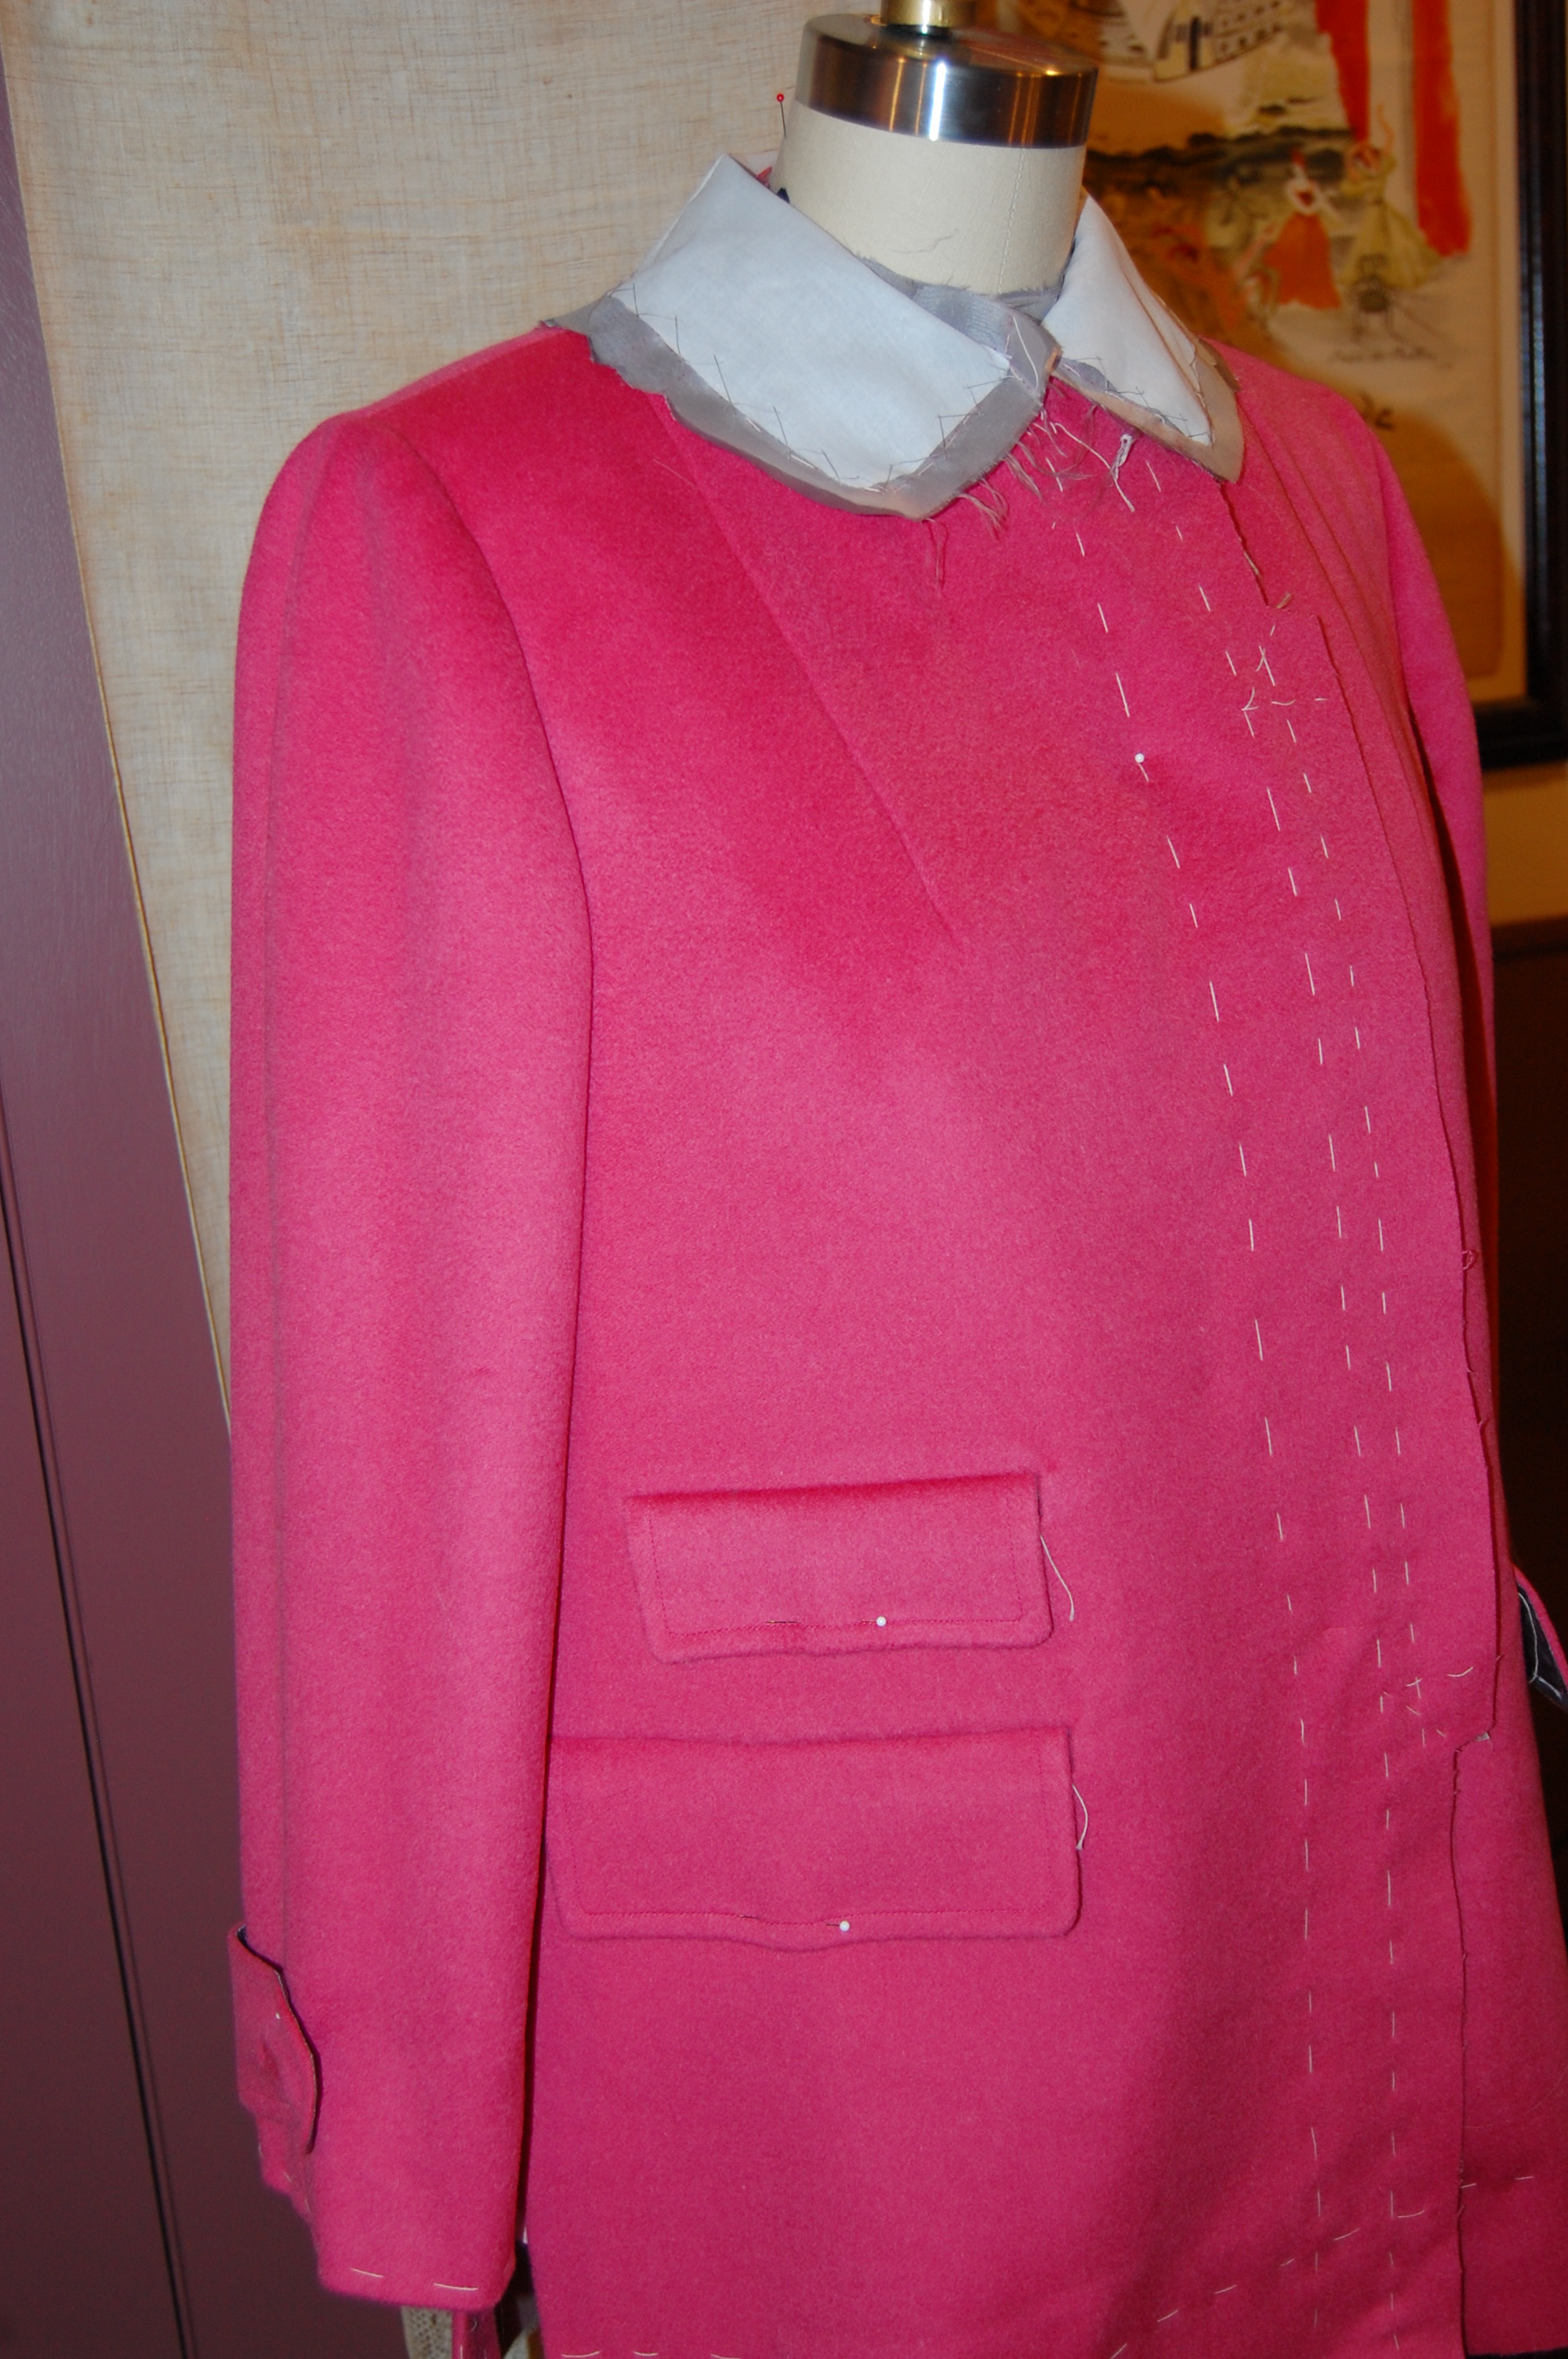
Once I was happy with this placement, I had a eureka moment when I knew I could accomplish two things with a simple bias trim made from the yardage of deep pink linen which coordinated nicely with the floral. 1) I could preserve the full 45” of cross-grain length by applying bias trim to the hem edge instead of turning it under, and I could do the same with the sleeves. And 2) the trim would add interest to the dress, just as I had vaguely imagined. (A quick aside here – I have ample yardage of the solid deep pink linen to make a coordinating coat at some point. Every dress needs a coat, right?)

I underlined this dress in a very lightweight, pre-washed, cotton batiste, then I lined it in Bemberg rayon. Moygashel linen washes beautifully, as does Bemberg lining, which is why I chose Bemberg over silk for this dress. I eliminated the neckline facing, choosing instead to bring the lining up to the edge of the neckline seam, then under-stitching it to secure that edge in place.
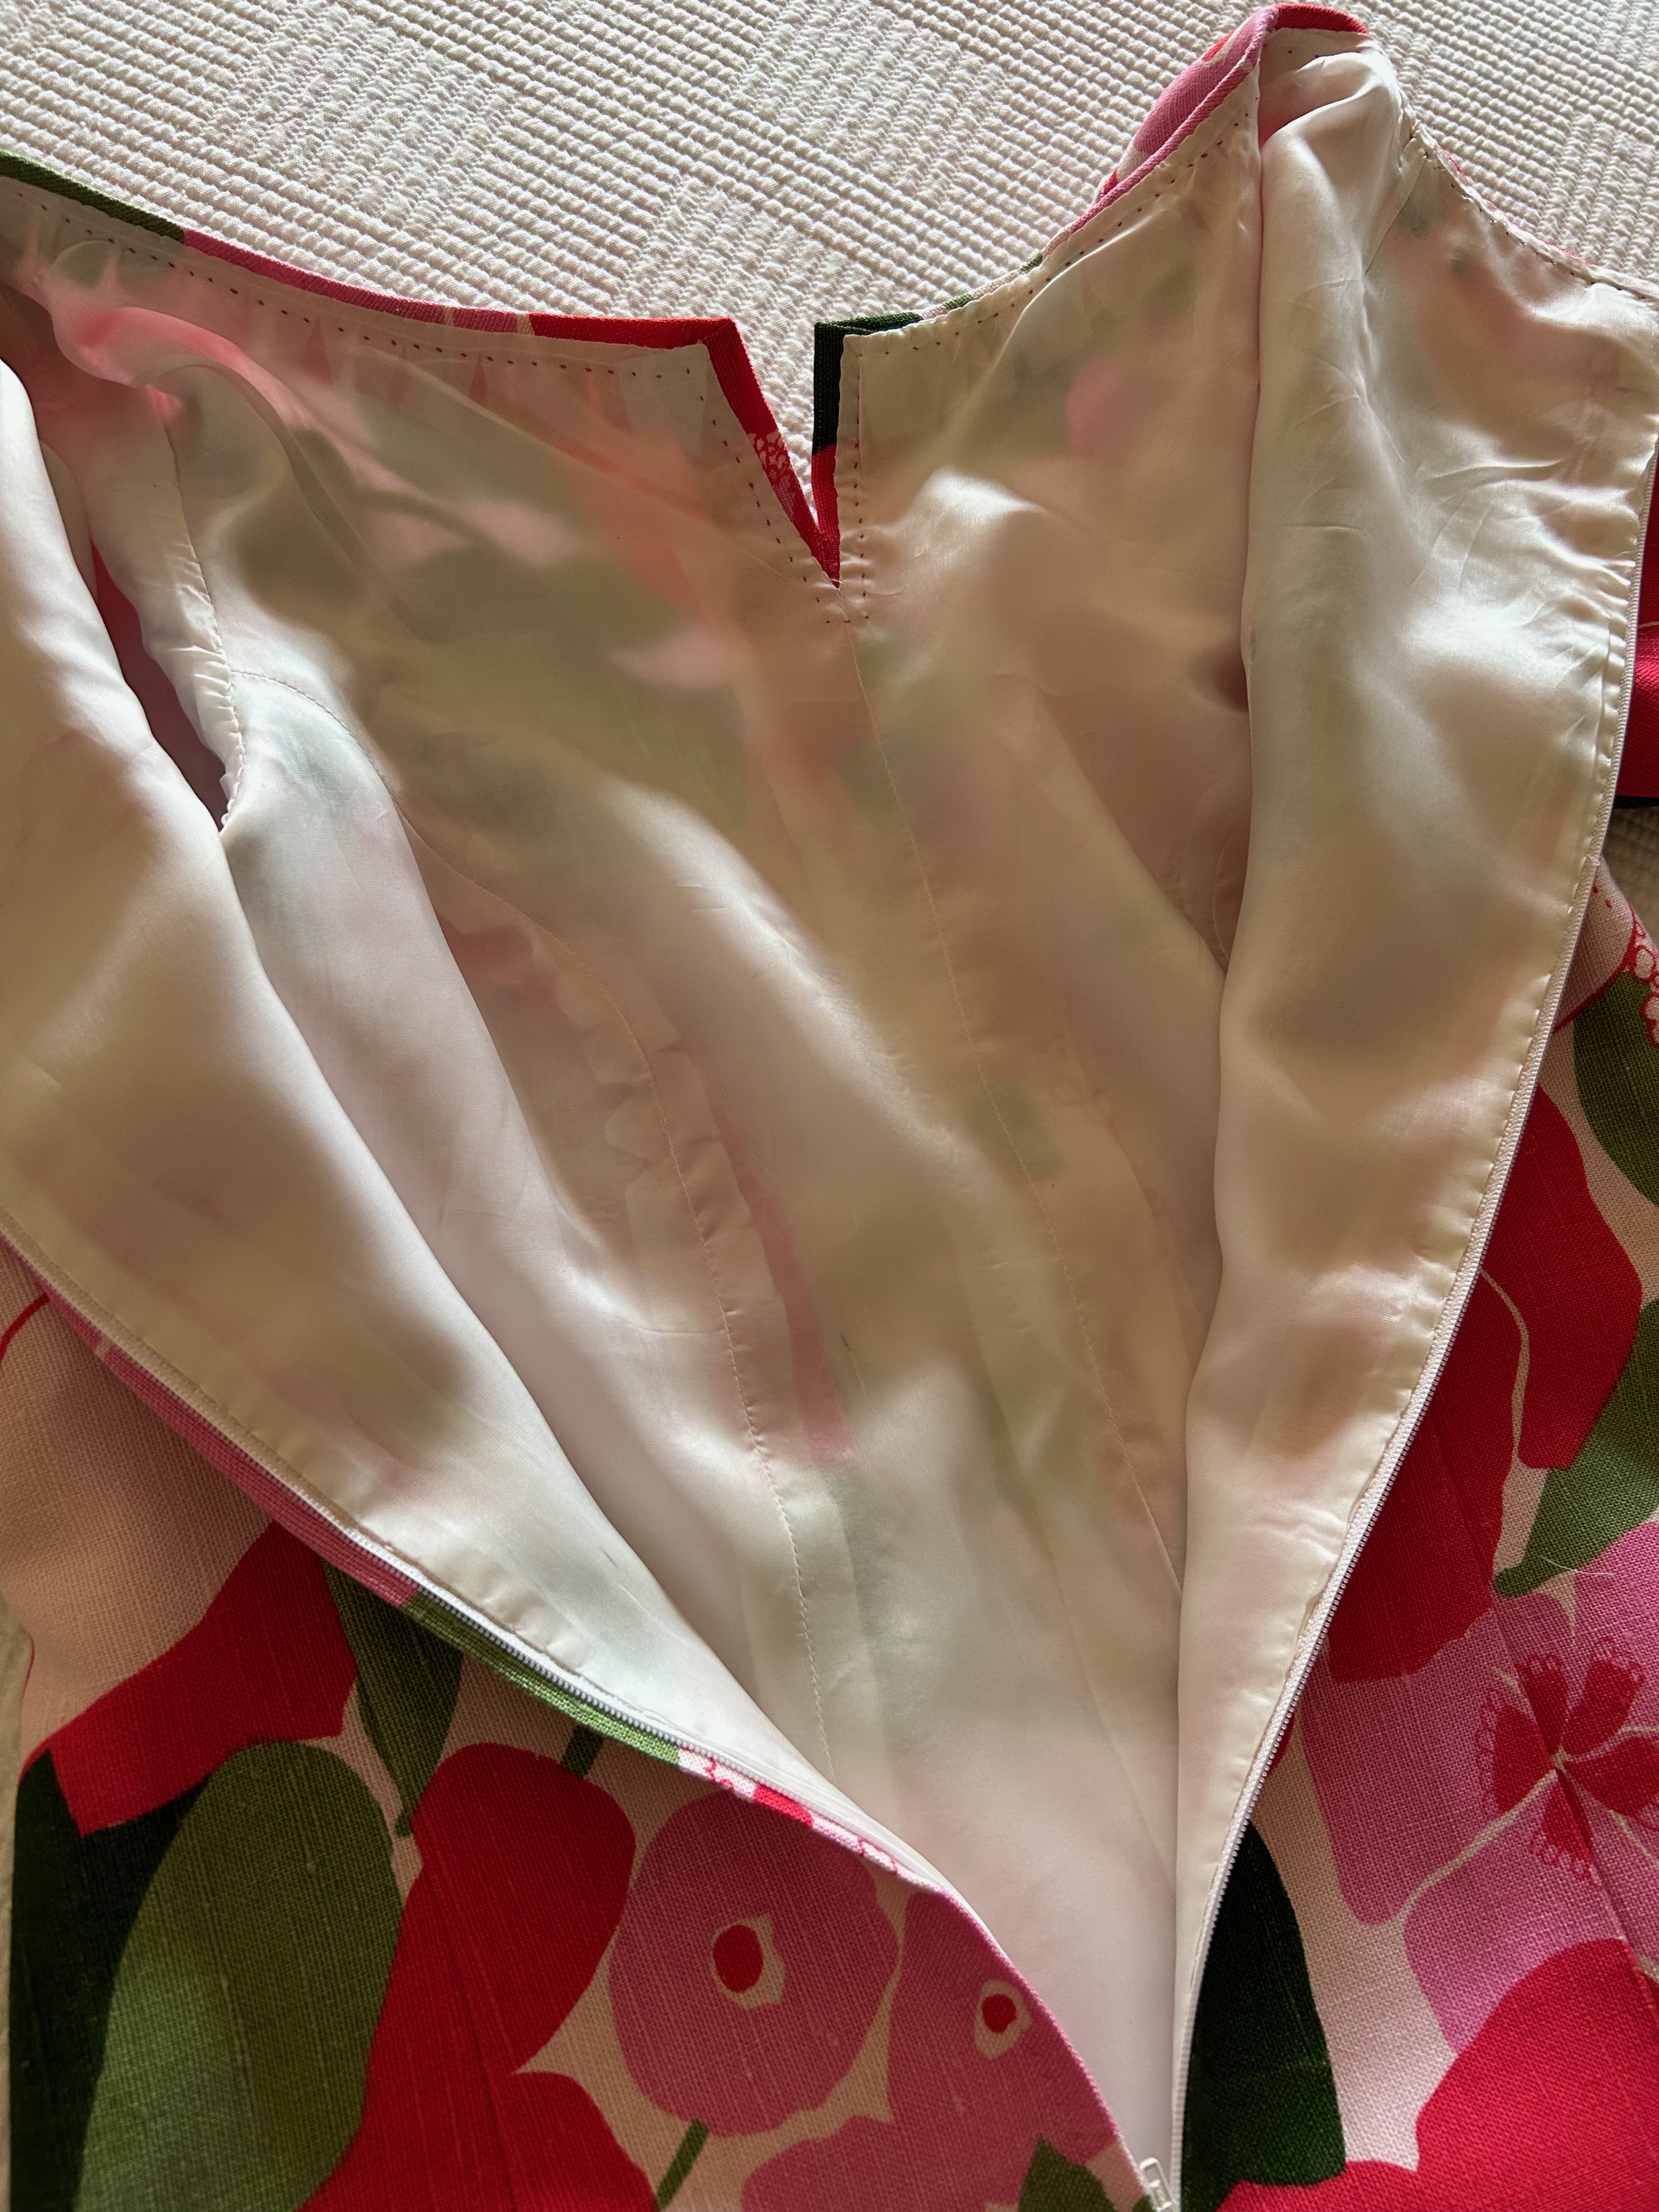
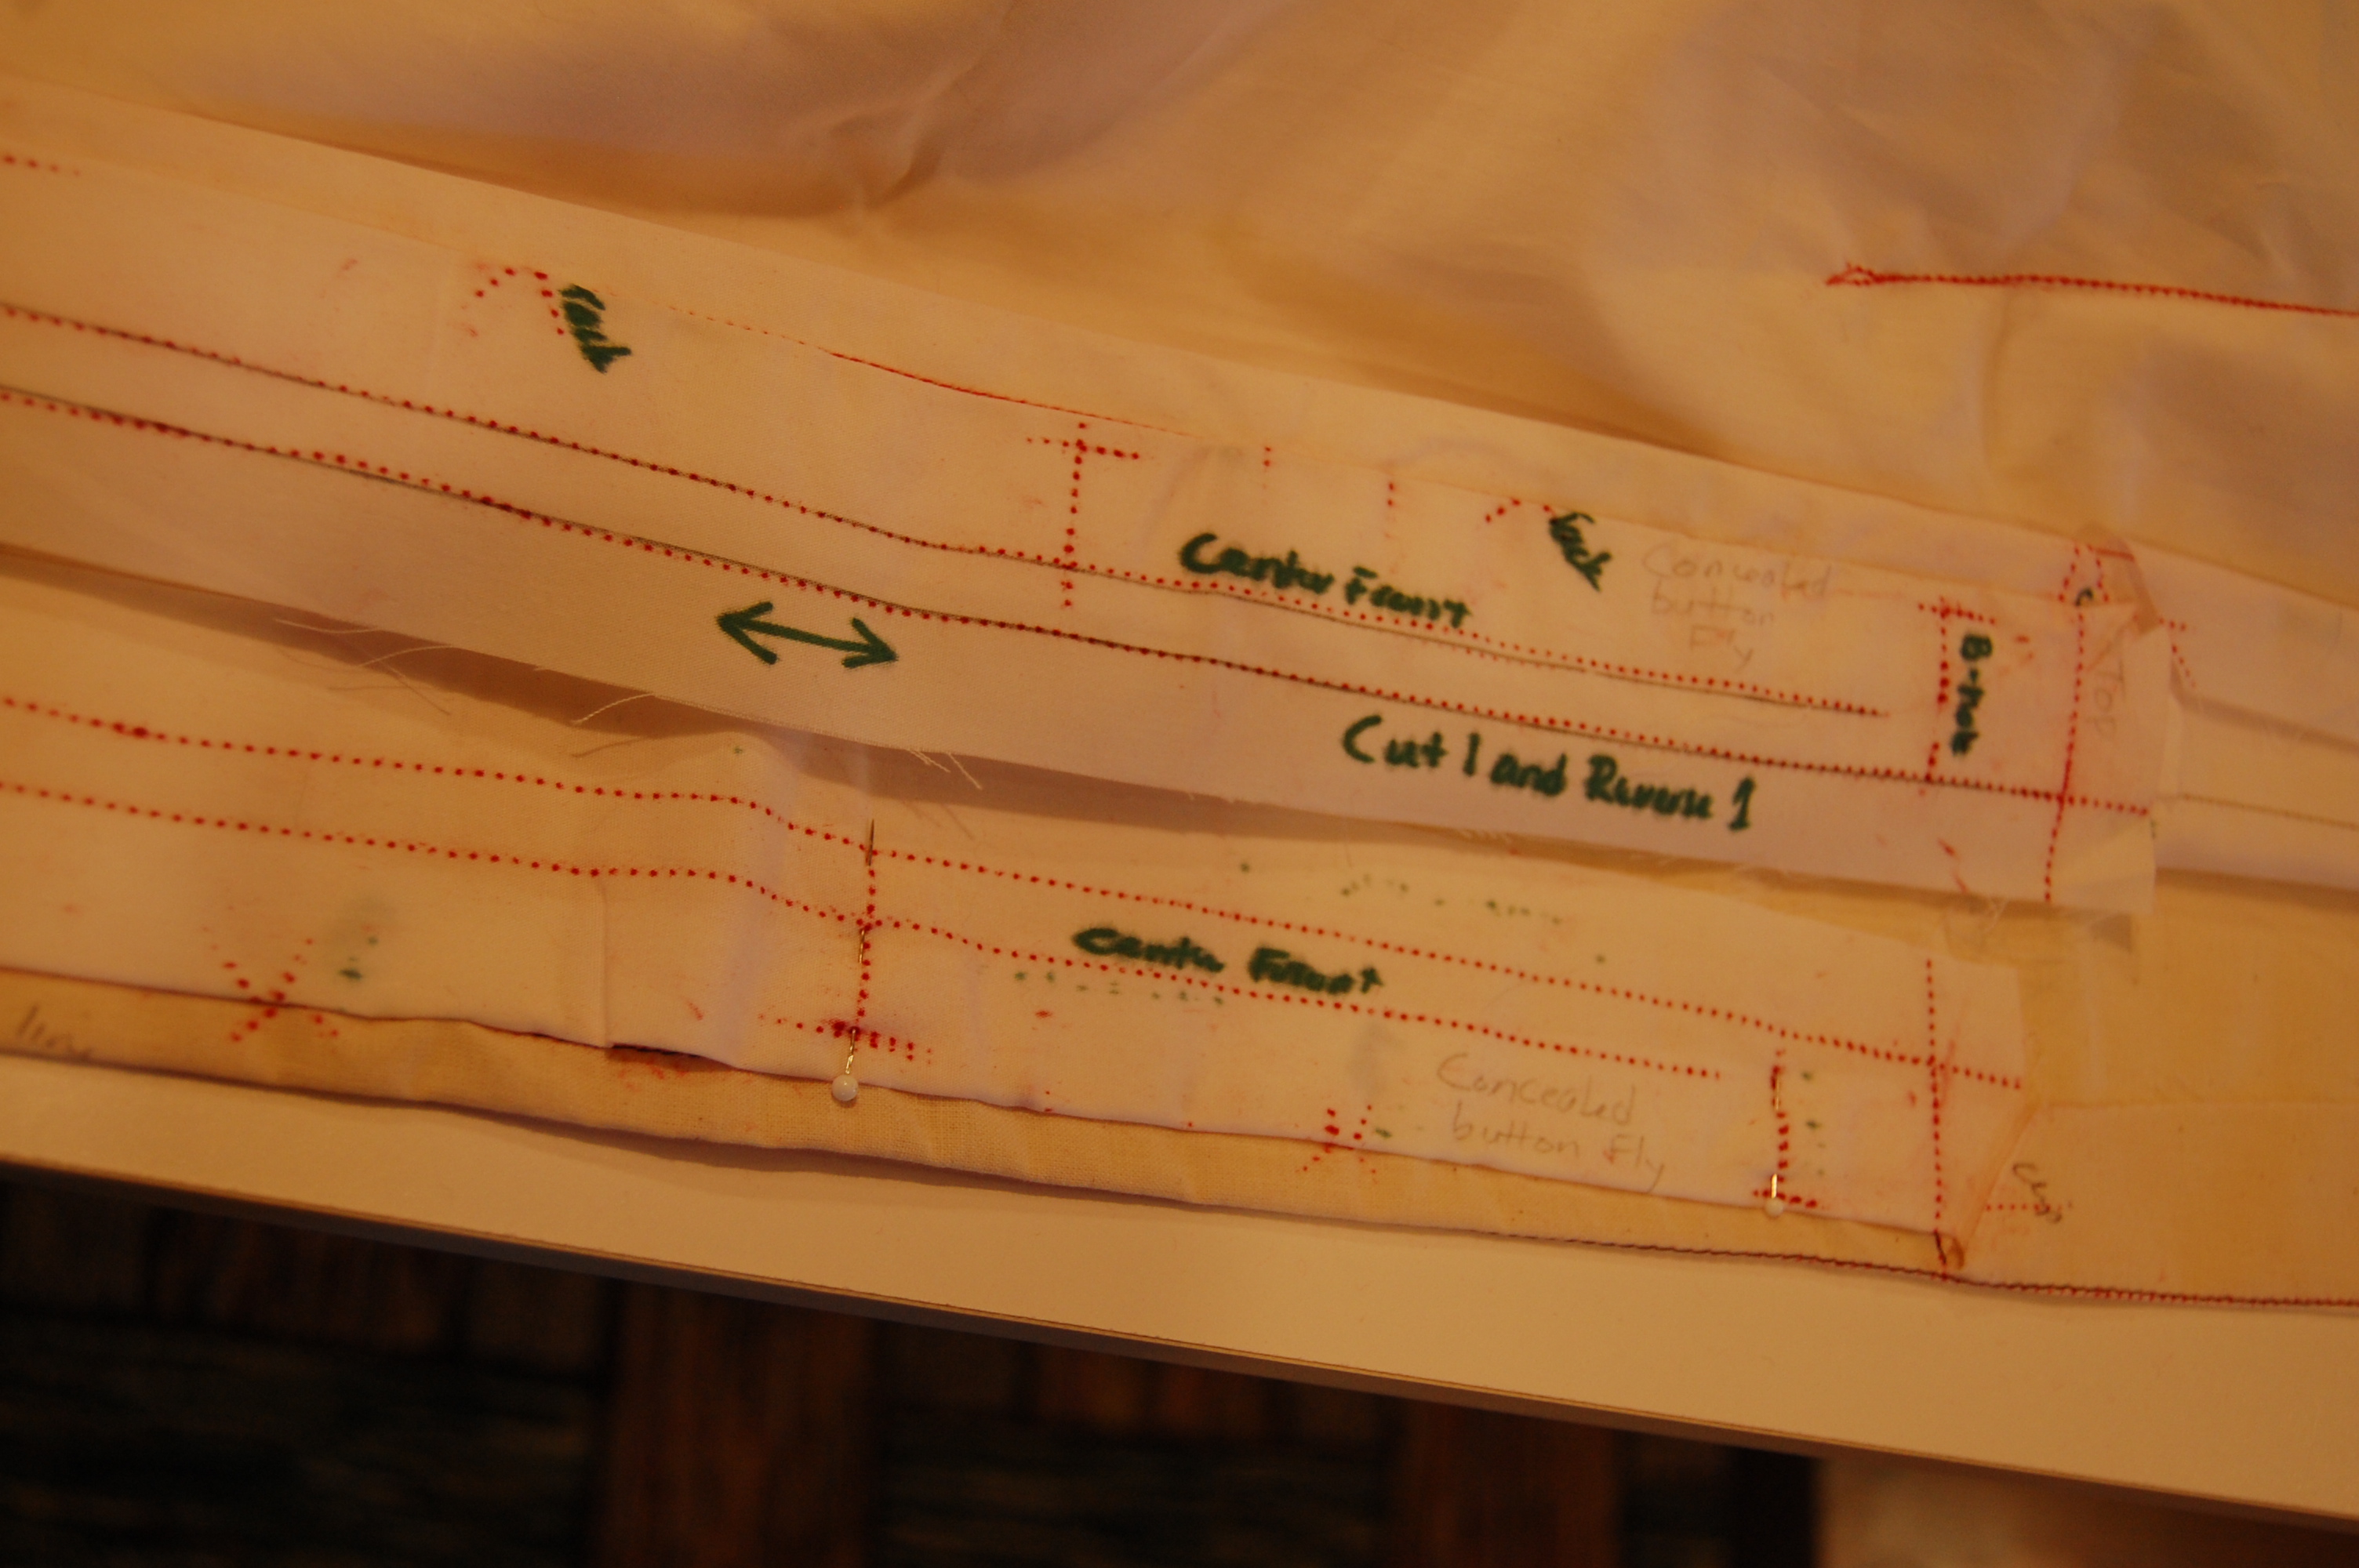
I chose to do a hand-picked, lapped zipper, an application which I think looks so lovely. Interestingly, I hand-picked the zipper in the dress I made in 1973, although it is a centered application.
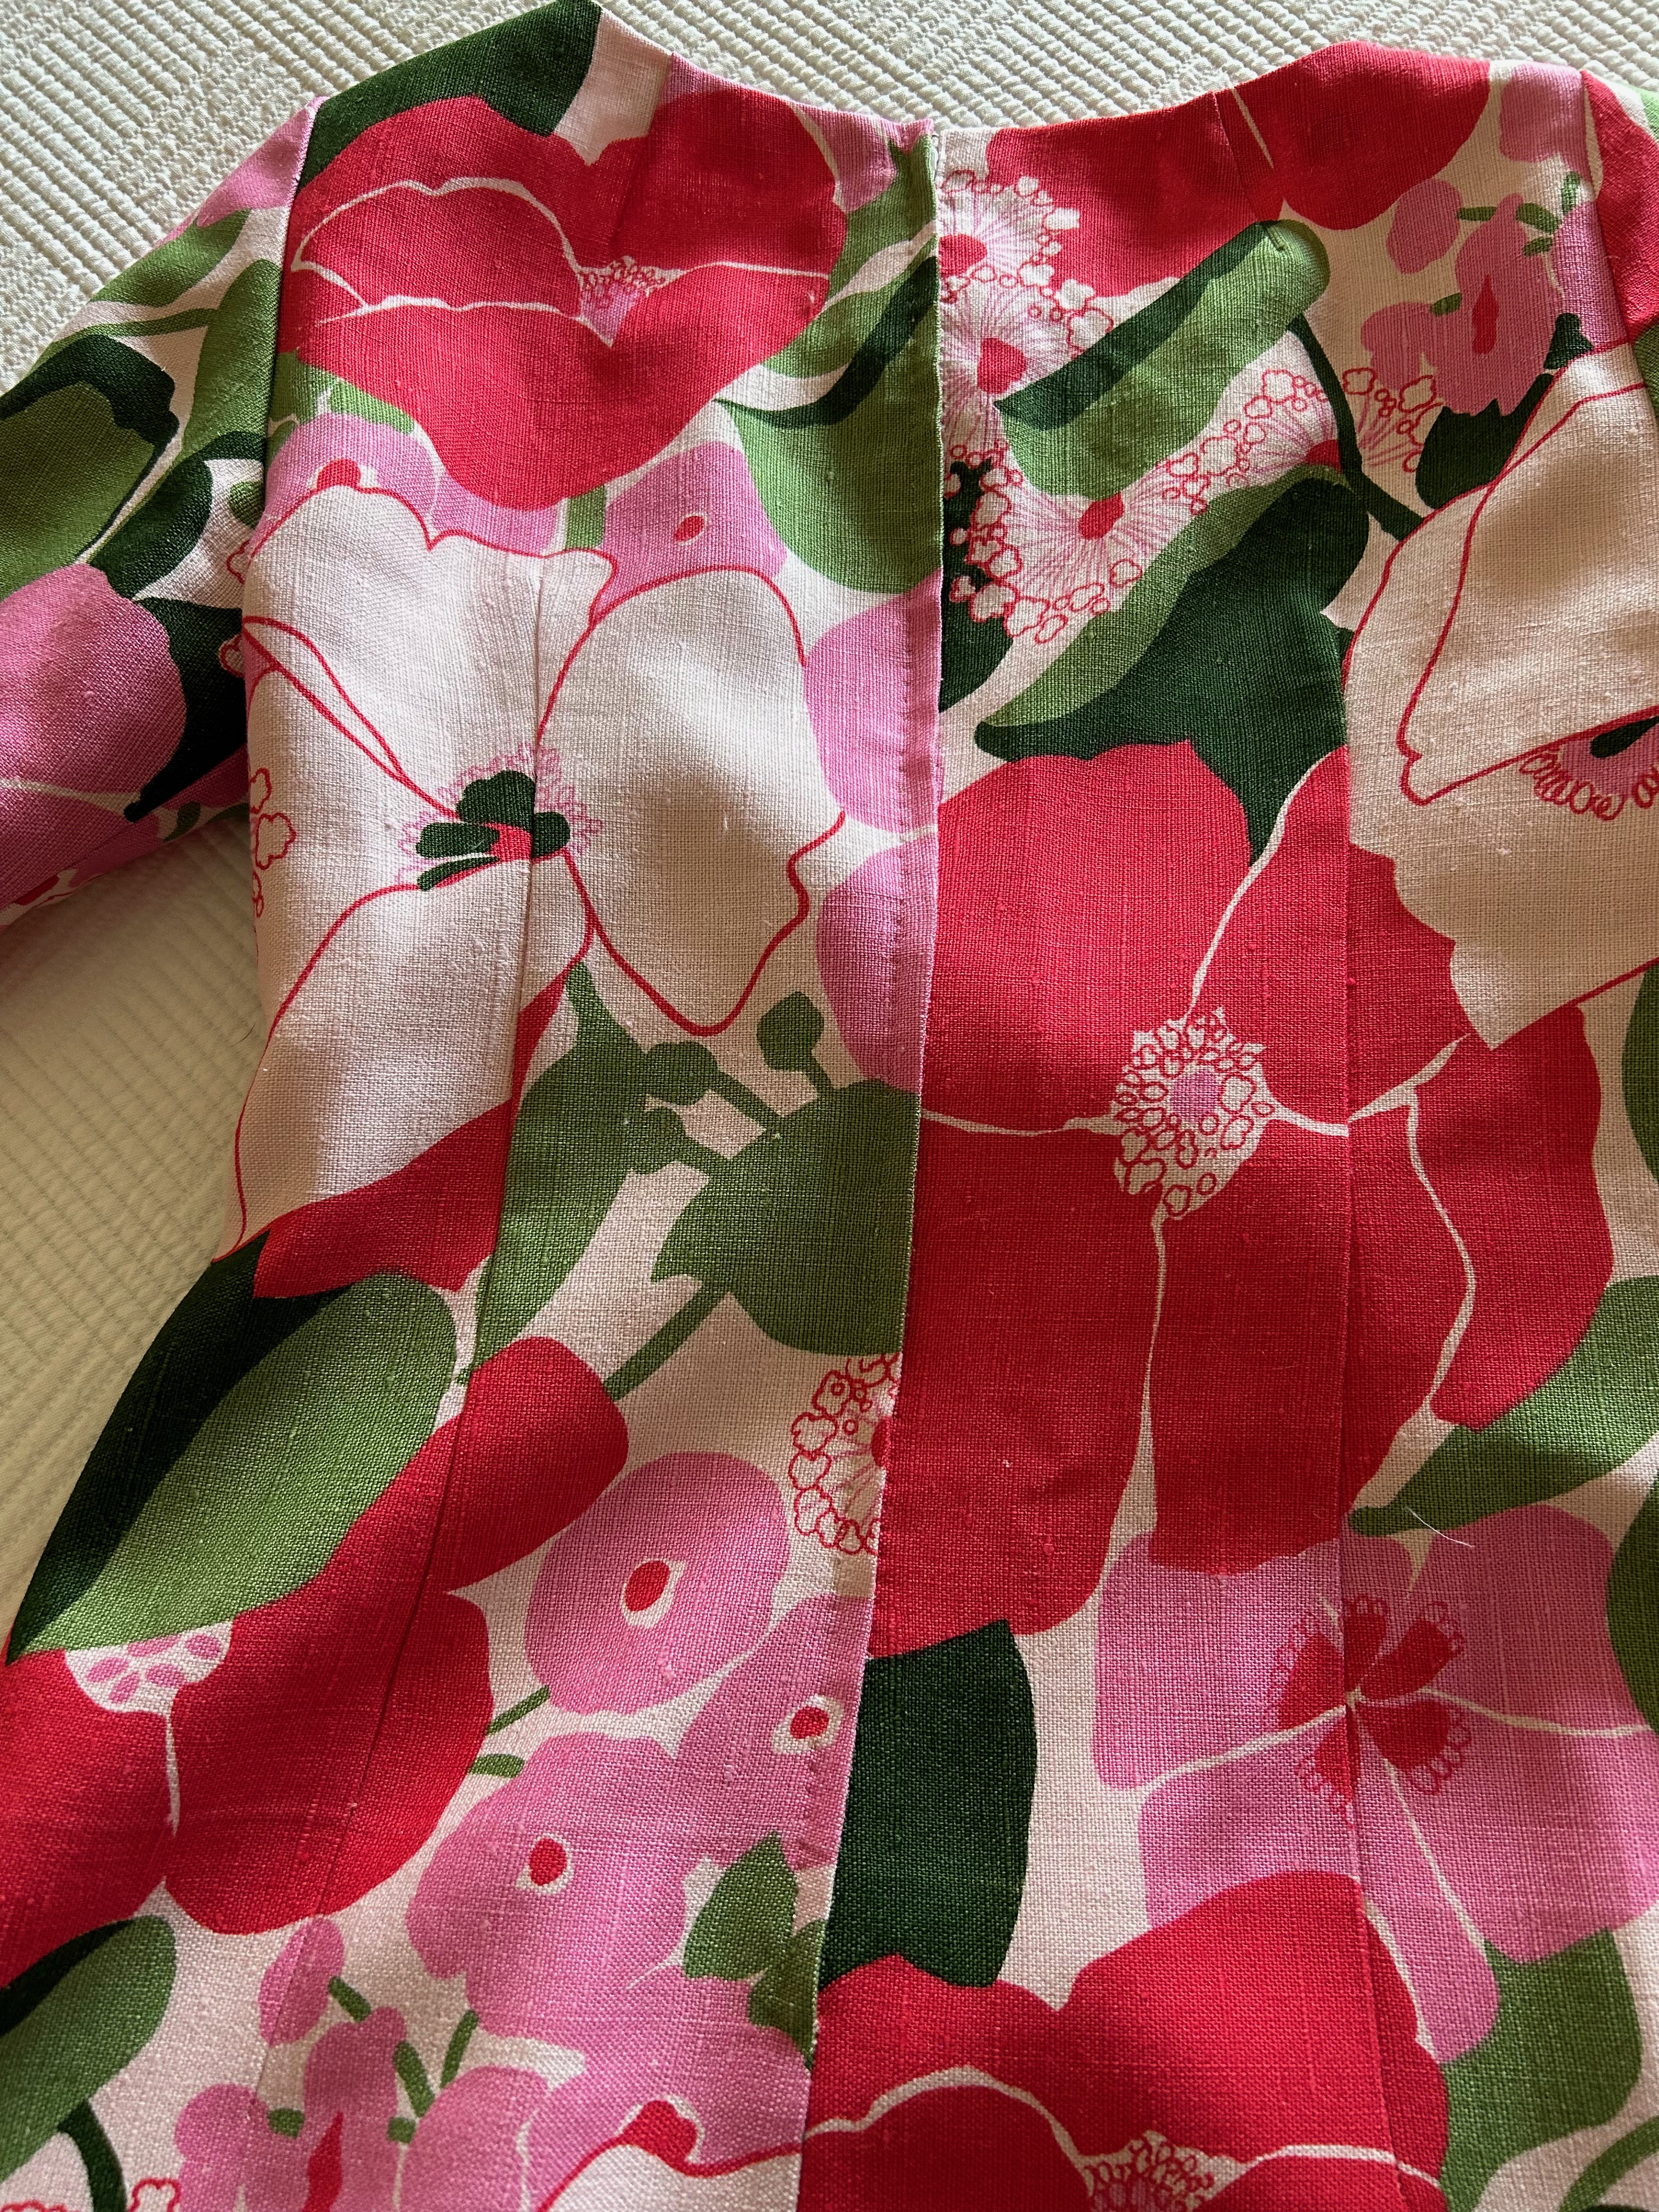

When it came time to apply the bias-cut trim to the hem and sleeves, I had to experiment around a bit. I didn’t want it too wide, but it needed to be substantial enough to look like it was meant to be and not an afterthought or decision made in desperation! I finally settled on an exposure of 1/2”.
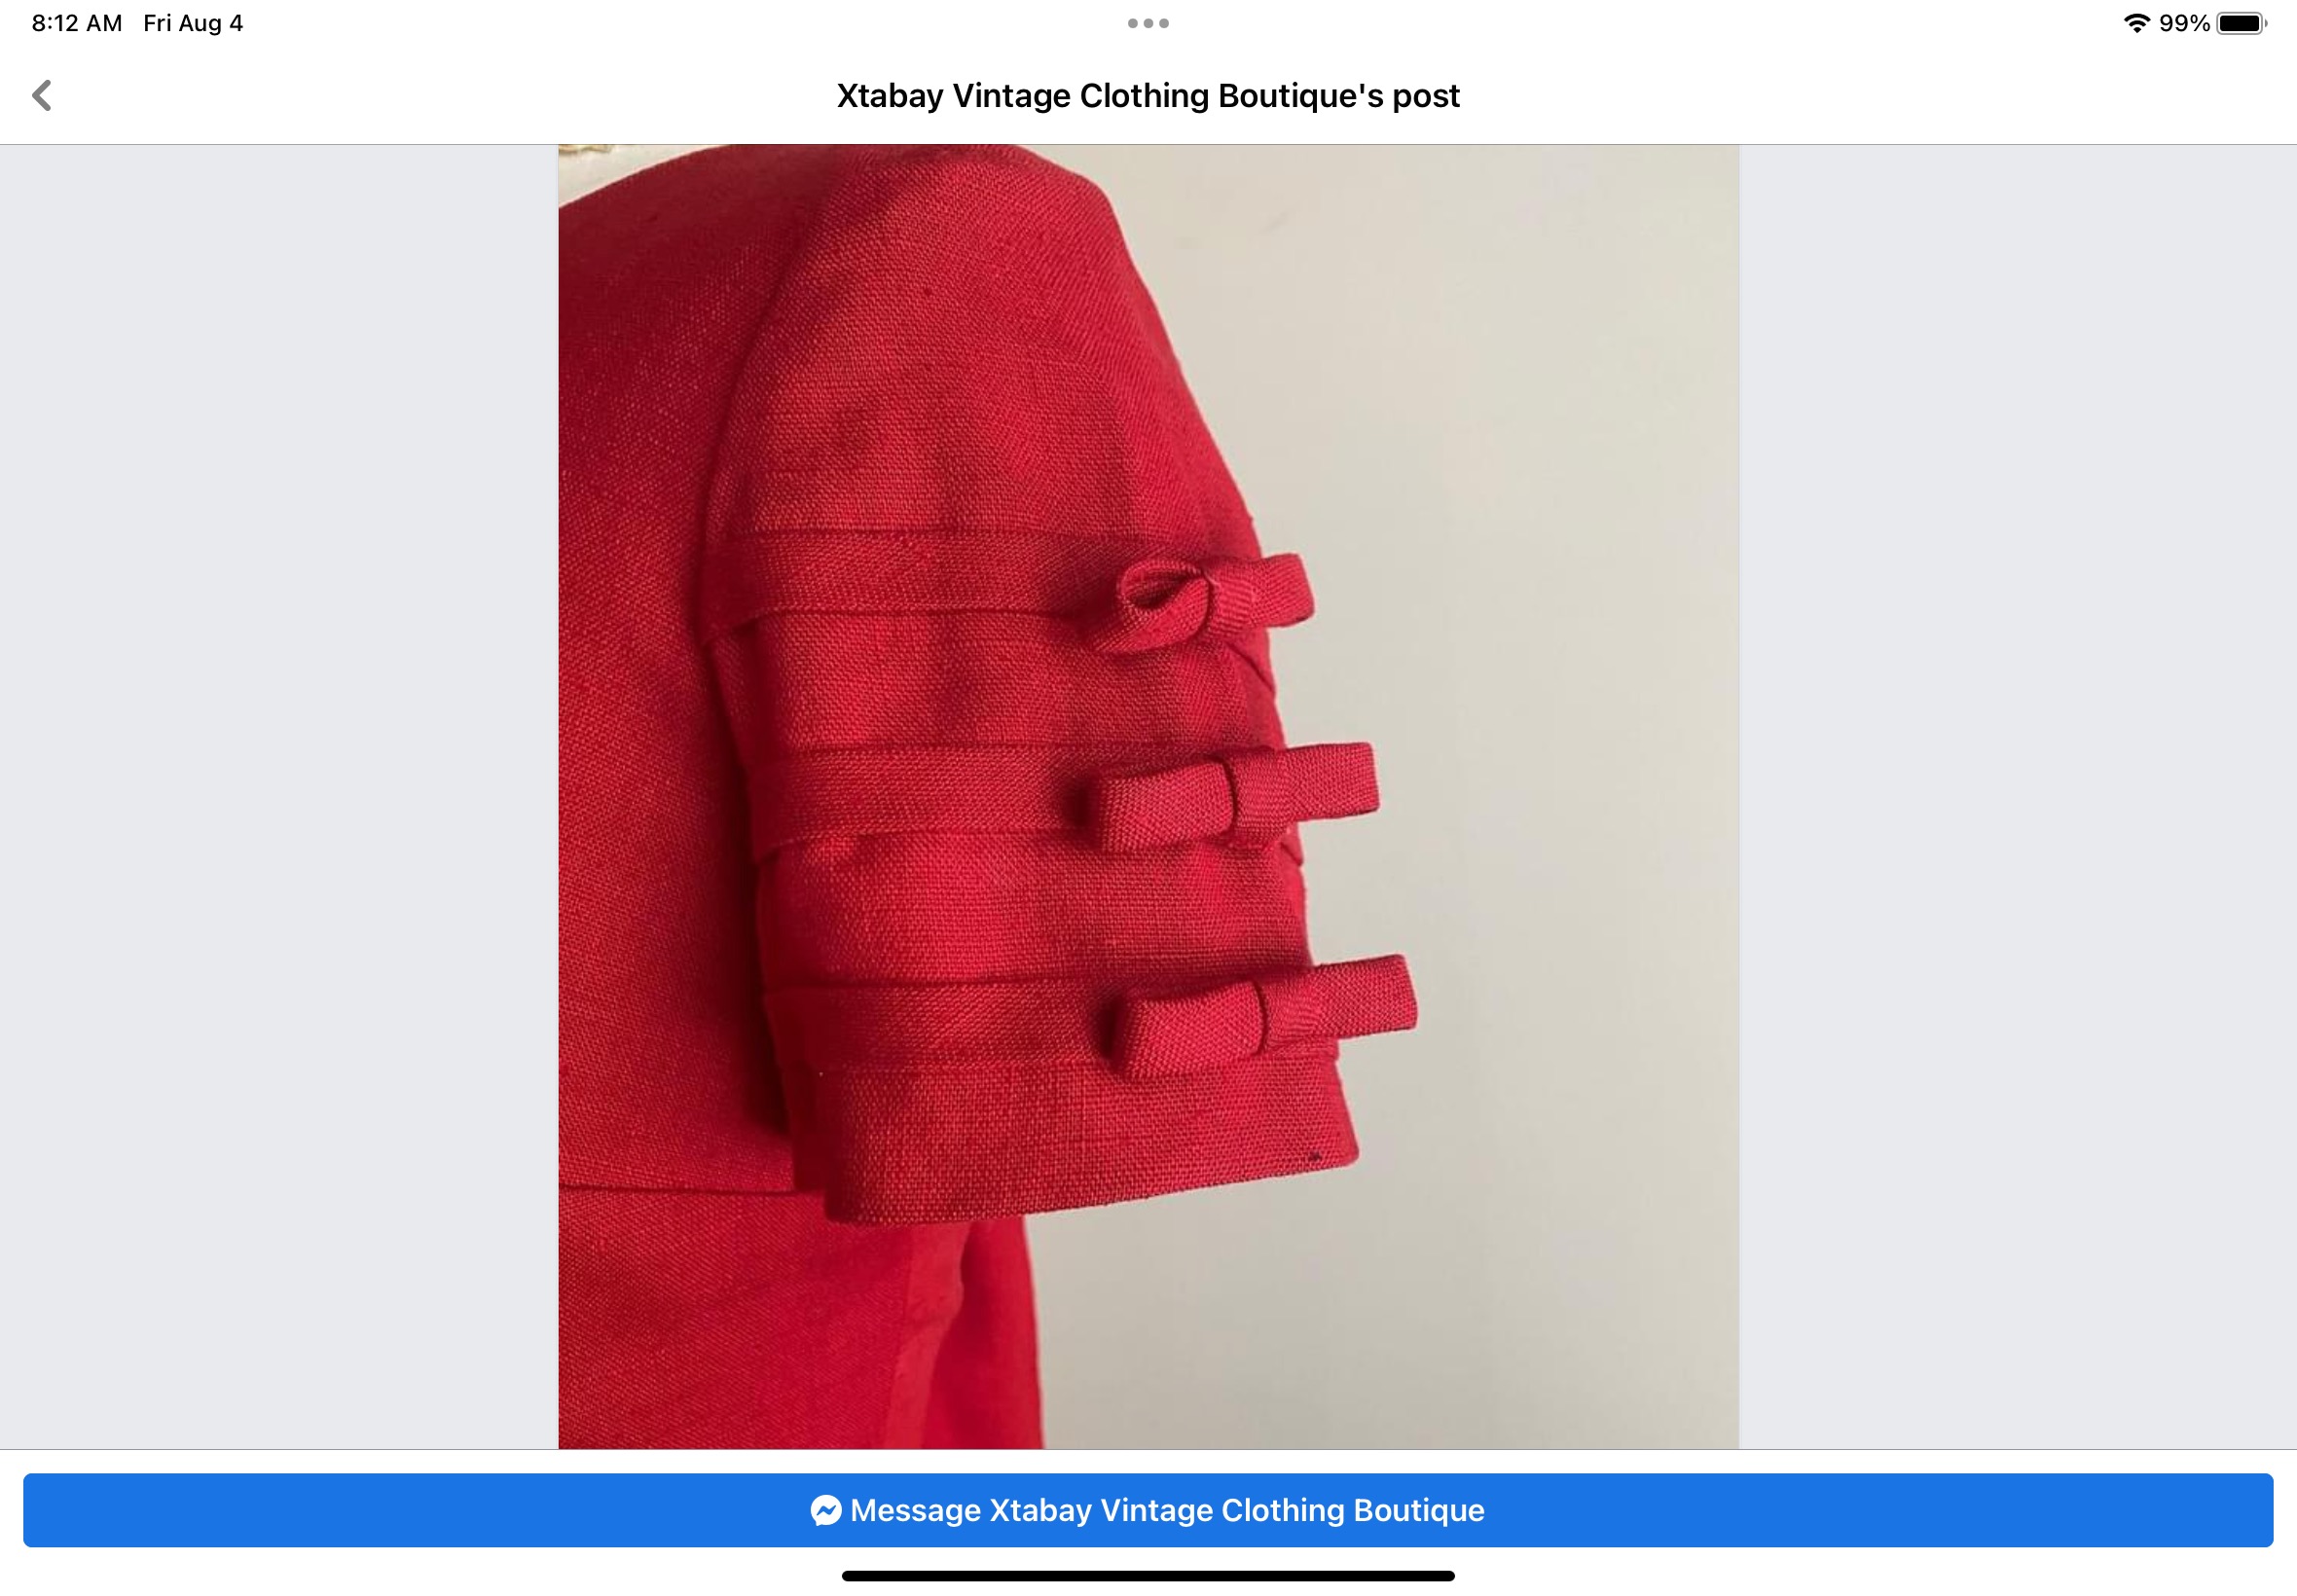
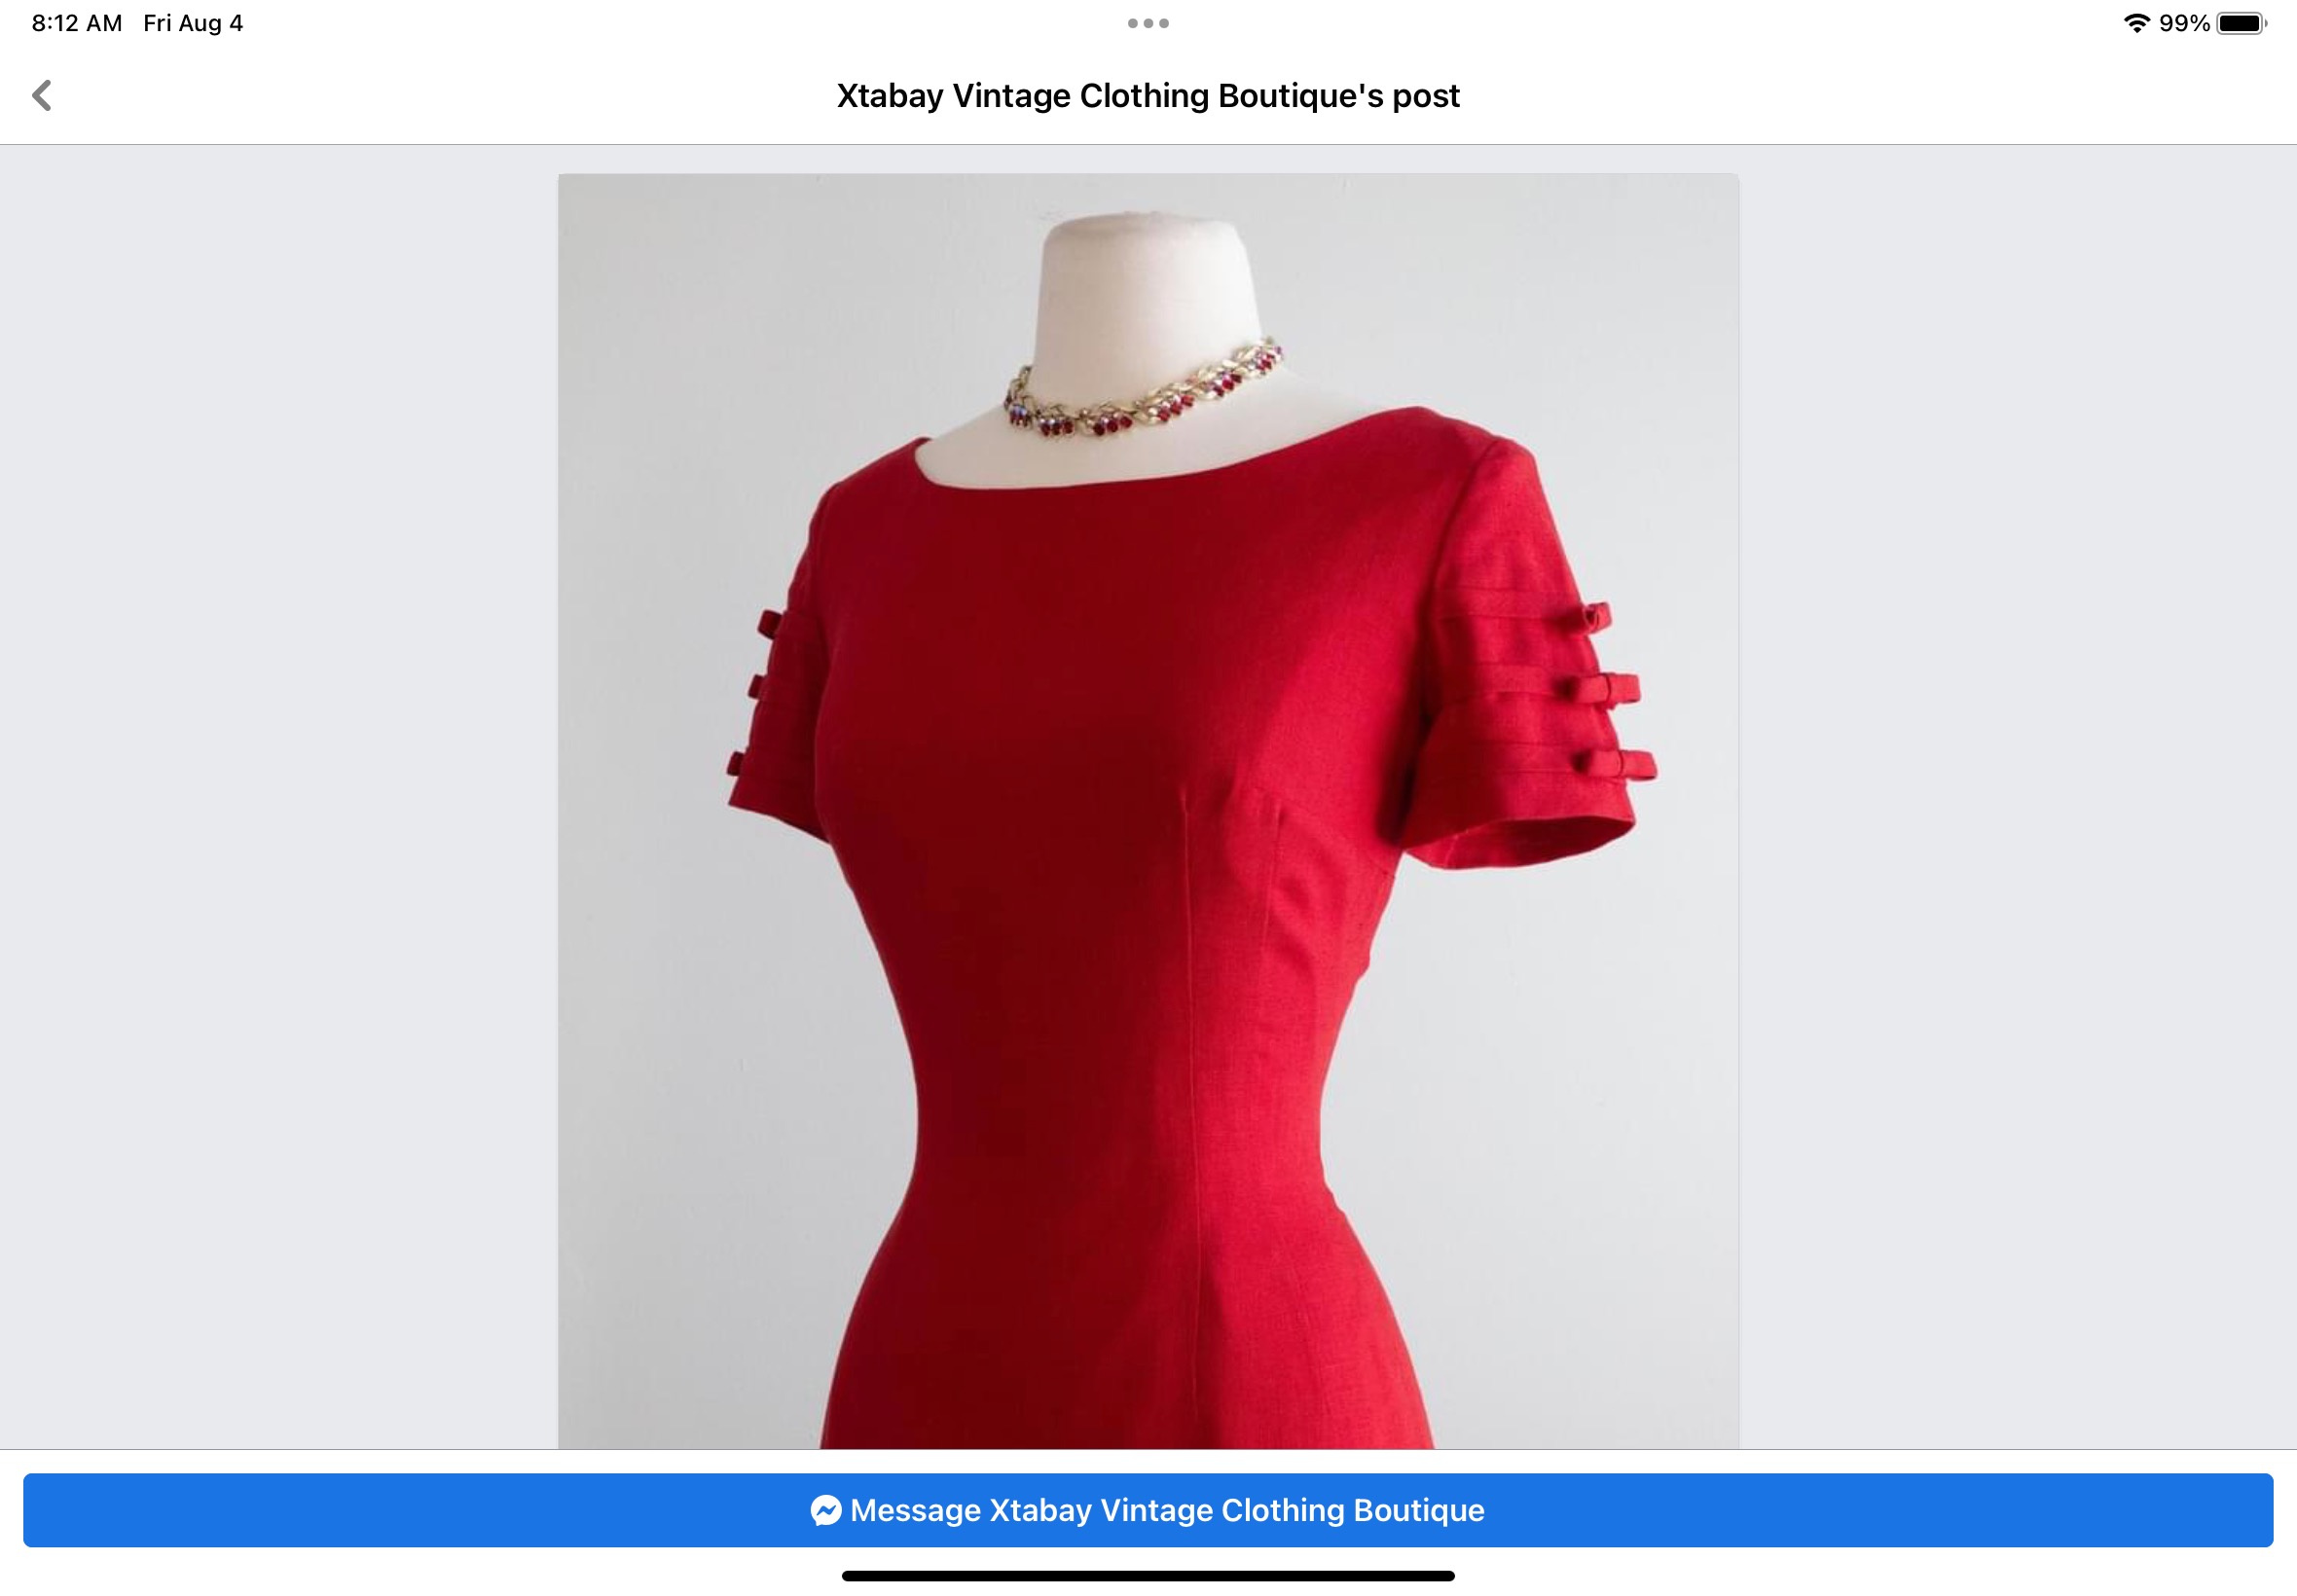
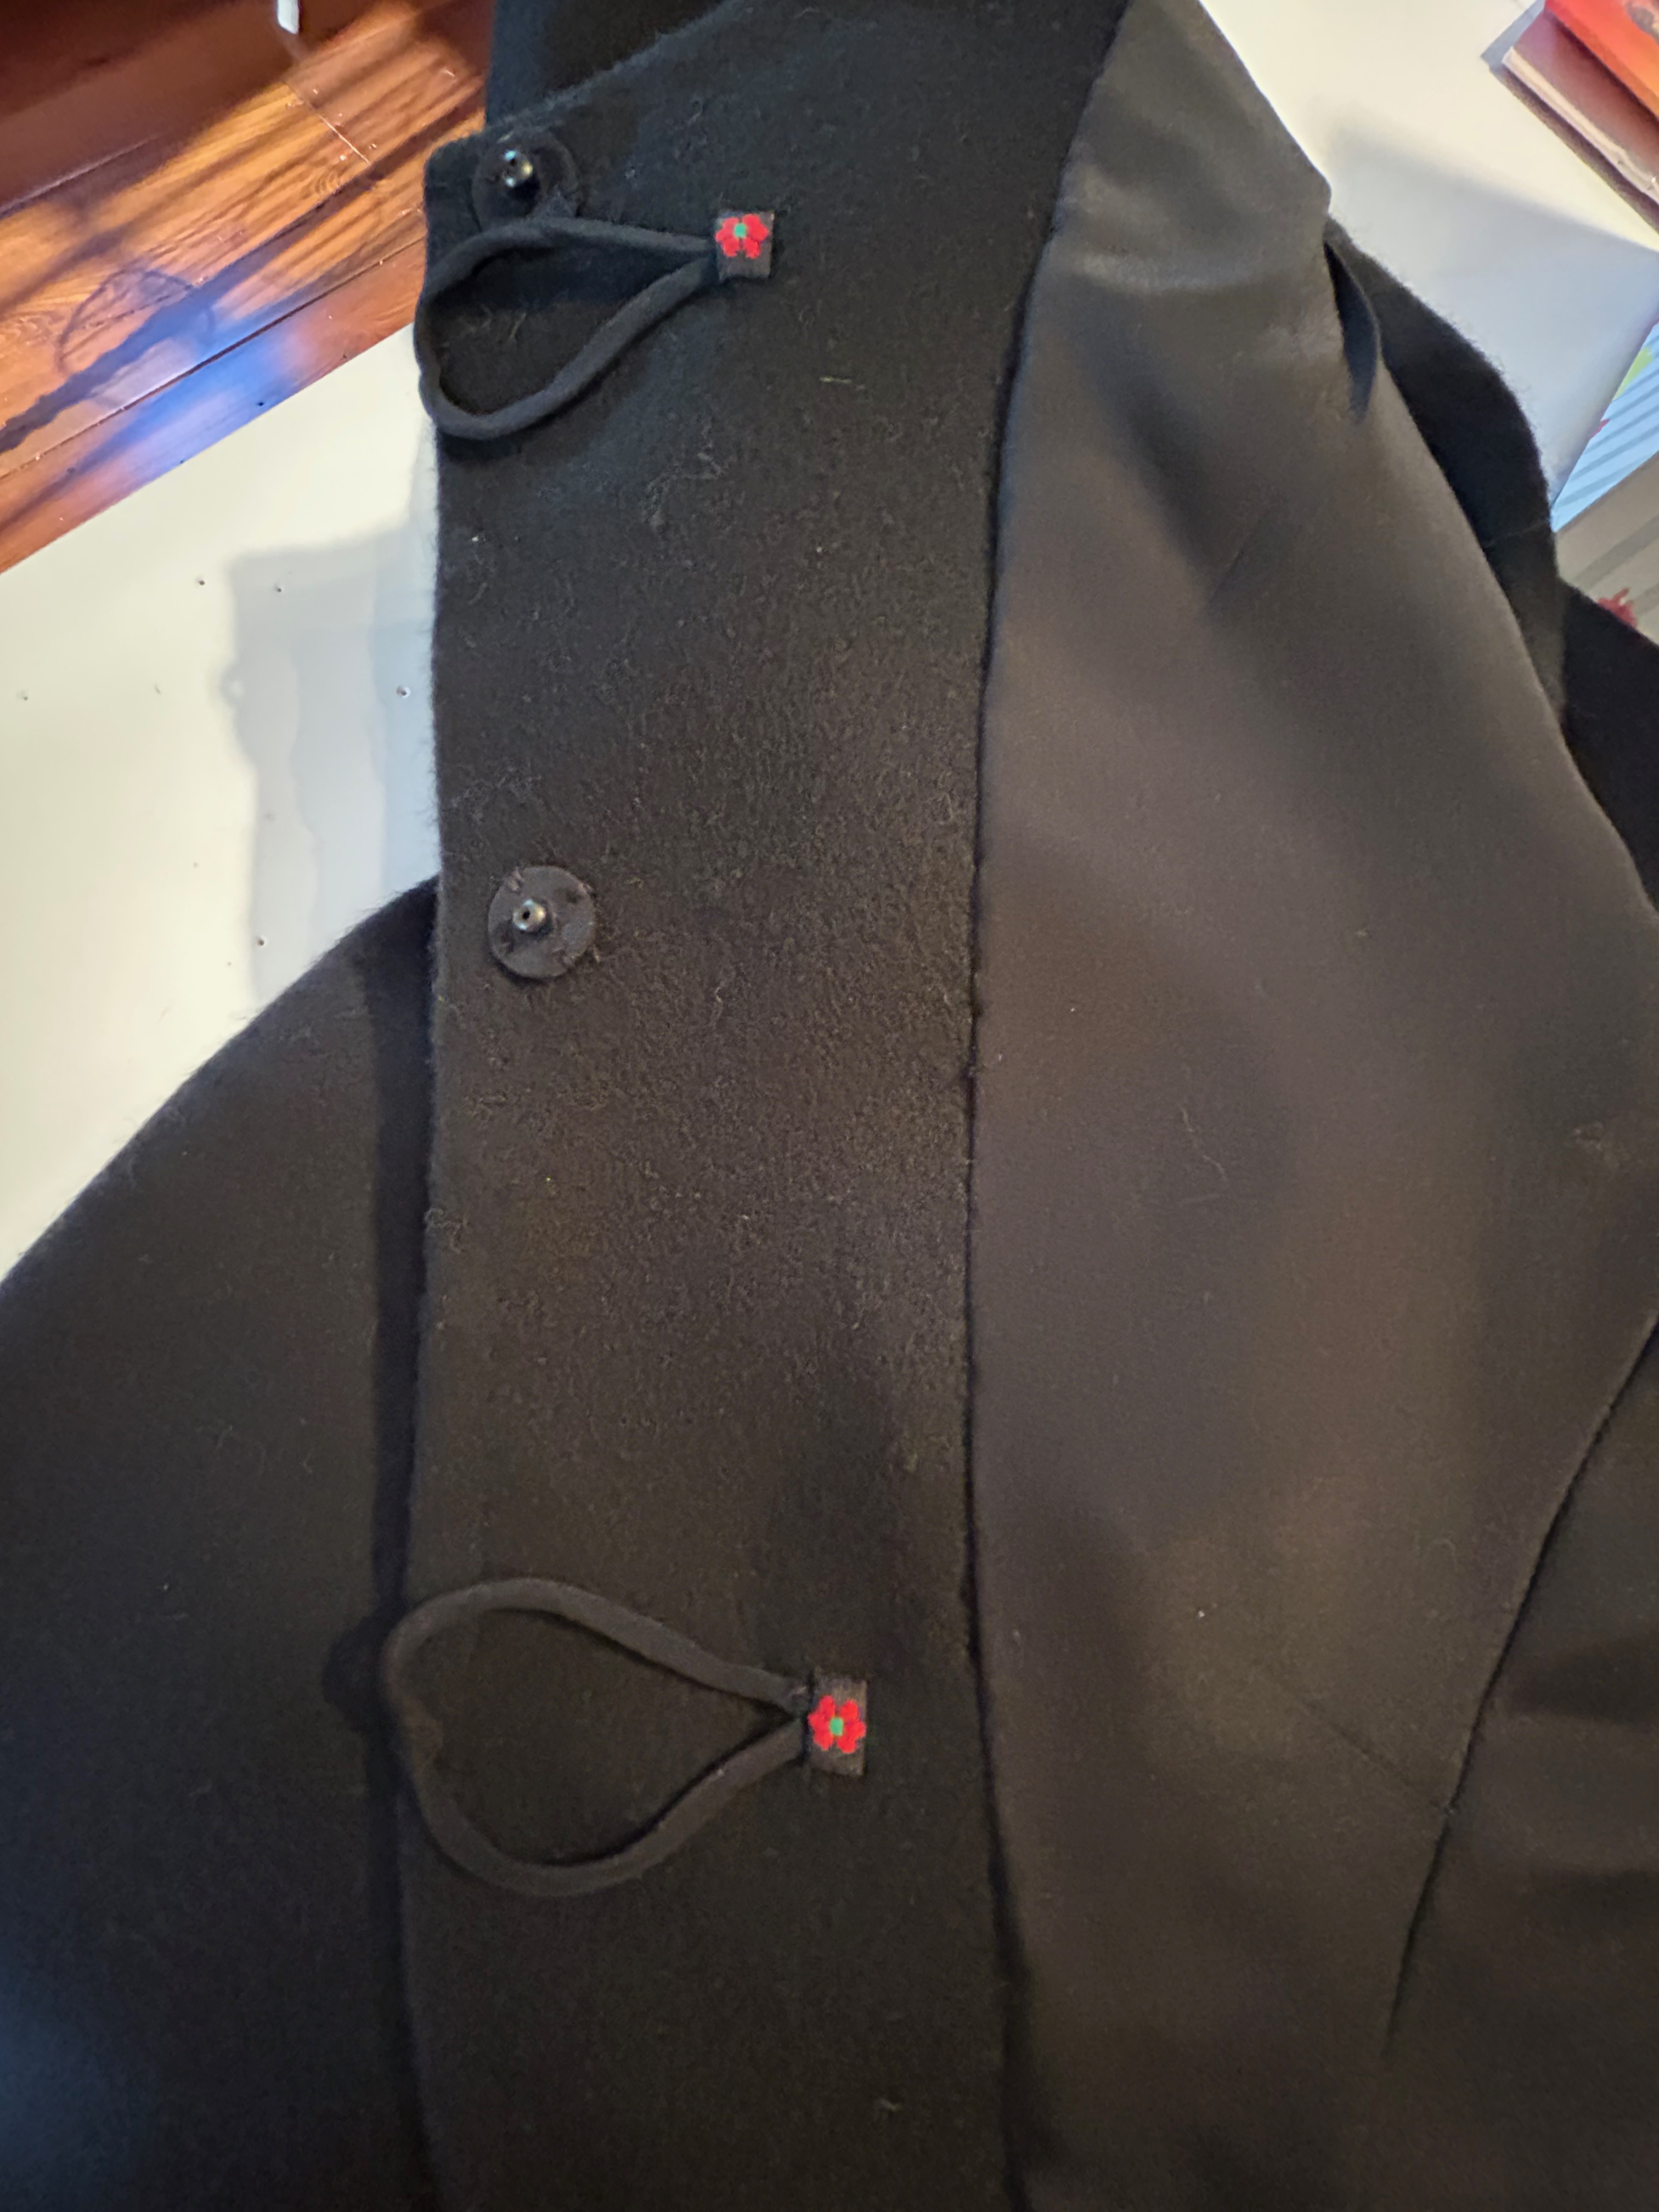
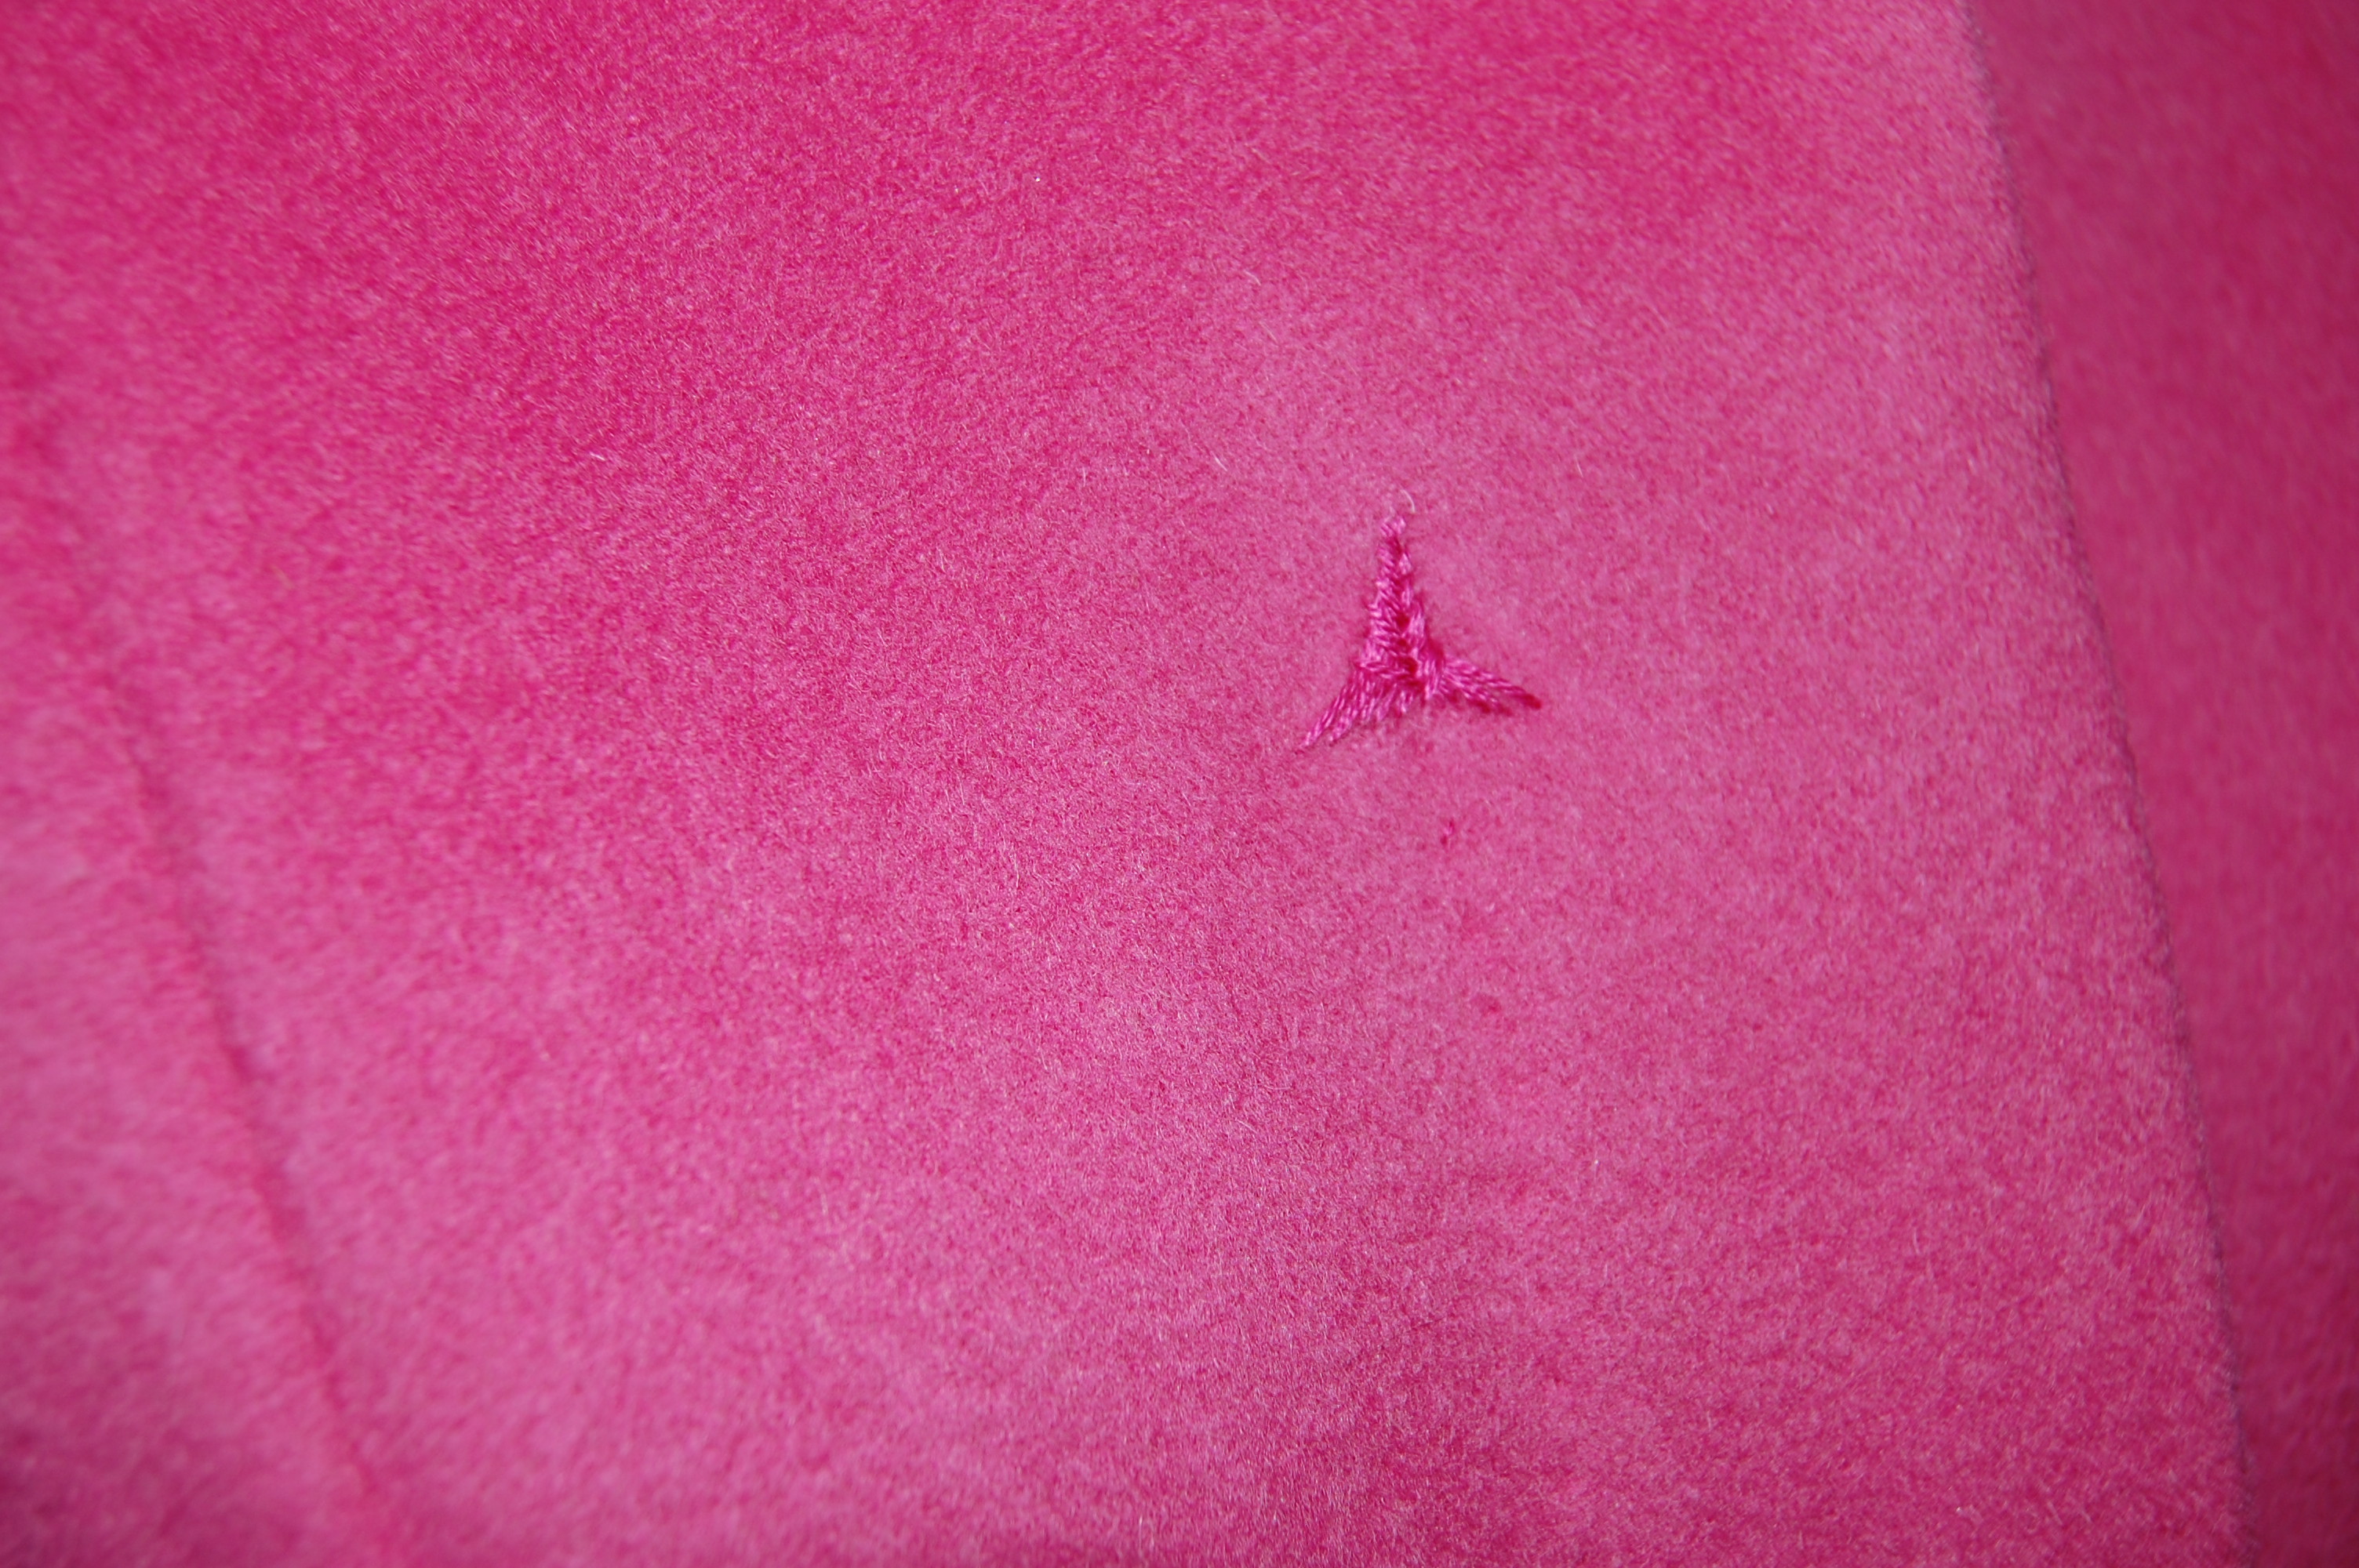
Now this is where it gets interesting. A few weeks ago I saw a vintage dress on a Facebook/Meta post by Xtabay Vintage Clothing Boutique. It is obviously Moygashel linen (I can tell by its weave and color), but what really caught my eye were the bias strips and low-profile bows adorning its sleeves. I tucked this idea in the back of my mind for future consideration. What I didn’t know was that the future was right around the corner! Yes – I “borrowed” this idea and added a single bias-cut bow to each sleeve. Somehow, it just seems to finish the dress.


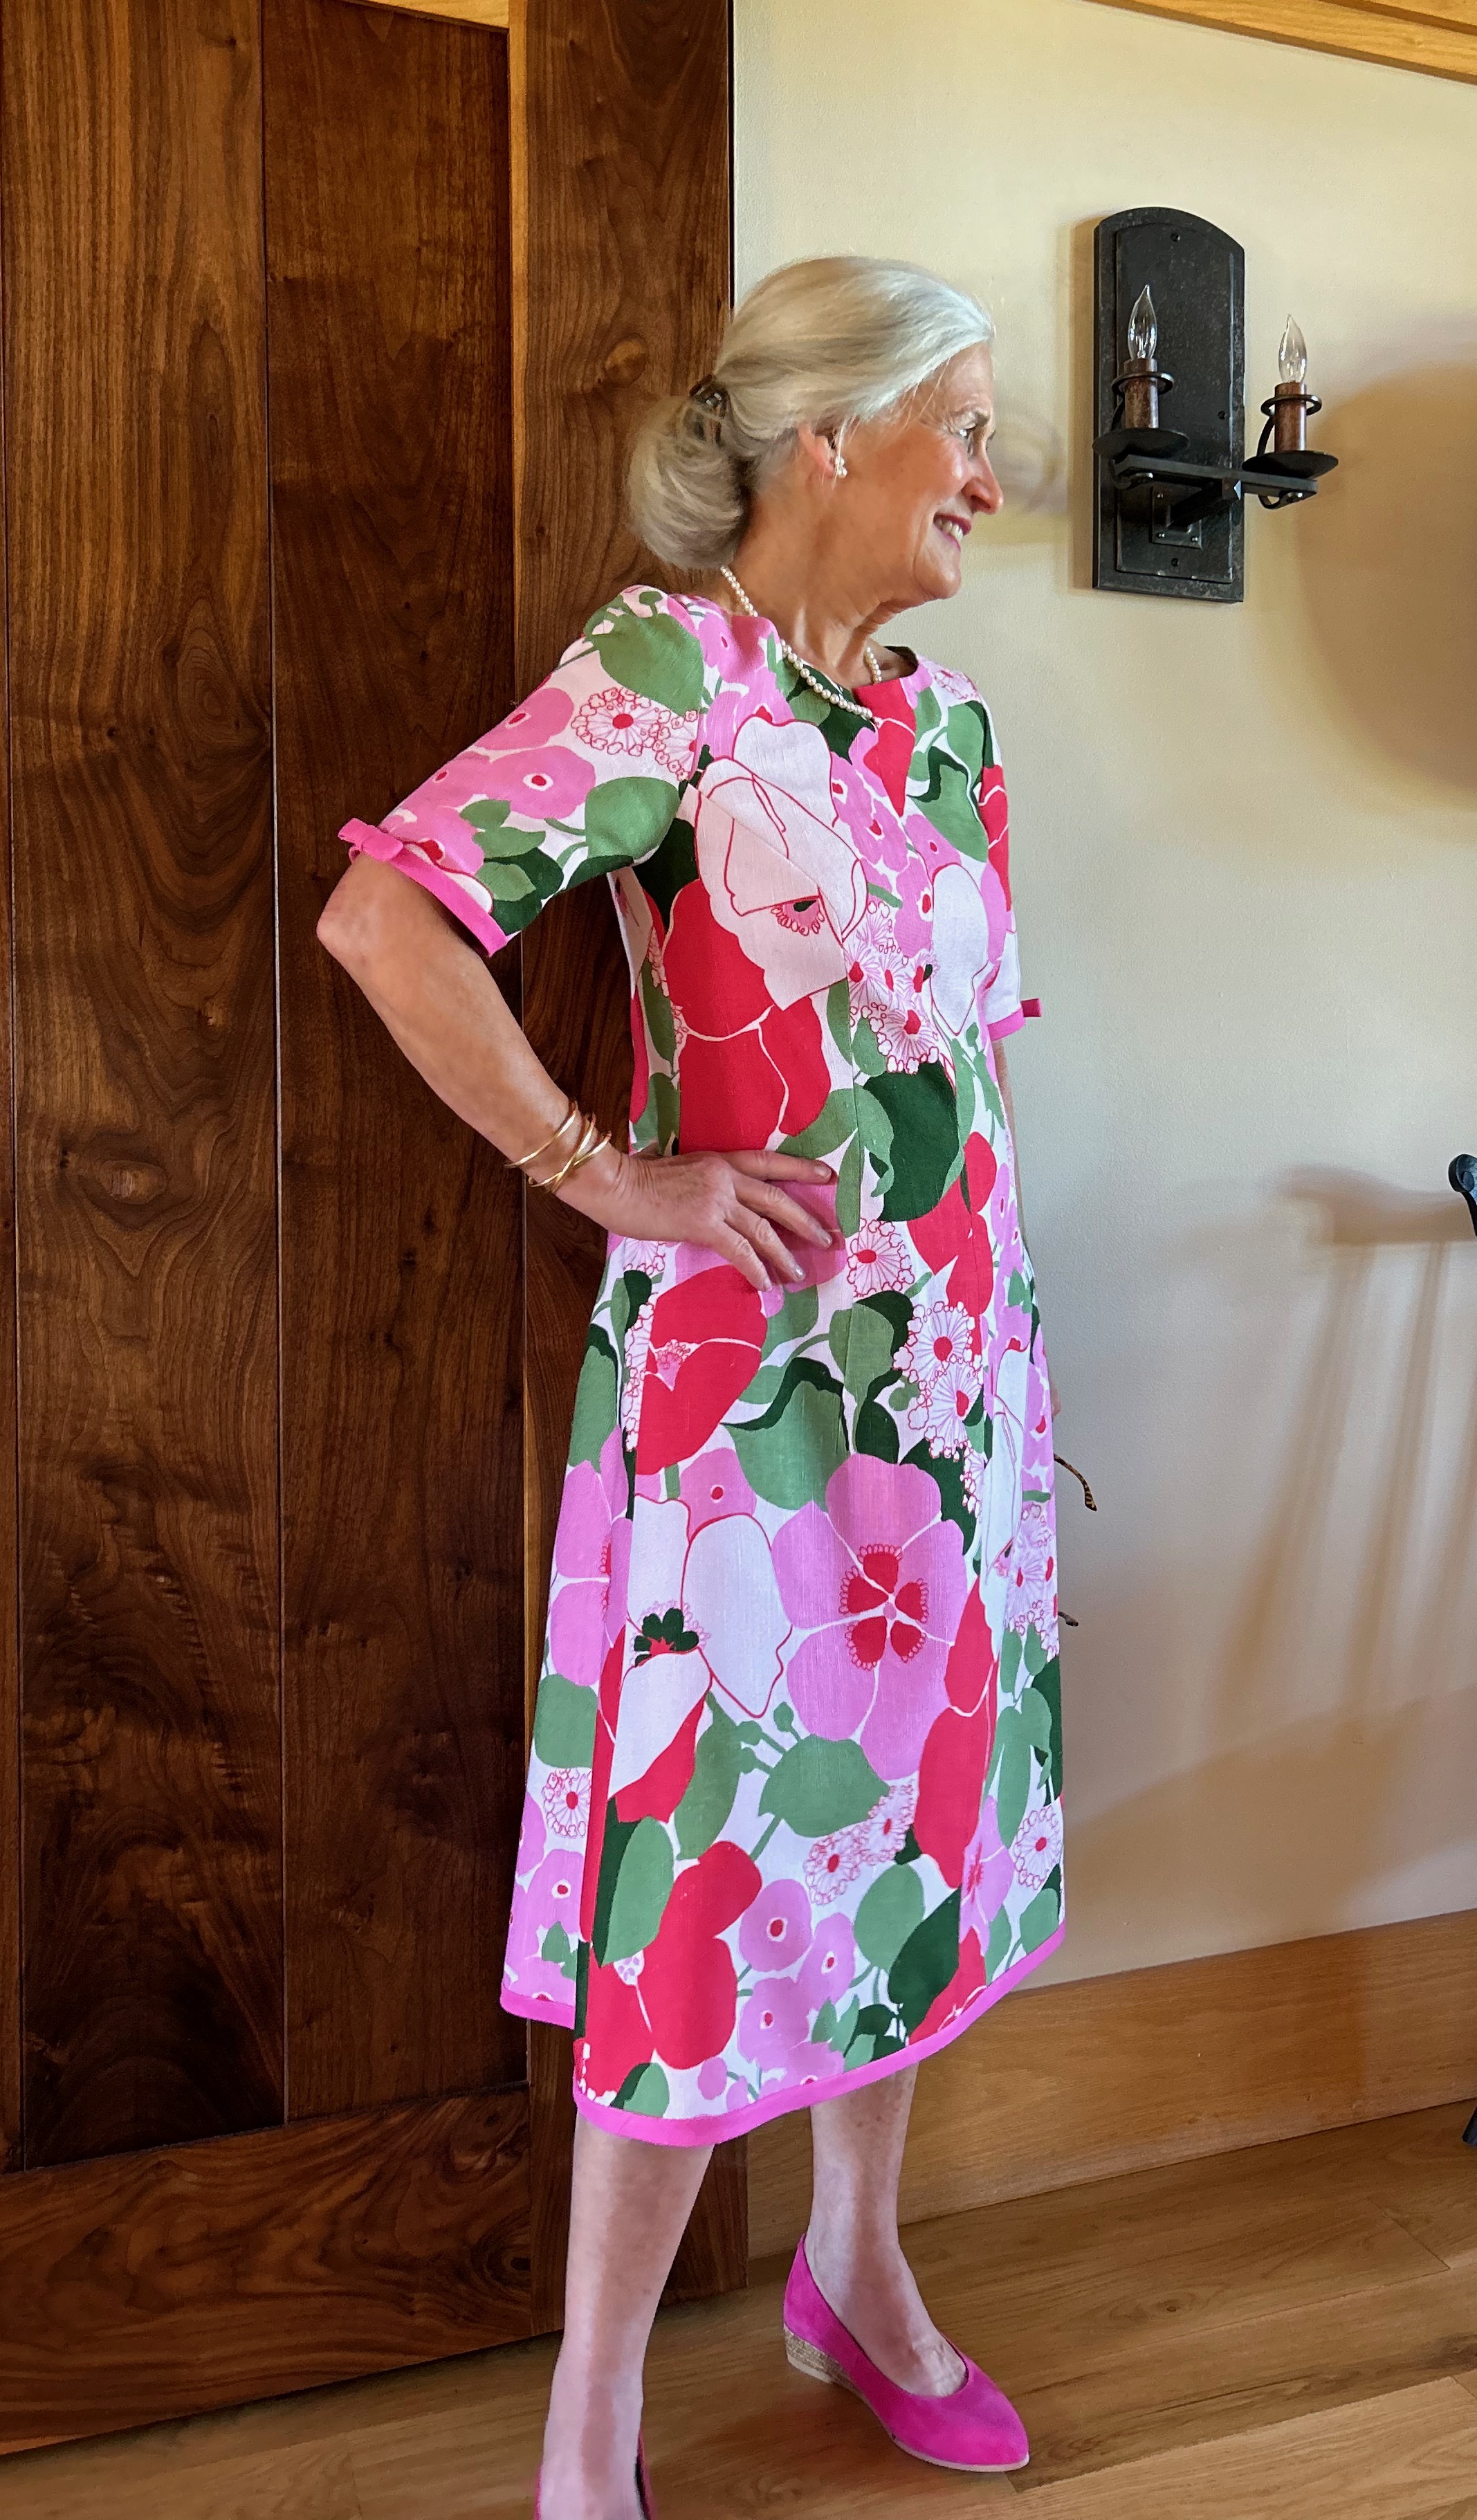
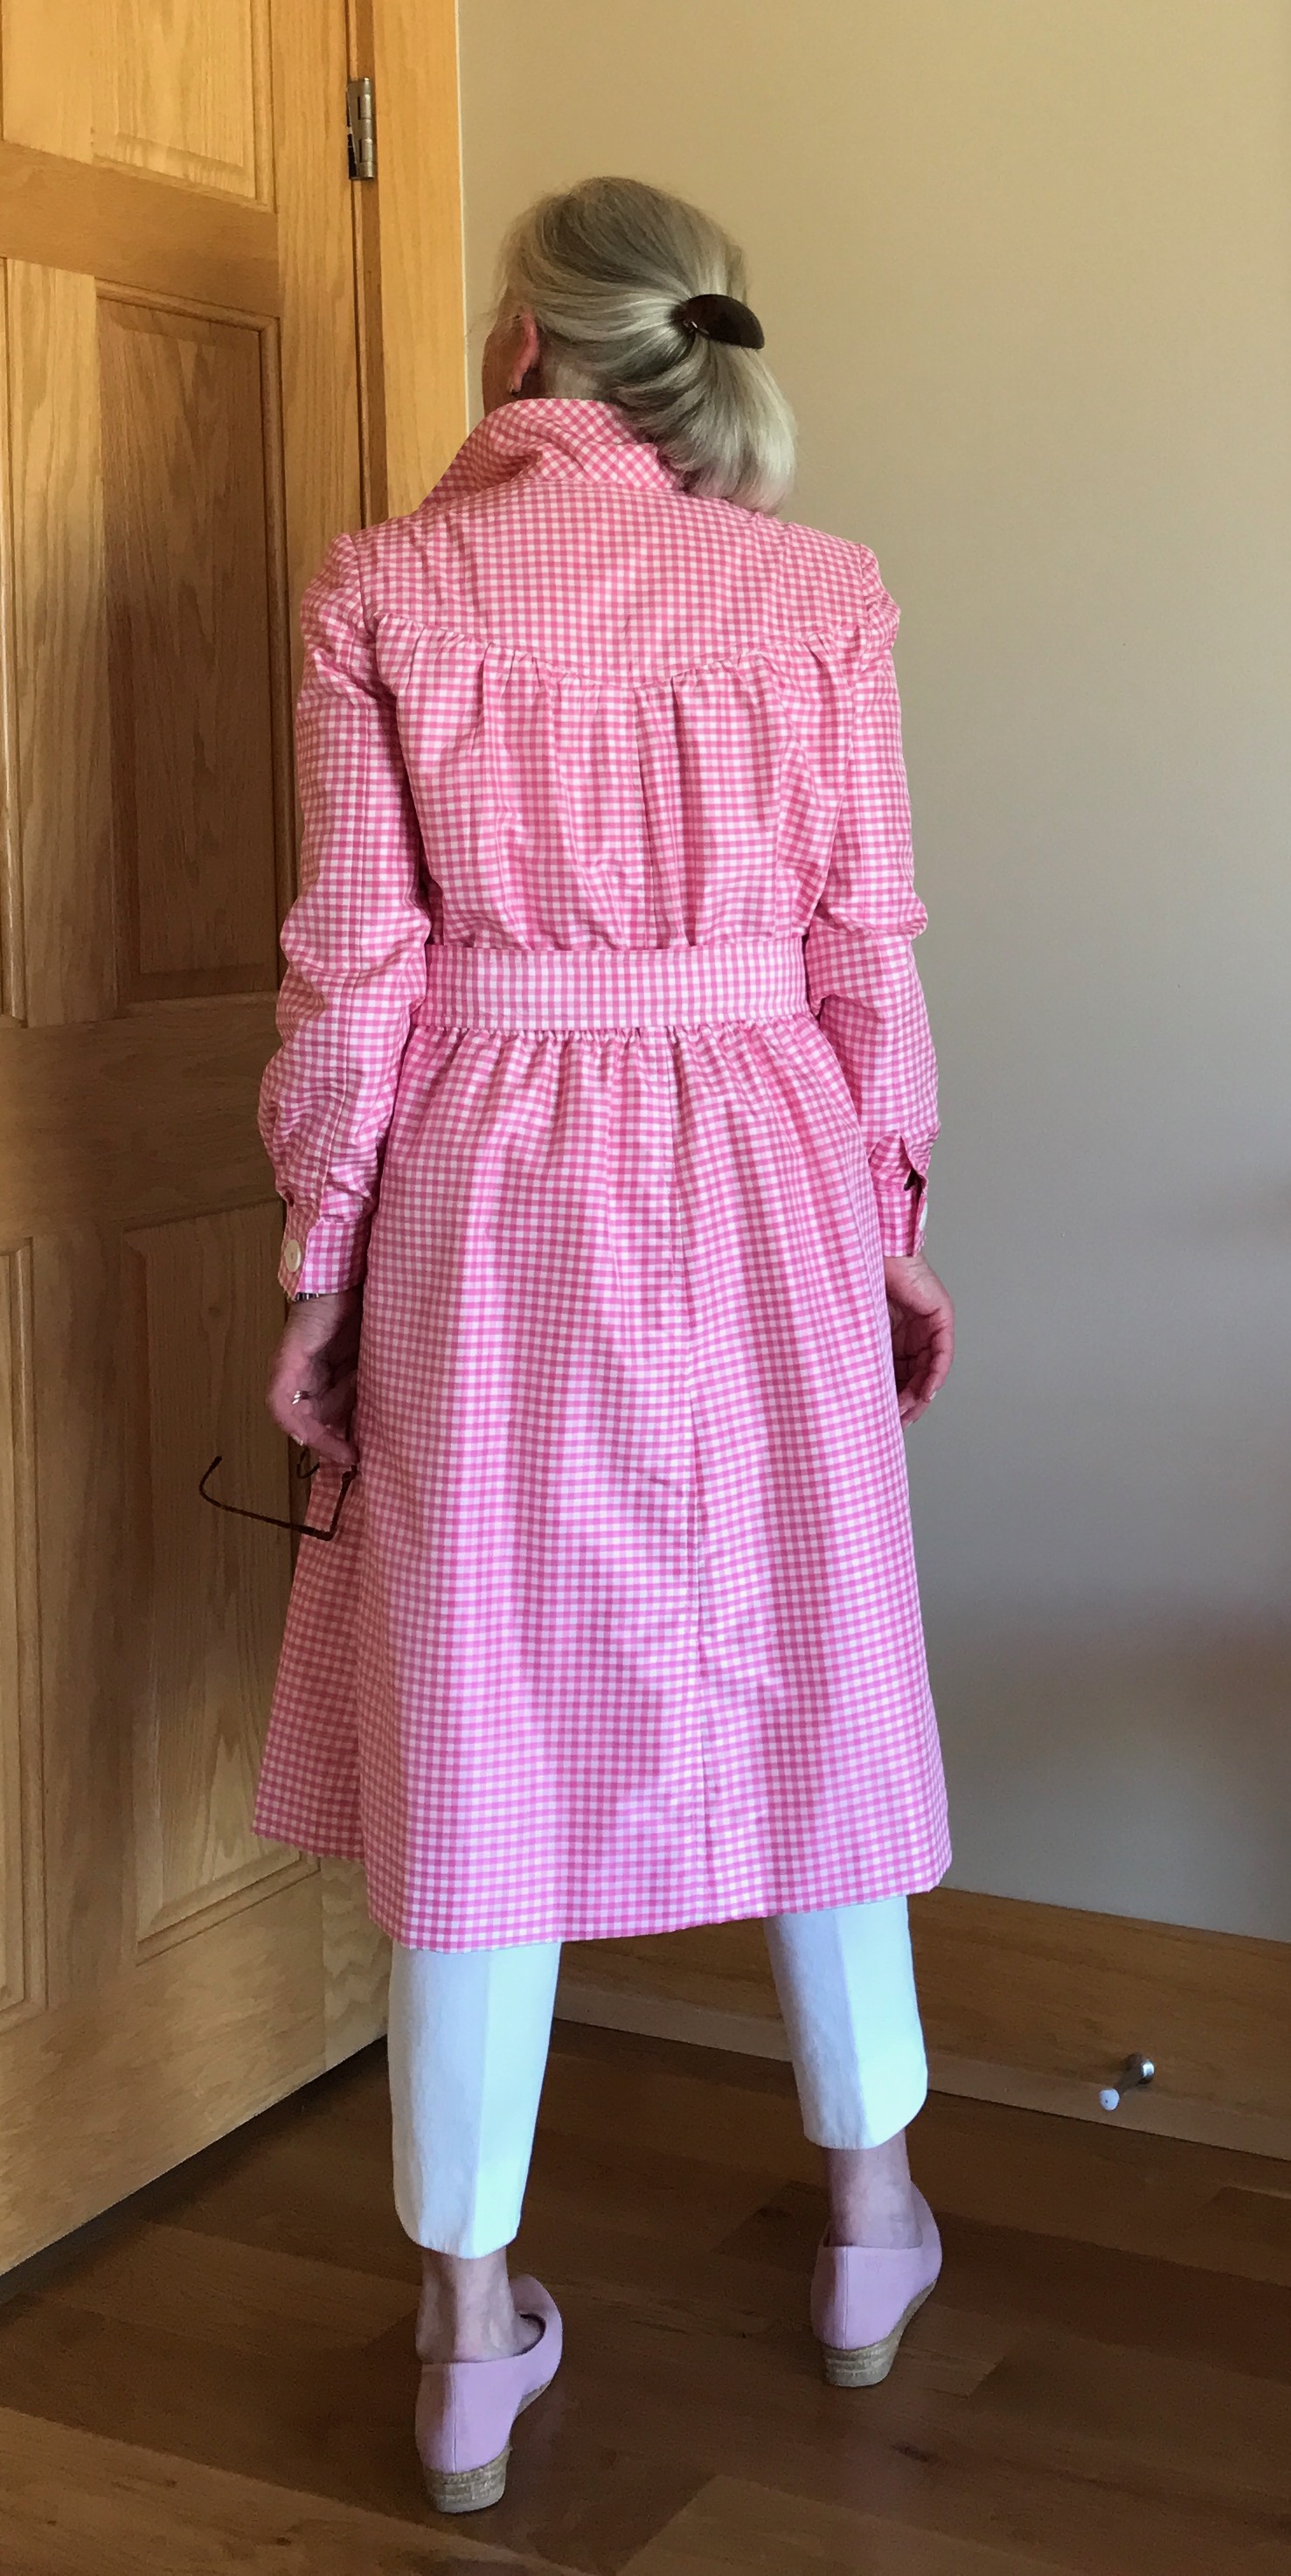
Well, you may have guessed by now the reason for making this dress this year. I will wear it next week when my husband and I celebrate our 50th Wedding Anniversary. I have changed a lot in those 50 years (and so has my husband!), but I still love pink in all its shades and I still love Moygashel linen (and I still love my husband, too!)


Going Around in Circles
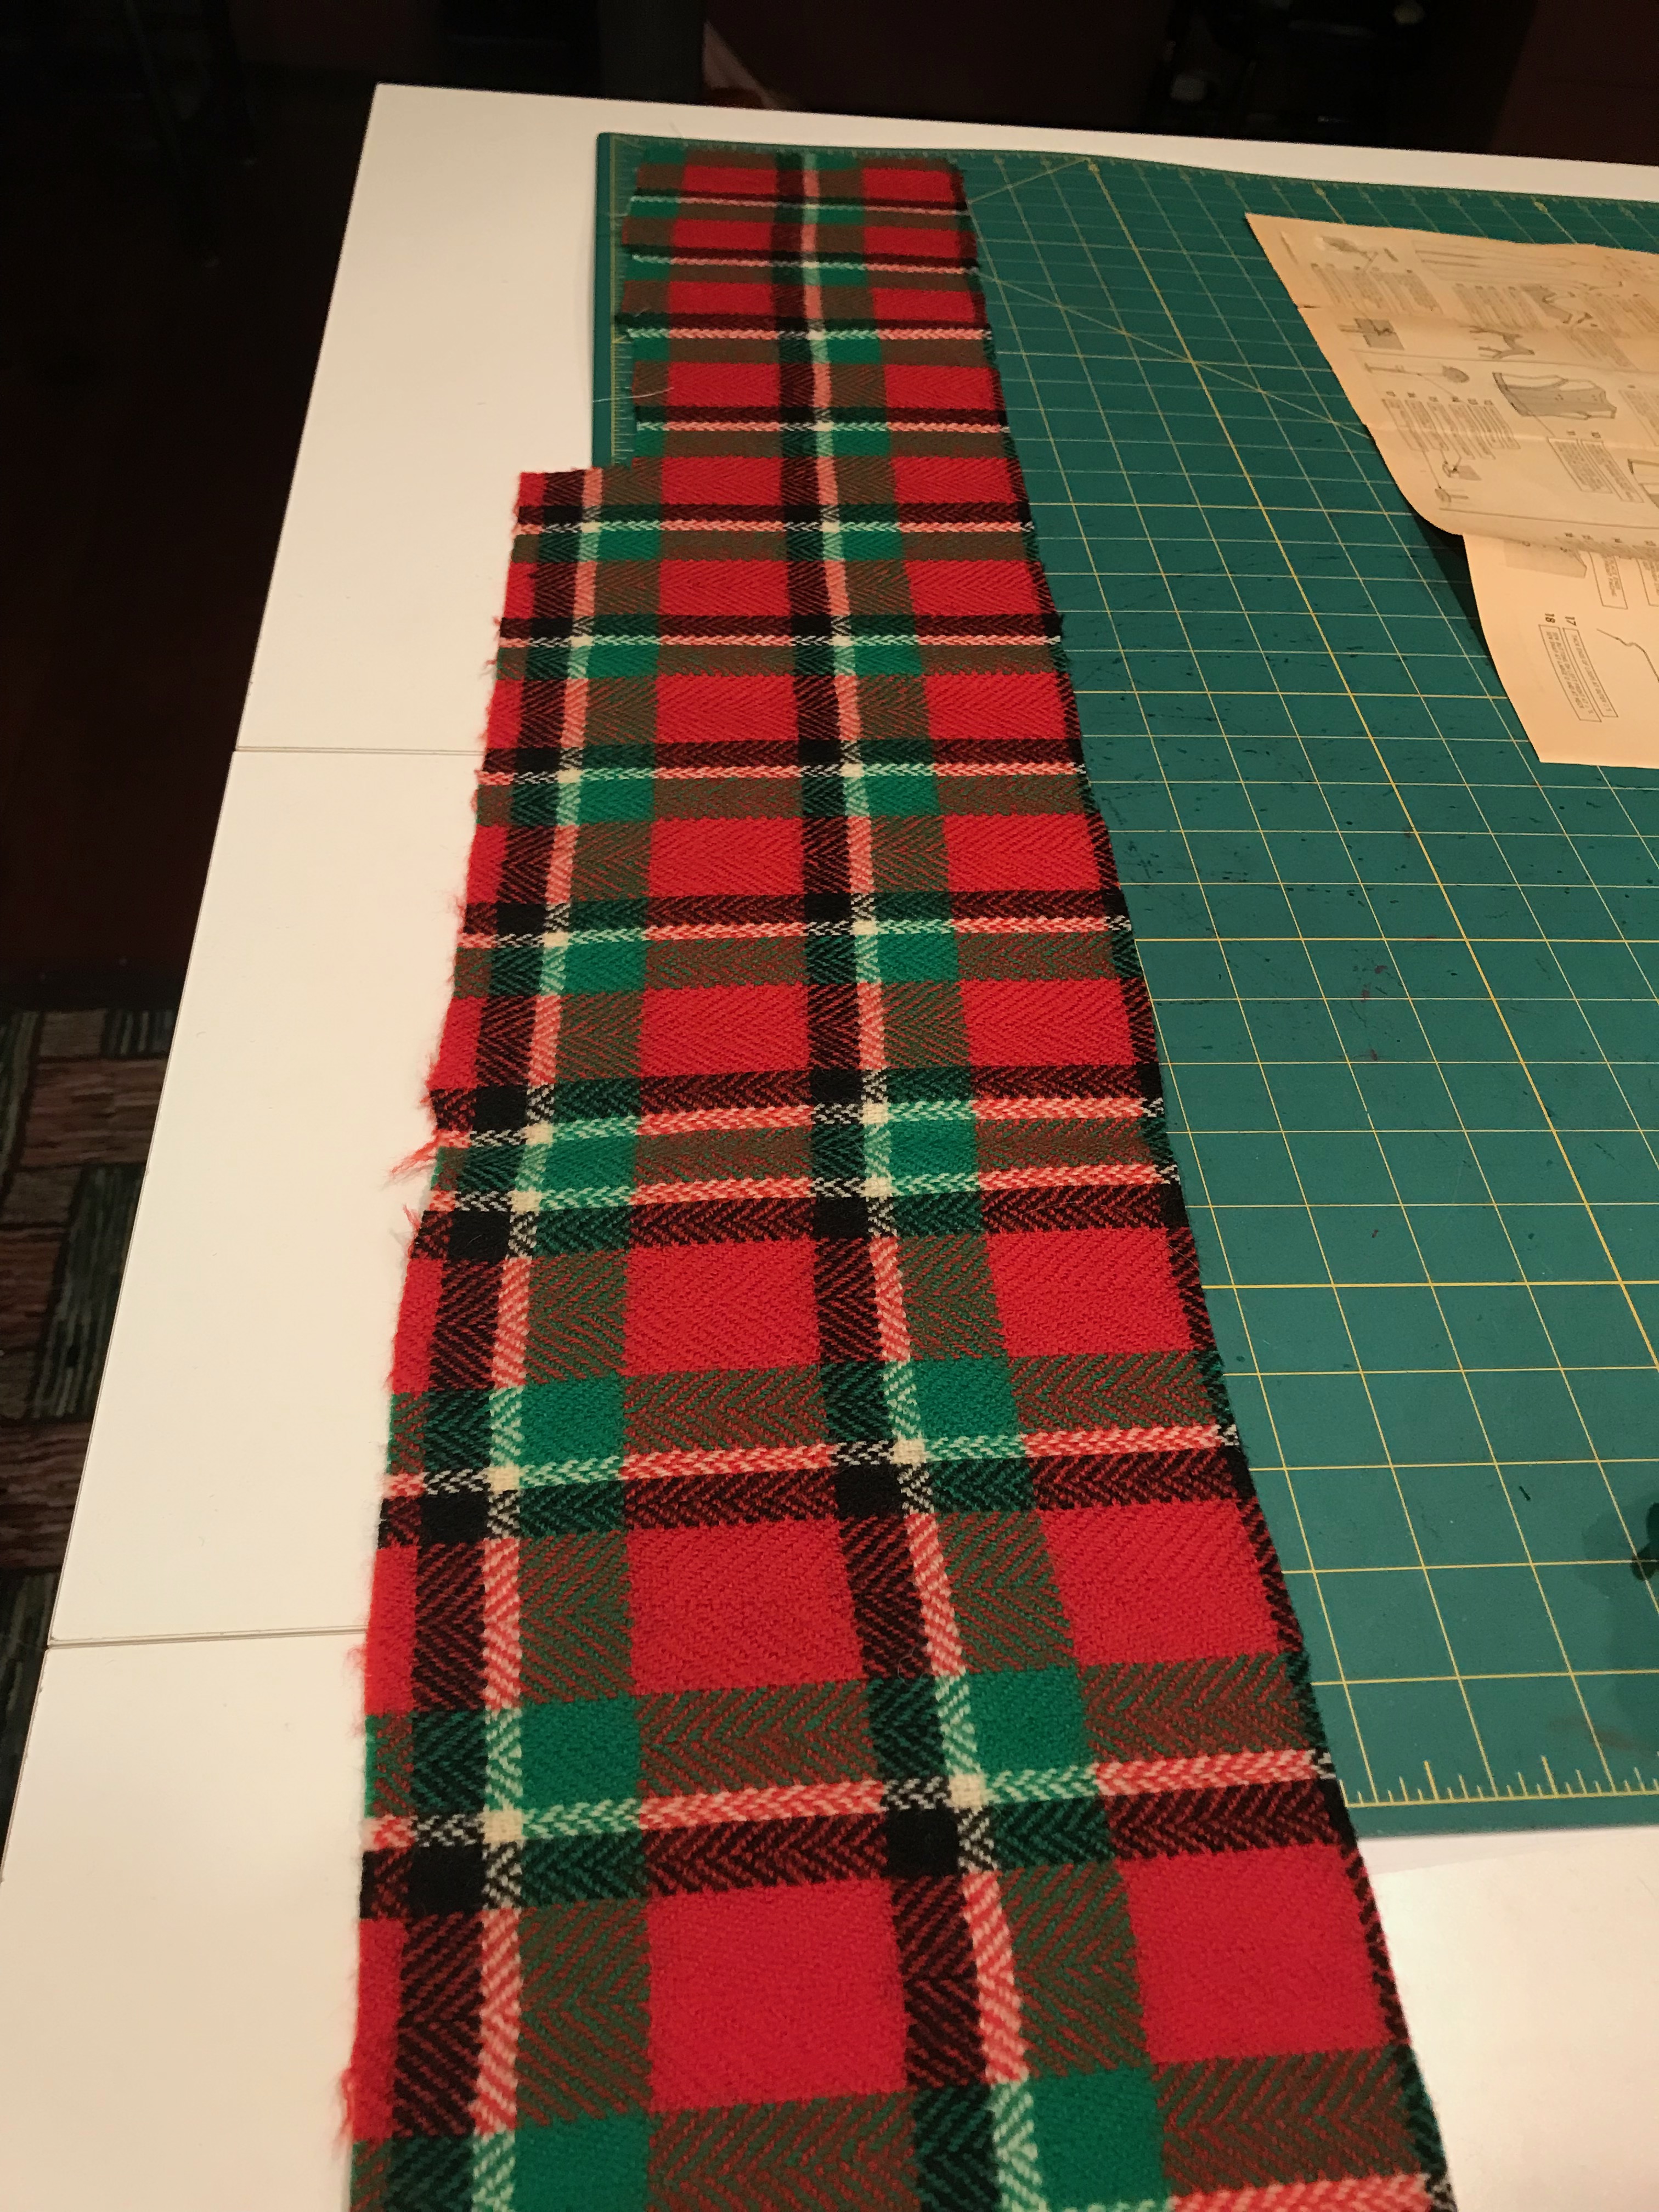
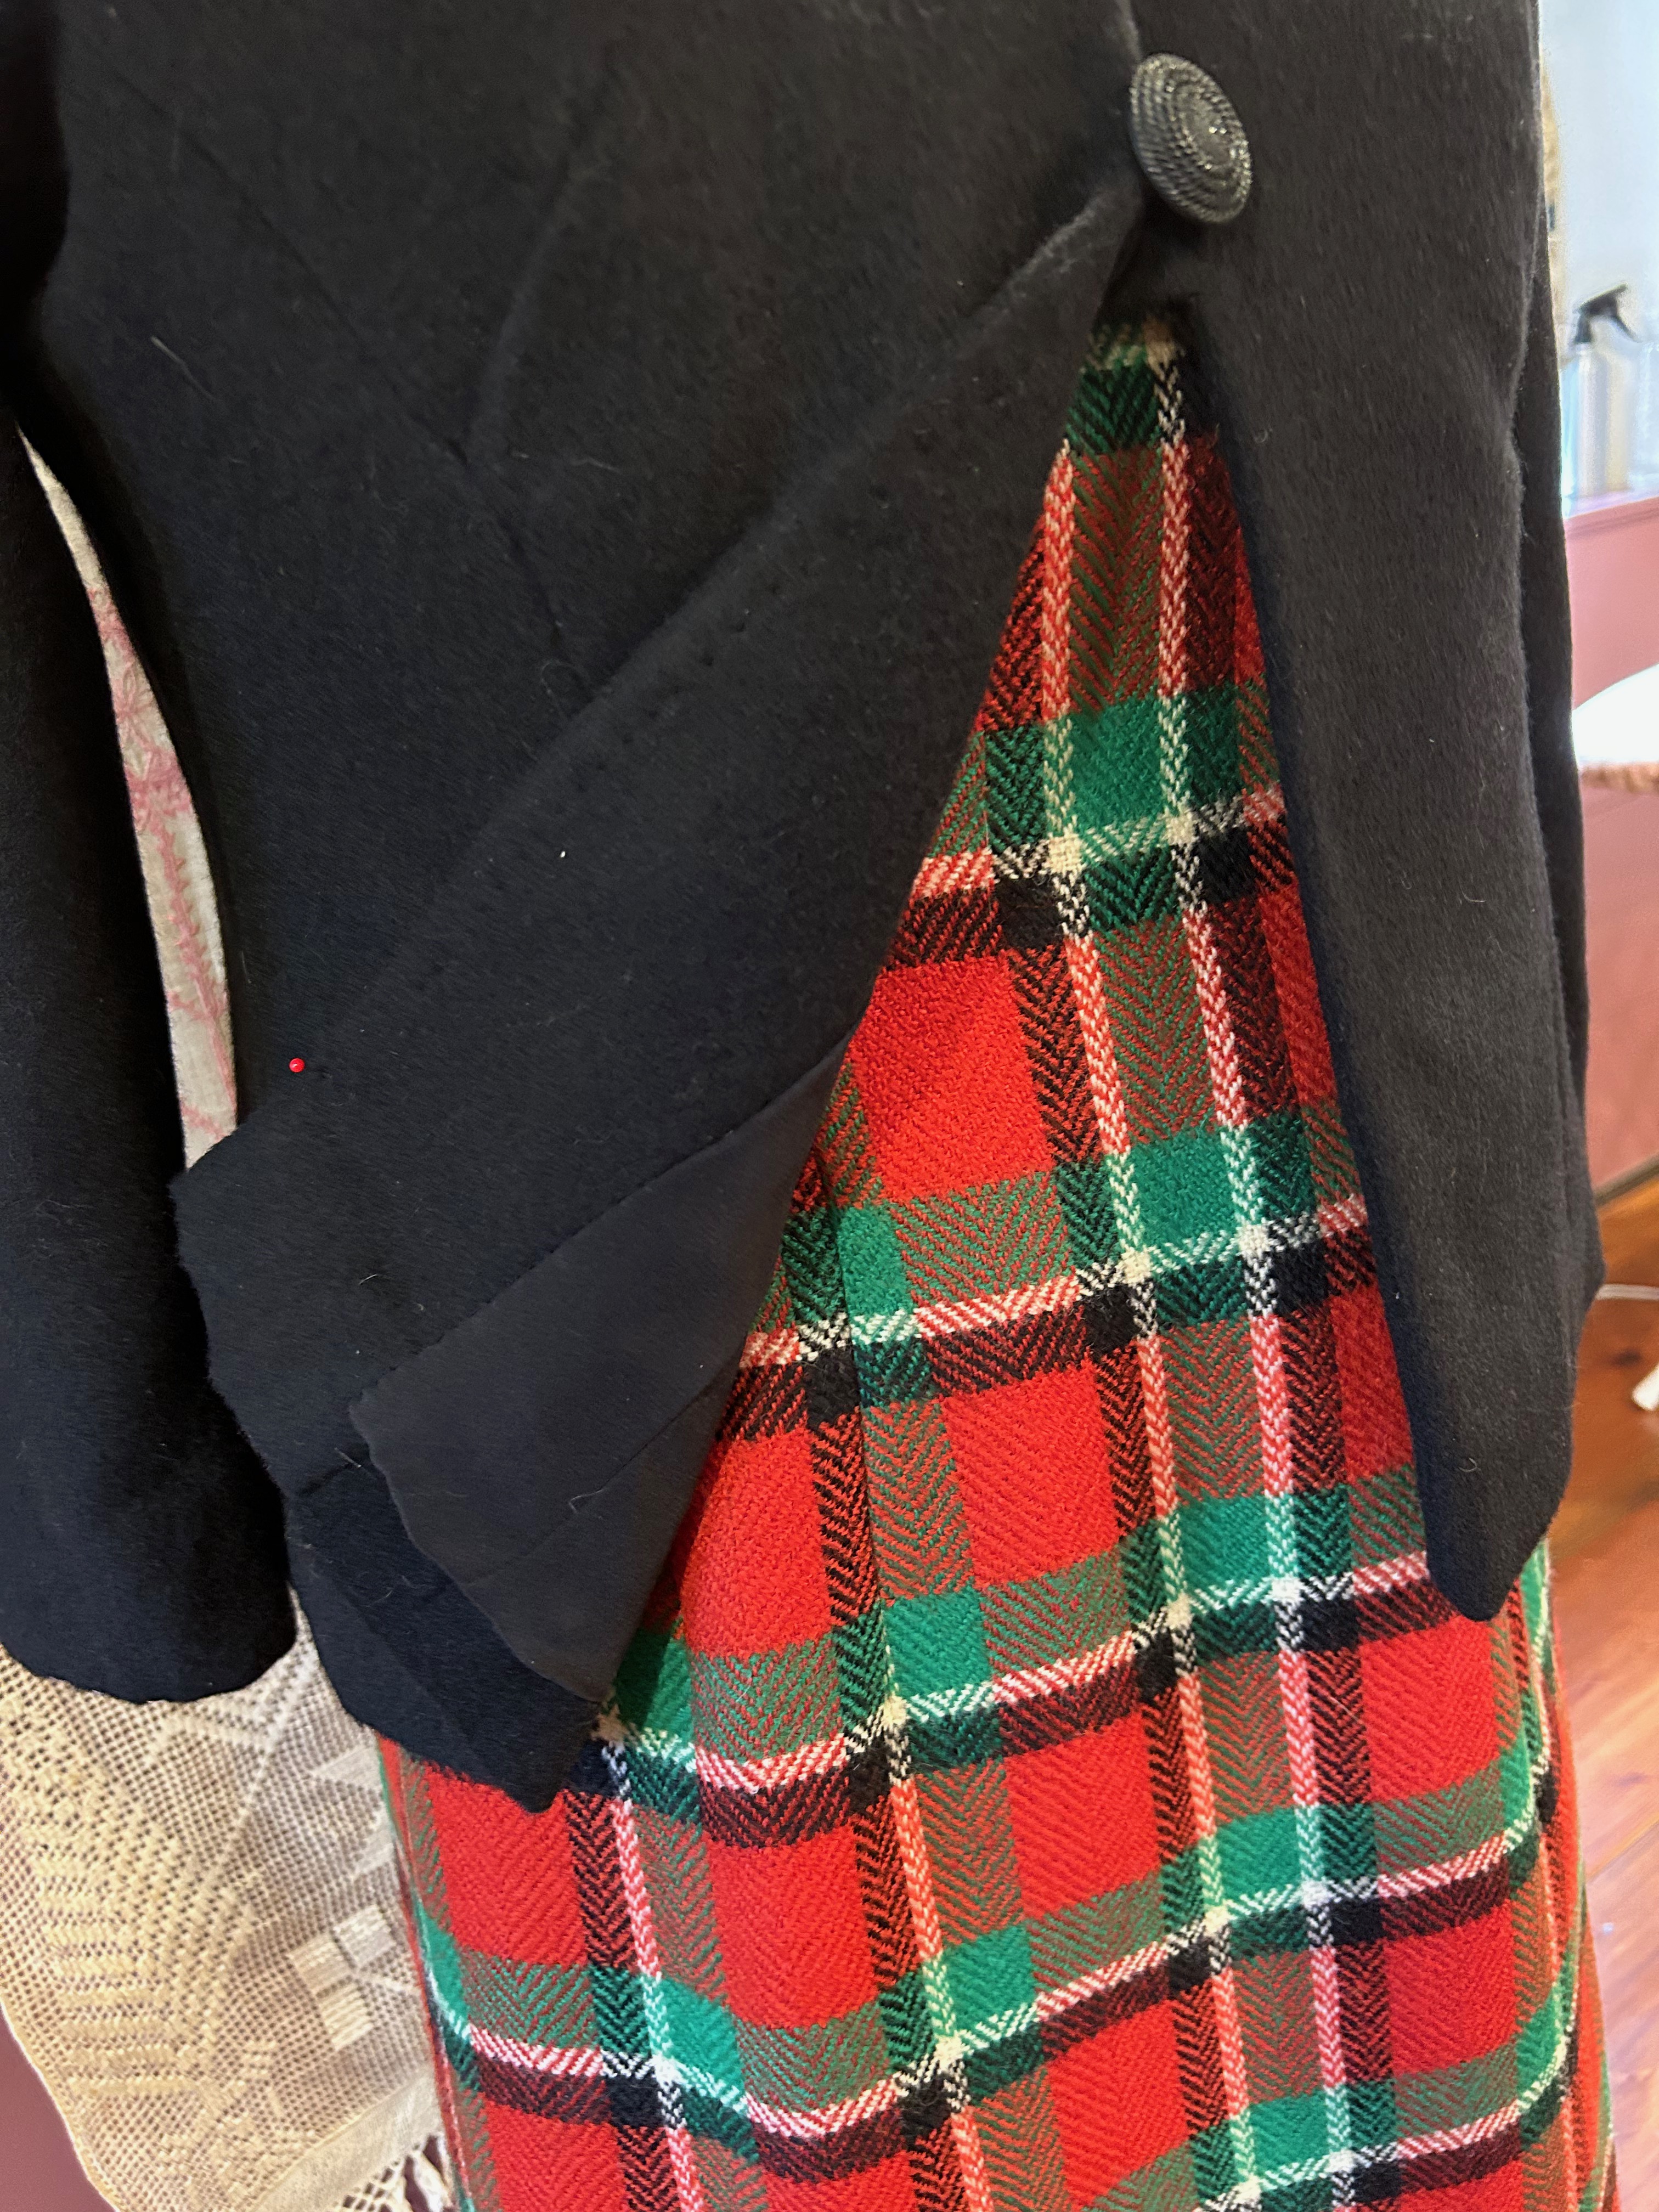
When I purchased this sateen, jacquard-woven fabric from Mendel Goldberg a couple of years ago, I wasn’t sure what it would eventually become. It had a wide repeat to the design (which is something to consider when you know you are facing considerable matching of the design), but it was a lovely 60” wide. I bought just 2 yards (it was expensive) and hoped I would have enough fabric to finagle something.
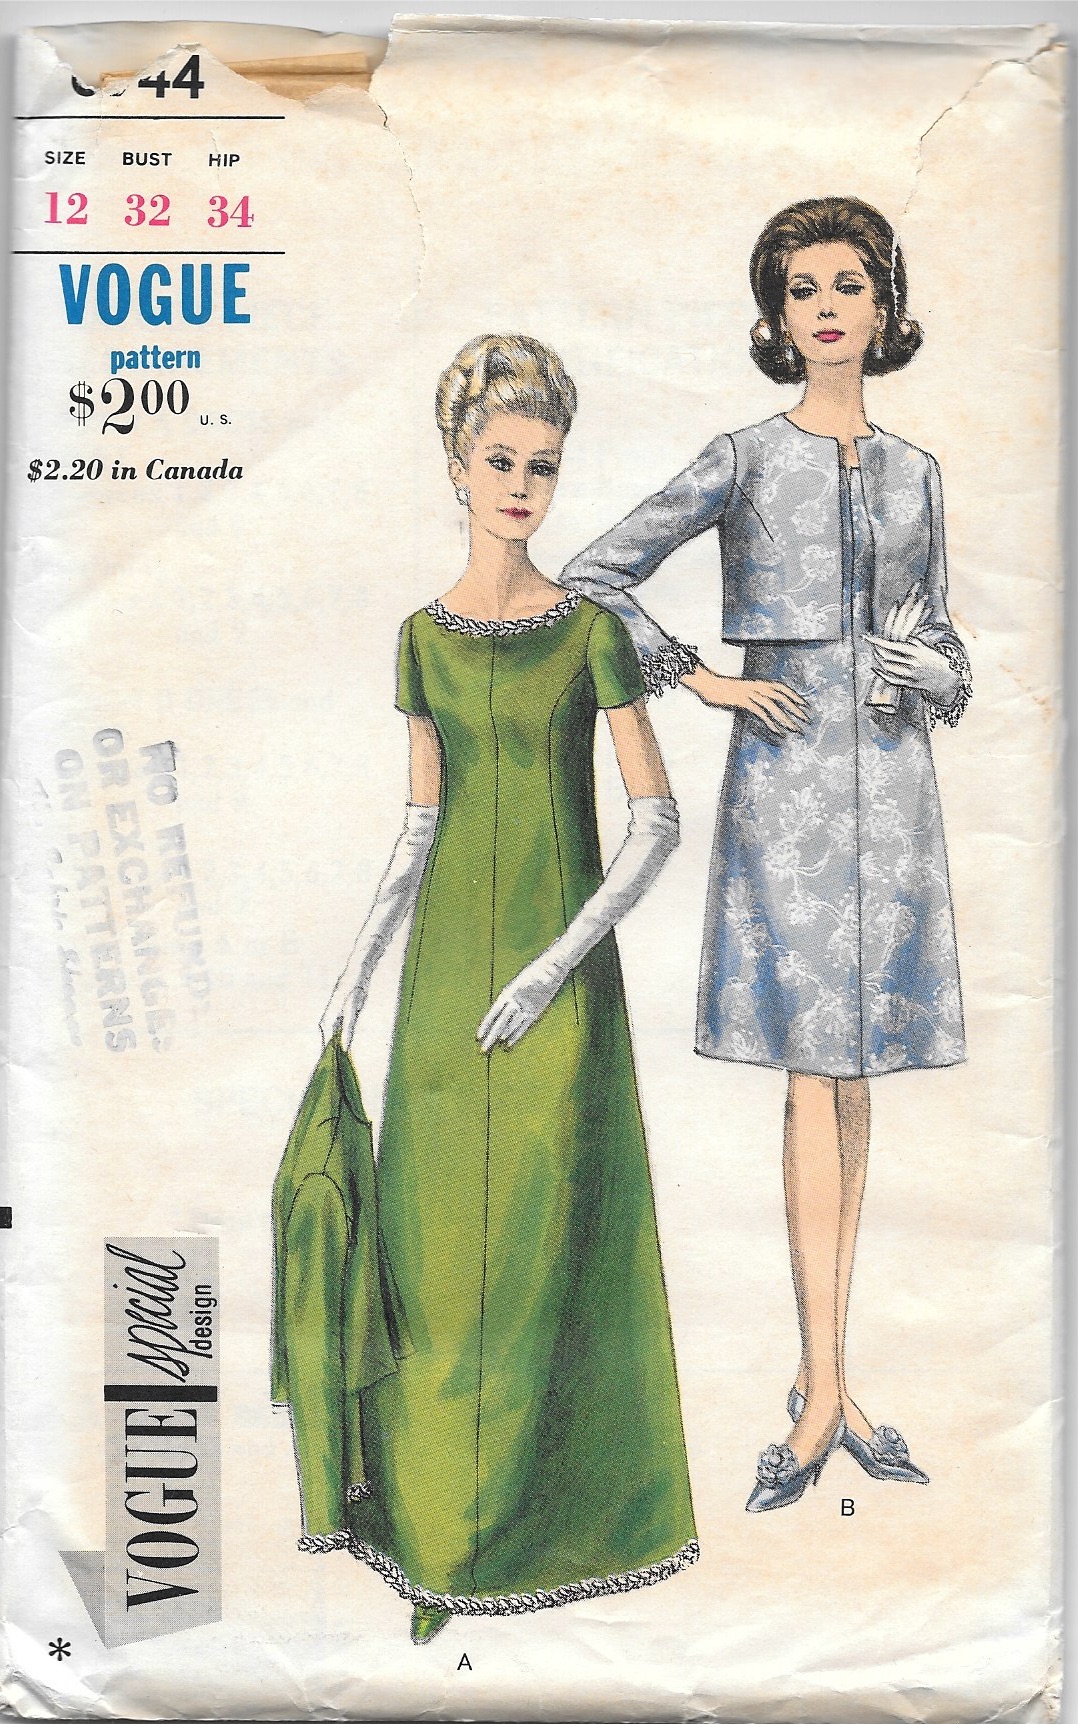
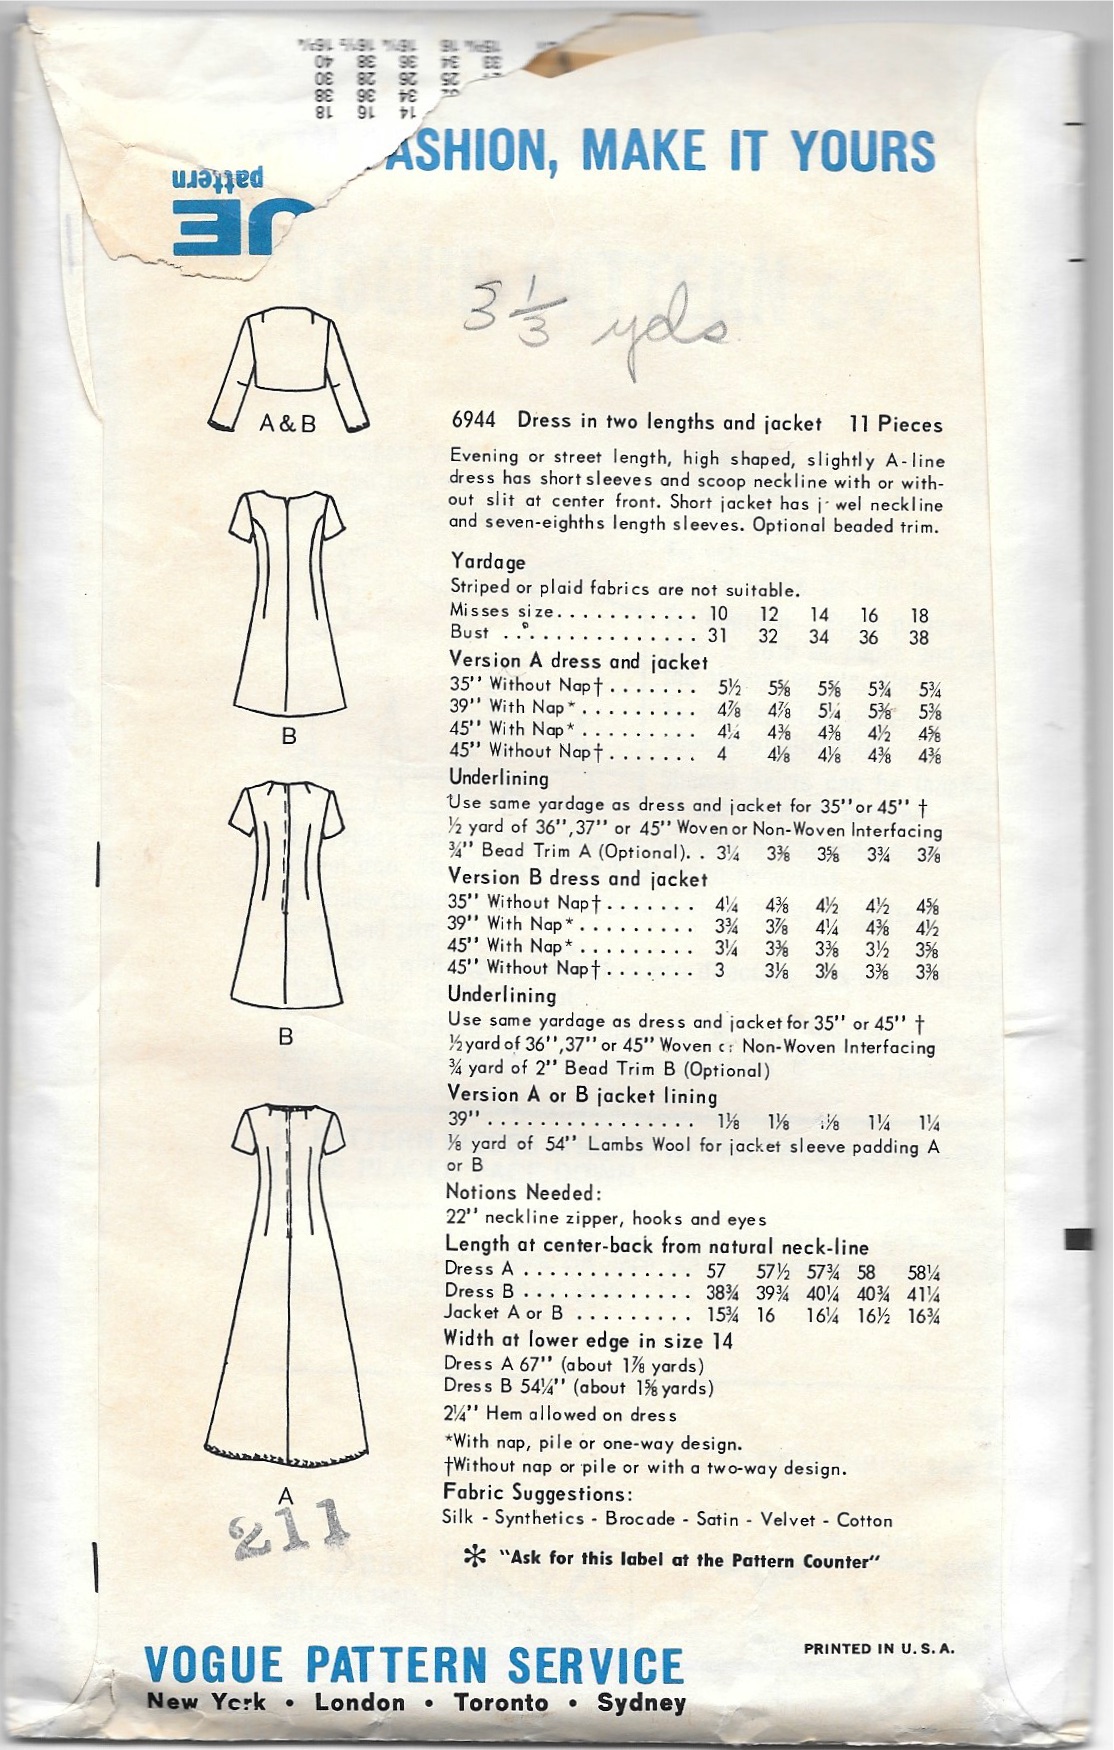
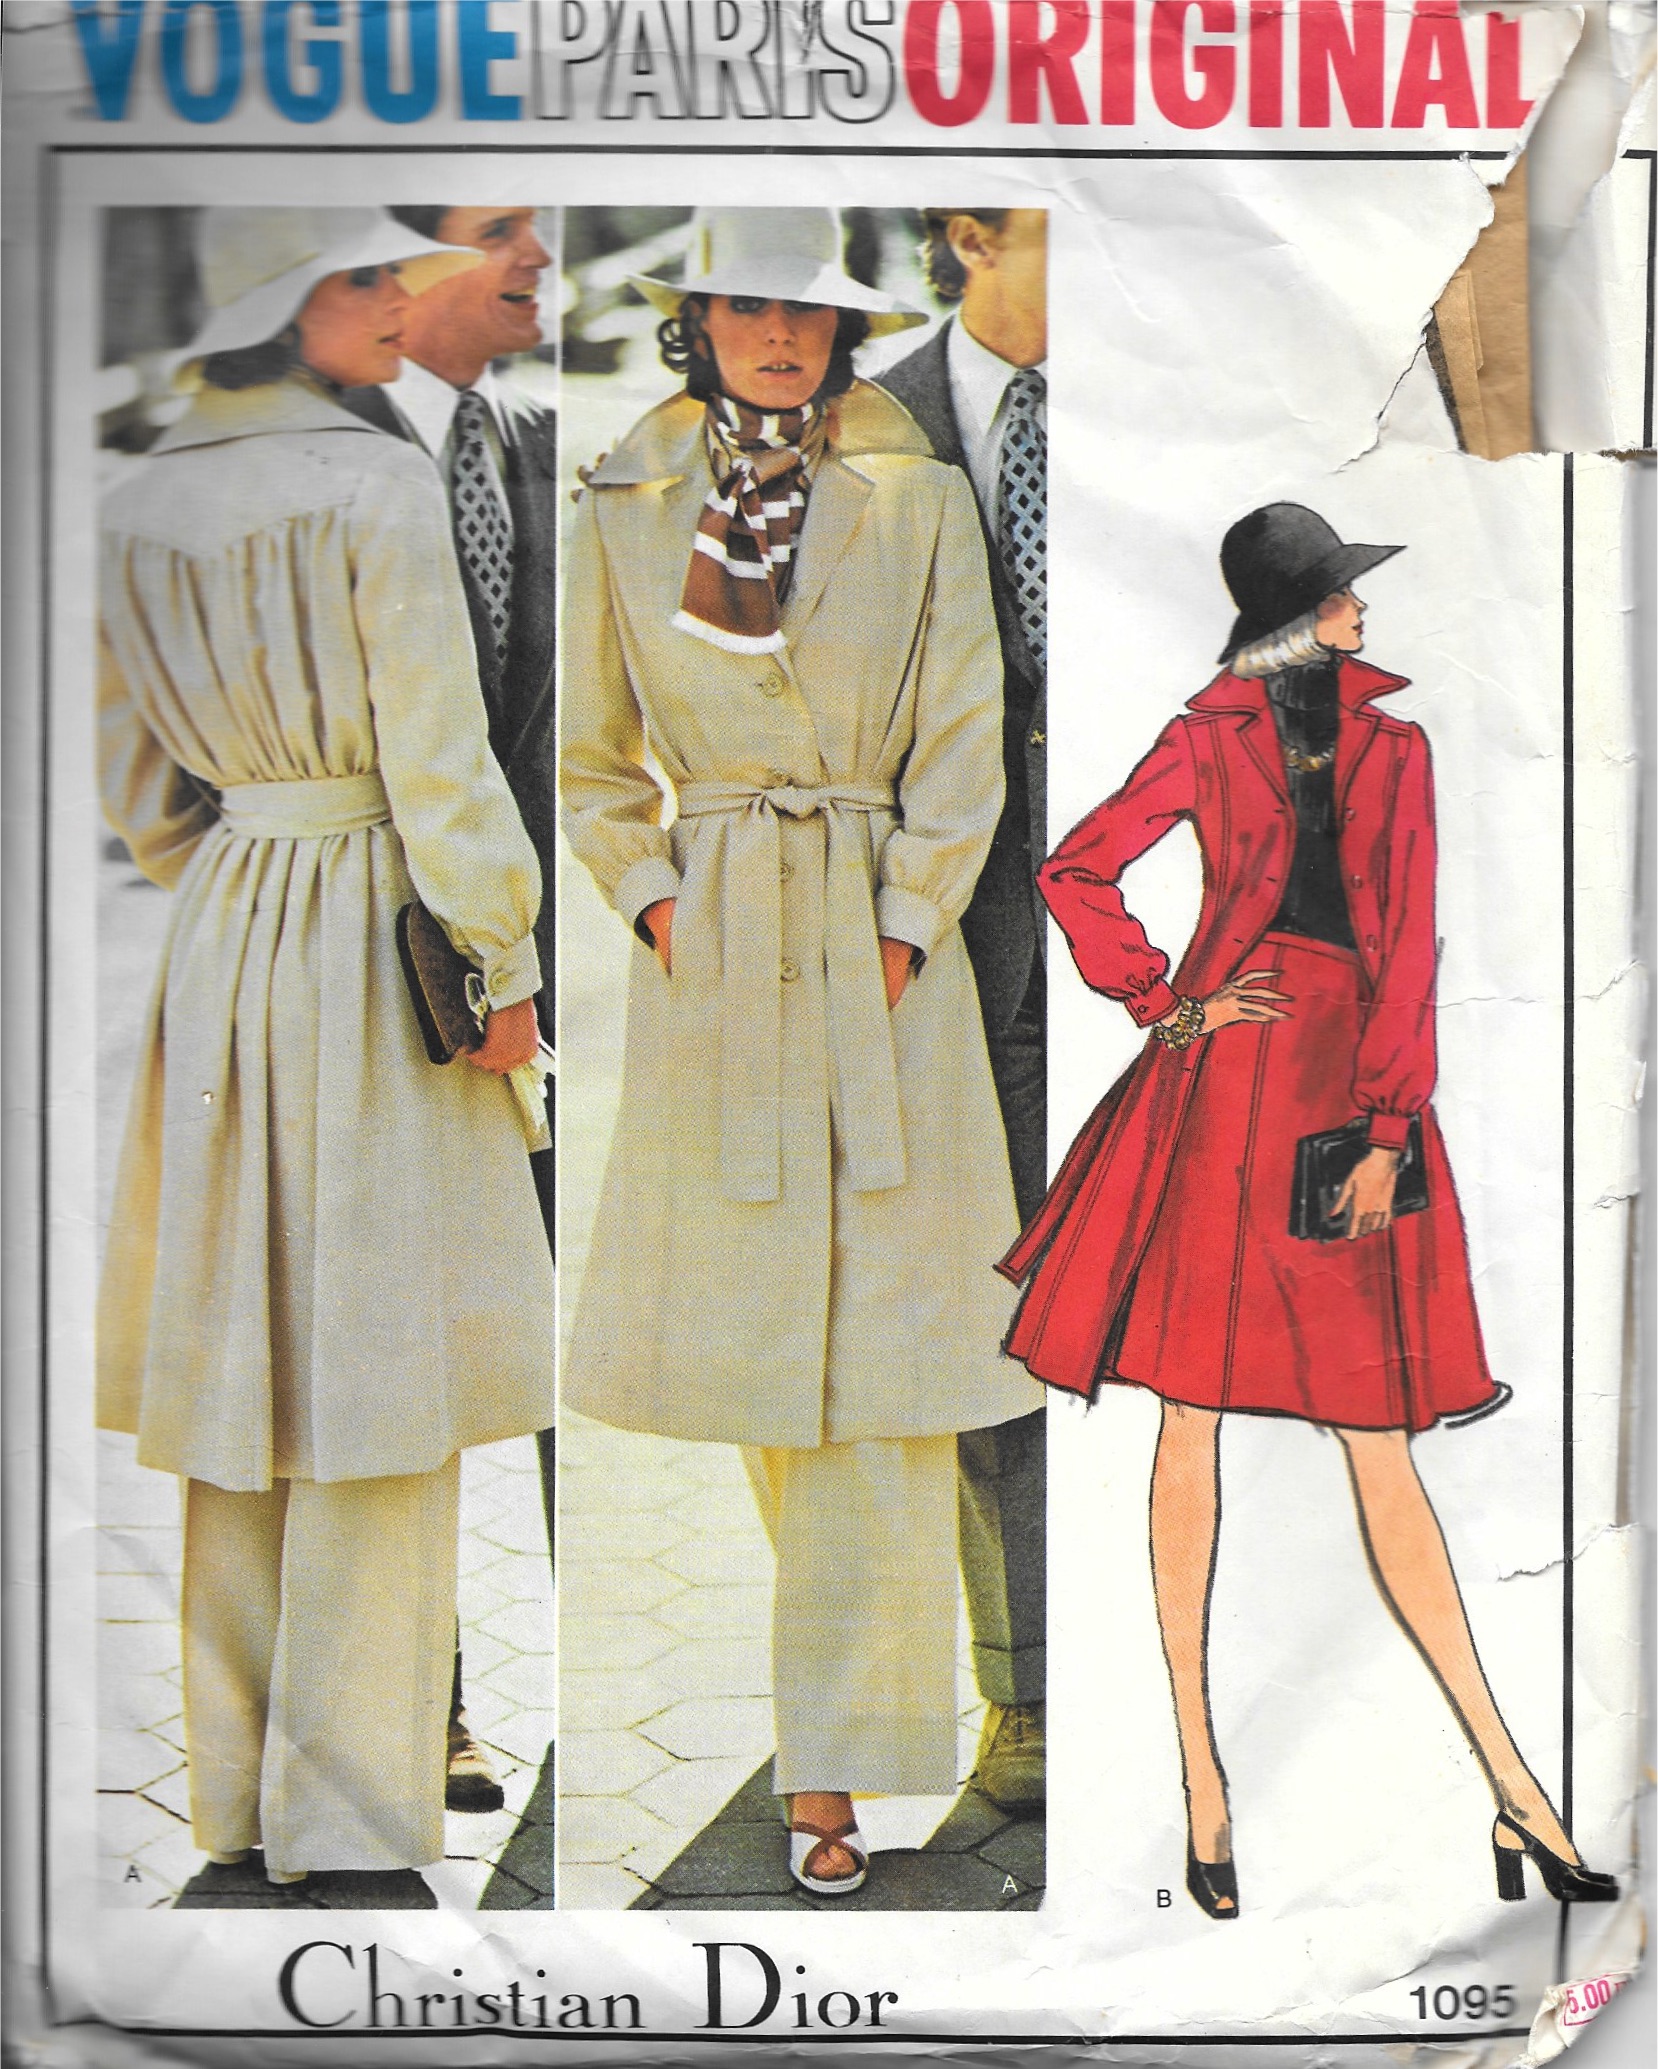
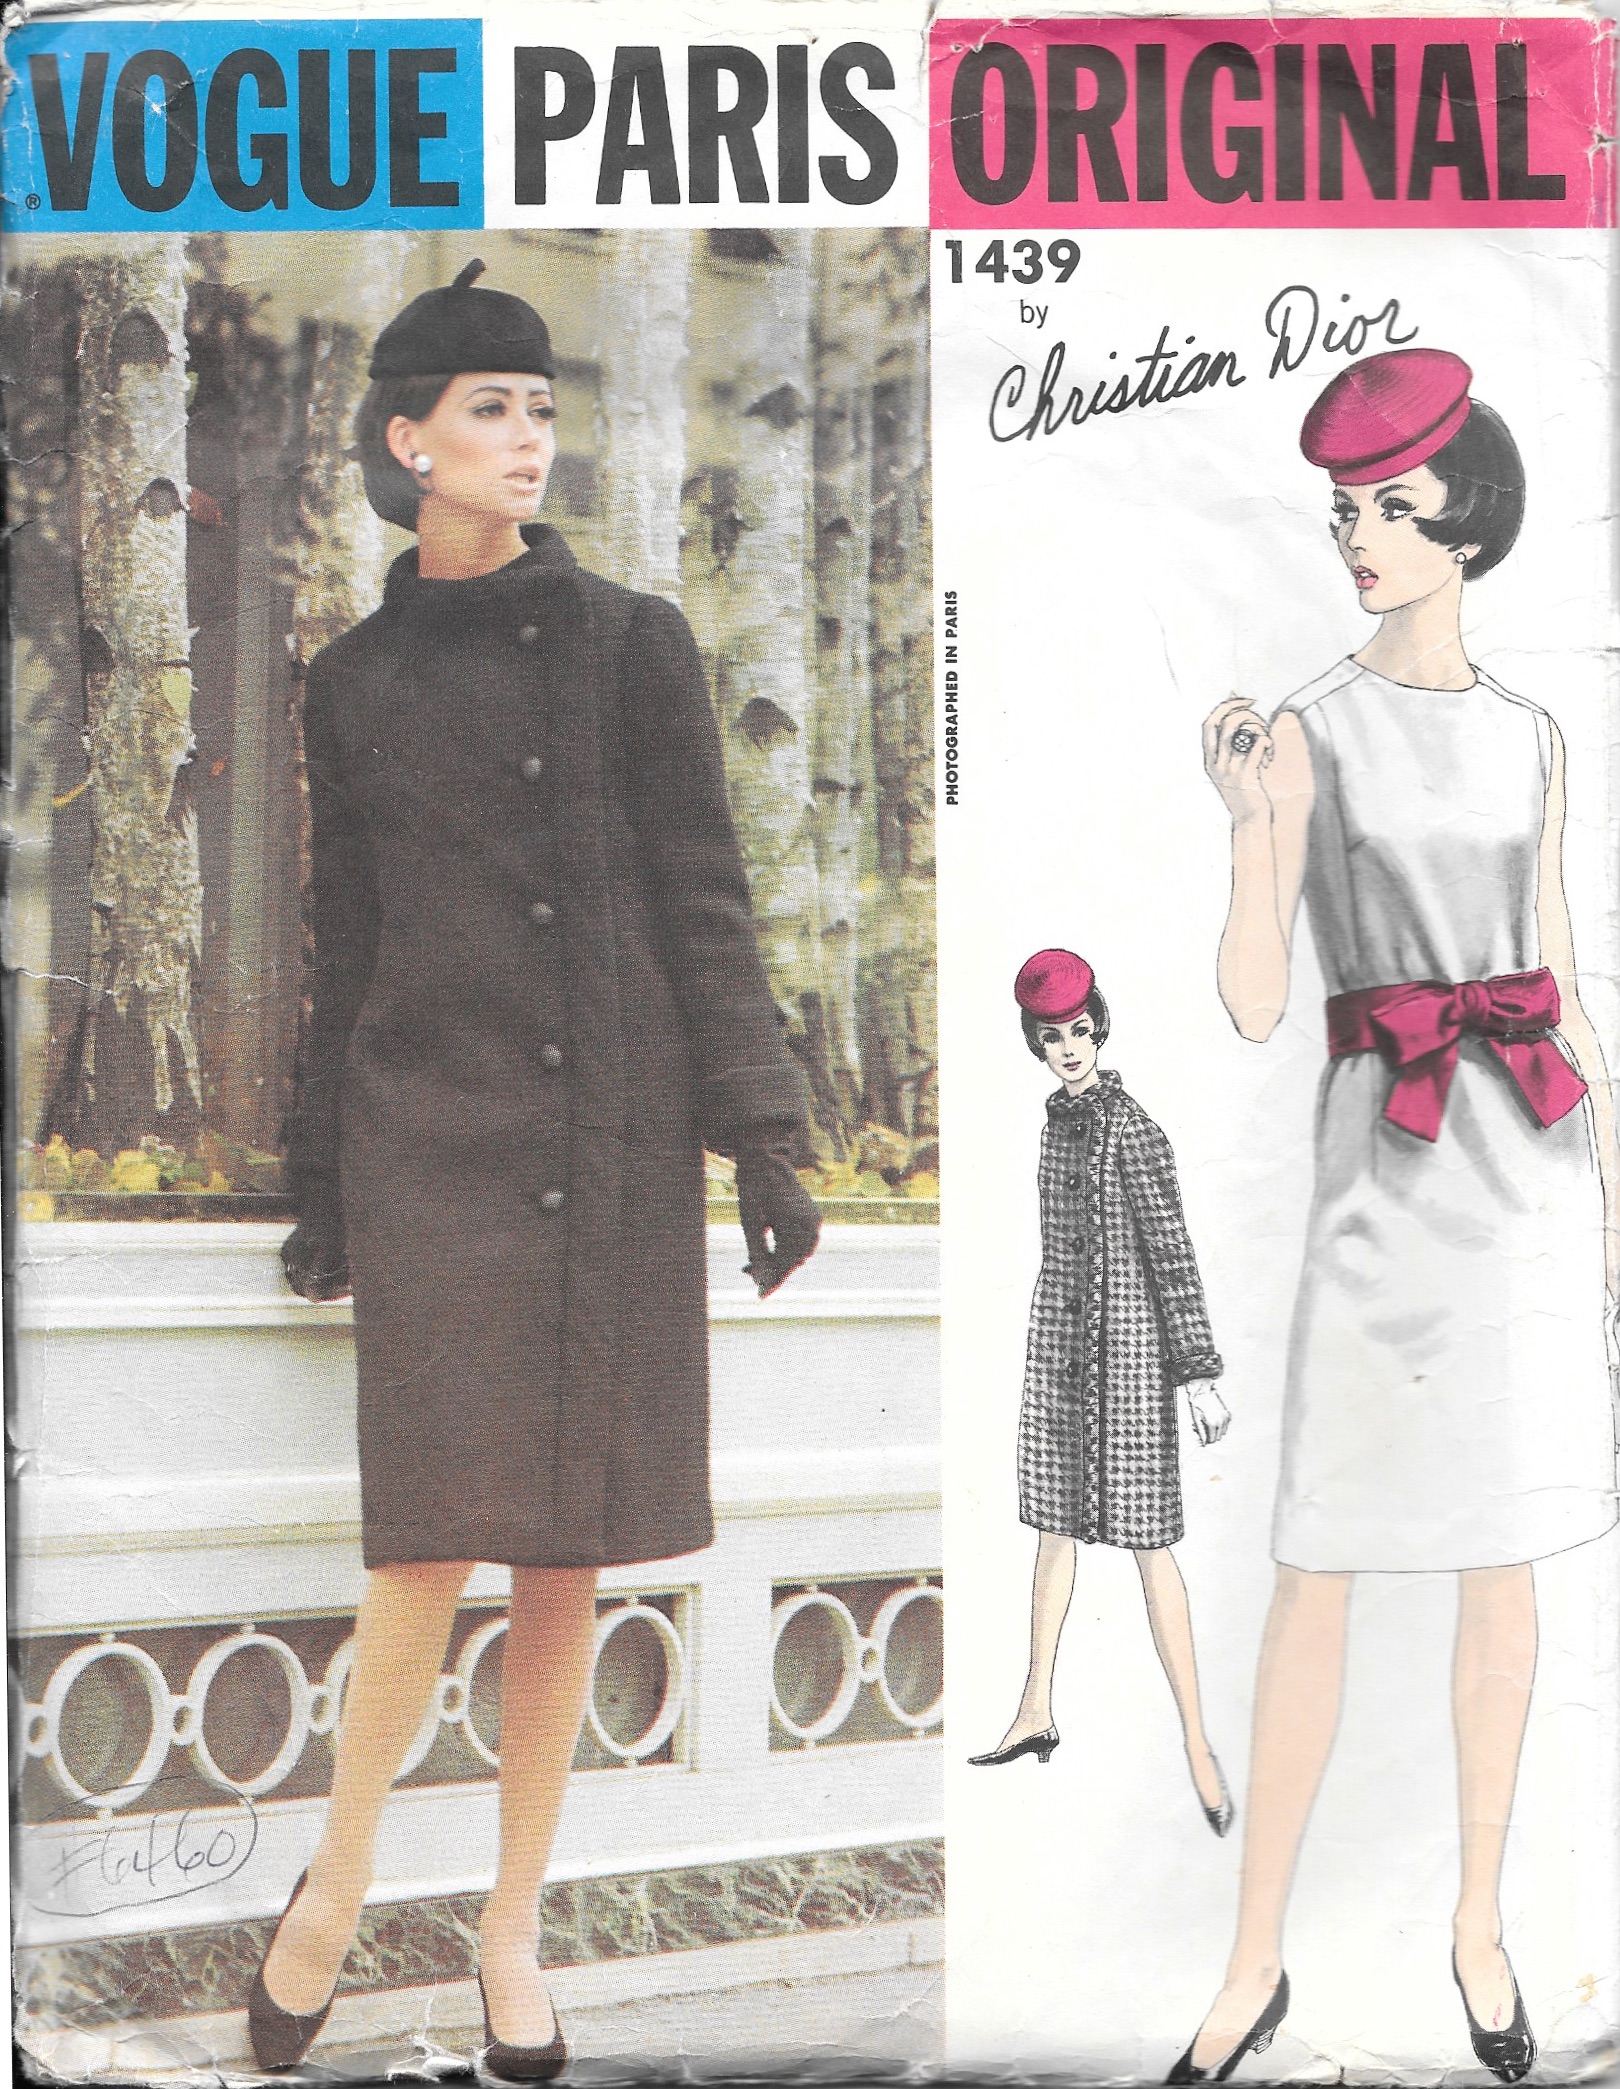
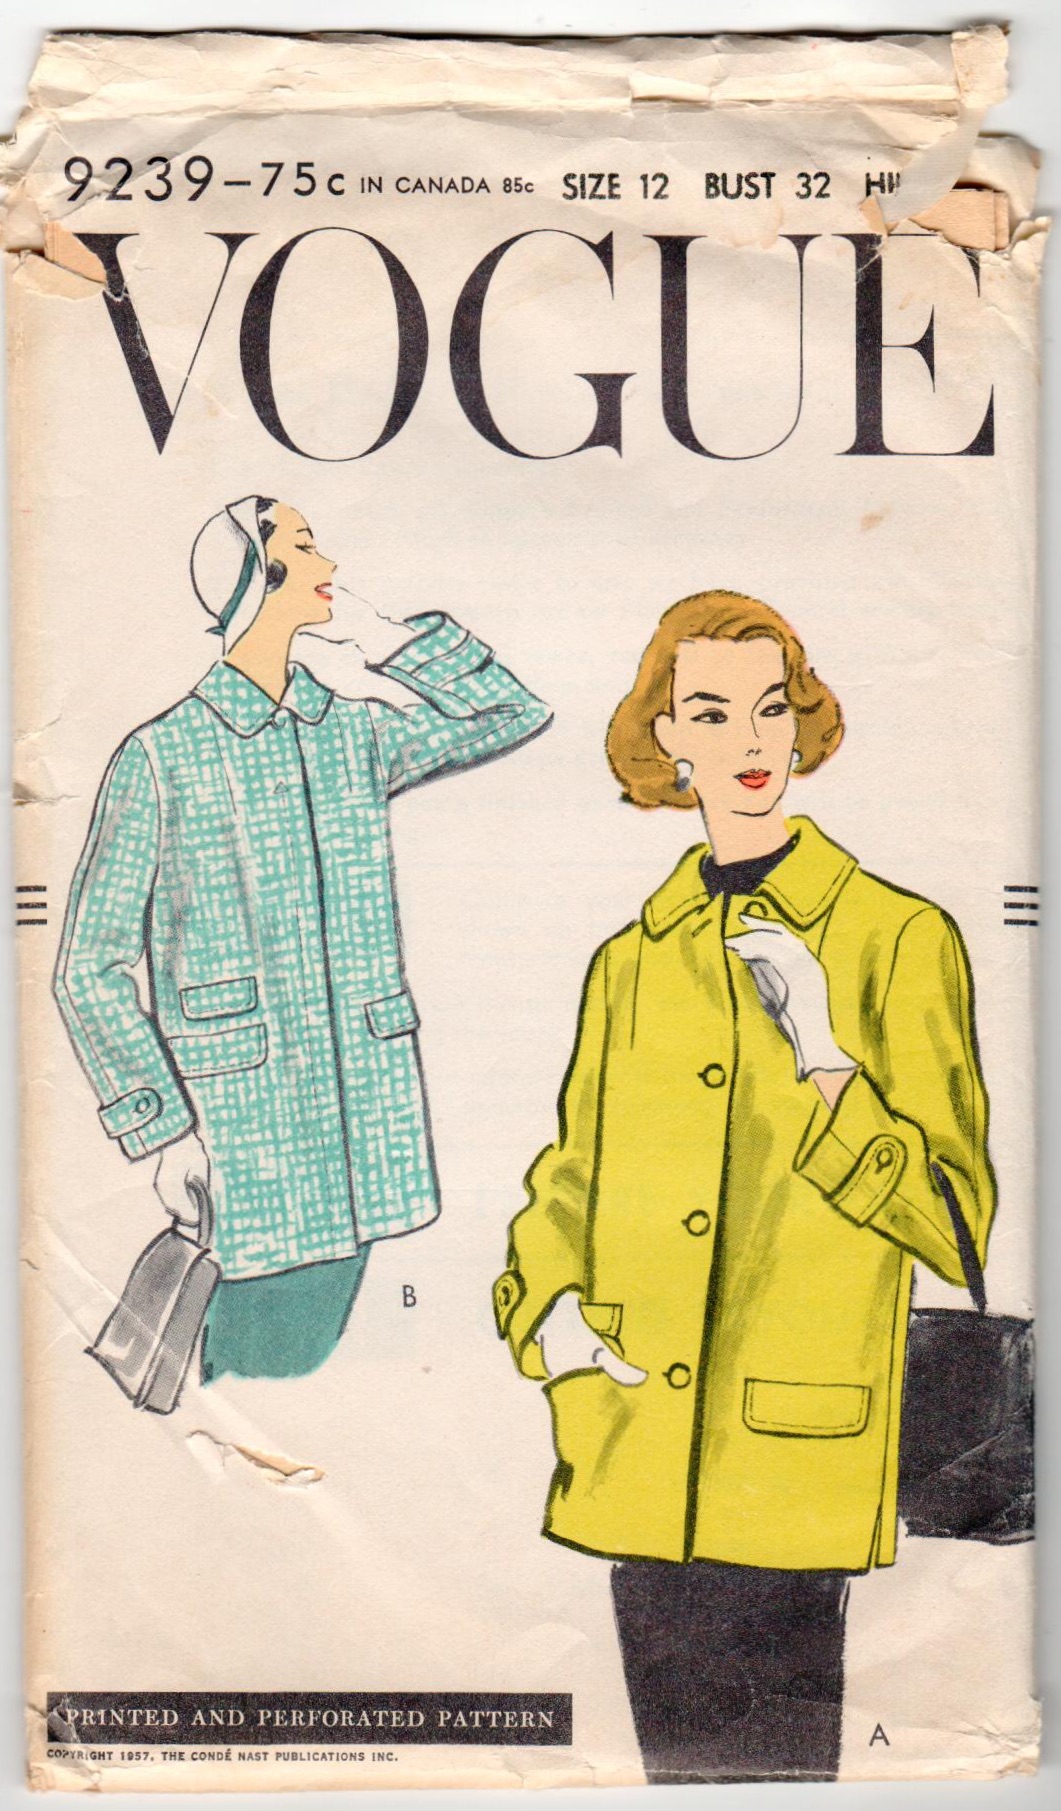
First I thought I would make a midi-skirt to wear with a pretty silk blouse or something. I even got so far as to make a muslin for a longish skirt, but it just wasn’t going to work. I didn’t have enough fabric to match the design and create the skirt I wanted. The next task would be to find a dress pattern which would work. I kind of viewed this fabric as a good Fall and Spring transition weight, so I wanted sleeves. And I wanted a pattern which would show off the circle design to its best effect. One of the patterns in my collection which I have seemed to dwell on frequently is this one:
I like the styling of both the dress and the coat. I thought I’d take a stab at eyeballing the pattern on my fabric, to see if it might work. Well, it was going to be a squeaker, but I thought I could manage to get the dress out of the yardage I had – and match all those circles and dots as much as possible.
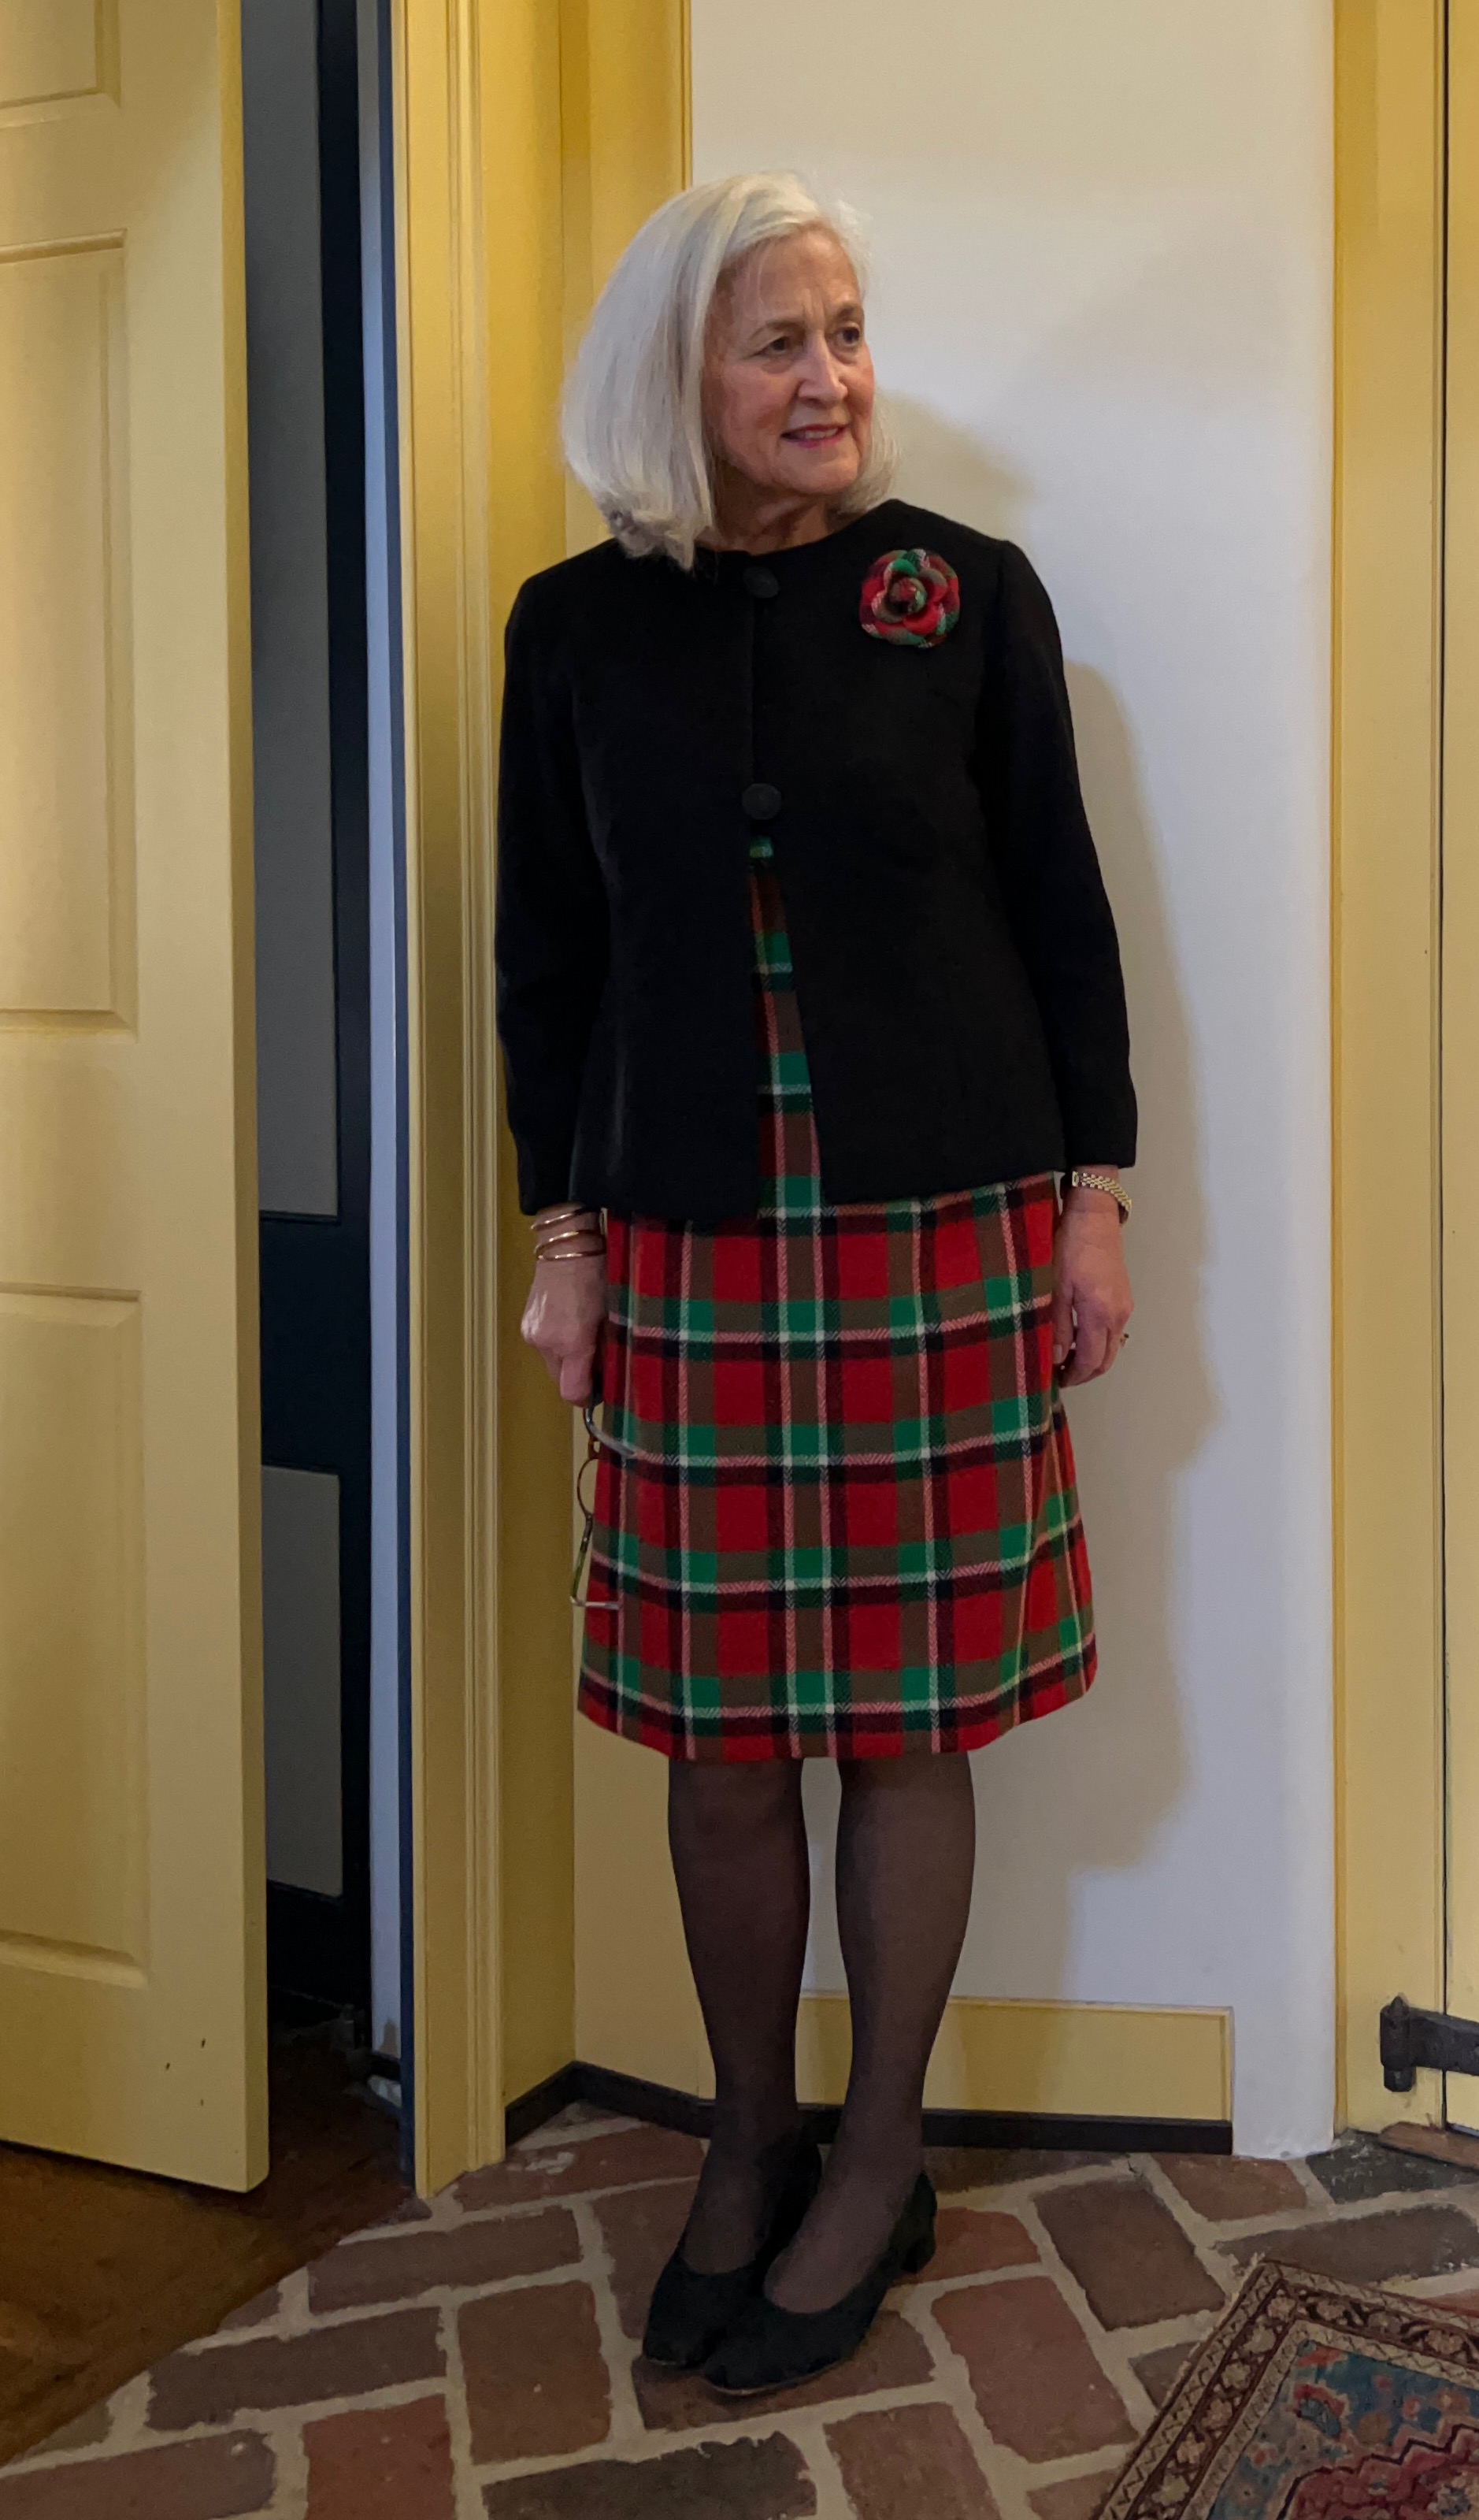
One thing I had to consider was the placement of the large dots and the smaller dots on my body. Working with dots can be a little tricky – you certainly don’t want prominent dots on top of each bust apex, for example, and a row of large dots around the waist might not be all that flattering. I thought the row of the largest dots would be best as an anchor at the hemline. That would place the wide band of smaller dots just over the waistline and somewhat below. This configuration would place one medium size dot over one bust, but I was okay with that since the dot on the other side was off to the side, and therefore not symmetrical. I also liked the repeat row of largest dots across the upper chest where they were not too obvious. And – the sleeves followed the line of varying size dots in a pleasing manner, I thought. It turned out, I had just enough fabric to get things lined up properly – except for the front facing. No way could I match that to the front of the dress.
Now, obviously the facing does not show on the right side of the dress. Still, I like to match across seams if possible. Which it wasn’t. I had to give myself permission to have a mismatched facing, and then I moved on. (I forgot to take a picture of the facing, unfortunately.)
A word or two about the fabric before I go on. According to Fairchild’s Dictionary of Fashion, (Third edition, by Charlotte Mankey Calasibetta and Phyllis Tortora, Fairchild Publications, Inc., New York, New York, c2003, page 395) sateen is a “smooth glossy cotton fabric made in the sateen weave with floating crosswise yarns on the right side, giving a lustrous finish.” This fabric is a combination of cotton sateen, with circles created by a damask weave on a jacquard loom. It makes for a striking fabric. And I think the fact it is done in navy blue makes the contrast more definitive. Christian Dior was a fan of navy blue, calling it “the only one [color] which can ever compete with black, it has all the same qualities.” (The Little Dictionary of Fashion, Abrams, N.Y., 2007, page 14). It is a wonderfully versatile color.
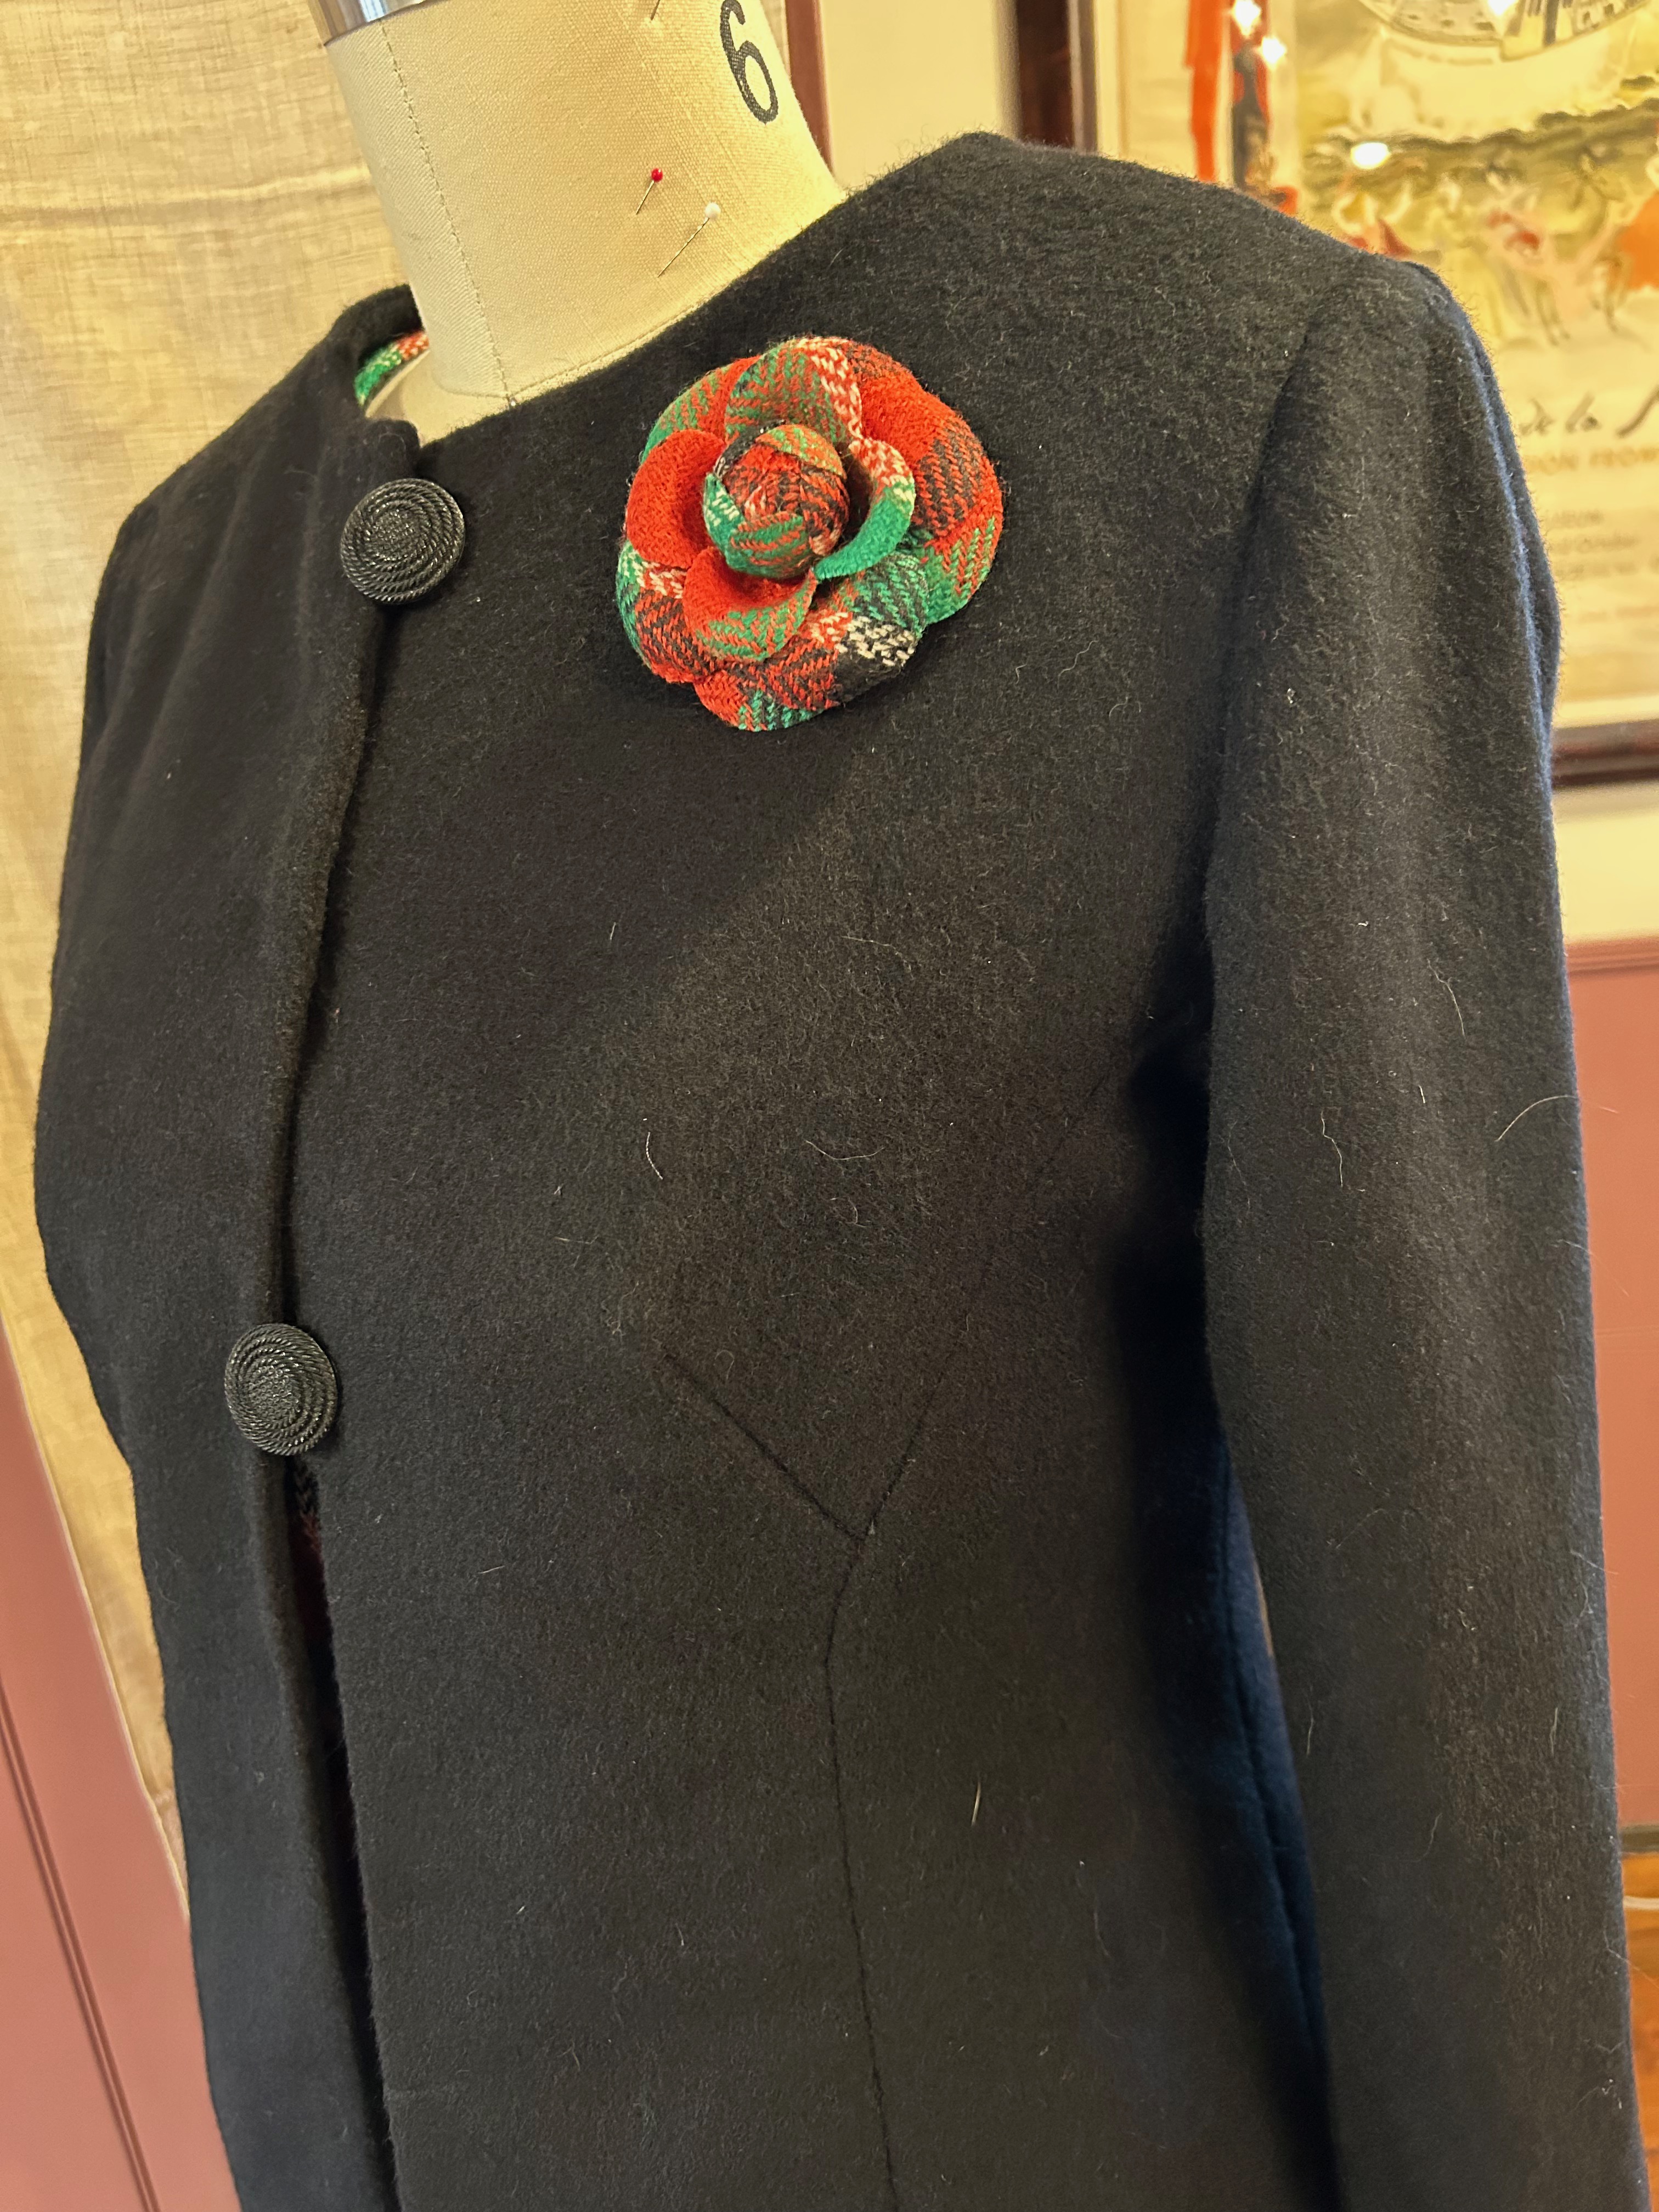
I made a few changes to the pattern. I cut the neckline a little wider, I shortened the sleeves by a couple of inches, and the big change was I lined the dress in a lovely silk batiste I purchased at Farmhouse Fabrics. (The pattern did not have instructions or pattern pieces for a lining.) The pleat in the front of the dress was a bit tricky to line, but I figured it out after quite a bit of thought. By the way, I underlined the dress with silk organza.
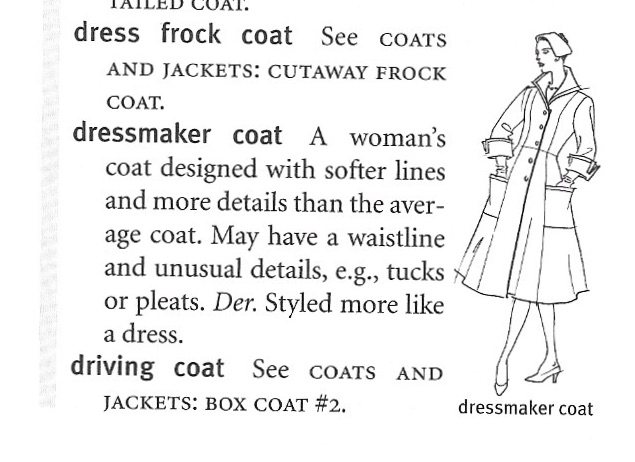
One more thing about the pattern and the dress. With the pleat in the front of the dress which extends to the hem, it gives the appearance of a coat dress. However, it is not. Again Fairchild’s gives us a precise definition of a coat dress: “Dress fastened down front from neck to hem, like a coat, in single- or double-breasted style, either belted or unbelted. A classic since the 1930s.” ibid., page 84. Someday I’ll make a coatdress, but this was not it.
As I mentioned in an earlier post, I made this dress to wear on my Paris trip, but alas, I never had the opportunity to do so. I feel certain it will eventually get its debut, but not in Paris!
26 Comments
Filed under Buttons - choosing the right ones, Christian Dior, Fashion commentary, Loops for buttons, Mid-Century style, Polka dots, Sateen, Uncategorized, underlinings, vintage Vogue patterns from the 1960s, Vogue patterns
Tagged as Choosing buttons, Farmhouse Fabrics, fashion sewing, Mendel Goldberg Fabrics, polka dots, sewing, vintage fashion, vintage Vogue patterns