
Any week spent in one of Susan Khalje’s Couture Sewing School classes is a week filled with opportunity. This past class was my third one taken with Susan, and I have come to expect that I will learn unexpected things! My first class with her was the Classic French Jacket; the second class was when I started my color-blocked coat; and this class saw the beginning of a silk formal dress which I need for a black-tie event in early July.
She asks her students to come with a prepared muslin (toile), ready for fitting. I have so many vintage patterns for long, lovely, fancy dresses, that it was difficult to focus on just one. As it turned out, I found myself drawn repeatedly to a dress which I had pinned to one of my Pinterest boards, and it is this dress which became my inspiration:
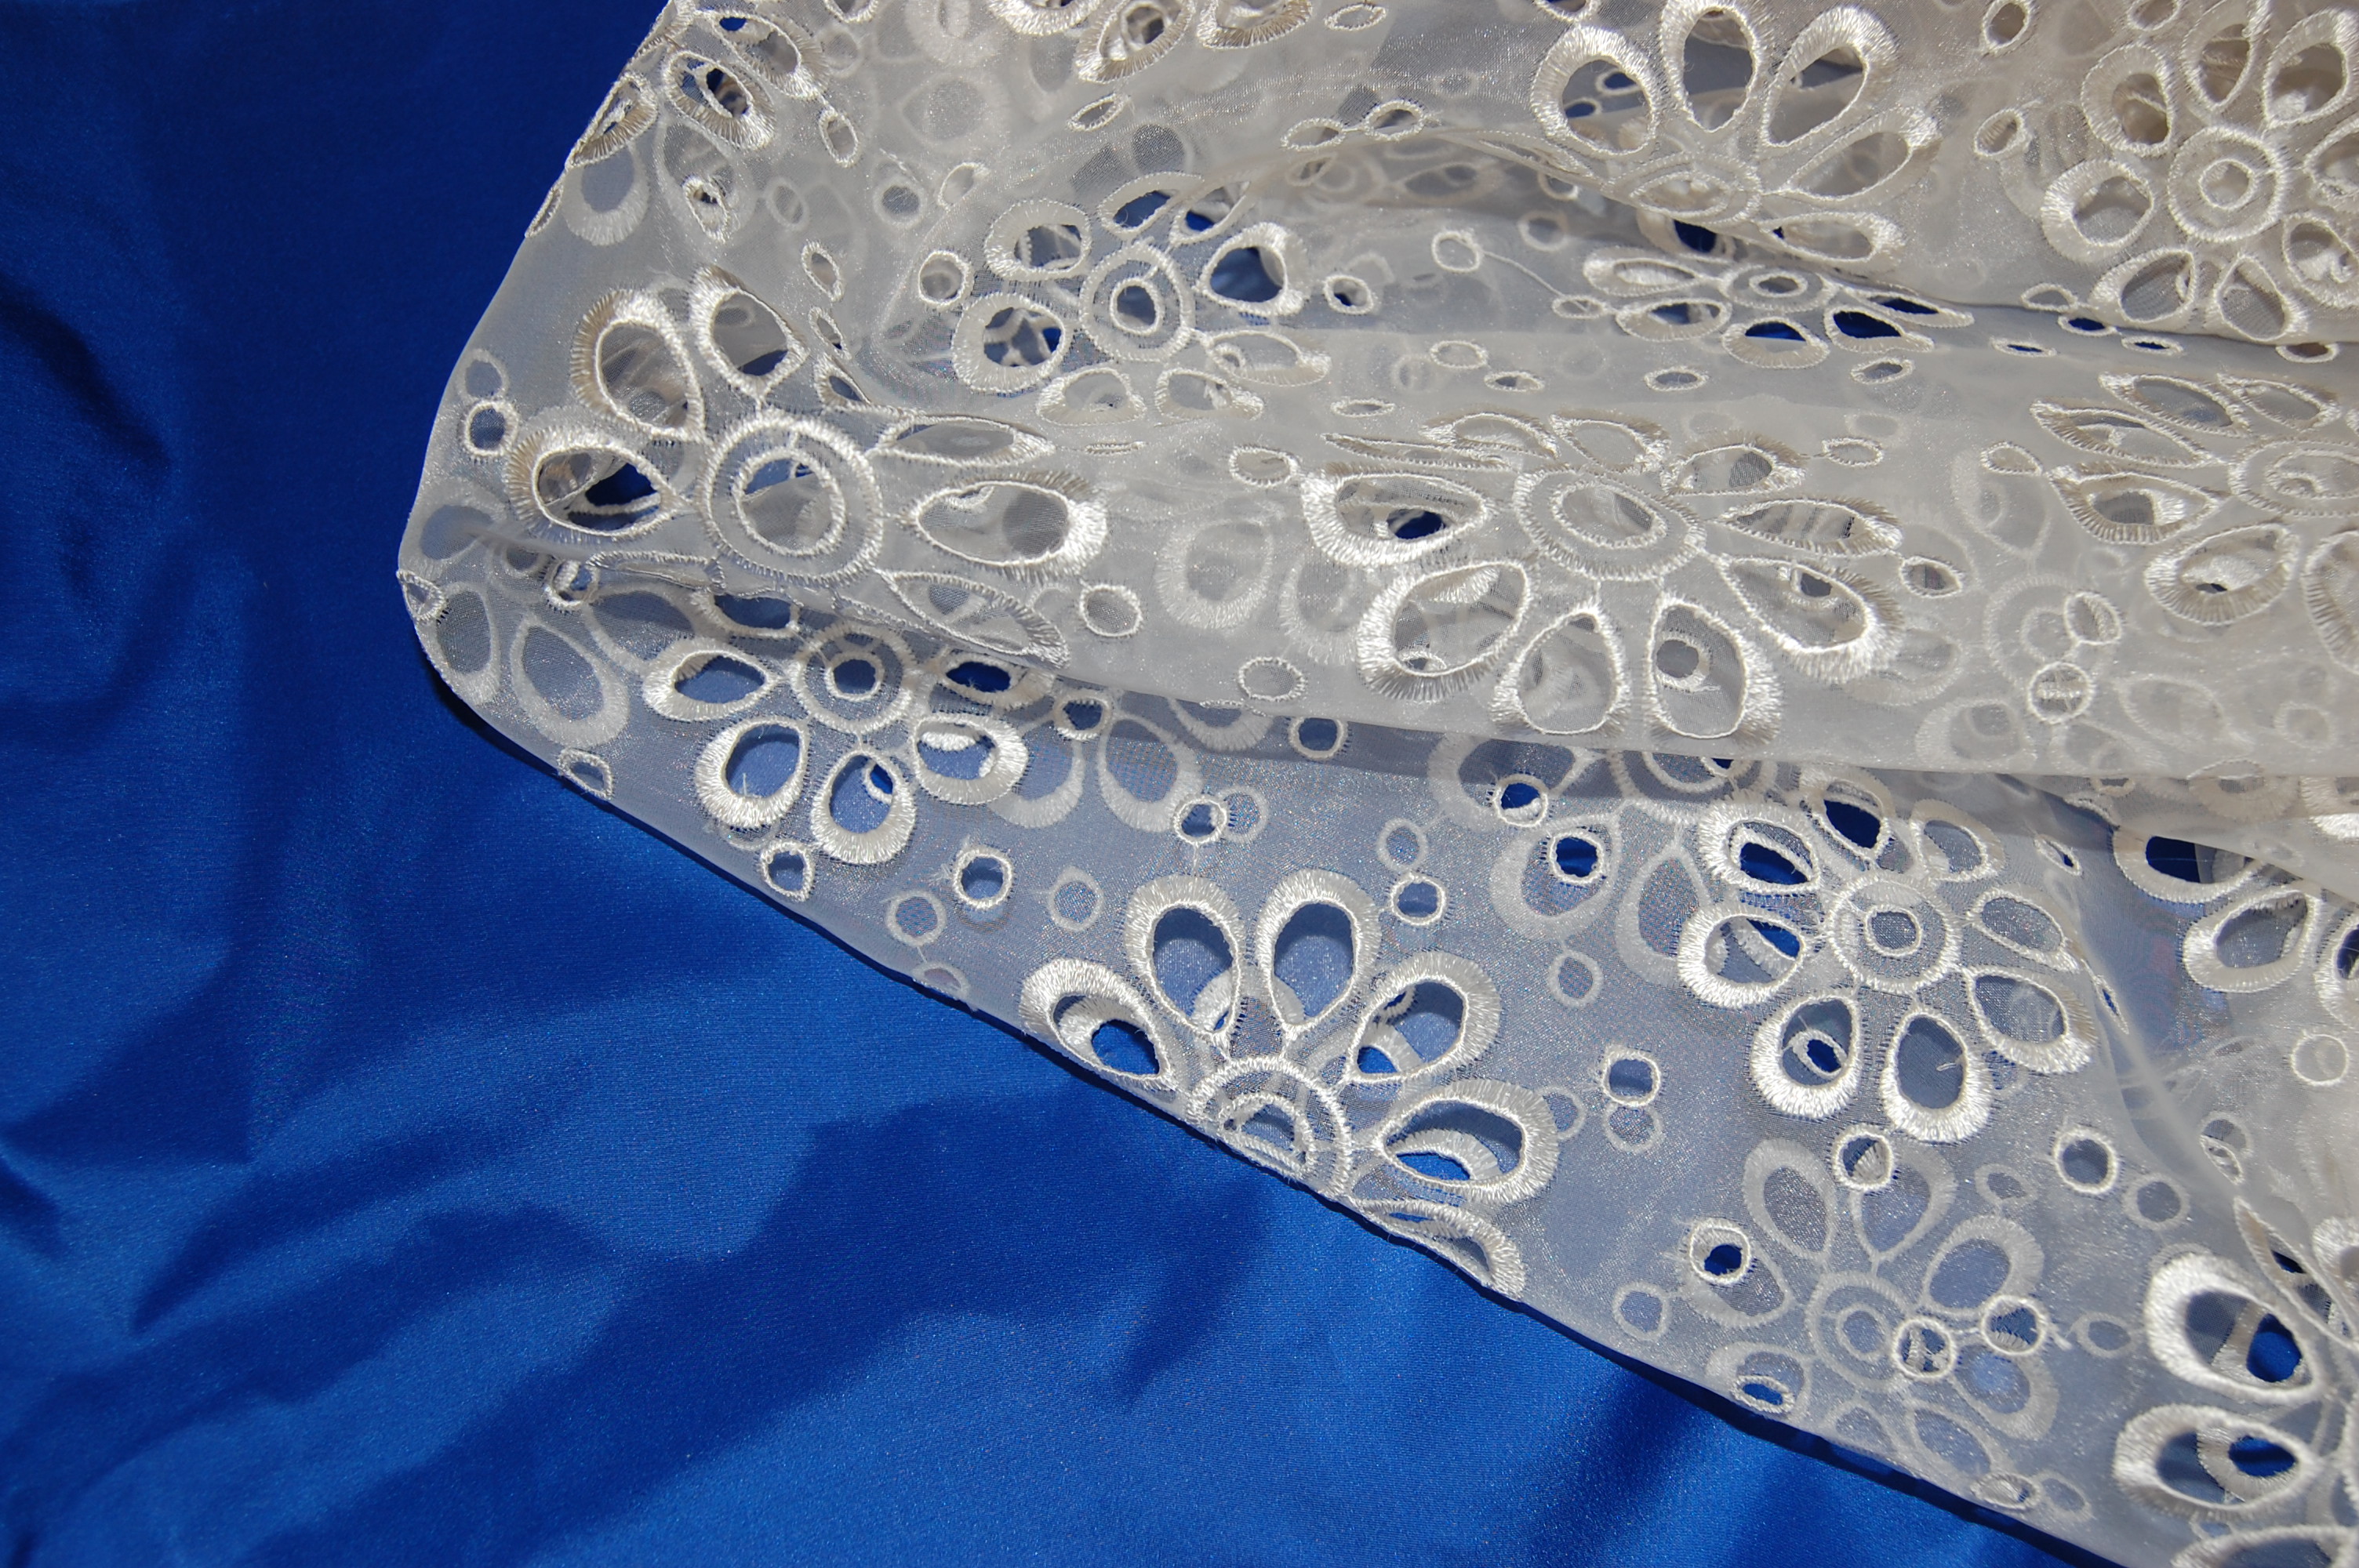
 I say “inspiration” as I knew I wanted to make certain changes. I decided I did not want to go completely strapless. Instead I envisioned a strapless underbodice, covered by a lacy, semi-transparent, sleeveless overbodice, both in white. I had already purchased a silk-embroidered organza (from Waechter’s Fabrics, before they closed their business), and I had also already purchased 3½ yards of sapphire-blue silk taffeta from Britex Fabrics. Those were my fabrics of choice for this project.
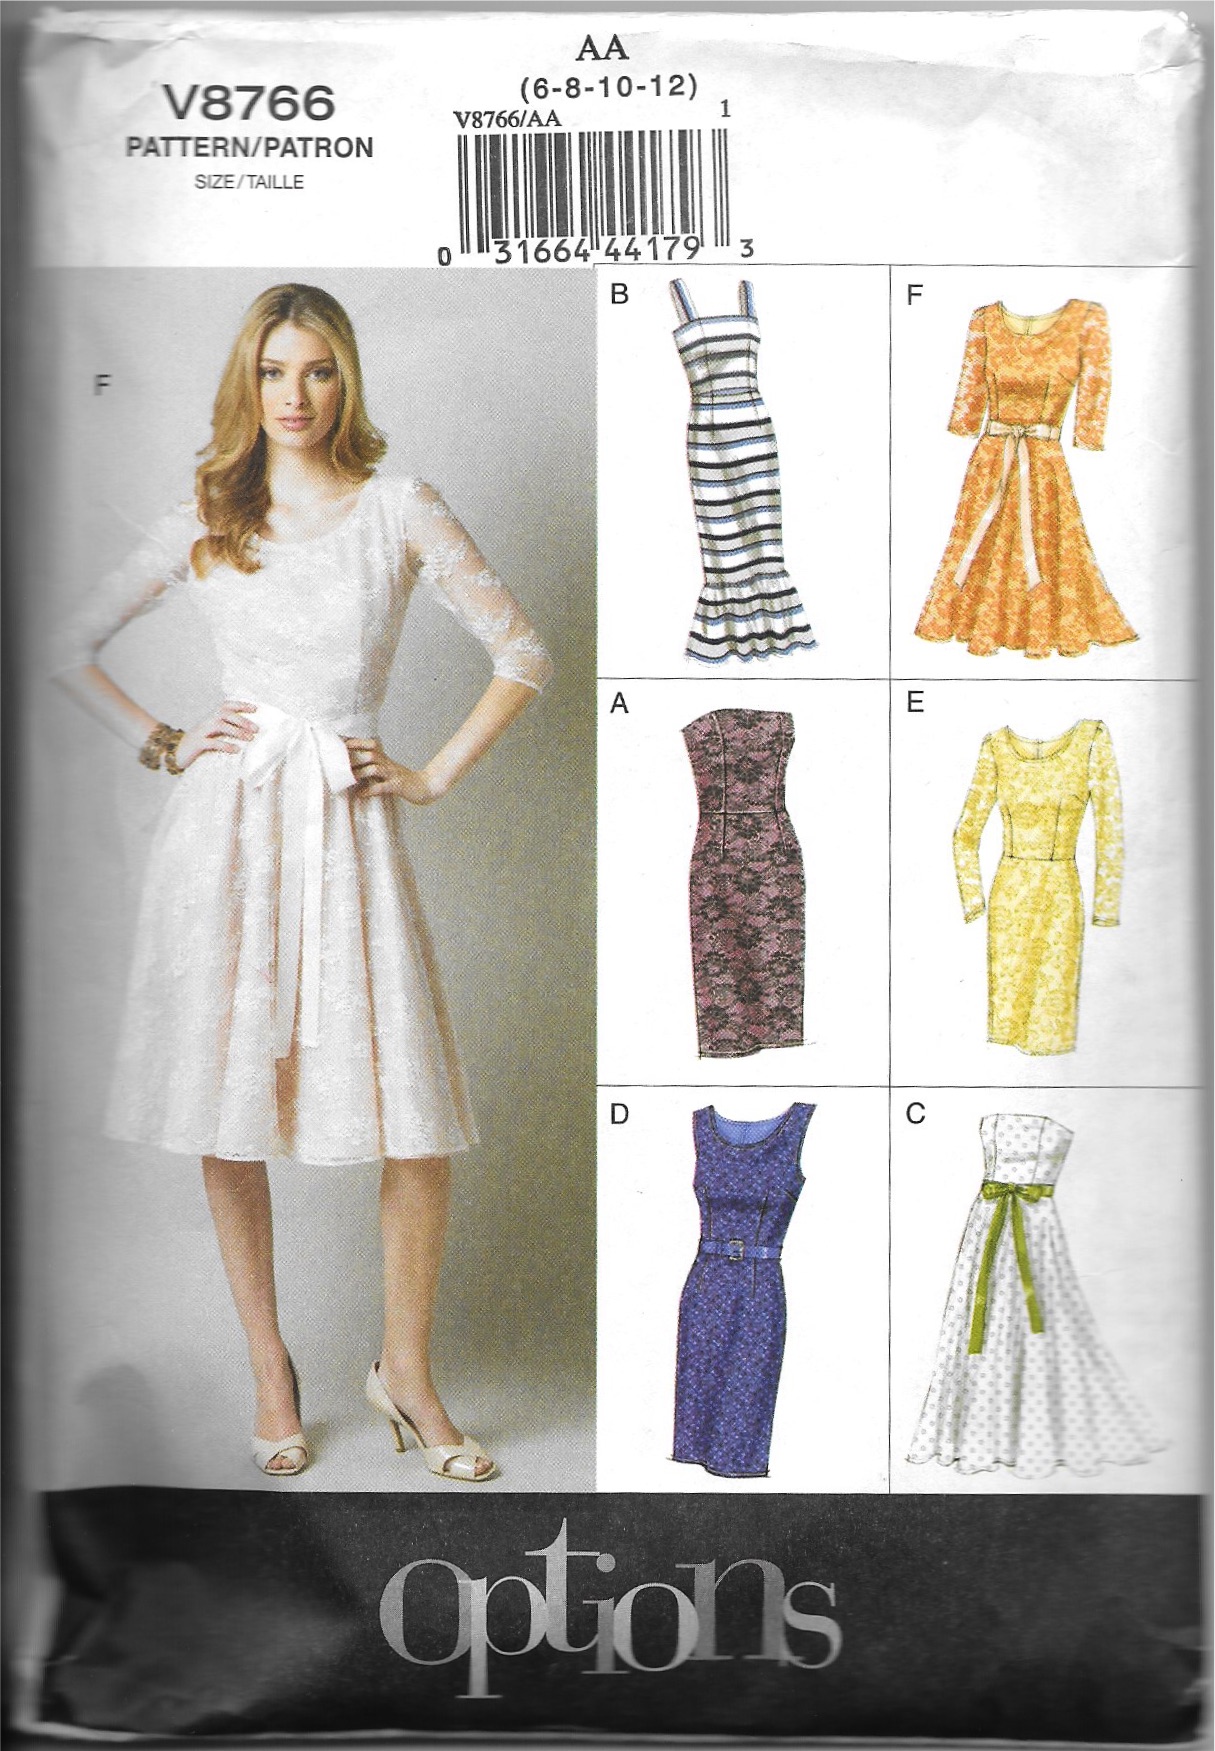
I started with the strapless top and the sleeveless top from this current Vogue pattern:
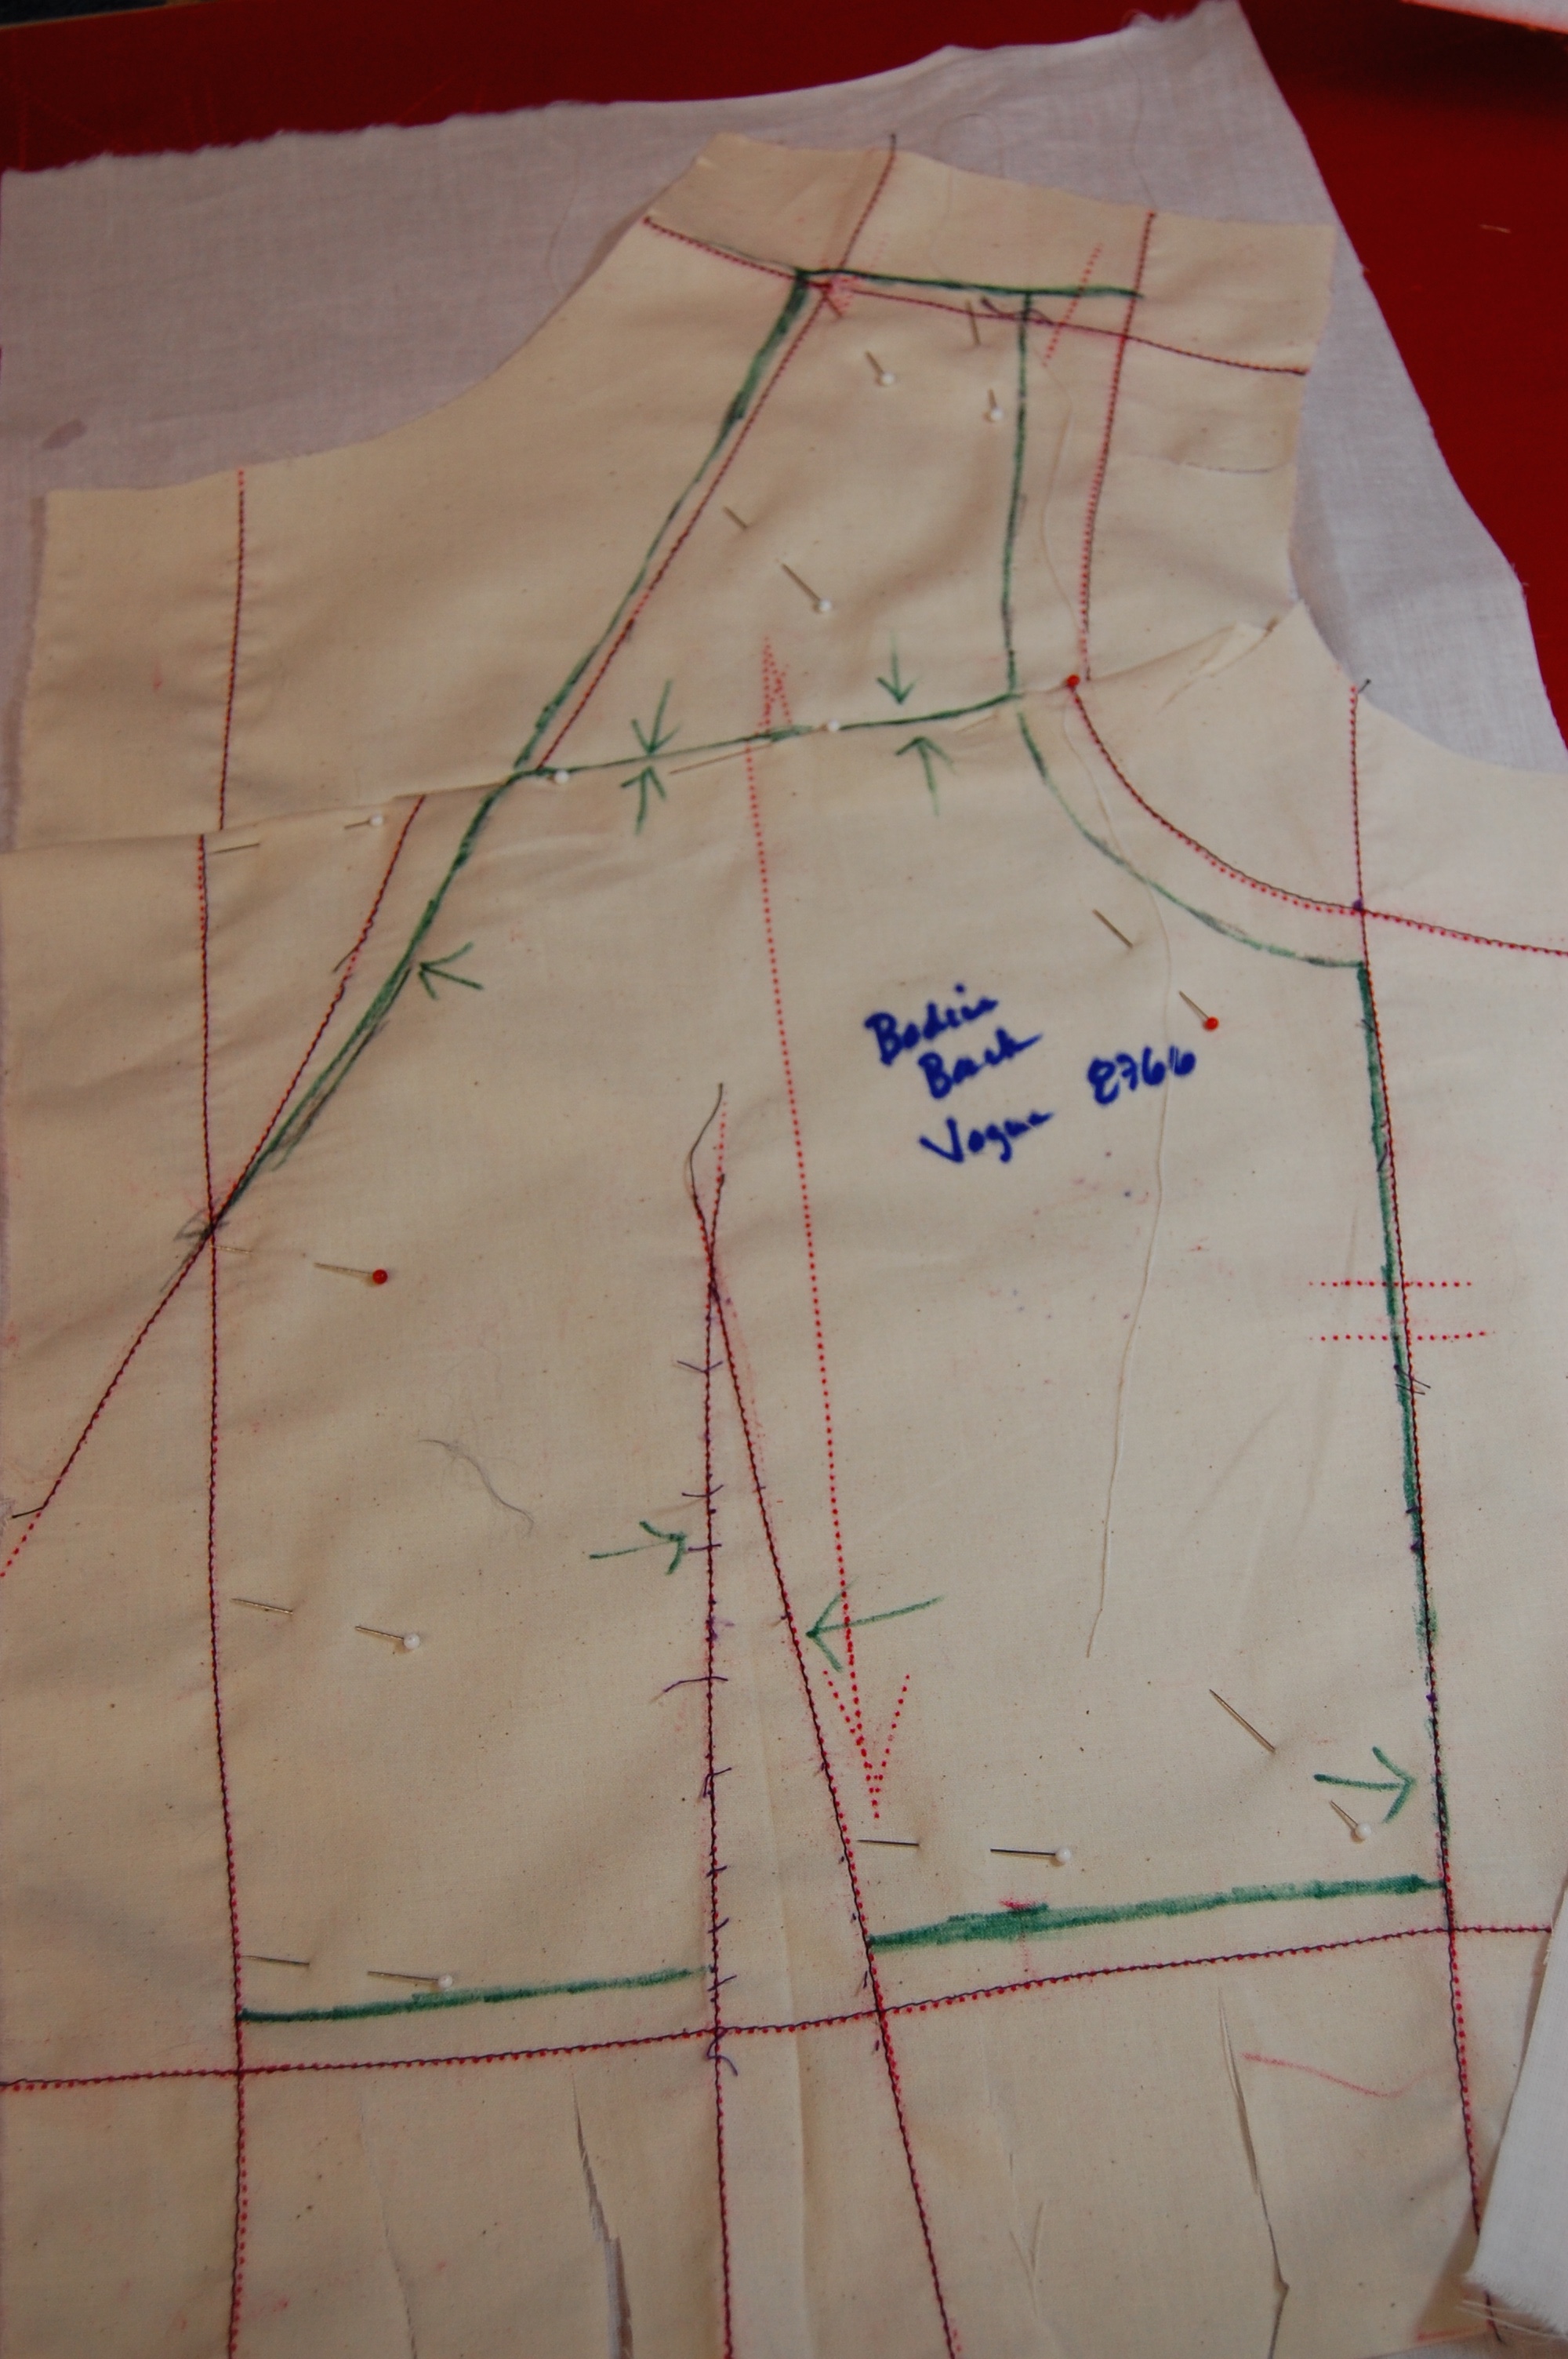
Here’s what happened when Susan fitted the muslin on me:
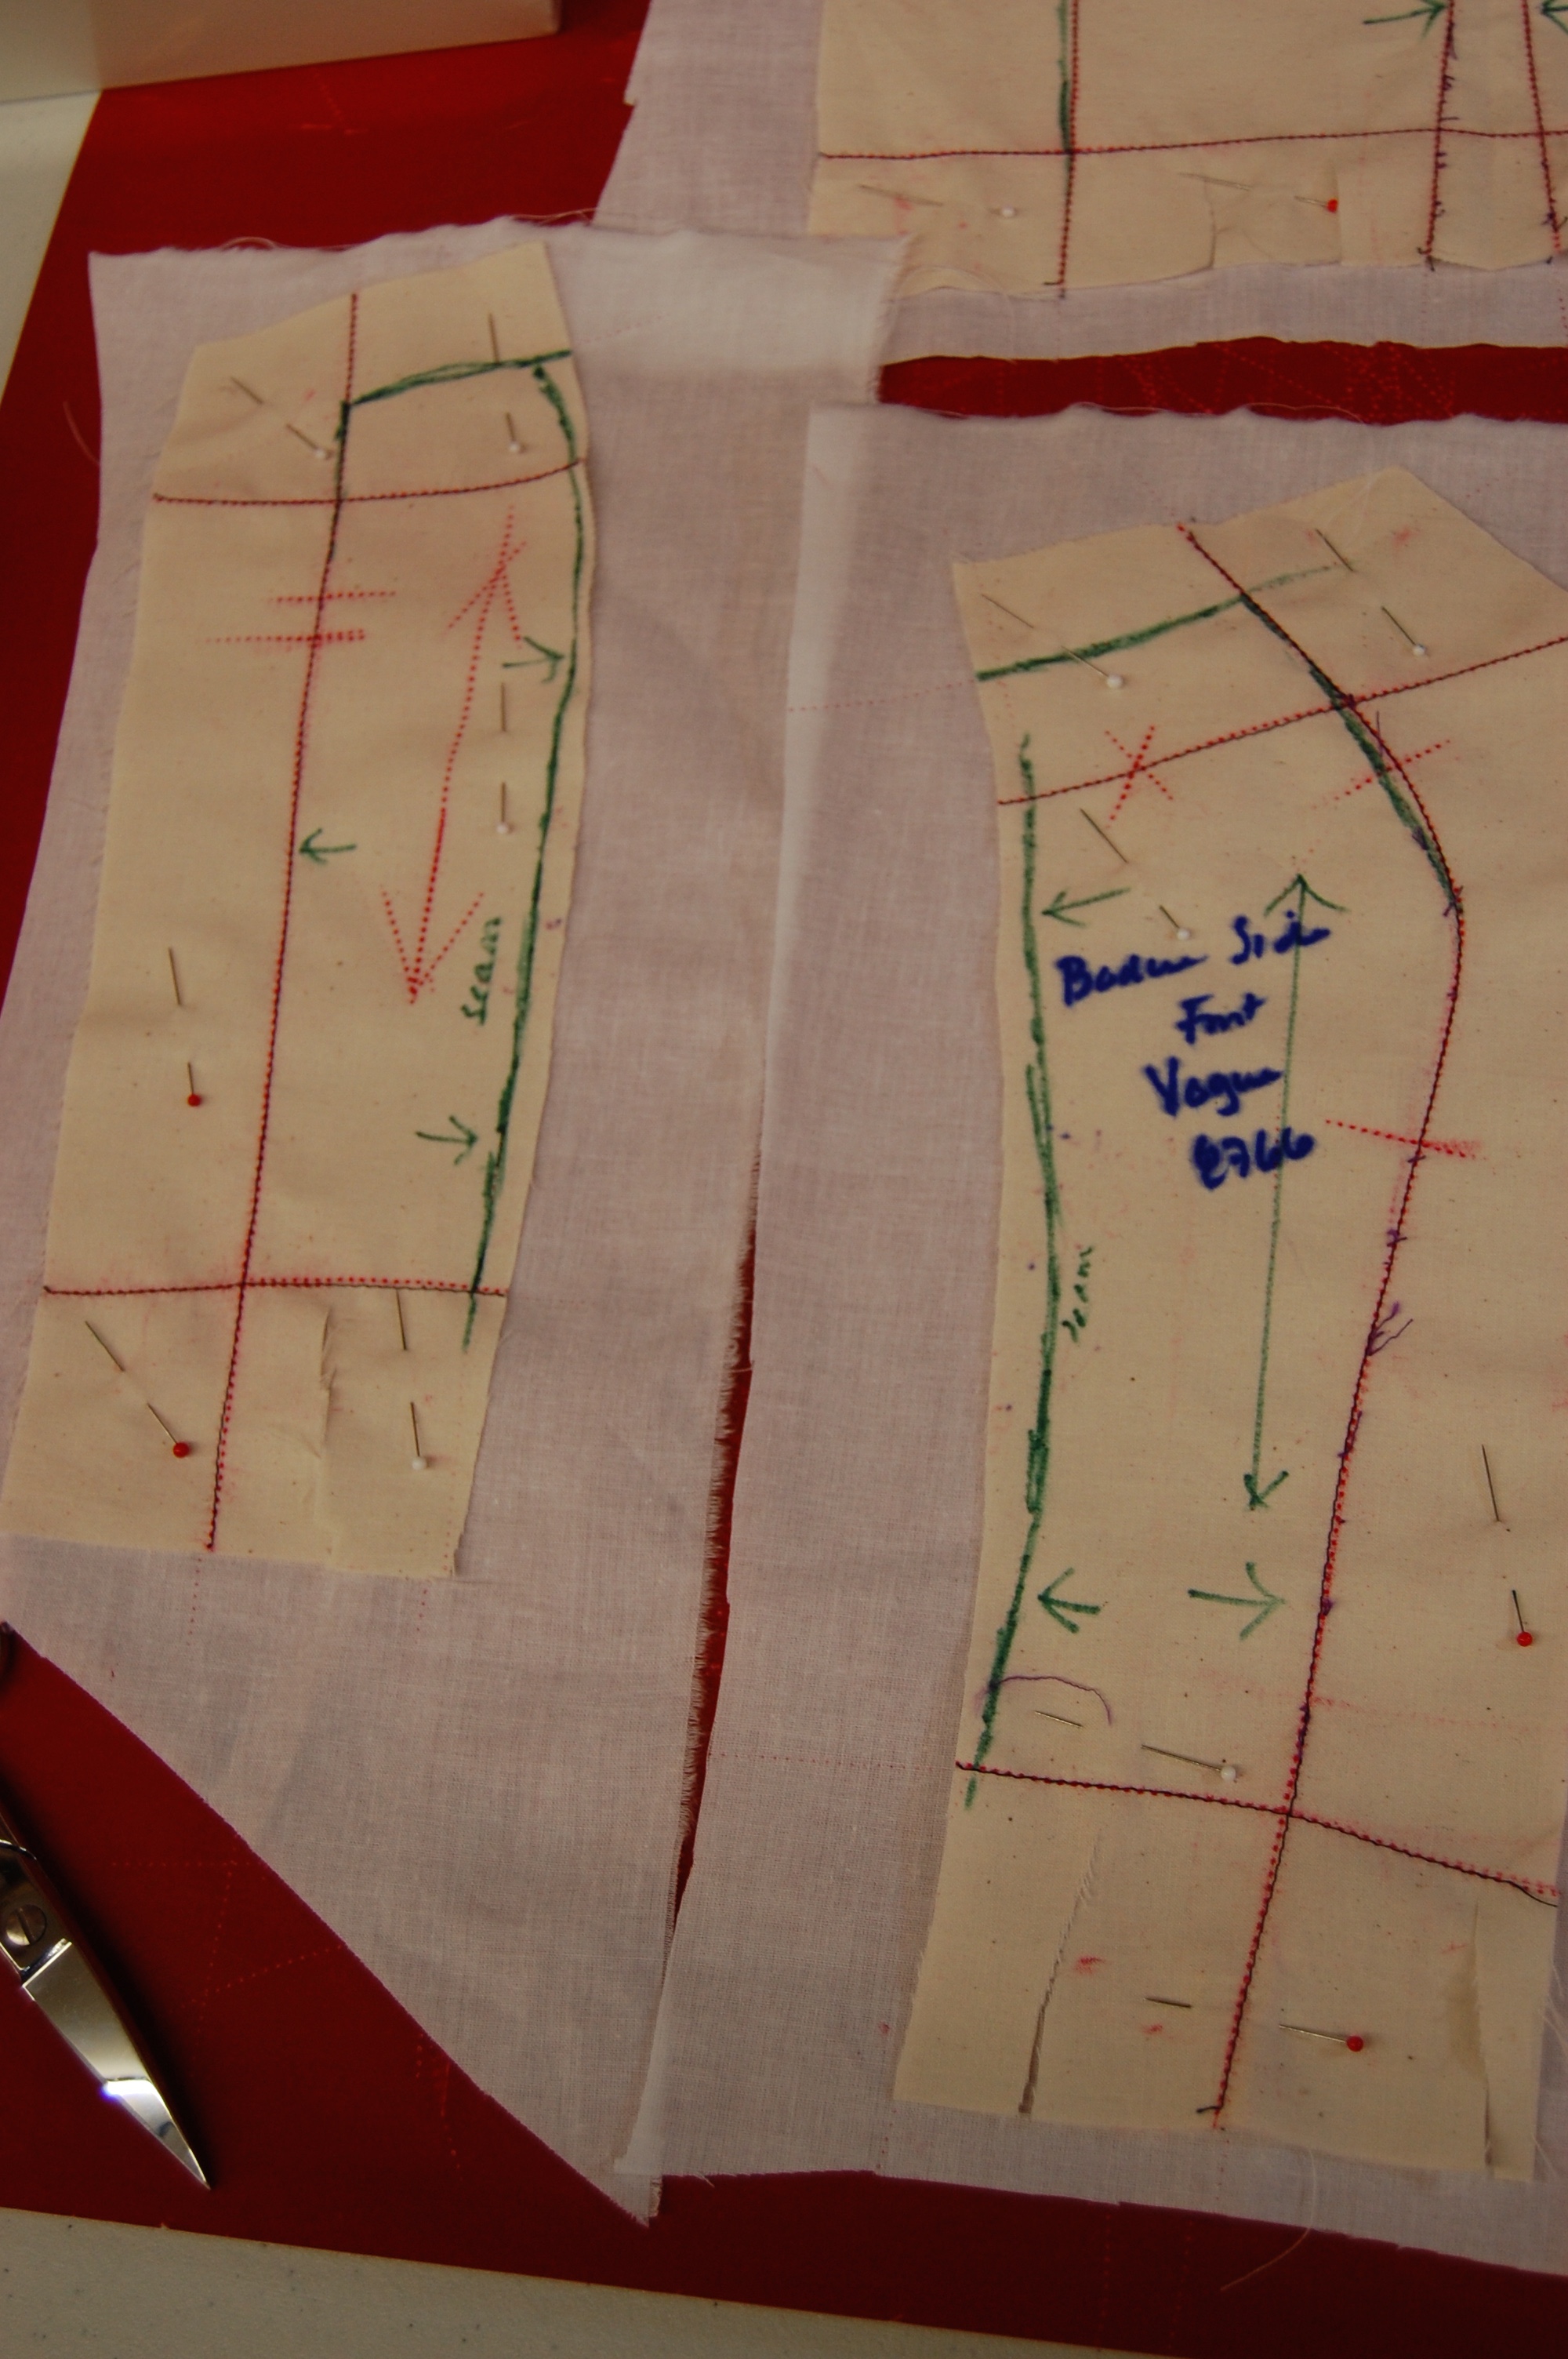
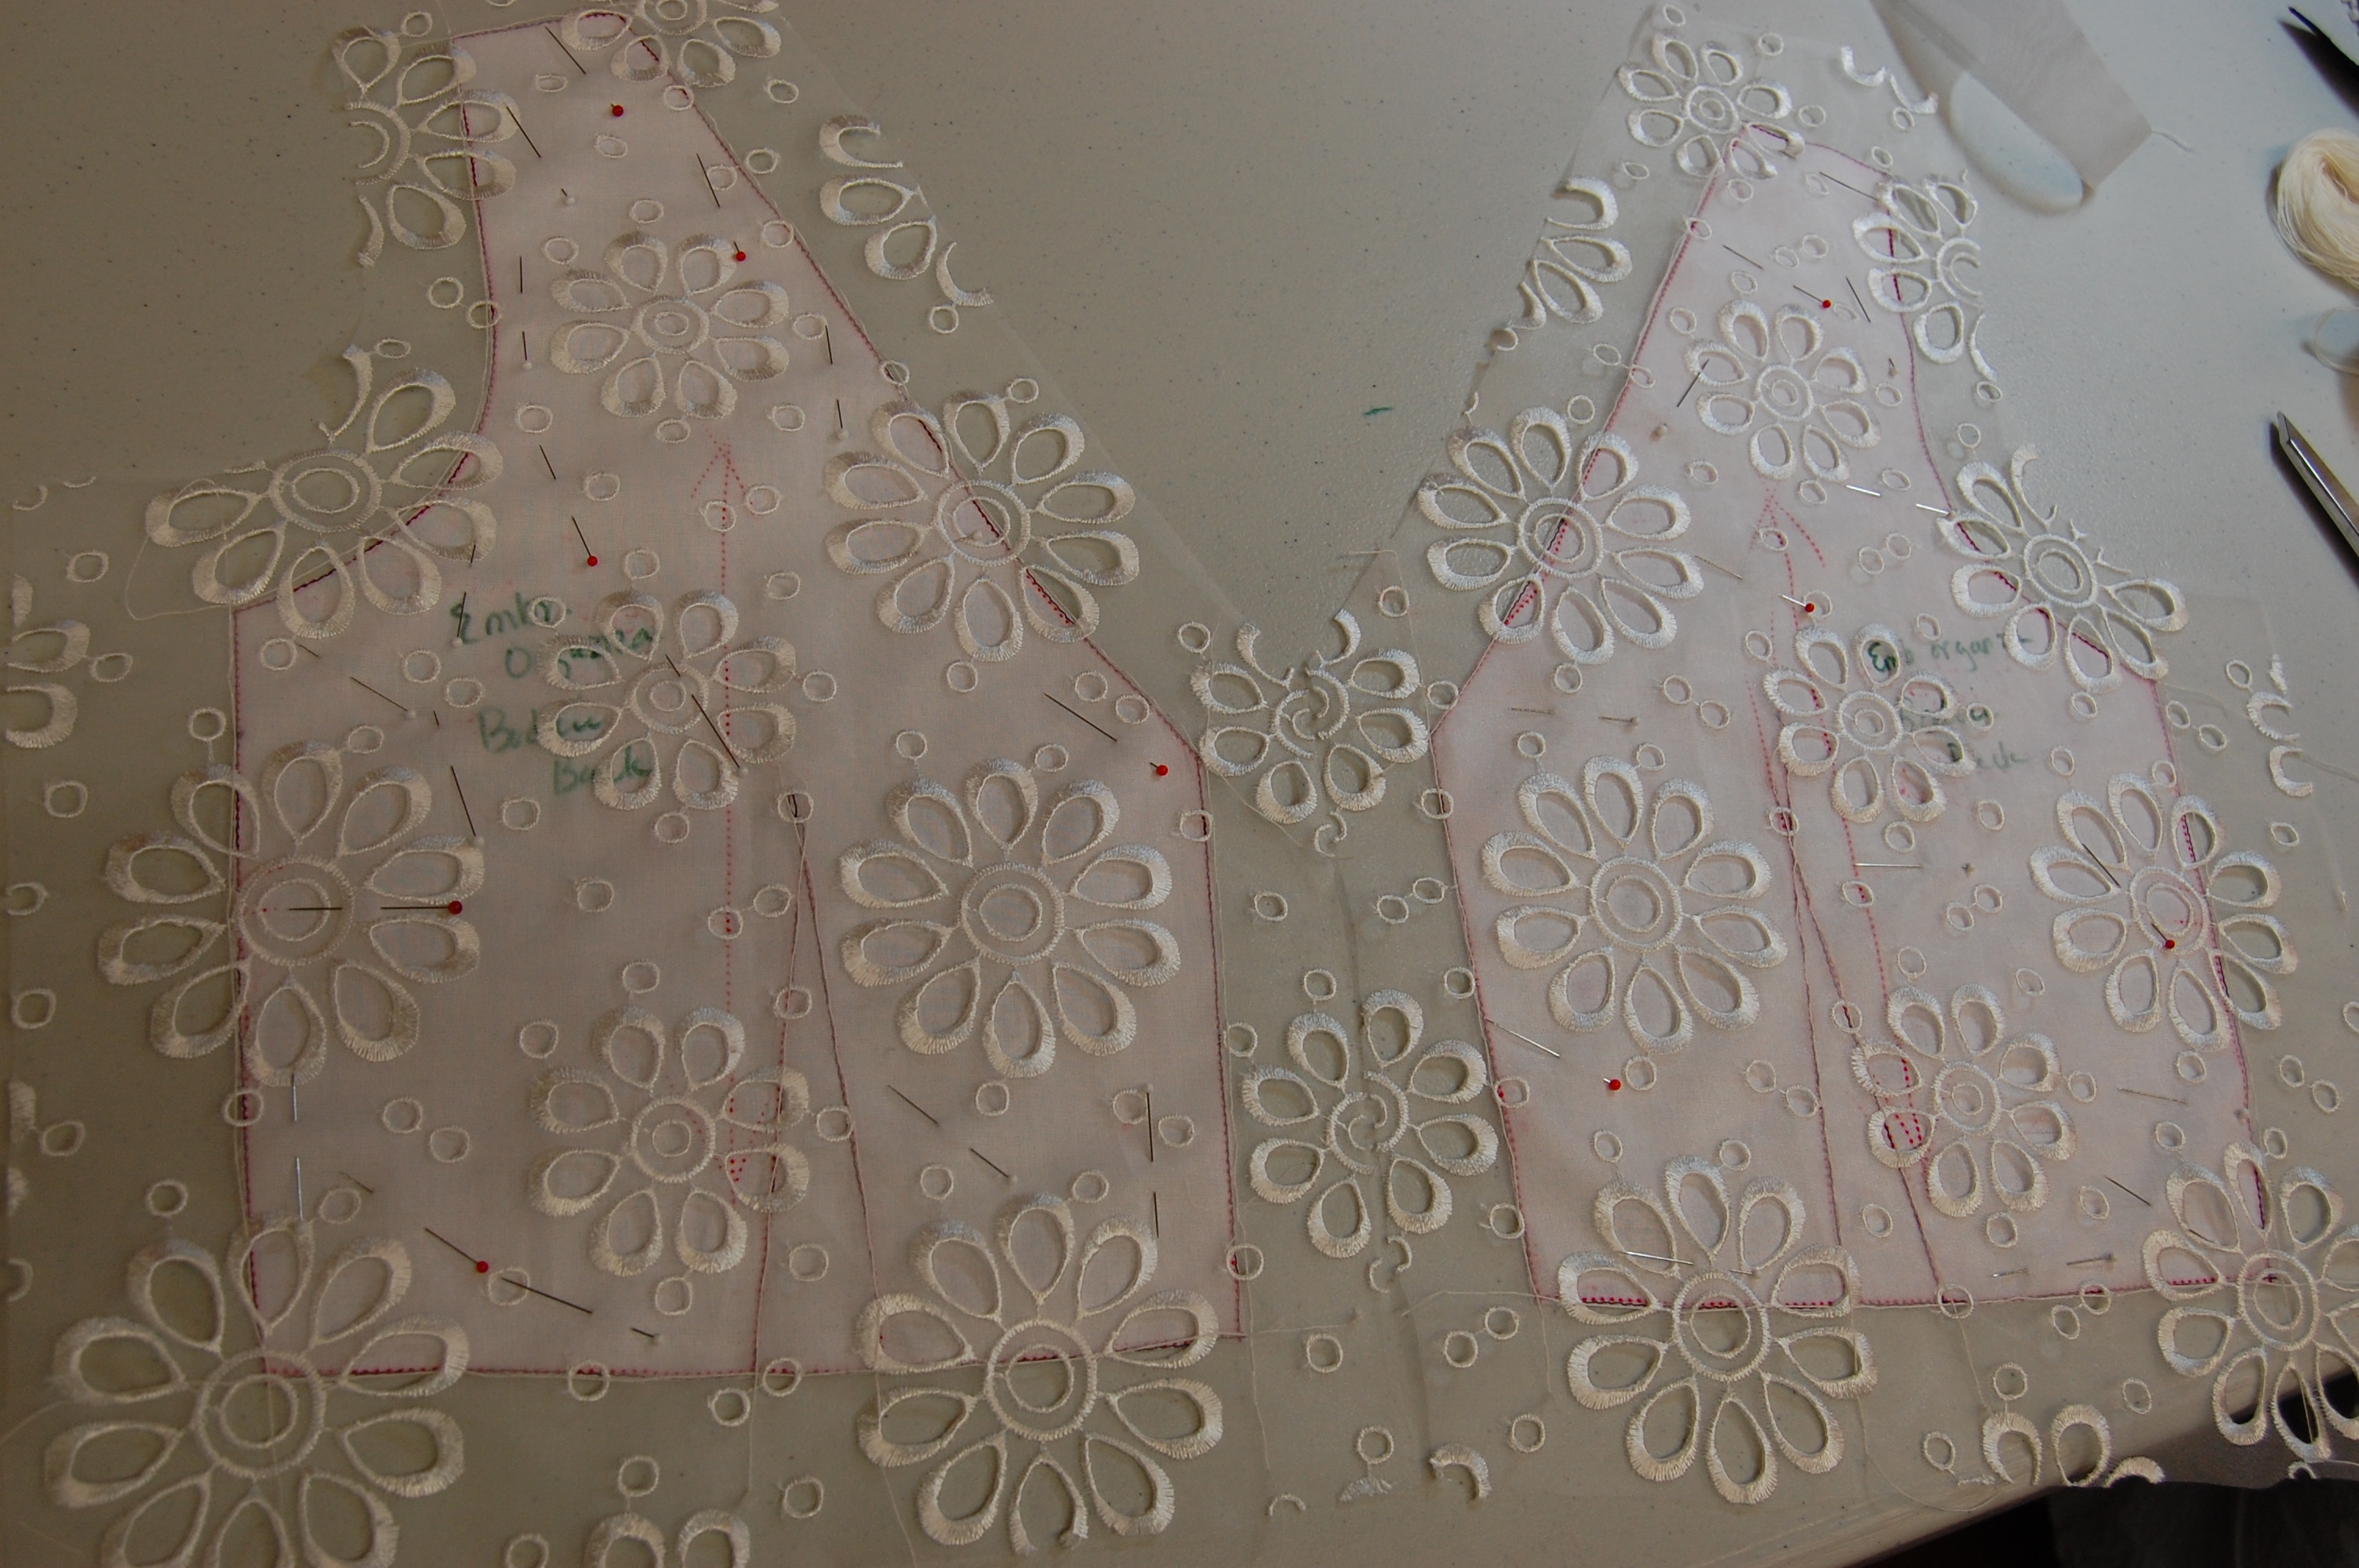
The pattern for the strapless under bodice consisted of a front panel, two side princess panels, and two back panels. However, Susan divided each side princess panel into two pieces, giving me 7 bodice pieces rather than 5.
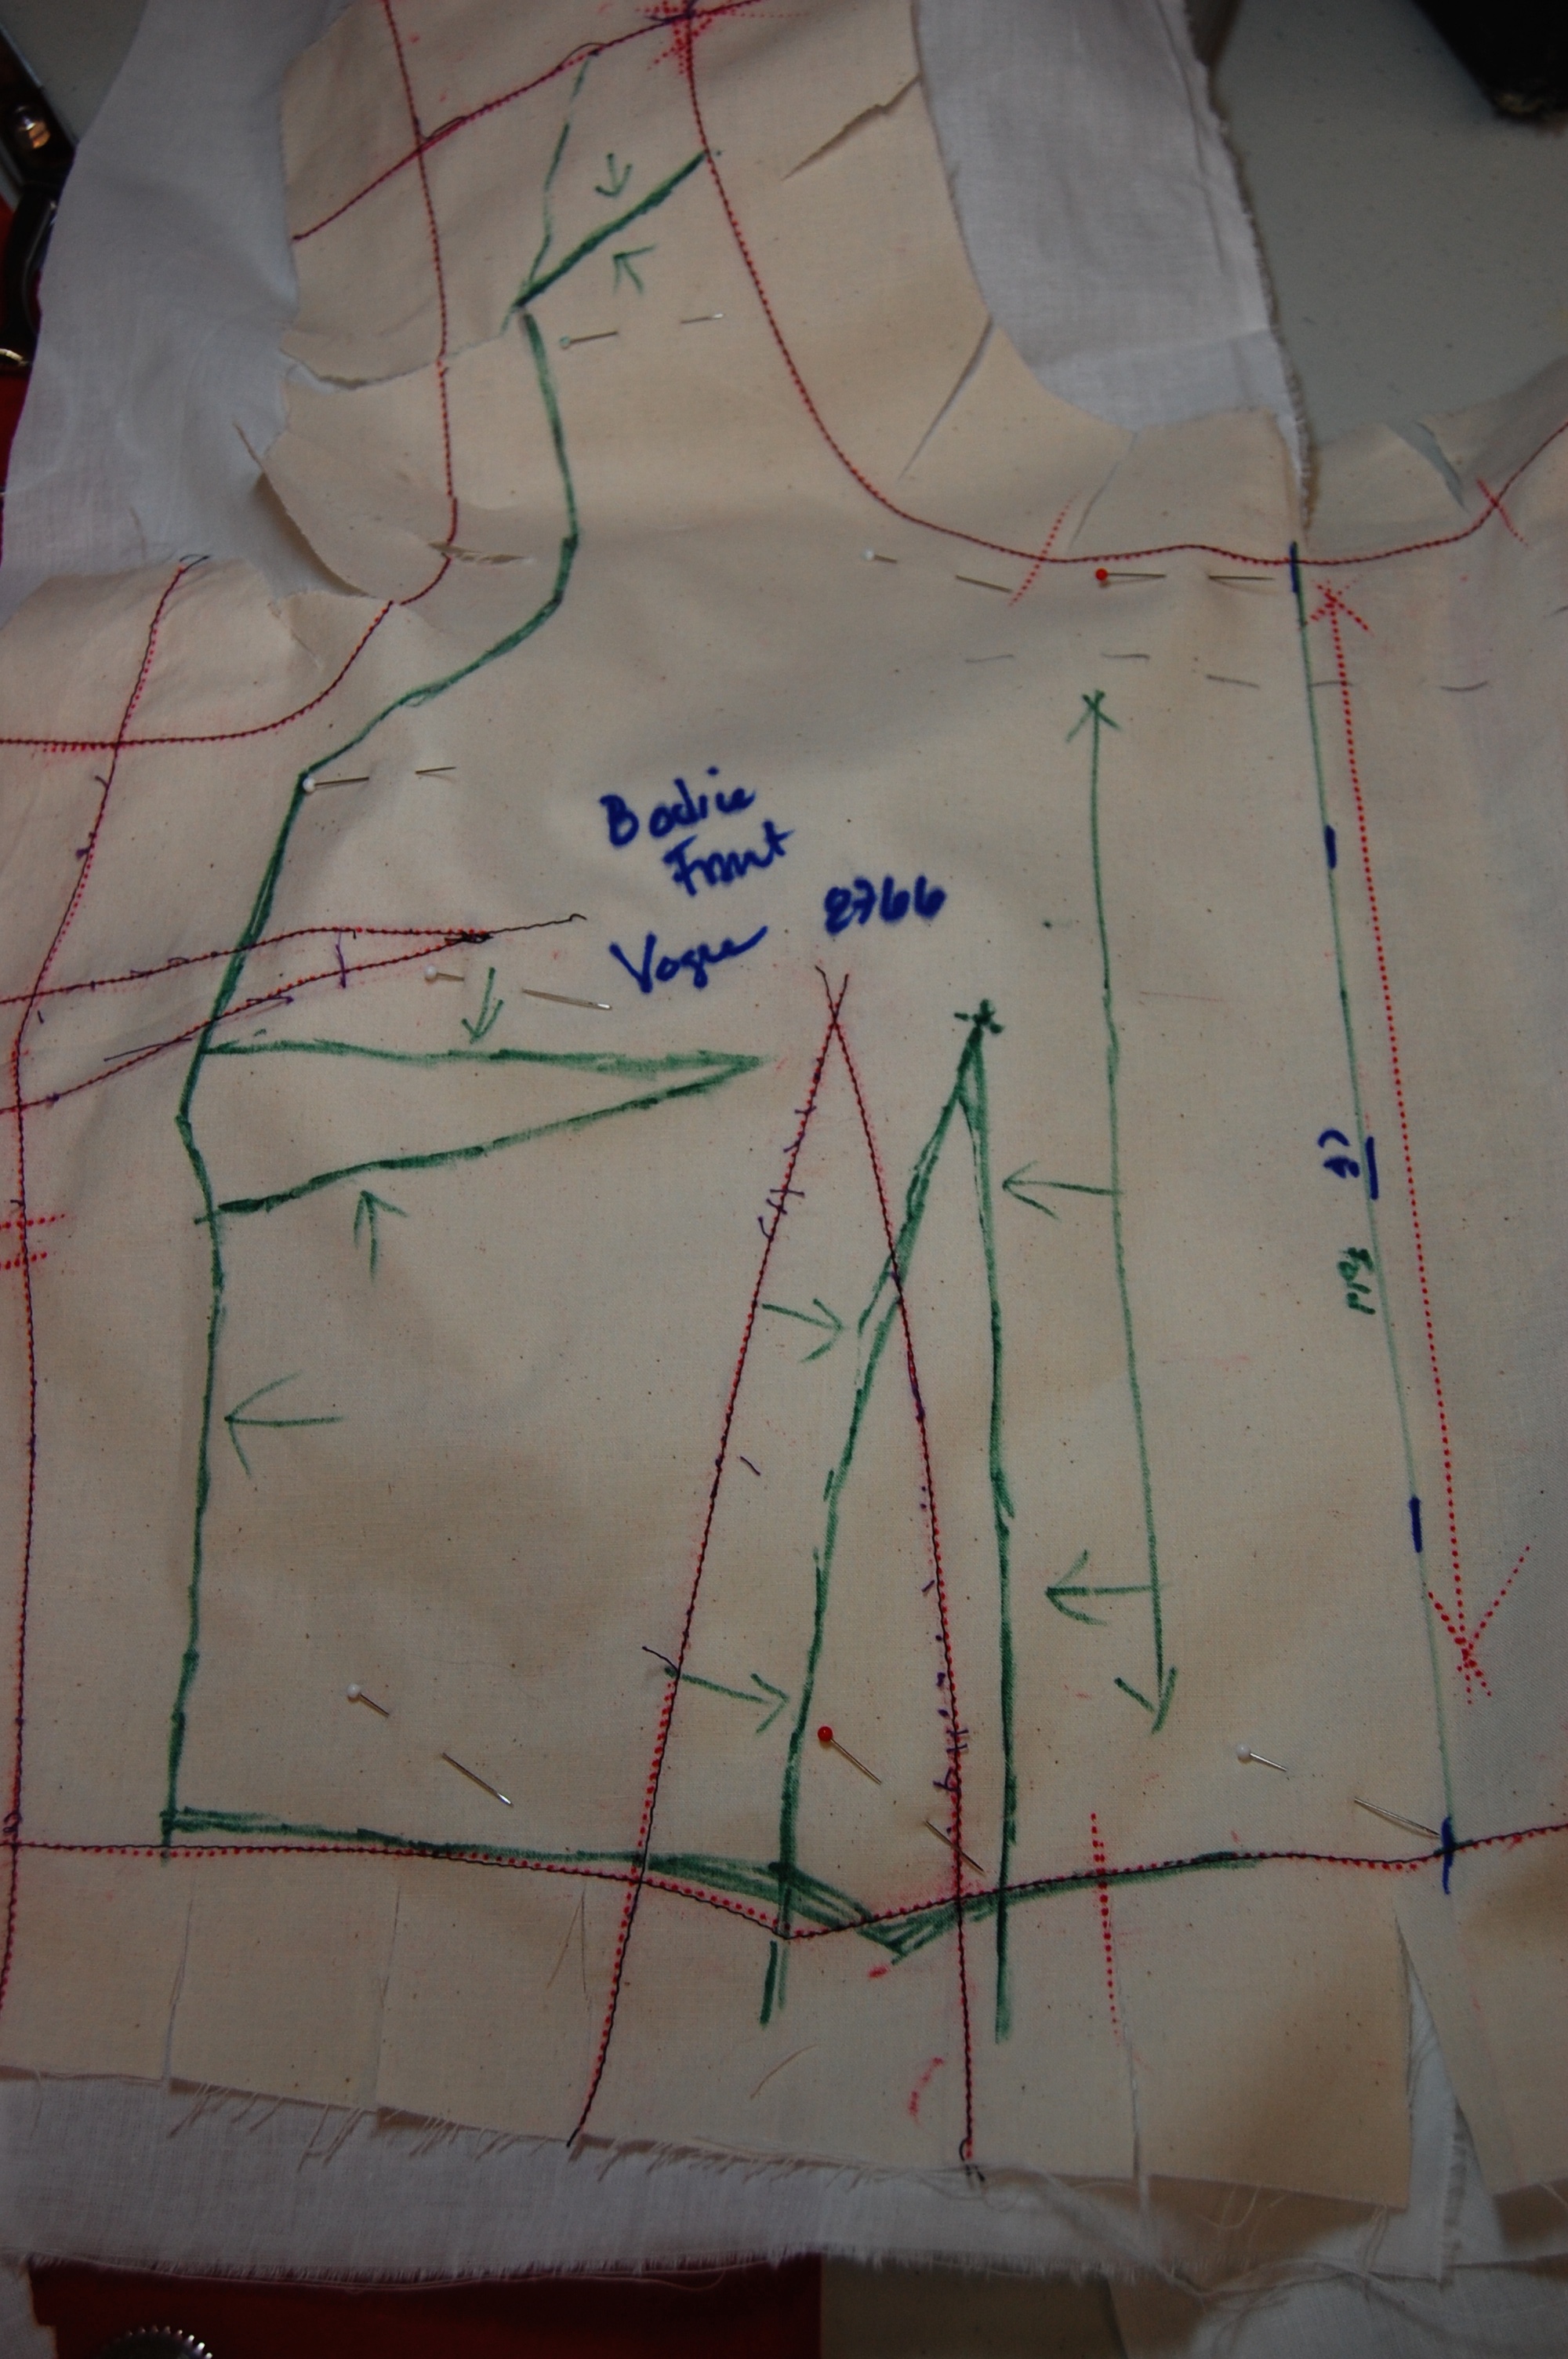
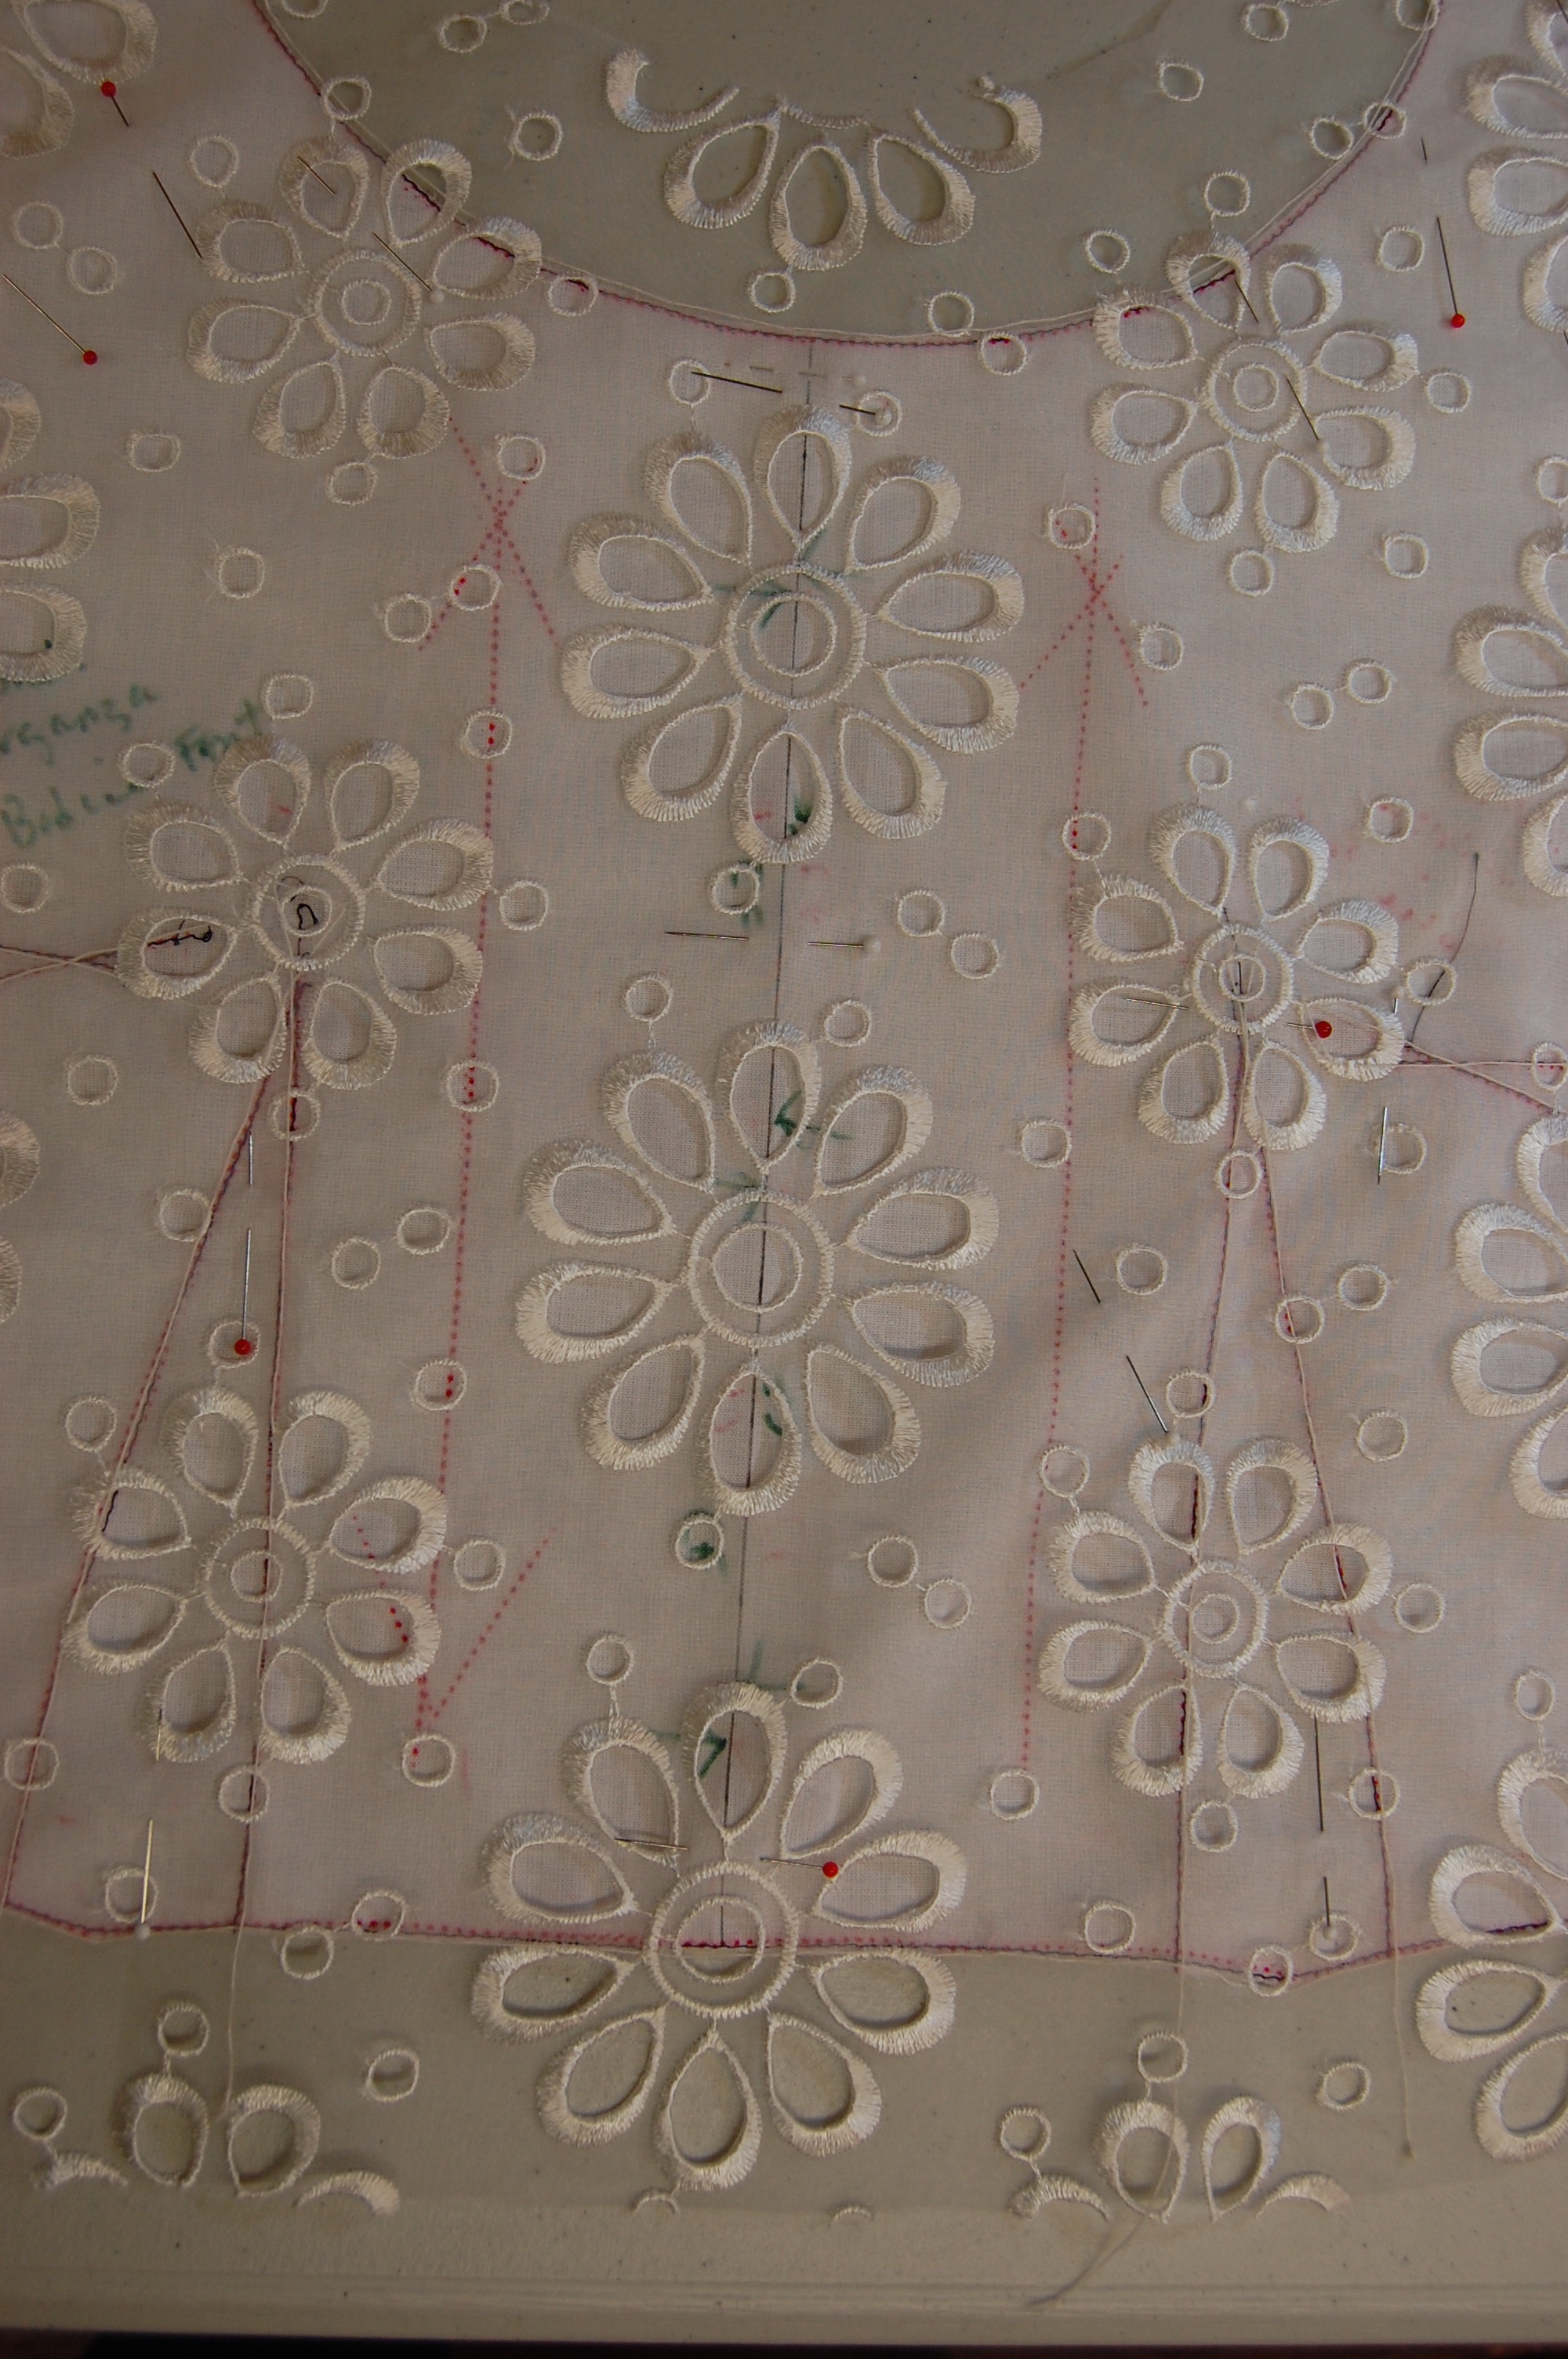
The pattern for the over bodice needed major adjustments. Here is the front . . .
. . . and here is the back. I made the back into a V-shape, which was a minor adjustment to the pattern I was using.
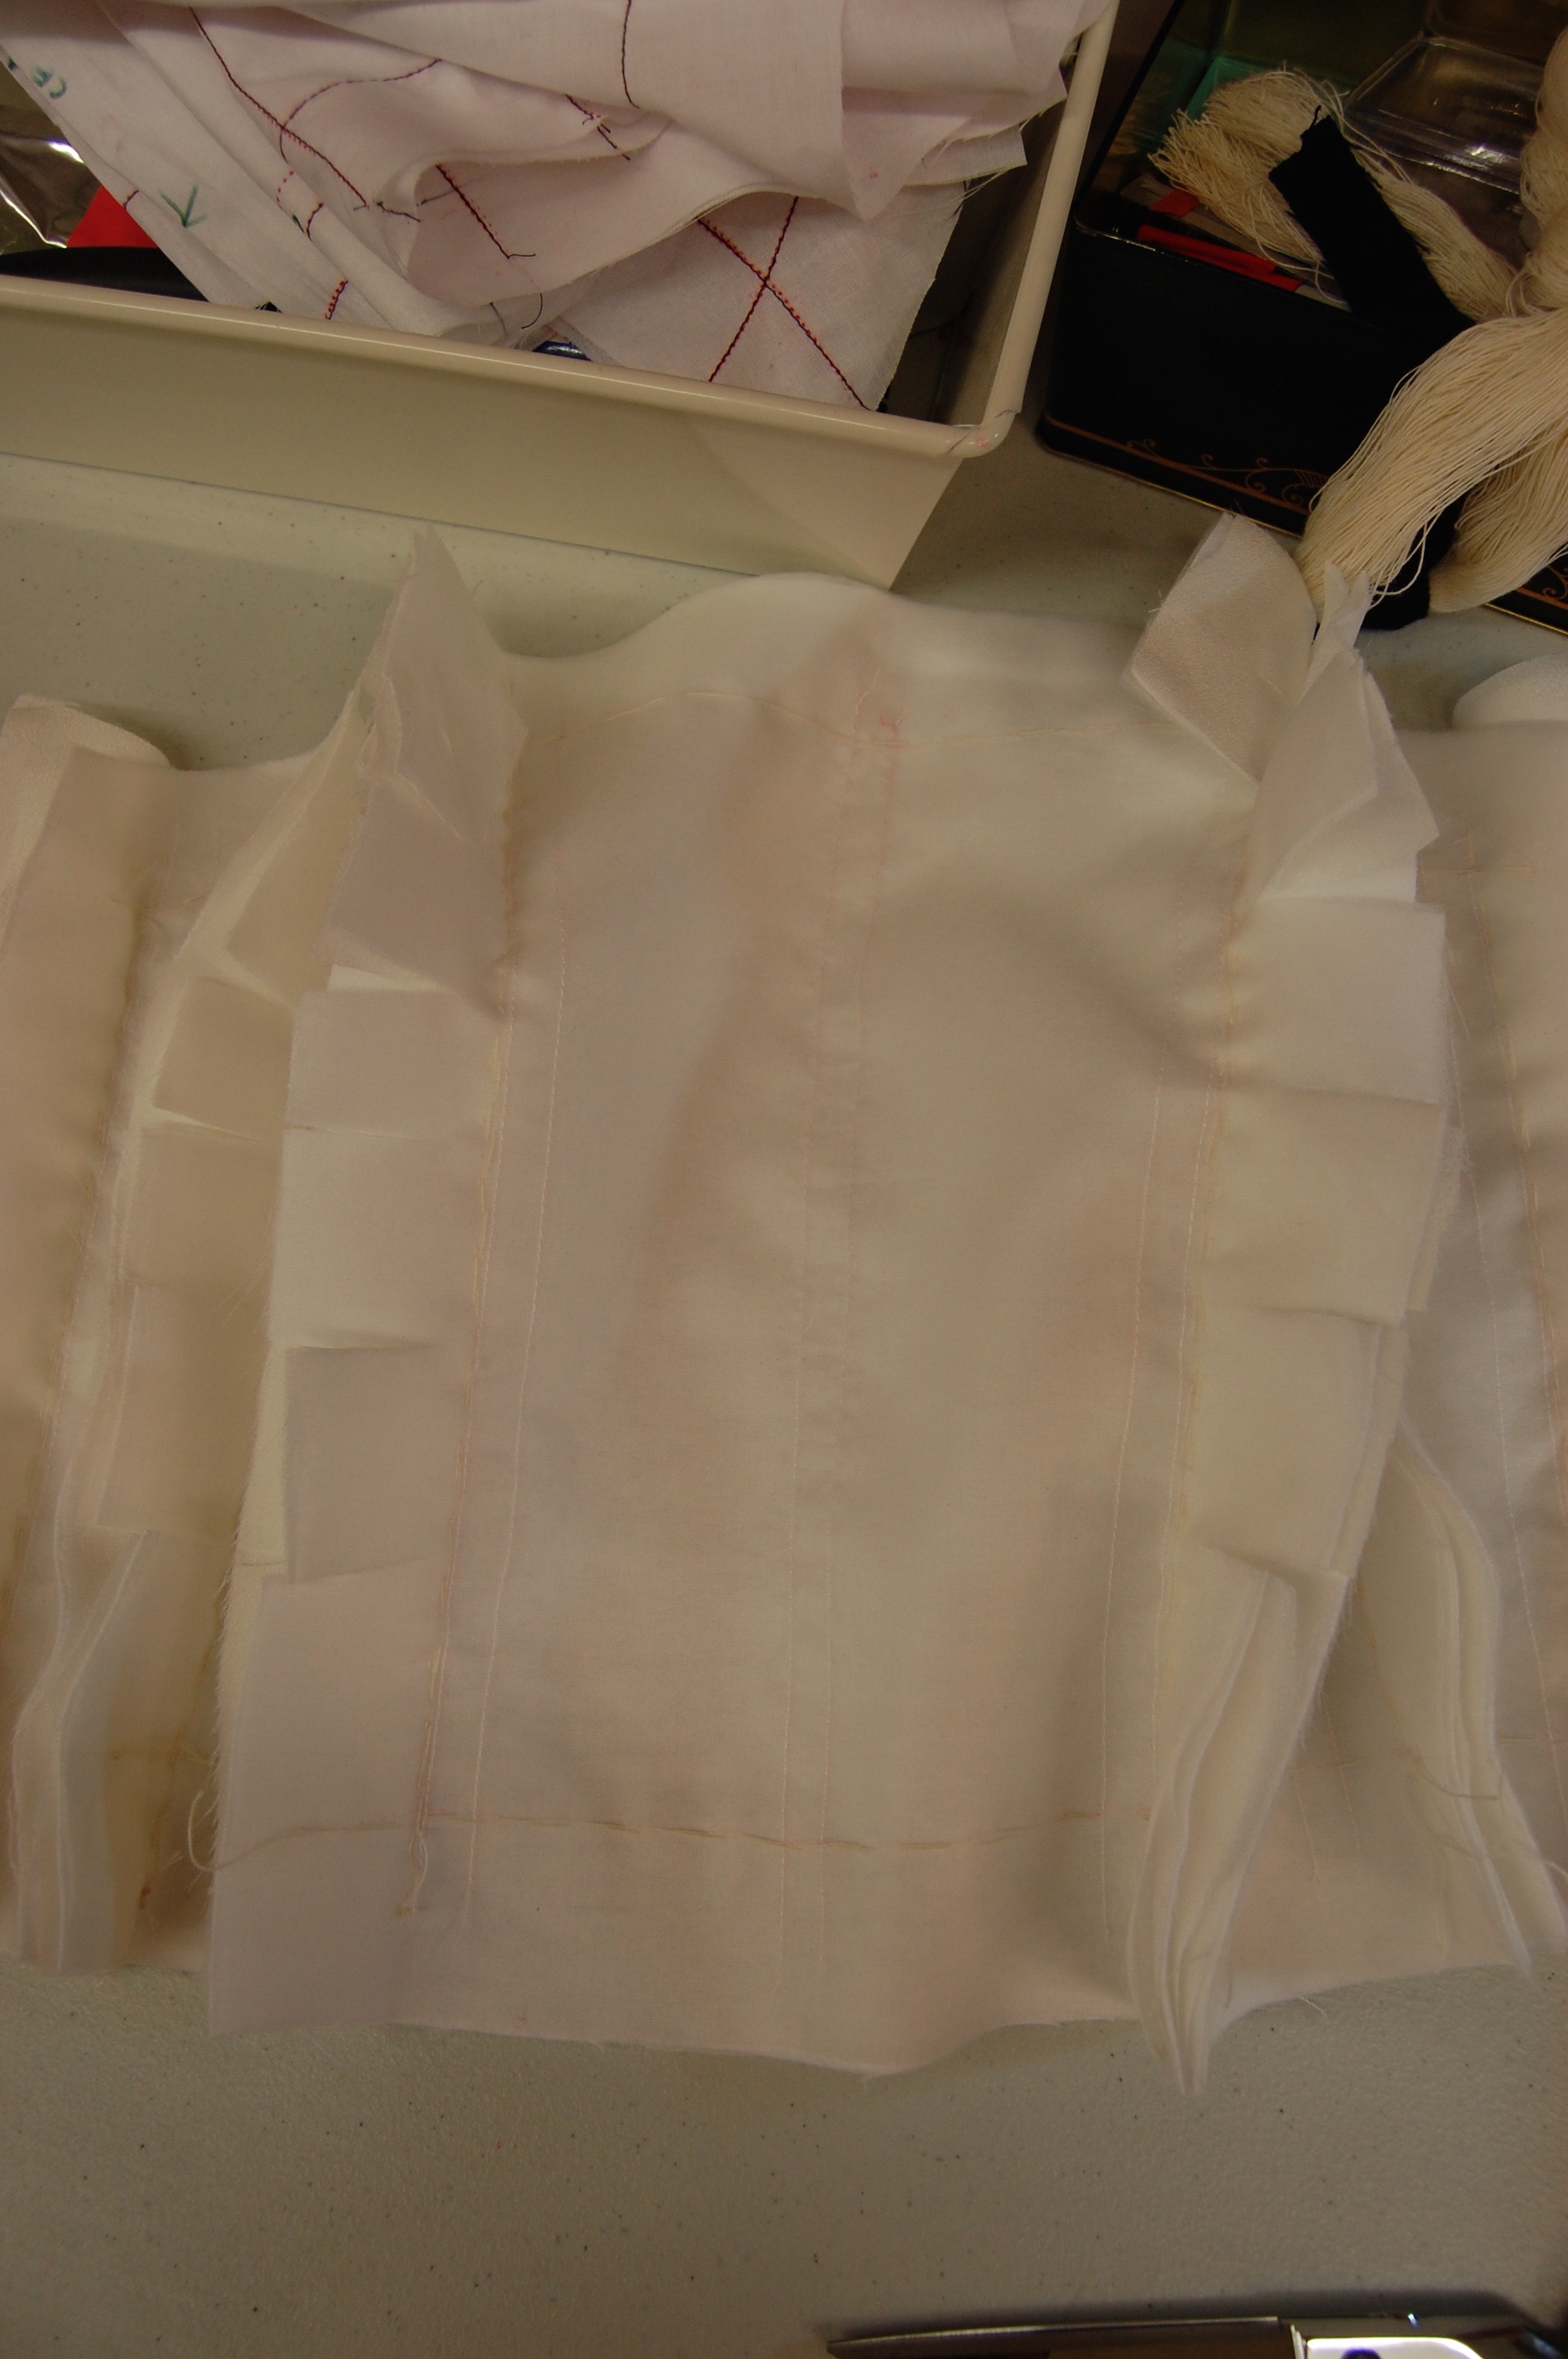
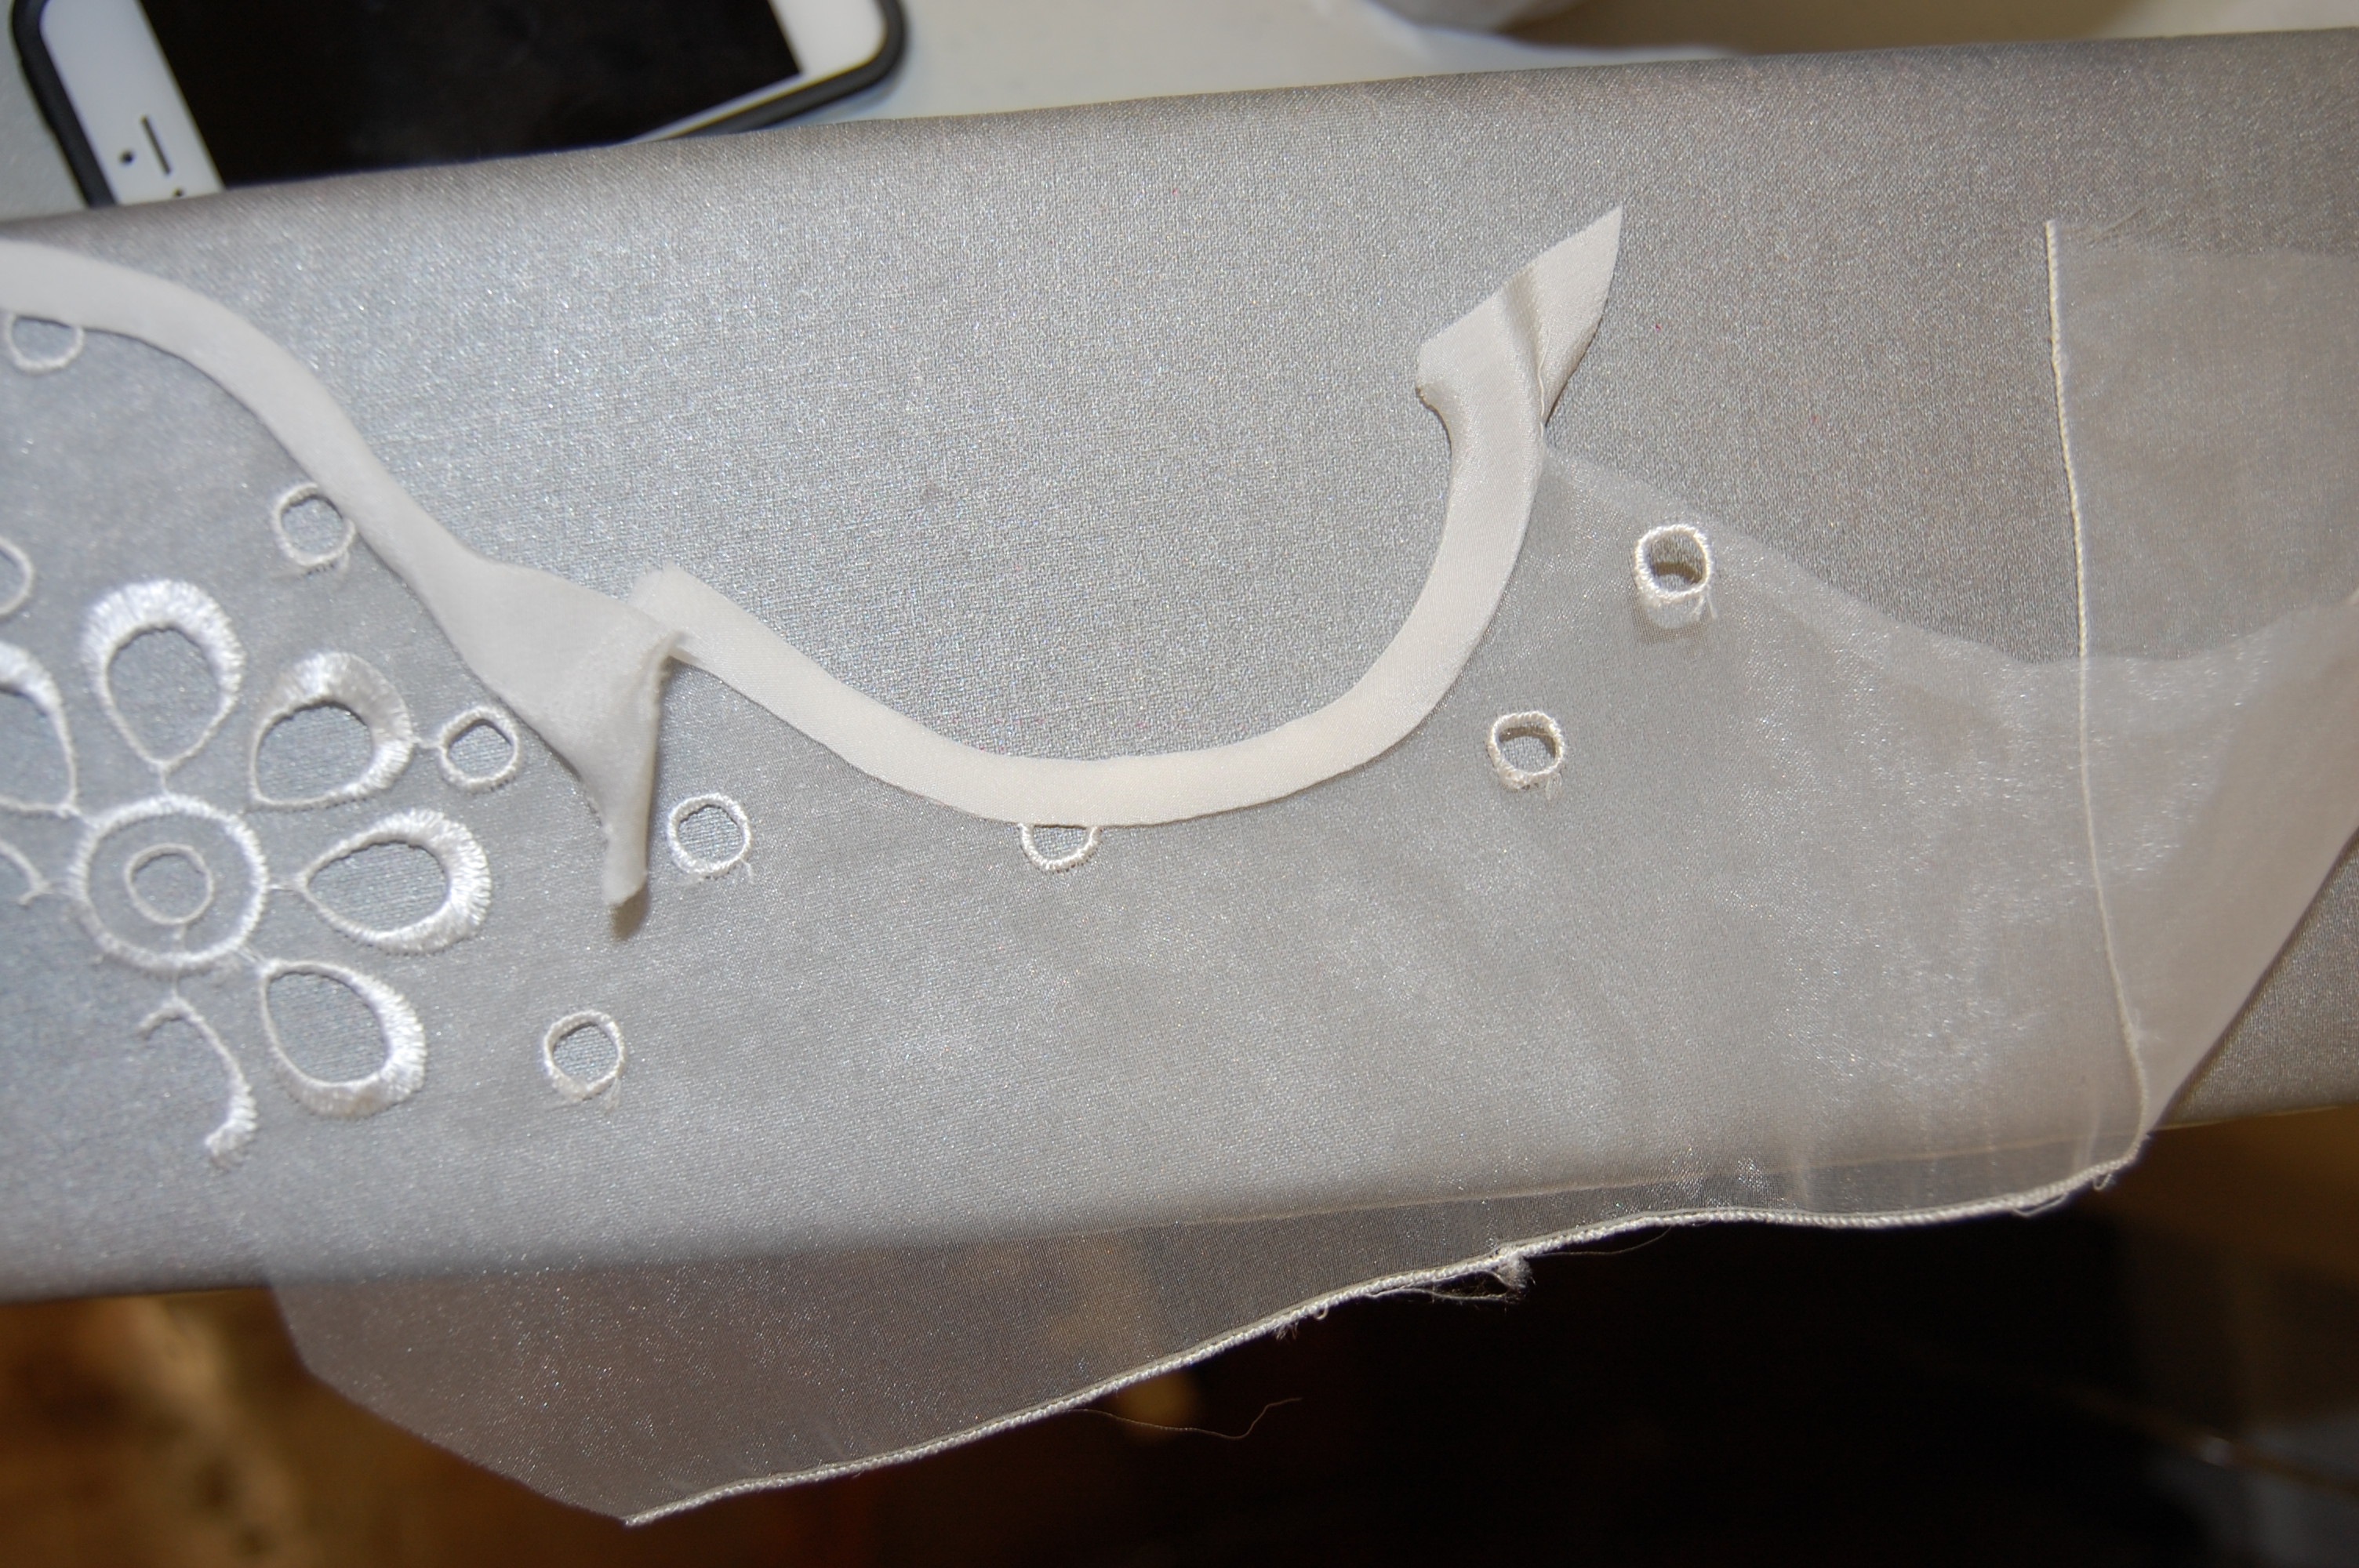
One of the reasons I wanted to start this dress under Susan’s tutelage was for the opportunity to learn how to add boning to a structured bodice. I knew the fashion fabric for the strapless underbodice would be white silk crepe de chine. What I did not know is that the channels for the boning would be cleverly made out of two pieces of silk organza, with parallel stitching strategically placed every couple of inches – making the perfect slots for the pieces of boning.

Lots of seams!
Click on the photo to see the channels for the boning.
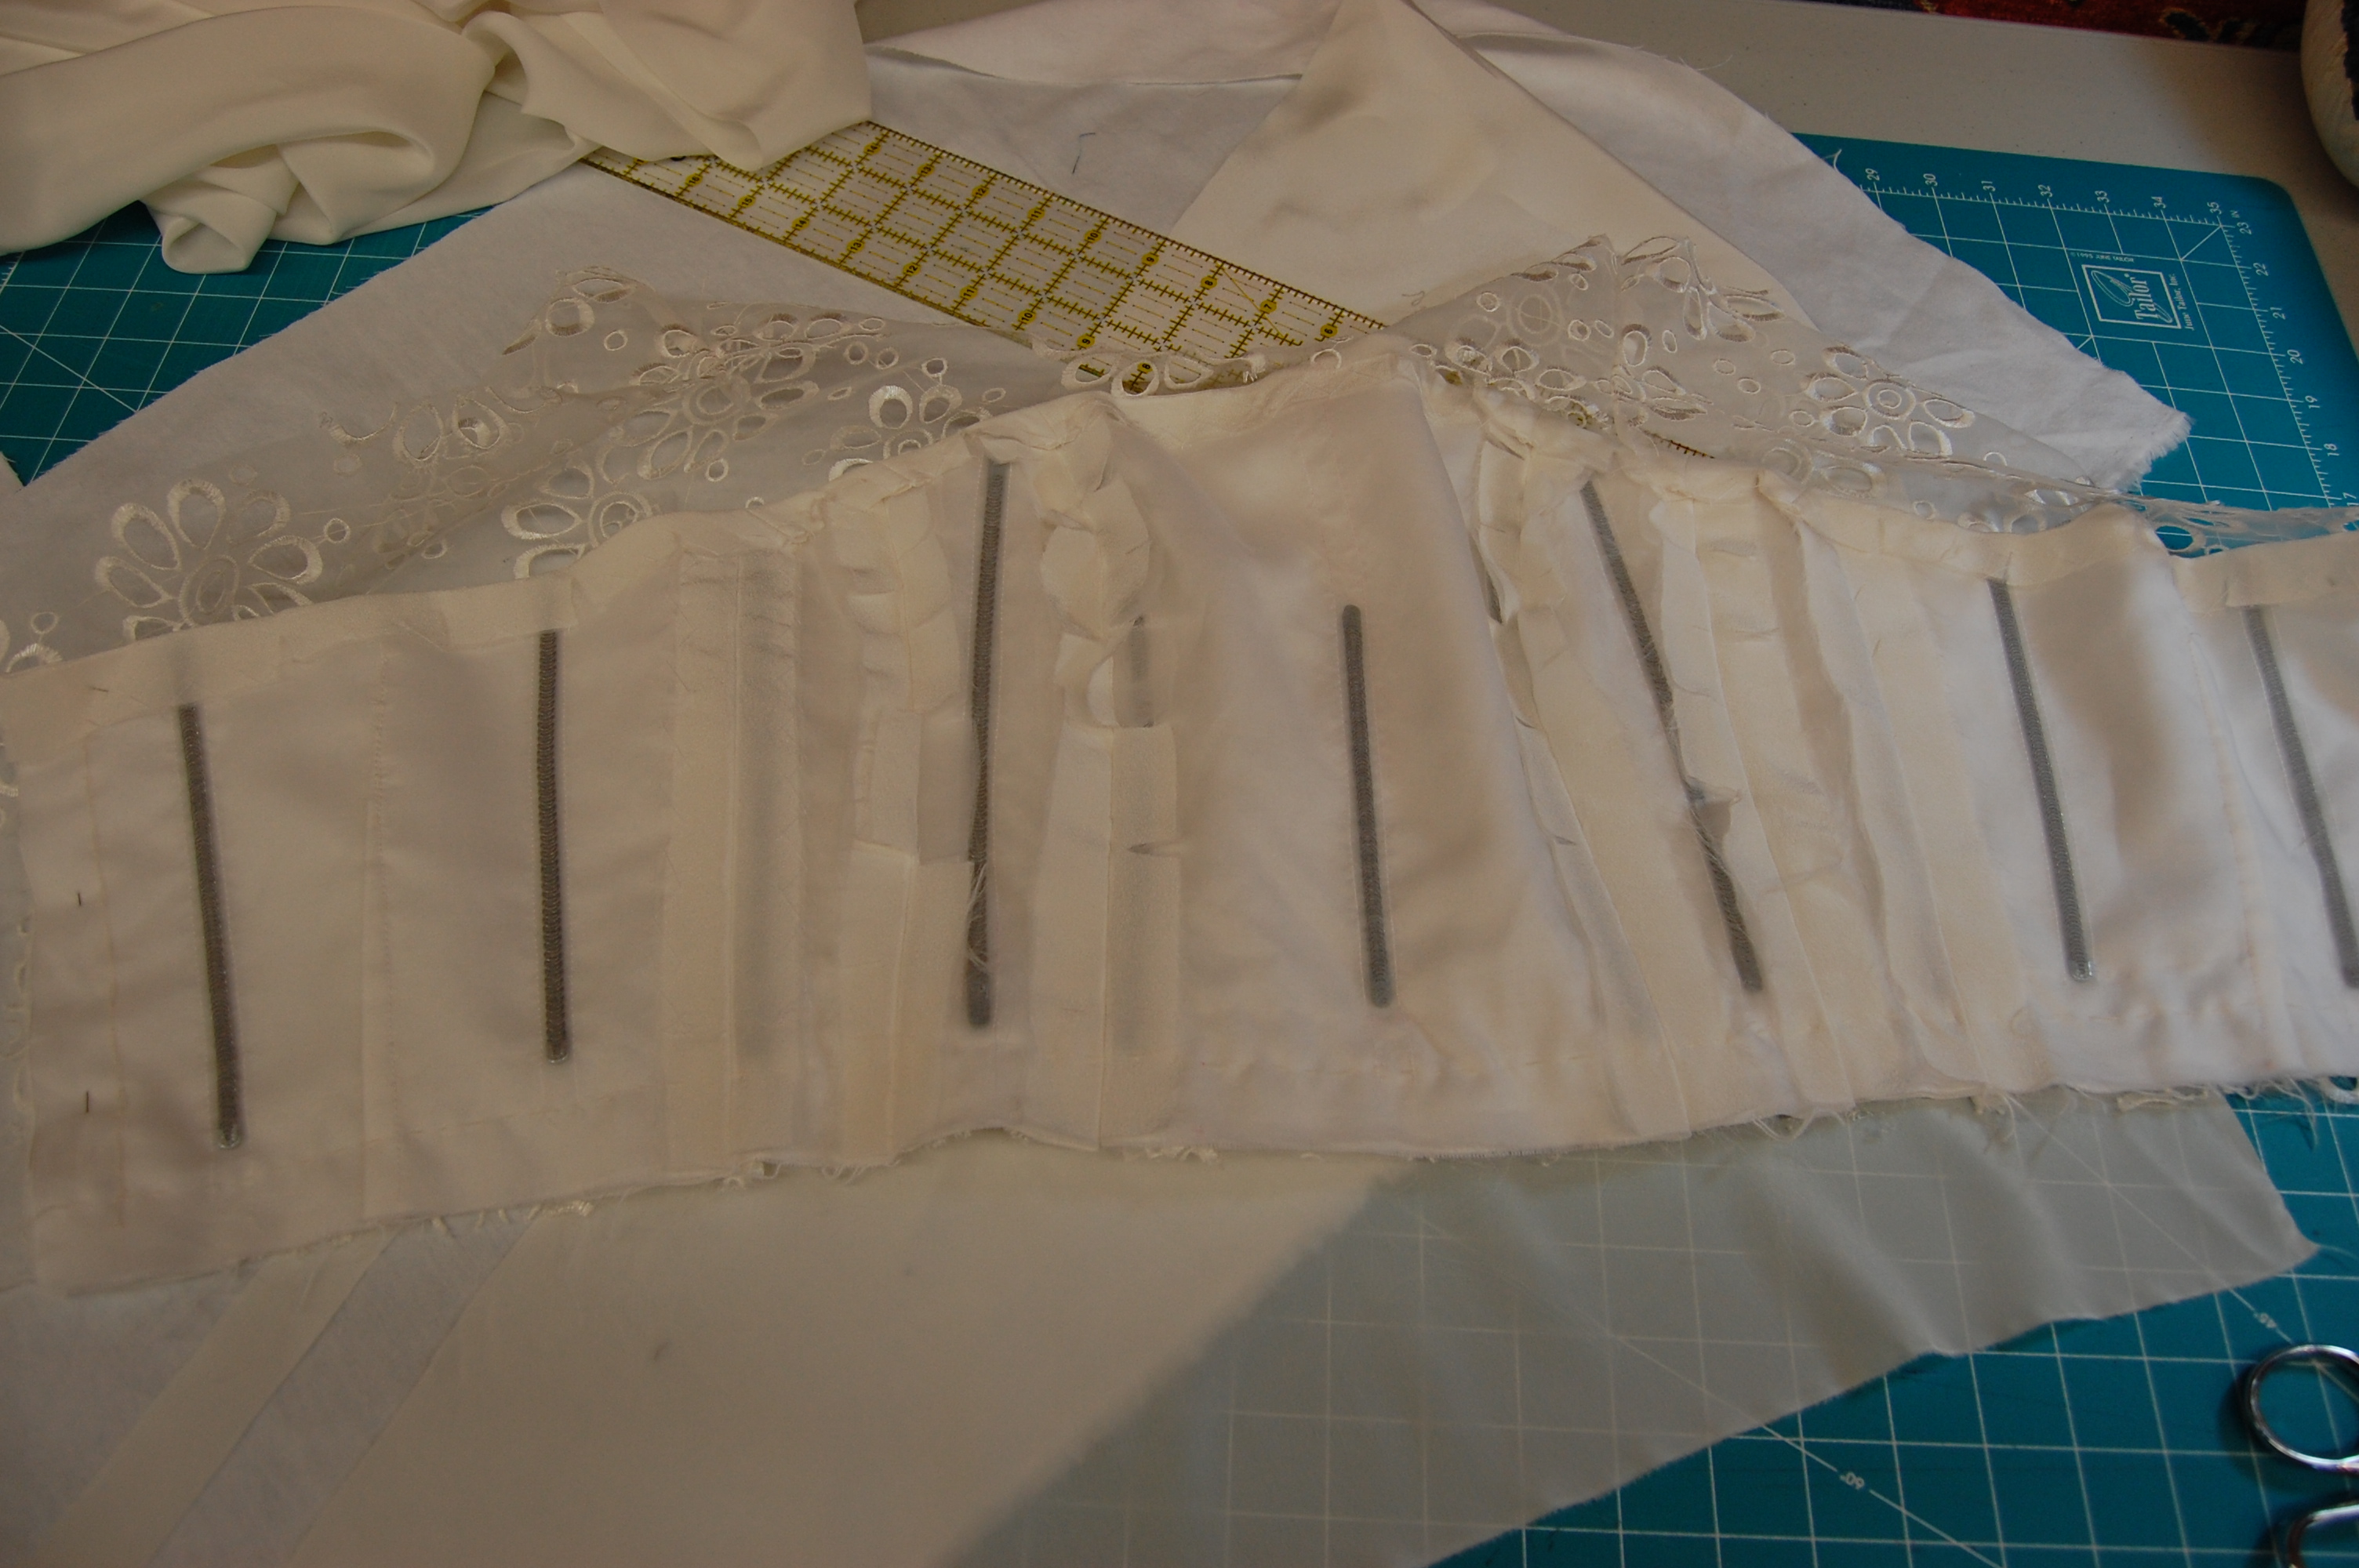
With the boning inserted.
Then the shocker came: in order to keep the boning from showing through to the right side, I needed to add another layer of … something. When Susan suggested white flannel – flannel! – I was skeptical, but trusting (I think!). I kept thinking of the bulk that flannel was going to add to this very fitted underbodice, but Susan assured me it would work. She consoled me by telling me that we would be able to cut away the seam allowances of the flannel, reducing much of the added bulk. But the real surprise was the wonderful softness the flannel added to the finished underbodice. The flannel not only camouflages the boning on the right side, it also adds an amazing smoothness to the appearance of the underbodice.
Once the underbodice was complete, I set about to start the embroidered silk organza overbodice. We played around with the placement of the motifs, making sure that two big “daisies” would not be right on top of the bust.
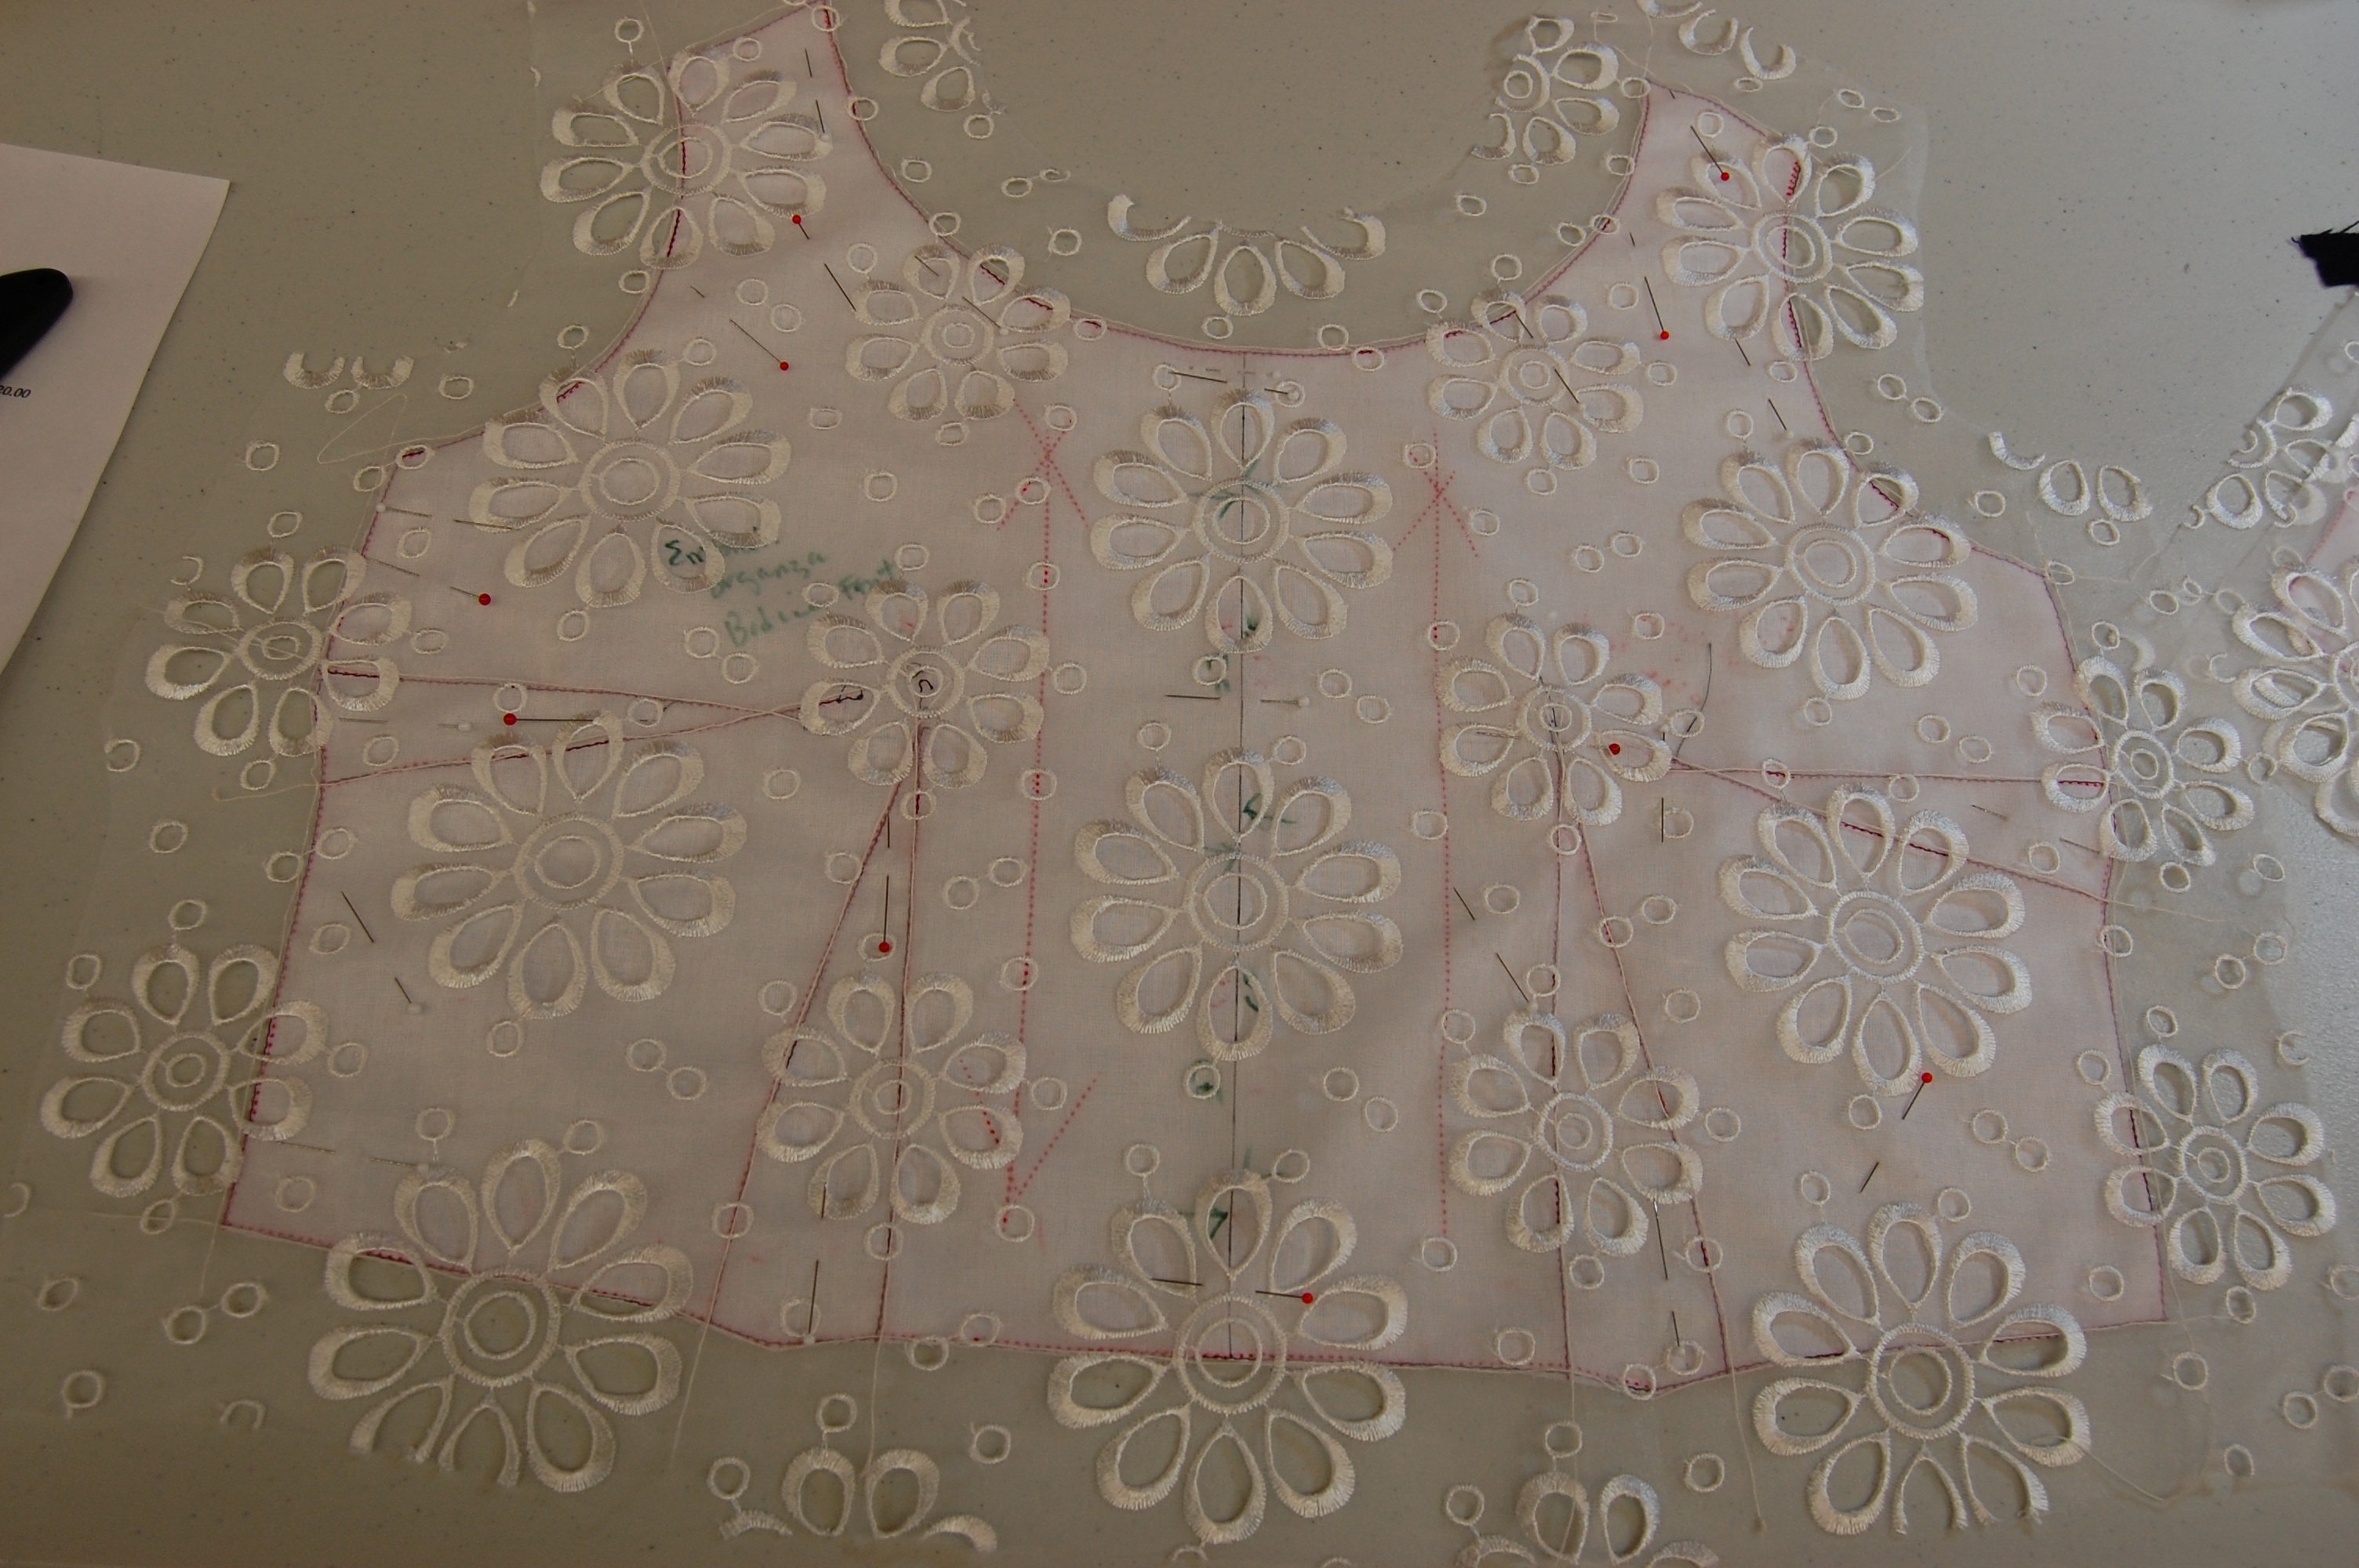
Small daisies close to the bust seemed to be okay.
The back of the over bodice

And I wanted to see what the embroidered silk organza would look like over the strapless under bodice. So pretty!
Interior seams were finished by hand, and darts were left as is, with no additional finishing. The neck and armhole edges were another story, as they would need to be bound in bias-cut crepe de chine. I found this very tedious and time-consuming and appreciated Susan’s suggestions and tips to help make these delicate finished edges as even as possible. First I practiced, then I sewed, then I took out stitches and started over again, carefully clipping away noticeable bulk from the embroidery in that narrow edge.
Practice!
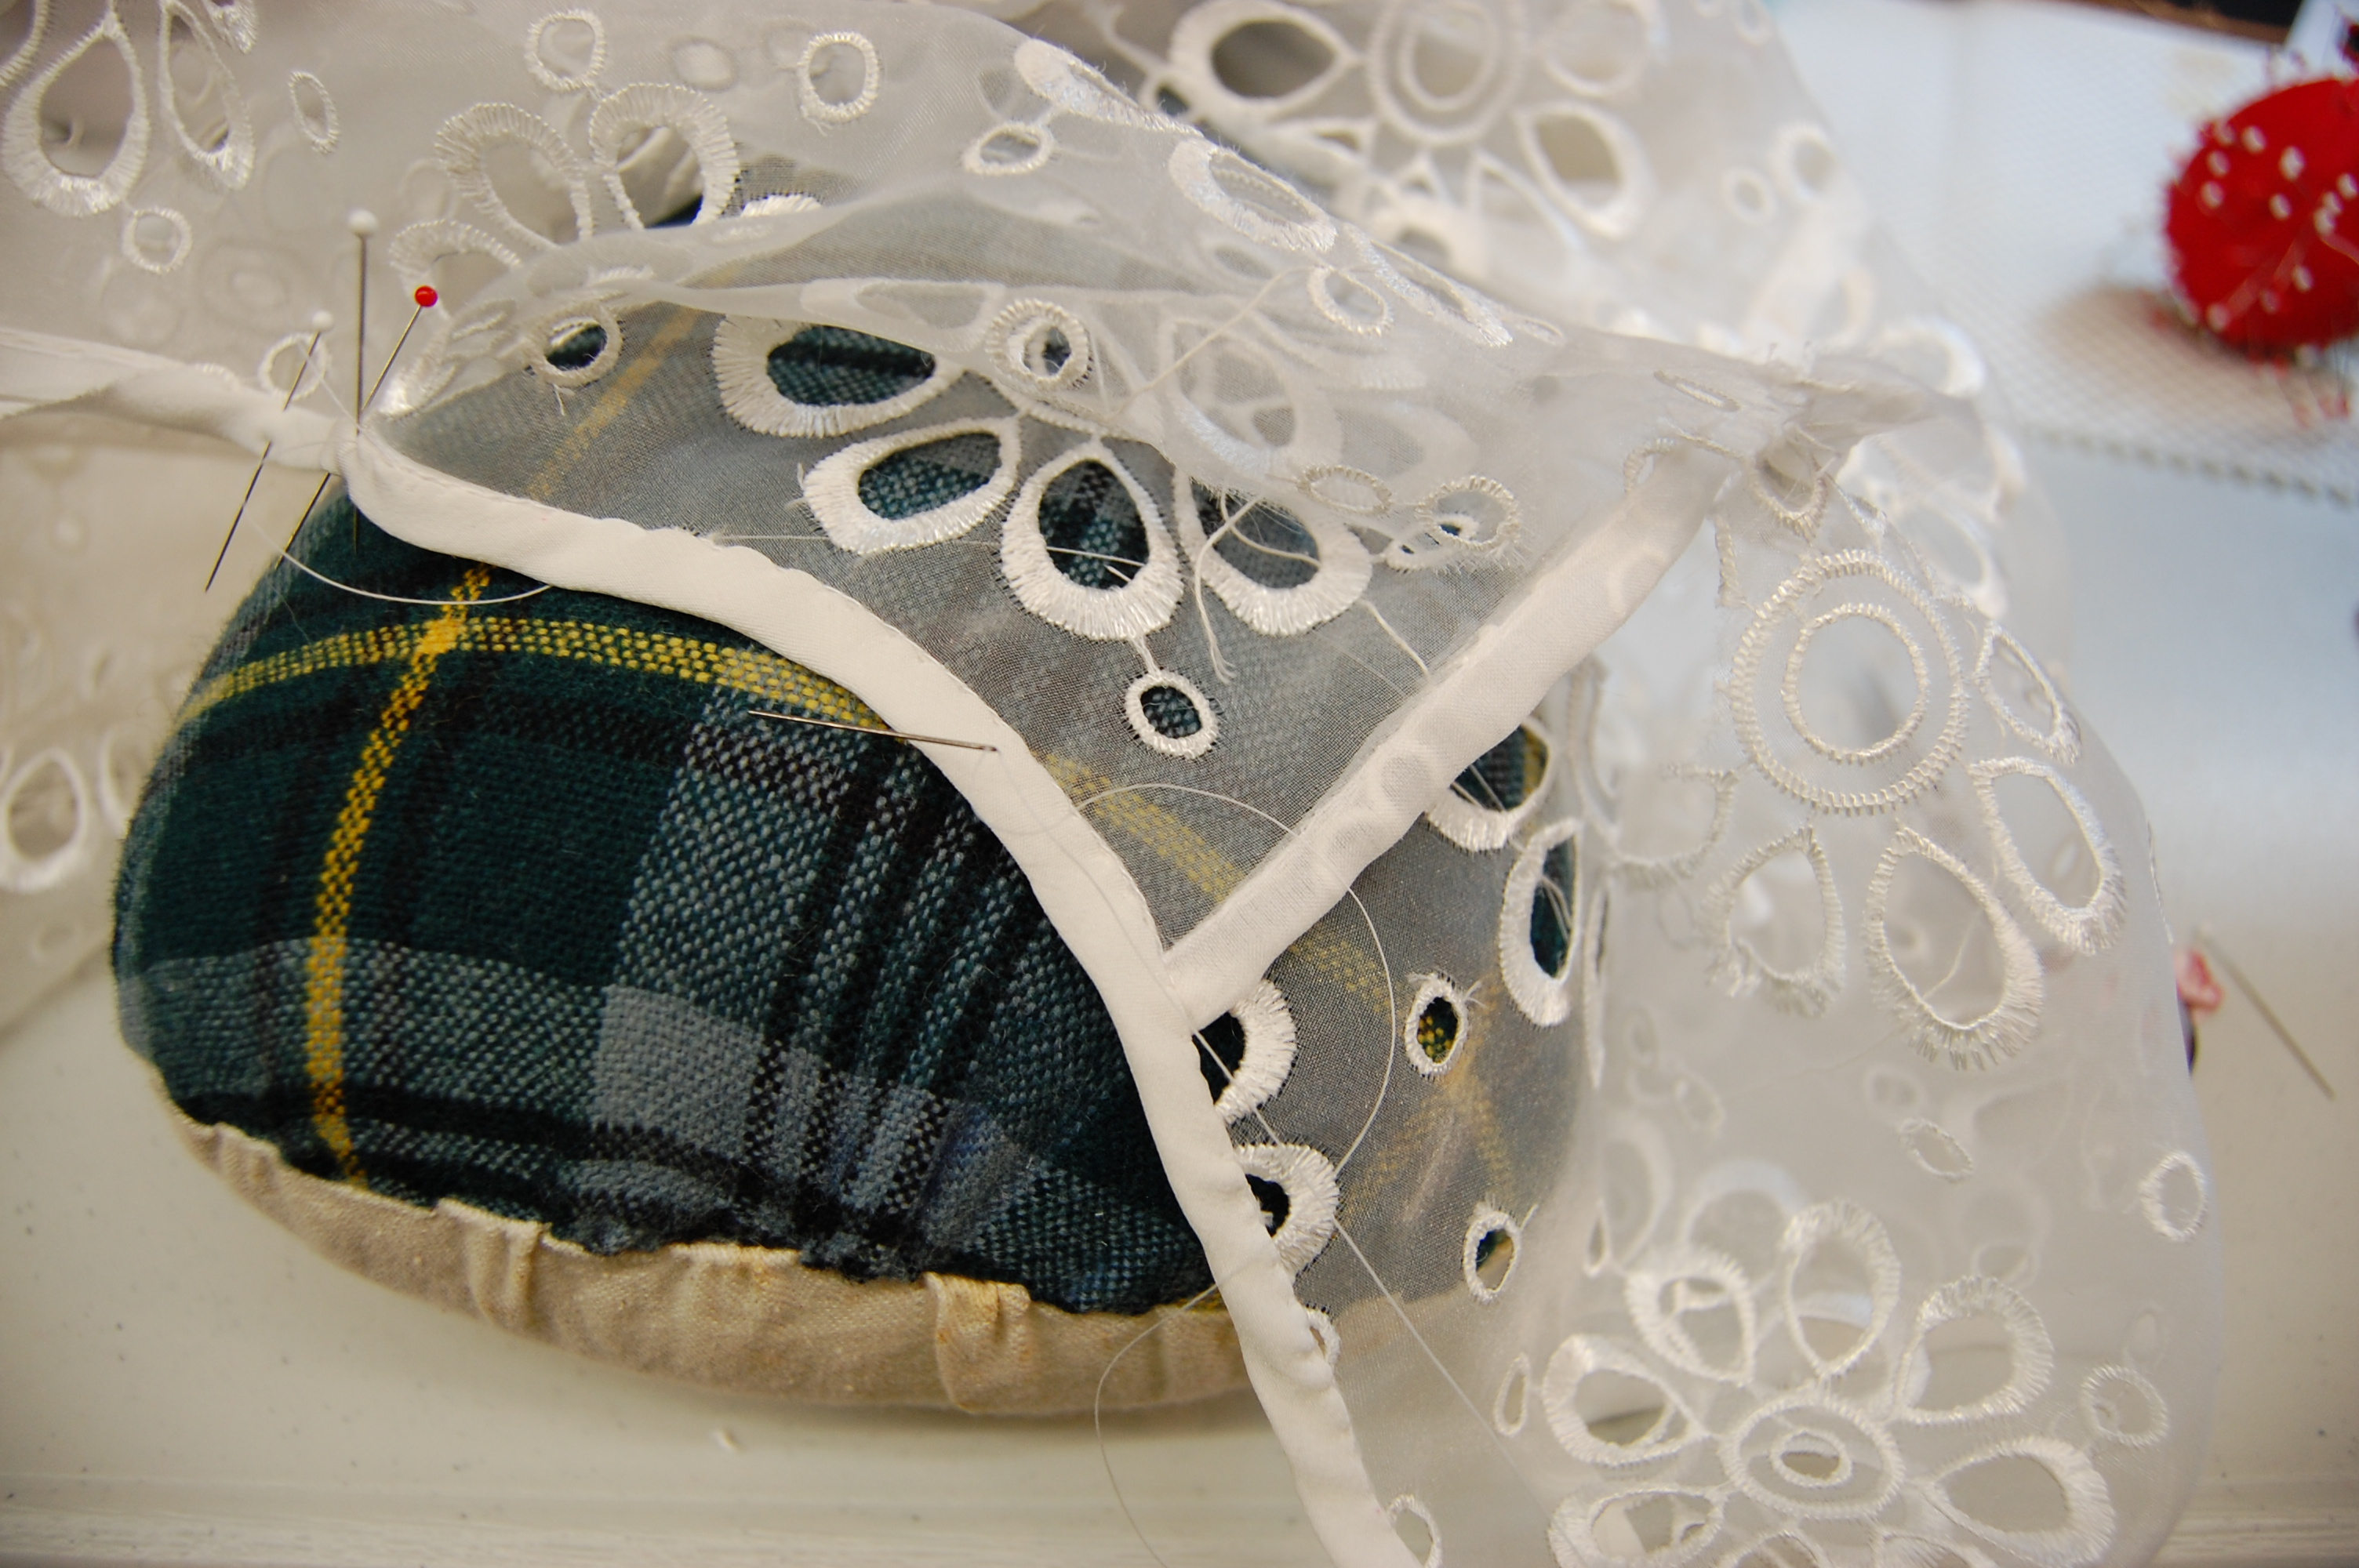
Working on that narrow binding. . . .
Once both bodices were completed, I basted them together at the waist. The only other place they are joined is at the back seam where the zipper will be inserted.
It surprised me that no other joining of these two bodices would be needed, but once again, I have found that the unexpected often makes the most sense when it comes to couture sewing!

What beautiful work, so worth the time. I can’t wait to see the finished dress!
Thanks, Anne! These things do take time, that’s for sure.
Very informative, thanks. You have beautiful fabric!
Thank you, Heather! Beautiful fabric is such a joy to work on – I feel very fortunate!
Wow! What a marvellous project and it is great to see how you are progressing it. I can’t wait to see how fabulous fabrics, a great design, insider skills and great craftsmanship combine to make a wonderful dress.
Thanks, Kate! Hoping it will turn out to be a wonderful dress . . .
It must be just fabulous to be making a dress for yourself with an expert’s guidance! I’m looking forward to seeing the next step.
It is so helpful to have had Susan’s tutelage on this dress. There are techniques that she shares that one could never learn on one’s own. And it is all such a great learning opportunity!
Ah, so beautiful. I loved reading about the progress, it’s so informative. I made my wedding dress recently, so boning and bodice structure and all of that stuff is fascinating to me. Can’t wait to see your finished product!
Thank you, Katy! I’m sure your wedding dress is gorgeous! That’s a very special thing to do for yourself. And, you’re correct – boning and bodice structure are simply fascinating.
Looks amazing so far!
Thanks so much!
What a beautiful project! And how unexpected to read about the flannel layer!
Thanks, Marianne! Yes – who would ever think snuggly flannel is couture?
Thank you so much for sharing all your learnings. The flannel layer is a great tip. And your fabrics are beautiful. Of course!
Aren’t we lucky to have such beautiful fabrics with which to sew? And I’ve found these fabrics very agreeable to handle, too!
Lucky you, studying with Susan! It looks like it’s going to be gorgeous.
Thanks, Julie. Very lucky, indeed!
Thanks for sharing pics of your wonderful sewing week. The finished dress will be fabulous. I love your choice of fabrics, just beautiful. I’ve often used flannel to conceal the boning in fitted bodices and it works wonderfully. I’m curious as to the reasoning of dividing the side front into two pieces. I thought the added seam might be to carry a boning channel but it looks like the side front bone is placed further towards center front. So much engineering goes into these fitted garments and I’m always interested in how others construct.
Well, I had to go back to my fitting muslin to remember why we added the extra seam. The side panel needed to be taken in, but to fit the bust correctly, we needed to add a small curvature down the center of it. So the only way to do that was to split it (the side panel, that is) in two. Hope this makes sense. Most of the boning channels are not necessarily set next to a seam, which was also interesting to me. I am now “sold” on flannel as an interlining in some applications and will surely be using it again.
Your dress is going to be stunning! Even unfinished, it already is. Sounds like you had a great week with Susan (is there anybody better?). When I made my strapless dress with Susan last spring, I was simply amazed at how comfortable it was with all that boning. Can’t wait to see you all dressed up for your black tie event.
We did have a great, wonderful week with Susan! She is simply the best teacher. I loved having the opportunity to learn boning from her – and so much else, as well. Looking forward to finishing my dress – soon, I hope!
So pretty! Love all the tips and tricks. It’s going to be a gorgeous dress – well worth the time put into its construction.
Thank you! These things do take time, but I wouldn’t have it any other way.
Looking forward to seeing the finished dress. This is one of my favorite patterns and and your fabric is beautiful. The engineering of the dress is pretty amazing. Thanks for sharing.
This is actually the first time I used this pattern, but it served me well on this project. Thanks for your comment!
Thanks for sharing this process with us. The fabric is beautiful and I can’t wait to see the finished product. Your style of writing makes it all so enjoyable to read about!
Thank you, Christine – what a lovely comment!
Oh yes. Classes with susan are worth it for the fitting alone! I spent the first full day of the class I took with her just watching her fit. It was fascinating. And how amazing is the flannel! I’ve underlined a dress with it before (I’ll admit – more for warmth than smooth lines) but was really thrilled with the result. This dress is going to really be something – love the delicate binding!
Thanks, Mel! Any class with Susan is filled with fascinating techniques and tips, isn’t it? I only have to travel 100 miles to take a class with her – I can’t quite imagine coming halfway around the world to do so, like you, but any distance is worth it!
Oh, absolutely. I’m definitely going to come back one day. If only I lived closer!
I’m so impressed with your attention to detail. And I am so looking forward to seeing the finished product.
Thanks, Lizzie. This has been a fascinating project – and I’m looking forward to the finished dress as well!
I’m finding this really fascinating! The finished dress will be a masterpiece, I’m sure. Thanks so much for sharing your work with us.
Oh, you are welcome, Marguerite. I’m so glad you find it interesting!
Oh, I can’t wait to see the finished garment! It is so beautiful already.
Thank you, Jen – still working on it!
Karen so beautiful. Quick question though, as far as the layers involved on the finished garment. Embroidered Silk Organza, Silk Crepe de Chine, Organza with the boning inserted, and then Flannel against your body. Is this right? Or is there lining involved in the bodice as well? I appreciate your sharing all of this, very inspiring.
Thanks for commenting – it gives me a chance to clarify the layering. The flannel is primarily used to camouflage the flexible steel boning (which is dark), so the layering from the outside in is: embroidered silk organza over bodice, silk crepe de chine for the under bodice, followed by flannel, two layers of plain silk organza (for the boning channels) and a lining of silk crepe de chine. So the lining (for the under bodice) is what is next to your skin.
Thank you Karen for clarifying this for me. Wow I had no idea how many layers you worked with as the bodice has such a delicate look to it. Wonderful job, I can’t wait to see the finished garment.