
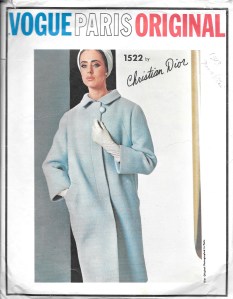
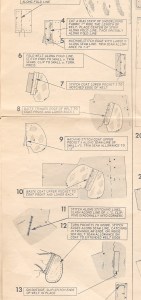
Instruction sheets for patterns always intrigue me, and especially so, instruction sheets for vintage Vogue Designer patterns. They so often include a quirky method of handling one aspect of construction. And often the construction details for an entire complicated dress or coat fit on one side of one sheet, completely at odds with the amount of time involved in the actual process from beginning to end. The beginning of my pink coat, however, commenced long before I started at “ number 1” in the Instructions.
With my adjusted and fitted muslin (toile) completed, and with its pieces disassembled again, I transferred it onto white silk organza to be used as both the pattern for the fashion fabric and as its underlining. This was the point about which I was both equally excited and terrified! There is a real thrill involved in laying out the pattern on your fashion fabric, but my pink coating wool is no normal fashion fabric. A rare survivor, this French Lesur wool from the mid 1960s, needed some special attention before I could begin to lay out my organza pieces on it.
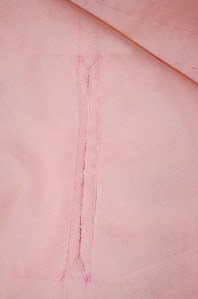
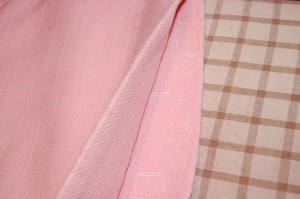
Often vintage wool displays a crease down its center point where it has been folded for decades. Fortunately, this Lesur wool was folded with the right side in. There was a definite crease line, and it looked a bit soiled as well.
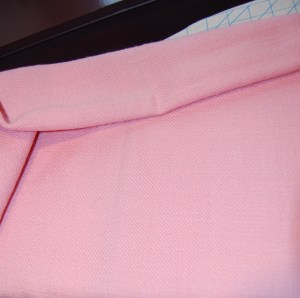
In the left half of this photo, you can see a line of light soil along the crease. This is the wrong side of the fabric.
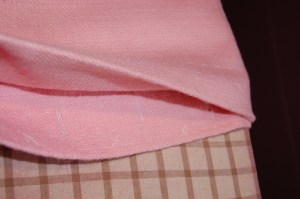
I used a Woolite spot remover pad and worked gently along the fold line to reduce the minor discoloration. Then I put the entire length of wool in the dryer with a Woolite dry cleaning cloth to freshen it. When it came out, the crease line was practically gone, but I noticed that the wool appeared just a bit thinner along that line. I knew I would have to work around this when I laid out my pattern pieces.
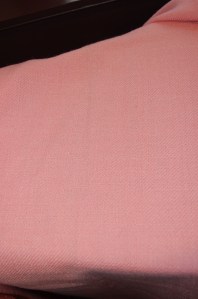
It is barely visible, but there is a line of thinner wool close to the center of the photo.
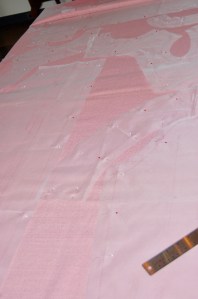
Working single layer, as is customary with couture construction, I spread out the wool on my dining room table. The “coat front and lower back” piece is quite wide, and extended across the center point line of my wool.
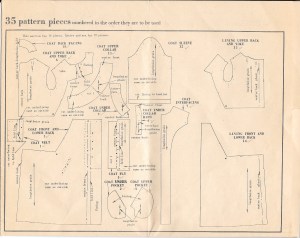
You can see how wide the Coat Front and Lower Back pattern piece (#3) is, on the lower left.
Because the longest straight edge of the piece is the front facing, I knew I had to make sure that line of “thinner” wool was on the facing and not on the main body of the coat. Fortunately the wool had no nap, so I was able to stagger those two very large pattern pieces with different vertical orientations, which saved the day!
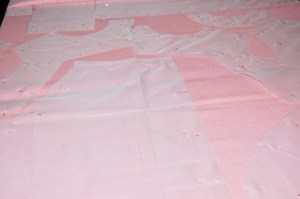
A number of pieces were on the bias which always seems to use more fabric.
All in all, it was tight fit to get all the pattern pieces on. I let it all sit overnight so I could doublecheck myself with fresh eyes before I actually started to cut. Knowing how special this wool is made taking that first cut with scissors extremely nerve-wracking. However, I figured it was now or never, and so I cut! One by one, the pieces piled up and when I was finished , all I had left was this small mound of scraps!
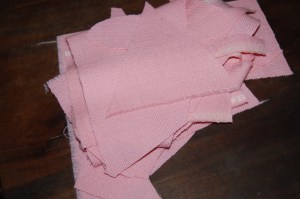
I have just enough left to make a half belt, should I choose to do so.
Next up was a part I always enjoy for some strange reason: basting the silk organza underlining and the fashion fabric together. And then to the Instruction Sheet, only to remember that the first thing to do was the pockets! I like detail work, but whenever I have to make a slash in the main body of anything, I get anxious. Fashion Sewing is not for sissies!
Here is one of the pockets slashed and ready to turn.
With lots of basting, lots of double-checking, lots of talking to myself, I finished with two flapped pockets that look they way they should, thank goodness!
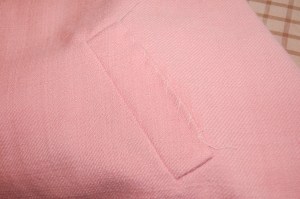
I basted the pockets closed to protect them while I finish the rest of the coat.
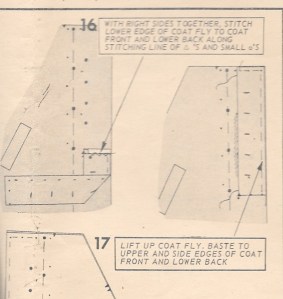
And then, no rest for the weary, the next item on the sheet was the fly for the concealed front. Actually these are not difficult, although this one was done a bit differently than the one I put on another coat I made several years ago.
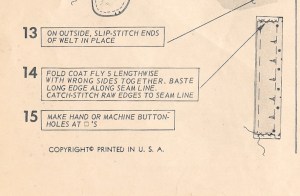
The buttonholes on a fly front need to be as flat as possible, so even though I was working in wool, which would normally dictate bound buttonholes, I made these five buttonholes by machine. Obviously they do not show, being within a concealed opening, so this was the way to go.
Here is the front of the coat with the concealed placket underneath. Top-stitching will be added later.
Remember what I said about quirky construction? I had already looked ahead (of course…) to see what next important step I was facing, and indeed, it was a facing! That looped button which is a design feature on the coat, turns out to be anything but normal. I will cover this interesting – and quirky – application in my next post, as the Pink Coat Odyssey continues.

Is there anything more nerve wracking than making that first cut? I think not! Your pockets and concealed button flap look perfect, good luck with that loop!
Thanks, Kathy! I am making progress!
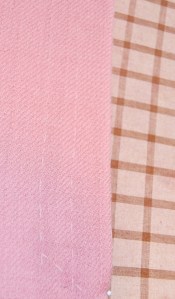
What a lovely shade of pink. Looking forward to the finished coat, but first the loop is intriguing so will be watching for your next post.
The more I work with this wool, the more I love this shade of pink. It’s probably not too practical, but this is not an everyday coat…
Oh, it’s so pretty already! Great pattern to exhibit this luscious fabric. Your details are already making it look like the lovely coat it will be. Thank you for sharing the details of how you cleaned that line and the pattern instructions. You are so right about how nerve wracking it is. We see the successes, but we know there is a very real possibility of doing something so wrong that the whole project is ruined. Can’t wait to see your coat and which dress you model it with.
That’s always the fear, that one wrong cut could ruin the entire project. And when there is no recourse to getting more of the fabric, then the stakes are really high. So far, so good… Thanks for your encouragement!
How exciting! This coat is going to be gorgeous. The style and the colour of your fabric are perfect. I can’t wait to hear more.
Thank you, Helen! Christian Dior was correct – pink is the sweetest of the colors!
Your coat is going to be beautiful. Do ou know the date of the original design ?
Thank you, Penelope. Yes, the pattern is from 1965.
Your coat will be so beautiful. Perfect choic of fabric. Do you know the date of the original design ?
I applaud your skill and knowledge in how to clean the fabric prior to cutting. I’m amazed with this garment and your dedication to the sewing craft. I am waiting anxiously along with everyone else to see the next phase of the creation and then the final coat.
Thank you, Peggy. Vintage fabric always seems to need a little bit of prep work, but it is mostly just common sense, not skill! I am definitely making progress on the coat.
I feel your trepidation! Cutting into a precious piece of fabric has delayed my plans many times. This leads me to a question that I am revisiting at the moment and would welcome your opinion. I have a piece of fabric that I am deliberating over, a medium weight Wool/silk blend and it is not folding neatly. I think that I need to preshrunk this but am unsure on the best method for this. I usually use steam from an iron and a damp cloth as taught long ago, but think this piece needs more. Should I try the method of using damp towels and a dryer, or the “London Method” of dampening the fabric by wrapping in towels then air drying. Would really welcome your thoughts.
Hi Cheryl,
I find it always helps to let things sit overnight before making that first cut. Now, about your wool/silk blend… It could just be that this particular wool does not take a crease or fold easily. I have seen that before with wool/silk blends. If your plans are to use it for a piece that needs a lot of “drape,” then you might want to reconsider. Having said that, first try to treat it. If you have a dryer with a steam function, then I would definitely put it in for a cycle or two. Otherwise, yes, put it in the dryer with damp towels on a low heat setting, and see if that helps. I hope you see some improvement, as the fabric sounds lovely!
Hi Karen!
Fine work!!! The process is amazing… I’m nervous too cutting into a fine fabric, and after I lay out the pattern pieces I too let everything sit overnight. Then I dive right in!
Looking forward to seeing this coat c
…coat come together!