
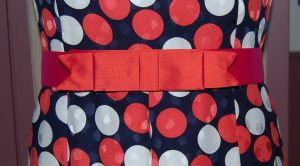
After adding the final details – specifically, attaching lingerie straps and sewing on a back neckline hook and eye – to my silk polka dot dress, I was feeling quite happy with my accomplishment. This dress did not seem to take forever to finish, as many dresses do. But I could not rest on my laurels for more than a few minutes – as I knew I still had to make a tailored bow – and belt – before this project would be really complete.
I started with the belt. I had already determined that a 1.5” wide belt would be the most attractive. I remember “back in the day” when belt-making canvas in various widths was readily available. Now, however, it takes a search on eBay or Etsy to find such a thing (as far as I can tell.) Fortunately, one of the last times I was in Britex Fabrics in San Francisco (on the opposite side of the country from where I live), I found a product – kind of a buckram – that I knew would work well for belts. I bought it in two widths – 1.5” and 1.25”. I used the wider width as the basis for my belt.

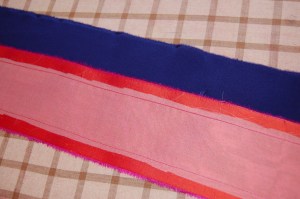
A segment of the belt buckram.
1) I first cut the desired length of belt buckram, leaving a good amount of overlap.
2) Next I cut out the fashion fabric to cover the buckram, which in my case was silk taffeta. I cut it out on the crossgrain as that gave me the color I wanted (the warp and weft of the fabric were in fuchsia and orange.) For a 1.5” belt I cut a width of 2.75” which allowed for a turn-under of 5/8” on either side. The length of this piece of fabric needed to be the entire length of the belt buckram, plus one inch for turning in the ends.
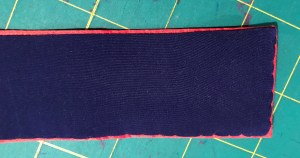
3) I wanted to line the belt with the navy blue crepe de chine I had used for lining the dress. I cut out a piece of the lining fabric identical in size to the long rectangle of the fashion fabric. I seamed the two pieces together along one long edge. Then I pressed it so that the lining was slightly offset from the fashion fabric.
I interfaced the fashion fabric with silk organza.
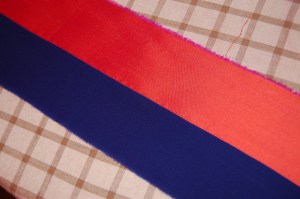
The lining sewn onto one side of the fashion fabric.
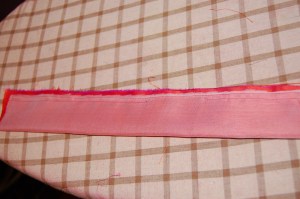
4) I placed the belt buckram securely inside against that sewn edge, with the seam allowances towards the back of the belt. I carefully secured the loose edge of the fashion fabric to the buckram using Dritz Wash Away Wonder Tape. Then I folded under the raw edge of the lining, pinned it in place and hand-stitched it in place, leaving another slight offset along the second edge.
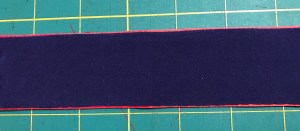
The underneath side of the belt with the lining attached, one side by machine, the other side by hand.
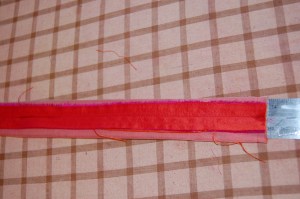
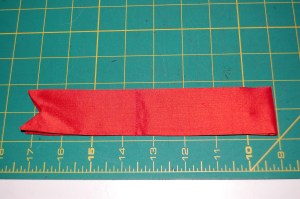
One end of the covered belt.
Next up was the tailored bow.
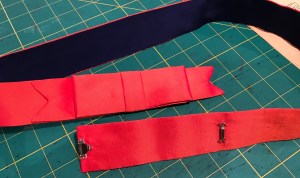
1) I decided the bow should be the width of the front panel of the bodice of the dress, which was 7”. For a finished bow, I needed to double that length, plus two ½” seam allowances, plus 1 inch for each tapered end of the bow. 7+ 7 + 1 + 1 + 1 = 17” length. The width needed to be twice the width of the belt (1.5” x 2) plus 2 seam allowances of ½” each. Total width needed to be 4” – thus I cut out a piece of fashion fabric 17” x 4”, making sure I cut it out on the crossgrain to match the belt.
2) I interfaced my bow with silk organza, trimming it close to the seam line.
3) I then stitched the strip along its length only (not the ends), leaving about two inches open in the center.
4) I centered that seam along the length on the “inside” side. I found inserting a metal ruler in the fabric tube helped me position that seam along the inside center. I then pressed that seam, being careful not to press a crease in the outside edges.
Inserting the metal ruler into the tube of fabric made centering its seam so much easier.
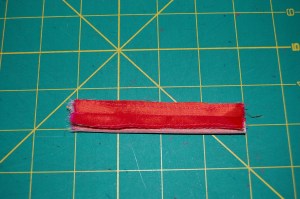
5) I wanted double-peaked bow ends rather than a single angle. I marked my sewing lines with a fine chalk marker and stitched, starting at the center and stitching to the edge. I tied off the threads by hand rather than back-tacking. Then I trimmed and clipped the ends.
6) I turned the fabric “tube” to the right side and stitched the opening together by hand. (A hemostat is a huge help in turning narrow tubes of fabric like this.)
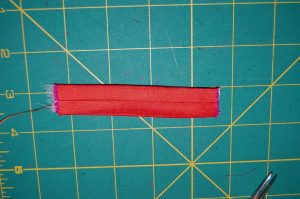
7) I don’t believe there is any magic formula for determining the spread of the bow – it is a visual determination, and I experimented until I had it looking well proportioned. I stitched across the width of the fabric tube at that spot.
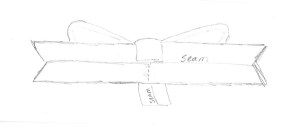
The stitching is visible between the 13 and 14 inch markers.
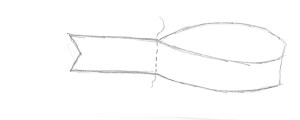
This drawing explains the seam a little better.
Then I centered the loops and carefully pressed across the seam I had just sewn. Basting by hand across this center point secured the position of the loops.
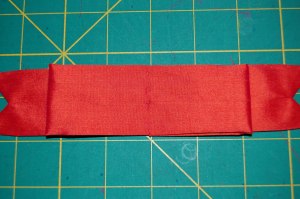
The loops of the bow are held in place by the center stitching line.
8) The bow was now ready for its “knot.” I had to determine how wide I wanted my knot to be. I chose to make it one half the width of the belt, or ¾” for the finished width.
9) The strip I cut needed to wrap around the width of the belt, front and back, with ample seam allowance to tuck in. Twice around the width of the belt equaled 3” plus seam allowance of 1”. So my strip of fabric needed to be 4 inches long. Its width was twice my chosen width of ¾” (1.5”), plus seam allowance of 1”. Thus the knot would be made out of a piece of fashion fabric 4” x 2.5”.
10) I sewed the long edge of that piece together. I again used a metal ruler (a smaller one this time) to position its seam along the center back of the piece. I pressed it carefully along that center seam and then turned it right side out.
The inside seam on the knot.
The length for the knot turned right side out.
11) I centered this finished tube around the center of my bow, tucked in the raw edges on back, secured by small stitches, and slip-stitched it to the back of my bow.
This diagram shows the back of the bow with the knot being set in place.
12) I hand-stitched the finished bow to one end of the belt, added fasteners, and my belt was finished.
If you are still reading by now – and are still awake (good for you if you are!) – you will realize how much common sense techniques help make such a belt successful. And in this instance, the success of my completed dress was largely dependent on the right belt – with its classic tailored bow.
