
“Suit dress – Used in 1960s to refer to a jacket and dress ensemble that resembled a tailored suit.” (The Fairchild Dictionary of Fashion, Third edition; Fairchild Publications, Inc., New York, New York, 2010)
Although the inspiration for my current project does not have its beginnings in the 1960s, it is certainly influenced by that era. The actual beginning was about 1974 or ‘75, although I did not know it then. That was when I first laid my eyes upon this Jo Mattli Designer pattern from Vogue:
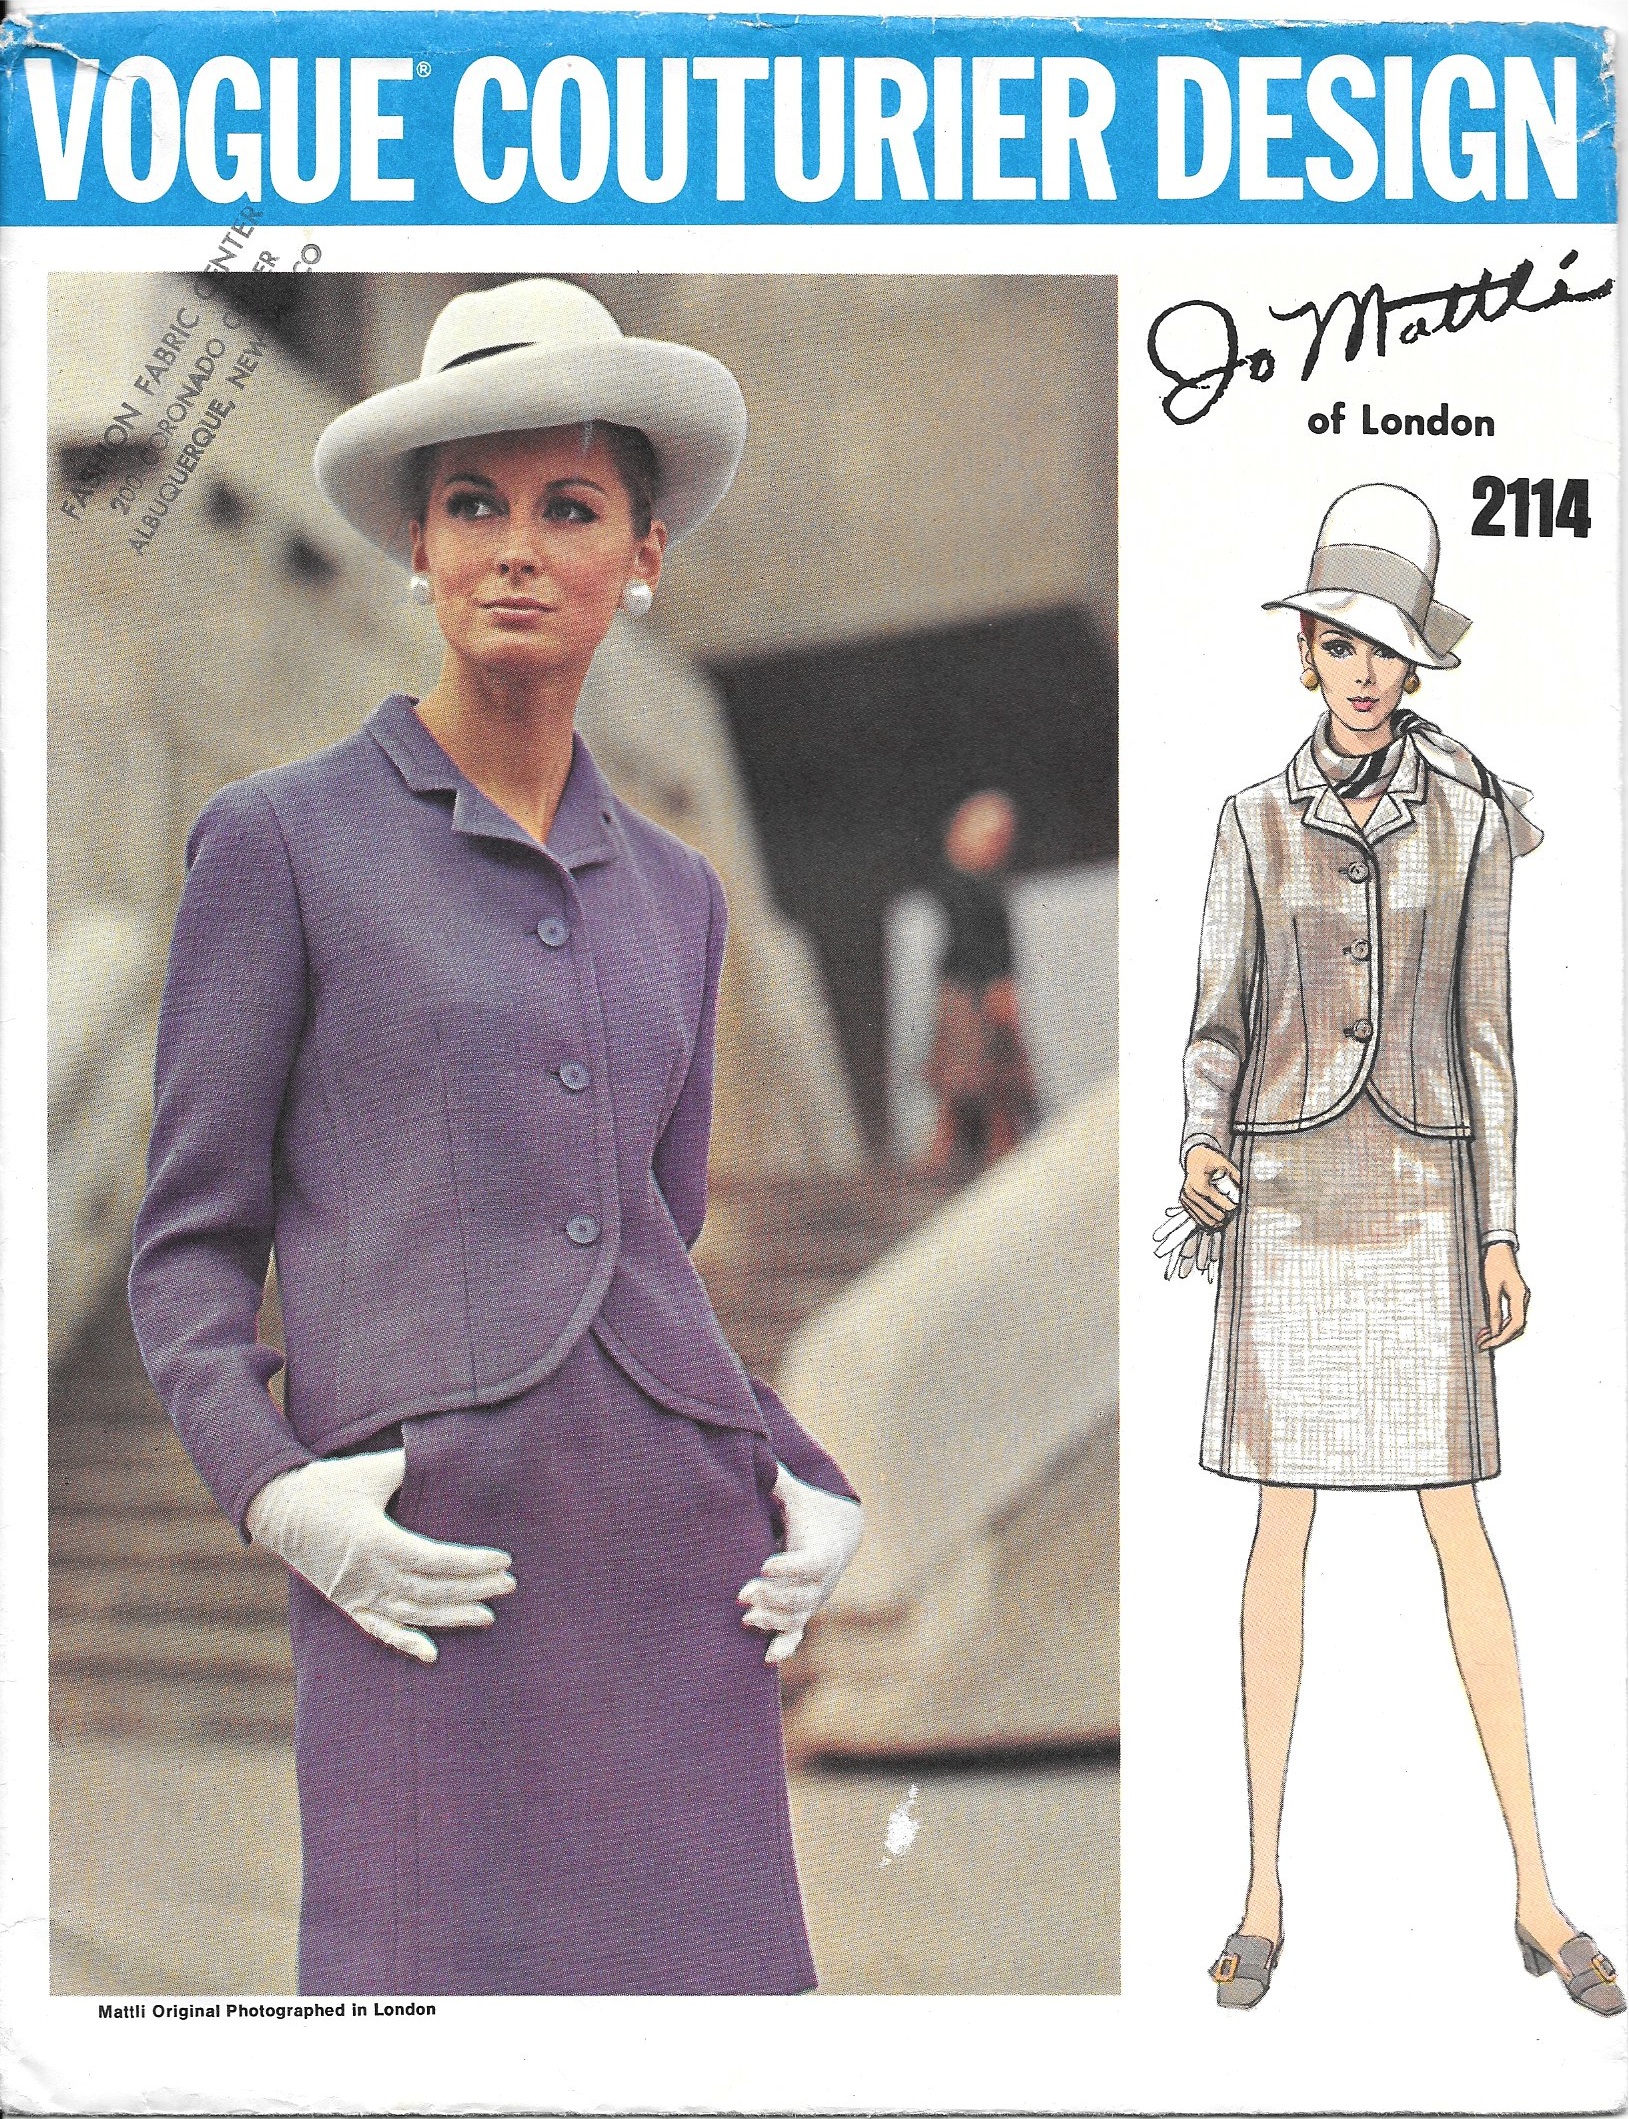
I loved the tailored, but feminine, look of the jacket, with its high, notched collar and its sleeves with gracefully curved slits. (I was less enamored with the style of the skirt, but skirts can easily be substituted, of course.)
This diagram of the jacket back better shows the interesting treatment to the cuff edges of the sleeves. Click on the picture to see a close-up view.
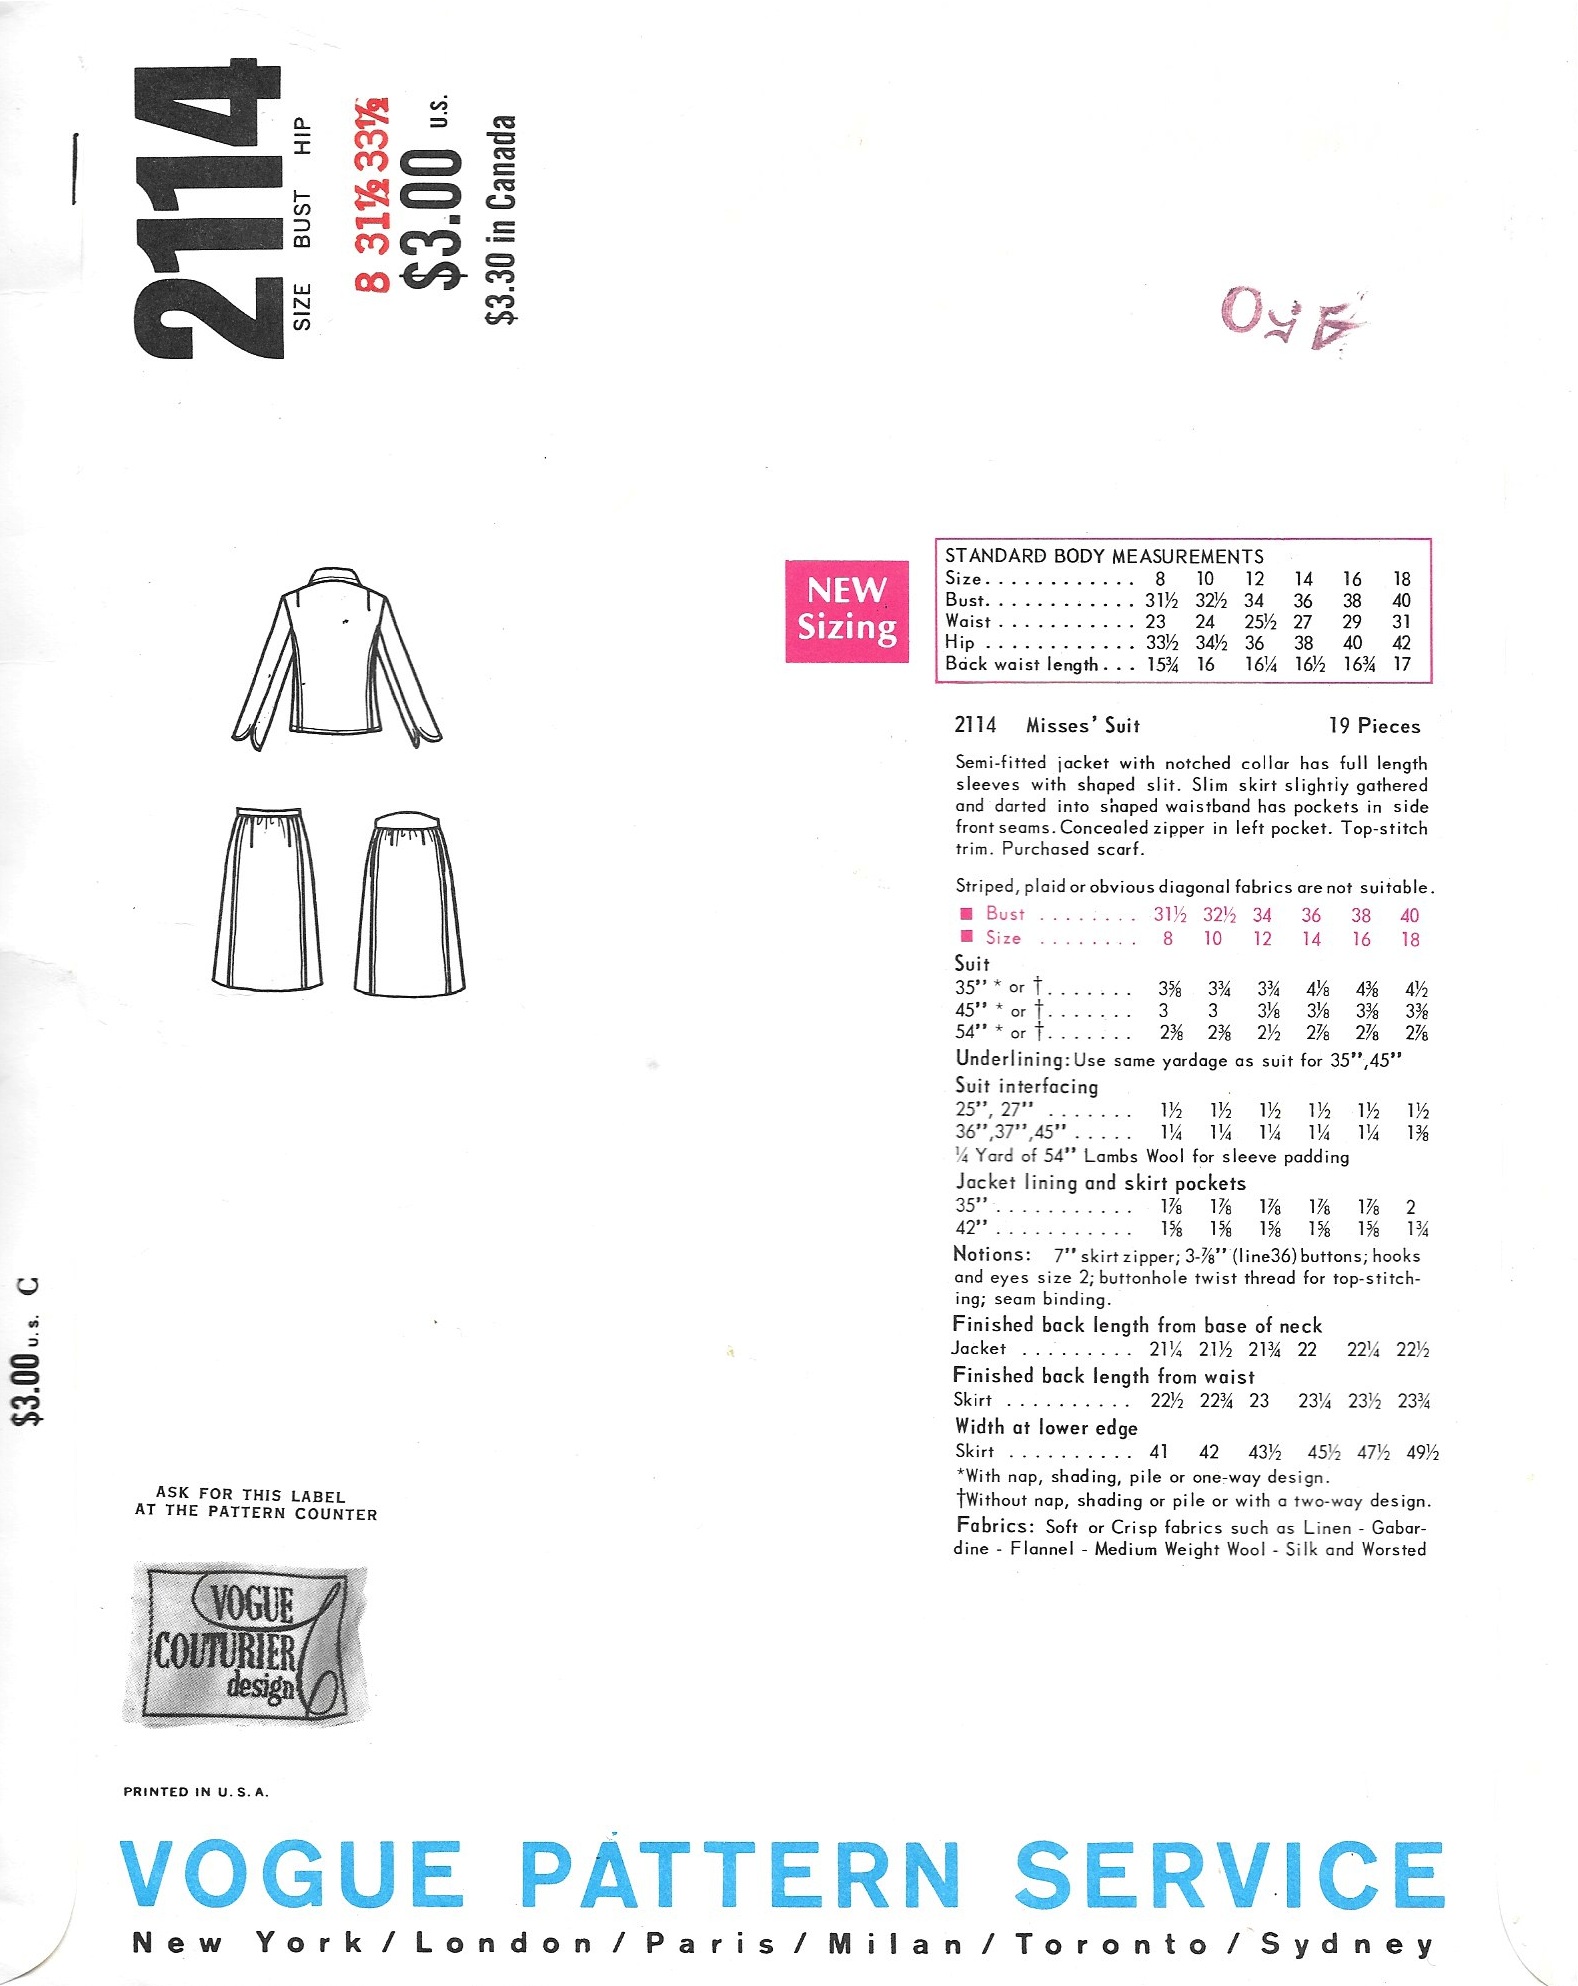
I admired this pattern on a regular basis while it was listed for sale in the Vogue Catalogue at my local fabric store, but in the end I didn’t buy it. That hefty $3.00 purchase price, and not knowing for sure that I would actually end up making this outfit, kept me from its purchase. Now I am not nearly as practical – or maybe I have learned from experience. One must get these things which speak to them while they can! So when I found this pattern a couple of years ago on eBay, I knew it was time to fulfill a long-delayed dream (at a much higher price than $3.00, I might add!).
Shortly thereafter I found this navy blue, windowpane-check cashmere fabric on one of my trips to Britex Fabrics in San Francisco. I purchased what I was sure would be ample yardage to make a two-piece suit (jacket and skirt, with this Jo Mattli design in mind) and to compensate for matching the plaid. Then I set it aside, knowing that the time to start this project had to be right.
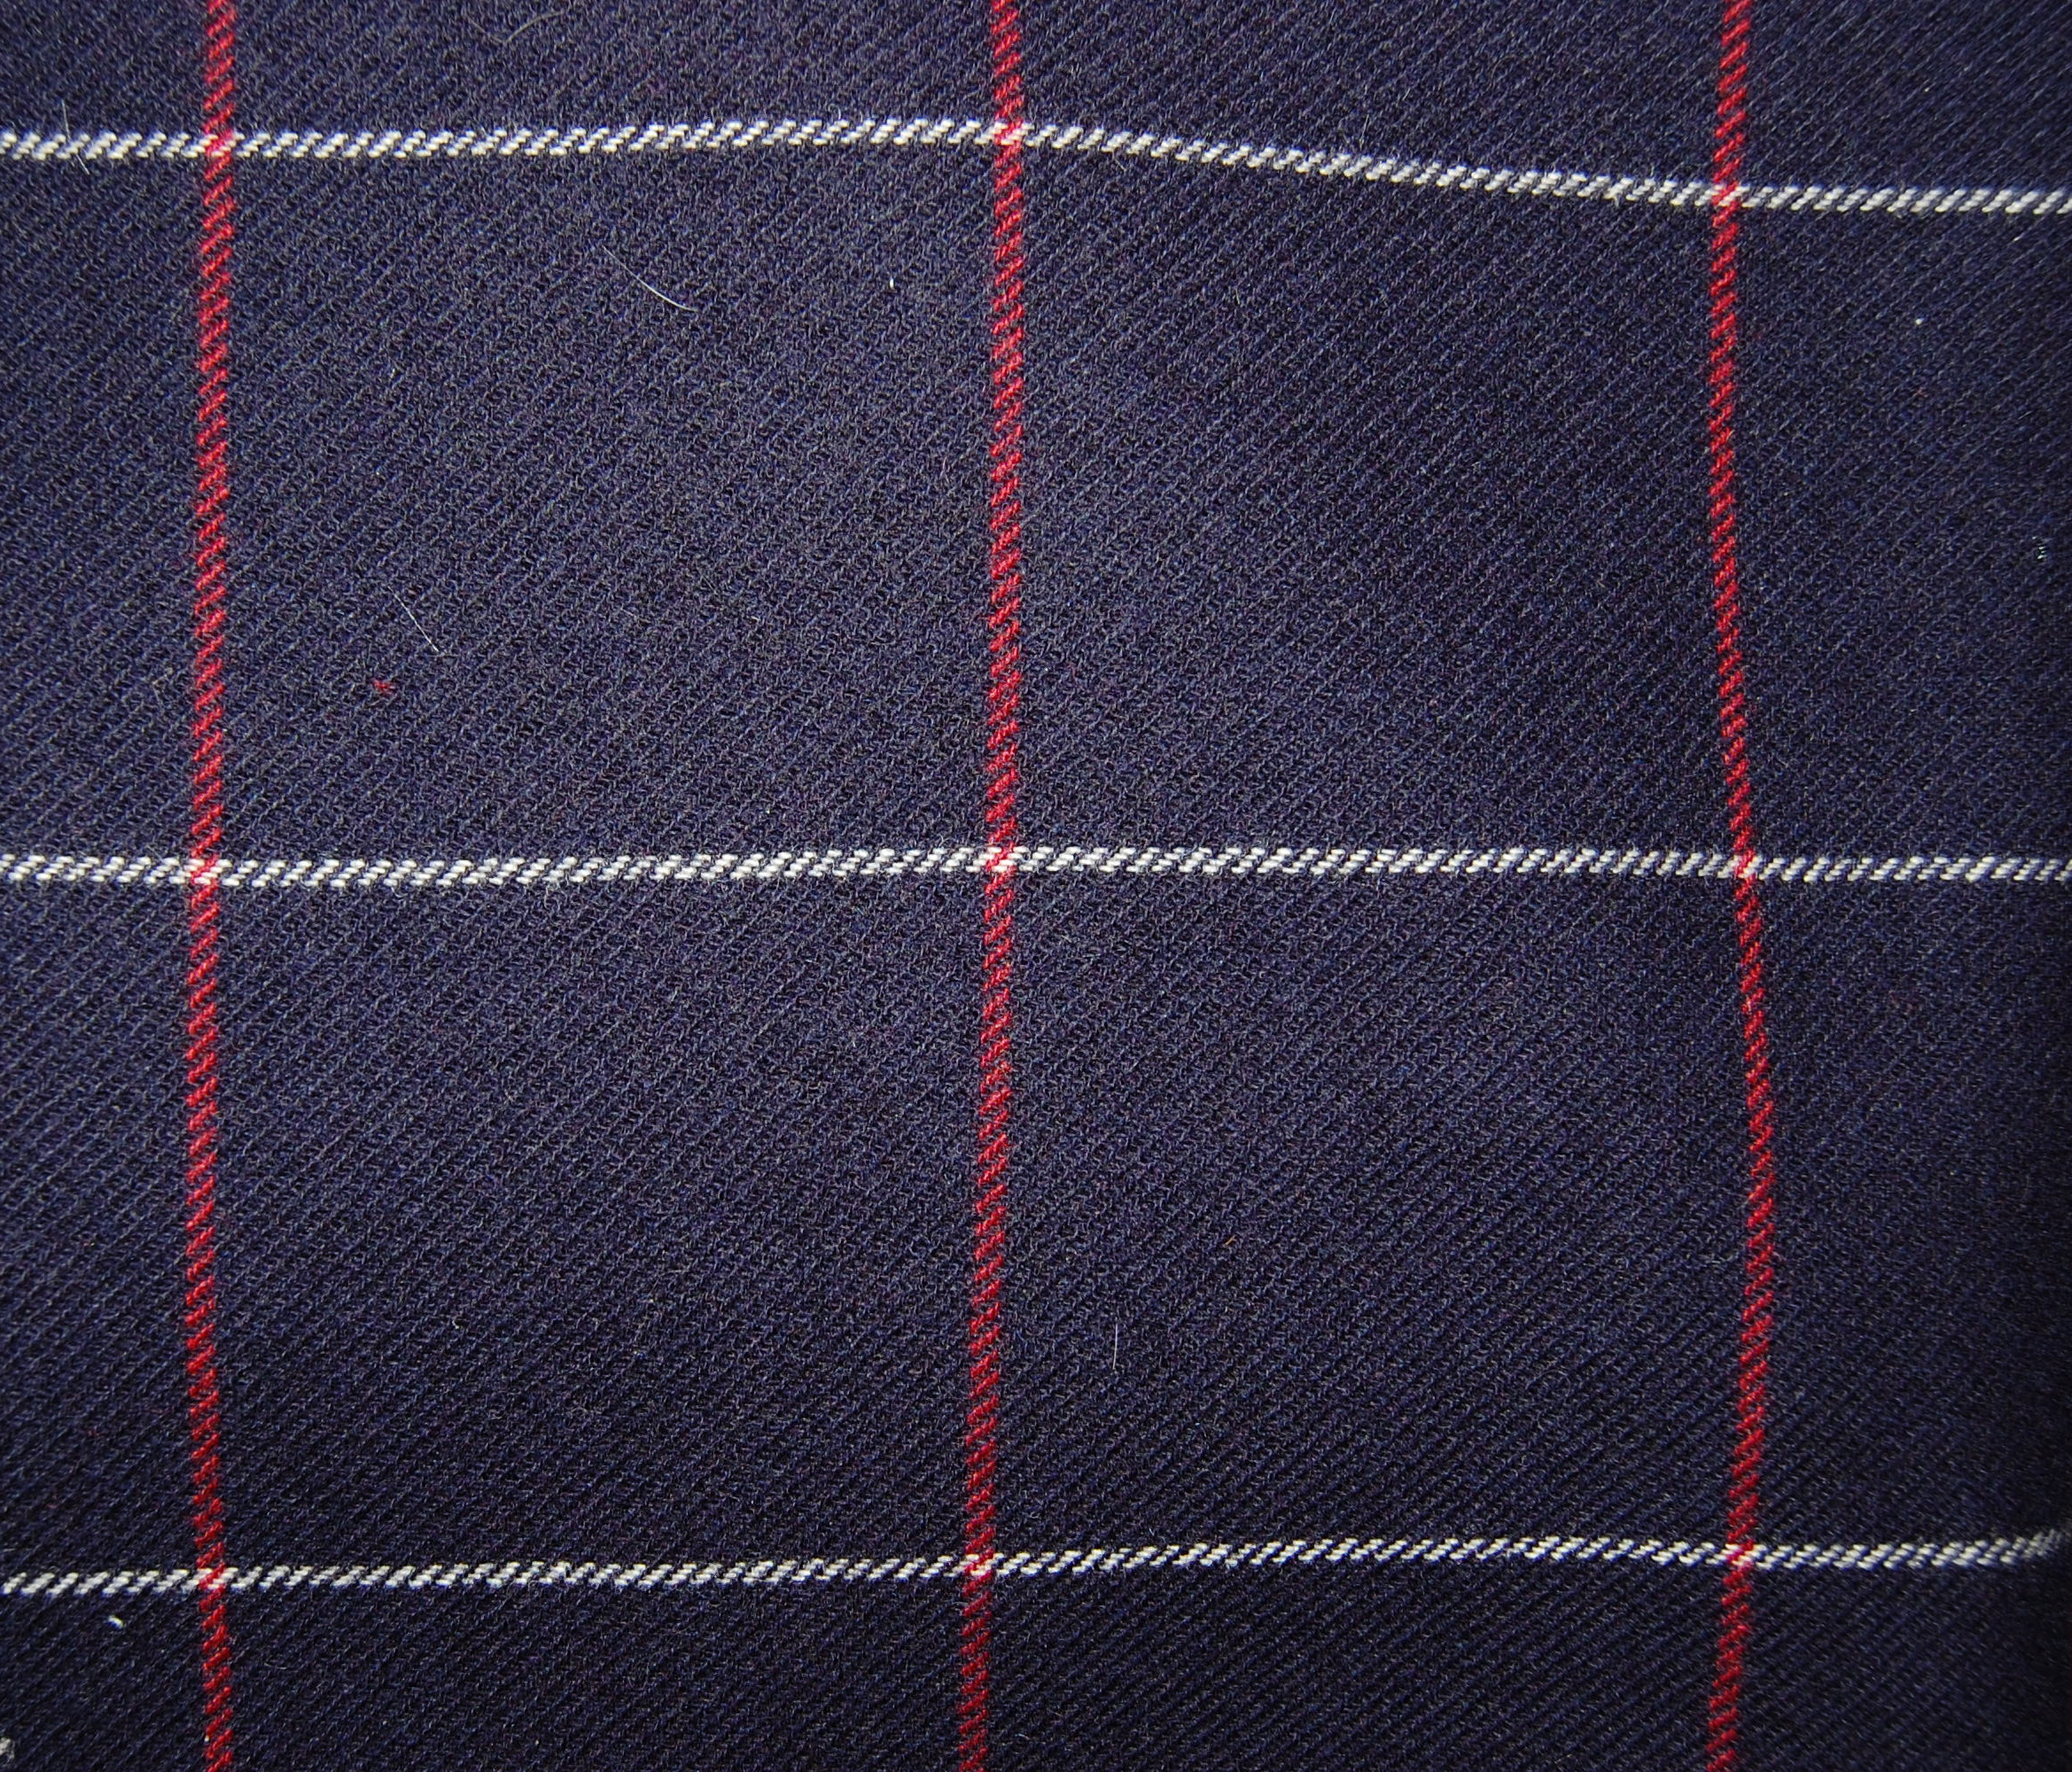
The feel of this wool is best described as like soft butter.
I am so glad I waited. As I have grown in my sewing and dressmaking skills (with so much credit in that arena attributed to what I have learned in classes with Susan Khalje), I came to see this fabric and this suit taking on a slightly different appearance. I knew I wanted to make the Mattli jacket, but more and more I felt that this fabric was too special to mix it up with a blouse, no matter what color or how simple that blouse might be. I began to envision the jacket paired with a sheath dress – in effect, a classic 1960s’ inspired suit dress.
But would I have enough fabric? Britex has always been very accommodating when cutting yardages for me, adding inches to compensate for the layout of plaids and designs, and simply being generous in adding a few inches to my requested amount. (I have found most fine fabric stores to be similarly inclined – Mendel Goldberg, for example, also adheres to this customer-friendly practice. Have you found this generally to be true as well?) Well, those of you who read my blog know that a little shortage of fabric has never kept me from my intended goal. Of course, I would have enough fabric… And so I do, especially with those few extra inches courtesy of Britex added on!
Fitting the muslin (toile) for the jacket took more thought and planning than usual. Much of this is because the pattern I found on eBay was actually one size smaller than what I usually buy and wear. For some reason I find it easier to size down patterns than size them up, so I’d rather, if necessary, start with a too-large pattern than one too small. Adding length and width to the body of the jacket, fitting the sleeves (which also needed a little more circumference) into those new dimensions, and adjusting the front/neck facing, which is part of the notched collar, was quite a puzzle. It took days!
I transferred my final changes from the muslin to silk organza, and then I was in business. I love a challenge, and it’s a good thing I do! Do you know how nerve-racking it is to make sure all your plaid lines match up vertically and horizontally? Also, I knew I could lay out only the jacket pattern pieces initially. There are two reasons for this: one is that I have not yet determined which sheath dress pattern I want to use. The other is that the plaid on the dress is going to have to match – perfectly – the plaid in the jacket horizontally first, with the vertical match being as close as it can be, taking into account darts and the curves in the body of the dress. So – I have to finish the jacket before I can lay out the dress. That fortuitously gives me some more time to think about the dress, which is still taking shape in my mind!

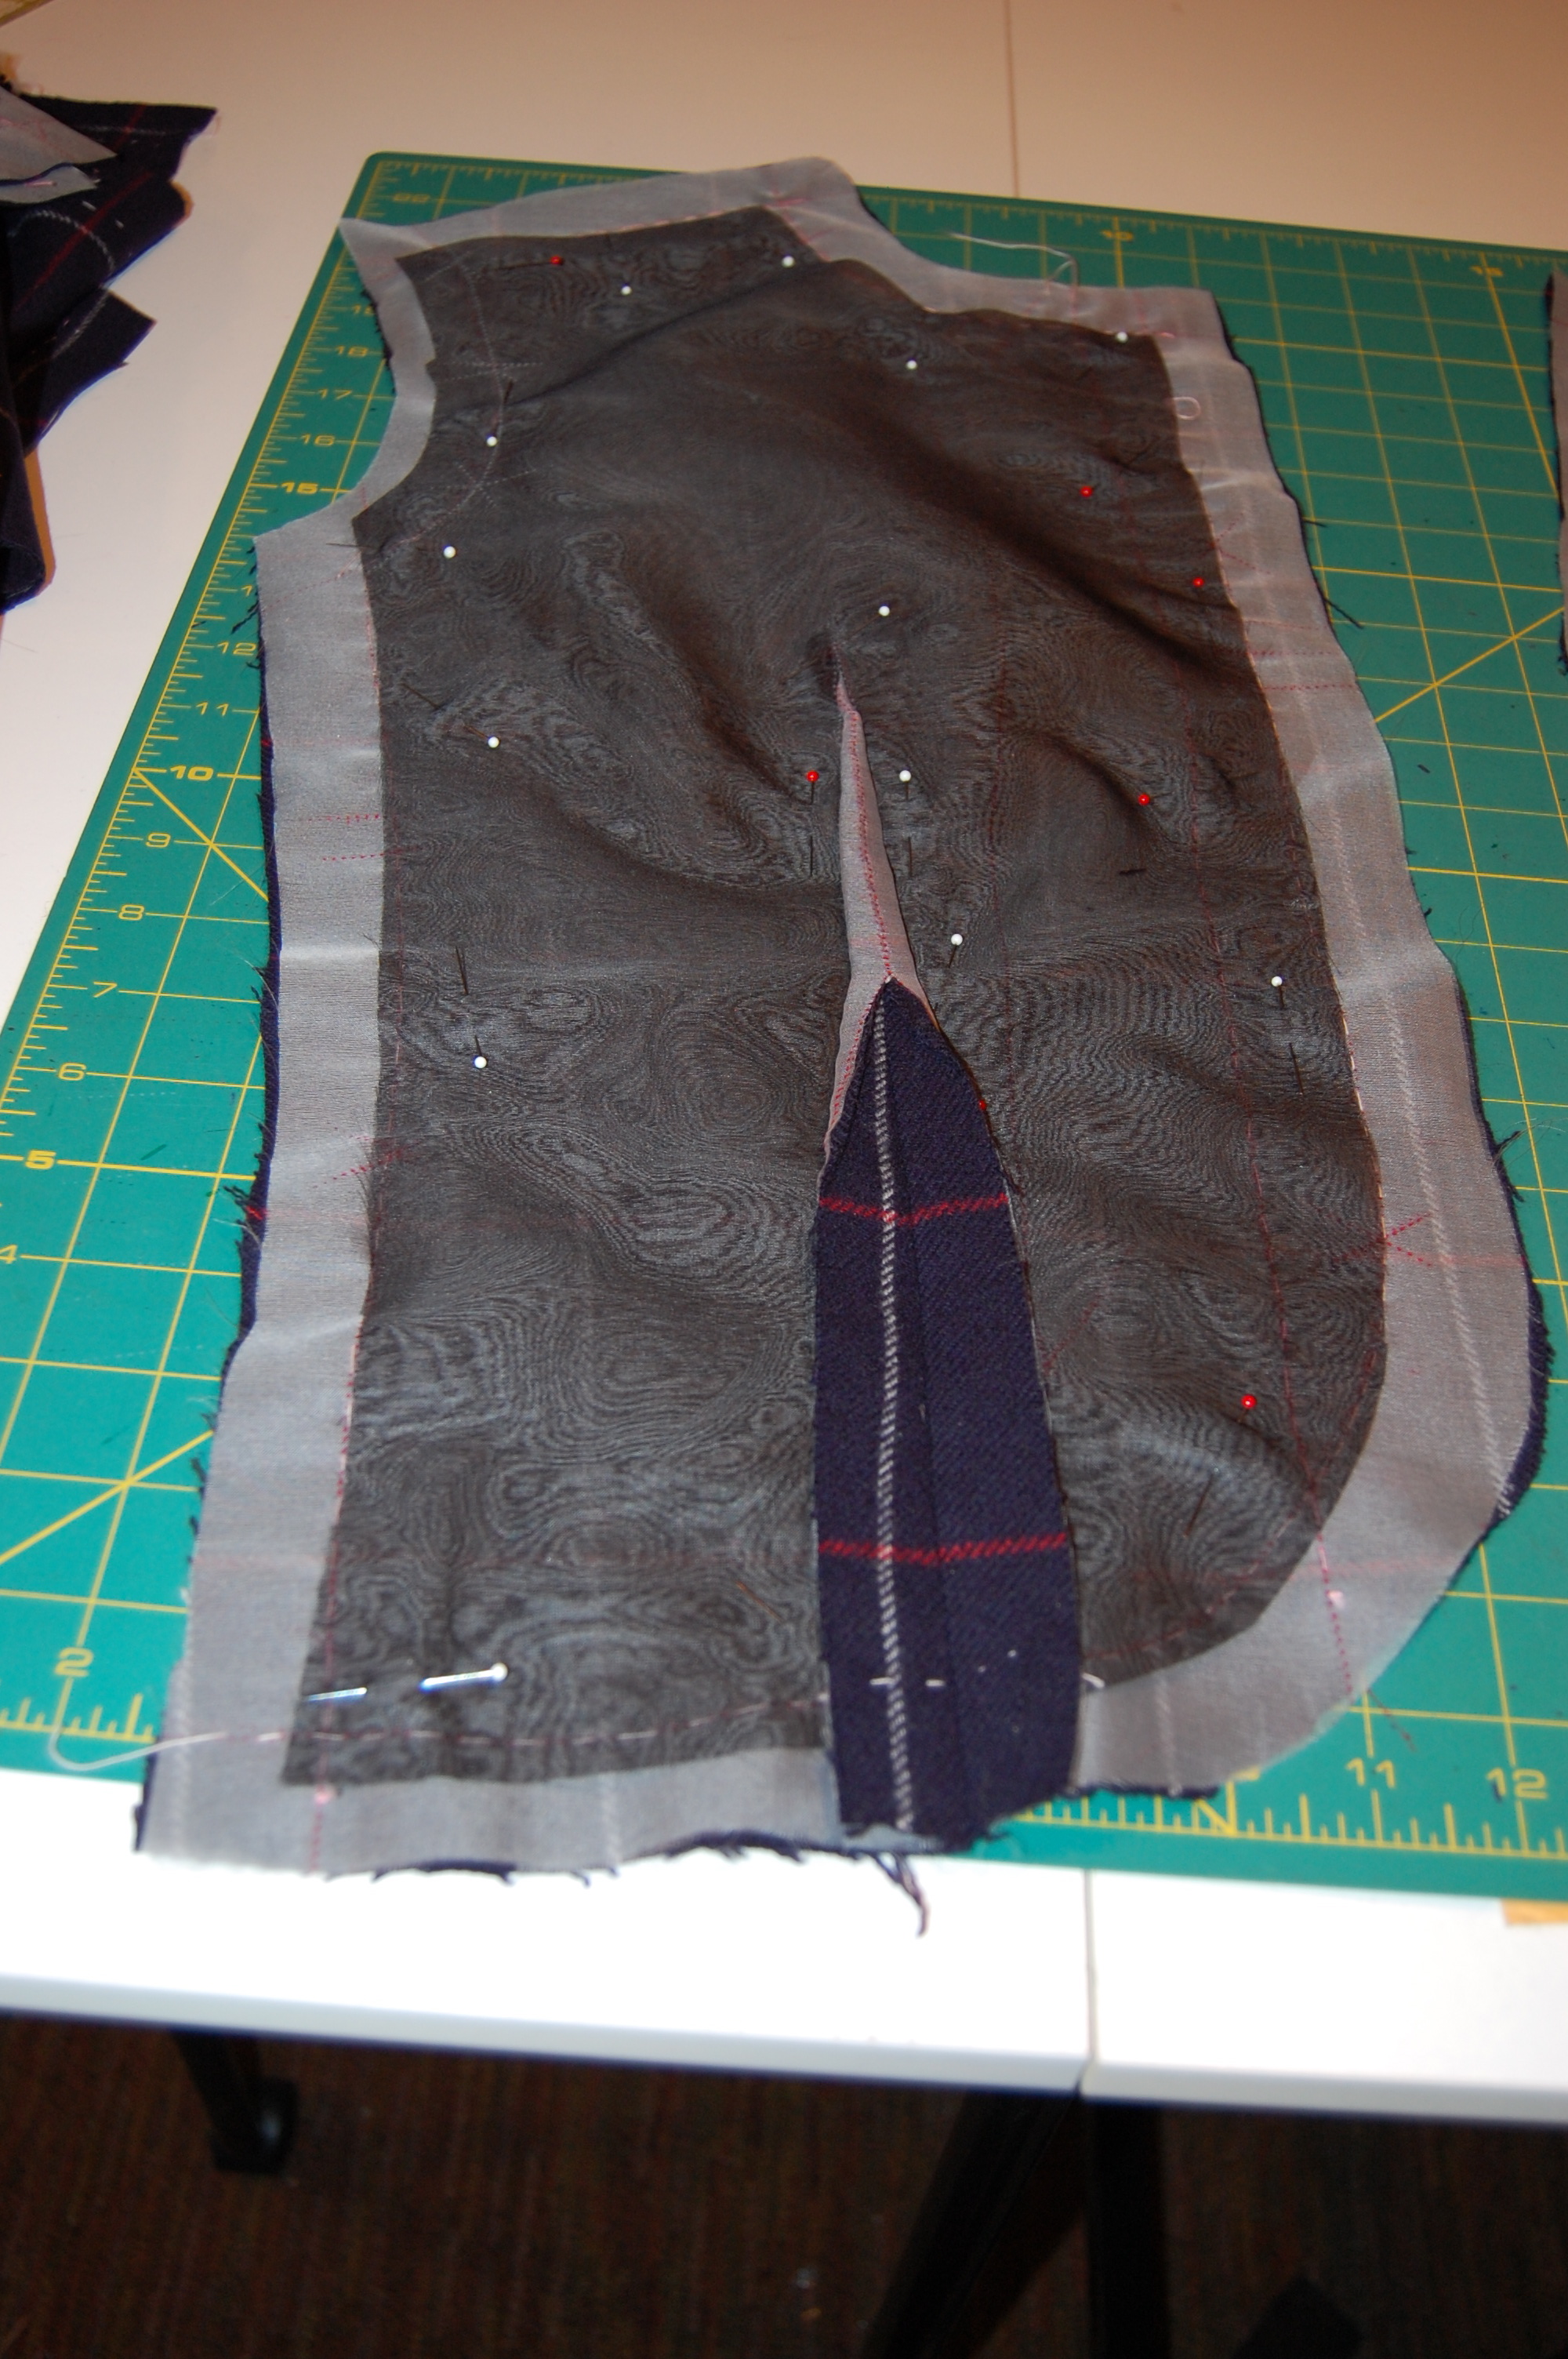
I chose to use white silk organza underling rather than black, as it is much easier to see the windowpane lines through the white, and easier on the eyes, too.
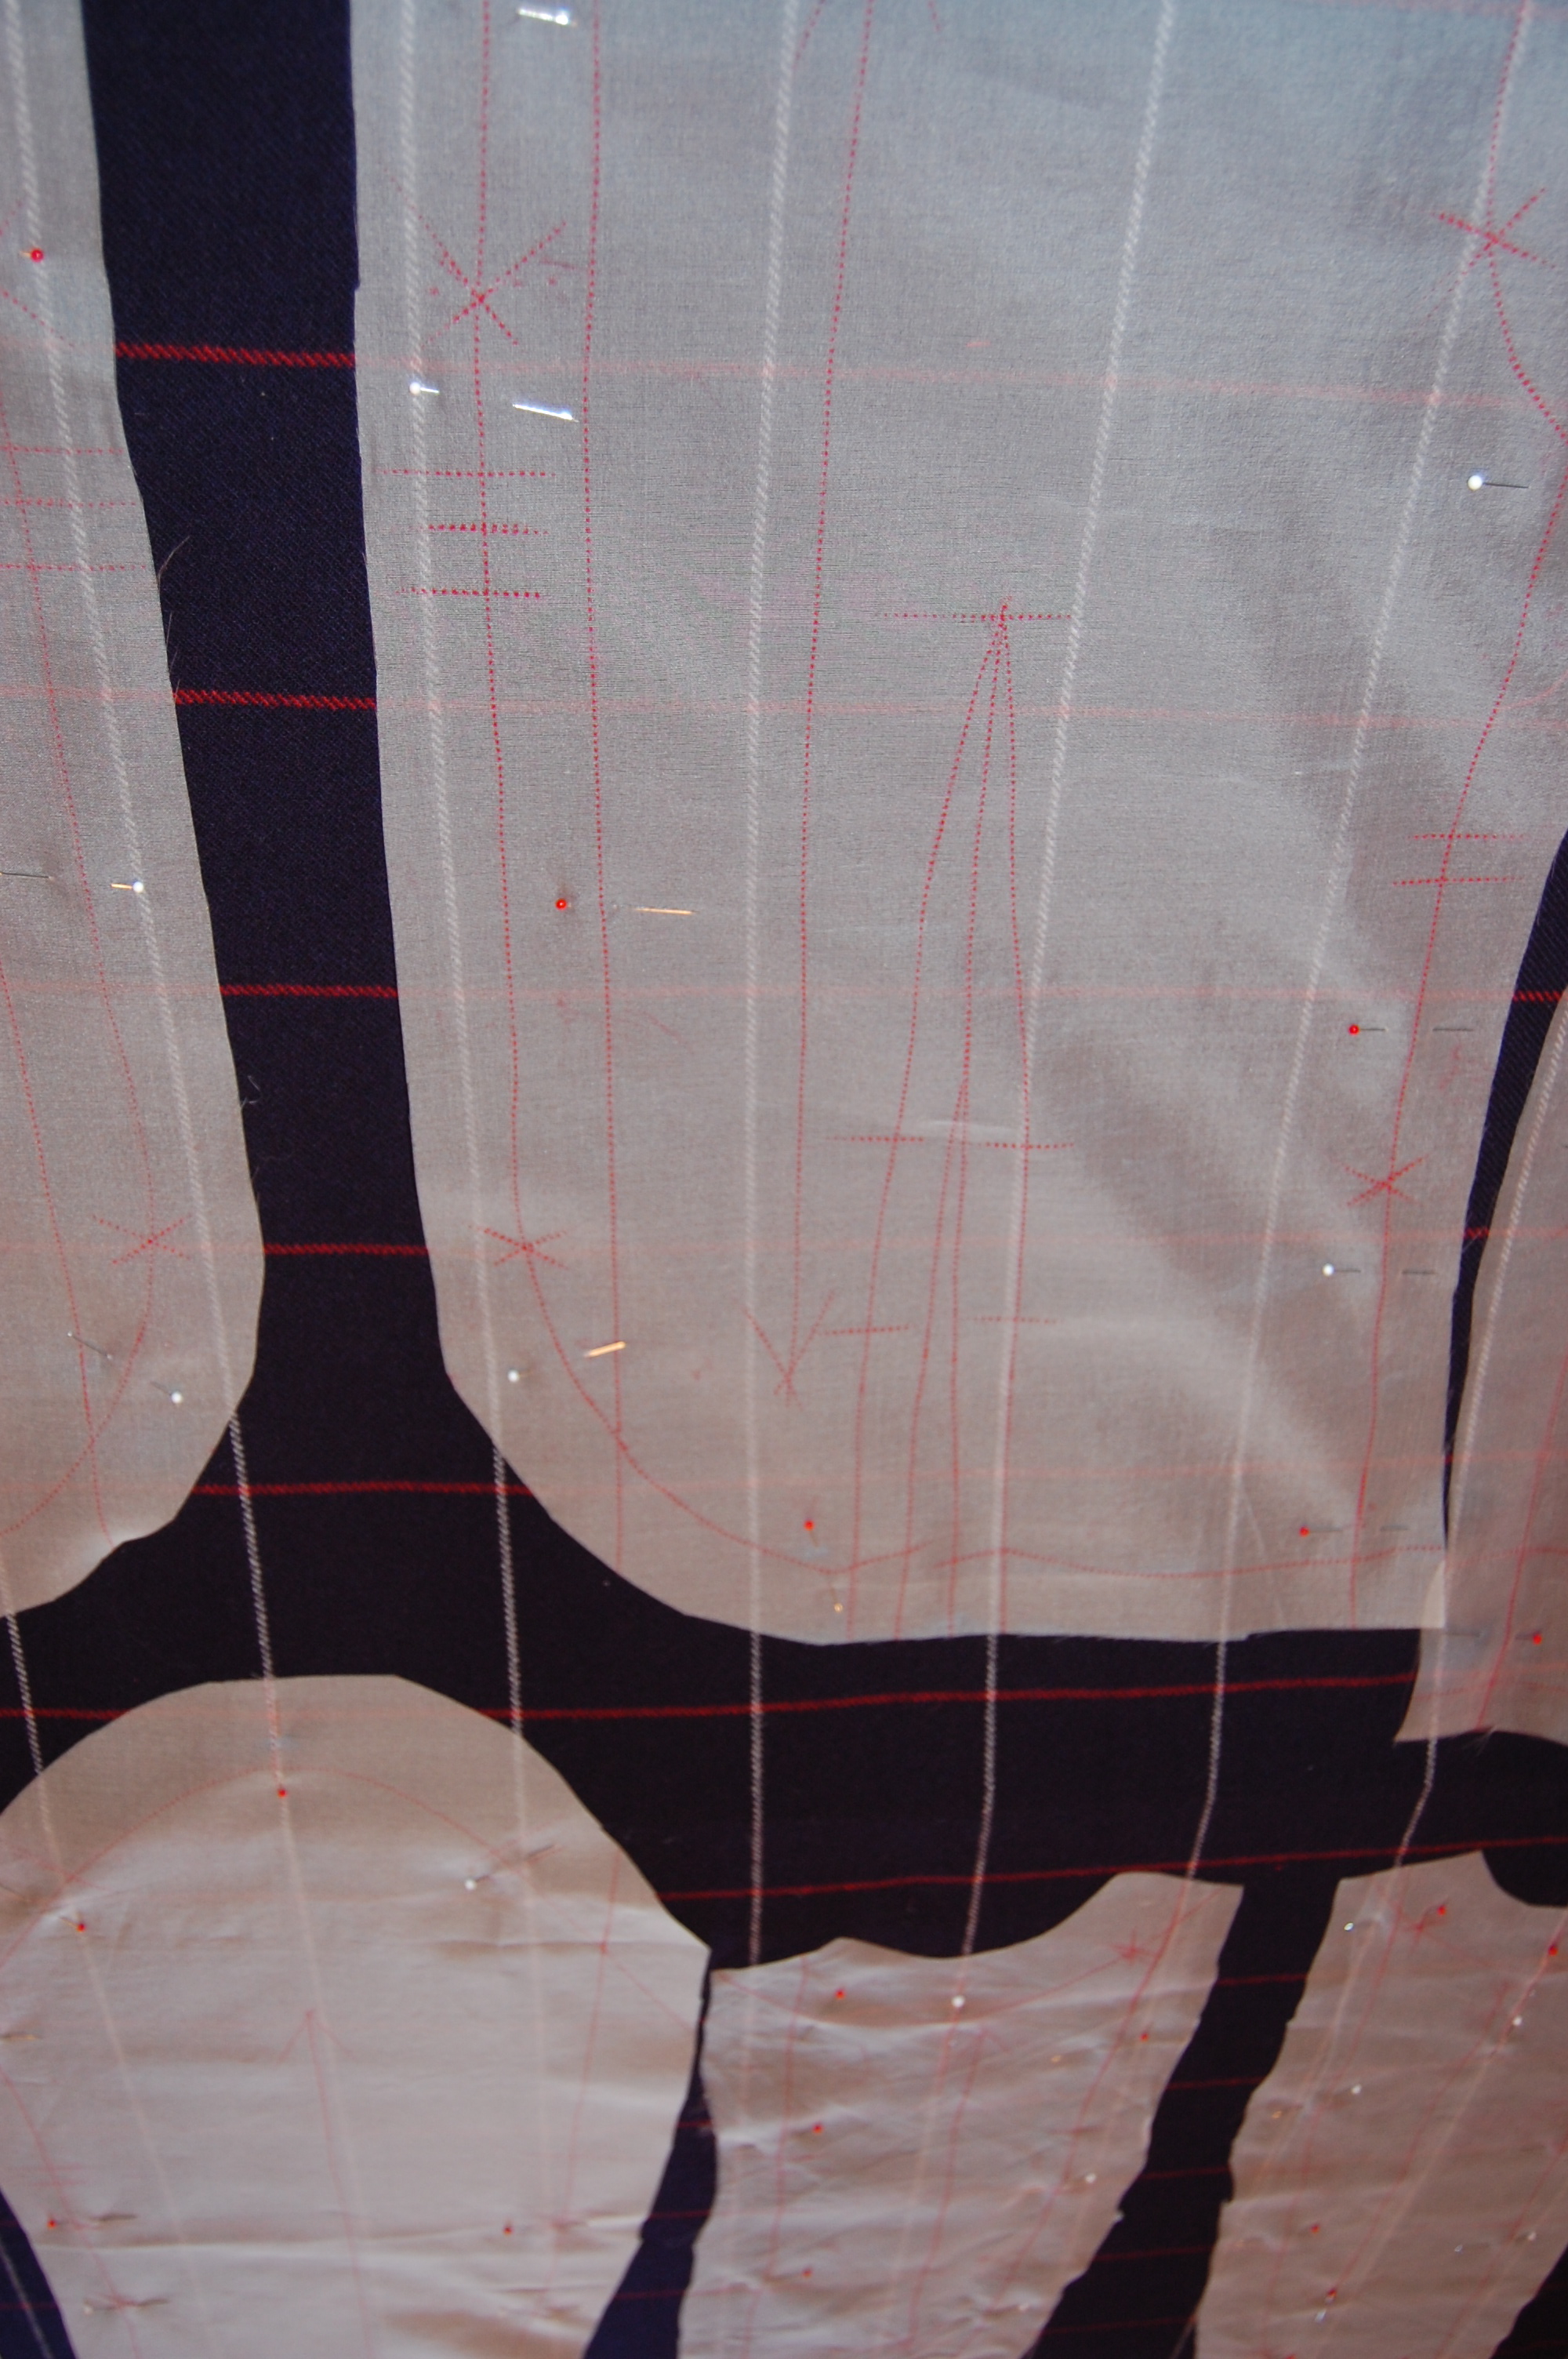
This photo better shows my markings on the silk organza underlining.
With all the silk organza underlining basted onto the wool, I am ready to sew.
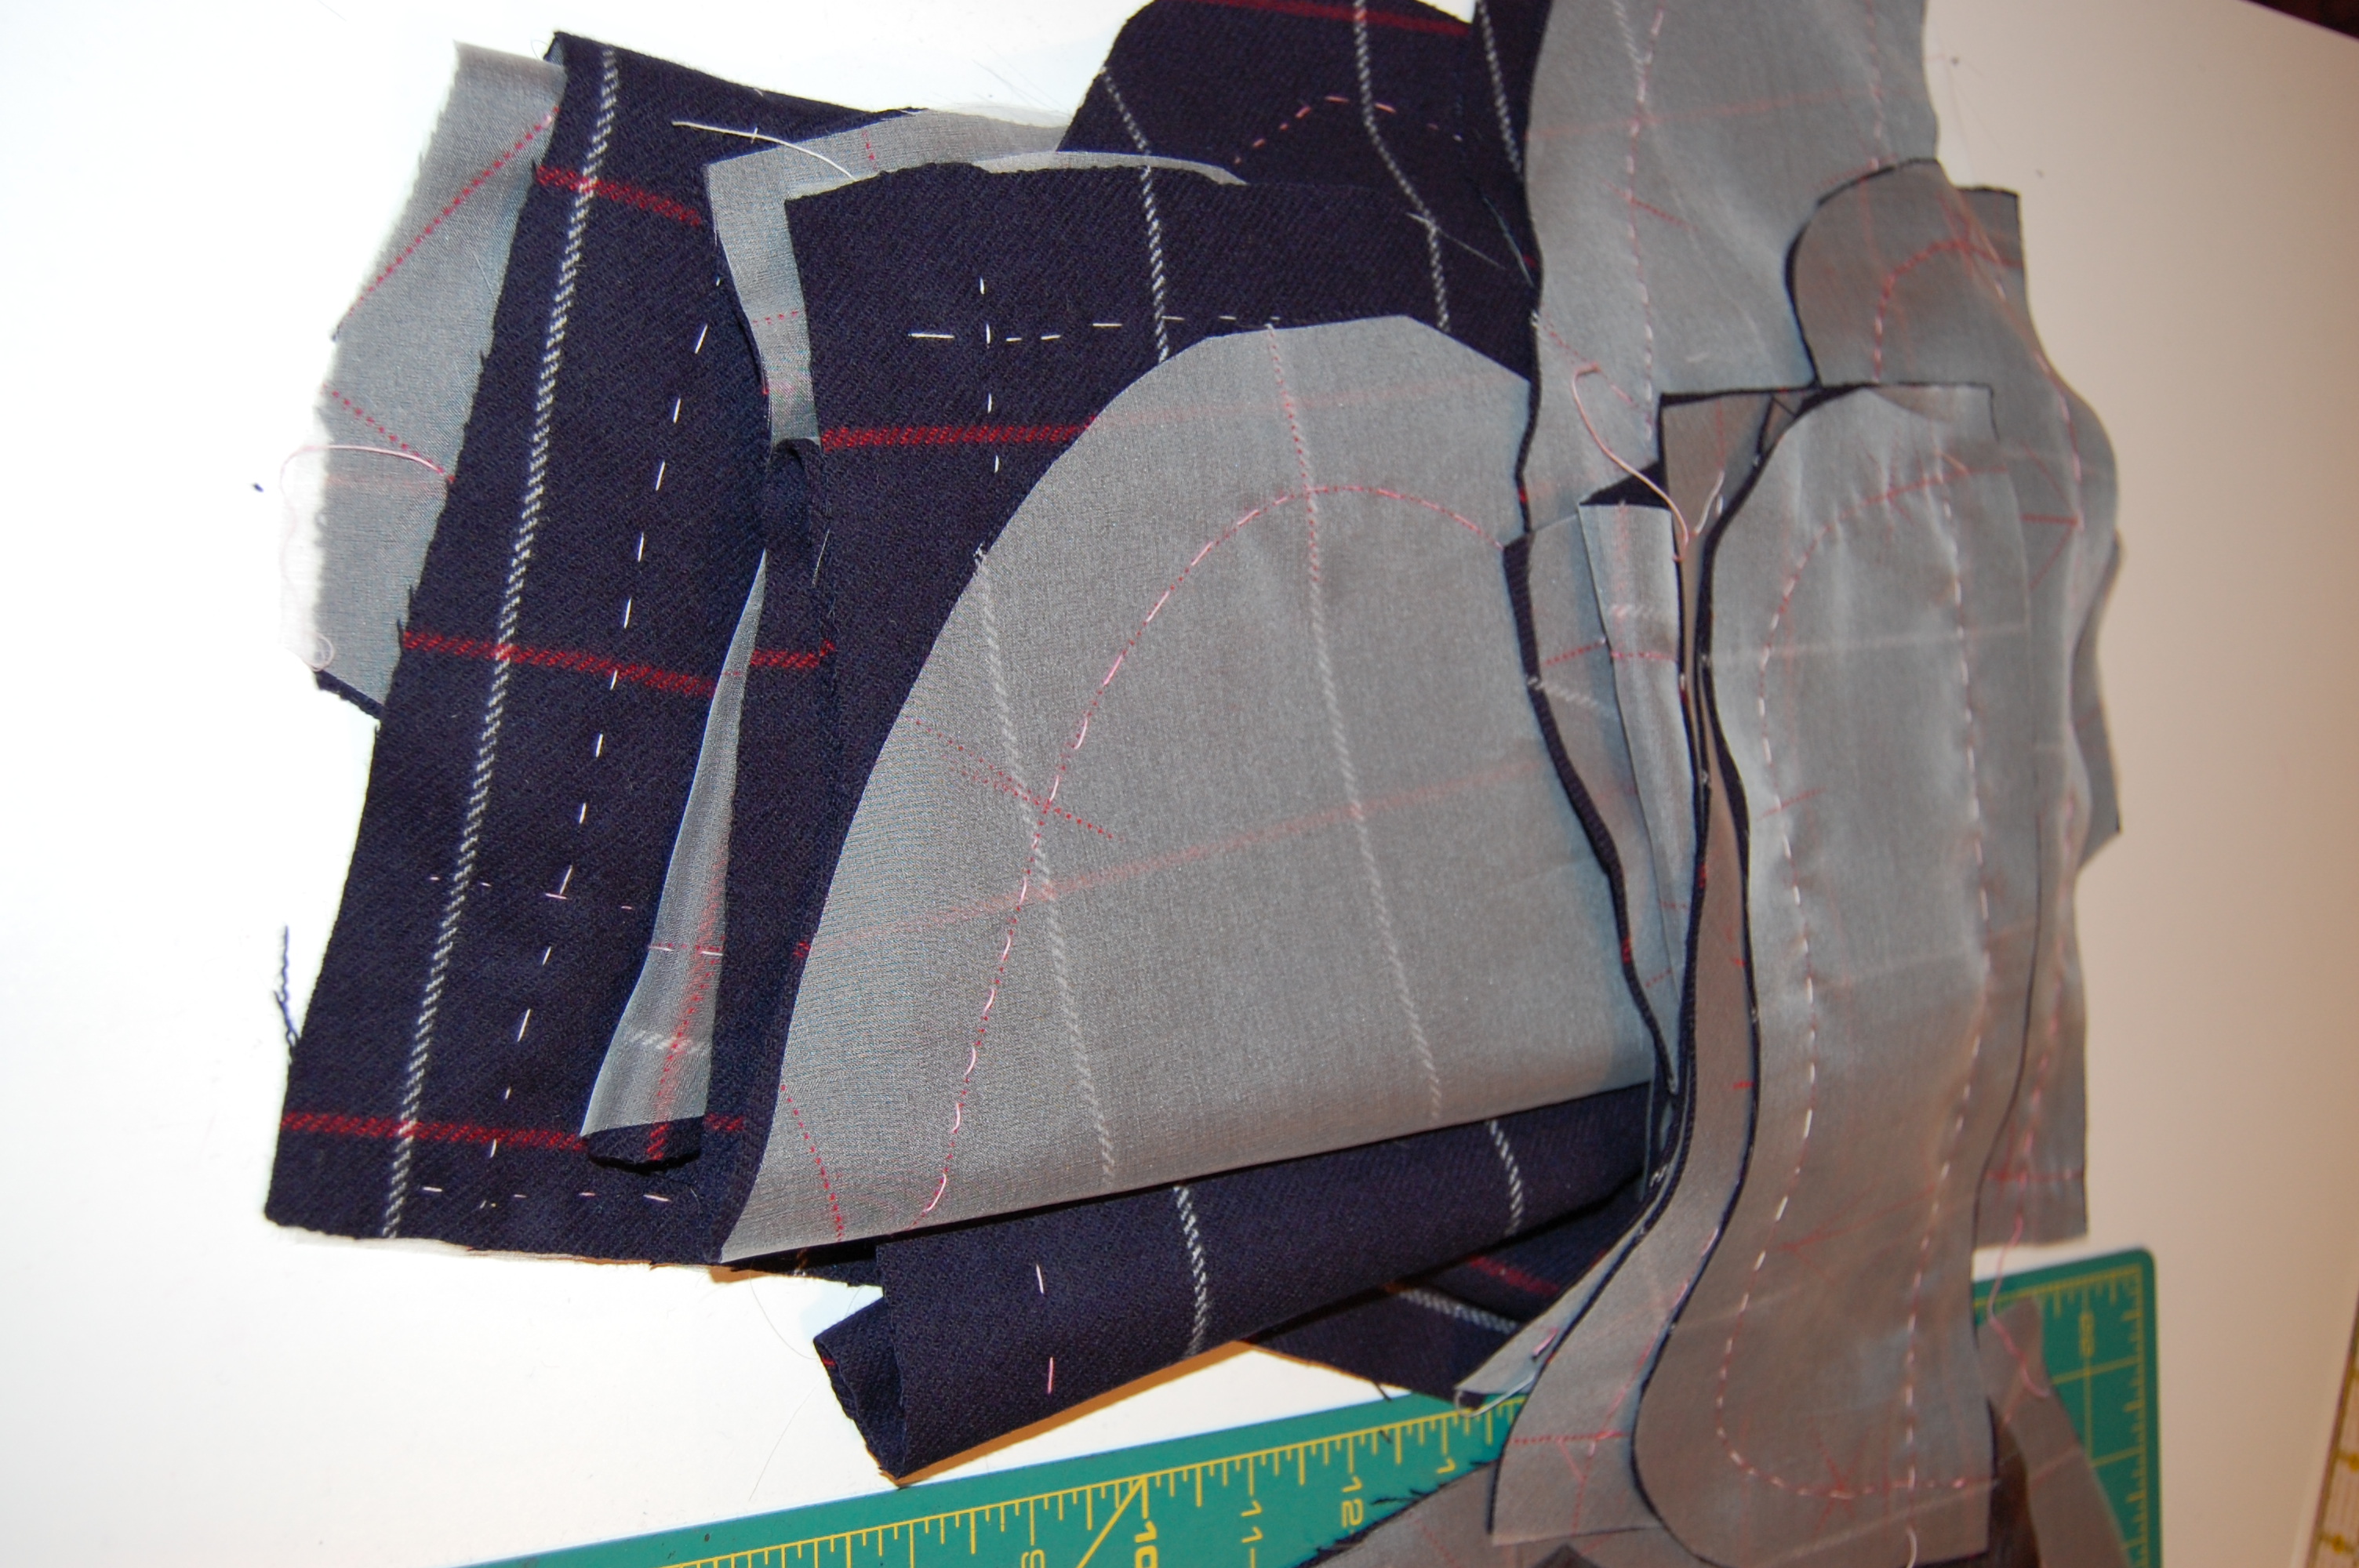
A pile of prepared pieces!
But hold the horses there, Fifty Dresses! First, there are interfacings to be pad-stitched and bound buttonholes to be made.
I am using black silk organza for the interfacing. This is what I did on my color-blocked coat, under Susan Khalje’s tutelage, and I was delighted with the results!
It is clear there is no hurrying this jacket, nor should there be. Some dreams just take a little more time.

Looking forward to seeing your progress on this. It will be so classy.
Thank you – I hope so!
I’m exhausted just from reading this! As for the extra fabric that some stores sometimes add, I bought several pieces at Mood last week, and at least eight inches was added to all of them. One piece had an extra 14 inches.
Good for Mood! I am not surprised, however, knowing Mood. It certainly is a practice that builds loyalty and engenders warm feelings, isn’t it?
Absolutely true! In my local shop, they also provide massive-sized samples compared to samples in the good old days.
Looks amazing thus far! It’ll all pay off in the end. 🙂
That’s what I am counting on, Zoe! Thanks for your encouragement!
Never heard about using silk organza as interfacing. Do you treat it the same way as you would horse hair canvas? What is the difference in feel and drape?
And I never would have thought of using it as interfacing either had I not worked with Susan on my color-blocked coat. Yes, it is treated the same as horse hair canvas, but it is not as heavy or stiff. I considered using canvas for this jacket, but it seemed to add too much heaviness and stiffness for the soft hand of the wool. I will show some photos of the pad-stitching on the front interfaced pieces in a future post. Hopefully that will help answer some of your questions, too.
Thanks a lot, I would love to see pictures of the pad stitching!
This is going to be beautiful. Your attention to detail is inspiring.
I love the details… Guess you can tell!
Look forward to seeing this completed. It will be beautiful. You have hit on one of my pet peeves about JoAnn Fabrics. They measure to the inch and then cut with dull scissors so you end up with a piece off grain. ALL my fabric haunts tear fabric (if possible) and add extra inches.
I totally agree about JoAnn Fabrics! I hate to complain too much as it seems I am always using coupons or they are having sales, so that’s an advantage! Plus, I am so grateful to have a store where I can buy the thread I want (although no silk buttonhole twist, sadly! I asked them once if they might carry it, and the sales clerk asked me what it was!) If it were not for JoAnn’s I would have NO fabric store in my area – difficult to believe, but true!
I agree, sewing is patience, sometimes it takes time to finish a project properly! Lovely fabric, your jacket is going to be beautiful!
Thanks, Linda! I am making steady progress on it, and enjoying it so much!
Can’t wait to see the final product!