Tag Archives: Jo Mattli Vogue pattern

The Essential Coat

How many coats do you own? (Not enough?) How many do you need? (More than you know!) Putting need aside, how many should you have? (Plenty!) In your sewing and in planning your wardrobe, do you give as much thought to your coats as you do to your dresses or pants or blouses? My guess is that you do not.

In our very casual world, coats seem to have taken on the essence of “practical” or “function over form.”   To me, this is such a shame, as I believe coats have an aura to them unmatched by any other garment. They are, after all, so often a significant part of the first impression you make when arriving at an event or party – or anything for that matter. A fantastic coat can also leave a lasting impression when departing such an event.

In her iconic book, What Should I Wear, Claire McCardell devotes an entire chapter to coats. Here is just a small snippet of her thoughts on the impression that your coat can make: “…Remember that a first impression often comes when you are wearing a coat. When you are interviewed for a job, you keep your coat on. Your future employer’s first impression of you may be based on the coat you are wearing.

When you walk down the aisle of a theatre, you are wearing a coat … your audience has already judged you and the most beautiful dress in the world cannot alter that first impression. Coats ride buses and subways and taxicabs…. A coat is not something to be dismissed lightly.”   (The Rookery Press, New York, New York, 2012, pages 61- 62.)

In The Little Pink Book of Elegance: The Modern Girl’s Guide to Living with Style, by Jodi Kahn, she writes: “Many an elegant look is spoiled by throwing on a coat or a wrap that is anything but . . . [I]f you think about the most elegant women you know, or those in the pubic eye, you’ll probably realize they have fabulous outerwear. In the ‘60s, Jacqueline Kennedy asked her designer of the day, Oleg Cassini, to pay special attention to what she wore over her clothes since she was always being photographed coming and going. Even if you don’t have to worry about getting your picture snapped around every corner, a few great coats will transform almost any [look.]” (Peter Pauper Press, Inc., White Plains, New York, c2005, pages 29-30.)

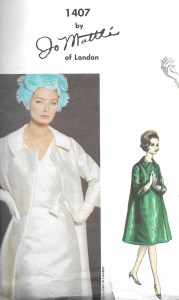
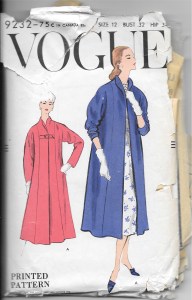
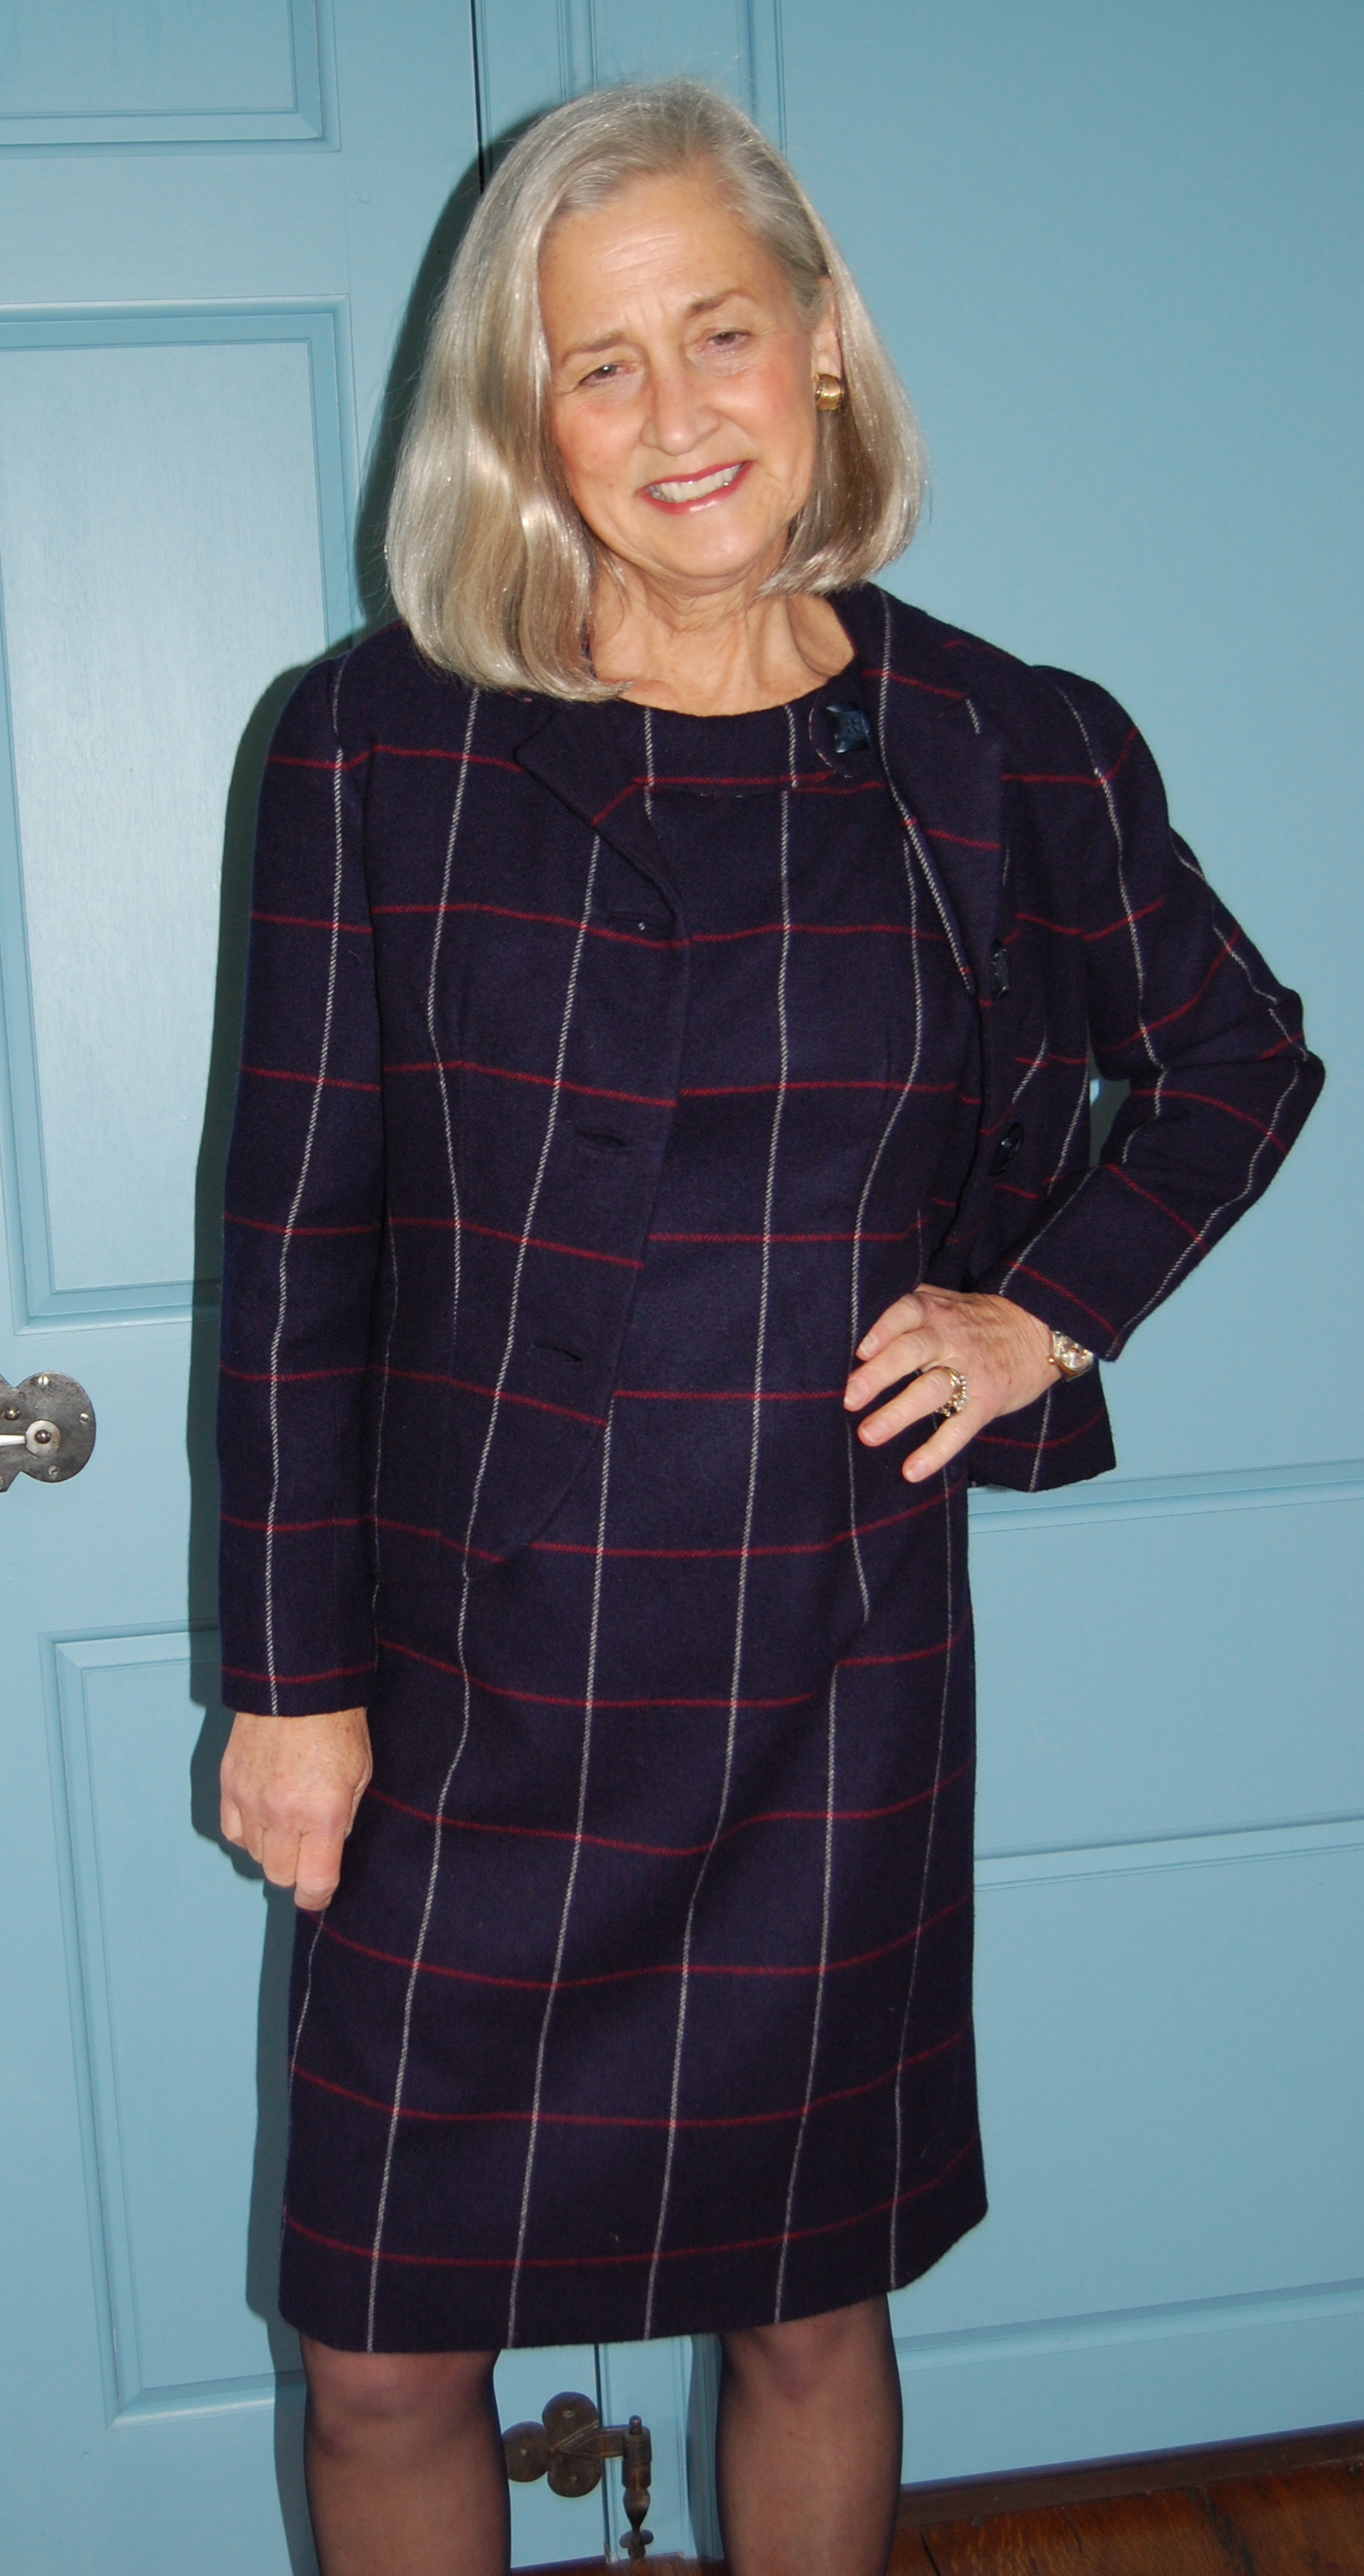
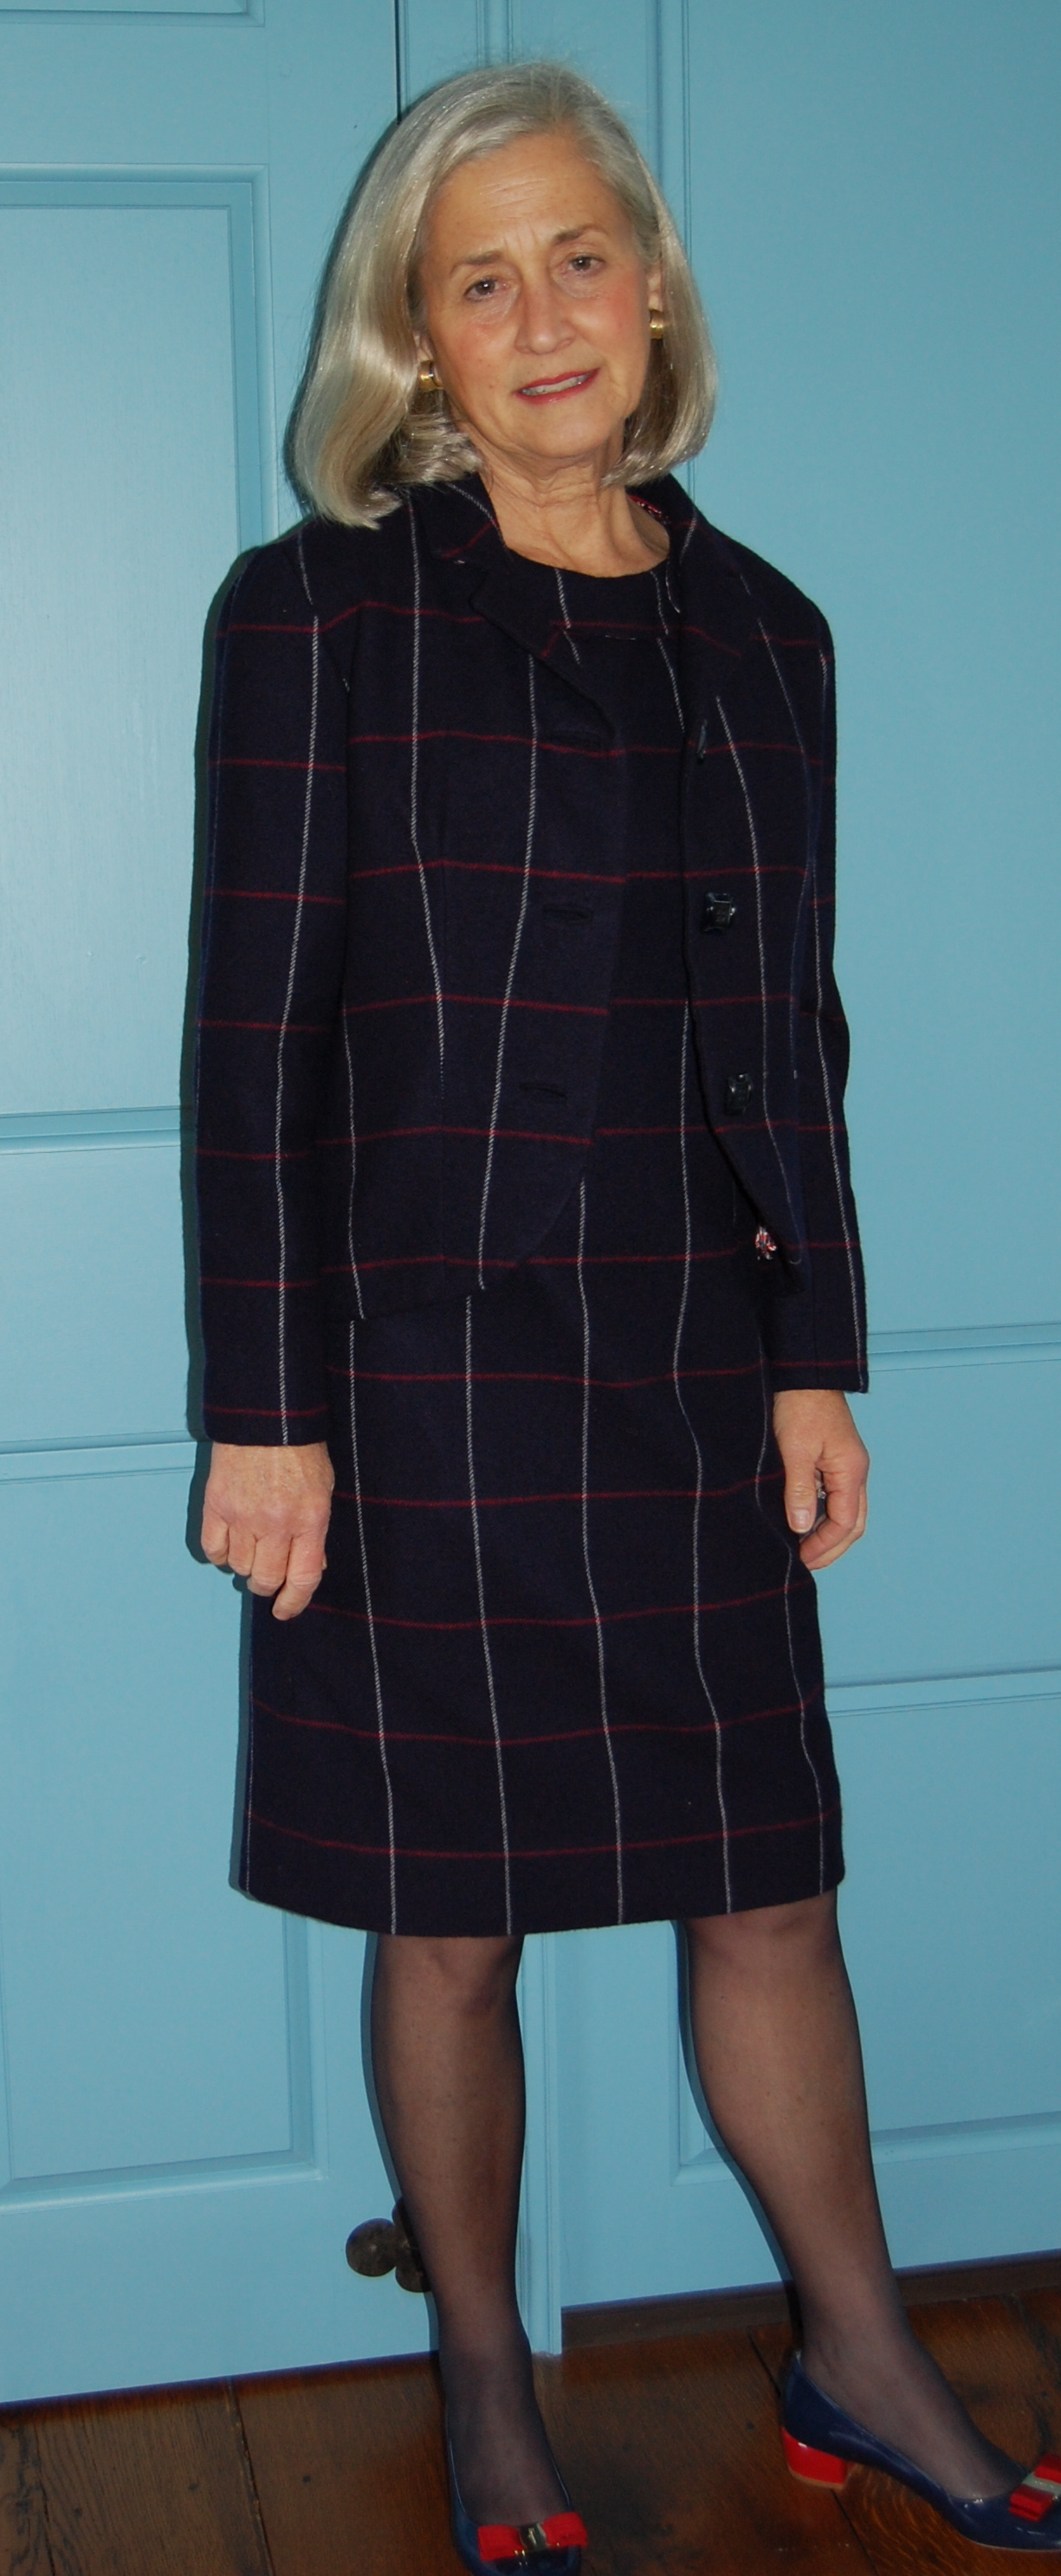
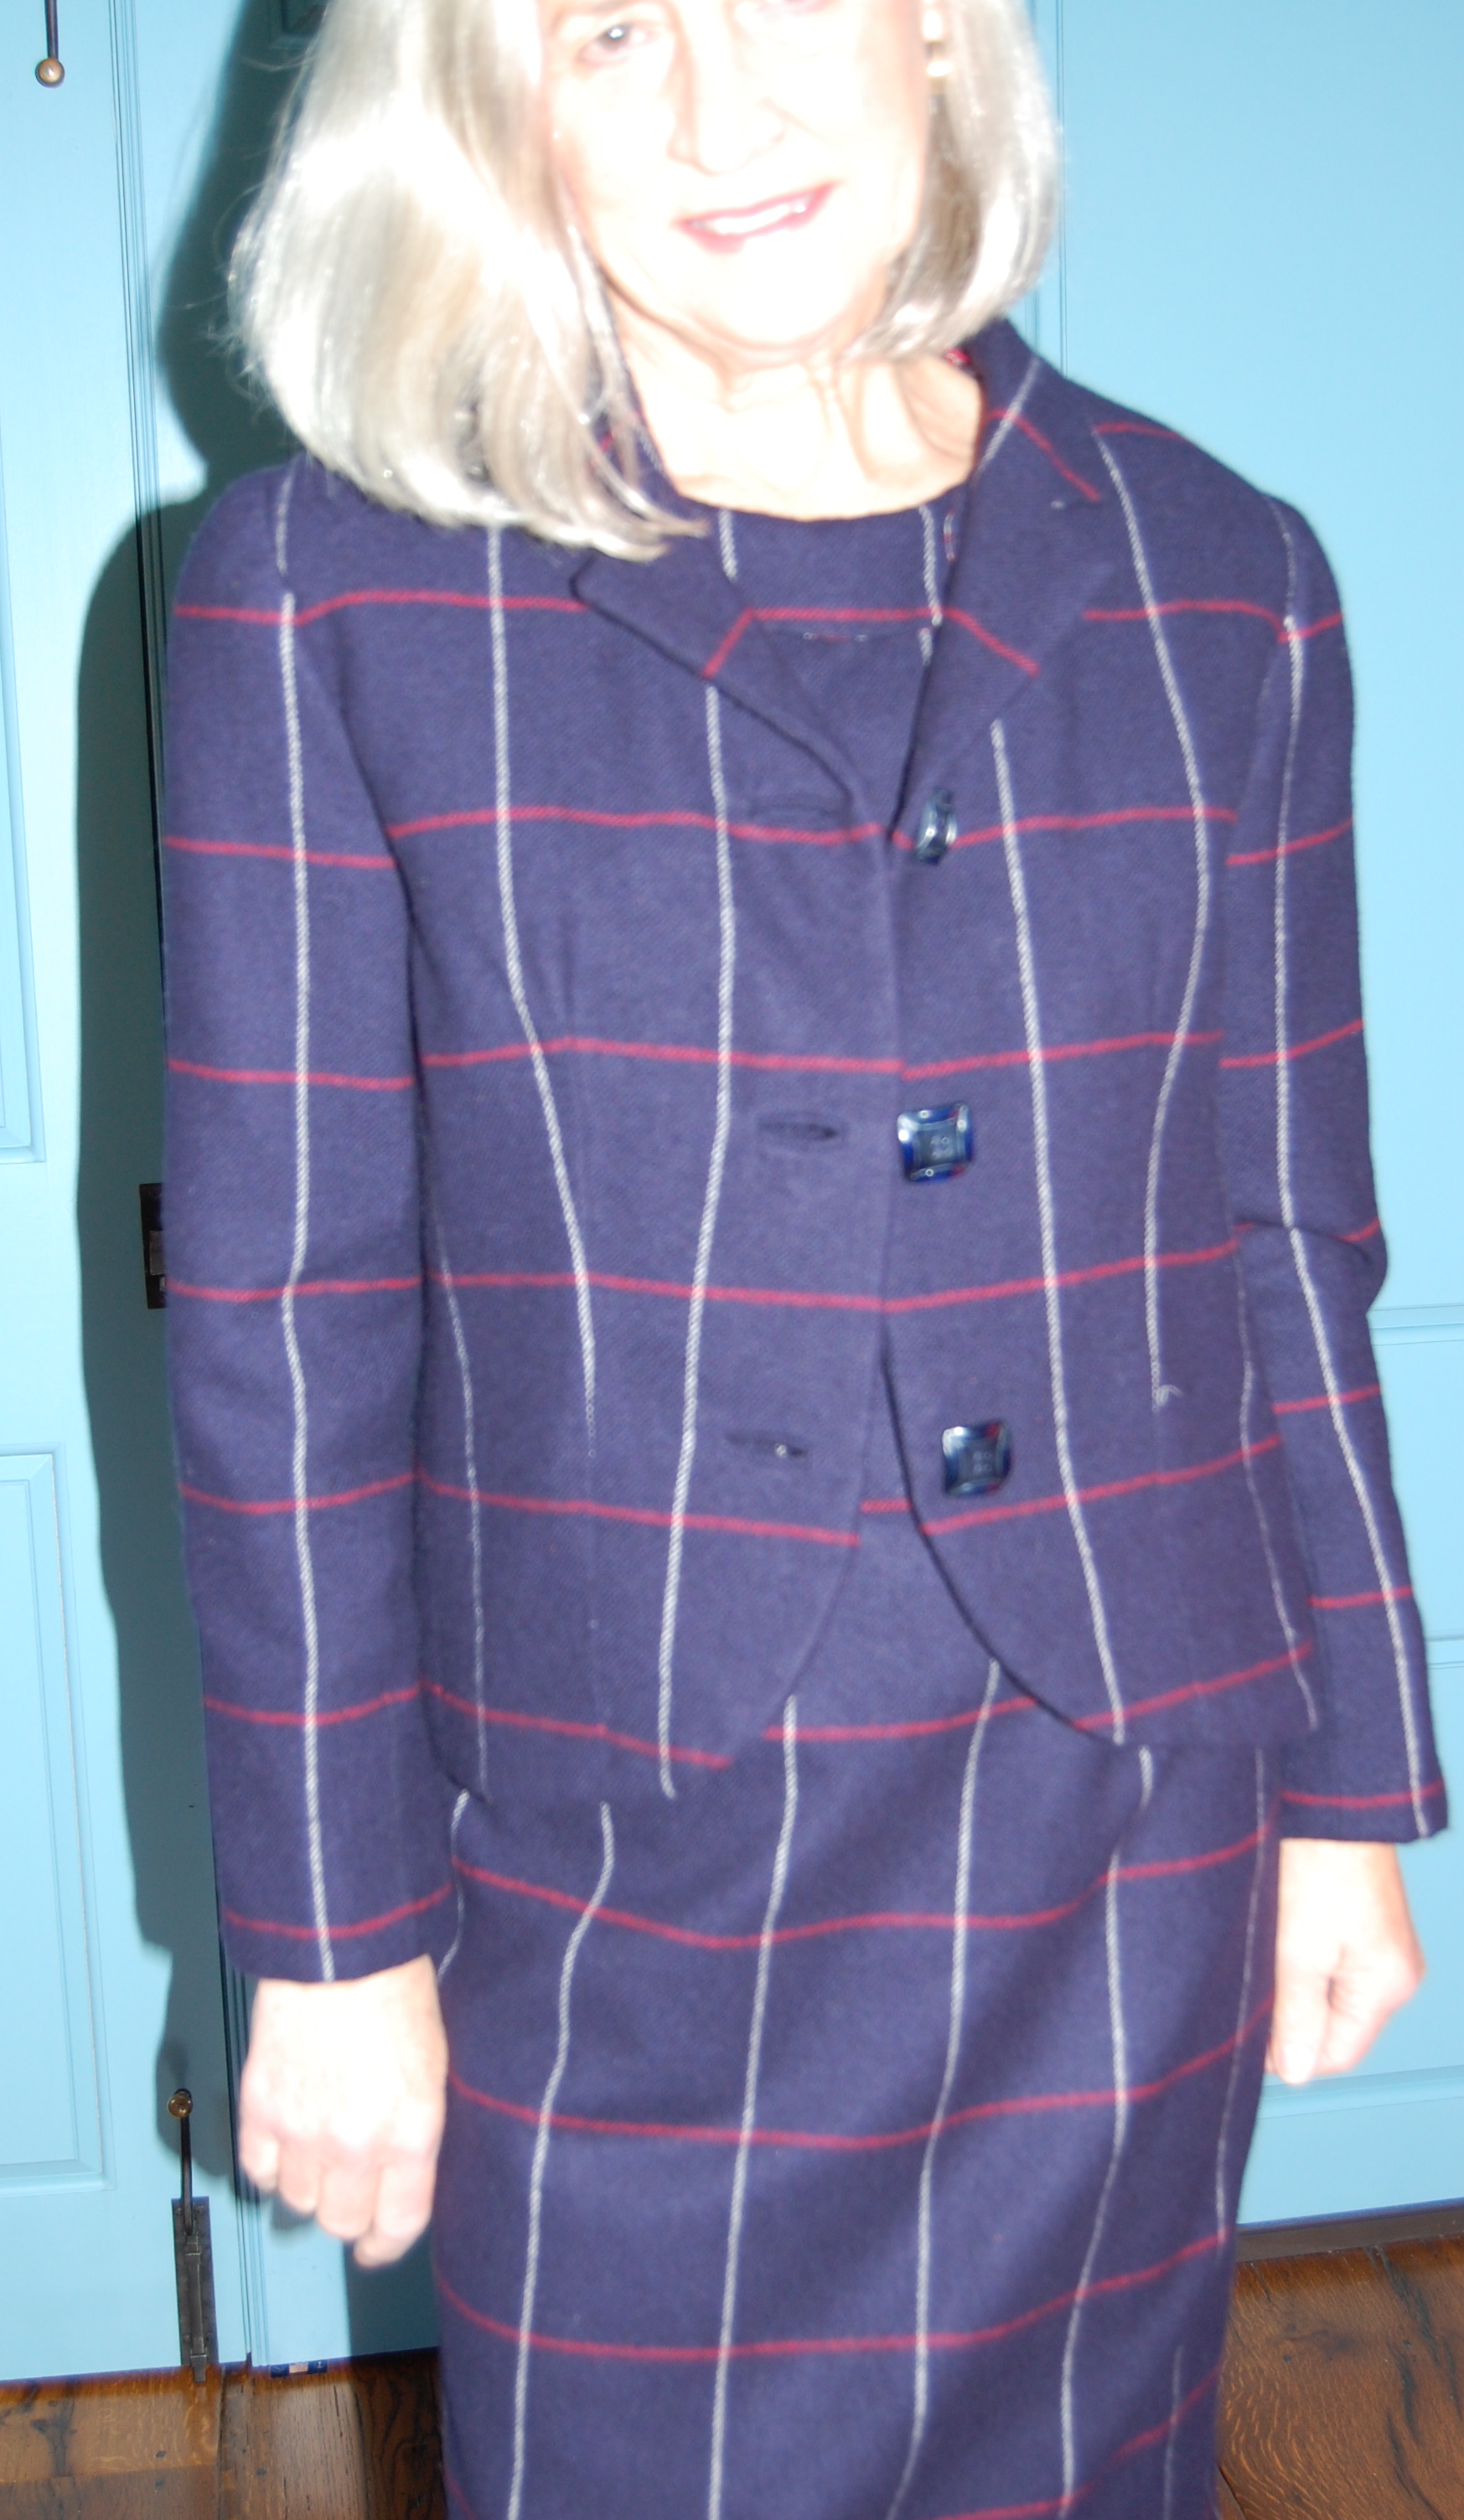
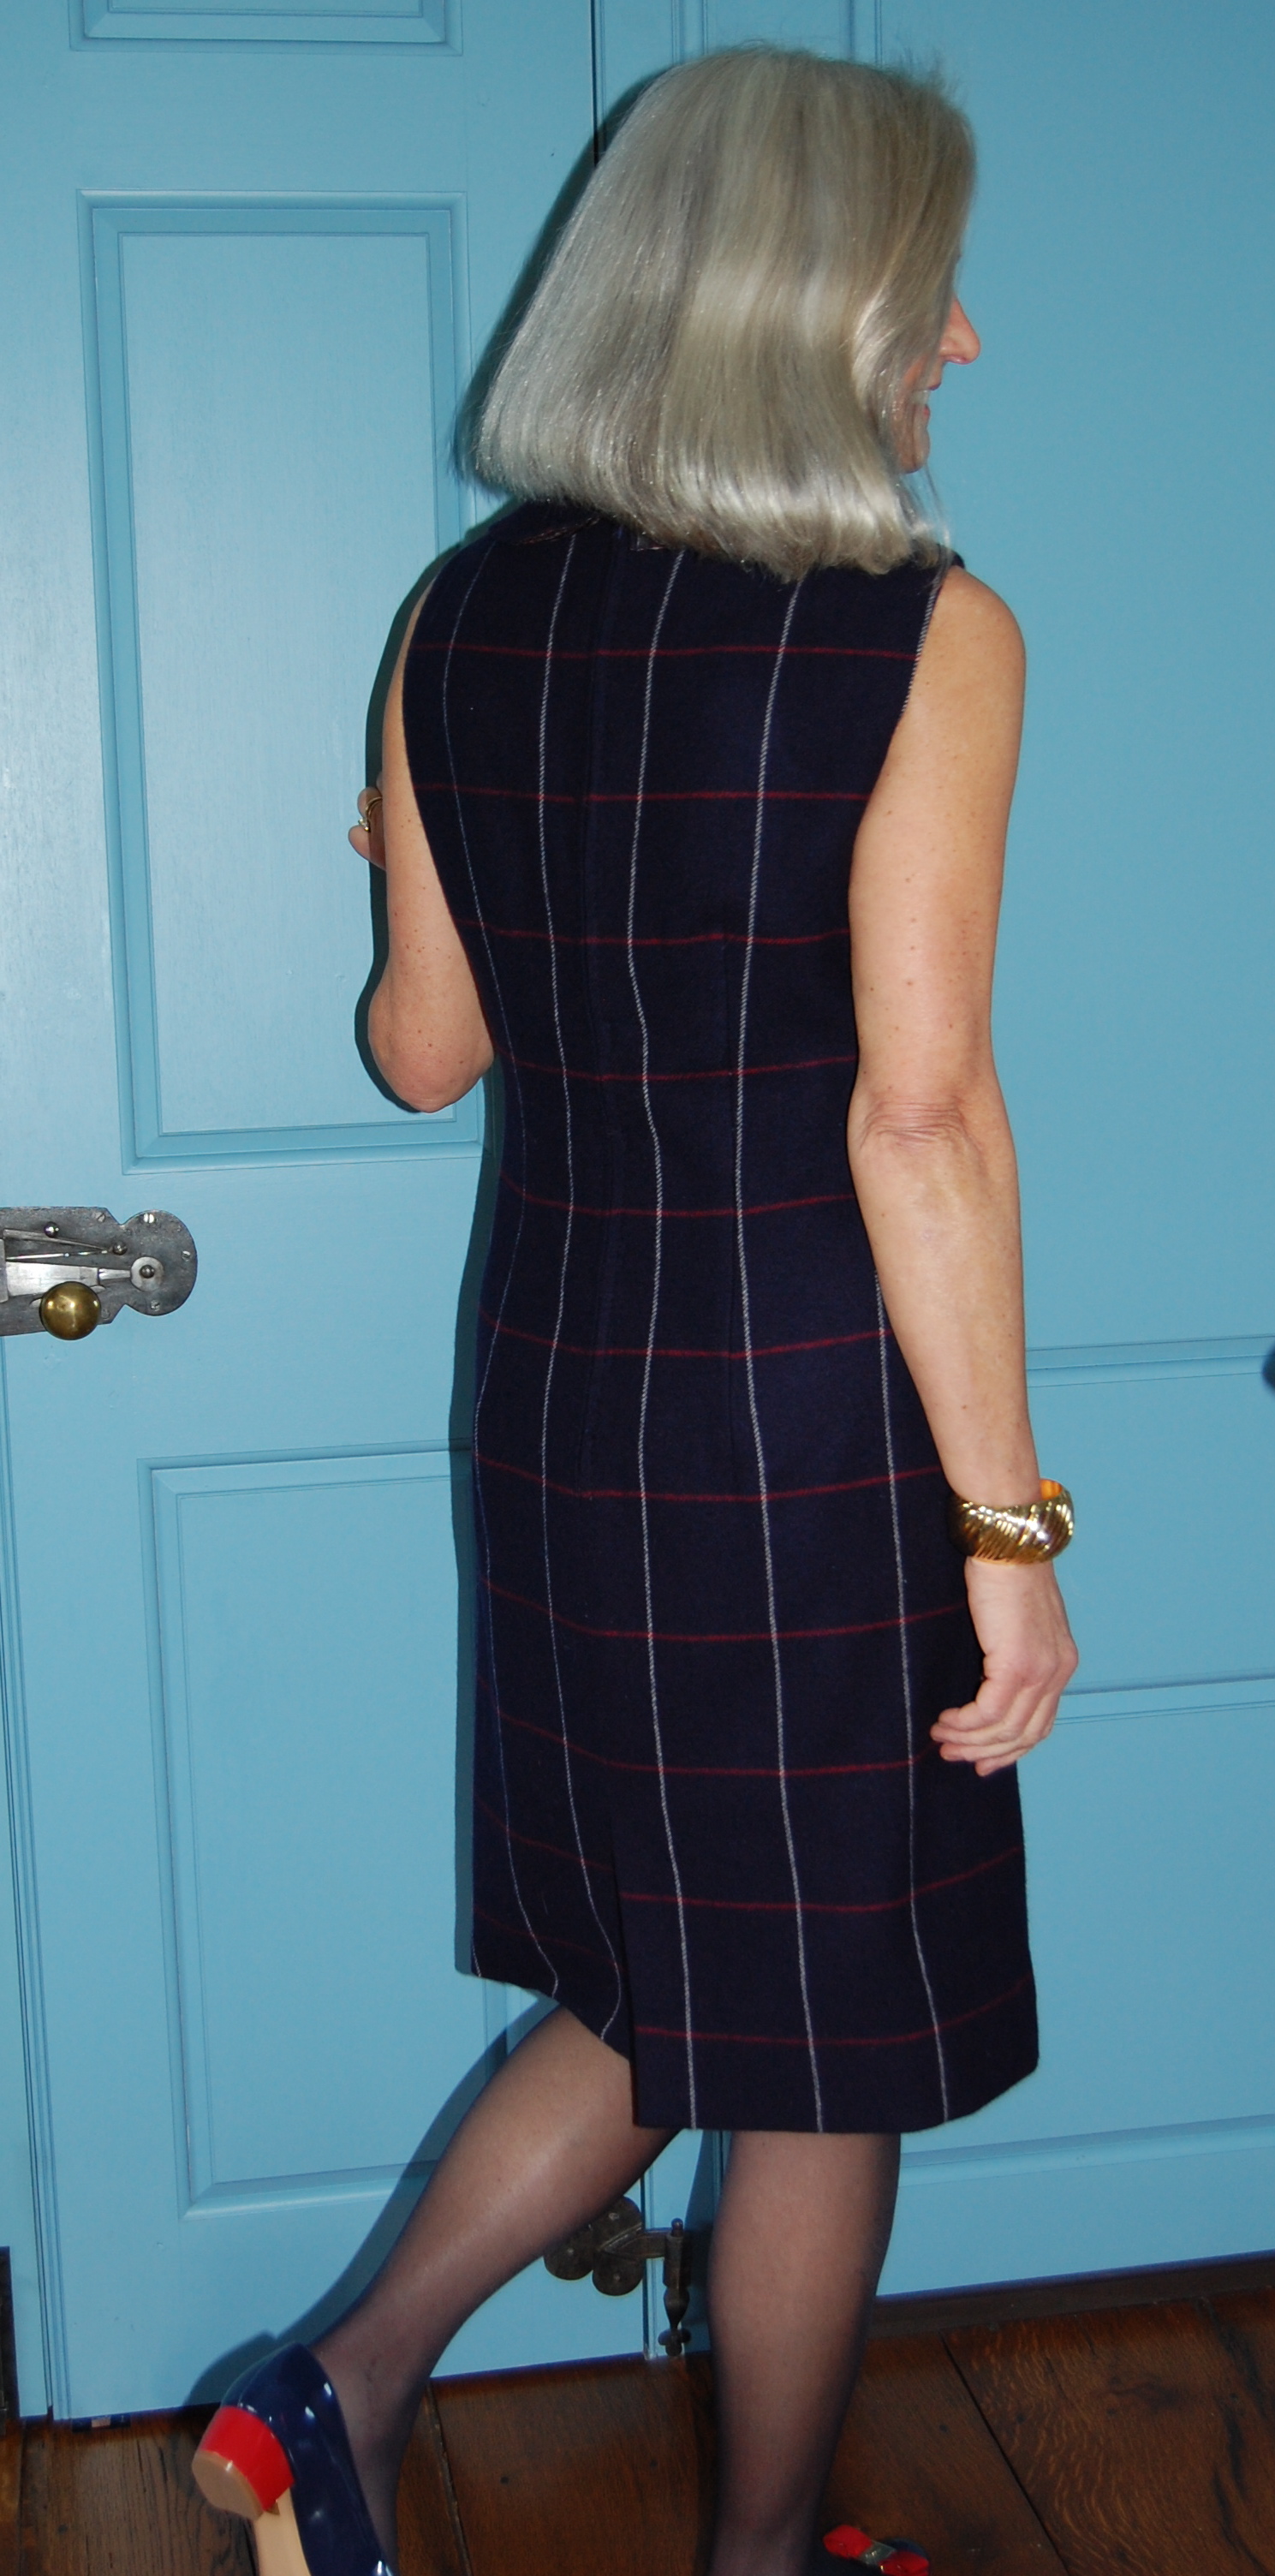
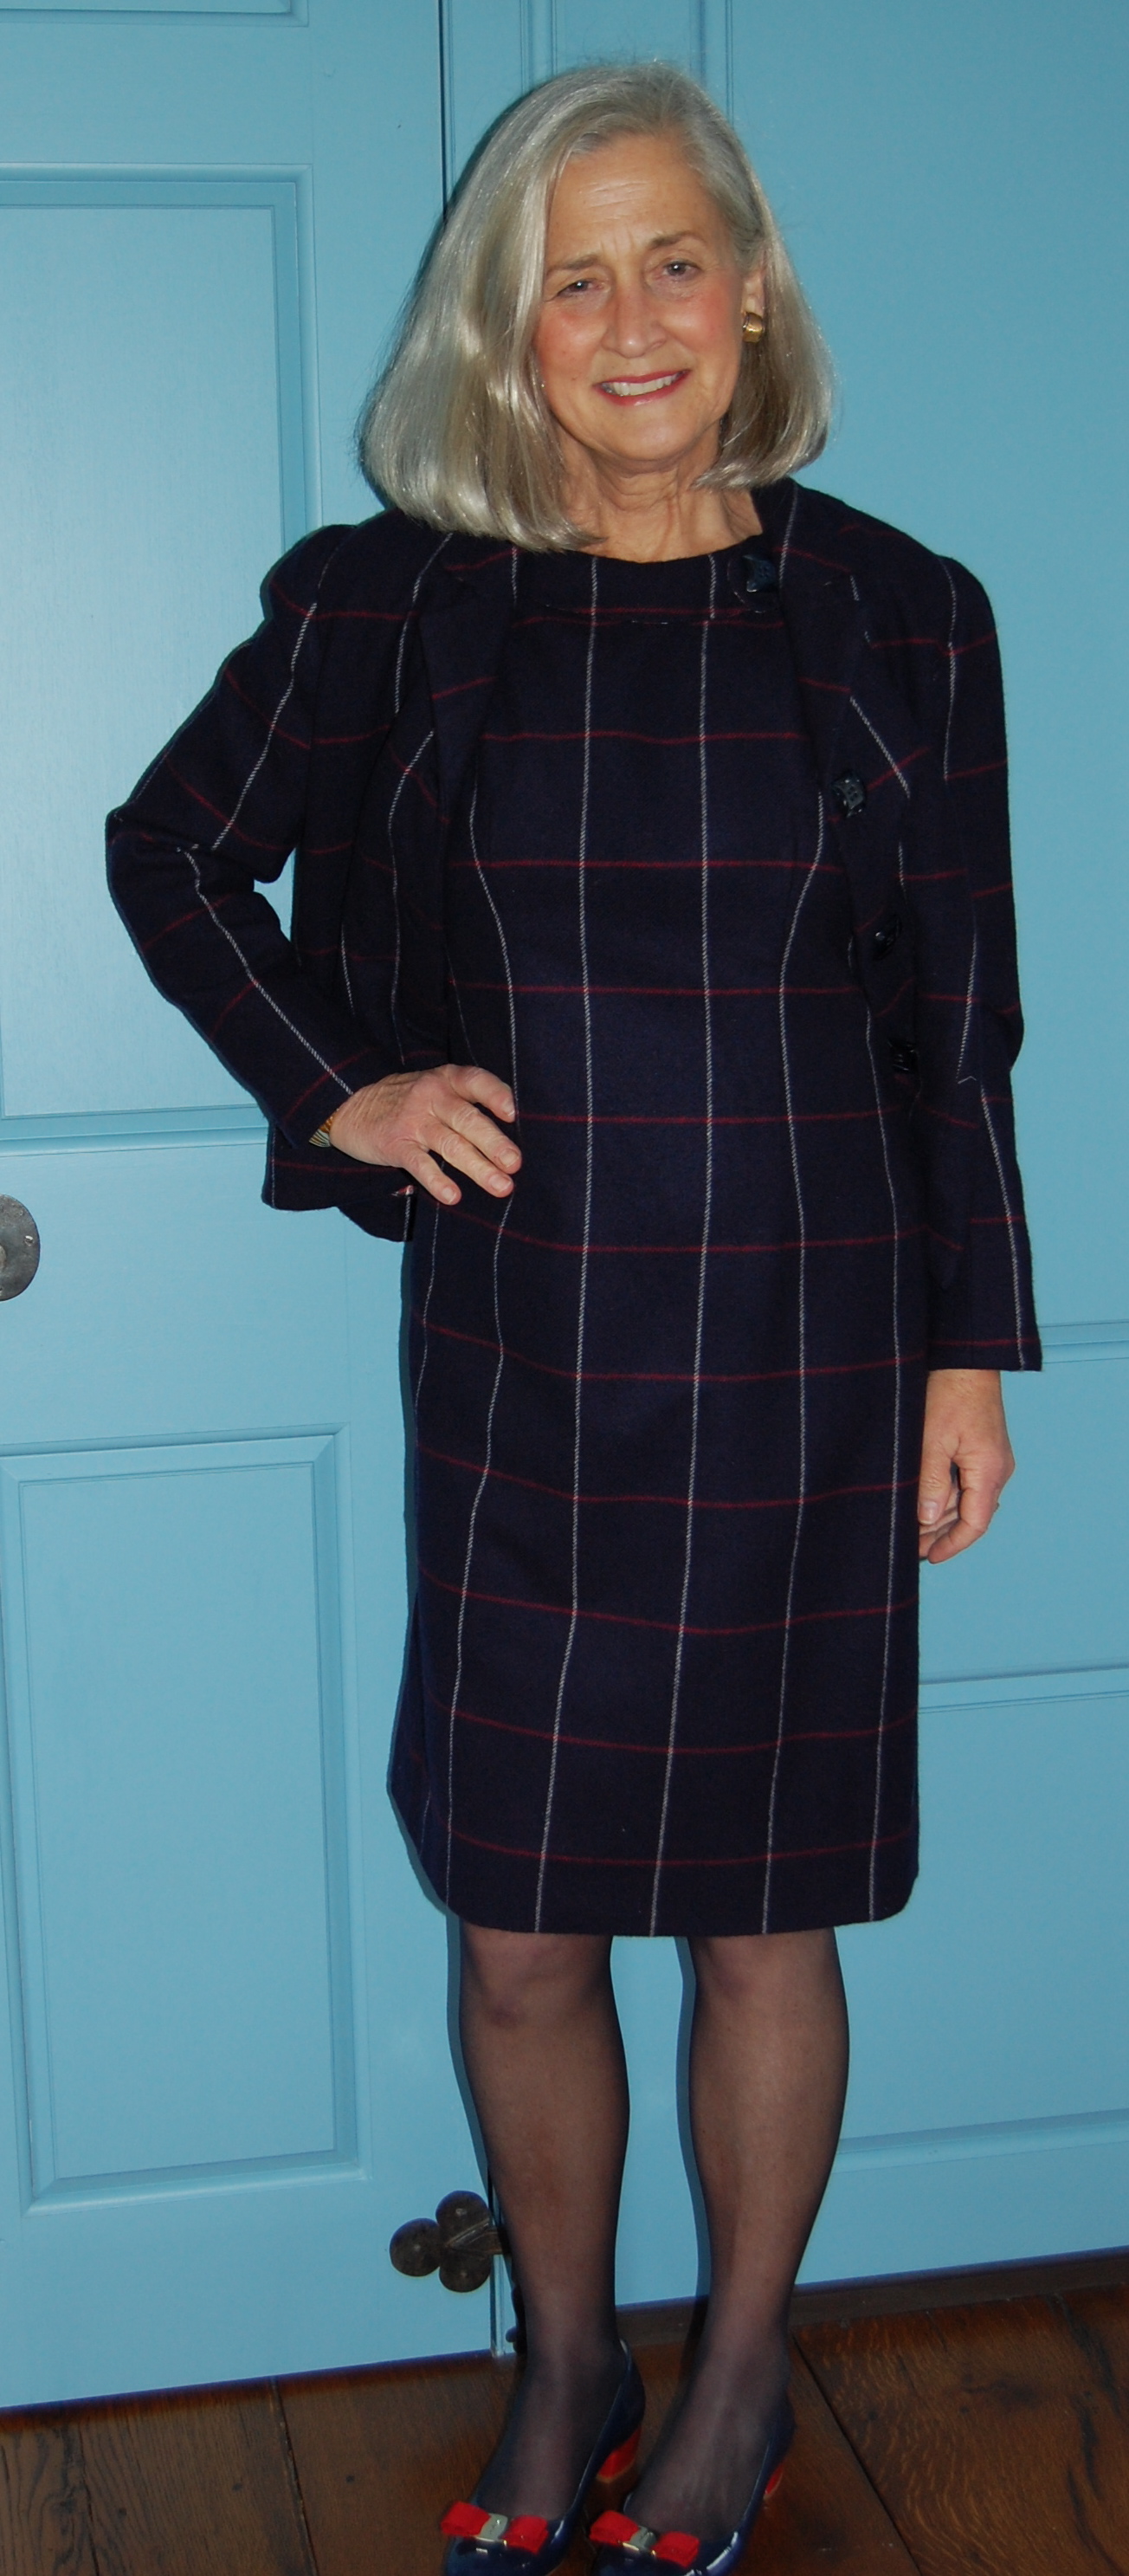
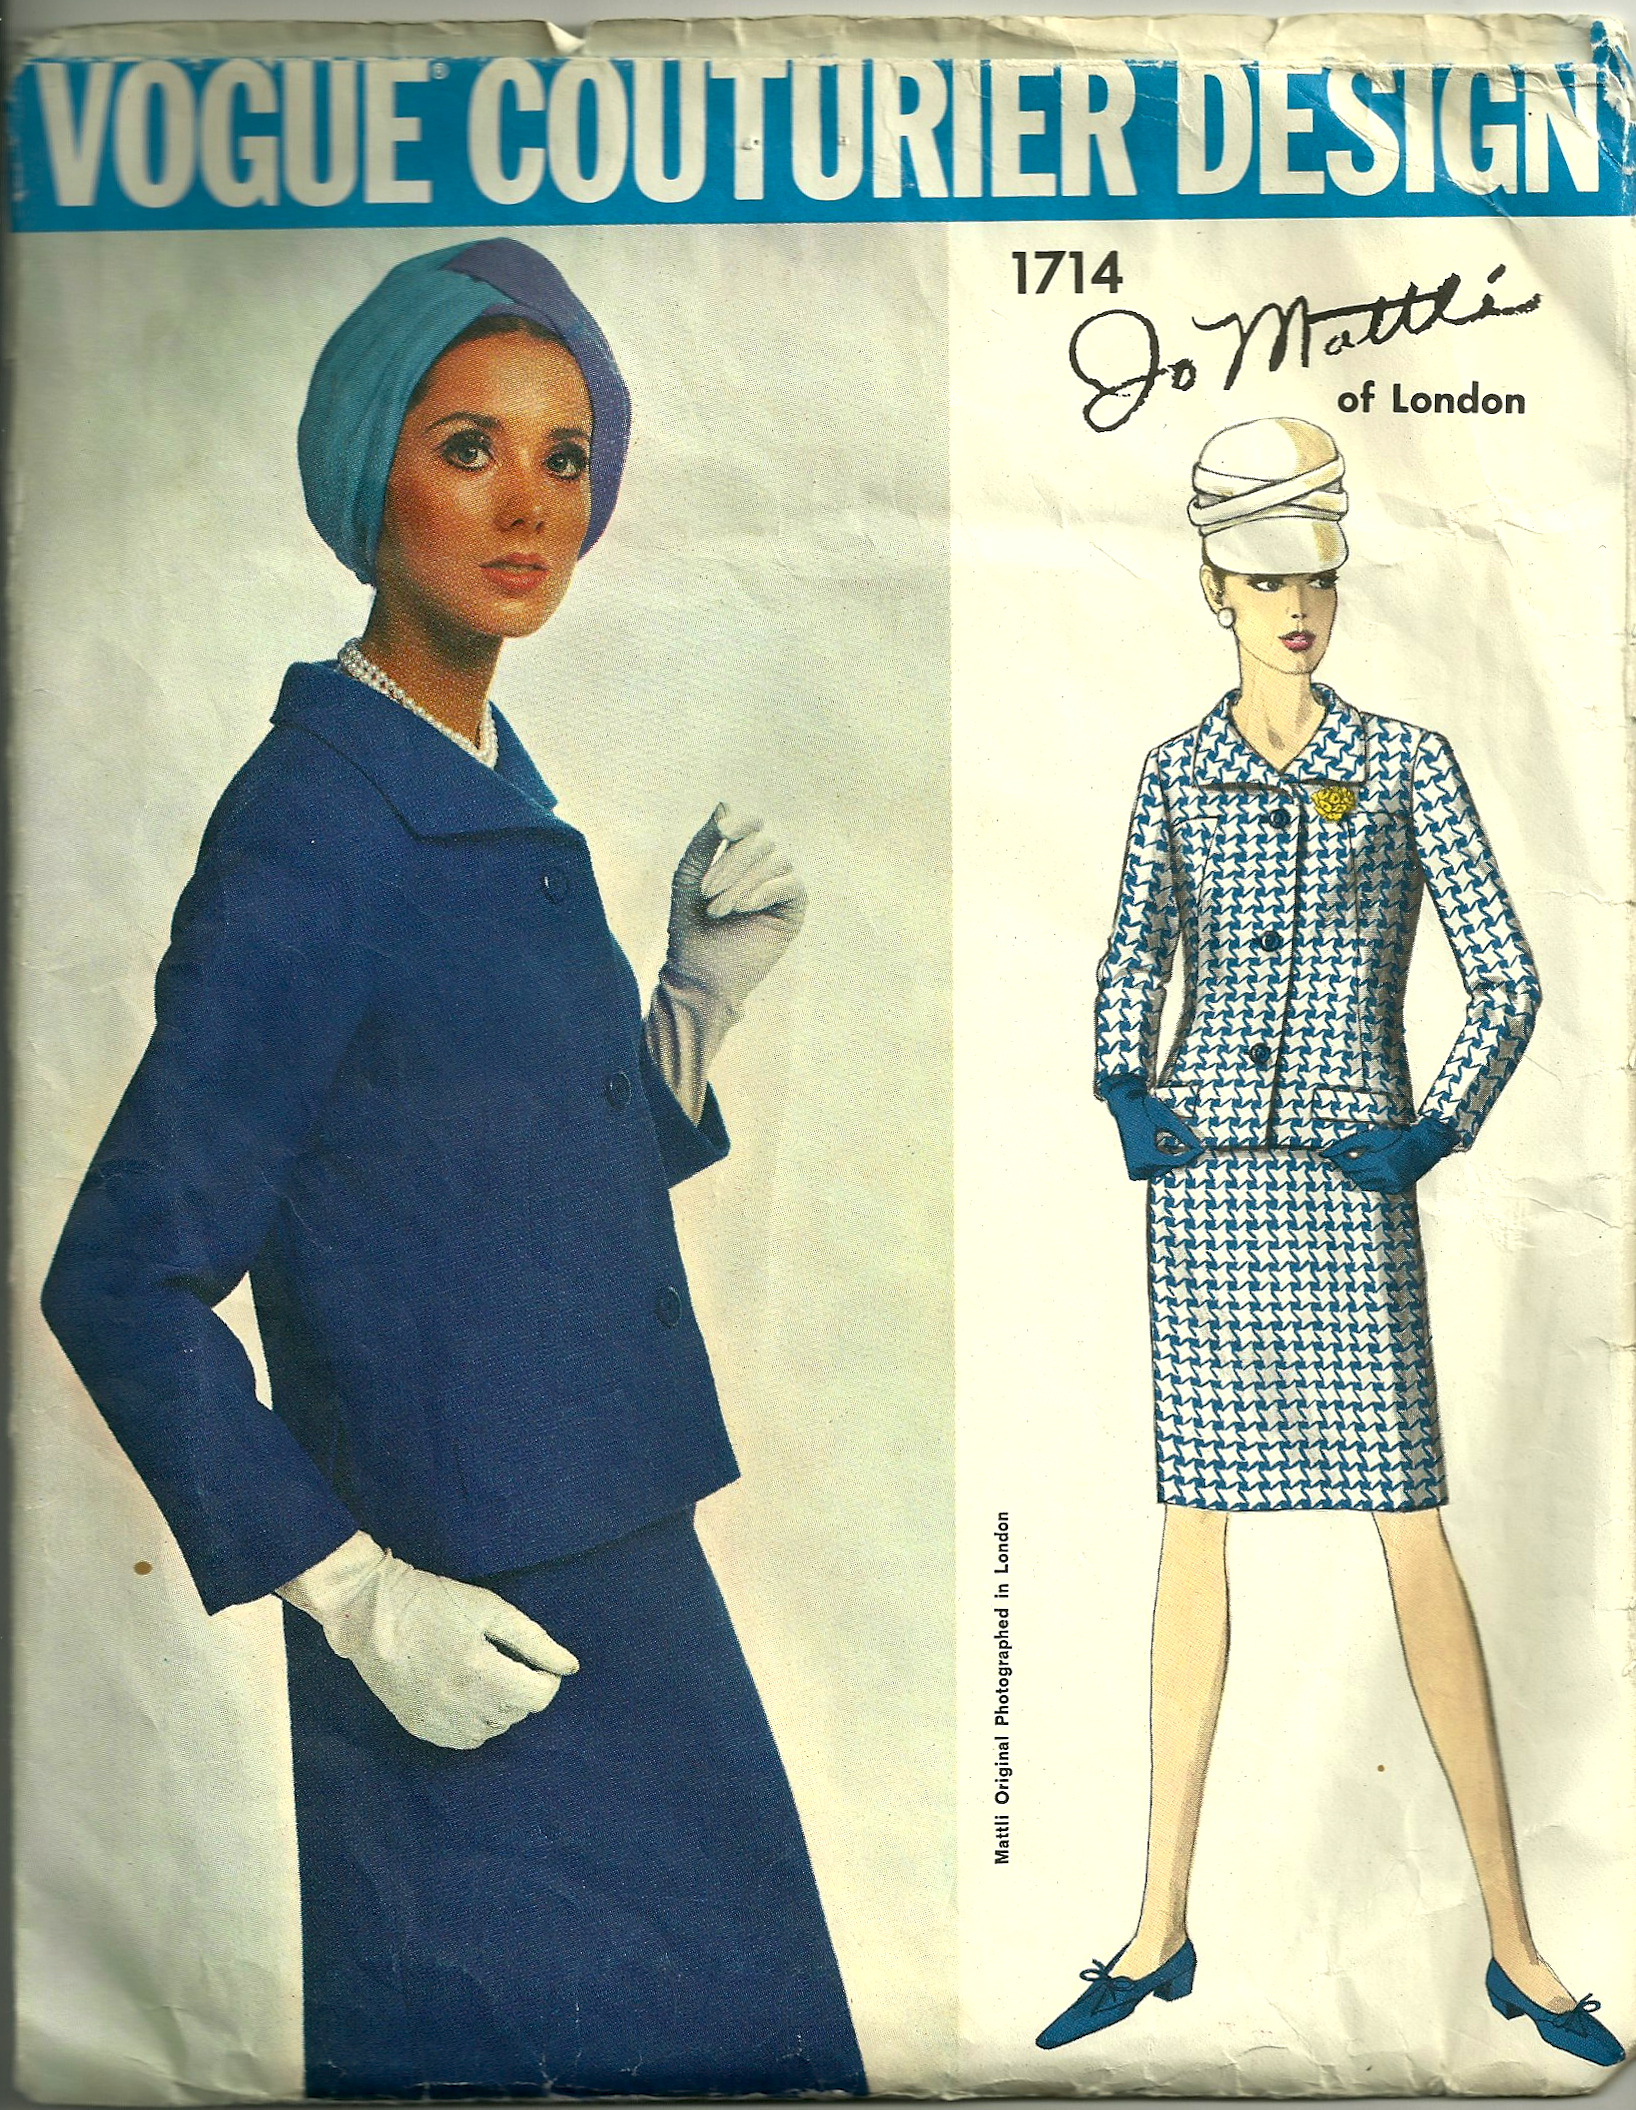
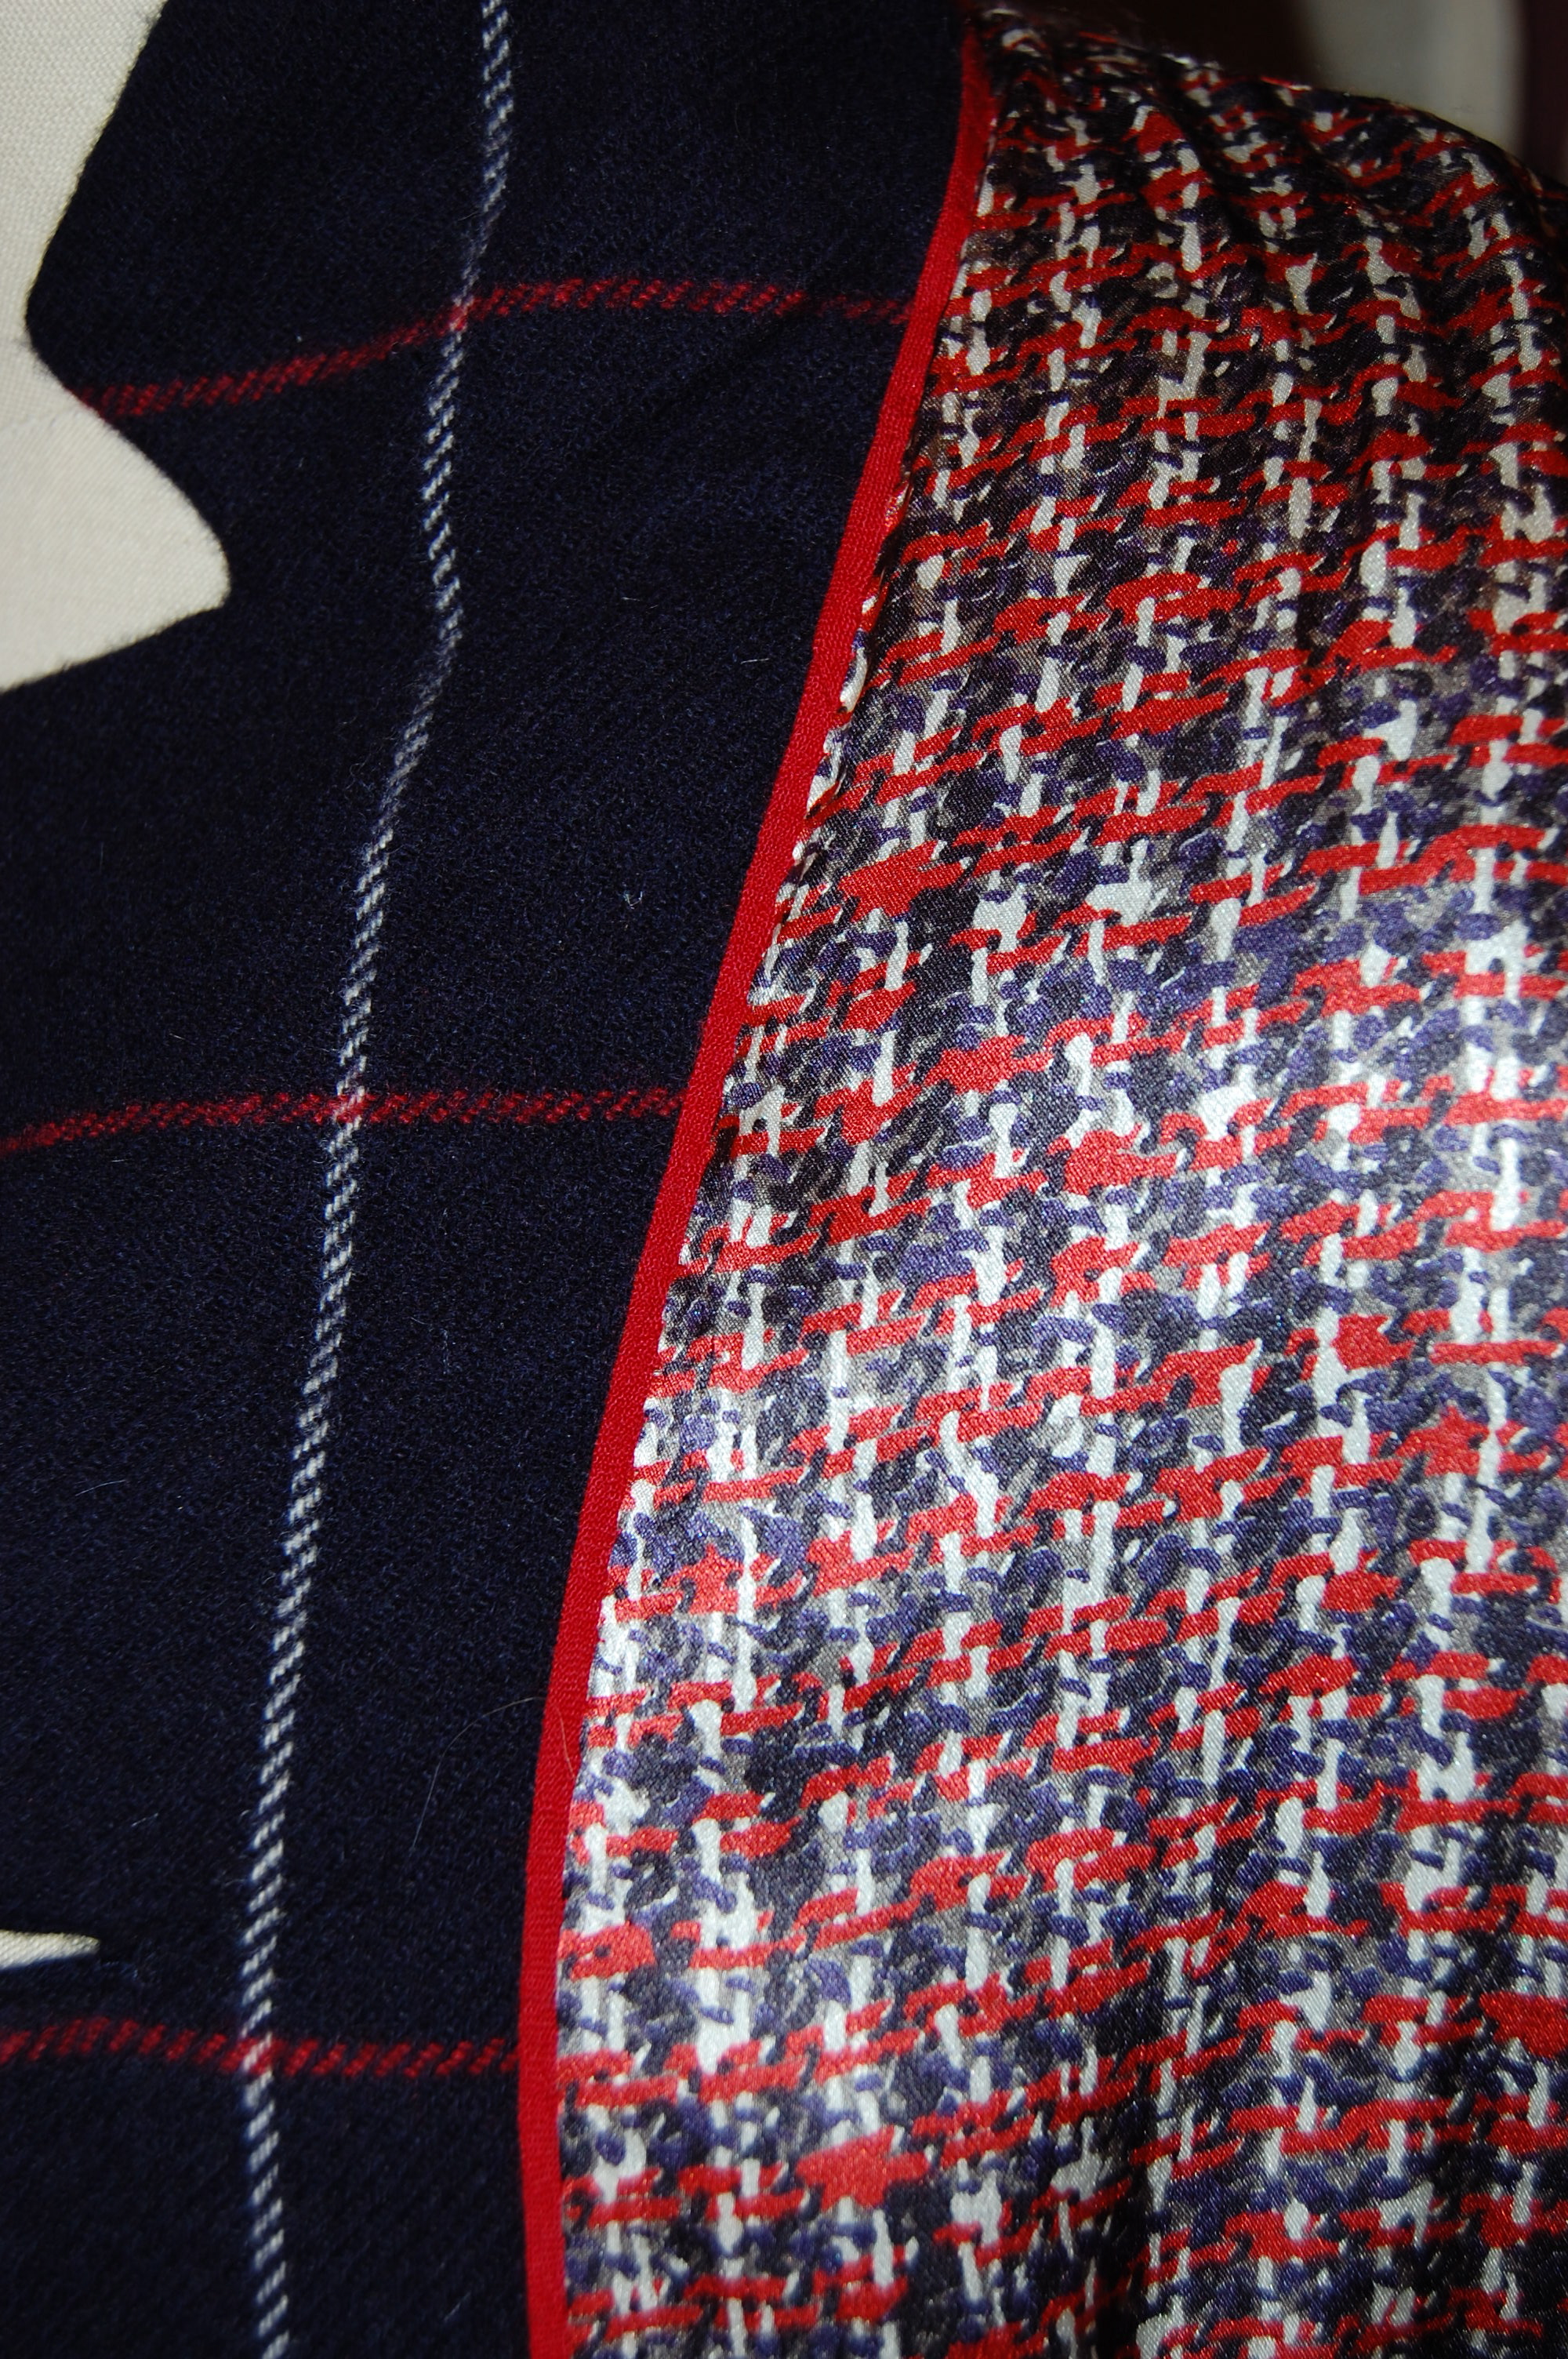
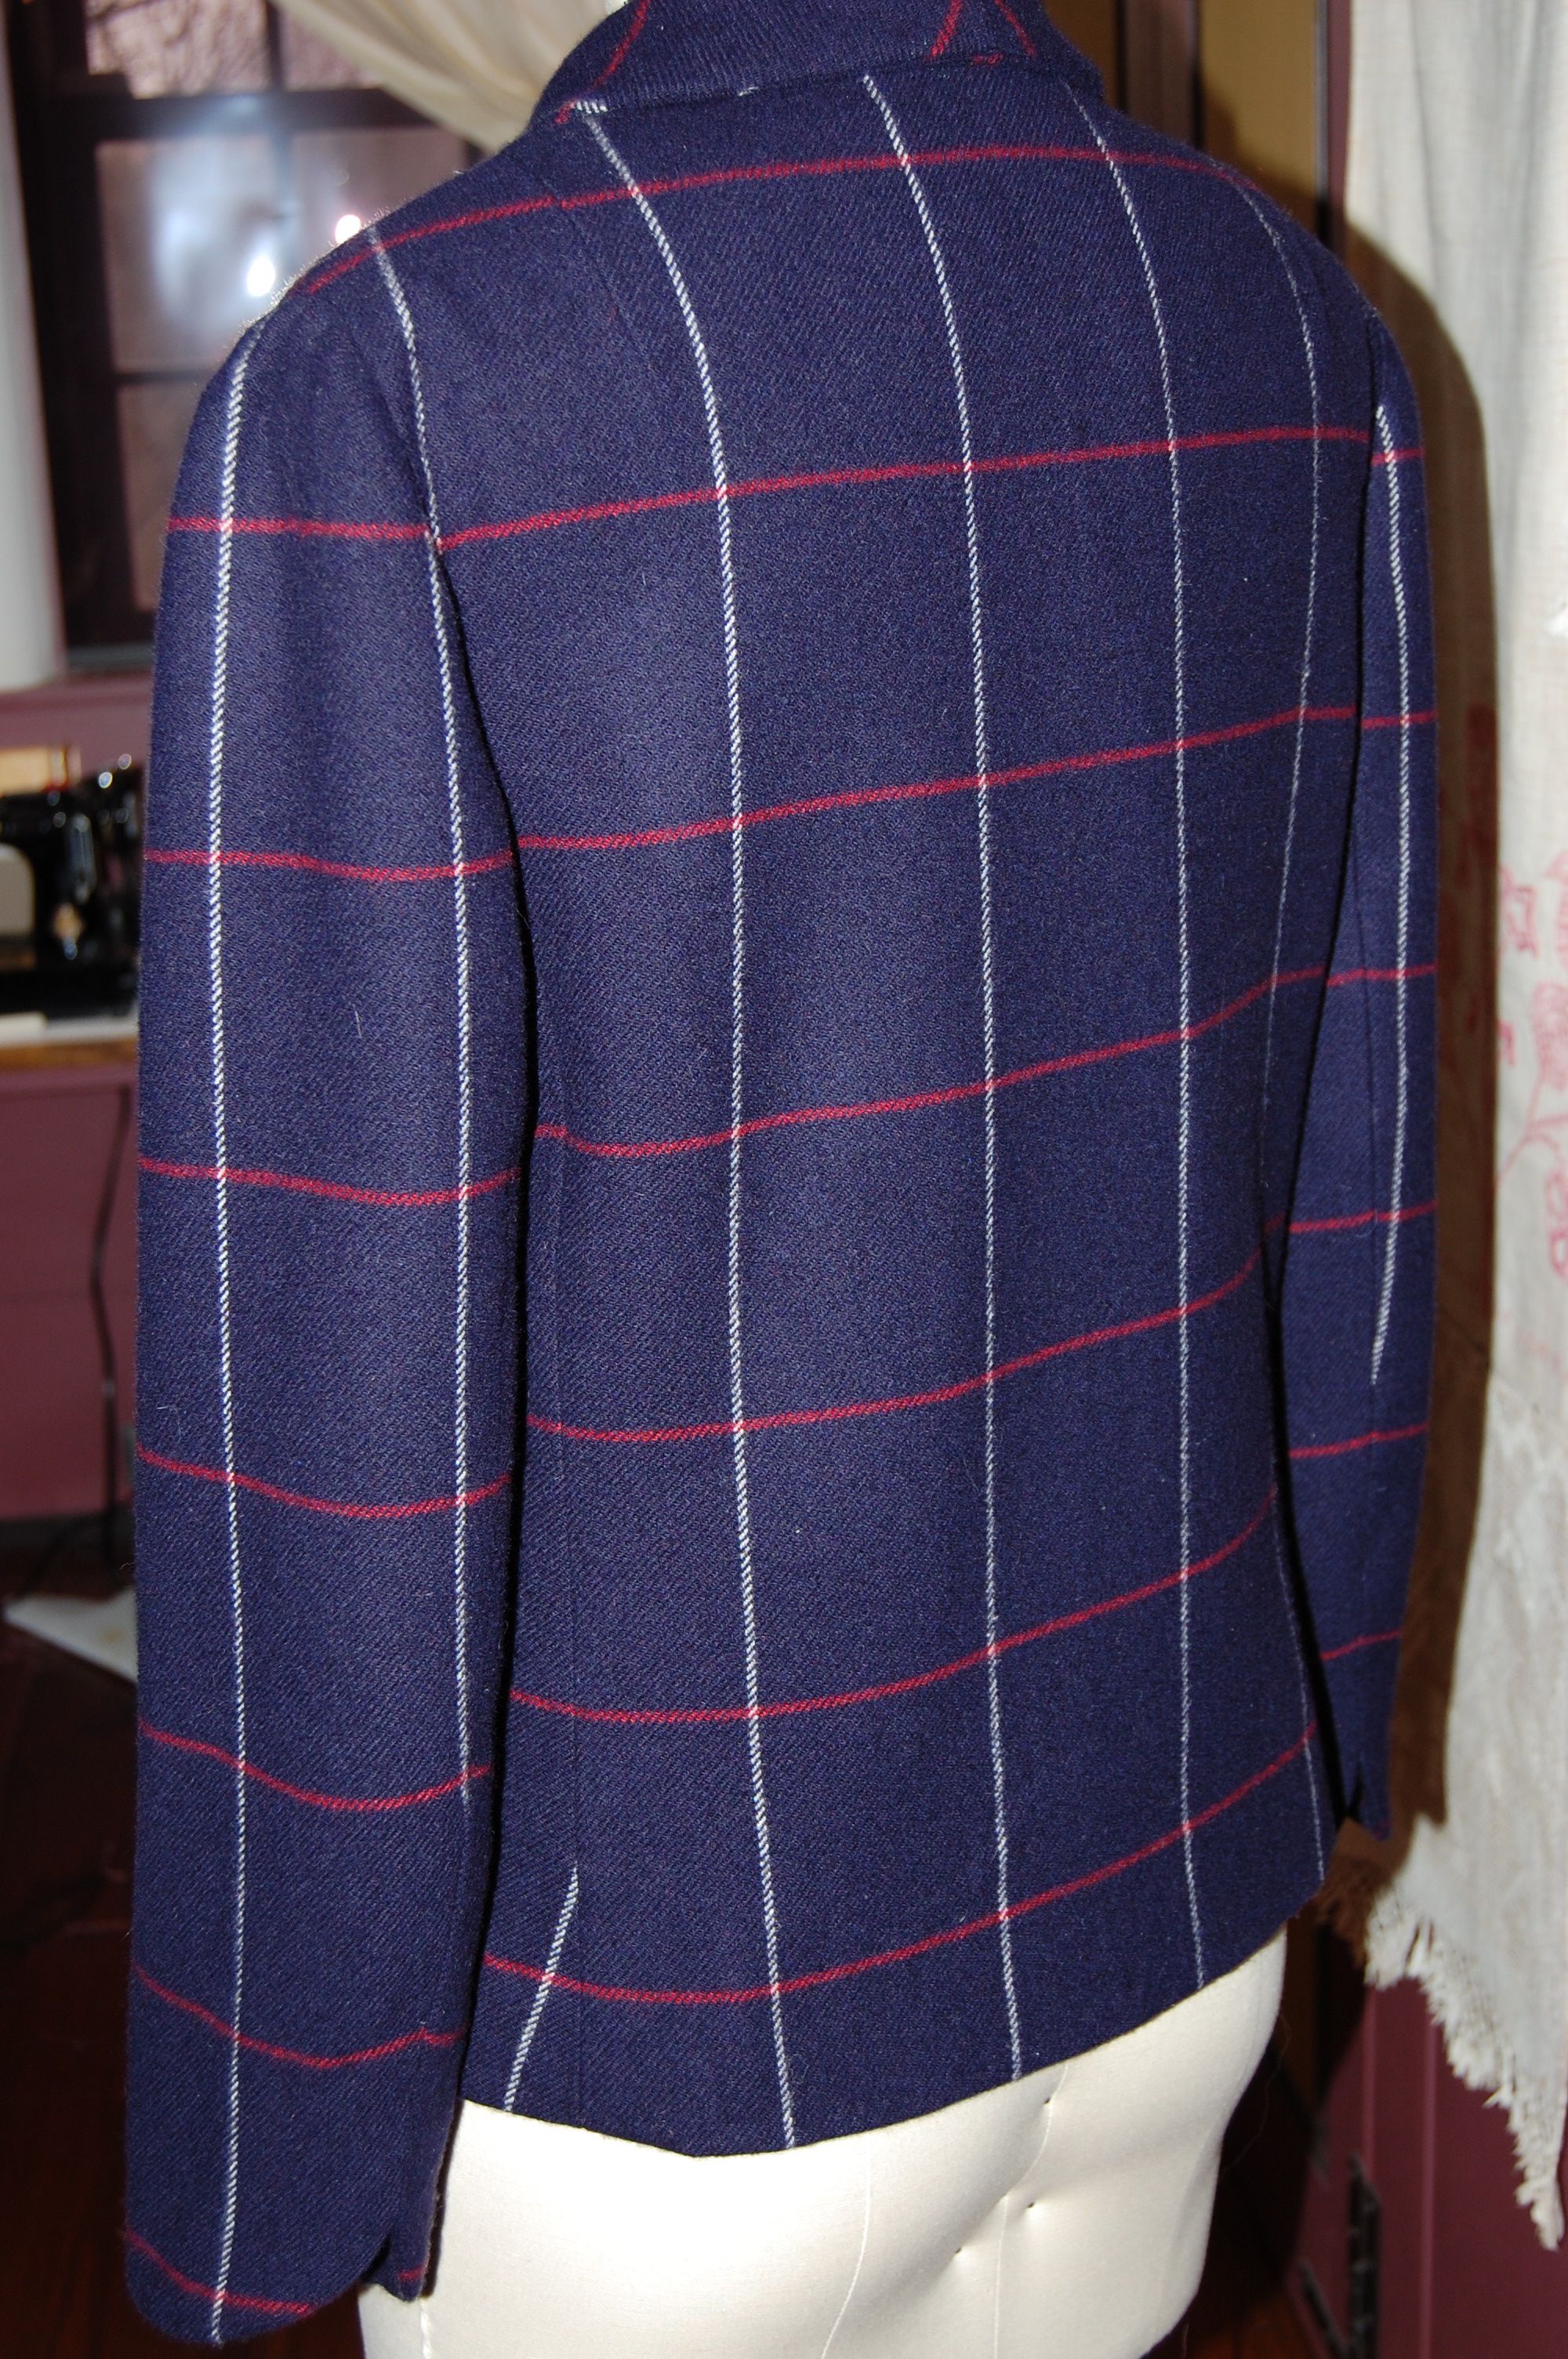
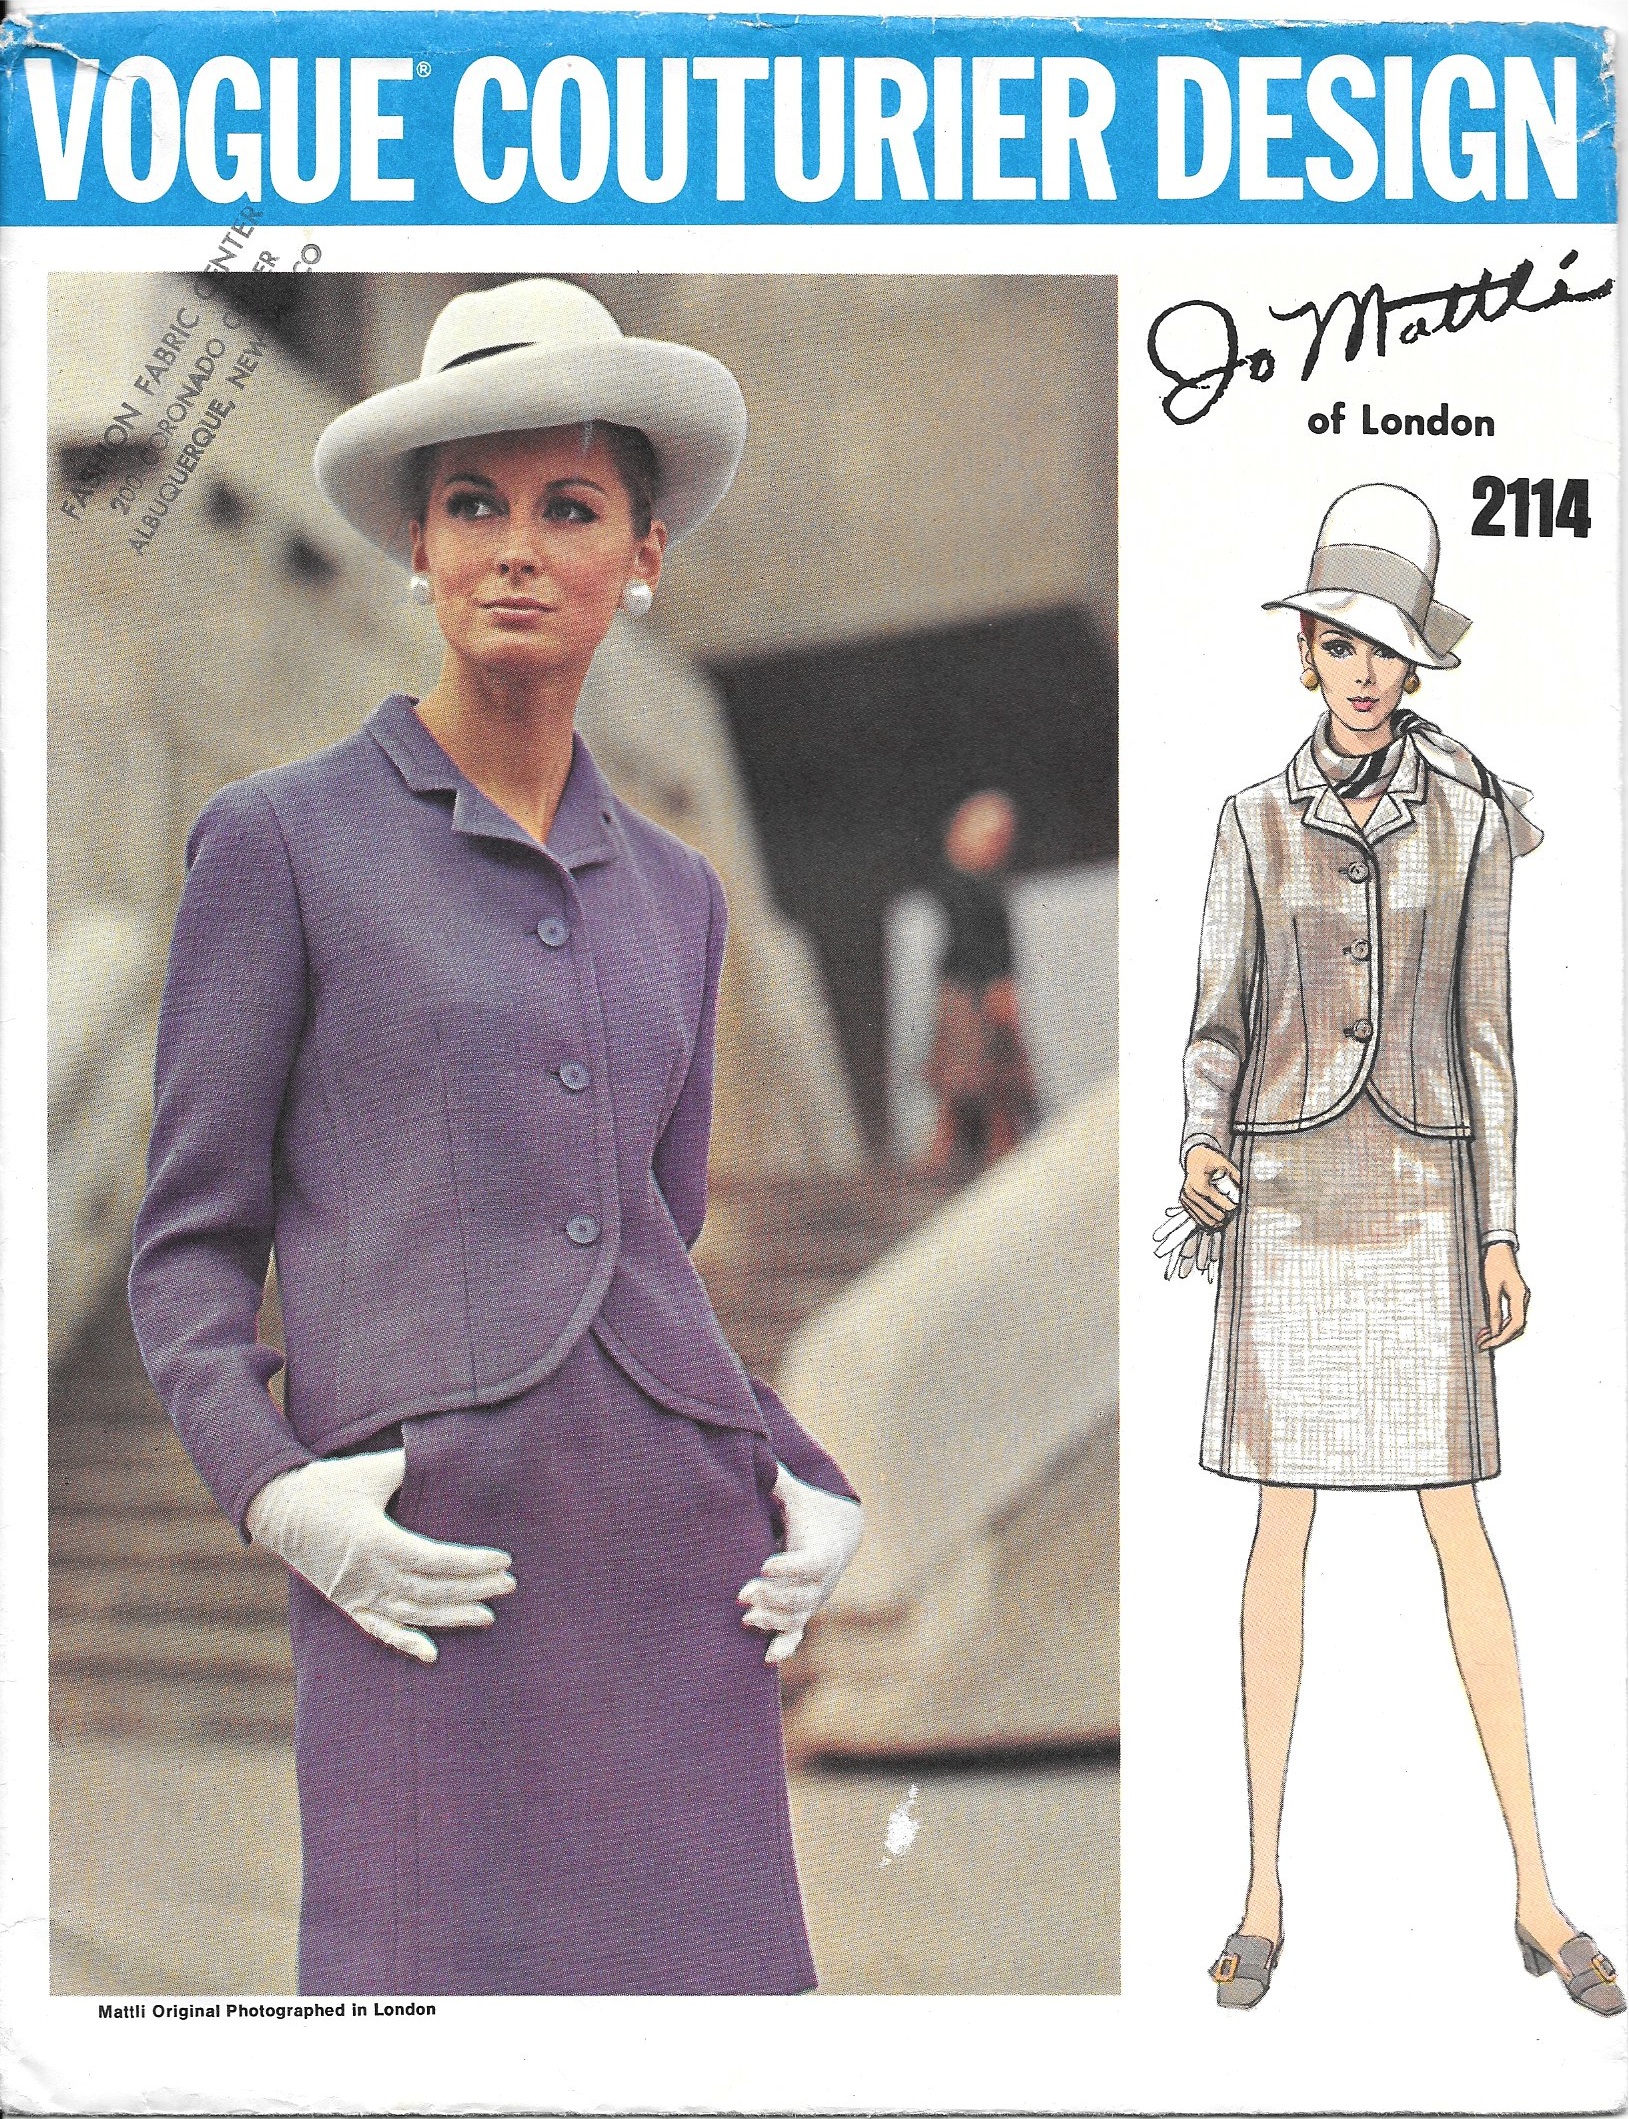
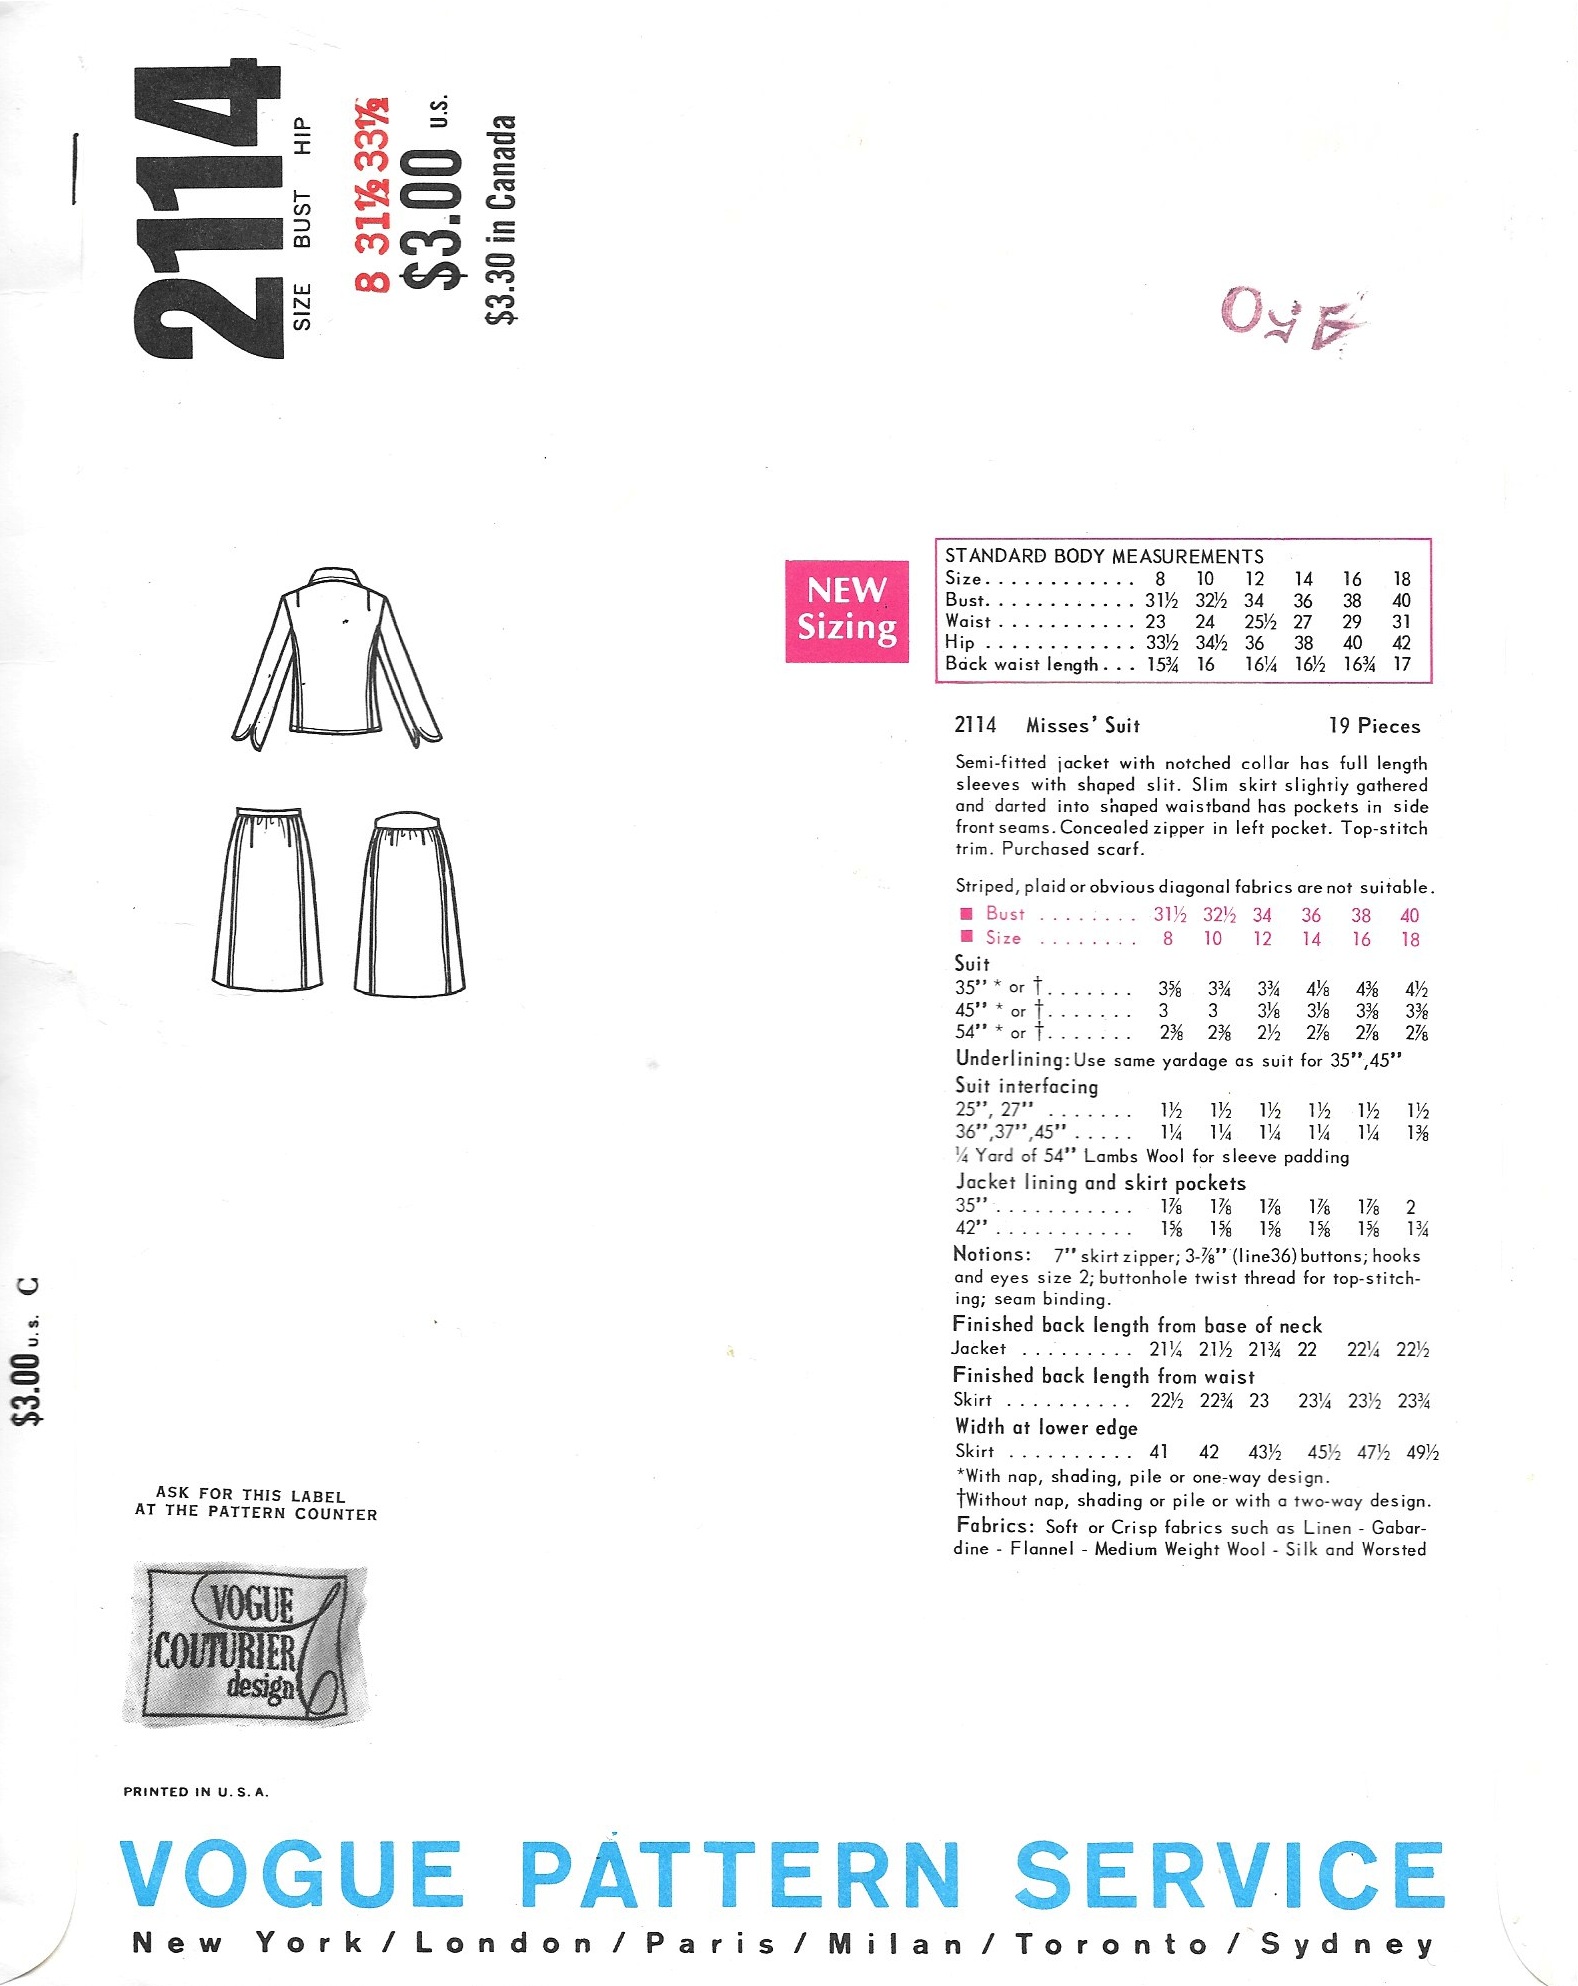
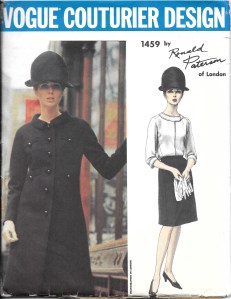
A beautiful coat can also hint at what is beneath it. One of the most elegant looks one can wear (and make for herself) is a matching coat and dress ensemble, where the two pieces are intended only to ever be worn with each other. Such a coat and dress often share similar style lines.   This Vogue Couturier Design by Mattli of London is an example of this:

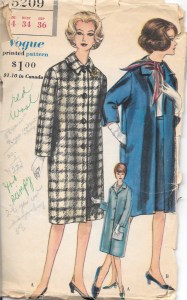
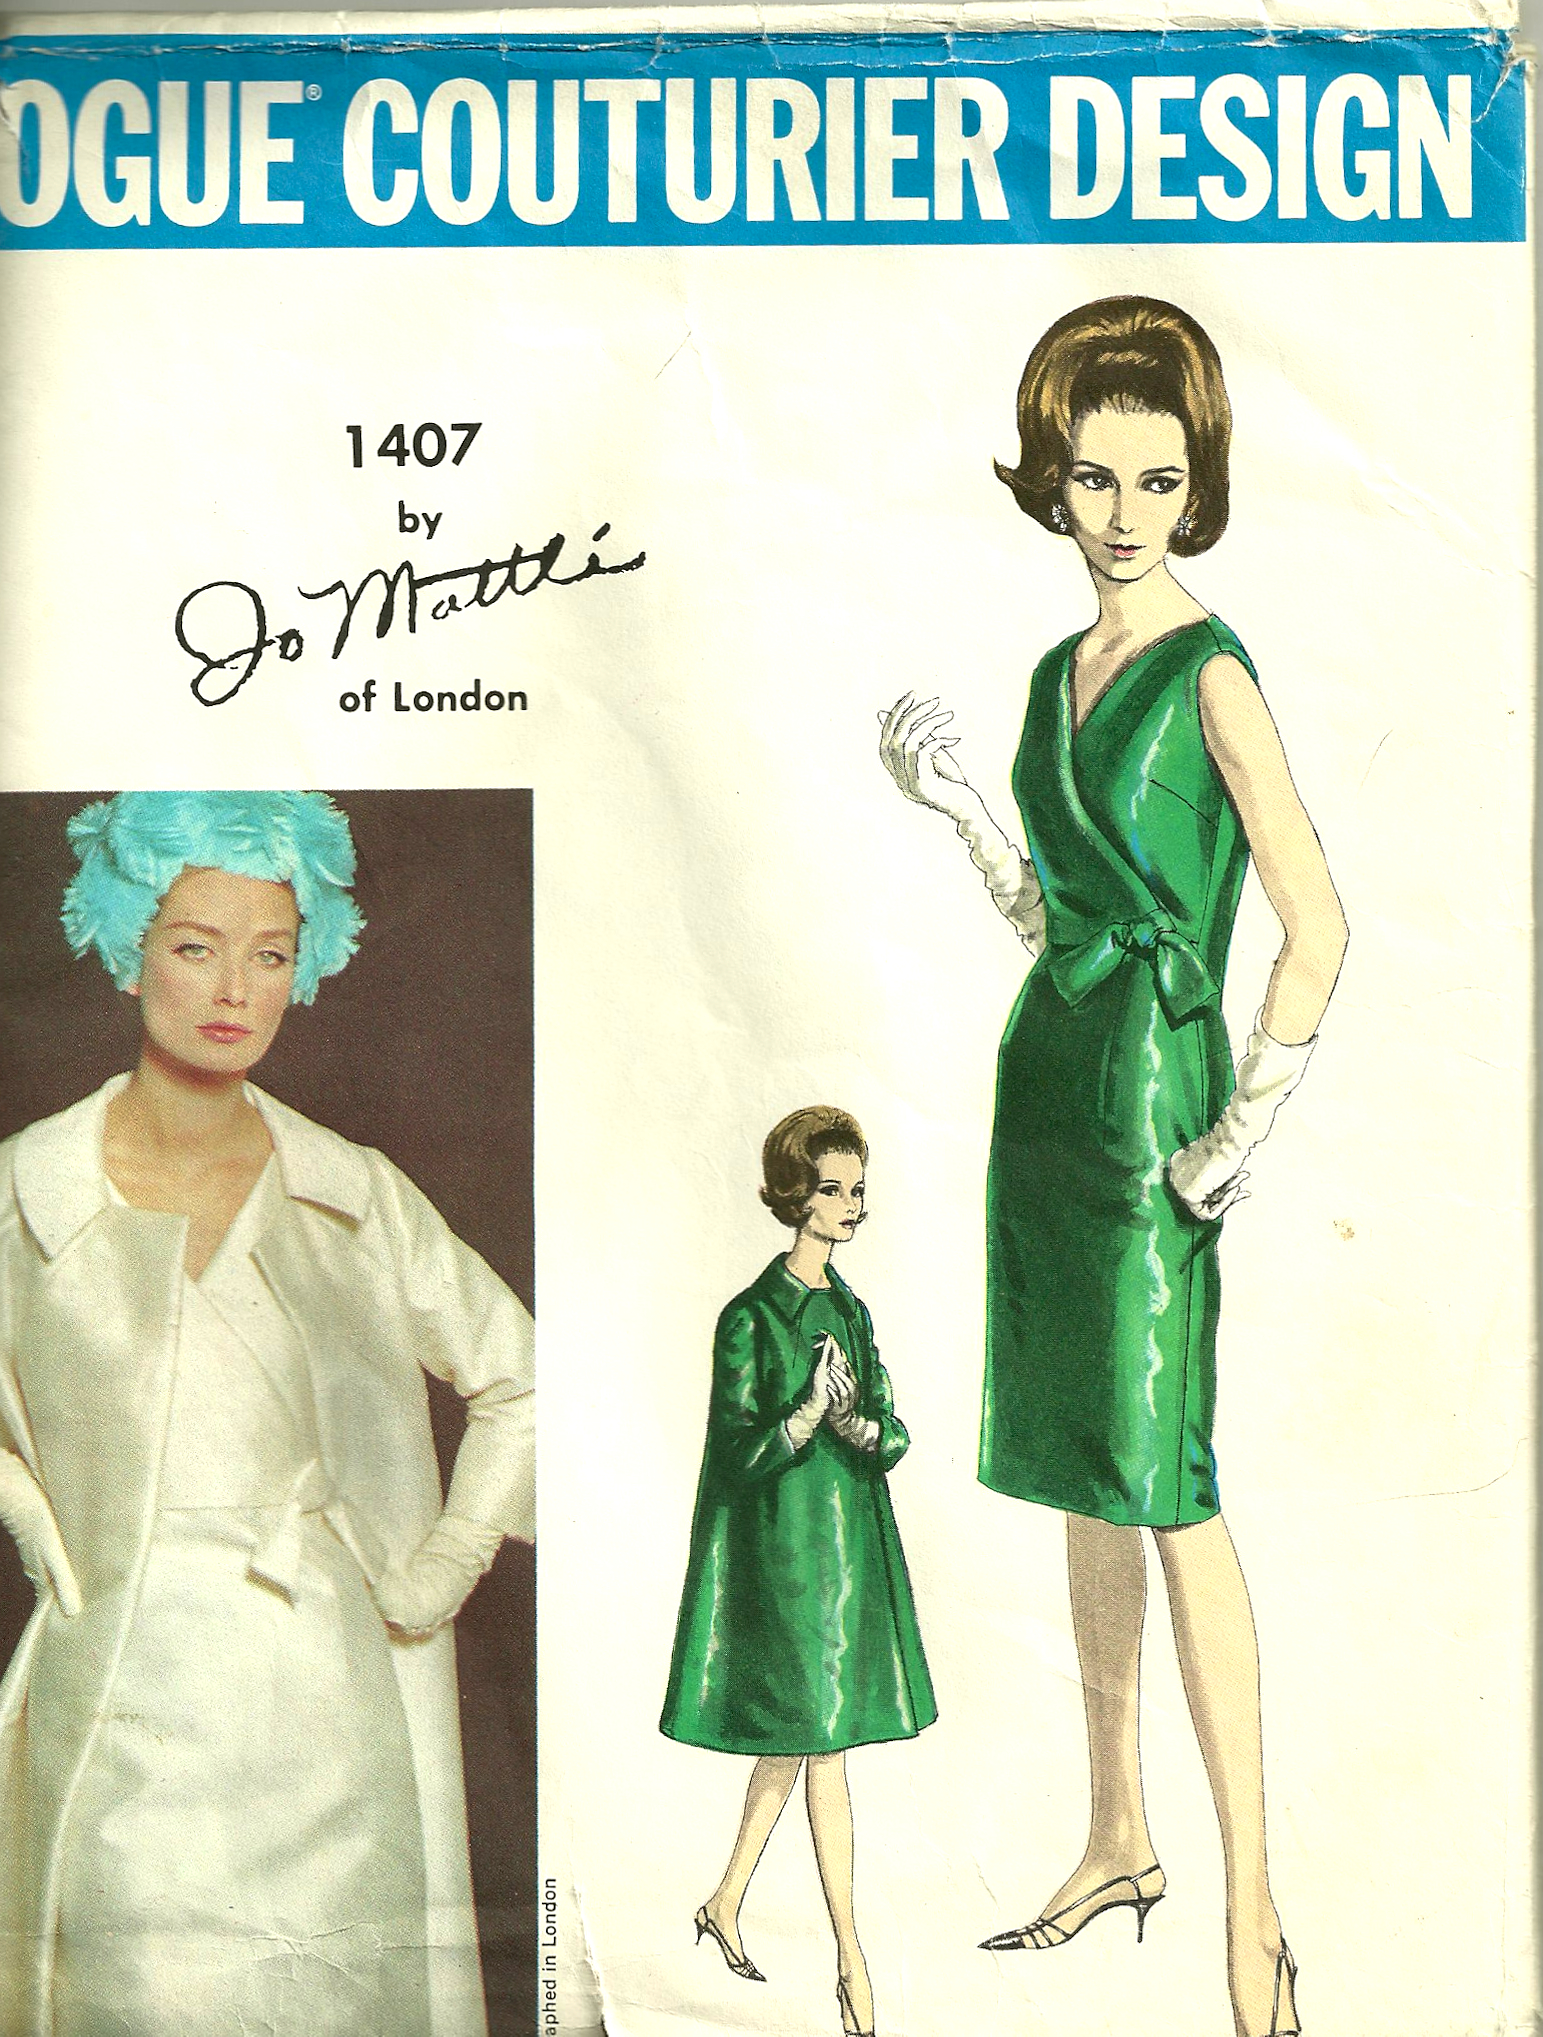
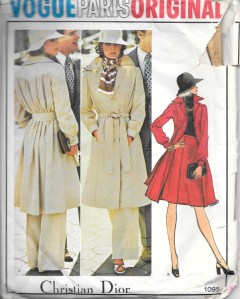
Another example of a coat and dress with complementary style lines is this Vogue pattern:

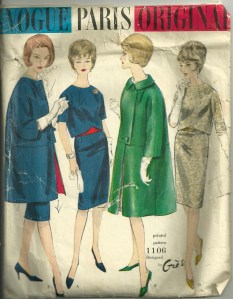
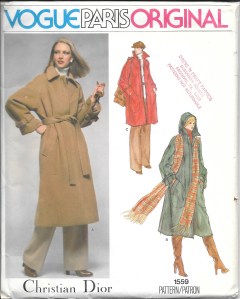
And although the style lines of the dress and the coat in this Vogue Paris Original by Madame Gres are not matching, clearly the coat and dress featured in blue on the pattern envelope are intended as such an ensemble:

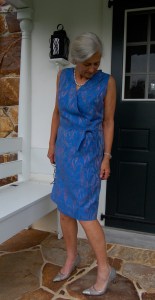
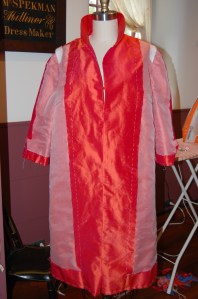
Here is an example of a formal dress and matching coat, sharing seaming details and clearly designed to go together. Would this dress be anywhere as exciting without its matching coat?

This evening coat makes my heart skip a beat!

Not every coat needs to match a dress, however. Here is a small sampling of coats, both dressy “dressmaker” coats and classy, more tailored coats, the prototypes of which have their rightful place in your coat wardrobe:

This is my original pattern from which I made the featured coat when I was in my mid-twenties. I loved this coat and only wish I still had it!

I am very anxious to make a coat from this pattern.

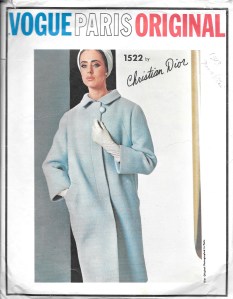
This is a beautiful example of a dressmaker coat.

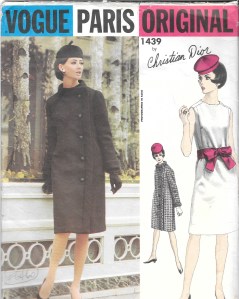
Another dressmaker coat.

A coat better suited for everyday wear, but still beautiful.

One of the many catalogs we receive here at our home is the catalog from the J. Peterman Company. It is so creatively conceived and presented, with each entry reading like a mini story, and often evocative of other times and places. The “Owner’s Manual” (as the company’s catalogs are called) arriving during this past holiday season was no exception. Imagine my delight when turning the page to this entry for a “French Coat with timeless Parisian style.”

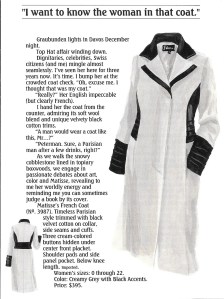
Click on the image to read its story.

But what really caught my eye was the caption at the top of the page: “I want to know the woman in that coat.” In a nutshell, that sums up the power of a beautiful coat. What fun to know that, as ones who can make our coats, we can also be the woman who made that coat!

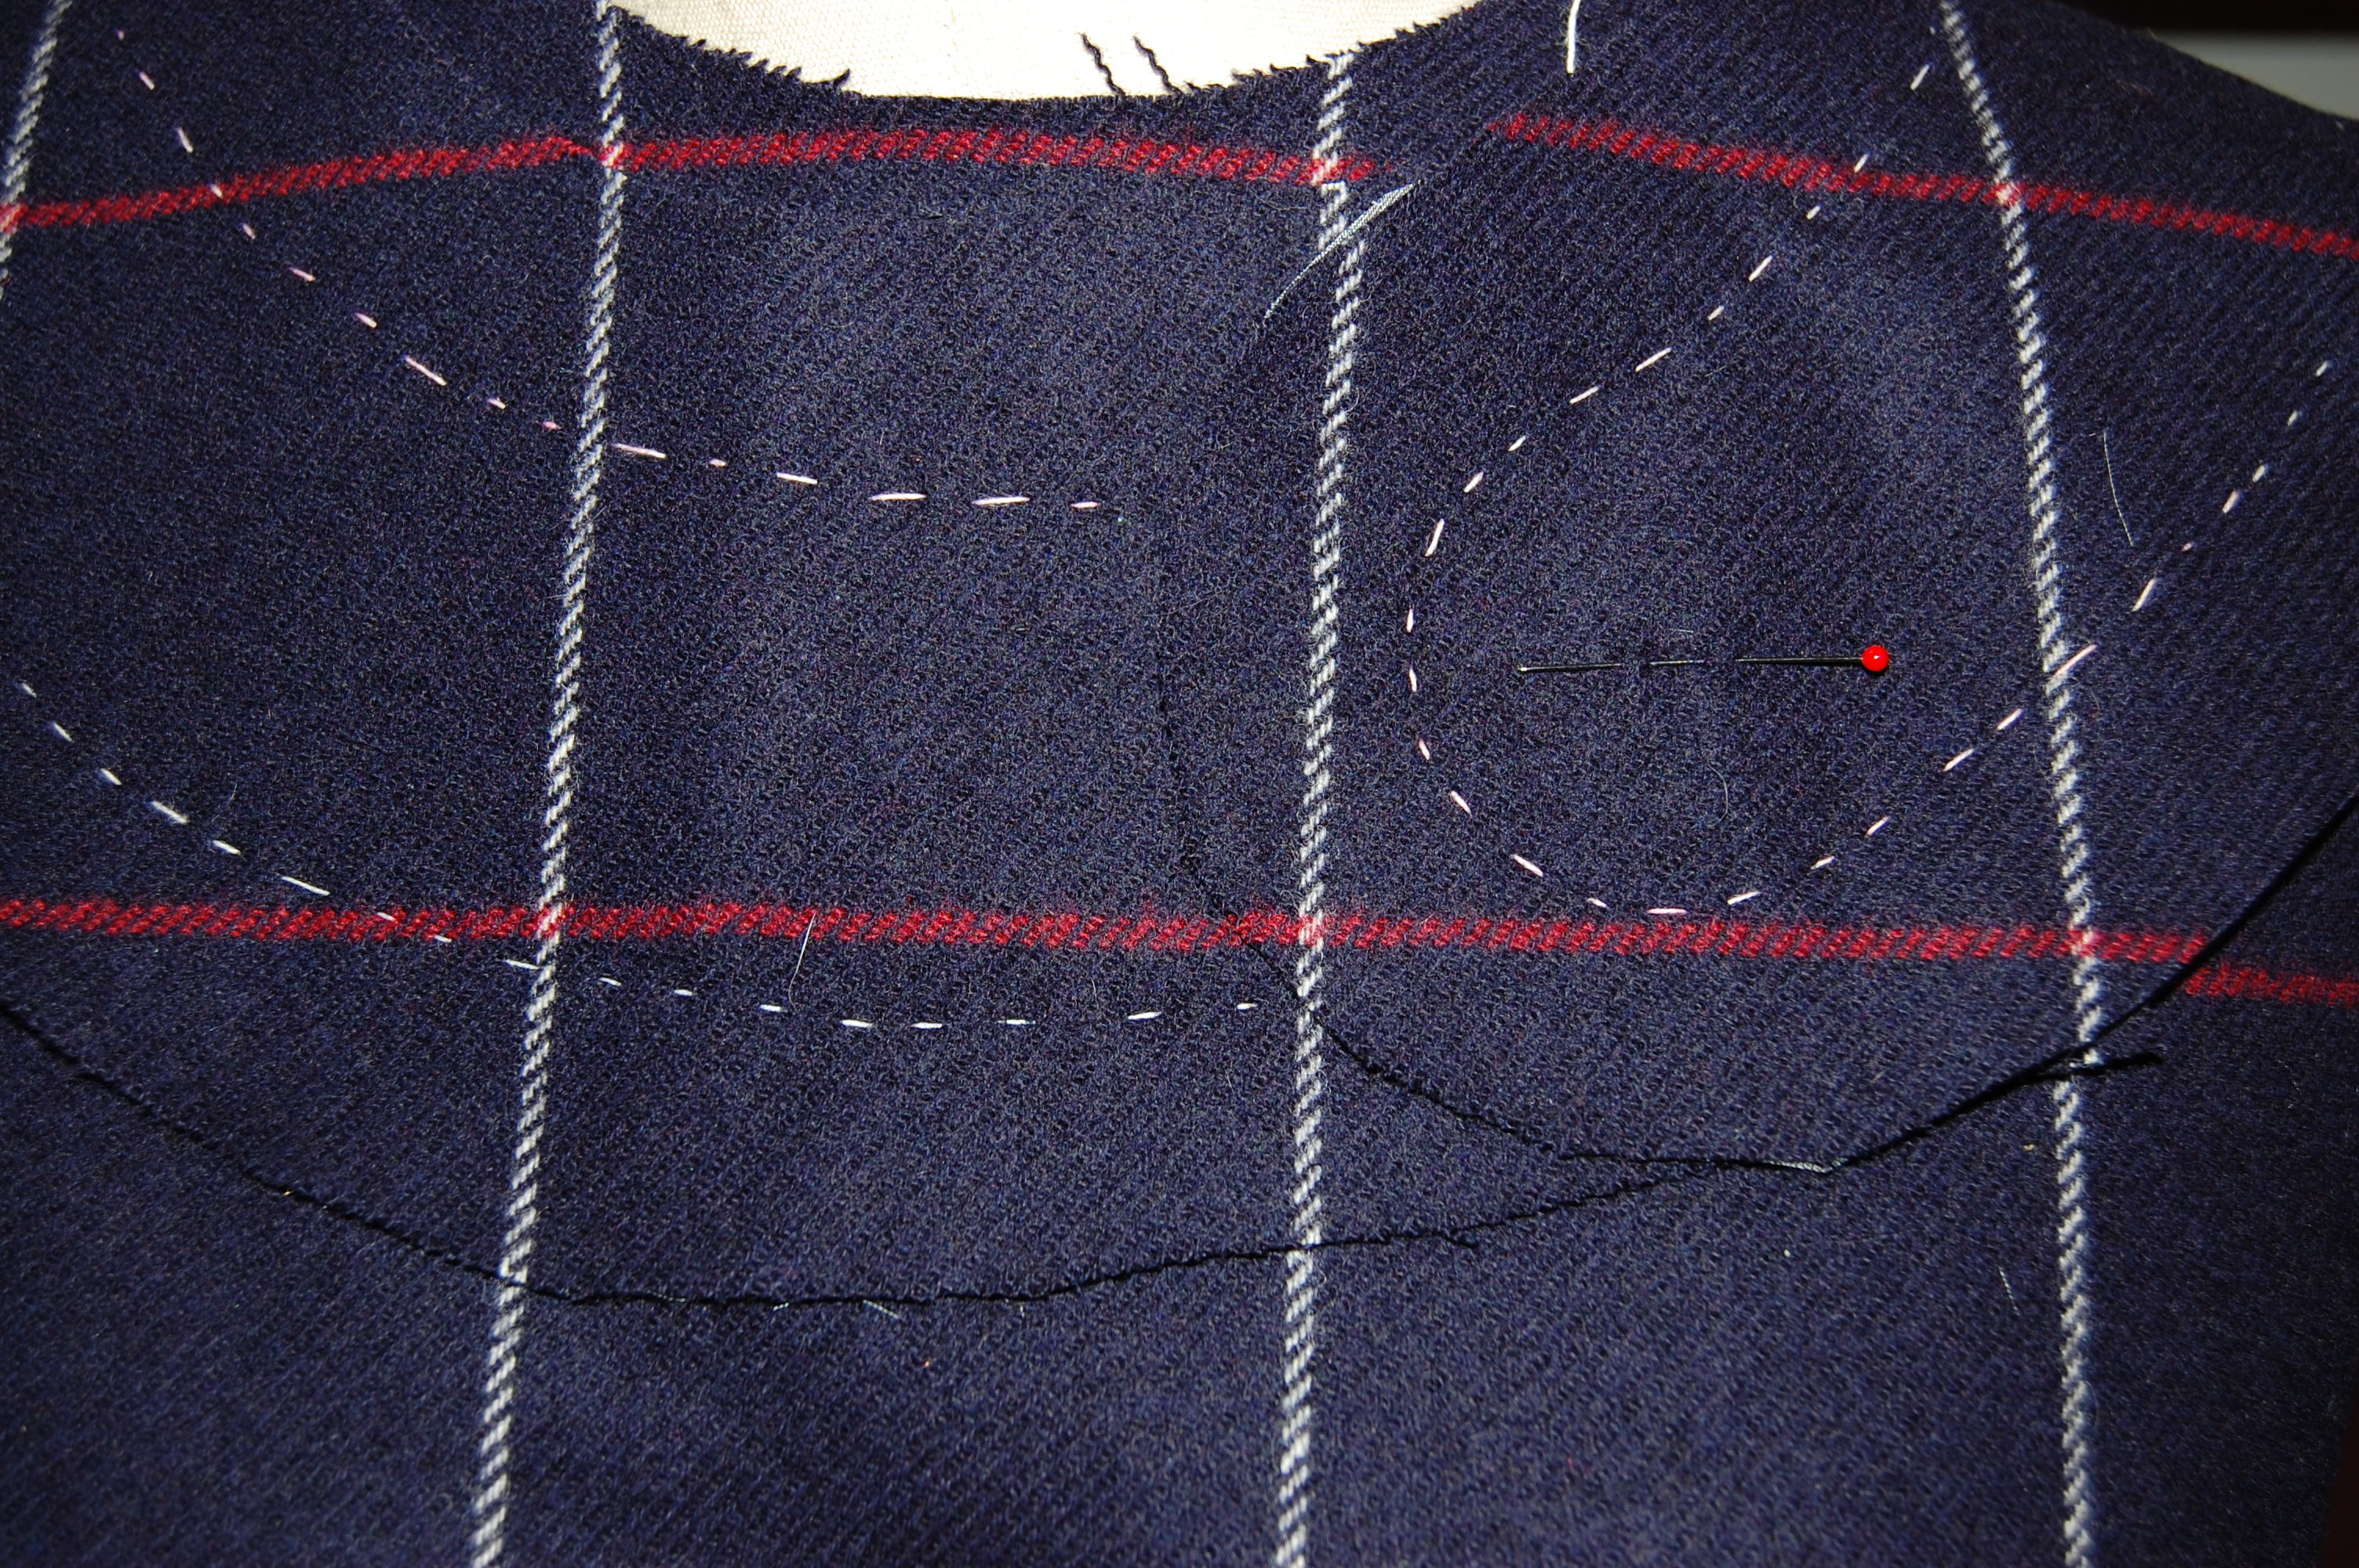
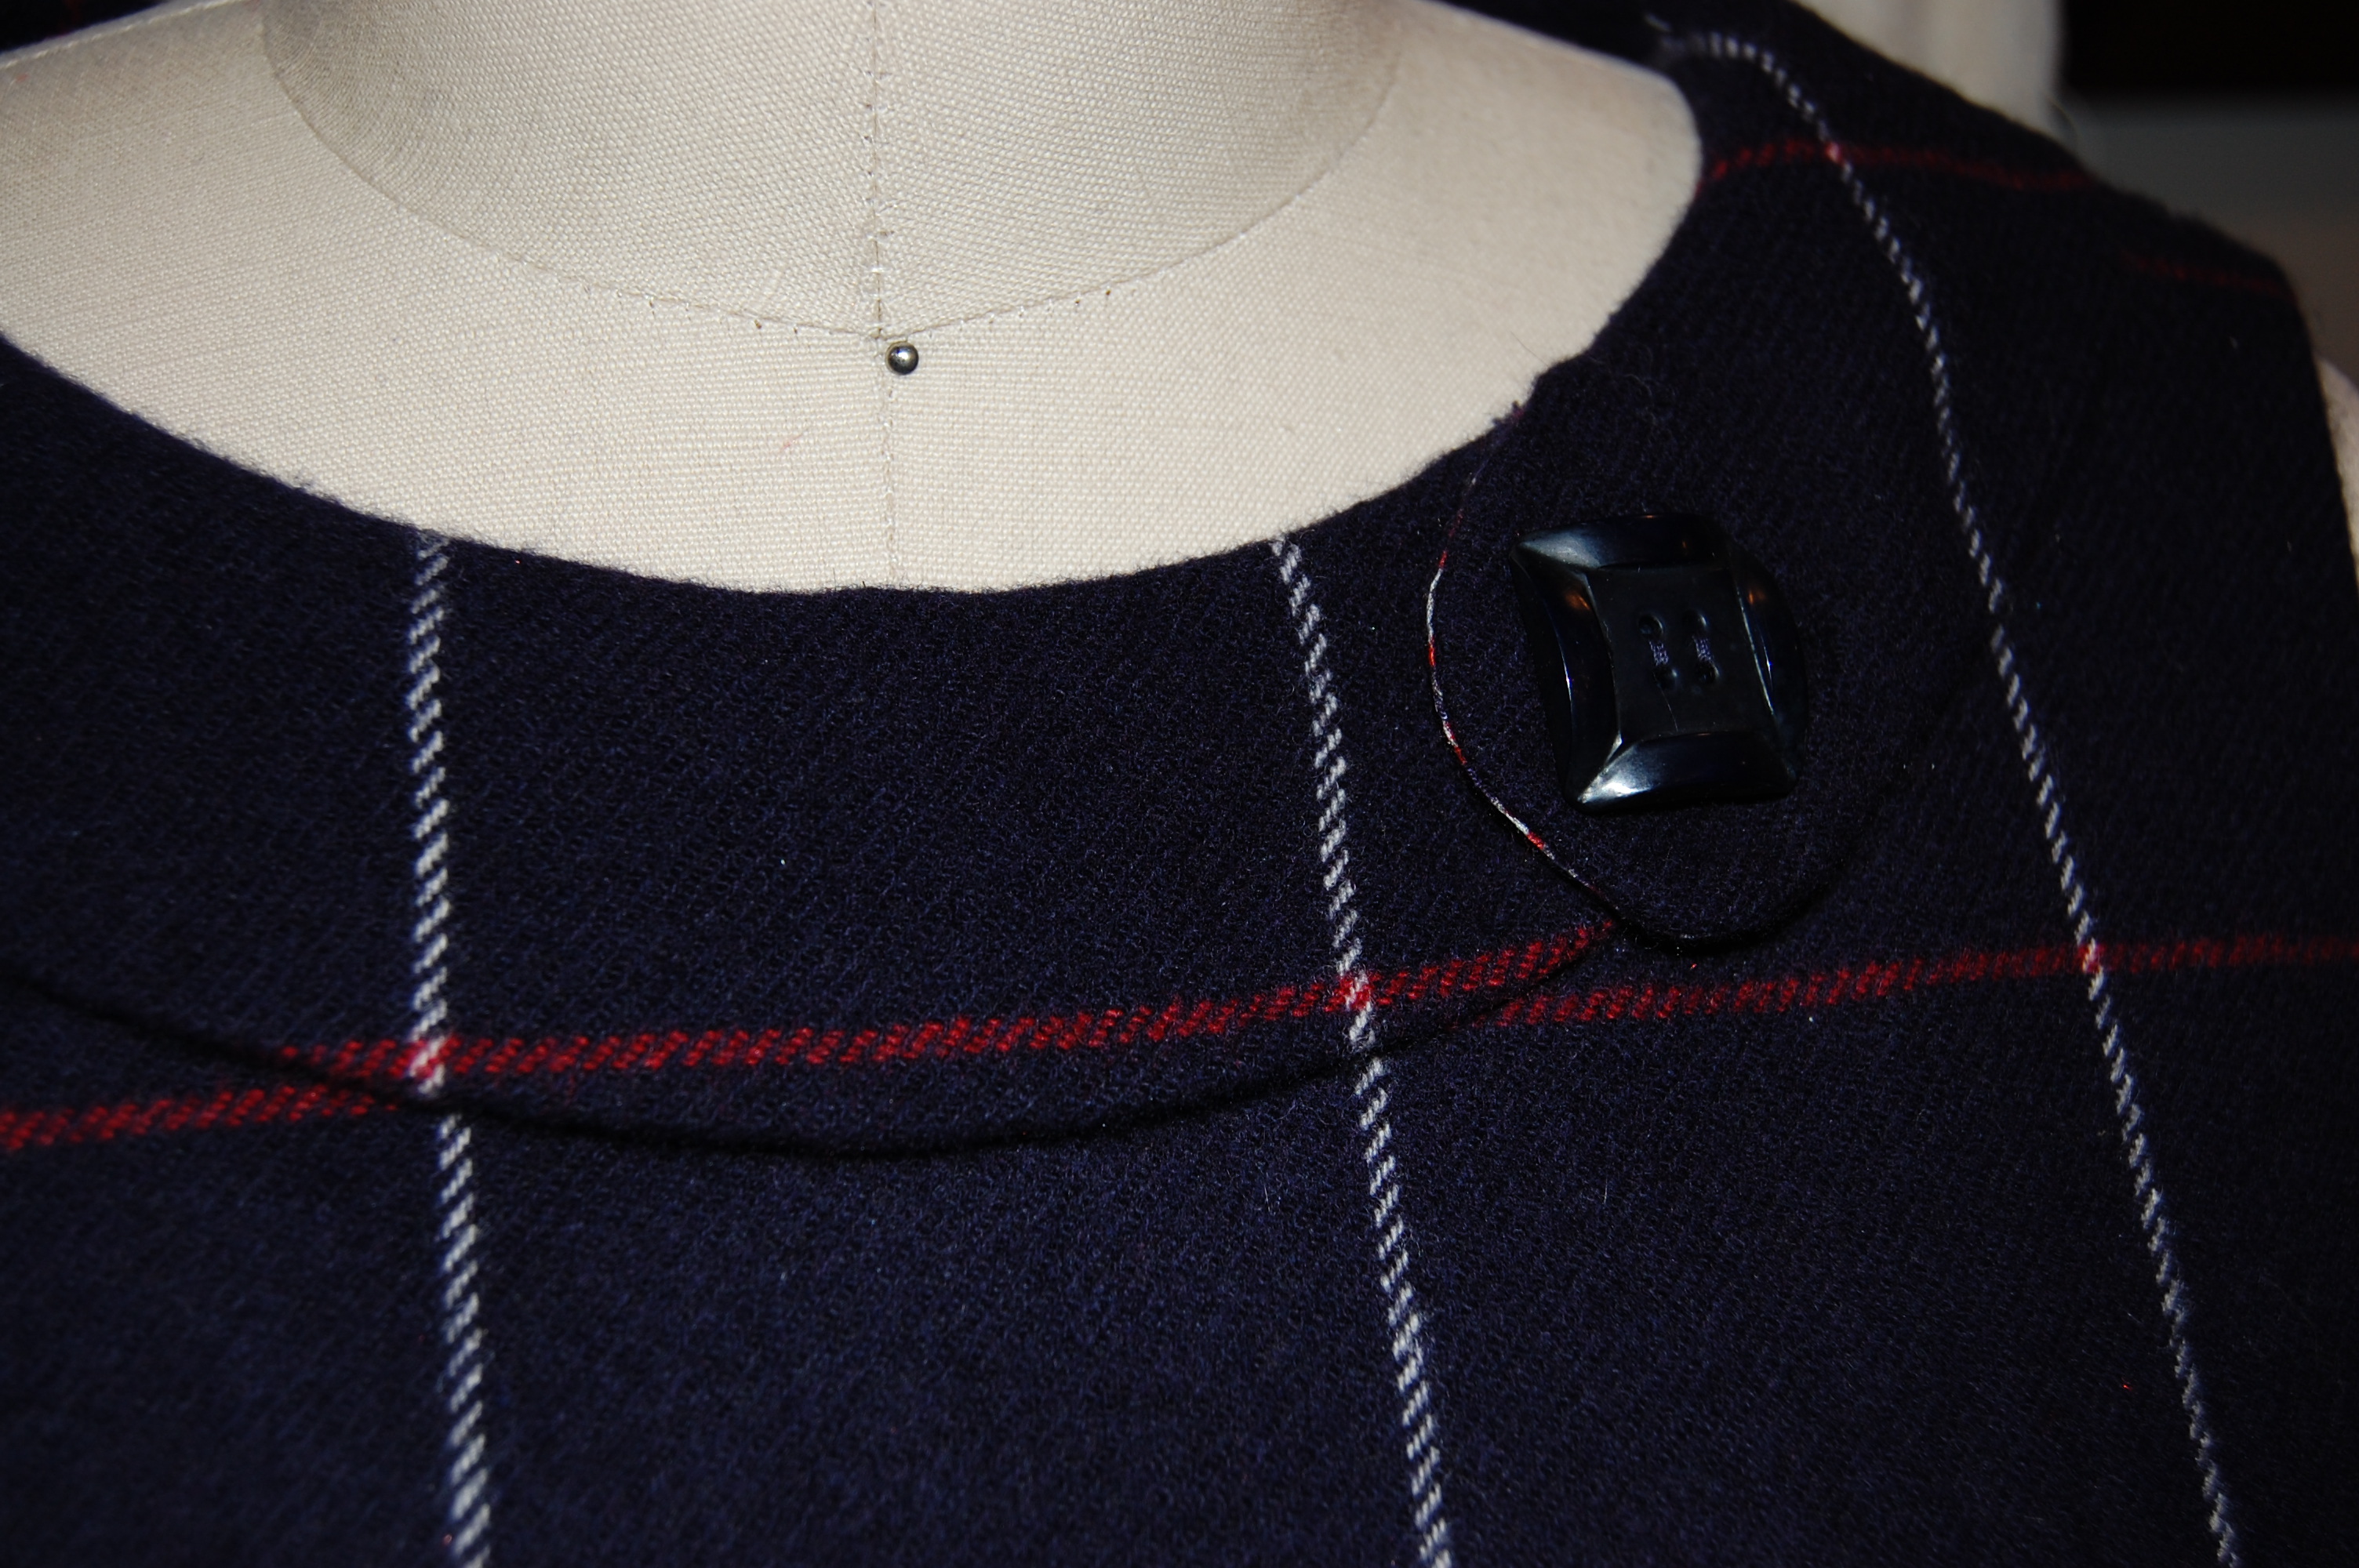
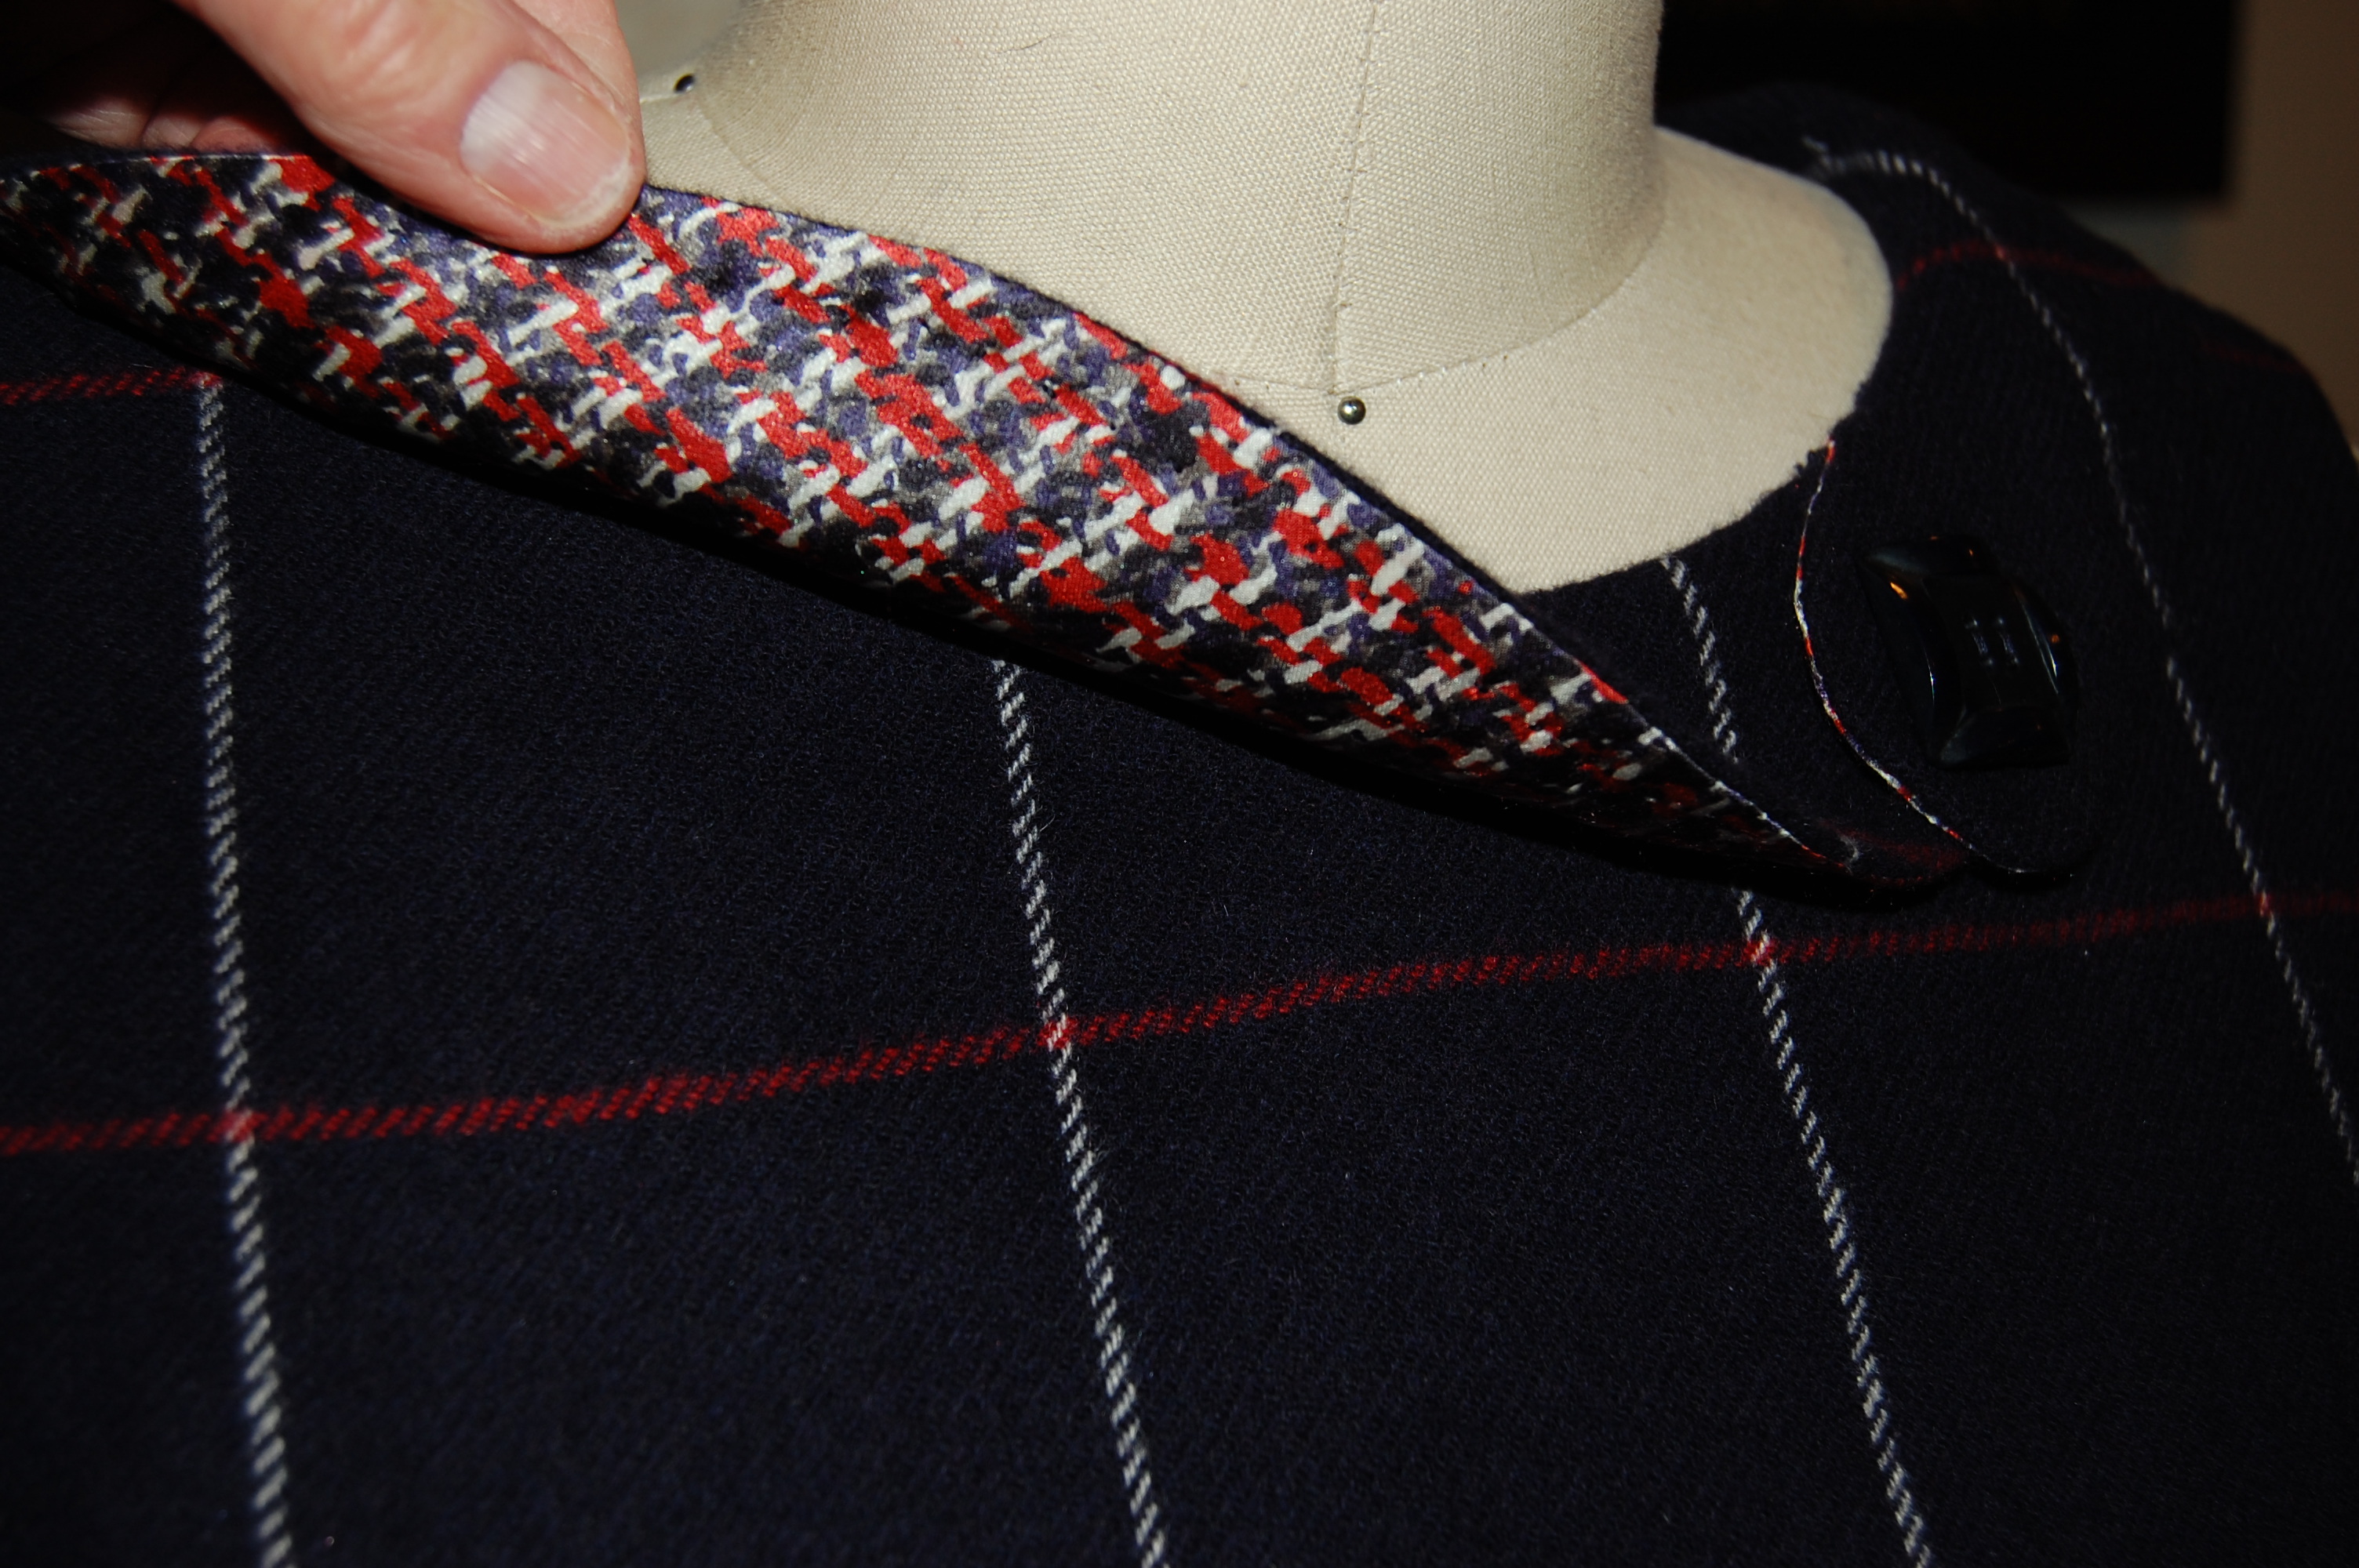
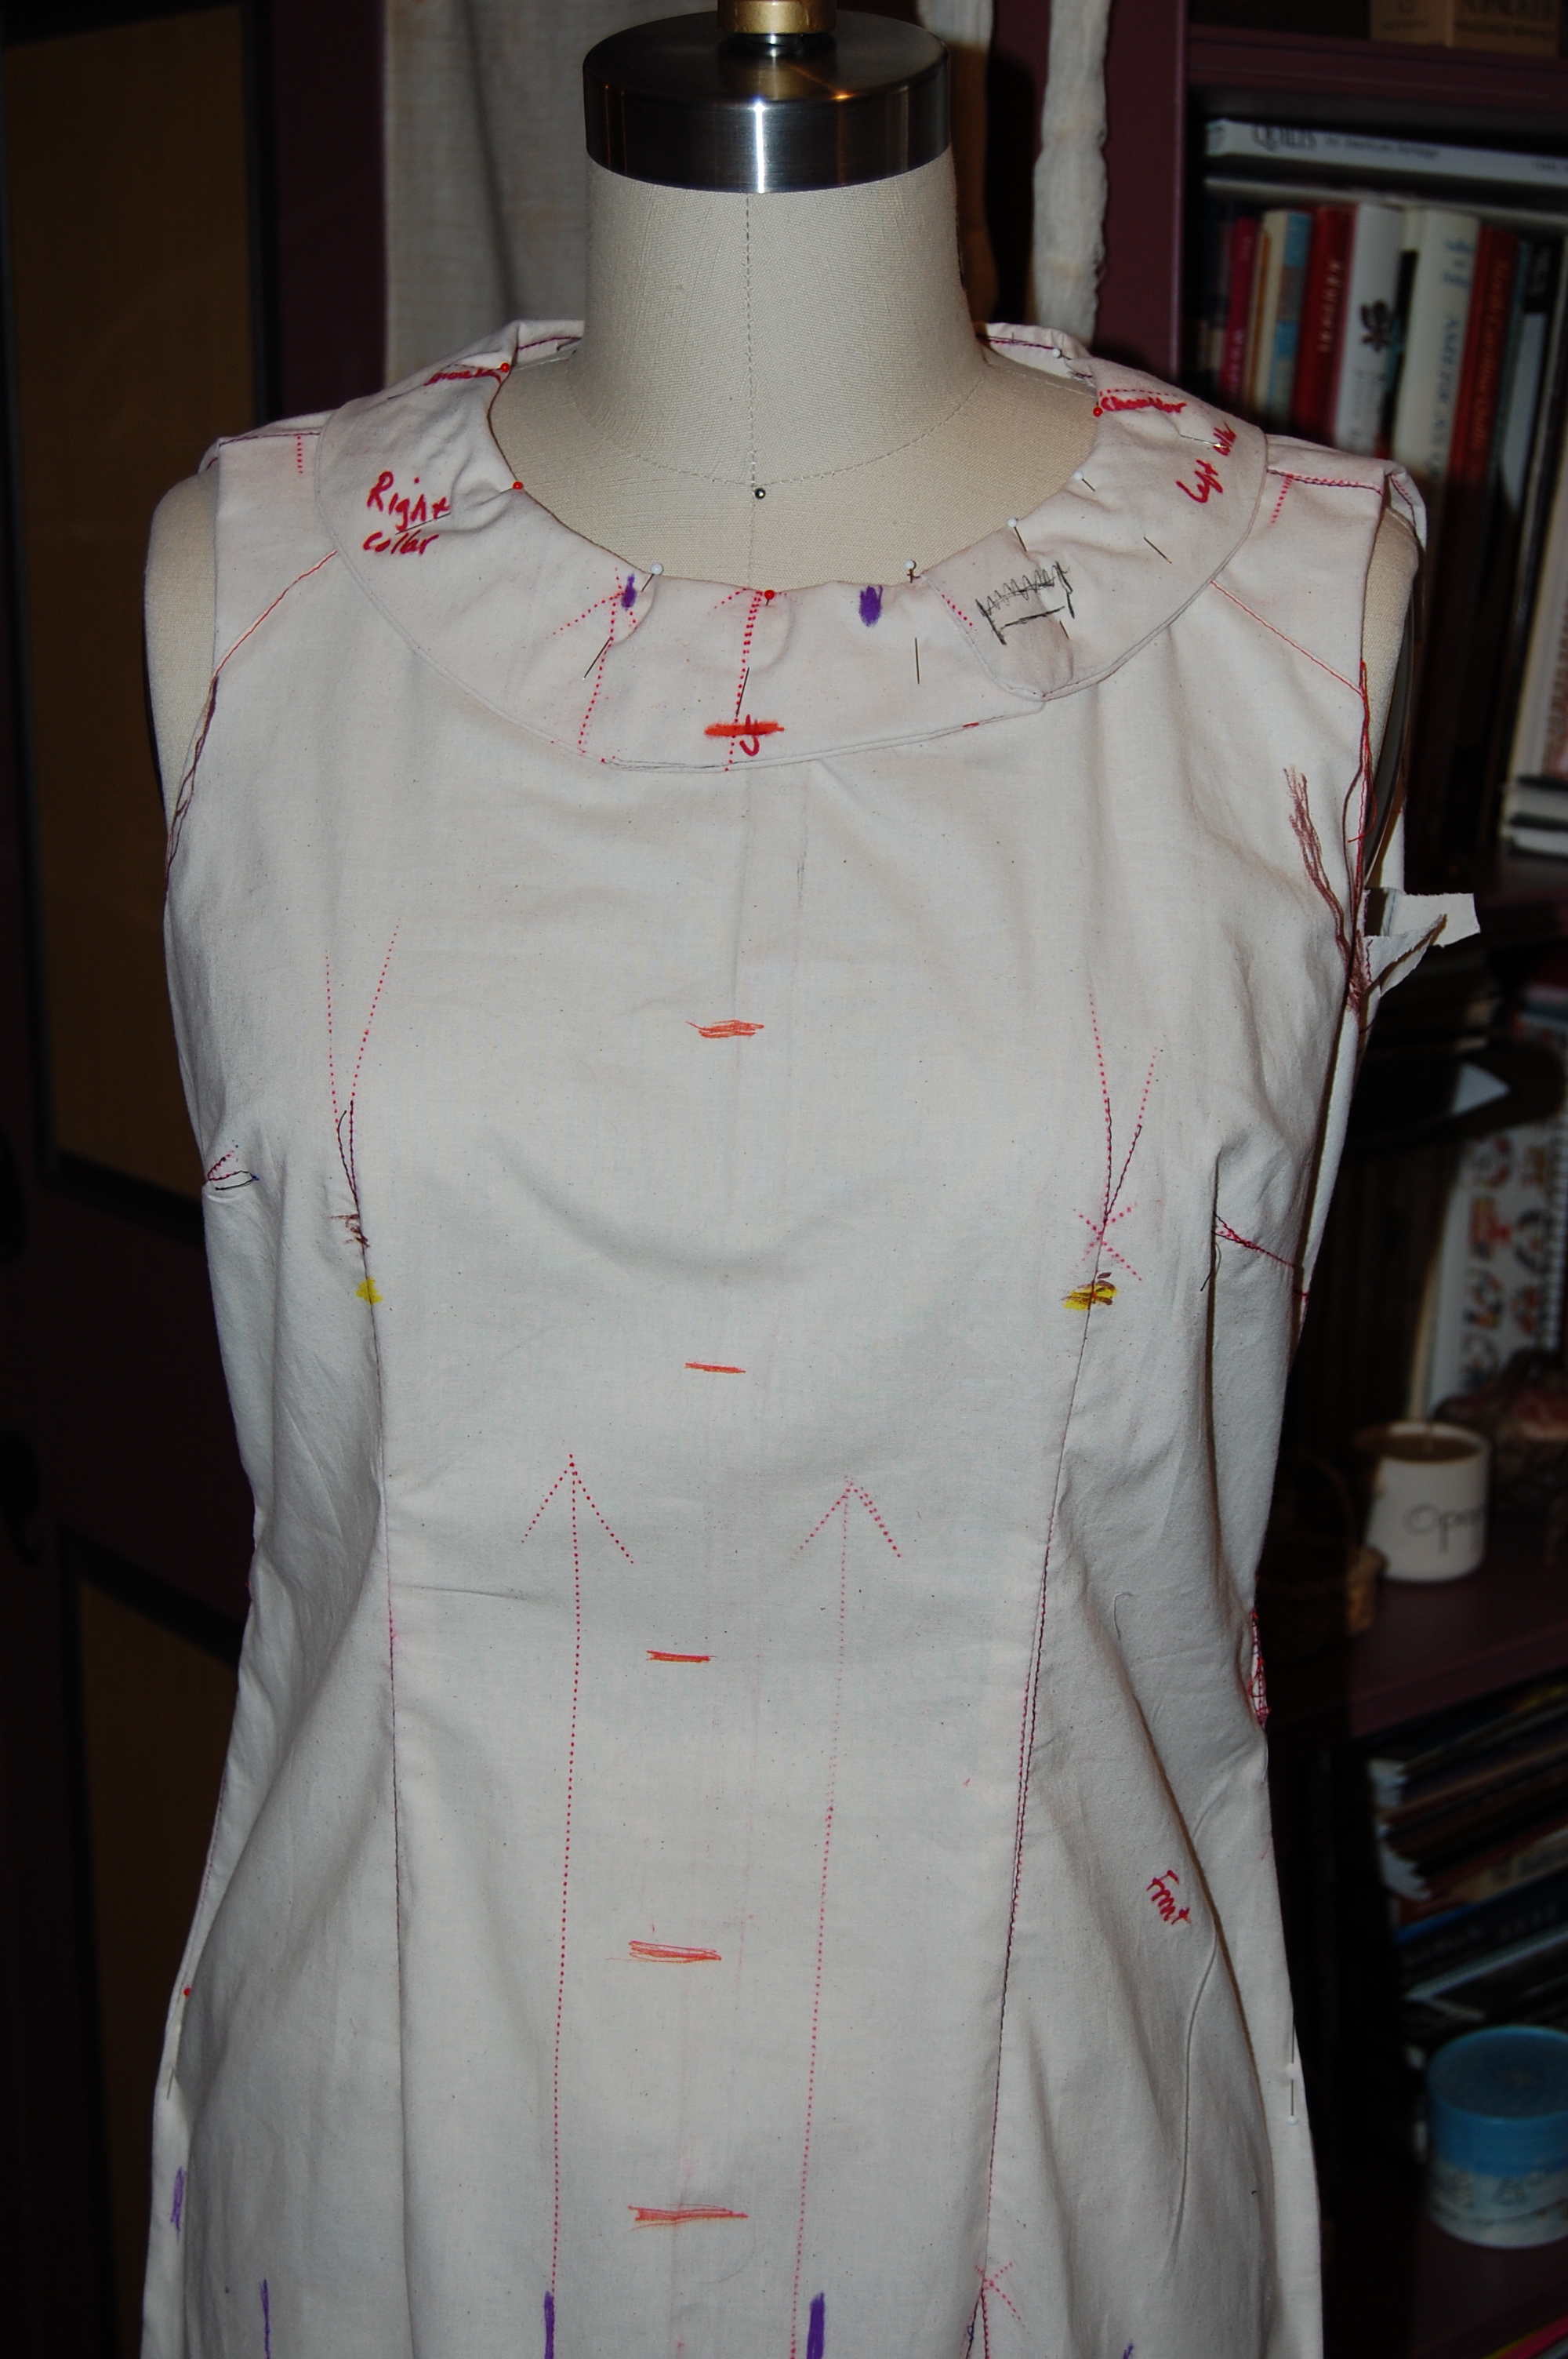
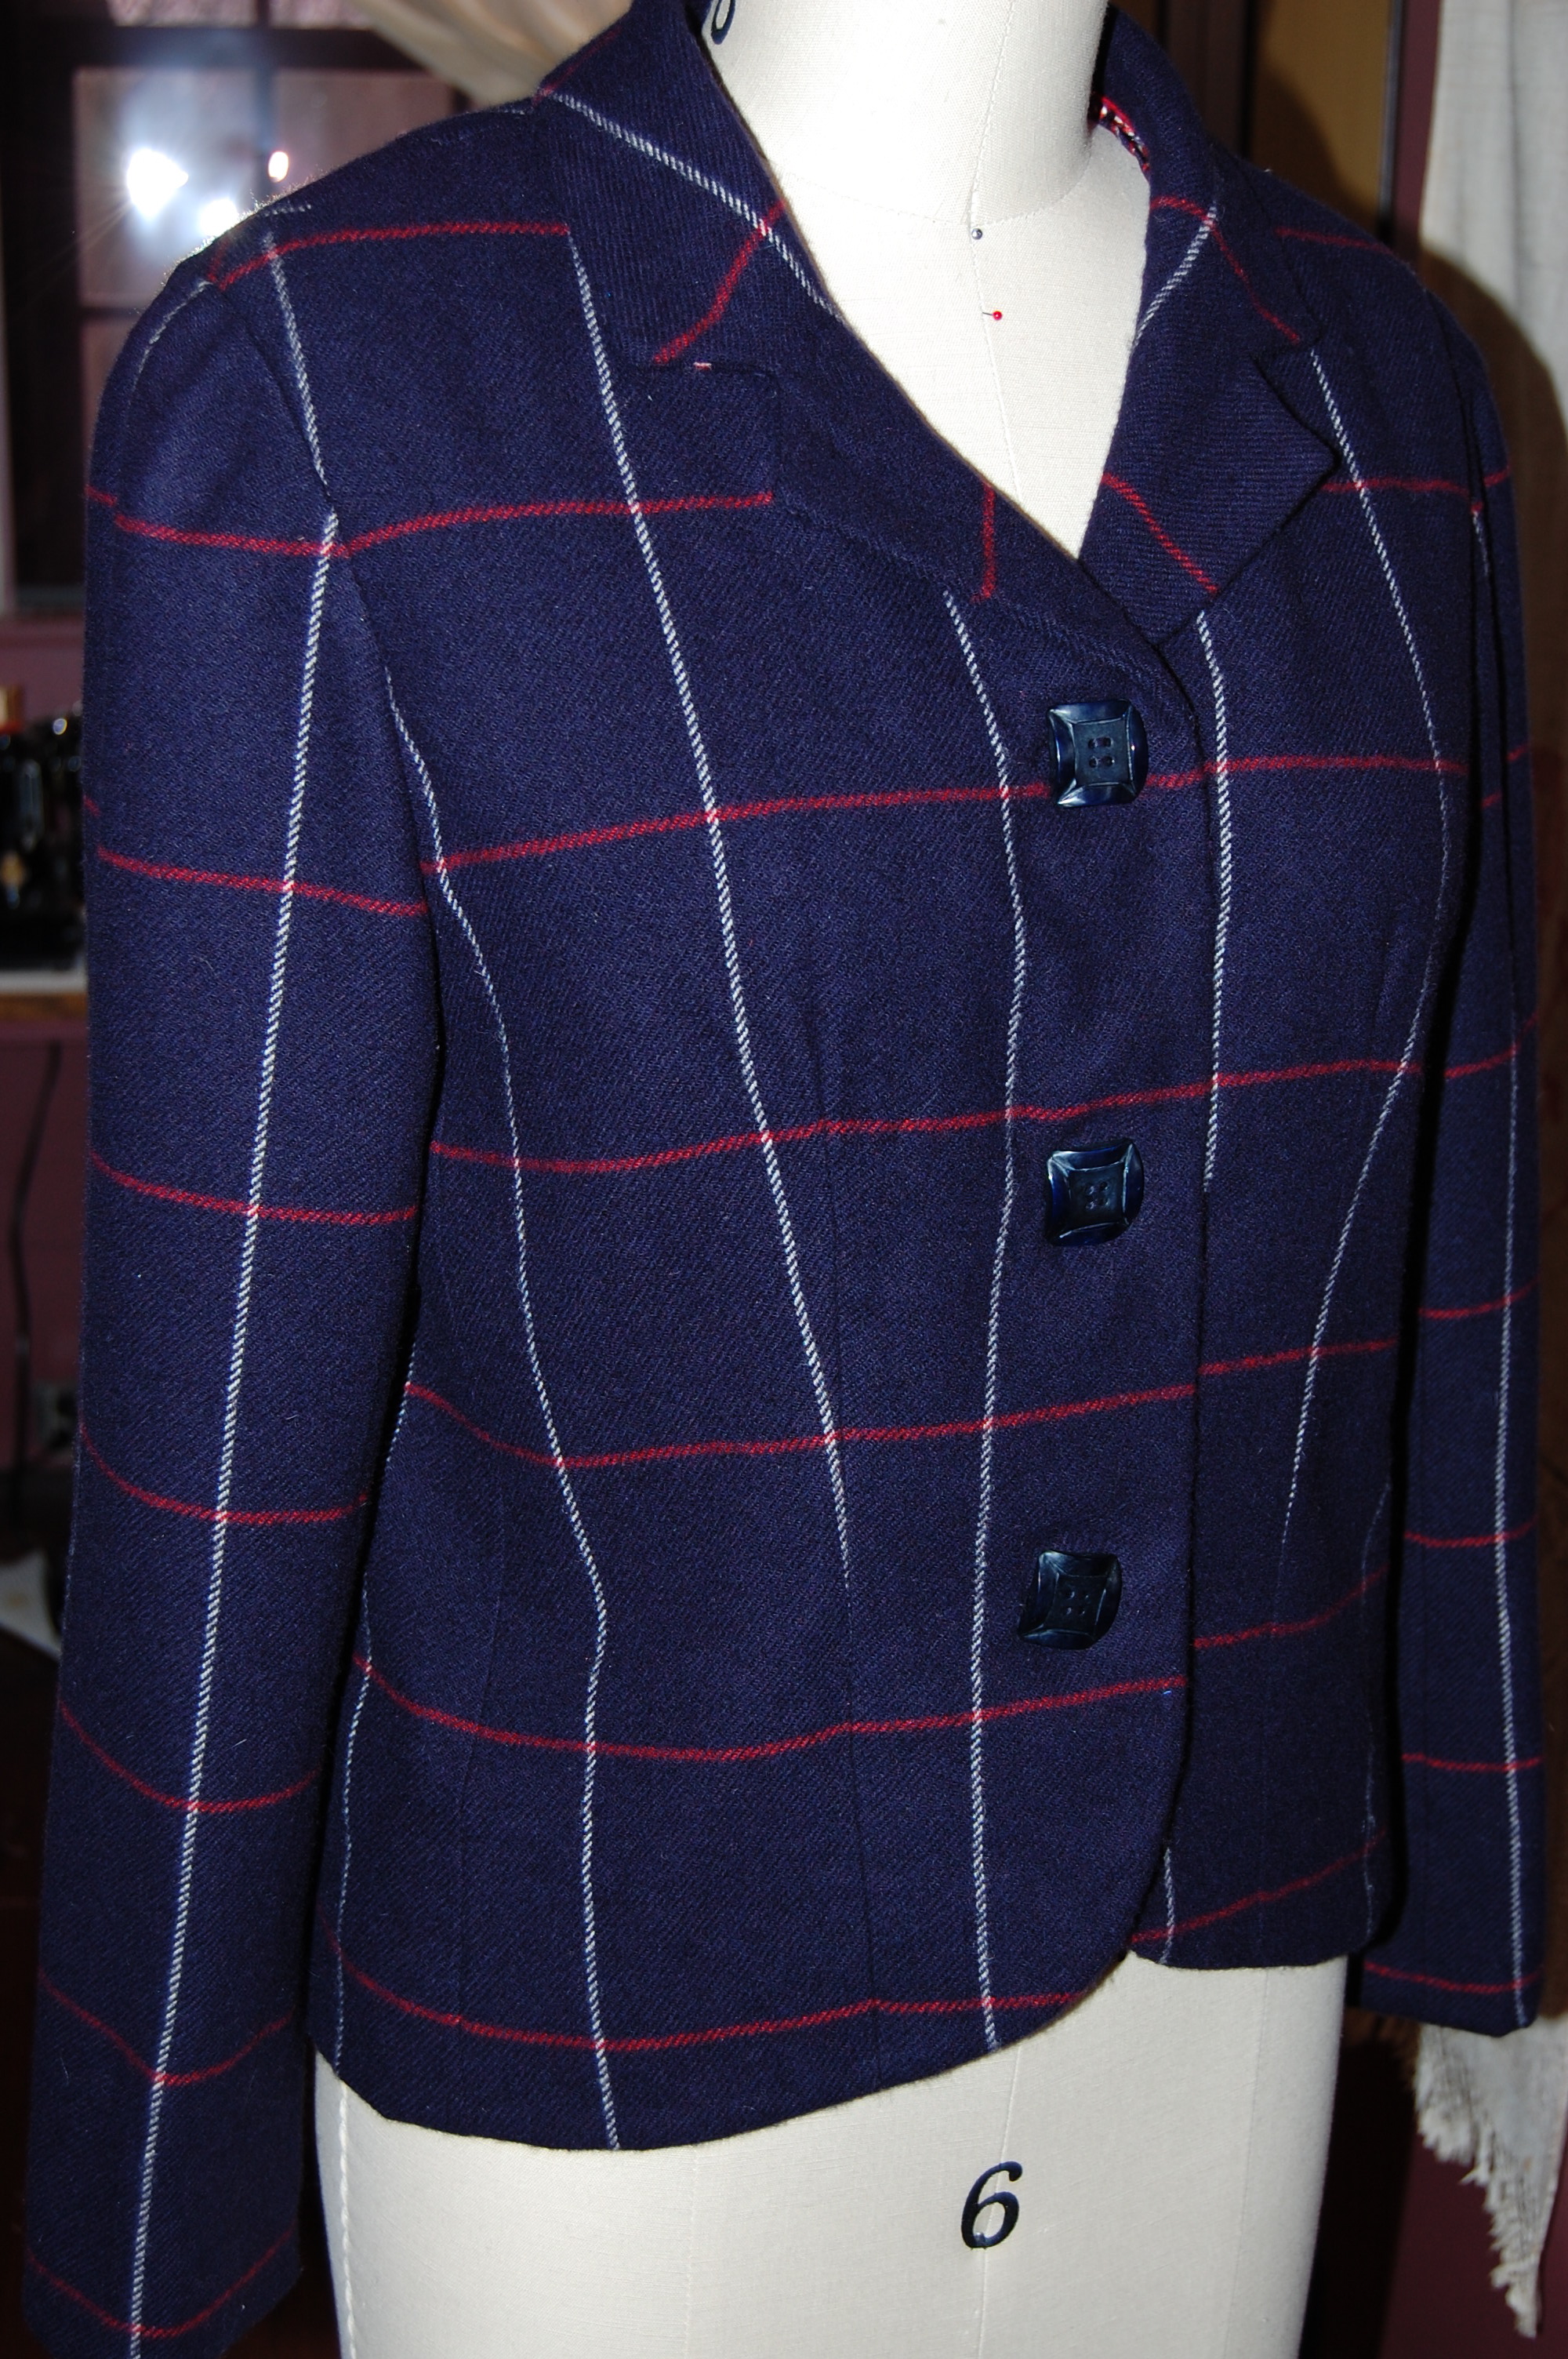
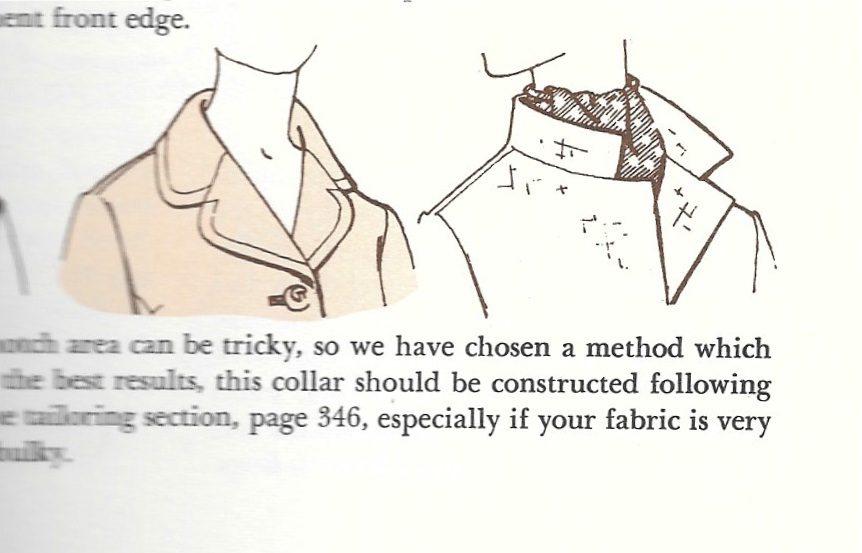
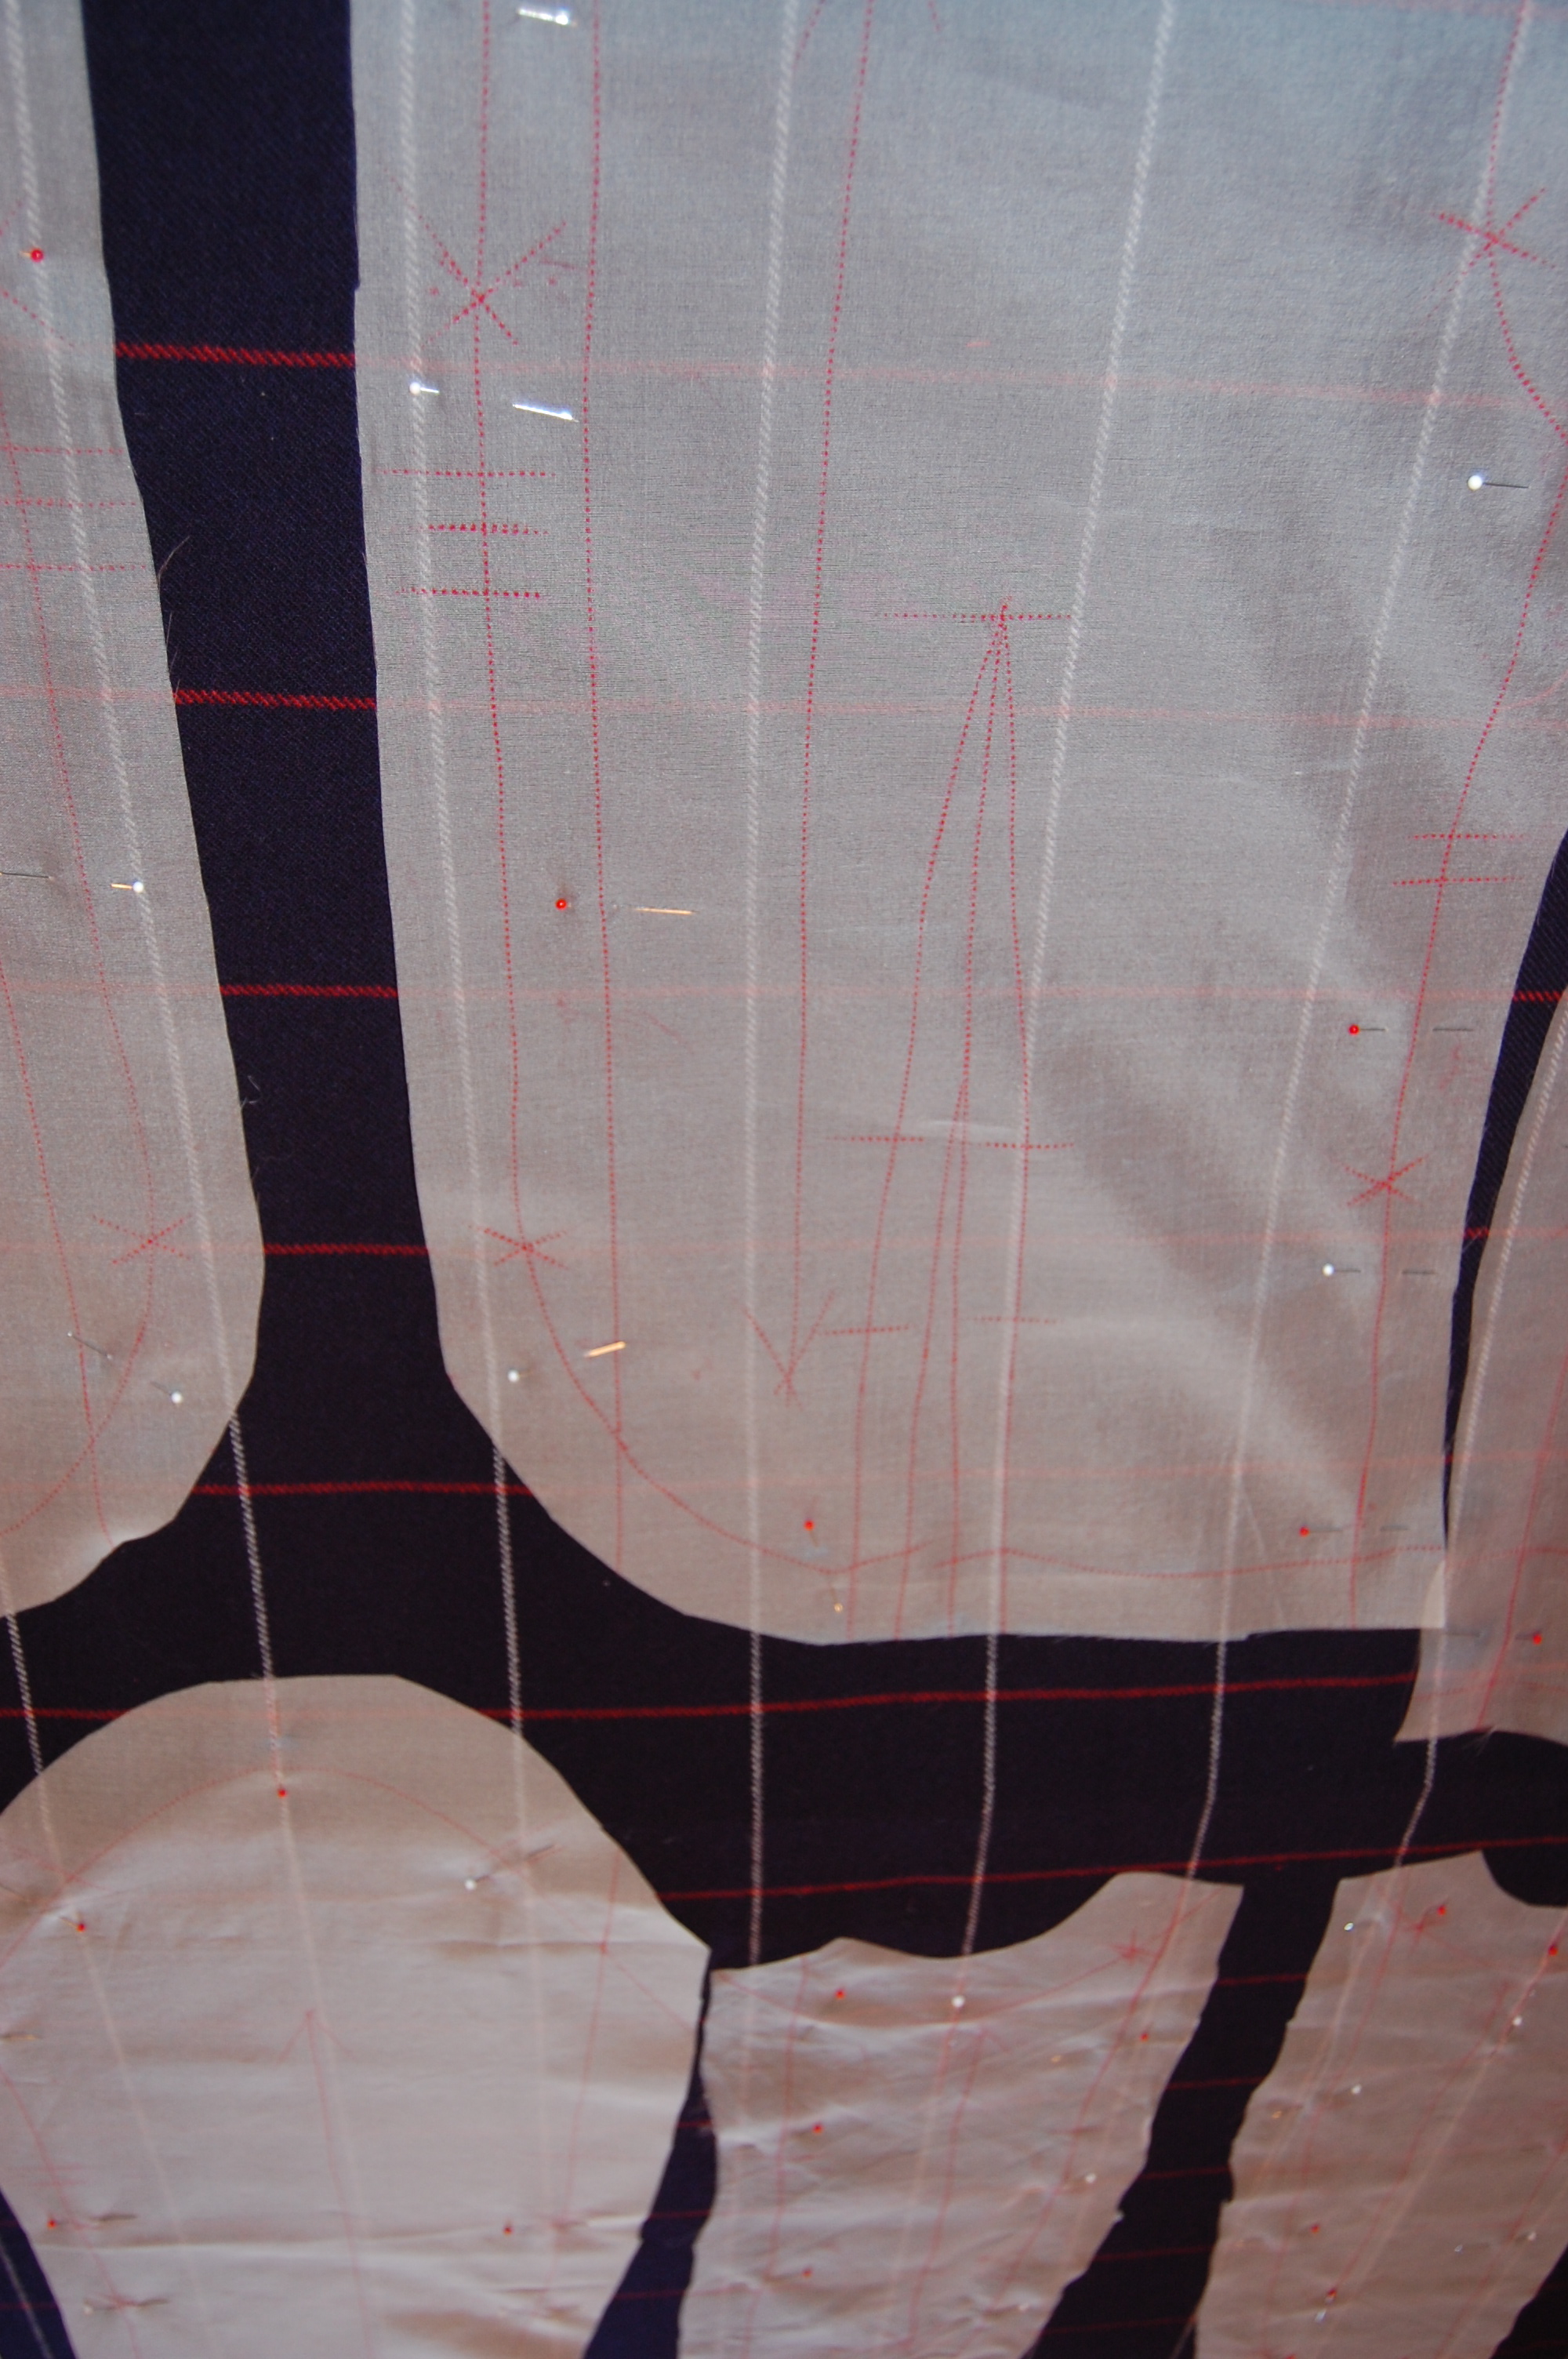
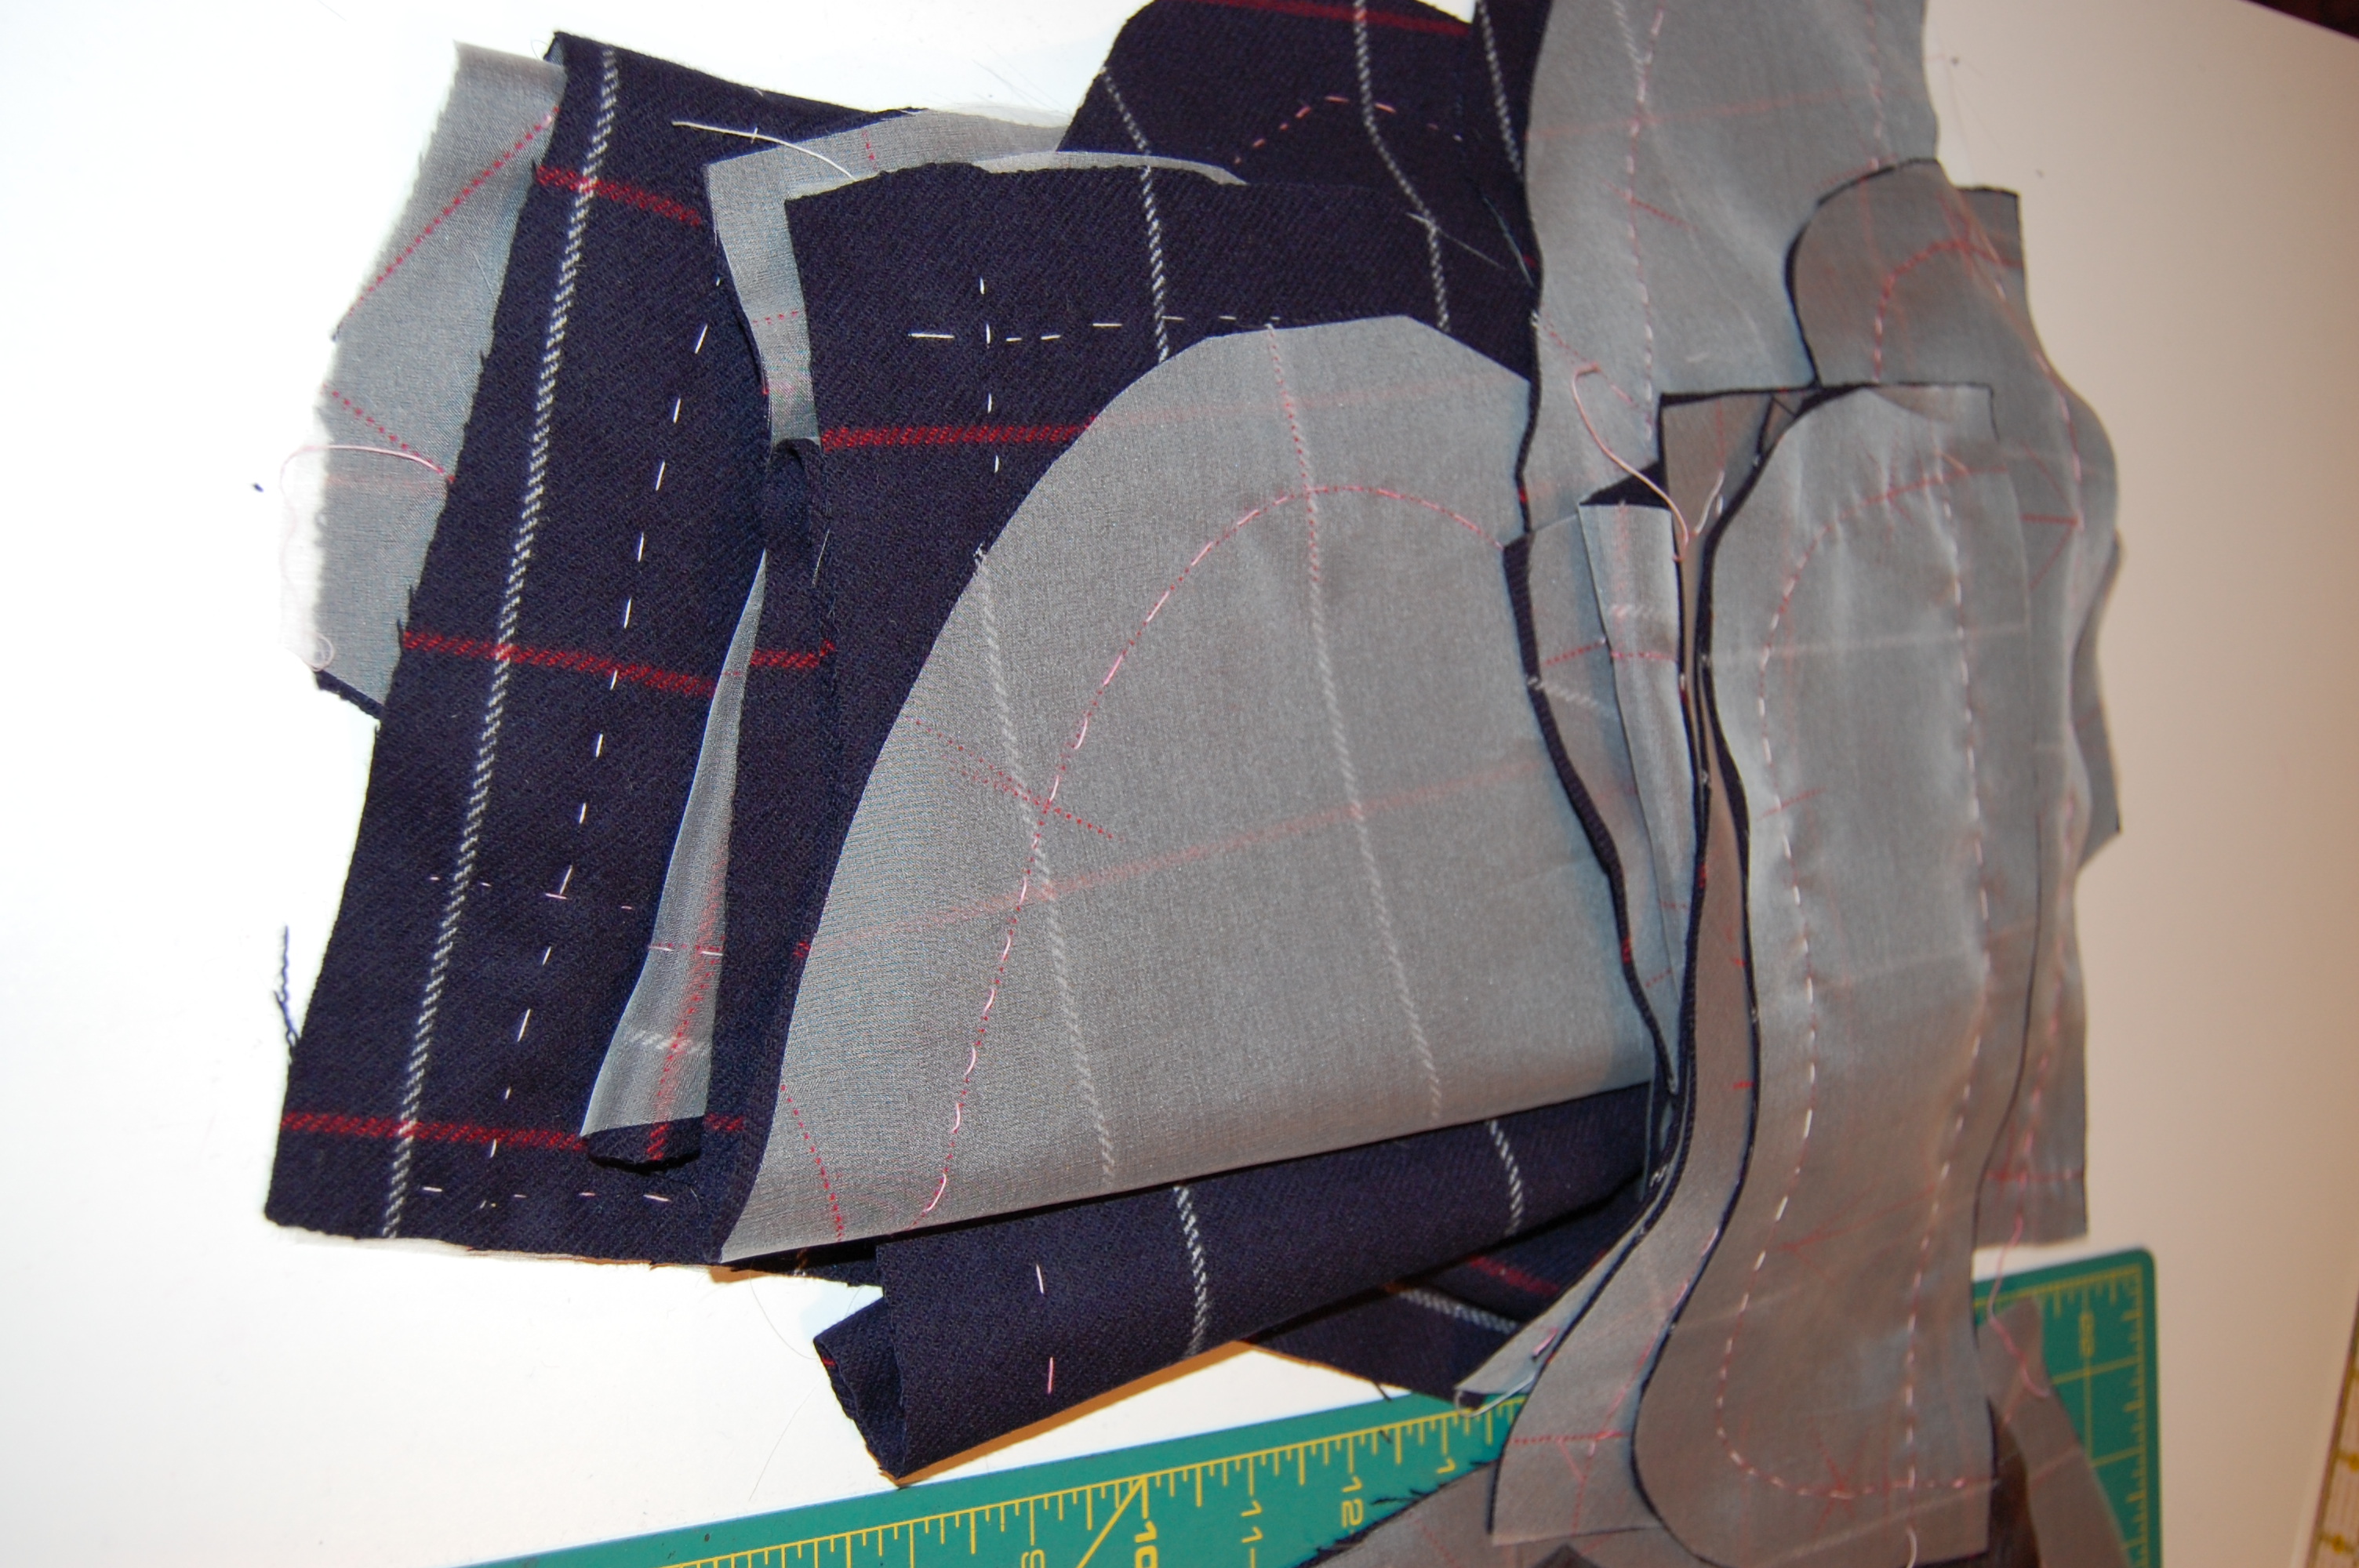
And now, in deference to some of my readers who want progress reports on my Number Four Classic French Jacket, here are a few photos – and a short quiz for those of you who have never made one of these jackets, but hope to one day.

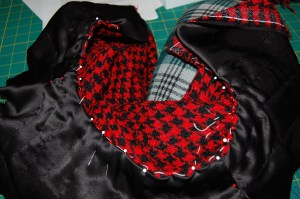
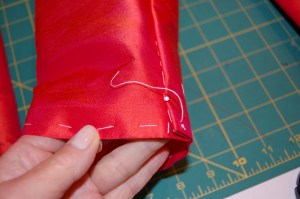
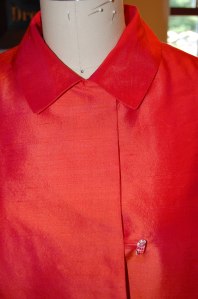
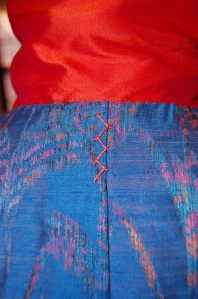
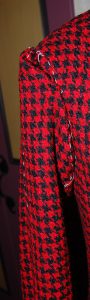
Here is the neckline, ready to be stitched.

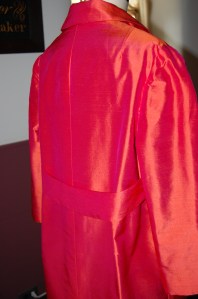
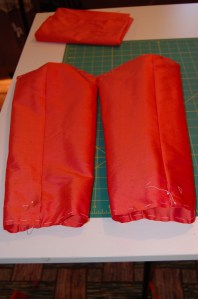
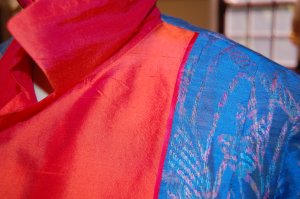
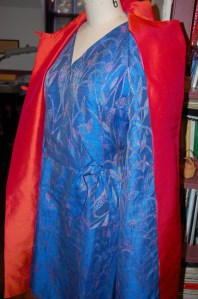
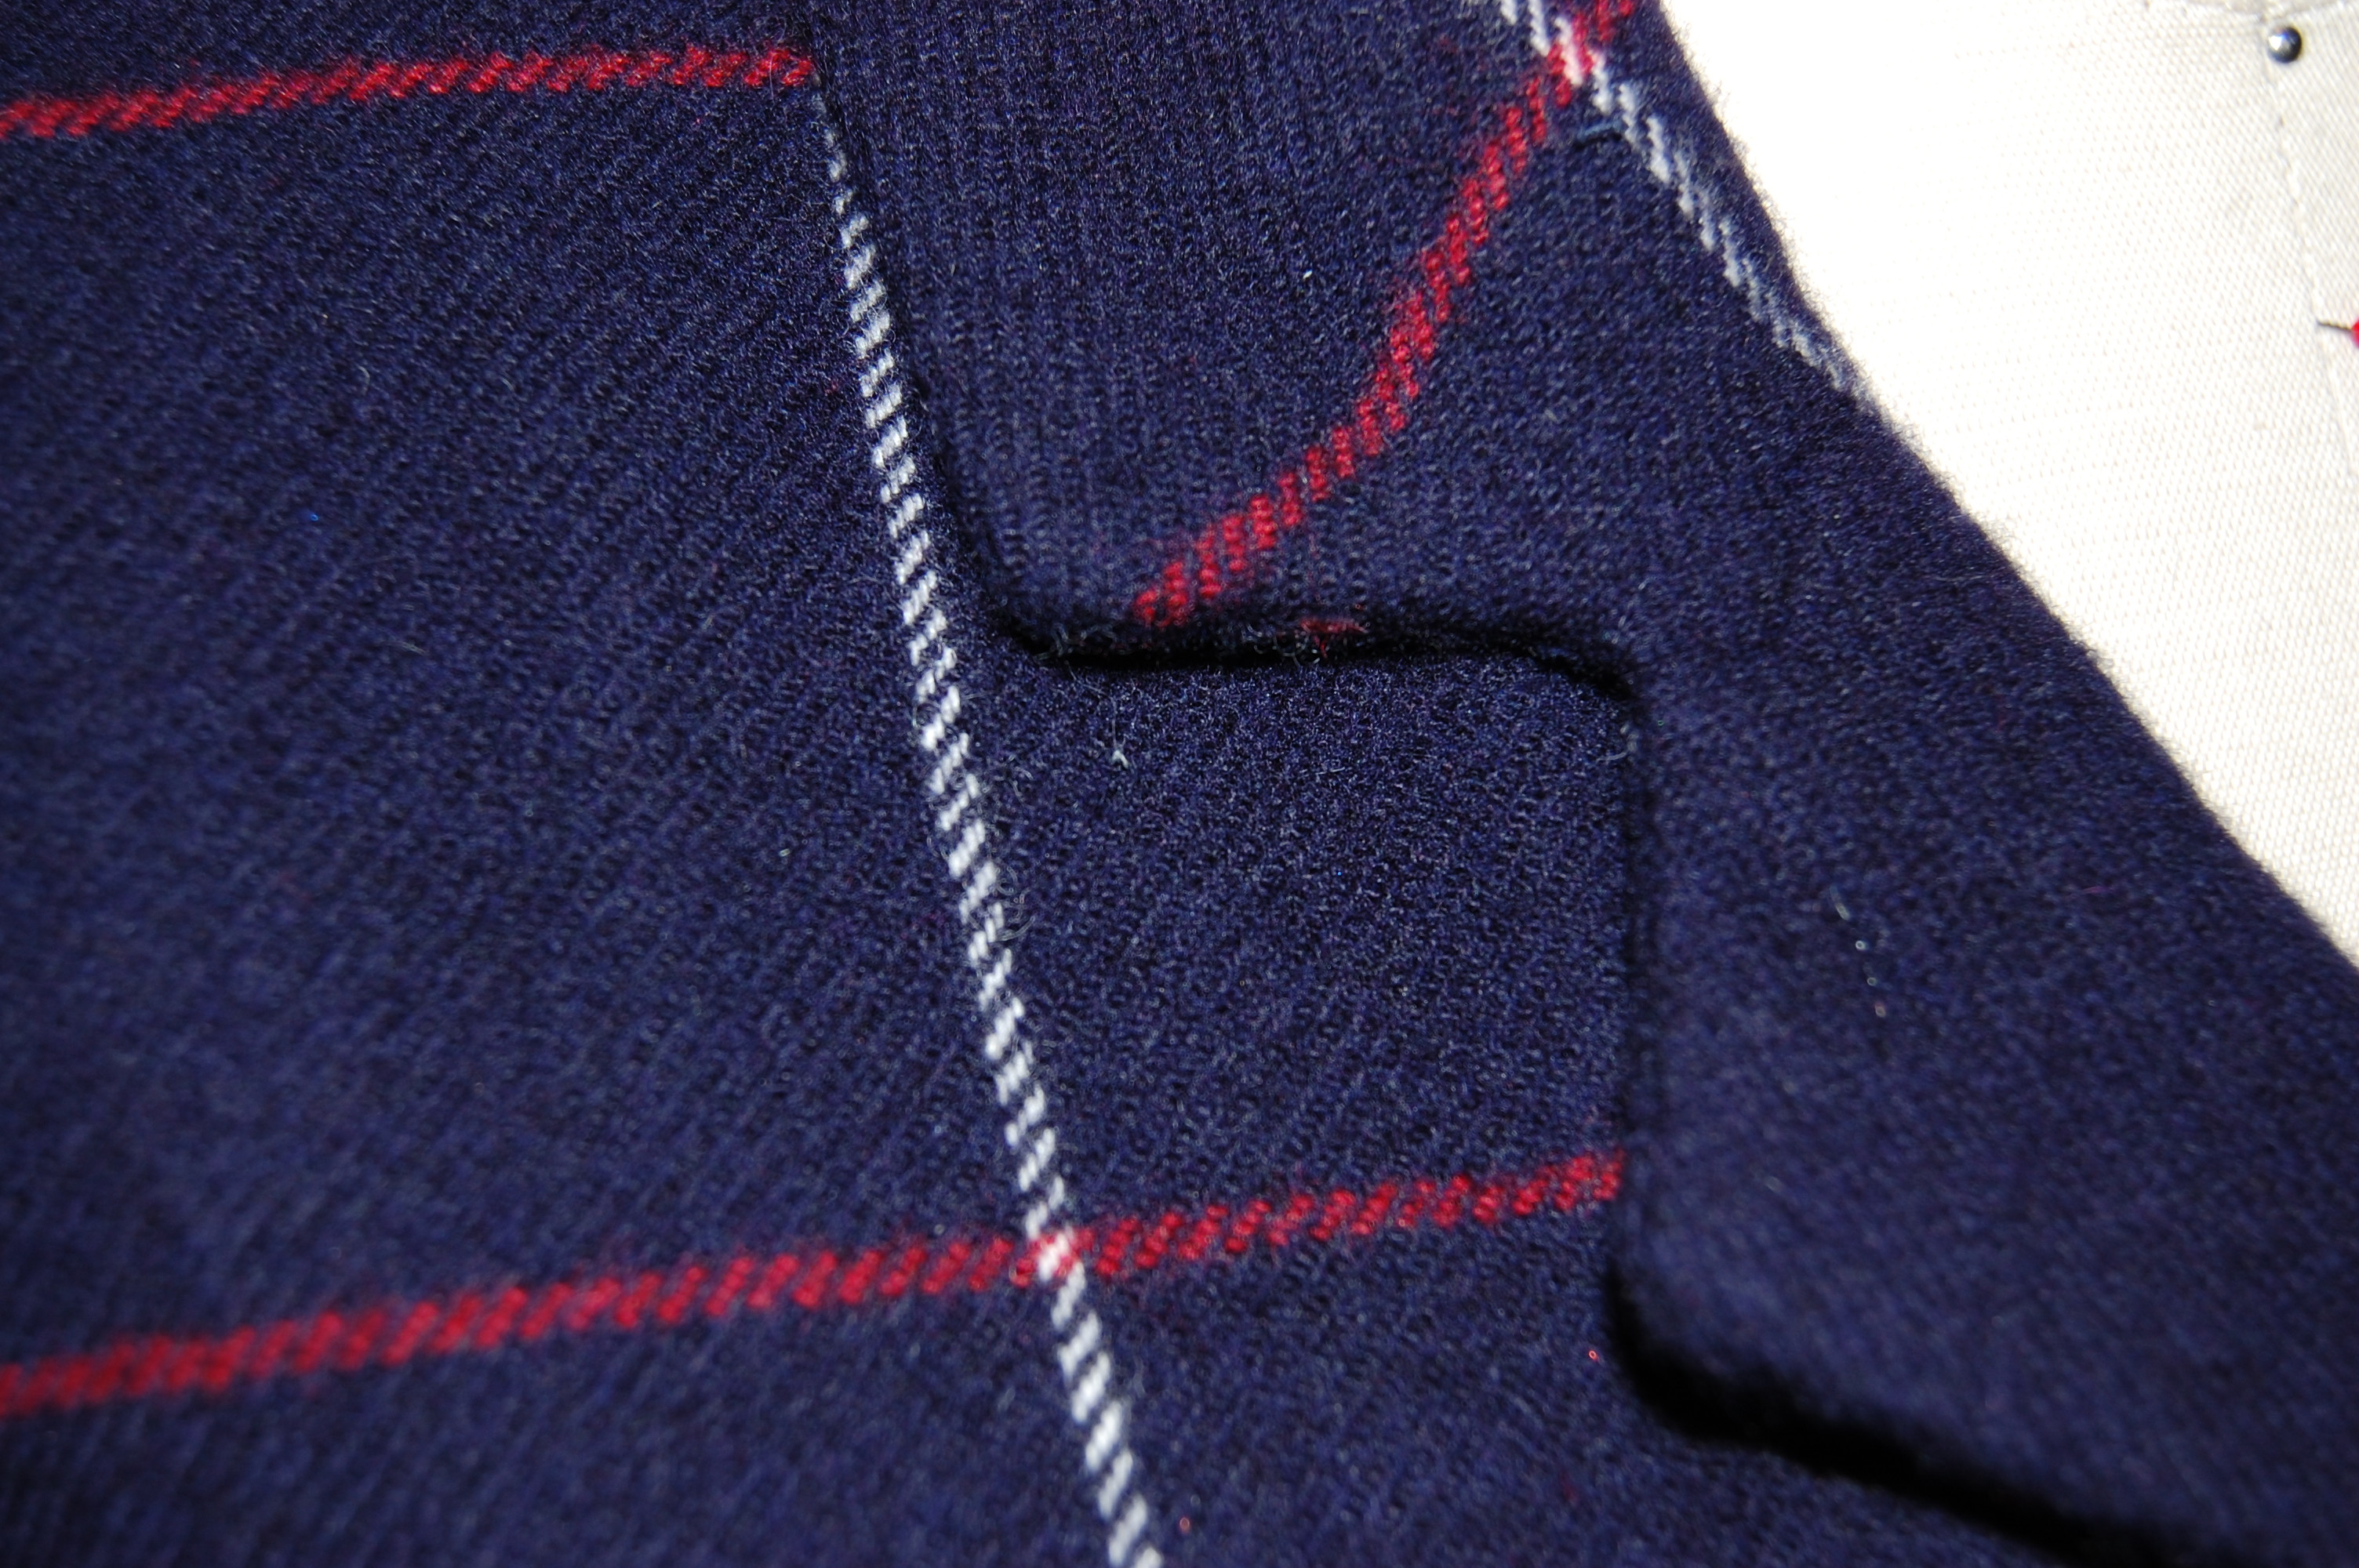
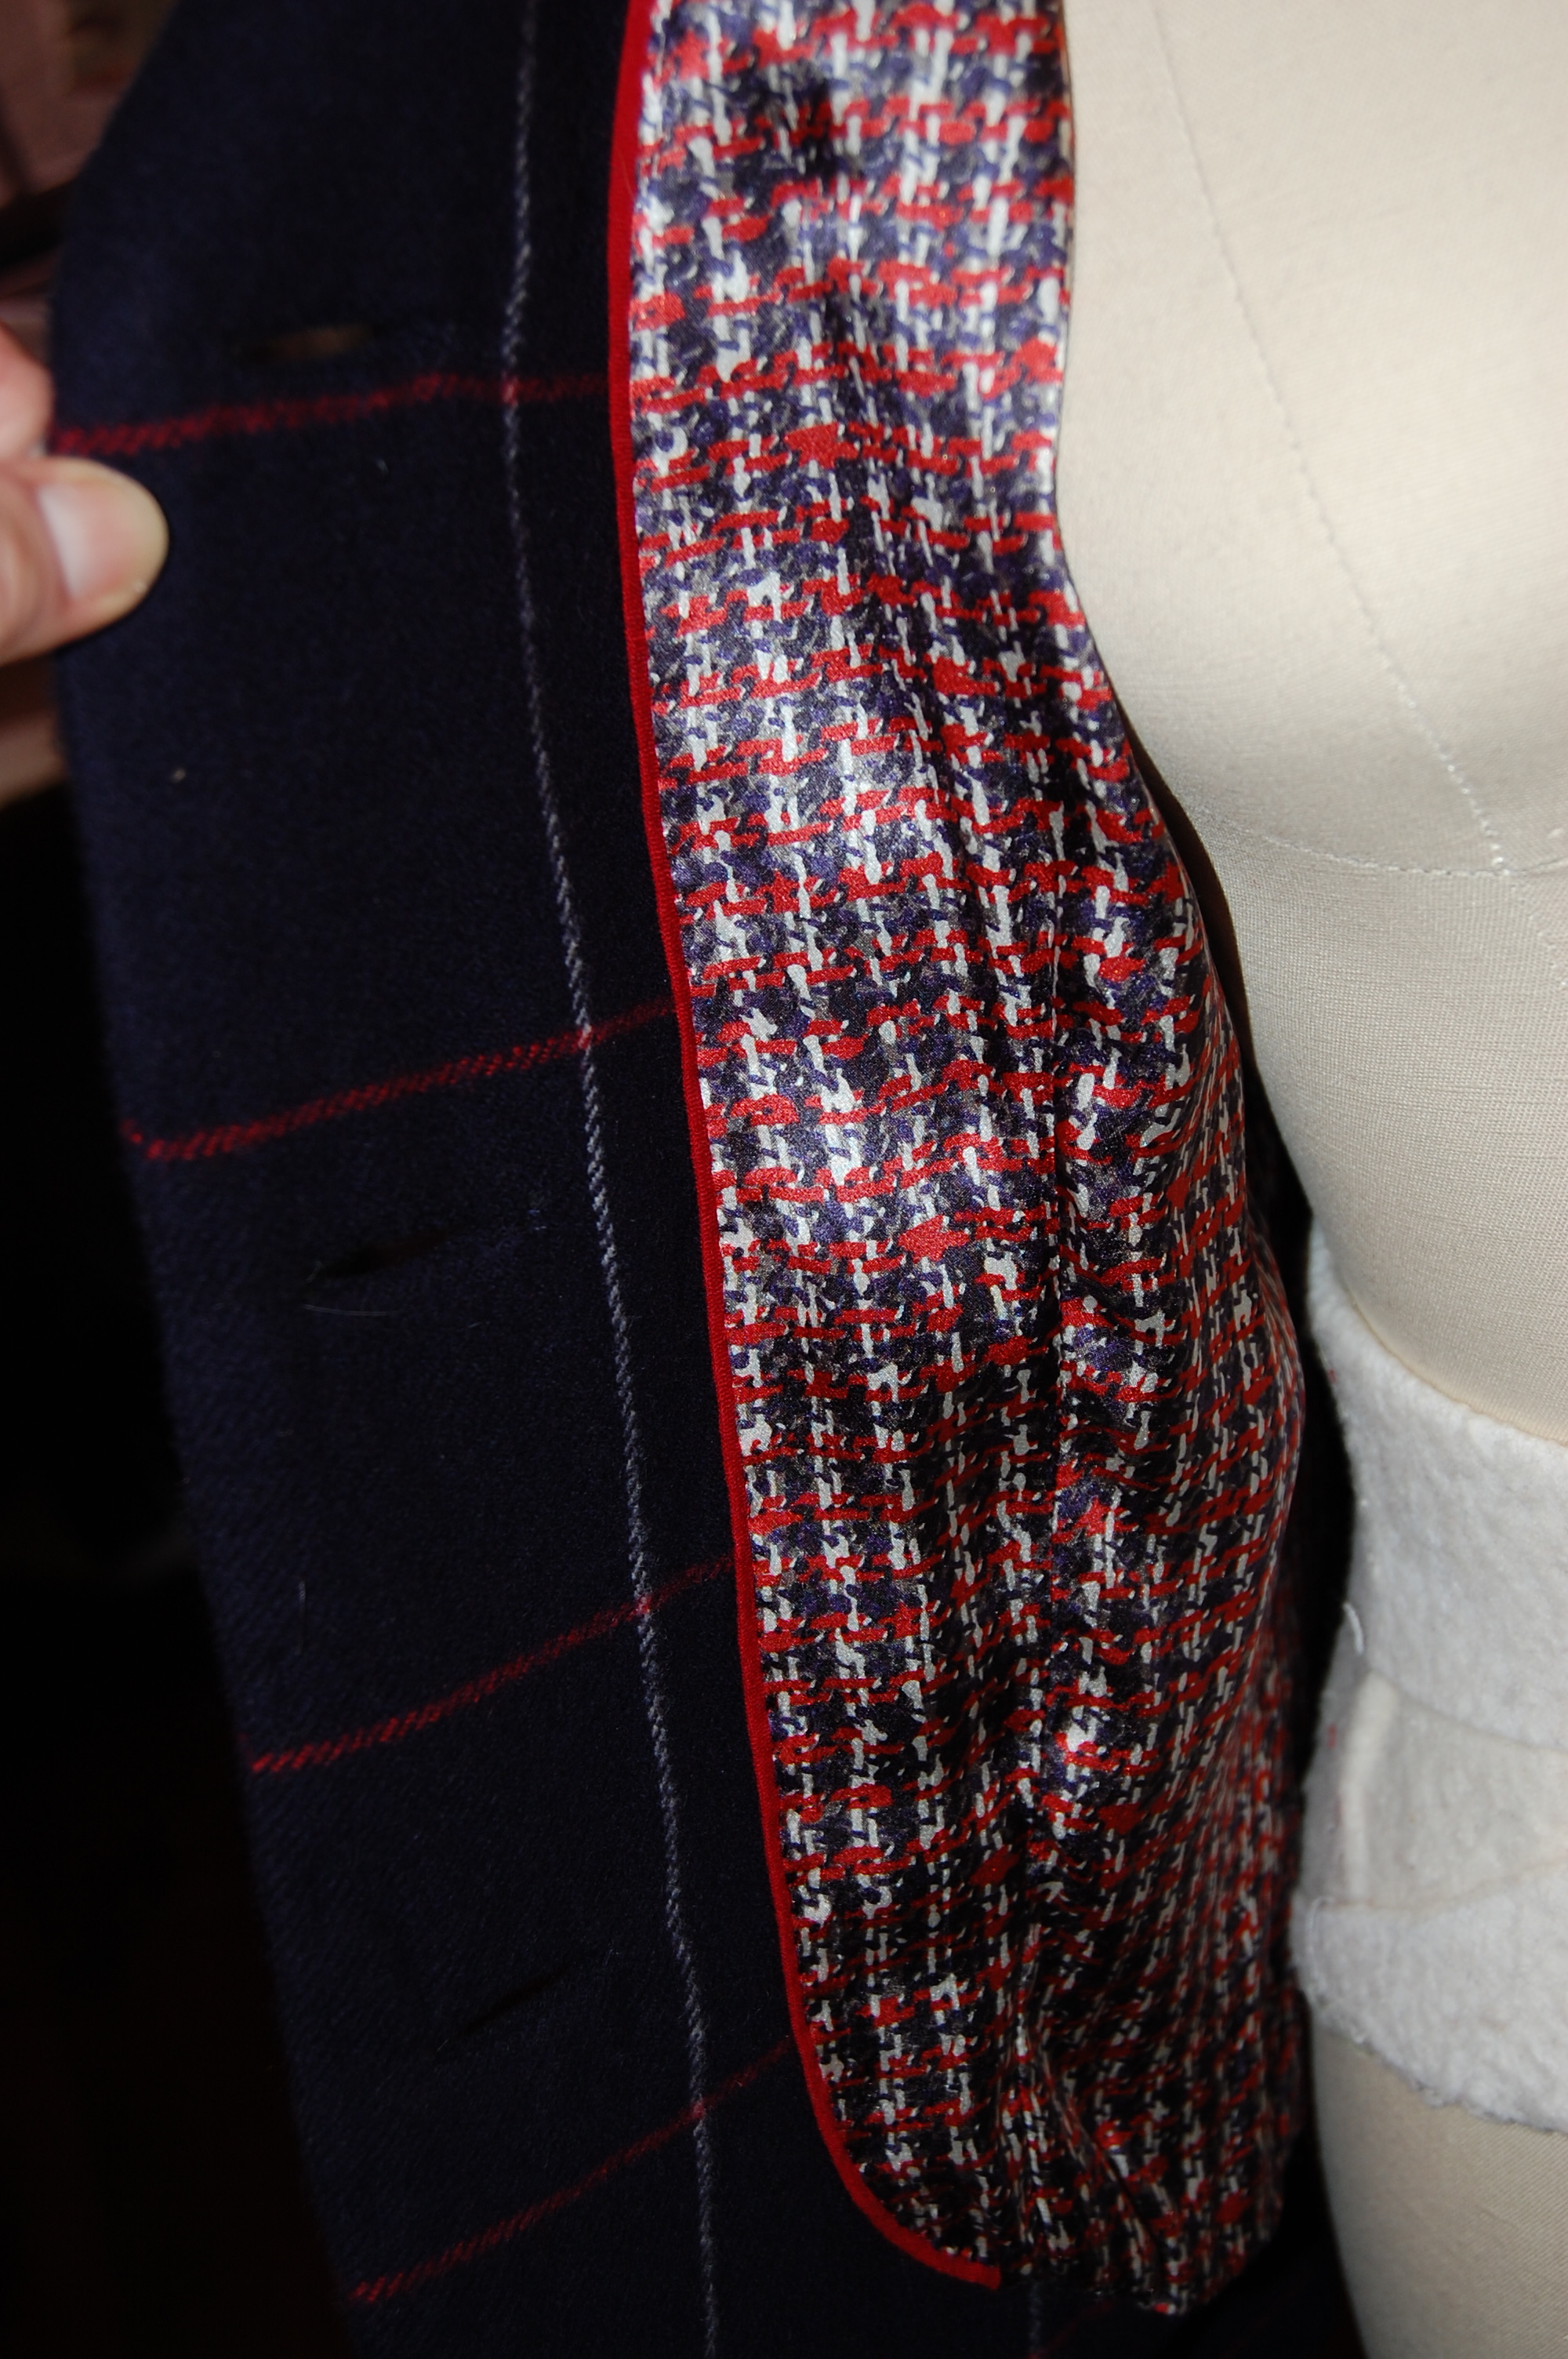
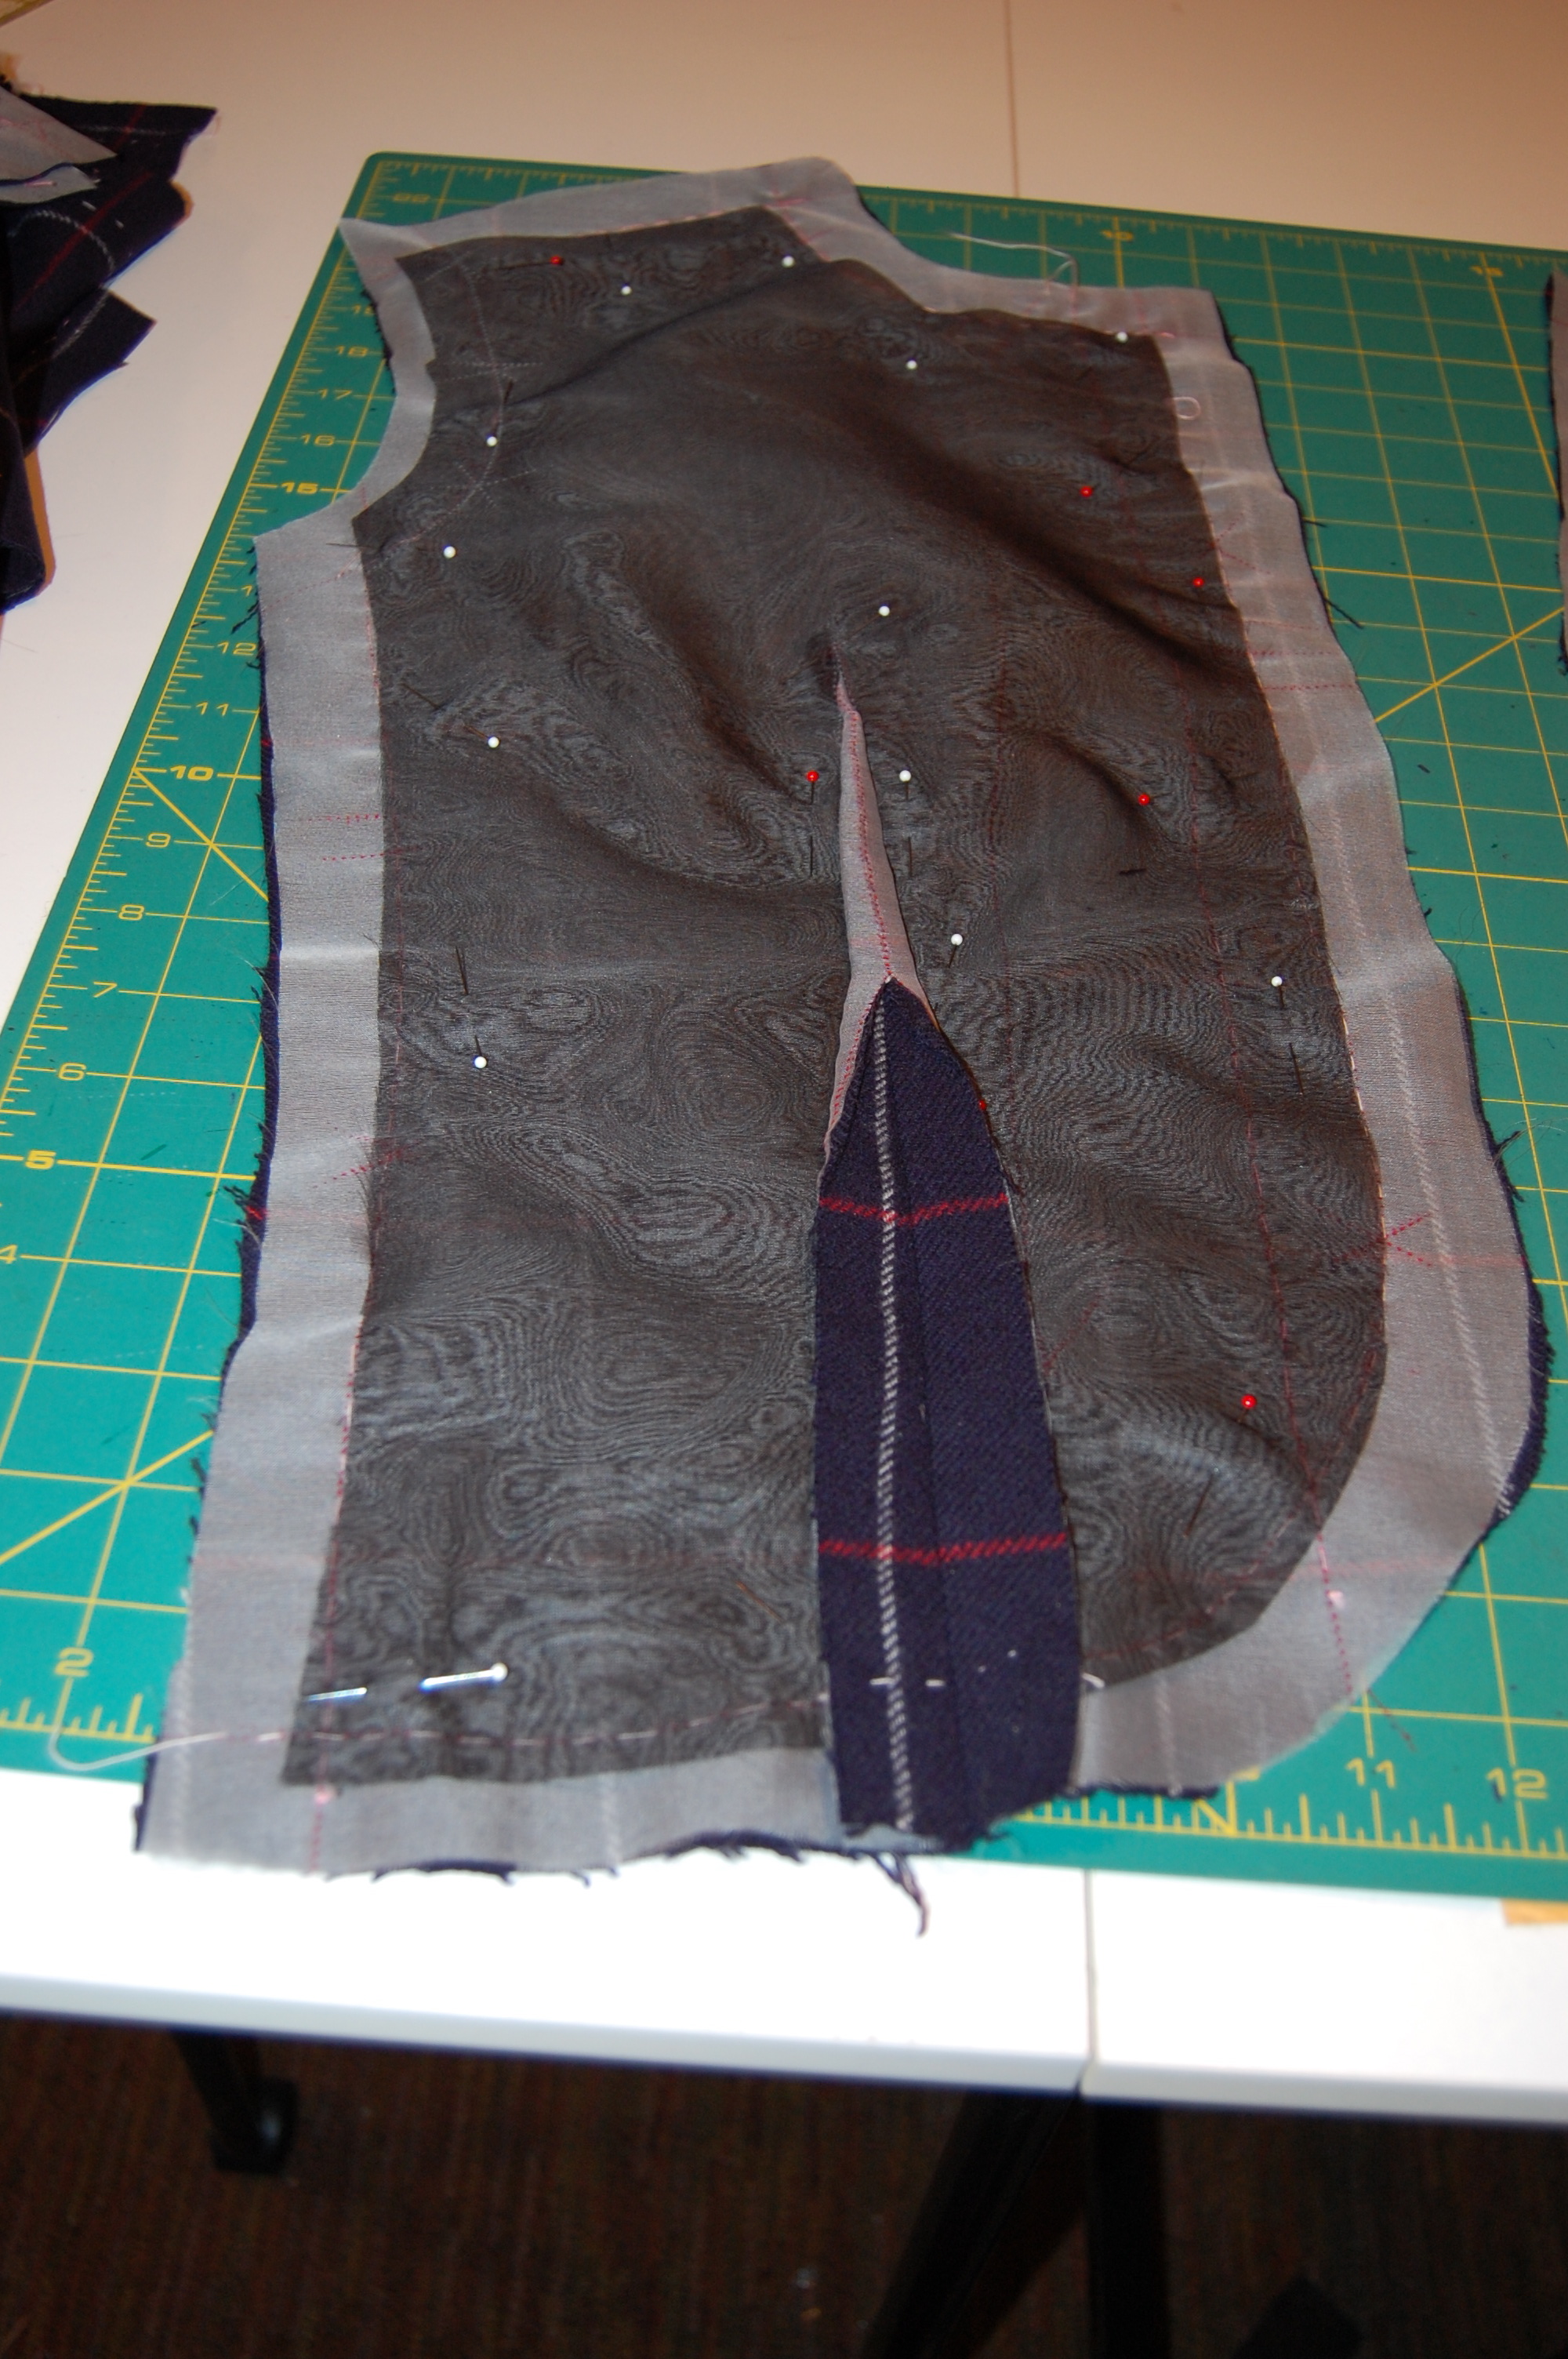
I call this the “vest” stage. This is the front of the jacket . . .

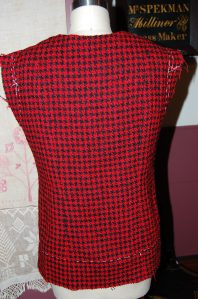
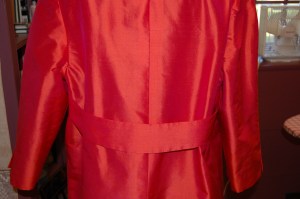
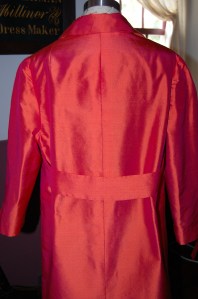
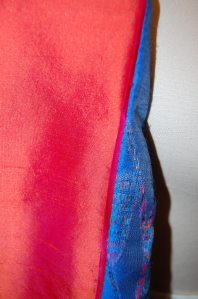
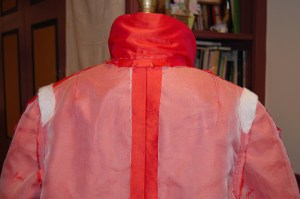
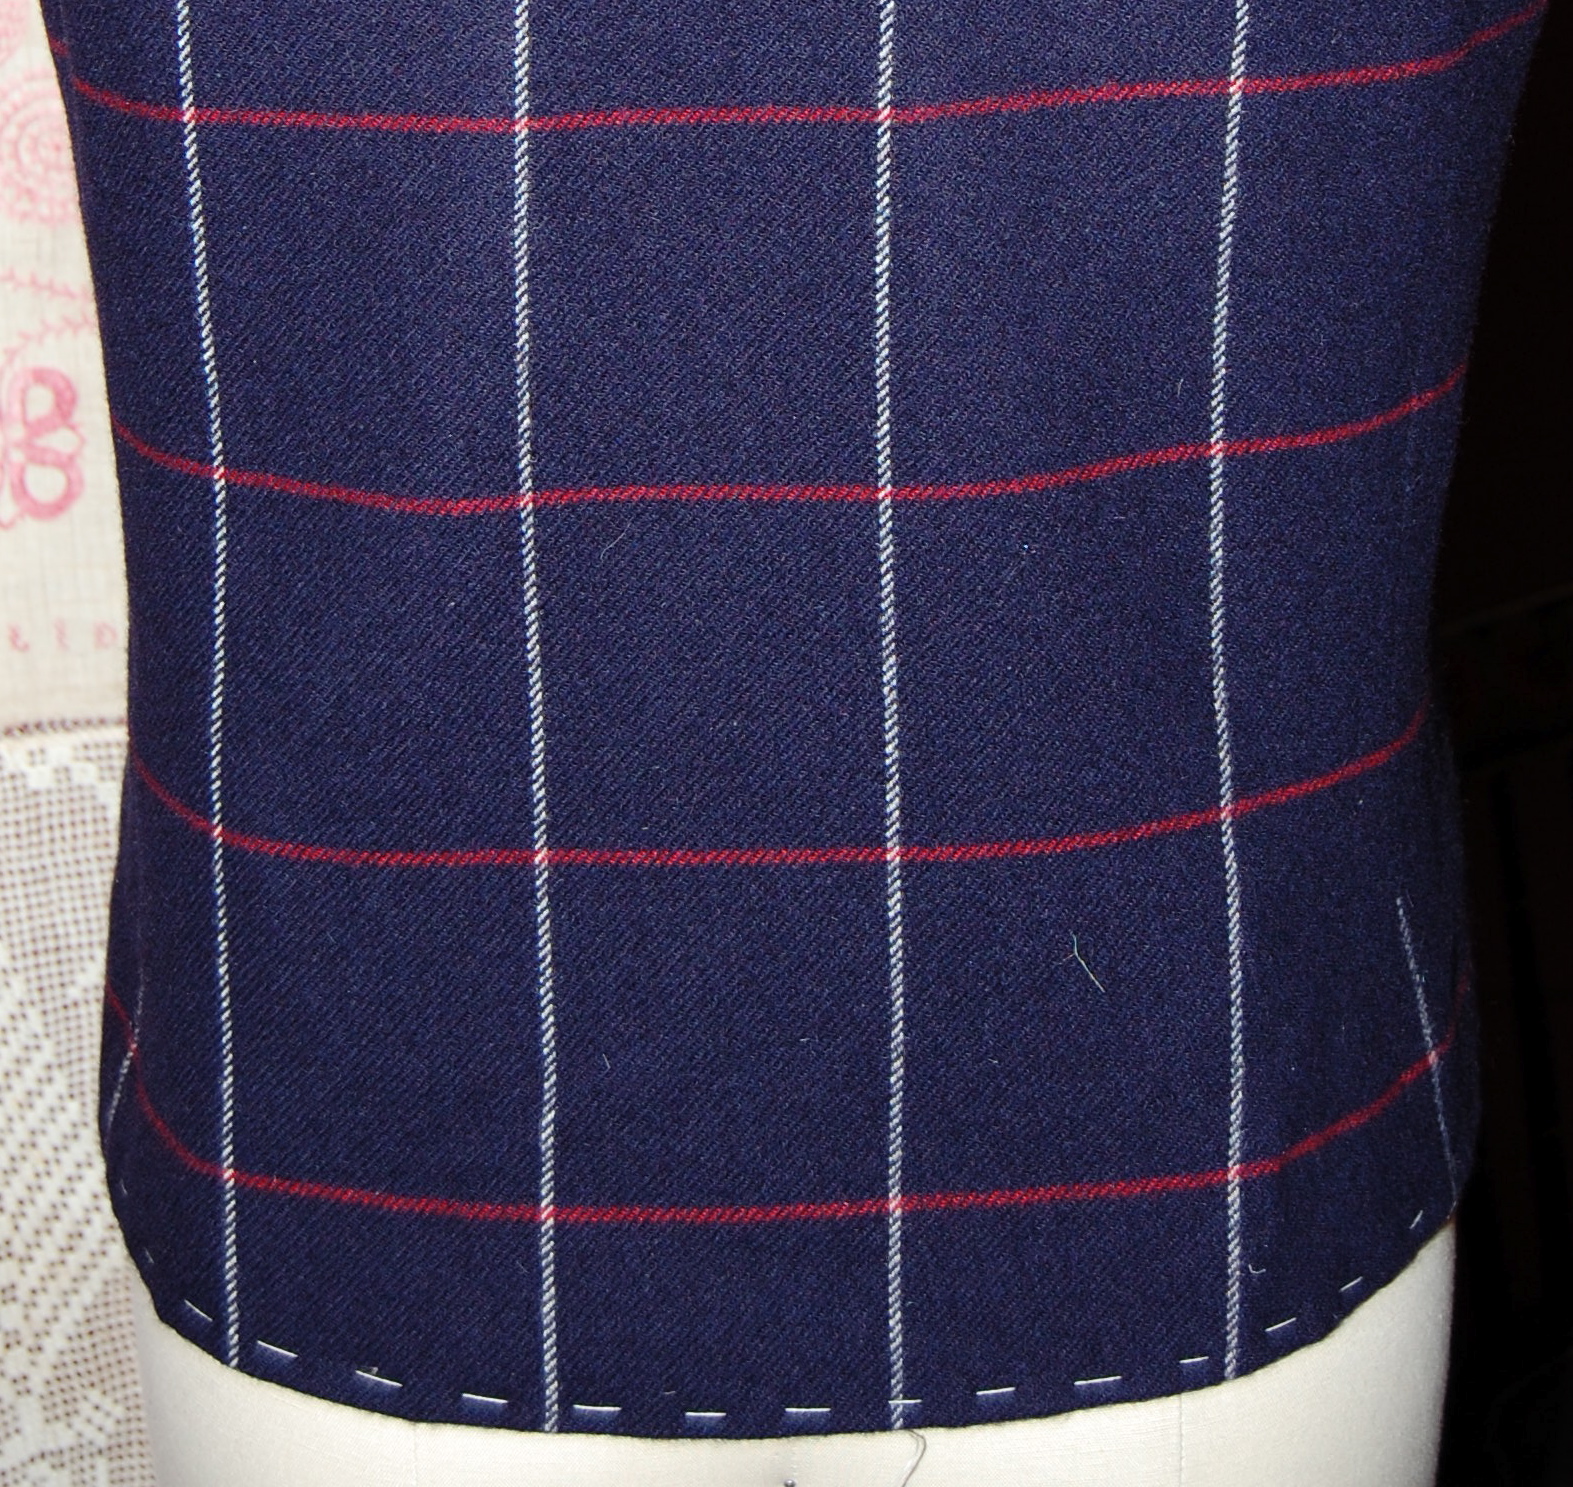
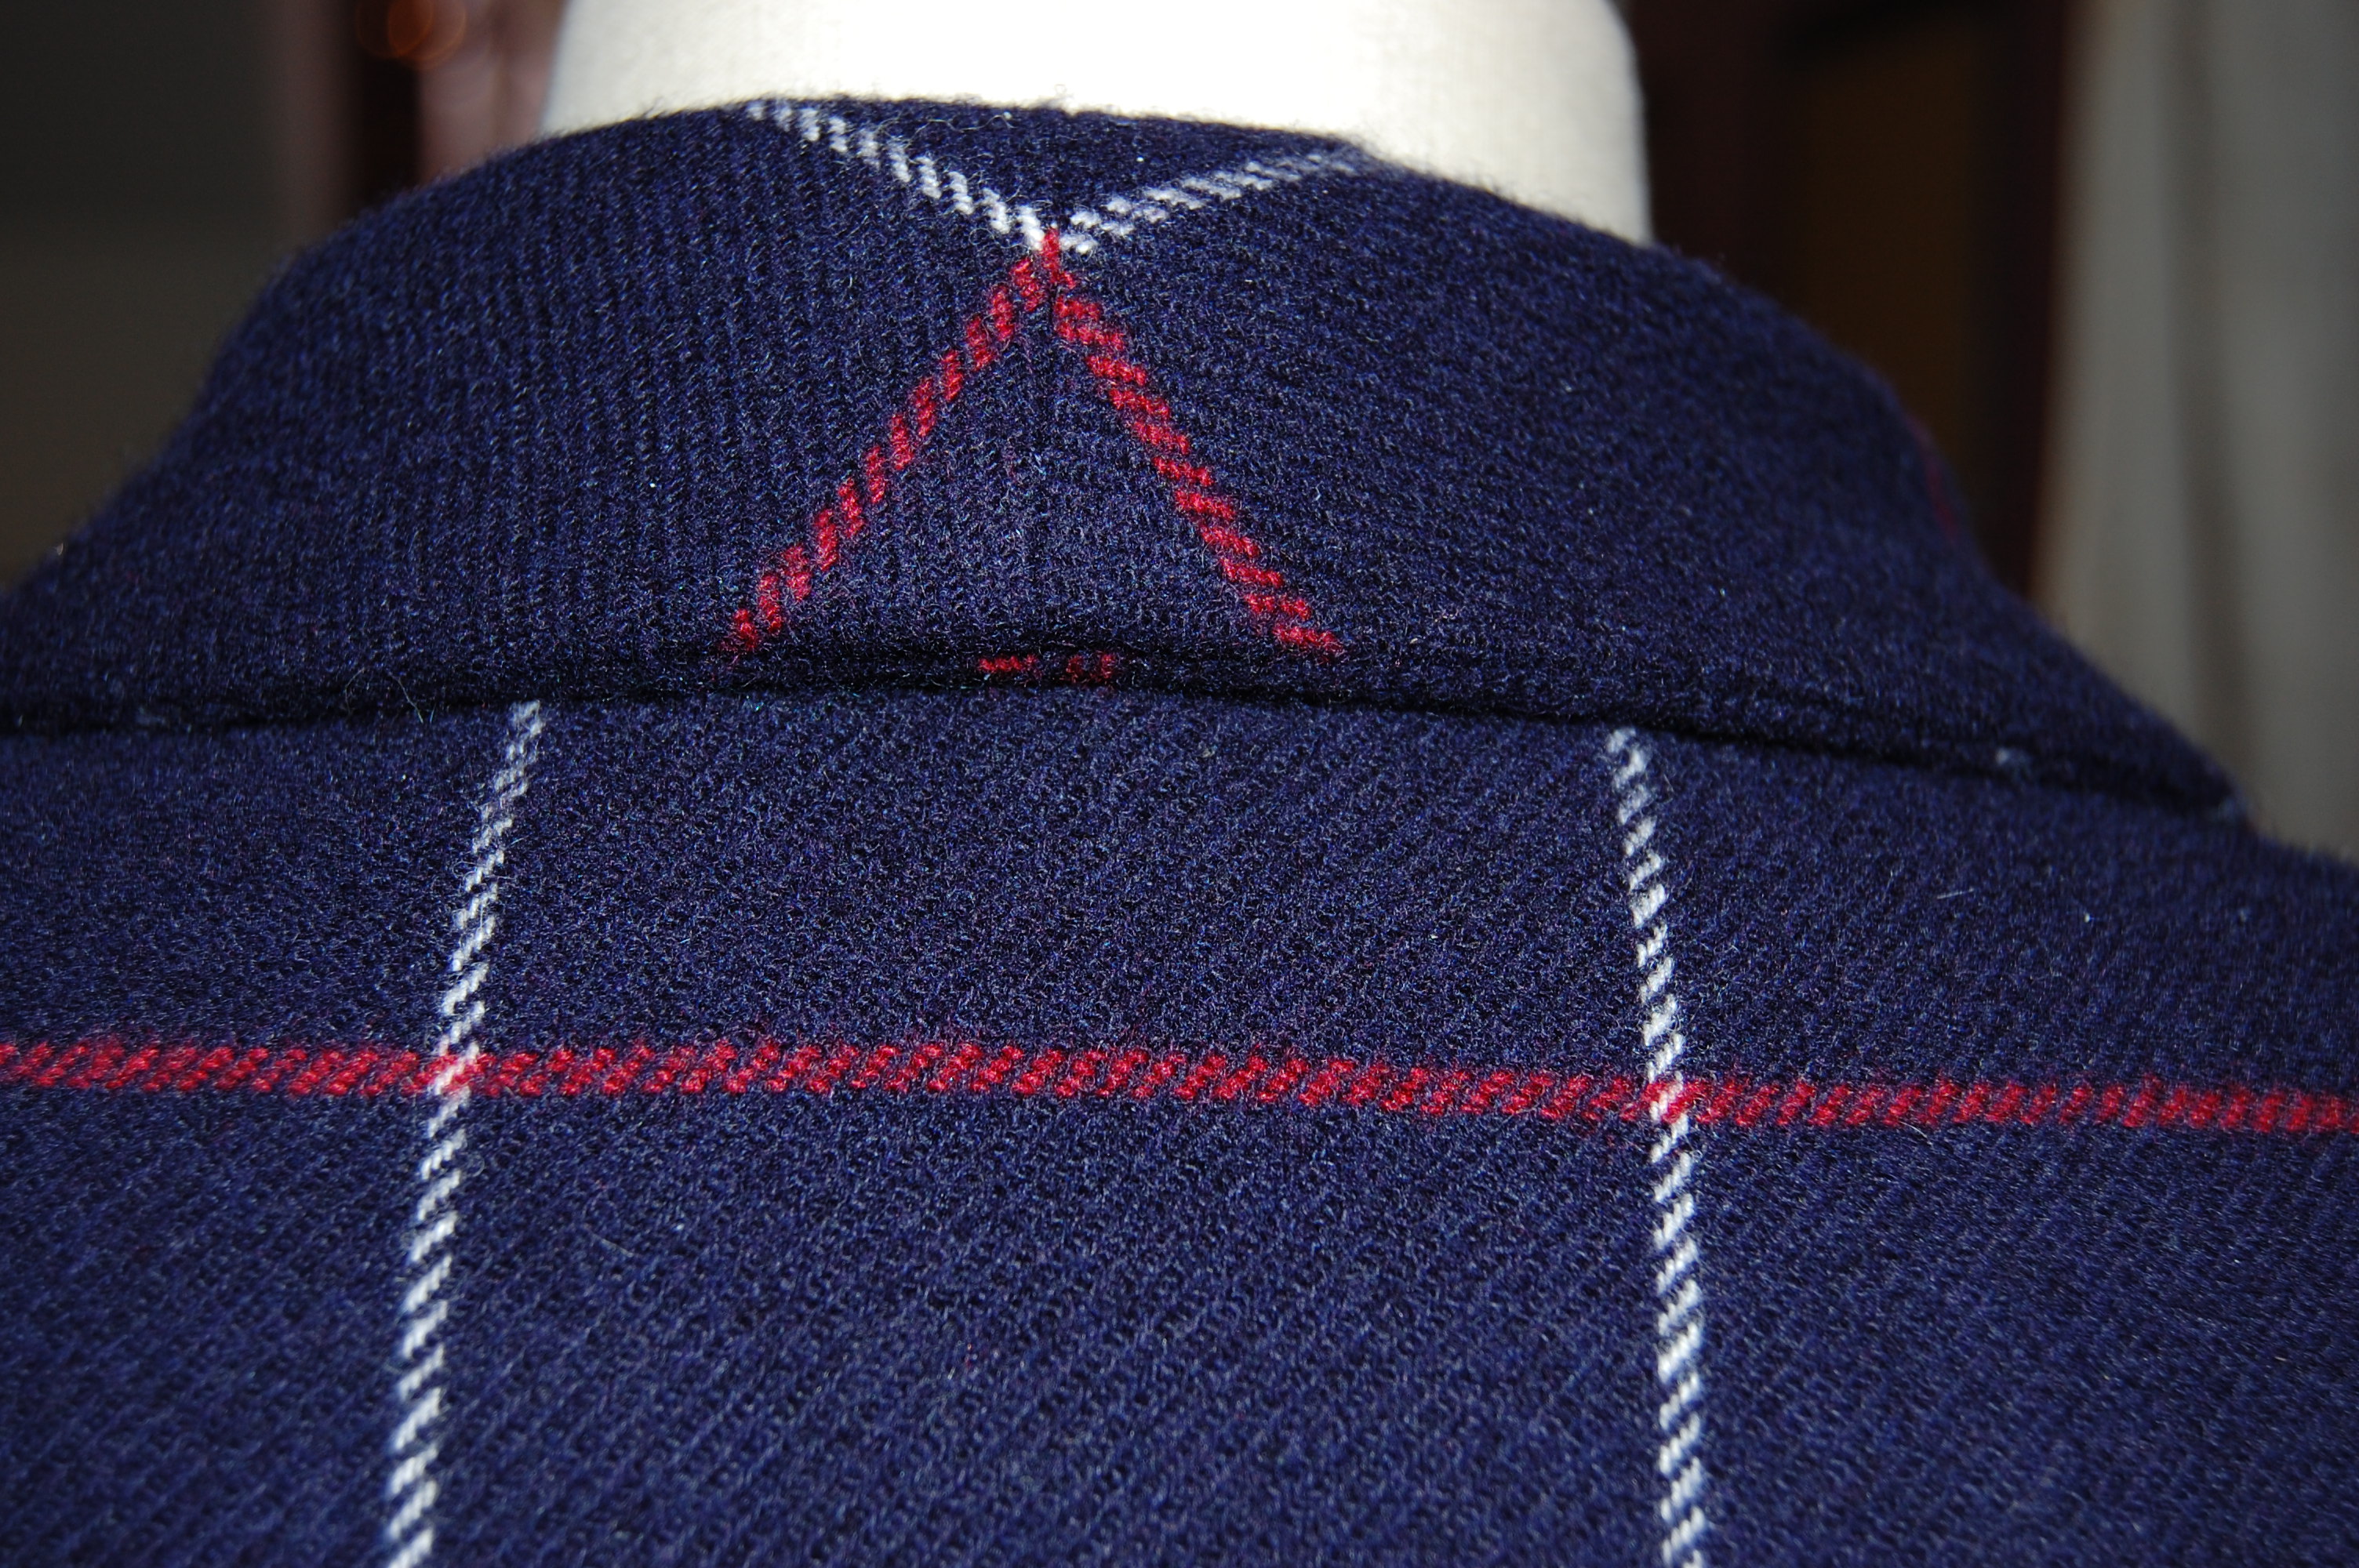
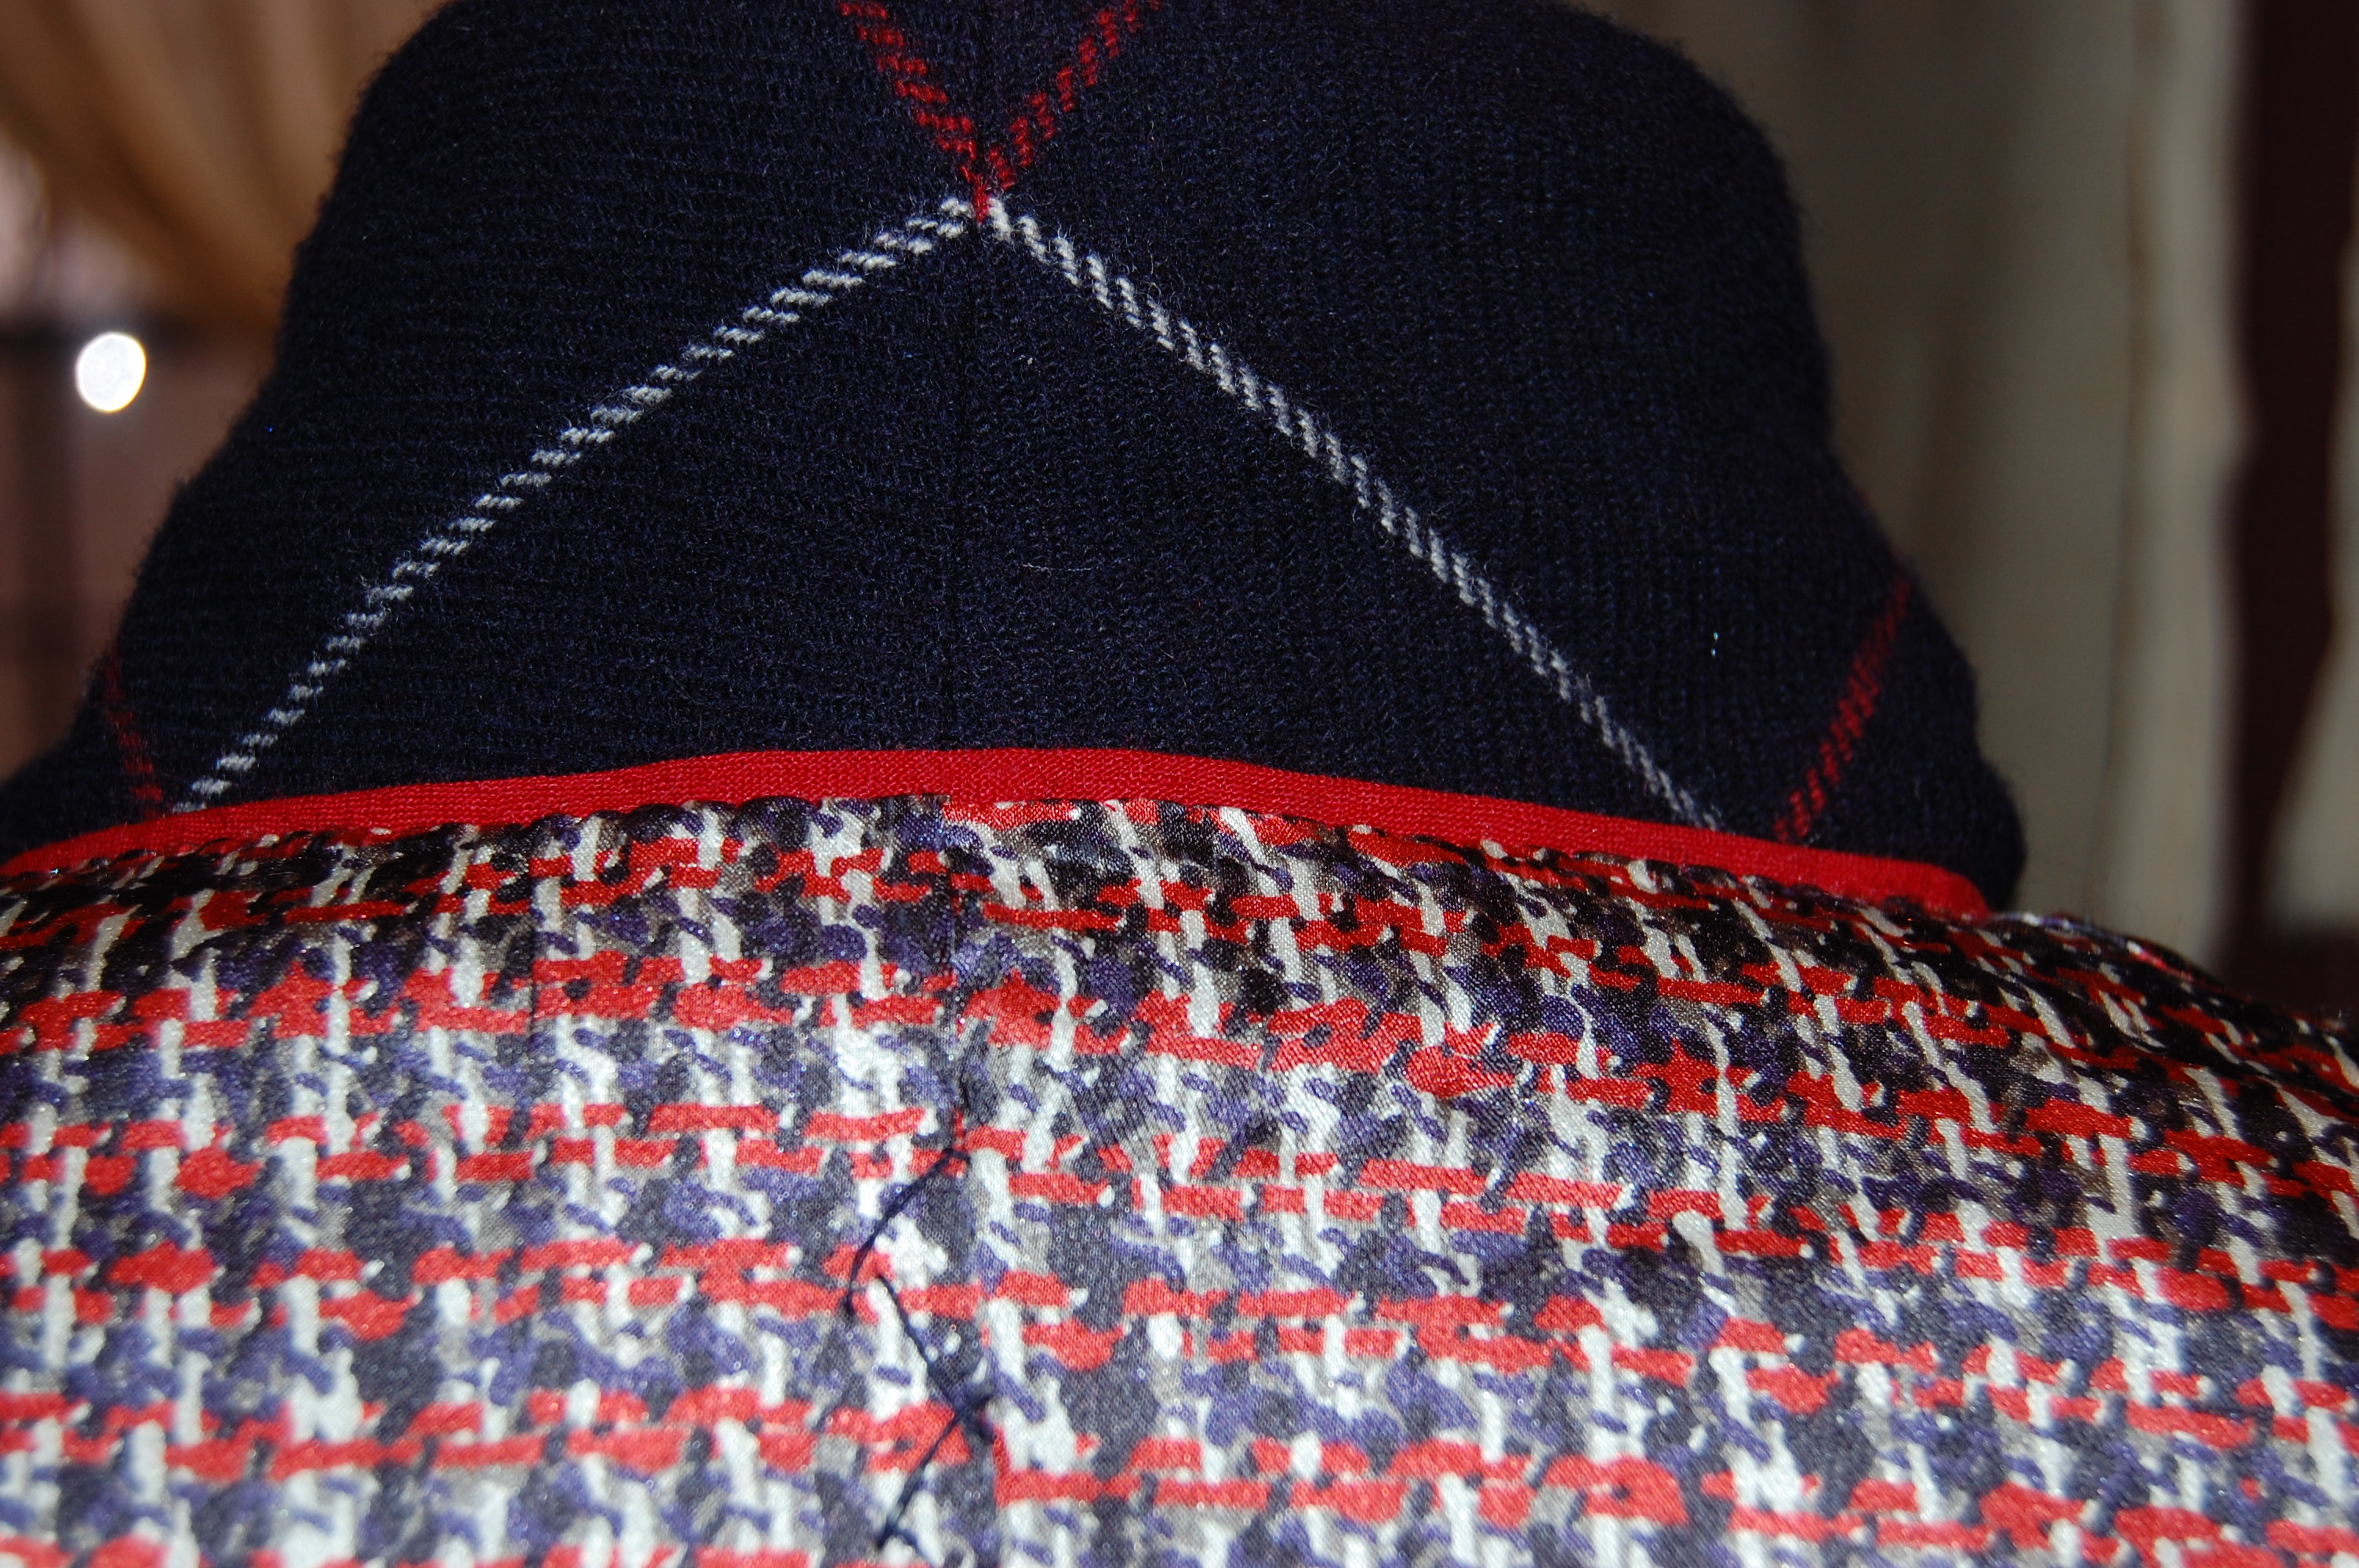
And this is the back of the jacket.

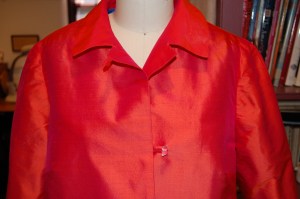
It is always fun to pin the sleeves on quickly just to see a jacket taking form!

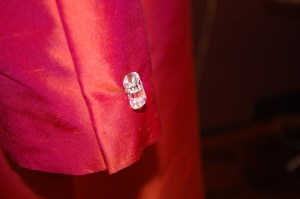
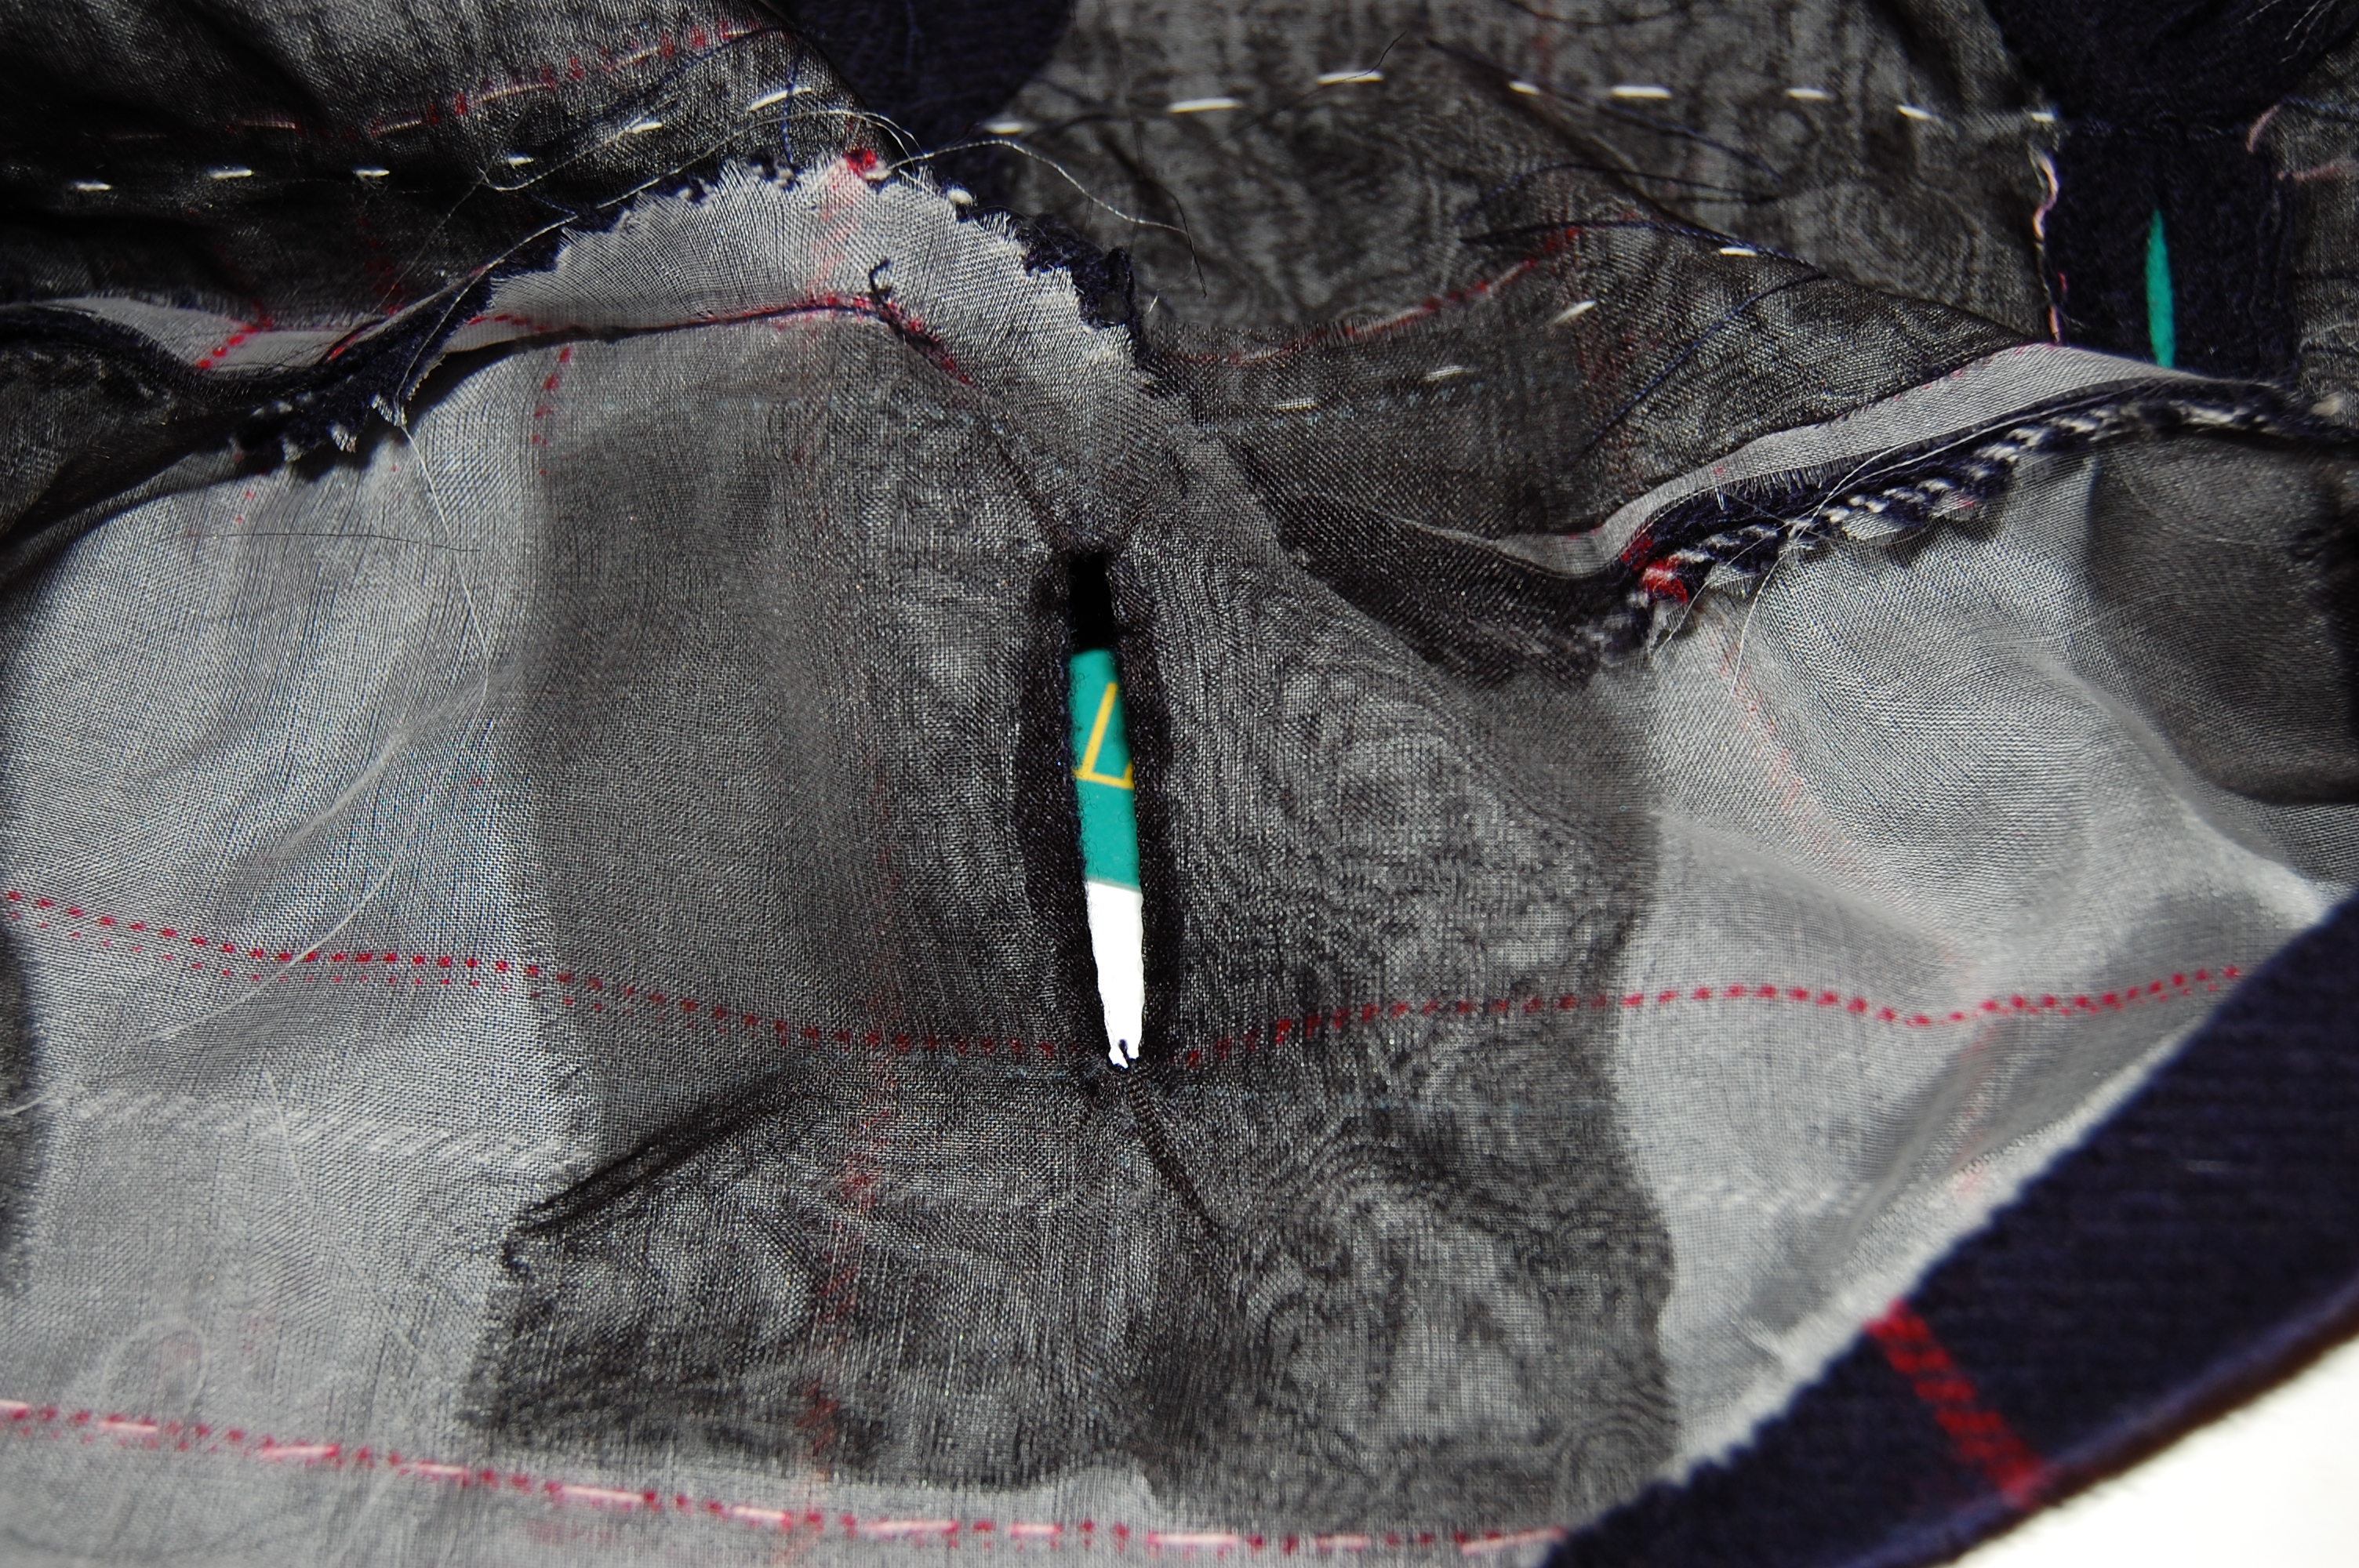
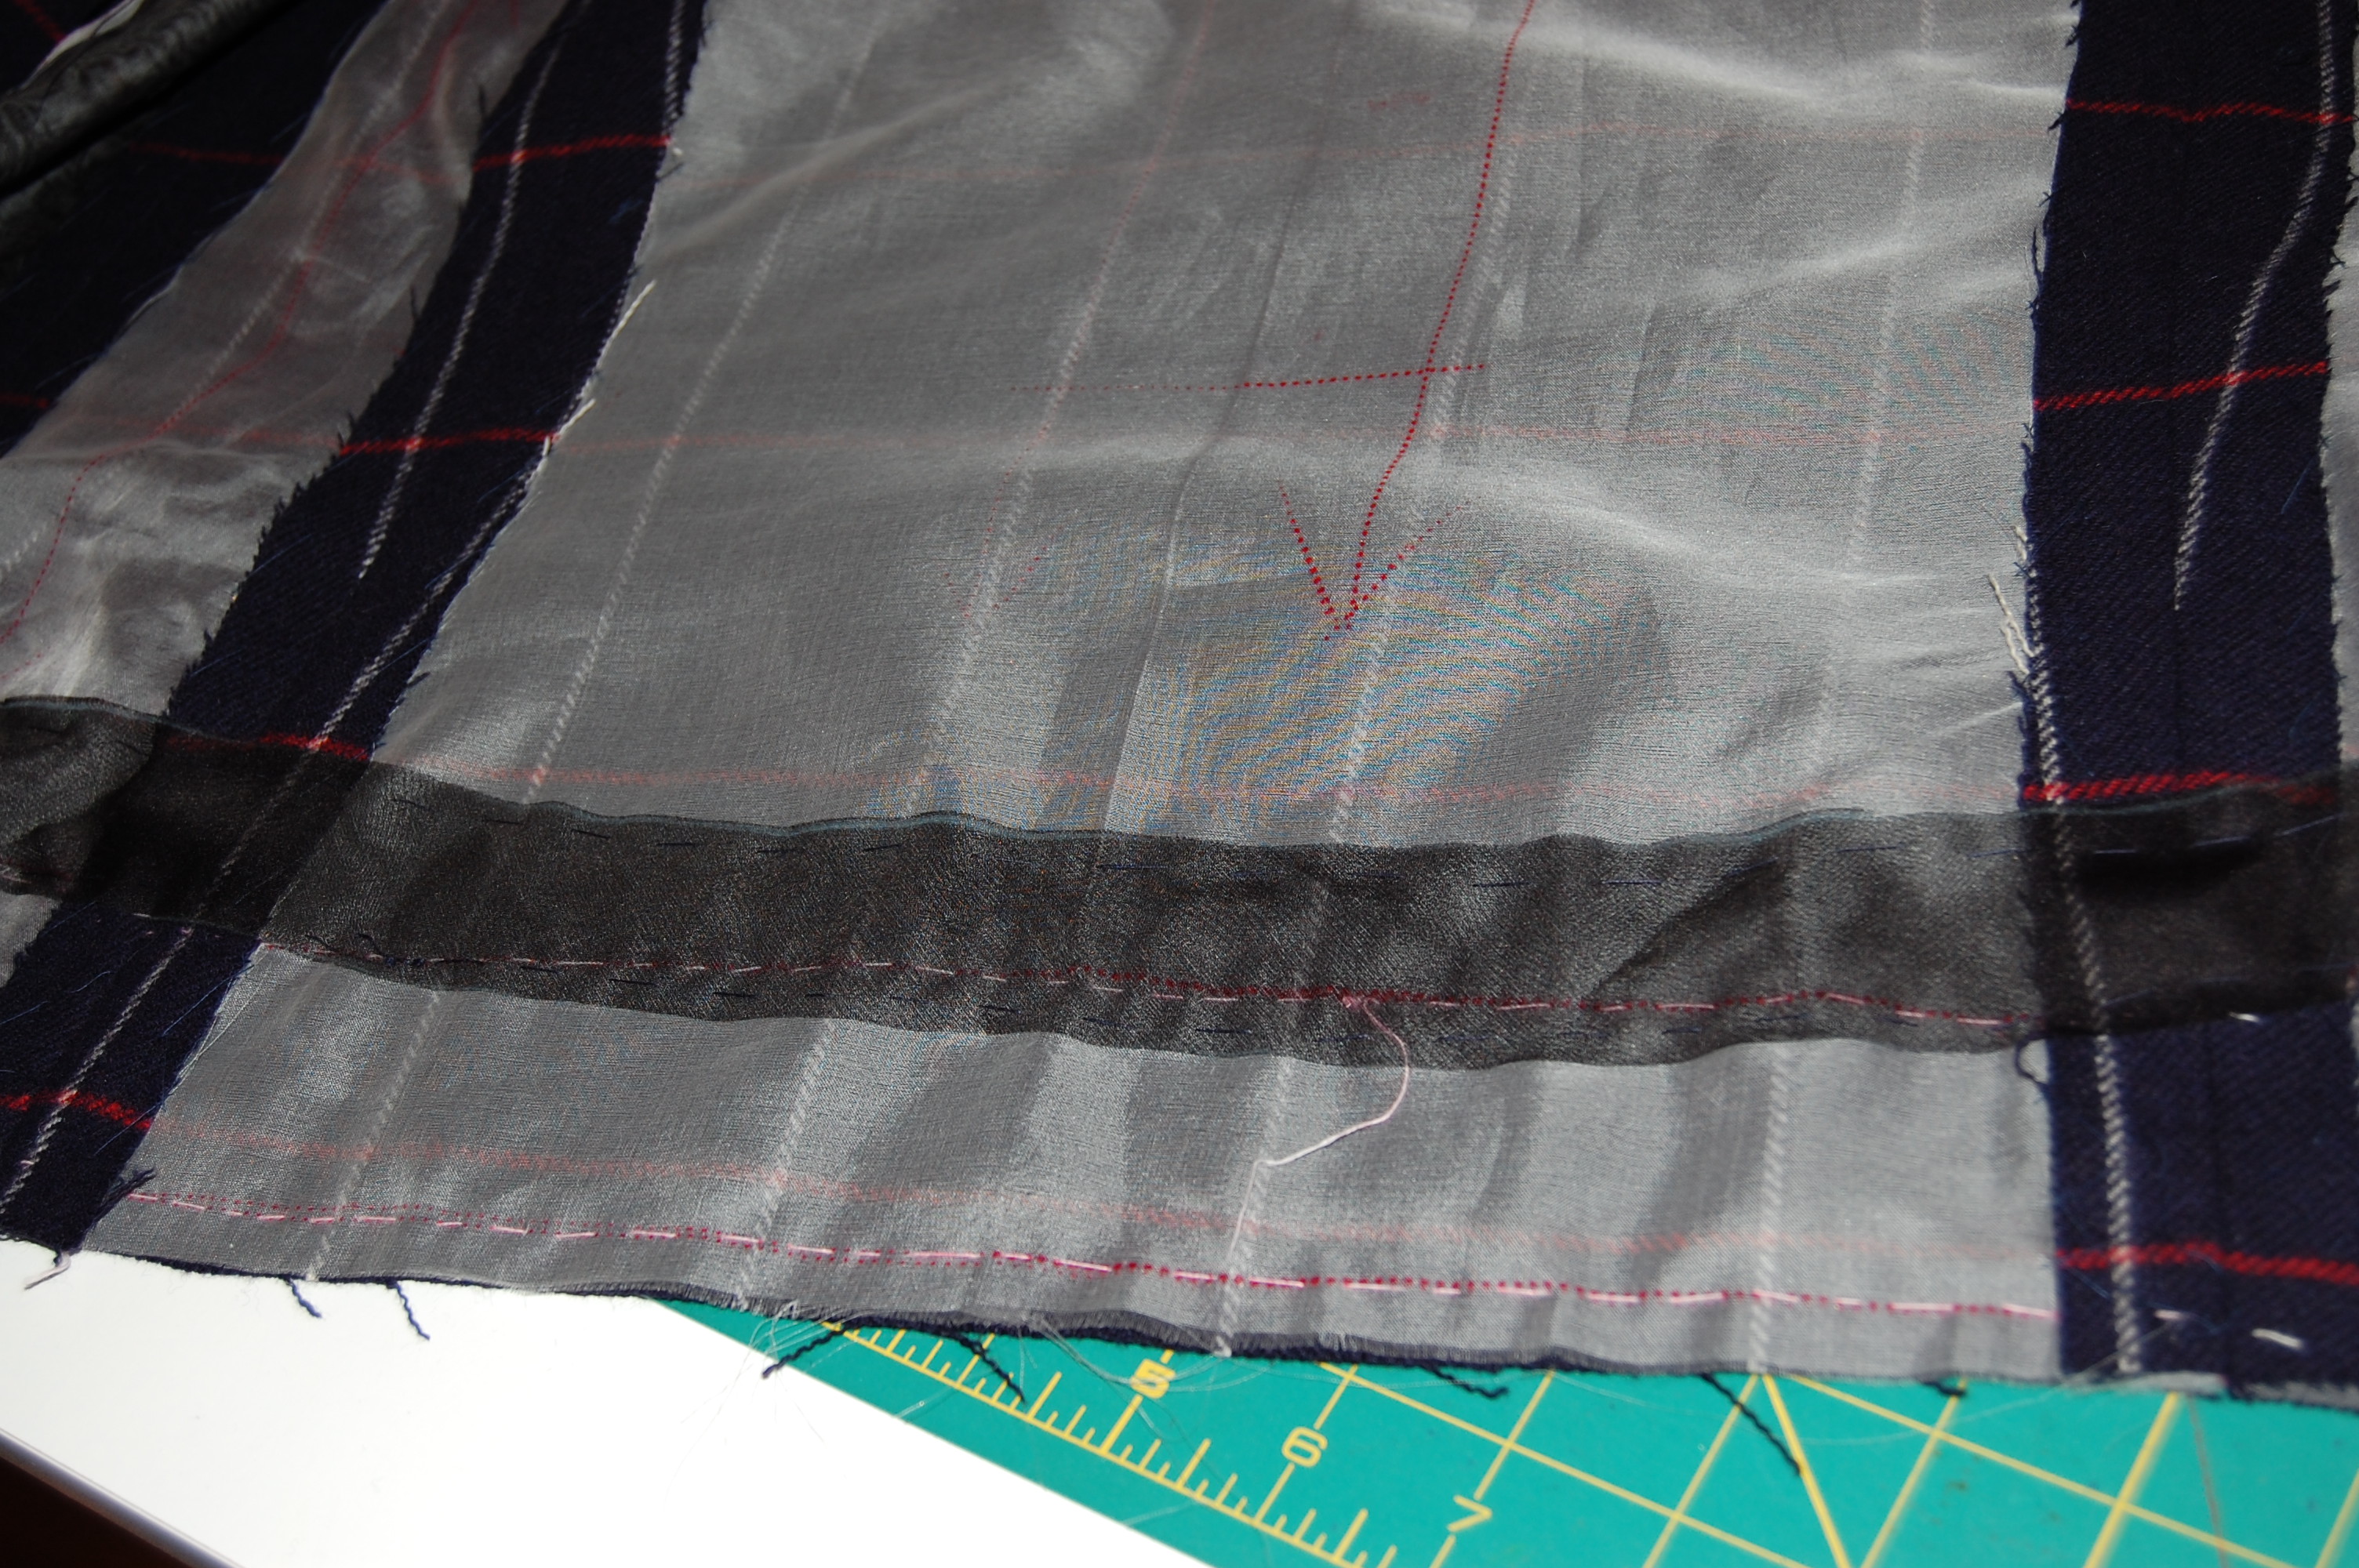
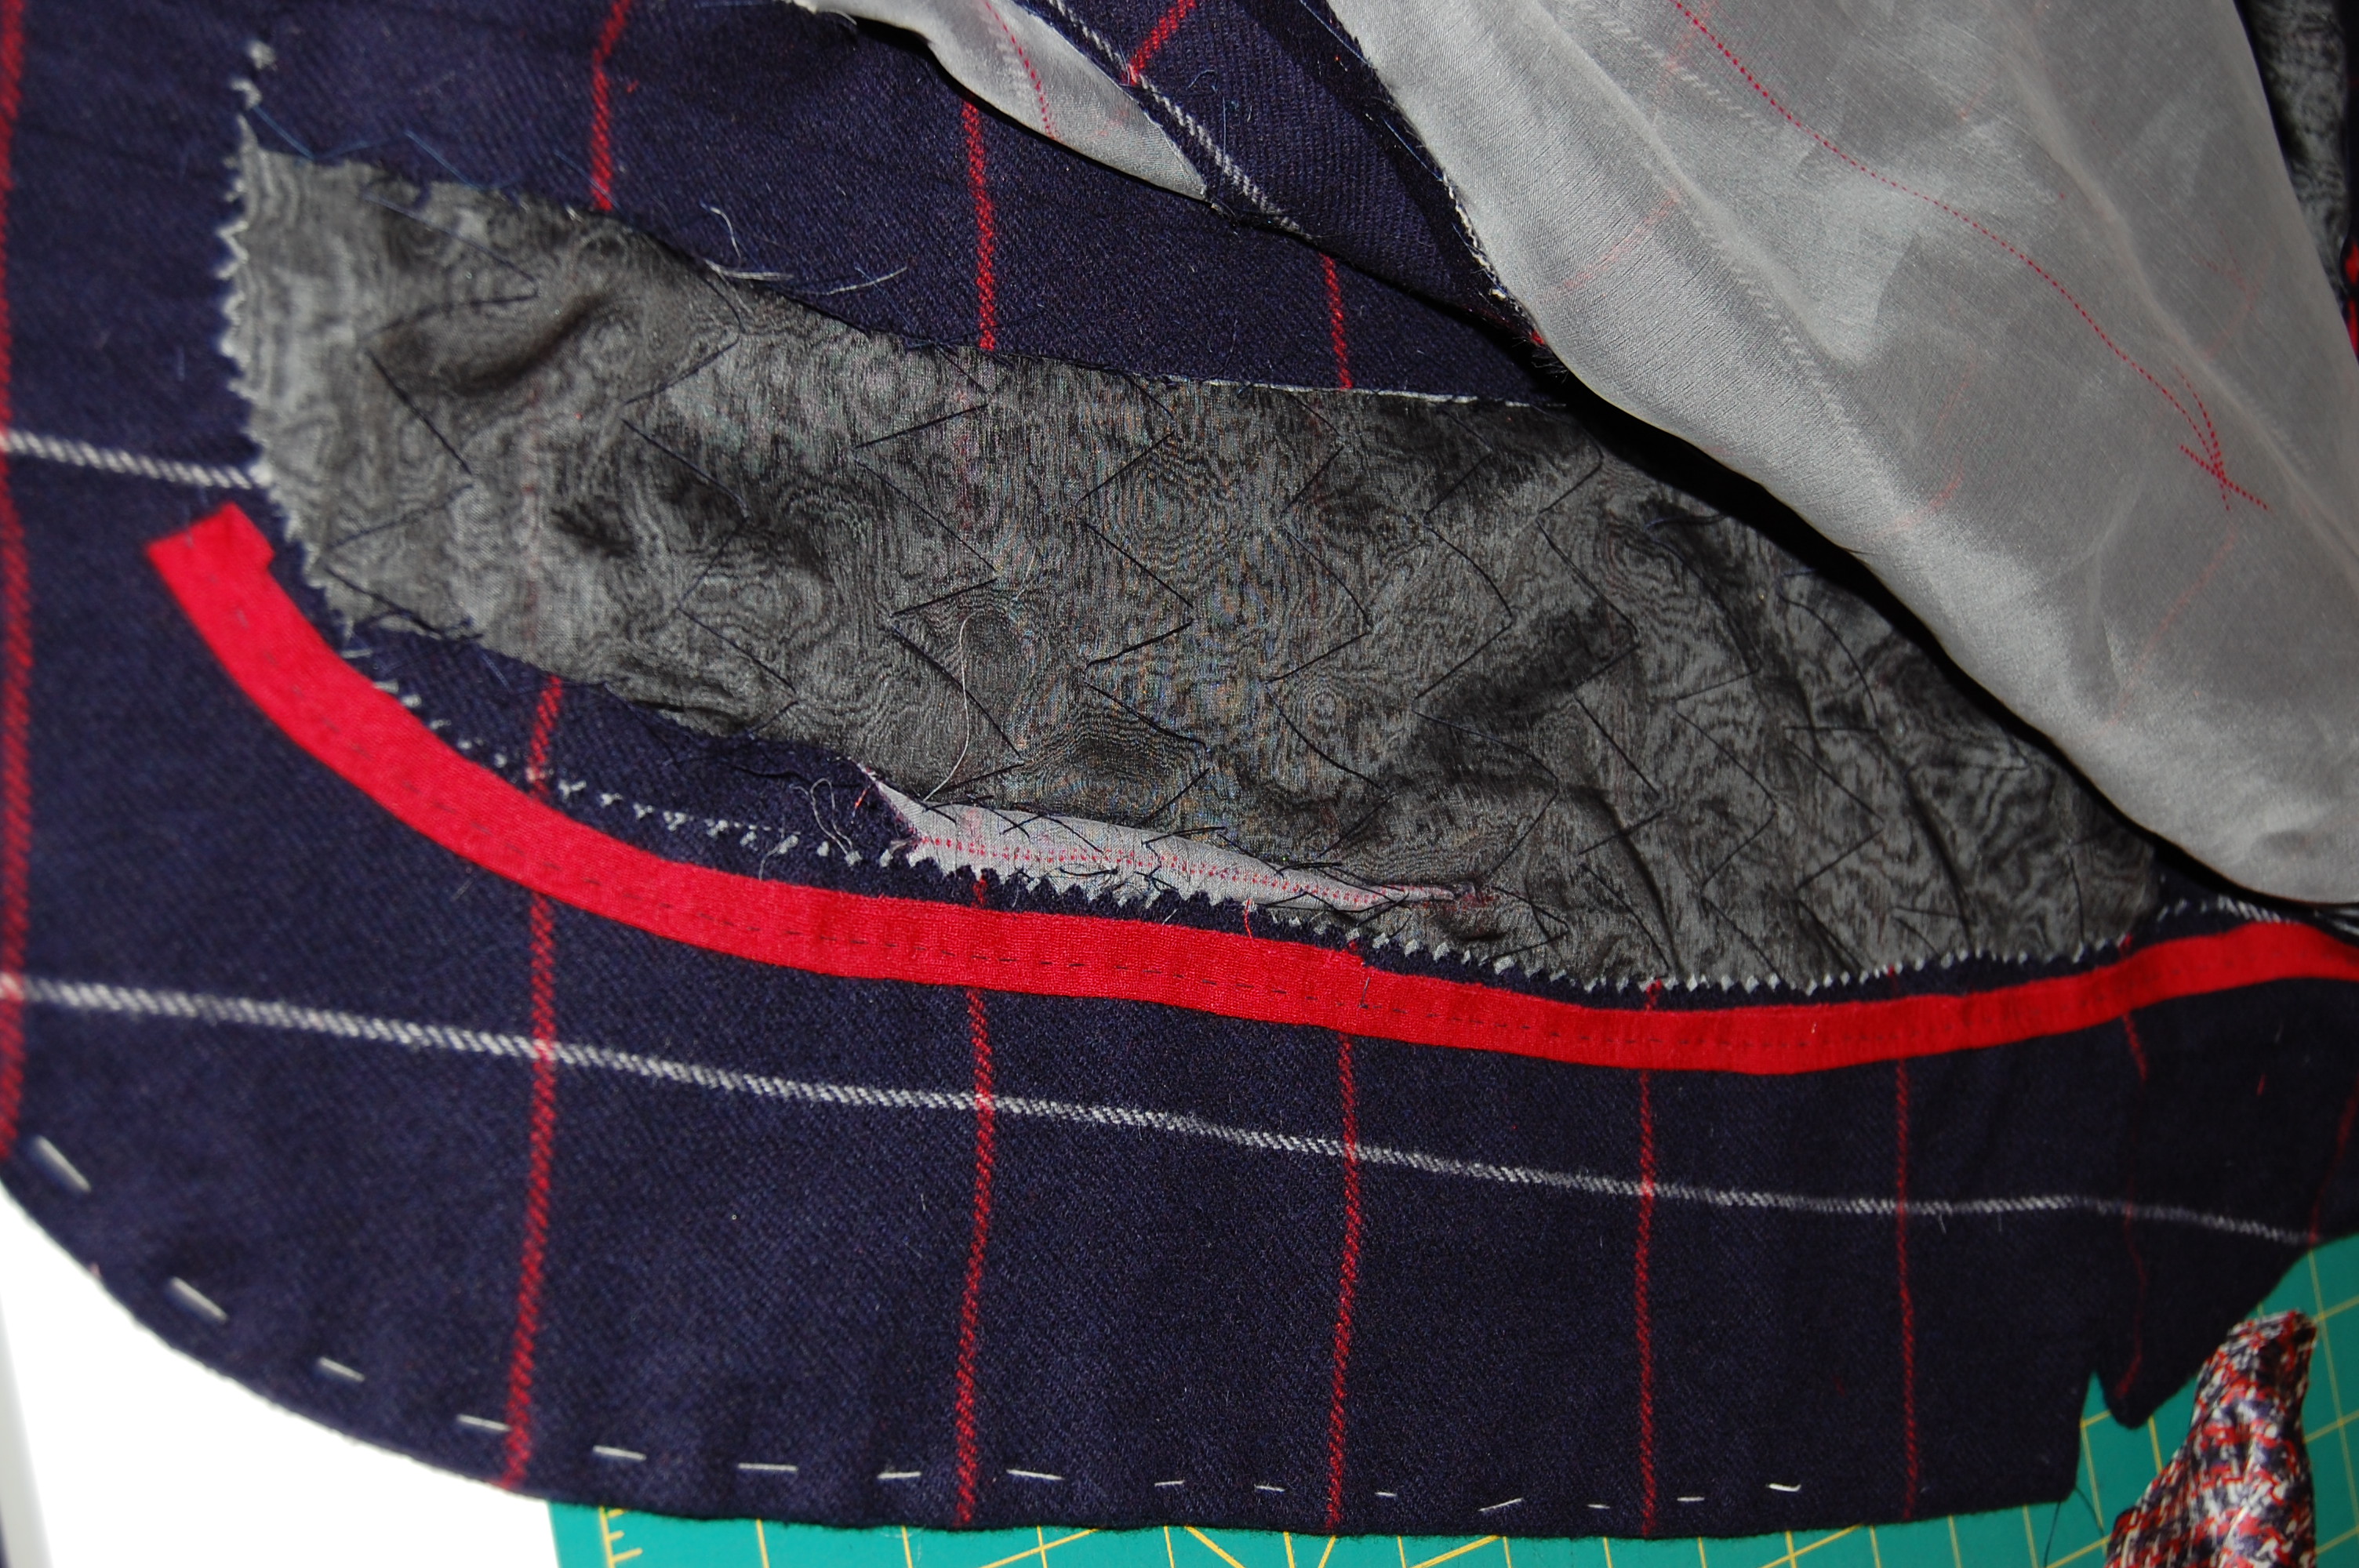
As you can see, all the machine quilting is complete. I’ve finished the interior seams as much as I can at this point. The next step is to insert the sleeves. Then I can complete the finishing work on the interior seams and the hems and get to work on the trim and the pockets.

QUIZ: How much more will I be using my sewing machine to do this work?

  1. a) only for the insertion of the sleeves
  2. b) only to make the pockets
  3. c) both for the insertion of the sleeves and to make the pockets
  4. d) not for anything

Back to Coats:  Are you ready to make one after reading this post? I hope so!

30 Comments

Filed under Chanel-type jackets, Coats, Dressmaker coats, Mid-Century style, Uncategorized, vintage Vogue Designer patterns, vintage Vogue patterns from the 1960s, vintage Vogue patterns from the 1970s

Just for the Chill of It

Autumn is a delightful season here in the northeastern part of the United States. One can tell it is on its way when the warm days quickly take on an evening chill once the sun slips below the horizon. It is the time of year when a light coat or sweater is a necessity, especially with a sleeveless dress.

With this scenario, and a September wedding to attend, what better excuse did I need, to make a coat to go with this dress?

The Year of Magical Sewing

If you follow my blog then you probably already know this was my intention all along, when I made the dress two years ago. But it took a while to find the right coordinating fabric for a coat. I was looking for something between a coral and a pink. While the silk taffeta I found at Britex Fabrics looks more like a deep persimmon color when photographed, the fuchsia pink warp is very apparent when being worn.

Taffeta coat - swatch

Once I decided the Jo Mattli-designed coat, part of the original dress pattern, was too voluminous, I went to another pattern. I wanted to keep the “intention” of the original coat, but have it more streamlined.

The "original" coat designed by Jo Mattli.

The “original” coat designed by Jo Mattli.

Taffeta coat - %22too scimpy%22

The coat pattern I settled on.

Somehow along the way, in making my muslin, I got the idea to add a curved belt to the back of the coat. I knew I had used a coat pattern several years ago with a curved belt back detail, so I went through my pattern collection to retrieve this:

This is a 1957 pattern, but look at the belt shown on the back of the envelope, below.

This is a 1957 pattern, but look at the belt shown on the back of the envelope, below.

taffeta-coat-belt-pattern-thumbnail

The belt is only shown in view A.

It took a couple of tries with the muslin to get the placement and angling of the belt correct, but once I did, I knew it was a winner. Dressmaker details like this always give me a thrill!

I anchored the belt in the side seams right under the bust darts.

I anchored the belt in the side seams right under the bust darts.

Just for the Chill of it

The curve of the belt needed to fall at my waistline.

The curve of the belt needed to fall at my waistline.

One of the things I like about this pattern is the two-part sleeve with a center seam. I think this design is always flattering to the shoulder. Here are the constructed sleeves:

Just for the Chill of it

That center seam also provides the opportunity for a faux vent, and since I just happened to have three buttons, which I thought would be perfect for the coat, I happily included vents, as the pattern dictated:

Just for the Chill of It

A small, cylindrical, crystal button!

A small, cylindrical, crystal button!

Although I originally thought I would leave the coat “closure-less,” that third button kept calling to me. While I did not want to have a single bound buttonhole in the center of the chest, I thought a button loop might do the trick. If I didn’t like it, I could remove it fairly easily from the front facing seam.

Just for the Chill of it

I also decided to add a loop at the neck, with a plain flat button under the collar. This way, I could close the collar if I chose to do so.

I pad-stitched the collar, but forgot to take a picture. Pad-stitching is like magic in how it makes the collar roll properly!

I pad-stitched the collar, but forgot to take a picture. Pad-stitching is like magic in how it makes the collar roll properly!

I have to say, I think the coat looks equally good any way it is worn: with the single button at the bust line closed, with both buttons secured and with neither of the buttons secured.

I chose not to add the optional pockets to this coat, but if I make it again in a less formal fabric, I would absolutely include them.

Once I got to the lining, I had to decide if I wanted to add the flat piping detail which I like so much. Of all the bias silk ribbon I have on hand, the only one which looked good was deep pink. Because of that, it doesn’t show contrast all that well, but I still like the subtle finishing look it gives to the lining.

Just for the Chill of it

Just for the Chill of it

Here, by the way, is the coat before I inserted the lining:

I underlined the entire coat with silk organza and added "cigarette" sleeve headings.

I underlined the entire coat with silk organza and added “cigarette” sleeve headings.

I love a center back seam!

I love a center back seam!

I used some vintage silk buttonhole twist to tack the center back fold in the lining at the neck and at the waistline.

Just for the Chill of it

There is no question that the dress and the coat go together once the lining shows!

There is no question that the dress and the coat go together once the lining shows!

Just for the Chill of it

I love that the lining peeks out from the sleeves when I am wearing the coat.

I love that the lining peeks out from the sleeves when I am wearing the coat.

taffeta-coat-full-copy

I was delighted when the photographer at the wedding wanted to take my picture because he "liked my outfit so much." (This is not that photo...)

I was delighted when the photographer at the wedding wanted to take my picture because he “liked my outfit so much.” (This is not that photo…)

Here with my husband - with a coordinating tie, no less (not planned, but makes for a great photo!)

Here with my husband – with a coordinating tie, no less (not planned, but makes for a great photo!)

It may seem a bit frivolous to make a coat like this, knowing that it will not be worn all that often – although I do have two other dress-weight silks in my collection which would look fairly stunning paired with this coat!  However,  it really is the perfect weight and look for an elegant, but chilly, evening out – and it was so much fun to make.

38 Comments

Filed under Buttons - choosing the right ones, Coats, Cocktail dresses, couture construction, Dressmaker coats, Dressmaker details, Linings, Mid-Century style, piping, sewing in silk, Silk taffeta, Uncategorized, vintage buttons, vintage Vogue patterns from the 1960s

My Suit Dress Fully Evolved – Finally! – Part 5

Can it really be that May will arrive in a few days? If that is true, then I am only about 2 months behind in my sewing schedule. But who’s keeping track? I’m happy that I have plowed through to finish my wool suit dress, even though it will immediately go into my cedar closet for safe storage until next Fall.

When I fell off the edge of the world after Part 4 (only figuratively, thank goodness!), I was starting on the sheath dress. I had decided to add a collar to it, so that I could use that fourth vintage button (I had already used three on the jacket itself). Matching the windowpane plaid on the collar section took some special attention, as this photo shows:

Collared sheath I underlined the collar with the lining fabric, and I made a working bound buttonhole instead of just sewing the button in place. Anything to make it more involved, right?

Detail of the button on the collar.

Detail of the button on the collar.

Lining the collar with silk charmeuse reduced bulk and helps it lay flat.

Lining the collar with silk charmeuse reduced bulk and helps it lay flat.

From that point on, it was a straightforward sheath dress. I love a sheath dress. I think it is such a flattering silhouette, and very feminine. As far as I am concerned, one can never have too many sheath dresses (just as one can never have too many shoes). Speaking of shoes, I decided this outfit needed complementary shoes! What do you think?

collared sheath

I wear a lot of red and blue, so I expect these shoes to serve me well!

I wear a lot of red and blue, so I expect these shoes to serve me well!

It turns out that even a simple sheath can take a lot of time to make when one is using couture techniques: underlining of silk organza; interior seams catch-stitched; hand-picked zipper; instead of facings, neck and armholes finished with lining-abutted edges, then pick-stitched for stability. The silk charmeuse lining in the dress matches the jacket lining and is an extravagance, I will admit. But it feels heavenly, and adds a fluidity to the dress which is a good match for the butter-soft cashmere wool fashion fabric.

Suit dress

Shown with the jacket unbuttoned.

Shown with the jacket unbuttoned.

Suit dress

A close-up look...

A close-up look…

... and another one.

… and another one.

And a partial back view.

And a partial back view.

I am happy I added the collar to the dress, as that extra detail seems to help the dress stand on its own if/when I take the jacket off. Framing the face is always a good fashion decision, and I think the collar helps in that regard.

Just the dress!

Just the dress!

Suit dress

So happy this is finished!

So happy this is finished!

I consider finishing this outfit a major accomplishment!  So what’s next? Something easy or something more complex? Those questions to be answered soon, with this caveat: it will most definitely be something for Spring/Summer!


Details:

Navy blue Cashmere fashion fabric:  Britex Fabrics, San Francisco, CA

Silk charmeuse lining fabric:  Britex Fabrics

Buttons:  vintage Ultra Kraft, ca. 1950s

Shoes: Ferragamo

Patterns:  Jacket: vintage Jo Mattli Vogue Designer pattern; Dress: vintage Vogue blouse pattern combined with new Butterick dress pattern

31 Comments

Filed under Buttons - choosing the right ones, couture construction, Dressmaker suits, Shoes to make an outfit complete, Suit dresses, vintage buttons, vintage Vogue Designer patterns, vintage Vogue patterns from the 1970s, woolens

The Evolution of a Suit Dress, Part 4: An Appreciation of Jo Mattli, and Dress-making Days Commence

The New Vogue Sewing Book published in 1963 contained a “Couturier Supplement”. According to the Foreword in this magazine-styled book, “Only Vogue Patterns can bring you original designs from the Paris and International Couture houses, because of an exclusive arrangement with world famous designers.” One of the 17 designers featured in the supplement was Jo Mattli.

Designers in Vogue

Designers in Vogue-1

Jo Mattli is second from the left on the top row. Click on the photo to see the image up close.

A quick look at the two-page spread on these designers shows a veritable who’s who of fashion design, with names very much still known today. Except for perhaps Jo Mattli.   (Mattli was born Giuseppe Gustavo Mattli in 1907 in Locarno, Swirtzerland; he died in 1982 in England). He is absent from The St. James Fashion Encyclopedia, even though he was considered one of the “big ten” London couturiers in 1953, when London Society was busy readying for the coronation of Queen Elizabeth II. Perhaps it was his move into ready-to-wear in 1955 that relegated him to lesser status among the world’s great couturiers. This did not keep Vogue Patterns from recognizing his wide appeal to stylish women who appreciated his attention to fine detailing, and his expertise in creating practical, wearable and charming dresses and suits.   As one of Vogue’s featured designers in their Vogue Couturier Design-labeled series, Jo Mattli made his mark. Indeed, even he recognized the value of being part of Vogue Patterns, saying “the royalties from these patterns had helped support his couture business” (from Wikipedia, the free encyclopedia).

The jacket I just completed (part one of a two-part jacket and dress ensemble) is the third Jo Mattli Vogue design I have sewn. Two years ago I made a suit from this pattern:

From Vogue's Designer series, ca 1970.

I would like to make this pattern again. The first time I made it, the fabric I chose was too heavy, but the fit and the styling were excellent.

Late last summer I made a cocktail dress from this pattern:

I still have plans to make the coat, to coordinate with the cocktail dress.

I still have plans to make the coat, to coordinate with the cocktail dress.

And now with three “makes” under my belt, my appreciation for Mattli’s design and construction sense is growing. Not only that, I realized after going through my pattern collection, that I have two more Mattli patterns, each of which also displays his characteristic and interesting seam detailing.

This is actually a one-piece dress, although it looks like it is a two-piece outfit.

This is actually a one-piece dress, although it looks like it is a two-piece outfit.

Dress Suit - red Mattli suit

Another beautiful suit!

While the Mattli-designed jacket in my suit dress ensemble is certainly the star of the outfit, I am hoping the dress will have its own charms. After being out of town and away from my sewing all last week, I have now been able to turn my attention to the dress part of the outfit. I believe I have successfully combined two patterns (sheath dress and collared blouse) to create – what else? – a collared sheath!

Dress for Mattli jacket

I was still adjusting the fit when I took this photo. Hopefully it will not look like a bag when I actually wear it!

After I had the muslin fitted and completed, I got the idea to make the end of the tab on the collar rounded, to mimic the curves on the jacket’s sleeves and on the jacket’s lower front edges.   I also had to take significant width out of the collar. I am hoping it will work and look good…

This shows the curved detail on the edge of the sleeve.

This shows the curved detail on the edge of the sleeve.

This shows not only the added curve to the collar end, but also how much width I had to remove from the collar pattern

This shows not only the added curve to the left collar end, but also how much width I had to remove from the collar pattern.

And here is the right collar section.

And here is the right collar section.

I  hope that Jo Mattli would approve of a dress being paired with his jacket. He would probably refer to it as a “slimline afternoon dress” were he alive. I have no doubt he created many such beautiful dresses in his lifetime.

[NOTE: Jo Mattli is the subject of a thesis by Dr. Caroline Ness entitled Famous, Forgotten, Found: rediscovering the career of London couture fashion designer Giuseppe (Jo) Mattli, 1934-1980.]

10 Comments

Filed under Cocktail dresses, Dressmaker suits, Jo Mattli, Suit dresses, Uncategorized, vintage Vogue Designer patterns, vintage Vogue patterns from the 1960s

The Evolution of a Suit Dress – Part 3: Finished Jacket

It is a fairly well-known fact that making a classic French “Chanel-like” jacket takes about (or at least!) 70 dedicated hours of sewing time. I did not keep track of the hours I spent on my Jo Mattli-designed jacket, but I am guessing that it rivals – in time spent sewing – both of the classic French jackets I have made. However, I am not complaining. I would commit to it all over again. And just think – I still have to make the coordinating dress for this jacket!

Mattli jacket But it is finished, and happily so. One of the true joys of sewing is the ability it gives us to make some stylistic changes, add embellishments if desired, and use our heads to determine what works and what doesn’t work for the fabric we are using and the intended usage of our garments. While I did not make any stylistic changes to this jacket, I did add my own “dressmaker details” while stitching my way through this project. But first a few more regular details, picking up where I left off in my last post.

1) To finish the underside of the bound buttonholes, I used organza patches. I have started using this method all the time, as it makes such a neat, fool-proof finish.

The silk organza patch is sewn onto the right side.  After cutting and clipping the corners - carefully! - you turn the organza and you have a perfectly finished opening to back up to your bound buttonhole.  then it is easy to sew the two sides together very neatly.

The silk organza patch is sewn onto the right side. After cutting and clipping the corners – carefully! – you turn the organza and you have a perfectly finished opening to back up to your bound buttonhole. Then it is easy to sew the two sides together very neatly.

2) Even though the entire jacket is underlined with silk organza, I added another layer of silk organza “interfacing” to the hemline, as directed in the pattern instructions.

Mattli jacket

I always like to baste the hem along the bottom edge to stabilize it until the jacket is complete.

I always like to baste the hem along the bottom edge to stabilize it until the jacket is complete.

3) I used black “cigarette” which I purchase from Susan Khalje’s store for the sleeve headings. I doubled and graduated the two layers to achieve the correct amount of sleeve–cap cushioning. Unfortunately, no photos were able to pick up the details in this – too much black and navy blue and not enough contrast!

This is what the "cigarette" looks like.

This is what the “cigarette” looks like.

One of the interesting construction details in this design is the notched collar. Most notched collars are seamed at the “notch,”,joining the upper collar and the front facing and forming a “V”.

This diagram from The Vogue Sewing Book. c. 1970, Butterick Division, New York, New York, shows a classic notched collar.

This diagram from The Vogue Sewing Book. c. 1970, Butterick Division, New York, New York, shows a classic notched collar.

However, the collar in this Mattli design is formed by extensions of the front facing, with a center back seam on the upper-collar portion of the facings.   Hopefully these photos will explain better than words can:

You can see there is no seam at the "notch."

You can see there is no seam at the “notch.”

Here is the seam at the back upper collar.

Here is the seam at the back upper collar.

While I was contemplating the lining for the jacket, I thought it would add just a really special touch if I did a interior bias piping to set off the lining where it joins the jacket along the front edges and around the neck. Normally this is made out of silk, but I did not have any light-weight silk which was the correct color of red. However, I did find some scraps left over from a red wool challis maternity dress I made for myself over 34 years ago. (Yes, you read that correctly!) Very light in weight – and the exact color I needed – made it the perfect fabric for this detail.

I cut a bias strip one inch in width and folded it in half.  I guess this proves it pays to save scraps!?

I cut a bias strip one inch in width and folded it in half. I guess this proves it pays to save scraps!?

This is such an easy flourish to do, and it adds such a professional touch.  Adding this flat “piping” is quickly becoming a standard for me when I make jackets or coats. Once you have your bias strip cut, folded in half and pressed, all you need to do is baste it in place along the line where the lining will be hand-stitched to the jacket interior.

The bias "piping" basted in place.

The bias “piping” basted in place. Click on the photo to see it close-up.

And here’s what the finished lining looks like:

Mattli jacket

Here is the back neck edge.

Here is the back neck edge.

I really like this extra flourish.

I really like this extra flourish.

Now – true confessions!  After top-stitching the sleeve edges, the collar and most of one front, I decided I did not like it.  I thought it detracted from the windowpane of the fabric, so I took it all out.  NO top-stitching – for me – on this jacket!

Finally, I made a small change to the back hem of the jacket. Can you figure out what it is? (A previous photo of the jacket back will also give you a clue.)

Mattli jacket I used a trick I learned from my French Jacket class with Susan Khalje: I added a slight curve to the hem and lengthened it by about a half-inch, graduating it back to the prescribed hemline at the side back seams. I love this graceful detail. I believe it will be especially effective when it is paired with the dress. (This photo also shows that all the hours I spent on the layout, making sure I had matched the plaid, was time well spent!)

Speaking of the dress (and matching more plaid) . . .   I never imagined I wouldn’t have this entire ensemble completed by about now. So – it looks like I’ll still be sewing on wool when Spring arrives. Hopefully by the time Spring departs I will have moved on to something more seasonal!

26 Comments

Filed under bound buttonholes, couture construction, Dressmaker details, piping, Suit dresses, Uncategorized, underlinings, vintage Vogue Designer patterns, vintage Vogue patterns from the 1970s, woolens

The Evolution of a Suit Dress, Part 1

“Suit dress – Used in 1960s to refer to a jacket and dress ensemble that resembled a tailored suit.”   (The Fairchild Dictionary of Fashion, Third edition; Fairchild Publications, Inc., New York, New York, 2010)

Although the inspiration for my current project does not have its beginnings in the 1960s, it is certainly influenced by that era. The actual beginning was about 1974 or ‘75, although I did not know it then. That was when I first laid my eyes upon this Jo Mattli Designer pattern from Vogue:

Dress Suit - front of pattern envelope

I loved the tailored, but feminine, look of the jacket, with its high, notched collar and its sleeves with gracefully curved slits. (I was less enamored with the style of the skirt, but skirts can easily be substituted, of course.)

This diagram of the jacket  back better shows the interesting treatment to the cuff edges of the sleeves.

This diagram of the jacket back better shows the interesting treatment to the cuff edges of the sleeves.  Click on the picture to see a close-up view.

I admired this pattern on a regular basis while it was listed for sale in the Vogue Catalogue at my local fabric store, but in the end I didn’t buy it. That hefty $3.00 purchase price, and not knowing for sure that I would actually end up making this outfit,  kept me from its purchase. Now I am not nearly as practical – or maybe I have learned from experience. One must get these things which speak to them while they can! So when I found this pattern a couple of years ago on eBay, I knew it was time to fulfill a long-delayed dream (at a much higher price than $3.00, I might add!).

Shortly thereafter I found this navy blue, windowpane-check cashmere fabric on one of my trips to Britex Fabrics in San Francisco. I purchased what I was sure would be ample yardage to make a two-piece suit (jacket and skirt, with this Jo Mattli design in mind) and to compensate for matching the plaid. Then I set it aside, knowing that the time to start this project had to be right.

The feel of this wool is best described as like soft butter.

The feel of this wool is best described as like soft butter.

I am so glad I waited. As I have grown in my sewing and dressmaking skills (with so much credit in that arena attributed to what I have learned in classes with Susan Khalje), I came to see this fabric and this suit taking on a slightly different appearance. I knew I wanted to make the Mattli jacket, but more and more I felt that this fabric was too special to mix it up with a blouse, no matter what color or how simple that blouse might be. I began to envision the jacket paired with a sheath dress – in effect, a classic 1960s’ inspired suit dress.

But would I have enough fabric? Britex has always been very accommodating when cutting yardages for me, adding inches to compensate for the layout of plaids and designs, and simply being generous in adding a few inches to my requested amount. (I have found most fine fabric stores to be similarly inclined – Mendel Goldberg, for example, also adheres to this customer-friendly practice. Have you found this generally to be true as well?)   Well, those of you who read my blog know that a little shortage of fabric has never kept me from my intended goal. Of course, I would have enough fabric… And so I do, especially with those few extra inches courtesy of Britex added on!

Fitting the muslin (toile) for the jacket took more thought and planning than usual. Much of this is because the pattern I found on eBay was actually one size smaller than what I usually buy and wear. For some reason I find it easier to size down patterns than size them up, so I’d rather, if necessary, start with a too-large pattern than one too small. Adding length and width to the body of the jacket, fitting the sleeves (which also needed a little more circumference) into those new dimensions, and adjusting the front/neck facing, which is part of the notched collar, was quite a puzzle. It took days!

I transferred my final changes from the muslin to silk organza, and then I was in business. I love a challenge, and it’s a good thing I do! Do you know how nerve-racking it is to make sure all your plaid lines match up vertically and horizontally? Also, I knew I could lay out only the jacket pattern pieces initially. There are two reasons for this: one is that I have not yet determined which sheath dress pattern I want to use. The other is that the plaid on the dress is going to have to match – perfectly – the plaid in the jacket horizontally first, with the vertical match being as close as it can be, taking into account darts and the curves in the body of the dress. So – I have to finish the jacket before I can lay out the dress. That fortuitously gives me some more time to think about the dress, which is still taking shape in my mind!

I chose to use white silk organza rather than black, as it is much easier to see the windowpane lines through the white, and easier on the eyes, too.

I chose to use white silk organza underling rather than black, as it is much easier to see the windowpane lines through the white, and easier on the eyes, too.

This photo better shows my markings on the silk organza underlining.

This photo better shows my markings on the silk organza underlining.

With all the silk organza underlining basted onto the wool, I am ready to sew.

A pile of prepared pieces!

A pile of prepared pieces!

But hold the horses there, Fifty Dresses! First, there are interfacings to be pad-stitched and bound buttonholes to be made.

I am using black silk organza for the interfacing.  This is what I did on my color-blocked coat, under Susan Khalje's tutelage, and I was delighted with the results!

I am using black silk organza for the interfacing. This is what I did on my color-blocked coat, under Susan Khalje’s tutelage, and I was delighted with the results!

It is clear there is no hurrying this jacket, nor should there be. Some dreams just take a little more time.

17 Comments

Filed under couture construction, Dressmaker suits, Mid-Century style, Suit dresses, Uncategorized, vintage Vogue Designer patterns, vintage Vogue patterns from the 1970s, woolens

A Timely Arrival

Last week, as I was putting in some final hours on a suit I have been sewing, I was  thinking about some of the “creative” solutions I had to come up with to make the jacket turn out successfully.  I had, unbeknownst to me, made a “bad” decision about the fabric. Even though I (still) love the color and design of the black and pink hounds-tooth wool blend, it turned out to be a very heavy, bulky fabric to sew.  Well, my newest Threads magazine arrived in the mail last Friday – and right there on page 56 is an article entitled “Better Sewing Habits”.  Number 4, by Claire Shaeffer, is:  Choose fabrics appropriate to the garment design.  Printed in bold is this line:  “Select a fabric that is recommended for the pattern”. 

This issue of Threads is packed with all kinds of great advice and ideas!

Sure enough, when I went back to the pattern envelope, there in plain English for the recommended fabrics is:  “Lightweight wool.”  I really felt that sinking feeling, but I tried to console myself by reminding myself that I had made some changes to the pattern and to the construction to accommodate the heavy fabric.  I was trying to feel grateful that I actually have some skills which allow me to make changes and try different approaches to solve sewing problems.  And, actually, now that the jacket is finished, I am happy with it.

This is the pattern I used – from Vogue’s Designer series, Jo Mattli, circa early 1970s.

The completed outfit – wool blend jacket and silk skirt.

Here is what went well:

1) I was able to match the design quite well across seam lines, shoulders, and sleeves.

2) I think I nailed the fit!  Of course, I made a muslin first, so it’s not like that just happened.

3) I reduced the spread of the collar, which actually turned out to be a good decision, when I realized how difficult double layers of the fabric were to work with.

Here is what either did not go well or needed to be “creatively” approached:

1) I really wanted to make bound buttonholes, but the loosely woven, heavy fabric gave me pause.  So I decided to make them out of the silk skirt fabric.  I backed the buttonhole strips with silk organza by fusing them together.  This made the silk stiff enough to stand up to that heavy wool.

The strips attached for the bound buttonholes.

I made the topmost  buttonhole a “blind” one as I determined that I would not be buttoning that top button anyway.  I knew I could never finish the back of the two remaining buttonholes by the normal method, so I “patched” behind them on the interfacing with a lightweight black wool.

Here is a close-up of the bound buttonholes – and the happily matched front!  Click on the photo for a closer-up view.

Before I sewed the front facing, I attached these “patches” to back up to the buttonholes. Then I cut away the heavy fabric underneath, so that I could finish the underneath of the buttonholes somewhat successfully. Click on the photo to see this up close.

2) The neck facing was going to be too heavy using the pink/black wool.  So I used that same lightweight black wool for it instead.

Using a lightweight black wool for the facing made the neckline much more manageable.

3) The back vents were not going to lay flat if I turned in the raw edges as the pattern instructions indicated.  So I bound them with black bias tape instead.

Instead of turning back the facing edge to finish it, I attached this bias binding.

4) Setting in the sleeves was an exercise in sewing terror!  I was sure they would never look good, but somehow they came out unpuckered and pretty well matched.  I only used a sleeve heading to round out the shoulder, even though the pattern called for shoulder pads.

5) I have steamed and steamed, but still feel like the front edge could use some further attention.  I might take the jacket to the dry cleaners and have it professionally steamed….

I actually really liked the engineering of the pattern: with the correct weight fabric, the jacket would go together quite well and the skirt pattern is a winner, with its shaped waistband.

This view of the back waistband shows how it is shaped.

And, of course, I inserted the zipper by hand.

Another look at the finished suit.

And one more…

Interestingly enough, in the same issue of Threads, the winners of the “Make it with Wool” contest were featured.  I couldn’t believe my eyes when I saw that the Senior Winner of the Mohair Council of America, Marisa Linton, of Mount Olive, North Carolina, had used either the same fabric or one very close to “my” fabric to make the coat for her entry (which is stunning, I might add!).  She had used a very original and successful technique for her buttonholes, which are part of the details which make her outfit so noteworthy.

Do you think this is the same fabric? (Threads, January 2013, page 52)

So – it seems the past 7 days have been a time of many arrivals, including a huge and destructive East Coast storm – and the first day of November.    May the next 7 days bring the final arrival of power and comfort to so many who lost so much in the storm, and make us all grateful for resilience, whether it be in life – or in sewing .

13 Comments

Filed under bound buttonholes, hand-sewn zippers, sewing in silk, Shoulder shapes (shoulder pads), Uncategorized, vintage Vogue Designer patterns, vintage Vogue patterns from the 1970s, woolens