Tag Archives: Threads magazine

C is for Couture . . .

. . . And Courage. I guess “C” could also be for Craftsy, come to think of it. Although I thought I would be writing only one post solely devoted to my guipure lace skirt (when finished!), I really feel the need to address my progress and the Craftsy course which is leading the way for me.

When, just a few months ago, Craftsy announced a new class by Susan Khalje, The Couture Lace Skirt, presented by Threads Magazine where Susan is a Contributing Editor, I jumped at it. Susan has not only written about these skirts in Threads Magazine (November 2014, number 175), she has also developed her own skirt pattern – with one view expressly intended for a guipure lace skirt – and, of course, she teaches the construction of these skirts in her own classes, too. Now with this class on Craftsy, there is ample reason to feel confident in plunging ahead with the construction of one of these elegant skirts.

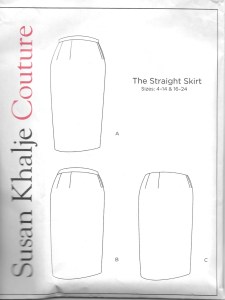
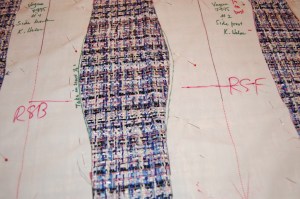
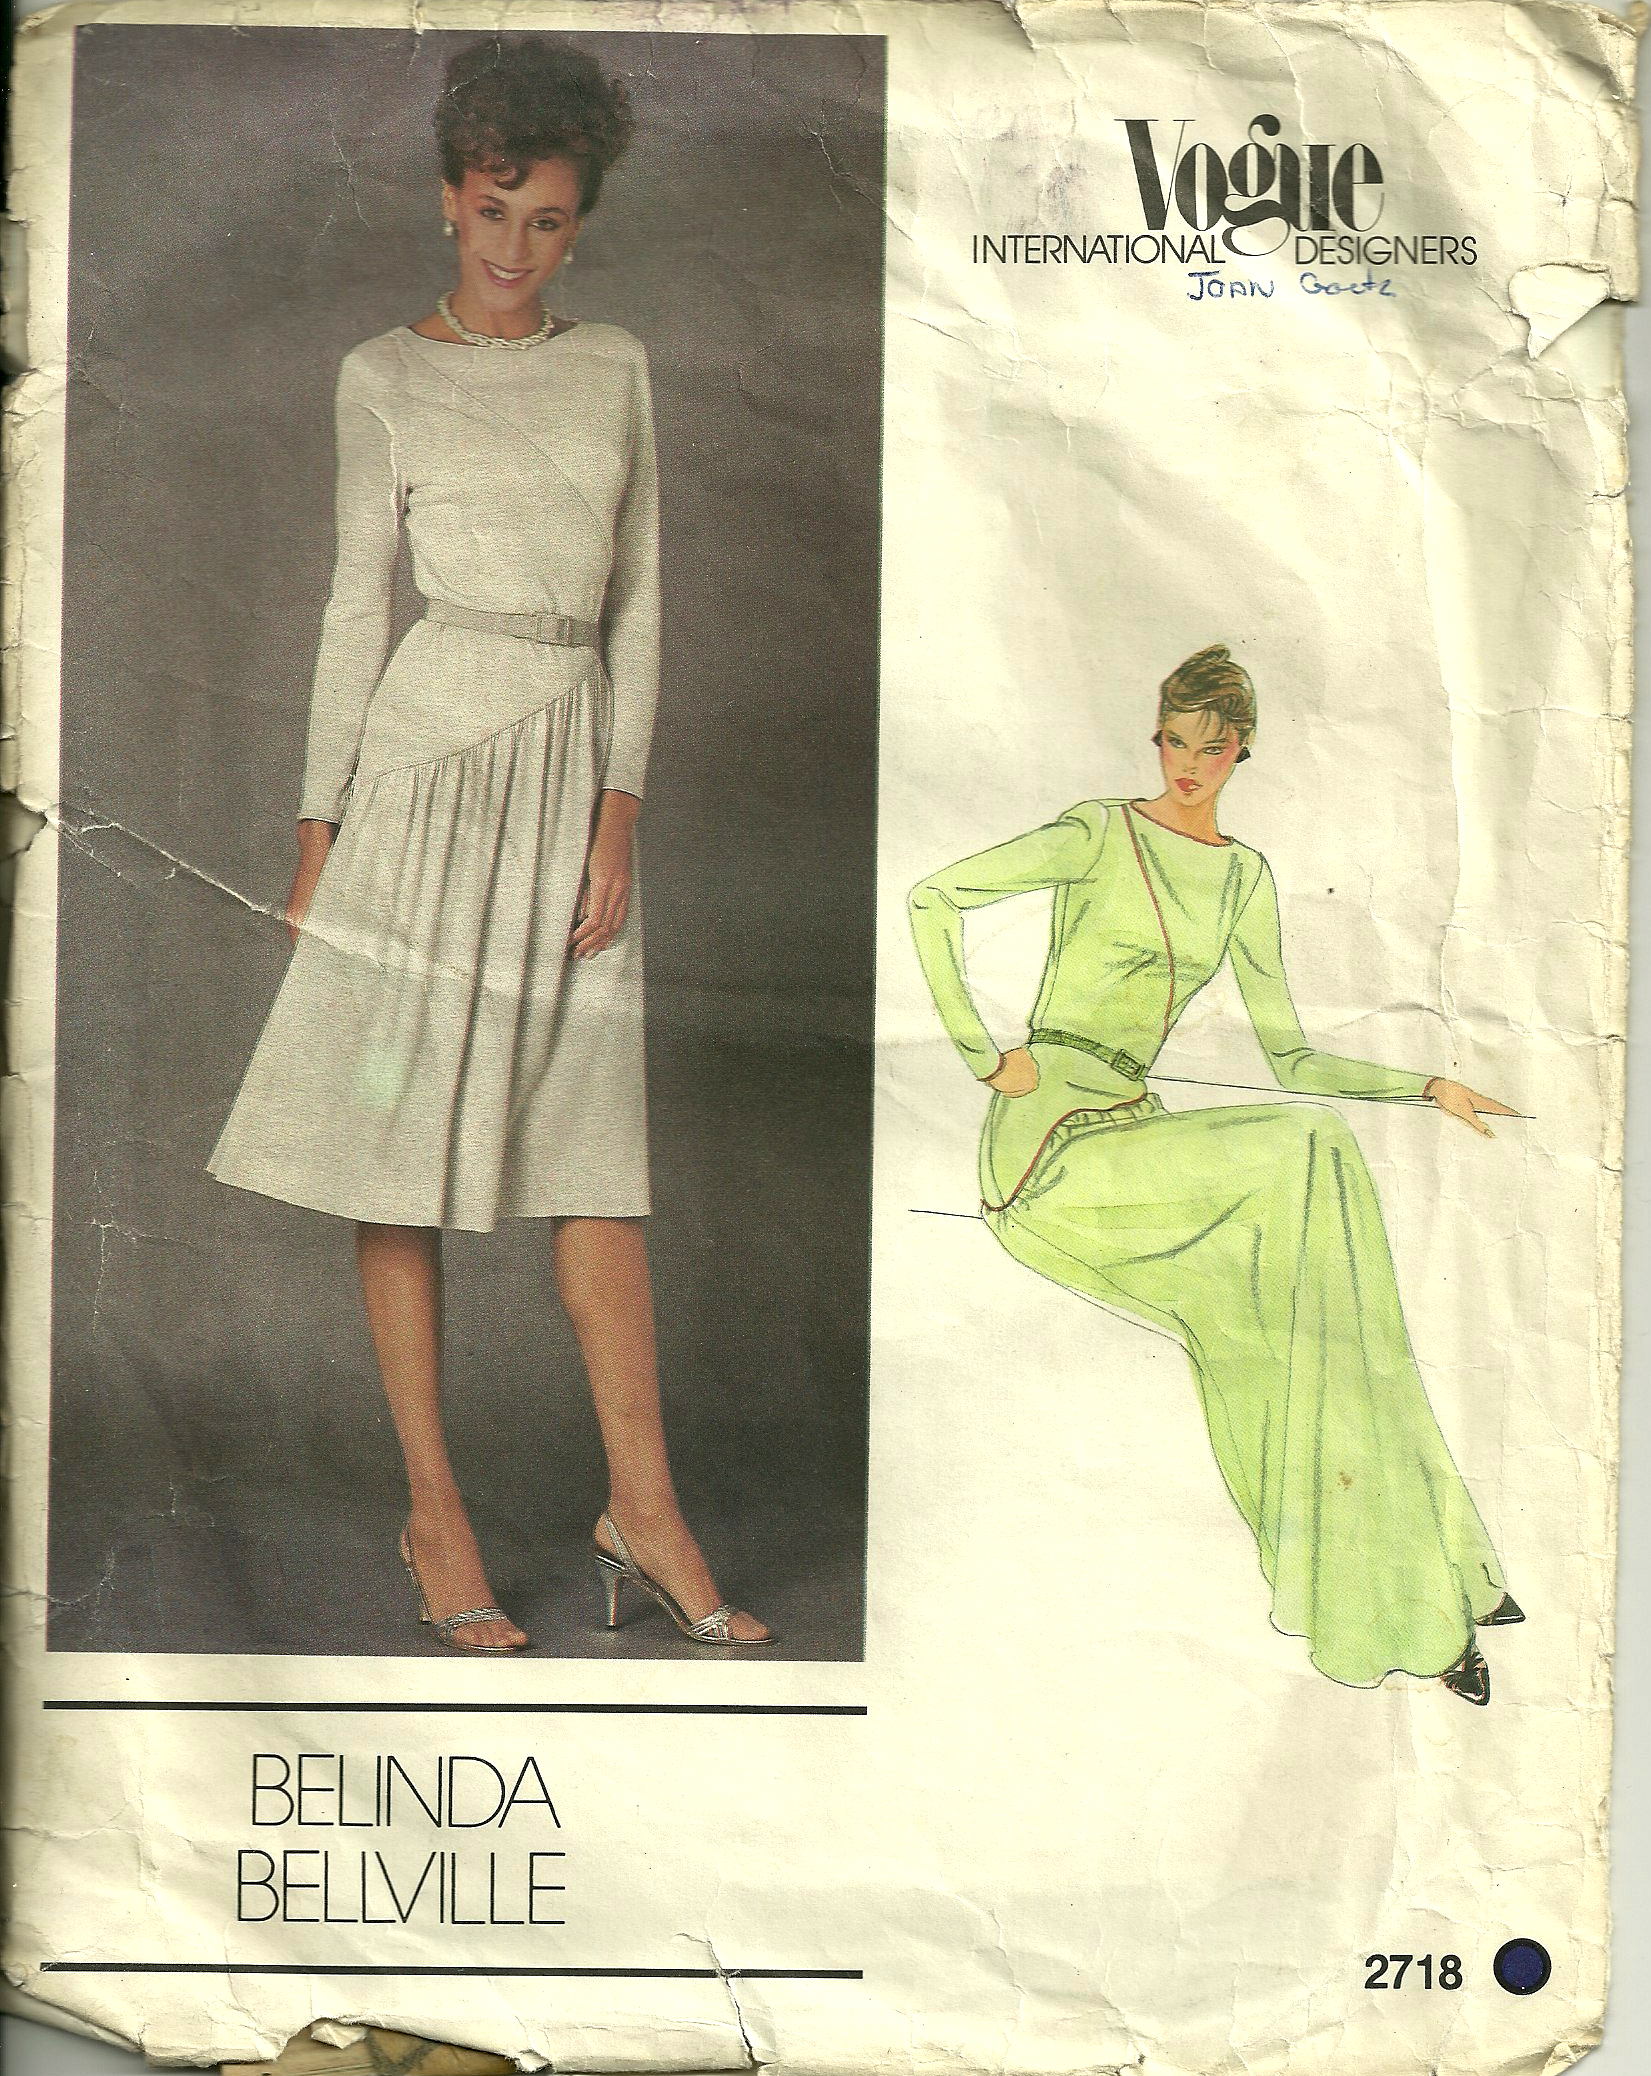
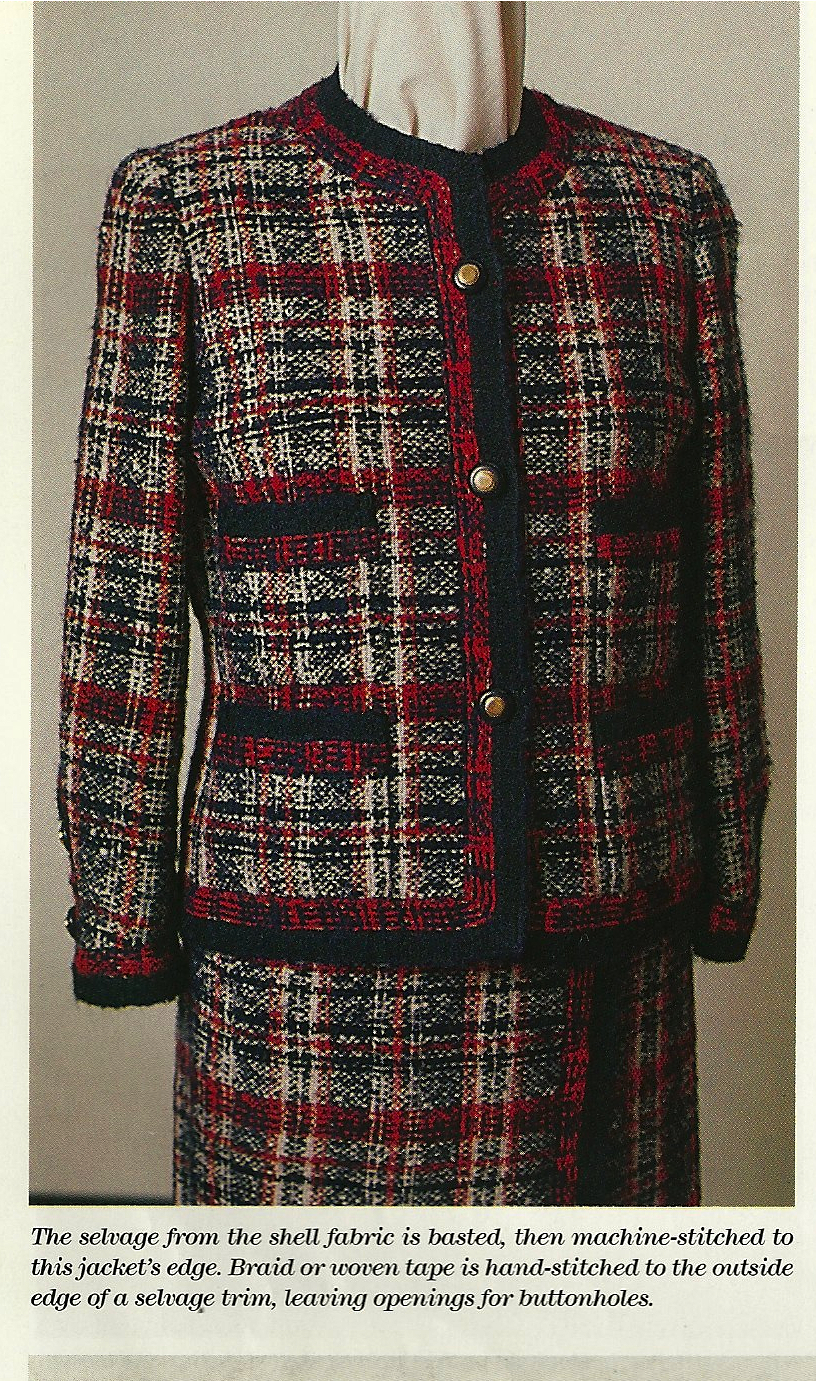
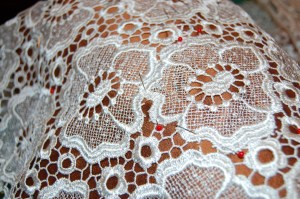
View C is the version intended for use with Guipure lace. Although this looks like a simple straight skirt, there are subtle details which make it a step above ordinary. For example, the side seams are set slightly back from the front. There is slight fullness built in at the hip; not enough to be noticeable, but enough to make it more comfortable for wearing. This pattern is available on Susan’s website.

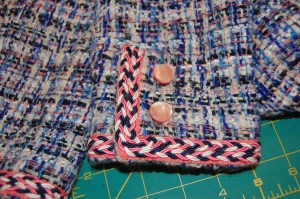
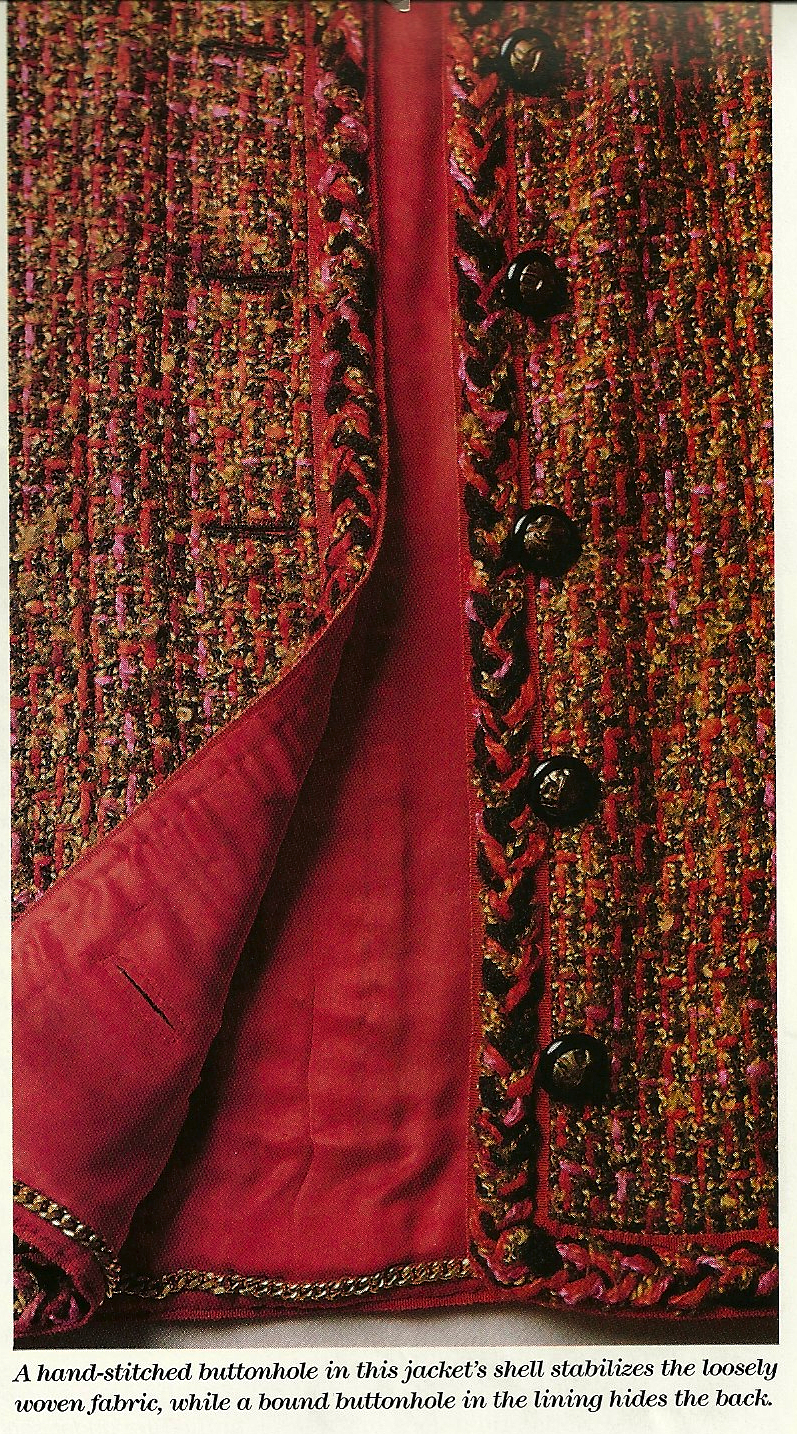
I knew I could not go wrong with this course, but it is even better than I imagined. To look at one of these skirts, one could never imagine the amount of work in something with such a simple silhouette. About halfway through the lessons, it dawned on me that there are quite a few similarities between making one of these skirts and making a classic French jacket. Both have very specific, and unusual, construction techniques. Both defy many of the normal sewing rules. Both have a tremendous amount of handwork involved. And both garments go through a really messy stage – almost chaotic! – before emerging in their final manifestation.

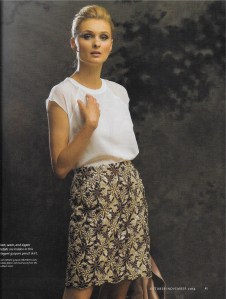
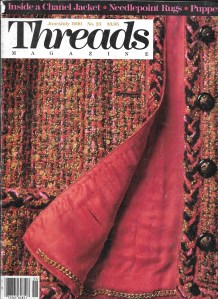
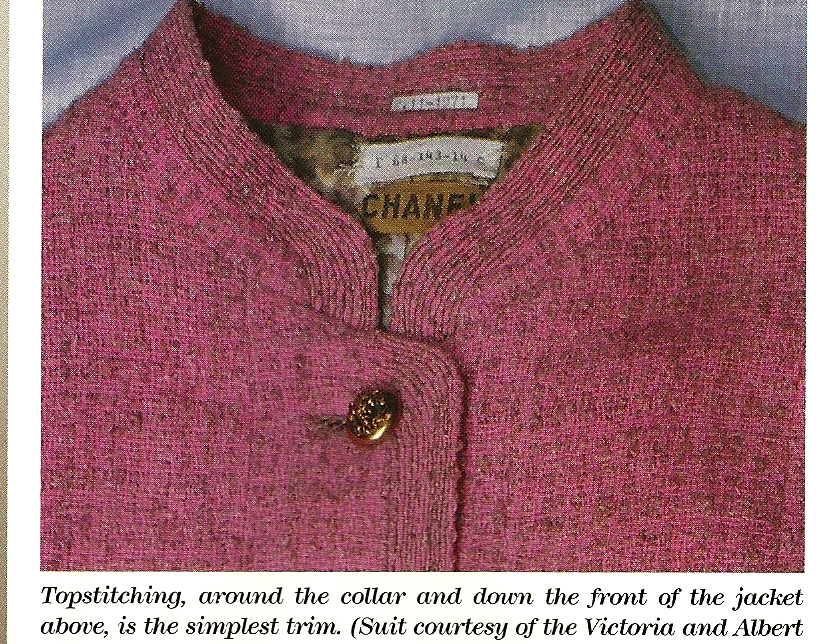
Here is one of the skirts illustrated in the Threads article from November 2014.

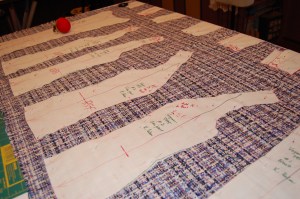
The course has ten parts, and although it is a couture sewing course, Susan’s directions can be implemented by someone with no couture construction experience. However, patience is a must. She walks you through the making and fitting of a toile, followed by preparation of the underlining and fashion fabric (the fabric which peeks through the lace, usually silk charmeuse), then the sewing of the side seams (only) and hem. I had never worked on a skirt where the back seam is not sewn until so far into the construction process, but such is necessary to provide a flat surface on which to shape and attach the lace overlay.

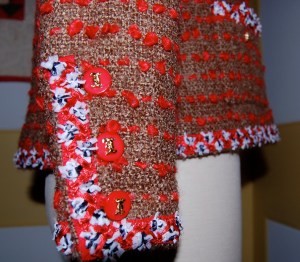
Another example of one of these skirts, from the Threads article.

This is where Courage comes in. Shaping the lace to lie properly on curves and darts requires a good amount of snipping and clipping and cutting of the lace! This is not for the faint of heart, but once you get into the process, it really is logical and even captivating. Besides, as Susan says, if you make a mistake, you can always patch!

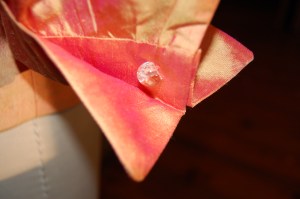
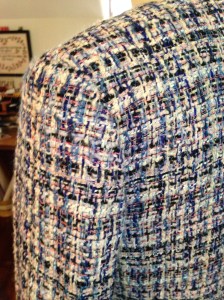
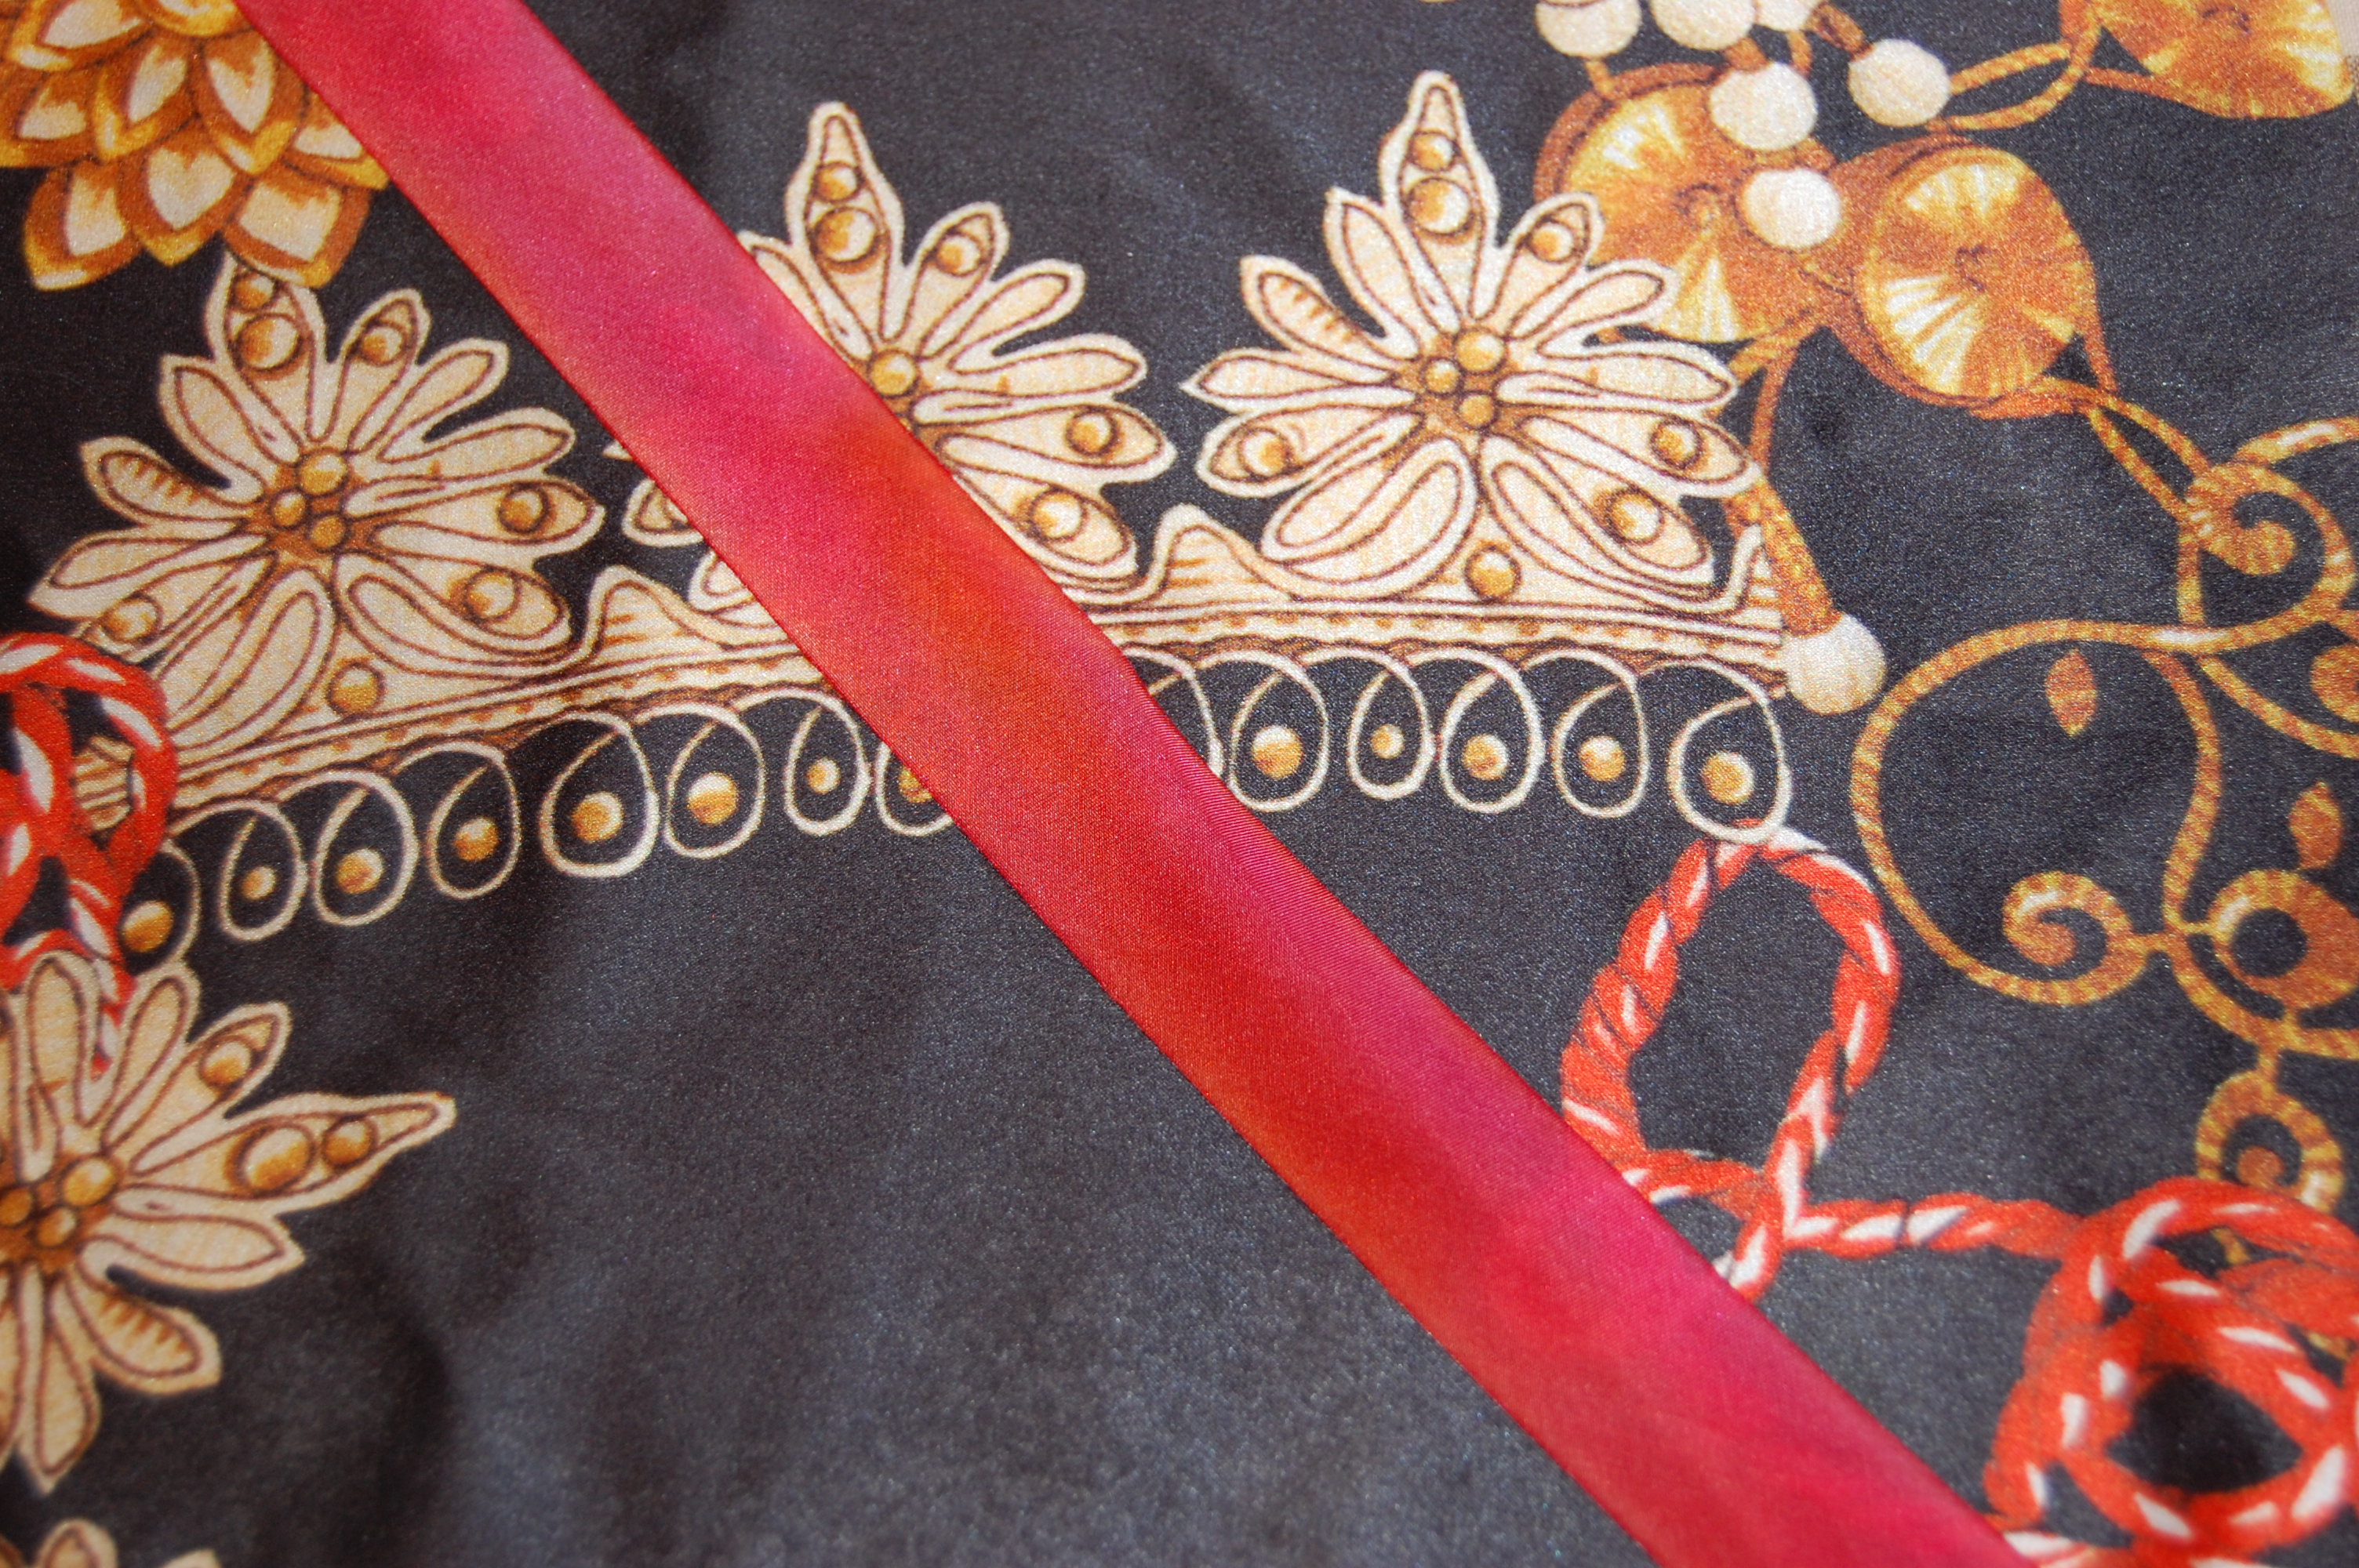
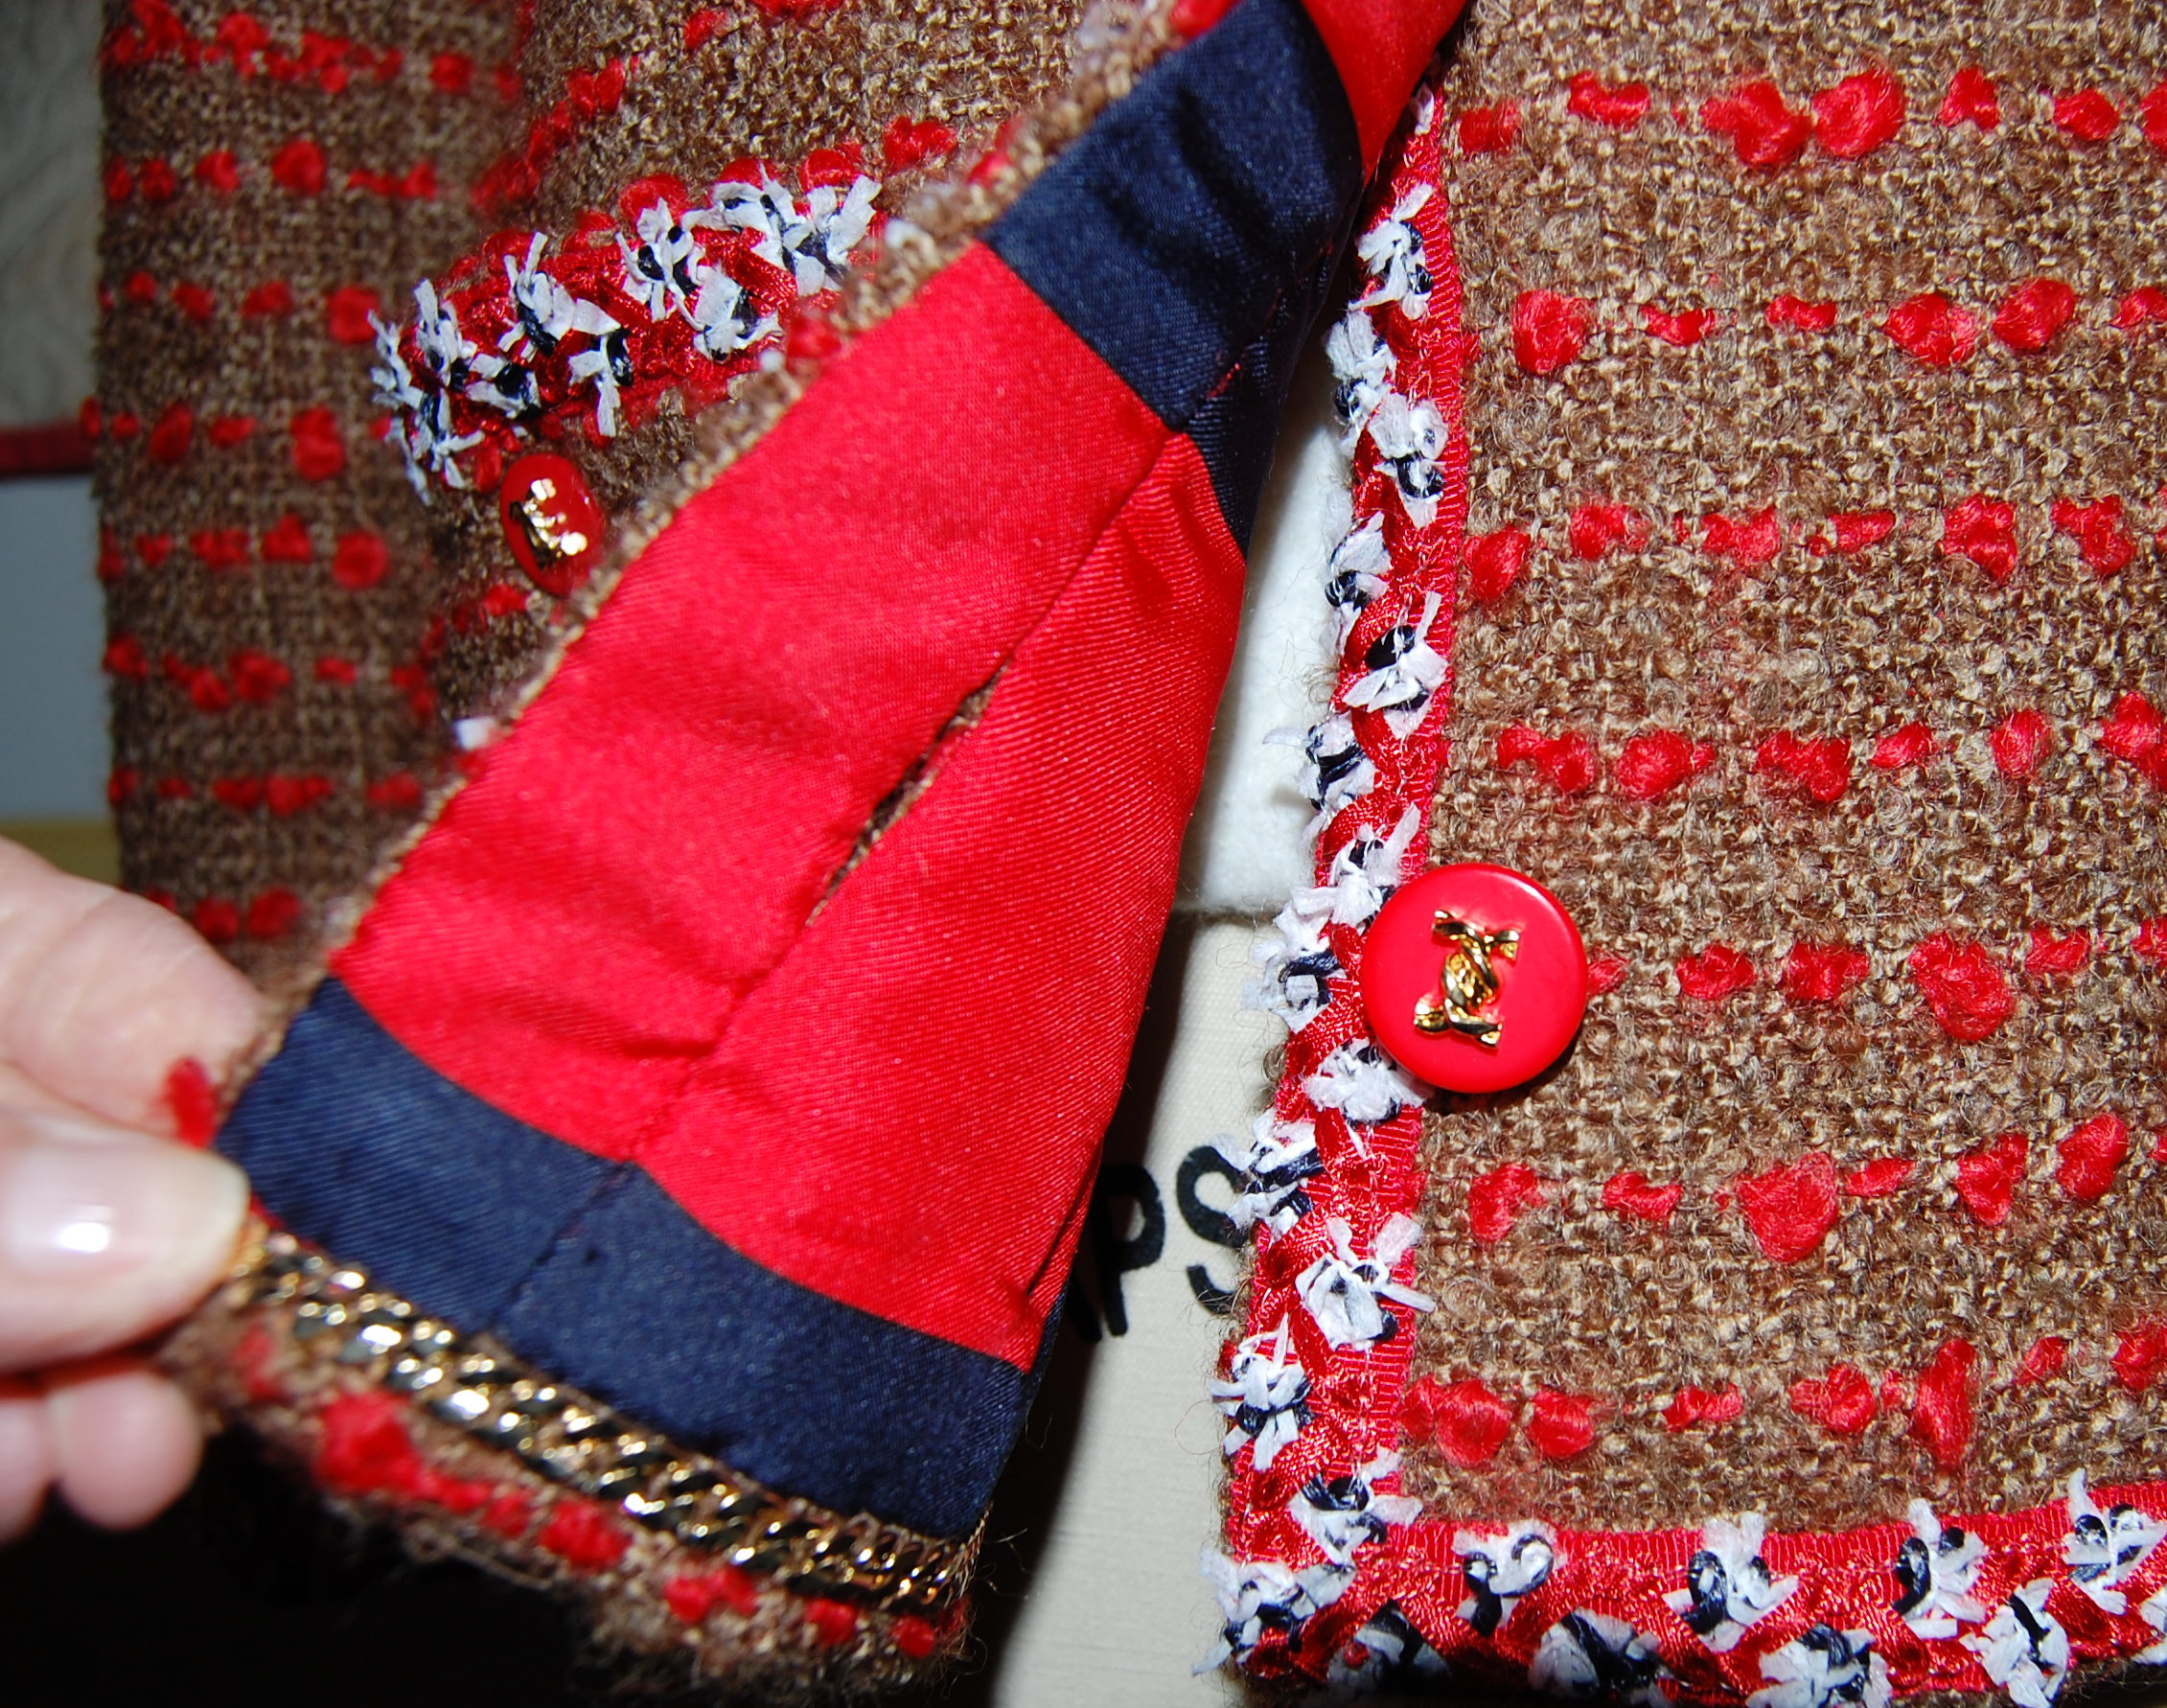
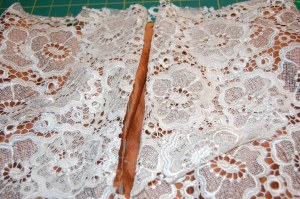
A detail from my skirt, with the lace pinned and ready to attach.

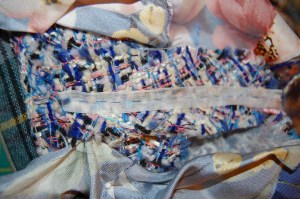
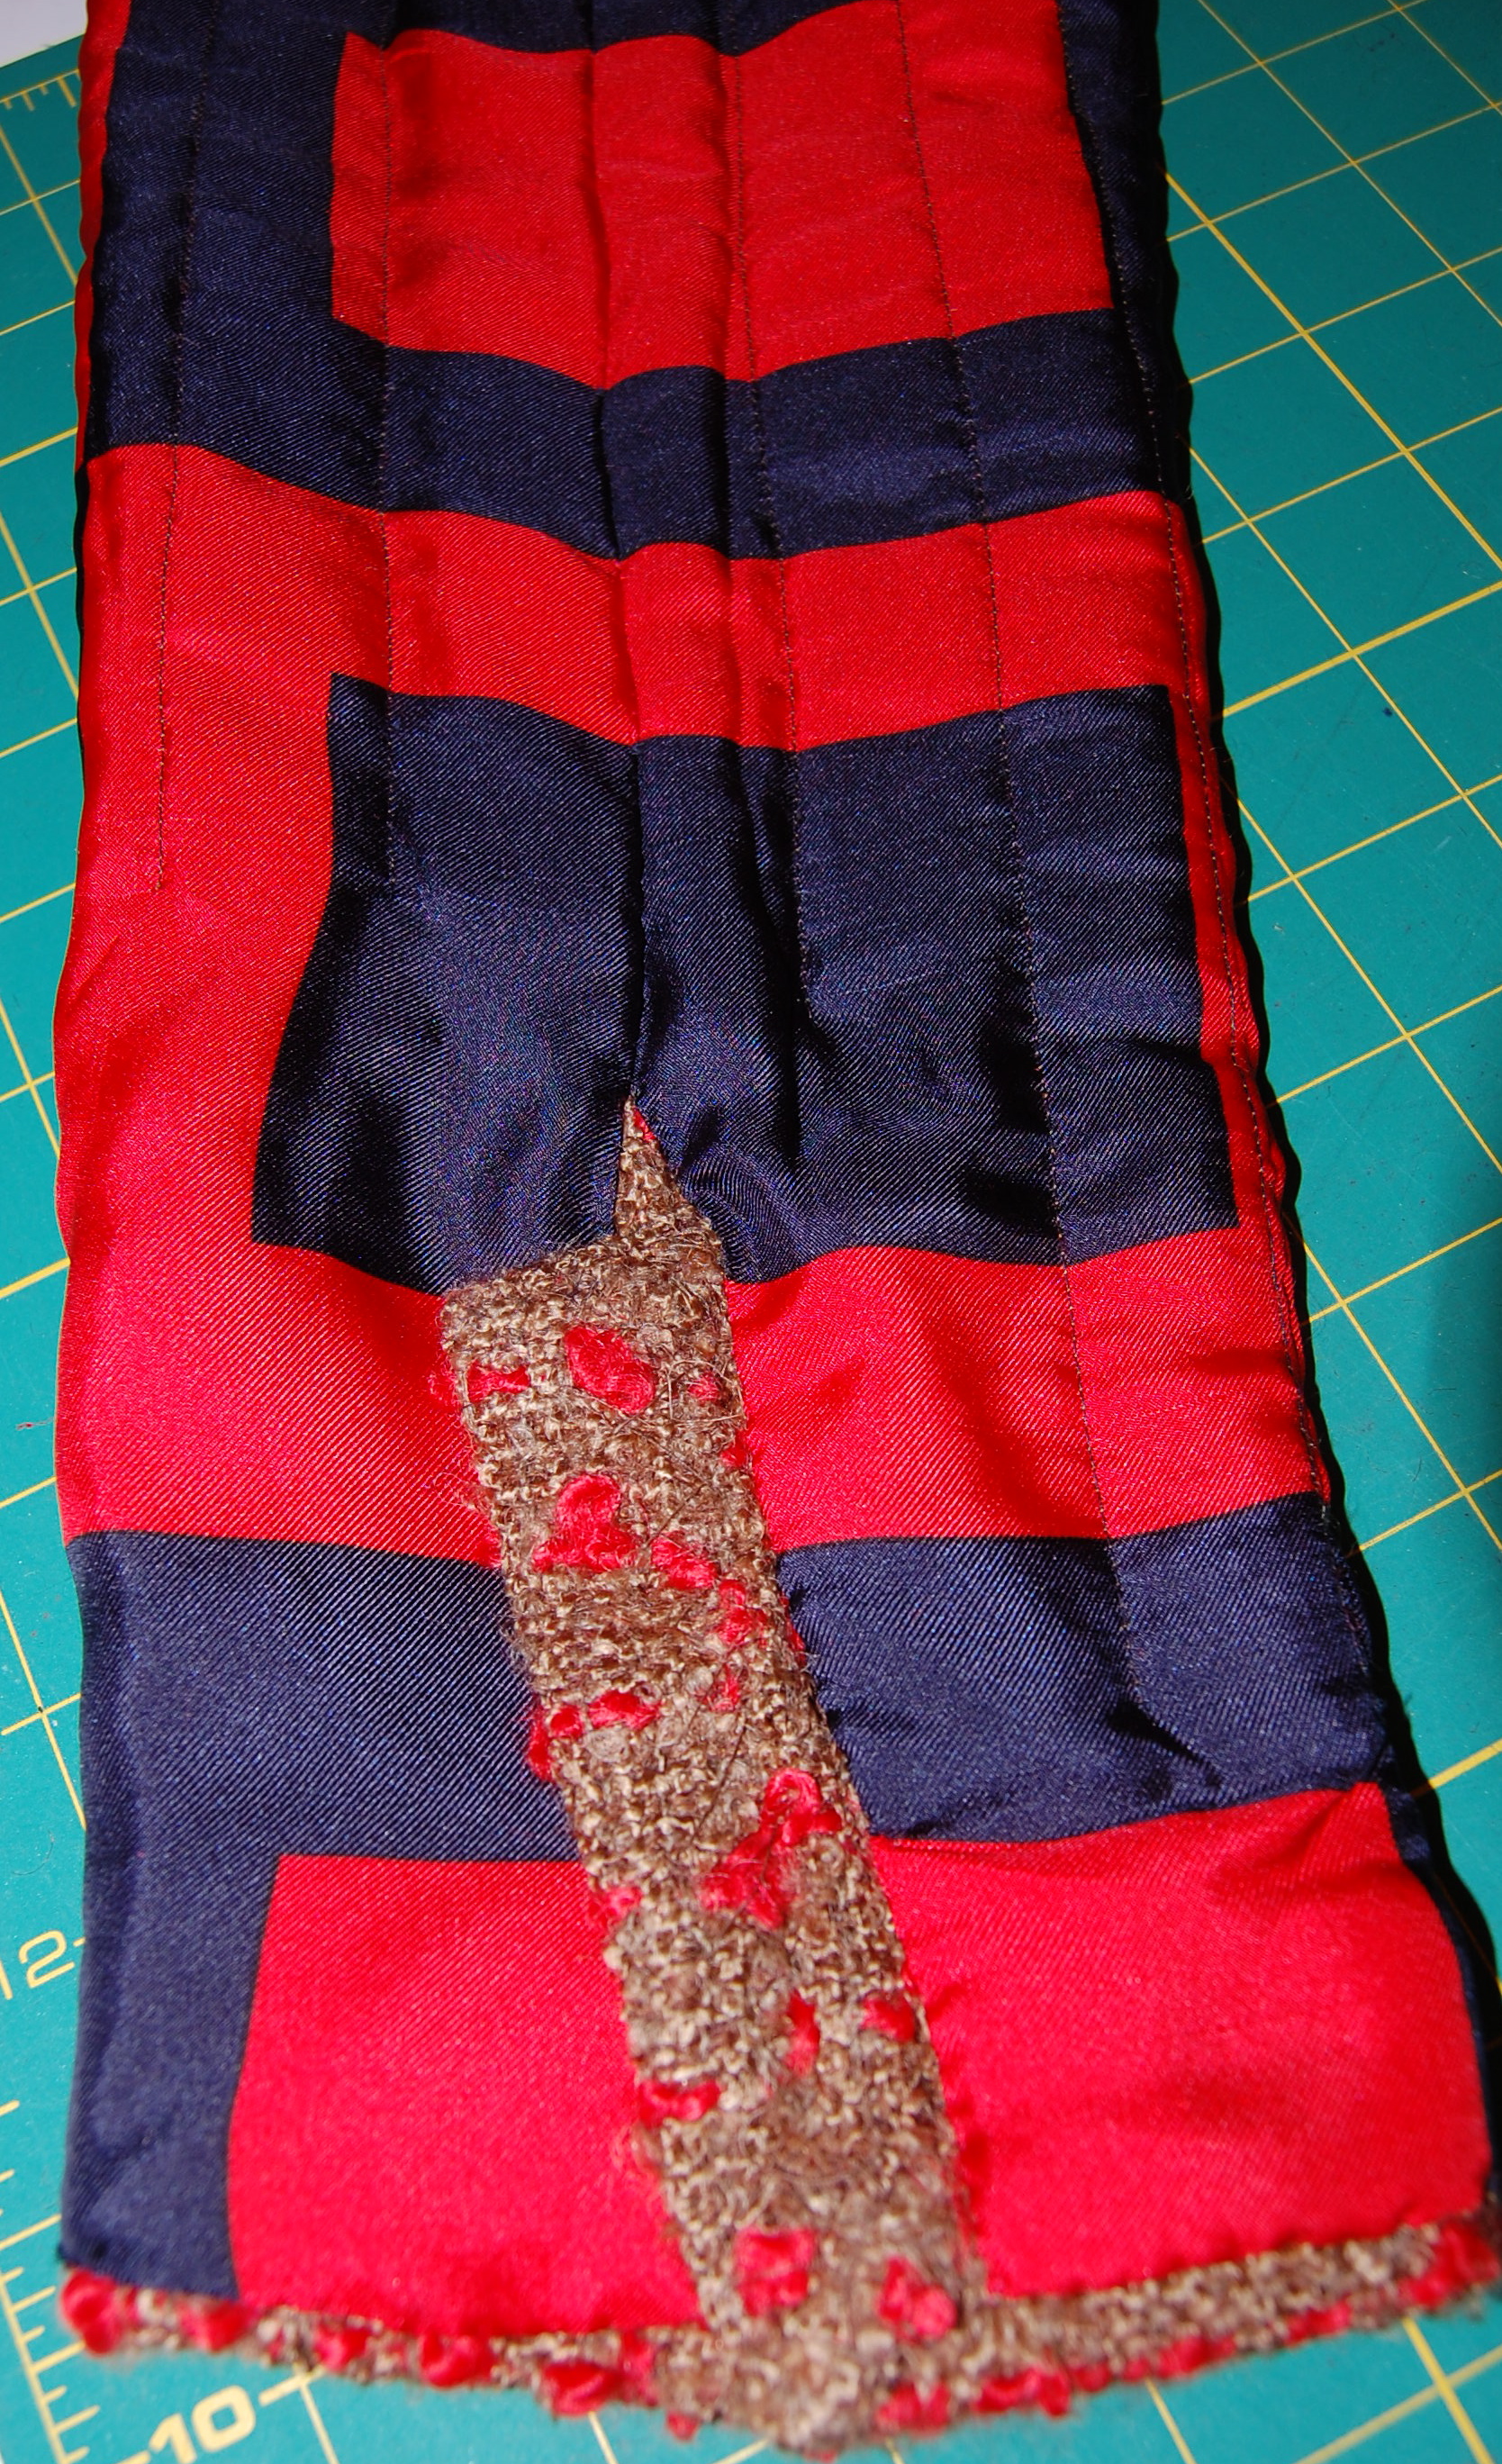
This is also the part that looks somewhat chaotic, with great flaps of lace waiting to be tamed, and a crazy network of tiny stitches emerging on the underlining, but invisible on top.

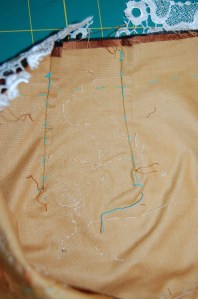
One section of the underlining cotton showing the maze of stitching required to attach the lace to the top of the skirt. Leaving the basting stitches in helps to orient the lace properly.

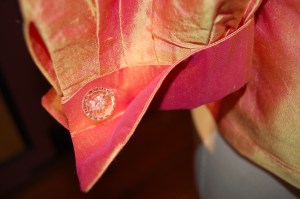
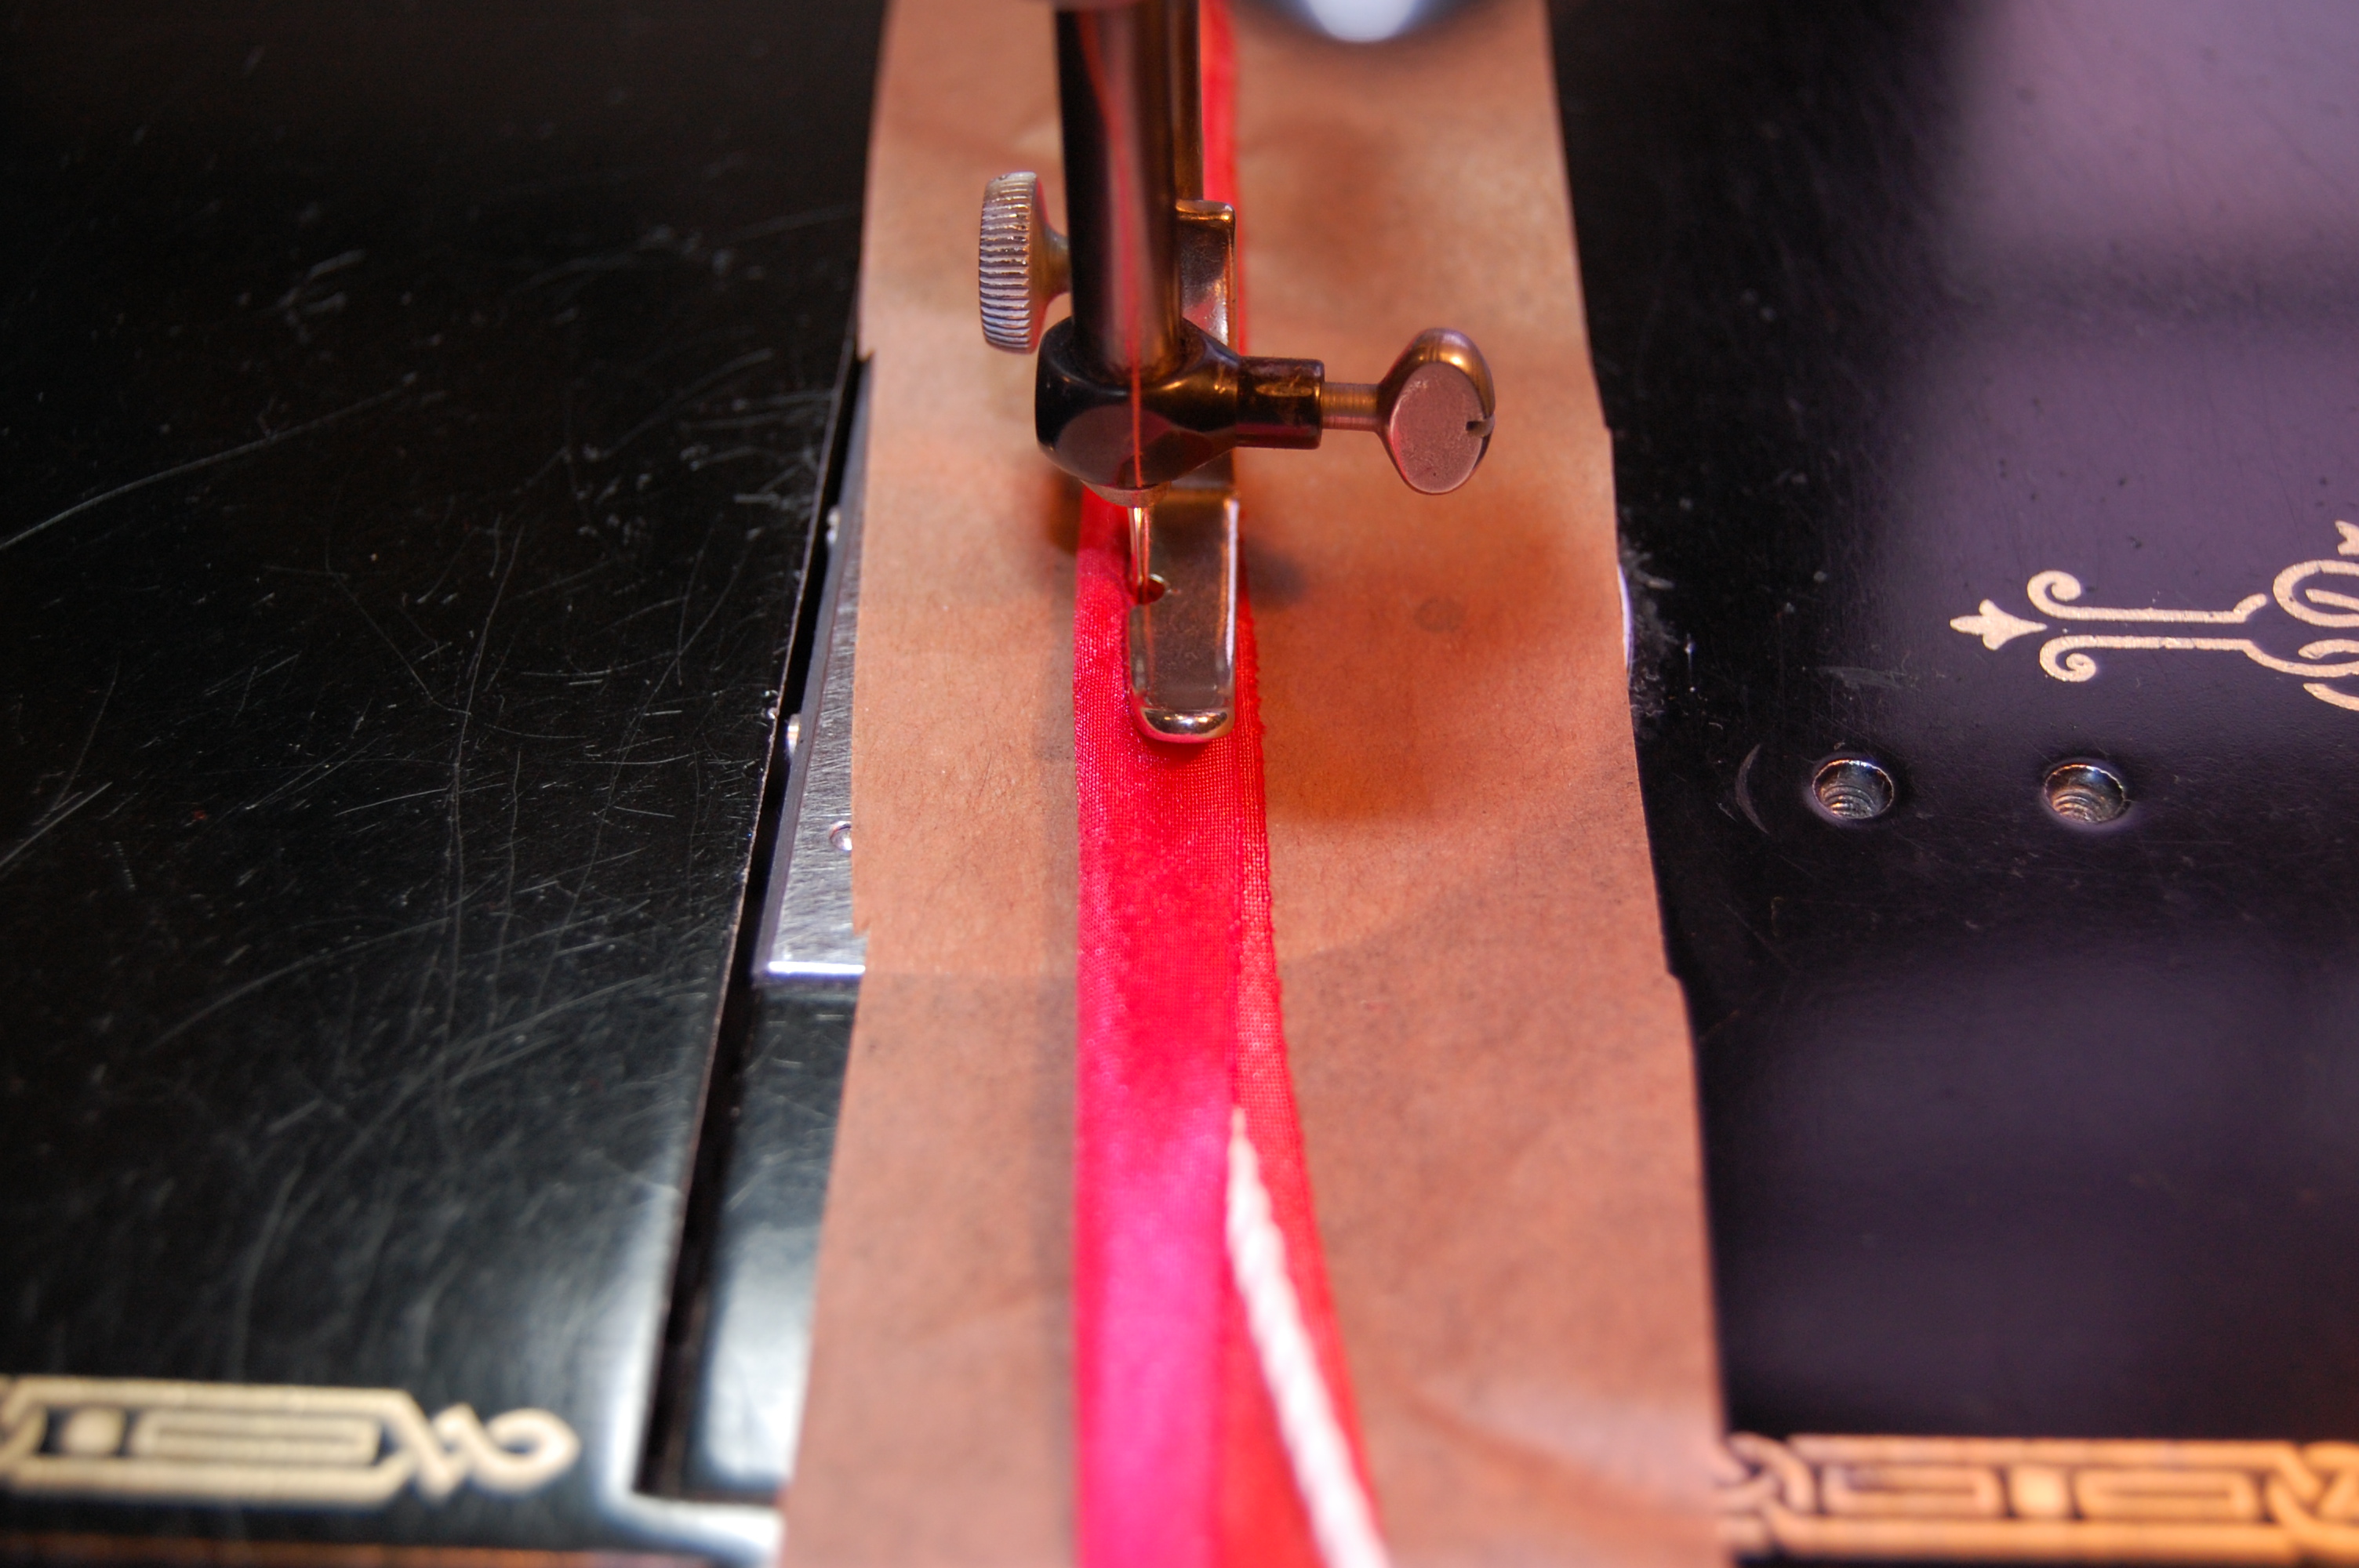
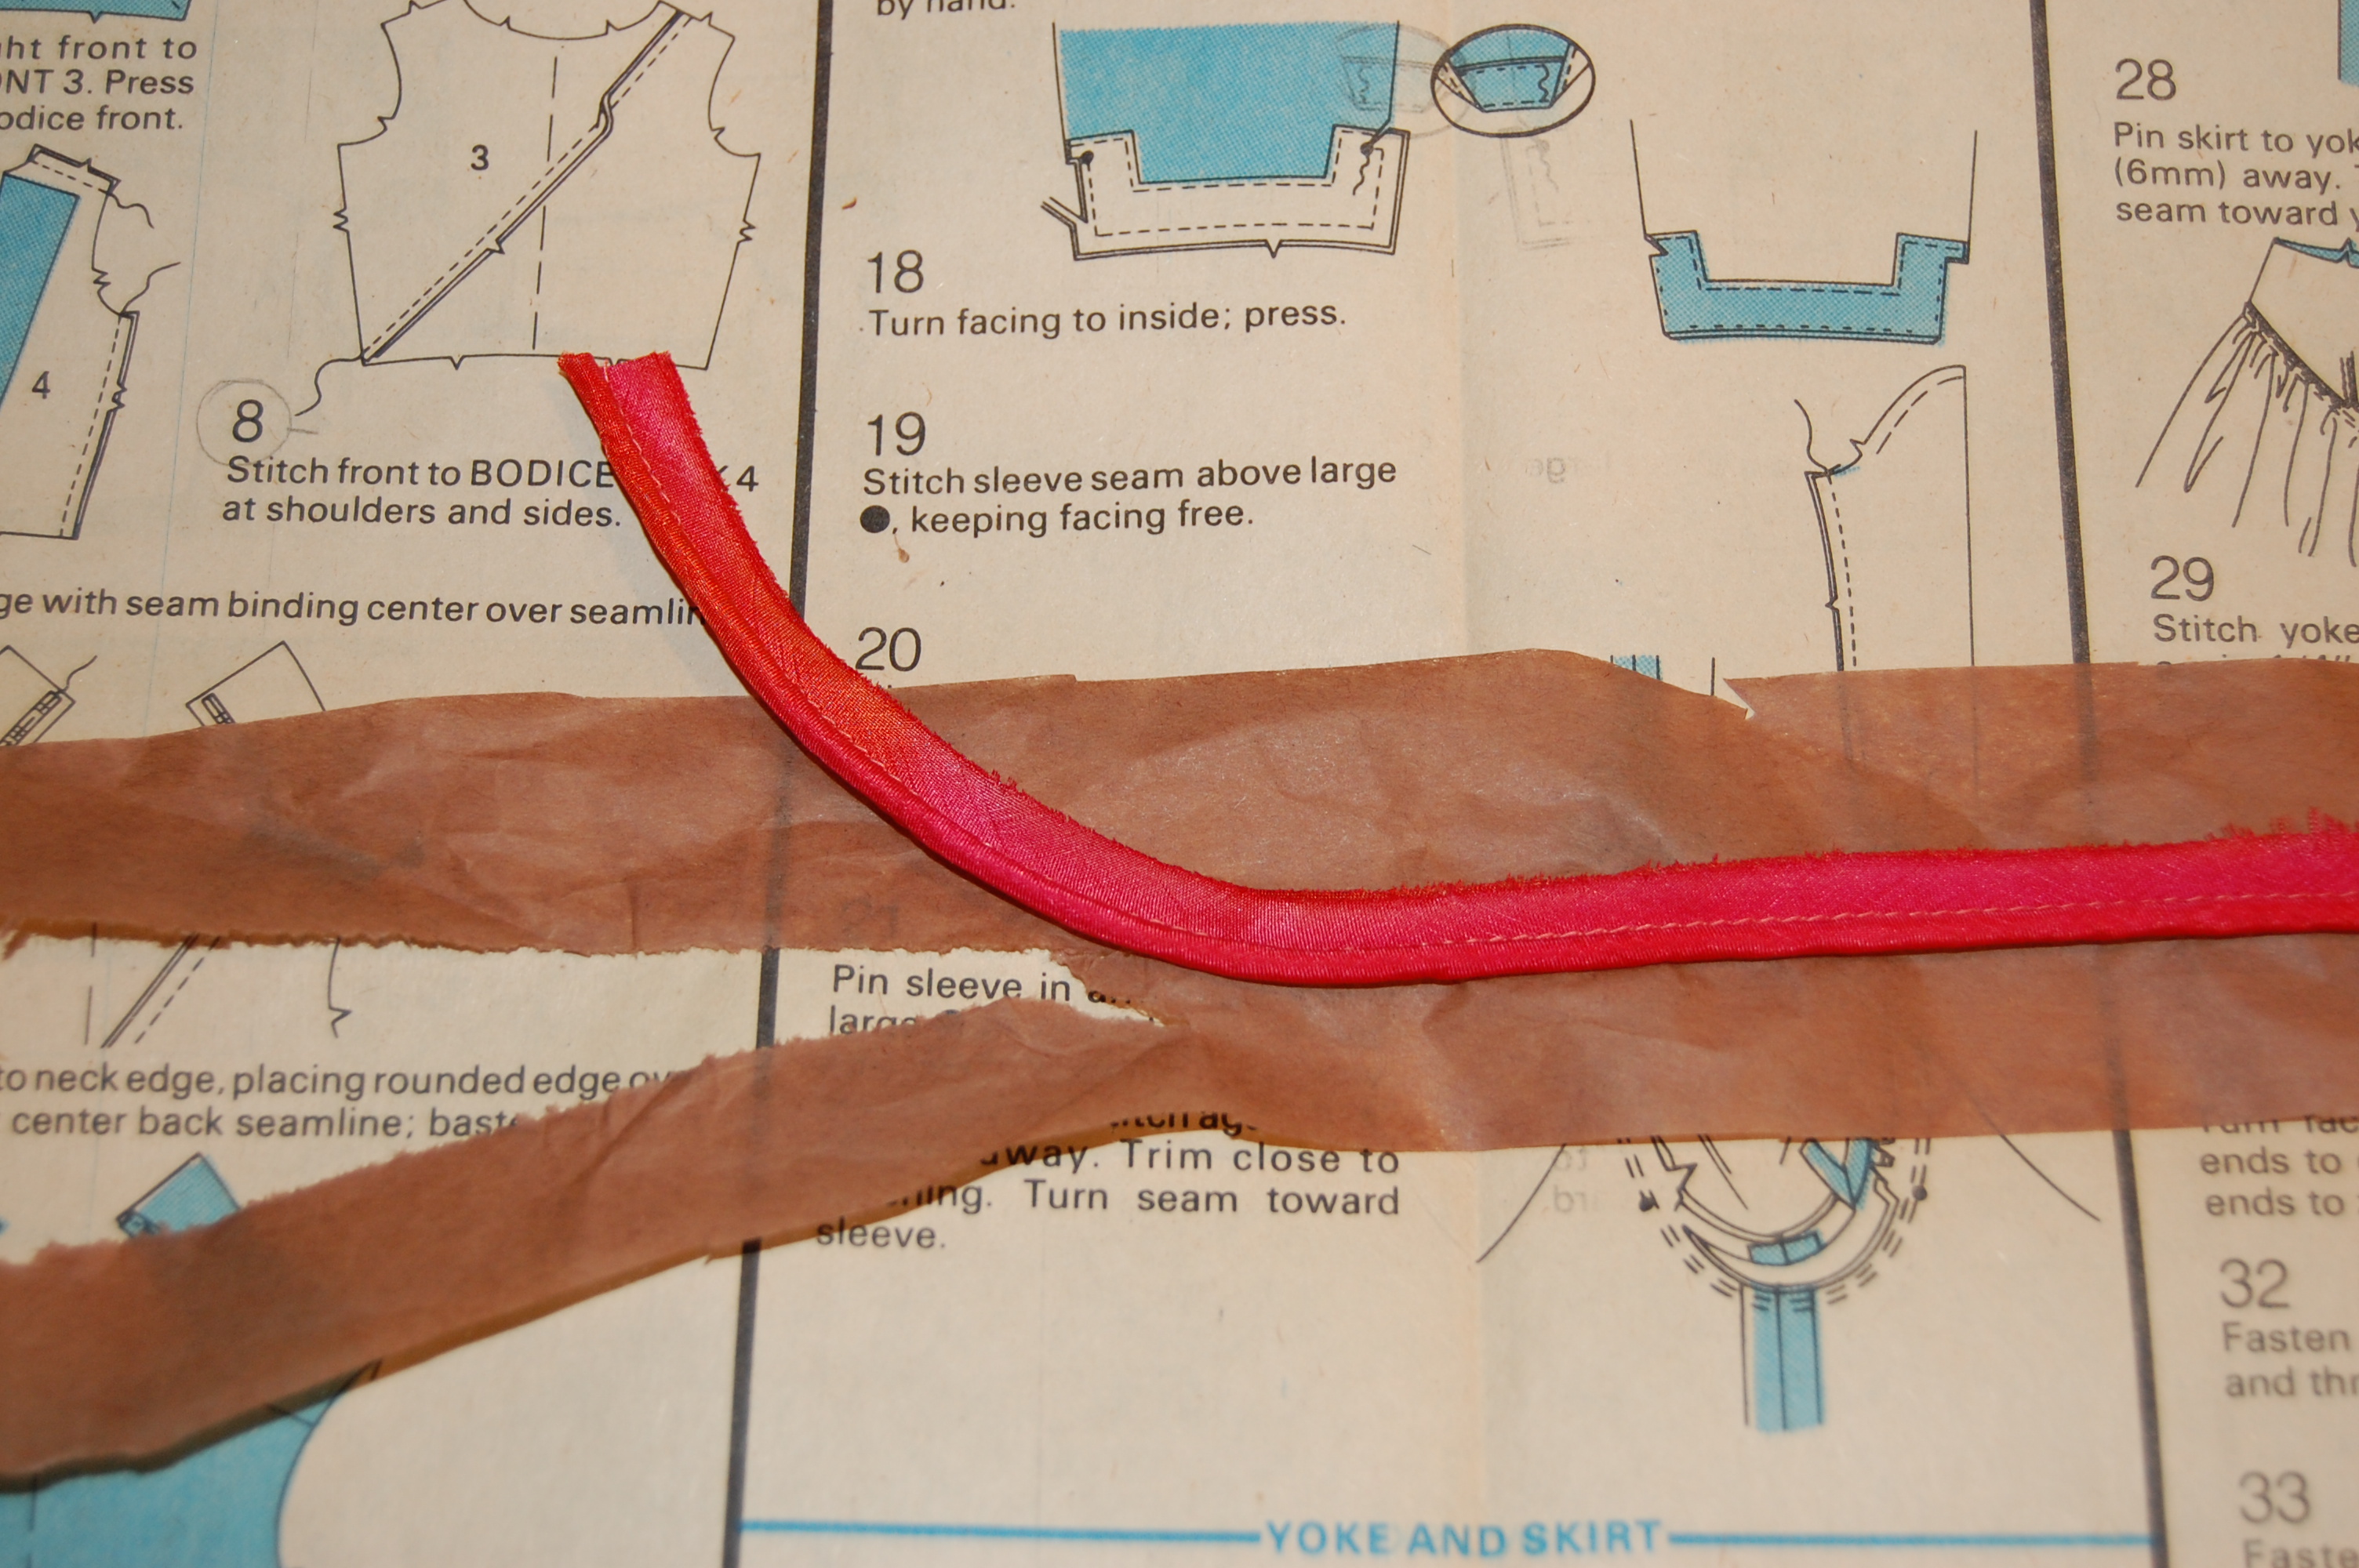
I am about ready to insert the hand-picked zipper, which will be hidden when finished.

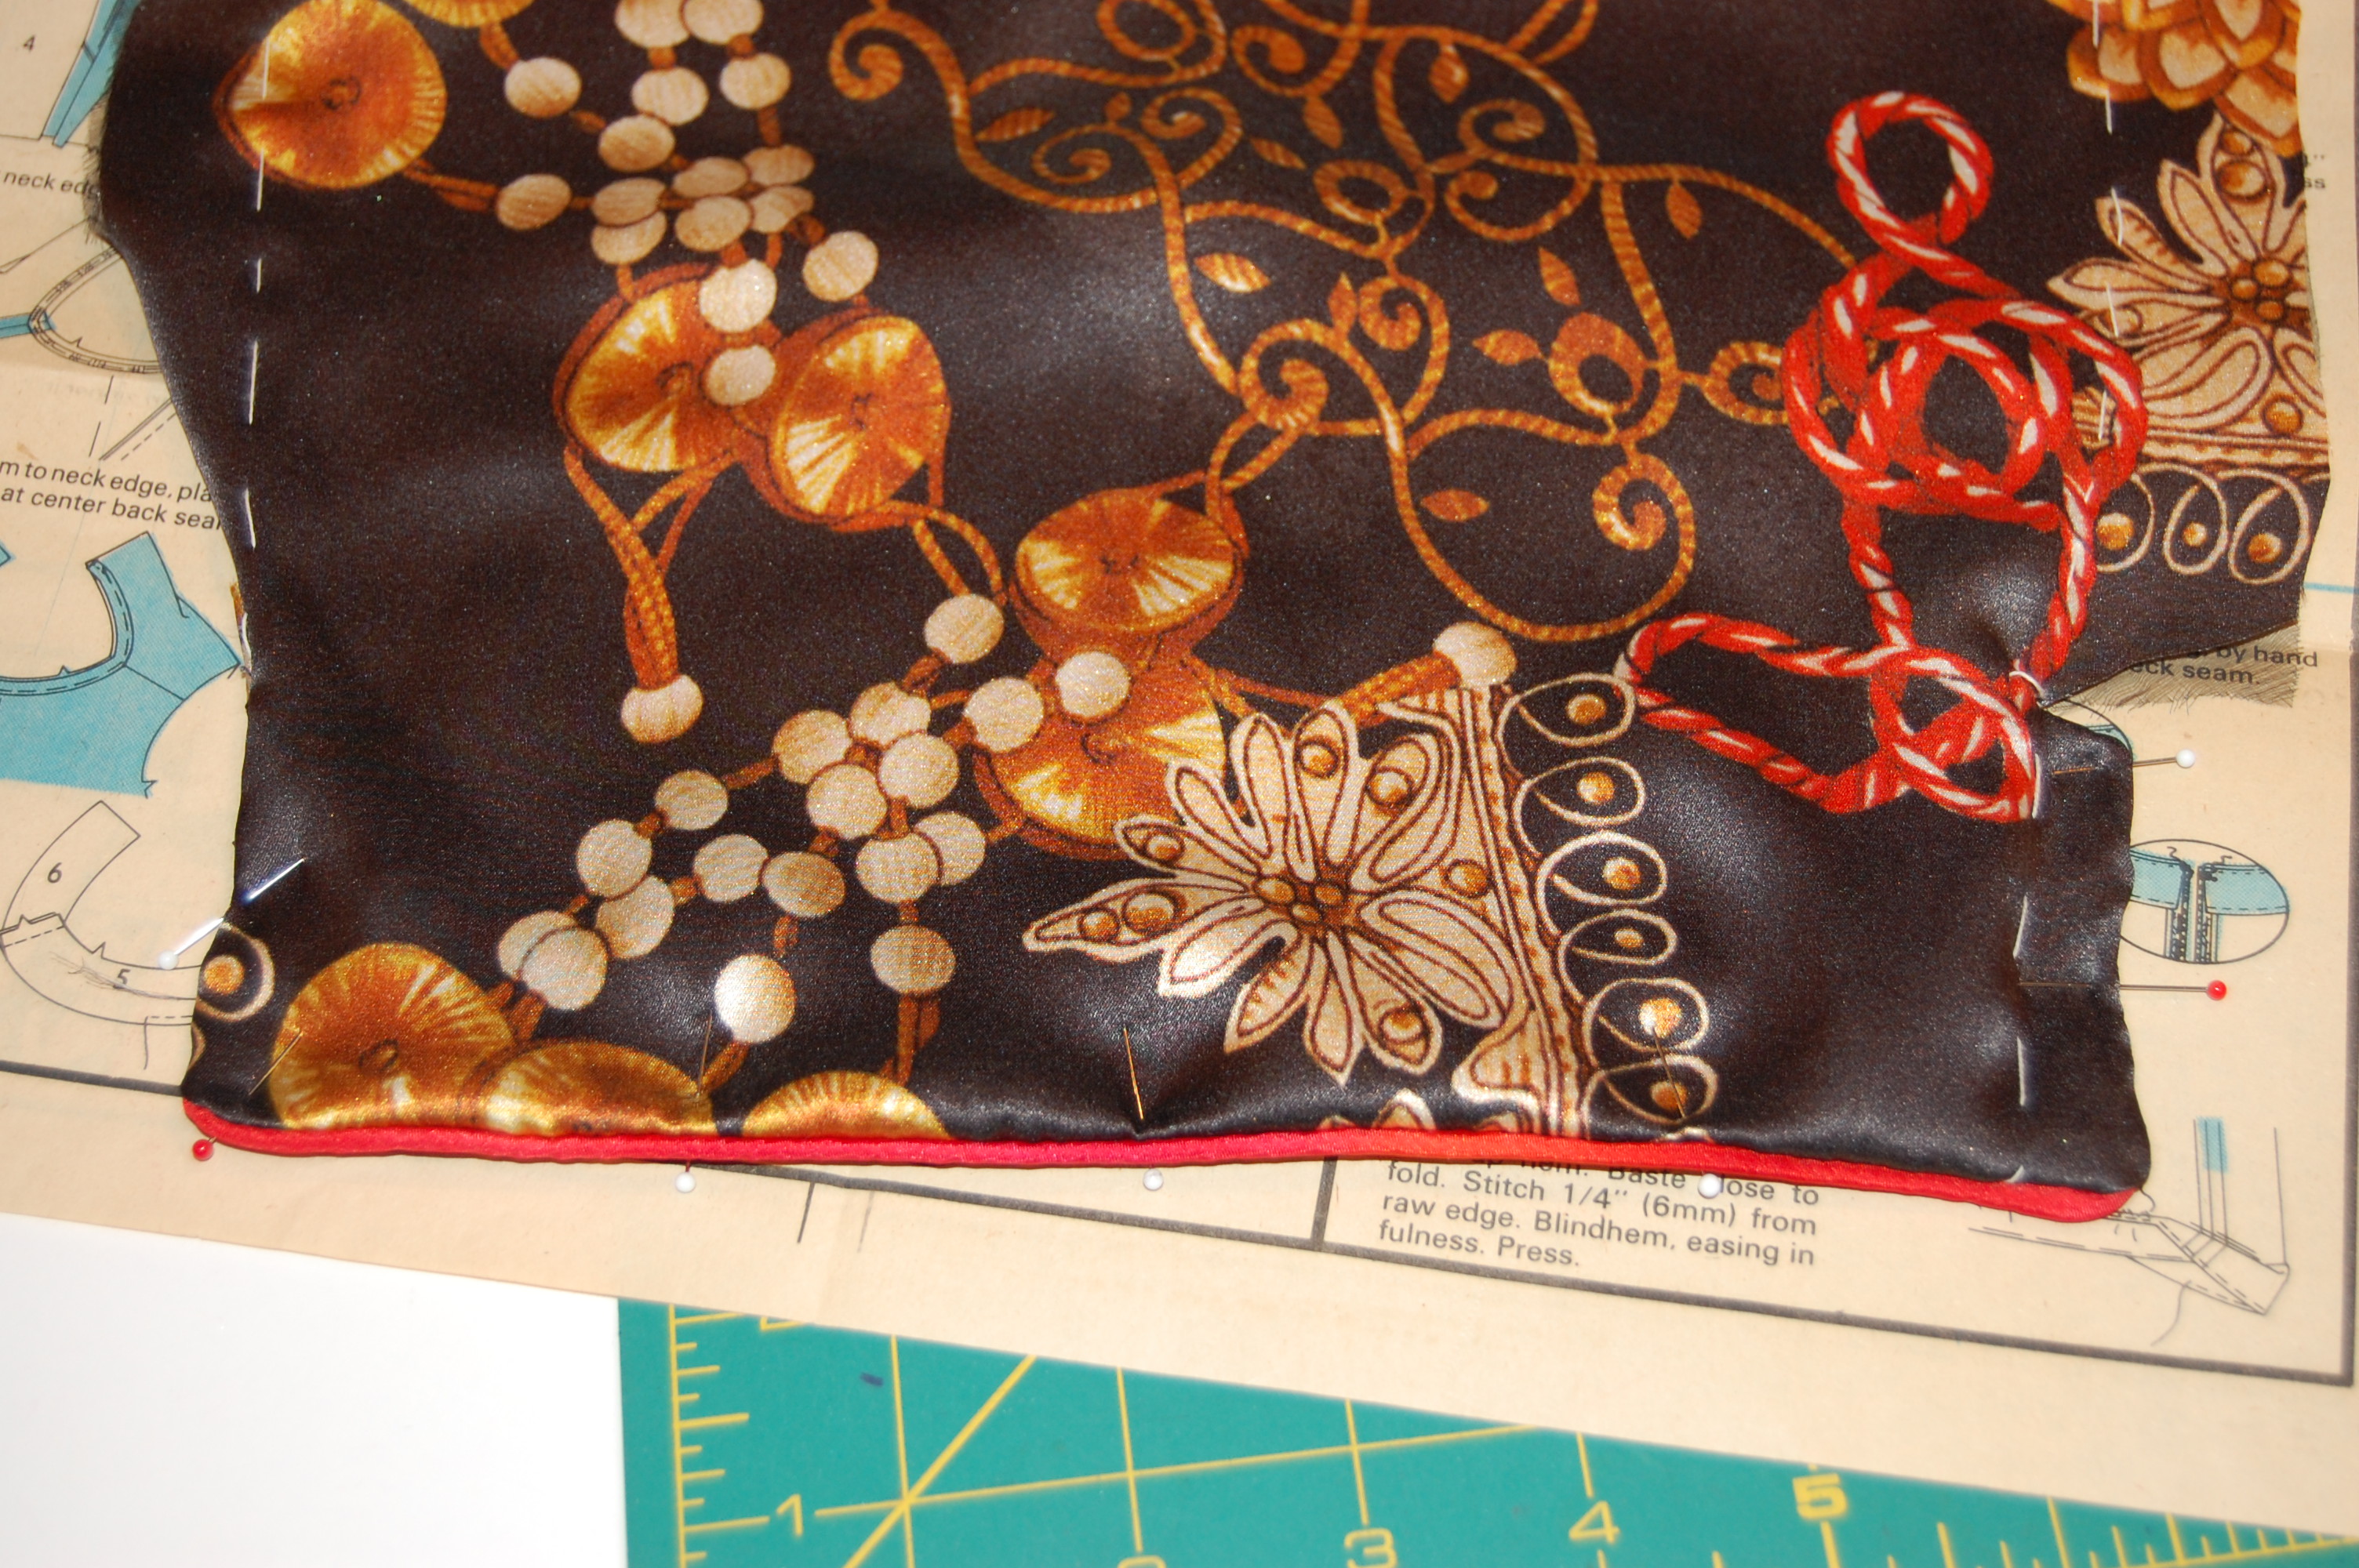
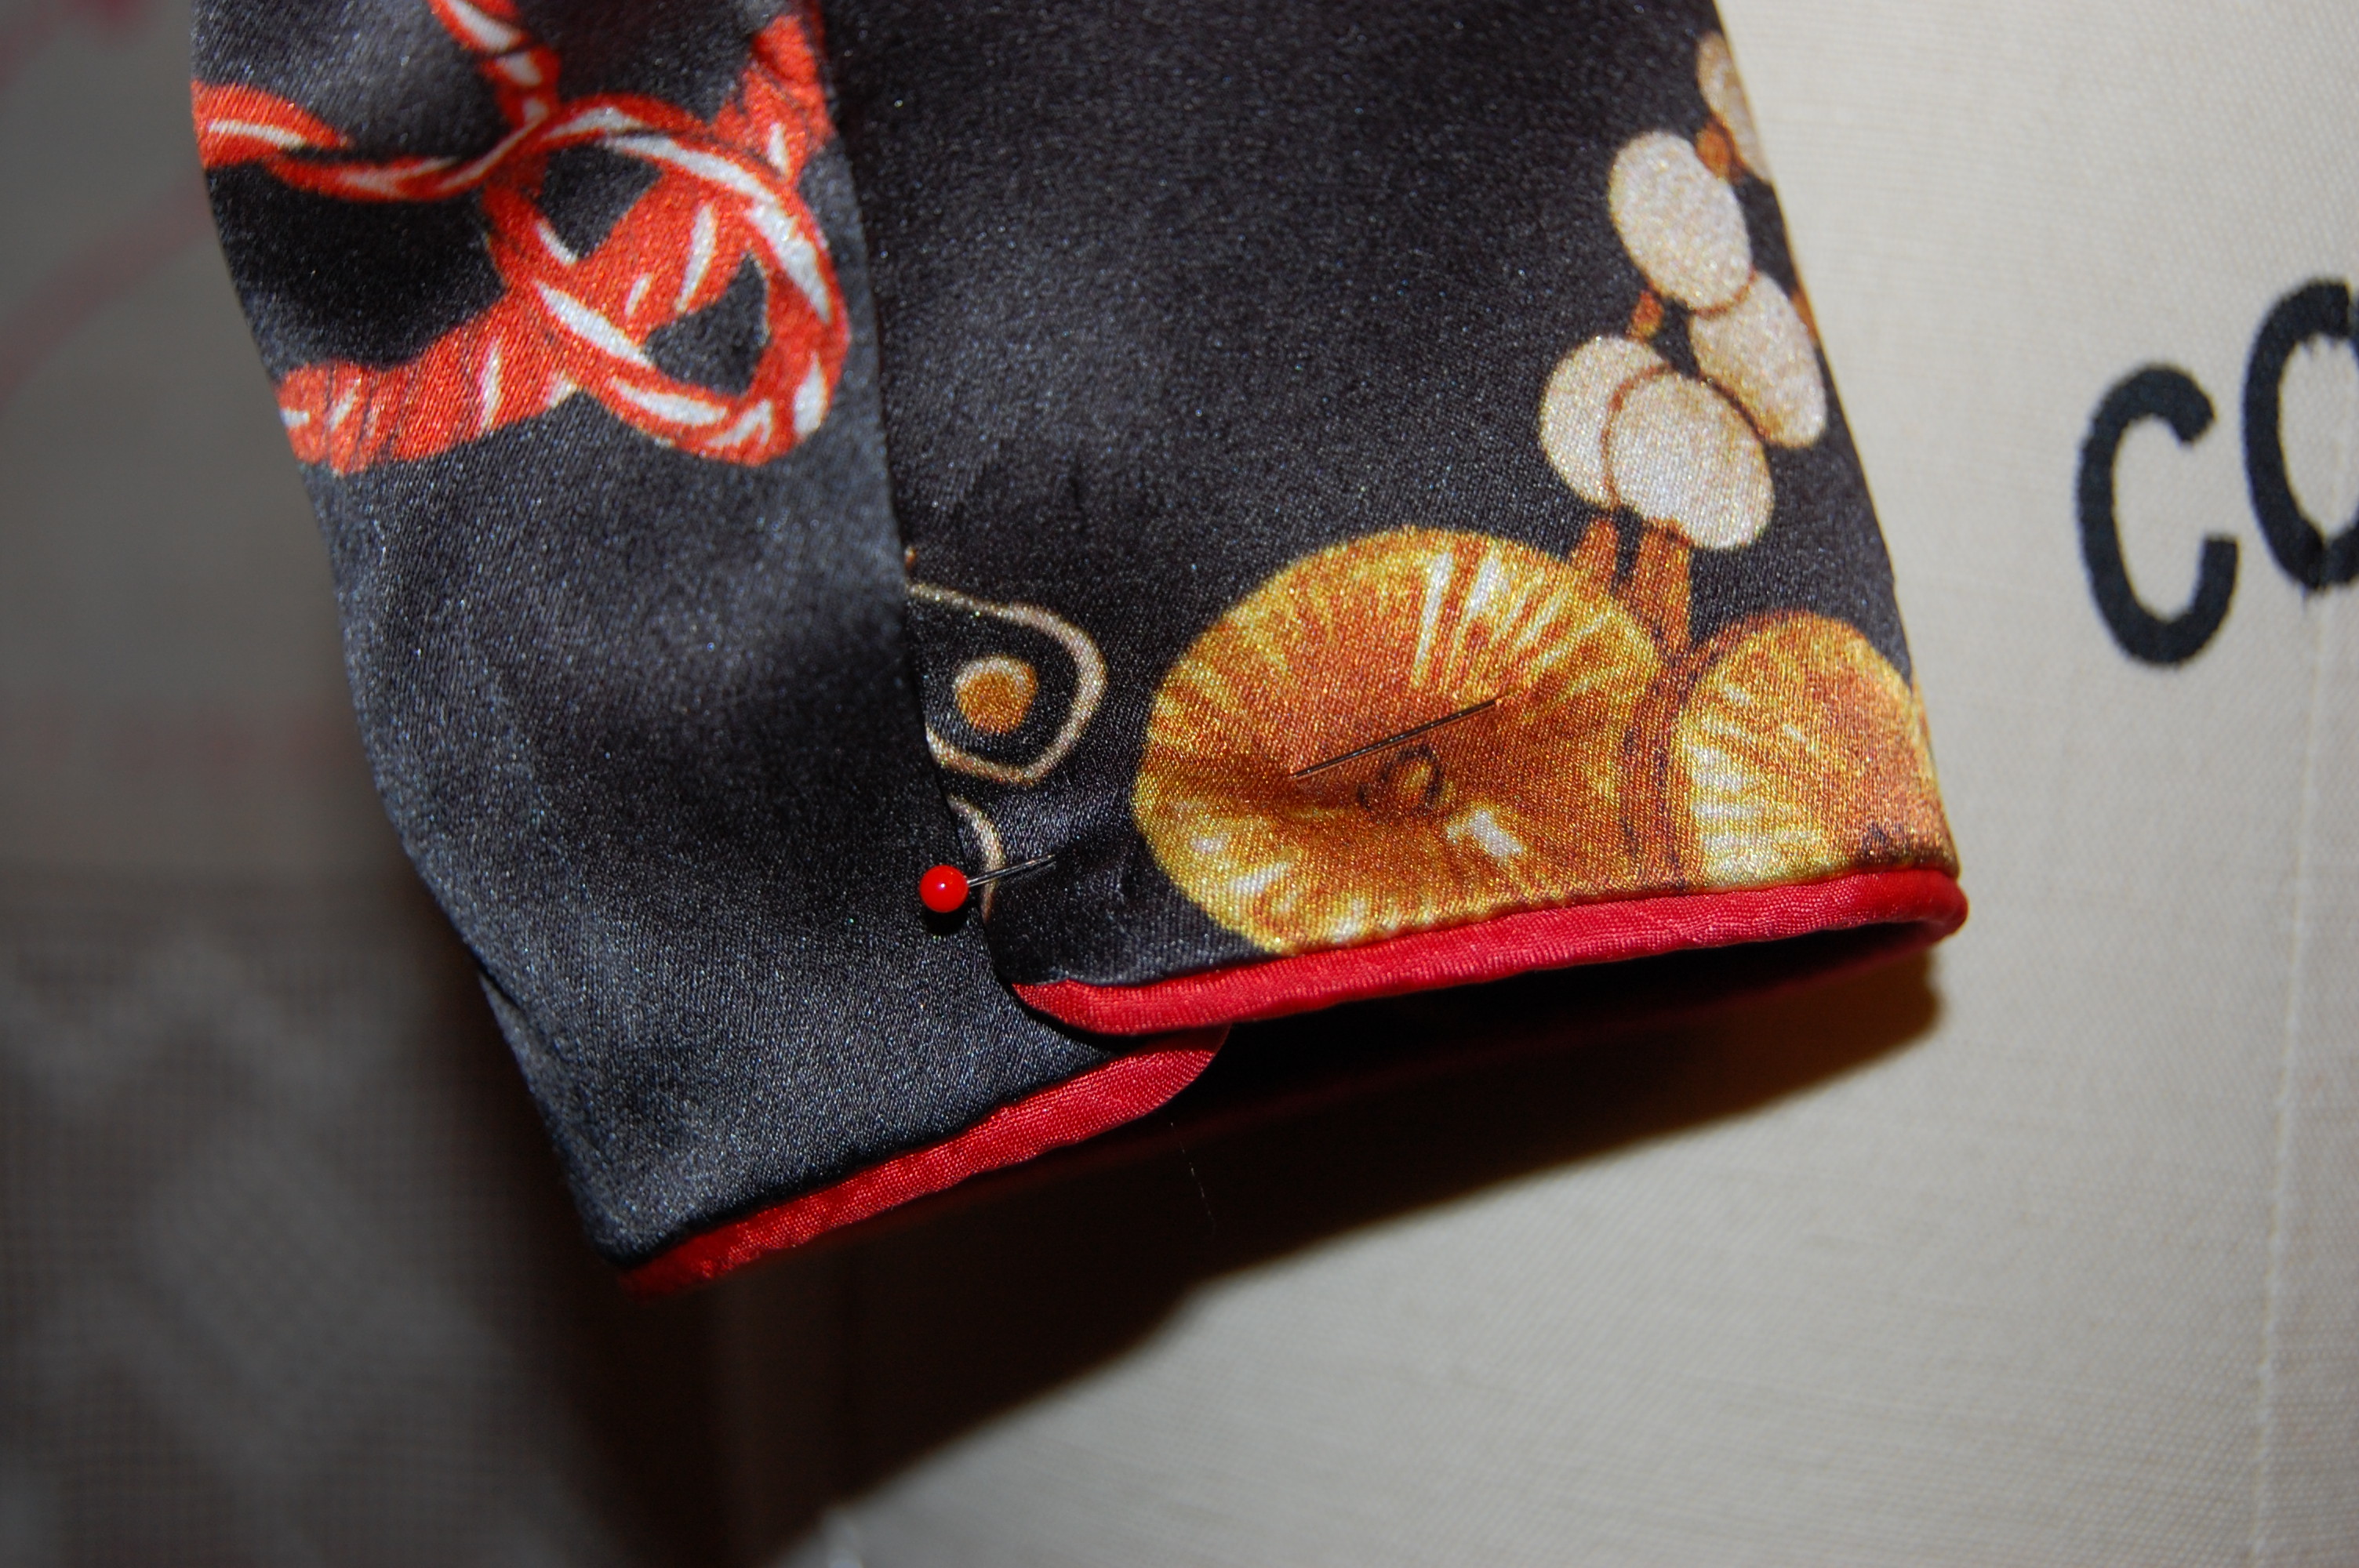
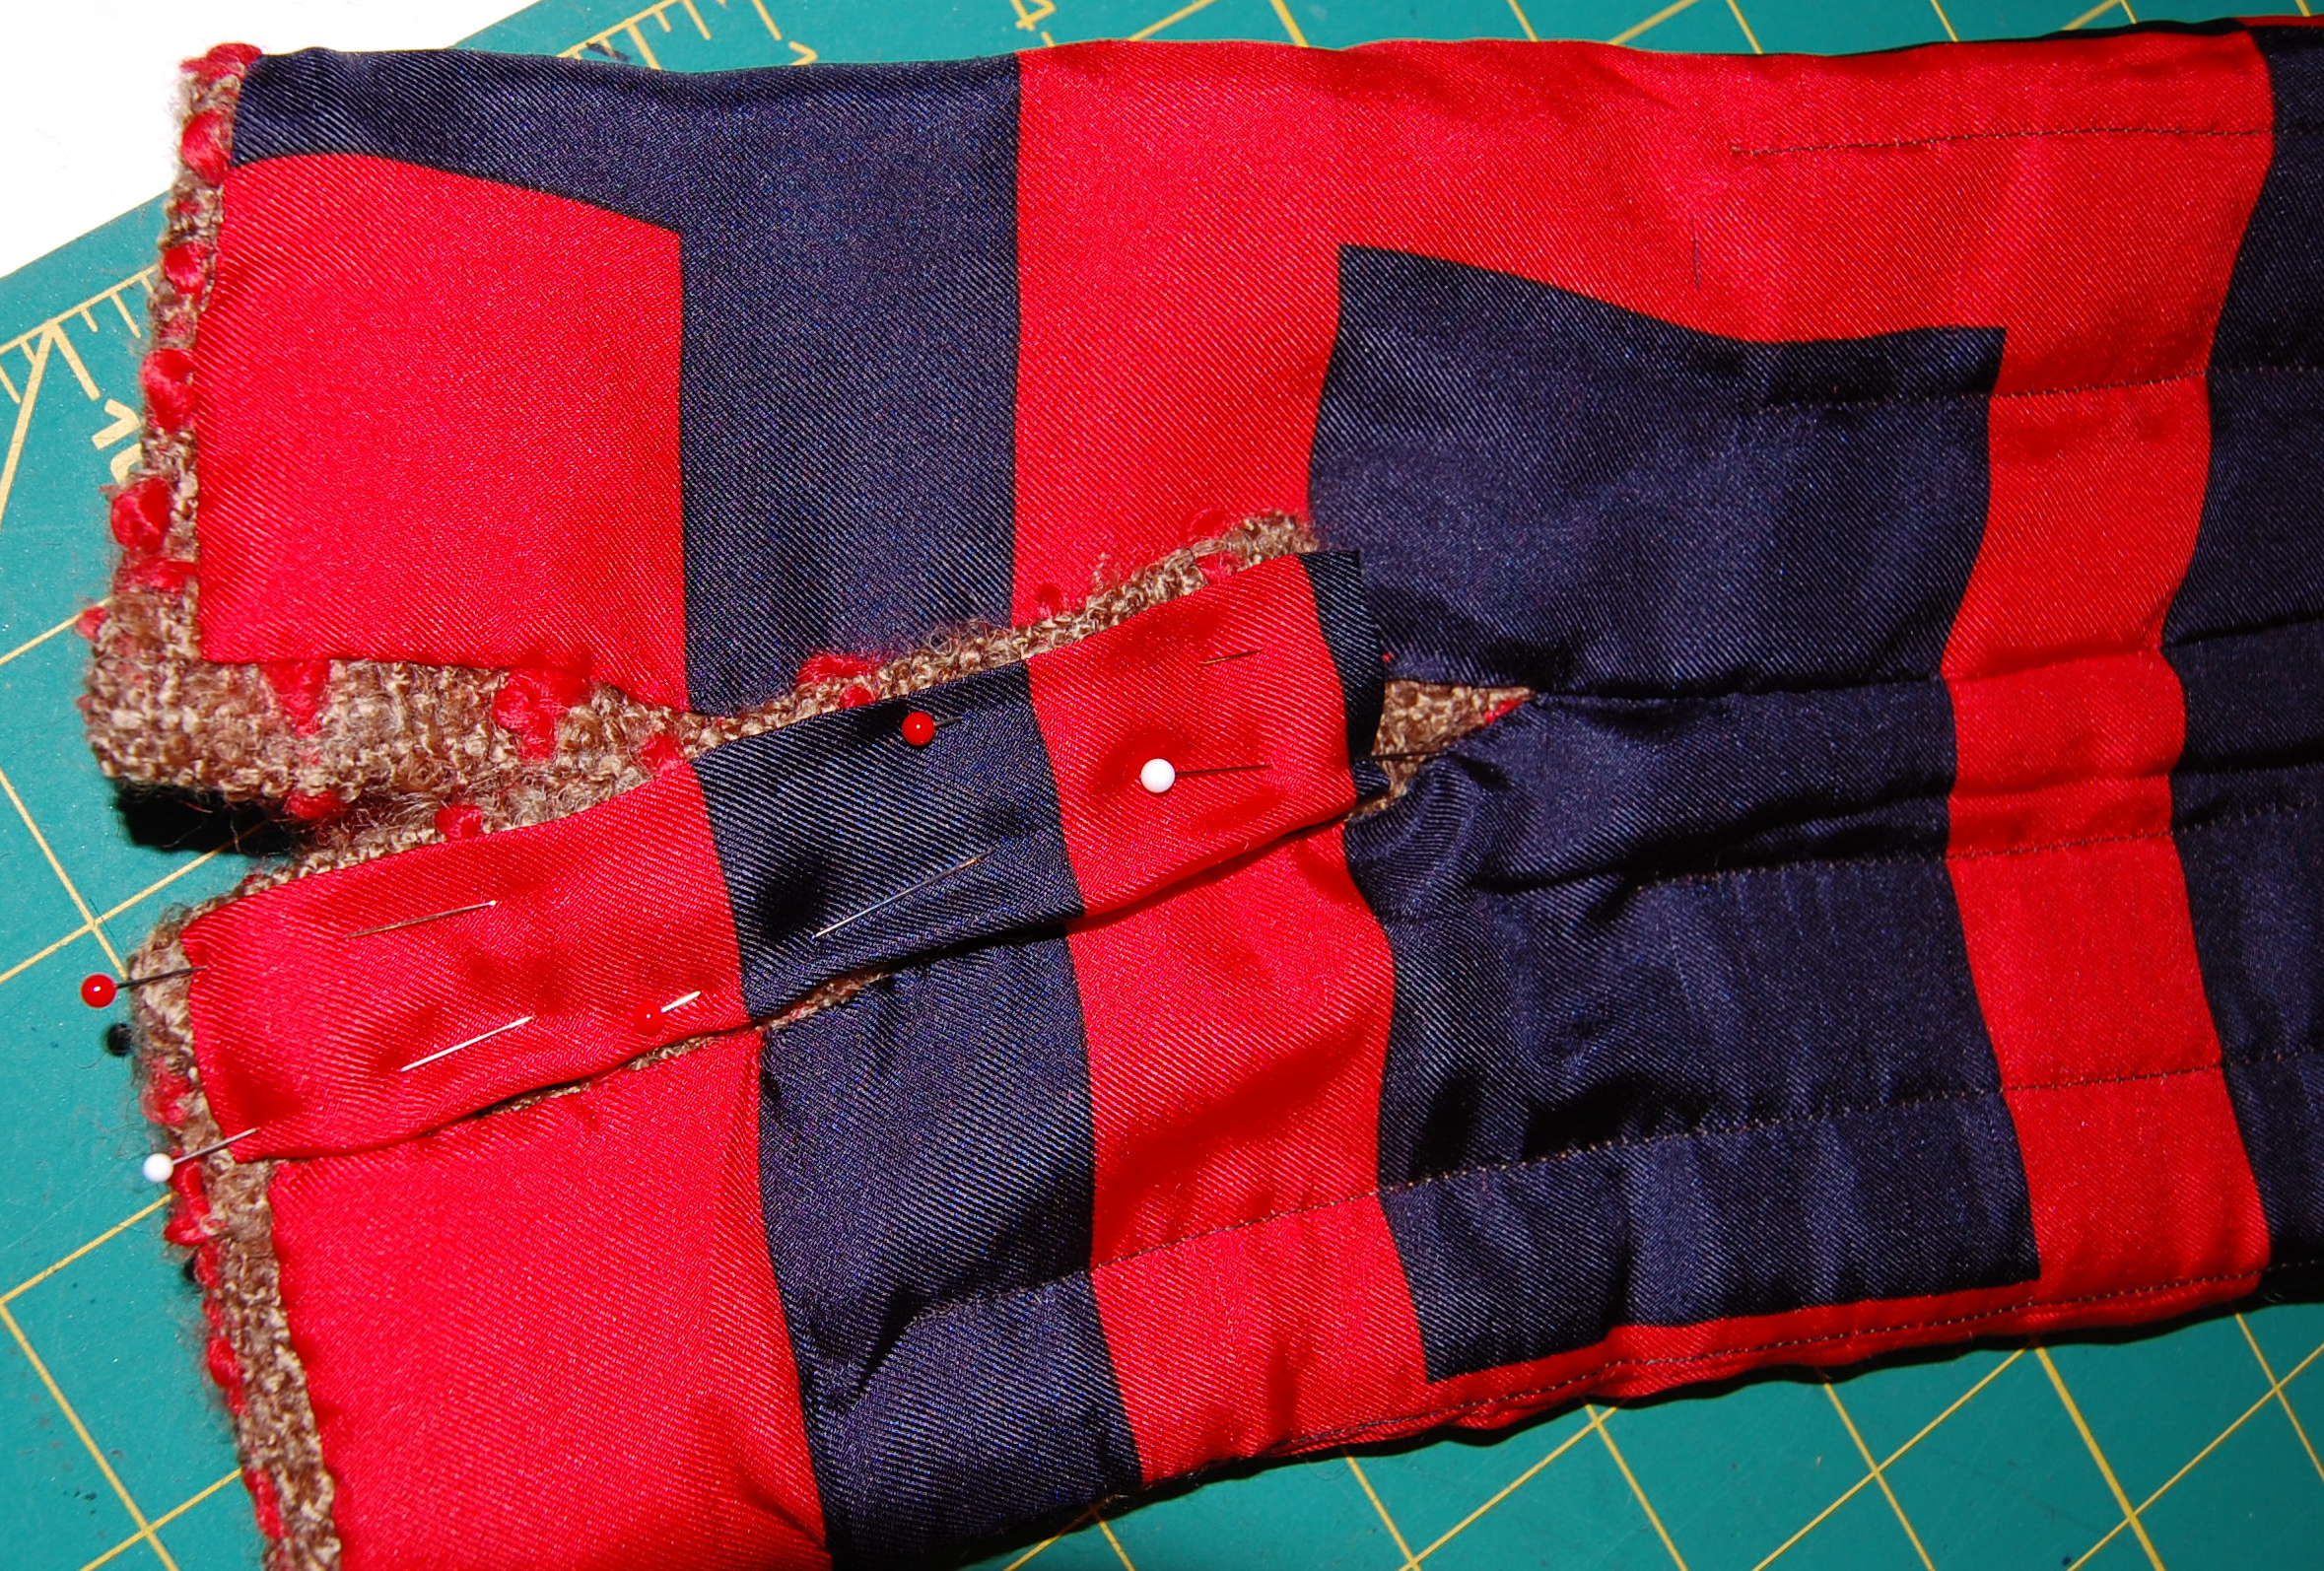
Ready for inserting the zipper. This is a good example of the flaps of lace which still need to be “tamed.”

What an interesting process this has been so far. Susan has so much sewing wisdom to impart, and she does it in such an engaging way, that it is like having your own personal couture teacher right by your side. If you have ever admired these skirts and thought about making one, you will find this course to be invaluable!  More on my skirt to follow in the next post on Fifty Dresses.

These opinions are my own. I purchased my subscription to the course on Craftsy and have no affiliation with the company.  


14 Comments

Filed under couture construction, Lace, sewing classes, silk, Uncategorized, underlinings

A Three-Piece Outfit for the Holidays: Part One, The Blouse

“Today blouses are not worn quite as much as they used to be and I think it is a pity.” So said Christian Dior in 1954. With that in mind, hopefully he would have approved of this Vogue blouse pattern from 1958:

You have already seen my toile of this blouse, where I worked out all the “kinks.” I liked it made up in muslin and now I am quite thrilled with it made up in silk dupioni, purchased from Britex Fabrics.

The iridescent quality of silk dupioni woven with two contrasting colors, such as this one, makes it an excellent fabric to use for “fancy” attire. The only reservation I had was whether it would be too stiff for use in a blouse. It is by nature rather “papery” in composition. I was a little concerned it might not have enough drapeability for this blouse, where a major focus is on the softly pleated sleeves. I did a little research, and of course, the first guideline I found was an admonishment not to wash dupioni! Doing so would diminish that papery nature. Well, that was exactly what I wanted to do – soften it a bit. Further research led me to an article in Threads Magazine from a few years back, where, indeed, a reader had successfully washed dupioni in her quest to make it suppler. Off to my washing machine I went with a large swatch for a (successful) trial run. Soon the entire two yards were gently swashing around in cold water on the delicate cycle. It took quite a bit of heavy steam to wrestle out the wrinkles, but I was left with a soft, drapeable fabric for my blouse.

Quite apparent in this image are the two contrasting threads, one fuchsia and the other bright yellow, which, woven together made a shimmery apricot color.

Buttons for a blouse such as this one are an important element. I knew they needed to be special, and what could be more special than vintage glass buttons from France? I found these listed in an Etsy store (YumYum Objects).

These glass buttons have silver accents, adding just a bit more depth to their appearance.

The listing was for a set of 6, and I needed 8 for this blouse. The French cuffs required two buttons each. These buttons were too perfect to pass up, however, so I decided I could use two buttons of another style for the rear-facing part of the cuff. I found a set of little, clear glass, ball buttons in my button box, which seemed appropriate and a good compromise!

The ball button on the back.

For some reason I always like to make sleeves first, so that is what I did. The French cuffs, by their very nature, of course, call for two buttonholes with two buttons looped together to thread through those openings, one on each side. However, I placed a buttonhole on the front part of the cuff only. I then sewed the two buttons together, back to back through the back part of the cuff, with the fancy button meant to thread through that single buttonhole and the other button to be stationary. I liked the idea that this method would hold the two sides of the cuff more tightly together.

The fancy glass button on the front.

This view shows the three pleats in the sleeve. In addition, there is a small amount of gathering which adds to the blouson effect of the lower sleeve.

Being a pattern from 1958, the instructions called for bound buttonholes, of course. However, due to the nature of the fabric, I decided machine buttonholes would make a nicer finish, so that is what I did (with a little hand-finishing on each one…)

The rest of the blouse was quite straightforward.

I took this picture with the sun streaming in one of my sewing room windows. It really shows the luminosity of the fabric.

I am so happy I decided to keep the released darts at the waistline. I think they will work beautifully with the skirt I have planned.

I gave my usual attention to hand-finishing the hem and facings (it just looks nicer!) and marveled again at the finesse added to this notched shawl collar by that small dart in the collar crease. Hopefully you can see this detail here:

That dart makes the collar turn beautifully.

Next up is a guipure lace skirt! I wonder what Christian Dior would have to say about that?

11 Comments

Filed under Blouse patterns from the 1950's, Blouses, Buttons - choosing the right ones, sewing in silk, silk, Uncategorized, vintage buttons, vintage Vogue patterns from the 1950s

More on Making a Classic French Jacket

What more can be said about the process of making a classic French jacket? Well, actually, quite a lot! These jackets look deceptively simple (and elegant) when finished, but their looks belie the hours involved in their construction.

One of their sneaky little secrets is the sewing of the sleeves onto the body of the jacket. The shoulder seam is one of the few areas of the jacket which requires interior reinforcement. The selvedge edge of the lining fabric can be used for this, but I prefer to use a selvedge edge of silk organza.

The strip of organza is sewn on the seam line by hand.

Once that is in place, the sleeve is ready to be inserted – all by hand! Pinning the sleeve in place accurately is so important, as the grainline of the boucle needs to hang perfectly both vertically and horizontally (and match, too, of course.) The top half of the sleeve is sewn from the outside with small, tight fell stitches. Then the lower half of the sleeve is sewn on the inside with small backstitches, both segments using waxed, double thread. If done correctly, the cap of the sleeve will curve nicely.

Looking at the sleeve head from the back of the jacket

And from the front.

Finishing the sleeve insertion is, for me, the last big hurdle to get over before the really fun part starts. That, of course, is the trim. I deliberated quite a bit over the trim for this jacket. I originally thought I would emphasize the blue in the boucle, using pink as a small accent. When I could not find a “demonstrative, stand-alone” trim I liked, I determined to use an underlay of Petersham ribbon, with a coordinating, narrower trim on top.

For those of you who are not familiar with Petersham ribbon, take a look at this cover from Threads Magazine, May 2016.

In the accompanying article by Susan Khalje, one of her suggestions is to use Petersham ribbon to frame a trim.

I used Petersham ribbon on my last French Jacket, and was really delighted with the effect.

Red Petersham ribbon under the frilly trim gives it more dimension.

The more I looked at the blue, the more I thought it did not give the effect I wanted. I then decided to try Petersham ribbon in a pink hue.

There are actually two pinks in the weave of the boucle, one peachy and one clear pink. Doing the trim this way brings out both hues, which I really like.

The Petersham ribbon is peachy, while the soutache trim has a clear pink intertwined with white and navy blue. The buttons take either hue!

Of course, this application of trims means four times around the perimeter of the jacket by hand to apply first the Petersham and then the double row of soutache trim. I never make things easy. Is it any wonder this jacket isn’t finished yet?

19 Comments

Filed under Boucle for French style jackets, Chanel-type jackets, couture construction, Uncategorized

Timeless: The Classic French Jacket

So much has been written and illustrated about Coco Chanel’s classic cardigan jacket, it is difficult to imagine more can be said, but that won’t keep me from trying. Of course, only Chanel is Chanel, and that fashion house rightly owns the claim to the mystique and allure of its trademark design. However, interpretations of that classic French jacket – and those who are making them – have added to the jacket’s lexicon over the years. In many ways, I think the advanced (in skill level, not age) sewing community has been instrumental in adding a whole new dimension to the way we look at the jacket and then personalize it.

Interest by home dressmakers in the classic Chanel jacket has been evident for decades. This Vogue Pattern Book Magazine from October/November 1962 is a prime example. To quote precisely, the caption for the cover says: “the new after-dark dazzle involves a certain amount of alchemy. Take a clean-lined suit design (shades of Chanel) and make it shimmer: a springy white suit wool scored with gold metallic and red braid…”

The June/July 1989 issue of Threads Magazine has one of the most iconic covers ever, described above the masthead as “Inside a Chanel jacket.” The extensive article by Claire Shaeffer covers the history of the jacket, idiosyncrasies of its construction and tips for the home dressmaker wishing to make her own Chanel-inspired jacket.

In more recent years, books and instructions for making the classic French jacket have been joined by classes, most notably on Craftsy and by couture teachers such as Susan Khalje, who, in my opinion, teaches the purest jacket construction interpretation available to the sewing community. If you are unable to attend one of her Classic French Jacket classes, then by all means, subscribe to her video for the next best thing.

There are several reasons, I believe, why the classic French jacket appeals to home dressmakers, particularly to those of us who delight in couture procedures, hand work, and artistic license. It is we who have the ability to chose from such a broad array of beautiful boucles and silk charmeuses, both at select fabric shops and online. Therefore, we are not limited to the fabric selections of a particular fashion house. Furthermore, we can adapt the jacket to our own individual preferences, for example, fitted or boxy, longer or shorter, collarless or not, to mention just a few potential changes. Finally, the finishing components of trim and buttons make it unique and uniquely our own.

This quote from Oscar Wilde is an appropriate summation of how home dressmakers, privileged as we are to know the “recipe” of jacket construction, approach the making of our classic French jackets: “To look at a thing is very different from seeing a thing.” We dressmakers see the jacket from various viewpoints:

1) construction techniques; including, but not limited to, the unique method of marking seamlines, quilting the layers of boucle and lining silk together, and hand-finishing the raw interior seams.

2) as already stated, the privilege of selecting our own fabrics, trims and buttons.

3) stylistic details which enhance the ability of the jacket to flatter ones particular form, such as altering the length of the sleeves, pocket details, front neckline variations, adding bust darts in certain situations, etc.

4) an appreciation for – and knowledge of – the engineering magic of invisibly quilting two fabrics together to produce an entirely new medium.

In my opinion, it is this ability to see – and appreciate firsthand- the complexities of the jacket which makes it such a worthy undertaking.

You may ask at this point why I am thinking so much about classic French jackets. Could there be any other reason than the fact that I have started work on my third, but far from final, one? Using boucle gifted to me by my grown children a little over a year ago, I am intently working through the “process.” Because I am fortunate enough to have a fitted pattern muslin template from my class with Susan Khalje 3½ years ago, my initial progress has been speedier than normal.

Here are my muslin pattern pieces freshly ironed and ready to start.

My muslin pattern arranged on the boucle, ready to double-check and cut out.

Allowing for wide seam allowances…

Pieces cut and thread-traced.  Next step:  the lining fabric.

Stay tuned as I make further posts about my time-consuming progress on this timeless style.

23 Comments

Filed under Chanel-type jackets, Coco Chanel, couture construction, Mid-Century style, Uncategorized

What Color is Your Lining?

Linings seem to be coming out of the (fabric) closet and finally getting the recognition they deserve! I have been thinking a lot about linings lately, as I have been working on a coat, the lining for which was its inspiration.

I made a cocktail dress out of the blue fabric and purchased enough to use as the lining for a coordinating coat.

I made a cocktail dress out of the blue fabric and purchased enough extra yardage to use for the lining of a coordinating coat.

As luck would have it, the current issue of Threads Magazine has an article on techniques to achieving “A Smoother Jacket Lining,” which states “the secret is installing it by hand.” I always appreciate an illustrated step-by-step approach to techniques such as this, and this article by Daryl Lancaster does not disappoint. While I am well versed in sewing in linings by hand, it is always good to read a refresher article such as this. (Obviously, the alternative to sewing in a lining by hand is to bag the lining, effectively sewing the lining in by machine.) I also always seem to gather one helpful tip, such as “Easy access to the armhole seam: Reach through the openings at the front hem to support the sleeve lining while you’re hand-sewing the armhole seams.” But what I really liked about this article was the section on “Fabric Guidelines.” In a nutshell, the author lists them as: “a low-friction surface; a supple hand; opacity; durability; and design compatibility.”

Design compatibility! This means, according to the author: “The lining should complement the garment. It can match or contrast. Lining offers the opportunity to subtly show the wearer’s creativity.” EXACTLY!

Many of us, I think, grew up or learned to sew with the idea that linings should match the color of the outer garment as closely as possible. And while that is still appropriate in many instances, there is also a case to be made for linings of contrasting or coordinating colors, and/or figured designs. In fact, I believe a lining has the potential to turn your garment from ho-hum into tres chic.

One of the best examples of the power of a lining is the classic little French jacket.   Pictured here are the two I have made for myself (with two more planned.) Imagine the one on the left being lined in a plain black or red charmeuse, and the one on the right lined in a solid light brown. Neither would be nearly as attractive even though the lining does not show when the jacket is being worn. As it turned out, I made a sheath dress, which matches the lining of the red jacket, and a blouse to match the lining of the jacket on the right. This makes the lining an integral part of the all-over design of the ensemble.

What color is your lining?

Likewise, this Pucci silk sat in my fabric collection for a few years until I found the right pattern for it. Then I became obsessed with somehow working out a way to line the jacket and make the dress out of the scant existing yardage I had.

Defying the passage of years

An inside look at the jacket with its matching lining.

An inside look at the jacket with its matching lining.

The nice thing about this jacket is that it does not have to be paired with the dress, looking equally as nice with a plain pink skirt. Which leads me into the next thought: sometimes it is more appropriate for your lining to be subtle in order to make your garment more versatile. When I made a linen coat last year, I would have loved to use a deep pink lining silk to match the linen dress I knew I would be wearing with it. I chose, instead, to match the lavender of the coat, making it easier to wear with other dresses or pants, which might not have any pink in them. To make it a little extra special, however, I added flat silk piping to the front edges of the lining. Because coats come off and on, and sometimes find themselves flung over chair arms, this little detail is often seen by more than just the wearer.

Fitting finish

Then there are the linings which truly are only seen by the person wearing the garment – you or I. Is it worth the time and/or expense to create a special lining in something like this? Every situation should be evaluated on its own merits, but I believe this is where the privilege of being your own dressmaker is in full flower. Why not add a little detail or use a beautiful, contrasting color to coordinate with your fashion fabric?

I used a gray Bemberg lining for this dress, but accented the neck edge with green piping. Obviously, no one sees this but me!

I used a gray Bemberg lining for this dress, but accented the neck edge with green piping. Obviously, no one sees this but me!

Here is the dress with its hidden lining detail.

Here is the dress with its hidden lining detail.

Who would guess that under this dress is . . .

And who would guess that under this dress is . . .

. . . this lining?

. . . this lining?

In sewing (as in life) it is often the hidden treasures or small gestures which add depth and enjoyment to the process and product. May your hidden or not-so-hidden linings be beautiful every time!

12 Comments

Filed under Dressmaker details, Linings, piping, Uncategorized

Wishful, Giftful Sewing

If you were putting together a holiday basket of gifts for a fashion-sewing friend (a very good friend, that is), what would you include? The tried and true? Something practical or something whimsical? Or maybe a few things to cover all those attributes?   I always think some of the best gifts are those you didn’t know you needed, but now wonder how you lived without them! Some of the following meet that criteria – and some are just plain lovely to live with.

First up is this handy little needle threader.

My needle threader is brown, but now they are available in an assortment of nicer colors.

My needle threader is brown, but now they are available in an assortment of nicer colors.

It certainly is a funny looking contraption, but oh does it work well! Thread your needles, big or small, with nary a squint of the eye. From Clover, who creates so many wonderful gadgets for those of us who sew.

If you use couture techniques in your sewing, then you, like me, do a lot of basting. Make that job go faster with these long and lovely basting needles.

Wishful sewing

Hug Snug rayon seam tape is one of the loveliest sewing products around. I always have to order this product online – and selecting  the correct color is an imprecise science.  A Hug Snug Seam Binding Color Card  would make identifying the perfect match so much easier!

So many colors from which to choose. This tape also is perfect for wrapping gifts.

So many colors from which to choose. This tape also is perfect for wrapping gifts.

Books always make wonderful gifts and these are two I would want my sewing friend to have:

the fashions in this book are a bit dated (1980s-ish), but the techniques and tips are timeless.

The fashions in this book are a bit dated (1980s-ish), but the techniques and tips are timeless.

Why, do you ask, is this such a good gift for a sewing friend? Because it is filled with so much information that makes you more informed about your sewing, fashion, and fashion history in general. I love that pronunciations are given for some of those words about which you always wondered.

Why, do you ask, is this such a good gift for a sewing friend? Because it is filled with so much information that makes you more informed about your sewing, fashion, and fashion history in general. I love that pronunciations are given for some of those words about which you always wondered.

Along those same lines, a subscription to Threads Magazine is a must for anyone doing serious sewing.

Wishful sewing - threads cover

I have two favorite sources on Etsy for beautiful padded hangers – indispensable for taking care of all those couture dresses and outfits we make for ourselves. These also make lovely gifts for any good friend or relative – they are luxurious, useful and so pretty!

The hanger on the top is from Out of the Closet Hangers; the one on the bottom is from GrandmasChalkboard.

The hanger on the top is from Out of the Closet Hangers; the hangers from this company tend to be elegant and sophisticated.  The hanger on the bottom is from GrandmasChalkboard; these hangers tend to be casual and whimsical.  Both are beautiful products.

Another beautiful product that comes in handy for couture sewing are these lovely Hanah hand-dyed silk ribbons, available from Britex Fabrics. They are cut on the bias, making them perfect for adding a piped edge detail to coat, jacket and dress linings.

Wishful sewing

Available in various widths, they are lightweight, but sturdy.

I would definitely tuck this note card into the basket:

"Balenciaga Coat 1960"

“Balenciaga Coat 1960” – Illustration by Tod Draz; card produced by the Dean Rhys Morgan Company.

The only problem with a note card like this is the hesitation to actually use it. (Maybe two would be best – one to keep and one to use!)

Another nod to vintage would be a Tammis Keefe handkerchief , similar to this one:

Wishful sewing

A close-up of the designer's famous signature.

A close-up of the designer’s famous signature.

Various ones are available on eBay and in Etsy stores – and their charm is legendary. Any lover of fine design and textiles, vintage or otherwise, would appreciate one of these!

Finally I would top off the basket with a Little Black Dress cookie cutter:

LBD cookie cutter

The tags which come with the cuttetters themselves! (All images copyright by Ann Clark Ltd.)

Image copyright by Ann Clark Ltd

Now – what have I forgotten?


15 Comments

Filed under Uncategorized

Light Load


String is a wonderful thing. I am particularly fond of kitchen string. Usually twisted cotton or a twisted cotton blend, it is useful for many things (such as tying together the newspapers for recycling, playing with the cats, securing open bags of flour and sugar, etc., etc.) It also occasionally makes its way upstairs to my sewing room.
Light Load DSC_1380

“Light load” kitchen string happens to be the perfect weight and diameter for making piping to be used in apparel. And – my current project for Fall features piping as one of the main design details.

The piping is more clearly visible on the green view of this dress.

The piping is more clearly visible on the green view of this dress.

As luck would have it, I had purchased some hand-dyed silk bias ribbon from Britex Fabrics a couple of years ago. One of the colors I had ordered turned out to be a perfect complement to this silk from Mendel Goldberg, which is slowly making its transformation into a dress.

Light Load

After hours and hours of working on the muslin (toile), cutting out the underlining (on the bias to accommodate the stretch of the silk fabric), checking and re-checking (multiple times) to make sure my pattern pieces were laid out properly, and then meticulously basting the gossamer silk gauze underlining and the slippery fashion fabric together, I was ready to do something fun. “What could be easier?” I thought. “The ribbon is already cut on the bias so I’ll just sew up three yards of piping and I’ll be in business.” Except that I kept getting ridges and lumps in my piping as I encased that kitchen string in the silk ribbon. I thought maybe if I stretched it a bit, it might look better, but it really didn’t. I must admit I was discouraged – actually very discouraged. I could not figure out what I was doing wrong, but I knew I needed to take a break from this mess and come back the next day.

Before I left my sewing room, I went to my stack of Threads Magazines to look for a particular issue recently recommended to me for another reason, and in my search found, by chance, the December 1994/January 1995 issue. There on the cover “Techniques for Perfect Piping” was a featured article.

I have many odd issues of Threads Magazine, but earlier in the year I bought the Threads Magazine Archive 1985-2013, available on their website. I can't recommend it highly enough - decades of sewing advice and expertise is readily available at the click of your computer mouse!

I have many odd issues of Threads Magazine, but earlier in the year I bought the Threads Magazine Archive 1985-2013, available for purchase on their website. I can’t recommend it highly enough – decades of sewing advice and expertise is readily available at the click of your computer mouse!

Needless to say, that became my evening reading. One line in this article by Linda Wakefield led me to the solution to my problem: “I also recommend reducing presser foot pressure, if possible, so that the fabric doesn’t twist or ripple as you stitch.” Even though I am unable to change the presser foot tension on my machine, that advice made me think that I needed to stabilize and reinforce the silk bias ribbon somehow to make it feed more evenly through the needle. The next day, back in my sewing room, I got some tissue paper – the kind one uses for wrapping presents – and cut it into strips. I placed a single layer of tissue under the silk ribbon as I stitched – and voila! Perfect piping emerged from my machine.

The tissue is brown (which is just some I happened to have with my gift wrapping supplies.)

The tissue is brown (which is just some I happened to have with my gift wrapping supplies.)


 The tissue paper tears off easily and cleanly from the silk piping.


The tissue paper tears off easily and cleanly from the silk piping.

Further advice in the article gave tips on applying the piping. I decided to try my hand with this added guidance, choosing to start with the sleeves. The pattern calls for piping around the lower edge – a nice short distance and easy to fix if I wasn’t happy with the finished look. What do you think?

Light Load

The sleeve has a side opening - to be secured by snaps.  Here it is just pinned.

The sleeve has a side opening – to be secured by snaps. Here it is just pinned.

There will still, I am sure, be some tedious moments as I continue work on this dress, but my load was definitely made lighter by something as simple as —- tissue paper!

26 Comments

Filed under 1980's dress patterns, piping, sewing in silk, vintage Vogue Designer patterns

The Second Time Around

Coco Chanel reopened her House of Chanel in 1954, and by the early ‘60s, her suit with its narrow skirt and boxy cardigan jacket, famously made from beautiful boucles, was a dominant fashion look.  I could not help but think of another product of the early ‘60s as I was working on my Chanel-inspired Jacket No. 2:  the song, written by Sammy Cahn and set to music by Jimmy Van Heusen, entitled “The Second Time Around”.  I wondered if making my No. 2 would be “lovelier the second time around”?  And you know what?  It was!  I give so much credit to Susan Khalje, from whom I took the Classic French Jacket Class, whose tips and teachings gave me much confidence as I tackled No. 2 on my own.

There were a couple of additions and subtractions I decided to try with my second jacket.  The easy one was deciding to have just two pockets rather than four.  The more involved one was deciding to add buttonholes to the front edge, the sleeve plackets, and the pockets.  However, I remembered Susan’s statements about making buttonholes in one of these jackets – and the reason she advocates in her class the use of “hook and eye” fasteners at the abutted front edges.  It is very difficult to make acceptable hand-done buttonholes in this loosely woven fabric, unless one is extremely skilled in this procedure.  Since the only hand-done buttonholes I am used to doing are bound buttonholes – not acceptable in this application, due to the type of fabric – I knew I had to figure out another way to get buttonholes in my No. 2.

Fortunately, I have an issue of Threads Magazine from June/July 1989 in which Chanel jackets are featured.  This picture gave me the idea for seam-slot buttonholes.

You can tell the buttonholes in this jacket are vertical, nestled between two trims.

You can tell the buttonholes in this jacket are vertical, nestled between two trims.  Pictured in Threads Magazine, June/July 1989, page 28.

I would just have to add on a separate piece for the right front, make each pocket in two pieces, and make the plackets on the sleeves separate pieces, sewn on with openings in the seams to make the buttonholes.  Here is an example of what I did.

The extension is sewn on separately, leaving three openings, evenly spaced for buttonholes in the seam.

The extension is sewn on separately, leaving three openings, evenly spaced for buttonholes in the seam.

Of course doing these extra pieces meant I had to apply separate linings to each extension.

Here is the separate lining piece being applied to the placket.

Here is the separate lining piece being applied to the placket.

The entire time I was quilting the jacket, working on the seams, and figuring out these buttonholes, I was pondering the trim.  Some of you may recall (if you read my blog regularly) that I could not decide between two different trims.

Here are the two trims I had chosen.

Here are the two trims I had chosen.  I really liked the fact that the spacing on the multi-color trim matched exactly the spacing of the red rows on my fabric.

Because of the lining fabric I had chosen (and from which I am making a blouse), I was leaning towards the red, white and blue trim, but I thought it looked a little “weak”.  What to do?  I started looking at as many pictures of Chanel jackets as I could find, but the one that made the light bulb go off was one from that same issue of Threads Magazine:

The Second Time Around - grosgrain ex

Click on the picture to see the underlying grosgrain ribbon.

If I could find a Petersham grosgrain ribbon in the right color, I thought it would be the perfect backing for either trim.  Once again, Britex Fabrics  (from which I had already purchased the boucle, the lining fabric, the buttons, and the two trims) came to the rescue:  I ordered 5/8 inch Tomato Red ribbon – and then paired it with each trim.

I thought the grosgrain ribbon made both trims look better, but especially the multi-color one.

The grosgrain ribbon made both trims look better, but especially the multi-color one.  Click on the photo for a close-up view.

I thought it added just the right amount of depth to the multi-color trim, and my decision was confidently made.

I sewed the Petersham ribbon on before I did the finish work on the inside lining seams.  Then the ribbon provided a wonderful surface on which to attach the trim.

The Petersham ribbon attached.  If you look closely, you can see the sea-slot buttonholes.

The Petersham ribbon attached. If you look closely, you can see the seam-slot buttonholes.

 I took this picture to show the contrast between the trims.  I think the multi-color trim adds more interest to the jacket.

I took this picture to show the contrast between an all red  trim and the multi-color one. I think the multi-color trim adds more interest to the jacket.

So – here’s the jacket (shown on my dress form for now.  Once I get the matching blouse finished, I’ll “model” it for you.)

No 2

Back view, obviously!

Back view, obviously!

No 2

Details, details!

Details, details!  Can you tell that I added a little length to the back of the jacket?  It makes for a more graceful appearance when worn.

Here is the bottom buttonhole on the front of the jacket - and notice the chain!

Here is the bottom buttonhole on the front of the jacket – and notice the chain!

There is no way to make this jacket quickly.  The extra steps I added (buttonholes and 2 layers of trim) added to the length of the process as well.  But – it was incredibly satisfying to see it turn out as well as it did.  I am grateful that I made this No. 2 shortly (well, within 6 months) after my first jacket, as it reinforced my knowledge of the process.  For my next one I’d like to add a “mandarin” type collar, as shown in these examples:

The Second Time Around - mandarin collar ex 1

This example is from Threads Magazine June/July 1989, page 28

I love this suit in houndstooth wool.  This is pictured in Threads Magazine, January 2014, page 44.

I love this suit in houndstooth wool. This is pictured in Threads Magazine, January 2014, page 44.

So when will No. 3 commence?  I don’t see it on the horizon yet, but perhaps when it does, the third time around will be … “the charm”.

23 Comments

Filed under Boucle for French style jackets, Chanel-type jackets, Coco Chanel, couture construction, Uncategorized, woolens

A Timely Arrival

Last week, as I was putting in some final hours on a suit I have been sewing, I was  thinking about some of the “creative” solutions I had to come up with to make the jacket turn out successfully.  I had, unbeknownst to me, made a “bad” decision about the fabric. Even though I (still) love the color and design of the black and pink hounds-tooth wool blend, it turned out to be a very heavy, bulky fabric to sew.  Well, my newest Threads magazine arrived in the mail last Friday – and right there on page 56 is an article entitled “Better Sewing Habits”.  Number 4, by Claire Shaeffer, is:  Choose fabrics appropriate to the garment design.  Printed in bold is this line:  “Select a fabric that is recommended for the pattern”. 

This issue of Threads is packed with all kinds of great advice and ideas!

Sure enough, when I went back to the pattern envelope, there in plain English for the recommended fabrics is:  “Lightweight wool.”  I really felt that sinking feeling, but I tried to console myself by reminding myself that I had made some changes to the pattern and to the construction to accommodate the heavy fabric.  I was trying to feel grateful that I actually have some skills which allow me to make changes and try different approaches to solve sewing problems.  And, actually, now that the jacket is finished, I am happy with it.

This is the pattern I used – from Vogue’s Designer series, Jo Mattli, circa early 1970s.

The completed outfit – wool blend jacket and silk skirt.

Here is what went well:

1) I was able to match the design quite well across seam lines, shoulders, and sleeves.

2) I think I nailed the fit!  Of course, I made a muslin first, so it’s not like that just happened.

3) I reduced the spread of the collar, which actually turned out to be a good decision, when I realized how difficult double layers of the fabric were to work with.

Here is what either did not go well or needed to be “creatively” approached:

1) I really wanted to make bound buttonholes, but the loosely woven, heavy fabric gave me pause.  So I decided to make them out of the silk skirt fabric.  I backed the buttonhole strips with silk organza by fusing them together.  This made the silk stiff enough to stand up to that heavy wool.

The strips attached for the bound buttonholes.

I made the topmost  buttonhole a “blind” one as I determined that I would not be buttoning that top button anyway.  I knew I could never finish the back of the two remaining buttonholes by the normal method, so I “patched” behind them on the interfacing with a lightweight black wool.

Here is a close-up of the bound buttonholes – and the happily matched front!  Click on the photo for a closer-up view.

Before I sewed the front facing, I attached these “patches” to back up to the buttonholes. Then I cut away the heavy fabric underneath, so that I could finish the underneath of the buttonholes somewhat successfully. Click on the photo to see this up close.

2) The neck facing was going to be too heavy using the pink/black wool.  So I used that same lightweight black wool for it instead.

Using a lightweight black wool for the facing made the neckline much more manageable.

3) The back vents were not going to lay flat if I turned in the raw edges as the pattern instructions indicated.  So I bound them with black bias tape instead.

Instead of turning back the facing edge to finish it, I attached this bias binding.

4) Setting in the sleeves was an exercise in sewing terror!  I was sure they would never look good, but somehow they came out unpuckered and pretty well matched.  I only used a sleeve heading to round out the shoulder, even though the pattern called for shoulder pads.

5) I have steamed and steamed, but still feel like the front edge could use some further attention.  I might take the jacket to the dry cleaners and have it professionally steamed….

I actually really liked the engineering of the pattern: with the correct weight fabric, the jacket would go together quite well and the skirt pattern is a winner, with its shaped waistband.

This view of the back waistband shows how it is shaped.

And, of course, I inserted the zipper by hand.

Another look at the finished suit.

And one more…

Interestingly enough, in the same issue of Threads, the winners of the “Make it with Wool” contest were featured.  I couldn’t believe my eyes when I saw that the Senior Winner of the Mohair Council of America, Marisa Linton, of Mount Olive, North Carolina, had used either the same fabric or one very close to “my” fabric to make the coat for her entry (which is stunning, I might add!).  She had used a very original and successful technique for her buttonholes, which are part of the details which make her outfit so noteworthy.

Do you think this is the same fabric? (Threads, January 2013, page 52)

So – it seems the past 7 days have been a time of many arrivals, including a huge and destructive East Coast storm – and the first day of November.    May the next 7 days bring the final arrival of power and comfort to so many who lost so much in the storm, and make us all grateful for resilience, whether it be in life – or in sewing .

13 Comments

Filed under bound buttonholes, hand-sewn zippers, sewing in silk, Shoulder shapes (shoulder pads), Uncategorized, vintage Vogue Designer patterns, vintage Vogue patterns from the 1970s, woolens

A Stitch in Time

I’ve been doing a lot of hand stitching as I work my way through “The Couture Dress” online class on Craftsy.  It’s mostly been basting (and more basting and even more basting) so far, but I’m now in the “catch-stitch” phase (controlling the raw edges), and that’s always been one of my favorite stitches to do.  All this hand stitching got me thinking about how I learned to do certain stitches – and I think I just taught myself by following directions on pattern instructions and from diagrams in sewing books and magazines.  There were lots of articles on perfecting one’s hand stitches when I was growing up, such as this representative page from Vogue Sewing Book, c1958, The Conde Nast Publications, Inc.:

Sewing in 1958: including tips and new ideas even for the experts!

This is just one page of many detailing stitches and seam finishes.


Five years later, another article in Vogue Sewing Book, c1963, The Butterick Company, Inc., featured the same basic stitches.

The introduction to this page gives this advice: “If it’s the custom-look you’re after, hand-stitch all details including zippers. But keep your stitches fairly loose or you’ll end up with that unhappy, puckered home-made look.”

It seems there can never be too much of a good thing, as evidenced by a February/March 2008 article in Threads magazine, by Kenneth D. King, entitled “Master the Hand Stitch: Learn the fine, invisible stitches that are the hallmarks of couture sewing.” This article is especially informative, with photographs and expert tips, all of which serve the modern amateur dressmaker so well.

So – how did our grandmothers and great-grandmothers learn the stitches and sewing techniques that are so readily available to us?  Many of them made their own sewing/stitching “example” books in “finishing school”.  My husband’s grandmother was one such young woman.  I am so fortunate that her “Sewing” book, dated November 1, 1907, is in my possession now.  She would have been fourteen years old in late 1907.

There is a label inside the book which tells me that she purchased this book of blank pages at L. B. Herr, Bookseller, Lancaster, PA.

Ethel filled her book with 35 pages of examples of stitches, types of seams, and sewing techniques. Every example was made by her, with a brief description in her handwriting.   Here are a few pages from her remarkable book (click on the photos to see them up close).

Some of the stitches represented are:

Basting stitches – three kinds!

Overcasting.

Running and a back stitch – notice that she spells it “stich”.

All buttonholes were made by hand in 1907 – and Ethel had to learn how to make them as well.  She finally spelled “stitch” correctly – although it looks like it was struggle!

She has examples of many types of seams:

Here is a gathered seam.

And numerous sewing techniques:

Here is Ethel’s example of Honey-combing or smocking.

She even learned how to make a gusset!

Although Ethel died before I had the opportunity to meet her, I understand that she was not a particularly great fan of sewing, but nevertheless, she thought enough of her sewing book to save it.  In learning her “stiches”, she was quite clearly carrying on a tradition that generations before her had also done.   Consider this quote from Catherine  E. Beecher’s A Treatise on Domestic Economy, 1843:  “Every young girl should be taught to do the following kinds of stitch, with propriety [my emphasis]. Overstitch, hemming, running, felling, stitching, back-stitch and run, button-stitch, chain-stitch, whipping, darning, gathering and cross-stitch.”

Although I know not every young girl now would be interested in learning such things – I suspect there are lots who would proudly make their own “sewing” book if given the opportunity.  (Maybe without the darning stitch – does anybody darn anymore?)

One interesting omission in Ethel’s book:  that catch stitch I like to do so much.

Here is one of my seams in my “couture dress” with the seams properly catch-stitched!

No matter what stitch you are doing – may it  look happy, unpuckered and definitely not home-made!

16 Comments

Filed under The Conde Nast Publications, Uncategorized, underlinings