
When I started planning this coat, I could not then have known the many reasons why I am now so happy to have made it.
The journey – and yes, it has been a journey – started with the fabric, offered for sale to me by a reader several years ago. Simply the provenance of the fabric – a piece of stamped Ernest Einiger wool, from one of the great mid-century American wool manufacturers, now sadly long gone – was reason enough to give it some extra thought. I knew I had to wait for the right time to put pattern and scissors to it. When the Pantone Color of 2018 – “Ultraviolet” – an orchid shade of purple – was announced, I knew the time had arrived!
In the meantime, I had given it much thought and the more I looked at it, the more I thought I would be wise to get some construction advice on it. Happily I was able to go to Baltimore in mid-April for one of Susan Khalje’s week-long Couture Sewing Schools, during which everyone works on their own project. Usually one is expected to arrive with a pattern selected, and a marked muslin (toile) of her project ready for fitting. This time was no different, which meant that all my thinking about the best pattern to use for this coat was ready to come to fruition.
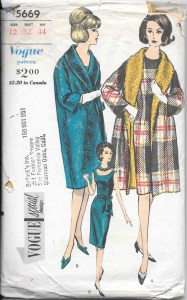
Because the fabric is a very heavy coat-weight boucle, I originally looked for a pattern which either did not include buttons and buttonholes (traditionally more difficult to do well on a fabric of this weight), or had slot-seam buttonholes. I thought I had the perfect pattern in this Vogue from 1962. However, when I actually opened out the pattern pieces, I realized it was not going to work. The kimono sleeves would surely produce drag lines in this heavy fabric, and a double layer of the wool in the shawl collar could be quite bulky.
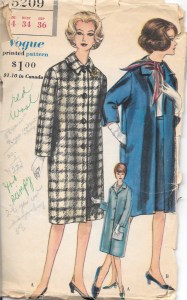
Then I pulled out two more patterns which I thought were possibilities:

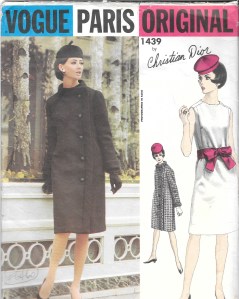
The single slot-seam buttonhole in the Mattli pattern was ideal, but all the intersecting seams could be a problem to do well, so I eliminated that one. The simple lines of the Christian Dior design were lovely, but then there were more buttons, in addition to my evolving thought that this fabric would work well with a pattern which did not have such a narrow silhouette. It was then that I went to a pattern which I had already used:
View A with the longer sleeve for this coat, although I originally made it with the shorter sleeve here.
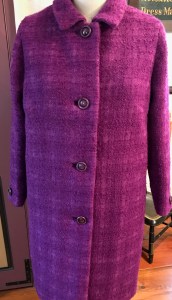
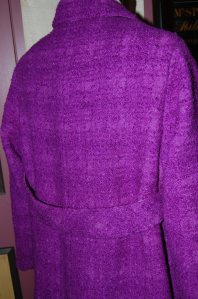
I love the simple lines of this coat and its well-turned collar, and I especially love my addition of a half belt to the silk coat I made. I still wasn’t sure what I would/could do about buttons and buttonholes. Advice from Susan would be very valuable! As it turned out, she helped me determine that I could do bound buttonholes even on this very substantial wool. Another fortuitous finding was that this pattern lent itself to showing off the interesting windowpane weave of the boucle, which became much more apparent the further away from it we got.
Other of Susan’s recommendations included:
1) Making the coat dress length rather than coat length. The intensity of the color, used with this pattern, looks better in a shorter length.
2) Cutting the belt on the bias. This was brilliant and gives a nice subtle focus to the back of the coat. She also recommended that I line the belt with the silk charmeuse lining fabric rather than using the boucle . It reduces bulk and makes the belt lay much more nicely. I sewed one side of the belt by machine and then hand-stitched the other side, making for a nice crisp turn of the charmeuse to the underside.
My addition of a belt to this pattern is an excellent example of what is known as a “dressmaker detail.”
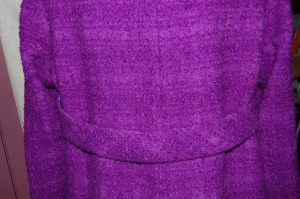
Here the bias cut of the belt is quite apparent.
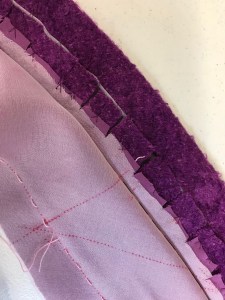
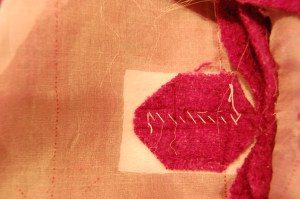
The entire coat is underlined in silk organza, including the belt, shown here with one side sewn by machine.
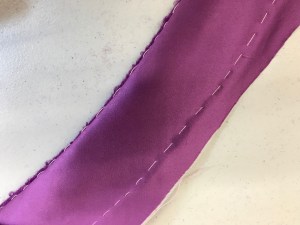
And here is the silk charmeuse belt lining almost ready to be applied by hand.
3) Underlining the collar with charmeuse (again to reduce bulk) and then under-stitching the underside, to make it turn beautifully.
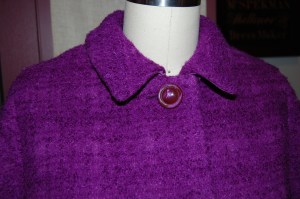
The collar on this pattern is beautifully designed to sit perfectly on the neck.
4) Clipping the long back center seam, even though it is on the straight of grain. Clipping it reduces strain on that seam and allows a much more fluid movement of the back of the coat. (I’m sorry I forgot to take a picture of this, but it is certainly not rocket science, just common sense.)
5) Tips for matching the woven windowpane design in the wool, the weave of which was difficult to see close-up. Forked pins and a walking foot helped to keep the layers – even basted ones – from shifting.
Other procedures I used to help “tame” this fabric were: lots of judicious trimming of seams and corners; clipping, clipping and more clipping; lots of steam and pressing; lots of basting of seams.
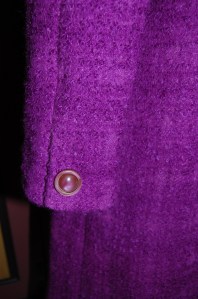
I even trimmed the edges of the bound buttonholes to reduce bulk down the front of the coat. I am not completely happy with the buttonholes (which were difficult to do on this fabric), but once I finished them, they looked better than I thought they would.
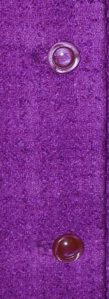
I found these buttons in an Etsy store. From the 1960s, they are a nice fit with the fabric and the pattern. And I like their wobbly edges!
By the time I returned home from my class, I had the coat about half finished, but I felt completely confident in my ability to finish it competently. Here are a few more details:
The sleeves feature a turned- back vent which is secured by a button through all layers.
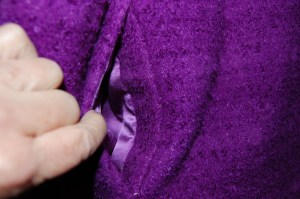
I used the pockets for this version of the coat (which I had eliminated for my silk version.)
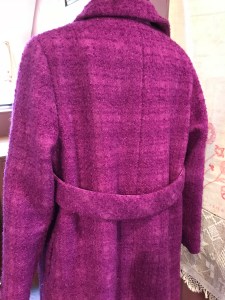
The belt is attached to the side seams just about an inch below the armhole. This placement allows it to fall right at the center back waist.
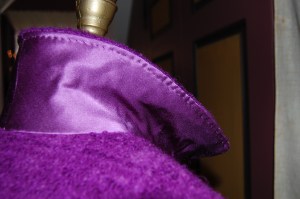
It is always rewarding to get to the point in the construction of a coat when you are ready to put the lining in. And to make it just a little more fun, I added flat silk piping on the inside front facings – which will match one of the dresses (still to be made) I intend to wear with this coat:
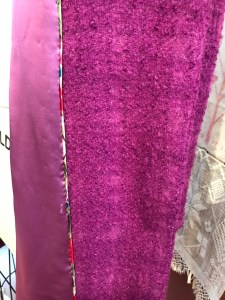

I ended the piping at the shoulder seam on either side. (I see a basting thread which is peeking out from the piping!)
So my “coat for many reasons” allowed me 1) to use treasured fabric which had been in my collection for a few years; 2) to take advantage of the focus of this beautiful purple color during the year of “Ultraviolet;” 3) to use a coat pattern which I really wanted to use again after making it once; and 4) to have experience in working – successfully – with such a heavyweight wool.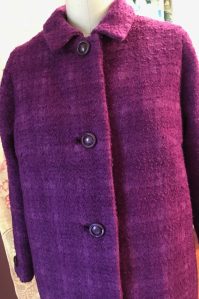
But the most important reason? I need another coat. I always need another coat.

Purple is one of the best colors ever, and your coat is WONDERFUL! I always do my undercollars that way with fabrics like Melton, and it makes such a huge difference in how things turn. Gorgeous, Karen! Maybe a wool dress to go with it, and enter MIWW this year? 😉
Thanks, Kathy! I actually have both a silk dress and a wool dress planned specifically for this coat, but not right now! The MIWW contest intrigues me – maybe sometime!
Just beautiful. I love the fabric and your finishing details are perfection, as usual.
Thank you so much! Success is always in the details, isn’t it?
This is spectacular! Thanks for the details!
You are welcome, Heather and thank you!
Oh, yes! You did it just right, all of it and each of its parts. I wonder if you might have done better than you think you did with the buttonholes because to me they look just right for these buttons. If the bound parts were bigger they’d detract from the buttons’ wave. Each of Susan Khalje’s suggestions was great. You do need another coat. You live where the coat is part of nearly every outfit for most of the year and, as you’ve noted previously, it’s what makes the first impression. I’m glad you used this pattern again. The belt you added to this one gives it a jolt of youthful movement. All your patterns are pretty but I’m particularly gaga about this one and the one you made the gray cashmere coat with. Hmm, one silk, one fabulous colored wool, and and maybe just one more in a pique for late spring early summer? Not this year.
It is so pleasing to see your messages in my inbox. Someday I’ll thank you more thoroughly for being such a beacon of timeless taste, beauty and trips down memory lane and climbing into the time machine well-dressed for the future.
Believe it or not I’m not some crazed fanatic. When message didn’t show up for a while I figured I’d deleted it instead of posting, so I re-wrote.
I have done the exact same thing before, so, no, I don’t think you are a crazed fanatic! Obviously blog technology is not as precise as sewing!
Thank you, Mery! Your comments always brighten my day and I’m so glad you enjoy my blog! I love writing it, but not everyone is interested in the type of sewing I do, so to have a fan like you is priceless!
When the cold wind starts to blow next Fall, I will be secretly pleased. Can’t wait to wear this coat for the first time!
Yes! All of it and each part fabulous! Each of Susan Khalje’s suggestions was great. I wonder if you did the buttonholes better than you think you did because to me they look just perfect with the buttons. I’m so glad you made this pattern again. The belt you added gives it a bit of youthful movement. All your patterns are pretty but I’m just gaga about this one and the one used for the gray cashmere. You do need another coat. You live where coats are worn with nearly every outfit most of the year, and as you mentioned previously, they make the first impression. Hmmm, one silk, one colored wool, and maybe just one more in pique for spring? Well, not this year.
Someday I’m going to thank you more thoroughly for what a treat your blog is.
I can see why you stuck out for the perfect style for this coat. The colour is just delicious and the bias cut belt has made all the difference! It is funny, but reading Susan’s guidance brought back lessons taught so long ago and since forgotten by me. I so enjoy your blog. Congratulations once again!
Thank you, Cheryl, so much, for your comment. The lessons are so filled with common sense – and it is helpful to have a reminder of that sometimes!
I love those yummy vintage coating wool, they are priceless. You found the perfect pattern and the addition of the bias cut belt makes it even more unique.
Thank you, Marie Noelle. It is very satisfying to sew with such beautiful wool – looking forward to wearing this coat!
I think this maybe one of my all time favourites. I love the colour and the weave and think the pattern choice is perfect. And your workmanship as ever is exemplary. What a completely lovely item. It deserves to live forever.
Thank you, Kate! What a perfectly lovely comment!
I’m speechless. That colour, those details. So, so beautiful!
Thank you, Marianne! I am so glad this wool “found” me and I was finally able to make this coat.
You should be very happy with this it’s a beautiful coat
Thank you, Mem. I AM happy with this coat and that’s a really good feeling! I so appreciate your comment.
What gorgeous fabric! You’ve handled it so well and it doesn’t appear that bulky. Deciding to use silk for the under collar and belt lining worked well and your piping adds a custom touch. Can’t wait to see the dress in what looks like another spectacular silk print.
The silk from which the piping was made – and which will be a dress, hopefully next Fall – is from Mendel Goldberg, which says enough, doesn’t it? I was able to get its muslin fitted while in class with Susan, so half the battle is done! Thank you, Mary – always so lovely to hear from you!
What a beautiful coat! You did a great job!
Thank you so much!
So beautiful. Thank you for sharing so many of the details.
You are welcome and thank you!
Your coat is scrumptious! Thanks for sharing so many of your construction details.
Thank you, Alania! It is a “scrumptious” color, isn’t it?
Very, very beautiful. Nice colour.
Thank you, Liselotte, for your lovely compliment!
Love the coat. I wish you would show making bound
Buttonholes.
Pegi
Absolutely gorgeous coat, thanks for sharing I am now inspired . The colour is fabulous.