Tag Archives: Dressmaker details

A Coat For Many Reasons

When I started planning this coat, I could not then have known the many reasons why I am now so happy to have made it.

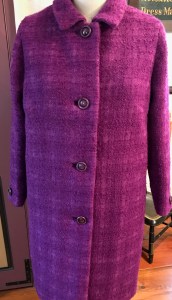
The journey – and yes, it has been a journey – started with the fabric, offered for sale to me by a reader several years ago.  Simply the provenance of the fabric  – a piece of stamped Ernest Einiger wool, from one of the great mid-century American wool manufacturers, now sadly long gone – was reason enough to give it some extra thought.  I knew I had to wait for the right time to put pattern and scissors to it. When the Pantone Color of 2018 – “Ultraviolet” – an orchid shade of purple – was announced, I knew the time had arrived!

In the meantime, I had given it much thought and the more I looked at it, the more I thought I would be wise to get some construction advice on it.  Happily I was able to go to Baltimore in mid-April for one of Susan Khalje’s week-long Couture Sewing Schools, during which everyone works on their own project.  Usually one is expected to arrive with a pattern selected, and a marked muslin (toile) of her project ready for fitting.  This time was no different, which meant that all my thinking about the best pattern to use for this coat was ready to come to fruition.

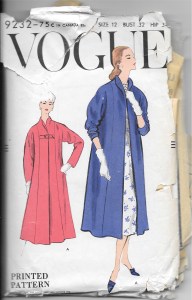
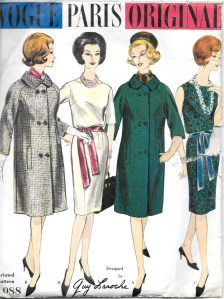
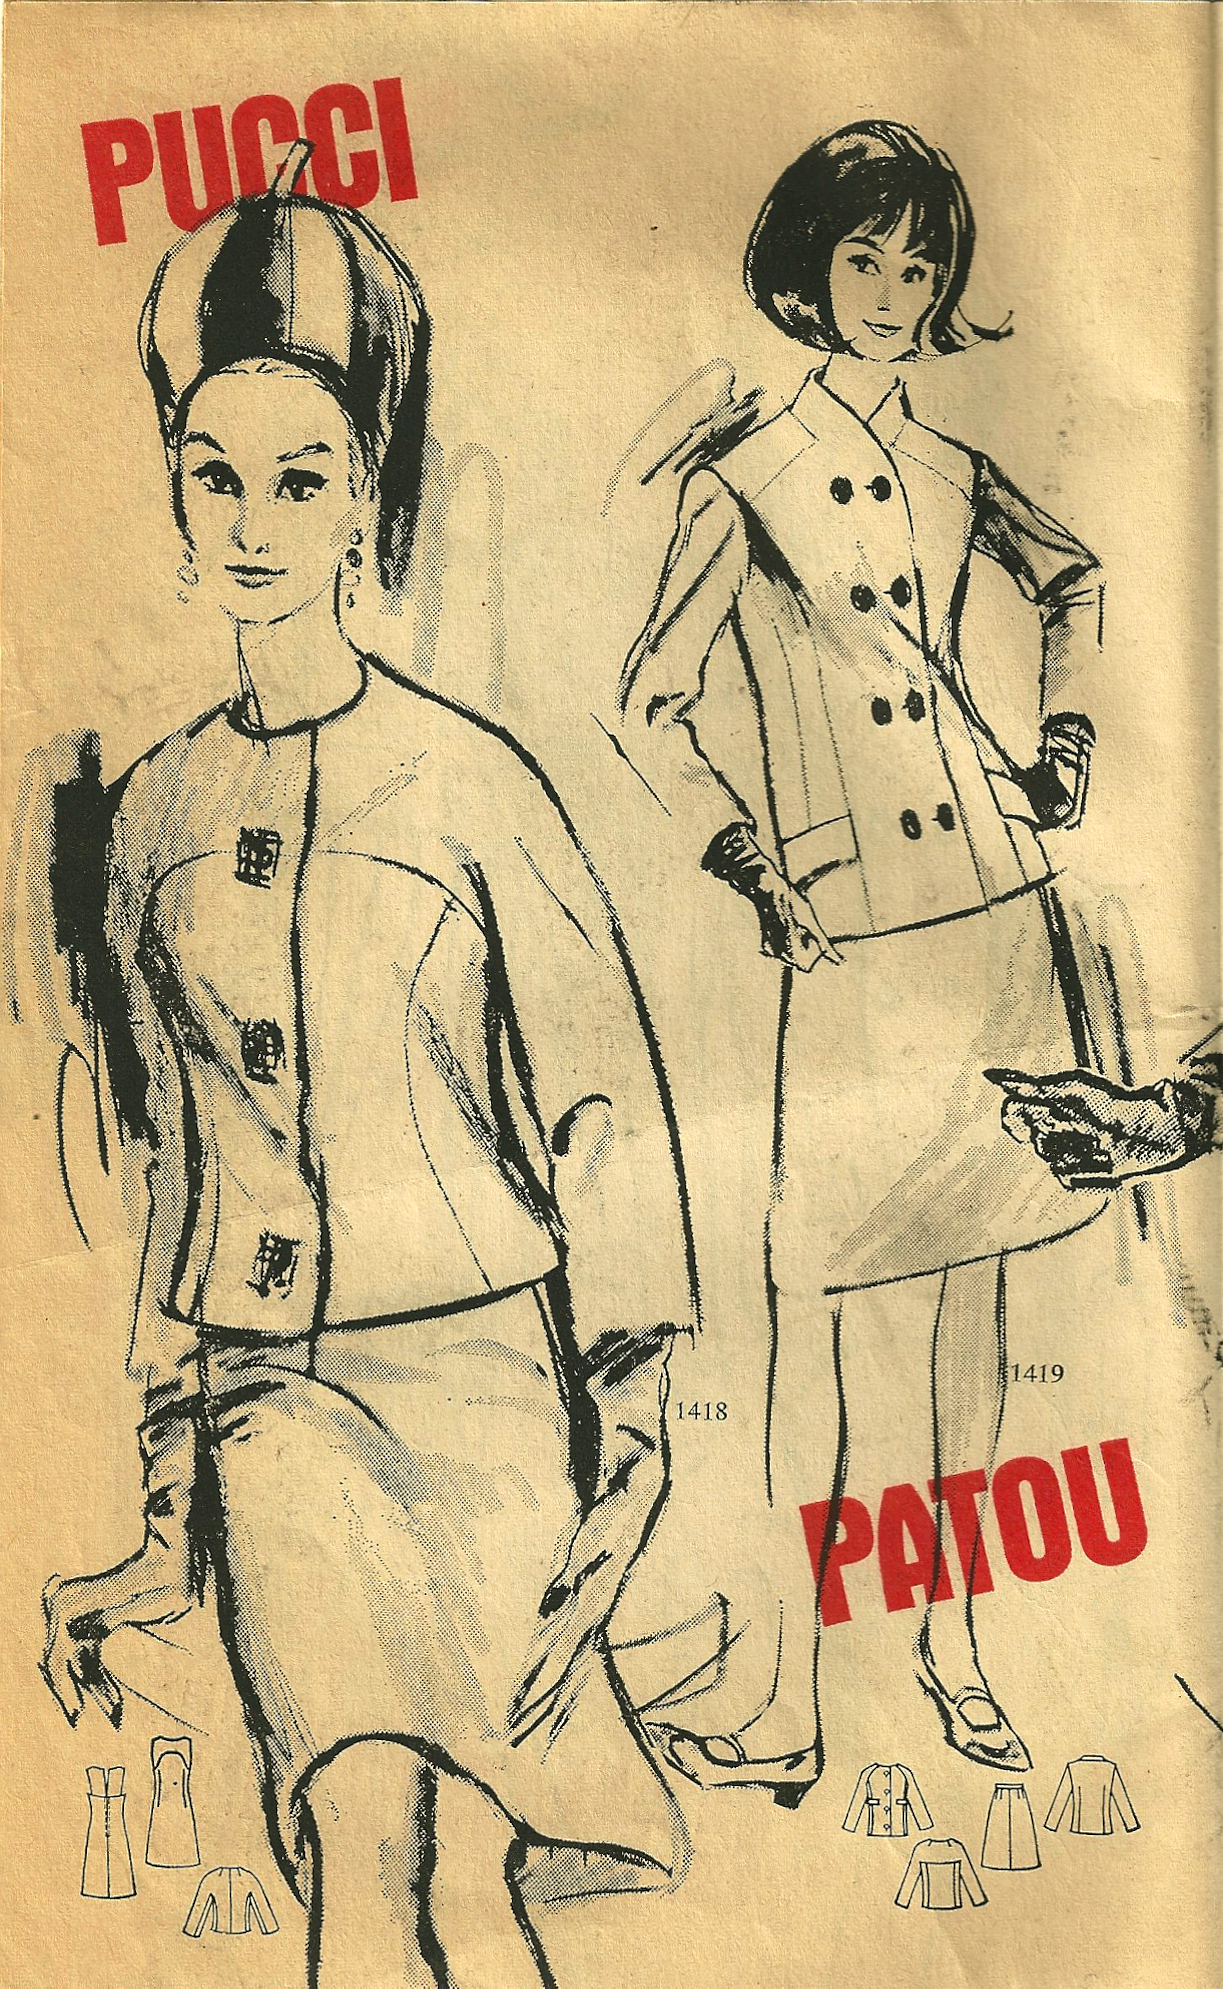
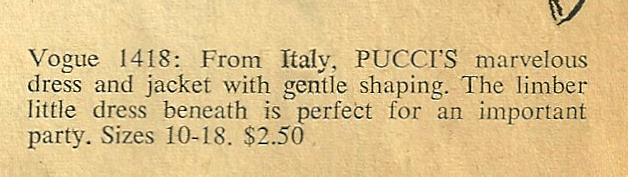
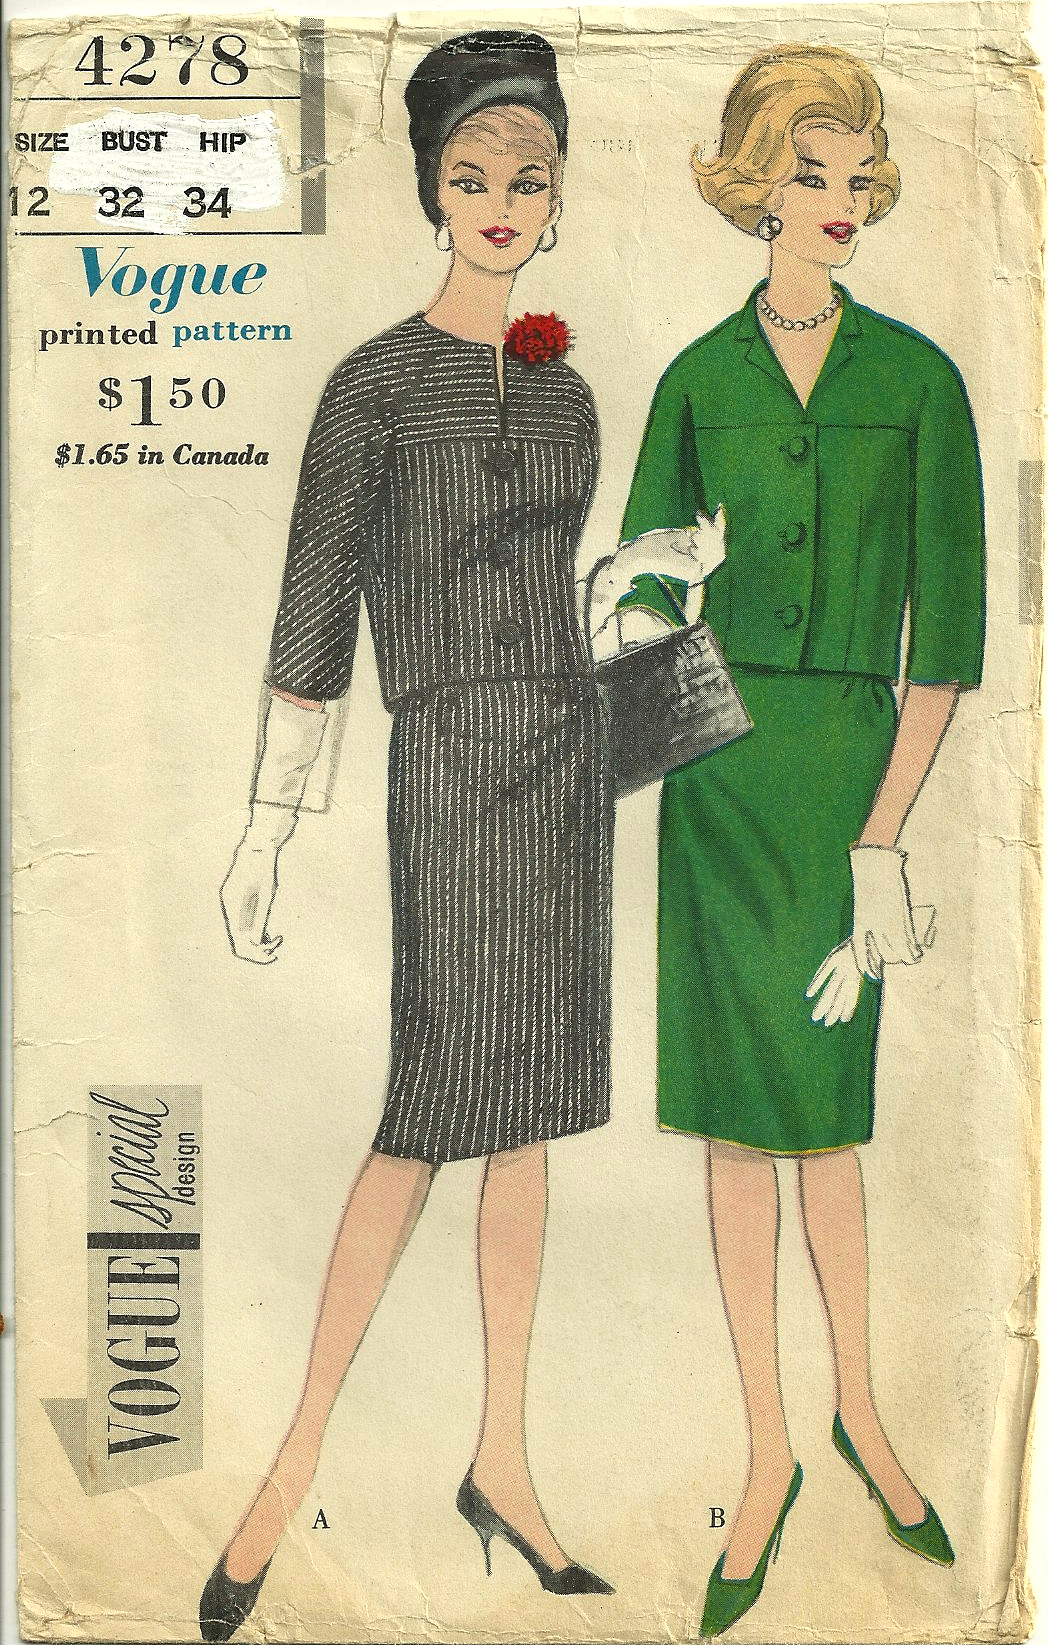
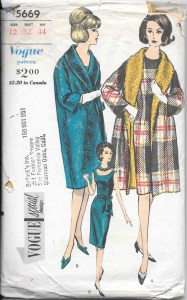
Because the fabric is a very heavy coat-weight boucle, I originally looked for a pattern which either did not include buttons and buttonholes (traditionally more difficult to do well on a fabric of this weight), or had slot-seam buttonholes. I thought I had the perfect pattern in this Vogue from 1962. However, when I actually opened out the pattern pieces, I realized it was not going to work.  The kimono sleeves would surely produce drag lines in this heavy fabric, and a double layer of the wool in the shawl collar could be quite bulky.

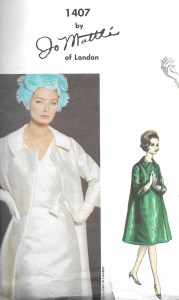
Then I pulled out two more patterns which I thought were possibilities:

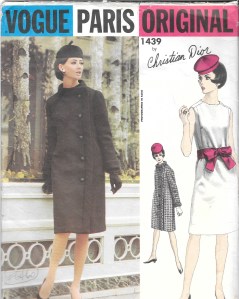
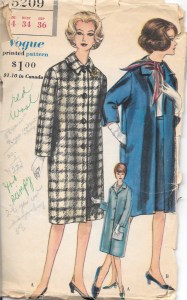
The single slot-seam buttonhole in the Mattli pattern was ideal, but all the intersecting seams could be a problem to do well, so I eliminated that one.  The simple lines of the Christian Dior design were lovely, but then there were more buttons, in addition to my evolving thought that this fabric would work well with a pattern which did not have such a narrow silhouette. It was then that I went to a pattern which I had already used:

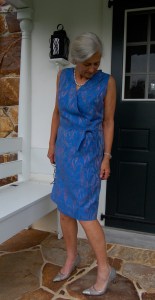
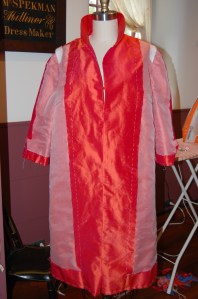
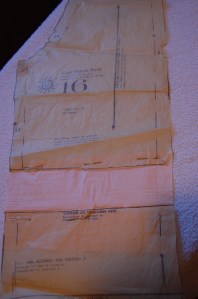
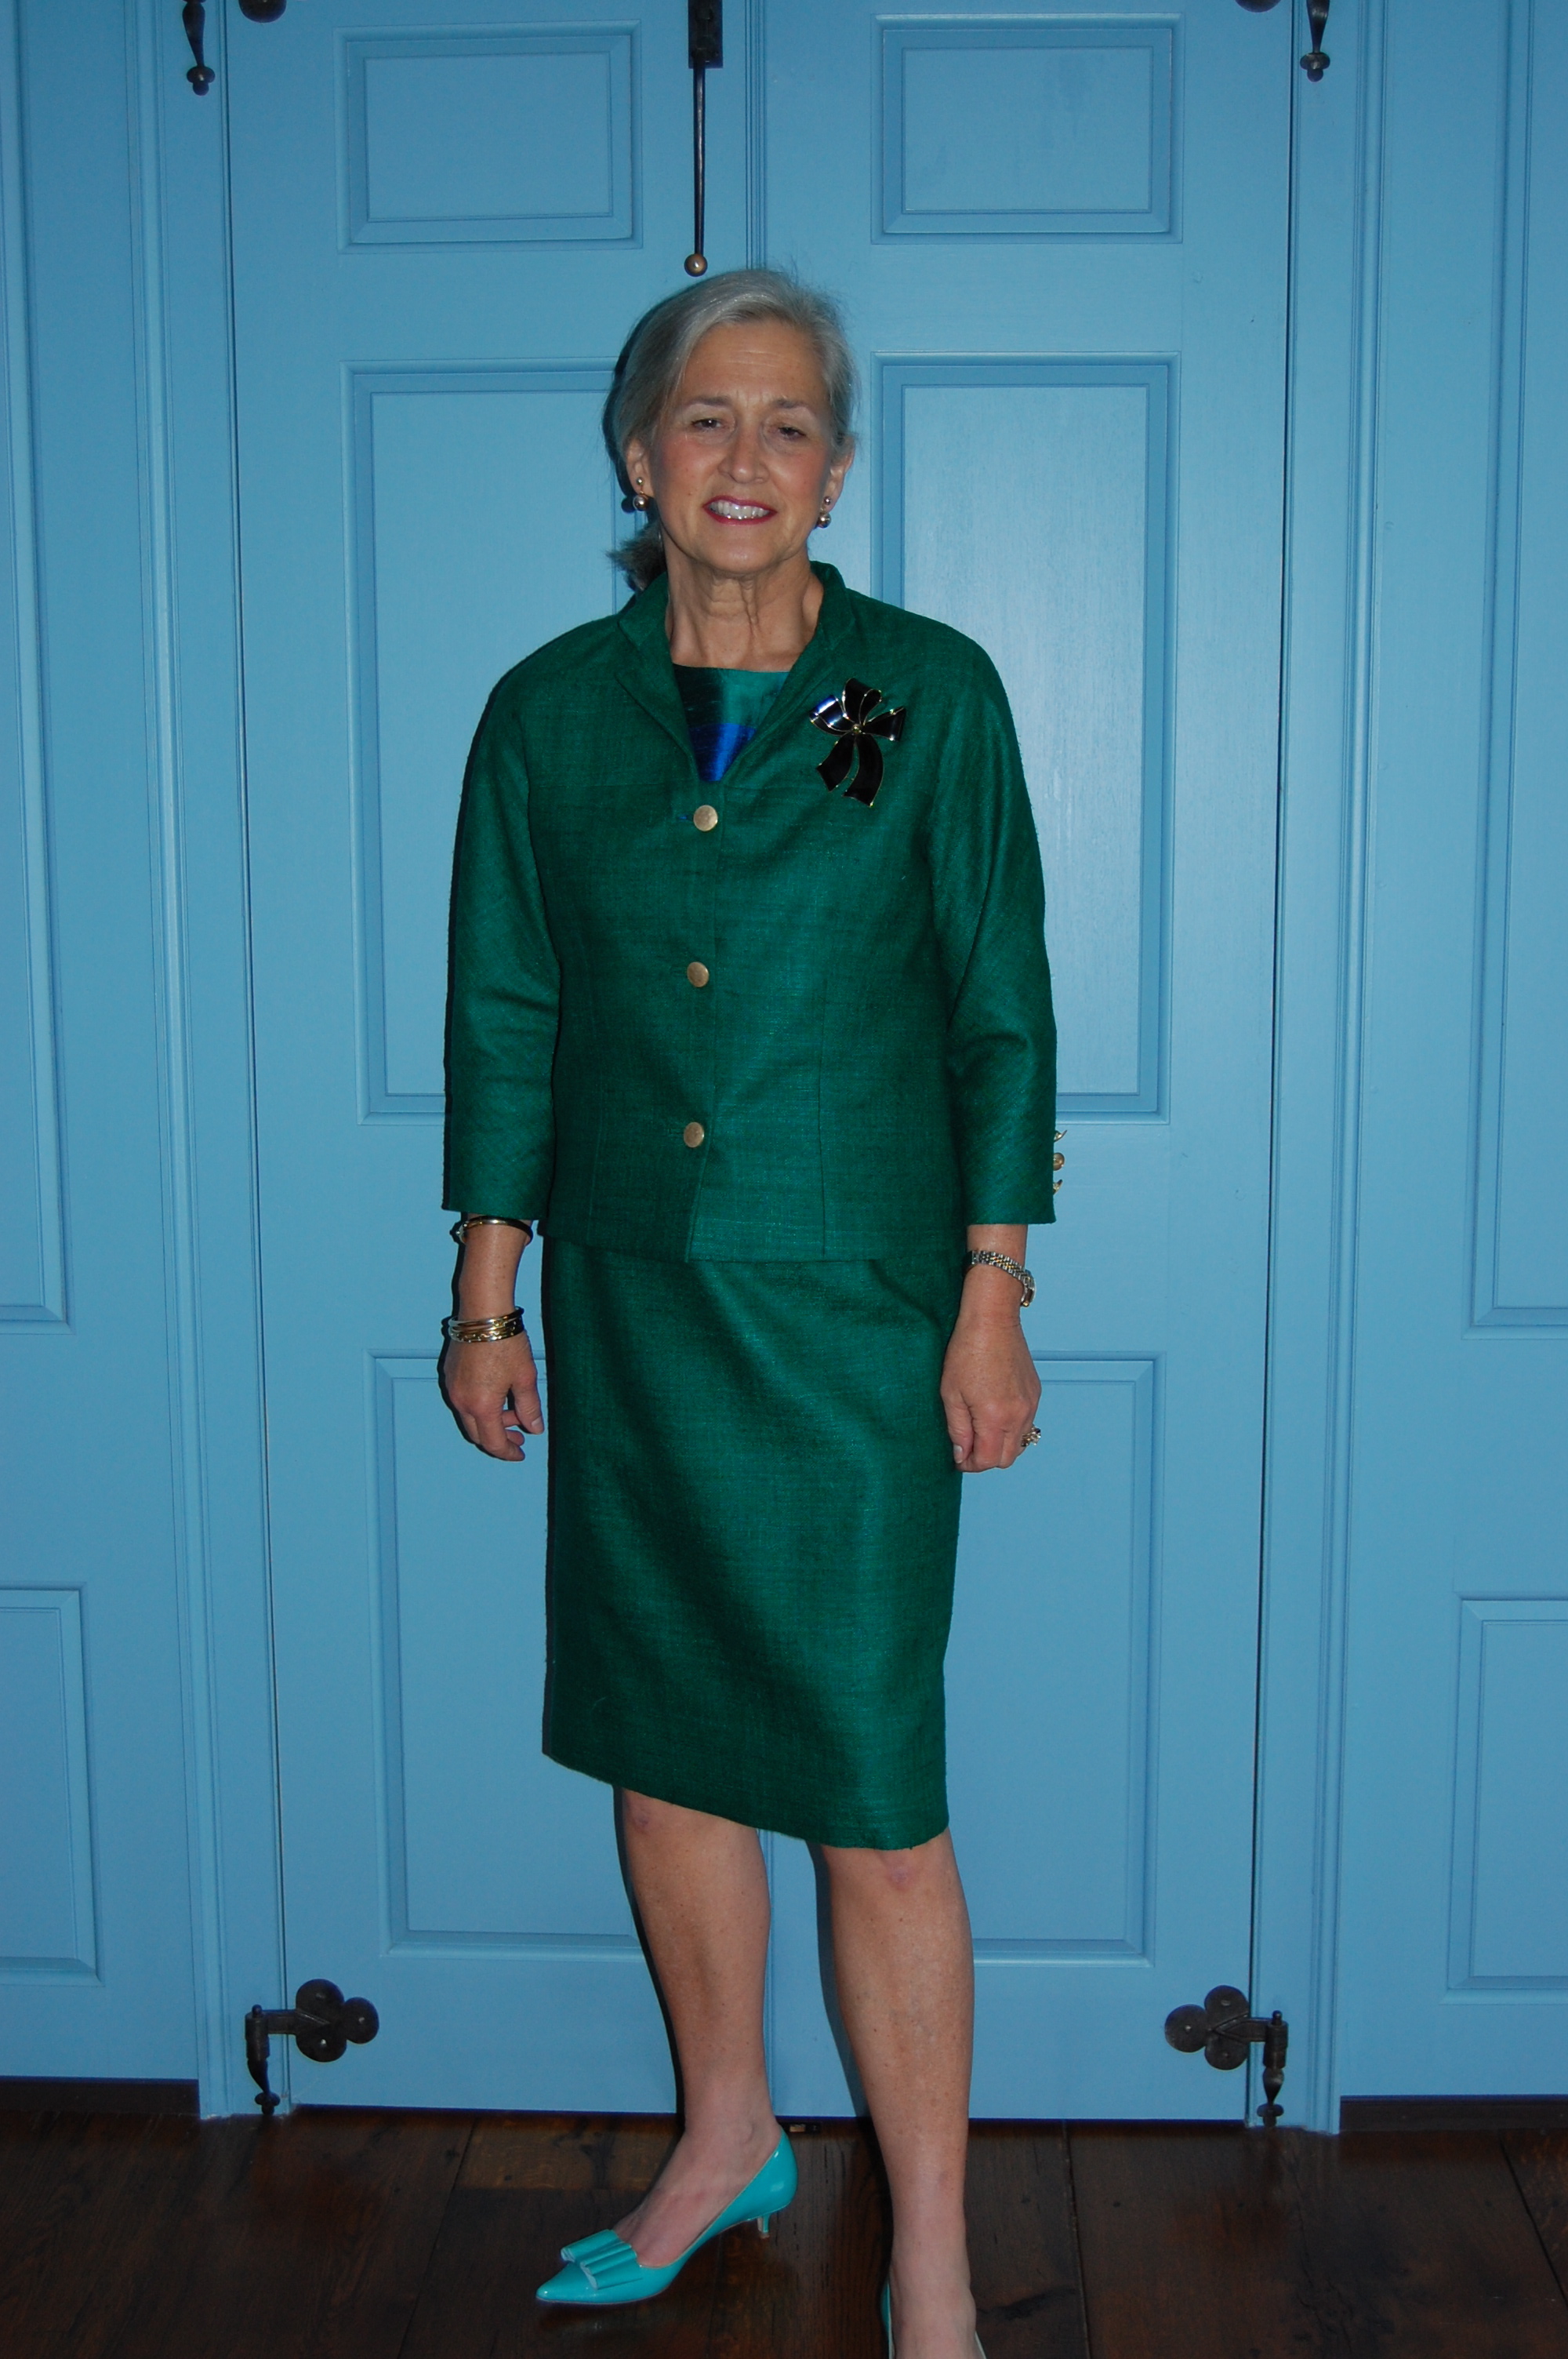
View A with the longer sleeve for this coat, although I originally made it with the shorter sleeve here.

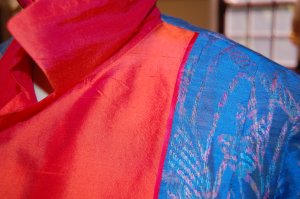
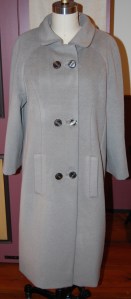
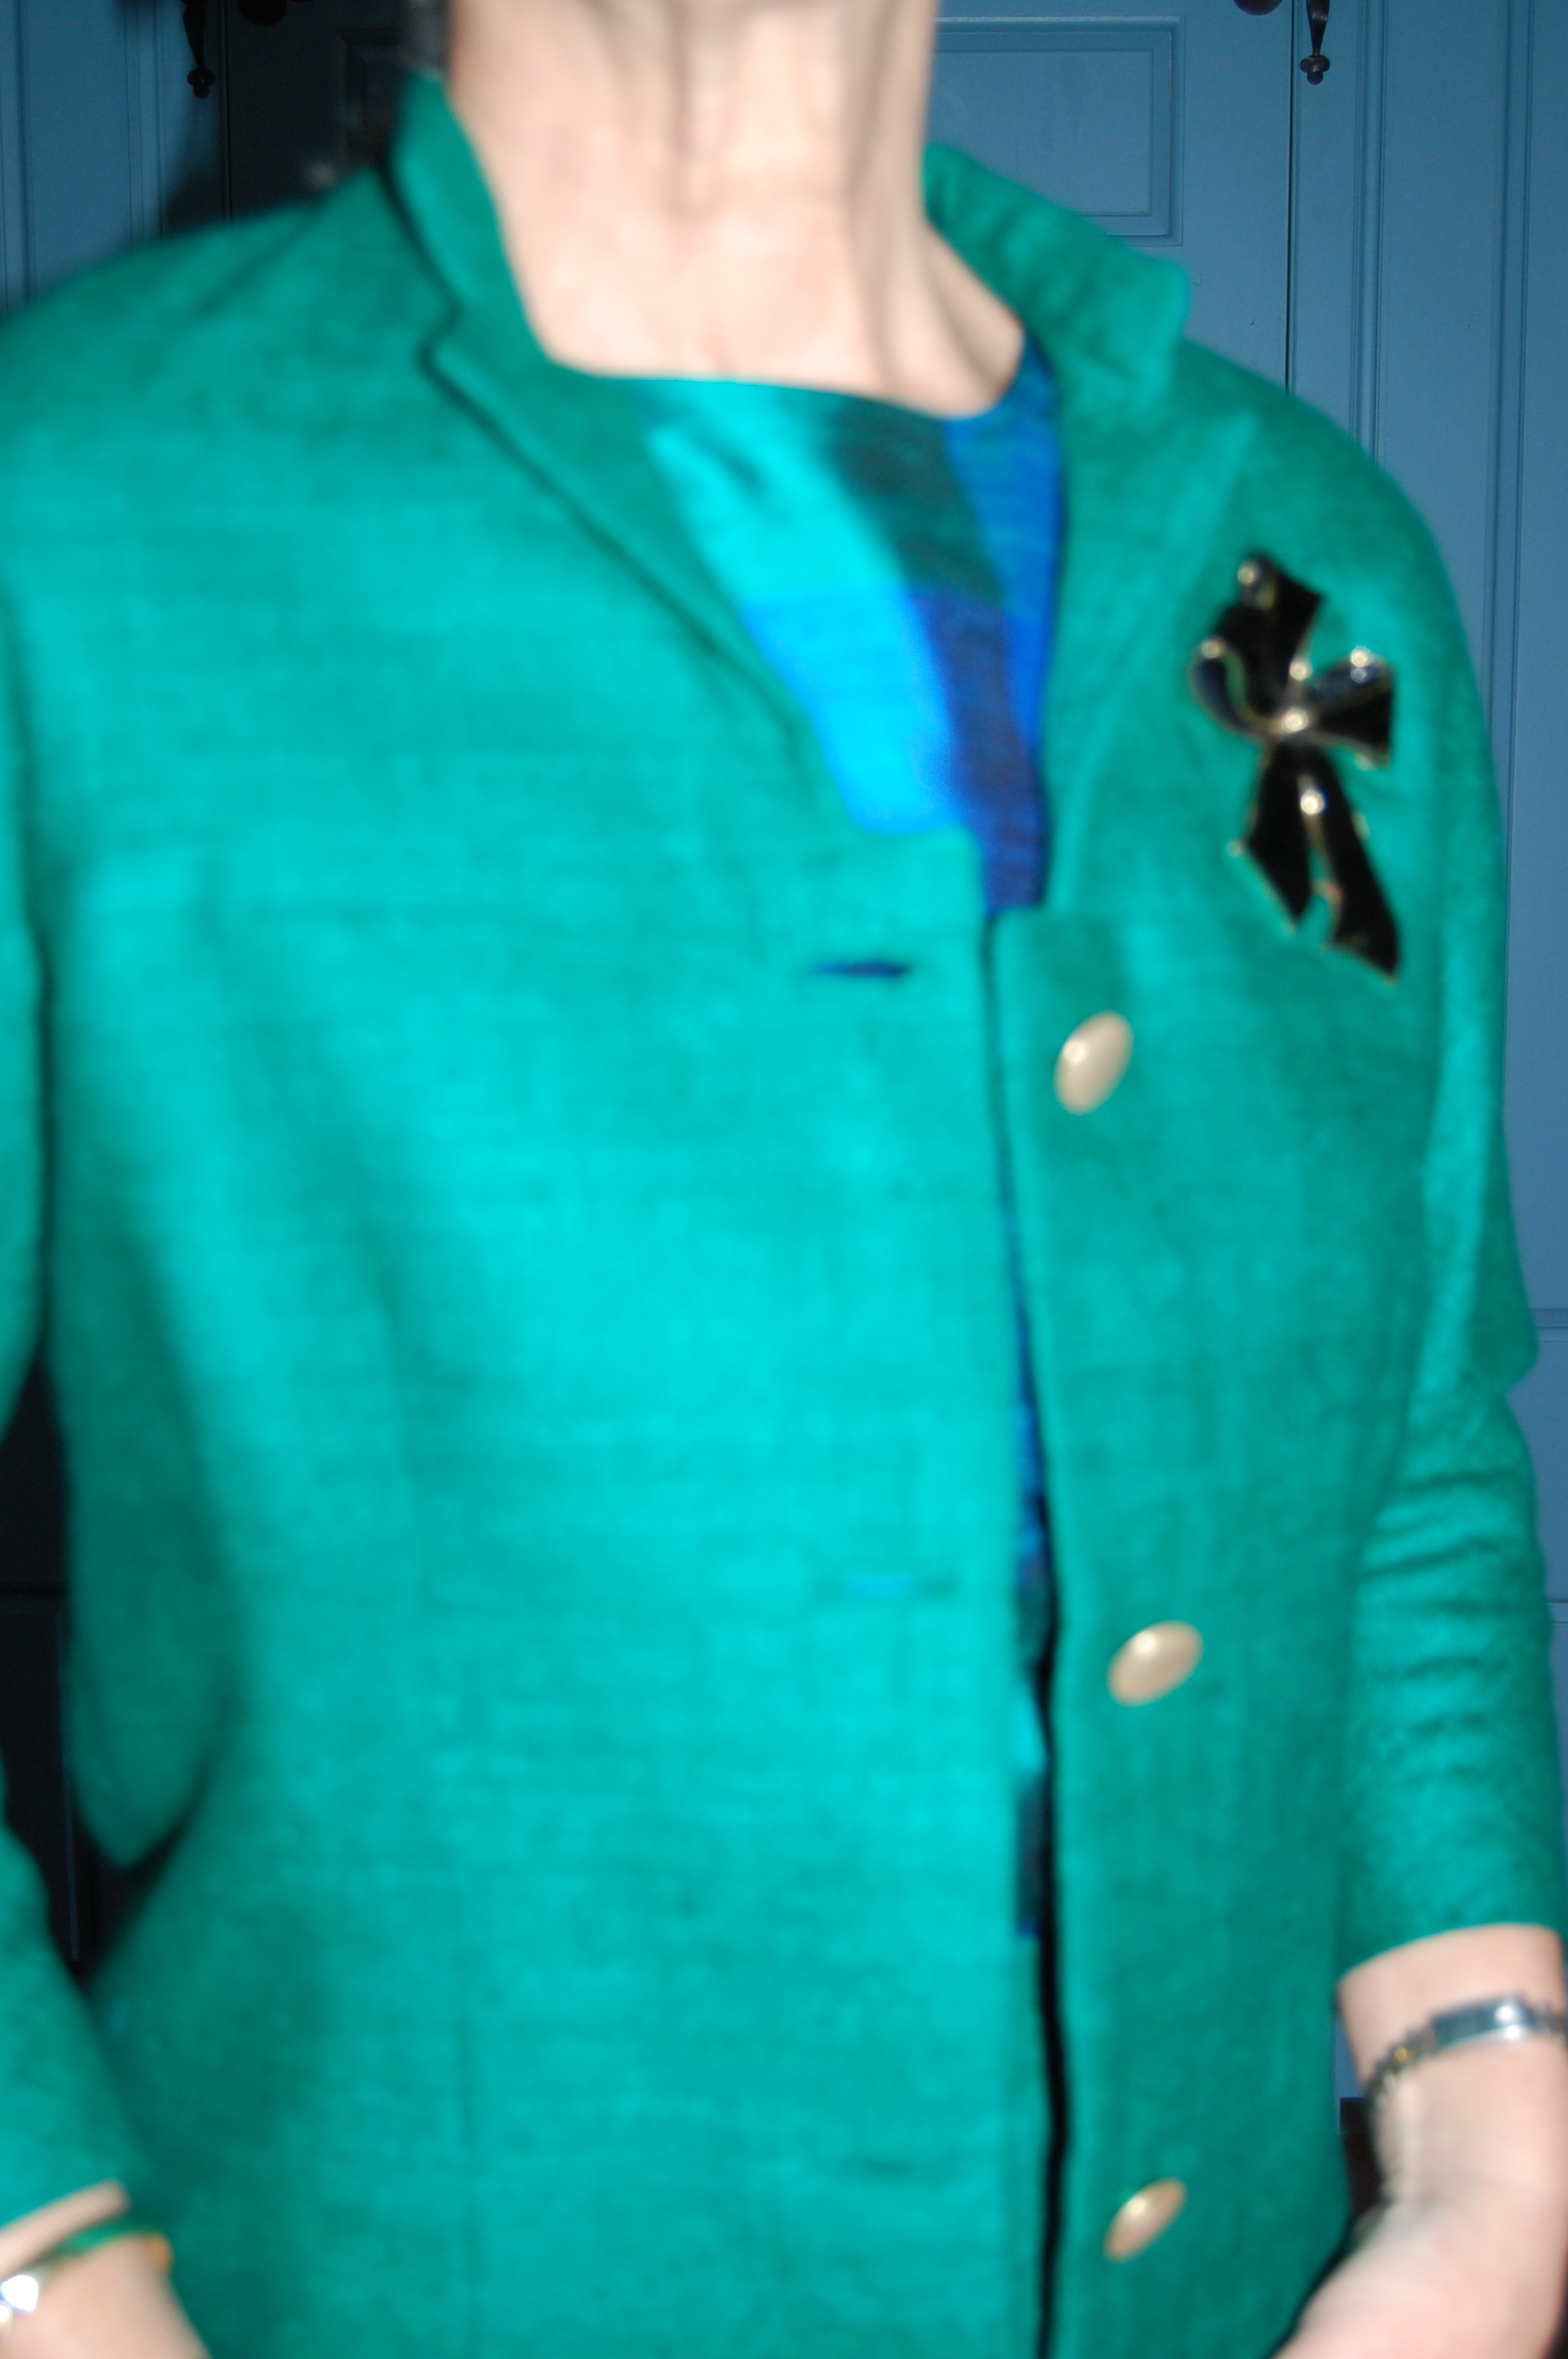
I love the simple lines of this coat and its well-turned collar, and I especially love my addition of a half belt to the silk coat I made.  I still wasn’t sure what I would/could do about buttons and buttonholes.  Advice from Susan would be very valuable!  As it turned out, she helped me determine that I could do bound buttonholes even on this very substantial wool.  Another fortuitous finding was that this pattern lent itself to showing off the interesting windowpane weave of the boucle, which became much more apparent the further away from it we got.

Other of Susan’s recommendations included:

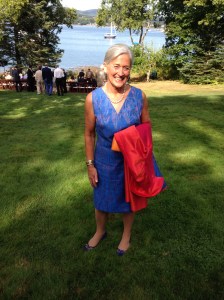
1) Making the coat dress length rather than coat length.  The intensity of the color, used with this pattern, looks better in a shorter length.

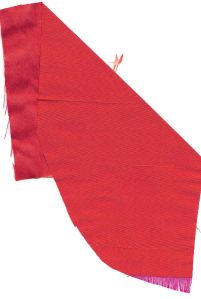
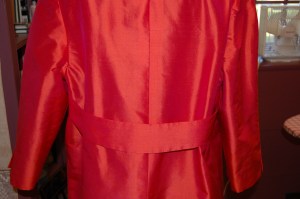
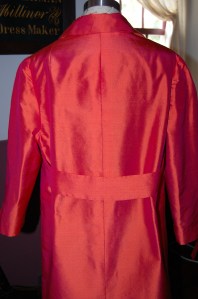
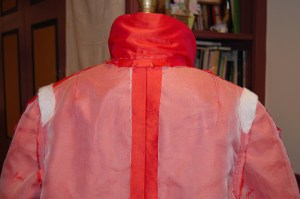
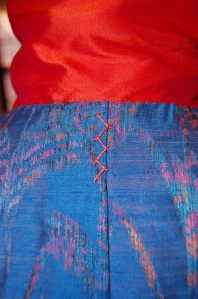
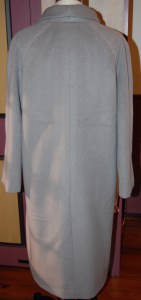
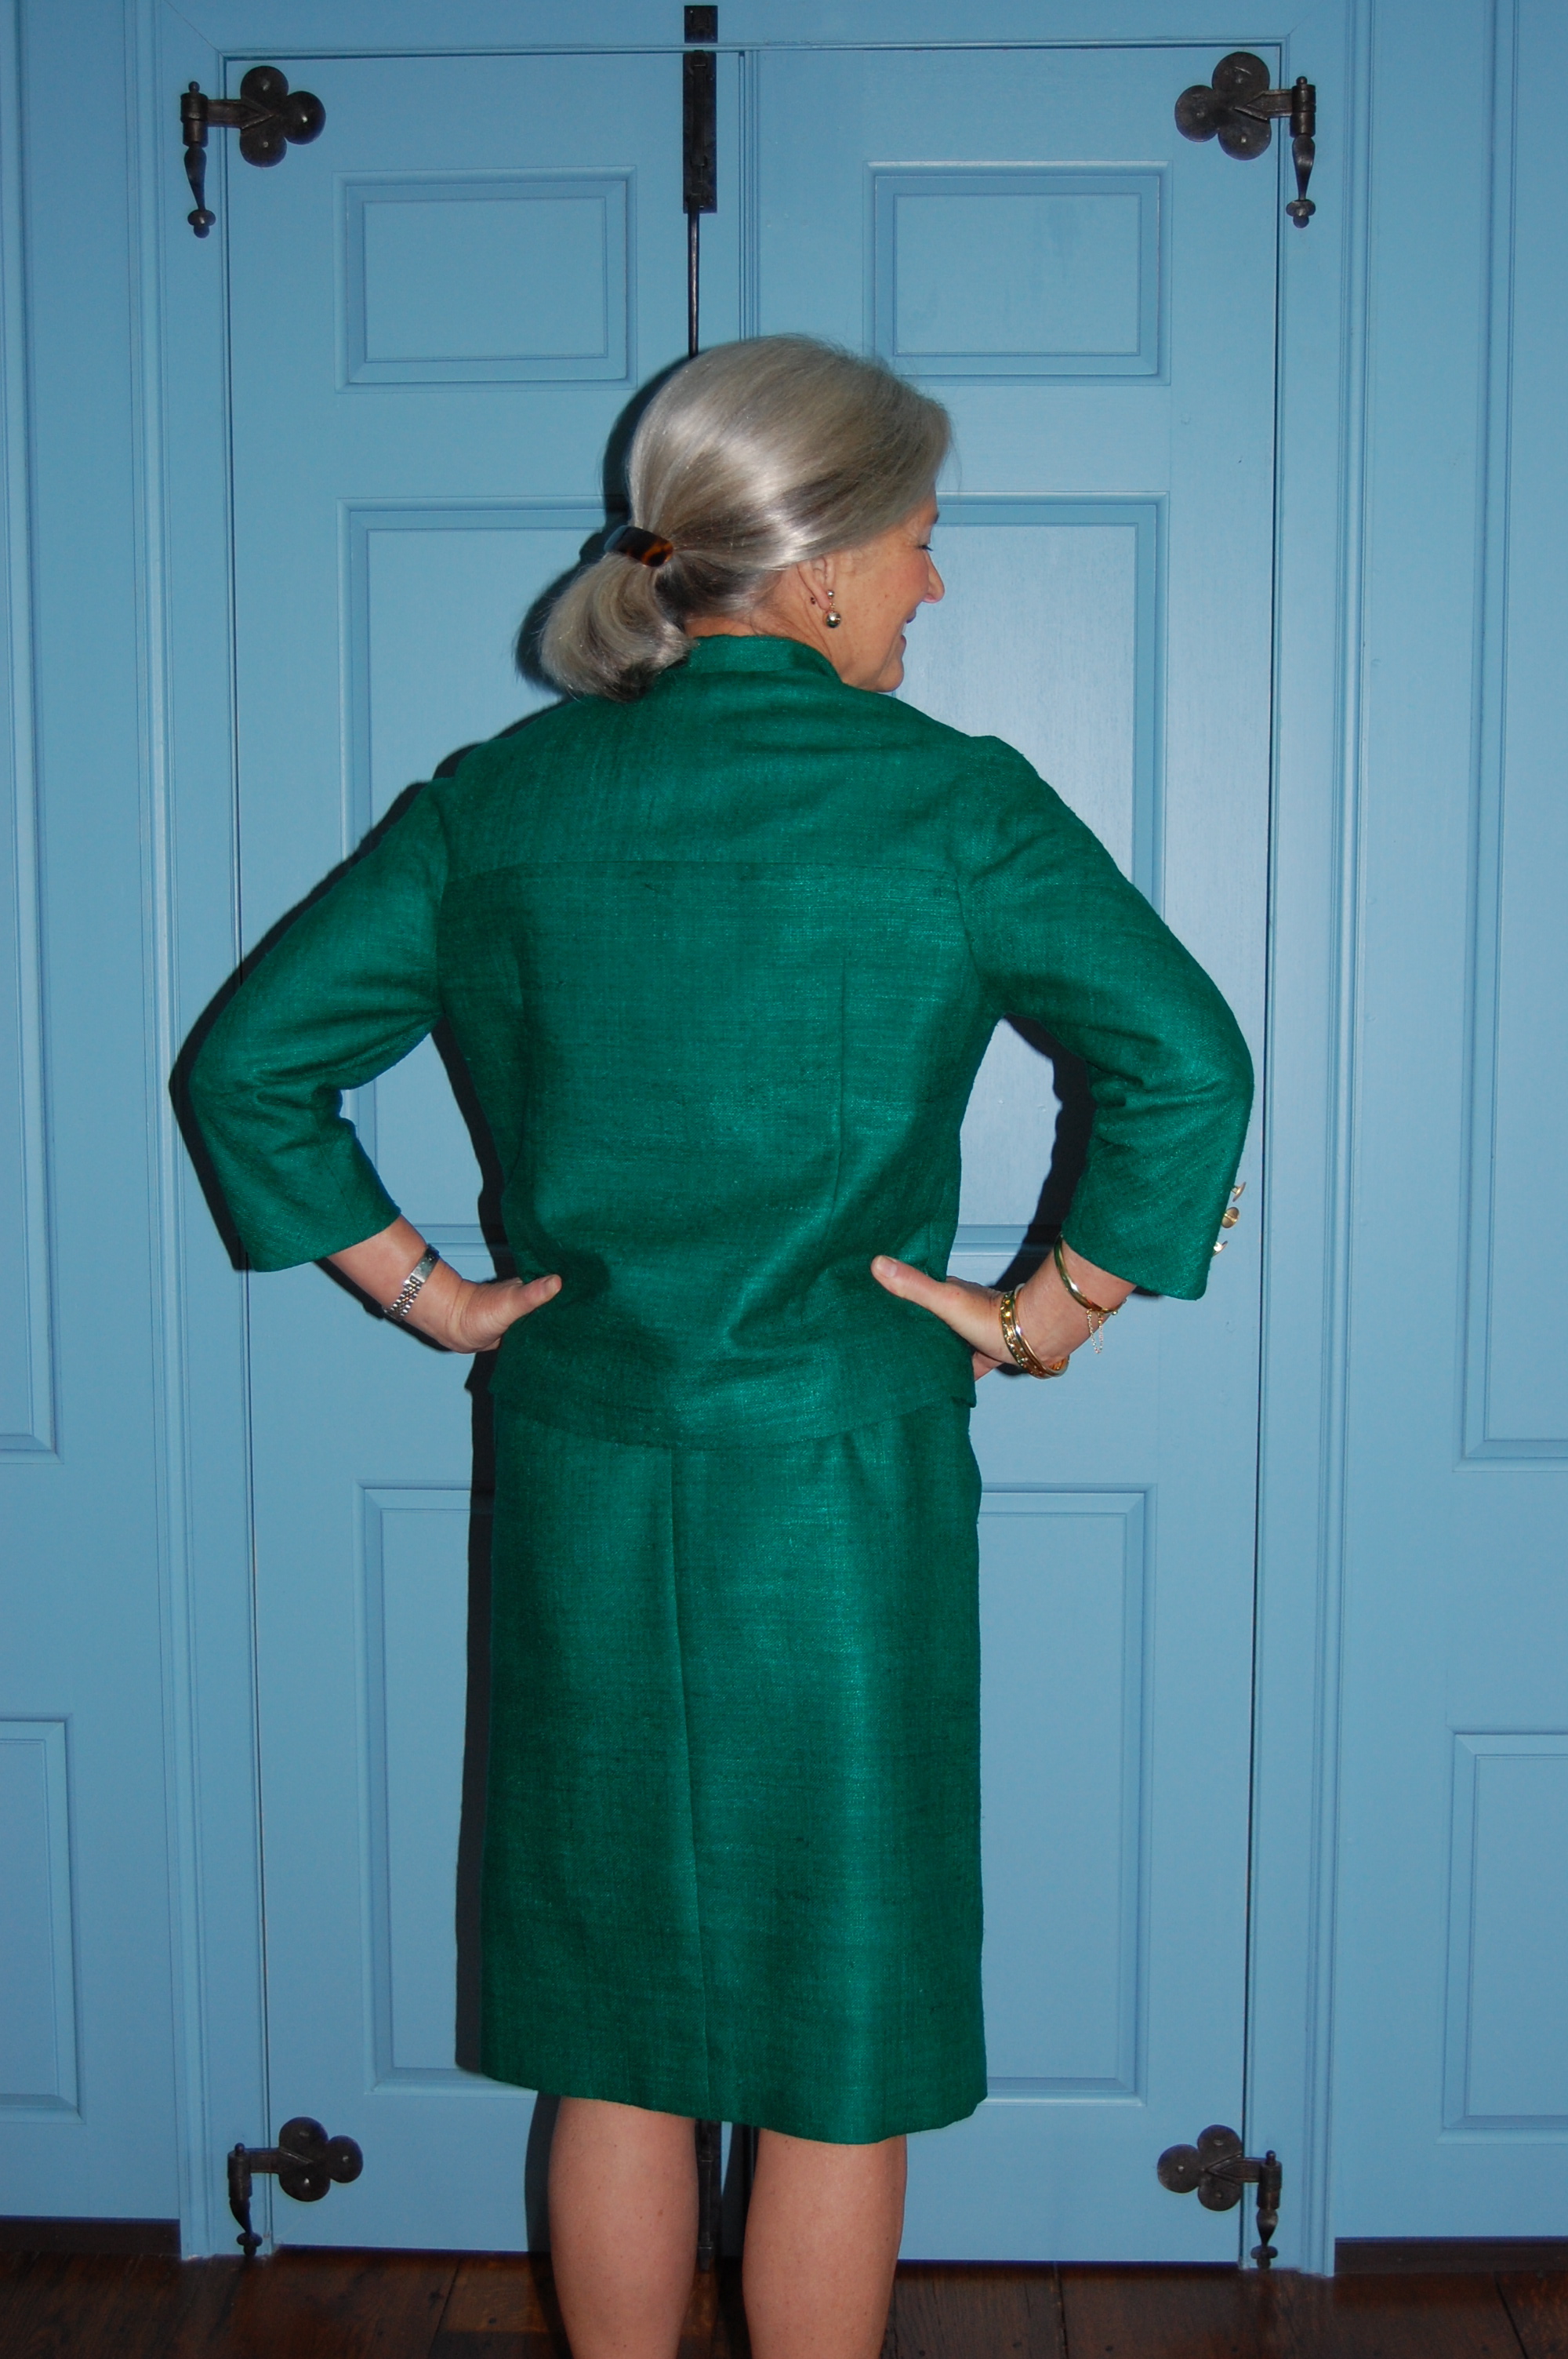
2) Cutting the belt on the bias.  This was brilliant and gives a nice subtle focus to the back of the coat.  She also recommended that I line the belt with the silk charmeuse lining fabric rather than using the boucle .  It reduces bulk and makes the belt lay much more nicely.  I sewed one side of the belt by machine and then hand-stitched the other side, making for a nice crisp turn of the charmeuse to the underside.

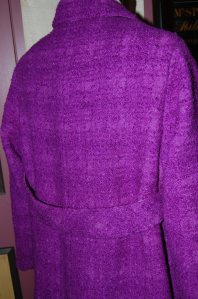
My addition of a belt to this pattern is an excellent example of what is known as a “dressmaker detail.”

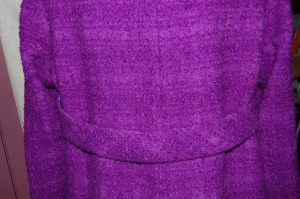
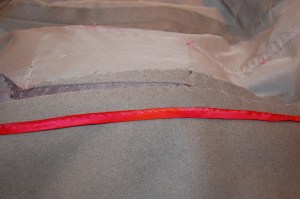
Here the bias cut of the belt is quite apparent.

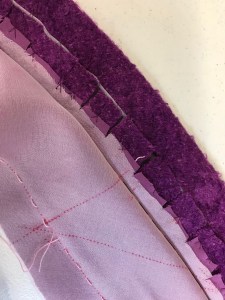
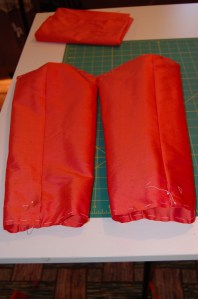
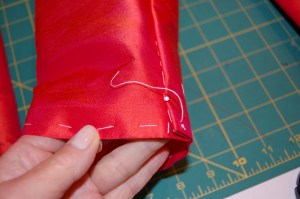
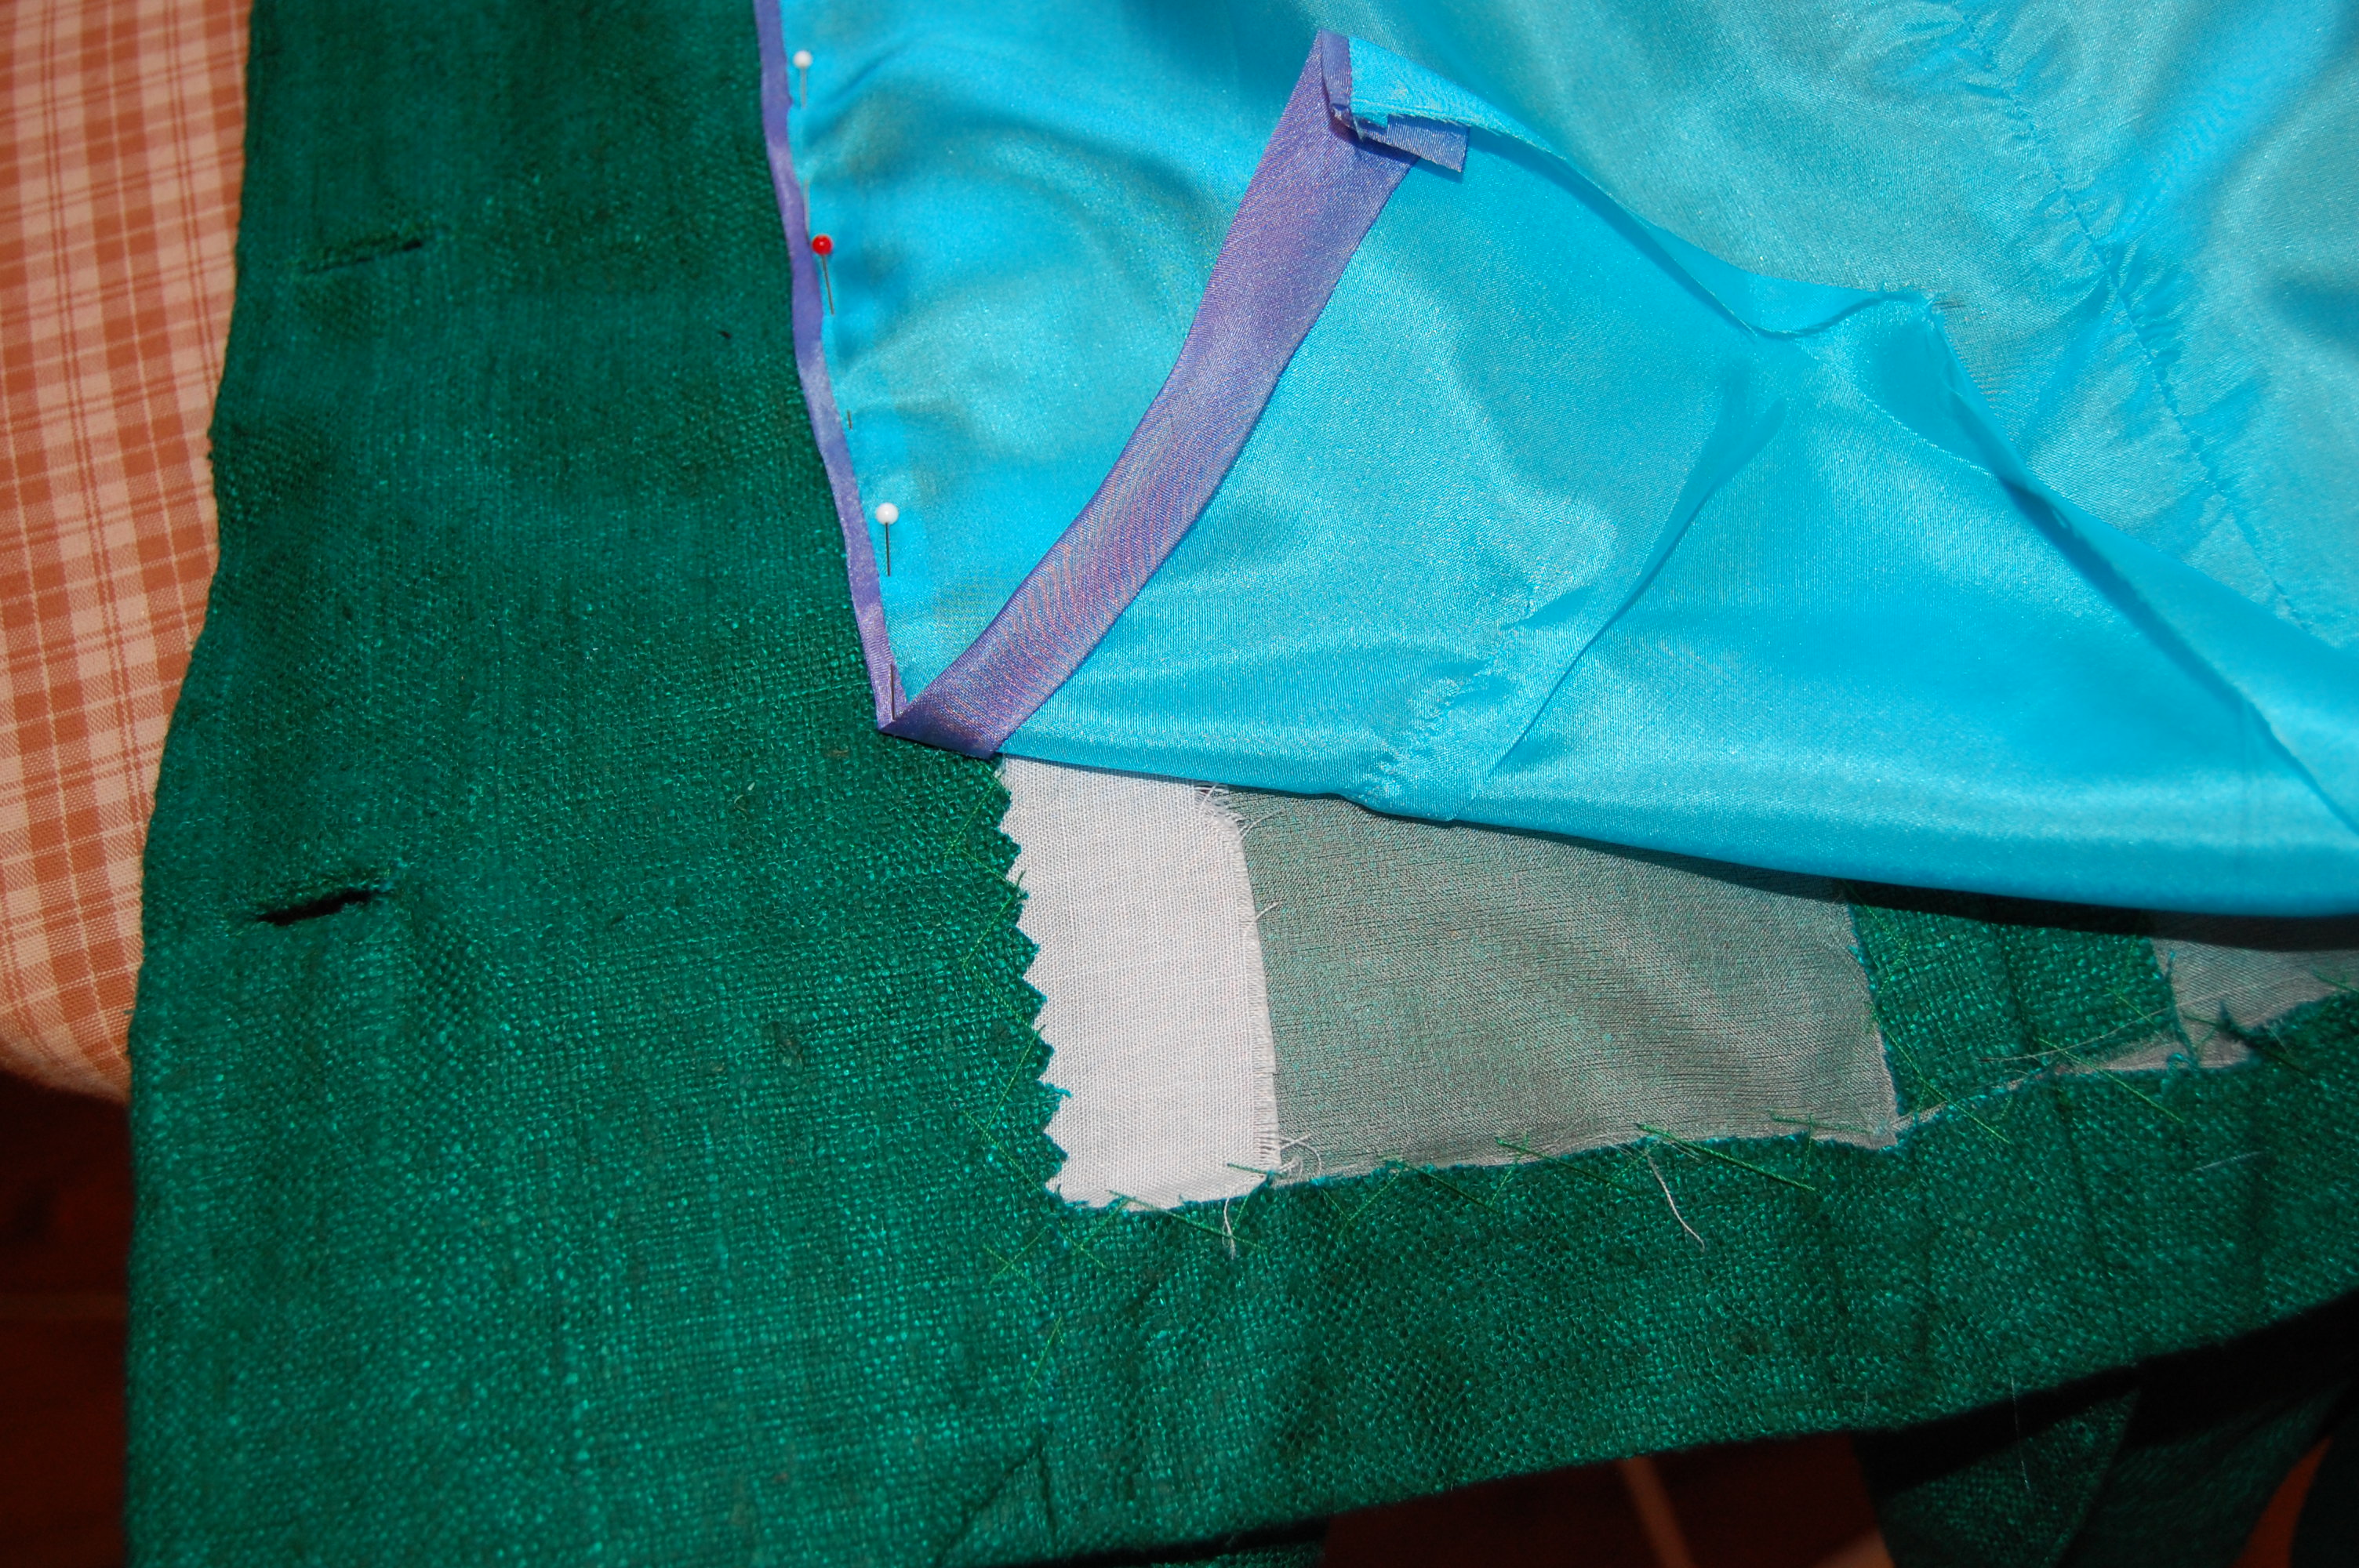
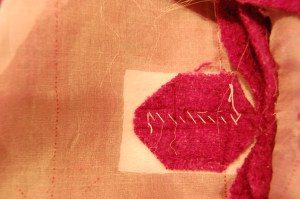
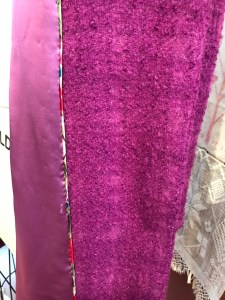
The entire coat is underlined in silk organza, including the belt, shown here with one side sewn by machine.

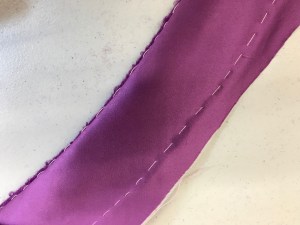
And here is the silk charmeuse belt lining almost ready to be applied by hand.

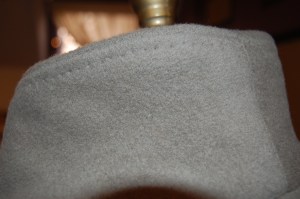
3) Underlining the collar with charmeuse (again to reduce bulk) and then under-stitching the underside, to make it turn beautifully.

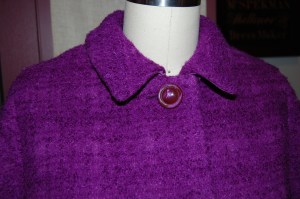
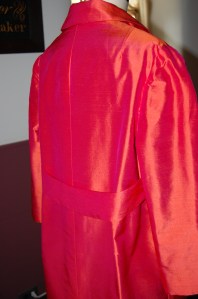
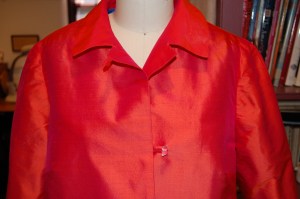
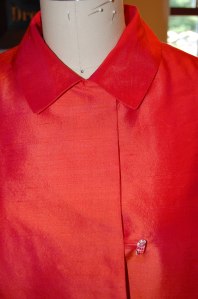
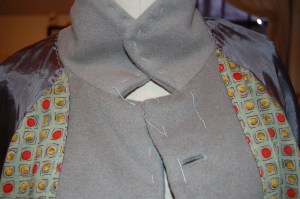
The collar on this pattern is beautifully designed to sit perfectly on the neck.

4) Clipping the long back center seam, even though it is on the straight of grain.  Clipping it reduces strain on that seam and allows a much more fluid movement of the back of the coat.  (I’m sorry I forgot to take a picture of this, but it is certainly not rocket science, just common sense.)

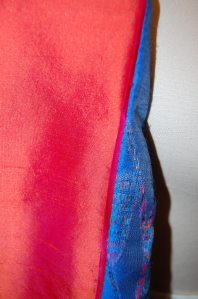
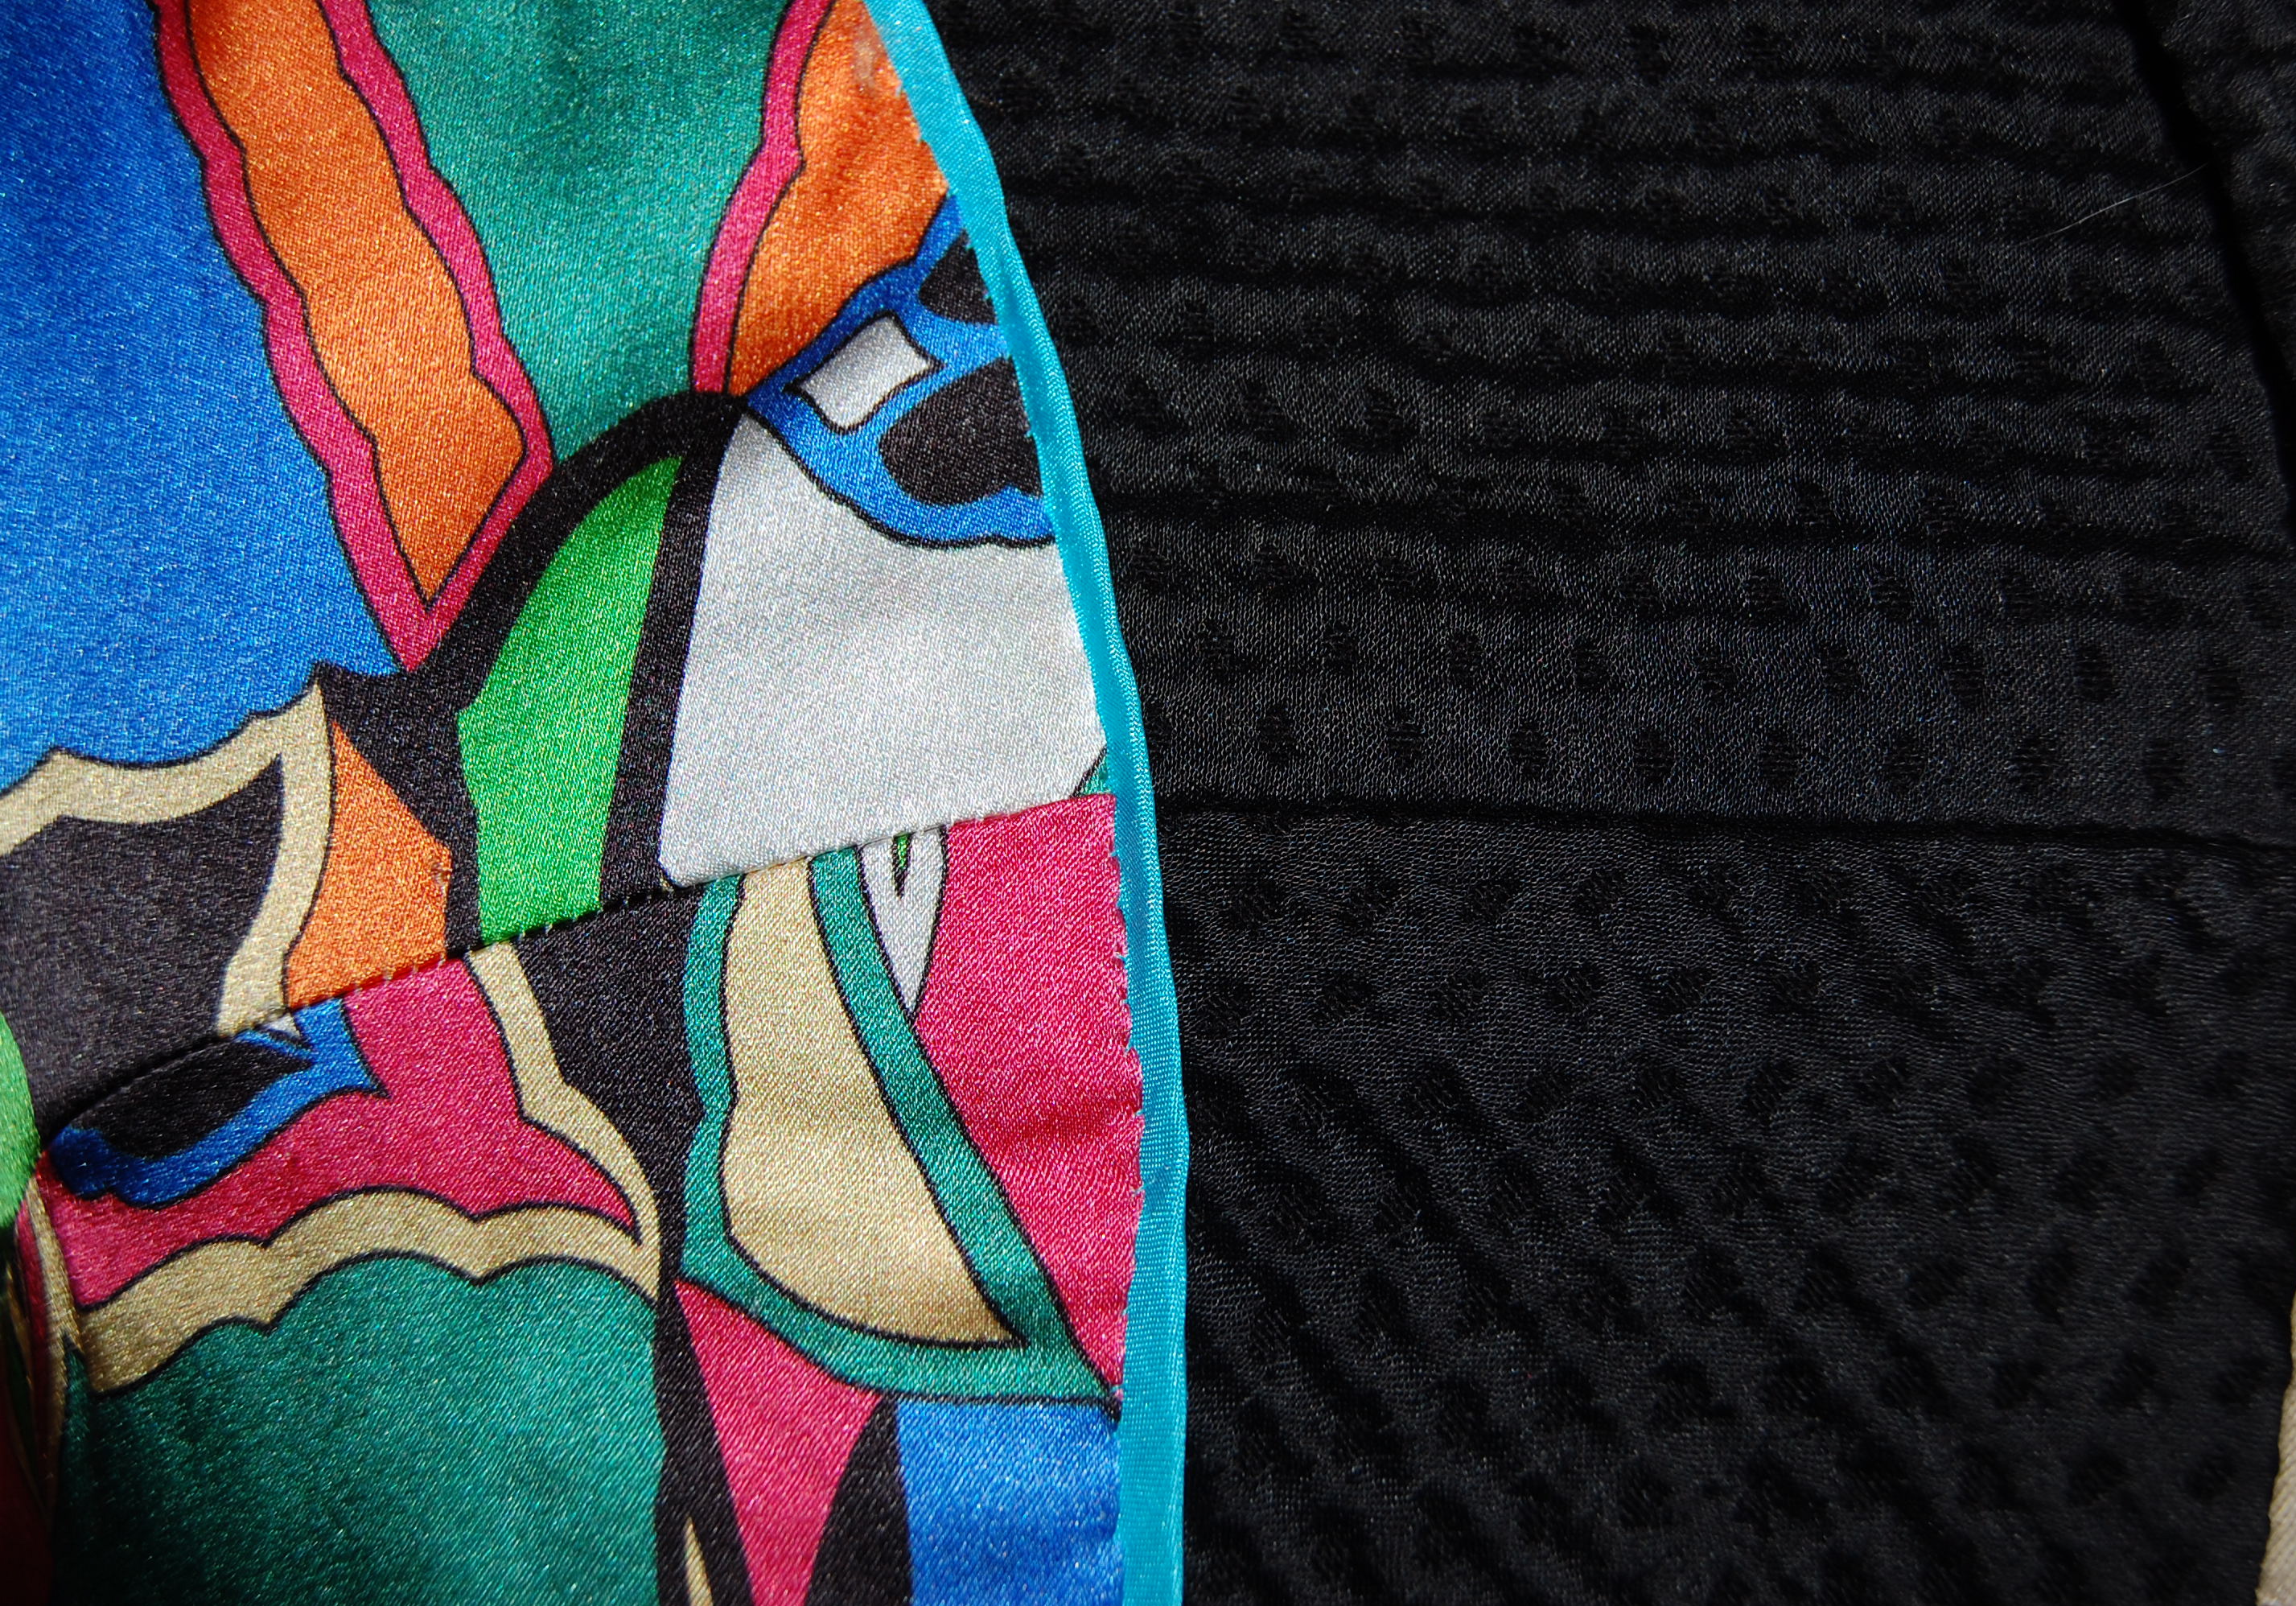
5) Tips for matching the woven windowpane design in the wool, the weave of which was difficult to see close-up.  Forked pins and a walking foot  helped to keep the layers – even basted ones – from shifting.

Other procedures I used to help “tame” this fabric were:  lots of judicious trimming of seams and corners; clipping, clipping and more clipping; lots of steam and pressing; lots of basting of seams.

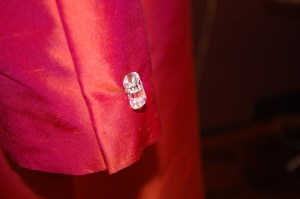
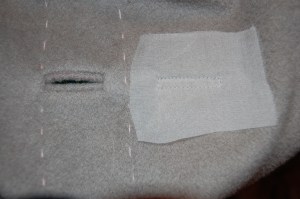
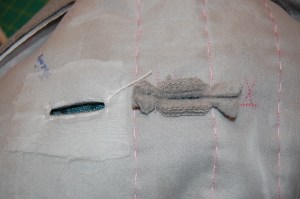
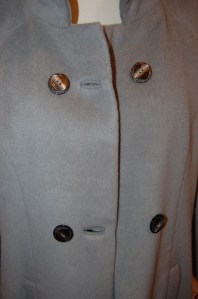
I even trimmed the edges of the bound buttonholes to reduce bulk down the front of the coat. I am not completely happy with the buttonholes (which were difficult to do on this fabric), but once I finished them, they looked better than I thought they would.

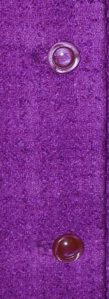
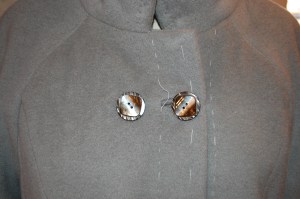
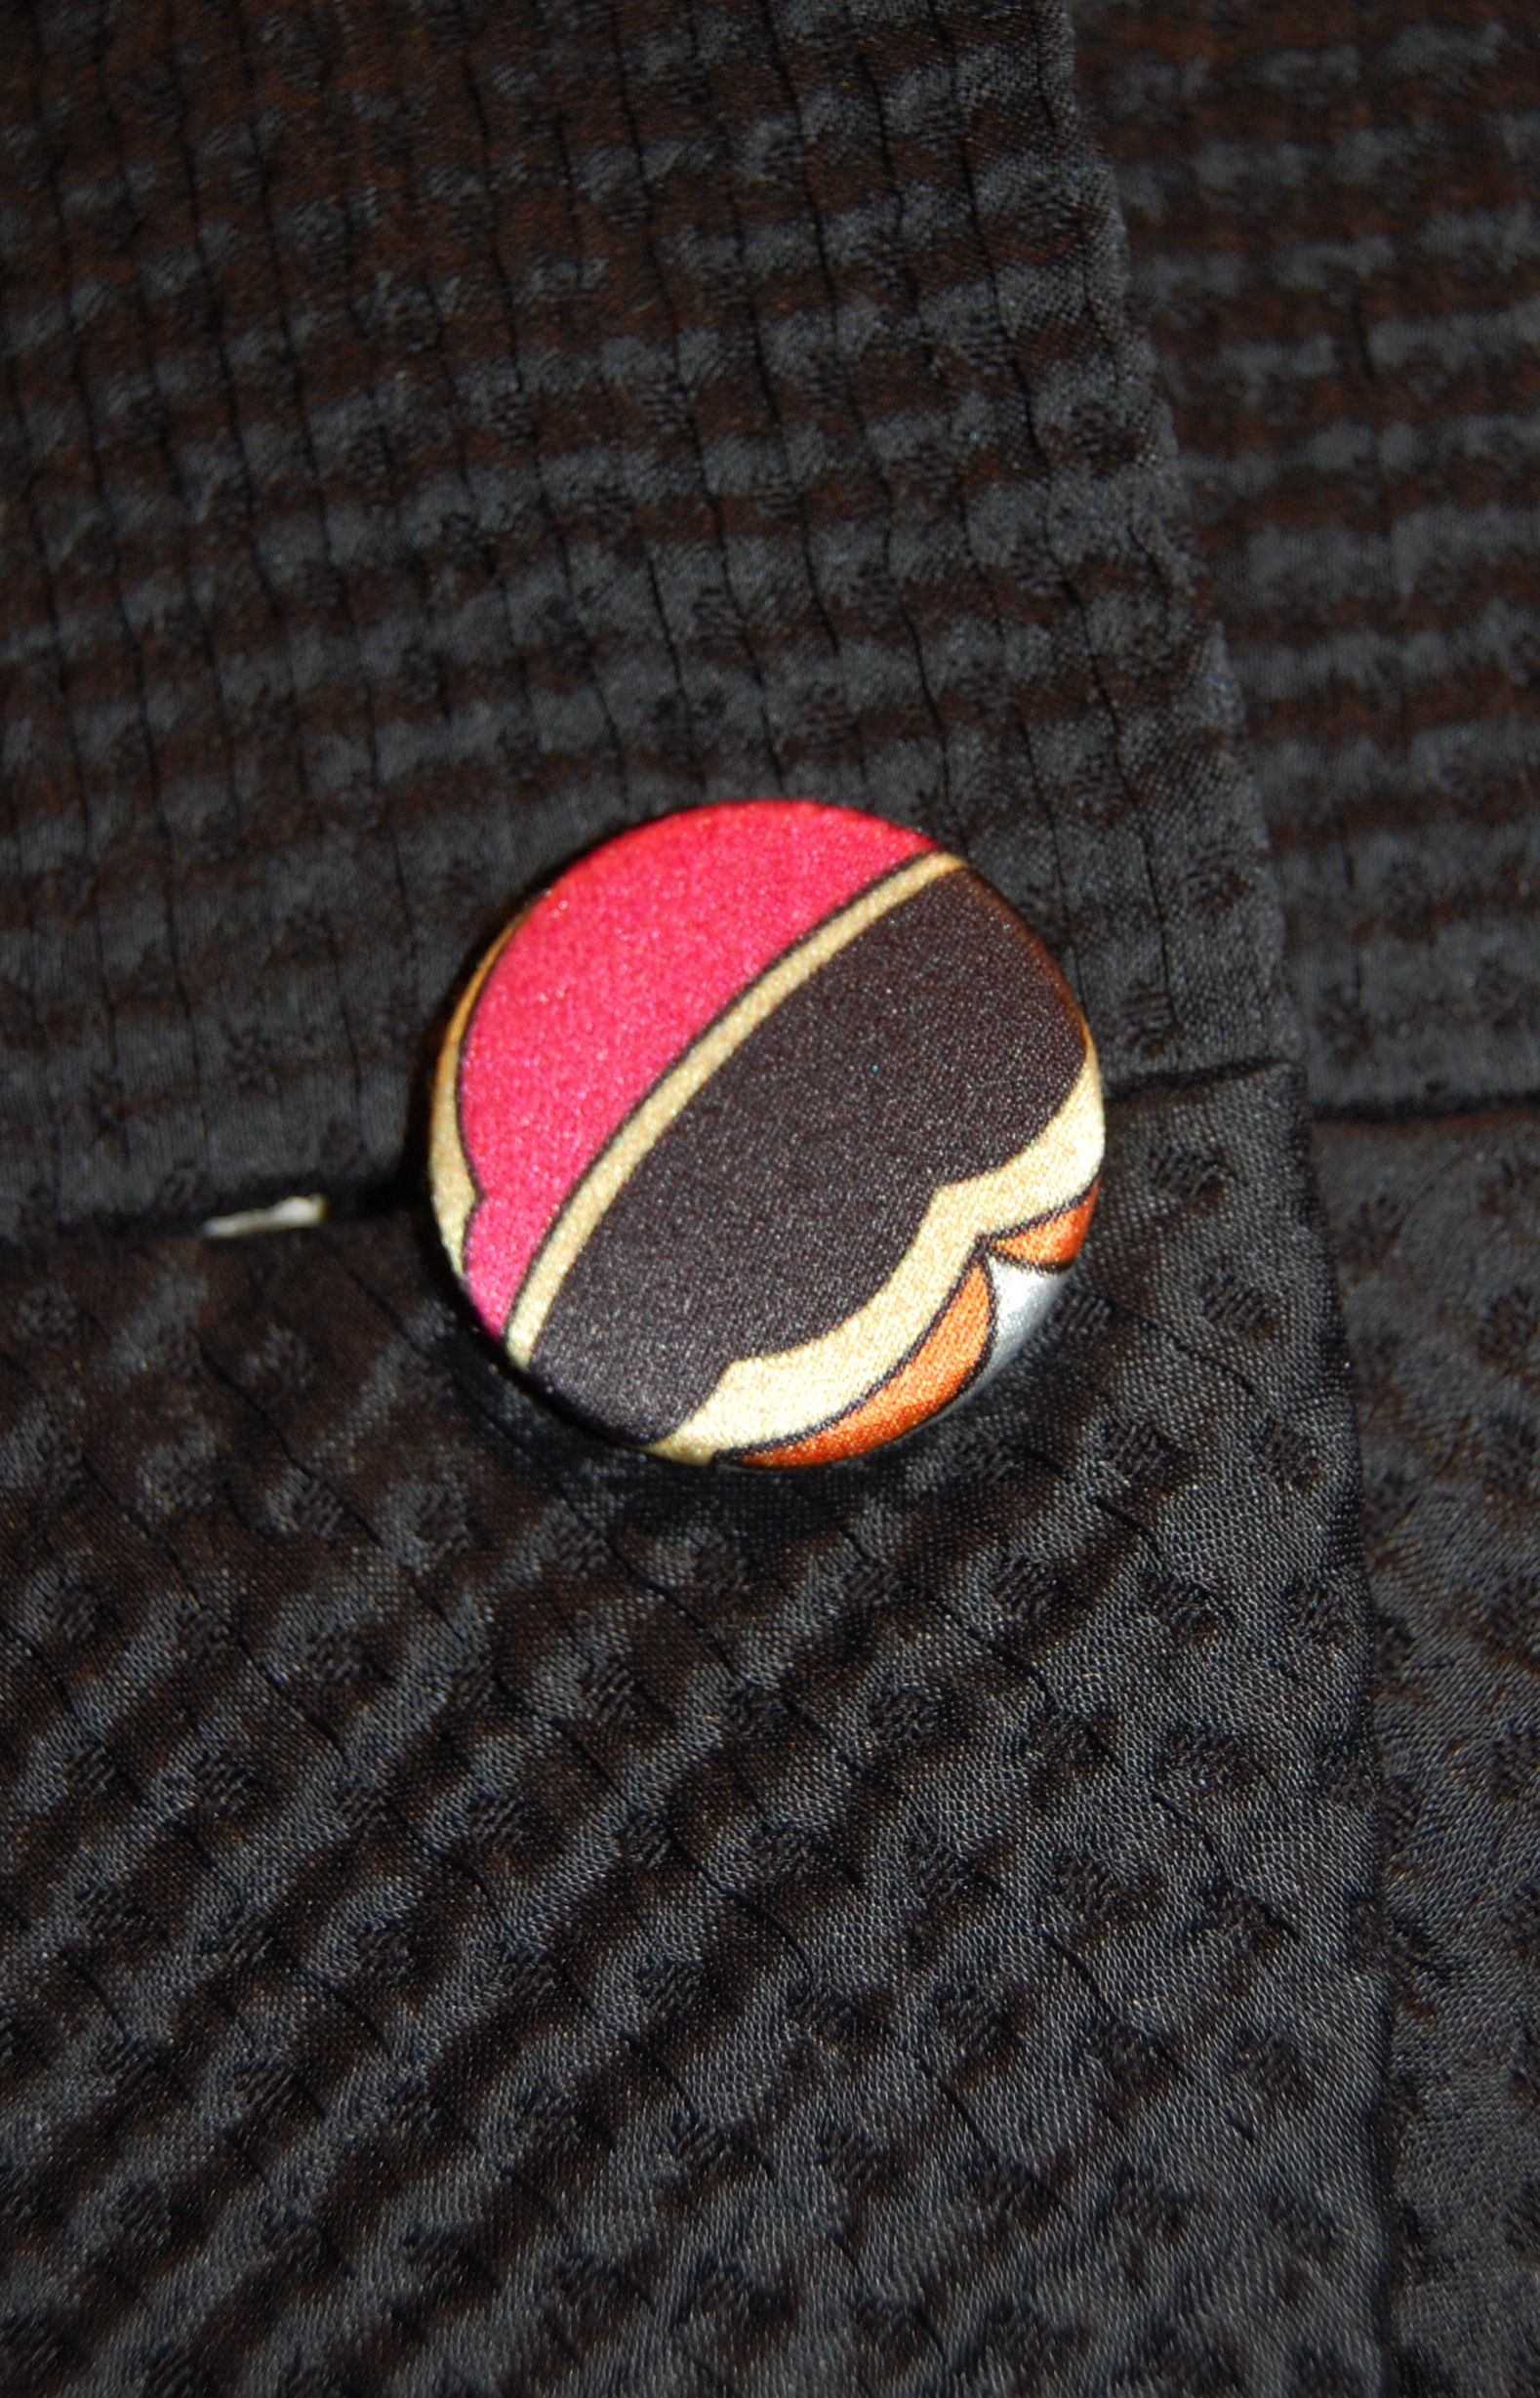
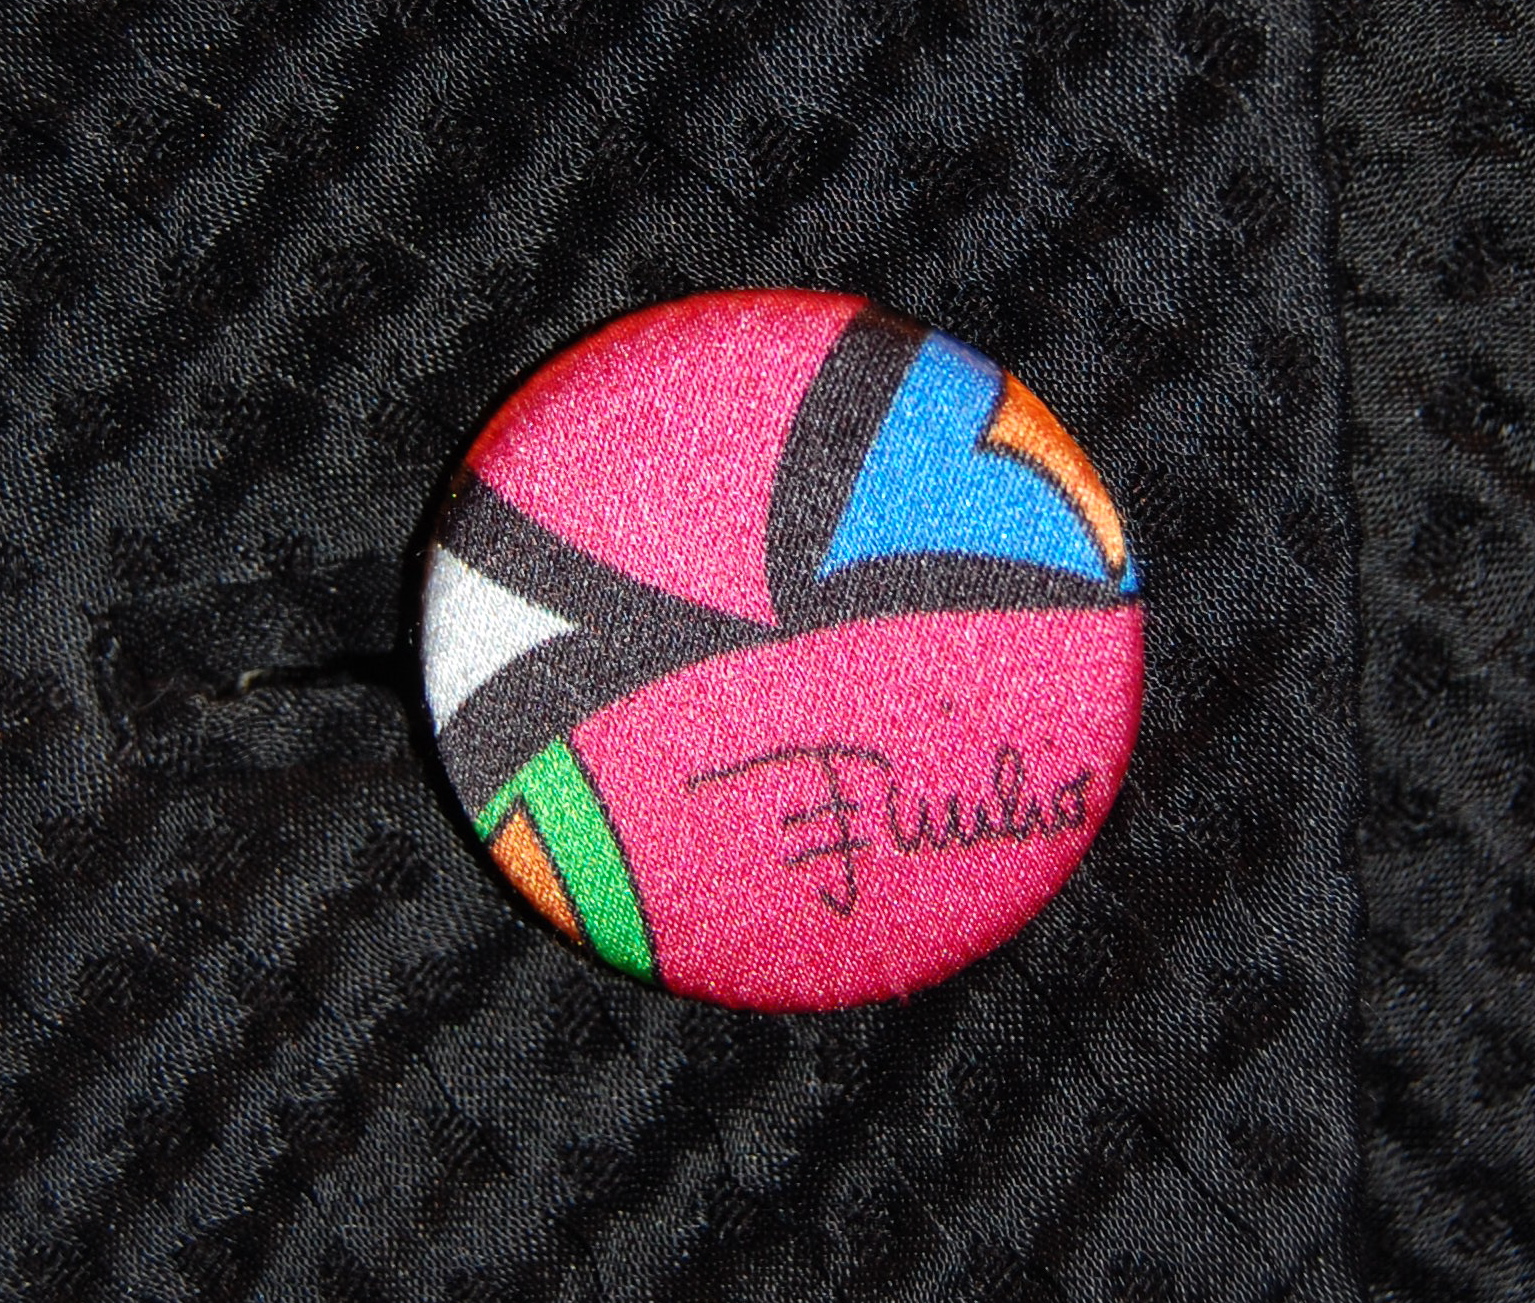
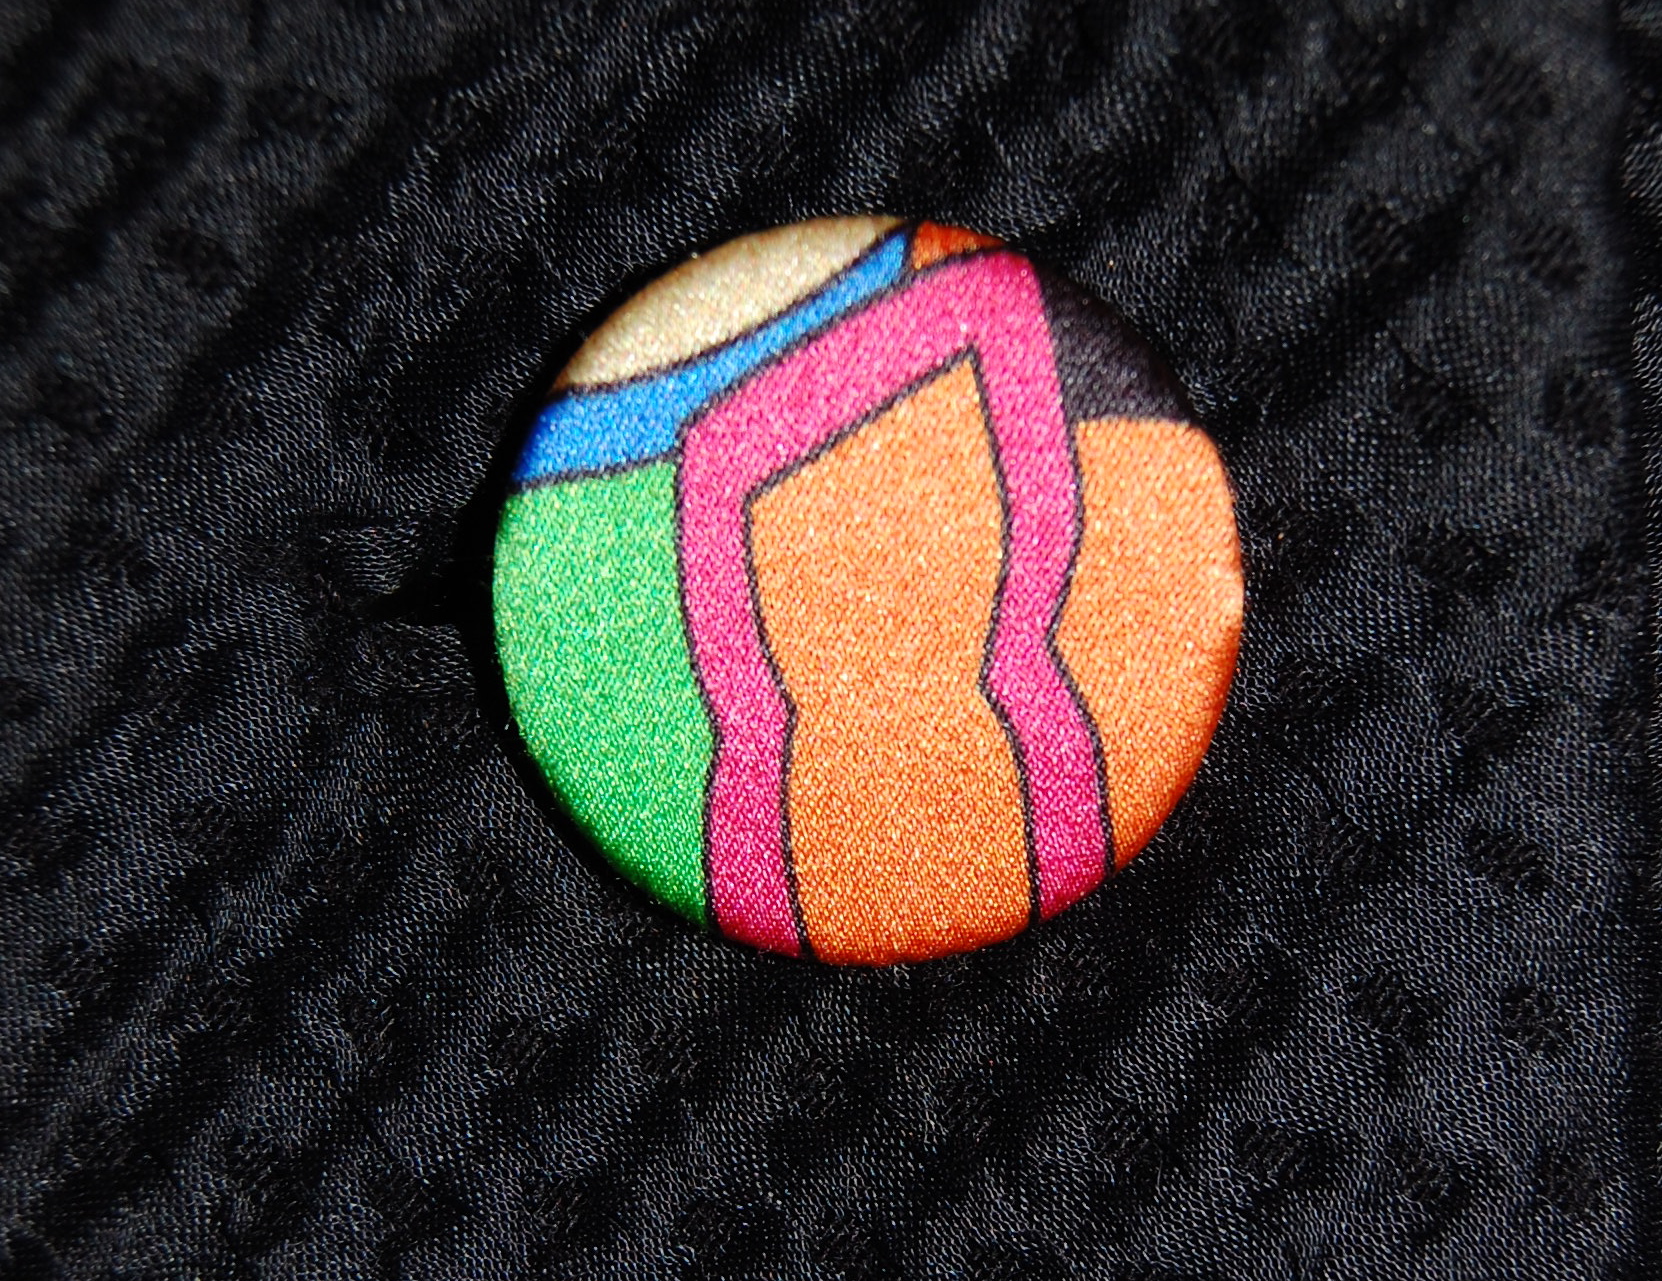
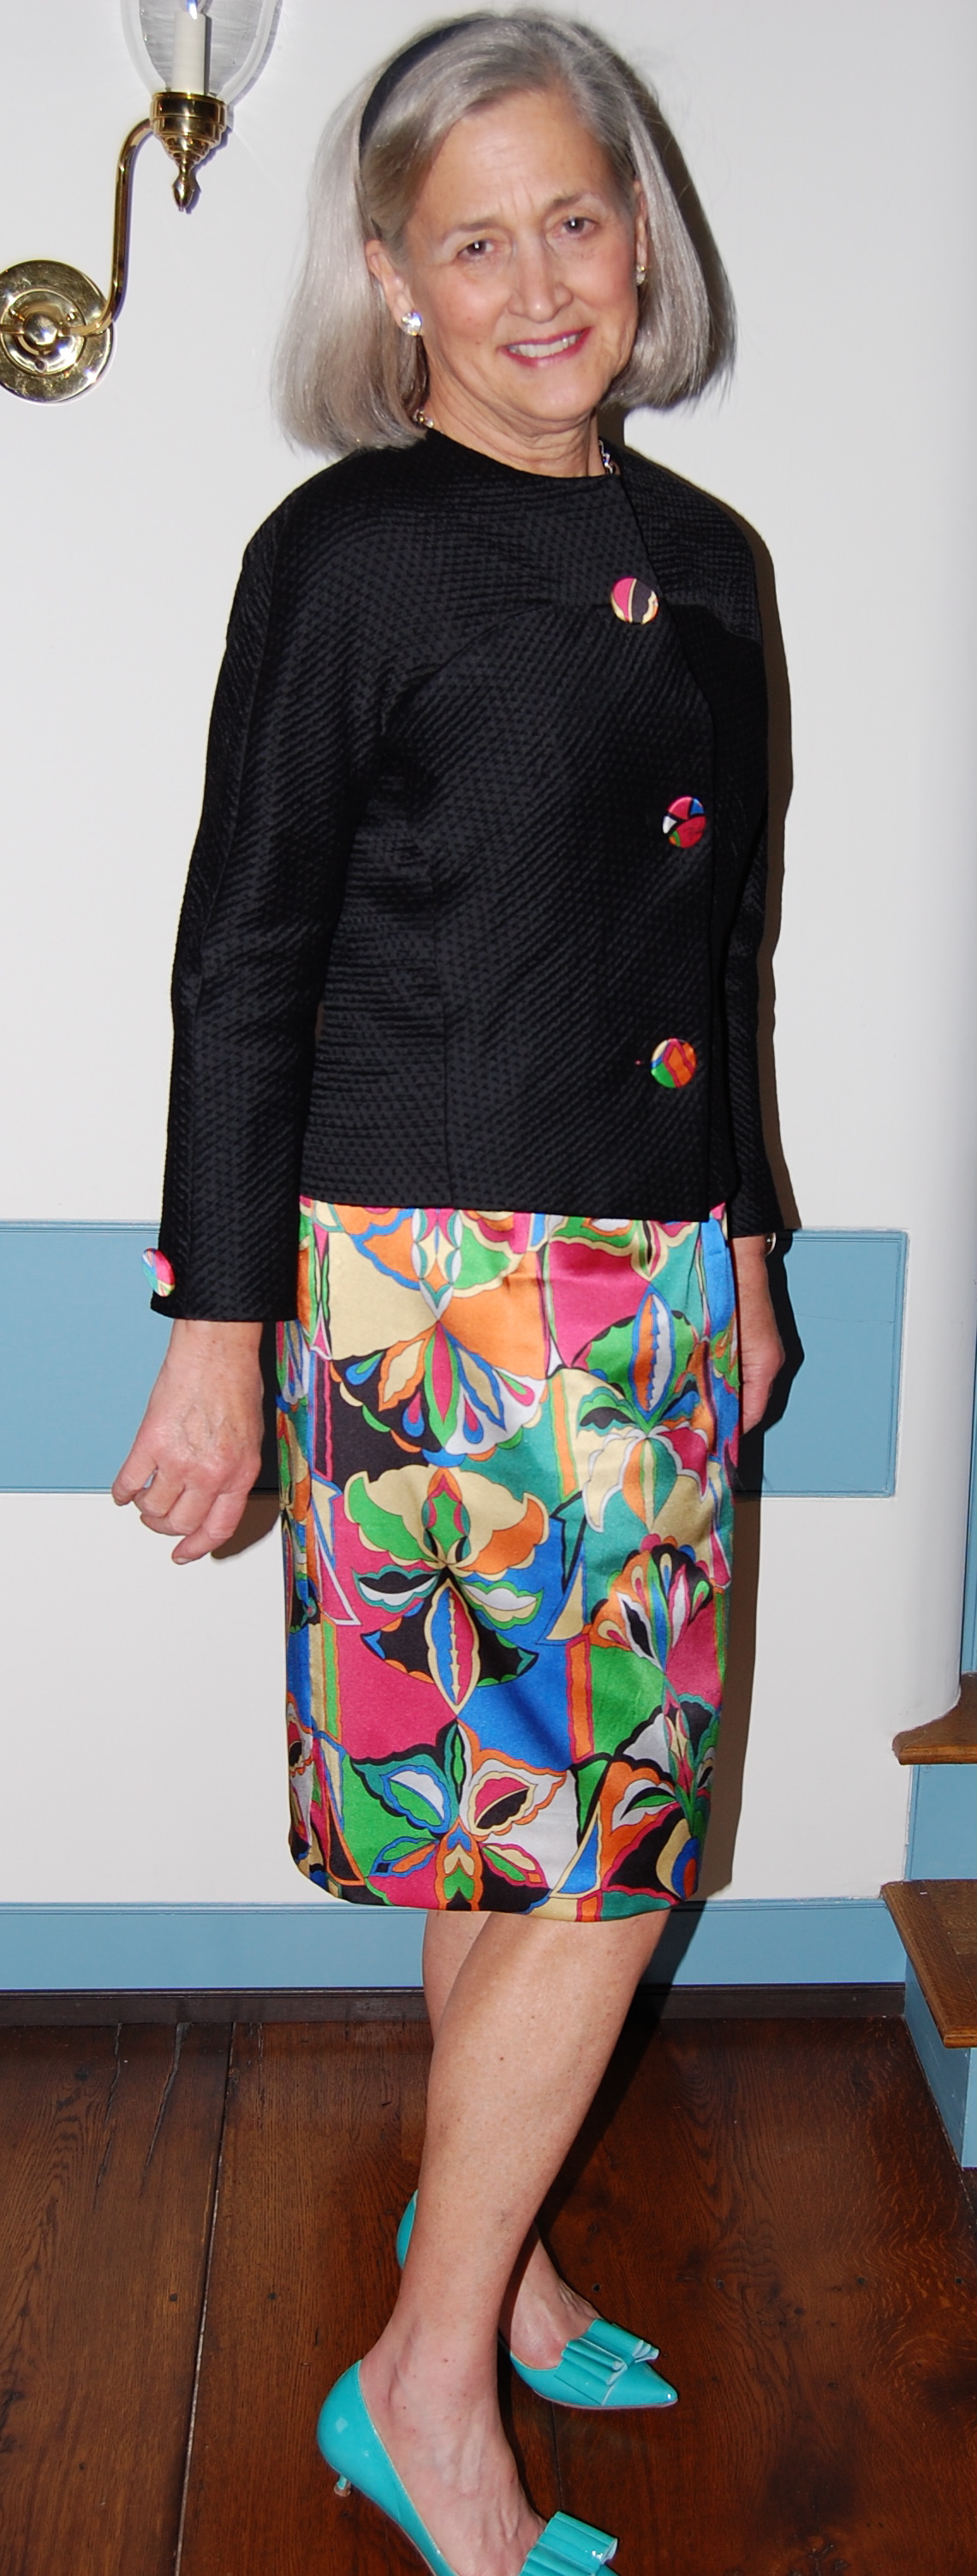
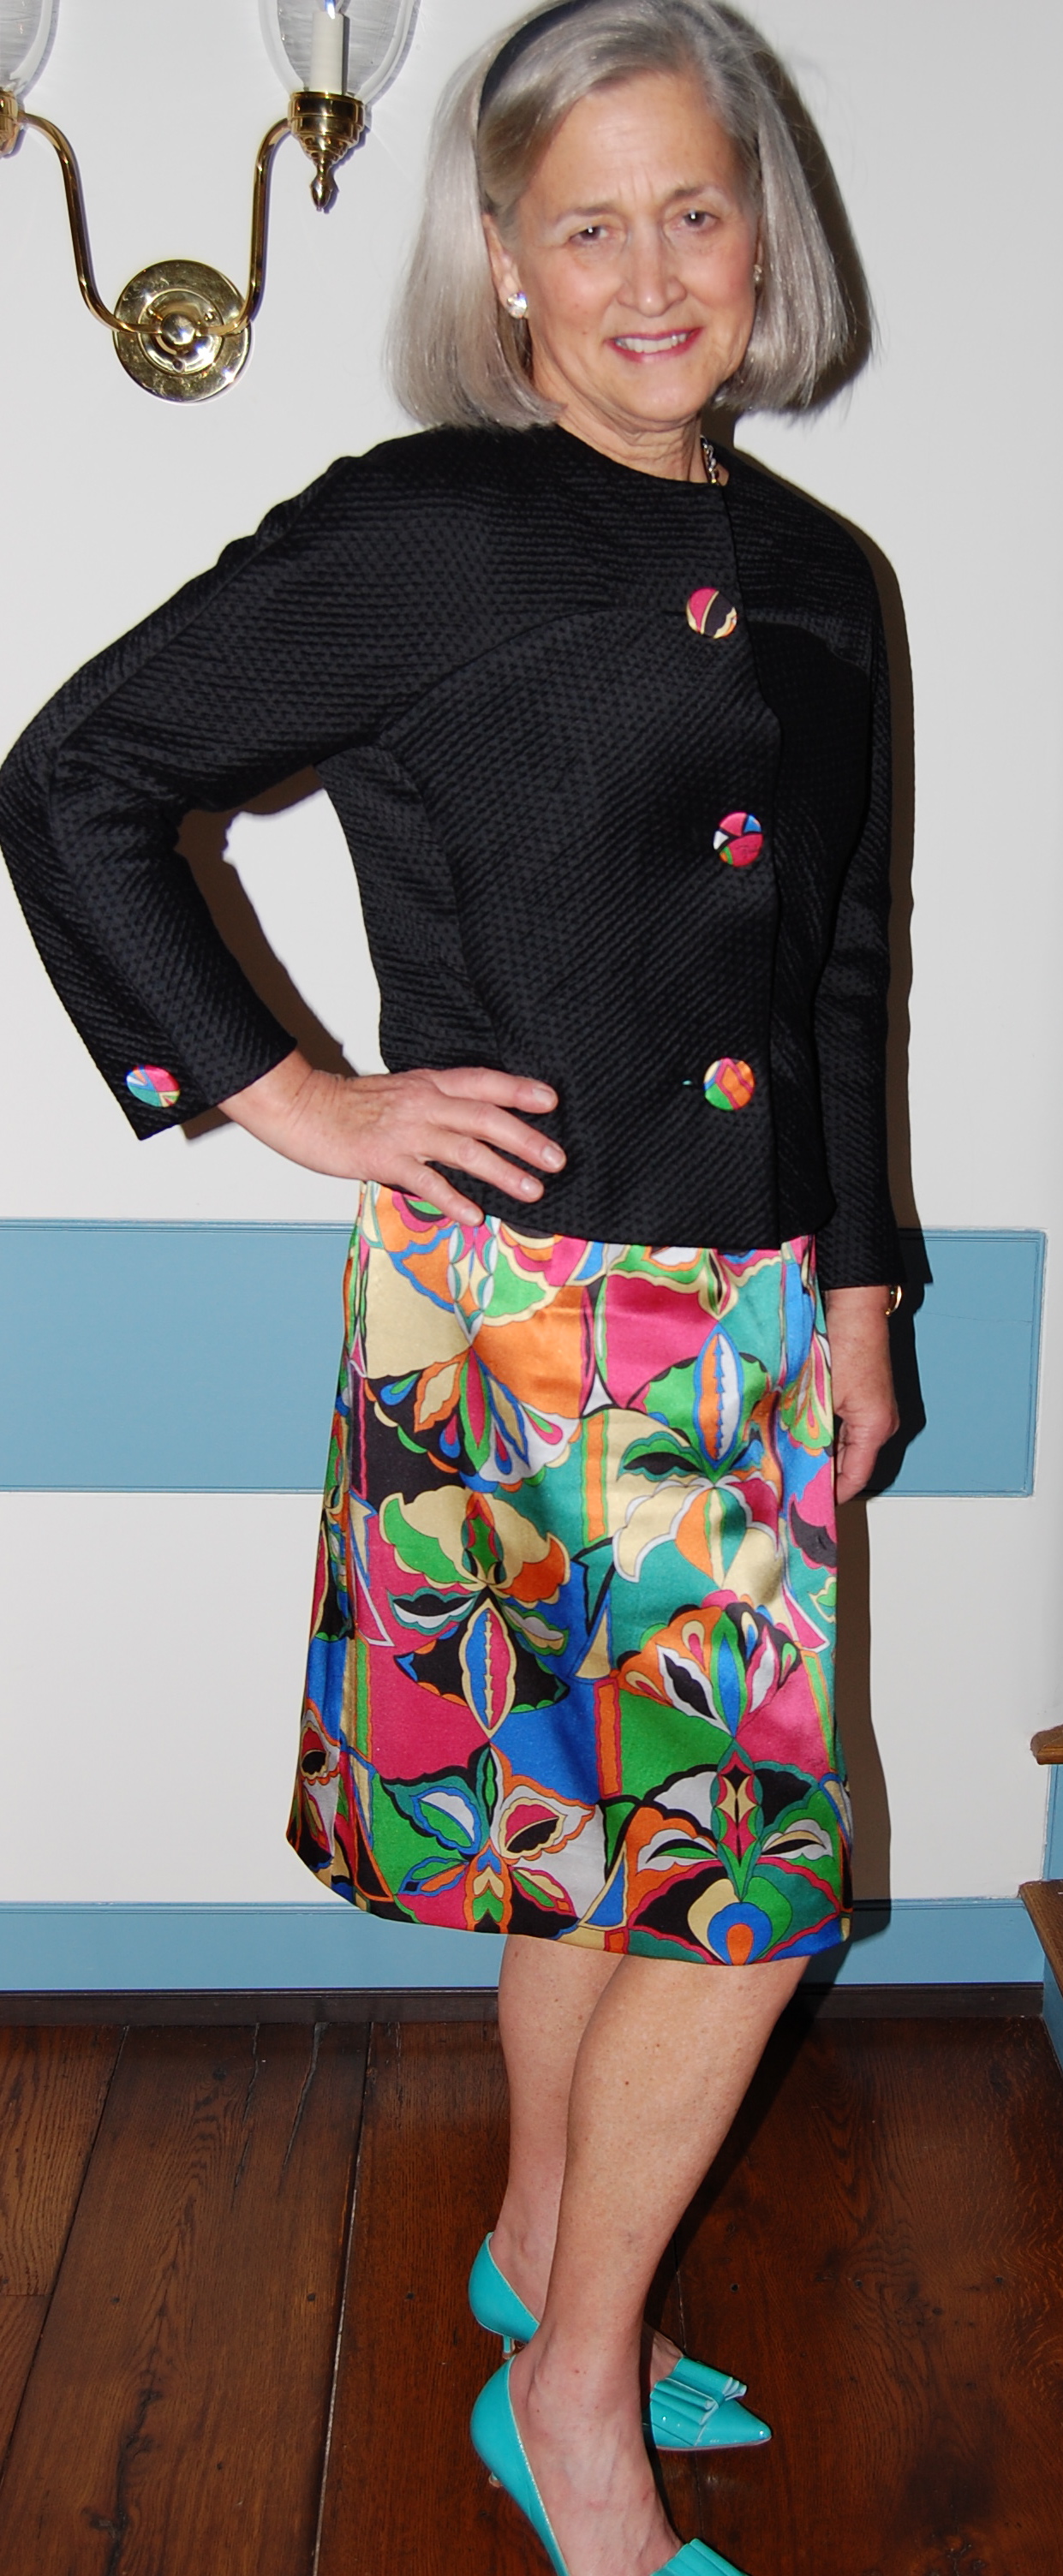
I found these buttons in an Etsy store. From the 1960s, they are a nice fit with the fabric and the pattern. And I like their wobbly edges!

By the time I returned home from my class, I had the coat about half finished, but I felt completely confident in my ability to finish it competently.   Here are a few more details:

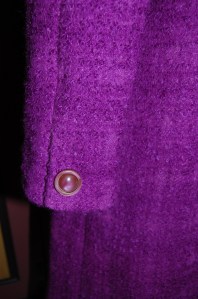
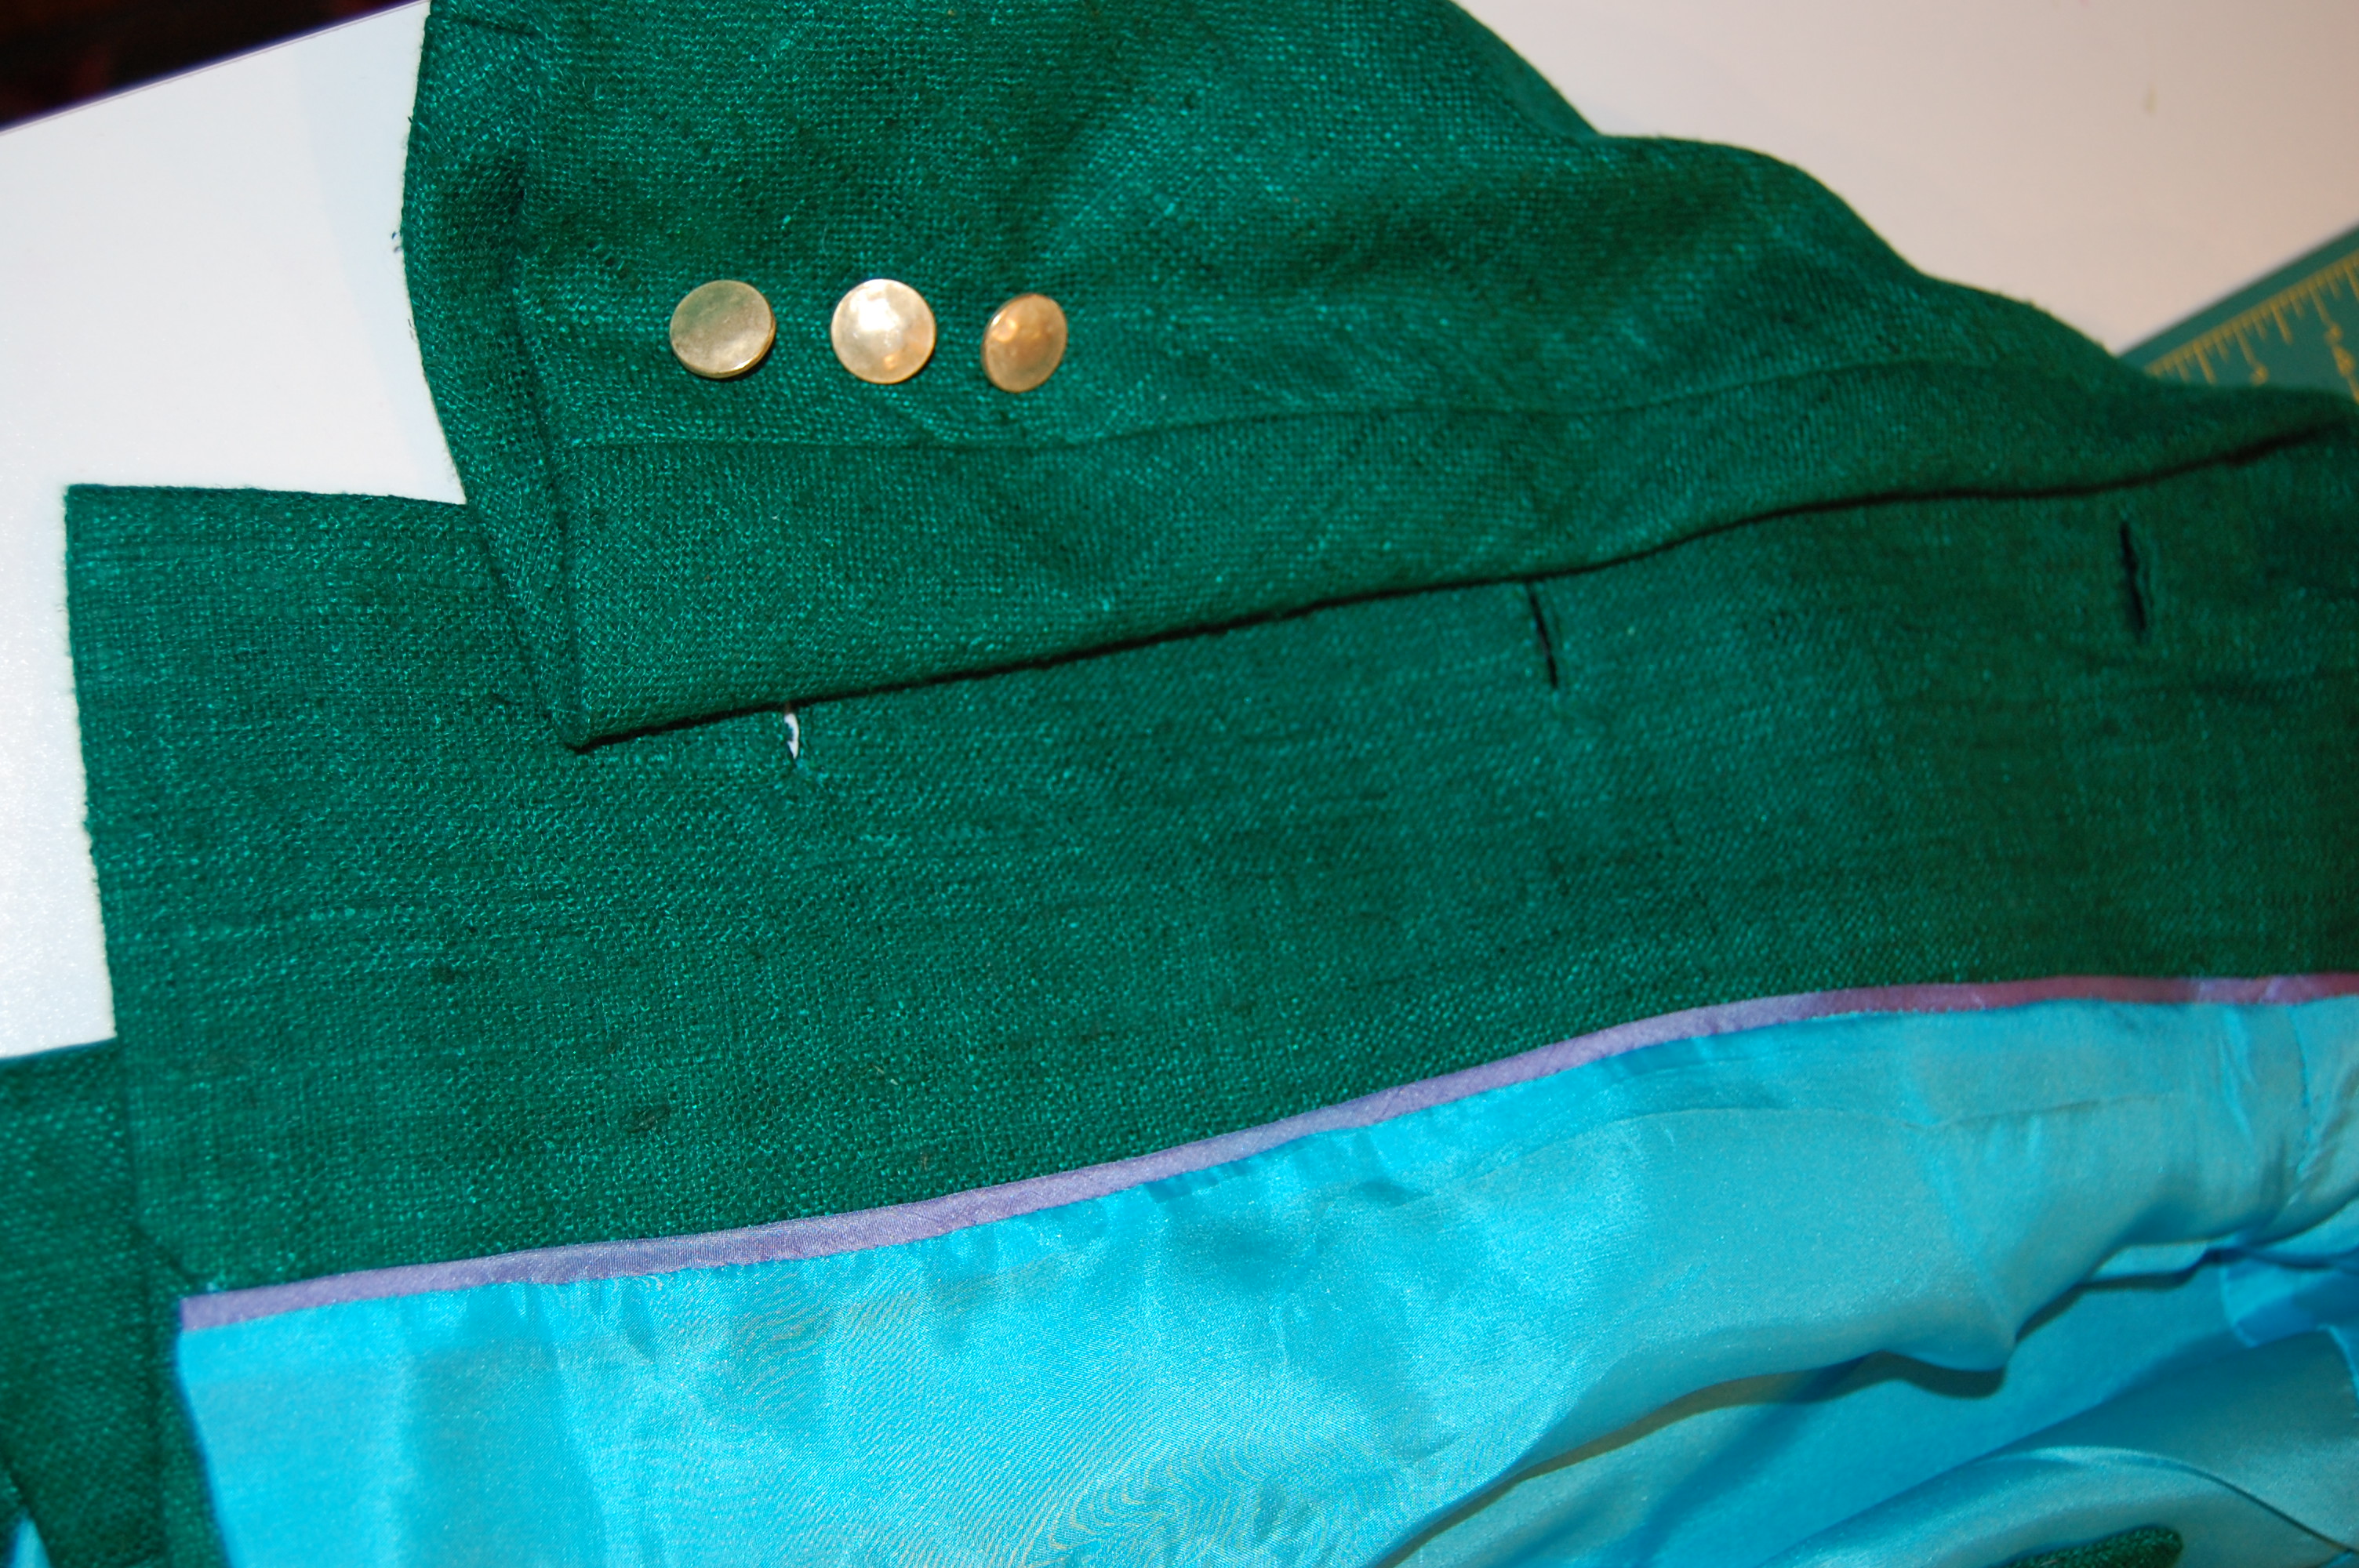
The sleeves feature a turned- back vent which is secured by a button through all layers.

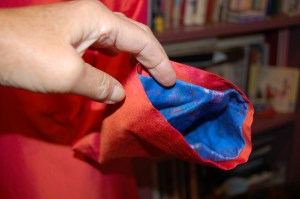
I used the pockets for this version of the coat (which I had eliminated for my silk version.)

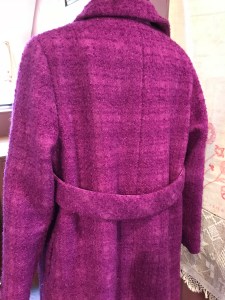
The belt is attached to the side seams just about an inch below the armhole. This placement allows it to fall right at the center back waist.

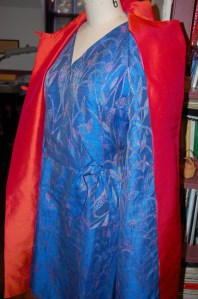
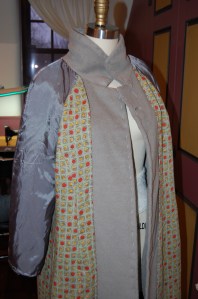
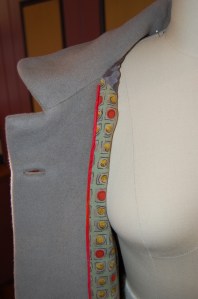
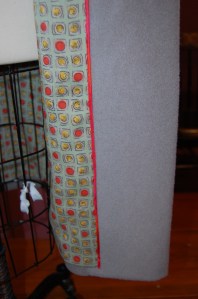
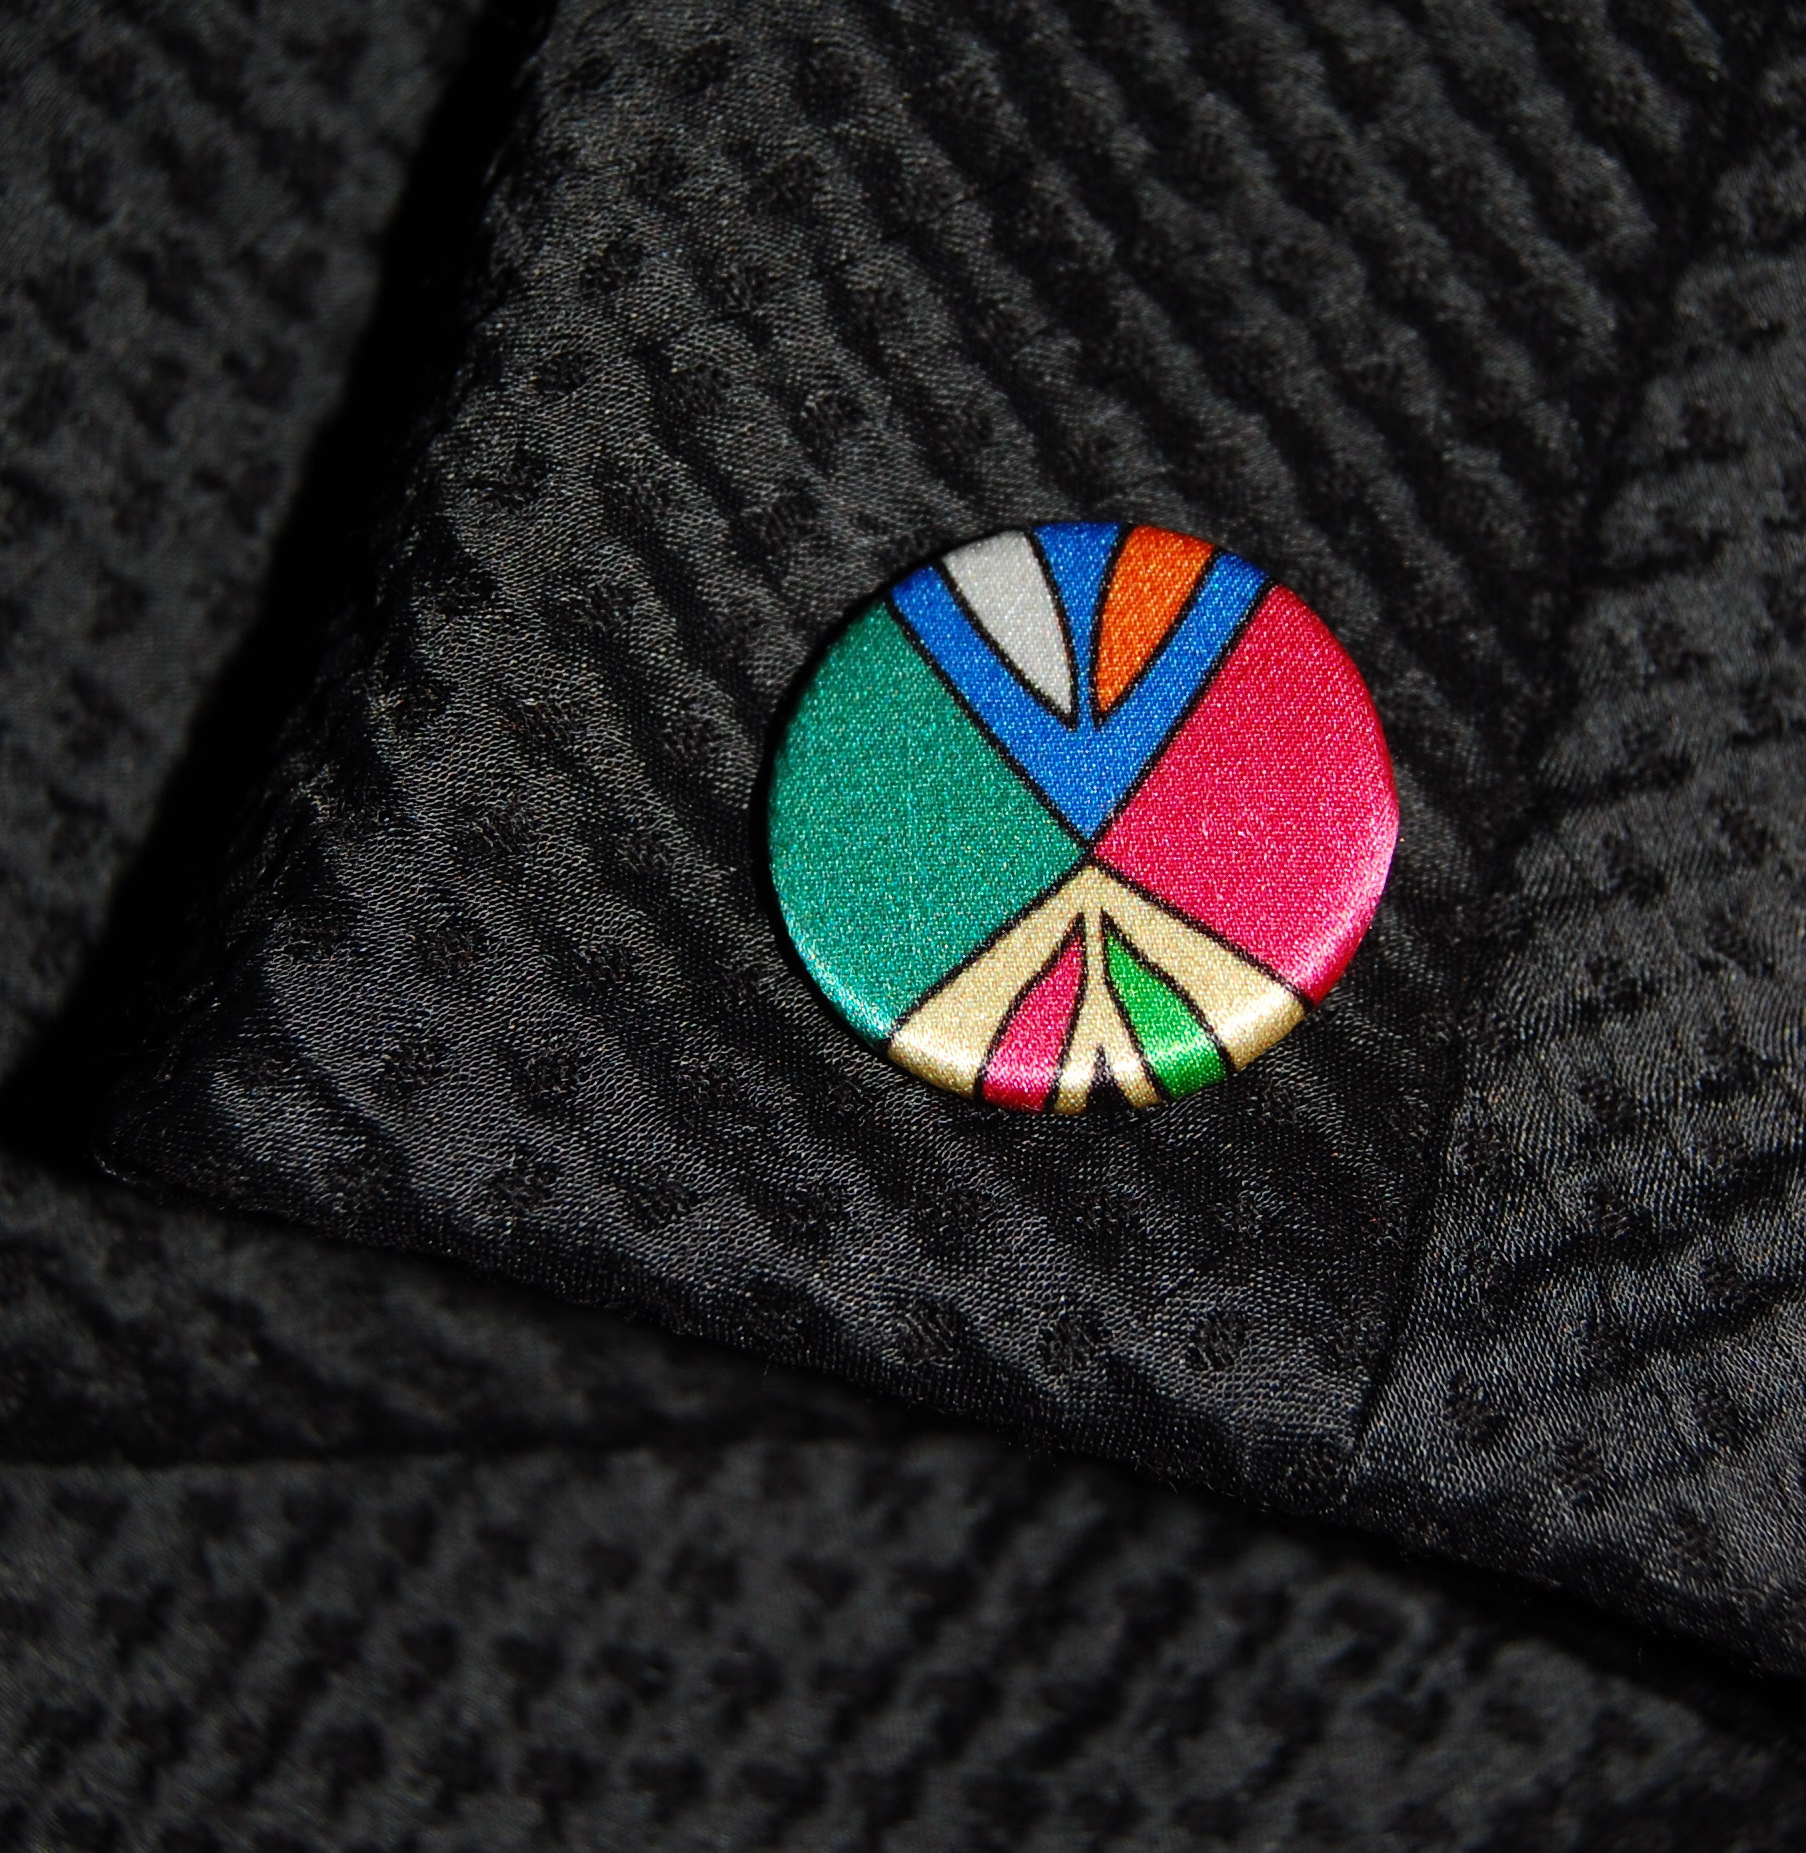
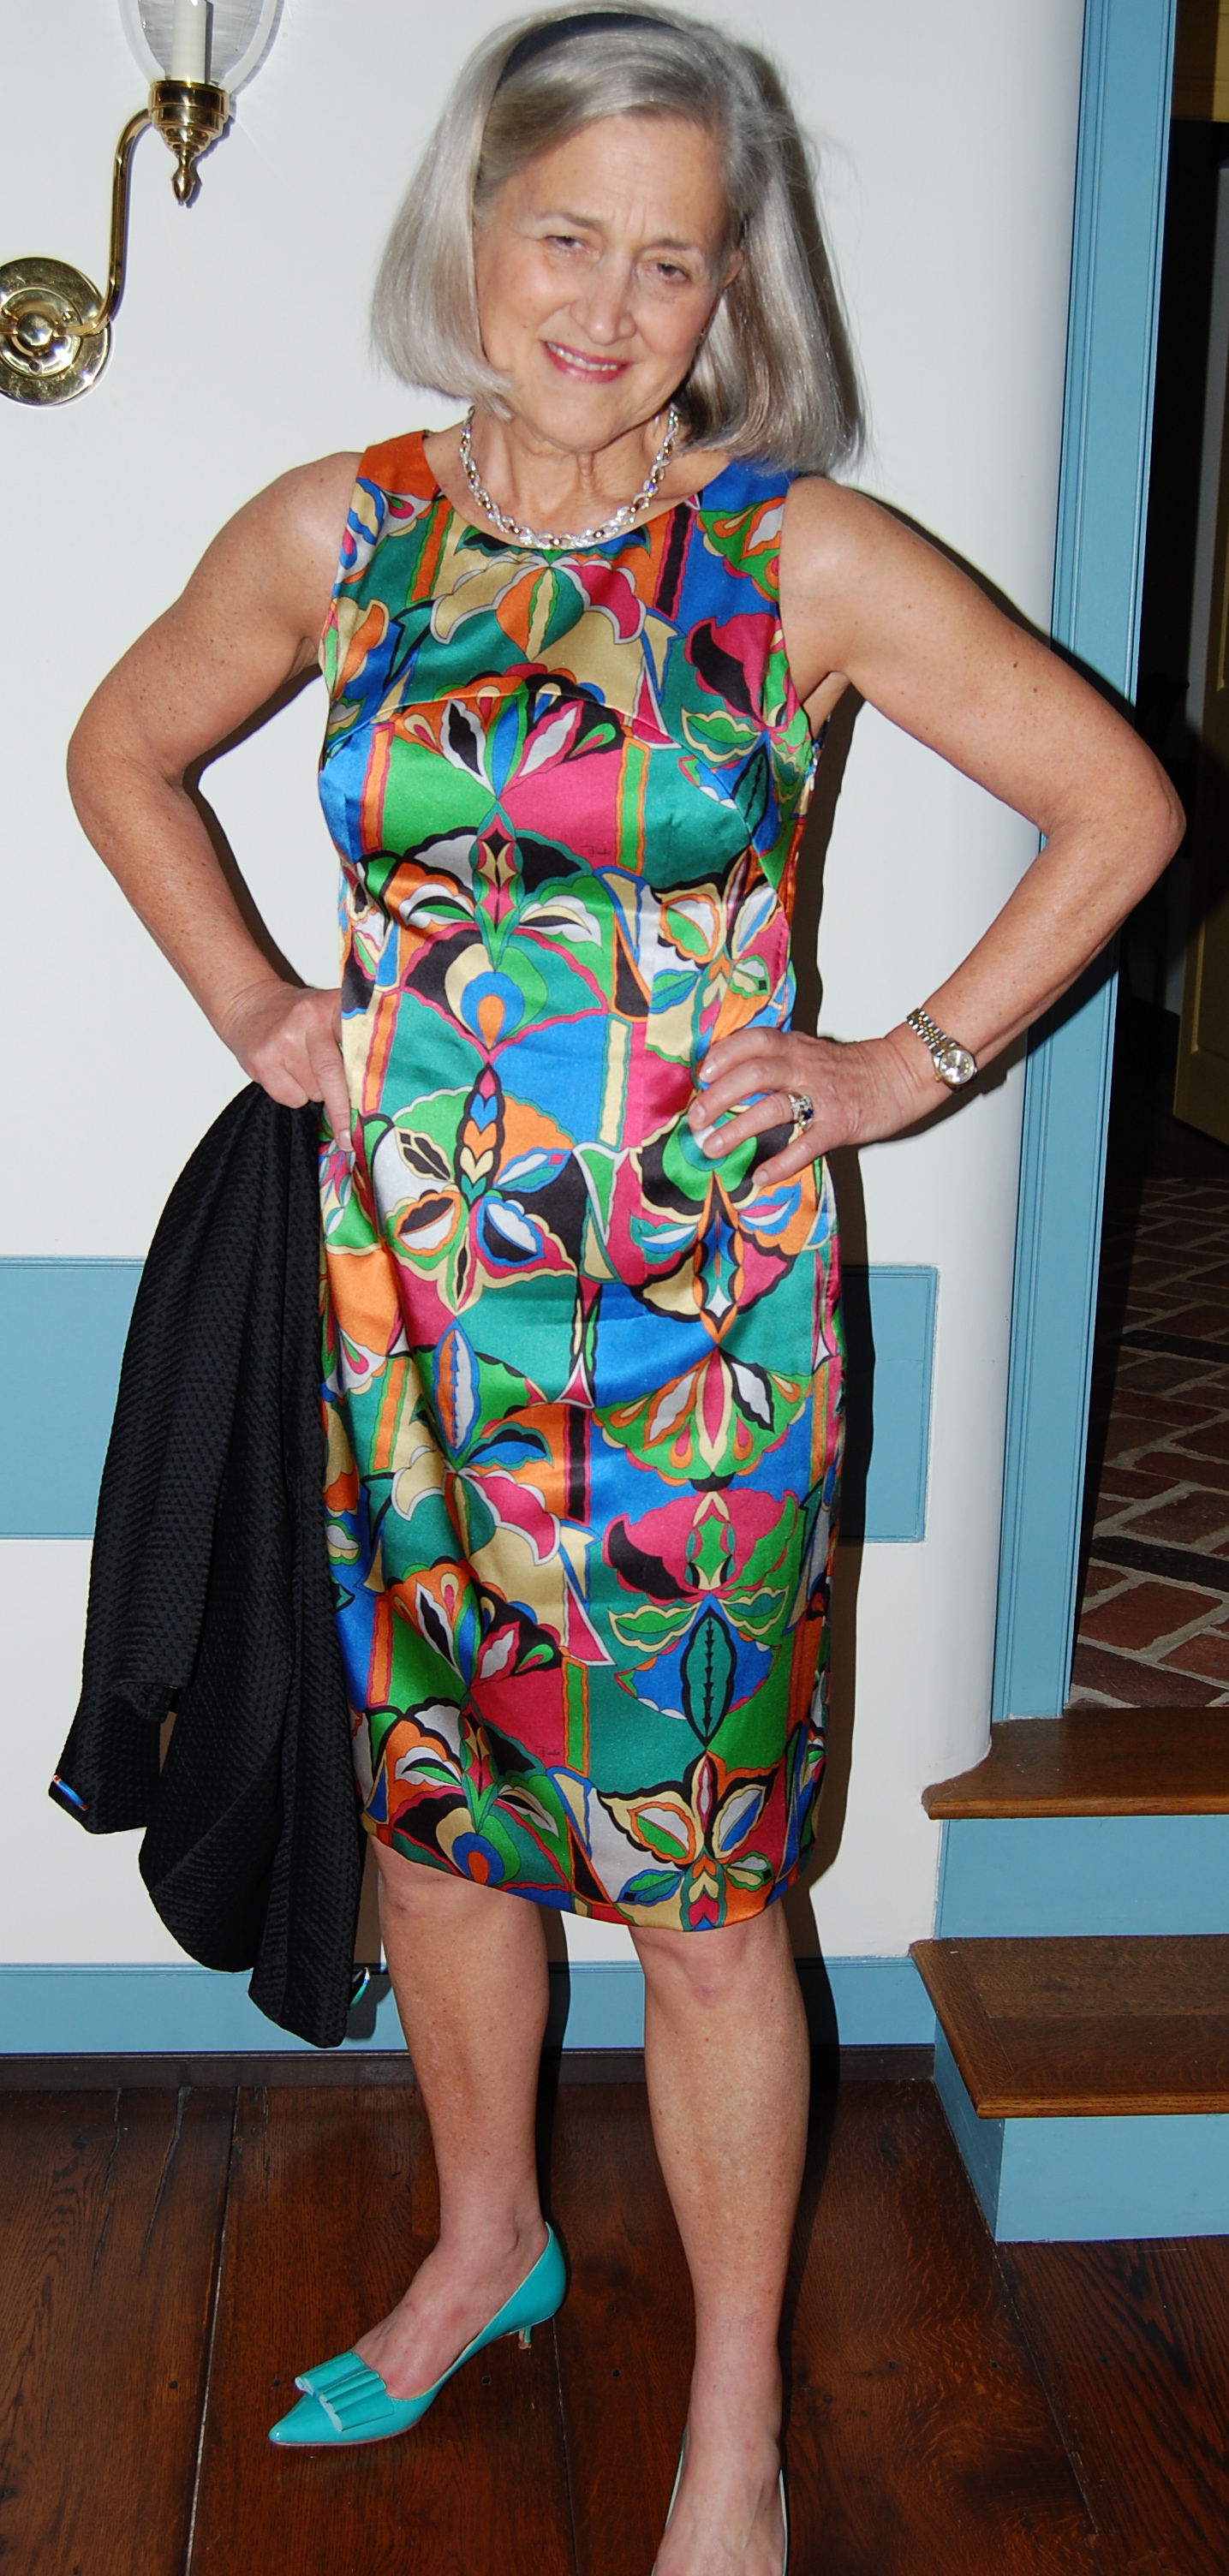
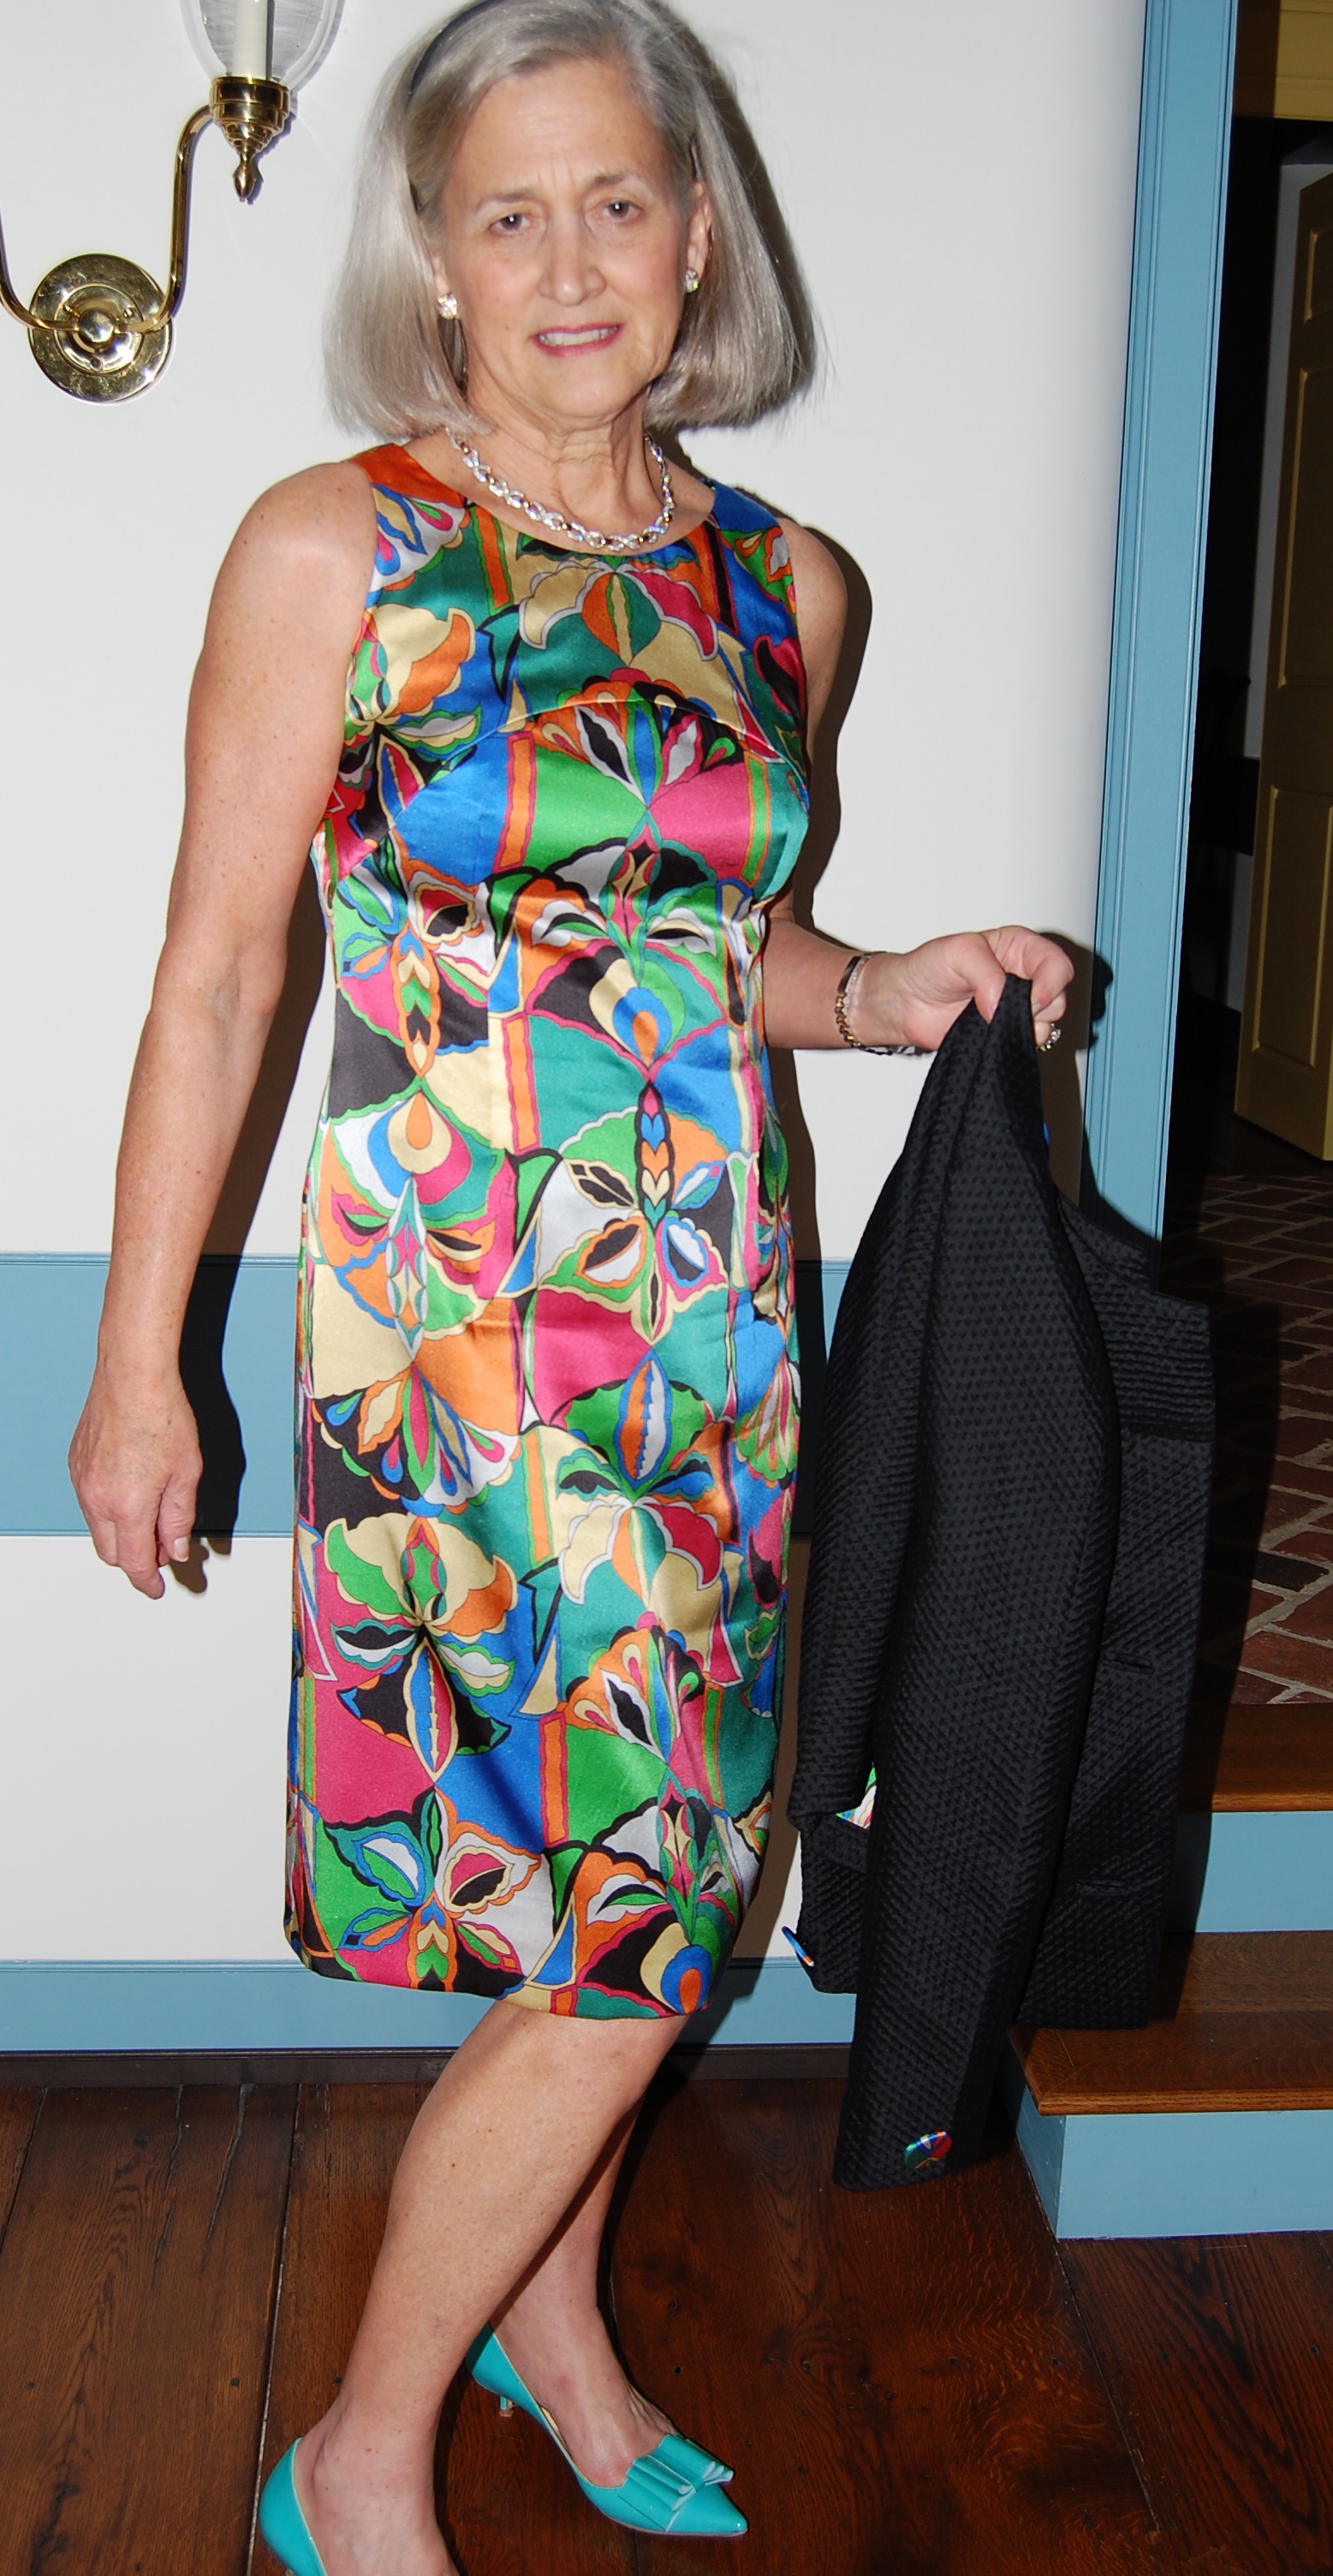
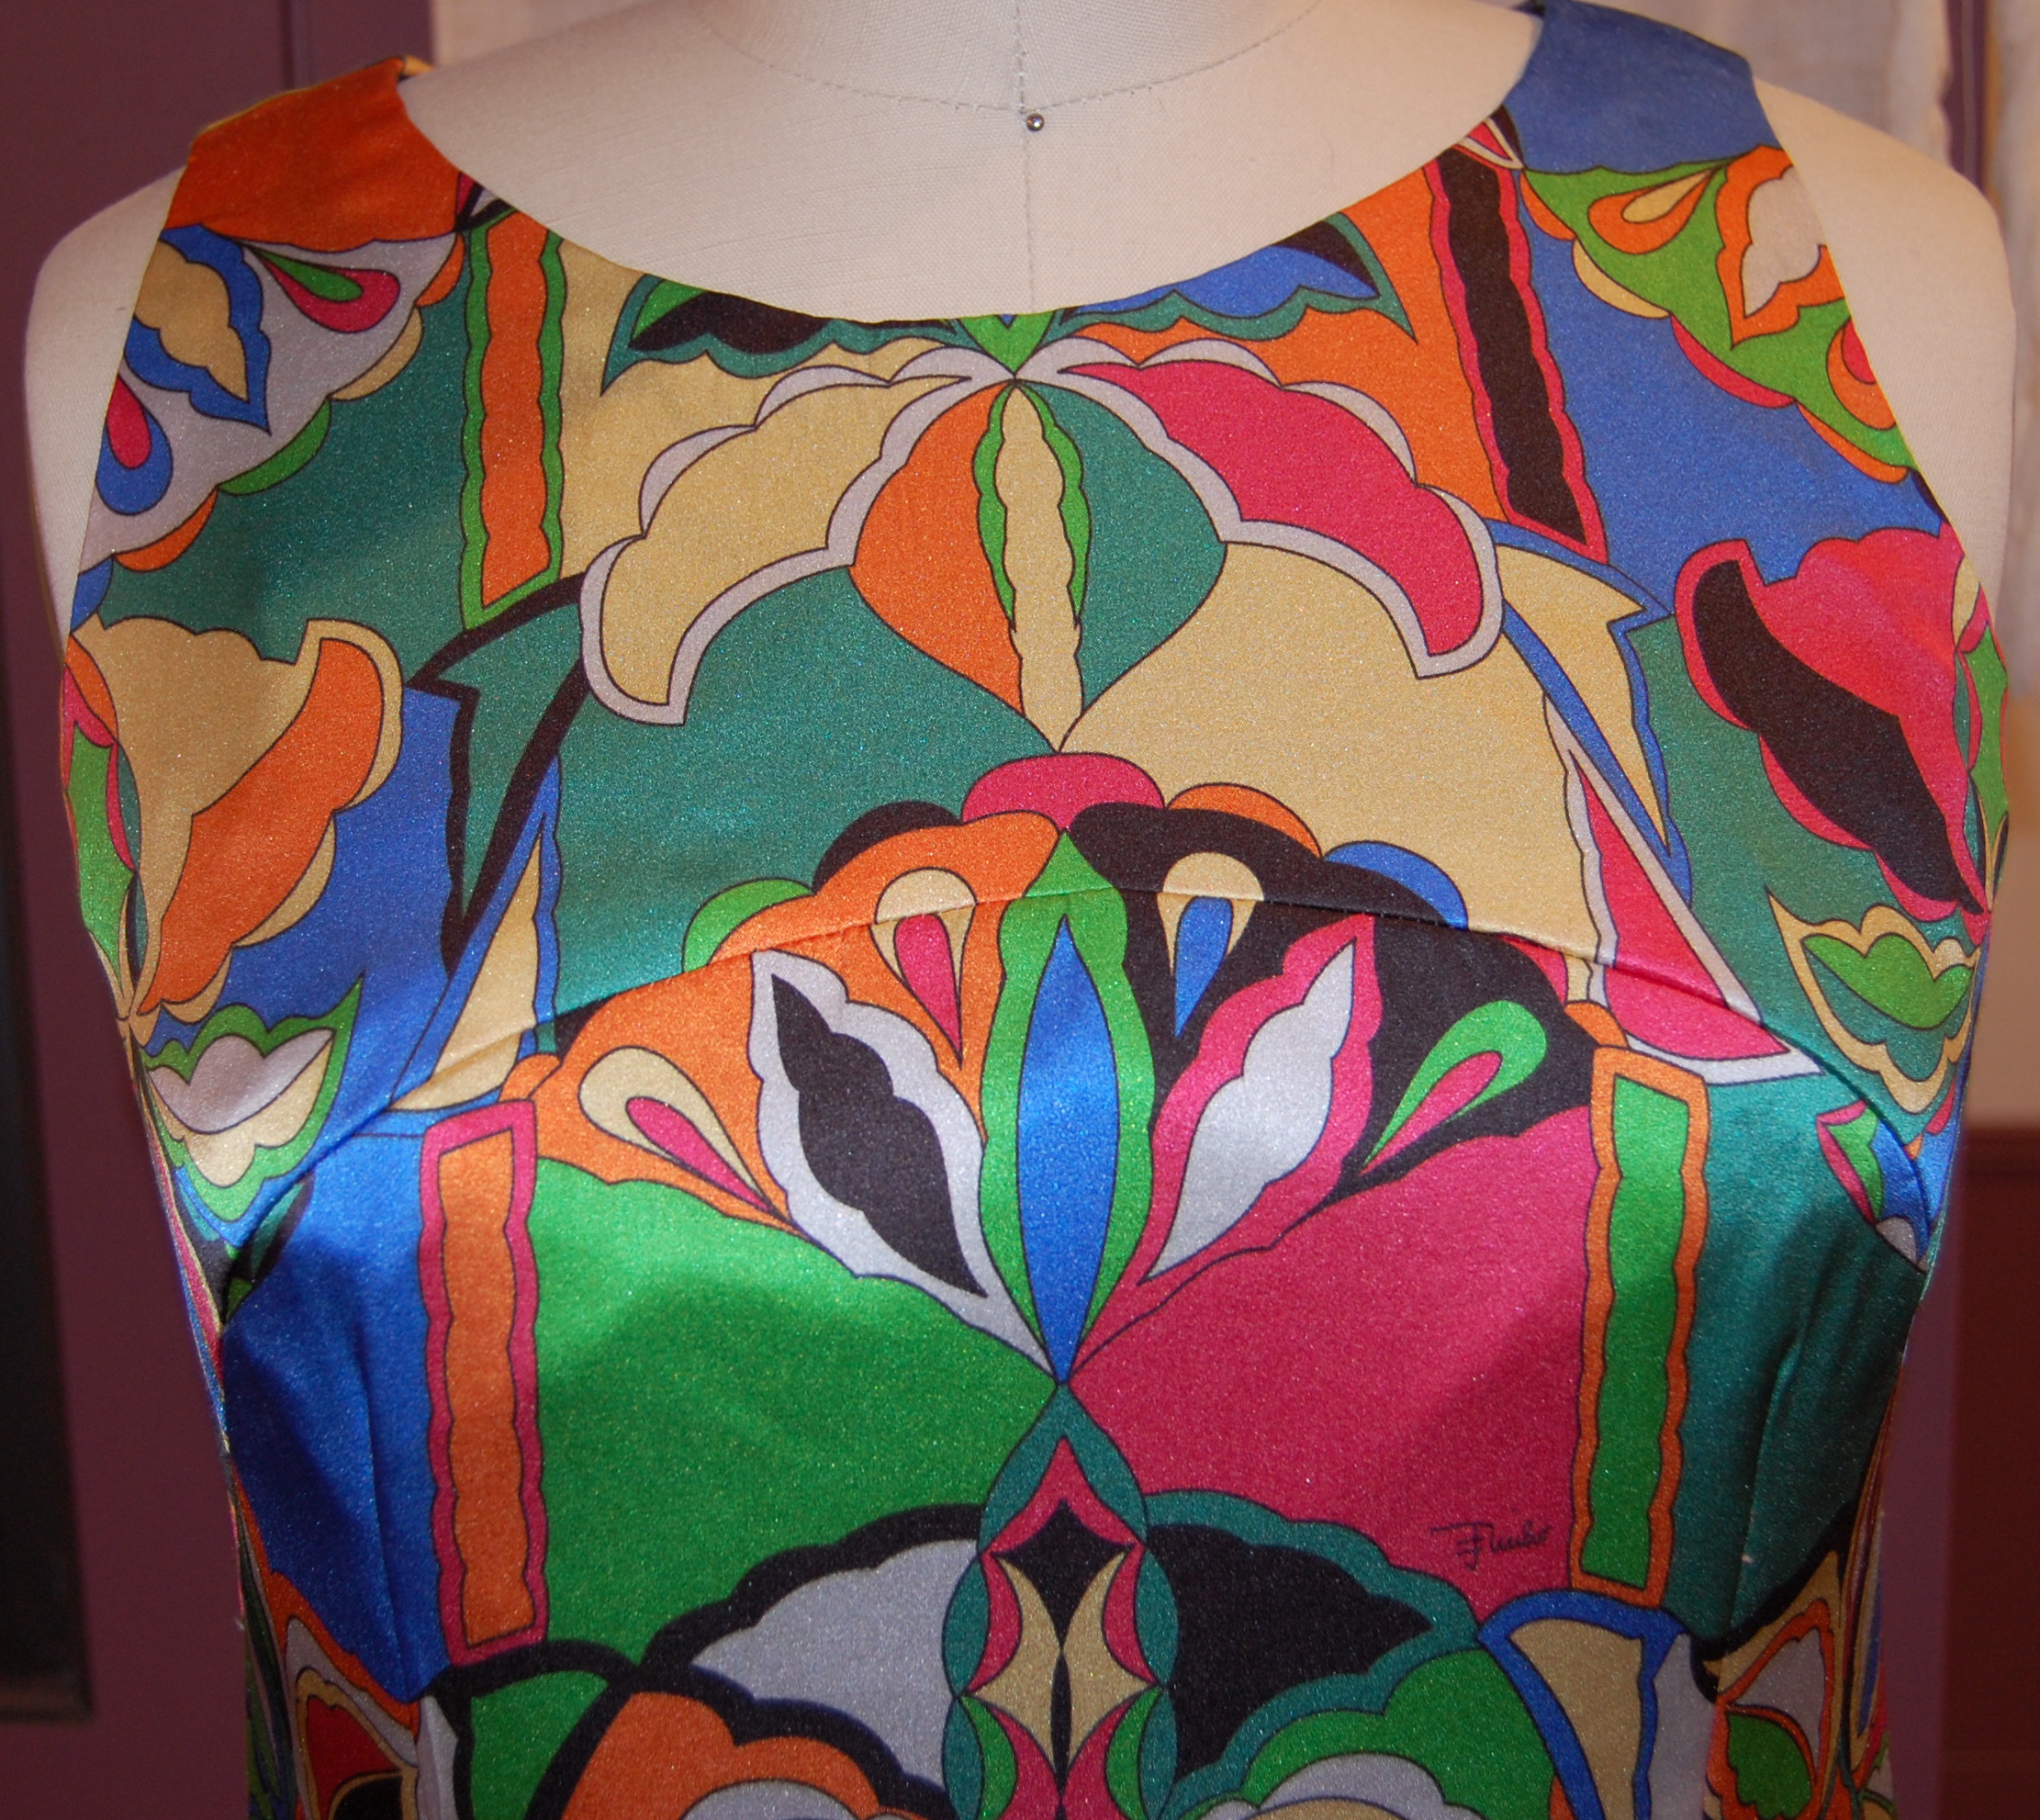
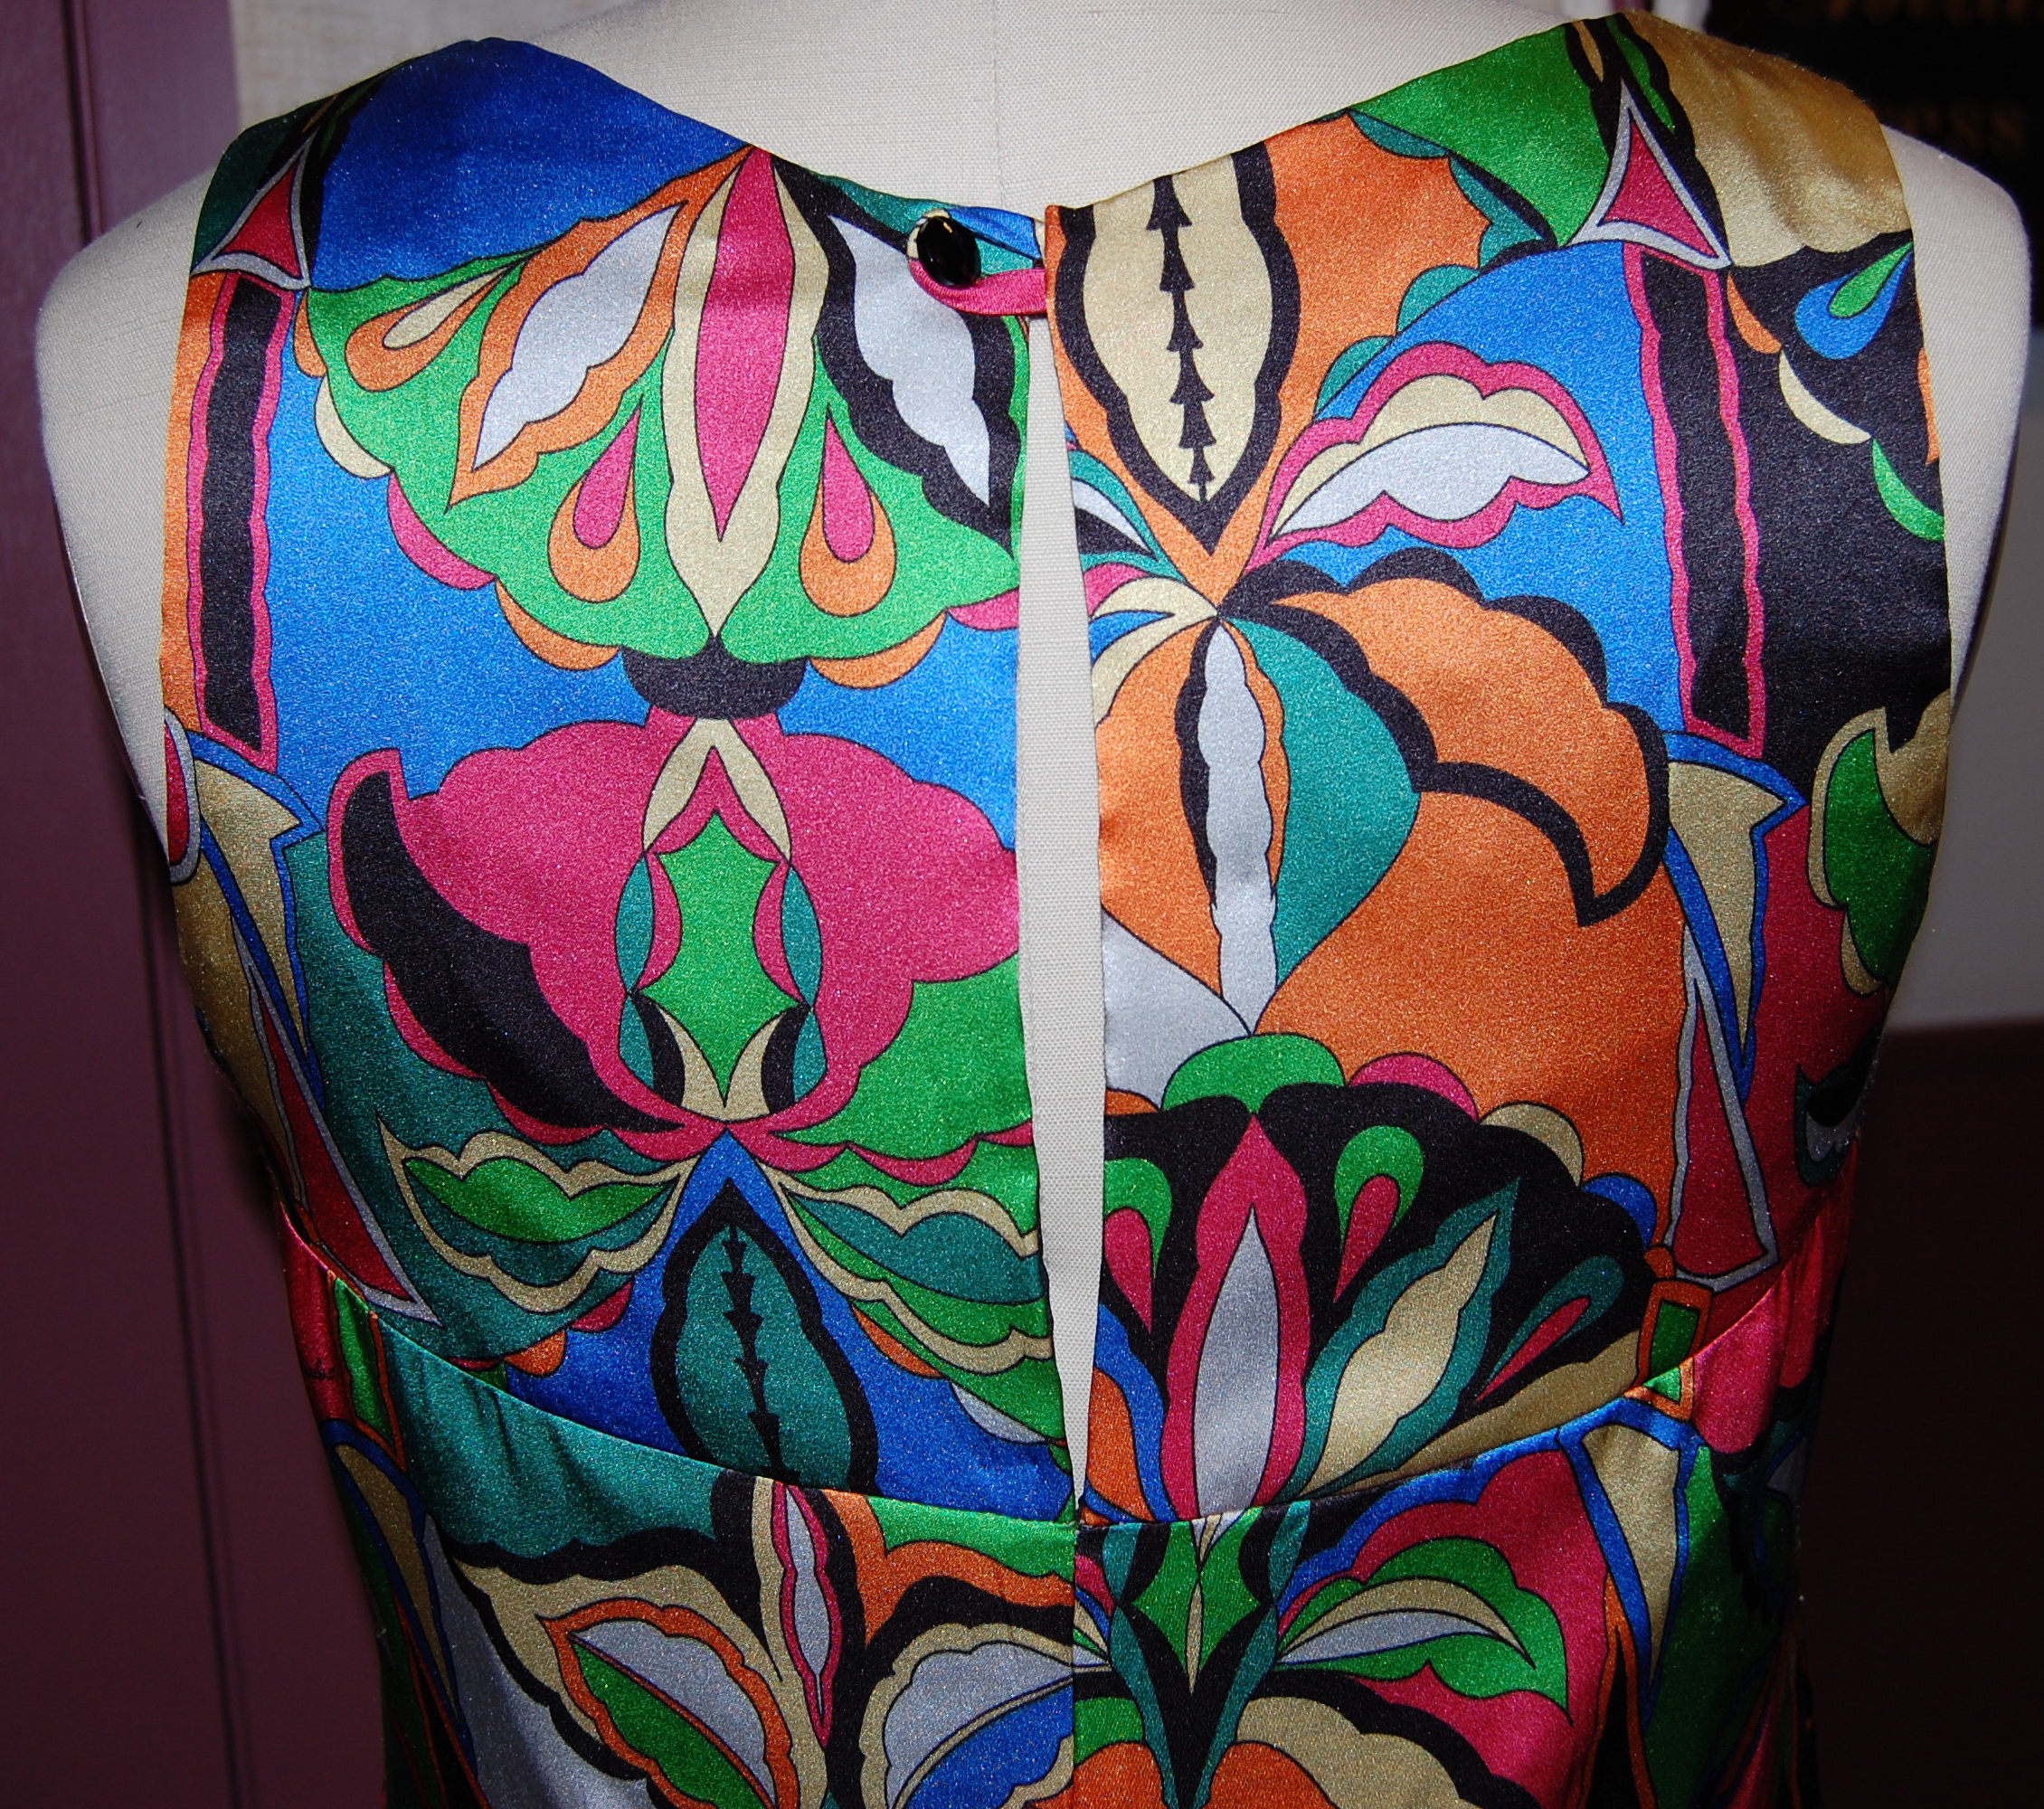
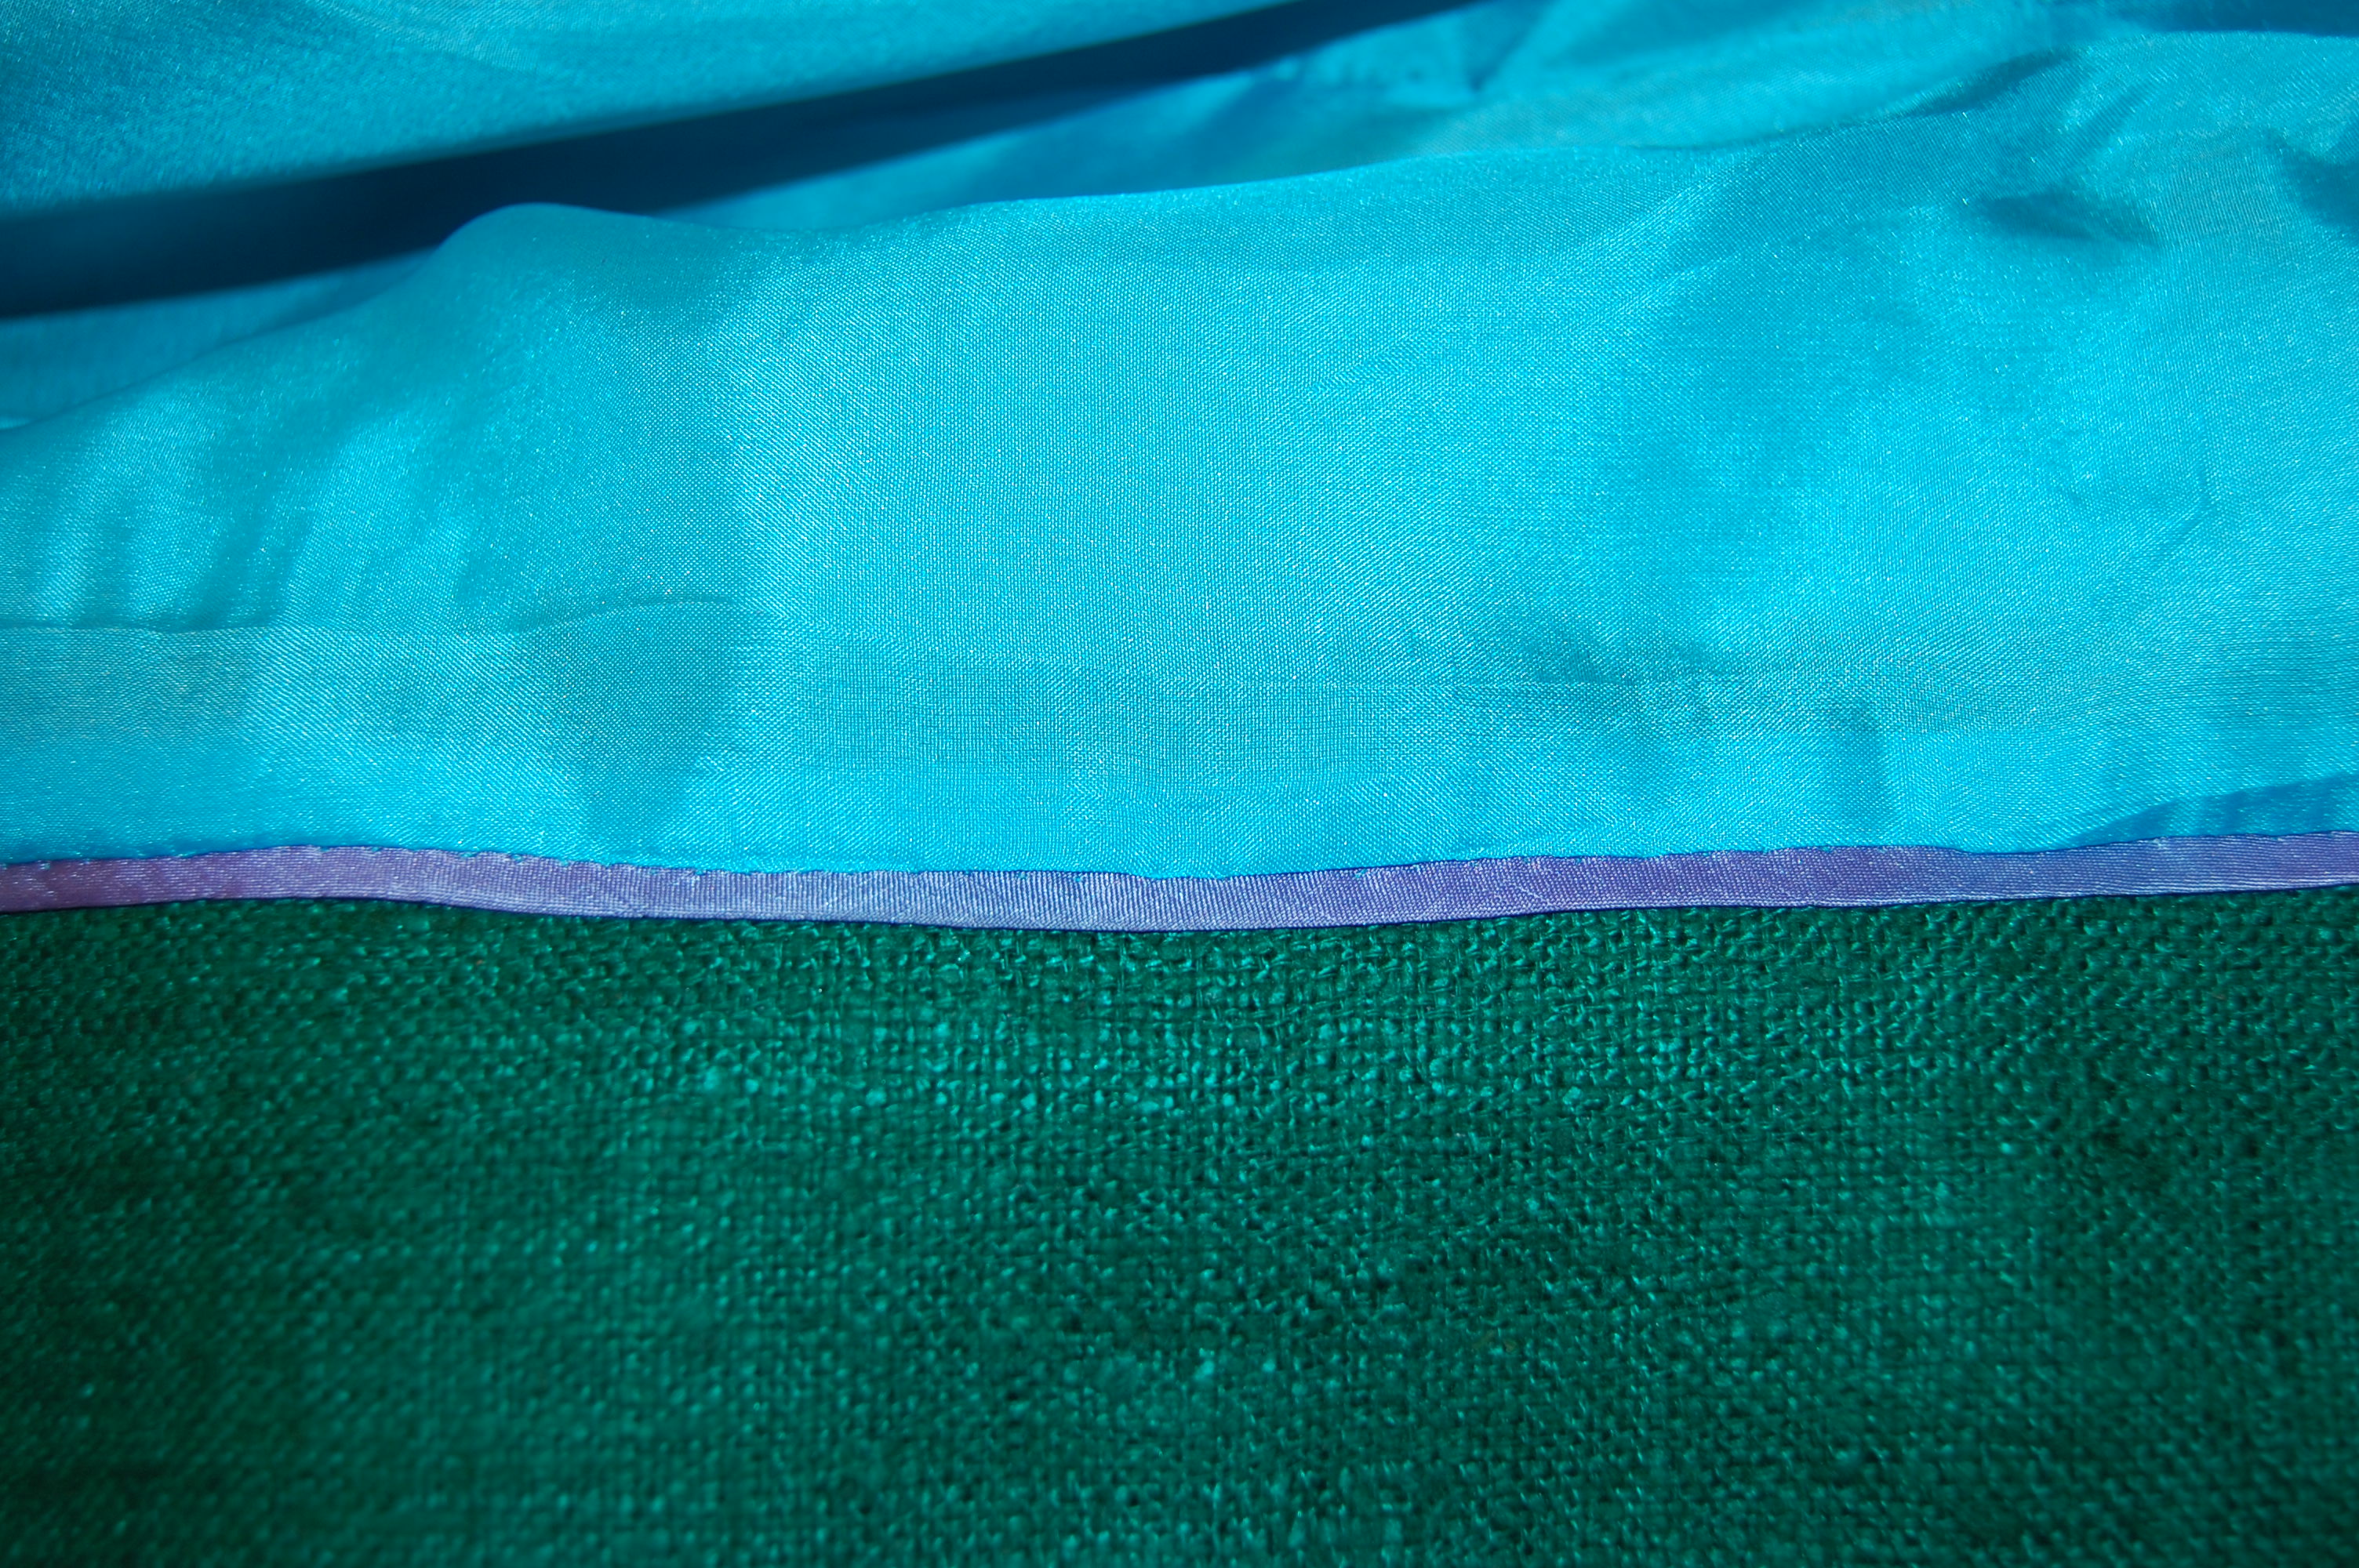
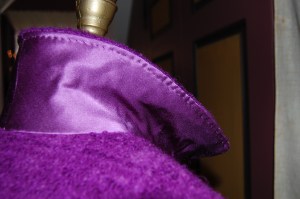
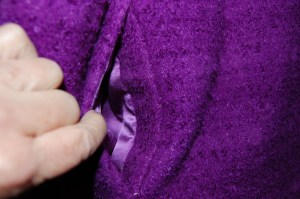
It is always rewarding to get to the point in the construction of a coat when you are ready to put the lining in.  And to make it just a little more fun, I added flat silk piping on the inside front facings – which will match one of the dresses (still to be made) I intend to wear with this coat:

I ended the piping at the shoulder seam on either side. (I see a basting thread which is peeking out from the piping!)

So my “coat for many reasons” allowed me 1) to use treasured fabric which had been in my collection for a few years; 2) to take advantage of the focus of this beautiful purple color during the year of  “Ultraviolet;” 3) to use a coat pattern which I really wanted to use again after making it once; and 4) to have experience in working – successfully – with such a heavyweight wool.

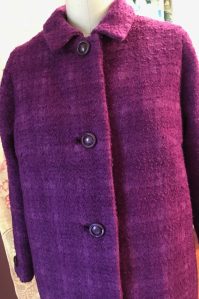
But the most important reason?  I need another coat. I always need another coat.

33 Comments

Filed under Buttons - choosing the right ones, Coats, Dressmaker details, Mid-Century style, piping, Uncategorized, vintage buttons, Vintage fabric, vintage Vogue patterns from the 1960s, woolens

Just for the Chill of It

Autumn is a delightful season here in the northeastern part of the United States. One can tell it is on its way when the warm days quickly take on an evening chill once the sun slips below the horizon. It is the time of year when a light coat or sweater is a necessity, especially with a sleeveless dress.

With this scenario, and a September wedding to attend, what better excuse did I need, to make a coat to go with this dress?

The Year of Magical Sewing

If you follow my blog then you probably already know this was my intention all along, when I made the dress two years ago. But it took a while to find the right coordinating fabric for a coat. I was looking for something between a coral and a pink. While the silk taffeta I found at Britex Fabrics looks more like a deep persimmon color when photographed, the fuchsia pink warp is very apparent when being worn.

Taffeta coat - swatch

Once I decided the Jo Mattli-designed coat, part of the original dress pattern, was too voluminous, I went to another pattern. I wanted to keep the “intention” of the original coat, but have it more streamlined.

The "original" coat designed by Jo Mattli.

The “original” coat designed by Jo Mattli.

Taffeta coat - %22too scimpy%22

The coat pattern I settled on.

Somehow along the way, in making my muslin, I got the idea to add a curved belt to the back of the coat. I knew I had used a coat pattern several years ago with a curved belt back detail, so I went through my pattern collection to retrieve this:

This is a 1957 pattern, but look at the belt shown on the back of the envelope, below.

This is a 1957 pattern, but look at the belt shown on the back of the envelope, below.

taffeta-coat-belt-pattern-thumbnail

The belt is only shown in view A.

It took a couple of tries with the muslin to get the placement and angling of the belt correct, but once I did, I knew it was a winner. Dressmaker details like this always give me a thrill!

I anchored the belt in the side seams right under the bust darts.

I anchored the belt in the side seams right under the bust darts.

Just for the Chill of it

The curve of the belt needed to fall at my waistline.

The curve of the belt needed to fall at my waistline.

One of the things I like about this pattern is the two-part sleeve with a center seam. I think this design is always flattering to the shoulder. Here are the constructed sleeves:

Just for the Chill of it

That center seam also provides the opportunity for a faux vent, and since I just happened to have three buttons, which I thought would be perfect for the coat, I happily included vents, as the pattern dictated:

Just for the Chill of It

A small, cylindrical, crystal button!

A small, cylindrical, crystal button!

Although I originally thought I would leave the coat “closure-less,” that third button kept calling to me. While I did not want to have a single bound buttonhole in the center of the chest, I thought a button loop might do the trick. If I didn’t like it, I could remove it fairly easily from the front facing seam.

Just for the Chill of it

I also decided to add a loop at the neck, with a plain flat button under the collar. This way, I could close the collar if I chose to do so.

I pad-stitched the collar, but forgot to take a picture. Pad-stitching is like magic in how it makes the collar roll properly!

I pad-stitched the collar, but forgot to take a picture. Pad-stitching is like magic in how it makes the collar roll properly!

I have to say, I think the coat looks equally good any way it is worn: with the single button at the bust line closed, with both buttons secured and with neither of the buttons secured.

I chose not to add the optional pockets to this coat, but if I make it again in a less formal fabric, I would absolutely include them.

Once I got to the lining, I had to decide if I wanted to add the flat piping detail which I like so much. Of all the bias silk ribbon I have on hand, the only one which looked good was deep pink. Because of that, it doesn’t show contrast all that well, but I still like the subtle finishing look it gives to the lining.

Just for the Chill of it

Just for the Chill of it

Here, by the way, is the coat before I inserted the lining:

I underlined the entire coat with silk organza and added "cigarette" sleeve headings.

I underlined the entire coat with silk organza and added “cigarette” sleeve headings.

I love a center back seam!

I love a center back seam!

I used some vintage silk buttonhole twist to tack the center back fold in the lining at the neck and at the waistline.

Just for the Chill of it

There is no question that the dress and the coat go together once the lining shows!

There is no question that the dress and the coat go together once the lining shows!

Just for the Chill of it

I love that the lining peeks out from the sleeves when I am wearing the coat.

I love that the lining peeks out from the sleeves when I am wearing the coat.

taffeta-coat-full-copy

I was delighted when the photographer at the wedding wanted to take my picture because he "liked my outfit so much." (This is not that photo...)

I was delighted when the photographer at the wedding wanted to take my picture because he “liked my outfit so much.” (This is not that photo…)

Here with my husband - with a coordinating tie, no less (not planned, but makes for a great photo!)

Here with my husband – with a coordinating tie, no less (not planned, but makes for a great photo!)

It may seem a bit frivolous to make a coat like this, knowing that it will not be worn all that often – although I do have two other dress-weight silks in my collection which would look fairly stunning paired with this coat!  However,  it really is the perfect weight and look for an elegant, but chilly, evening out – and it was so much fun to make.

38 Comments

Filed under Buttons - choosing the right ones, Coats, Cocktail dresses, couture construction, Dressmaker coats, Dressmaker details, Linings, Mid-Century style, piping, sewing in silk, Silk taffeta, Uncategorized, vintage buttons, vintage Vogue patterns from the 1960s

The ABCs of D-R-E-S-S-M-A-K-I-N-G, Part I

Those of us who do fashion sewing sometimes have difficulty identifying what we do in a single descriptive word. A “sewer” (not those stinky things that go underground that happen to be spelled the same way) can be one who sews many different things, right? The term “sewist” is a somewhat new word, made up of sew + artist, which really doesn’t describe anything specific to my way of thinking. Most of us are not “designers” (and not all designers can sew), although most of us use some design techniques in our fashion sewing.   Some of us may be “sewing professionals,” a term which covers a broad range of endeavors, such as being a custom clothier, a sewing teacher, a writer about sewing, or even a retailer involved in the sewing industry. The term “seamstress” implies one who sews on a machine, as in a factory; although this person may be very talented in certain techniques, her job does not leave room for innovation or creativity. And that is why I like the term “dressmaker” so much. In one word it expresses many things explicit and implied. And although it is a term much used until the 1960s and not much since then, I consider myself a Dressmaker; maybe you do, too?

This wonderful Vogue book, copyright 1957, still used the term "Dressmaking" in its title.

This wonderful Vogue book, copyright 1957, still used the term “Dressmaking” in its title.

A dressmaker is one who makes custom clothing for women (oneself included.) She usually works from a commercial pattern, and then uses all her creative, design, and technical skills to create a one-of-a-kind dress, blouse, skirt, coat, etc. I have devised this ABCs of DRESSMAKING to define some of the important aspects and practices of dressmaking, especially in the couture sense.

D is for Design. This seems like it should be common sense, but it cannot be said too often that you should choose a design that is going to work for you. Unlike ready-to-wear that we get to try on, when we sew, we are working from patterns that we think will be flattering, but we really will not know until it is finished (a muslin takes some of the guesswork out of this, but not entirely.) Most of us have our own personal style that we know is flattering to us. Even if you want to diverge a bit from it (which is fine), it’s probably best not to go too far afield. Also, beware of trends that may not be flattering. (An example of this from a couple of years back is the revival of the peplum, a look that not too many of us can wear very successfully.)  When it comes to Design, choose one that is “smart for [many] seasons” rather than “one that’s soon outdated.”

The first page of the book pictured above tells the reader why she should be using Vogue patterns, but it also suggests some of what it means to be a "Dressmaker."

The first page of the book pictured above tells the reader why she should be using Vogue patterns, but it also suggests some of what it means to be a “Dressmaker.”

R is for Risk. Let’s face it, fashion sewing can be risky. We can be sewing with really expensive or “difficult” fabric or vintage fabric, which is now no longer available – or sewing with a complicated design/pattern – or making something for a very special occasion – and the outcome is entirely in our hands! It takes bravery, confidence in one’s skills, patience, and a willingness to take a risk to grow in our dressmaking, but the rewards are manifold.

One of the Dressmaking signs I have hanging in my sewing room.

One of the Dressmaking signs I have hanging in my sewing room.

E is for two things: Engineering and Embellishment. I have said this before, but it bears repeating – sewing is engineering. I love to read pattern instruction sheets, especially for something that is complicated, and I bet many of you do, as well. It’s fascinating to see how patterns go together, how different fabrics demand specific approaches to that process, how the pattern pieces need to be manipulated to fit one’s particular form. A well-engineered pattern is a beautiful thing, and it takes a sewing-engineer’s mind to know how to best bring that pattern to life in a stylish and successful fashion. It takes a dressmaker.

Another one of my signs, the first one I purchased and still my favorite!

Another one of my signs, the first one I purchased and still my favorite!

Embellishment is almost synonymous with the term dressmaker. “Dressmaker Details” include such things as ruffles and frills, ribbon, or braid, but also those little touches that add so much to a successful garment, such as well-chosen buttons, interior trims, non-boring linings, covered snaps, bound buttonholes (when appropriate), and the creative manipulation of, or addition to, a pattern to get the effect you want. A creative dressmaker can start with something basic and make it unique – and couture – by adding just the right embellishments or details.

S is for Seams. This is about as basic as it gets, but those seams must be sewn well and finished well for a successful finished garment. One of the techniques I learned in the couture sewing classes I have taken with Susan Khalje is, for me, the method to achieve successful seams. That is – thread basting along seam lines to use as your sewing guide, rather than relying on the seam allowance markings on one’s sewing machine.   This is the building block for successful dressmaking.  And then, finish those seams on the inside to control bulk and add to the wearability and durability of your garment.

S is also for Steam. As in ironing. A good steam iron is worth its weight in gold! Steam is useful in so many ways – here are just a few:   1) When sewing with wool or most dry-cleanable fabrics, a good place to start is steaming your fabric before you begin to lay out your pattern pieces. Even if you have pre-washed cotton or linen fabrics, a good initial steaming of your yardgoods will insure a better outcome. 2) Steam newly sewn seams flat to set your stitches before spreading the seam open for its second pressing. 3) Contours can be set beautifully with steam, especially when using a pressing ham and/or a seam roll, or draping your work-in-progress on a dress form.

Te Vogue Dressmaking Book has an entire section on pressing, with guidelines still appropriate almost 60 years later. Click on the image to read the page.

The Vogue Dressmaking Book has an entire section on pressing, with guidelines still appropriate almost 60 years later. Click on the image to read the page.

And then, S + S  is for Sewing Sense, which is what every successful Dressmaker must develop. This subject is so vast it warrants its own blog post sometime in the future!

So now I am halfway through the ABCs of D-R-E-S-S-M-A-K-I-N-G. Part II is yet to come…

17 Comments

Filed under couture construction, Dressmaker forms, The Conde Nast Publications, Uncategorized, Vogue patterns

A Fine February Finish

Leap Year, with its extra February day, seemed to be custom made for my sewing schedule. I had hoped to have my gray cashmere coat finished by the end of the month, and thanks to those extra 24 hours, I managed to do just that – barely! I will confess to taking out basting stitches, steaming, and adding two bar tacks to the lining on March 1st (gasp), but now my coat is finished.

A Fine Feb Finish

A Fine February Finish

Photos of me in this coat will be in a future post…

Like Claire McCardell, who said “I believe in a collection of coats,” and coats are “revealing, a clue to your taste, and your knowledge of Fashion,” I also believe that one should not “make a coat too basic.” The unique aspect of fashion sewing is that one can start with a basic (or not-so-basic) coat pattern and then make it her own.

The first owner of this Vogue Designer Original pattern, designed by Guy Laroche, which I used for my coat, had obviously used it. (This isn’t always the case – many vintage patterns are still “factory-folded” and in their unused condition.)

When I purchased the pattern, I had already decided to lengthen the sleeves, which are shown on the pattern envelope as “below-elbow” or bracelet-length. I wanted full-length sleeves as a practical matter. Much to my delight, the original owner had decided the same and had added tissue paper inserts into the sleeve pattern pieces. As it turned out, the length she had decided upon was also exactly right for me.

What a nice surprise to find the sleeves already lengthened!

What a nice surprise to find the sleeves already lengthened!

There are really only a few details I chose for this coat which serve to make it “not basic.” Besides the bound buttonholes (which used to be basic but are not so much anymore!), I put emphasis on the buttons, the lining and a couple of the finishing details.

First the buttonholes and buttons: because the cashmere fabric is coat-weight, I needed to make the “lips” of the buttonholes a bit wider than normal. Once again, I used an organza patch on the underside of the buttonholes, which makes a very nice interior finish:

The line of basting stitches is the fold line - the organza patch is on the facing part of the front edge.

The line of basting stitches is the fold line – the organza patch is on the facing part of the front edge.

Here is the patch ready to be sewn onto the back of the buttonhole.

Here is the patch ready to be sewn onto the back of the buttonhole.

I found these vintage buttons in an Etsy shop. Although they appear to be gray mother-of-pearl, they are actually plastic. The iridescent strip through the middle of each one, along with the square detail on the tops, gave me the idea to arrange them on an angle. I think they add just the right amount of interest to the front of the coat.

The "square" detail on the buttons picks up the design in the lining fabric.

The “square” detail on the buttons picks up the design in the lining fabric.

A Fine February Finish

Using the printed wool challis for the lining certainly elevates this coat to a notch above ordinary. The sleeves are lined with gray rayon Bemberg for practicality’s sake.

An inside out view, trying out the lining.

An inside out view, trying out the lining.

This photo shows a good look at the finished buttonholes, too.

This photo shows a good look at the underside of the finished buttonholes, too.

Of course the detail I love the most is the flat piping I added to the front interior edges of the lining.  As I have said before, doing this is so easy and adds so much.

A Fine Feb Finish

A Fine February Finish

Here is the flat piping stitched in place - so easy!

Here is the flat piping stitched in place – so easy!

The final small detail, which helps the collar to keep its shape, is under-stitching (by hand) on its underside.

A Fine February Finish

So what else did Claire McCardell say about coats? To quote from her book, What Shall I Wear, page 69, “… you can take another step and get a coat and dress that go together—never to be separated, never to be worn with any other dress or any other coat, and always with a special feeling of satisfaction. If you take a little trouble, you may be able to manage a heavy fabric skirt to go with the coat.”  I plan to take that little bit of trouble – a skirt out of the gray cashmere, and a blouse from the printed challis – to complete the outfit, and I will hope for that “special feeling of satisfaction.”

30 Comments

Filed under bound buttonholes, Buttons - choosing the right ones, Coats, couture construction, Dressmaker coats, Mid-Century style, Quotes about sewing, Uncategorized, vintage buttons, Vintage fabric, vintage Vogue Designer patterns, vintage Vogue patterns from the 1960s, woolens

Defying the passage of years?

Throughout the 1950s, copyright dates appeared on all Vogue patterns (or, at least that has been my observation). Copyright dates appear on some of the patterns from 1960-‘62, but after that, they are non-existent. It is always a thrill when I find a reference to, or picture of, a pattern, which I own or am working on, in one of The Conde Nast Publications, Inc. magazines or other printed materials. It is one sure way to date an otherwise undated vintage Vogue pattern.

So – you can imagine my delight when a small, 8-page Vogue Pattern Fashion News from February 1965 – which I recently purchased – featured the Emilio Pucci dress and jacket which has been my sewing focus for the past several weeks.

On the cover of this small "flyer", which was available for pick-up wherever Vogue patterns were sold, is the reference to fashion from Florence - as in Pucci's Florence!

On the cover of this small “flyer”, which was available for pick-up wherever Vogue patterns were sold, is the reference to fashion from Florence – as in Pucci’s Florence!

And here is the sketch of "my" Pucci pattern.

And here is the sketch of “my” Pucci pattern.

The brief caption gives an apt description of the Pucci pattern:

Pucci pattern - fashion news caption

And – I did indeed wear this dress (and jacket) to an “important party” just last weekend – to a beautiful wedding in Center City Philadelphia.


(This photo was not taken at the wedding...)

(This photo was not taken at the wedding…)

I was working diligently all last week to finish the jacket. Here are the details on what was transpiring in my sewing room:

First, I can tell you I was delighted that the pieced sleeve linings worked just as I had hoped they would. Here is the jacket turned inside out, showing the piecing on the lower sleeves.

Defyng the passage of years

Inside out, a back view.

Inside out, a back view.

And here is a photo inside the jacket, looking towards one sleeve, which shows that the piecing does not show! Hurray. I honestly don’t think anyone seeing the jacket slung over a chair is ever going to suspect that the Pucci lining fabric does not extend all the way down the sleeves.

Defying the passage of years

I also had the idea to add a narrow, bias, flat piping to the edge of the lining down the fronts and around the neckline. I found a turquoise silk in my fabric closet which seemed to keep with my “theme” of the turquoise under-stitching on the interior of the dress. This is one of those “dressmaker details” which just makes me happy.

Defying the passage of years

Another thing that makes me happy are the buttons! I picked out specific scraps of the silk, which featured designs I wanted to emphasize on the buttons. I sent them off to Pat Mahoney in Lodi, California, who returned them made into 1¼ inch buttons – flat and beautiful!

This is the button I chose for the top of the jacket.

This is the button I chose for the top of the jacket.  Notice the slot-seam-buttonhole.

The middle button - I couldn't resist featuring the Emilio signature on this one.

The middle button – I couldn’t resist featuring the Emilio signature on this one.

And the lower button.

And the lower button.

I decided to have two extra buttons made in case I wanted to add them to the sleeves.   And – add them, I did. I like the extra subtle  attention they bring to the jacket. (Another dressmaker detail – specifically, an added embellishment.)

Defying the passage of years

Defying the passage of years

I had the jacket finished when I suddenly remembered that a Vogue label had come with the pattern. Of course, I was delighted to sew it in place.

Defying the passage of years

Defying the passage of years

Defying the passage of years
 Defyng the passage of years

Defying the passage of years

There is something about using a pattern from 1965 that seems quite amazing to me. Yes, it is simple math, but think about this: 1965 was 49 years ago!   Is anyone who sees me in this dress and jacket going to think that it is sewn from a 49-year-old pattern? Somehow I doubt it. I think my secret is safe.


28 Comments

Filed under Buttons - choosing the right ones, couture construction, Dressmaker details, sewing in silk, Slot-seam buttonholes, The Conde Nast Publications, Uncategorized, vintage Vogue Designer patterns, vintage Vogue patterns from the 1960s

Presently Preferring Pucci

Once I get into a project, especially one that has some complicated decisions or construction to it, I tend to think about it during many of my non-sewing hours. (I wonder if other sewers/dressmakers do that?) Now that I have finished my Pucci dress, I’ll be spending both sewing and non-sewing hours on the jacket.

First, however, some details about the dress are in order.

The dress is finished!

The dress is finished!

There are a few design aspects of this dress which set it apart from a simple A-line or sheath dress.  Notable to me is the effect that the curved front yoke makes on the bustline. It gives it more definition than it would have with just darts.

If you look closely, you can see the yoke seam.

If you look closely, you can see the yoke seam.

The back yoke adds some “surprise” interest by being split in the middle. In addition, the back of the dress would not be quite so clean looking if the zipper were placed in the center back below the yoke. Its location on the side seam is one of those hallmarks of a carefully planned Designer pattern.

The "open" yoke on the back of the dress.

The “open” yoke on the back of the dress.

I made some changes to the dress, based on the muslin. My six alterations are:

1) I decided to incorporate curved armholes into the two back yoke sections. On a younger person, the more revealing back arm would be fine, but I was not so comfortable with it!  Please see the photo above.

2) I took out some of the A-line from the dress. I wouldn’t say I actually “pegged” it, as I left a slight taper, but the effect is now one of a straighter skirt, which I think is a bit more “current.”

A sdie view shows this alteration best.

A side view shows this alteration best.

3) Taking out some of the taper meant I had to give myself a bit more ease in the skirt, so I left a slit at the center back.

The center back slit at the hem line.

The center back slit at the hem line.

4) I added two small darts to the back sides at the waist, which adds some definition to it.

5) I lowered the neckline to accommodate a particular necklace that I want to wear with this outfit. Isn’t it just lovely that sewing allows us the ability to make these kind of custom alterations?

6) The pattern called for a hook and eye at the center back neck. I decided to add a loop and small button instead, although I added an interior hook and eye to help the back neck lay flat.  Adding this button and loop can definitely be called a “dressmaker detail”.

The button is one I have had in my button box for decades!  Its faceted surface seemed perfect for this dress.

The button is one I have had in my button box for decades! Its faceted surface seemed perfect for this dress.

Of course I underlined the dress with silk organza.

Preferring Pucci

This back view also shows the extended armhole line.

This back view also shows the extended armhole line.

And this side view shows how the front yoke adds definition to the bustline.

And this side view shows how the front yoke adds definition to the bustline.

Then I lined the dress in black crepe de chine, and under-stitched the neckline and armhole seams with turquoise silk buttonhole twist, just for fun.

The dress turned inside out.

The dress turned inside out.

Under-stitchibng in turquoise. No one will ever see it, but I love what it adds!

Under-stitching in turquoise. No one will ever see it, but I love what it adds!  Click on the photo for a close-up view.

So – that’s it!

Now here’s a phenomenon that seems to happen to me frequently. I’ll be using a mid-century designer pattern for a project, and I’ll come across a current magazine or newspaper article, which in one way or another relates to what I am sewing or planning to sew. So it was this past weekend, when I was catching up with reading the April WSJ. The Wall Street Journal Magazine, delivered the weekend before. Right there on page 84 was an article on Laudomia Pucci, Emilio’s daughter, entitled: Fortress of Fashion. It is a fascinating account of her commitment to preserve the “fashion legacy” of her father, by reinventing an ancestral estate in Tuscany into an accessible-and-preservation-minded archives. On view are fabrics and fashions, and “already Pucci has hosted several educational events… Two groups of students … have come to study sewing and print design…[would not this be wonderful?! – my addition].  Laudomia is hoping to extend the educational activities to international fashion schools for longer visits.”   Her goal is to encourage the “next generation … to find inspiration for innovative fashion.” Now this is a place where a Preference for Pucci is definitely a way of life!


26 Comments

Filed under Buttons - choosing the right ones, couture construction, Dressmaker details, sewing in silk, side-placed zippers, Uncategorized, underlinings, vintage Vogue Designer patterns, vintage Vogue patterns from the 1960s, Vogue patterns

The Return of the Ladylike Suit

It seems I just can’t get way from that word – ladylike.  Just as I was finishing the jacket to my emerald green silk suit, the weekend Wall Street Journal arrived with this article in the Off Duty – Style & Fashion section:  “Gran Larceny – Fashion’s latest rebellion is co-opting looks from grandma’s closet.”

This photo, copyright The Wall Street Journal, is the lead photo for the article.

This photo, copyright The Wall Street Journal, is the lead photo for the article.

To quote from this article by Alexa Brazilian:

“Is conservative the new radical?    The fashion world certainly seems to think  so  . . .    Designers are reimaging soignée staples for spring and summer – skirt suits, twin sets, below-the-knee dresses, kitten heels and frame bags – that appear anything but moth-eaten.

“ ‘A young girl now doesn’t want to dress like her mother; she finds her grandmother much cooler,’ said Nina Ricci creative director Peter Copping, who designed skirt suits inspired by his own nana.  ‘She wore little smart tweedy suits.  I always had a romantic notion of that.’ “

And then later in the article is this statement by Christopher Kane (which I might frame and put on the wall in my sewing room!):  “Ladylike is the ultimate sexiness,” said the designer.  “It’s clean, elegant and in control.  The famous saying, ‘It’s the quiet ones you need to watch,’ definitely applies to this style.”

Well, I won’t necessarily feel radical or even sexy when I wear my new green skirt suit, but I do believe it is an example of that ladylike style of the early 1960s — which actually makes sense since the pattern is indigenous to that decade.

This is the pattern from the 1960s I used for my suit.

This is the pattern from the 1960s I used for my suit.

Finally finished!

And here is the suit finally finished.

I make a few changes to the design once I made the muslin for it.  First, I added two tapering darts to the back.  It was supposed to have a boxy feel to it, but I felt a little narrower silhouette would be more flattering to me.  I also lengthened the jacket by about 1 and ½ inches.

The jacket is still "boxy" but less so with the added darts.

The jacket is still “boxy” but less so with the added darts.

I decided to make the sleeves below elbow length, so I added another inch and ½ to them.  Then I had to narrow them a bit as well to make them look proportional.

Now to the fun part:  the two dressmaker details I added.  In an earlier post, I already showed the turquoise silk lining fabric I chose.  Once I had such a dramatic contrast in the works, I thought I’d push the envelope a bit farther.  I found silk bias ribbon in a lovely periwinkle color and used it to add an edge detail to the lining in the body of the jacket.

Here is the bias silk ribbon attached to the edge of the lining.

Here is the bias silk ribbon attached to the edge of the lining…  Click on the photos to see them up close.

DSC_0804

… and one more picture of it.

This was so much fun to do and made attaching the lining to the jacket very easy, as all I had to do was “hand-stitch in the ditch” where the silk ribbon and the lining fabric were sewn together.

Here is what the finished edge looks like.

Here is what the finished edge looks like.

When I found the gold buttons for the jacket, I immediately knew that adding buttons to the sleeves would make it all look more complete.

The gold buttons added to the sleeves and another view of the lining (and the back of the bound buttonholes).

The gold buttons added to the sleeves and another view of the lining (and the back of the bound buttonholes).

And here is a close-up of the larger buttons for the front of the jacket, with their bound buttonholes.

And here is a close-up of the larger buttons for the front of the jacket, with their bound buttonholes.

The last thing I did was attach the label to the inside front of the jacket.

Emerald green suit

The silk shell I am wearing is a RTW one!  I purchased it last Spring and now have something with which to wear it!

The silk shell I am wearing is a RTW one. I purchased it last Spring and now have something with which to wear it!

Another view, without jacket.

Another view, with jacket over my shoulder.

When I found this emerald green silk matka online last Fall at Waechter’s Fine Fabrics, I envisioned a skirt suit – or dressmaker suit, as this type of dressy suit is also called – but I had not progressed beyond that in my planning.  Well, now this new grandmother is feeling pretty fortunate that, not only did I grow up with the styles from the 1960s, but they are making me feel quite fashionable now that I am in my 60s!

17 Comments

Filed under Buttons - choosing the right ones, Dressmaker details, Dressmaker suits, sewing in silk, Uncategorized, vintage Vogue patterns from the 1960s, Vogue patterns

Chance of Sprinkles

Whatever possessed me to decide to make a coat during this hot, hot Summer?

Actually, I have a (somewhat logical) answer to that question!  For starters, it’s a raincoat.   And how I came to sew a raincoat is a good example of what keeps the wheels in my head turning!

While perusing the website for Britex Fabrics last Summer, I came across its offerings of rainwear fabrics.  Just out of curiosity, I took a look at them, and I was immediately smitten with the “French Winter White Water-Resistant Rainwear Fabric”.

The woven “wave” design in this fabric really caught my attention.

I sent off for a swatch, which confirmed for me the graceful woven design and lovely creamy color inherent in this fabric.  A subsequent trip to California gave me the opportunity to see the fabric in person, and I decided it was time to “commit”!  I had frequently felt the need for a “dressy” raincoat, so I thought, “Why not make one?”  I also knew I had the perfect pattern  – this “swing” coat design from 1957.

I remember swing coats from my childhood – and now I have one!

I figured the kimono sleeves and the loose fit would be great for wearing over  dresses or suits, and the collar can be worn turned up or folded down, depending on the inclement conditions!  Well, it only took a year to get to it, which I decided was long enough.  Oh yes –  I had one more incentive to “get to it”. When my friend, Nancy C. opened up her family’s button box for me to pick out some treasures, I spied this beautiful single glass button:

I placed this button on a piece of black velvet so that the design would show up. It is a little more than an inch square in size.

The design in it reminded me of raindrops – perfect for a dressy raincoat, and, I thought, a perfect complement to the fabric, already in my possession.

Of course, every pattern and project seems to demand certain changes or adaptations, and the count for this one stands at four:

1)   I took a little fullness out of the front side panels.  When I made a muslin mock-up of the pattern, it just seemed a little too full for my frame.

2)   I added pockets to the side seams.  I can’t imagine any coat without pockets, but a lot of the vintage styles (dresses and coats) did not have them.

Here is one of the pockets under construction.

3)   Because I wanted to use the glass button, I decided to put in a bound buttonhole instead of using the buckle and band detail as shown on the pattern. (I did make and attach the back belt, however.)

Here is the bound buttonhole placed in the front right section – before the facing is attached.

Here you can see the button and finished buttonhole. Click on the photo to see it in detail.

4)   With just a single closure at the top of the coat, I thought I needed something lower on the coat as well, to keep it closed in windy, rainy conditions. However, I didn’t want to interfere with the look of the coat when I might be wearing it open.  Here’s what I came up with:

I made a “tab” with buttonholes on each end.

I made machine buttonholes in the tab.

I placed the buttons for it on the inside facings on either side of the coat, about halfway between my waist and  my hips.  It can easily be buttoned to secure the coat, and when I unbutton the left side, the button on the right side allows it to fall down, hidden from view, but easily accessible.

This shows the inside of the coat, with the tab buttoned.

And this shows the tab unbuttoned on one side and hanging down, out of sight – inside the coat.

A few more details about construction:  The rainwear fabric is an acetate/rayon blend which I underlined with rayon voile.

Here is the coat, showing the underlining, before I attached the lining by hand.

I lined it with a pure silk lightweight twill in white.  I would have loved to have lined it with a neat polka dot silk, but I didn’t want any “shadows” of a printed lining to show through.  Guess I’ll just have to dress it up with polka dot scarves instead!  The rainwear fabric was very easy to work with – surprisingly easy, actually.  It drapes beautifully for a pattern like this.  Speaking of patterns, this one was so precise and cleverly engineered (especially the collar), turning it into a really fun project!

Here are some finished views of my new dressy raincoat:

More of the same…

Hopefully you can see the “belted” back in this view.

Making a garment like this during the Summer months means that I had to be prepared for “delayed gratification” as I probably won’t have a chance to wear my new raincoat for at least a couple of months.  However, when a future Fall or Winter forecast is for “Chance of Sprinkles” – or even full-force rain – I’ll be ready!

13 Comments

Filed under bound buttonholes, Buttons - choosing the right ones, Coats, Dressmaker details, kimono sleeves, sewing raincoats, swing coats, Uncategorized, underlinings, vintage buttons, vintage Vogue patterns from the 1950s, Vogue patterns

A Dress for the Duchess

Do you ever read a book and feel enchanted by its storyline, or its life lessons, or because it speaks to you on many different levels of meaning?  How often is that book a children’s book?

Since I started writing this blog, I’ve been thinking a lot about the influences that the written word can have on the process of sewing – and vice-versa – and I have found my thoughts  going back time and again to a skinny little paperbound book first published in 1986.  My daughter was five years old at the time, the perfect age to have this small story by William Steig read to her.  Its title is Brave Irene.  If you sew and you haven’t read it, you should; even if you don’t sew, you should read it.

This book is still in print and available on Amazon, of course!  The publisher is Farrar Straus Giroux.

Quite simply, it is the story of Mrs. Bobbin (how perfect is that name?), a dressmaker who has just finished a fancy pink and lacey gown for the Duchess to wear at the evening’s Ball.

Mrs. Bobbin, the dressmaker, puts the final stitches in the ball gown.

However, Mrs. Bobbin is too ill to get the dress to the palace.  Her young daughter, Irene, takes charge – putting her mother to bed with blankets and tea – and then, with the dress carefully boxed and tight in her arms, setting off to deliver the beautiful dress to the Duchess.   Everything that can go wrong, does.  It is snowing mightily, and the wind is so strong that Irene can barely walk with her large precious parcel.  Suddenly the wind grabs the box and whips the dress out of it.  Away it flies.

“How could anything so terribly wrong be allowed to happen?  Tears froze on her lashes.  Her dear mother’s hard work, all those days of measuring, cutting, pinning, stitching … for this?  And the poor duchess!  Irene decided she would have to trudge on with just the box and explain everything in person.”

As if this humiliation were not enough, Irene steps in a hole buried beneath the snow and hurts her ankle.  At this point she just wants to go home, but forward she persists, ignoring her pain and searching for the palace in the swirling snow.  Finally she sees its glittering lights, and as she approaches it, she sees the most wonderful sight: the beautiful gown is spread out on a huge tree trunk, held in place by the hateful wind which had torn it from her.

So – Irene and the dress arrive at the palace with much fanfare.  Needless to say, the ball is a wonderful success with the Duchess in her glorious new gown and Irene, in her simple dress, is just as glorious.

The Duchess in her new gown . . .

. . . and Irene, brave and honorable, enjoying the Ball!

The next morning Irene is accompanied home by two footmen, a doctor for Mrs. Bobbin sent by the Duchess, presents from the Duchess to Mrs. Bobbin, “along with a note saying how much she cherished her gown, and what a brave and loving person Irene was.”

Here are the things I love about this story:

1)   The art of dressmaking is in full display, with pride in accomplishment and recognition of the intricate, time-consuming, and complicated work that goes into the construction of such a gown.

2)   Irene’s love for her mother and understanding of the immediacy of delivering this important dress to the Duchess instill in her a take-charge attitude.  We all know those times in our lives when we must take charge – they choose us, we don’t choose them.

3)   Irene was not going to give up, even when she thought all was lost!   She was determined to do the honorable thing.

4)   Irene attended the Ball (as an unexpected guest of honor) in the only clothes she had with her – her simple dress.  However plain her attire, her attitude made her radiant.

5)   Sometimes a piece of clothing will take on special significance because of the circumstances under which it is worn.  I daresay Mrs. Bobbin’s beautiful creation was thus for the Duchess!

A couple of years after this book was published, I made a “Duchess” dress for my daughter to play in.  Here it is:

A dress for playing out the storyline of  “Brave Irene”.

Here is the back of the dress, with its beautiful bow.

And then a couple of years after that, I needed to make a contribution to a fund-raiser at my son’s school.  So – I put together a “Brave Irene” auction item, which consisted of another “duchess” dress, this one a little fancier, with lace flourishes and silky ribbons.  I lined a sturdy, new cardboard box with shiny white paper, addressed it to the “Duchess c/o the Palace” (with Mrs. Bobbin’s return address, of course!); placed the dress in the box, with a new copy of the book, and a wool scarf for “Irene” to wear on her journey.   In retrospect, I should have included a tomato pincushion, too, and maybe a tape measure ….

Mrs. Bobbin’s dress form (called a “dummy” in the book).

Whenever I read this simple story, I wonder if William Steig might have been inspired by this quote by Isaac Bashevis Singer:  “What a strange power there is in clothing.”   Indeed!

6 Comments

Filed under Dressmaker details, sewing in silk, Uncategorized

Spring-Summer Fashion Show – A Day Remembered from 1976

I was working in center city Philadelphia in 1976.  The venerable John Wanamaker Department Store was just a few blocks away from my place of employment – and often I would grab a quick yogurt and crackers for lunch and then head over to the Fabric Department to spend the remainder of my lunch hour dreaming among the bolts of silks and linens, cottons and wools.  It was about this same time of year – mid-March – when I saw a notice about a fashion show, which was going to be held at the store.  It was to feature Vogue patterns, and the sole fabric of choice was to be American-made silk.  Well, this was quite enough to make a girl’s heart go pitter-patter; this was one show I was not going to miss!

When the appointed day arrived, somehow I carved out the time from work and scurried off to the top floor of the Wanamaker building which housed the “designer fashions” department.  I was feeling a little young and naïve among the well-dressed ladies in attendance, but that did not deter me!  I was in heaven as I saw one gorgeous outfit after another, all in glorious colors of the most beautiful silk fabrics.  I came away with the printed “program” from the show and have kept it all these years.  Here is the front of it:

The symbol for American Silk featured on the cover of the Program is still used today.

I came away with a couple of other things as well – a Vogue pattern which had been featured, and a piece of American silk in which to make my chosen design!  First, however, a few words on the company which sponsored the Show – and a few peeks into the rest of the printed program.

Here is the statement at the bottom of page two of the Program:

“All fabrics in the show are pure silk and made in America by the American Silk Mills Corp. and distributed to the over-the-counter market by Logantex, Inc.  You will find the fabrics in the colors in the show as well as other favorite colors in the fabric department.  Fashion note:  the identical silk fabrics are presently being used by leading American designers in their spring and summer ready-to-wear collections.”

American Silk Mills is still in operation, but it seems they are no longer producing dress goods, just drapery and upholstery fabrics.  Logantex is still a distributor of fabrics.

The Show was conducted by Charles Kleibacker, whom I remember as very charming and very sophisticated on stage.   He was known as “Master of the Bias” and gave some styling and sewing tips that day on using the bias in dressmaking.  He died in 2010 at the age of 88.

The show was divided into five “scenes”:  Day Dressing in Silk, Sporty Silks, Silk Chic – The Layered Look, At Home in Silk, and Evenings in Silk.  Twenty-eight patterns were featured in twenty-four “looks”.  The diagrams of these outfits are in black and white, but the colors and types of silk used for each are designated in the  descriptions.  Here are the four pages of designs (click on the images to see them enlarged):

Not all the Vogue patterns featured were from their Designer Series, but of those that were, they were all American designers - very appropriate for the Bicentennial Year!

The sailor middy and skirt outfit shown at the top of the page was memorable in its Fire Engine Red, Canton Navy Blue and White.

You can read some more about Charles Kleibacker at the top of this page from the Program.

The designs on this page give a good feel for the various weaves of silk which were featured in this show: crepe de chine, "Shan-Twill", broadcloth, and linen. Shantung was also one of the weaves.

Reading the color descriptions and combinations is totally inspiring.  For example, View 6 featured Shocking pink, Pure pink, and Blossom pink.  Olive and Pistachio were paired in view 8, while view 13 brought Mariner blue, Sun gold, Chrysanthemum, and Canton Navy together in one stunning outfit.  View 24 was a fabulous finale piece in Straw, Apricot, Desert Coral and Wheat.

However, the colors which spoke to me the most that day were the Hyacinth silk linen, the Desert coral silk linen and the Melon twill.  I could only afford to buy one length of fabric – I opted for the pattern shown in View 2, an Anne Klein shirtdress –  and I purchased the hyacinth blue silk linen.

I made a wide self belt and wore this dress with the collar up in back as pictured.

Here is all I have left of the fabric, two scraps!

This photo cannot show you the depth of color saturation, nor the perfect weight and weave of this silk linen.

I remember wearing the dress to parties and feeling very happy.  Isn’t that what beautiful clothes are supposed to do?

3 Comments

Filed under Dressmaker details, sewing in silk, Uncategorized, vintage Vogue patterns from the 1970s, Vogue patterns