Tag Archives: sheath dress

Too Late – or Too Early?

This sewing out of season is perplexing.  On the one hand, I am happy to have been able to complete this dress.  But on the other hand, the timing of its completion means it is too late in the season to even think about wearing it – or much too early.  Not that it will matter six months from now. 

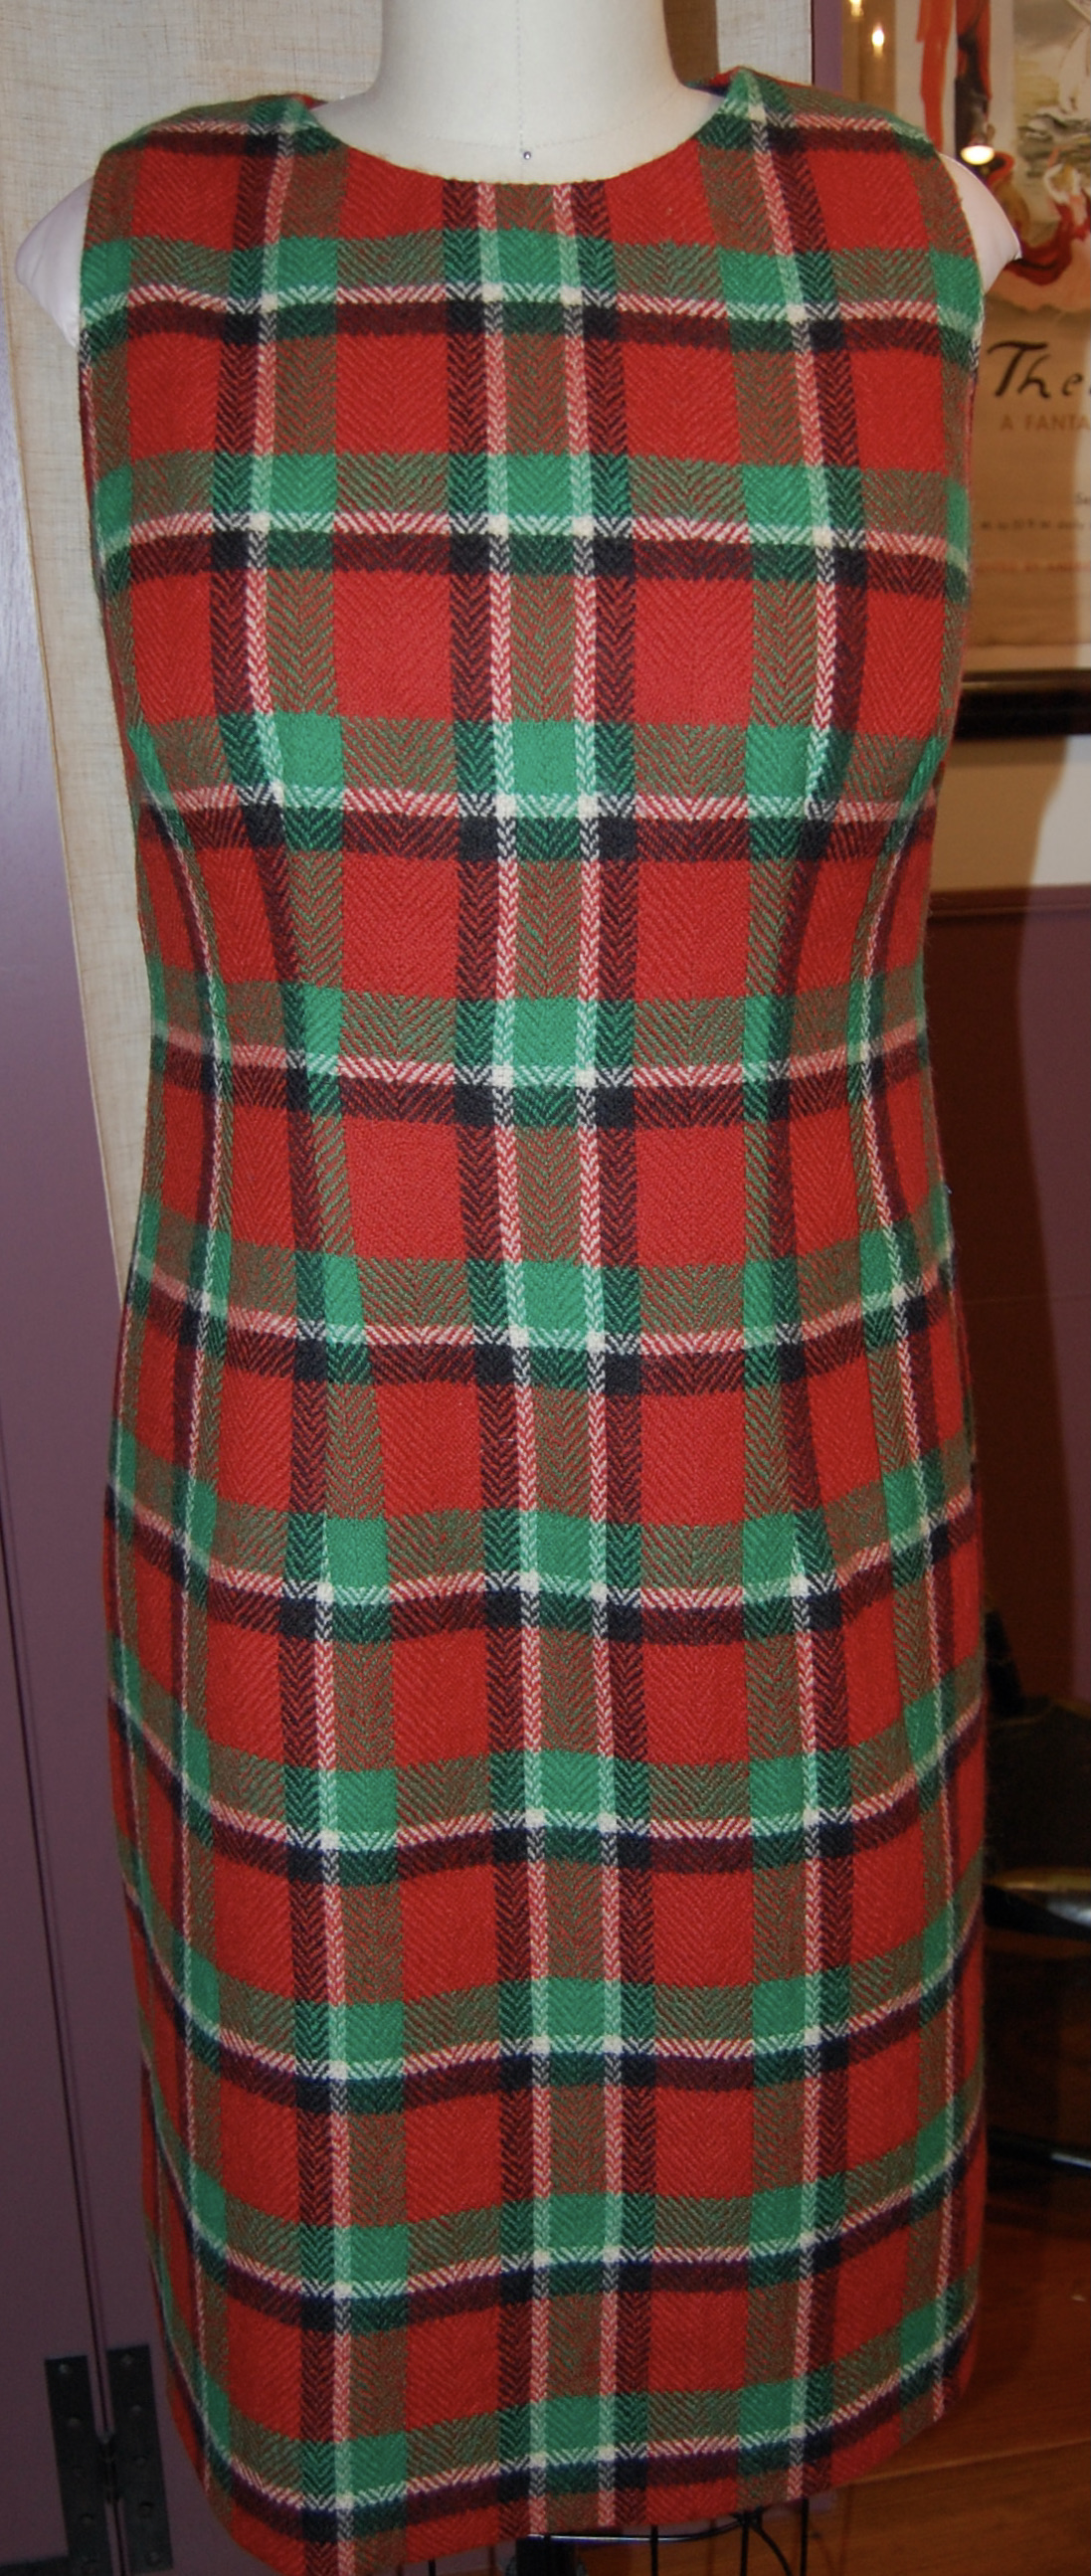
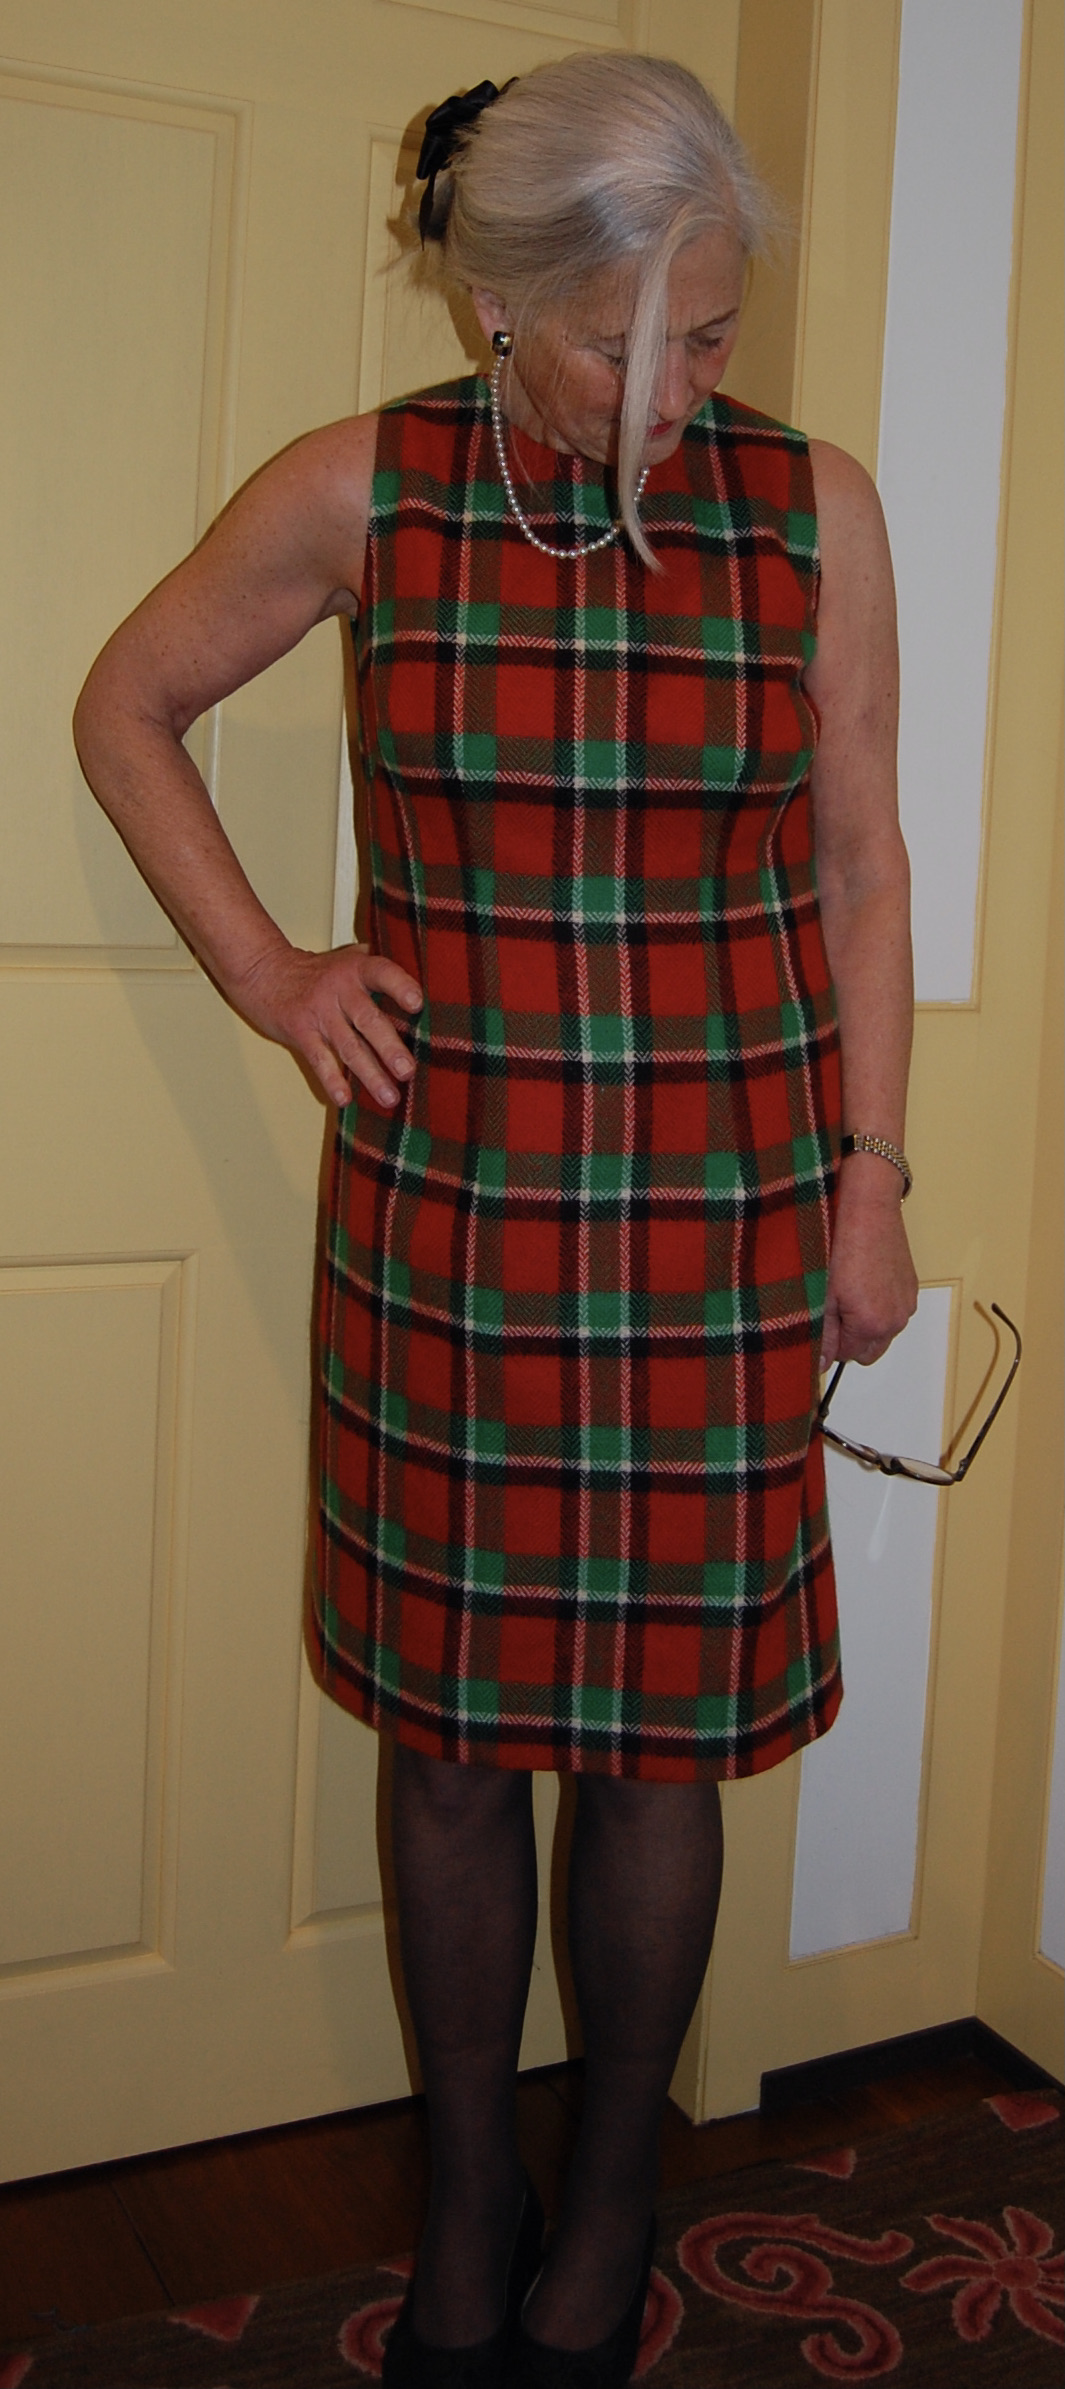
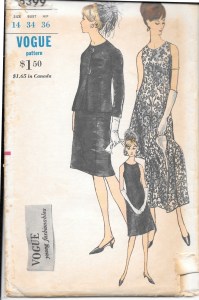
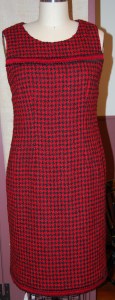
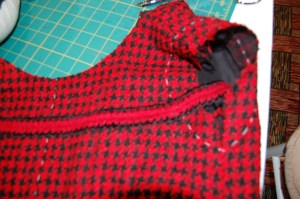
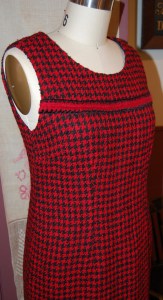
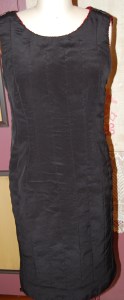
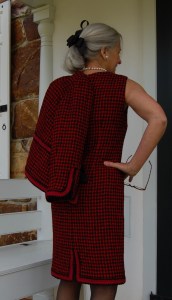
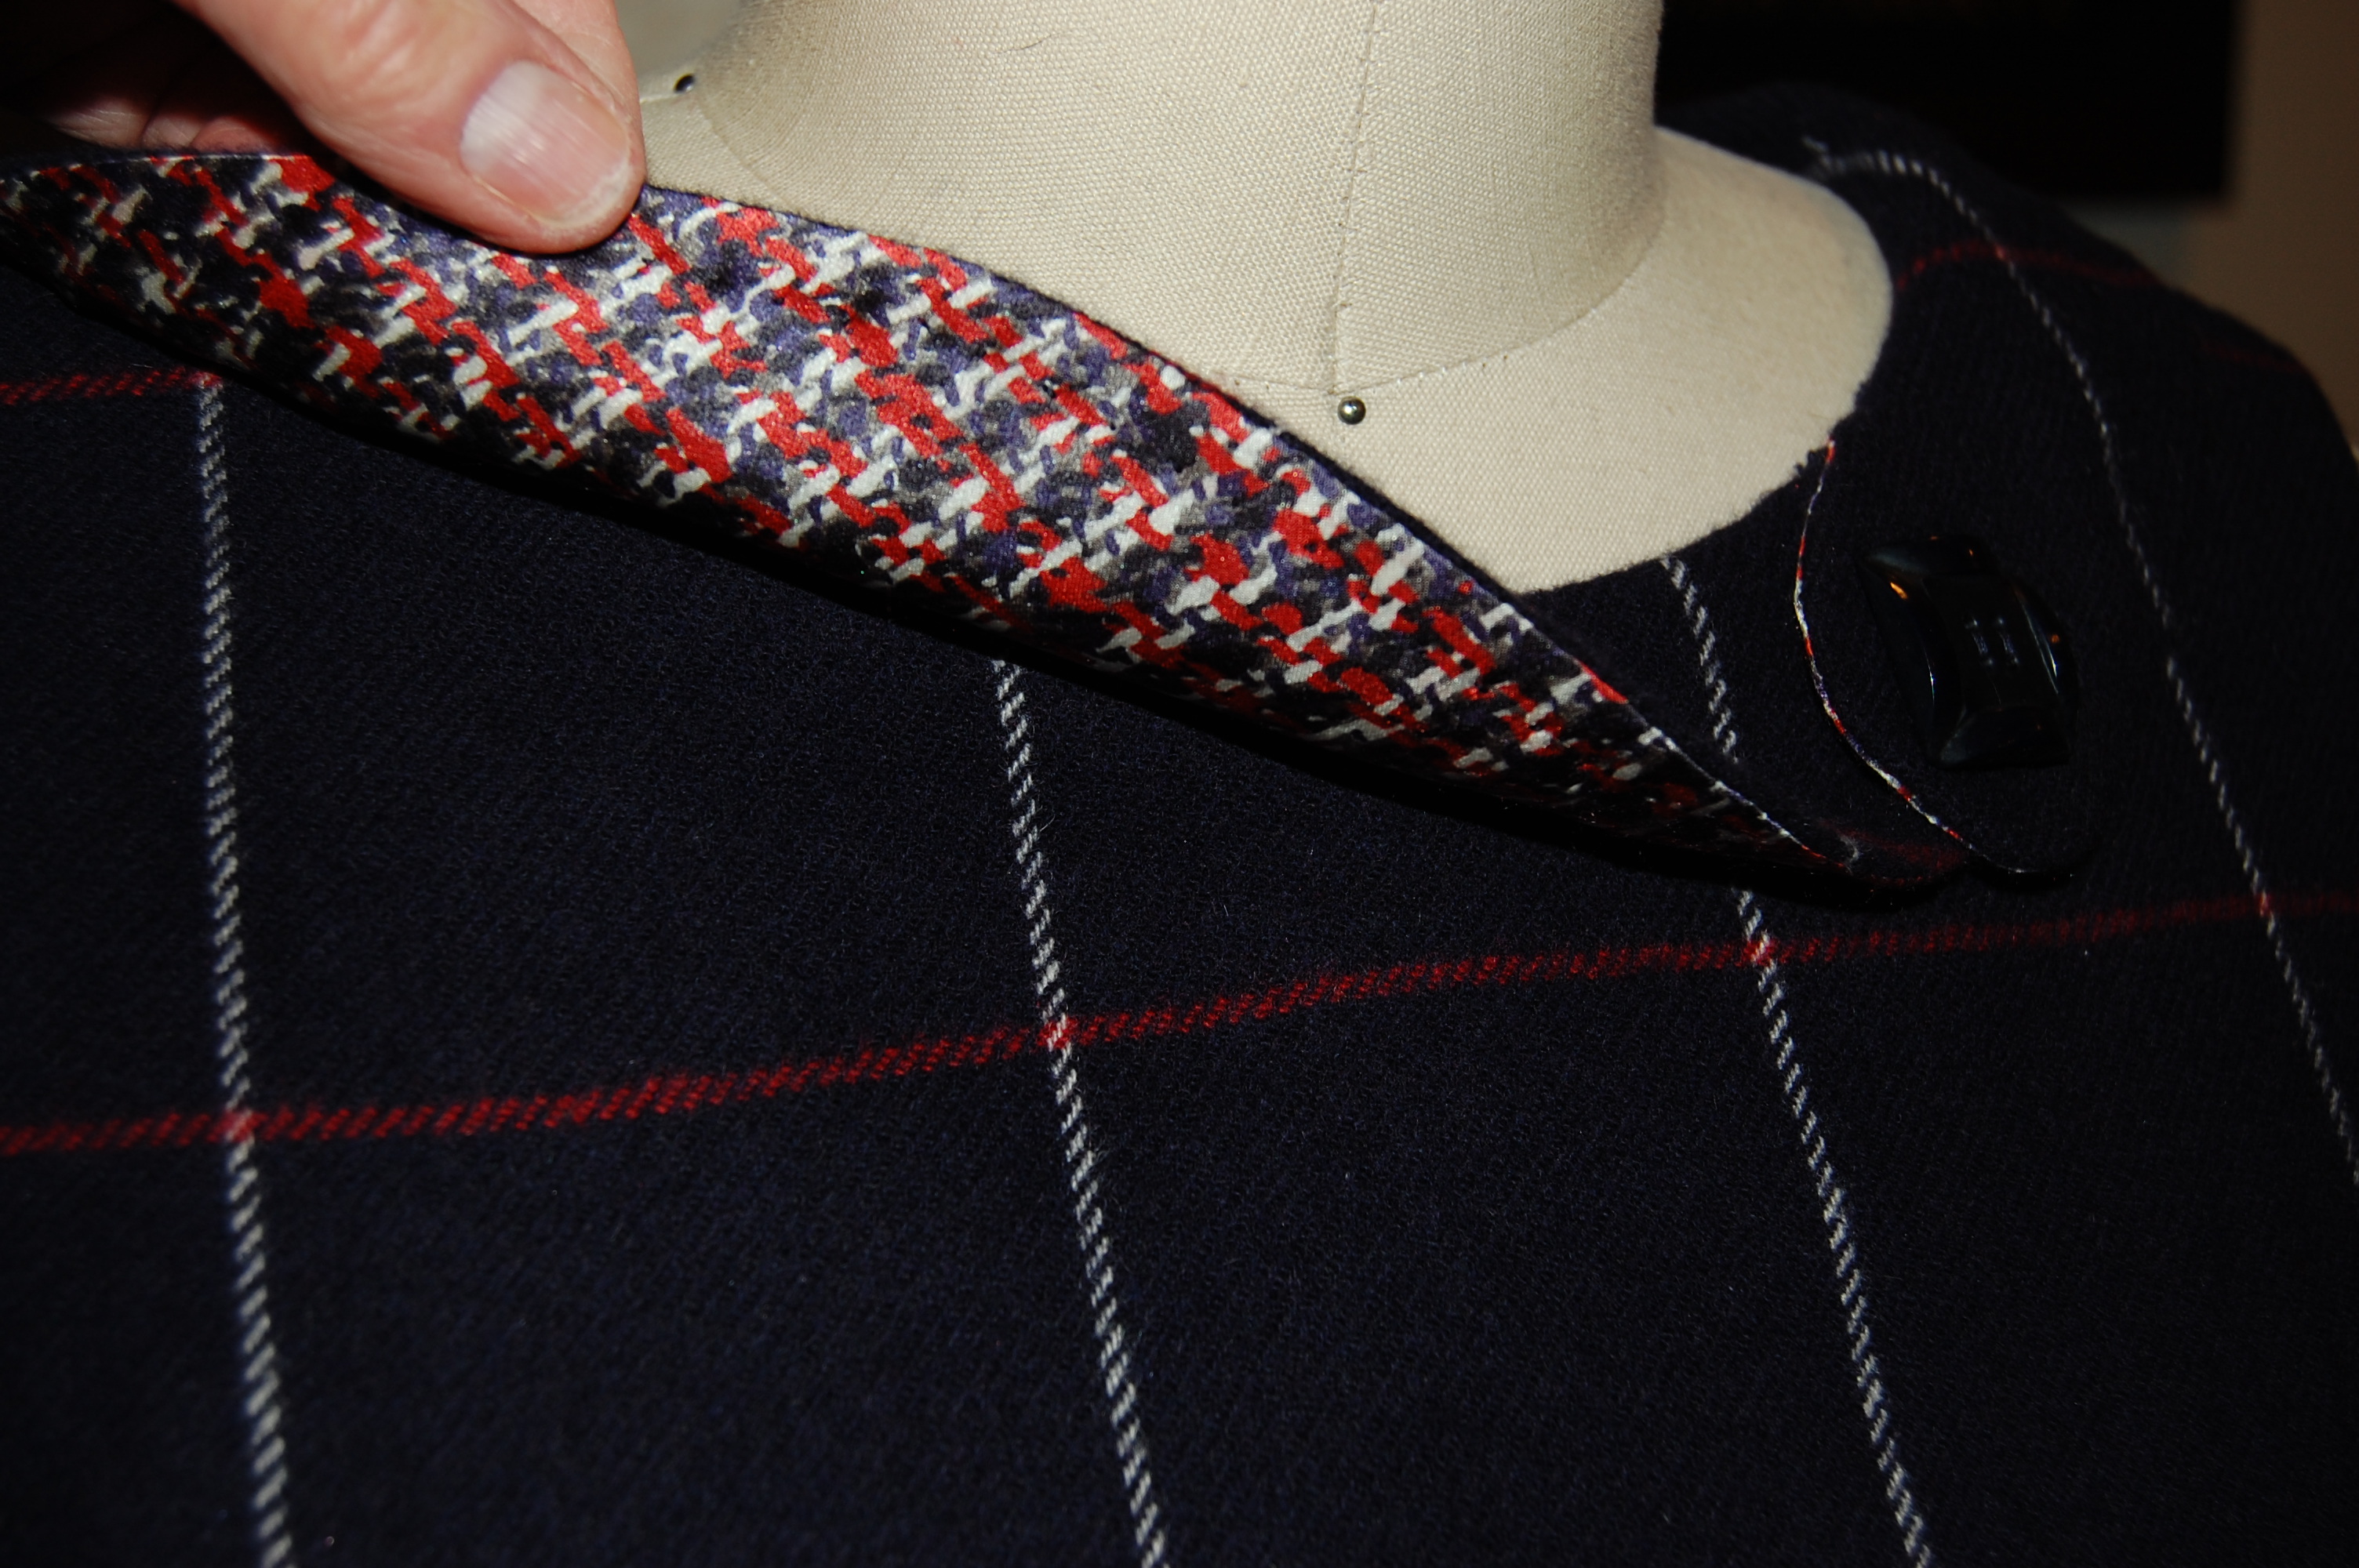
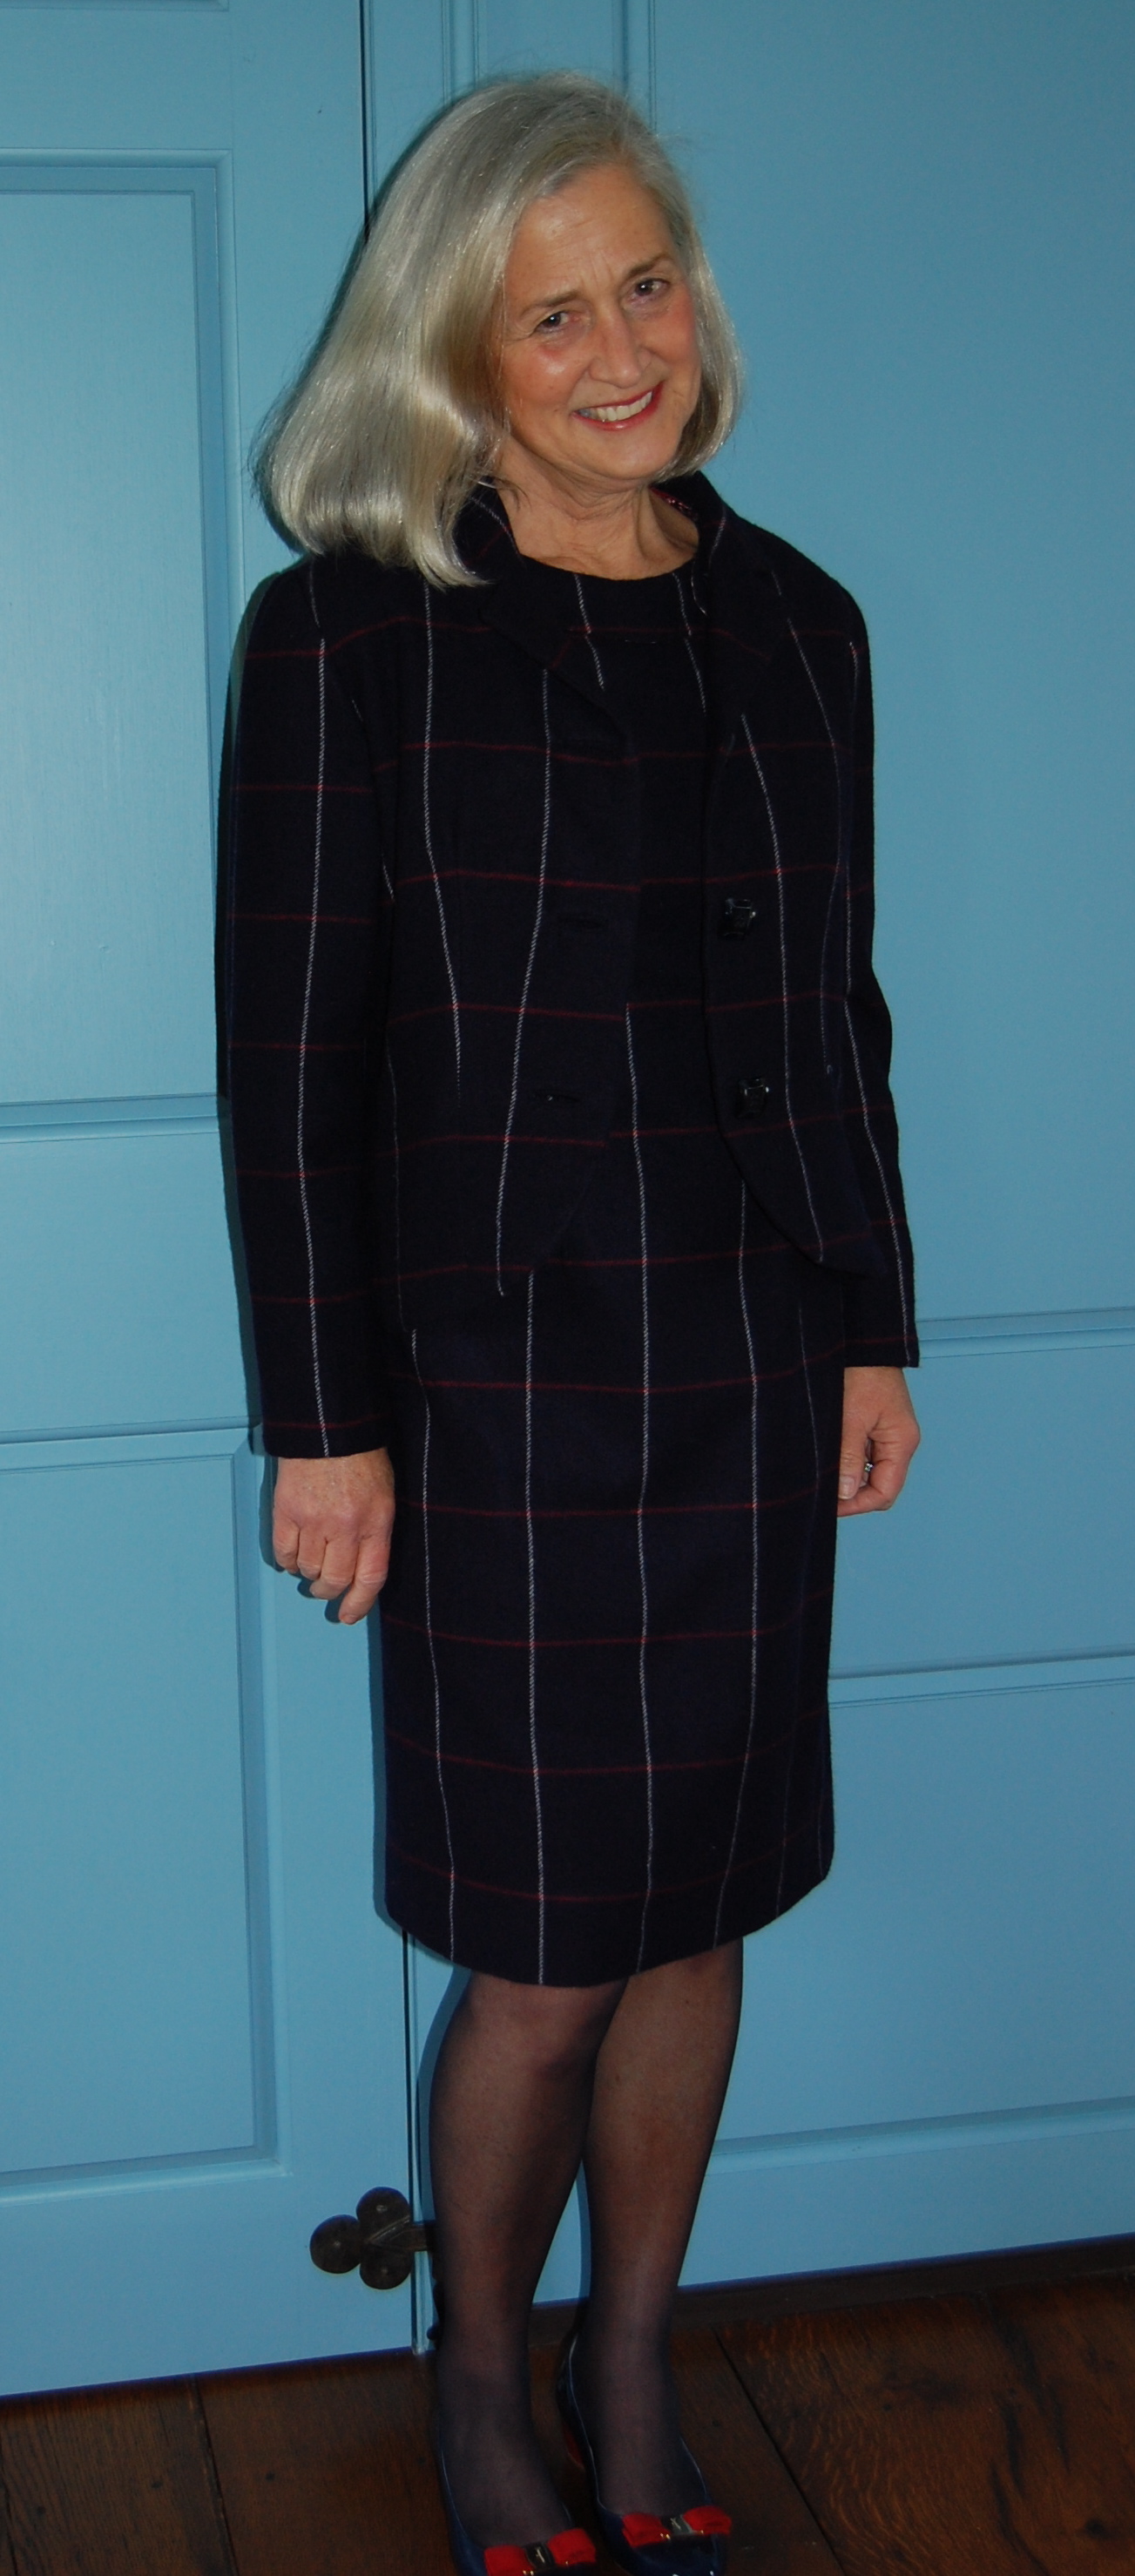
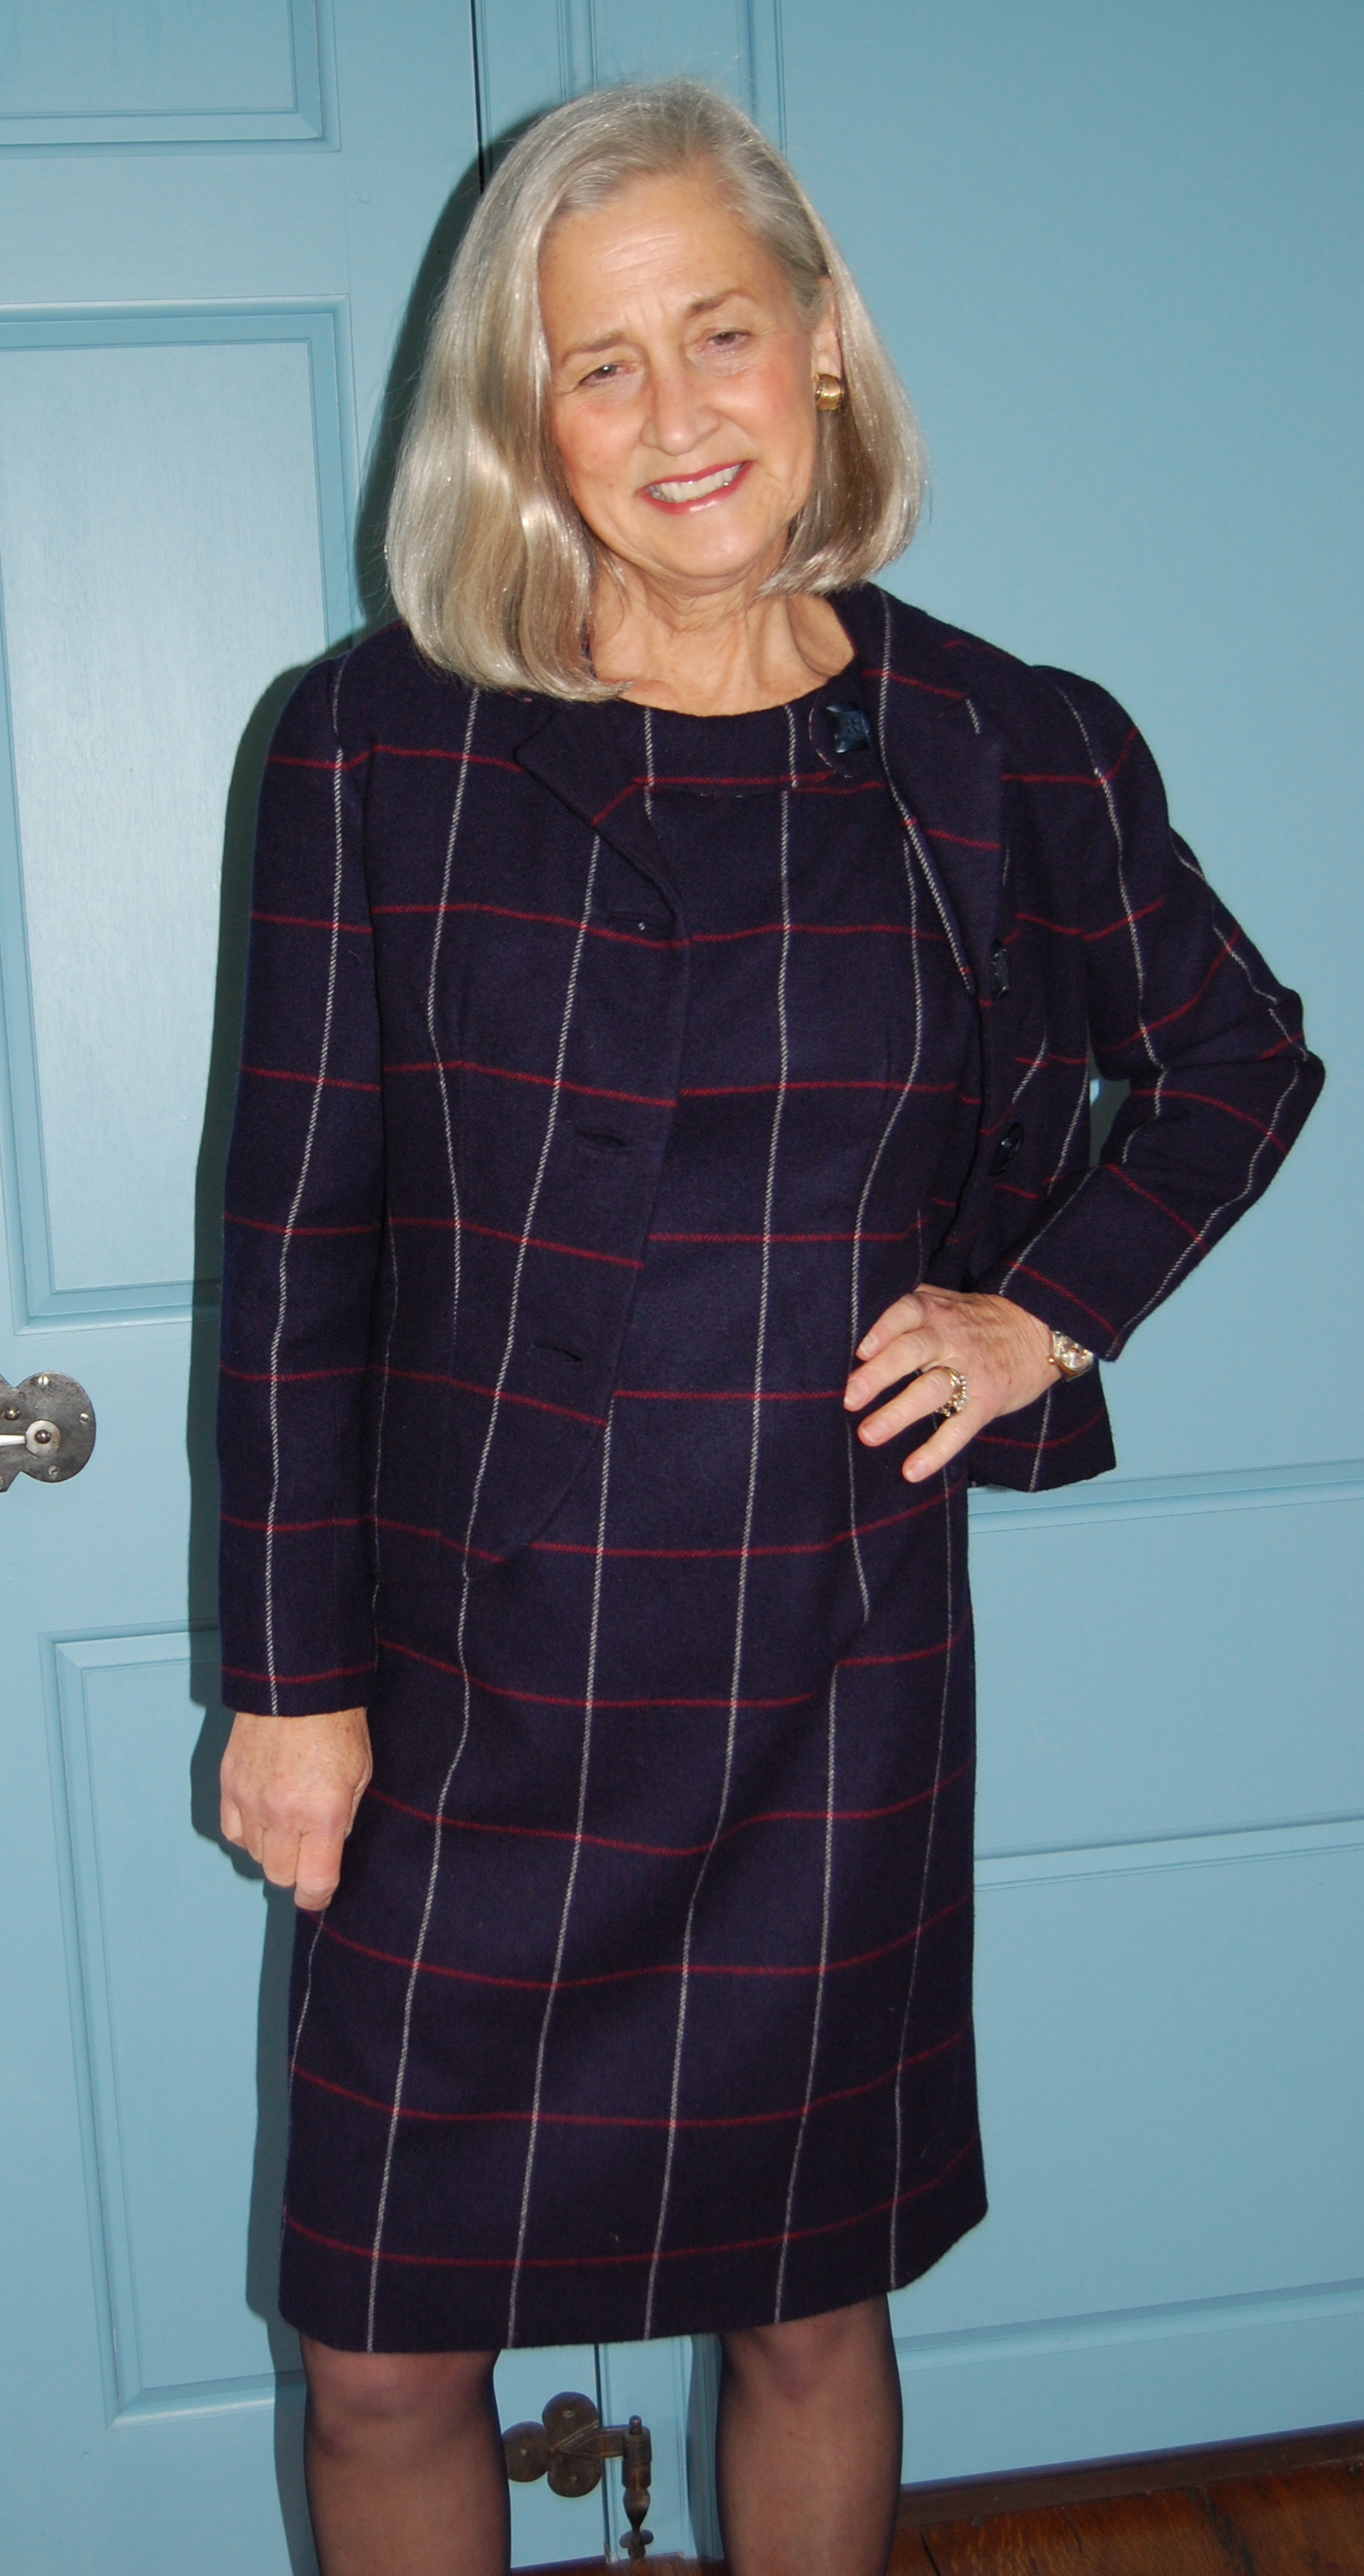
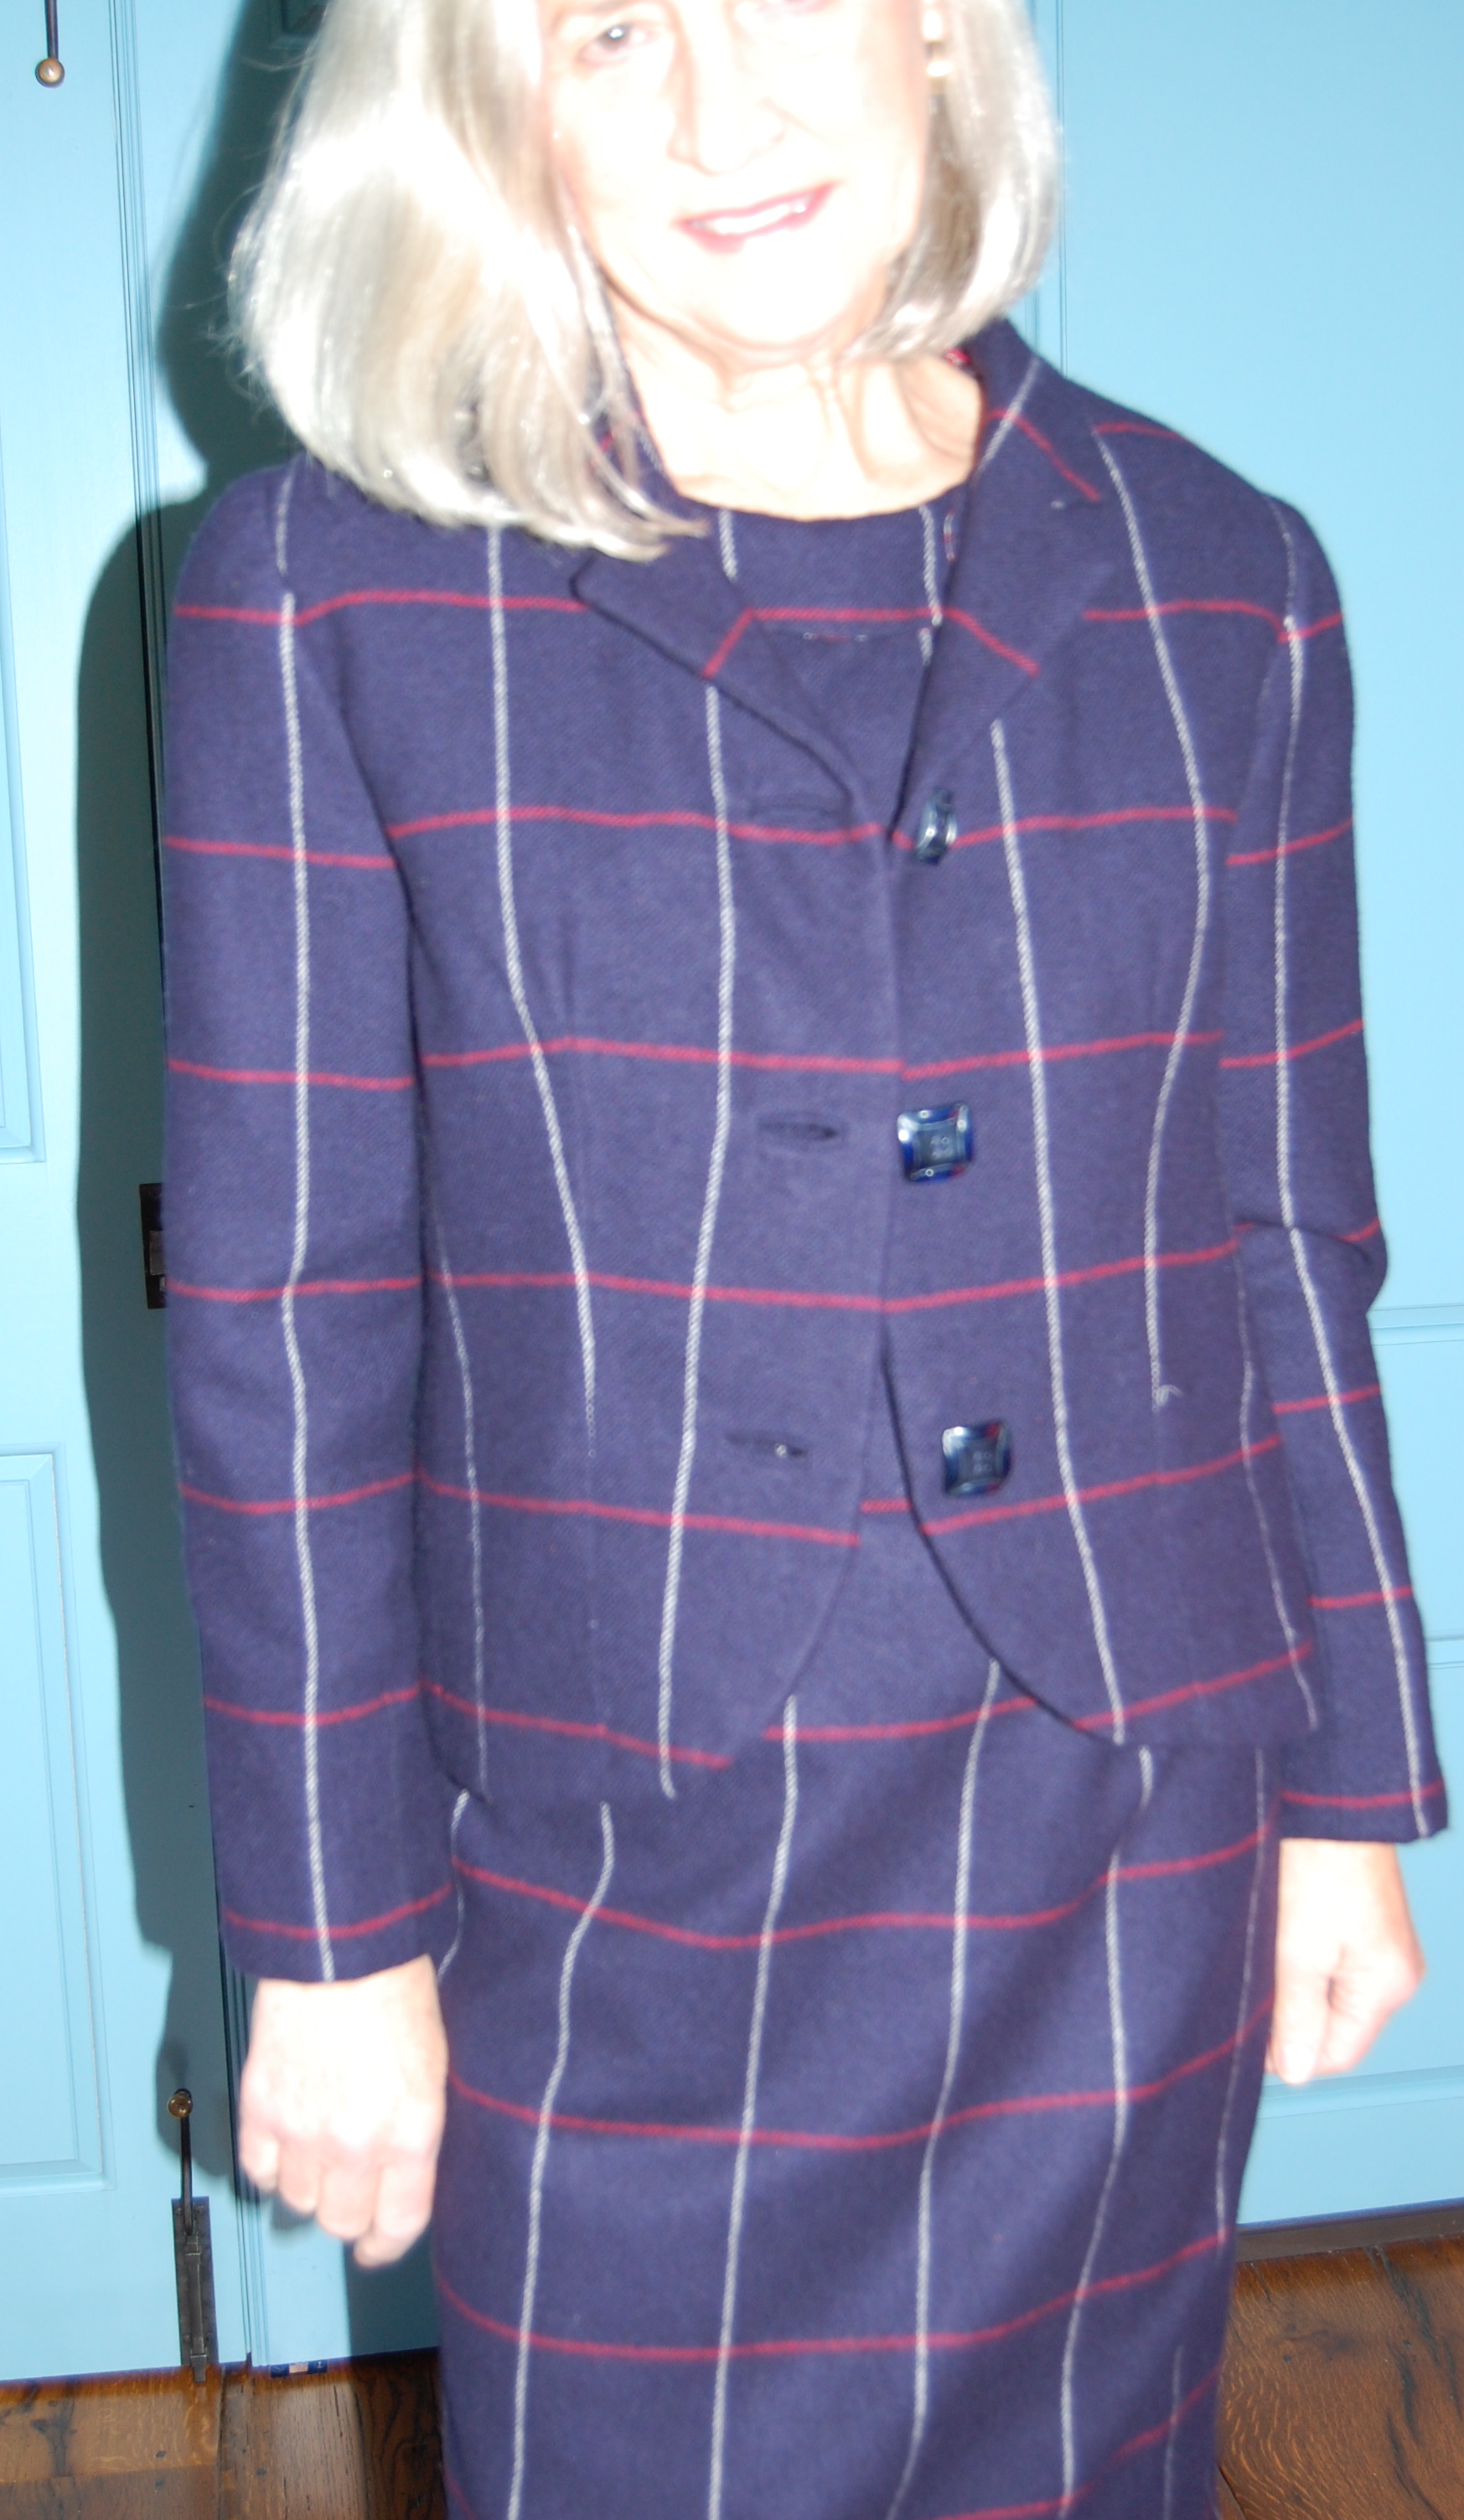
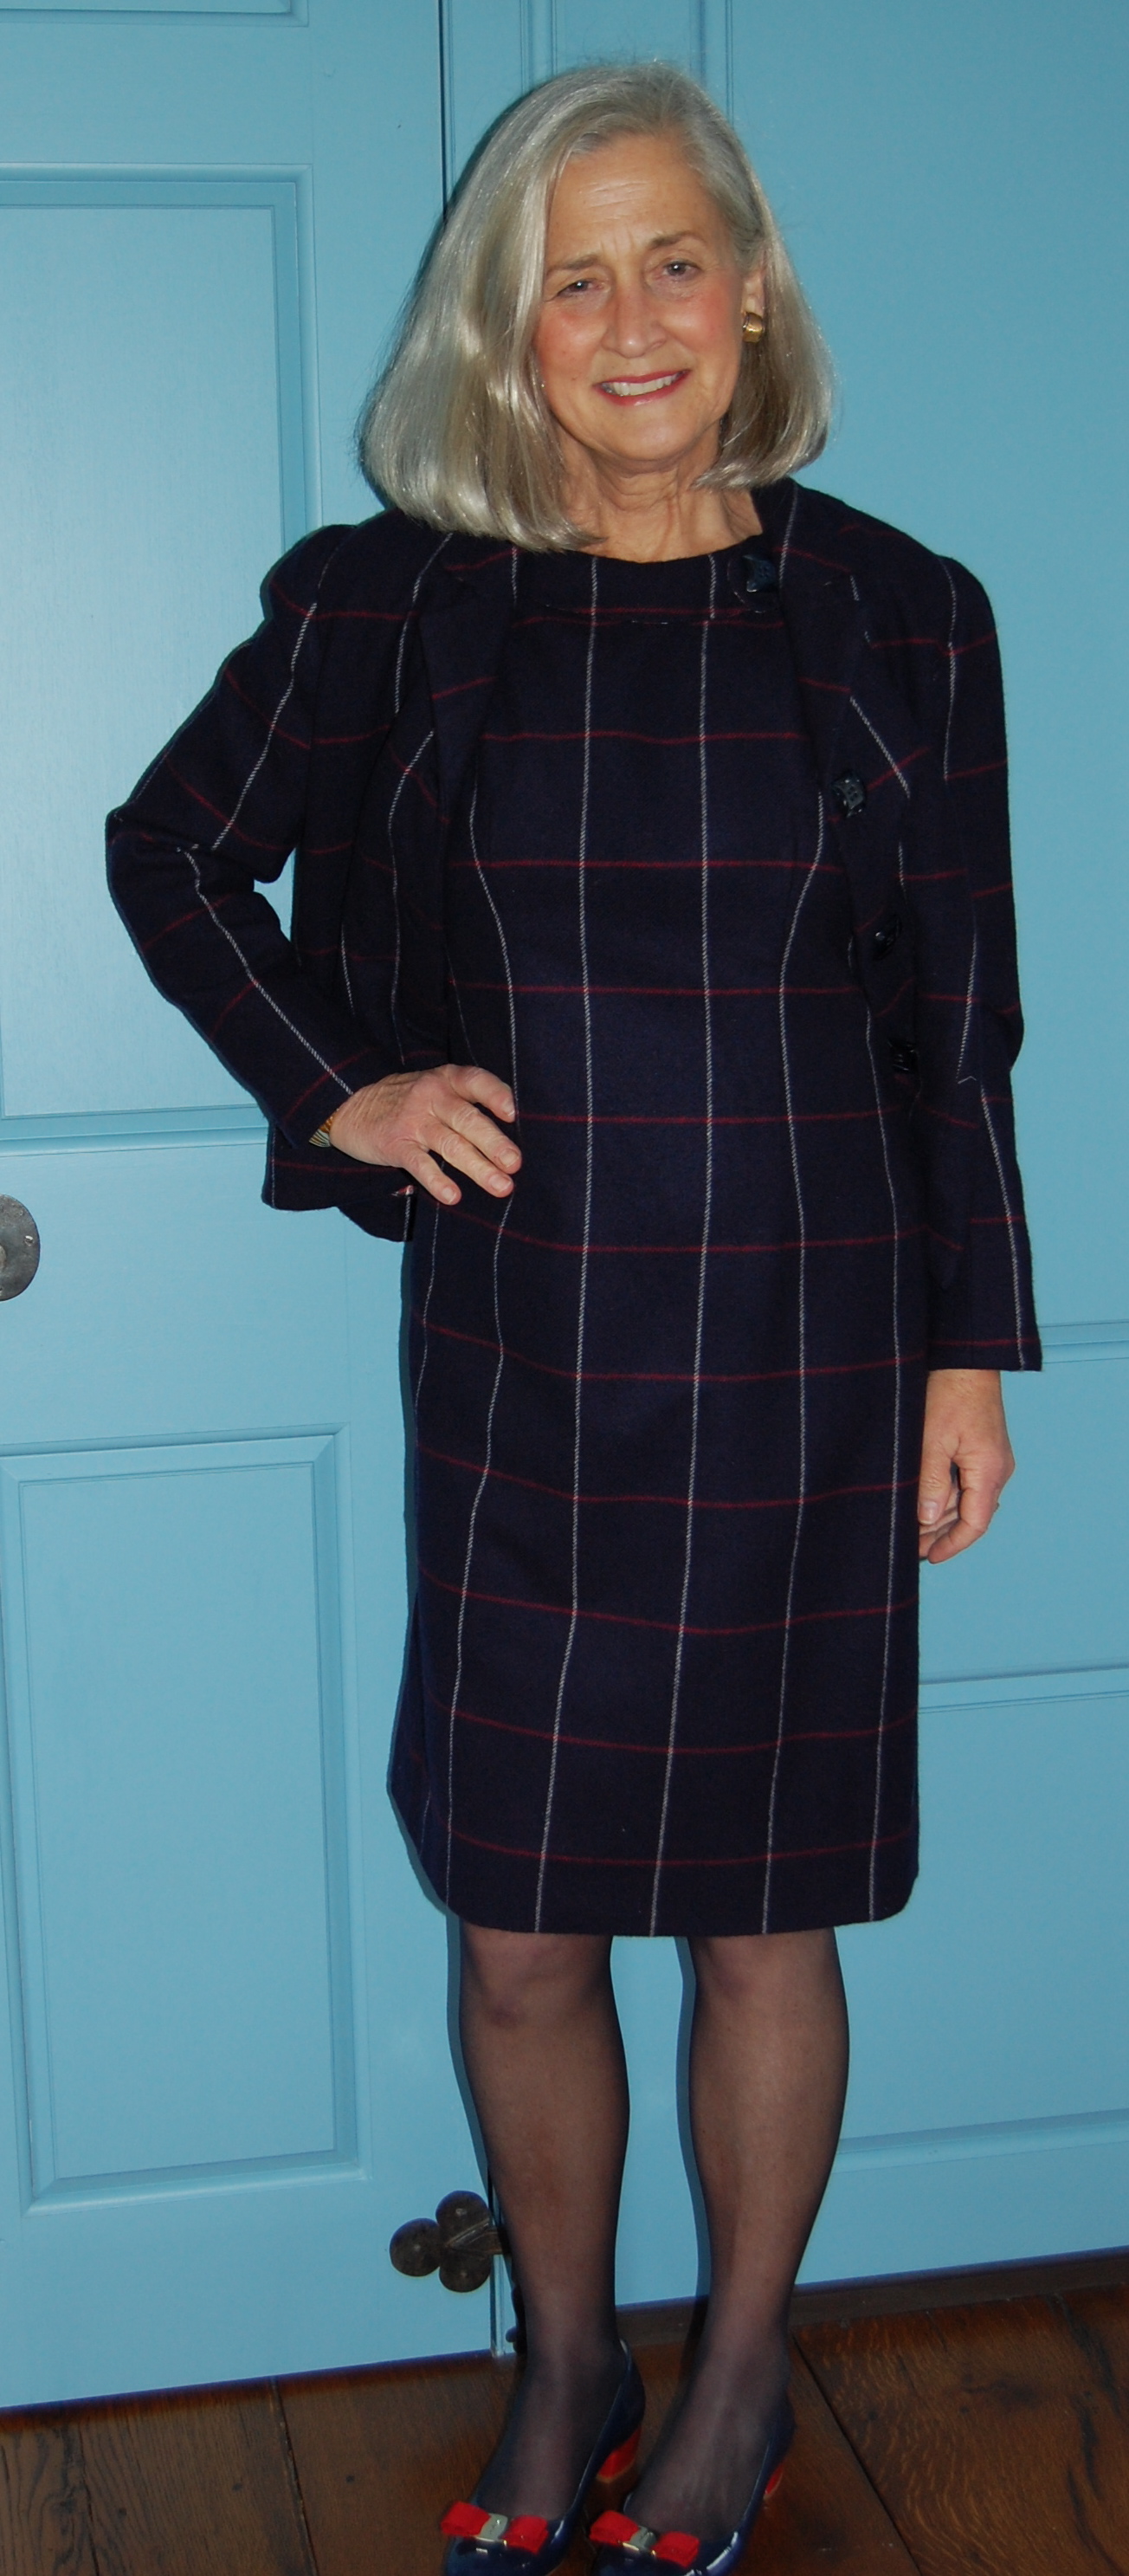
After my successful use of a new sheath dress pattern earlier this winter, I was anxious to use it again.  And I just happened to have a piece of cashmere herringbone wool tucked away for such an occasion.  I had been on the hunt for a wool to coordinate with the Classic French Jacket shown, and I was quite excited when I found this selection at Farmhouse Fabrics.  The bonus was the fact that it is cashmere, and oh, so soft.  

Wool is quite possibly my favorite fabric on which to sew.  Christian Dior certainly had kind words to say about wool in his Little Dictionary of Fashion.  “Wool shares with silk the kingdom of textiles…  And like silk it has wonderful natural qualities.  Always before you cut woolen material it has to be shrunk to avoid disappointment afterward.” [I always steam wool fabric heavily before I cut into it for just this reason].  Dior continues, “Wool has the great advantage over all other materials in that it can be worked with a hot iron and molded.” (The Little Dictionary of Fashion, by Christian Dior, Abrams, New York, New York, c2007, Page 122.)  

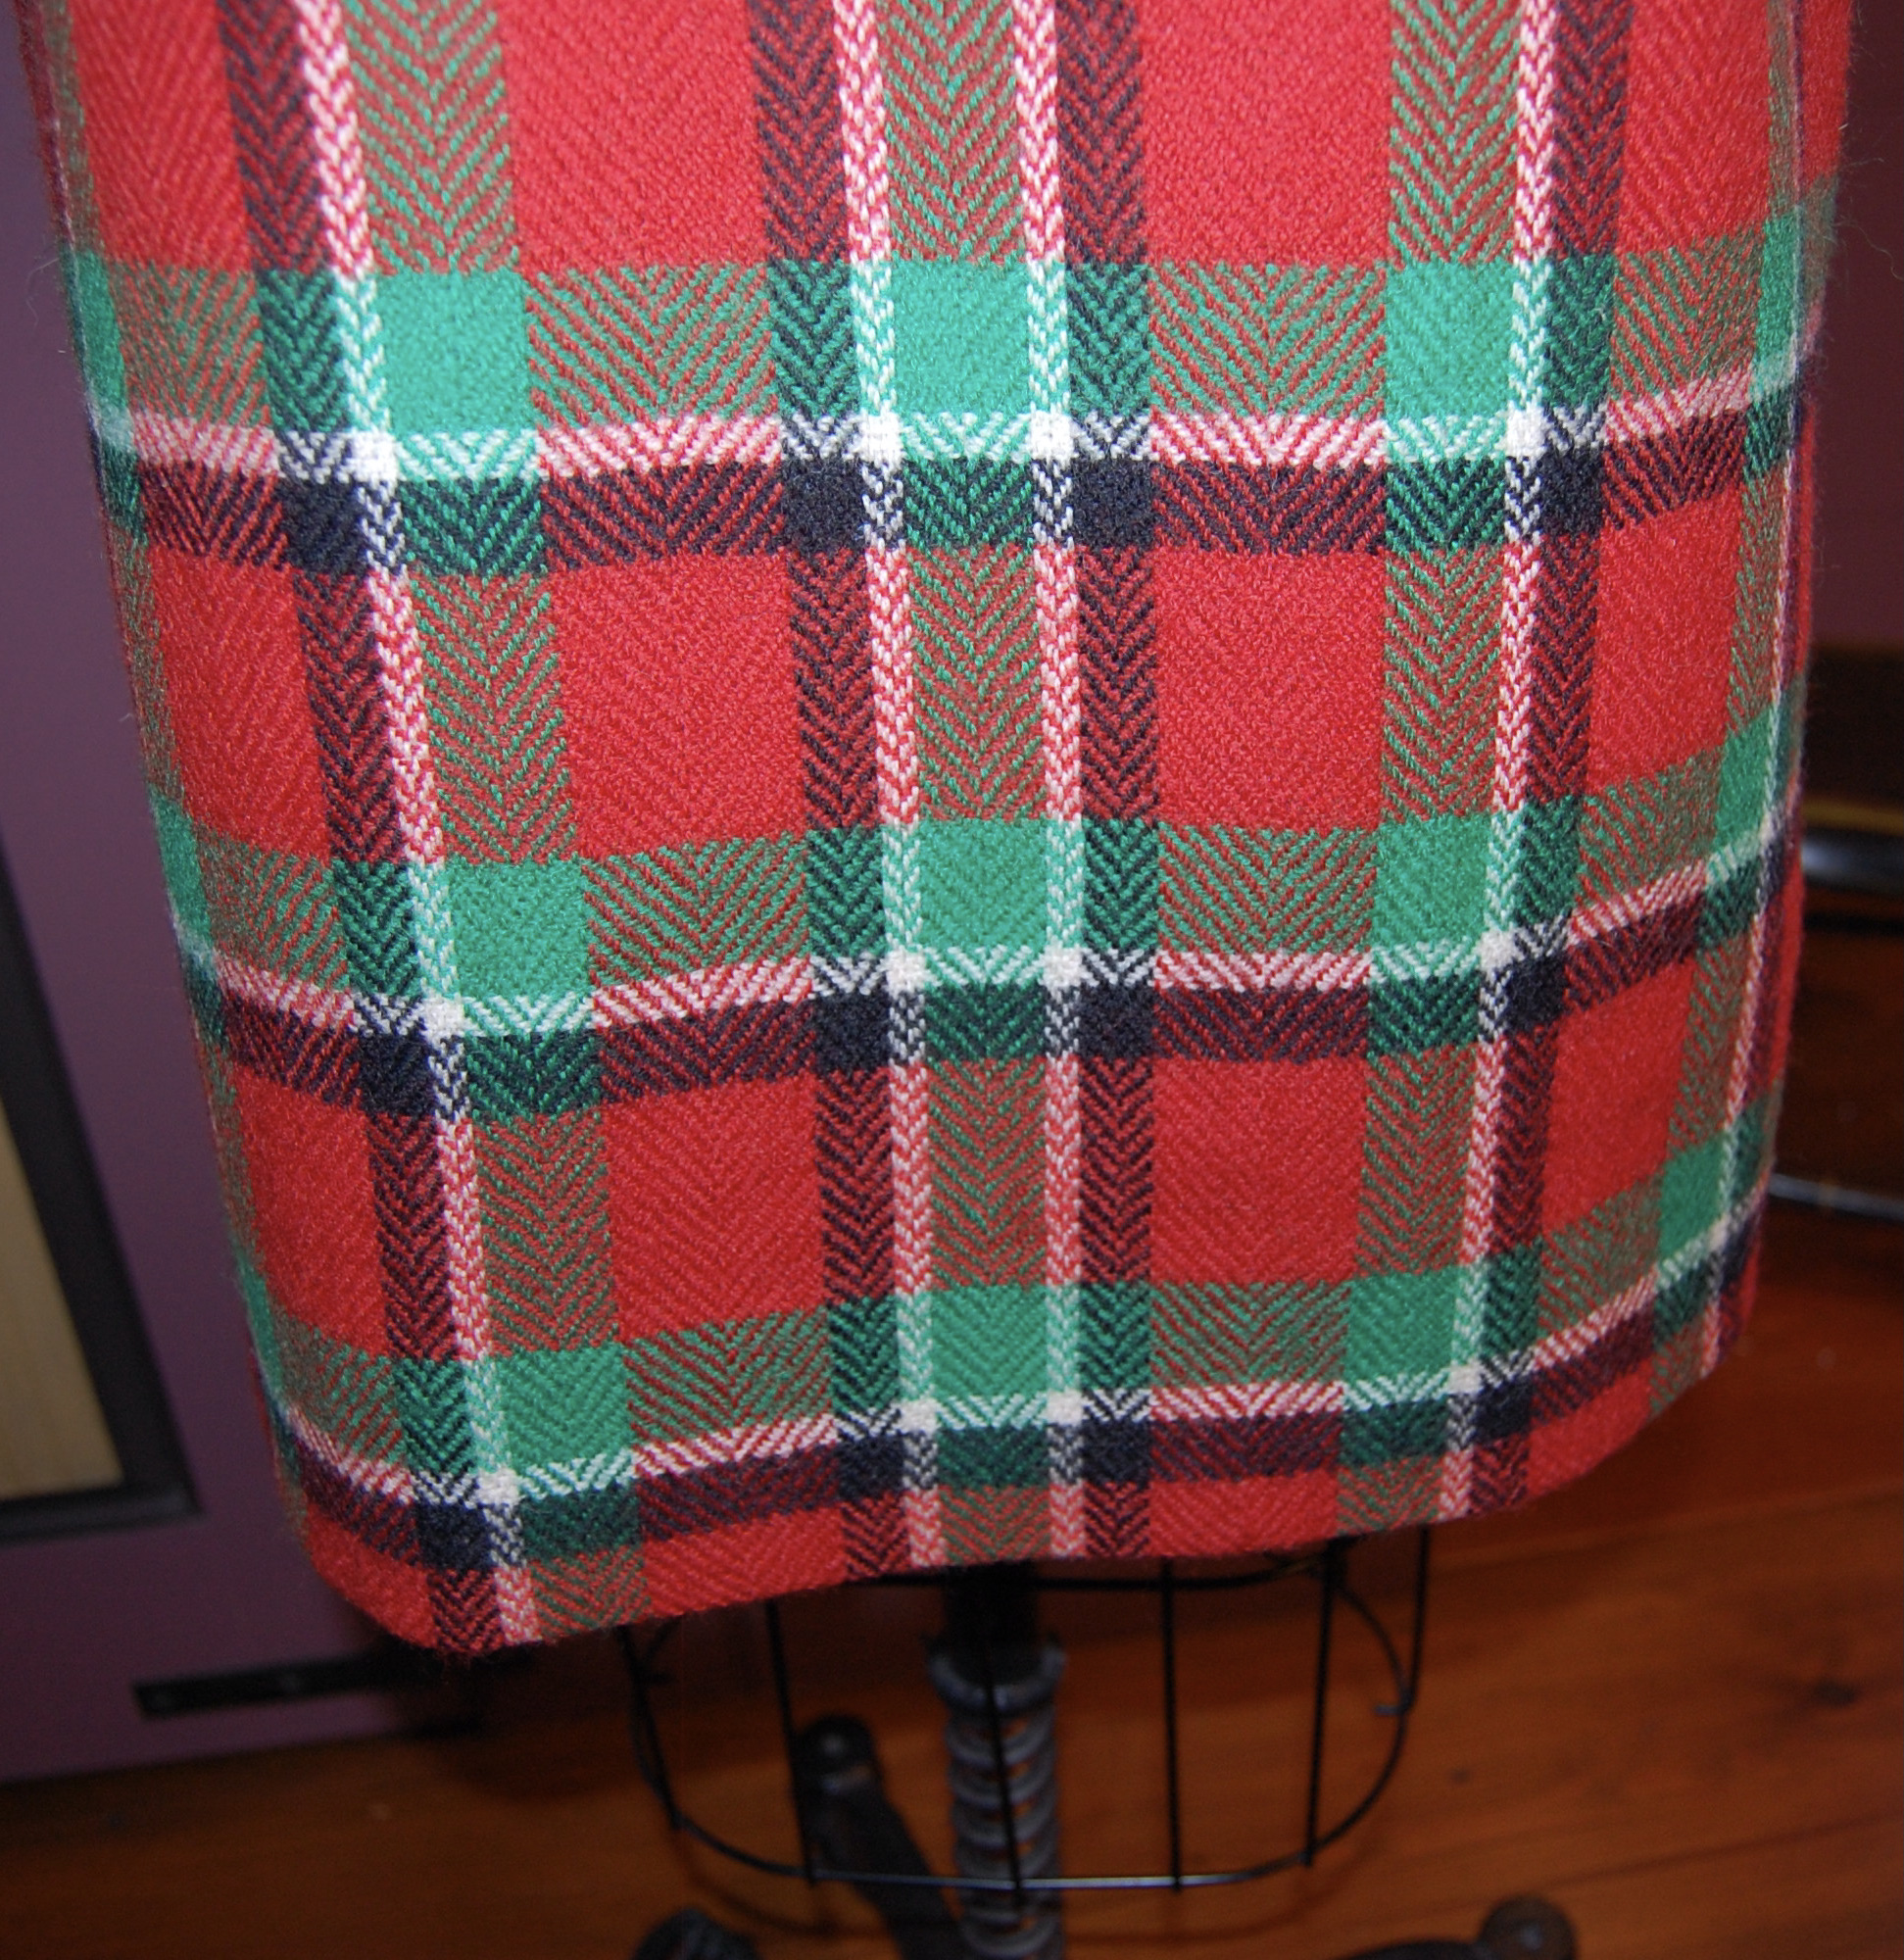
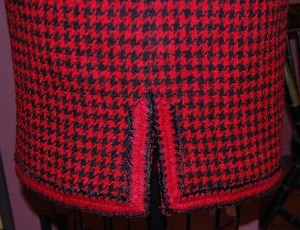
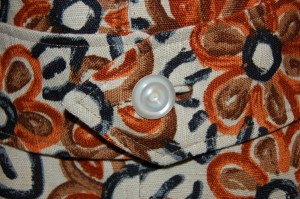
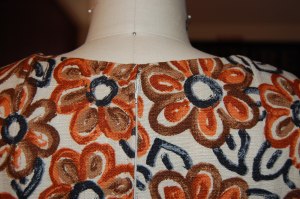
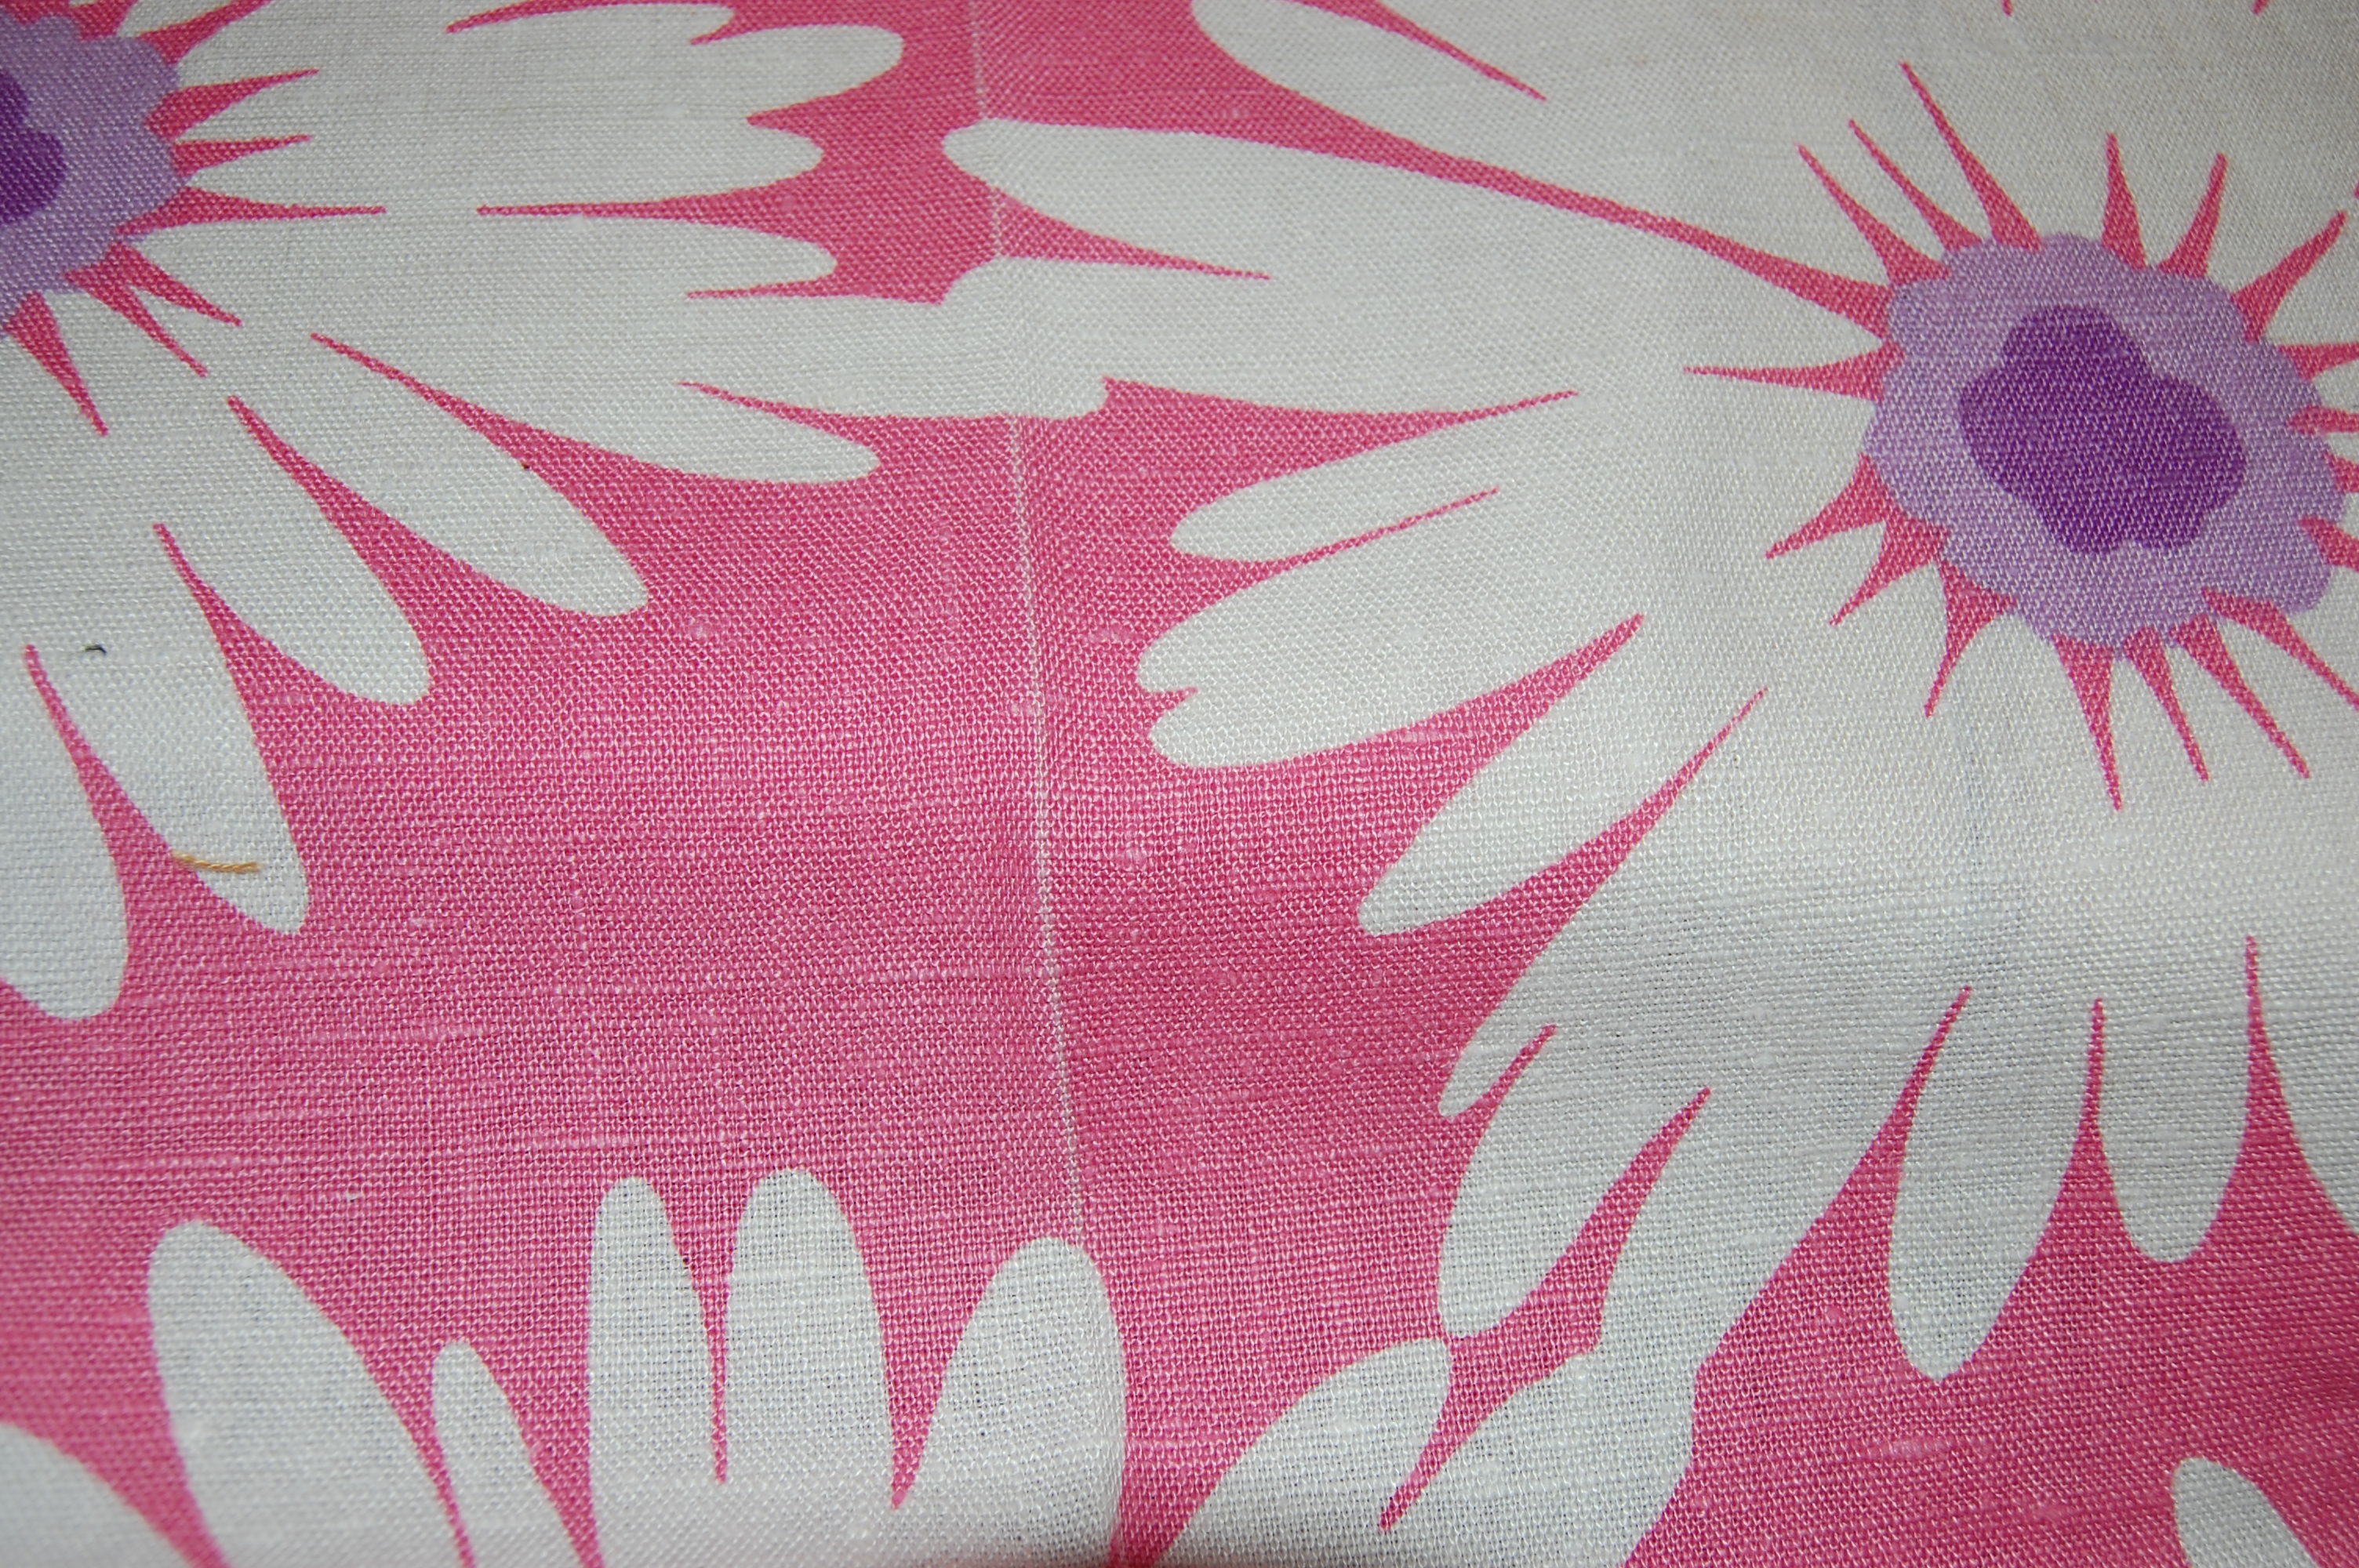
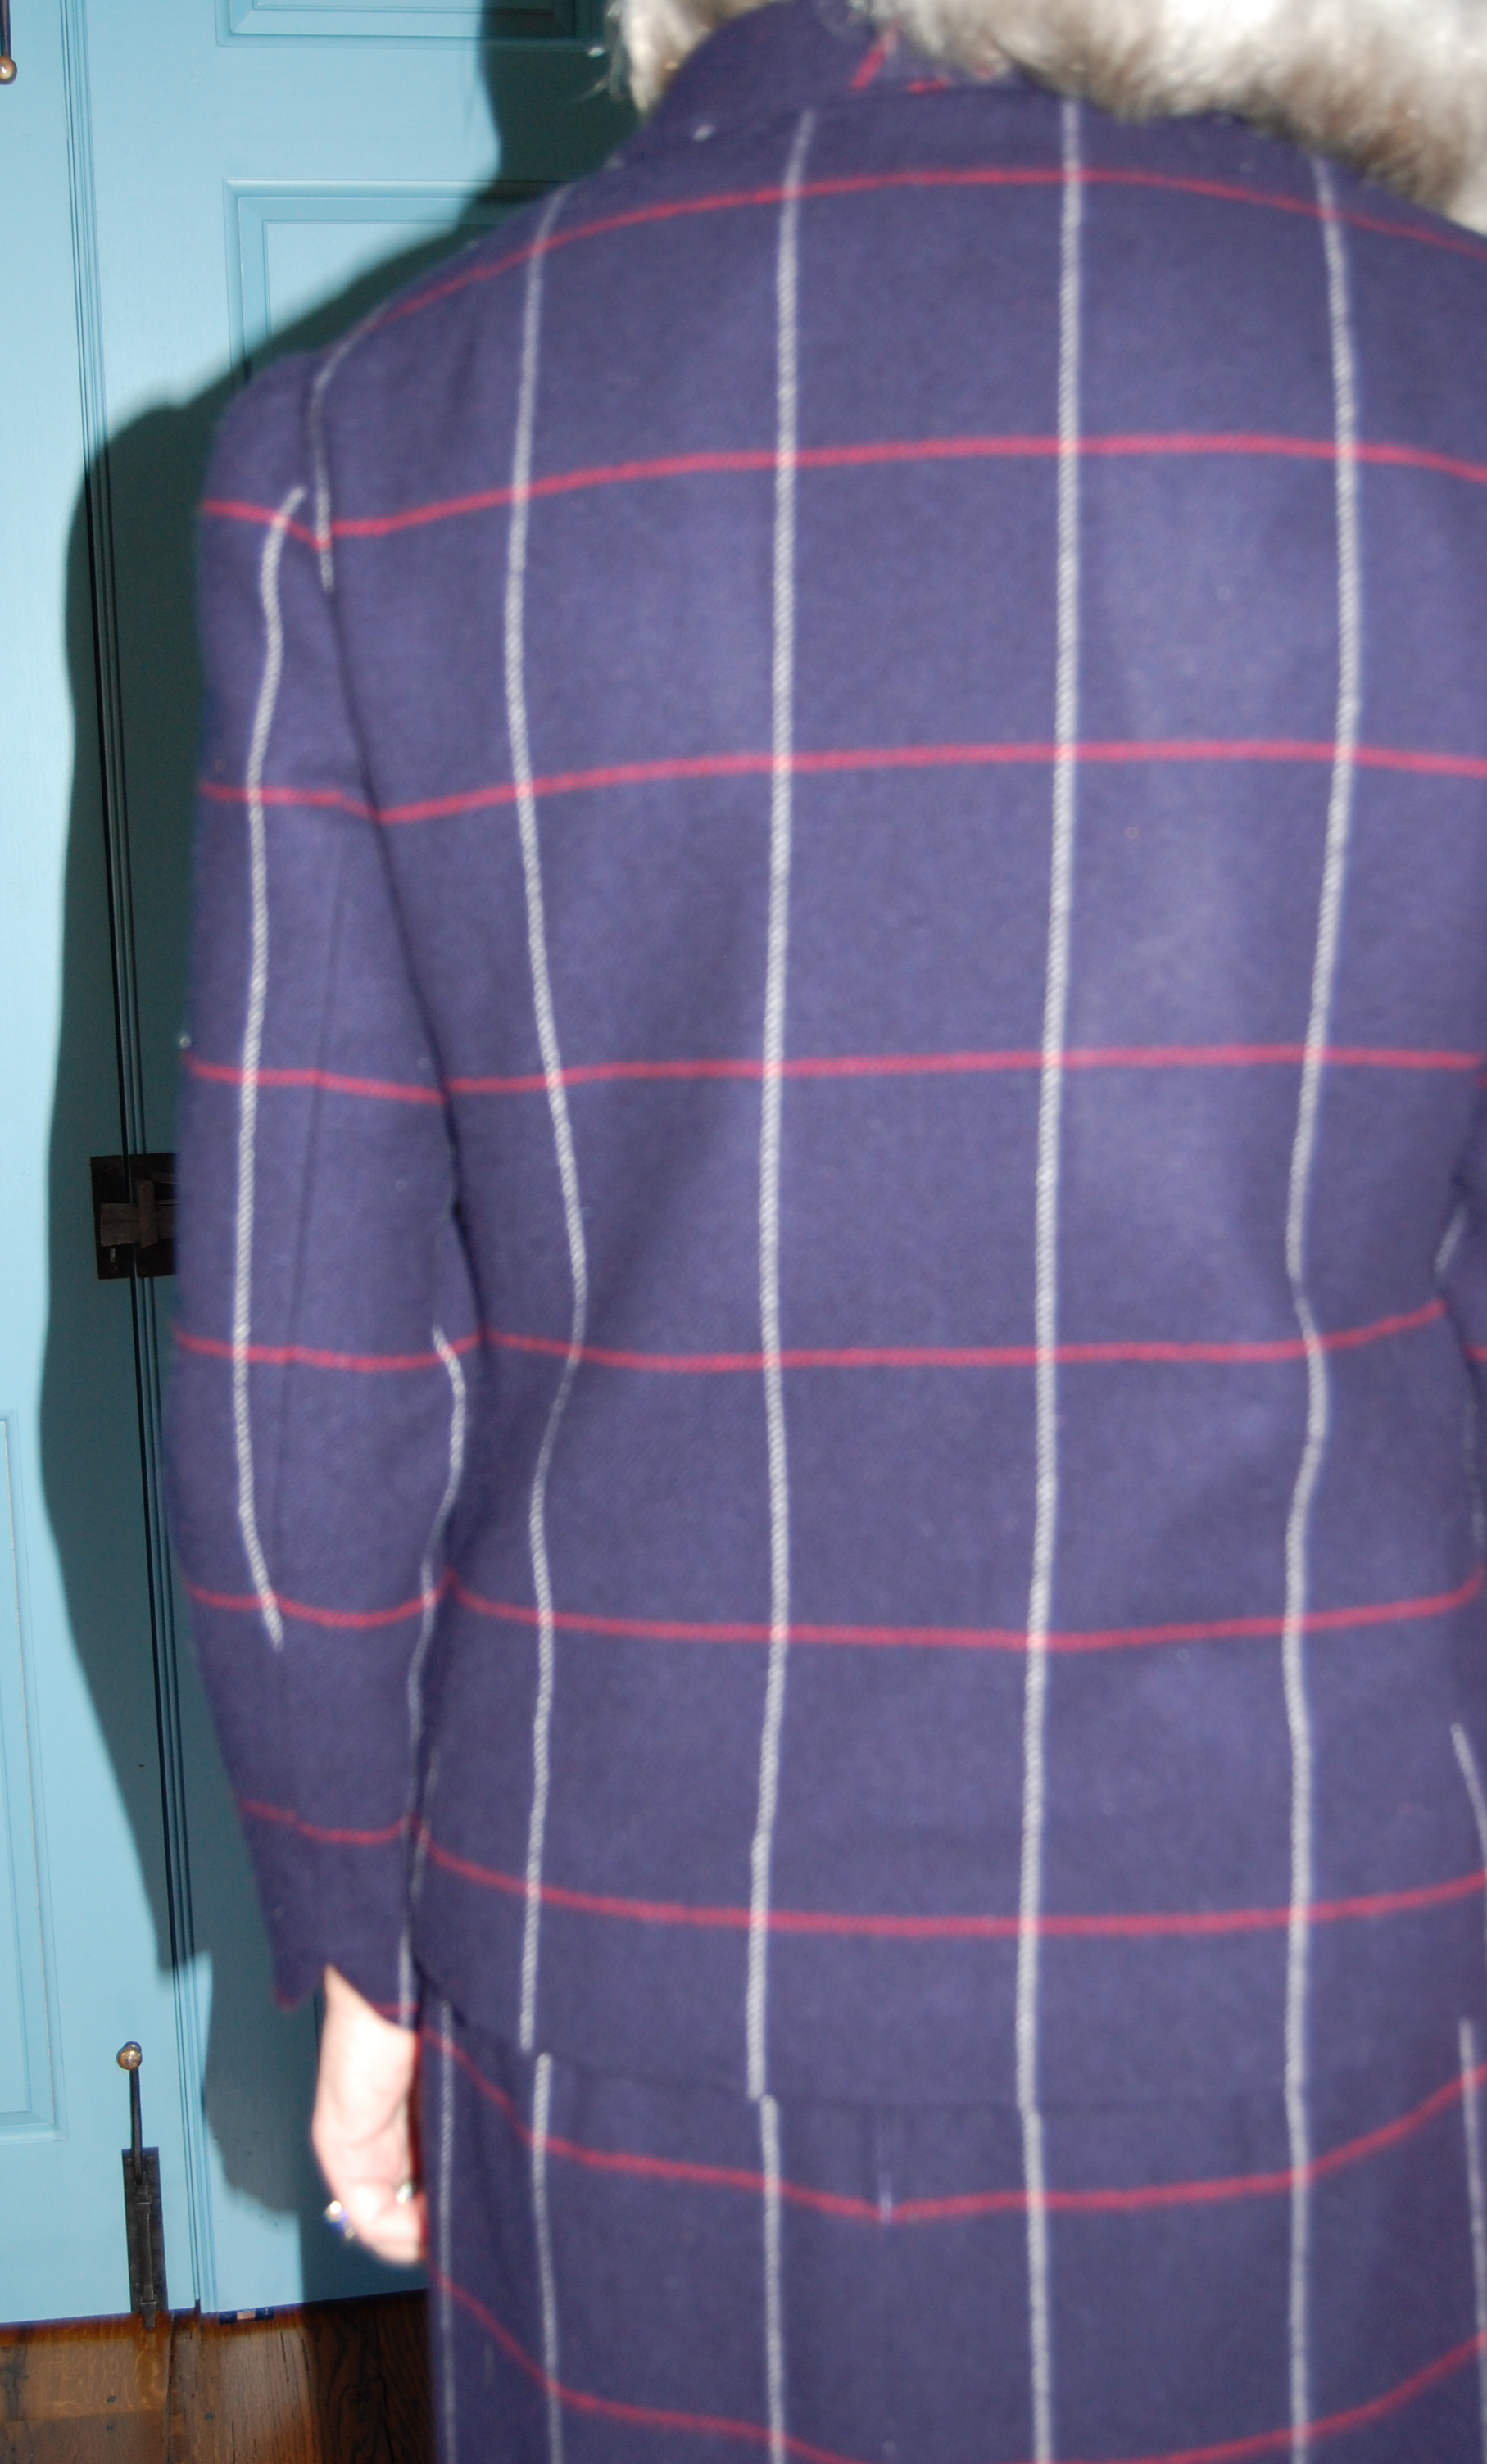
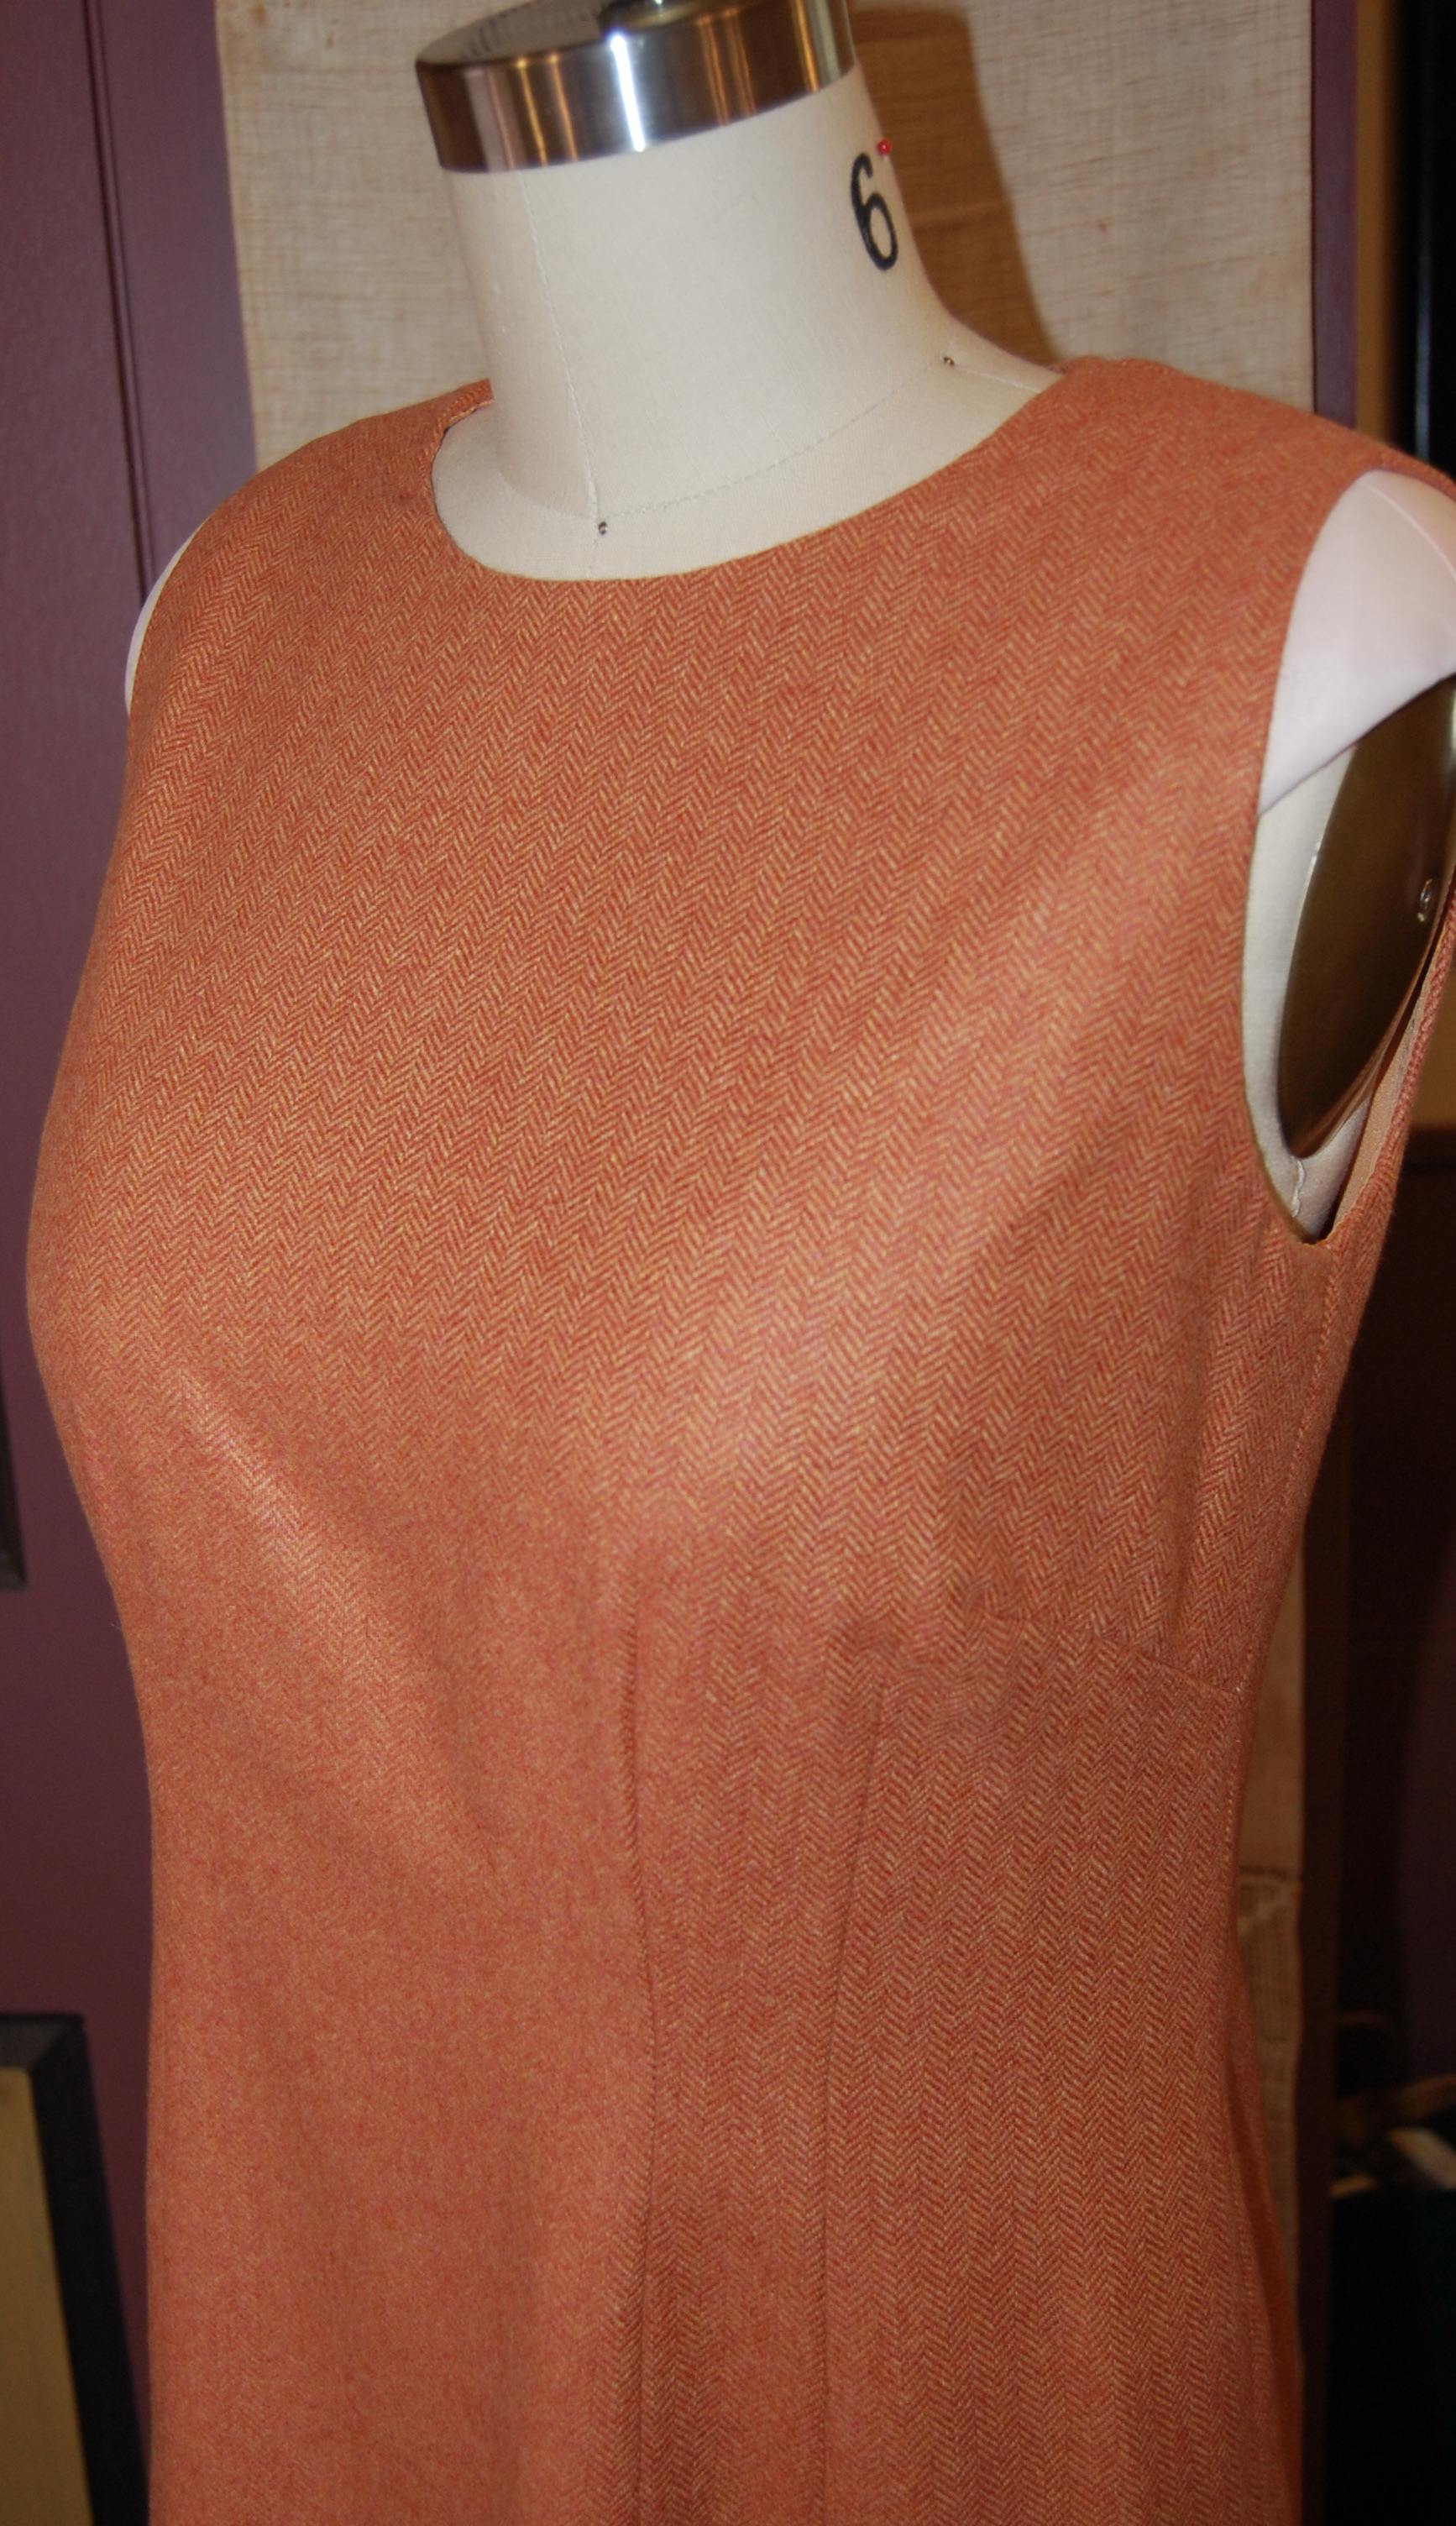
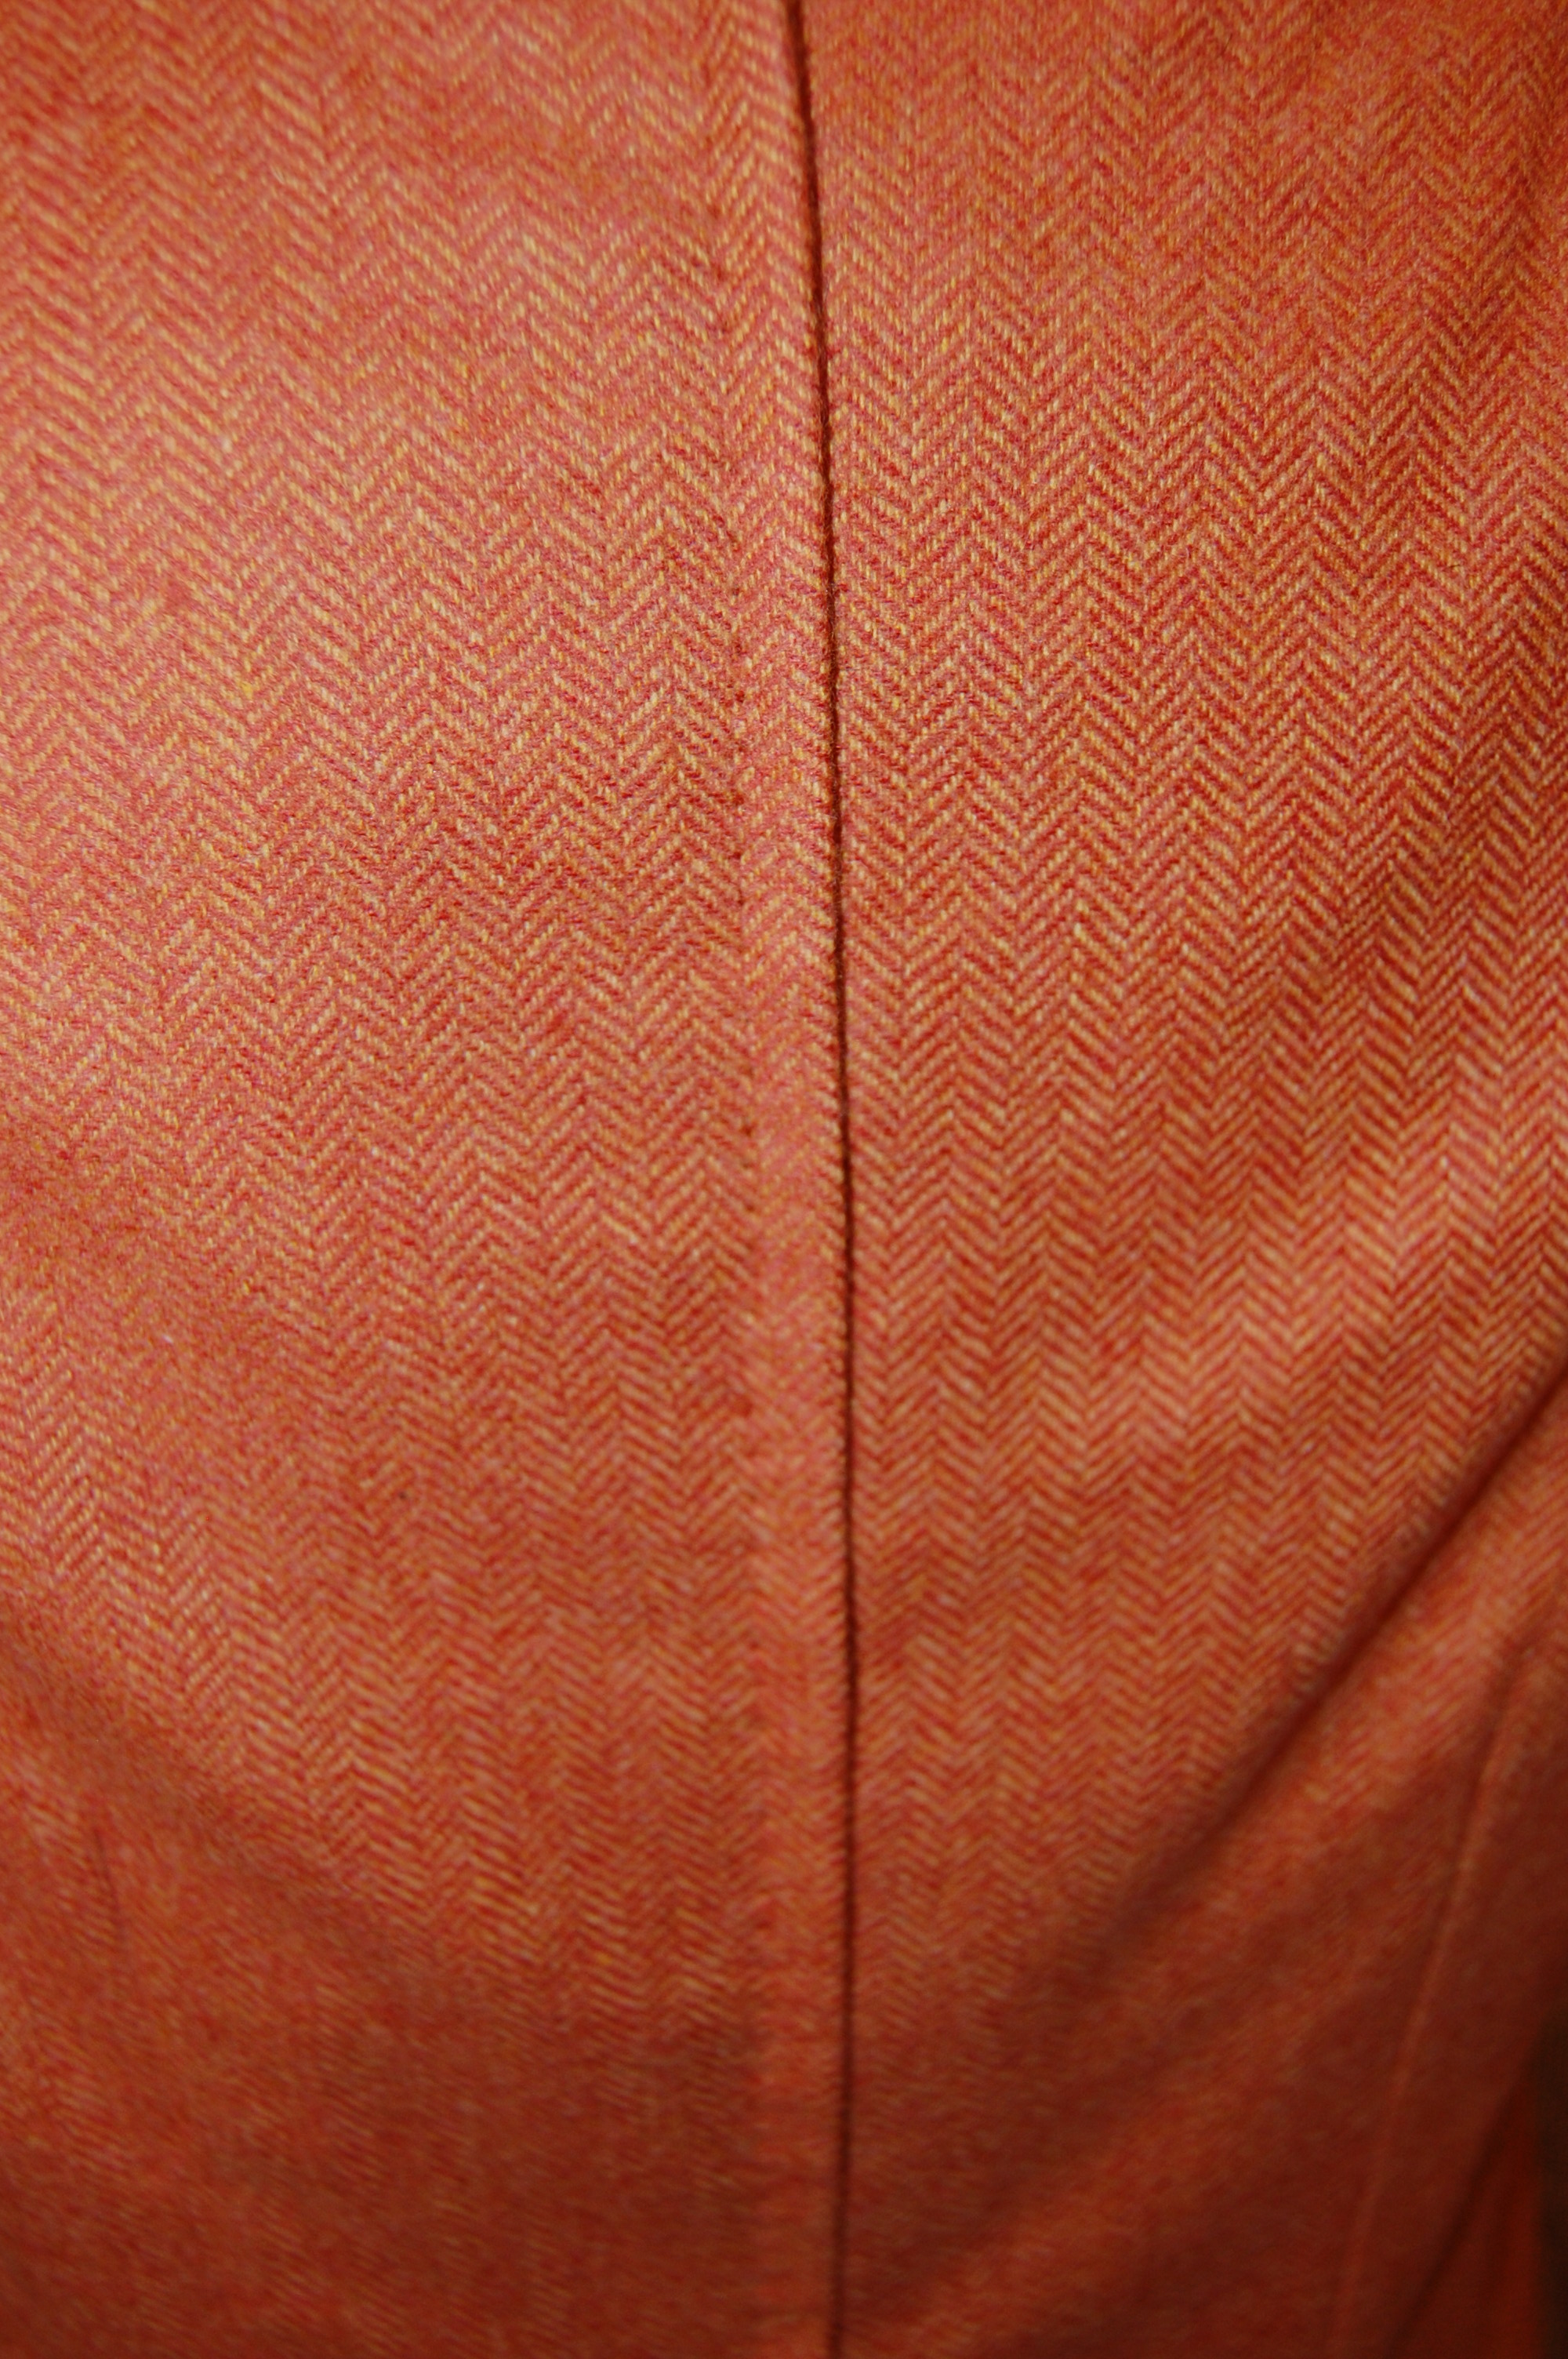
Additionally, I have always loved the herringbone weave.  The chevron pattern in this particular fabric is achieved by the use of two contrasting colors, yellow and pumpkin, which produces the lovely and soft deep persimmon color.  

The two contrasting colors are apparent in this photo.

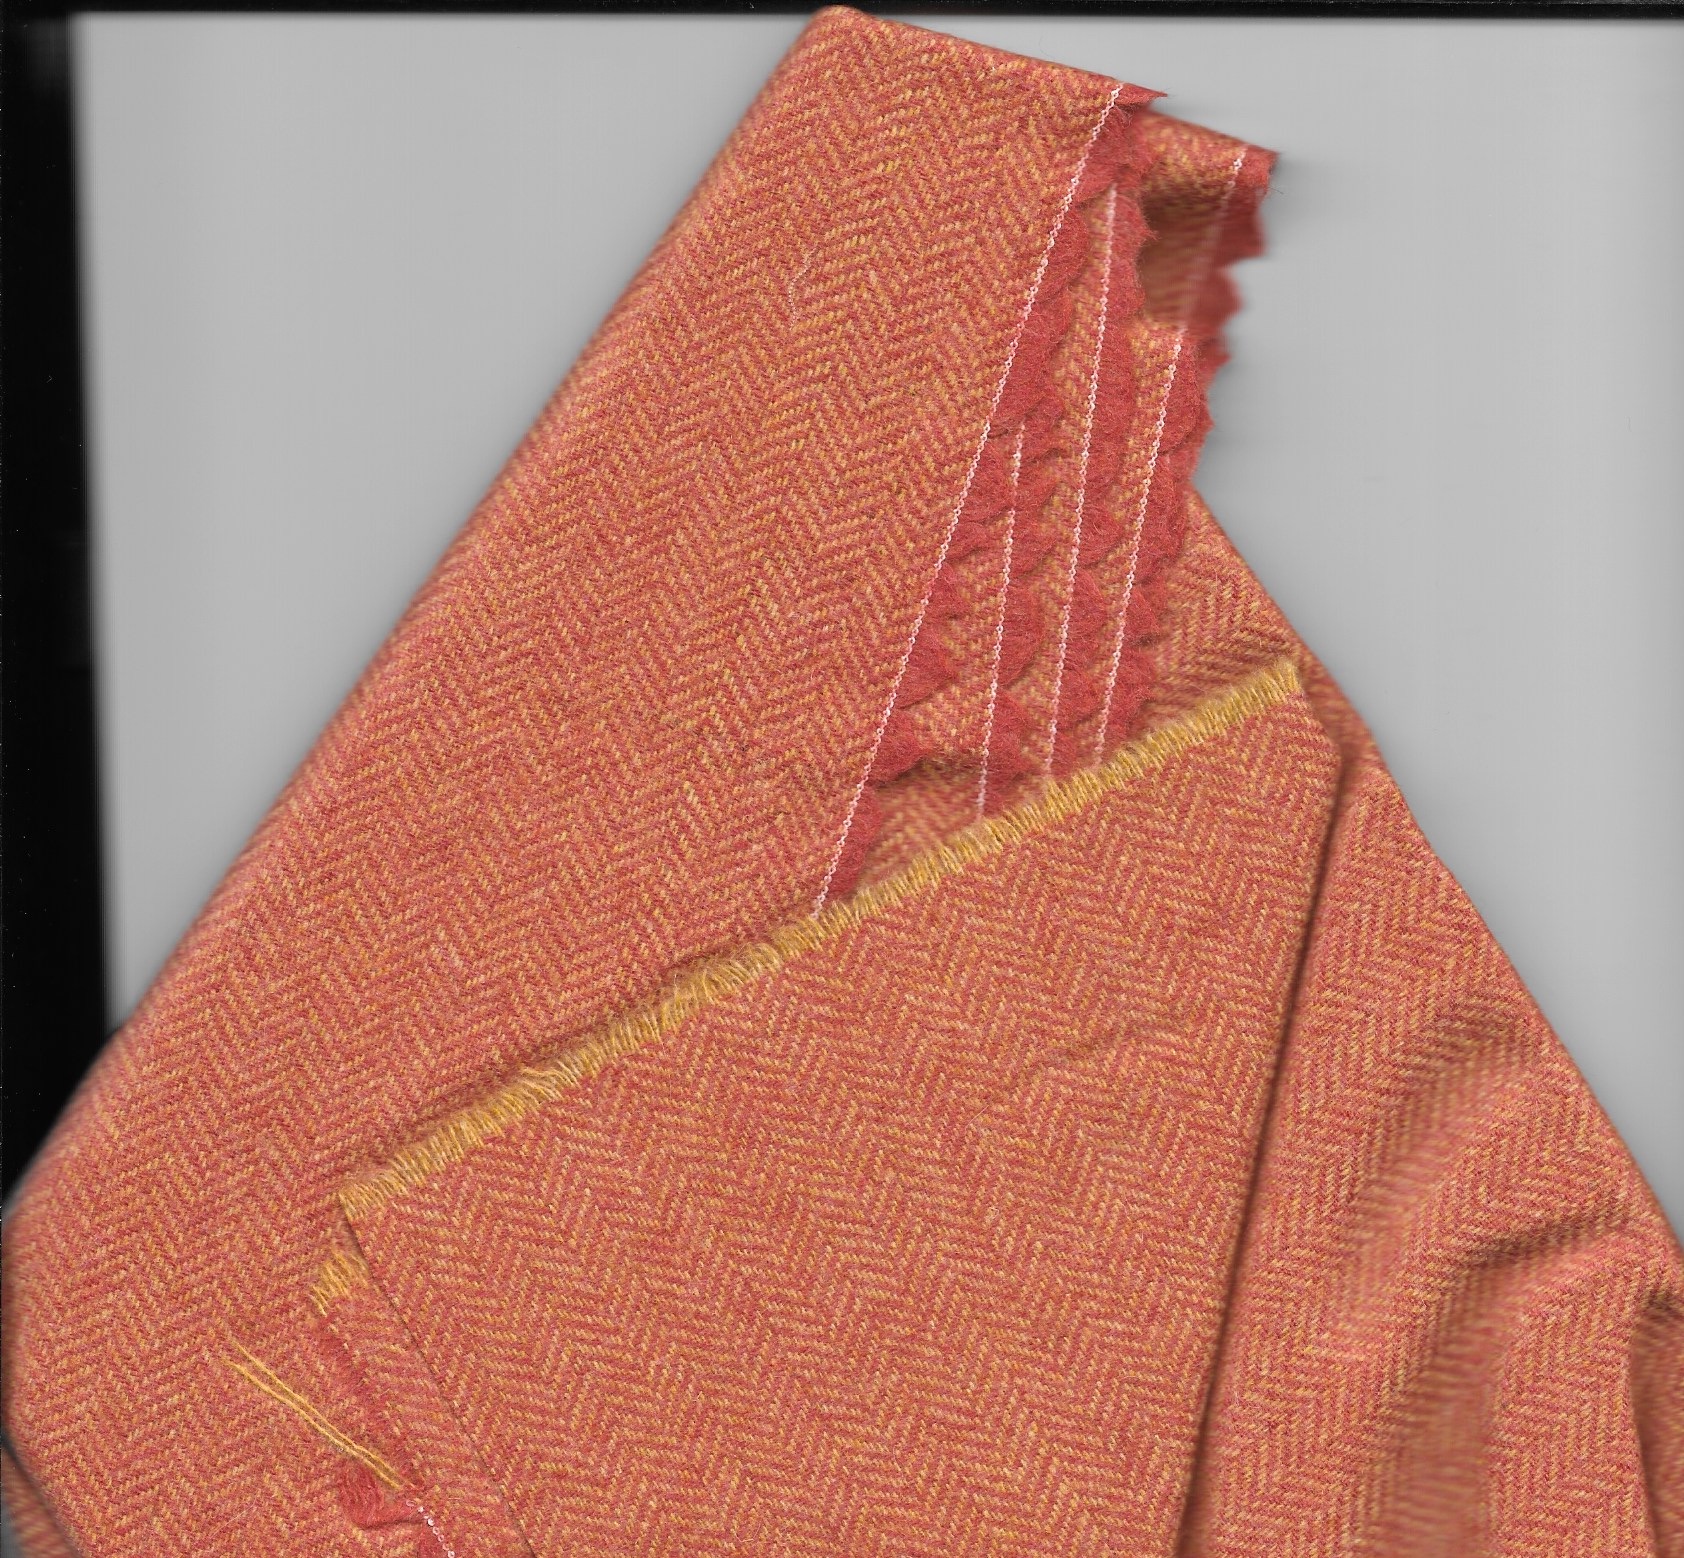
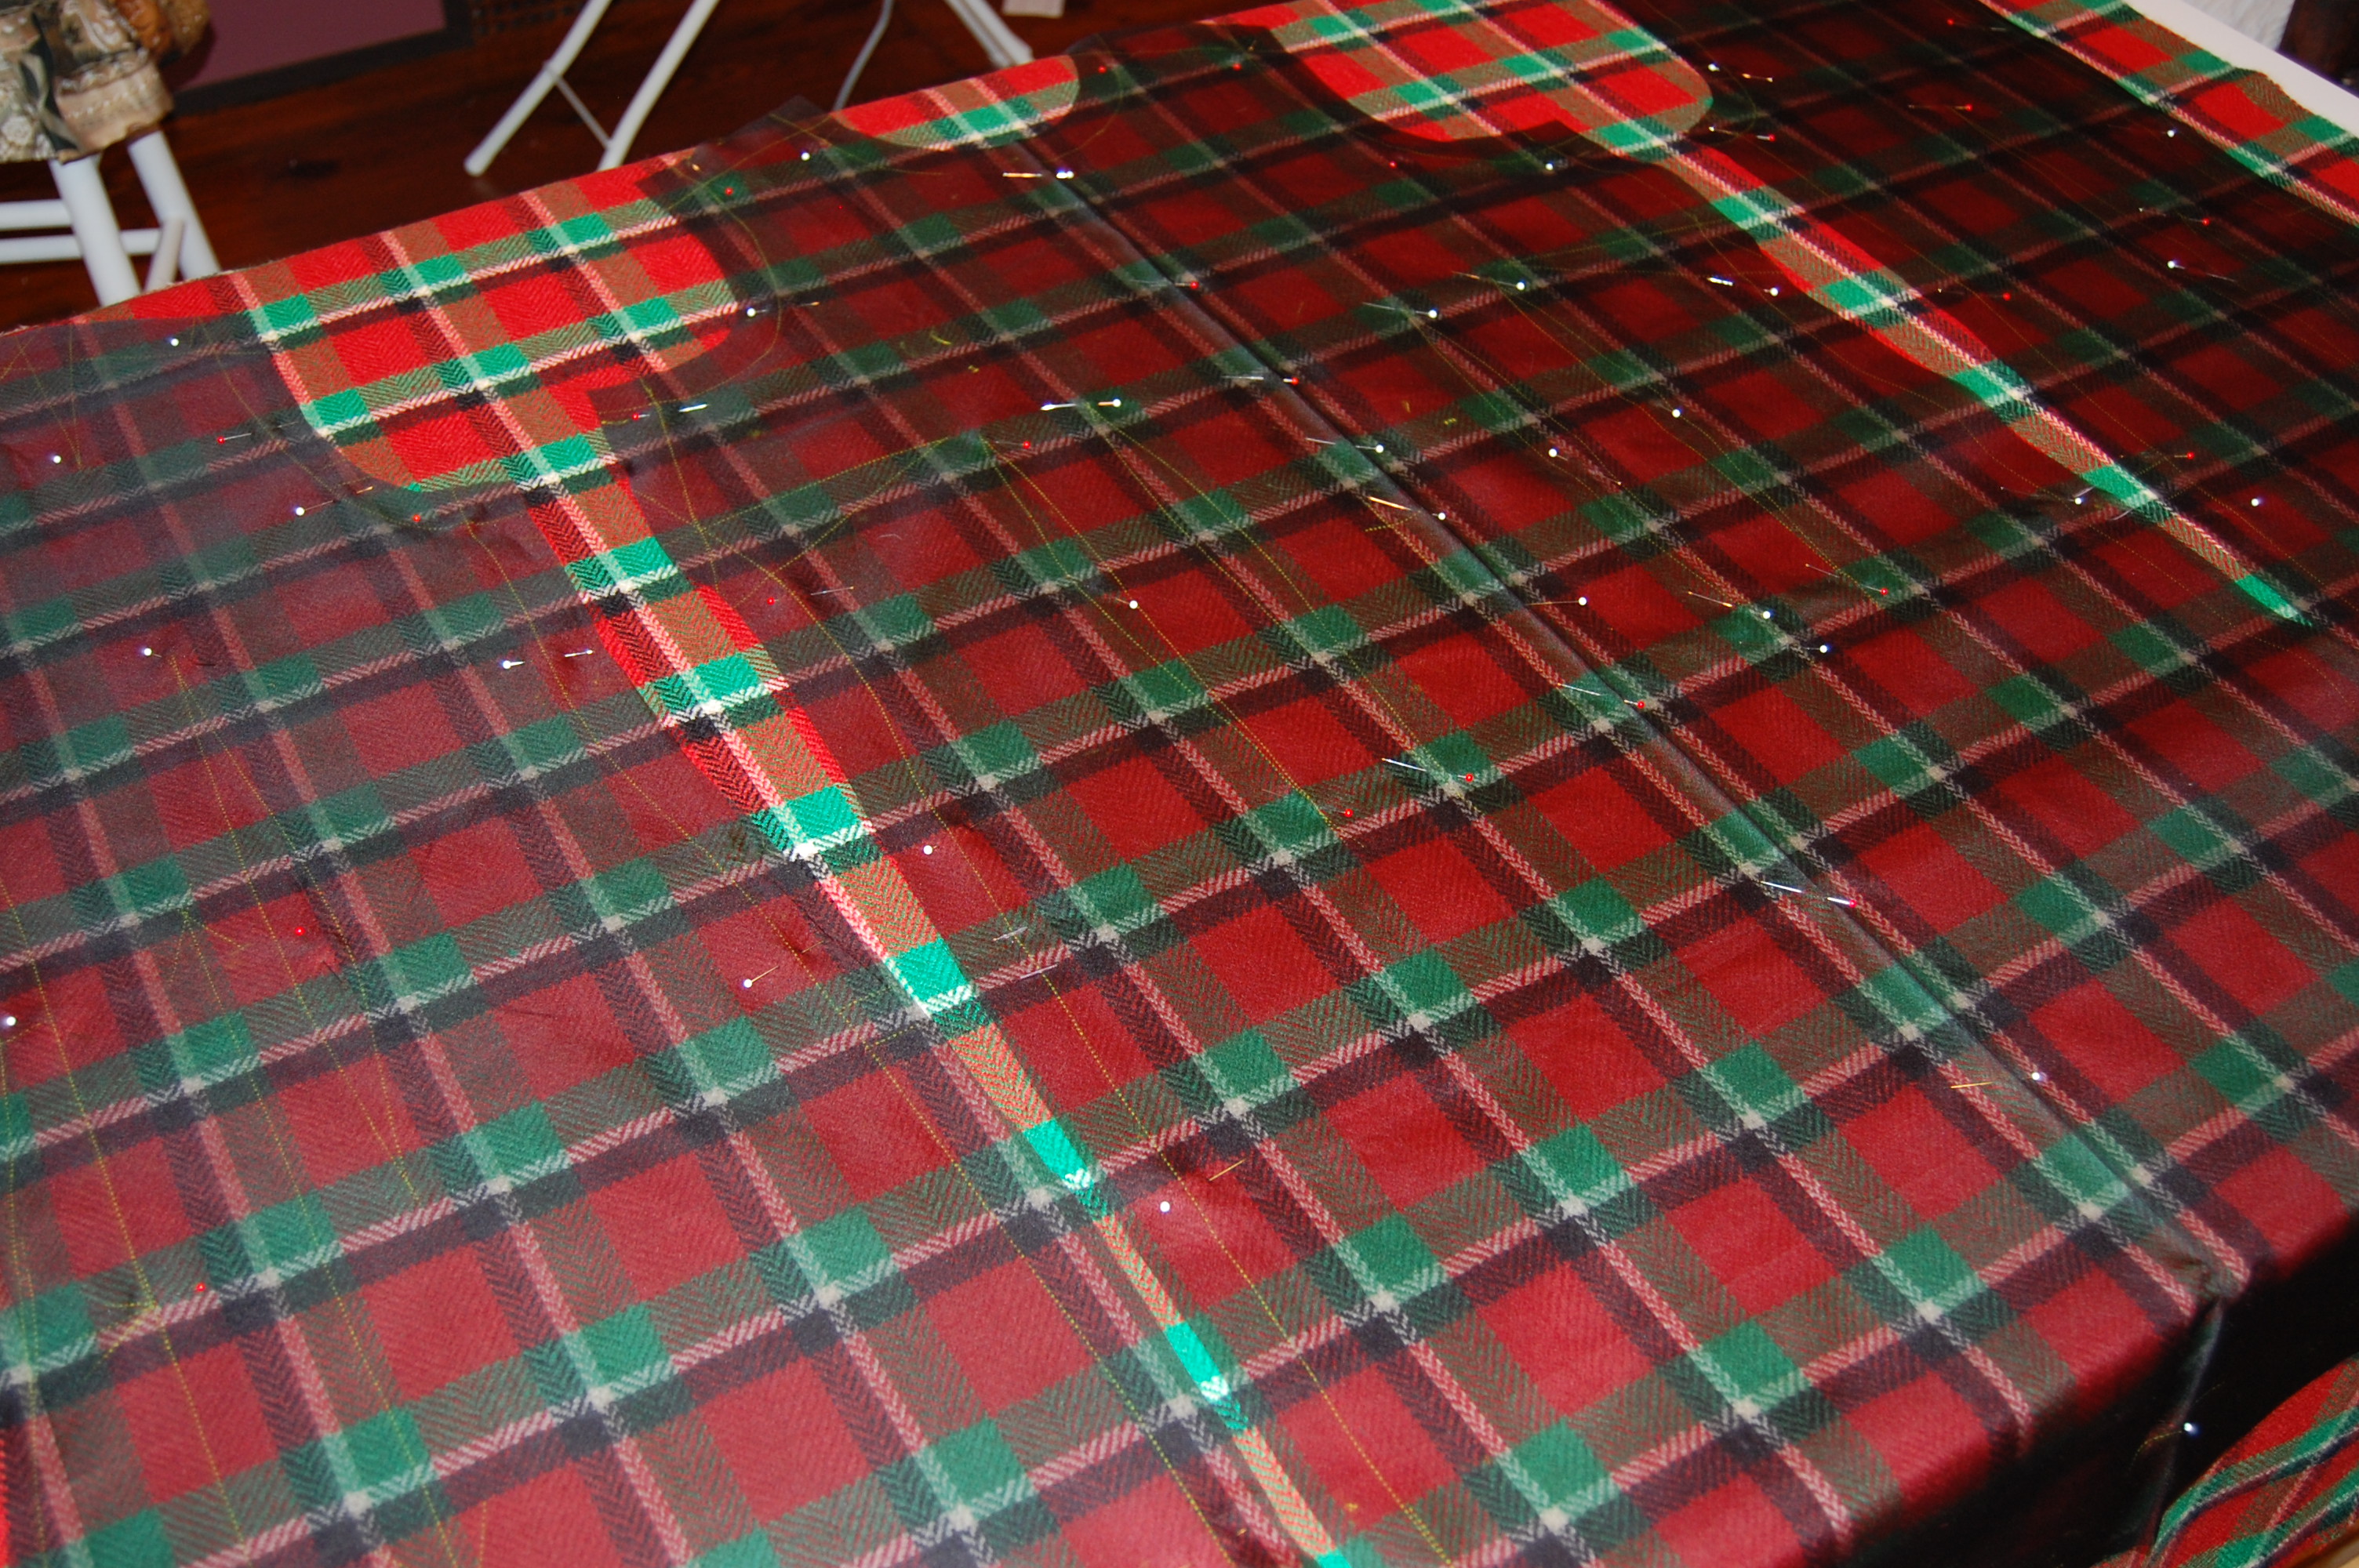
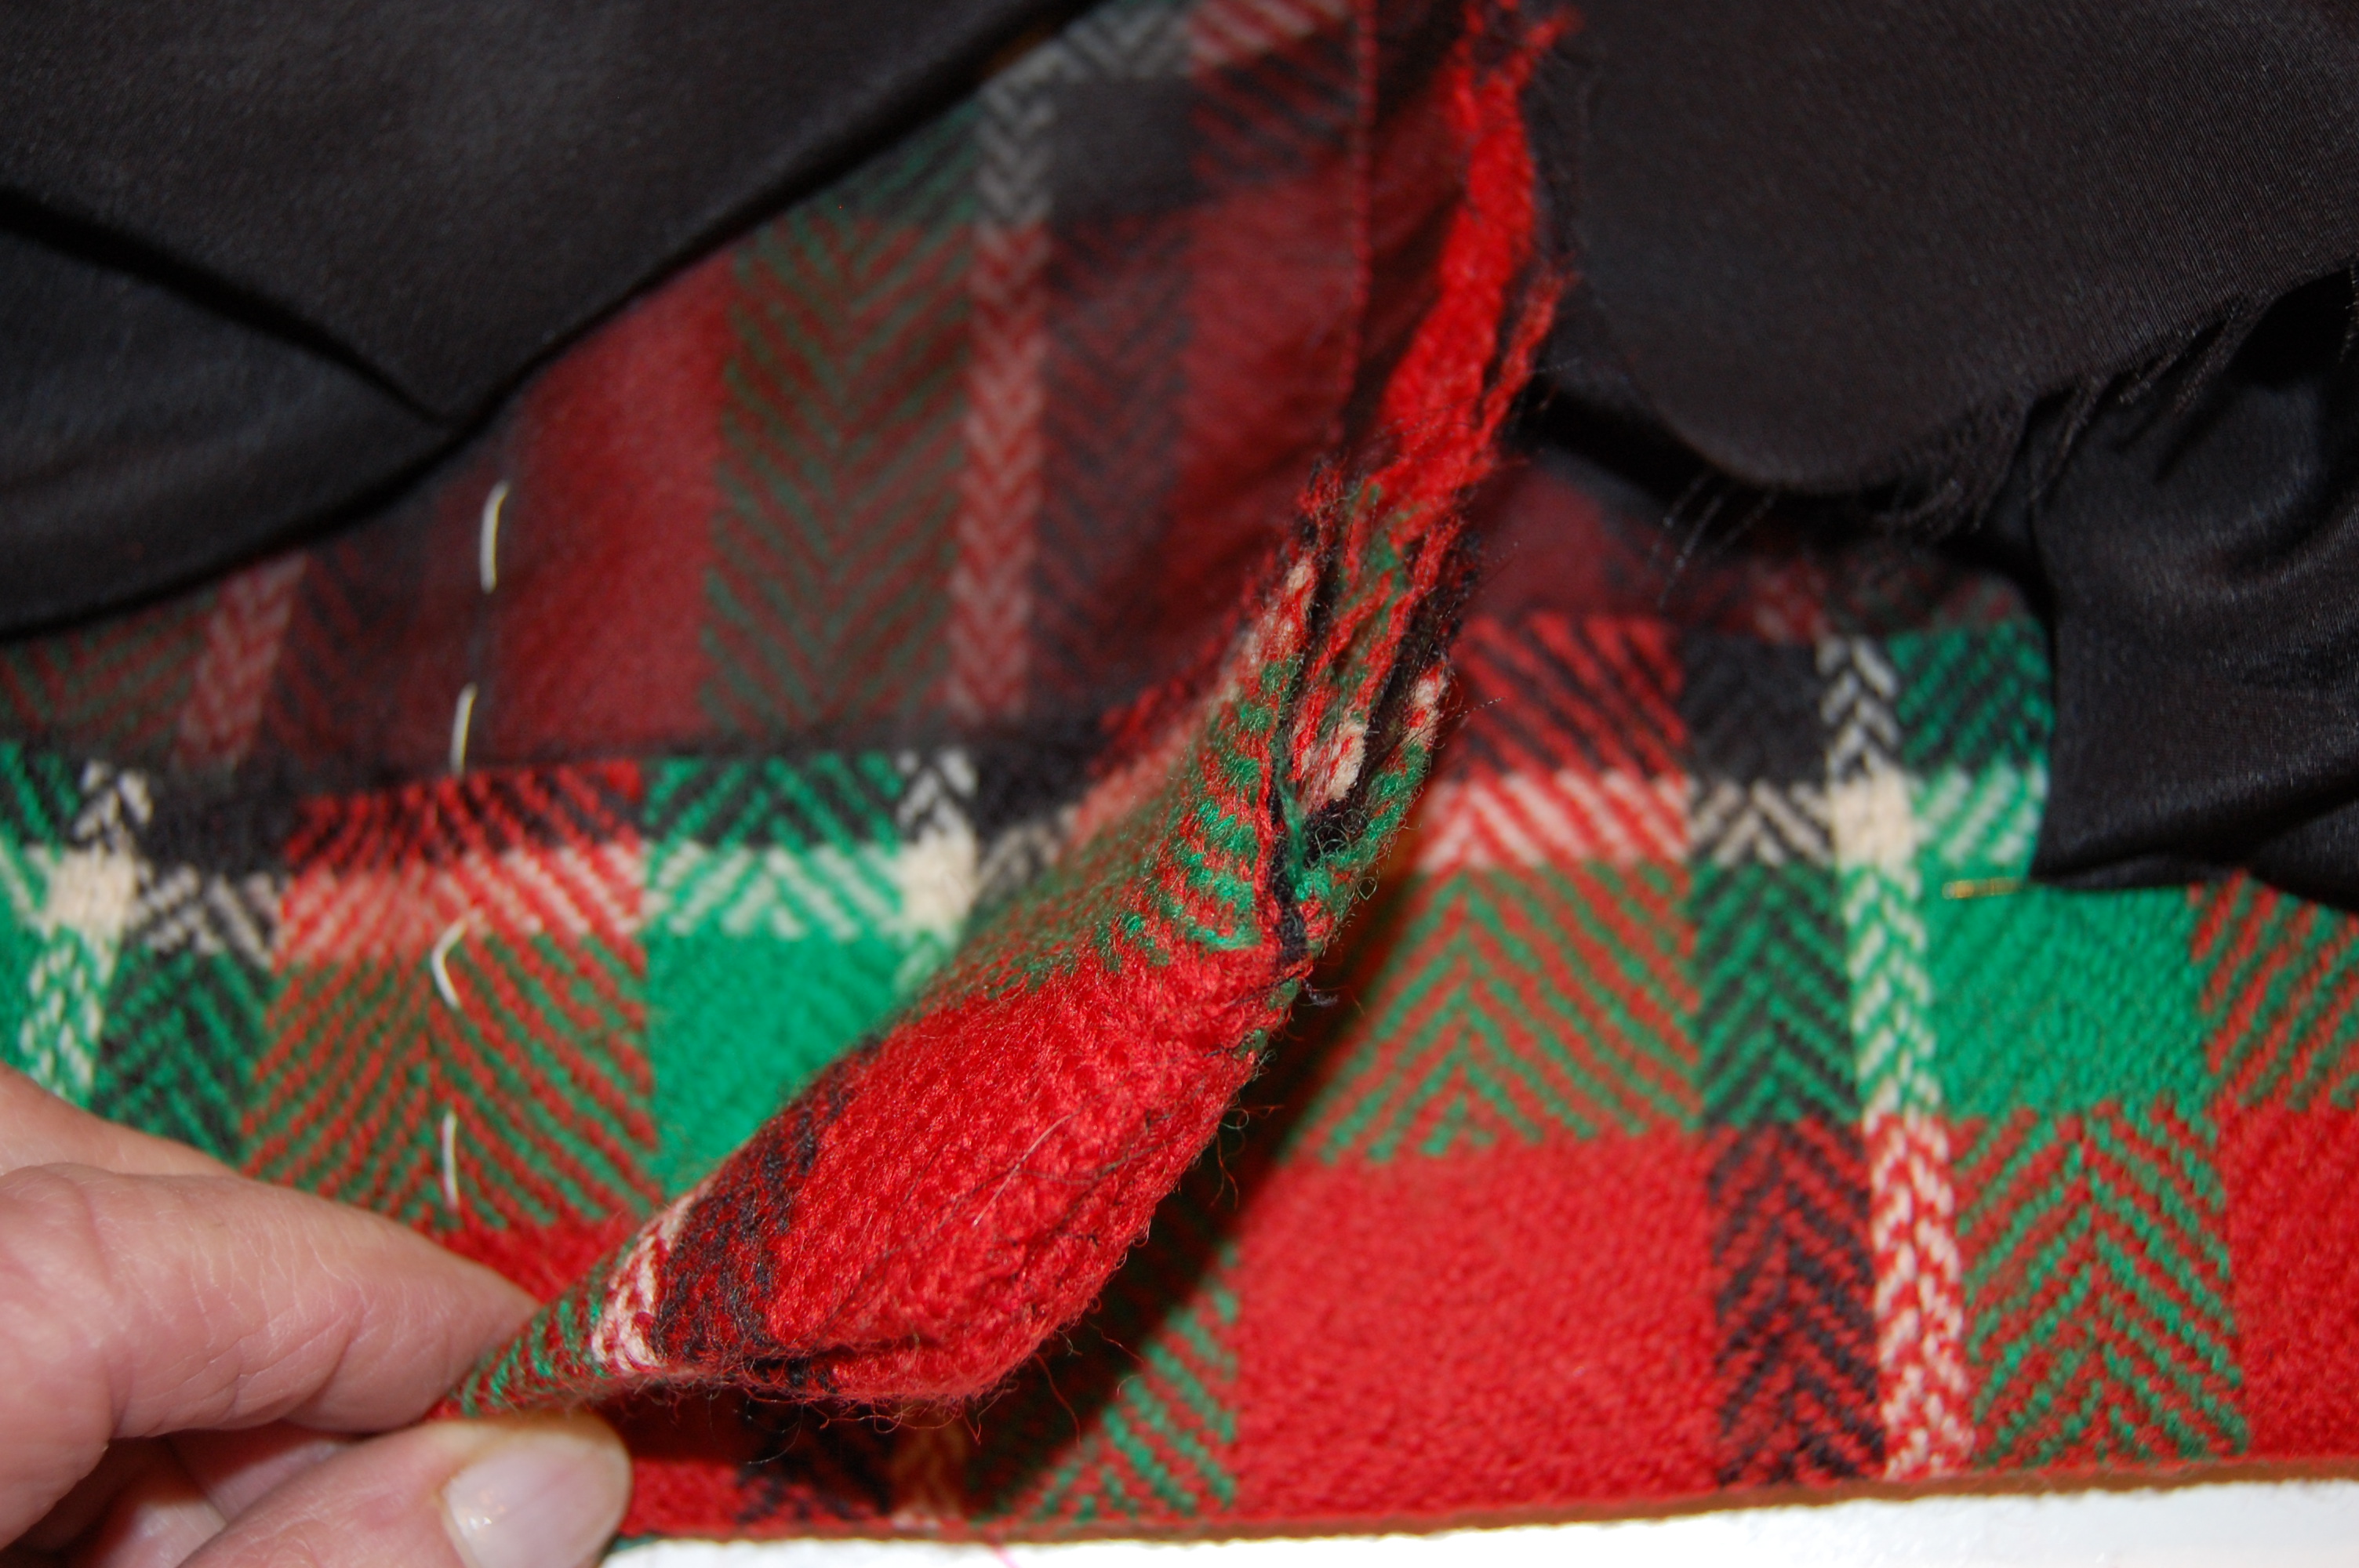
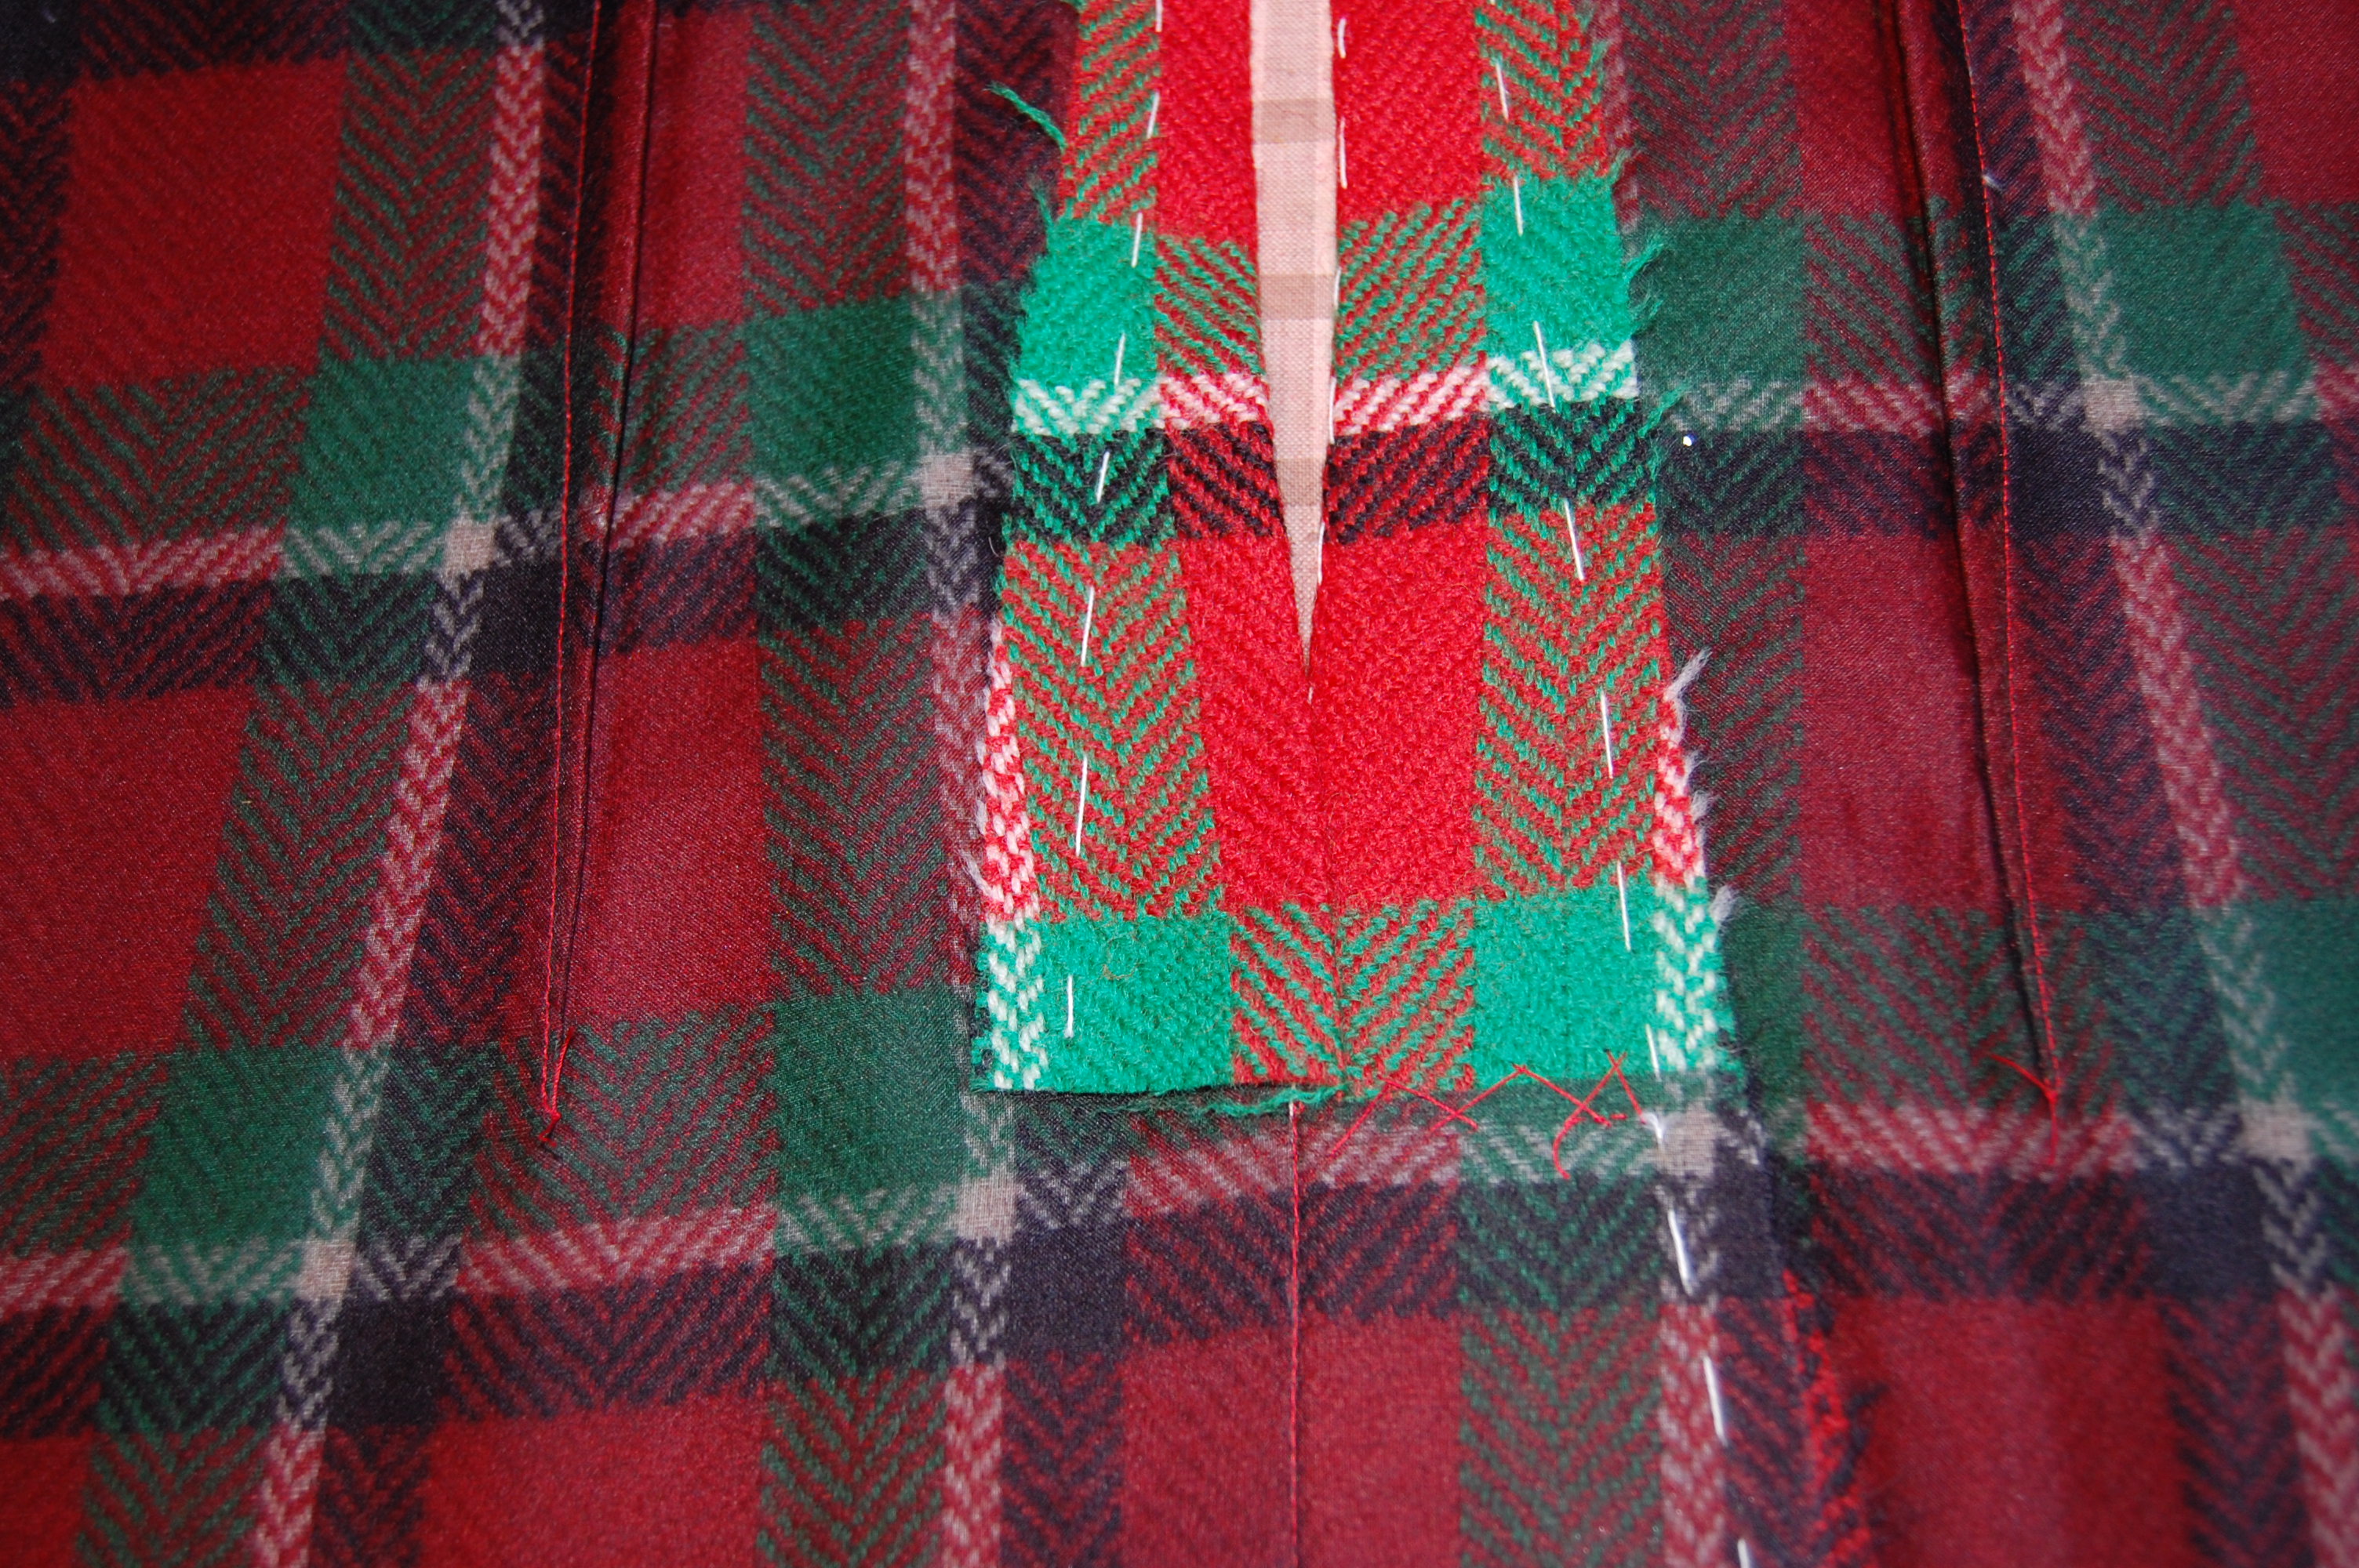
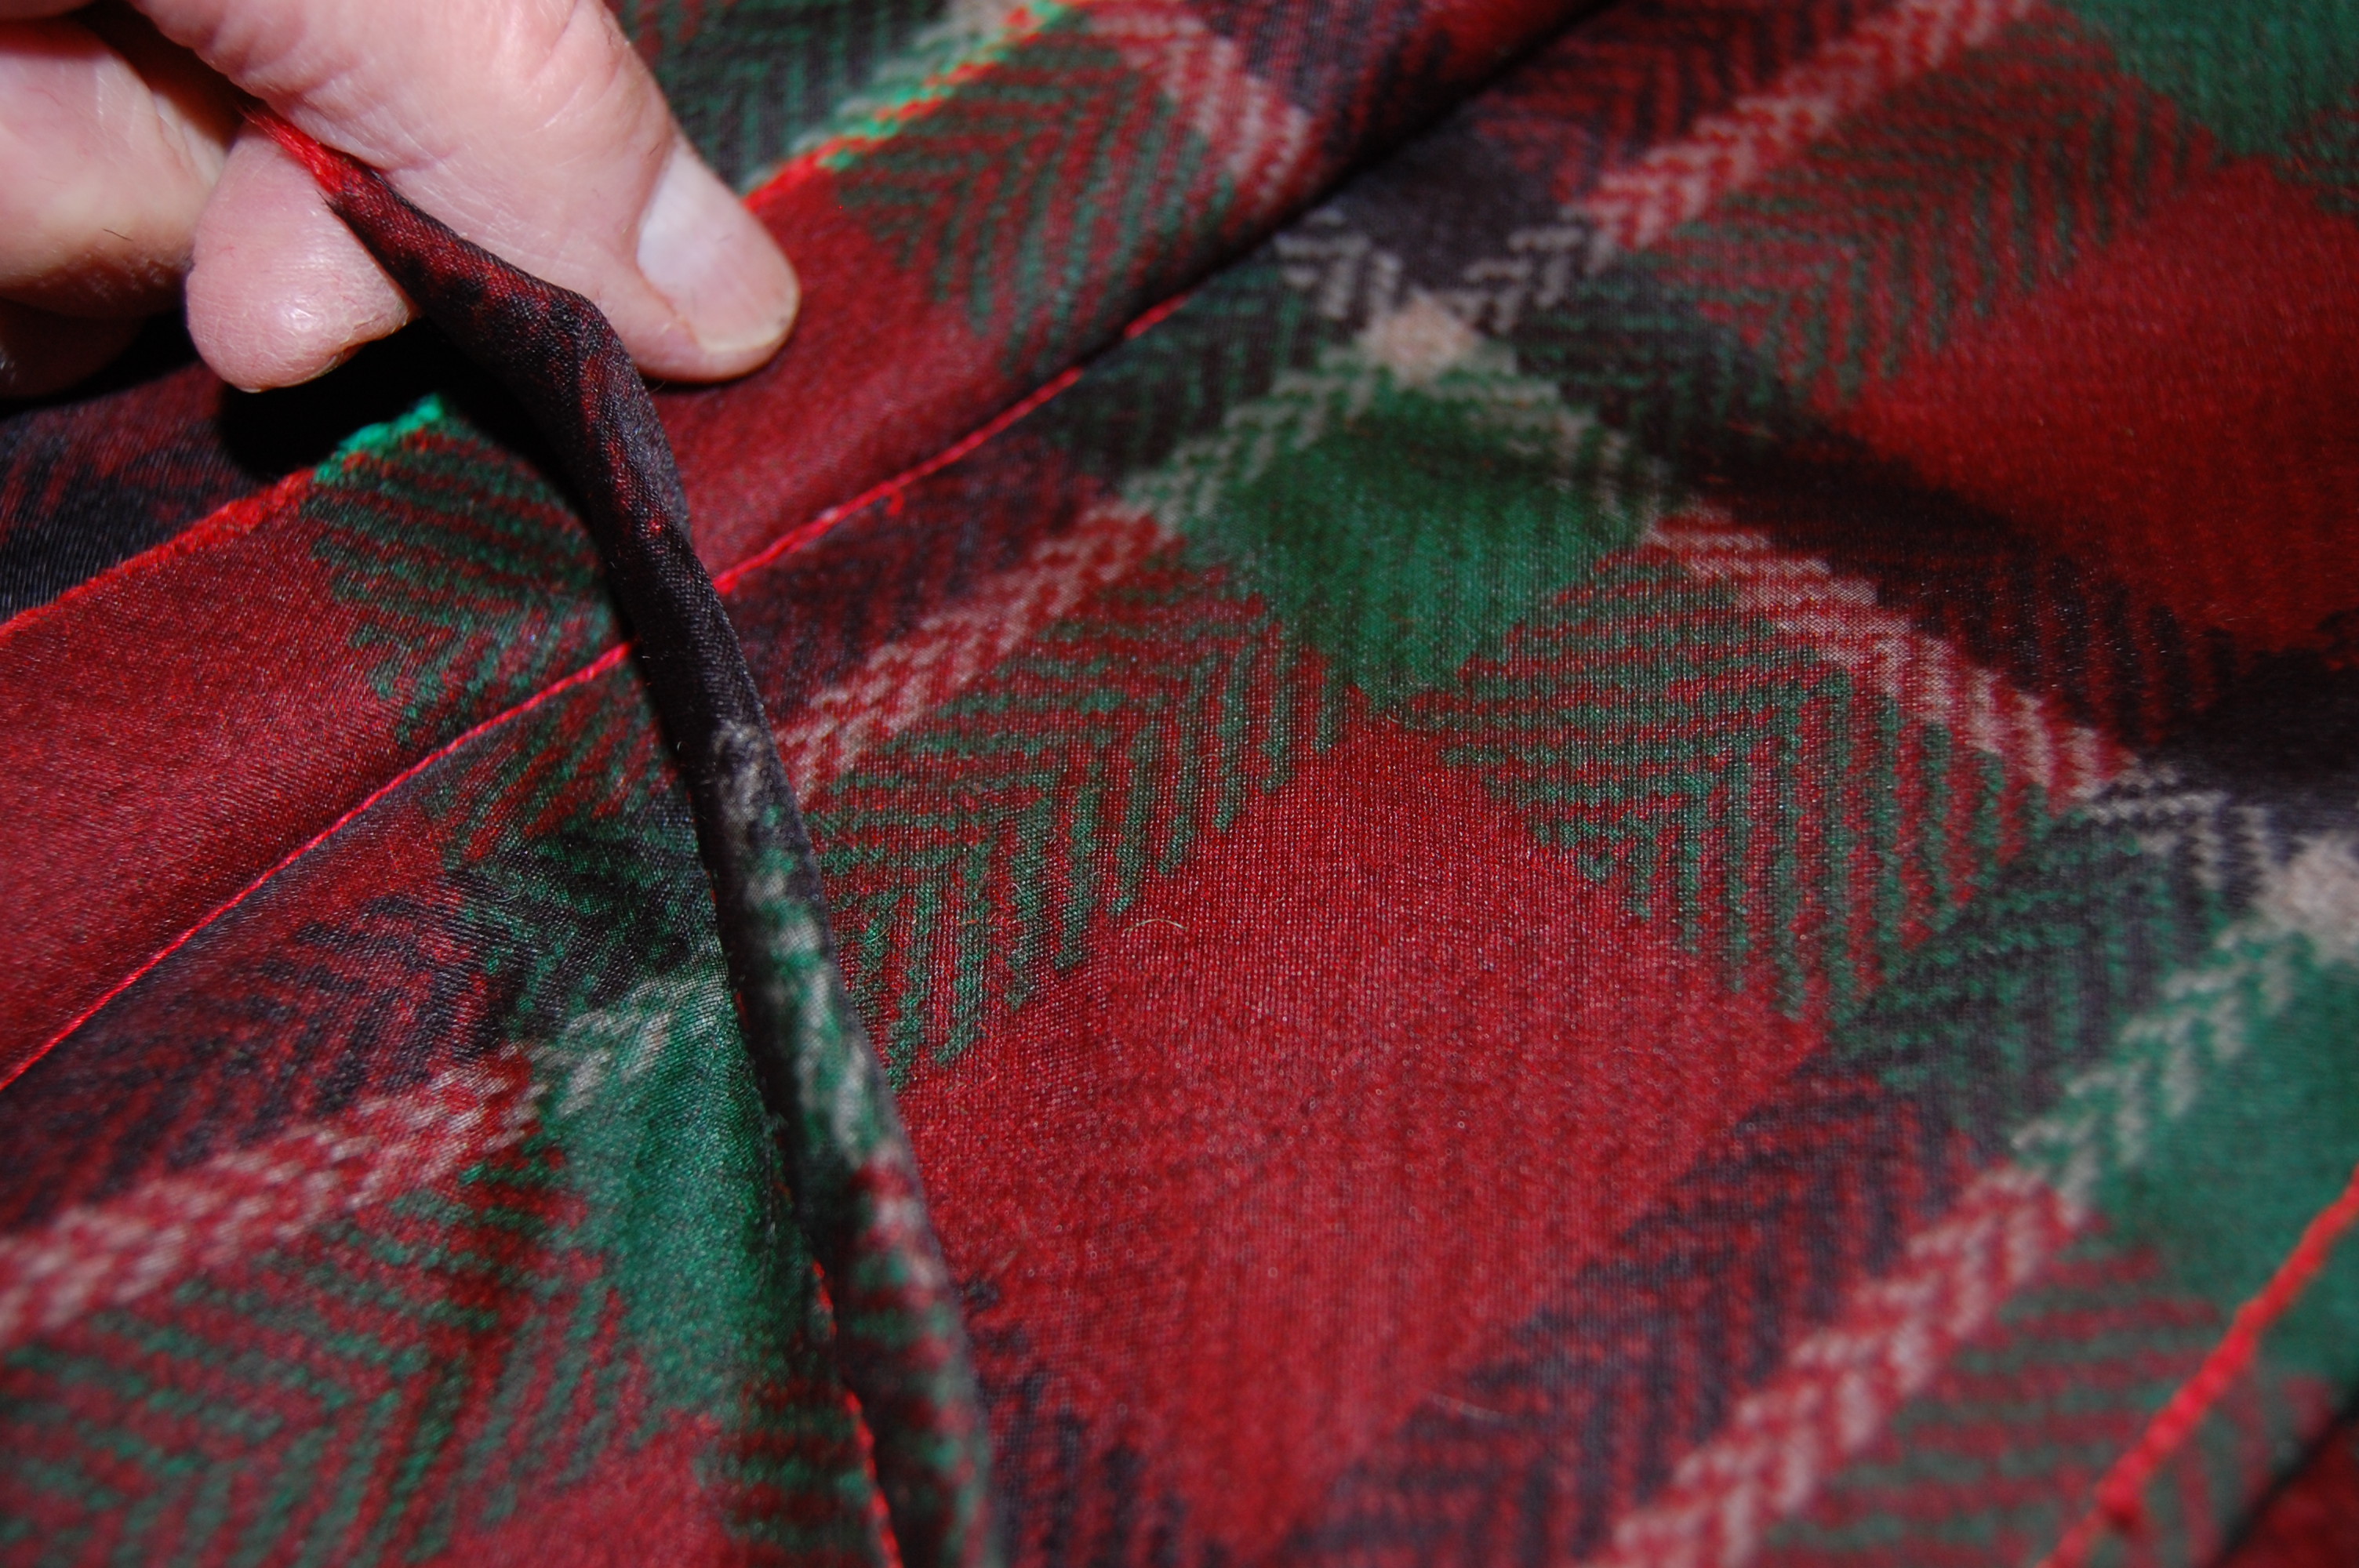
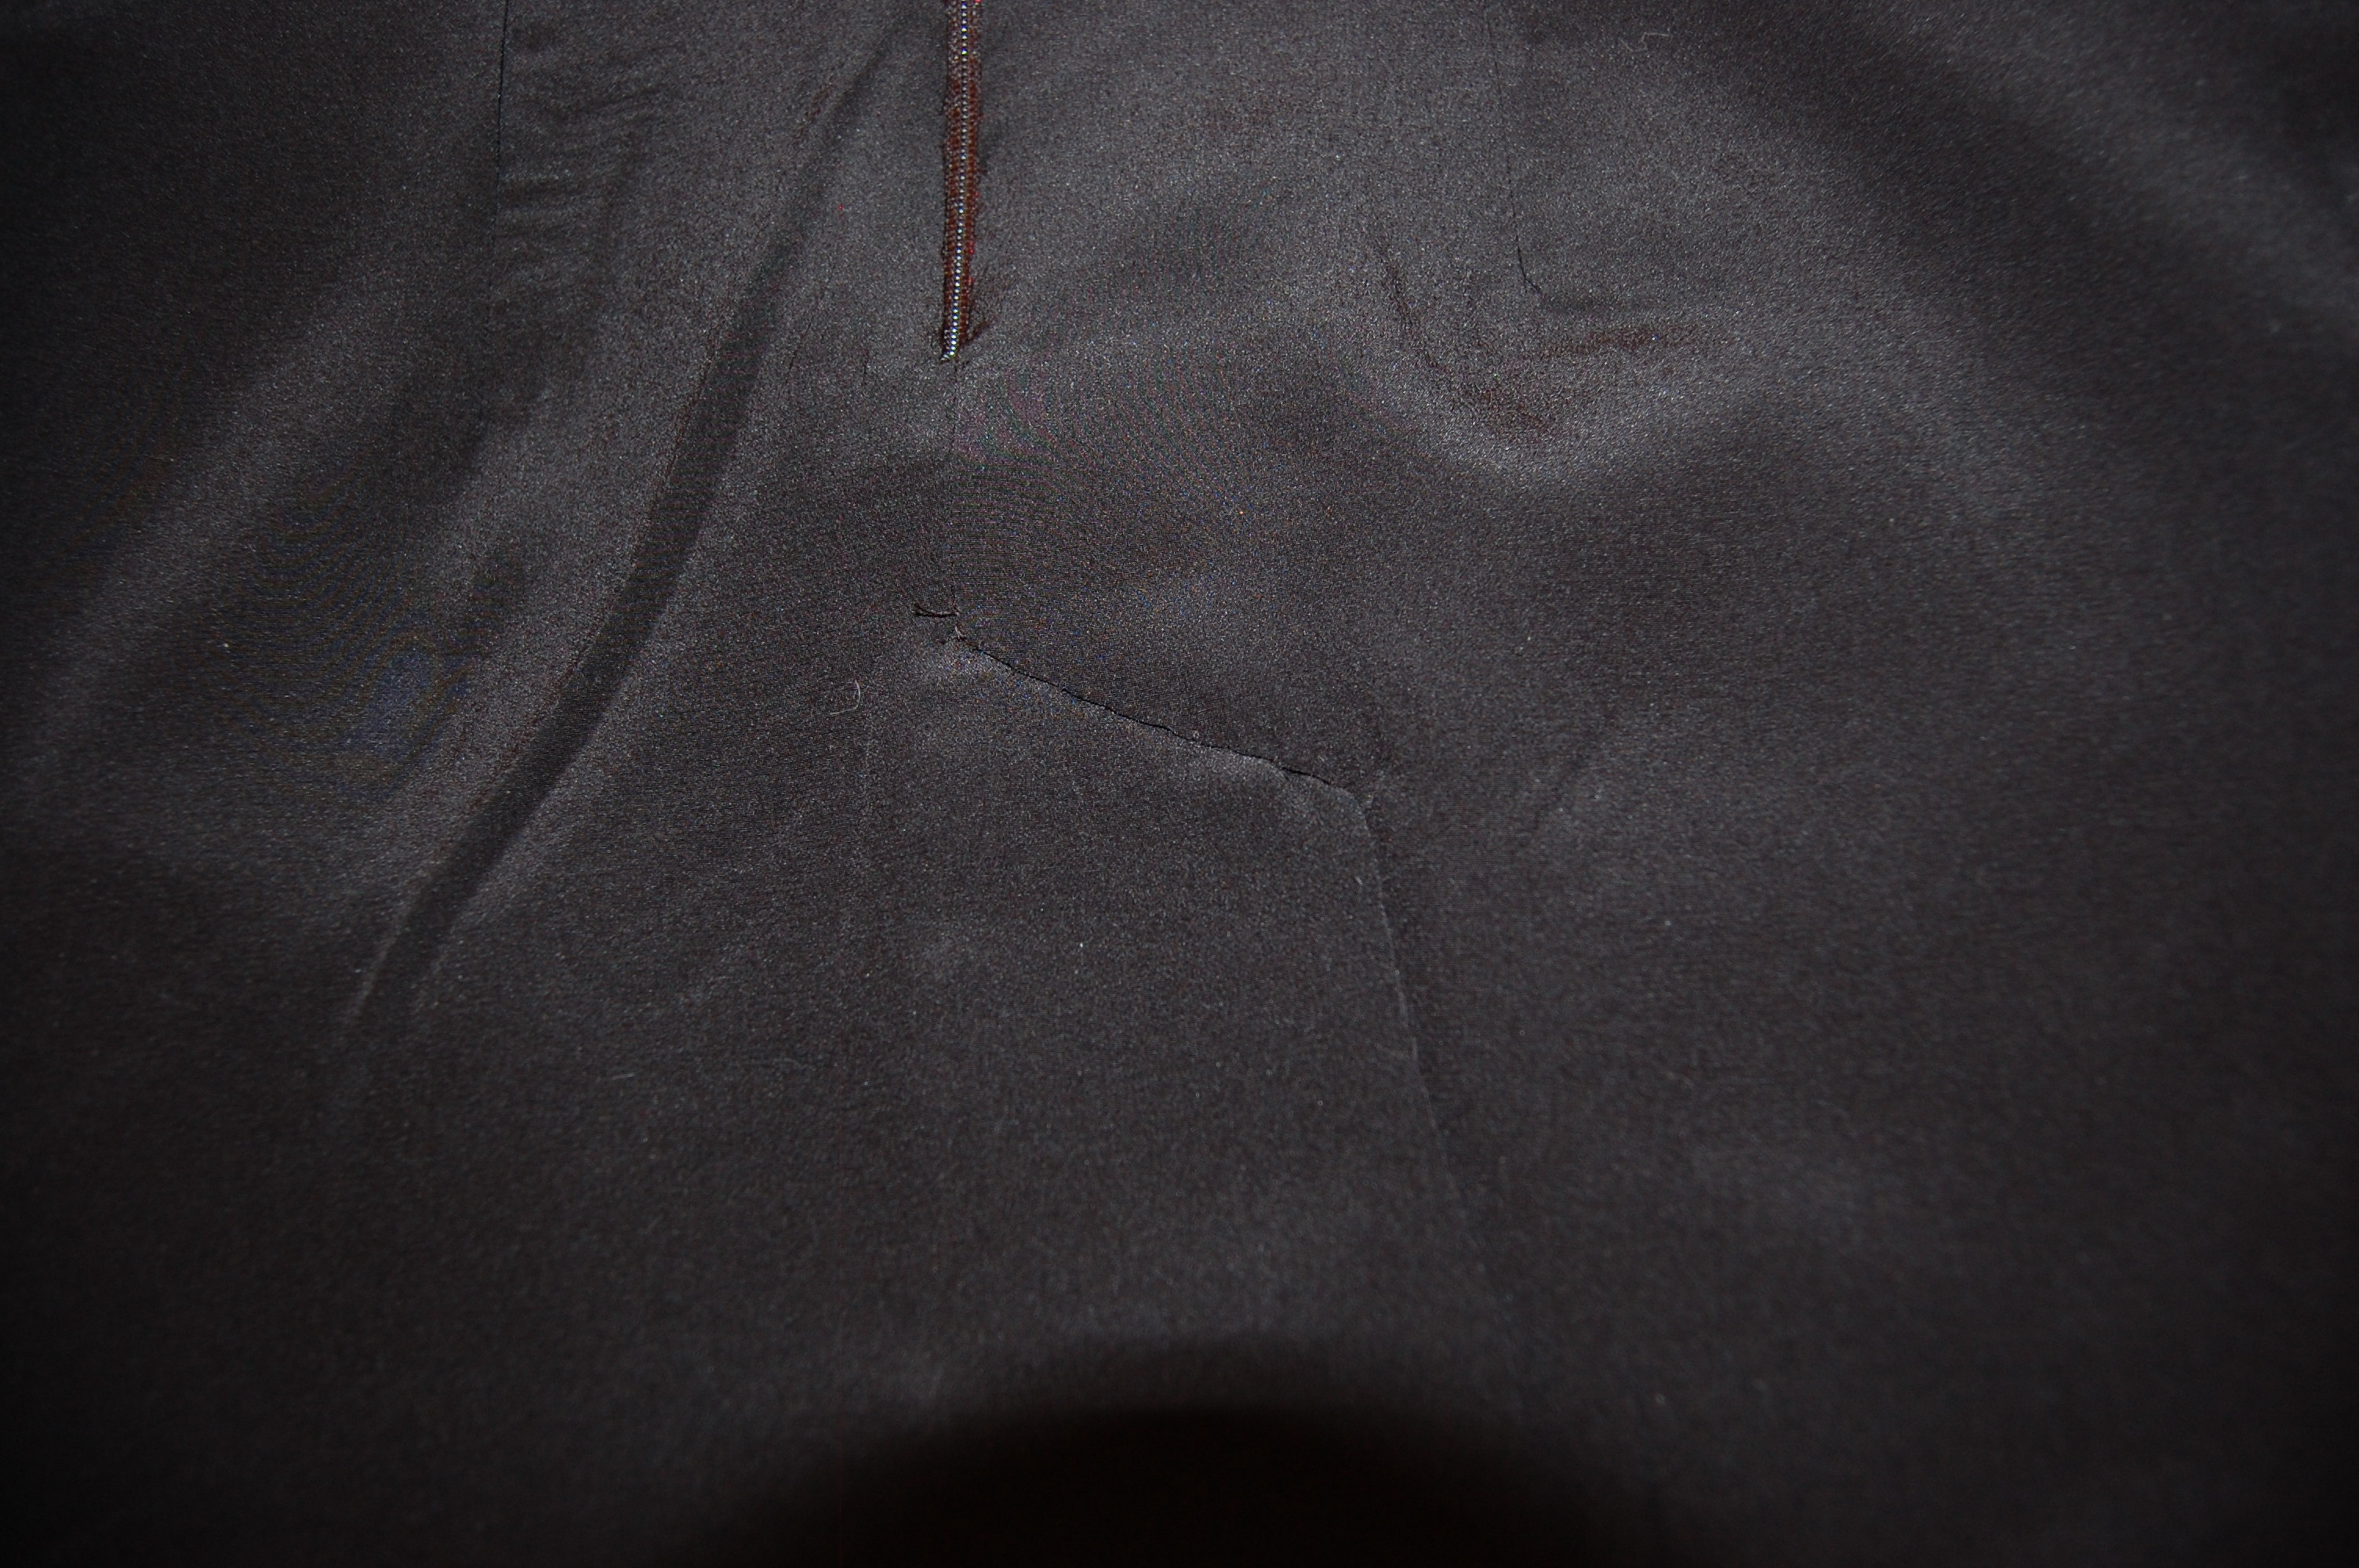
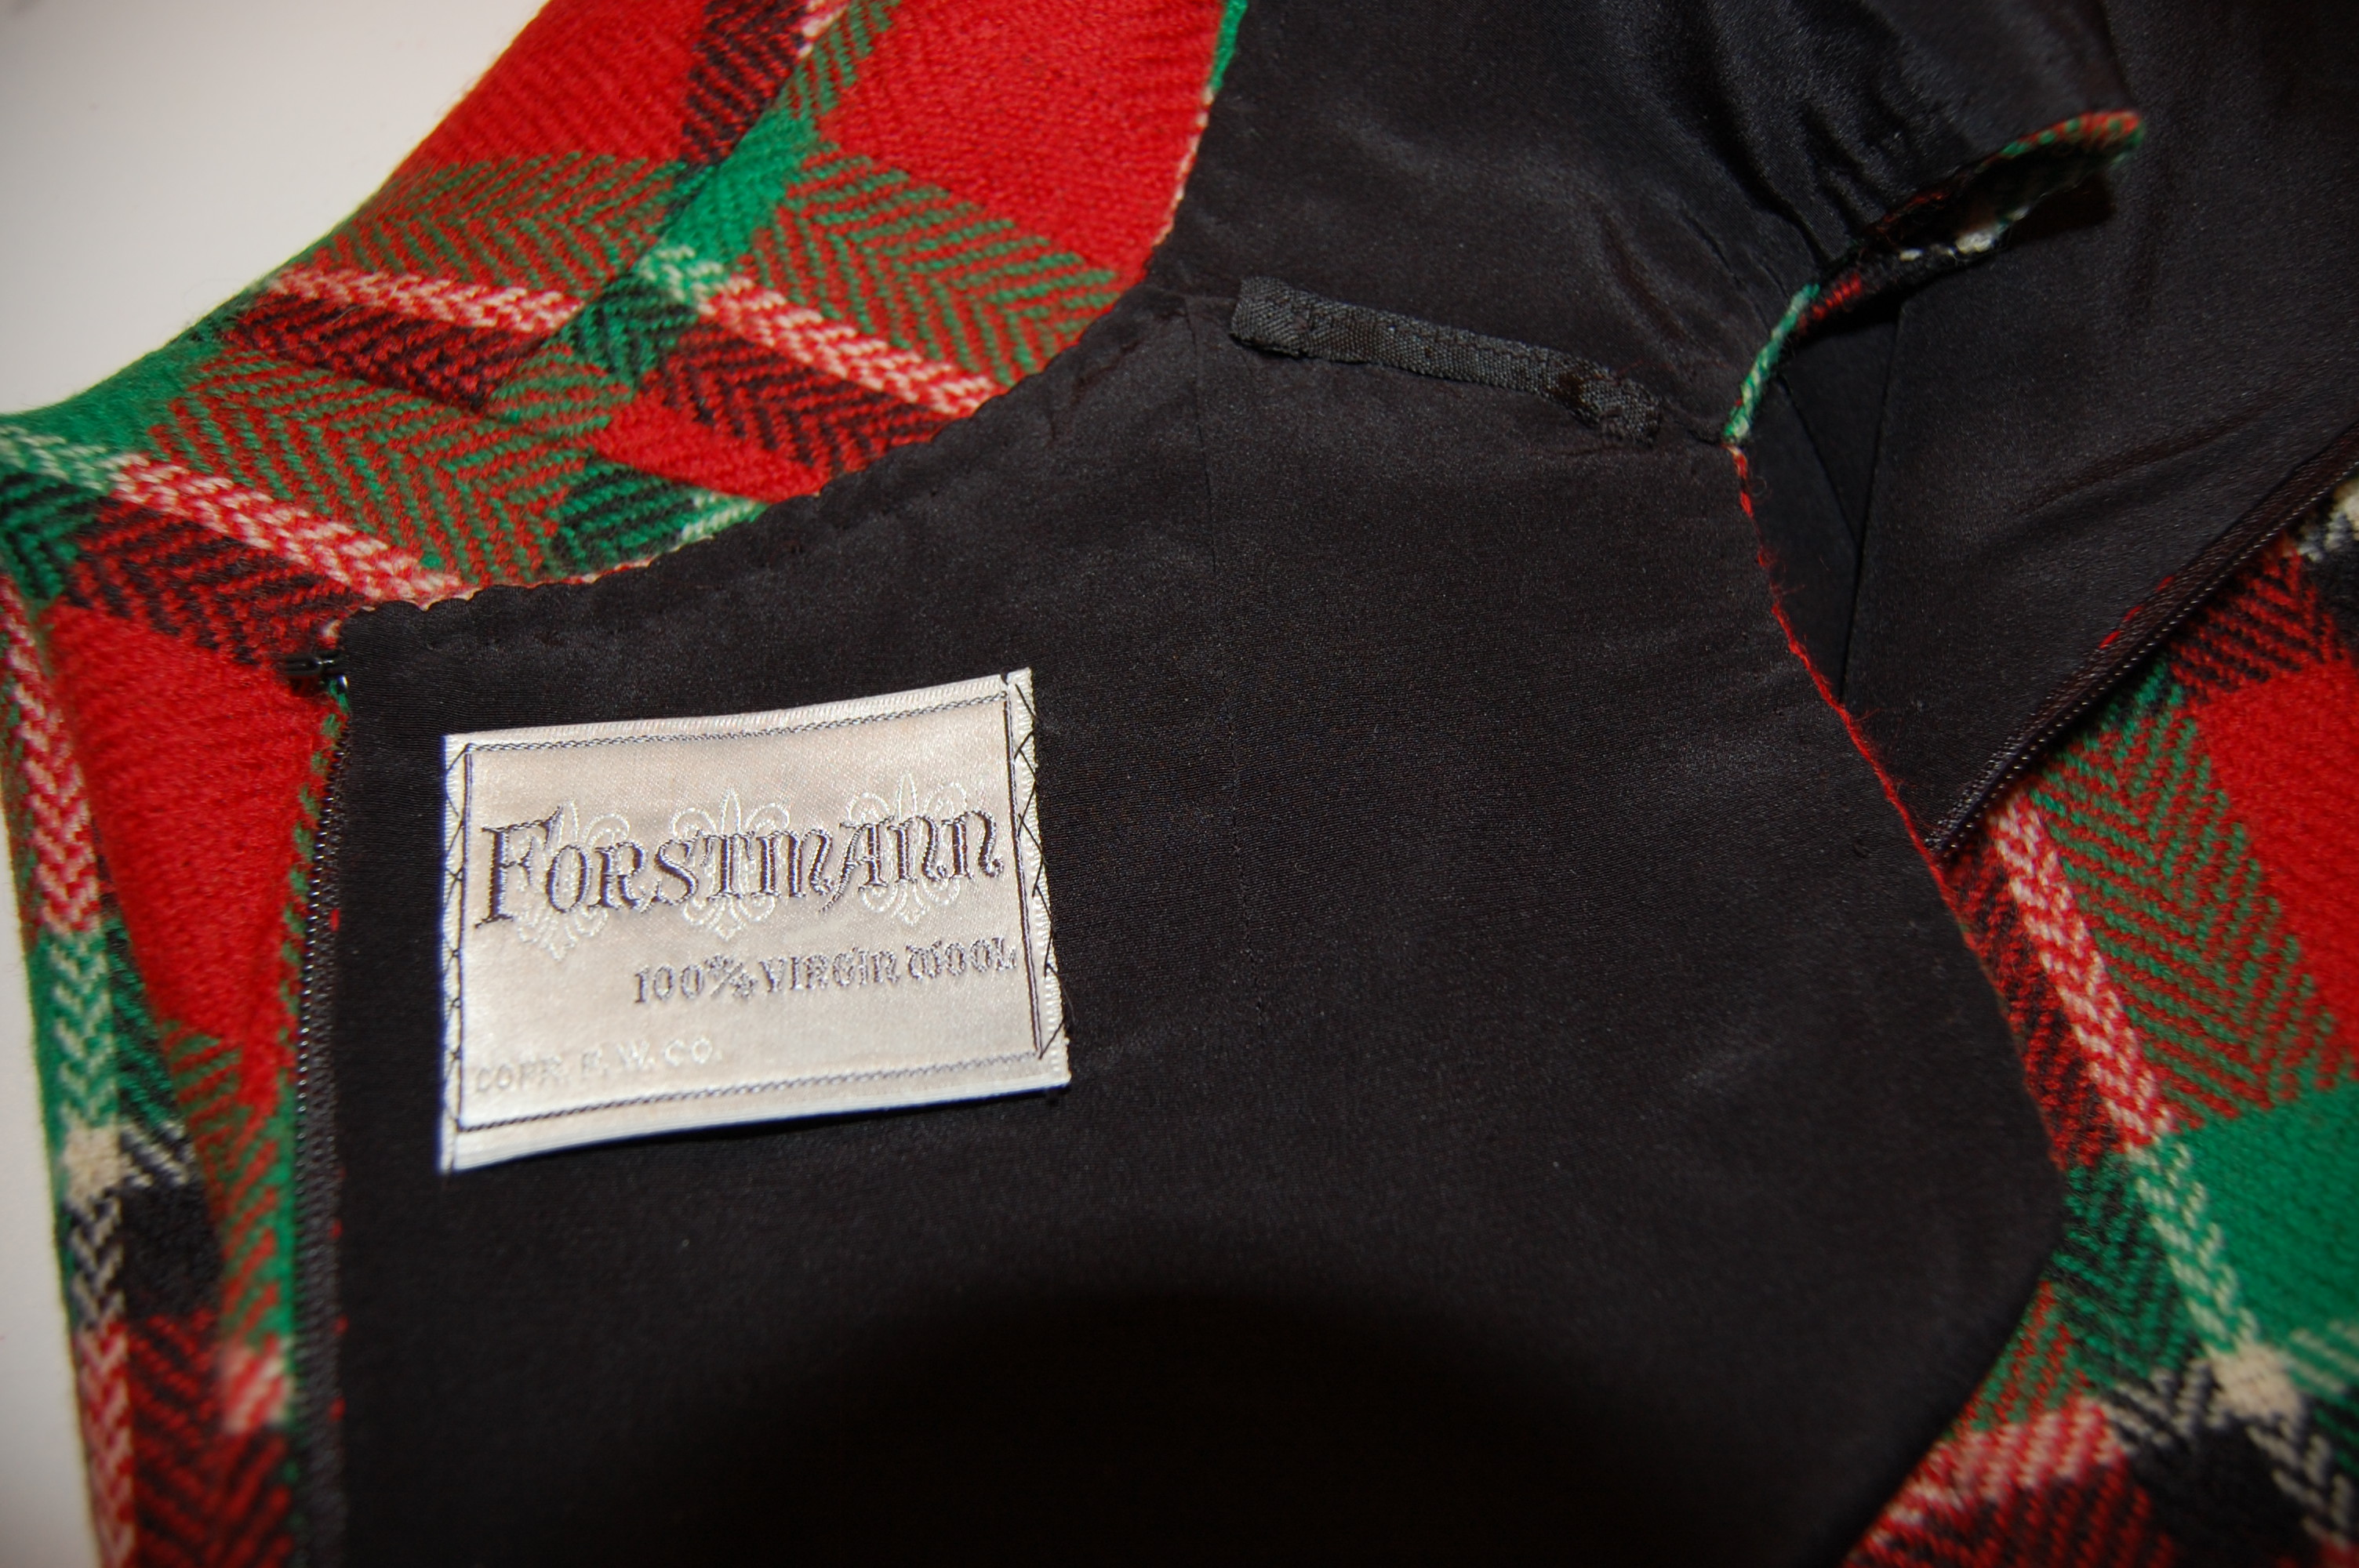
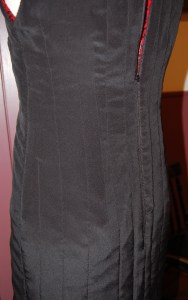
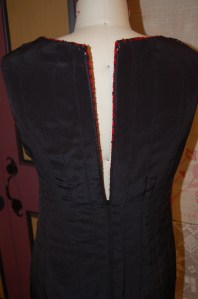
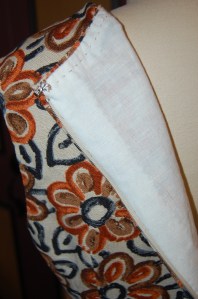
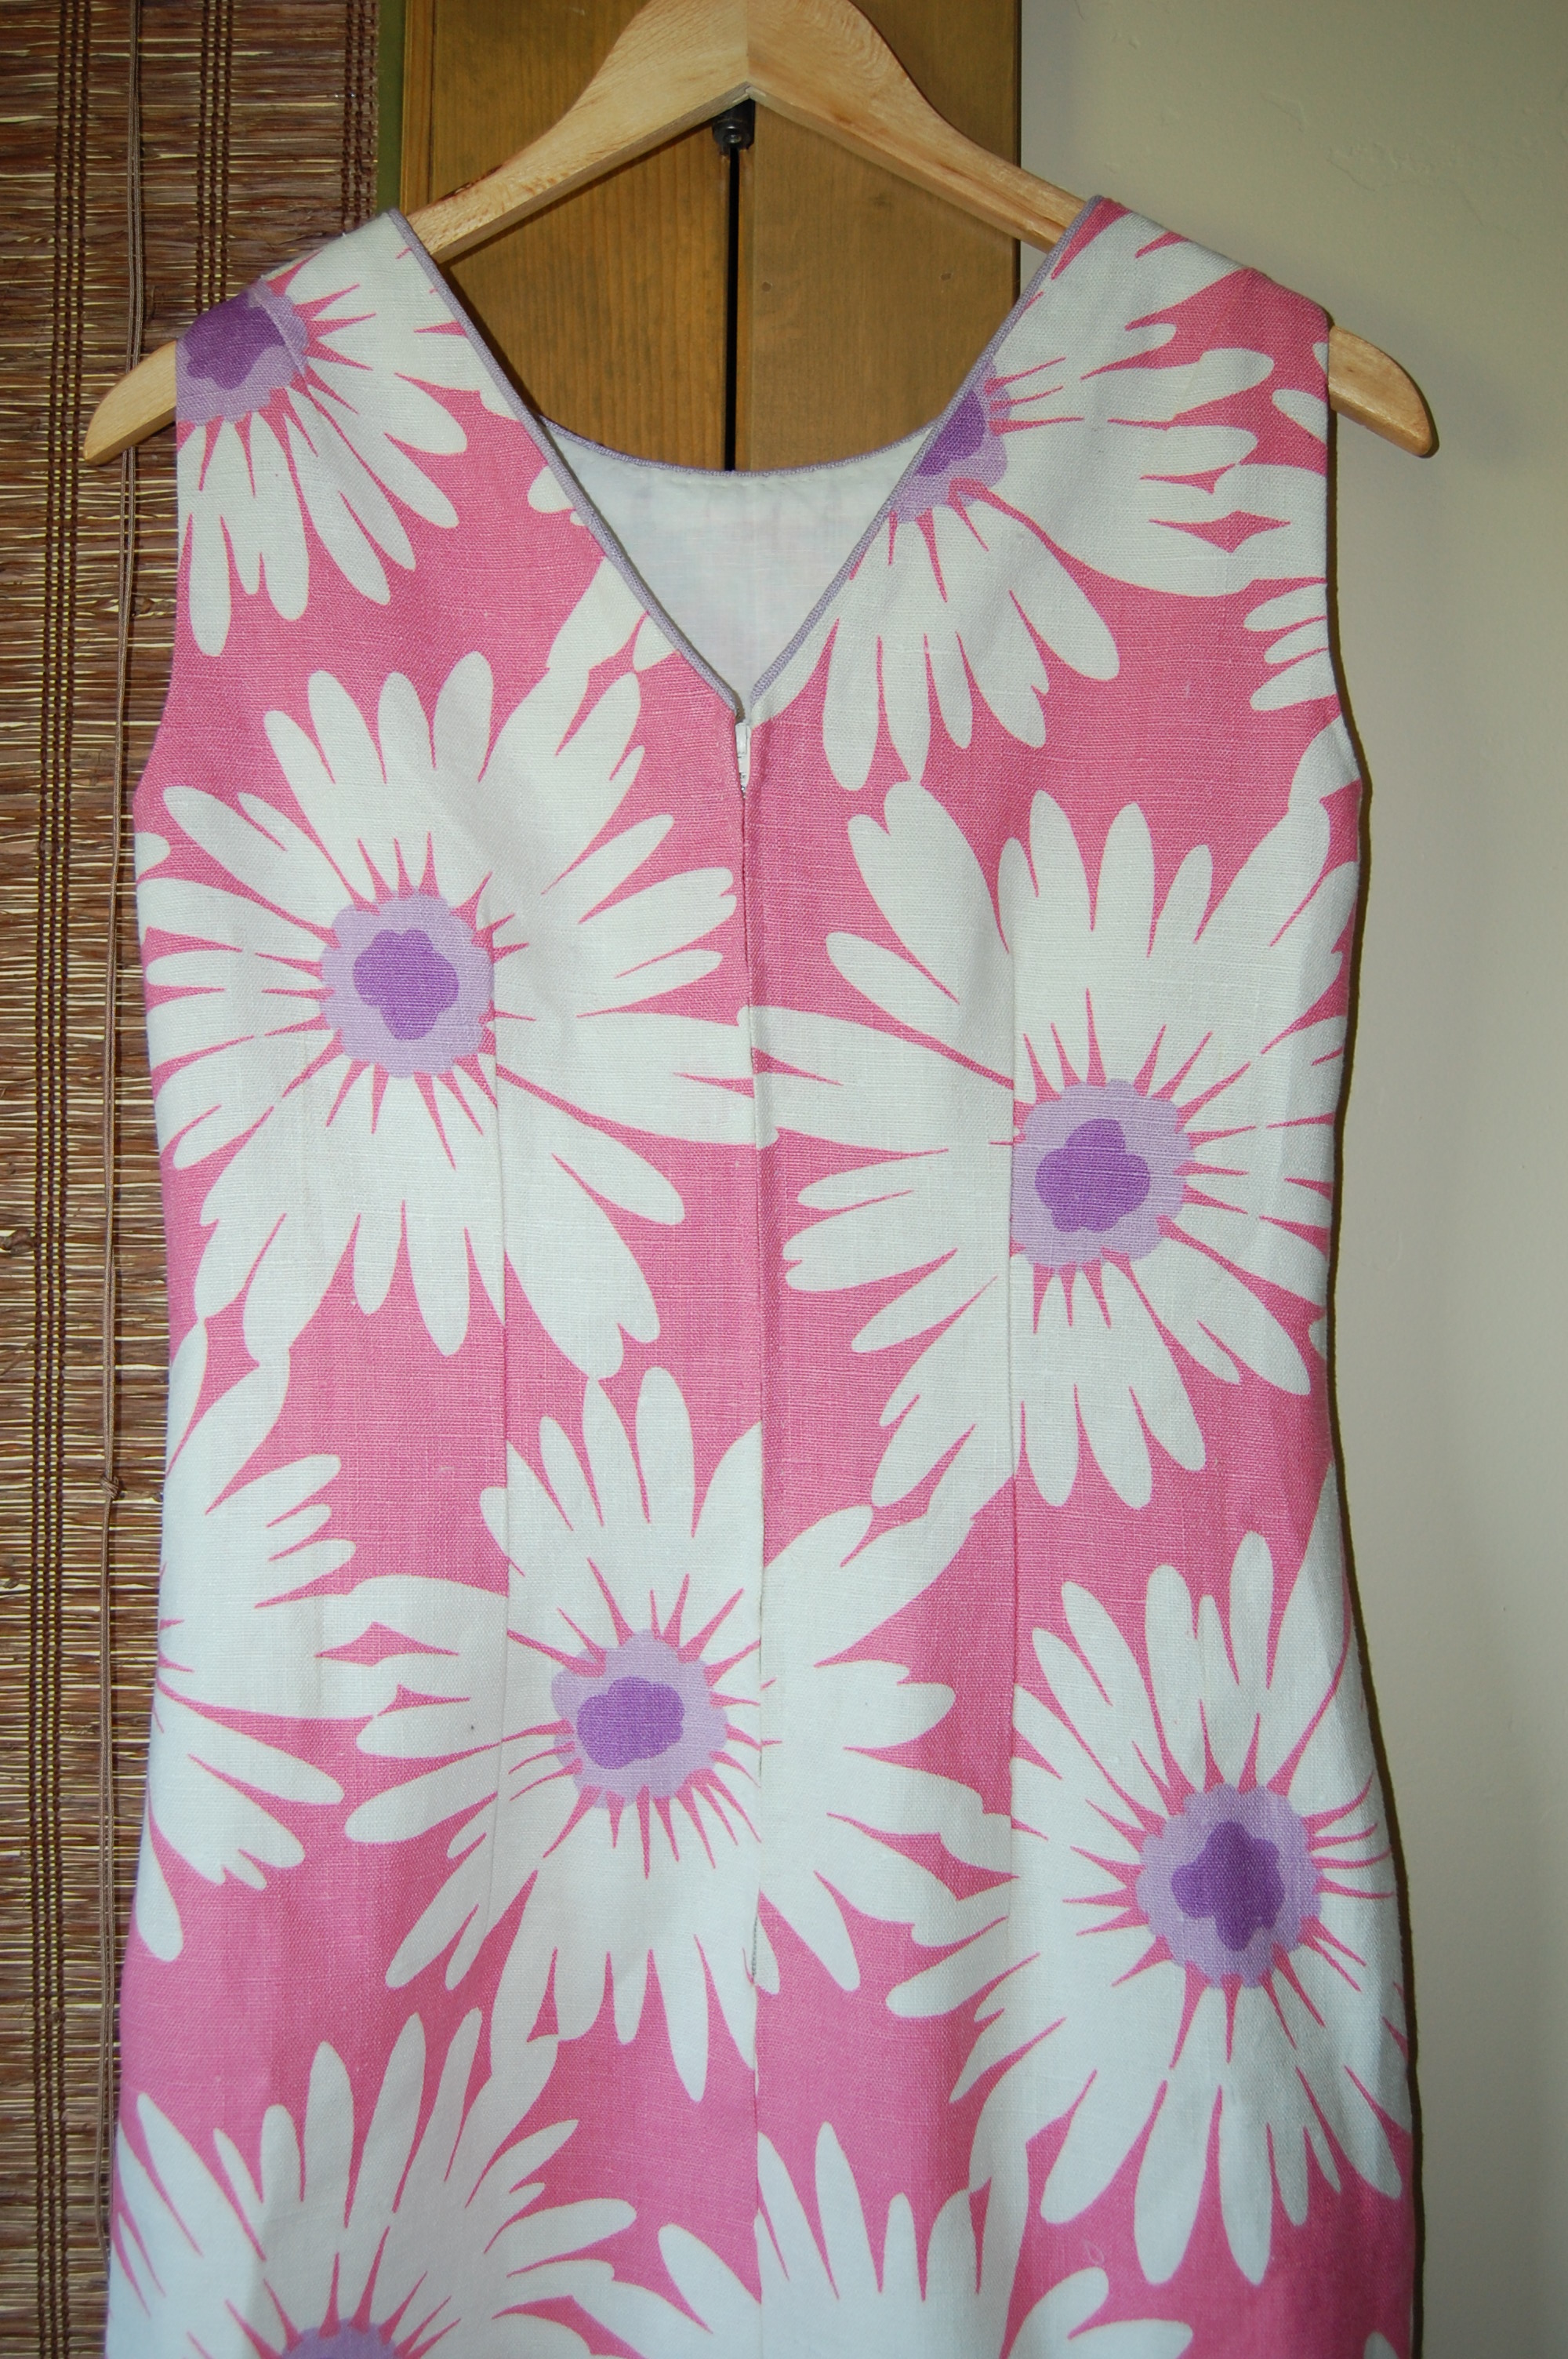
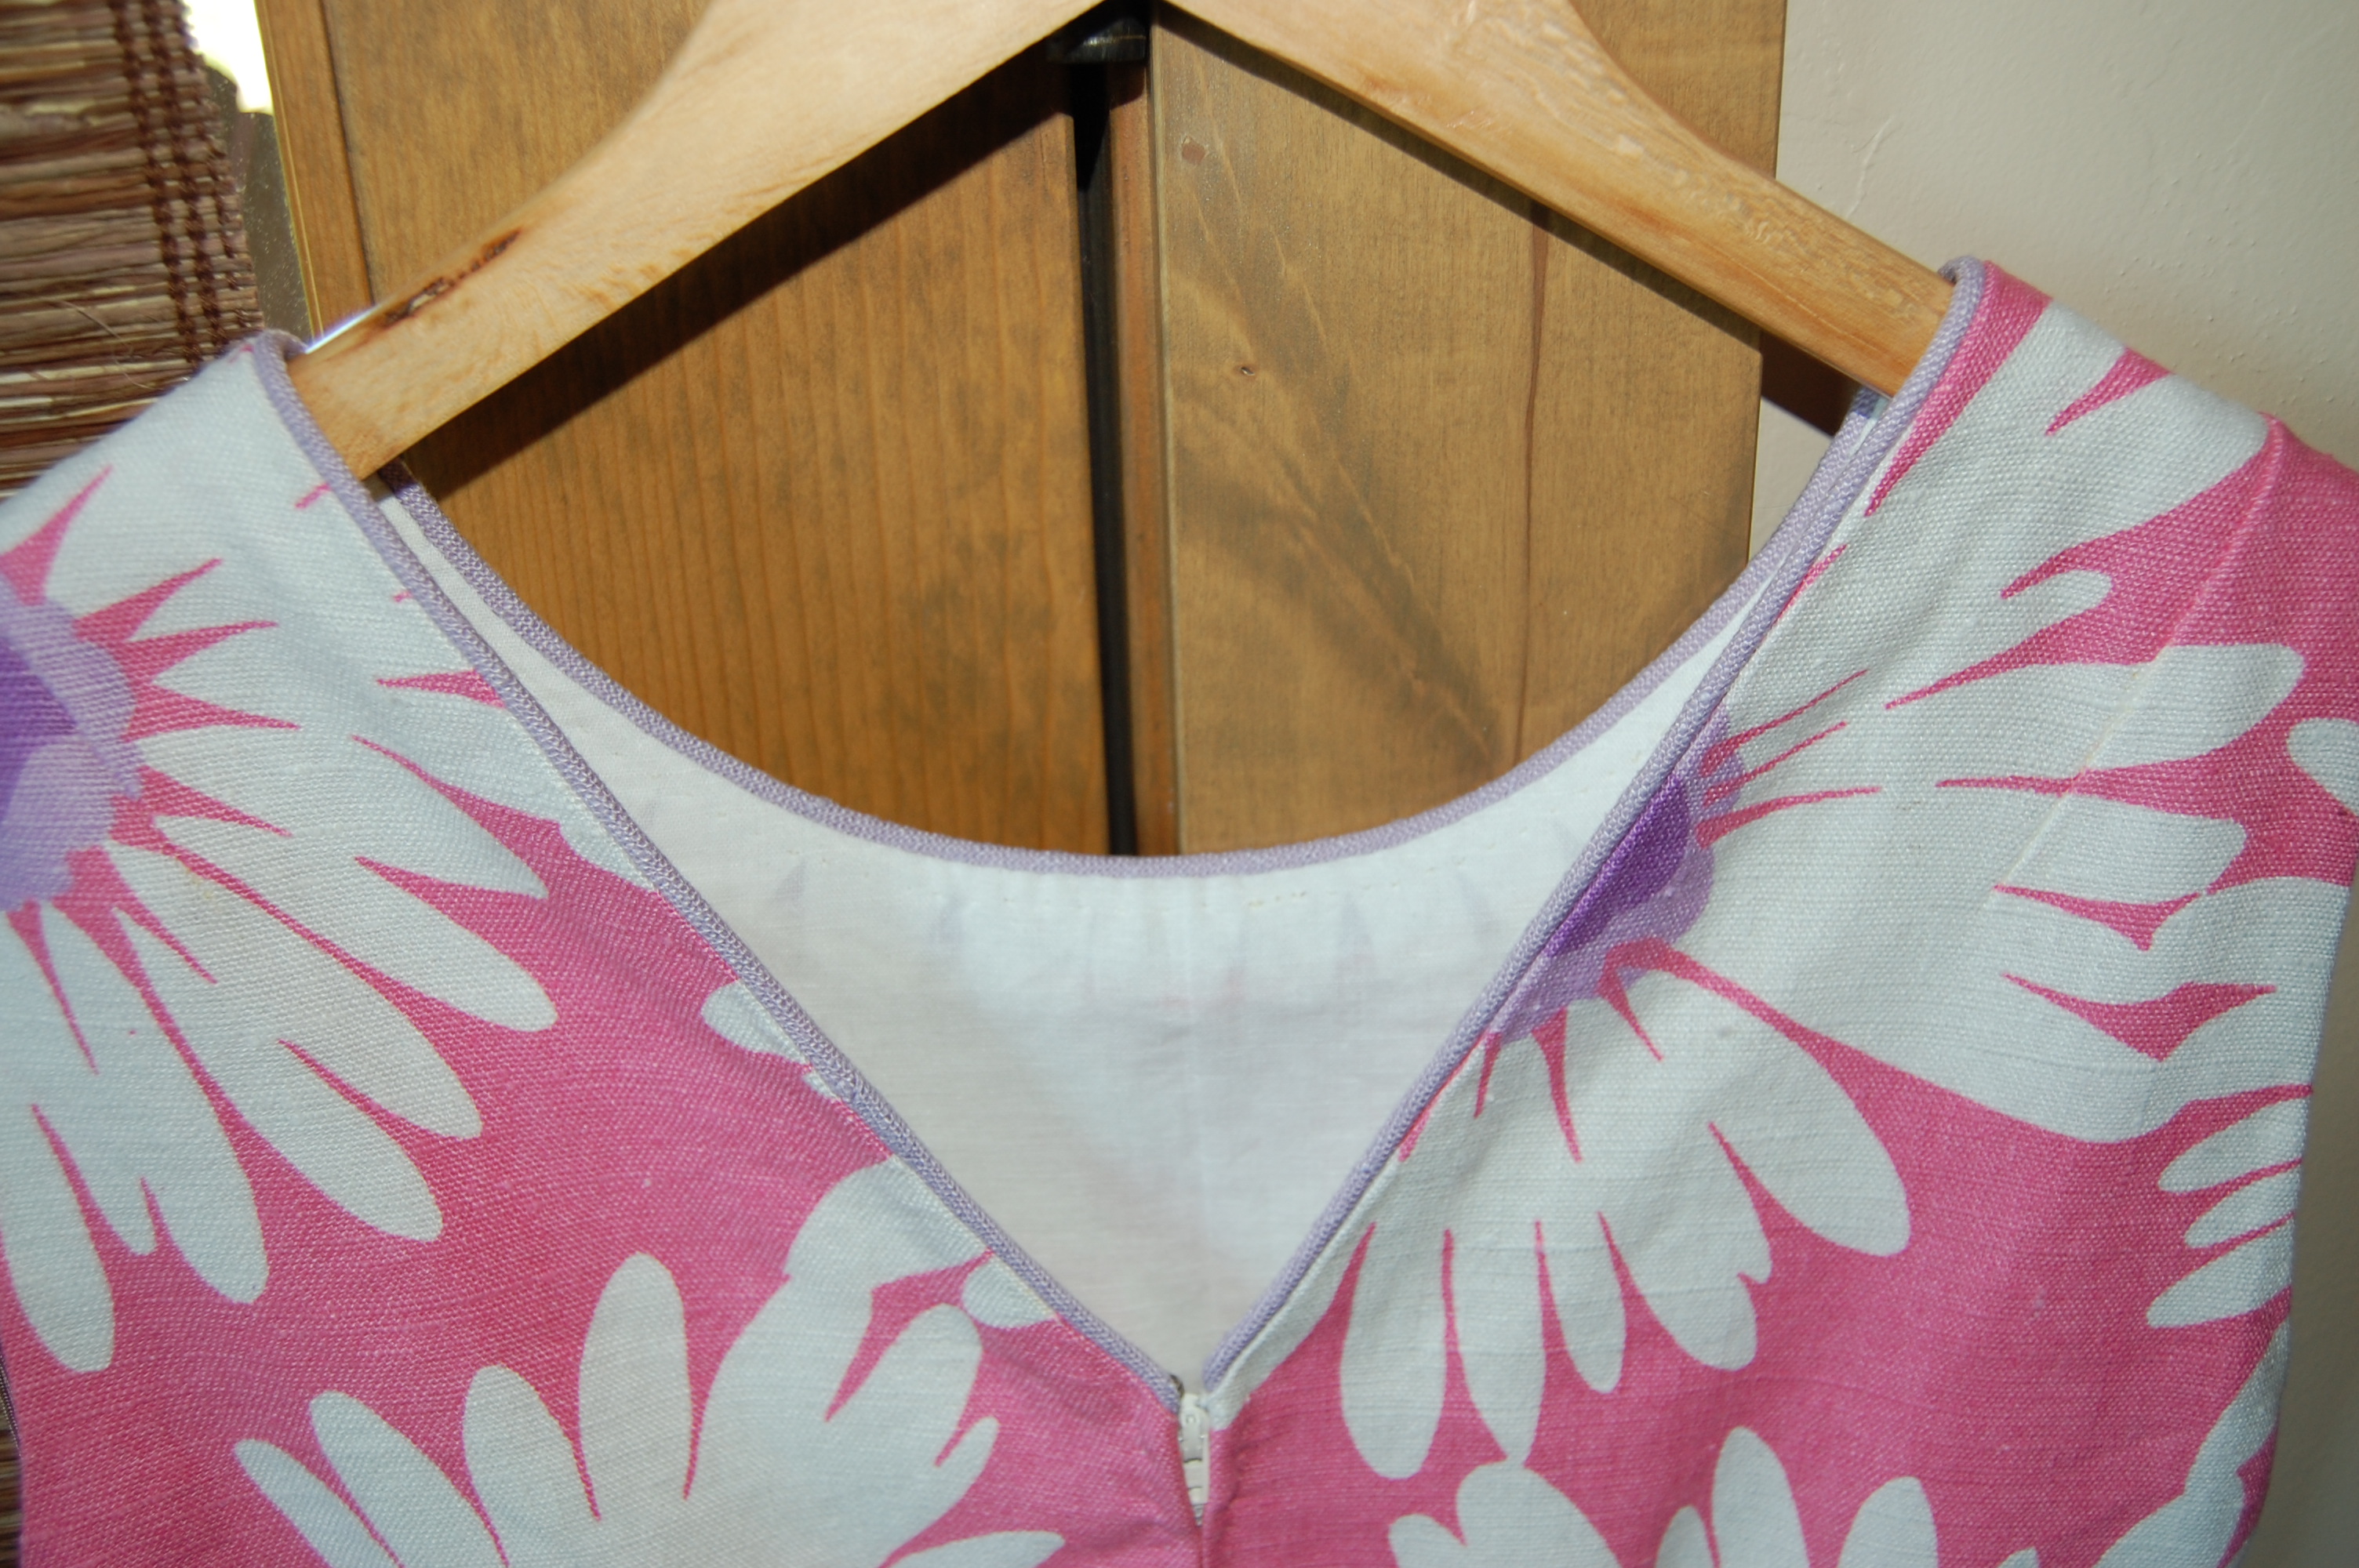
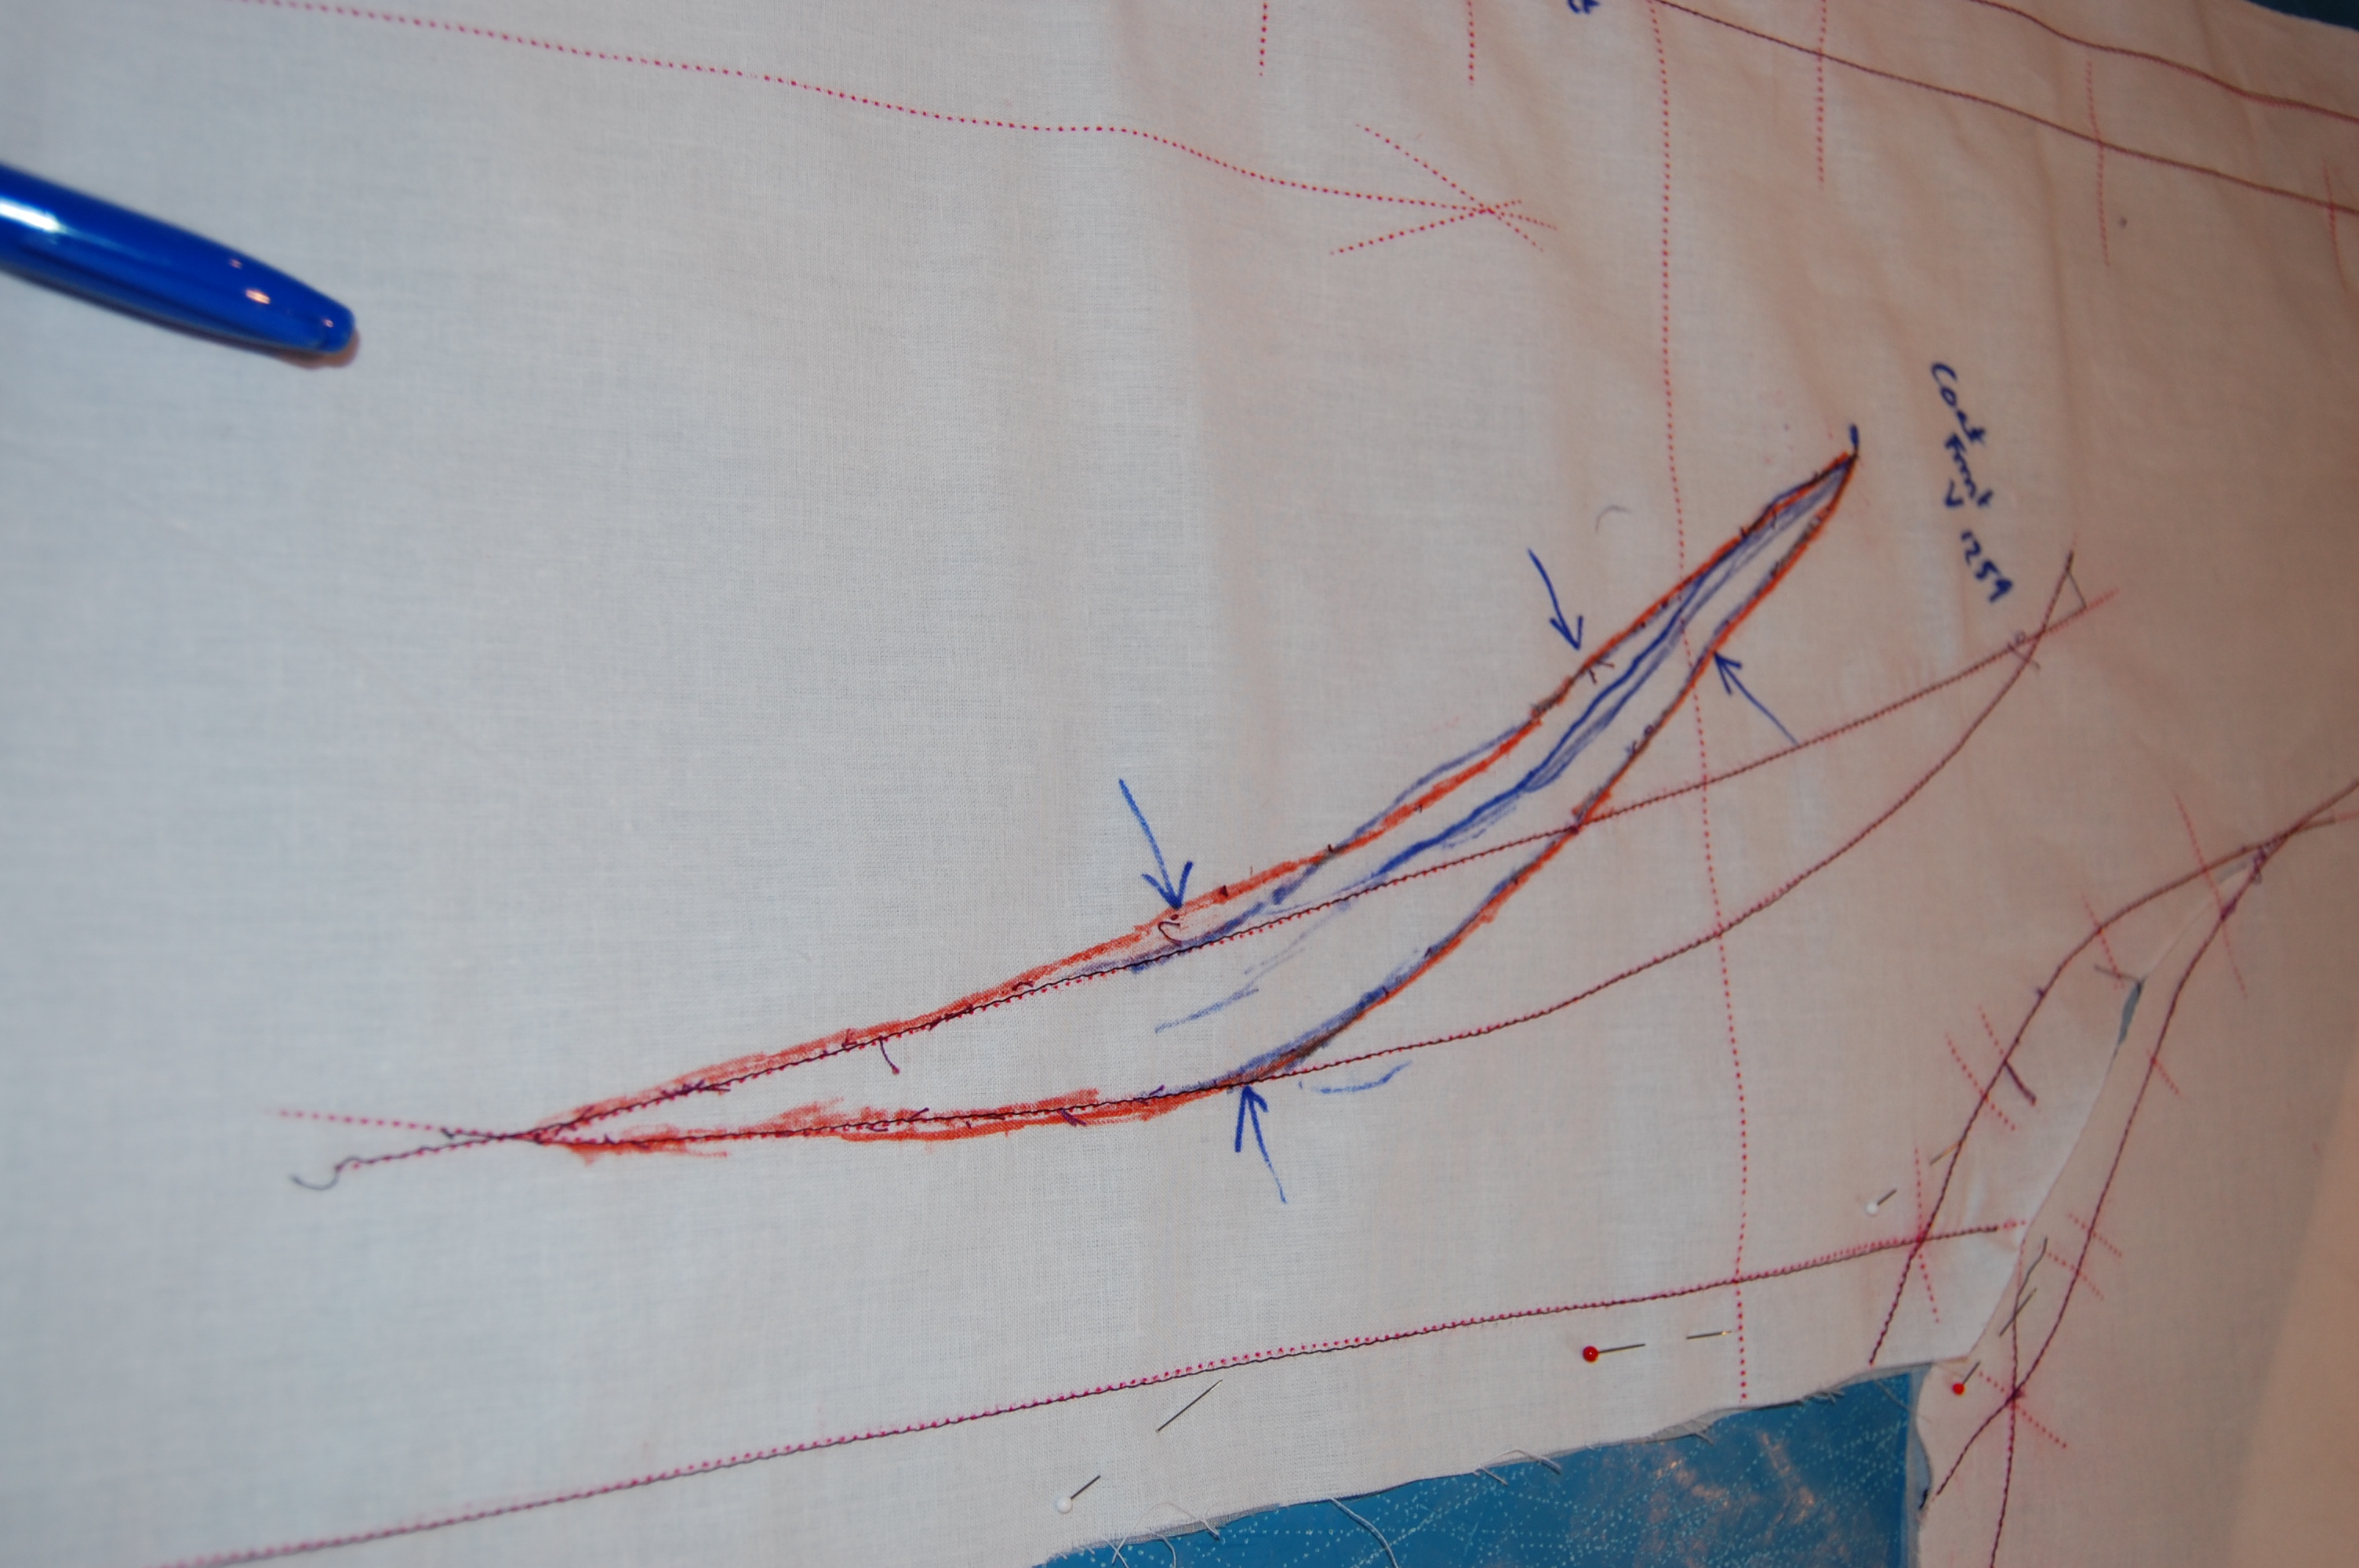
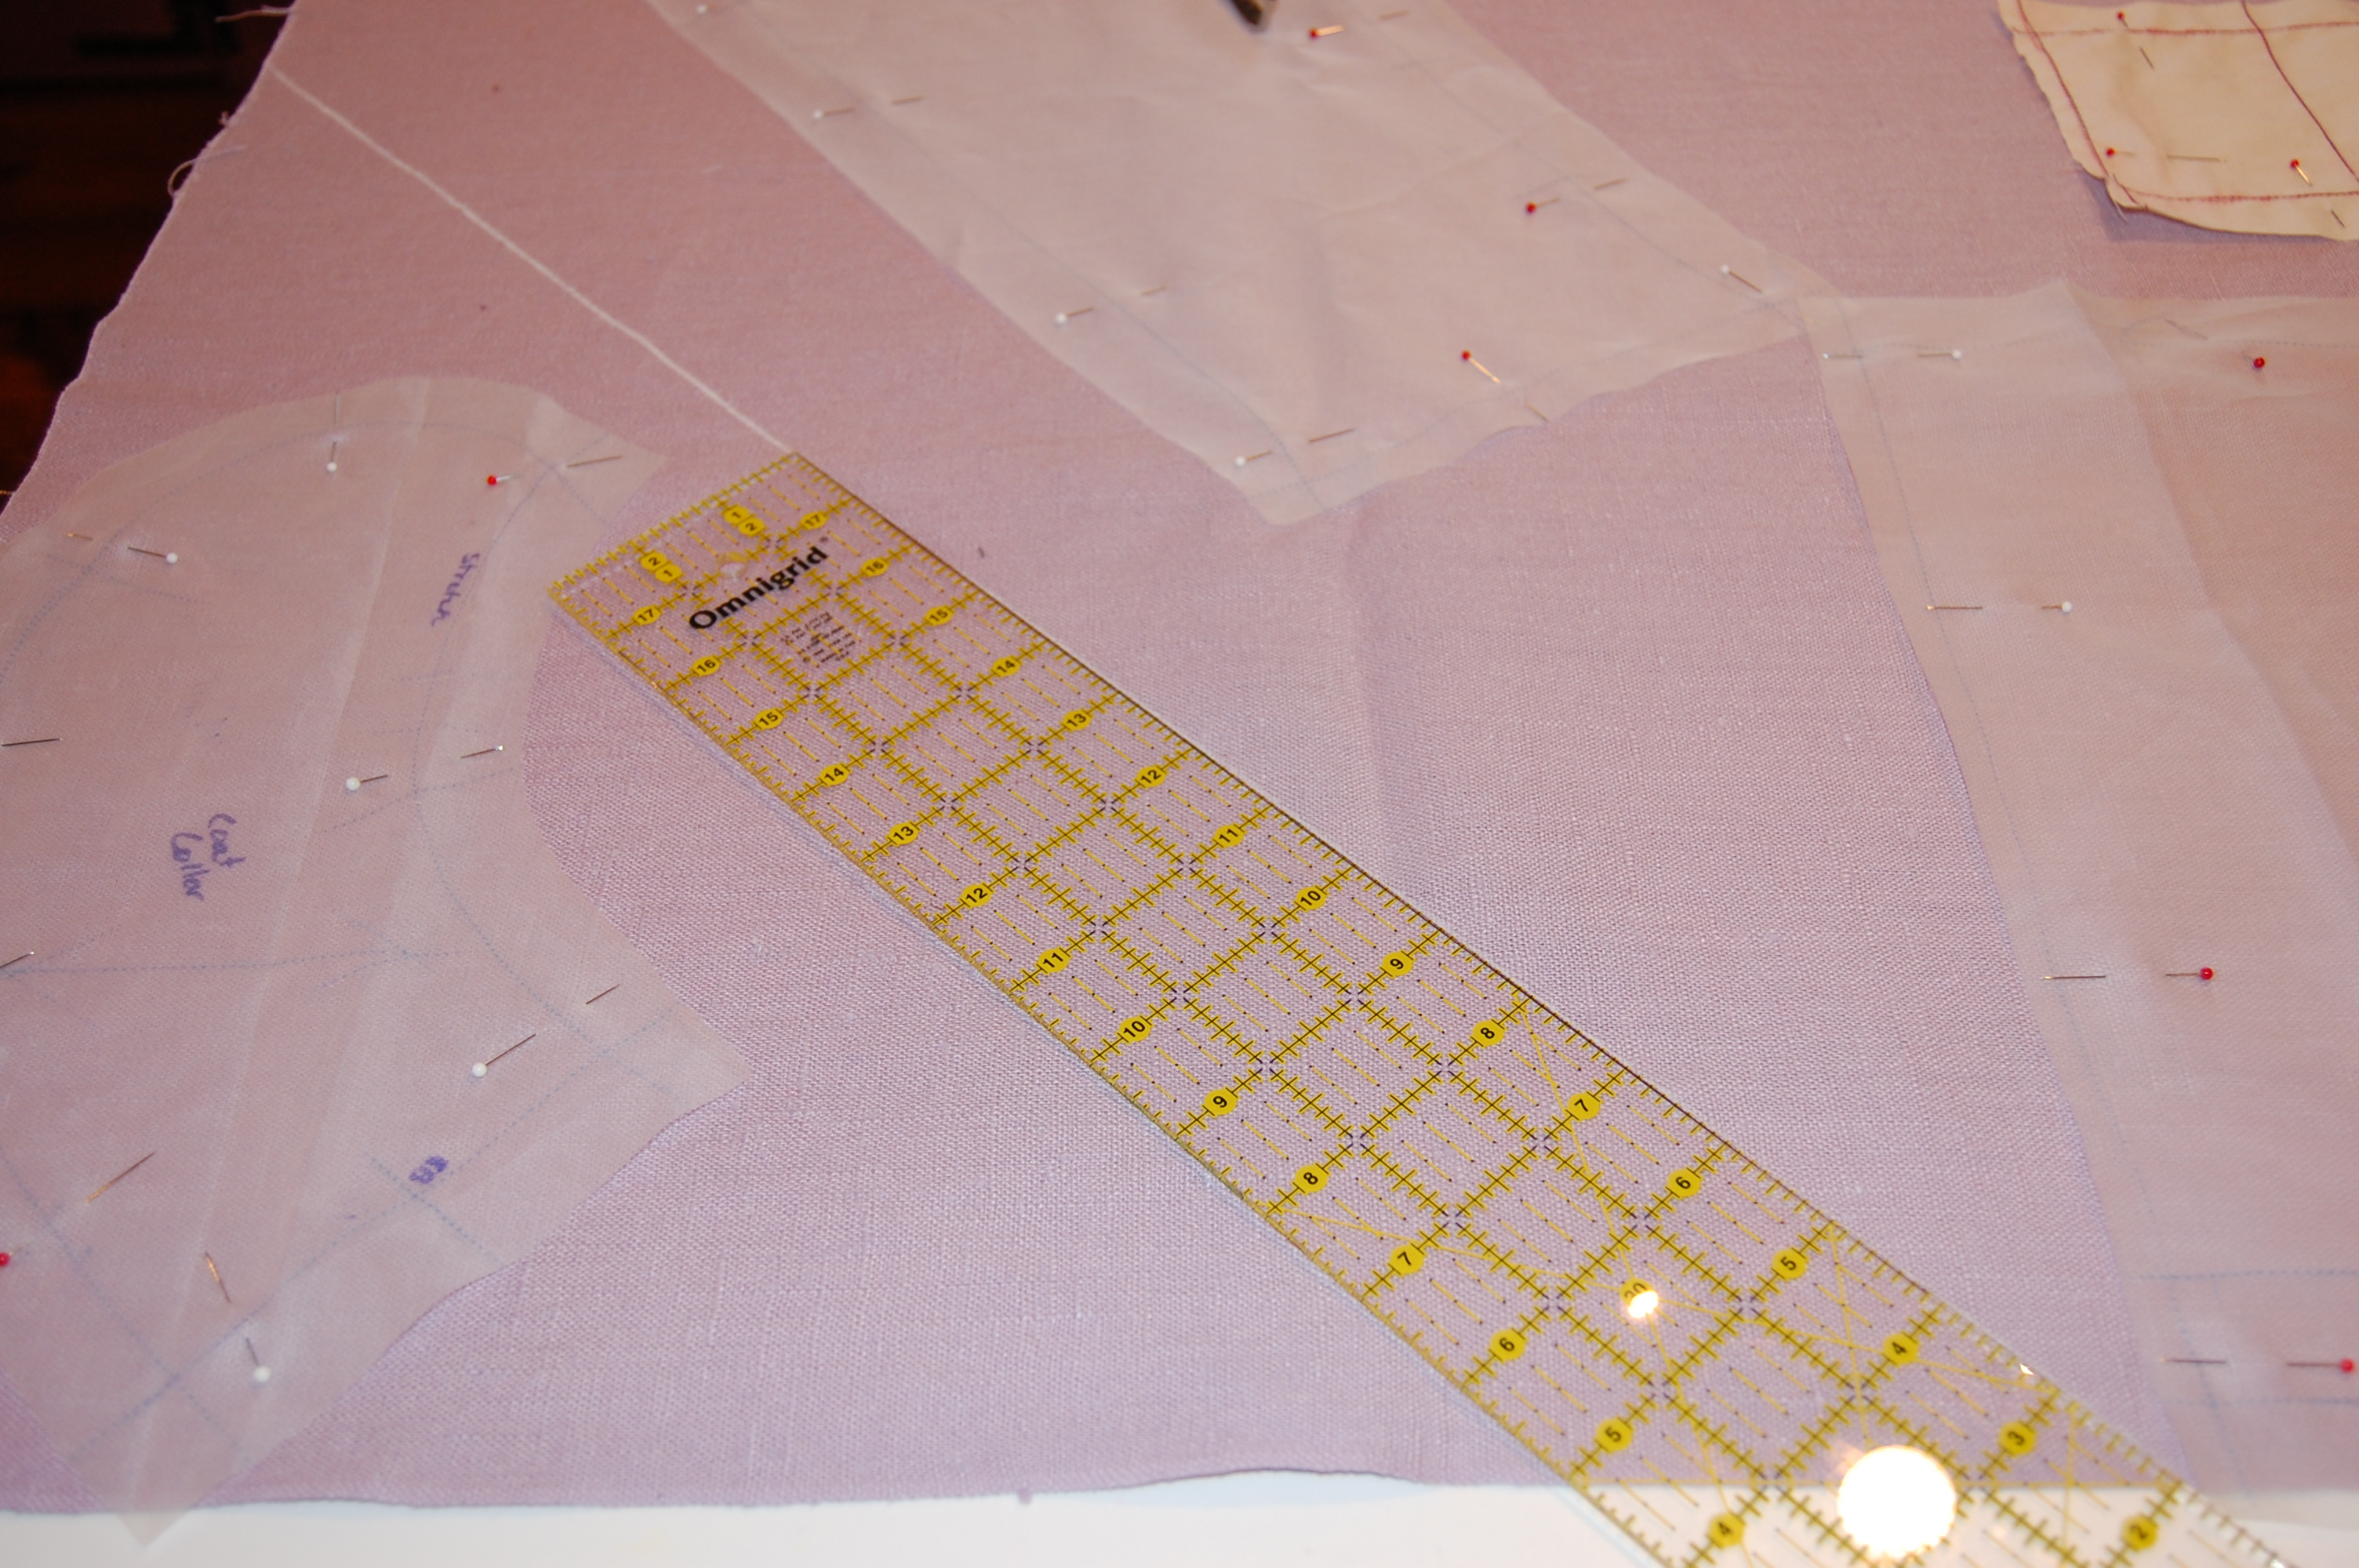
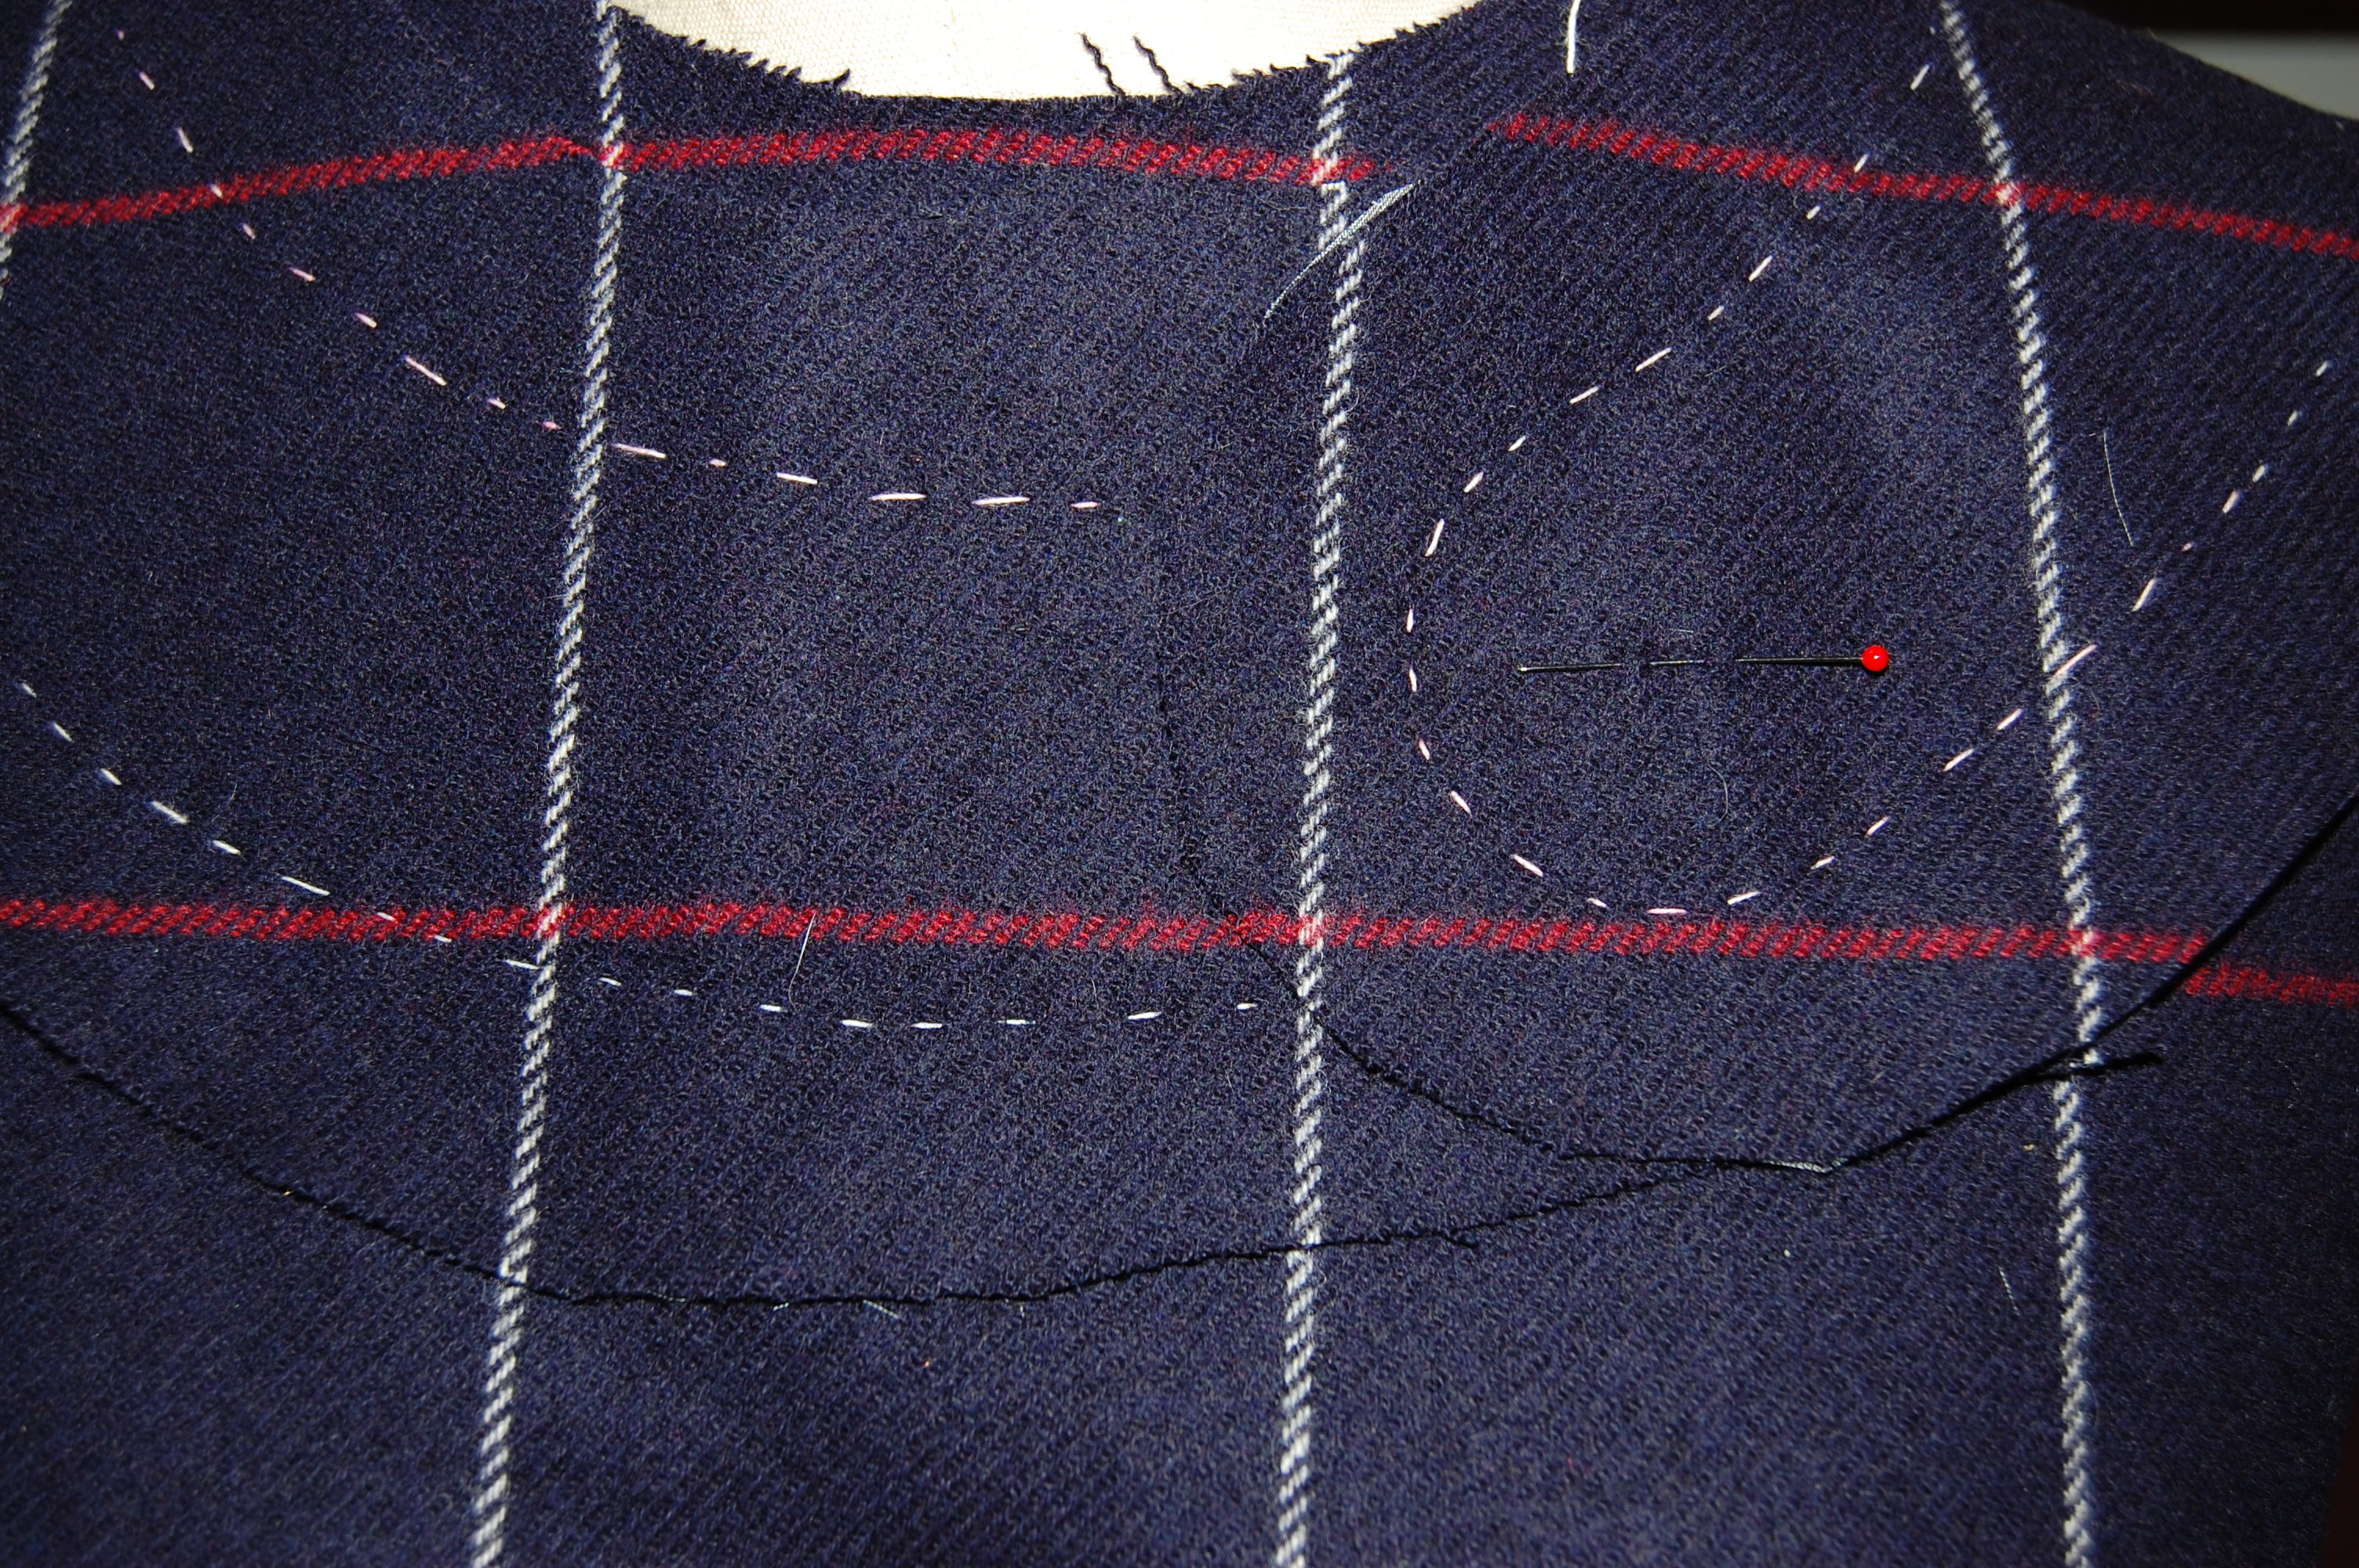
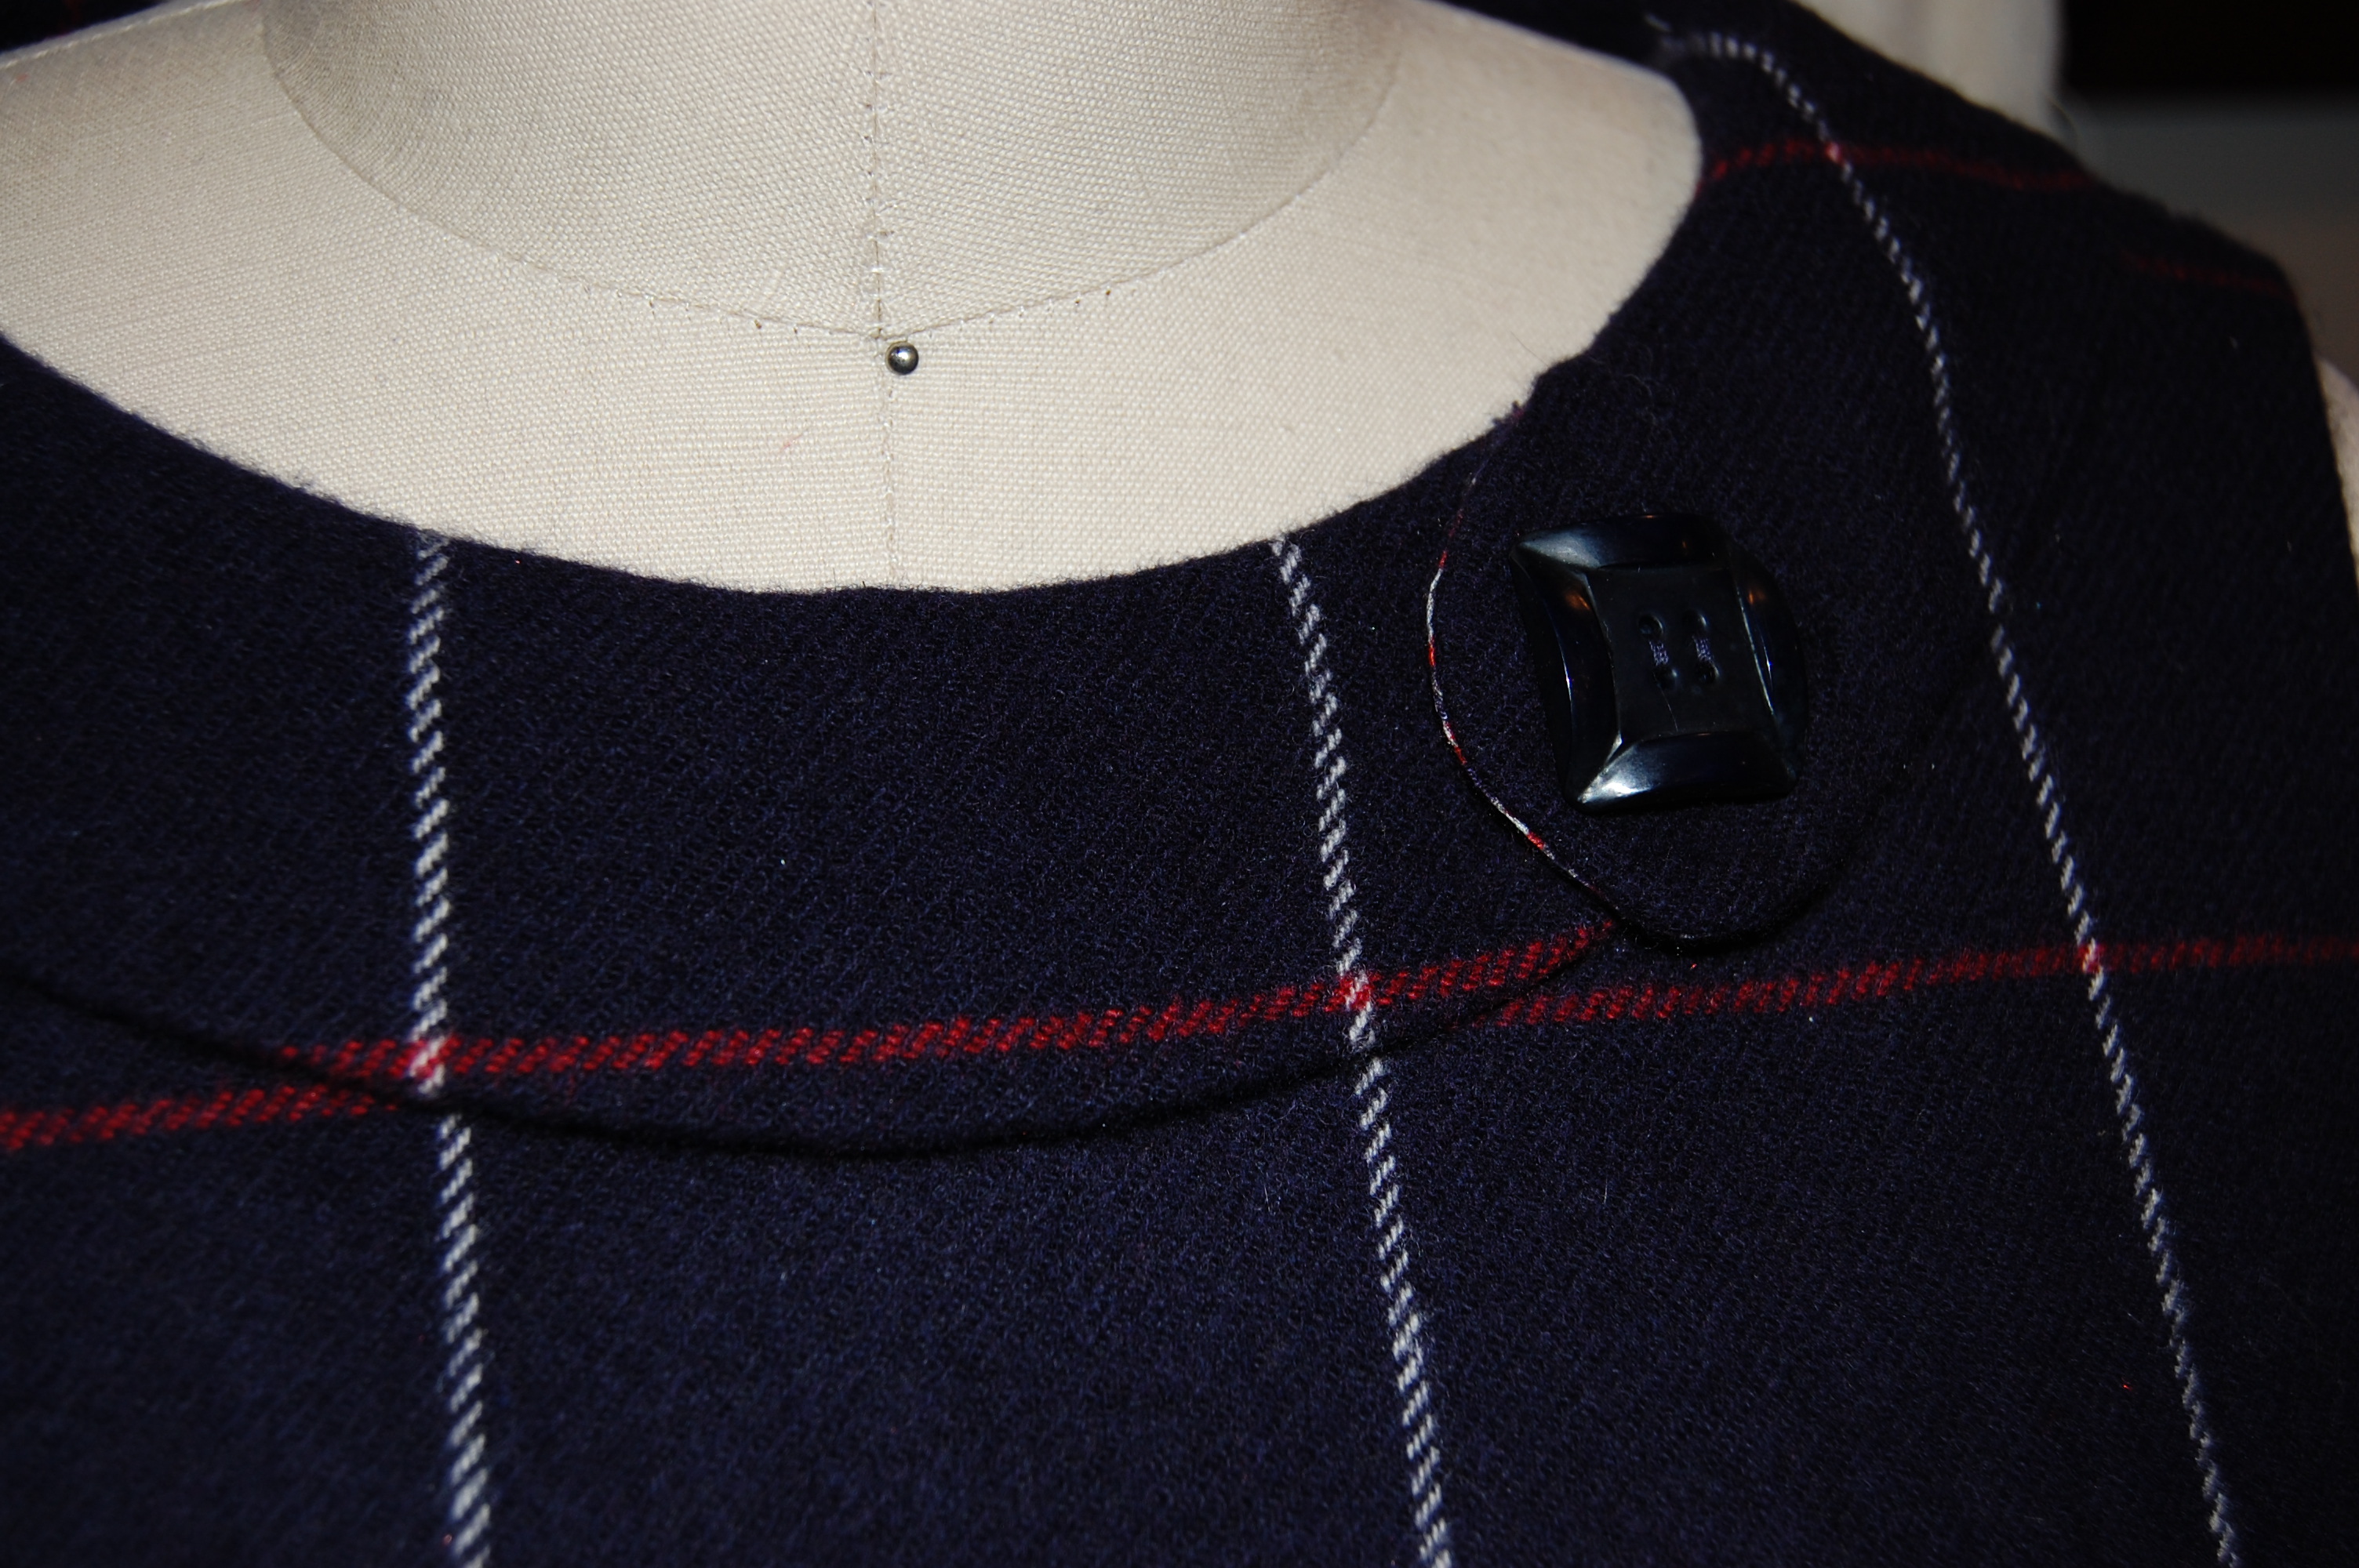
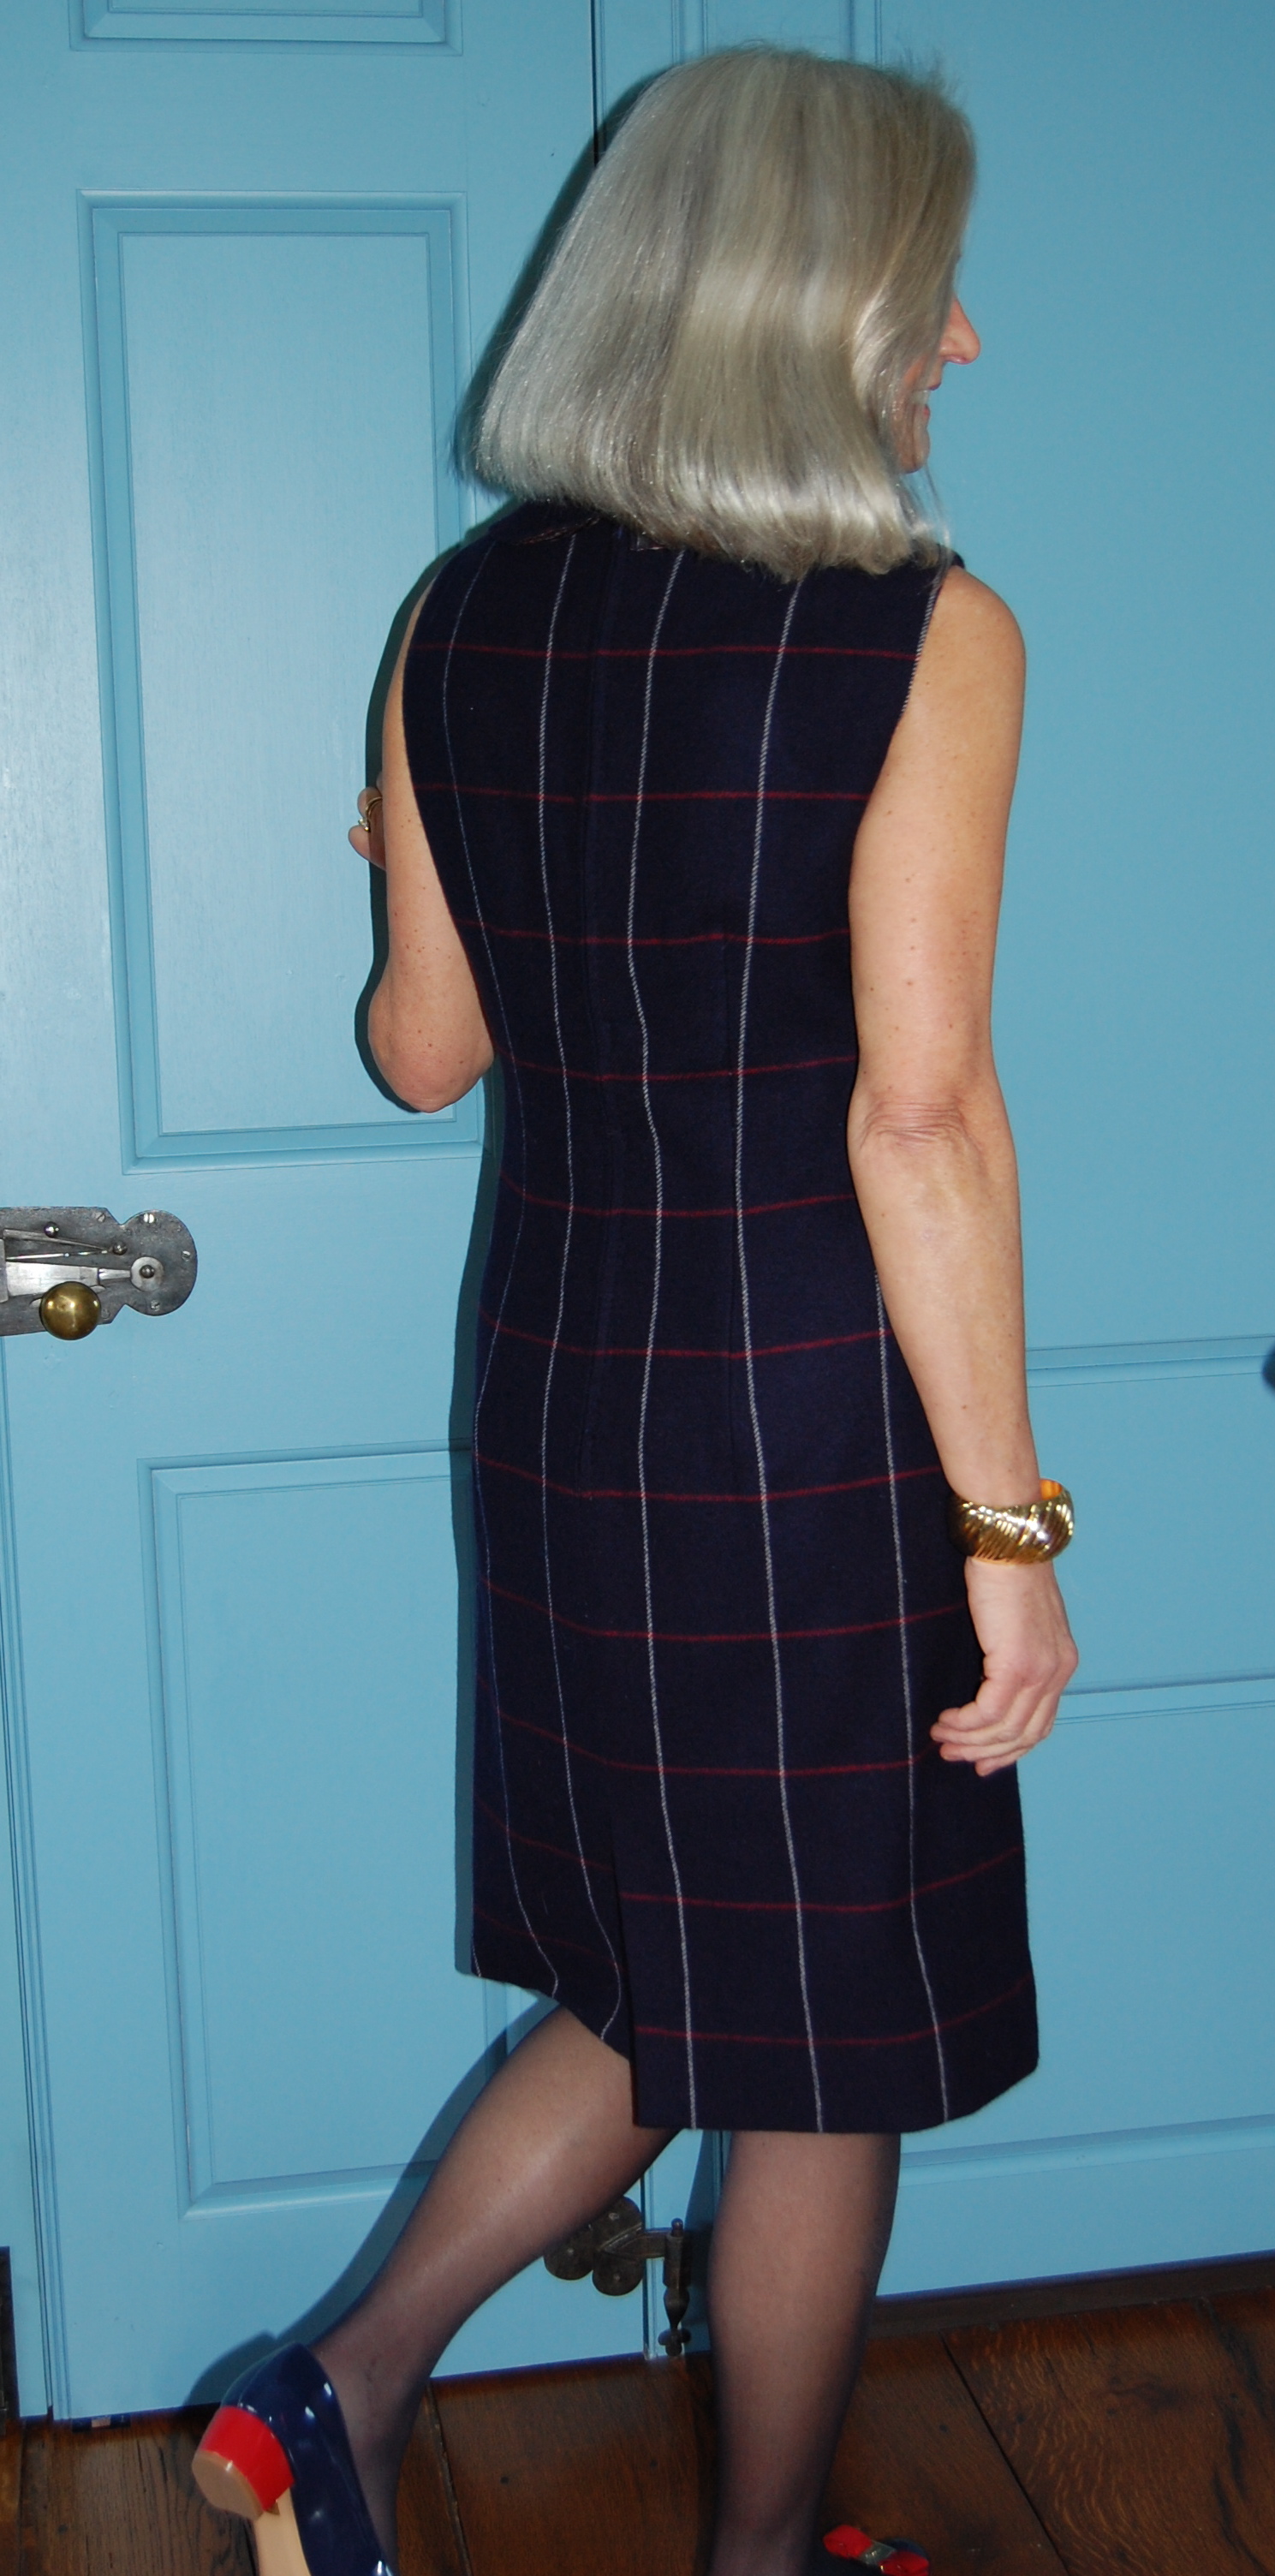
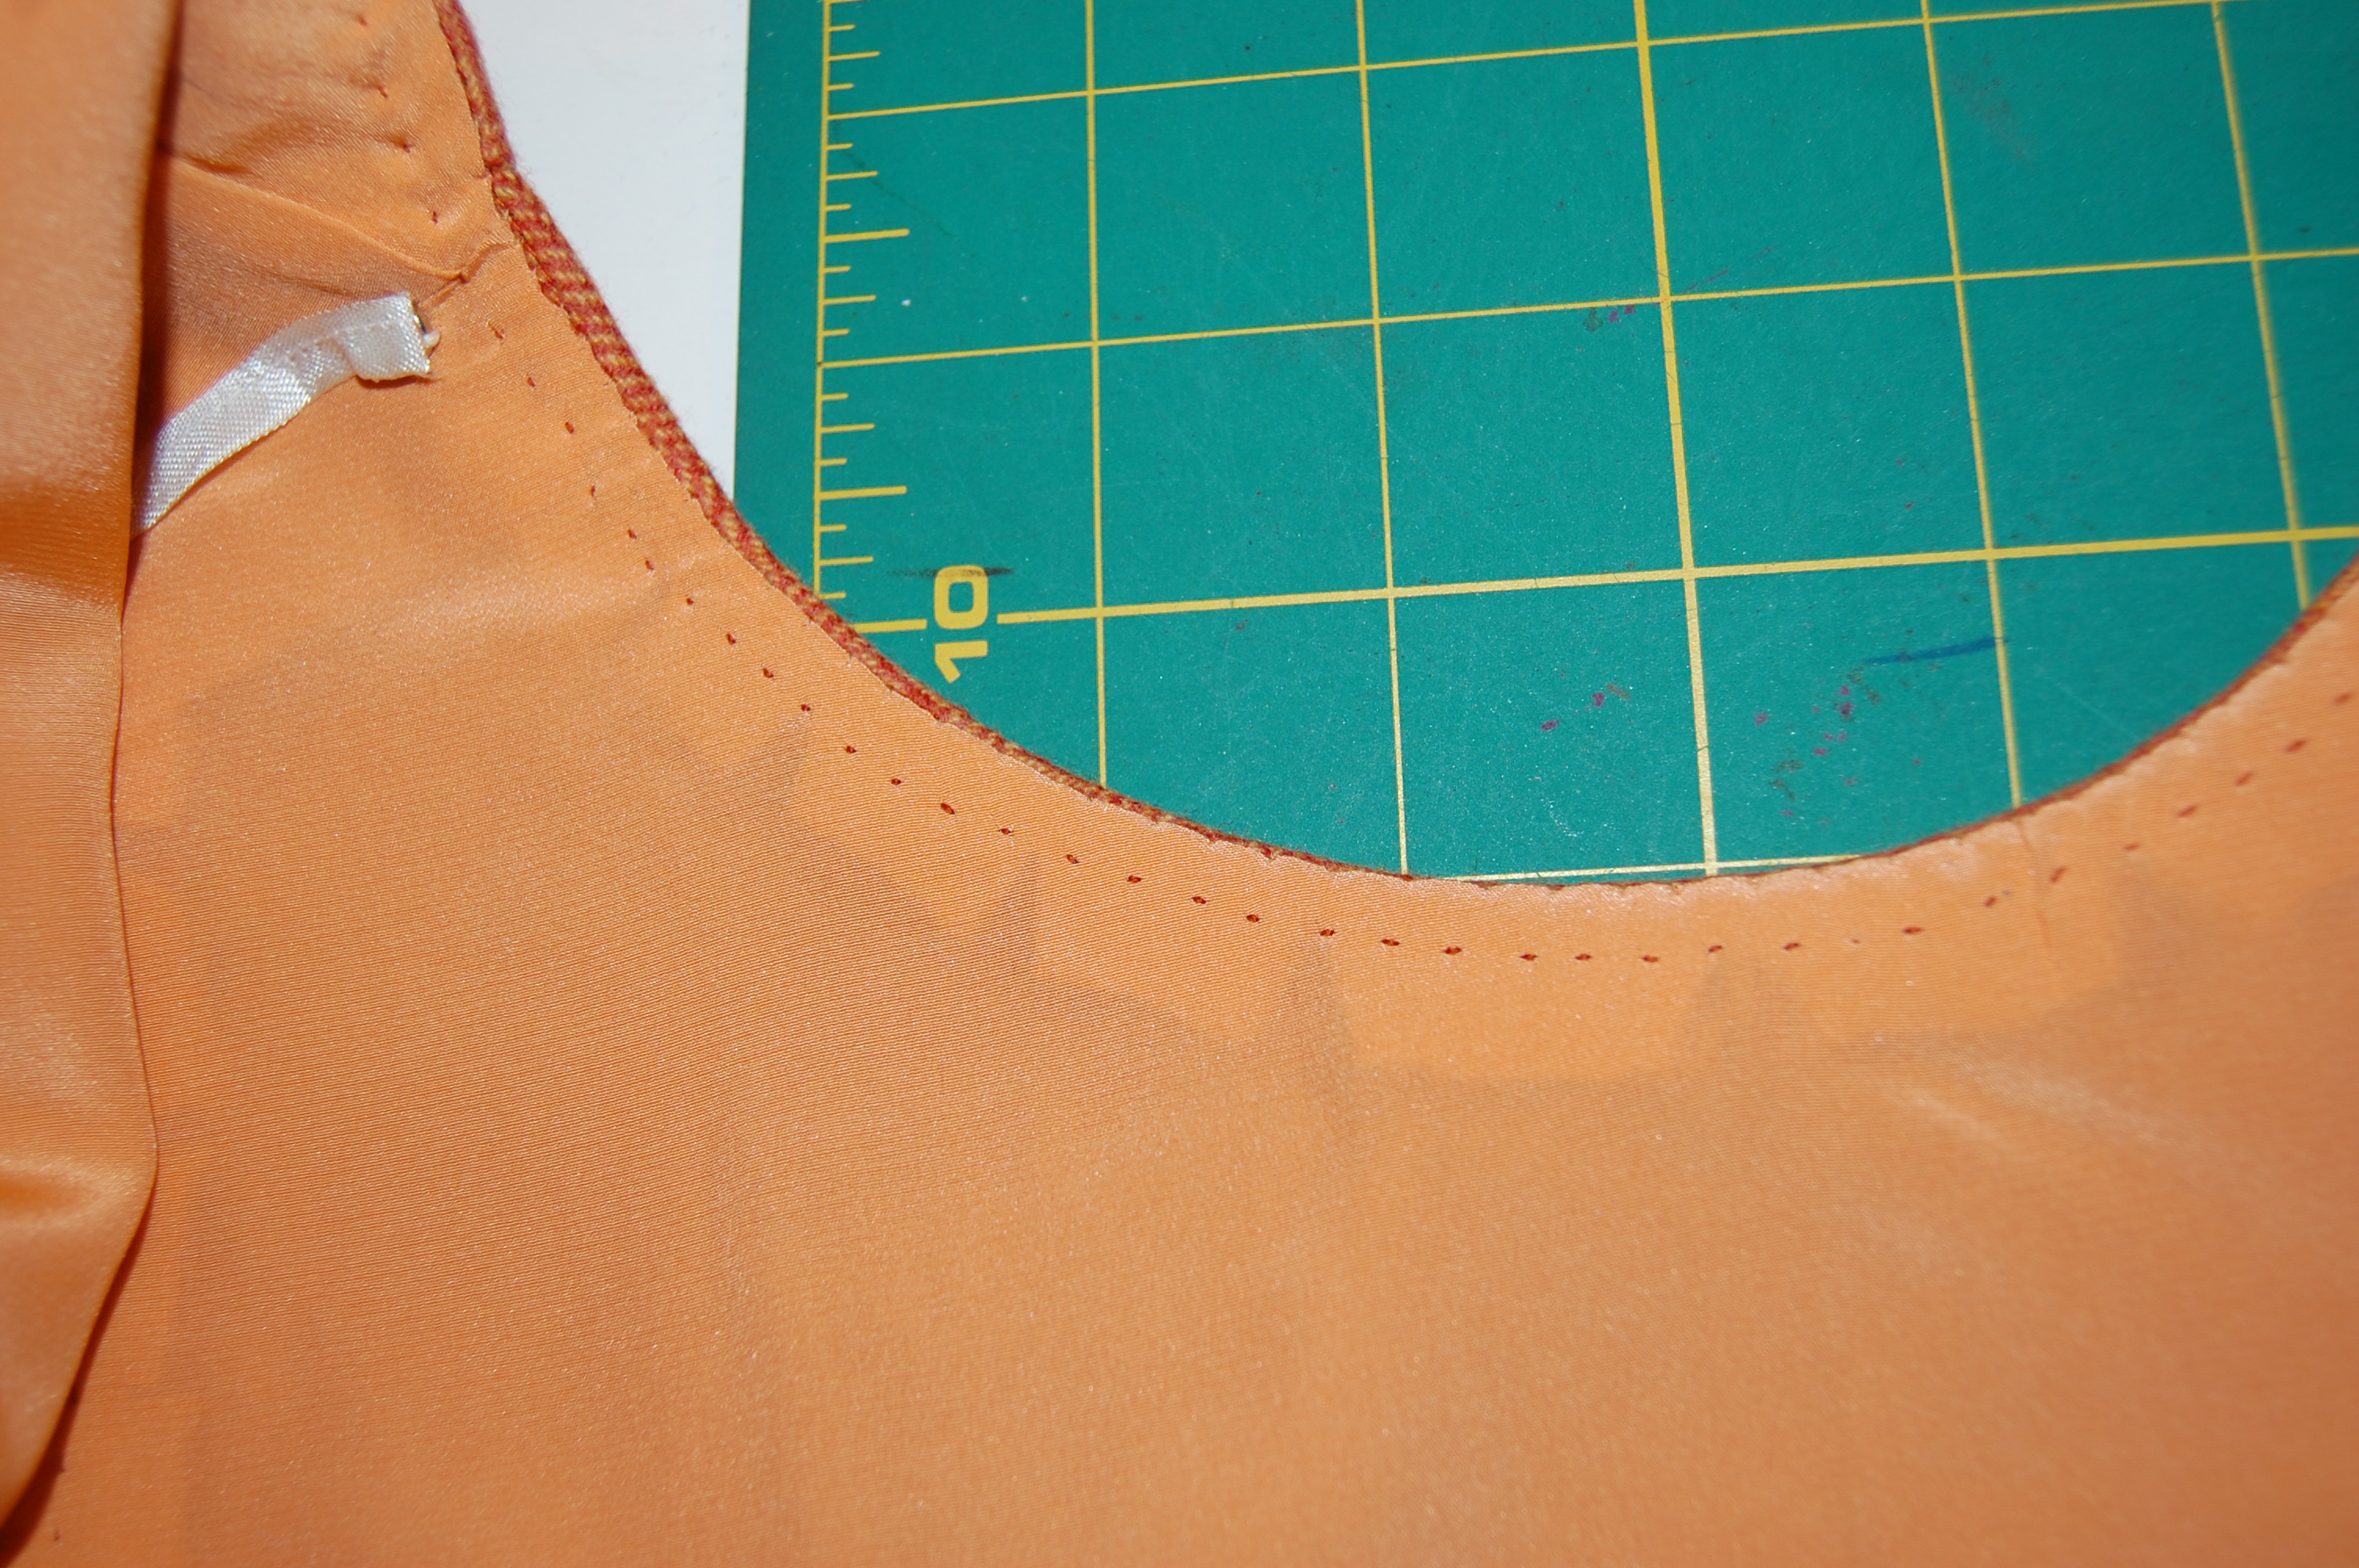
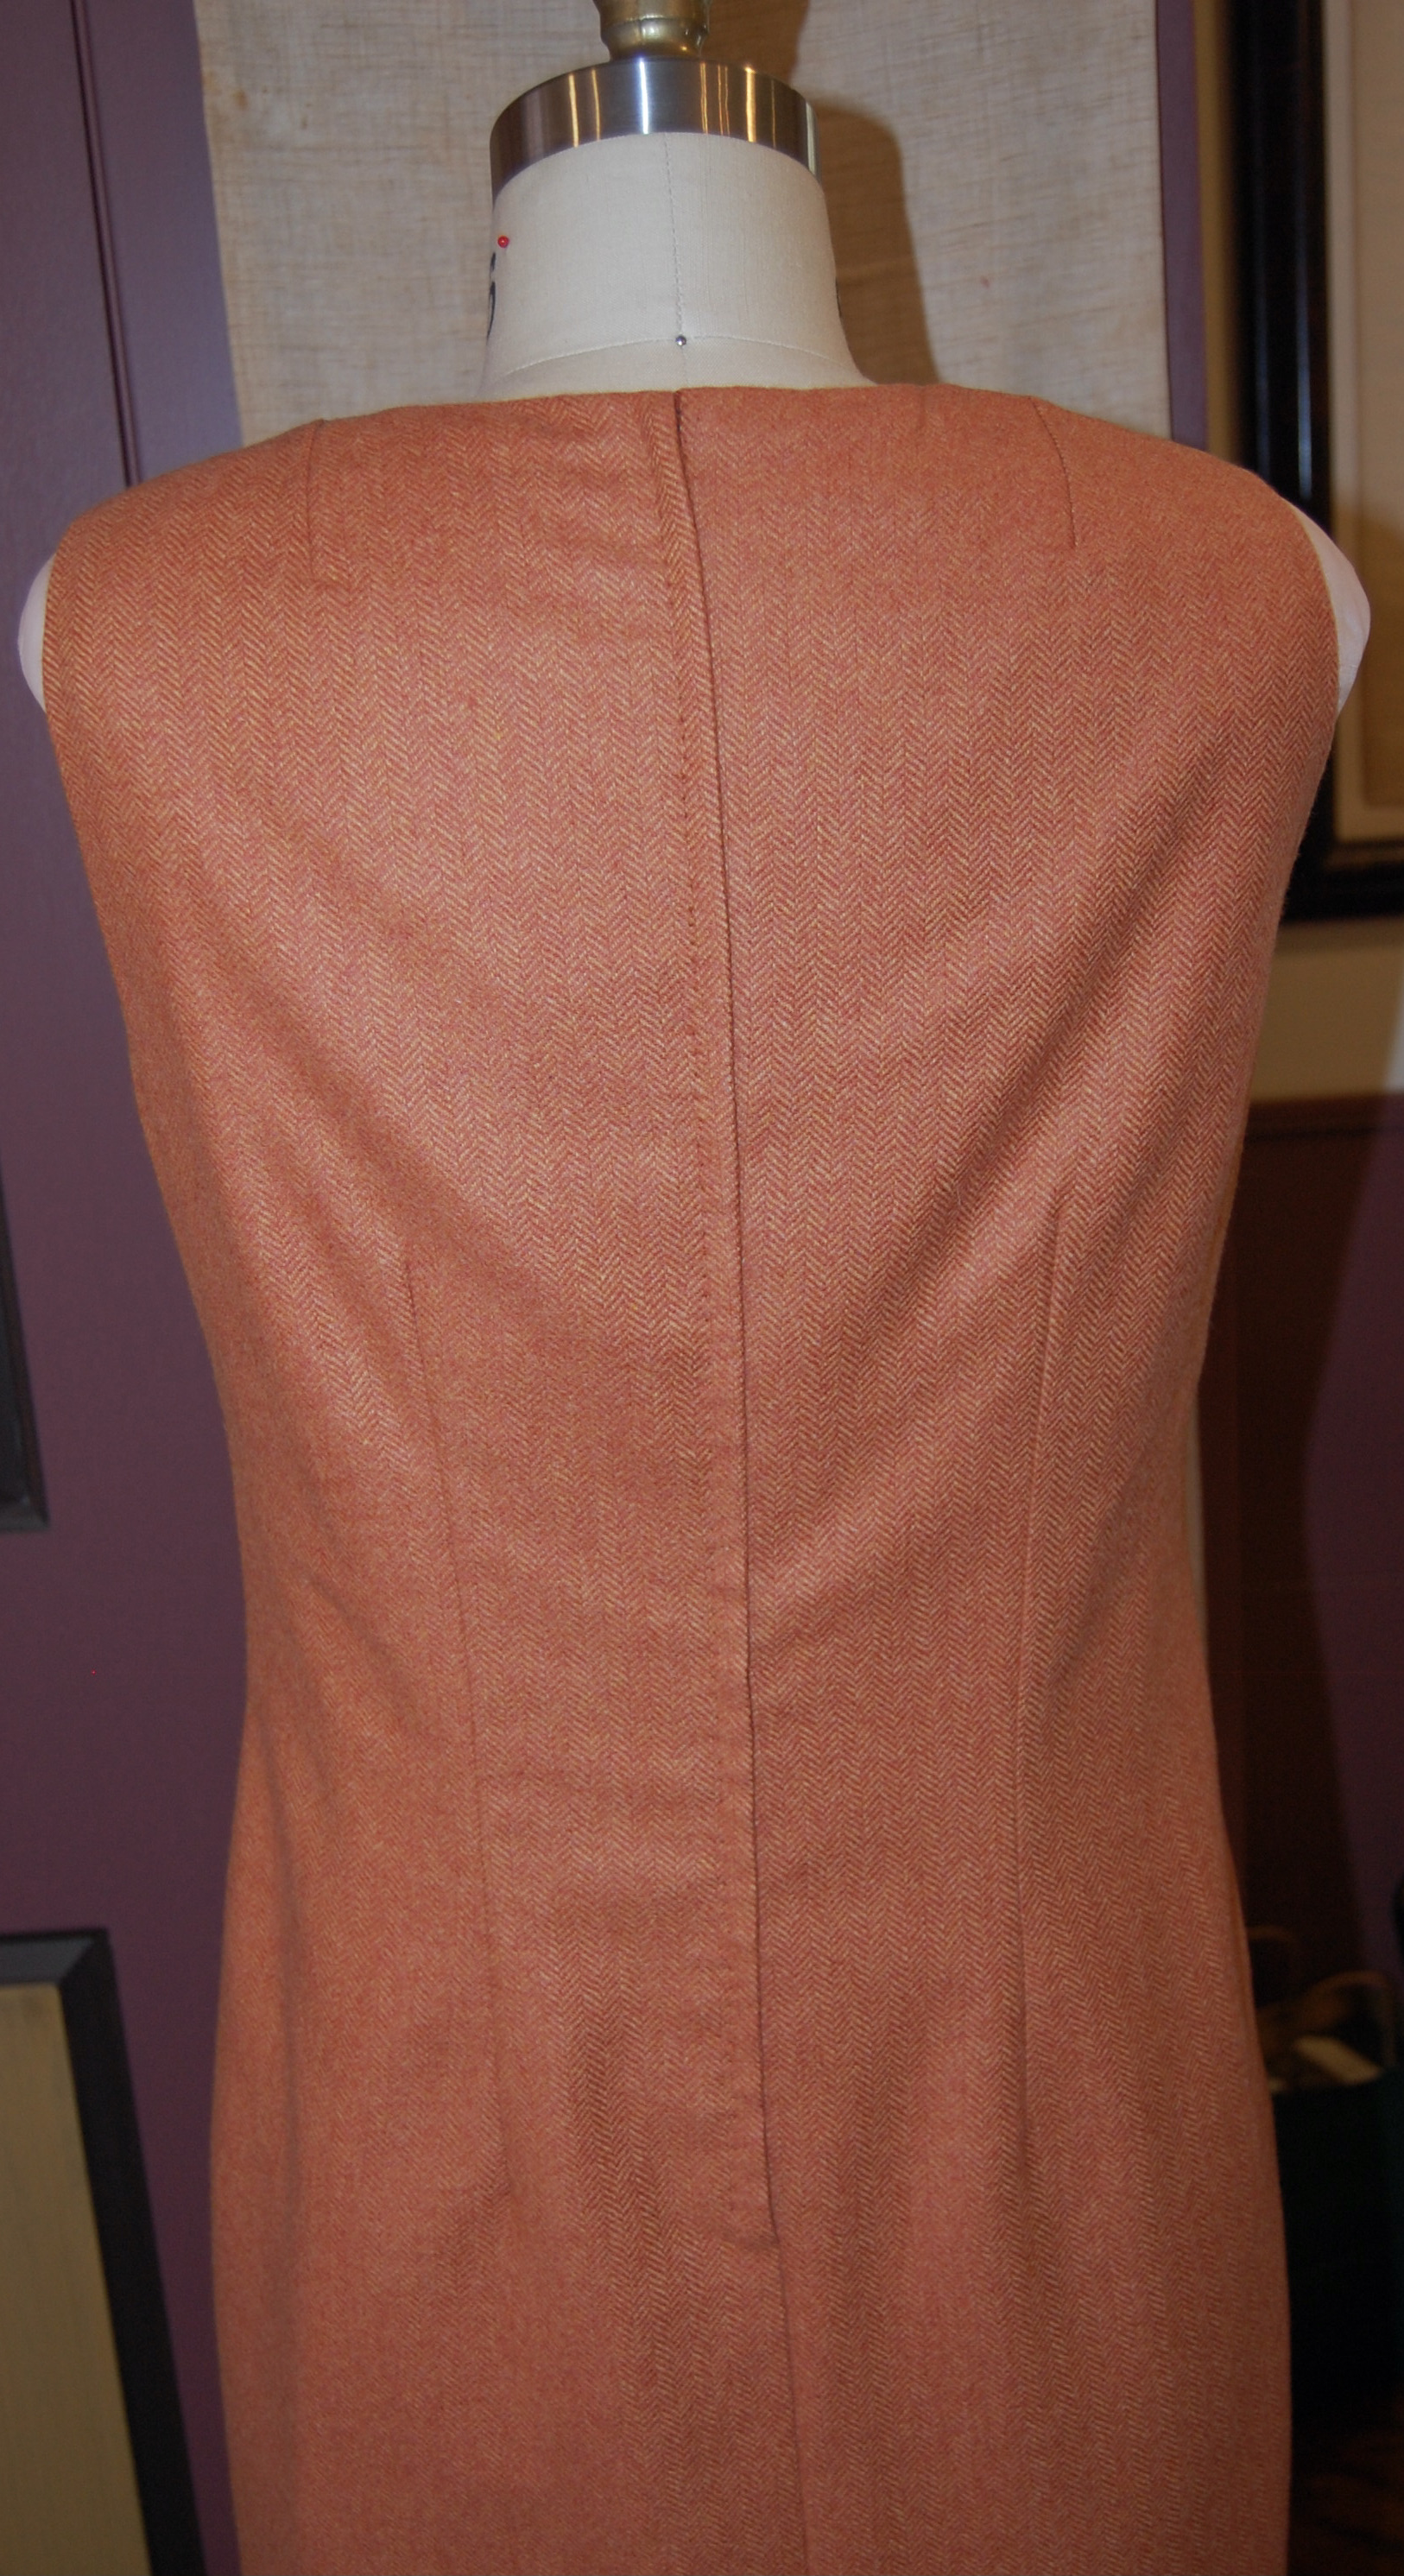
Making this sheath dress was very straightforward, its details identical to the sheath dress which preceded it:  lapped zipper, underlined with silk organza and lined with crepe de chine, under-stitched neckline and armscyes, and a real kick pleat.  

I chose this delicate crepe de chine for the lining. I purchased it from Emma One Sock, which has a beautiful assortment of silks suitable for linings.
Oh, how I love this kick pleat.

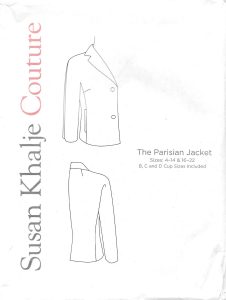
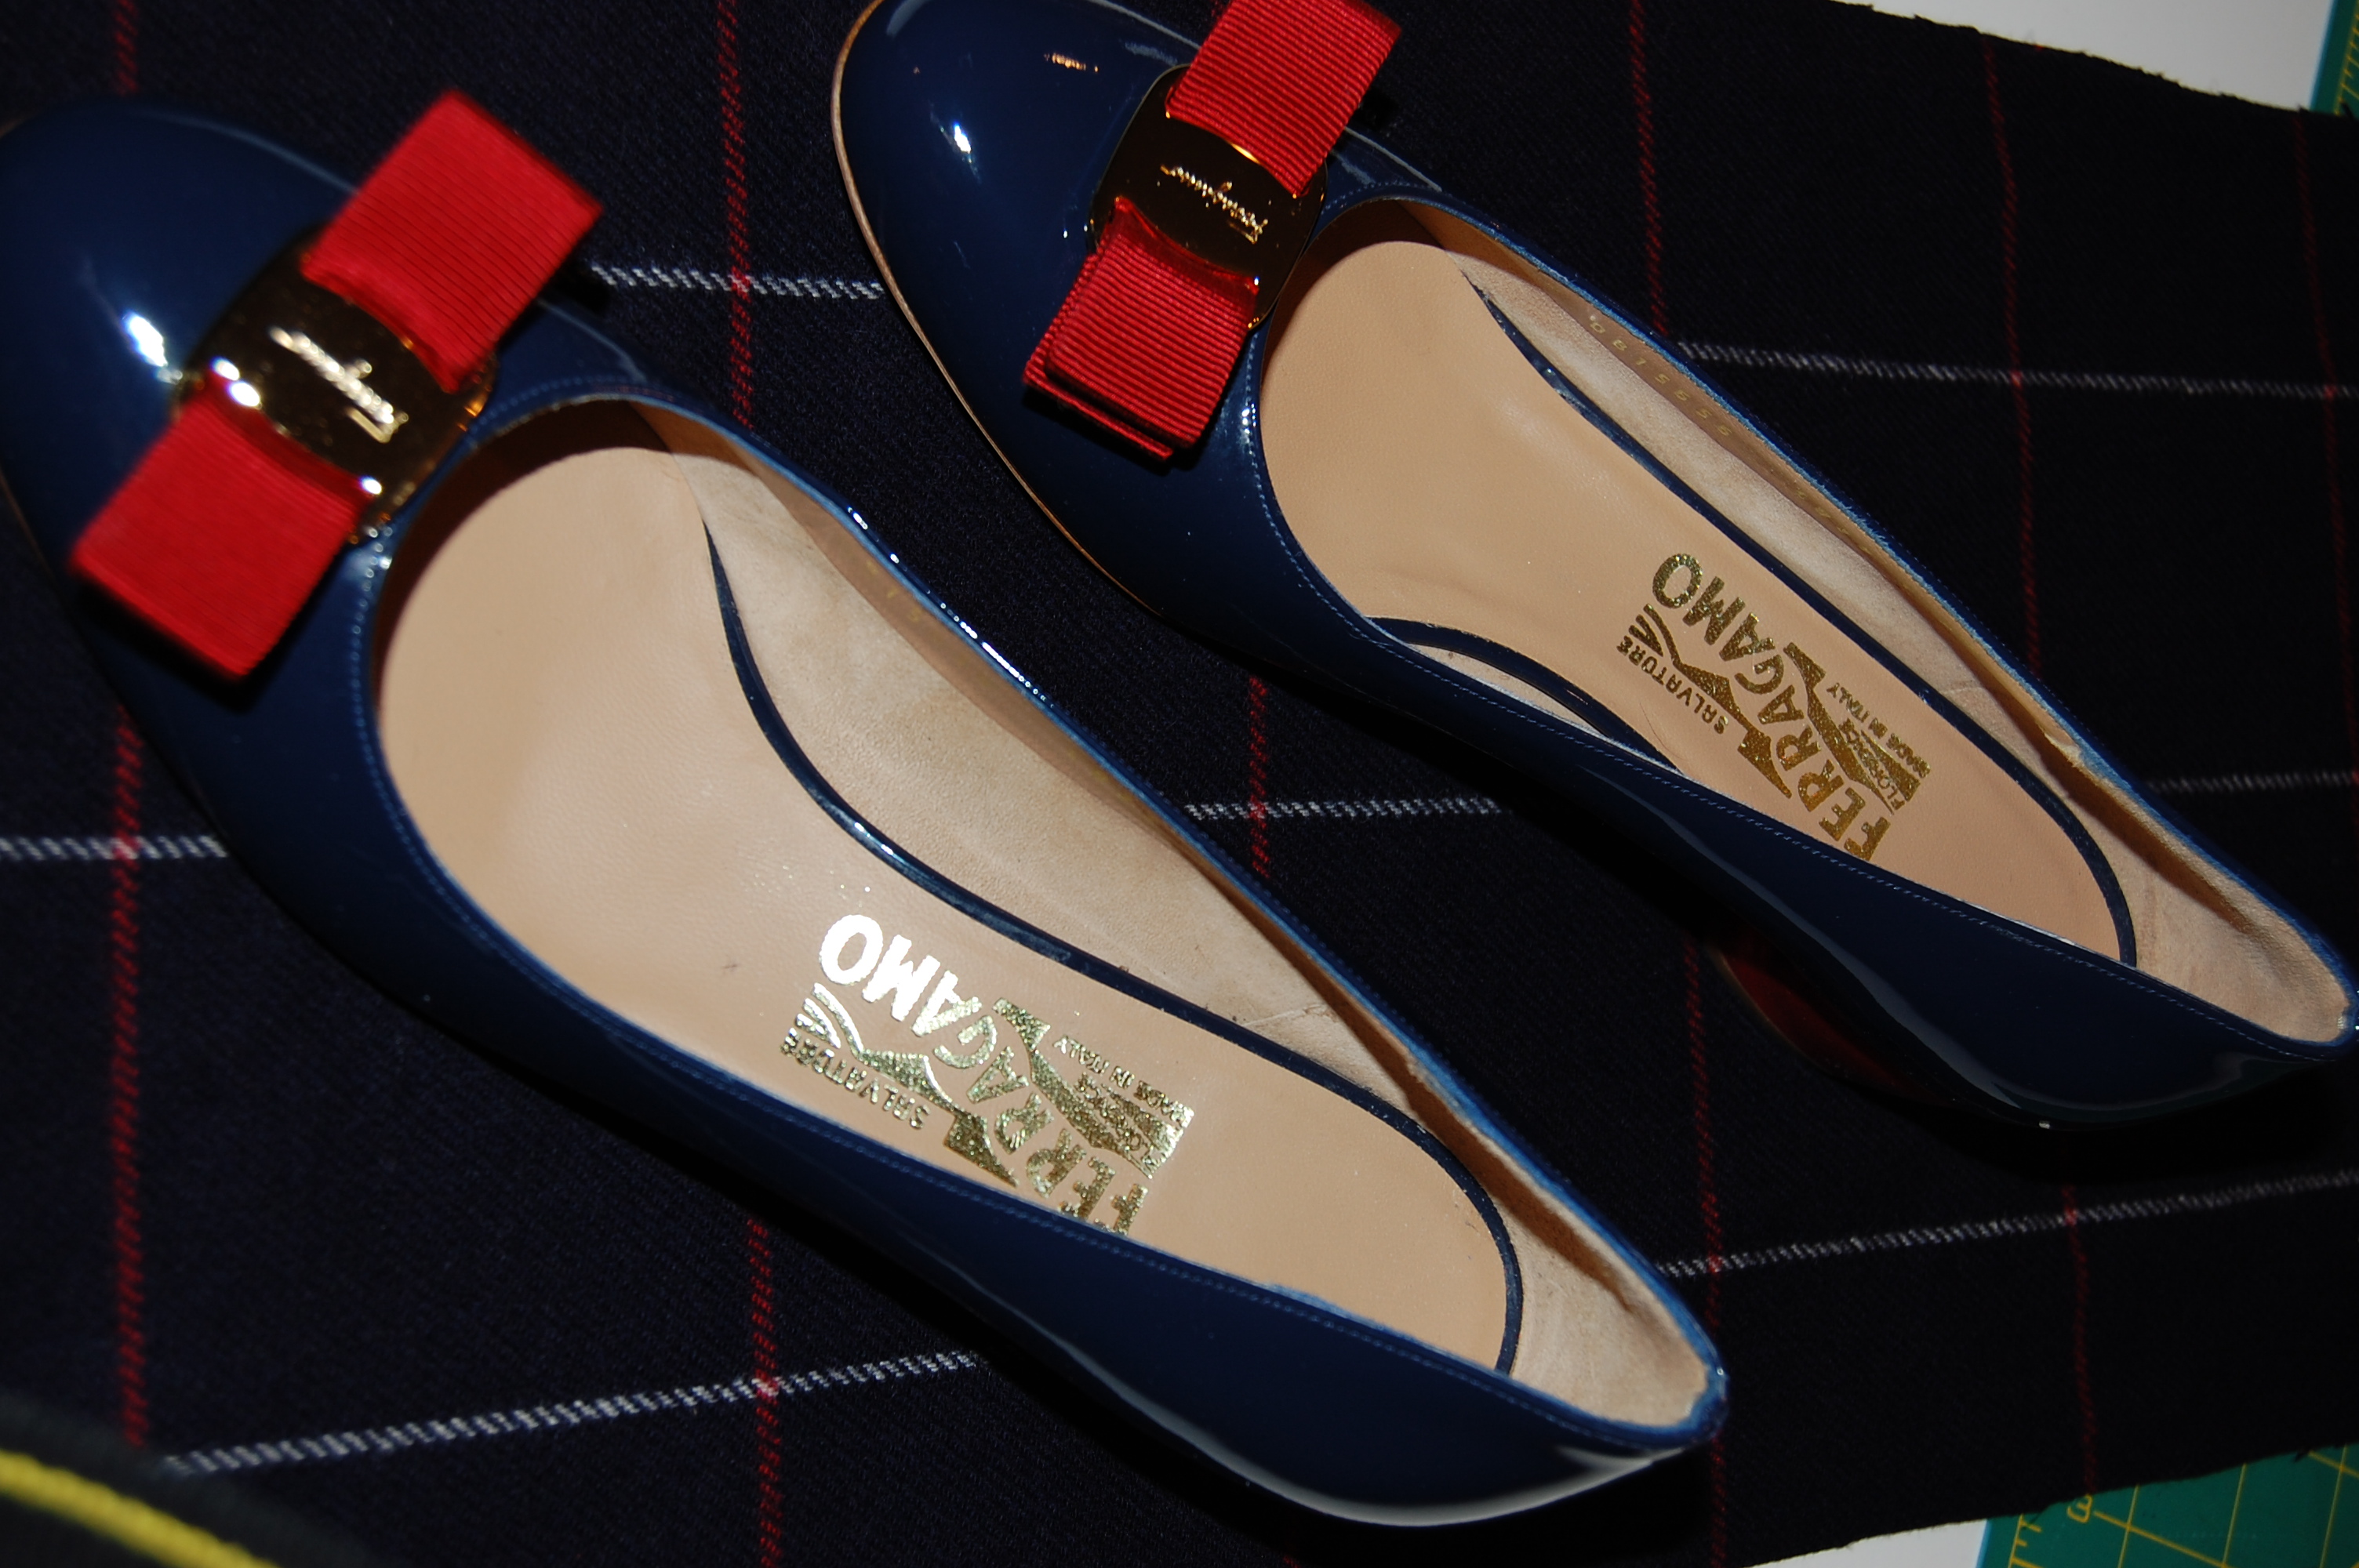
This jacket and skirt will be perfect for Fall – and I am delighted to have a dress to wear with my jacket which I completed two years ago.  

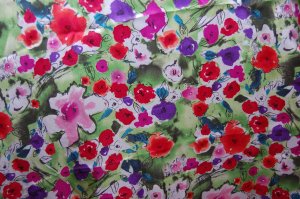
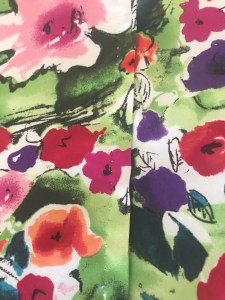
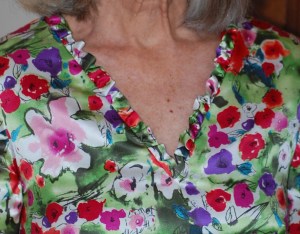
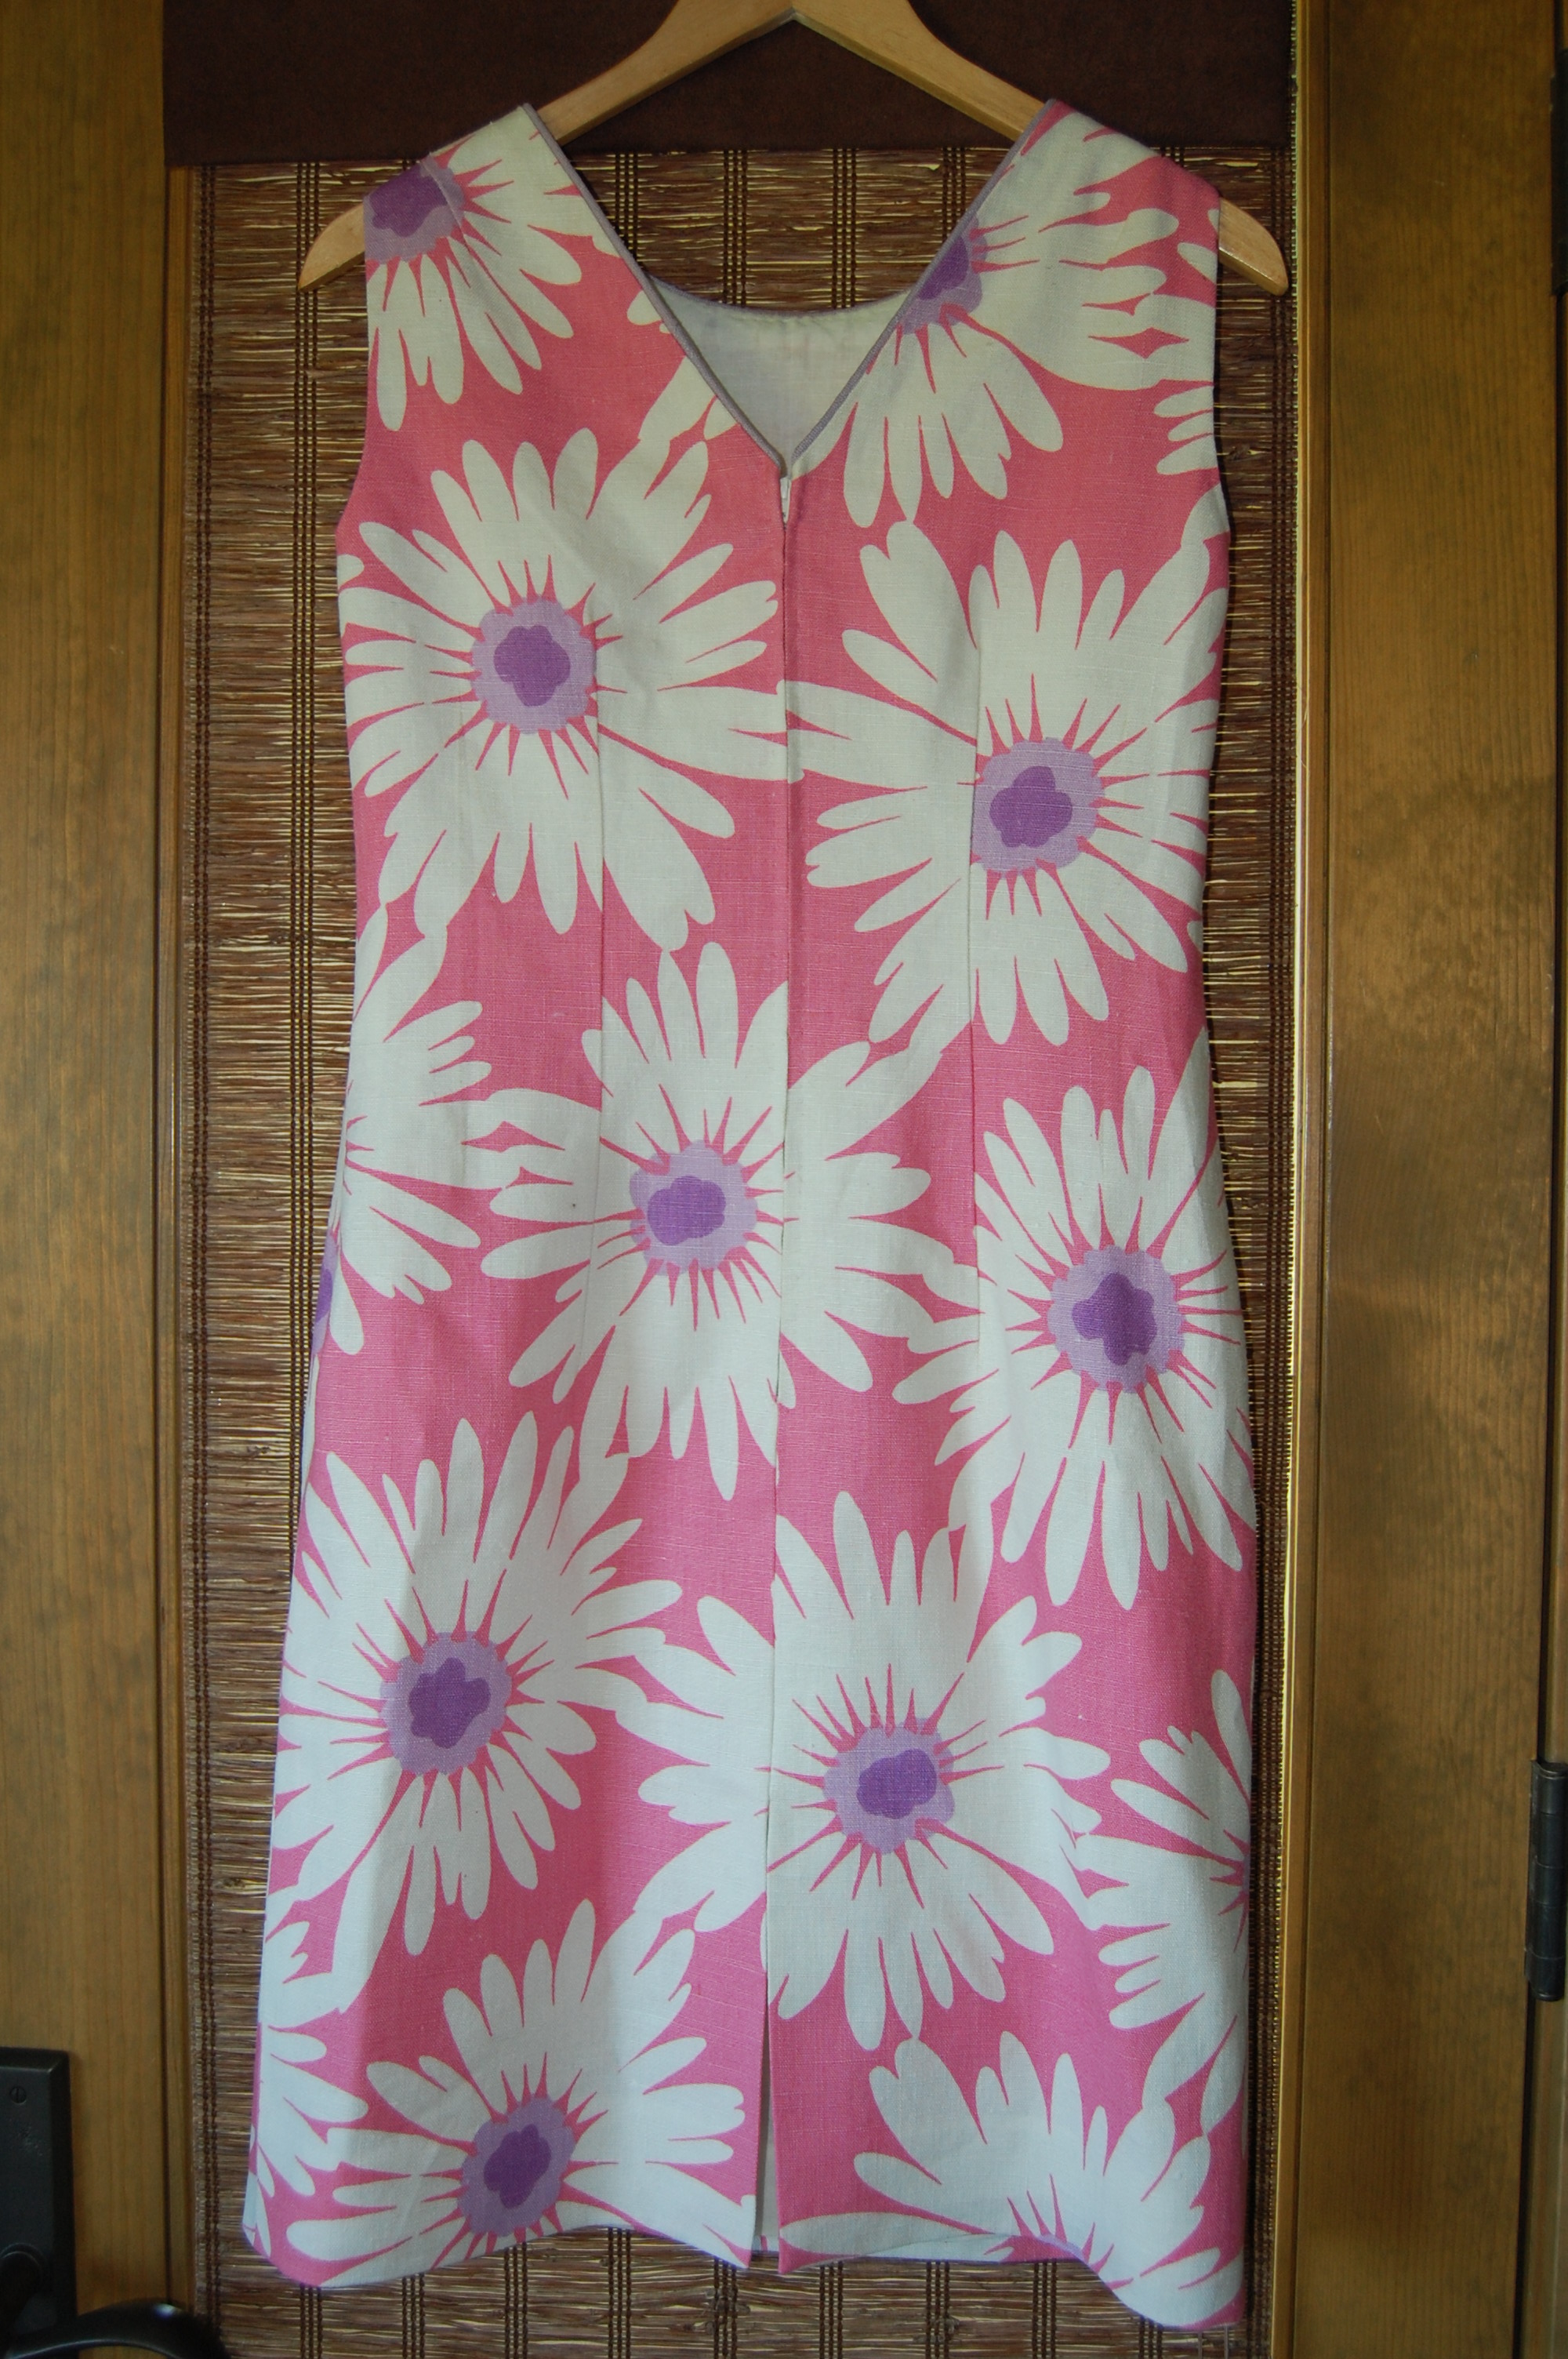
And now for those of you who like to see the sewing I do for my granddaughters, here are two more dresses which were definitely too early (although on time for Spring birthdays.)  Unseasonably cold Spring weather kept these dresses on their hangers apparently, but I do have pictures of them before they went on their journey across many, many miles to their final destination.

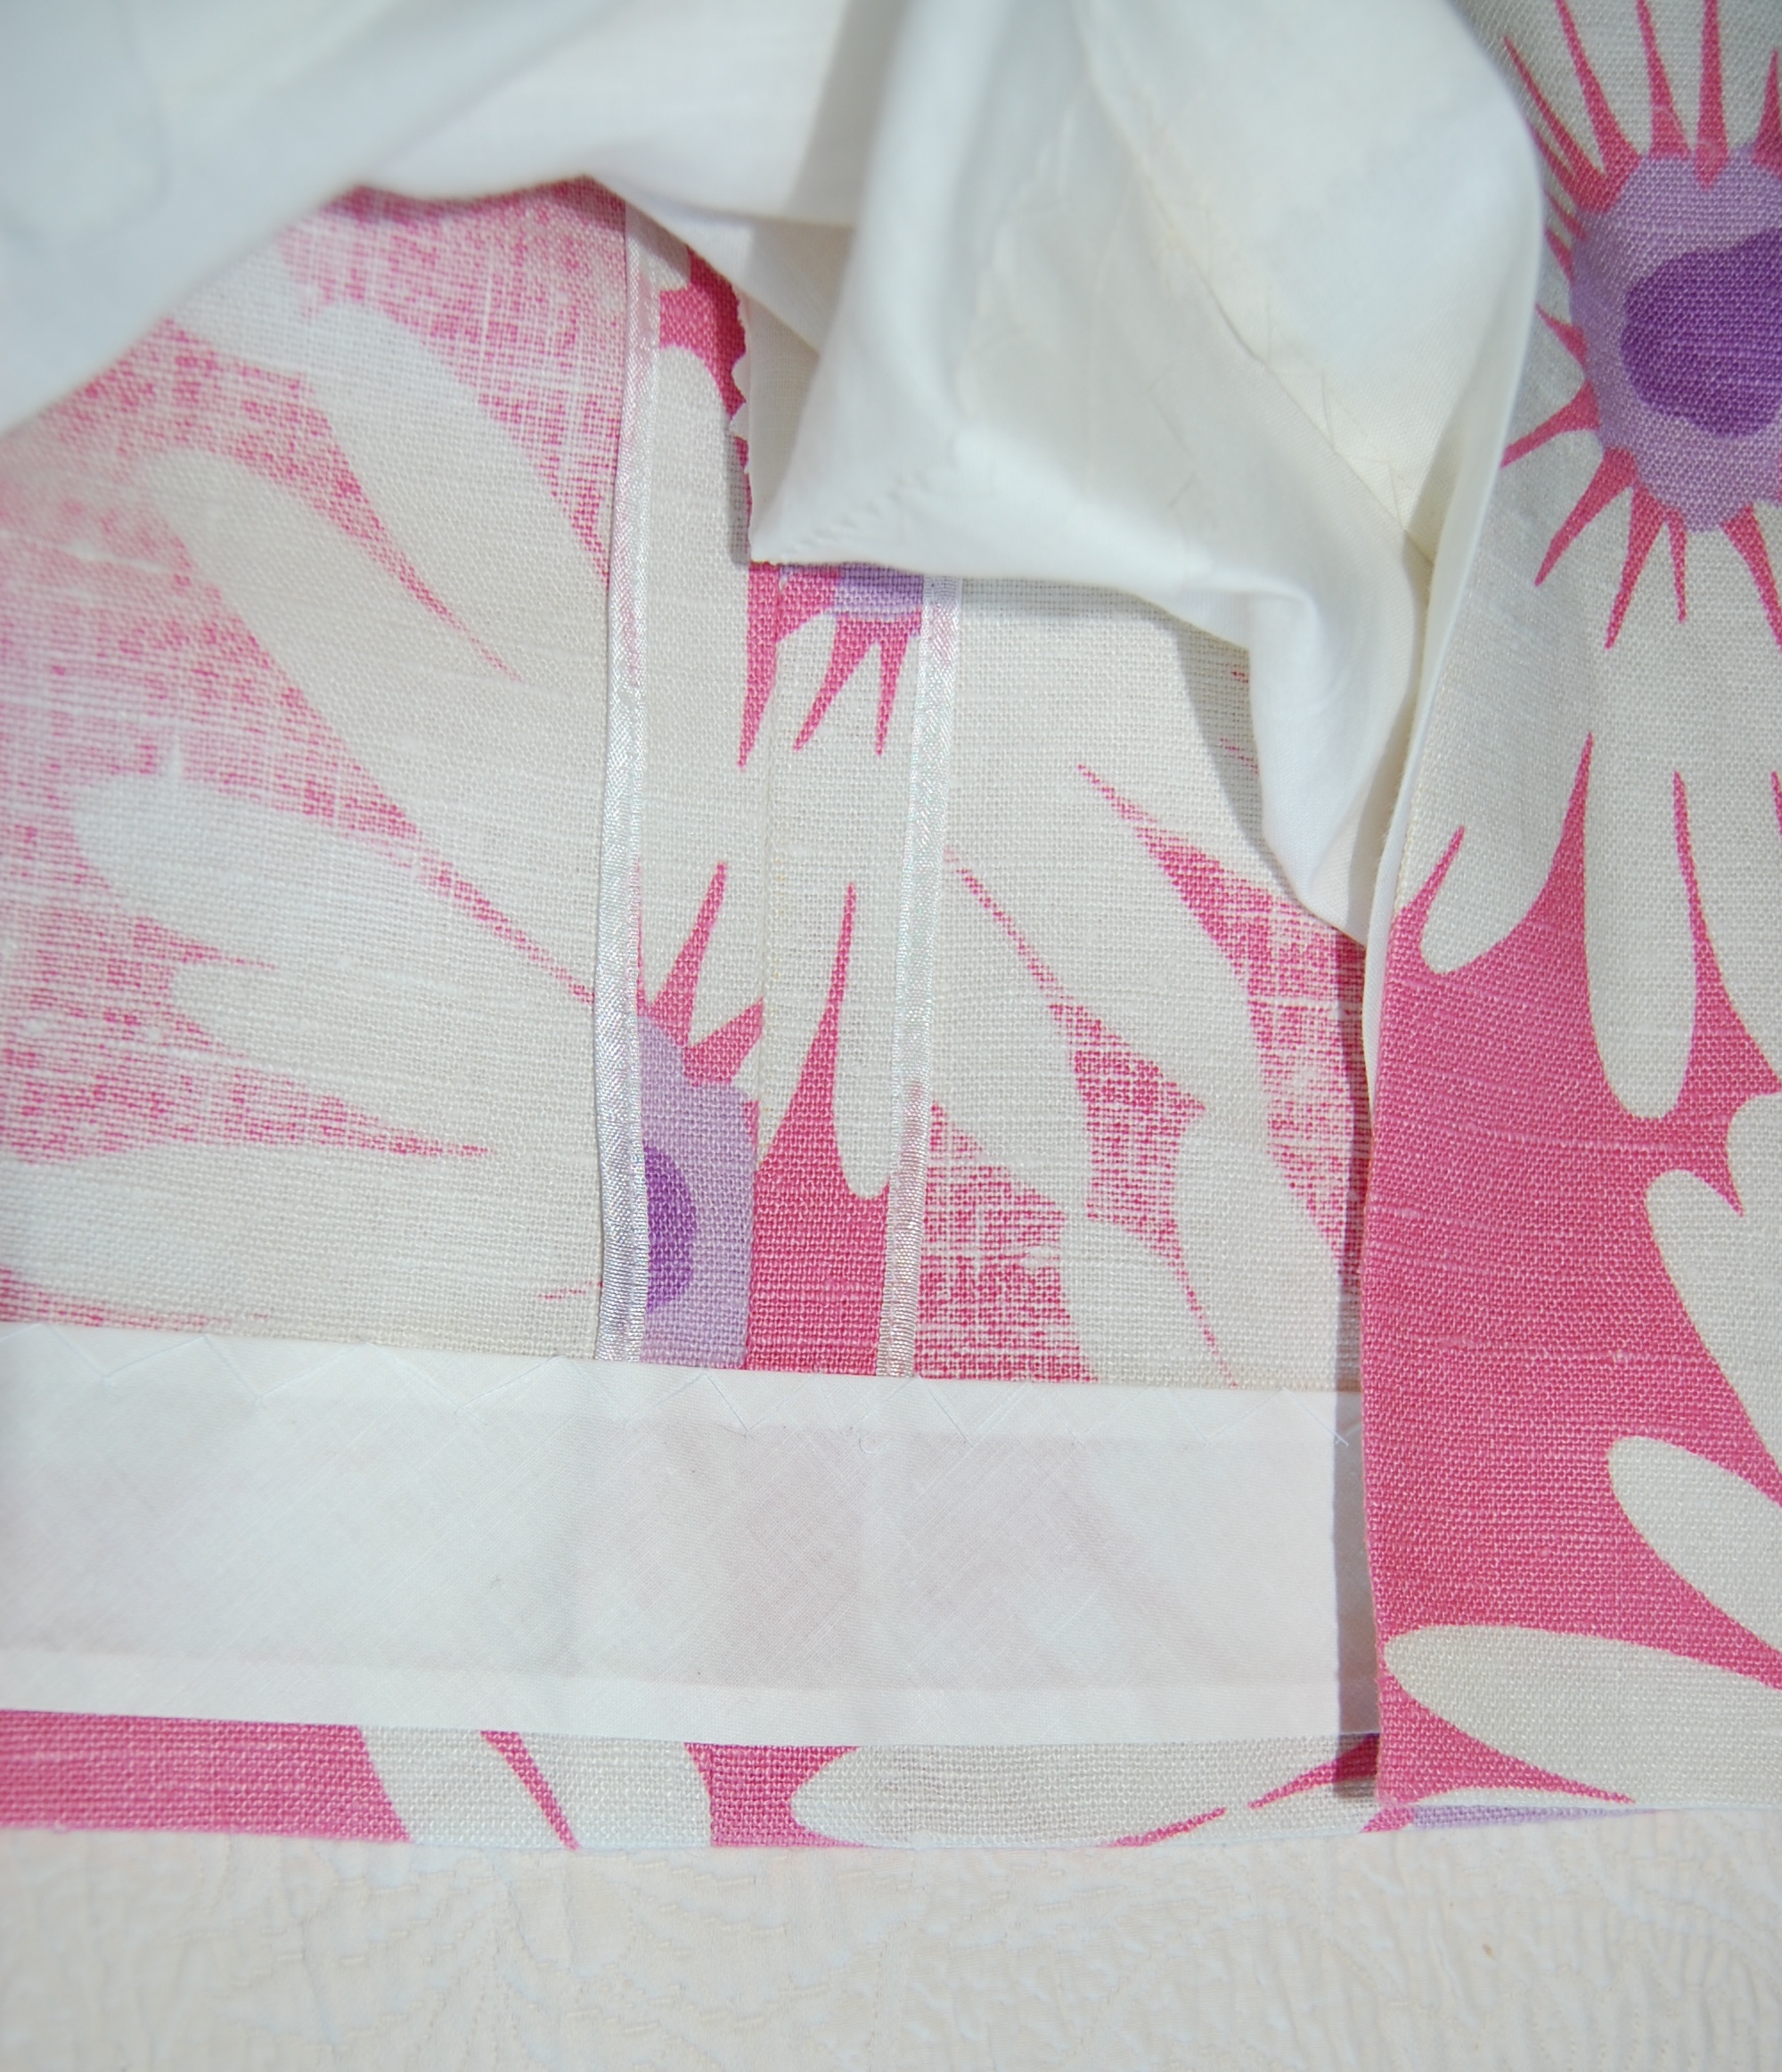
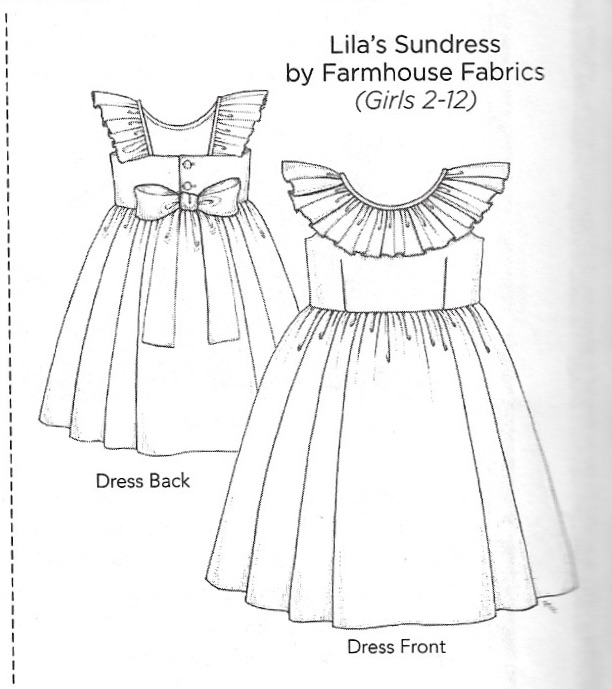
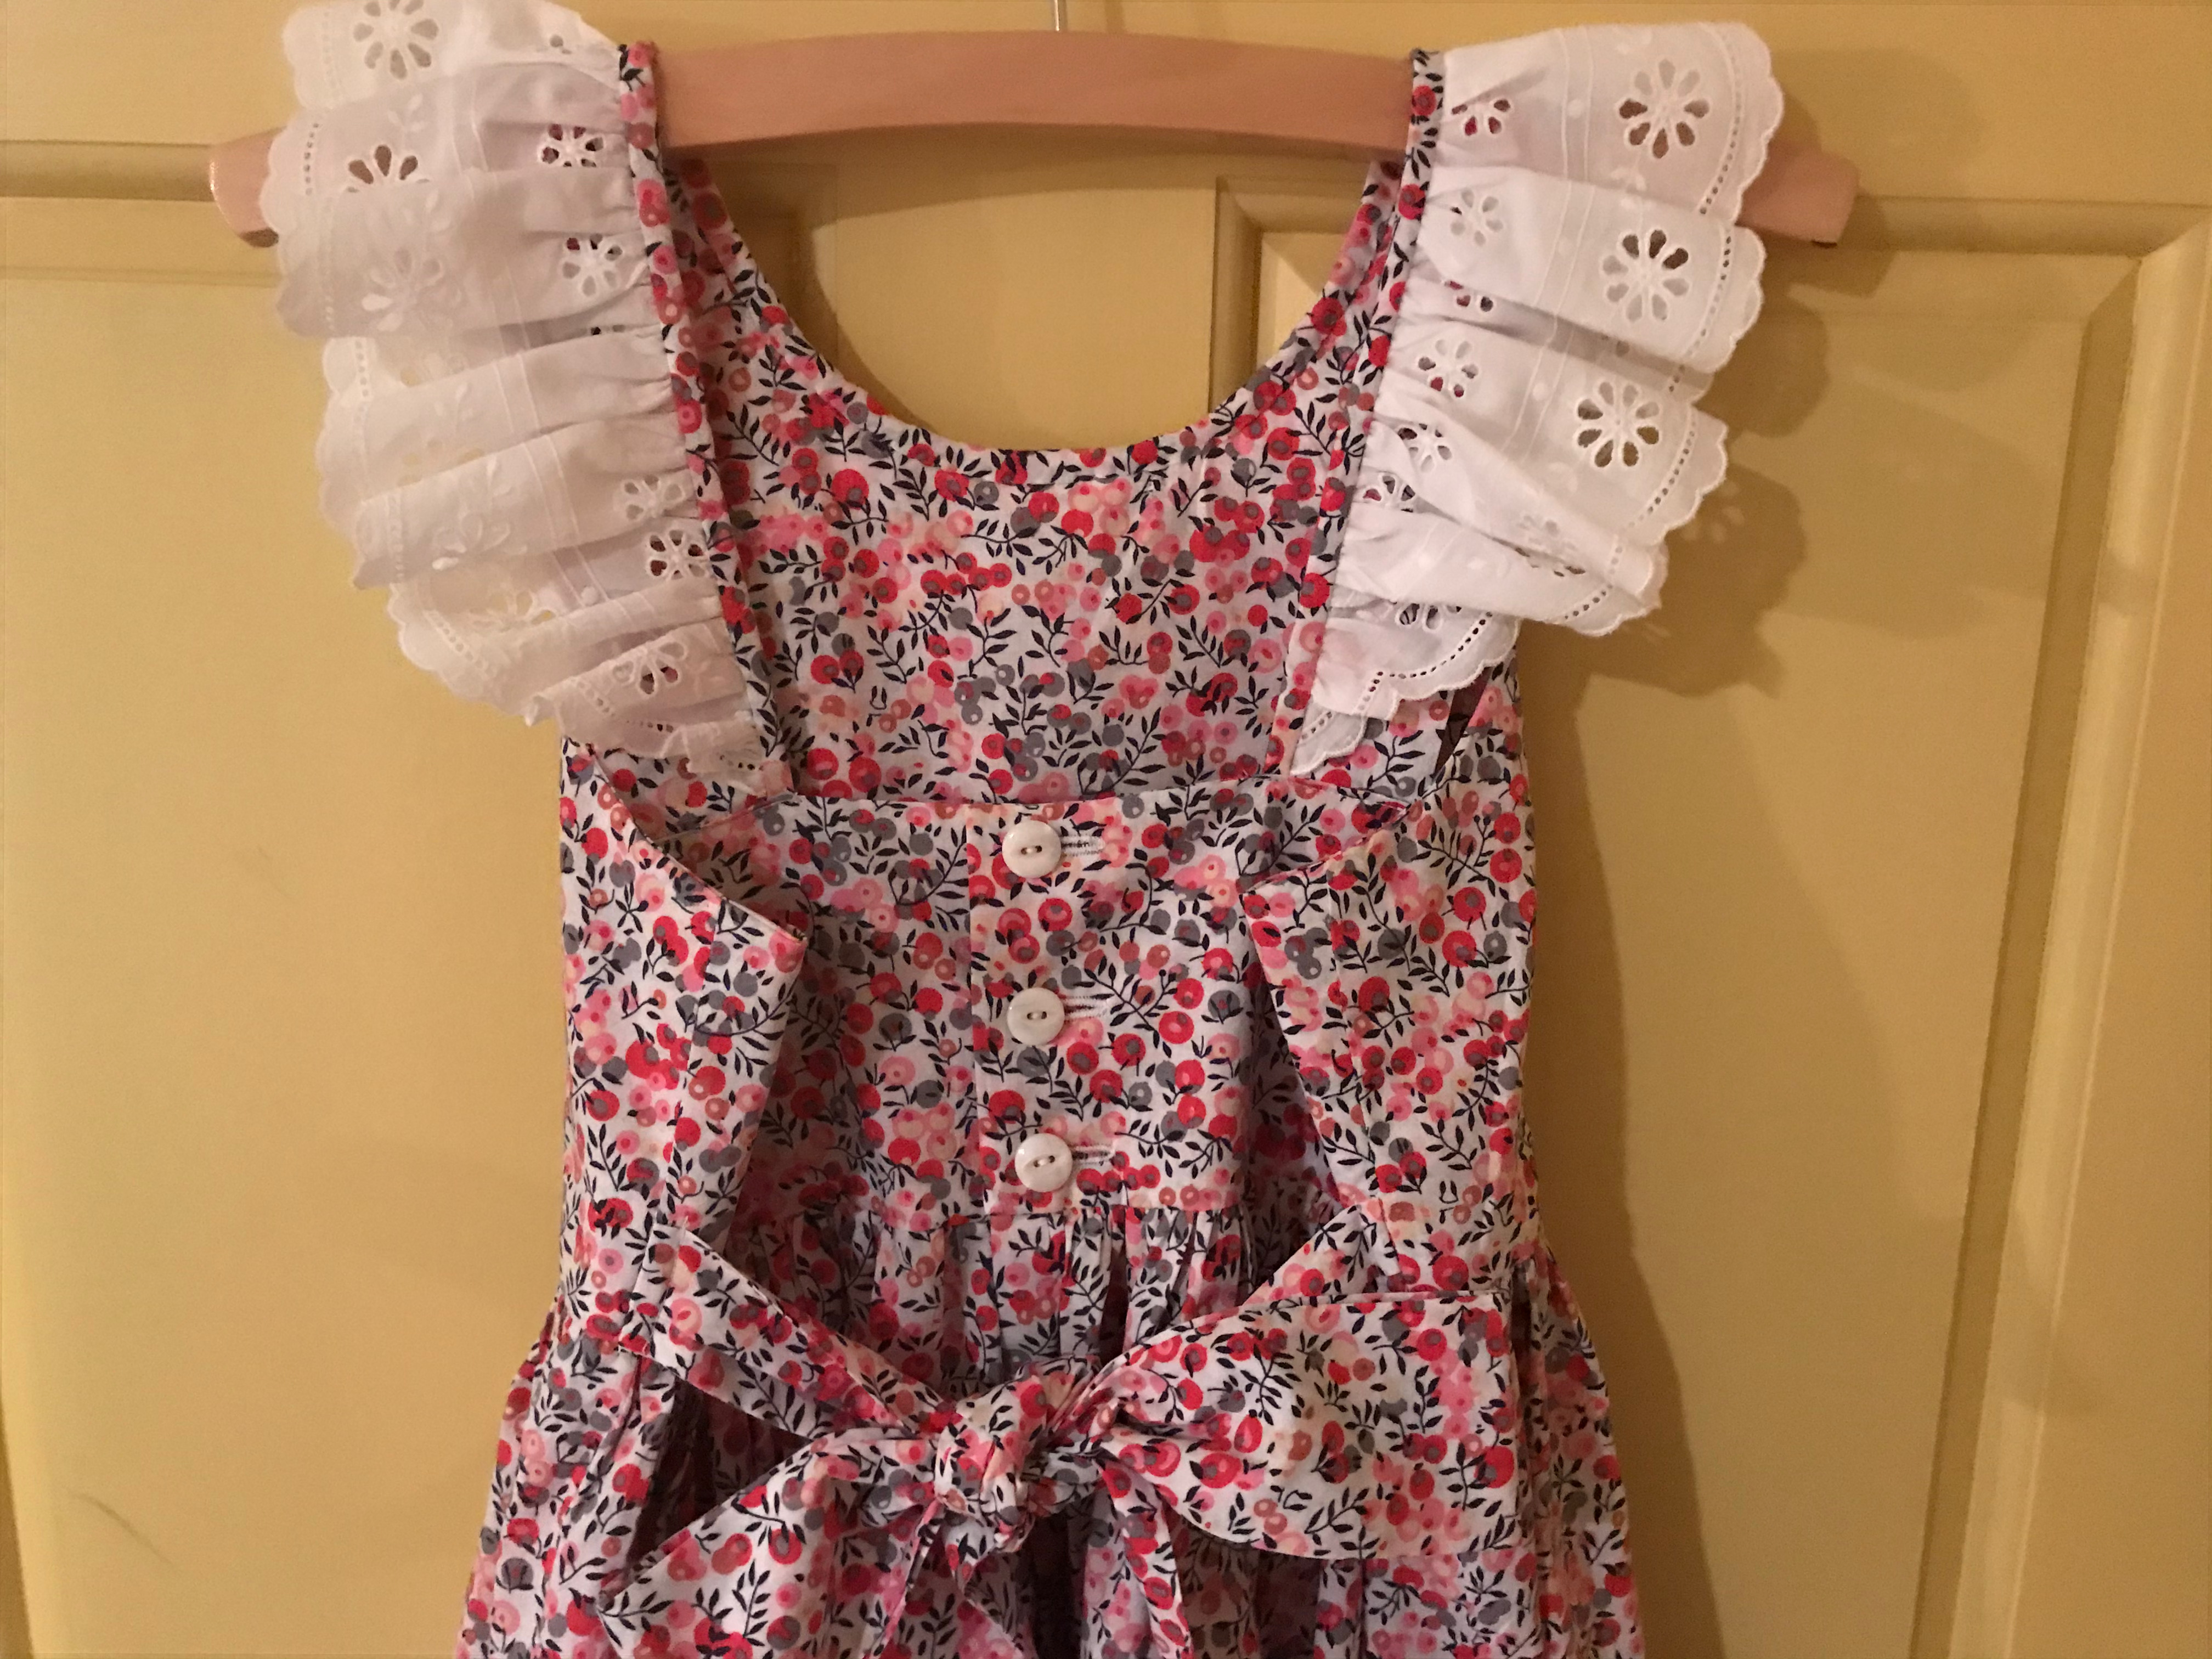
I found the fabric at Emma One Sock last Fall.  It looks and feels like Liberty Lawn but is not.  The bordered eyelet which I used for the collars is from Farmhouse Fabrics, as is the pattern, which I have used before.  (This is the last year for this pattern for my girls, as I used the [largest] size 12 for my very tall and slender eight-year-old!) 

This diagram helps to show the details of the pattern. Notice the narrow darts in the bodice, which gives such a nice degree of shaping. This is the type of detail found on well-engineered patterns, of which this is one.

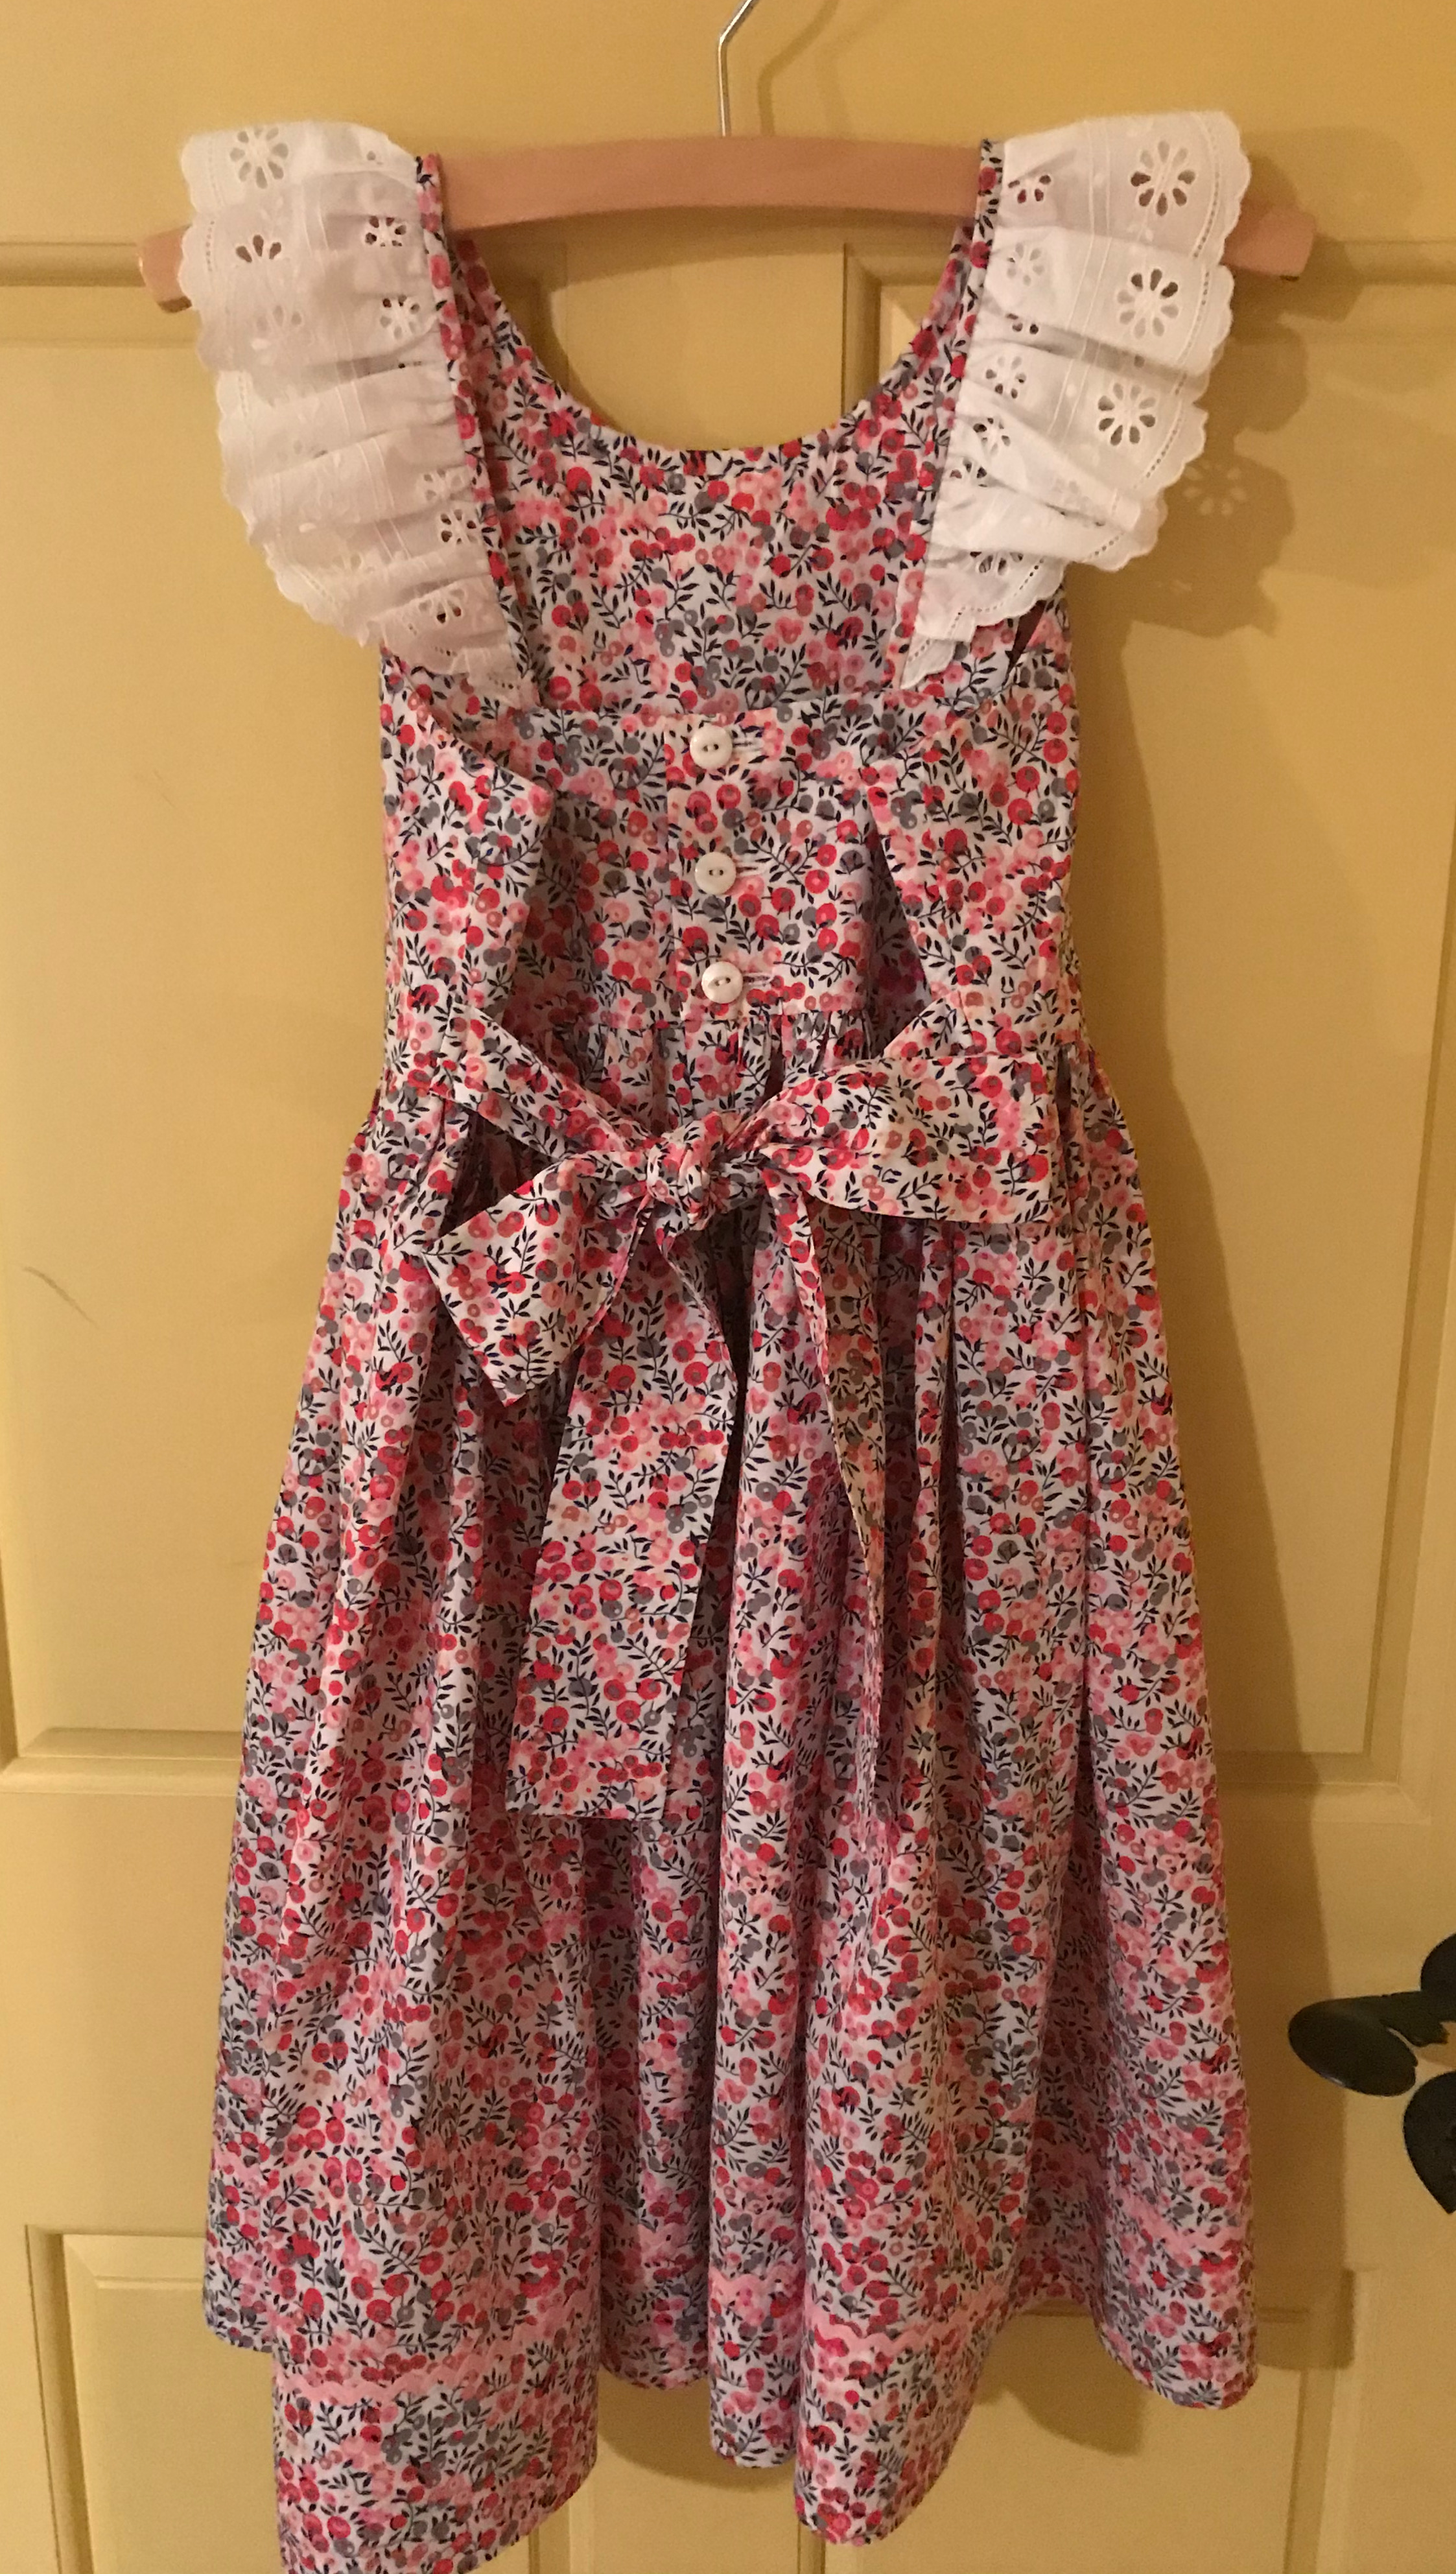
The buttons are vintage Lady Washington Pearls.  The pale pink rickrack is also vintage – and 100% cotton – which makes it lay beautifully flat, molding itself with the cotton fabric.   


Beautiful vintage buttons like these are a good match for this timeless pattern.
Such lovely eyelet and just the perfect weight for gathering into a collar.

So quickly these weeks turn into months and then into seasons! Whatever the season from whence you are reading this, I wish you dresses which are just right!  One of these days, mine will be, too.

13 Comments

Filed under Buttons - choosing the right ones, Chanel-type jackets, Christian Dior, classic French jacket, couture construction, Eyelet, Sewing for children, Sheath dresses, Uncategorized, vintage buttons, vintage Vogue patterns from the 1960s, woolens

A Dress That Was Meant to Be – in Vogue

Sometimes the sewing stars align to ensure success (and sometimes they don’t.)  But this story is a success story, although it played out differently than I originally planned.  

I wrote about this vintage Forstmann wool fabric in a previous post.

Having only 1.25 yards of this vintage wool restricted my options to either a simple sheath dress or a skirt.  I opted for the sheath, with all good intentions of using the princess-lined pattern I had recently used for a pink dress in vintage Linton wool.  In fact, one of the reasons I made the pink dress was to see if I would be able to successfully match plaids when I started on the red/green wool.  (The weave of the pink Linton has a plaid woven into it, which I knew would be helpful to me in determining the pattern’s useability for a multi-color plaid.)  Only one problem – when I laid out the pattern pieces on the Forstmann wool, I didn’t have enough fabric.  I should have realized that the 7-panel princess dress would take more fabric than I had – and this time there was no making it work.

SO – I had to find another pattern.  I have, over the years, made several sheath dresses using a newer Butterick pattern, but I really wanted to use a vintage pattern for this wool.  Now, I have a lot of vintage patterns in my collection – and I went through every single one looking for the right sheath dress.  At first I didn’t realize this pattern had the look I wanted.  

I had originally purchased this pattern for that gorgeous shawl collared coat.  But – BINGO – when I took another look, there was the perfect sheath looking right at me.  

Although the pattern was not dated, I knew it was from the early 1960s.  But of course, I thought it would be wonderful to know the year it first appeared.  A lengthy search through old Vogue Pattern Magazines proved to be successful – not only successful, but timely.  This pattern was included in the December 1962/January 1963 issue, and was the featured pattern for a Special Capsule Catalog included in the issue.  Not only that, the caption read: “110 IDEAS TO START THE NEW YEAR IN VOGUE.”  Yes, I thought, that’s what I want to do!  

What a glamorous look!
And here is the entry for this pattern in the capsule catalog.

Of course, starting with a pattern I had not before used meant I had to make a muslin (toile)  and fit it.  That little effort took two days.  But then I got started in earnest, cutting out the silk organza underlining and positioning it right where it needed to be on the fabric.

You will notice that this fabric has a center front, woven to provide a mirror image of the plaid on each side. Really a brilliant way to handle an uneven plaid.

There were two important considerations for placing my silk organza underlining “templates” on the plaid:  1) the orientation of the plaid vertically and 2) the correct placement of the hemline on the grid of the plaid and making this placement work with the position of the waistline and neckline.  

I thought the wider, darker part of each woven “block” on the plaid should be oriented to the bottom of the dress, which I believe is apparent above.  

I find, when working with plaid, it is very important to have the hemline determined before you cut out your fabric.  Visually it is more appealing if the hem does not cut a block of the plaid directly in half or, especially with smaller plaids, end right at the edge of a block.  I think it looks better if there is a bit of a “float” around the bottom of the dress to anchor the bottommost blocks. (Larger plaids have their own considerations. Look at the art on the pattern envelope above to observe this.)

The red “band” at the hemline serves as this “float.”

One of the design features of this dress is the kick pleat, which has its origin in the back seam starting at the bottom of the zipper.  I wasn’t sure how I was going to work the lining around this, but I also thought I could probably figure it out.

The instruction diagram shows the kick pleat quite well.
I angled the raw edges to finish the bottom edge of the seam.
Here is the finished kick pleat.

I loved that fact that this type of kick pleat made the perfect setting for a lapped zipper, shown below.  

The left side is pressed slightly to the middle to accommodate a lapped zipper.

You will notice this dress has two shaping darts on either side of the front panel, in addition to the bust darts.  The back has one shoulder dart and one shaping dart on either side.  

All these darts make for such a lovely fit. In addition, I used a trick I have learned from Susan Khalje. Instead of sewing the bust dart into the side seam, I allowed it to float free, stitching the seam above and below the dart. I did this for both the fashion fabric and the lining. Using this method provides more ease to the bust.

This photo shows what I did with the side seam at the bust dart.

I did lower the neckline by about ½ inch, and I cut the shoulders in by about an inch on either side.  These changes just seemed to look better on me, as determined by my muslin (toile).  

I lined the dress in black silk crepe de chine. (I find almost all my lining silk at Emma One Sock.)  When it came to the kick pleat, I found that a slanted seam below the end of the zipper was necessary to divide the lining between the two sides of the kick pleat. 

Black is so difficult to photograph, but hopefully the angle is apparent.

 I have no idea how to explain what I did to finish the lining in this area.  Just know that whatever I did – worked!  I ended up with no lumps and no restriction on the functionality of the pleat.  

How lovely to have a label for this vintage wool.

This dress was such a fun project.  I loved working with such a beautiful wool and such a beautiful pattern.  There will be more such sheath dresses in my future. 

I now would like to make a black jacket to wear with this dress; I do have a small amount of fabric remaining to use as trim in some way…

So now, how about you?  Have you started the new year in Vogue? I hope so!

52 Comments

Filed under couture construction, fabric labels, Hems, Linings, Mid-Century style, Pattern Art, Sheath dresses, Uncategorized, underlinings, Vintage fabric, vintage Vogue patterns from the 1960s, woolens

Almost September

What?  It is almost September and time to assess just exactly what I accomplished the last three months.  I have a friend whose late mother always said, “A flurry of activity at the end of the day does not make up for earlier unfocused, unproductive hours.”  I guess the same could be said for the waning days of a month or a season.  However, despite my nagging feeling that I have not accomplished much this summer, I have actually made some progress on my never-ending list.

For one thing, I tackled the alterations on my silk floral dress about which I wrote earlier in the summer.  I took out the hand-picked, lapped zipper to see if resetting it would give me enough ease over the tight bust and uncomfortable back.  There was much to take out and then put back in:  the lining, part of the neck ruffle, the understitching of the neck facing, and of course the entire zipper, in addition to reattaching the silk organza underlining back to the fashion fabric.  Thank goodness for the ample seam allowances which, in true couture fashion, enabled me to add just enough extra across the back.  Yes, it worked, and I am so much happier with the fit and the look of the dress.  Now I can wear it or hope to wear it! (Someday?)  I still think I will tweak the neckline a bit if I make this pattern again, but I do feel I salvaged this dress.

Well,  these are not the shoes I intend to wear with this dress. They happen to be the only heels I have with me this summer.

This dress fits so much better… I’m so happy I did not put off “fixing” this dress until … who knows when!

Several weeks of the summer were devoted to home decorative sewing, including pillows, cushions, and a tailored bed skirt.  I won’t bore you with that! But it was all very time-consuming, as those things tend to be.  More weeks were spent, happily, with welcoming  family for visits and extended stays and even some sewing for my granddaughters. I have never known two little girls who enjoy “playing dress-up” more than my two.  In a weak moment a couple of years ago I purchased this amazing vintage pattern of the Chiquita Banana Señorita’s dress in girls’ size 6-8.

The Chiquita Banana copyright for this costume is from 1947. The pattern is undated, but it is undoubtably from the 1950s.

I knew this was the summer to make these dresses, so I was off to the races on them.  I opted for rick rack rather than bias tape as the decorative trim. I ordered the fabric from Farmhouse Fabrics – a cotton/poly blend which was lovely, and in equally lovely colors.  As the dresses got heavier and heavier as I worked on them, I decided to eliminate the third row of ruffles.  As it turned out, the dresses were amply sized.  My 5-year-old granddaughter reassured me that it was so good to have dresses with room to grow.  And so, these fiesta dresses will serve them for at least a couple of years.

I wanted the girls to have different colored dresses, and I got creative with the colors, as I really think of these as “fiesta” dresses rather than Chiquita Banana. Lots of twirling ensued!

And then last week – yes the last full week of the month – I was finally able to focus on what will be my last make of Summer. Here is the pattern:

This pattern is dated 1957.

And here is the fabric:

I was fortunate to find this vintage piece of Moygashel linen several years ago. It is also from the 1950s.

And so my last minute flurry of sewing activity is well underway.  Happy September!

23 Comments

Filed under hand-sewn zippers, Moygashel linen, Ruffles, Sewing for children, sewing in silk, Sheath dresses, Uncategorized, Vintage fabric, vintage Vogue patterns from the 1950s

Unfinished Business

What happens when an unavoidable interruption takes you away from the depths of a sewing project for more than a couple weeks of time?  Well, if you are me, you forget exactly where you were in the process.  And, when you finally get back to work on it, you assume, incorrectly, certain fitting steps have already happened.  Recipe for disaster?  Well, not quite that bad, because this dress can be saved.  It is just going to take some time.

The dress in question is the one for which I used this colorful floral silk.

Although I was so certain in May I would finish this dress before we departed our home on the East Coast (USA) for our Summer home in Wyoming, it did not happen.  So I brought it with me to finish.  When I finally picked it up again, I needed to reacquaint myself with all the steps yet to be completed.  I had the hand-picked lapped zipper sewn and the sleeves inserted.

I love a hand-picked lapped zipper…

I was working on the narrow ruffle I had decided to add to the V-neck edge.  I consider this to be the focal point of the dress (in addition to the fabric).

I used the same vintage pattern for this dress as I did for a blue silk dress late in 2019. This fabric, to me, was begging for a narrow neck ruffle.

As luck would have it, the most recent issue of Threads Magazine included an article by Susan Khalje on Couture Gathering.  Now, I have done a lot of gathering of fabric in my life, but this article is illuminating in all the tips it offers for an excellent result.  It could not have been more timely.  As it turns out, there is lot more to gathering than I ever considered.

Among the concepts covered in the article are:  gathering ratio, fabric grain, underlining, stitch length, preparation of the piece to be ruffled, forming the gathers and attaching the gathered fabric to the body of the item.  As with so much of couture sewing, each step builds on the one before it.

Three of the tips in the article, so helpful to me in completing this detail, were:  1) cutting the piece to be gathered much wider than I would have thought was necessary.  This gives one much more control than with a narrower strip.  2) using three lines of gathering rather than the customary two, and 3) once the gathers are formed, using an iron to set them in place, stopping just short of pressing the ruffle.

I decided on a 5/8″ wide ruffle. I cut my piece to be gathered 5″ wide, folded to 2.5″. I used three rows of gathering stitches.

For those of you with subscriptions to Threads Magazine, I highly recommend this Essential Techniques article.  It has forever changed the way I will do gathering/ruffles.  And although not all features in Threads are as useful, it is offerings like this which make me a fan of this sewing magazine.  (These are my opinions;  I have no relationship with Threads.)

Well, back to where I left off.  After picking up work on this dress again, I proceeded to go through all the steps necessary to complete it.  When I thought this dress was finally finished, I put it on to take pictures, and to my surprise, it did not fit correctly.  It pulls across the bust and forms drag lines on the V-neck.  Ugh.

The pulling across the bust and at the V-neck is clearly noticeable in this photo.

I can only guess I thought I had tried it on for fit after the zipper was basted, but I must not have done that.  Unknowingly, I proceeded with the finishing of the interior – the facing of the V-neck, the hem, and the insertion of a green crepe de chine lining.

Normally with couture sewing, neck facings are eliminated and the lining is brought right up to the neck edge and then understitched to secure it. However, with a V-neck, a facing is necessary. I then cut the lining about 3/4″ below the neck edge and fell-stitched it into place.

I believe removing the zipper and taking some of the center back seam allowance to add to the width of the back will correct this glaring mis-fit. This is not a dress which I will have occasion to wear  this summer – so do I dig in and make the corrections now, or do I wait?  I have quite a bit in my summer sewing queue, and perhaps a tried and true project like a blouse will put me in a better frame of mind.  Regardless, this “unfinished business” will one day be finished, hopefully successfully.


16 Comments

Filed under couture construction, hand-sewn zippers, Linings, Ruffles, Sheath dresses, silk, vintage Vogue patterns from the 1960s

Dressmaking in 2020 and Beyond

Every January when I sit down to do some planning for the new year at hand, I usually start by doing three things:

  • Looking at what I accomplished on my list from the past year, and moving those unfinished items onto my new list,
  • Going through my fabrics and deciding what looks inspiring – or in desperate need of action – and
  • Assessing what my wardrobe needs will be for the year.

This year, I am adding #4 to that list:  What patterns do I want to try for the first time, and which ones do I want to make again.

Number 1 looks like this:

This is my list for 2019, perhaps the third iteration of it. Things and priorities change during the year. My list for 2020 is still being planned!

Number 2 is shocking to me.  I have so many beautiful fabrics.  I could easily just concentrate on what I have stored away and be totally occupied with those for not just this year, but for several years to come.  However, I know from experience that I will buy new fabrics (and already have since January 1!), and I will be glad I did.  So there.  I am admitting I am a hopeless case when it comes to fabric.  There are too many dreams tied up in some fabrics for me to resist their purchase.  I always just hope that the fabrics used from my existing collection slightly outnumber the new ones I buy.  Usually this is the case.  Hopefully it will be this year.

Number 3 is not always apparent.  I do know I will need some dressier things for Springtime events.  I do know my summer will be very casual.  And usually Fall and early Winter require some dressier apparel.  I have a big birthday (gulp!) coming up this year, and I think it deserves something special, but I’m not sure what that is yet.  But I would be willing to bet it will demand a new dress, at the least.

And my new Number 4 – now here is a category that really inspires me.  I have so many amazing vintage patterns to try, but I also have so many I have made once (or more) and love so much that I never tire of making them.   I believe my patterns will guide my sewing this year to a large degree.

Here are a few I have never used, but have hopes for in 2020:

This pattern is out of print, but I don’t really consider it vintage. However, it looks like a great shirtwaist dress pattern. I especially like Views A and D. My hope/plan is to make at least two, and perhaps three, shirtwaist dresses this year. In fact, View A is my current project.

I love everything about the design of this dress: it has a two-piece look, but the skirt is attached to a camisole under the over-bodice. I love the buttoned back and the front seaming detail. I particularly like the long-sleeved version.

Here are the back views of this dress.

Here is another take on a princess-lined dress, with jacket. It is not suitable for striped, plaid or diagonal fabrics, which eliminates quite a few of my choices, but I would love to try it. Even better would be to make a dress and jacket…

The line drawings on the envelope back show the seaming details and dart placement. It looks really, really lovely.

I came across a piece of deep pink cashmere last year, and if I decide to make a coat I think it will be View B of this classic coat pattern.

And here a few patterns I have used and want to use again.  Most have been fitted correctly (although I always seem to tweak one or two little things) – and most are versatile and classic and have simple, but elegant, lines to them.

I will definitely be making this pattern again this year at least once.

I know for certain I will be making the short version of this dress again. I have a dress planned for Spring using it.  My first use of this pattern resulted in the dress below,  selected for inclusion in the Gallery of A Stylish Guide to Classic Sewing, by Sarah Gunn and Julie Starr.

I would love to make another bow blouse this year. This classic look from 1957 is about as lovely a bow blouse as one can find.

A bow blouse would be the perfect pairing with another Parisian Jacket.  A silk blouse with a Parisian Jacket made from vintage Moygashel linen?

Finally, ever since I used this pattern years ago, I have wanted to make it again, in a short-sleeved version.  I am hoping this will be the year!

I think I could make either view of this dress over and over and not get tired of it.

Much has been said this year about the start of a new decade.  It does seem prescient, doesn’t it?  Full of hope and anticipation, the new decade will, nevertheless, do what it will.  Dressmaking will be just a part of the new  continuum, but my days and months and years will be measured in no small part by what I put on my list, and then the placement of those happy checkmarks when I have accomplished that which I set out to do.

Welcome 2020!  No doubt you will be gone in a flash, so may we all make the most of your wondrous days, the dressmaking ones and all the others, too.

19 Comments

Filed under Blouse patterns from the 1950's, Coats, Day dresses, Uncategorized, vintage Vogue patterns from the 1950s, vintage Vogue patterns from the 1960s

The Never-Ending Winter

One advantage to this never-ending Winter we are having in the Northeastern part of the United States is the focus – and extra time – it has given me in finishing my Winter projects. After completing my recent Classic French Jacket, I did some “birthday dress” sewing for my granddaughters (still to be shared) and made two baby gifts, and only then did I come back to making a matching sheath dress for that jacket.

I had thought long about how this dress should be constructed, and not having the advantage of taking a class in such a project, I knew I would have to figure it out on my own. I decided I would combine classic couture construction with the techniques used for making a classic French jacket.

First, I underlined the three pieces of the dress (front and two back panels) with black silk organza, and I anchored all the darts with a catch-stitch. (I always go back to that sound advice from Susan Khalje – couture is about control – and I know how this extra step helps to keep everything in its rightful place.)

Then I machine quilted the two back panels and the dress front just as I would quilt the separate pieces of a French jacket. I ended the quilting about two inches from the tops and bottoms of the pieces and tied off each line of quilting inside between the two layers. I figured the quilting did not need to be as closely placed as it is with a French jacket, so my quilting lines are about 2 inches apart. This following photo shows the quilted channels on the inside (they are virtually invisible on the fashion fabric):

The three pieces were sewn together as a Jacket would be sewn with the edges of the lining loose and then finished by hand with a fell stitch. At this point I felt fairly confident that the dress was going together as I had hoped. And yes, there is a lot of handwork involved! Next I inserted the long back zipper by hand and then finished the neckline and lining with a fell stitch.

Because I wanted to apply a length of trim above the bust – to match the trim placement on my jacket – I did the armholes last, as the trim needed to be attached before they were finished.


Finally, the hem. The length had to be precise, as there will be no lengthening nor shortening of this baby! The final step was to sew the hemline trim on by hand. I delineated the back vent with the trim to give it some extra interest. Also, although it is not visible here, I angled the edges of the vent slightly to the inside so that when the dress is on, the vent will not gape, but rather hang straight. This is another one of those lovely couture tricks I learned from Susan Khalje!

I must say this dress is a dream to wear, with that quilted silk interior.

And – I am quite happy with how it looks with my jacket.

Br-r-r-r-r!

As warm as this dress and jacket are, I was freezing when these photos were taken!

I have faith that Old Man Winter – who is truly ancient by now – will soon leave us, but not without a fond farewell from Fifty Dresses who appreciated his extra encouragement on seasonal sewing!


40 Comments

Filed under Boucle for French style jackets, classic French jacket, couture construction, Linings, Sheath dresses, Suit dresses, Uncategorized

Linen for Fall

Although Fall is undoubtedly my favorite season, I find it the most difficult one for which to dress. Bright Summer colors look out of place, it’s not chilly enough for wool yet, and the days can be very variable. And although linen is usually thought of as a Summer fabric, I believe there are some linens which lend themselves beautifully to this time of year. These are, of course, not lightweight, or handkerchief linens. These are linens with some heft to them, which can be cool to the skin if needed and add some warmth as the sun goes down (sweaters help, too!).

I was fortunate to find a length of Moygashel linen on eBay several years ago, which seemed to fit this bill, especially in its color combination. What could be more Fall-ish than burnt orange, chestnut brown and deep navy, all set on an ecru background?

Moygashel dress linen was produced in a few different weights. The pink dress I made in early Summer was fairly lightweight; this linen is heavier, but still dress-weight.   It was 35” wide, which tells me it was produced not any later than about 1962 or 1963. (About that time, Moygashel seems to have switched to wider looms, thereafter producing 45” wide yard goods.) That “daisy” design also is a clue to its age of production, although it certainly does not scream 1960s. I had 2¼ yards so I had to find a pattern that would accommodate narrow fabric width and limited yardage. That pretty much eliminated the idea of sleeves! However, knowing how warm some of these Fall days can be, I was fine with a sleeveless dress. And I am an avid cardigan sweater-wearer, so I knew this fabric would lend itself to a pairing with a deep navy sweater.

With that in mind, I went searching through my pattern collection for a sheath dress with something more to it – and here is the winner:

This pattern is also from the early 1960s.

I really liked the half-belt, and the seaming detail of the bodice.

So I was off and running after making quite a few adjustments to the pattern for fit. I prefer to work with a 32” bust/34” hip pattern, but this was what I had. (I think if I make this pattern again, I will take it in just a bit more, especially in the bust.)

I considered adding some self-piping to the front seaming detail and around the perimeter of the belt, but I decided against it as I felt that would add too much bulk. So instead, I decided to top-stitch those areas.

Here is the front center seam detail. I used a light brown thread for the top-stitching.

I had this one lovely pearl button which seemed perfect for the belt with its concentric circle design.  I did a bound buttonhole, just what the pattern instructions called for!

The belt follow the lines of the front bodice.

I did a lapped, hand-picked zipper, and I also lowered the neckline just a bit in the front.

And note those neat shoulder darts. Why don’t new patterns have such necessary details?

I lined the dress with a very lightweight linen/cotton blend. I eliminated the facings and brought the lining up to the neck and armscye edges, as in customary couture sewing. Although I did not underline this dress (I have found that linen usually does not benefit from underlining in silk organza. Also, machine washing is easier without an underlining), it is still possible to tack the lining around those areas to insure the edges stay put!

I know I am always going on and on about Moygashel linen (which is no longer being produced), but it really is such a delight to sew – and to wear!

Nice with a sweater…

So there you have it – my first dress made specifically for Fall! However the story does not end here. With any luck this dress will have a starring role in a more complete outfit, which is going to have to wait until next Fall before I can get to it. Do you have any idea what I might be planning?


45 Comments

Filed under bound buttonholes, Buttons - choosing the right ones, couture construction, hand-sewn zippers, Linen, Linings, Mid-Century style, Moygashel linen, Uncategorized, vintage buttons, Vintage fabric, vintage Vogue patterns from the 1960s

“Do What You Can…”

“Do what you can, with what you have, where you are.” – Teddy Roosevelt

I had never seen nor read this quote before three weeks ago, seeing it for first time carved into the slats of this rustic bench:

DSC_0652

There is a lot of wisdom in those few words, especially meaningful to many people in many different walks of life, I am sure, but especially pertinent to those of us who sew. Why so, do you ask?

Do you, as I do, plan sewing projects which are transportable when you travel? Can you quite imagine being without needle and thread – or at the least, a book or magazine on sewing or fashion? What do you do when you can’t (gasp!) bring along your sewing machine when traveling far from home? Well, you do what you can, with what you have, where you are….

What I knew I could do before we left our home in Pennsylvania three weeks ago for a month in Wyoming – was plan to do hand-sewing on two or three projects. What I had for a “first-project-to-finish” before I departed home (sans sewing machine) – was the unfinished pink-flowered linen dress, started what seems like a lifetime ago.

Big, bright daisies with lavender centers.

Big, bright daisies with lavender centers.

And where I was going to be – had possibility and promise and “best plans” written all over it. The possibility and promise have come in bucketfuls, with days and weeks of family fun: hiking; wildlife-sightings; story times with little granddaughters; diaper changing and laundry; shopping a la Western style; cocktail hour every evening; magnificent mountain peaks, valleys, lakes and rivers; grocery shopping and more grocery shopping; and the list goes on and on. I realized a week into our stay that all my planning for some strategic hand-sewing tucked into these busy days was, well, quite simply, not going to happen – at least not while grown children and little grandchildren took loving precedence!

And then suddenly, all too soon, the house was much too quiet, the toys were put away, and while hiking and wildlife sightings are happily still commonplace, my sewing – and my pink linen “not-quite-a-dress-yet” dress – came out to give me a different type of focus.

I was scrambling before I left home to get it to the point where I had only the hand-sewn finishing to complete. The first challenge I had was with the layout of the sheath dress pattern on that large floral print. The linen is a piece of vintage Moygashel, dating to the late 1960s. By this date, Moygashel was being produced in 45” width, rather than 35”. I have found that it is not uncommon to find center crease lines in the linen from this era, where decades of storage have caused the fabric dye to rub off enough to leave a faint pale line.

The fold line - and subsequent faint white line showing dye loss is visible in this photograph.

The fold line – and subsequent faint white line showing dye loss is visible in this photograph.

This left me with only one option: I had to place the dress front and the two side backs on either side of the center line of fabric, to avoid that pale line. But I also had to think about the placement of those large daisies. I wanted to try to match the fabric design as much as possible along the center back seam. To accomplish both these goals, I had to line up the front of the dress and one of the side backs, one above the other. (I forgot to take a photo.)  It turned out I was a couple of inches short of the length I needed to do this. So – I knew I would need to face the hem.

I was fairly successful in matching the flower design along the back seam . . .

I was fairly successful in matching the flower design along the back seam . . .

Then on to the machine sewing of darts, seams, seam finishings. With those completed, I turned my attention to the lavender piping I wanted to put around the neck edge. I used the same cotton kitchen string I had used on my “ghost dress” to use as the filler for the piping. The heavier weight of the linen made the piping more substantial, which is exactly what I wanted.

I added piping only to the neck edge.

I added piping only to the neck edge.

With the piping sewn in place, I could proceed to the zipper. Even though I would be hand-picking the zipper, I wanted to complete it, to double-check the fit before I left on our journey. Then I realized that I had purchased the wrong length zipper! I had picked up a 20” zipper, forgetting that I was adding a V to the back neck. I needed a 16” zipper and had no time to make the trip to JoAnn’s to get a new one. In desperation I searched through my notions drawers and found every color and length of zipper under the sun except a 16” white one. (I’m exaggerating, of course.) Then I looked through a bag of zippers I had gotten from my mother, and lo and behold, there was a 16” white metal zipper, still in its original wrapper. Well, why not? A vintage metal zipper would be perfect for vintage linen. Crisis averted.

As it turns out, I found this ad for metal versus nylon coil zippers in a 1964 Vogue Pattern Book Magazine. If you read the copy, they recommend using metal zippers for fabrics like cotton and linen which require a hot iron. The quality of nylon coil zippers is now such that they can be used for these fabrics without a worry.

As it turns out, I found this ad for metal versus nylon coil zippers in a 1964 Vogue Pattern Book Magazine. If you read the copy (click on the photo for easier reading), they recommend using metal zippers for fabrics like cotton and linen which require a hot iron. The quality of nylon coil zippers is now such that they can be used for these fabrics without a worry.

Before I turned my attention to making the lining for the dress, I wanted to address that faced hem. With no time to think about making a facing from the lining fabric, I went back to my notions drawer. Once again, sewing hand-me-downs from my mother came to the rescue! I found this package of white cotton hem facing, which would be perfect for my needs.

Look at the price on this! Also, now I am quite sure the hem facing would be a cotton blend rather than 100% cotton.

Look at the price on this! Also, now I am quite sure purchased hem facing would be a cotton blend rather than 100% cotton.

The faced hem, plus a view of the seams which I finished with Hug Snug seam binding.

The faced hem, plus a view of the seams which I finished with Hug Snug seam binding.

Once the lining was sewn, I gathered all the tools and notions I would need to finish the dress by hand. Off it all flew to Wyoming, where finally I finished this flower-powered dress under the expansive Western skies.

The front of the dress. No time to get photos of me in it yet, unfortunately!

The front of the dress. No time to get photos of me in it yet, unfortunately!

This full photo of the back of the dress shows some more of the pattern matching.

This full photo of the back of the dress shows some more of the pattern matching.

I did what I could, with what I had, where I was.

20 Comments

Filed under Linen, Moygashel linen, piping, Uncategorized, Vintage fabric

The Domino Effect

Being totally smitten with this bold floral linen, purchased within the past year, I have had my heart set on making it into a day dress this Summer.

Big, bright daisies with lavender centers.

Big, bright daisies with lavender centers.

Not long after I purchased it, this small article on “Signs of Spring 2015 On New York Runways” appeared in the September 10, 2014 Wall Street Journal.

"Memorable moments included bold floral daytime dresses from Carolina Herrara..."

“Memorable moments included bold floral daytime dresses from Carolina Herrera…”

And then in November of 2014, more of Carolina Herrera’s Spring/Resort collection for 2015 was featured in Town & Country magazine.

Perennial daises on two lovely Carolina Herrera dresses.

Perennial daises on two lovely Carolina Herrera dresses.

It seems this vintage Moygashel linen from the late 1960s, with its bold daisy design is very much in vogue currently, both for its size and its floral motif. (The bodice of my recent fancy dress also featured a “daisy” motif in the silk embroidered organza):

The Allure of silk, pt 1

Although I am of the mind that daisies are always in vogue, nevertheless, this seems like the perfect year to fashion a dress from this linen. Such a demonstrative print begs for a simply-styled dress, such as – you guessed it – a sheath dress.   The fabric will make this dress, not the pattern. How could I, I wondered, do something a little different and still keep it simple? The answer to that question began to take shape when I found a length of pale lavender Moygashel linen this past Spring. Suddenly I envisioned a V-back to a sheath dress with a rounded neck, detailed with piping made from this lavender linen.

Then it began to get complicated. With just a few inches over 3 yards of the 35” wide lavender fabric, I knew I would have to calculate carefully when I cut bias strips for the piping, if I wanted to fashion another garment out of the lavender. And of course, I do! Actually, when I looked at the lavender fabric, and paired it with any number of my other fabrics and/or dresses, it seemed the only thing to use it for was a “Spring” coat. But would I have enough fabric for both a coat and bias strips for piping?

Obviously, I would have to find a coat pattern and lay it out leaving enough space for bias strips, to see if I could manage this minor miracle. Of all my coat patterns, this Madame Gres design is the one I decided had the best chance of working, both for my limited yardage and for the pattern’s simple, uncluttered lines:

The short version of the coat is on the left.

The short version of the coat is on the left.

The fact that it is featured with below elbow length sleeves and in a shorter version – perfect for pairing with coordinating dresses – worked in my favor. The entire coat has only 5 pattern pieces: front, back, collar, undercollar, and front facing. First I positioned the tissue pattern pieces on my fabric, strewn out on the floor selvedge to selvedge. I was heartened enough by this exercise to go ahead and make a muslin, so I could have a “real” pattern to work from. All this time, the pink flowered daisy linen lay folded, awaiting her turn.

One of the most unusual features of the coat design is the front dart, which serves both as a bust dart and as a side-shaping dart. As is so often the case with these vintage patterns, the dart sewn as indicated on the pattern was too high for me. In addition, it pulled and stretched the kimono shoulder in all the wrong ways. I lowered the apex of the dart and re-sewed it, trying to preserve its curve, and suddenly it fit like a charm.

The newly drawn dart is in orange, while its original position is in red.

The newly drawn dart is in orange, while its original position is in red.

Now that I had a workable pattern, I knew I could just eke out the coat if I “pieced” the left front facing. I could live with that! And, just as important, I would have enough of the fabric to cut bias strips for piping for my daisy sheath. Whew!

This see-through ruler helped me find a corner from which to cut the bias strips for the piping.

This see-through ruler helped me find a corner from which to cut the bias strips for the piping.

So now, the pieces for the coat, with their silk organza underlinings pinned in place, are taking their turn waiting for further attention. One project started another and now both are lined up like a circle of dominoes, ready to go down in an orderly fashion, albeit in slo-o-o-w motion.

13 Comments

Filed under kimono sleeves, Linen, Moygashel linen, piping, Uncategorized, Vintage fabric, vintage Vogue Designer patterns

My Suit Dress Fully Evolved – Finally! – Part 5

Can it really be that May will arrive in a few days? If that is true, then I am only about 2 months behind in my sewing schedule. But who’s keeping track? I’m happy that I have plowed through to finish my wool suit dress, even though it will immediately go into my cedar closet for safe storage until next Fall.

When I fell off the edge of the world after Part 4 (only figuratively, thank goodness!), I was starting on the sheath dress. I had decided to add a collar to it, so that I could use that fourth vintage button (I had already used three on the jacket itself). Matching the windowpane plaid on the collar section took some special attention, as this photo shows:

Collared sheath I underlined the collar with the lining fabric, and I made a working bound buttonhole instead of just sewing the button in place. Anything to make it more involved, right?

Detail of the button on the collar.

Detail of the button on the collar.

Lining the collar with silk charmeuse reduced bulk and helps it lay flat.

Lining the collar with silk charmeuse reduced bulk and helps it lay flat.

From that point on, it was a straightforward sheath dress. I love a sheath dress. I think it is such a flattering silhouette, and very feminine. As far as I am concerned, one can never have too many sheath dresses (just as one can never have too many shoes). Speaking of shoes, I decided this outfit needed complementary shoes! What do you think?

collared sheath

I wear a lot of red and blue, so I expect these shoes to serve me well!

I wear a lot of red and blue, so I expect these shoes to serve me well!

It turns out that even a simple sheath can take a lot of time to make when one is using couture techniques: underlining of silk organza; interior seams catch-stitched; hand-picked zipper; instead of facings, neck and armholes finished with lining-abutted edges, then pick-stitched for stability. The silk charmeuse lining in the dress matches the jacket lining and is an extravagance, I will admit. But it feels heavenly, and adds a fluidity to the dress which is a good match for the butter-soft cashmere wool fashion fabric.

Suit dress

Shown with the jacket unbuttoned.

Shown with the jacket unbuttoned.

Suit dress

A close-up look...

A close-up look…

... and another one.

… and another one.

And a partial back view.

And a partial back view.

I am happy I added the collar to the dress, as that extra detail seems to help the dress stand on its own if/when I take the jacket off. Framing the face is always a good fashion decision, and I think the collar helps in that regard.

Just the dress!

Just the dress!

Suit dress

So happy this is finished!

So happy this is finished!

I consider finishing this outfit a major accomplishment!  So what’s next? Something easy or something more complex? Those questions to be answered soon, with this caveat: it will most definitely be something for Spring/Summer!


Details:

Navy blue Cashmere fashion fabric:  Britex Fabrics, San Francisco, CA

Silk charmeuse lining fabric:  Britex Fabrics

Buttons:  vintage Ultra Kraft, ca. 1950s

Shoes: Ferragamo

Patterns:  Jacket: vintage Jo Mattli Vogue Designer pattern; Dress: vintage Vogue blouse pattern combined with new Butterick dress pattern

31 Comments

Filed under Buttons - choosing the right ones, couture construction, Dressmaker suits, Shoes to make an outfit complete, Suit dresses, vintage buttons, vintage Vogue Designer patterns, vintage Vogue patterns from the 1970s, woolens