Category Archives: Sewing for children

Two Holiday Dresses

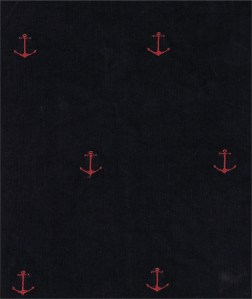
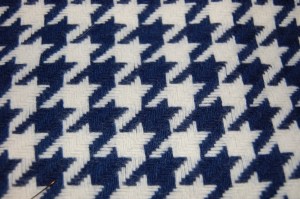
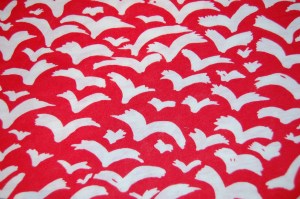
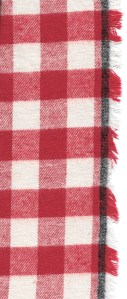
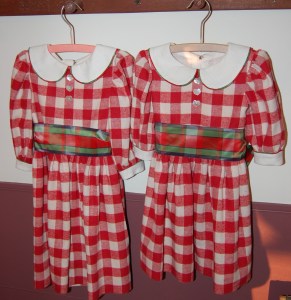
Sewing for my granddaughters, ages 4½ and 2½, generally means I am sewing two of everything. As they get older, I suspect this will not always be the case, but right now, it seems safe to go with identical sister dresses. They live in a part of the country which can get very cold winters, and the specific part of their state where they live tends towards a casual lifestyle. Keeping those parameters in mind, I decided to look for warm flannel when planning for dresses which could see them through the holidays and into the winter months. I wanted the dresses to be festive but not too fussy. When I found this red brushed flannel check, I bought five yards – the details for adding “festive” to the dresses would come to me, of that I was sure!

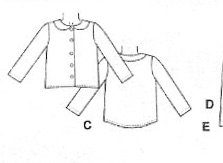
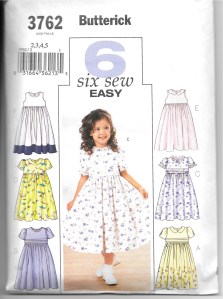
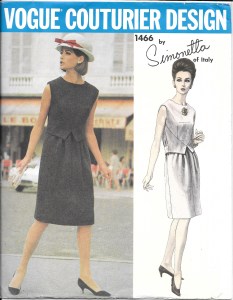
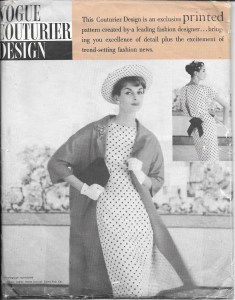
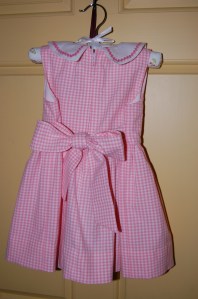
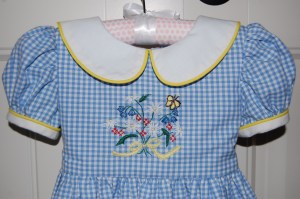
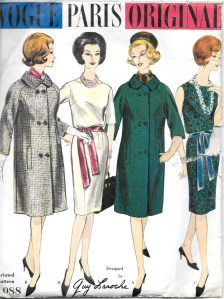
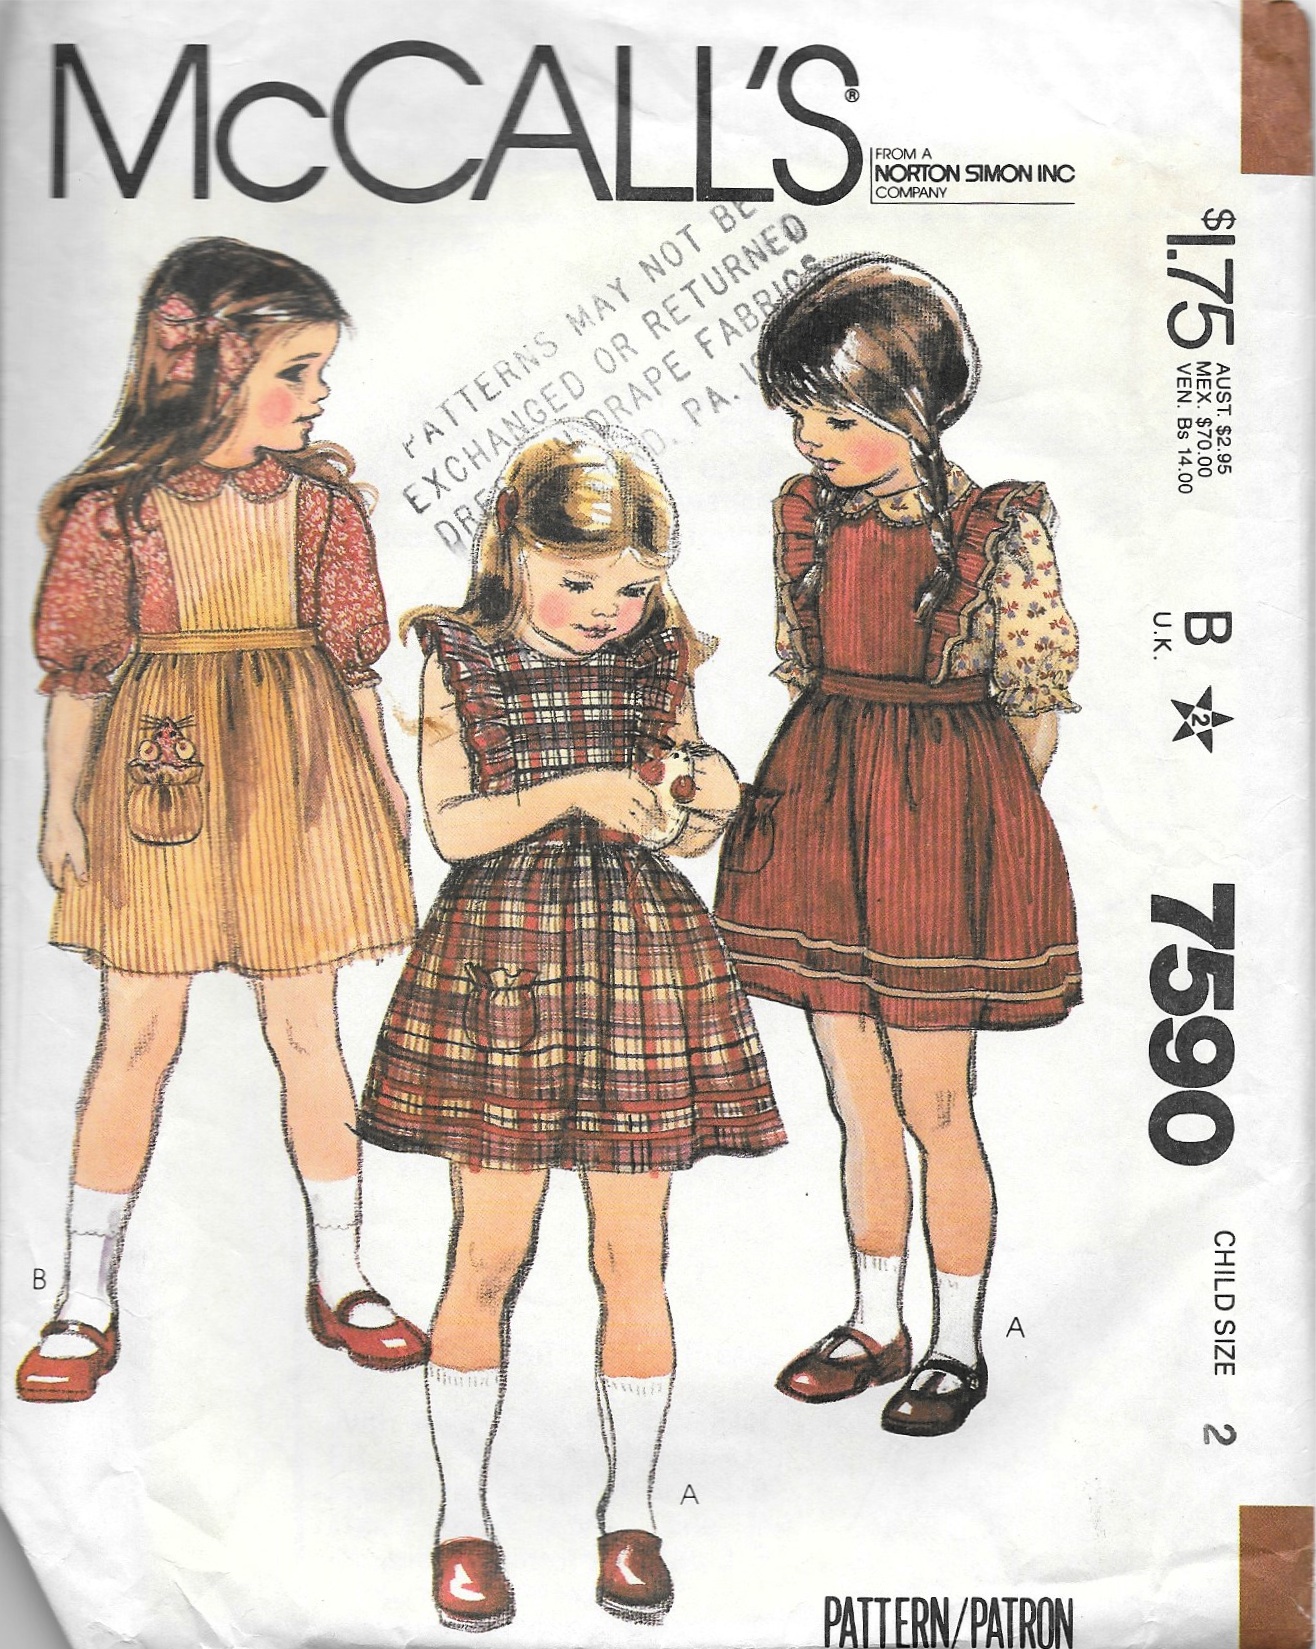
I went back to a pattern I have been using over and over, adjusting the sizing as the girls have grown, and adding my own varying design aspects to make the dresses look new and different from one season to another. The contrasting collars and cuffs add interest to the dresses, through the use of various trims.

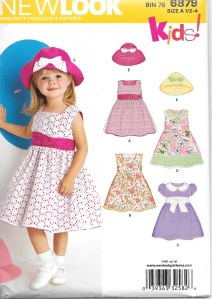
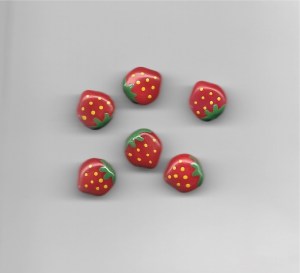
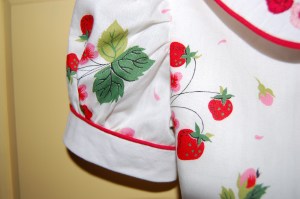
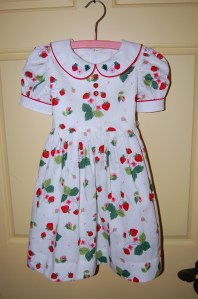
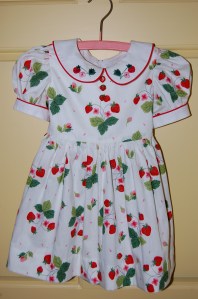
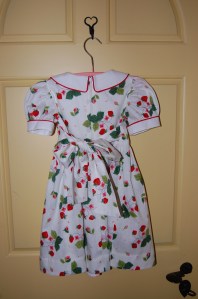
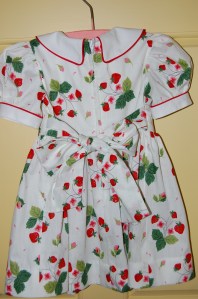
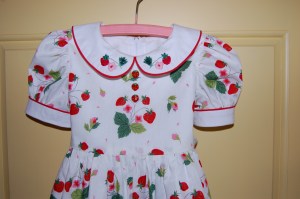
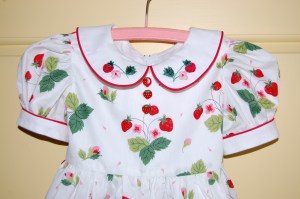
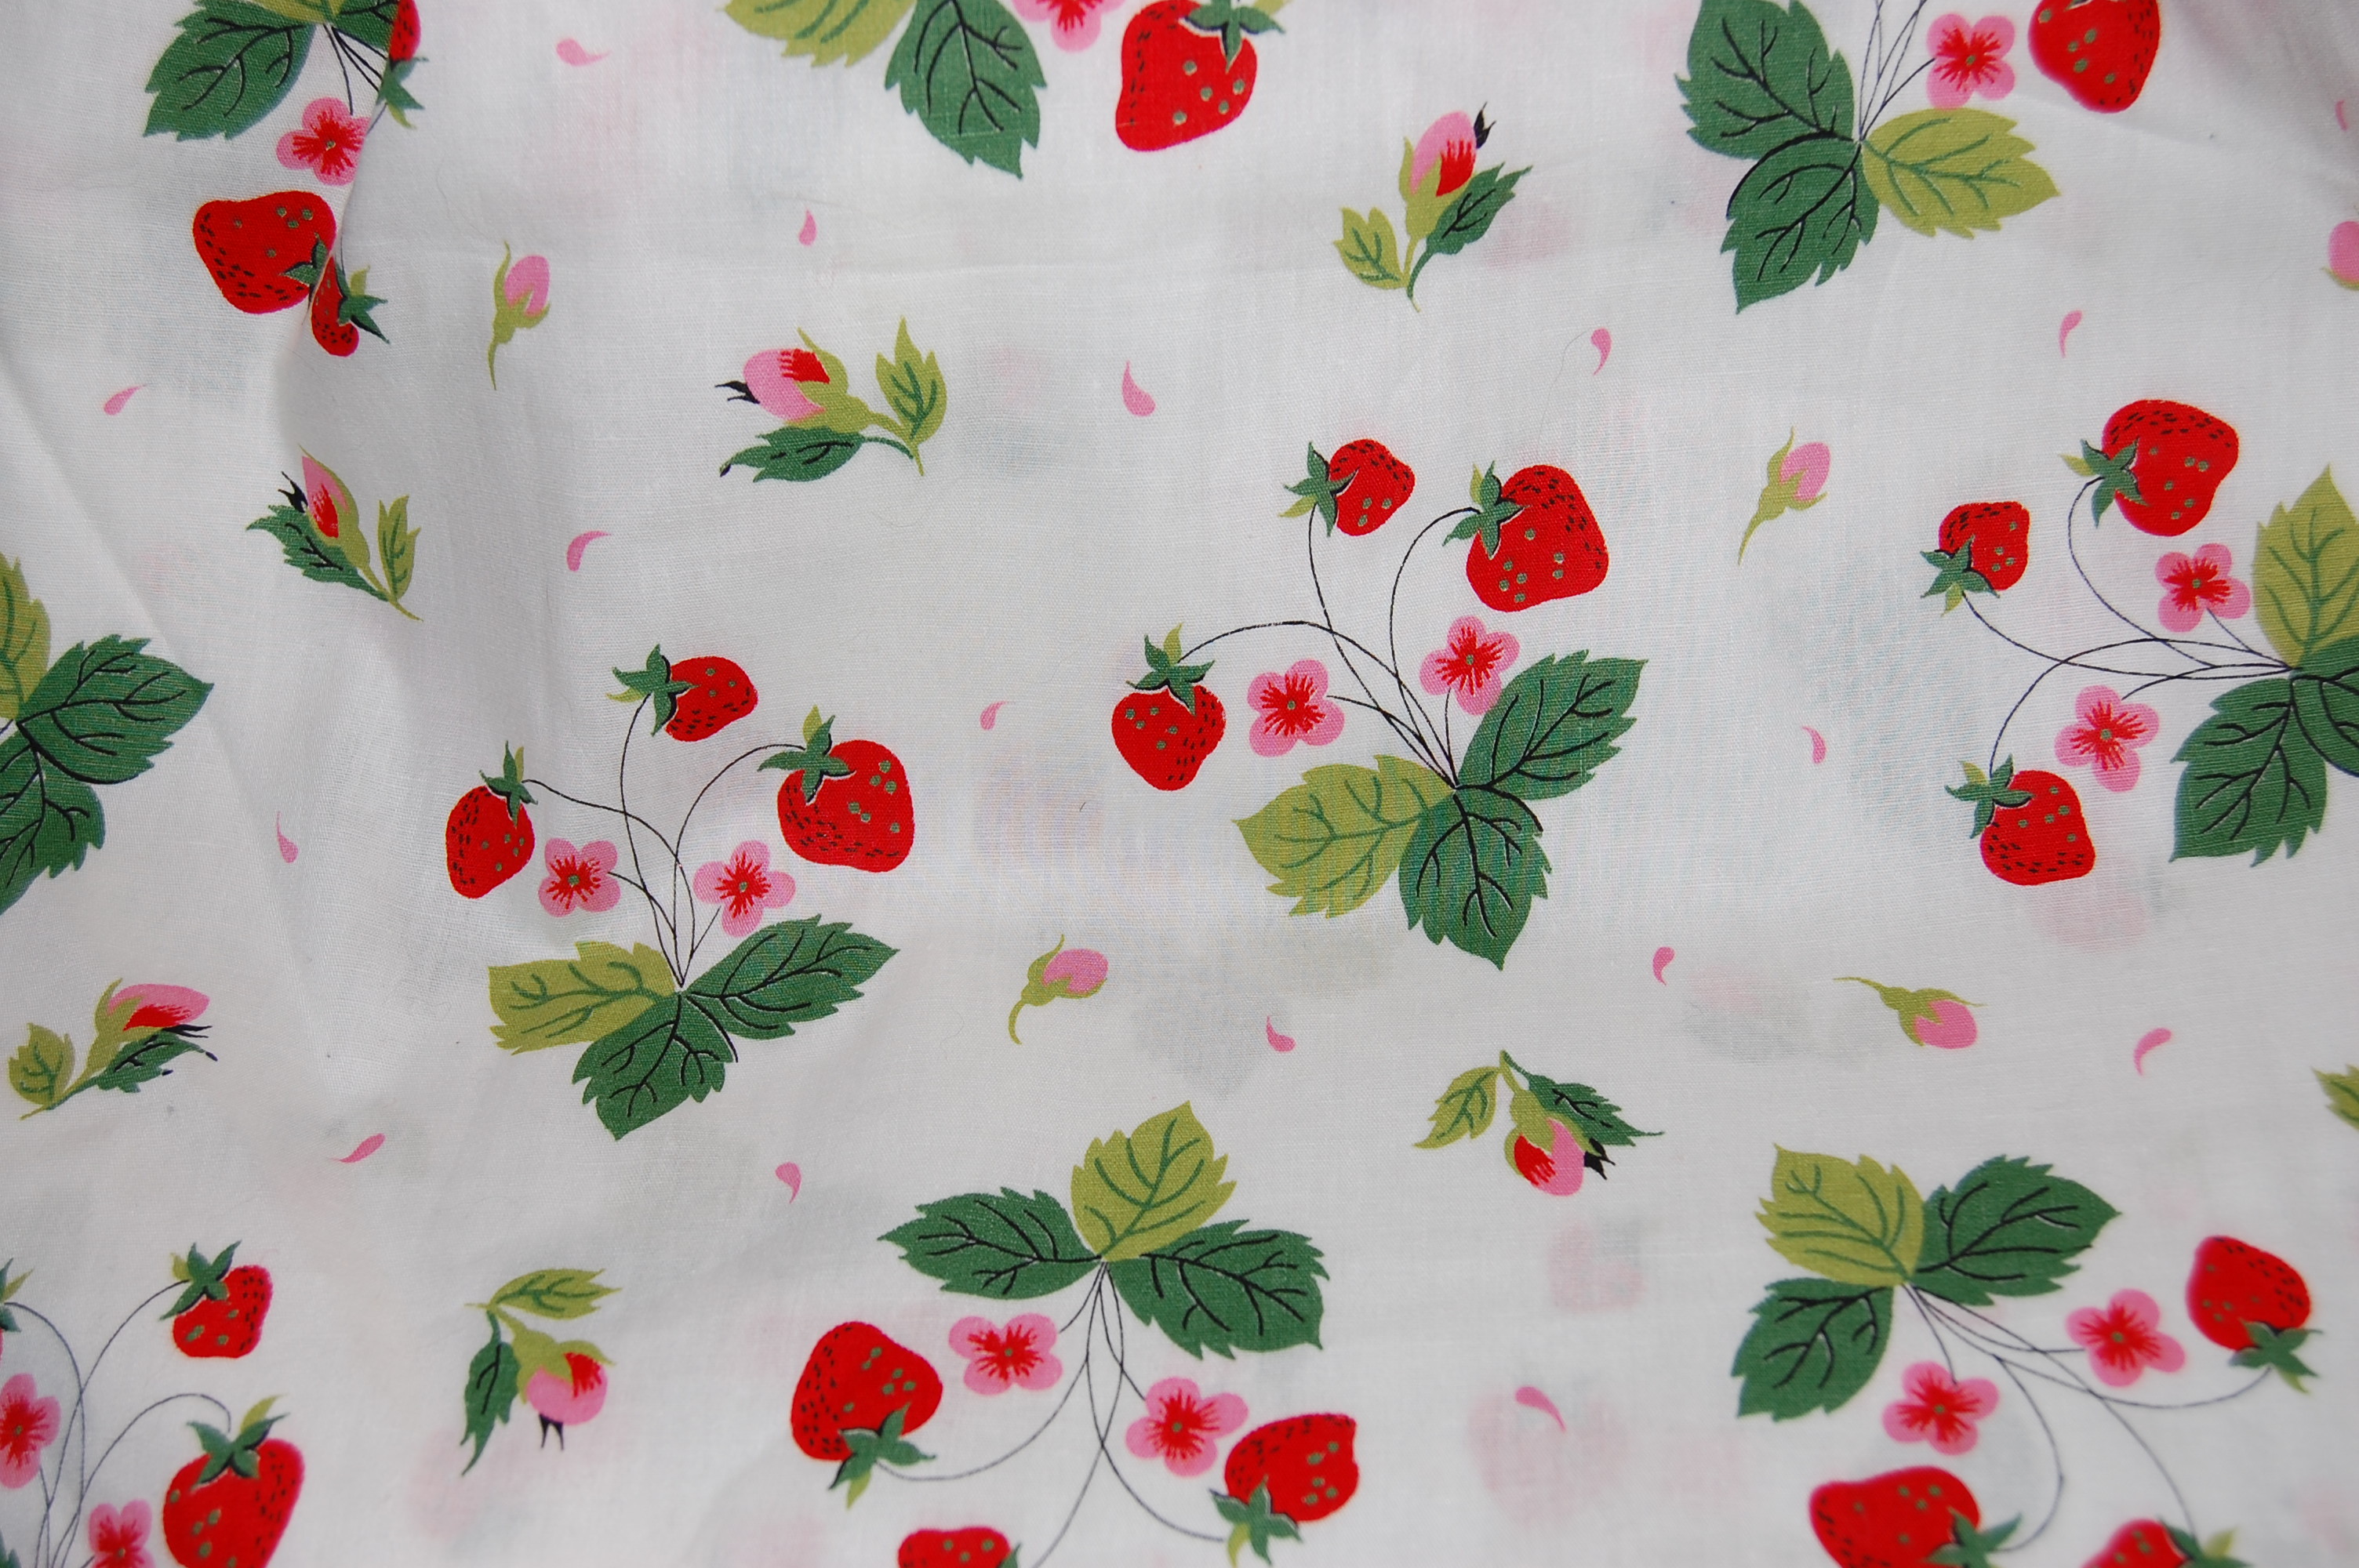
I have used View C of this pattern for birthday dresses, including the Strawberry-print dresses from last Spring.

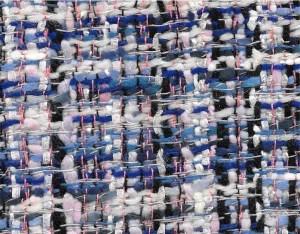
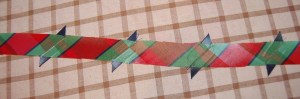
Finally I did not want these dresses to look so Christmas-y that the girls would not be able to use them beyond the holiday season. I knew that if I made solid holly green the sole accent color, it would limit their versatility. That’s when I got the idea to look for some multi-color wide ribbon, preferably vintage, which could be used not only for sashes, but also for piping for the collars and cuffs. I found some of the most gorgeous plaid ribbons online, especially at Promenade Fine Fabrics. They have a bricks-and-mortar store in New Orleans and a website, but they also have an Etsy Store, and that is where I found this ribbon:

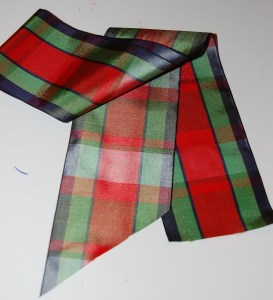
The ribbon is vintage French, of course (!) – 3 1/2″ wide.

Somehow I knew instinctively that the orderly flannel gingham check and the more random plaid of the ribbon would work together. (I have since found the term for this phenomenon, as clearly stated on page 84 of the wonderful little book, 101 Things I Learned in Fashion School by Alfredo Cabrera with Matthew Frederick: “Combining visual patterns – The most effective tool for the harmonious mixing of visual patterns is counterpoint. Scale counterpoint means grouping patterns of dissimilar scales, i.e. a larger pattern with a smaller pattern… If similar patterns are used together [in this case, two plaids], their scales need to be very different. …”) I also knew that making piping out of the ribbon to accent the collars and cuffs would tie the entire look together.

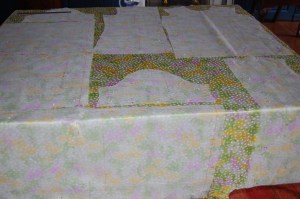
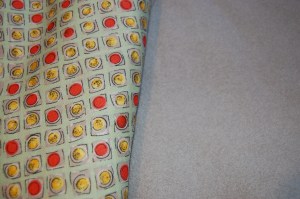
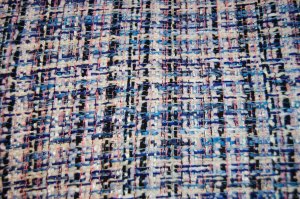
Normally with piping, I try to avoid too many seams, but the ribbon is lightweight and such lovely quality that I was able to piece together bias strips of it easily, and the seams are really imperceptible on the finished dresses.

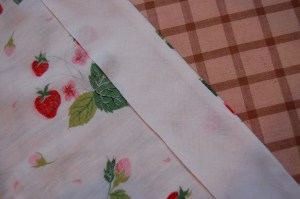
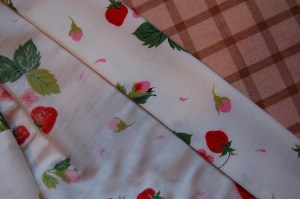
This gives you an idea of how much piecing I had to do to make the bias strips for piping!

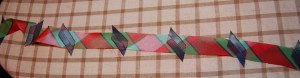
However, the plaid gave me very specific sewing lines when joining the bias pieces.

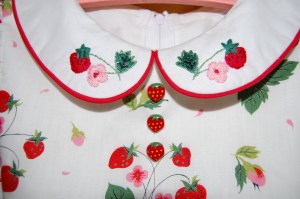
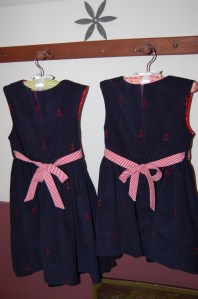
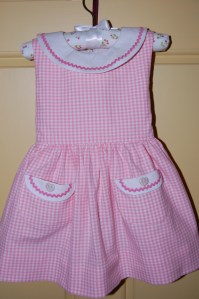
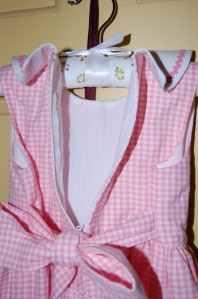
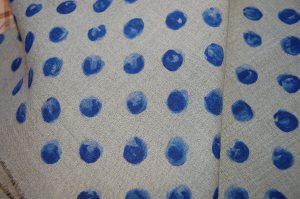
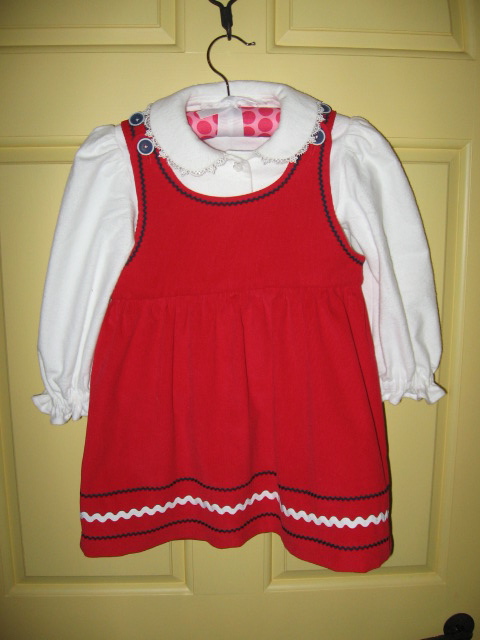
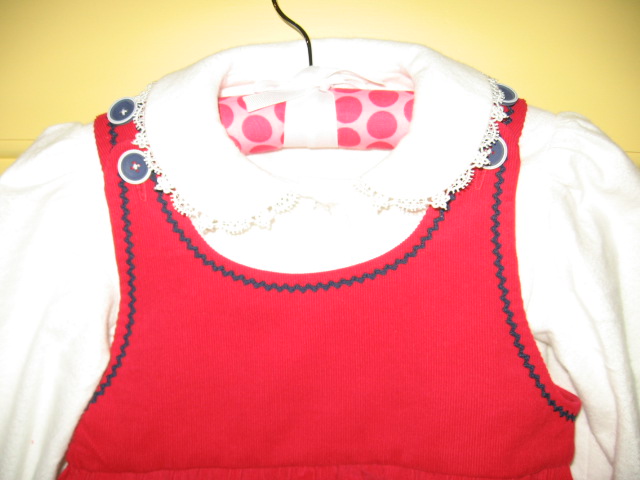
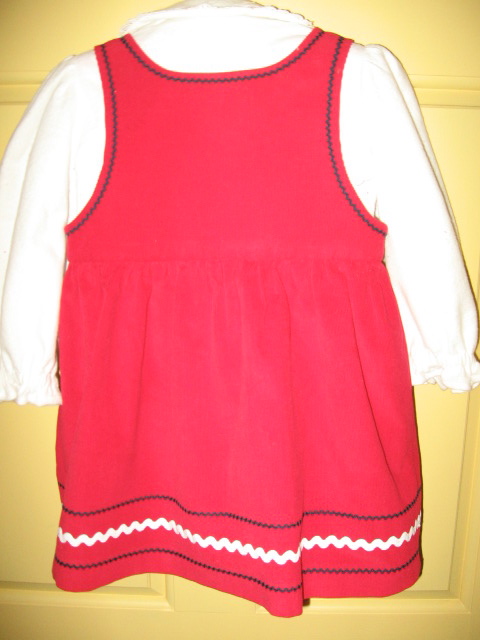
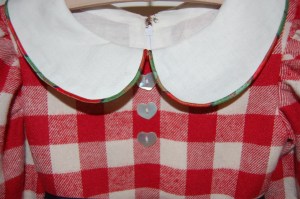
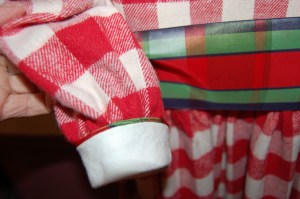
I made the collars and cuffs out of a creamy white linen and cotton blend, which matched the “white” in the flannel well. I also lined the bodices with that same fabric.

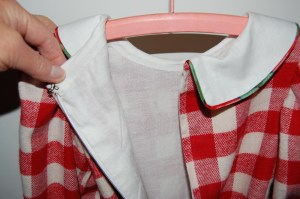
I couldn’t help myself – I put the zippers in by hand.

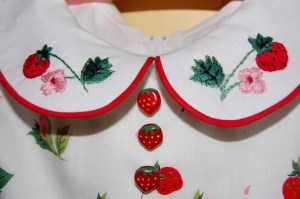
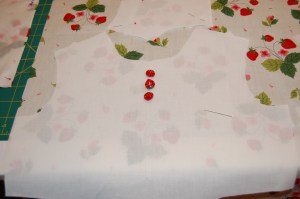
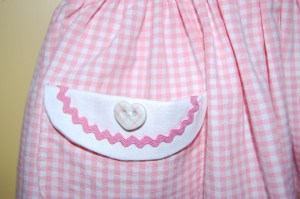
The buttons are vintage ones that I have had in my button box for decades, just waiting for the right application.

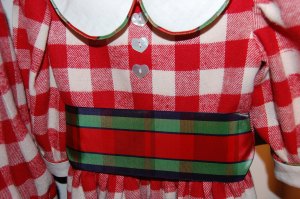
I originally thought I would place each button within a square of the gingham plaid, but it looks so much better to have the buttons straddle the squares.

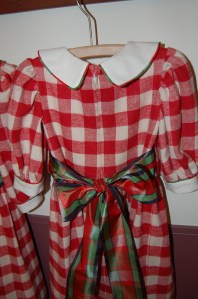
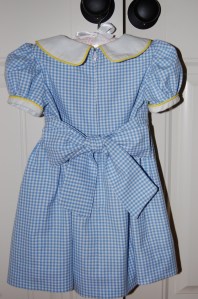
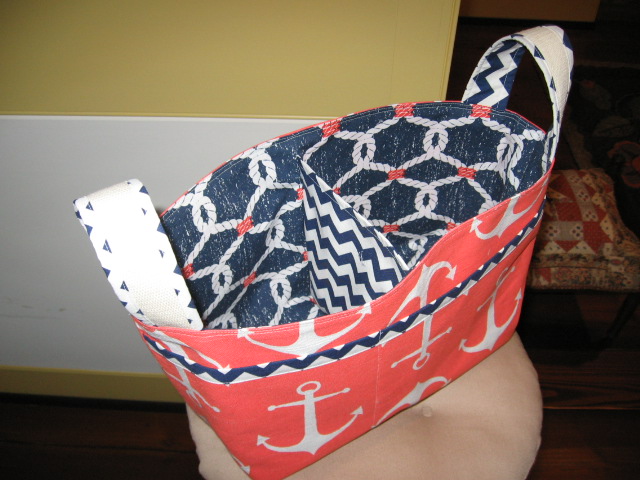
I added sash carriers to the side seams, and the ribbon just gets tied in a big bow.

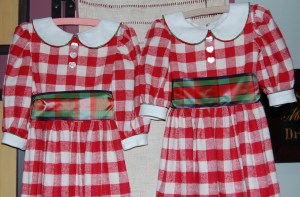
The longer sleeves will help keep the girls warm.

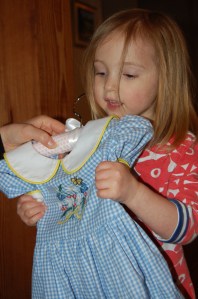
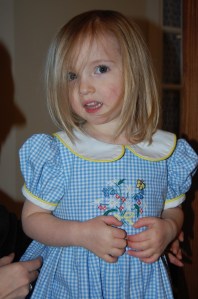
And here are Aida and Carolina, after visiting Santa, candy cane included!

This is very satisfying sewing, made especially so by two little girls who seem to love dresses! My daughter tells me they will be wearing them when they go to see a special performance of the Nutcracker Ballet. They may just steal the show!


28 Comments

Filed under Bows as design feature, Buttons - choosing the right ones, Sewing for children, Uncategorized

A Detour through the Strawberry Patch

Sewing on more than one project at a time is, I guess, a form of multi-tasking. Although I believe I am like most women in that I am good at multi-tasking, I prefer not to do so with sewing. I like to work on one thing at a time, but sometimes, life just doesn’t lend itself to such discipline. Such has been the case with the hours I have spent sewing, not on my Classic French Jacket, but on two little dresses – birthday dresses! – for my two little granddaughters. I know they won’t always want to wear sister dresses, so I am anxious to sew such things for them while they might still think it is fun. And if that means I need to steal some hours away from my personal sewing, then that’s what happens.

Spring birthdays are lovely as it means I get to sew with cheery cottons and make little puffed sleeve dresses with big sashes in back. I was especially inspired this year with a 5+ yard length of vintage fabric I purchased from an Etsy shop a couple of years ago.

A strawberry print cotton for two little Spring sisters

I knew this fabric was most certainly from the 1950s, as this type of print was prevalent then, as well as the fact that the fabric was only 35” wide. The more traditional width of 45” most of us are used to, did not become commonplace until about 1960. To corroborate my suspicions, I saw this dress on Pinterest:

Sold as a vintage 1950s’ dress, it is edged with rickrack.

Although this fabric would probably have been used for adult fashions in the 1950s, I found it to be perfect for little girls’ dresses in 2017. Not only that, I found these vintage strawberry buttons which just seemed to be made to go with the fabric!

The Etsy store from which I purchased these buttons indicated they are from the 1960s. They are hand-painted and quite small.

I started with a (new) pattern I have used before, and made new copies of the sizes I needed for my two little ones.

I used View C of this pattern last year for another birthday dress, but obviously made some apparent changes to it for these dresses.

I knew I wanted to make the collars and sleeve bands out of white cotton, and pipe them in red. I made my own piping out of cotton kitchen string and some vintage all-cotton bias tape I had in my sewing supplies.

I decided to add a bit of embroidery to the collars just to make these dresses a step above ordinary. I selected a strawberry motif from the fabric and made a drawing, which I then transferred onto the collars.

This is the dress for the 4-year-old.

This is the dress for the two-year-old.

On the back of the dresses, I added snaps to the edges of the collars to make them lay flat. They can be unsnapped for ironing or to wear a sweater, but it certainly makes for a nicer appearance,

When it came to the hems, I found that I had cut the skirt length for my older granddaughter just a little too short. I was pretty irritated with myself until I realized that facing the hem in white bias cotton actually looked better than if I had just turned up the hem. The strawberry print fabric is lightweight and the design would have shown through a hem which was just turned up. You can see this happened in the dress featured on Pinterest.

When it was time to hem the dress for my younger granddaughter, I had enough length, but I decided to underline the hem with white cotton to avoid that “see-through” of the design. So my mistake on the larger dress made for a better outcome with both of the dresses. (It doesn’t always work that way, does it?)

I sewed the bias strip on as if I were facing the hem, then turned it up again. This way, the dress can be easily lengthened if need be.

After doing a light running stitch by hand to secure the bias band inside the hem, I then turned up the hem and sewed it as usual.

Three little buttons at the front were the finishing touches for both dresses.

The larger dress…

…and the smaller one.

The back of the larger dress

And a back view of the smaller dress.

Interestingly, I had to do some strategic planning when laying out the pattern pieces on the fabric. While the design does not have an up-and-down orientation, there are spacing issues that I had to account for. For example, I wanted each bodice front to have a spray of strawberries in the center, with enough space to add the buttons above. In addition, the spacing of the strawberry sprays determined how the patterns for the skirts were arranged on the cloth, as I wanted a balanced appearance of the strawberry sprays, without any cut in half at the waistline.

Here I am trying to find the “sweet spot” for the design on the bodices when arranging the pattern pieces.  It was easier to do on the larger dress.  The bottom button on the smaller dress is a little closer to the strawberry design than I would have liked, but in order for the design to be centered as much as possible, I opted to go this route.

This is the front bodice of the larger dress, with a carefully placed central motif.

And this is the smaller dress, with a tighter fit for the placement of the buttons.

Sometimes it can get a bit boring making the same dress twice, but the quality of this silky soft fabric is such that it was an absolute joy to sew. And, of course, I was inspired by the thought of my two little girls dressed up and looking so cute! They seem to like their strawberry dresses.

39 Comments

Filed under Buttons - choosing the right ones, Heirloom sewing for children, Sewing for children, Uncategorized, vintage buttons, Vintage fabric

Sleepy Time for Two Little Valentines

Not all sewing needs to be couture-inspired. Sometimes simple pajamas are just right, especially when they are for two little granddaughters, with Valentine’s Day in mind.

Sleepy Time

I stumbled across this cozy flannel last year on Fabric.com.

Sleepy time

Designed by Riley Blake and in her “Lovey Dovey” collection, it is certainly “heart” oriented, but not so much that it is restricted just to February 14th. I bought 3 yards and tucked it away for the day when my youngest granddaughter no longer needed to be in onesies. Well, guess what? That is this year!

I picked up this Butterick pattern as I really liked view CE on the left, and set about to make matching PJs for my two little girls.

sleepy-time-pattern

One of the nice design details is the longer shirttail back of the pajama top. This makes it easier to tuck in if desired.

One of the nice design details is the longer shirttail back of the pajama top. This makes it easier to tuck in if desired.

Sleepy time

I’m very glad I have so much experience working with not enough fabric! I had to get very creative with the placement of the pattern pieces, and I was still a little short. I solved the problem by making the undercollars out of plain white flannel (which I had on hand.)

Sleepy time

I don’t own a serger, so to finish the seams and make them extra sturdy for many washings, I made flat felled seams throughout.

Sleepy time

I also added elastic to the sleeves and to the pajama pants legs, to help keep the cold air out and the warm body heat in.

Sleepy time

The fabric is so busy that I knew it did not need much embellishment, but I can never resist a little bit of rick rack, so I added a small flourish to the collars, applying it free-form.

Sleepy time

Sleepy time

When I “auditioned” the fabric for buttons, pink and red ones simply did not add any interest, so instead I chose to pick up the contrasting aqua.

Sleepy time

What fun to make something so simple, but so cute!

Wrapped up in festive paper, off they went across the miles…

Sleepy time

May your Valentine’s Day be cozy and sweet and a celebration of some of life’s simple joys!

14 Comments

Filed under Buttons - choosing the right ones, Sewing for children, Uncategorized

The Old Year Sails Away

“Where there’s a will, there’s a way” is a maxim I grew up with, and once again, it served me well to remember it. Although much of my sewing had to be put on hold after I injured my left hand in October, I was determined to get a dress made for each of my two granddaughters for Christmas. Matching sister dresses seemed to be the way to go.

Sailboat dresses

My inspiration was a child’s jumper I had seen on Pinterest, with appliquéd sailboats, but first I needed to find the right fabric. I knew I wanted to make the jumpers out of fine wale corduroy, and a quick search on fabrics.com produced a lovely Robert Kaufman fabric with the requisite anchors embroidered onto it.

a-little-sewing-fabric

The coordinating cottons I found at JoAnn’s, along with a pattern which I adapted to this particular use:

This is a very adaptable pattern. I was quite pleased with it!

This is a very adaptable pattern. I was quite pleased with it!

I turned the shoulder seams into button tabs, with the thought that this would make the dresses more “adjustable.” (I still installed zippers in the center back seams, as this just makes it so much easier to get two little busy girls dressed.) Button tabs also allowed me to use two sets of vintage buttons I had stashed away, waiting for the perfect application for them.

The larger buttons I used for my older granddaughter's dress and the smaller ones for my younger one's dress.

The larger buttons I used for my older granddaughter’s dress and the smaller ones for my younger one’s dress.

I lined the bodices in red polka dotted cotton, and I took a little bit of the fullness out of the skirt patterns. I added carriers to the sides of each bodice, for the belts to slip through.

Sailboat dresses

The belts come off completely, for easy washing. Being sewn on the diagonal keeps them from twisting, and it also makes them more interesting!

The belts come off completely, for easy washing. Being sewn on the diagonal keeps them from twisting, and it also makes them more interesting!

Then I left the hull of the sailboats open along the top edge, so my little girls could use them as pockets if they like. And, of course, I had to add some rickrack embellishment – to the mast as streamers, and below the boats, as waves.

Sailboat dresses

Although I was fairly certain the girls would like these jumpers, I was gratified and somewhat amazed at their excited and happy reactions to what they dubbed their “swirly dresses.” After what turned out to be a difficult year for me, it was rewarding to end it with a little success!


29 Comments

Filed under Buttons - choosing the right ones, Jumpers, Sewing for children, vintage buttons

The Silky, Shimmery Colors of Spring

Just as with the elusive answer to “Which came first, the chicken or the egg?,” those of us who sew can try to answer “Which comes first, the fabric or the pattern?” The answer, at least as I see it, is “It depends.” And sometimes, even, it is a little of both.

When I saw this fabric on the website of Mendel Goldberg Fabrics last Fall, I really did not stop to think about a pattern. It was a “bolt end,” 1 3/8 yards of 58” wide Italian silk. With that width, I wasn’t particularly concerned about the length being under 1 and ½ yards. I just ordered it as soon as I could.

The colors of Spring

Upon arrival, the fabric was even prettier in person, shimmery with “polka dots” woven in, fluid as only silk can be, and the picture of Spring. At that point, I was up to my ears with my Winter sewing, so I thought about it only casually until just a few weeks ago. I already had this pattern in my collection, and in the back of my mind, I had paired that fabric with the dress in View B on the right.

Oh the things we can learn, no 10

One interesting thing about vintage patterns is the yardage requirements are often given for widths that are narrower than many modern fabrics are produced in. For that reason, it can be difficult to determine exactly how much fabric is needed for a particular design. I’m getting better at sensing what I need, so I just assumed that I would have enough fabric to make that dress.   I had my heart set on it, actually. So much so, that when Britex Fabrics announced an upcoming sale of silk fabrics, I sent off for swatches for coordinating silk for the short jacket (in view A) and lining for the dress.

The green is a lightweight silk/cotton blend. The goldenrod yellow is silk taffeta from Italy, without the stiffness that taffeta so often has.

The green is a lightweight silk/cotton blend. The goldenrod yellow is silk taffeta from Italy, without the stiffness that taffeta so often has.

Dutifully ordered, the fabric arrived from California, and it, too, was even prettier in person! I was in love, and really could not wait to get started, first on the dress, and then on the jacket.

DSC_0036

The green for the lining . . .

The colors of Spring

… and the yellow for the short jacket in View A.

Then reality hit. When I took out the pattern pieces, here is what I found for that unusual flounced skirt:

This skirt piece uses almost a yard in length, and the diagonal shaping on it uses more fabric than normal.

This skirt piece uses almost a yard in length, and the diagonal shaping on it uses more fabric than normal.

My heart sank as I knew immediately I did not have enough fabric. There was going to be no Rumplestiltskin to help me with this one.   I went back to my pattern collection and pulled out two more possibilities.

I love this dress, but I thought it might be too tailored for the fabric. Also, the seaming detail would be lost entirely with the busy design of the silk.

I love this dress, but I thought it might be too tailored for the fabric. Also, the seaming detail which adds so much to this dress would be lost entirely with the busy design of the silk.

I felt like Goldilocks evaluating this pattern for my fabric. Just not right...

I felt like Goldilocks evaluating this pattern for my fabric. Just not right…

With both these dresses I would have to rethink the jacket, as the styles would not compliment each other. I stewed over this, re-measured, re-thought, and left it all in a heap in my sewing room. There was something about that shimmery silk that kept telling me that a dress made from it needed to have some movement to it –  like the flounced half-skirt pictured in the pattern. And then it hit me. If I made the front part of the skirt the same as the back, I could probably just squeak it out.

I did a quick diagram to consider this option.

I did a quick diagram to consider this option.

My completed muslin verified this for me, and, not only that, I loved the look, at least done up in muslin. Once again, using the couture technique of laying out and cutting each pattern piece individually enabled me to manipulate the pieces to make the most of the fabric I had available to me. Fortunately, there was no matching to be done, although there is a specific up and down to the design.

Now this is what is called making the most of one's available fabric!

Now this is what is called making the most of one’s available fabric! This shows my silk organza underlining pieces in place, ready to cut.

As far as the jacket – losing the diagonally shaped flounces on the skirt, makes the effect of the jacket not quite as dramatic, but I think it will still be very flattering – and appropriate. (The jacket has a million pieces to it, so it will be quite the project…!)

Well, I can’t leave this post without sharing another color of Spring, although this one is not silk and not shimmery. Pink cotton gingham is the picture of Spring, especially in a little dress for a little girl! When I made a crib quilt for my younger granddaughter, Carolina, I backed it in pink gingham, appropriately called “Carolina Pink.” I ordered enough so that I would be able to make her a dress for her first birthday (earlier in April) and here it is:

The colors of Spring

The colors of Spring

The bodice is lined in soft white cotton, which makes a lovely finish.

The bodice is lined in soft white cotton, which makes a lovely finish.

In my tins of buttons, I found these little ceramic ones, purchased years ago when Carolina’s mommy was my little girl. (Well, she is still my little girl, but you know what I mean.) How appropriate to use them for one of her daughter’s dresses.

The colors of Spring

These buttons, with their delicate cross-hatch design, were just waiting for this dress.

And with this dress –  the fabric absolutely came first!

17 Comments

Filed under Buttons - choosing the right ones, Formal or fancy dresses, Heirloom sewing for children, Mid-Century style, Sewing for children, sewing in silk, Silk taffeta, Uncategorized, vintage Vogue Designer patterns, vintage Vogue patterns from the 1950s, vintage Vogue patterns from the 1960s, vintage Vogue patterns from the 1970s

A Second Chance

Although I did quite a lot of sewing for my two children when they were young, there were a few particular dresses I had always wanted to make for our daughter. Somehow by the time I had the time to think about making them, she had grown just a bit too old for these dresses better suited for a two, three, or four-year-old. But now I have a second chance to make them, this time for granddaughters. (Lucky me!)

With our oldest granddaughter’s third birthday approaching, I picked one of my favorite “sewing-for-children” books off of my shelf, and went right to the section on what has to be my favorite little girl’s dress of all time.

This beautiful book by Kitty Benton was published in 1981, by Hearst Book, New York. It is extensively illustrated, with explicit instructions for every project. It also has a complete section on Sewing Techniques, including smocking, embroidery stitches, hems, sewing on buttons, etc., etc. The book is an invaluable guide for heirloom sewing. Copies of it are available on Amazon and through a few Etsy shops.

This beautiful book by Kitty Benton was published in 1981, by Hearst Books, New York. It is extensively illustrated, with explicit instructions for every project. It also has a complete section on Sewing Techniques, including smocking, embroidery stitches, hems, sewing on buttons, etc., etc. The book is an invaluable guide for heirloom sewing. Copies of it are available on Amazon and through a few Etsy shops.

And here is the dress I love so much!

And here is the dress I have always loved so much!

The dress in the book is geared towards a two-year-old, so I decided to lengthen the bodice to fall at the waist, better suited for a young lady of three. I actually used this New Look pattern, version C (in lavender), for my pattern.

Obviously, I intended for the sash to tie in the back.

Obviously, I intended for the sash to tie in the back.

I lengthened the sleeves as well, in keeping with the intention of Kitty Benton’s design.

To transfer the embroidery design onto the bodice, I photo-copied it and enhanced the stitching lines with a fine-tipped black marker. Then I held it up to a window, with the blue gingham bodice piece centered on top, and I traced the design lightly with a sharp pencil.

A Second Chance embroidery pattern

A simple and sweet flower bouquet.

I used purchased yellow piping, being fortunate enough to find the perfect color. No need to make more work for myself when what I needed was readily available.

The embroidery on the dress took me longer than I anticipated, but I was able to finish the dress in the nick of time (except for a hook and eye at the back neck; I actually finished much of the hand sewing on it while spending the past 9 days with my daughter and granddaughters while our son-in-law was away on business; I forgot to bring hooks and eyes with me, so on my next visit, I’ll be doing that little addition!)

A Second Chance

I actually hand-picked the zipper! I'll be happy when I can get that neck properly finished with hook and eye.

I actually hand-picked the zipper. I’ll be happy when I can get that neck properly finished with hook and eye.

And a close-up look at what makes this little dress so endearing, besides the little person who will wear it!

And a close-up look at what makes this little dress so endearing, besides the little person who will wear it!

All I had to do was hope that the dress would fit little Aida well, and most importantly, that she would like it! Fortunately, both concerns were quickly dismissed, as she seemed to love the dress from first glance in the box and immediately wanted to put it on.

DSC_1147

A Second Chance

Her birthday party was held on the first day of Spring, and although it felt more like Winter, Aida happily wore her new dress for that special day.

The birthday girl!

The birthday girl!

Aida has already given me more joy than she will ever know – and also a second chance for some “little” sewing!

27 Comments

Filed under Heirloom sewing for children, Sewing for children, Uncategorized

One Year at a Time

Let’s start with 2016. Although, truthfully, right now in January 2016, I could probably plan at least three years’ worth of sewing. That is how many patterns and fabrics I have tucked away, waiting for their turn. But it is time to concentrate on the year at hand and get on with it!

Some of the year is shaped by events that I know will be happening – such as weddings and fancy parties. Some of it will be devoted to little granddaughters who are already growing too fast for me to indulge all my sewing fantasies for them.   And some of it will be my own self-determined challenges – coats and dresses I want to make – that right now are looking like small Mt. Everests, waiting to be conquered!

I probably should be sewing right now for Spring and Summer, but I have wools that are too enticing to ignore during these current Winter months:

Wool challis on the left and vintage cashmere on the right.

Wool challis on the left and vintage cashmere on the right.

Navy and white houndstooth.

Navy and white houndstooth.

Some cute and classic cottons for little girls should be able to find themselves tucked in amongst my plans for Springtime.

The buzzy bee fabric is a vintage cotton. The blue gingham is new.

The buzzy bee fabric is a vintage cotton. The blue gingham is new.

Looking towards Spring weddings already on the calendar, I am excited for the opportunity to use this amazing printed silk for a dress and perhaps pairing it with the plain yellow silk taffeta left over from my fancy dress from last Summer.

One year at a time

I have so many vintage linens in my collection, that it is difficult to narrow down my focus, but here are four that just may see the sewing shears this year:

These are all vintage Moygashel linen.

These are all vintage Moygashel linen.

This vintage, authentic Diane von Furstenberg cotton blend knit has been calling my name for quite some time.

One year at a time = DvF

Hopefully this fabric and this pattern will finally find each other this year!

One year at a time - DvF pattern

The sewing year will no doubt end next Fall with a return to wool. The polka dotted wool is similar to the wool in a dress I made in Fall of 2015. It is from Mendel Goldberg Fabrics in NYC.

As one who loves polka dots, I could not pass up this wool/silk blend fabric.

As one who loves polka dots, I could not pass up this wool/silk blend fabric.

When I purchased it, several swatches of boucle were in the package – and I was in a swoon over this blue and pink sample:

How wonderful that Pantone's two "colors of the year" - pink and blue - are the color way for this boucle.

How wonderful that Pantone’s two “colors of the year” – pink and blue – are the colorway for this boucle.

Lucky me to open a box on Christmas morning to find 2 yards of it (thank you to my dear children!) – enough for another Classic French Jacket.

2 full yards of this glorious boucle! What a wonderful gift!

Two full yards of this glorious boucle! What a wonderful gift!

Some of the patterns I might be using this year are all vintage ones that deserve attention. I tidied up the boxes where I keep my pattern collection and these just happened to be some which would NOT go back in silence, so here they are with all their wily temptations!

One of my big projects for this year is this coat.

One of my big projects for 2016 is this coat.

I have been wanting to make the dress on the right for quite a while - this may be the year it happens!

I have been wanting to make the dress on the right for quite a while – this may be the year it happens!

I really like this shirtwaist dress (a little shorter, of course) and I envision it made out of a lovely summer linen.

I really like this shirtwaist dress (a little shorter, of course) and I envision it made out of a lovely summer linen.

I think I could make either view of this dress over and over and not get tired of it.

I think I could make either view of this dress over and over and not get tired of it.

One thing I learned a long time ago is the importance of flexibility in planning my sewing year. Sometimes things happen that impede my sewing plans. Sometimes I change my mind. And always, always, I plan too much. And when (not if) that happens, there is always 2017 right around the corner.

17 Comments

Filed under Boucle for French style jackets, Diane von Furstenberg Vogue patterns, Linen, Moygashel linen, Polka dots, Sewing for children, Uncategorized, Vintage fabric, vintage Vogue Designer patterns, vintage Vogue patterns from the 1950s, vintage Vogue patterns from the 1960s, vintage Vogue patterns from the 1970s, woolens, Wrap dresses

A Quilt for Carolina

The calendar tells me it is January of 2016. However, I cannot quite let go of Christmas 2015 yet – at least not until I share the story of the small quilt I made for the newest member of our family.

A quilt for Carolina

Dear little Carolina was born in April, and it was then that I began to plan the quilt I knew I would make for her first Christmas. I had done the same for her big sister, Aida, two years ago.

This is the quilt I made for Aida two Christmases ago.

This is the quilt I made for Aida two Christmases ago.

Once we knew what her name was (Carolina is pronounced like the American states, North and South Carolina, with a long “I”), it seemed an easy decision to anchor each corner of the quilt with a “Carolina lily.” Here is a classic Carolina lily quilt square:

A quilt for Carolina

However, there are a ga-zillion variations of this design, and because I don’t enjoy “piecing,” I designed a block with an appliquéd lily, set in a blue pot. I thought I would tie these blocks together with rows of undulating vines, as seen in the first image above.  And then I got stuck. I wanted to draw on some of the design features in Aida’s quilt, but make it look entirely different. Initially I thought I’d like the great middle field of this quilt to be of a “random” nature similar to this quilt pictured in one of my books:

This quilt is pictured in Crib Quilts and Other Small Wonders, by Thos. K. Woodrd and Blanche Greenstein, E. P. Dutton, New York, New York, 1981, p. 16.

This quilt is pictured in Crib Quilts and Other Small Wonders, by Thos. K. Woodard and Blanche Greenstein, E. P. Dutton, New York, New York, 1981, p. 16.

I spent hours fiddling with paper appliqués and trying to get inspired. Nothing was working and time was flying by!! Even small quilts (Carolina’s quilt is 46” square) take a long time to make. I finally realized that this quilt needed to be orderly, but whimsical, for me to come up with a successful design. I like a quilt that can be rotated and viewed logically from all four edges – so I decided each side of the quilt had to be anchored by something. I thought about some of the memories Carolina might have of her first home – and then it all became obvious. Tall – very tall and very green – pine trees define the property where Carolina and her Mommy, Daddy, big sister, and dog live. The pines are sheltering, sturdy but sometimes swaying, and home to untold numbers of birds and animals. They would be the perfect definition for this quilt, too.

A quilt for Carolina

Two blue birds are on each of the tall middle trees.

The animals – dog, cat, chicken, and bees (flying around their hive) – practically designed themselves:

The dog's ear is floppy! I lined it with pink gingham. Here i have it pinned back so you can see it!

The dog’s ear is floppy! I lined it with pink gingham. Here I have it pinned back so you can see it.

I am a big fan of the dog's ear - so another look at it!

I am a big fan of the dog’s ear – so another look at it.

One of our cats wears a pink collar - thus the pink gingham ribbon for this cat. I added her smile after I had taken this photo.

One of our cats wears a pink collar – thus the pink gingham ribbon for this cat. I added her smile after I had taken this photo.

I embellished the chicken with wide rick rack. One of the fun aspects of designing a quilt is the ability to select the perfect fabric to tell your story - this hen has feathers!

I embellished the chicken with wide rick rack. One of the fun aspects of designing a quilt is the ability to select the perfect fabric to tell your story – this hen has feathers!

Bees a-buzzing around their hive!

Bees a-buzzing around their hive!

Each interior corner of the middle field is anchored by the Sun, the Moon, and the Stars:

The sun in this corner.

The sun in this corner.

A smiling moon, with rick rack mouth and a green button eye.

A smiling moon, with rick rack mouth and a green button eye.

Polka dotted stars in the other corners.

Polka dotted stars in the other corners.

You are seeing sections of the finished quilt, but here are some “in progress” photos, showing the freezer paper appliqués that were easy to spread out so that I could consider  the placement of each one.

This was how I knew I had the right composition of the quilt. Then it was on to hours and hours and hours of hand appliqué!

This was how I knew I had the right composition of the quilt. Then it was on to hours and hours and hours of hand appliqué!

It was rewarding to see this progress!

It was rewarding to see this progress!

I would occasionally place the border pieces on the edges to see if I like how it looked. With quilts, I am known to make decisions as i go along.

I would occasionally place the border pieces on the edges to see if I liked how it looked. With quilts, I am known to make decisions as I go along.

Once I had the center finished, the borders needed something else. I decided Carolina’s initials – CHT – would be the perfect addition, appliquéd with the surname initial in the prominent outer and middle position on each edge. See the above photo for my thinking process on this.

A baby hand is appliquéd in the center, surrounded by baskets, ready to be filled to their brims by her imagination, just as with Aida’s quilt.

I added the red rick rack bows, secured by vintage buttons, because i thought the center of the quilt needed more "heft" - and I was pleased with the effect this small addition made. (I took this photo before I had trimmed the ends of the rick rack even.)

I added the red rick rack bows, secured by vintage buttons, because I thought the center of the quilt needed more “heft” – and I was pleased with the effect this small addition made. (I took this photo before I had trimmed the ends of the rick rack even.)

I neglected to take a photo of the back of the quilt. I chose pink gingham cotton – in Carolina pink! – to make cuddling under it even more fun – and it serves as a tie-in with the bow on the cat, and the dog’s floppy ear.

I finally finished this quilt just one day before our whole family arrived for the holiday. I was obviously so glad to have it done, but then I found myself filled with weepy emotion and grateful wonder at the great blessing of grandchildren and the love that such a quilt can represent.

Made with love!

Made with love!

Carolina with her new quilt!

Carolina with her new quilt!

Oh, yes – lest you think Granddaughter #1 was to go without something handmade by her Coco (the name our granddaughters call me!),  please think again. I had purchased this pattern a couple of years ago, and decided this was the time to use it.

Quilt for Carolina - bear pattern

I made the baby polar bear, opting for pink ears and a pink gingham ribbon around its neck.

With button eyes and an embroidered nose.

With button eyes and an embroidered nose.

DSC_1031

DSC_1032

Hello, Aida!

Hello, Aida!

Now, at last – I am ready for the New Year, with all its promise and mystery! Happy 2016 to all of you around the world!

30 Comments

Filed under Baby quilts, Sewing for children, Uncategorized

Fifty Little Dresses – Part 2

Two years ago I was absent from my blog for a few weeks as I helped our daughter and her husband after the arrival of their first child, a beautiful little girl. I have just returned home after another absence, this time to welcome another beautiful little girl!

The snow is gone, and even the mailbox, battered by the snow plows, looks happy.

The snow is gone, and even the mailbox, battered by the snow plows though it be, looks happy.

For almost three weeks, I cooked, I cleaned, I ironed, I shopped for groceries, I did laundry, I baked, I drove hither and yon as chauffeur, I spent untold fun and busy hours with granddaughter number one, and then I started it all over again – and again – and again!

Just as with their first child, our daughter and her husband chose not to learn the sex of their baby ahead of time, so the arrival of this baby girl was another delightful surprise. Now I wonder if I had a premonition that I would have two granddaughters? In the past two years I have come across a couple of lengths of vintage cottons which appealed to me for their possibilities of being turned into little girls’ dresses.

A strawberry print cotton for two little Spring sisters?

A strawberry print cotton for two little Spring sisters?

With navy blue sailor collars and red ties?

With navy blue sailor collars and red ties?

The plentiful yardage of both fabrics will be perfect for matching sister dresses, although it will be a couple of years until Aida and Carolina are ready for that. But still, I can start to plan . . .

Sewing, of course, was not on the agenda while I was on grandmother duty. But sewing is a patient endeavor, and sometimes a forced break can be good. When I left home I was one day away from finishing my complete cashmere suit dress ensemble. I will admit I was a little worn out from it, and when I realized I was not going to be able to finish it before I left home, I was definitely feeling discouraged. I saw every perceived flaw in it, and I knew it would no longer be seasonable when I returned. I would be finishing a dress and jacket that I could no longer wear this year.

But when I walked into my sewing room after my long absence and saw the (as yet, unlined) dress and completed jacket on my dress form, I suddenly felt totally energized again. Hey, I thought, it looks pretty good after all! Some things, like new babies, are worth waiting for, aren’t they?

Welcome to the world, dear little Carolina!

Welcome to the world, dear little Carolina!

31 Comments

Filed under Love of sewing, Sewing for children, Uncategorized, Vintage fabric

Frigid February

For such a short month, February is certainly making itself heard loud and clear here in the northeastern United States. Windy, snowy, bitter, bitter cold. The only way to push through it is to try to have some fun with it. So – in that vein, I am delighted to announce the winner of my February give-away, who is Adecia!

Frigid February - winner tag Adecia, I’ll be sending you an email so that I can get your mailing address. And a warm (emphasis on warm, mind you!) thank you to all who commented and added so many wonderful additions to my “hopeless dressmaker” list.

Of course, another way to have fun with winter days which keep us housebound is to spend those days sewing. And so I have! In anticipation of Valentine’s Day, I did some sewing for my almost-two-year-old granddaughter, First I made her a little apron to wear when she is playing with her little kitchen – or helping her mommy in the real kitchen:

I found the red gingham in one of my fabric drawers, and I purchased yards and yards of the heart lace when Waechter's (sadly) went out of business.

I found the red gingham in one of my fabric drawers, and I purchased yards and yards of the heart lace when Waechter’s (sadly) went out of business.

Next, I made her a white flannel blouse, using a pattern which I had used 30-some years ago when I was sewing for her mommy (my daughter).

The best view of the blouse is in View B on the left.

The best view of the blouse is in View B on the left.

I made the blouse out of flannel so that it would be warm and practical, and I lengthened the sleeves so that they would reach to her wrists. Next, I changed another pattern, also left over from my daughter’s toddler days, and made a red jumper, embellished with rick rack (of course!)

I started with the yoke part of the yellow dress and made it into a jumper.

I started with the yoke part of the yellow dress and made it into a jumper.

Frigid February

With adjustable buttons on the jumper...

With adjustable buttons on the jumper…

The back view.

The back view.

More fun sewing was spent on two baby bags. One baby bag was for a new little girl, so I chose a pink and navy blue color scheme.

Frigid February

Frigid February
 The next one was part of a shower gift for a little baby boy, expected in April. I chose an orange and navy “sailing” theme for this little one.

Frigid February

Frigid February

Now it is back to some serious sewing, as I have finally started work on a cashmere wool suit dress. One way to get the weather to improve is to spend these final weeks of Winter sewing with wool, right? By the time I have it completed, the days will be longer and the sun warmer. But if Mother Nature continues her wrath, I may be able to wear it once this year – and that is what I am hoping for (I think)!

8 Comments

Filed under aprons, Sewing for children, Uncategorized