Tag Archives: sewing

A “Little” More on Chanel

Coco Chanel has been the fascinating, and sometimes controversial, subject of many, many biographies, several of which I have read.  However, none has charmed me quite the way Different Like Coco has.  This delightful slim book by Elizabeth Matthews is written for the 5 – 9 group.  Now, I don’t mean the fun-loving cocktail ladies, who start sipping at 5:00 PM and finally get to dinner at 9:00.  No, this group is the age-group of 5 – 9, meaning the “little” ones.  Yes, this is a children’s book, a small biography of Coco Chanel, with expressive illustrations, and text which strikes a good balance between simplicity and sophistication.

This bright yellow book jacket hints at the lively story inside.

This bright yellow book jacket hints at the lively story inside.

Different Like Coco was published in 2007 by Candlewick Press, a children’s book publisher located in Massachusetts.  I became acquainted with the newly-minted book when I read a review of it in The Wall Street Journal, by Meghan Cox Gurdon.  Being a “pushover” for all things about the fashion and creative sense of Coco Chanel, I ordered my own copy from Amazon.  (Little did I ever imagine that 6 years later, I would have my own little granddaughter who might just hear this book read to her – oh, who knows how many times?)

On one level, the book is purely biographical, emphasizing Chanel’s childhood spent in poverty – which she did not allow to define her.  The later part of her childhood was spent in a convent, and it was there where she learned to sew.

The author's charming illustration of Coco as a child with her sewing.

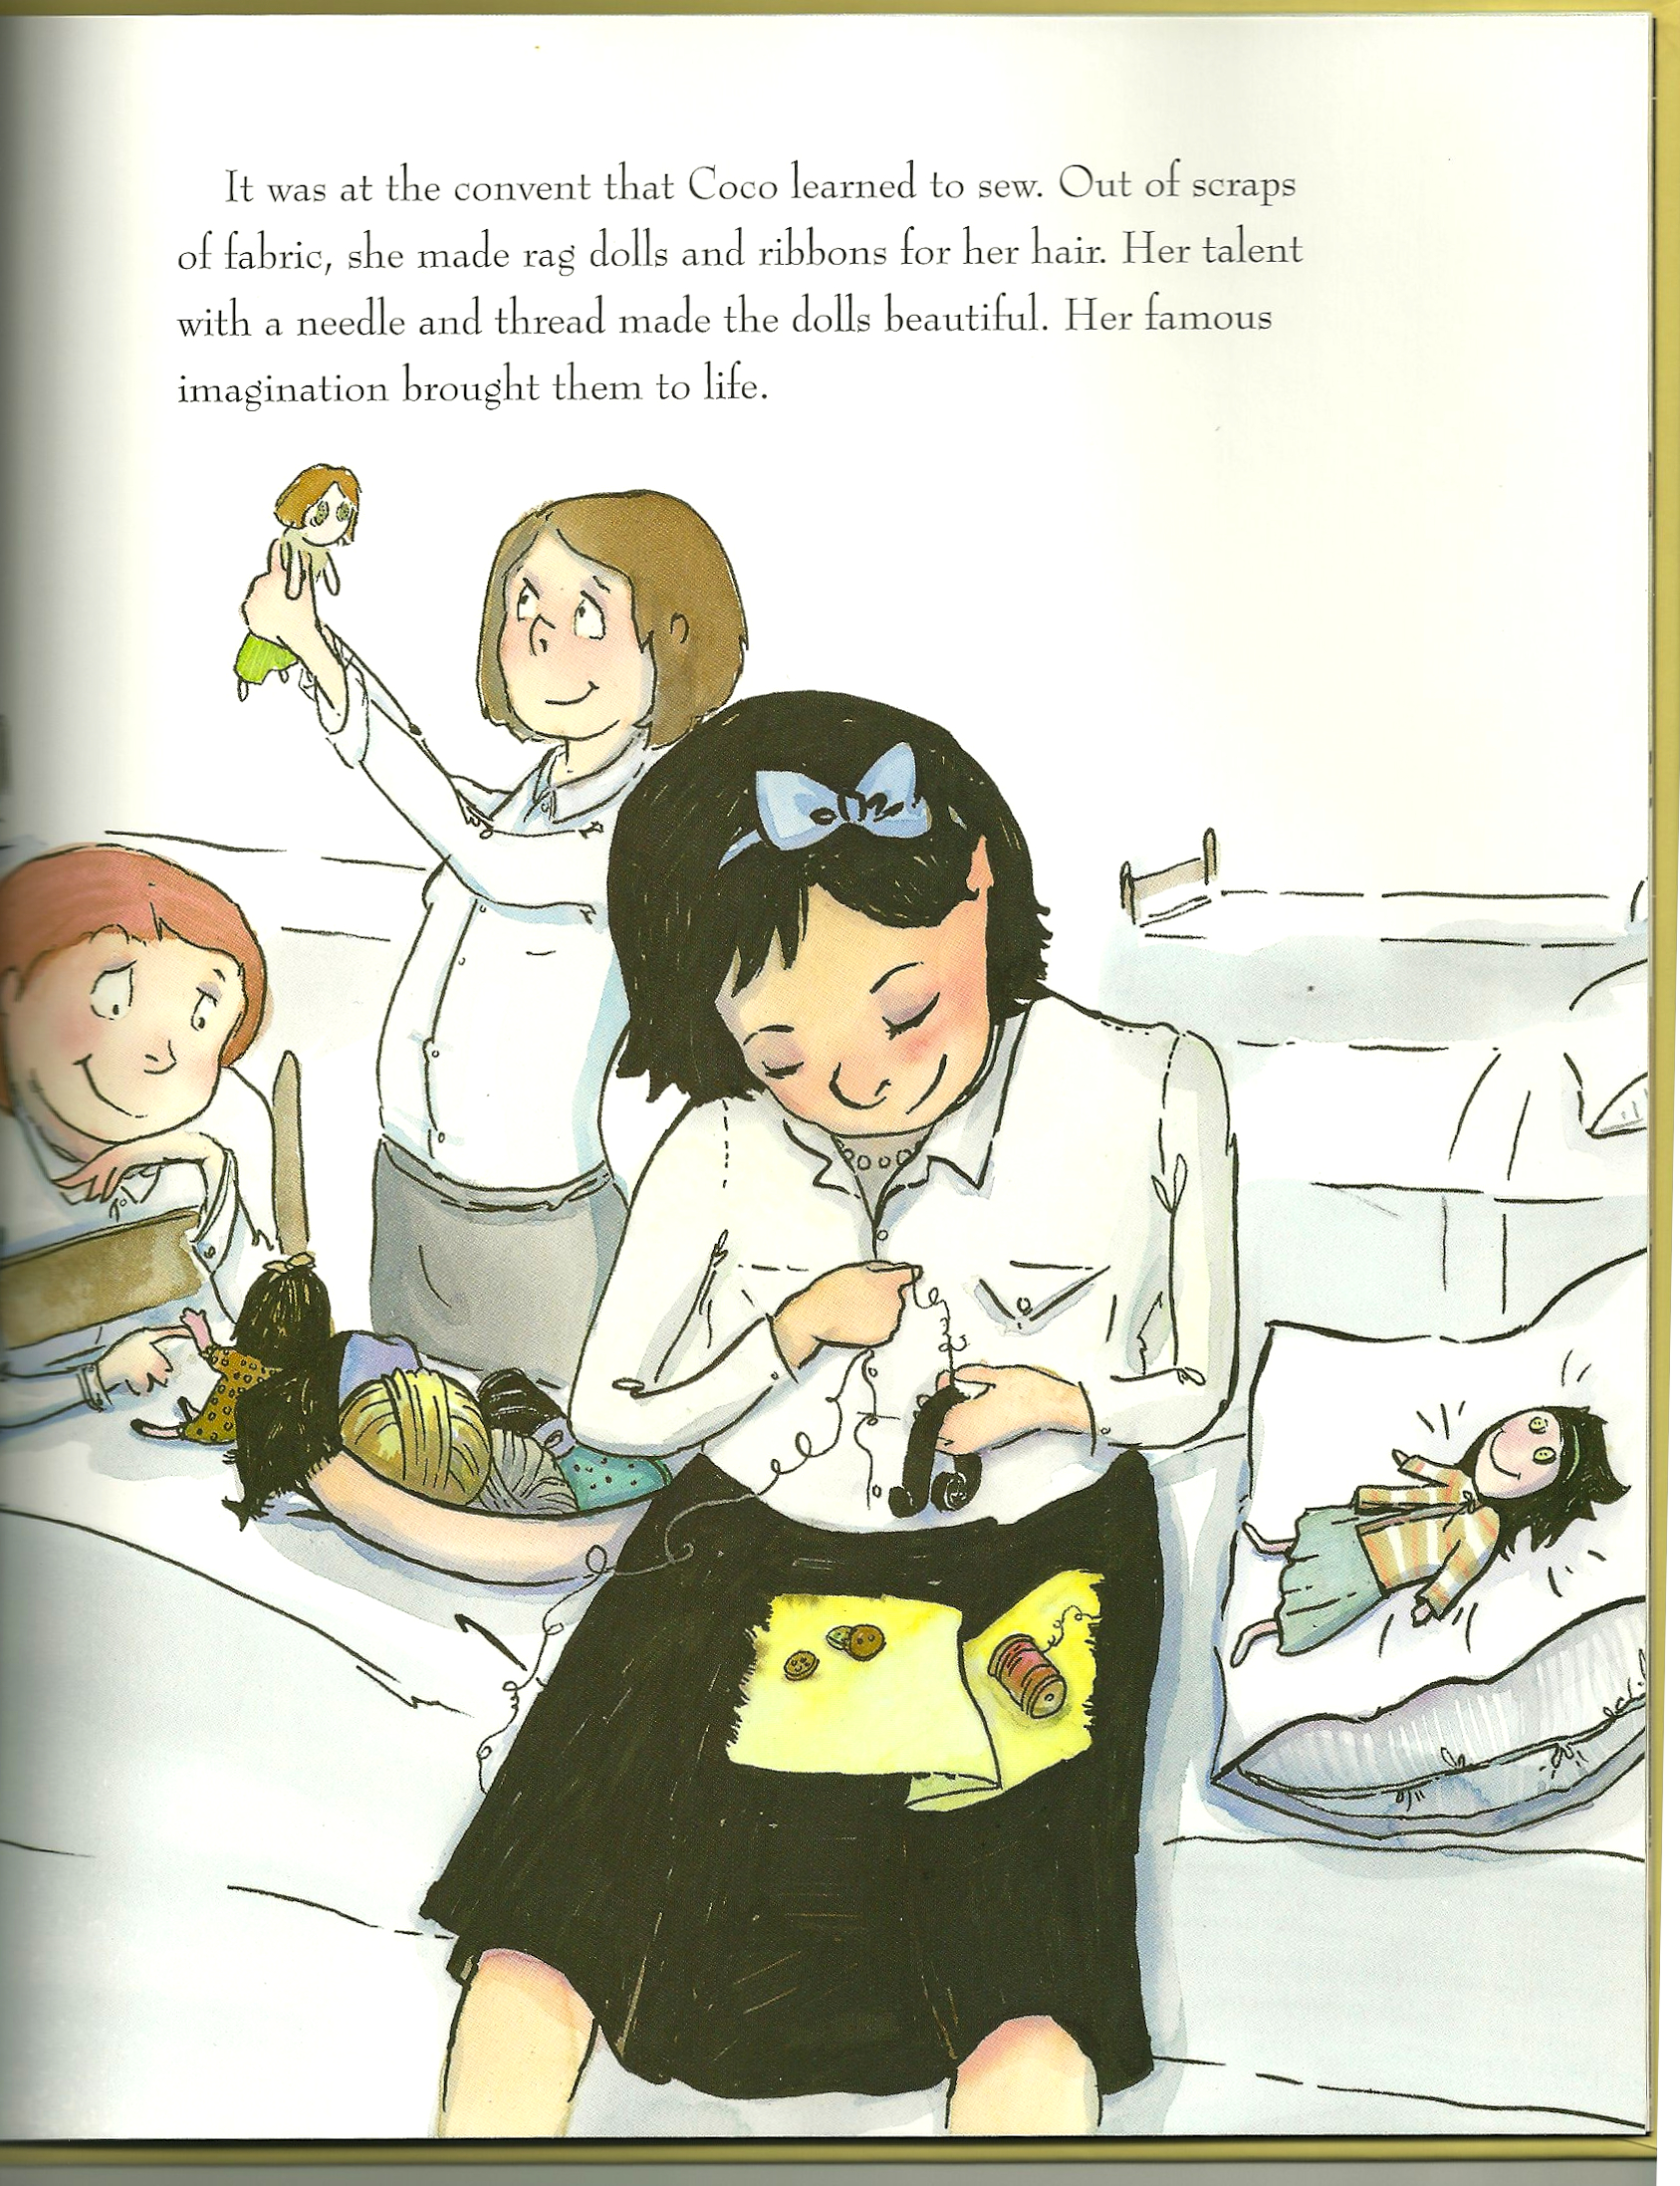
The author’s charming illustration of Coco as a child with her sewing.

Those sewing skills were the “mechanical” ticket to her success, while her creativity, her determination, her hard work and her daring flounting of convention set her apart from others of her age.

Coco's creativity on display.

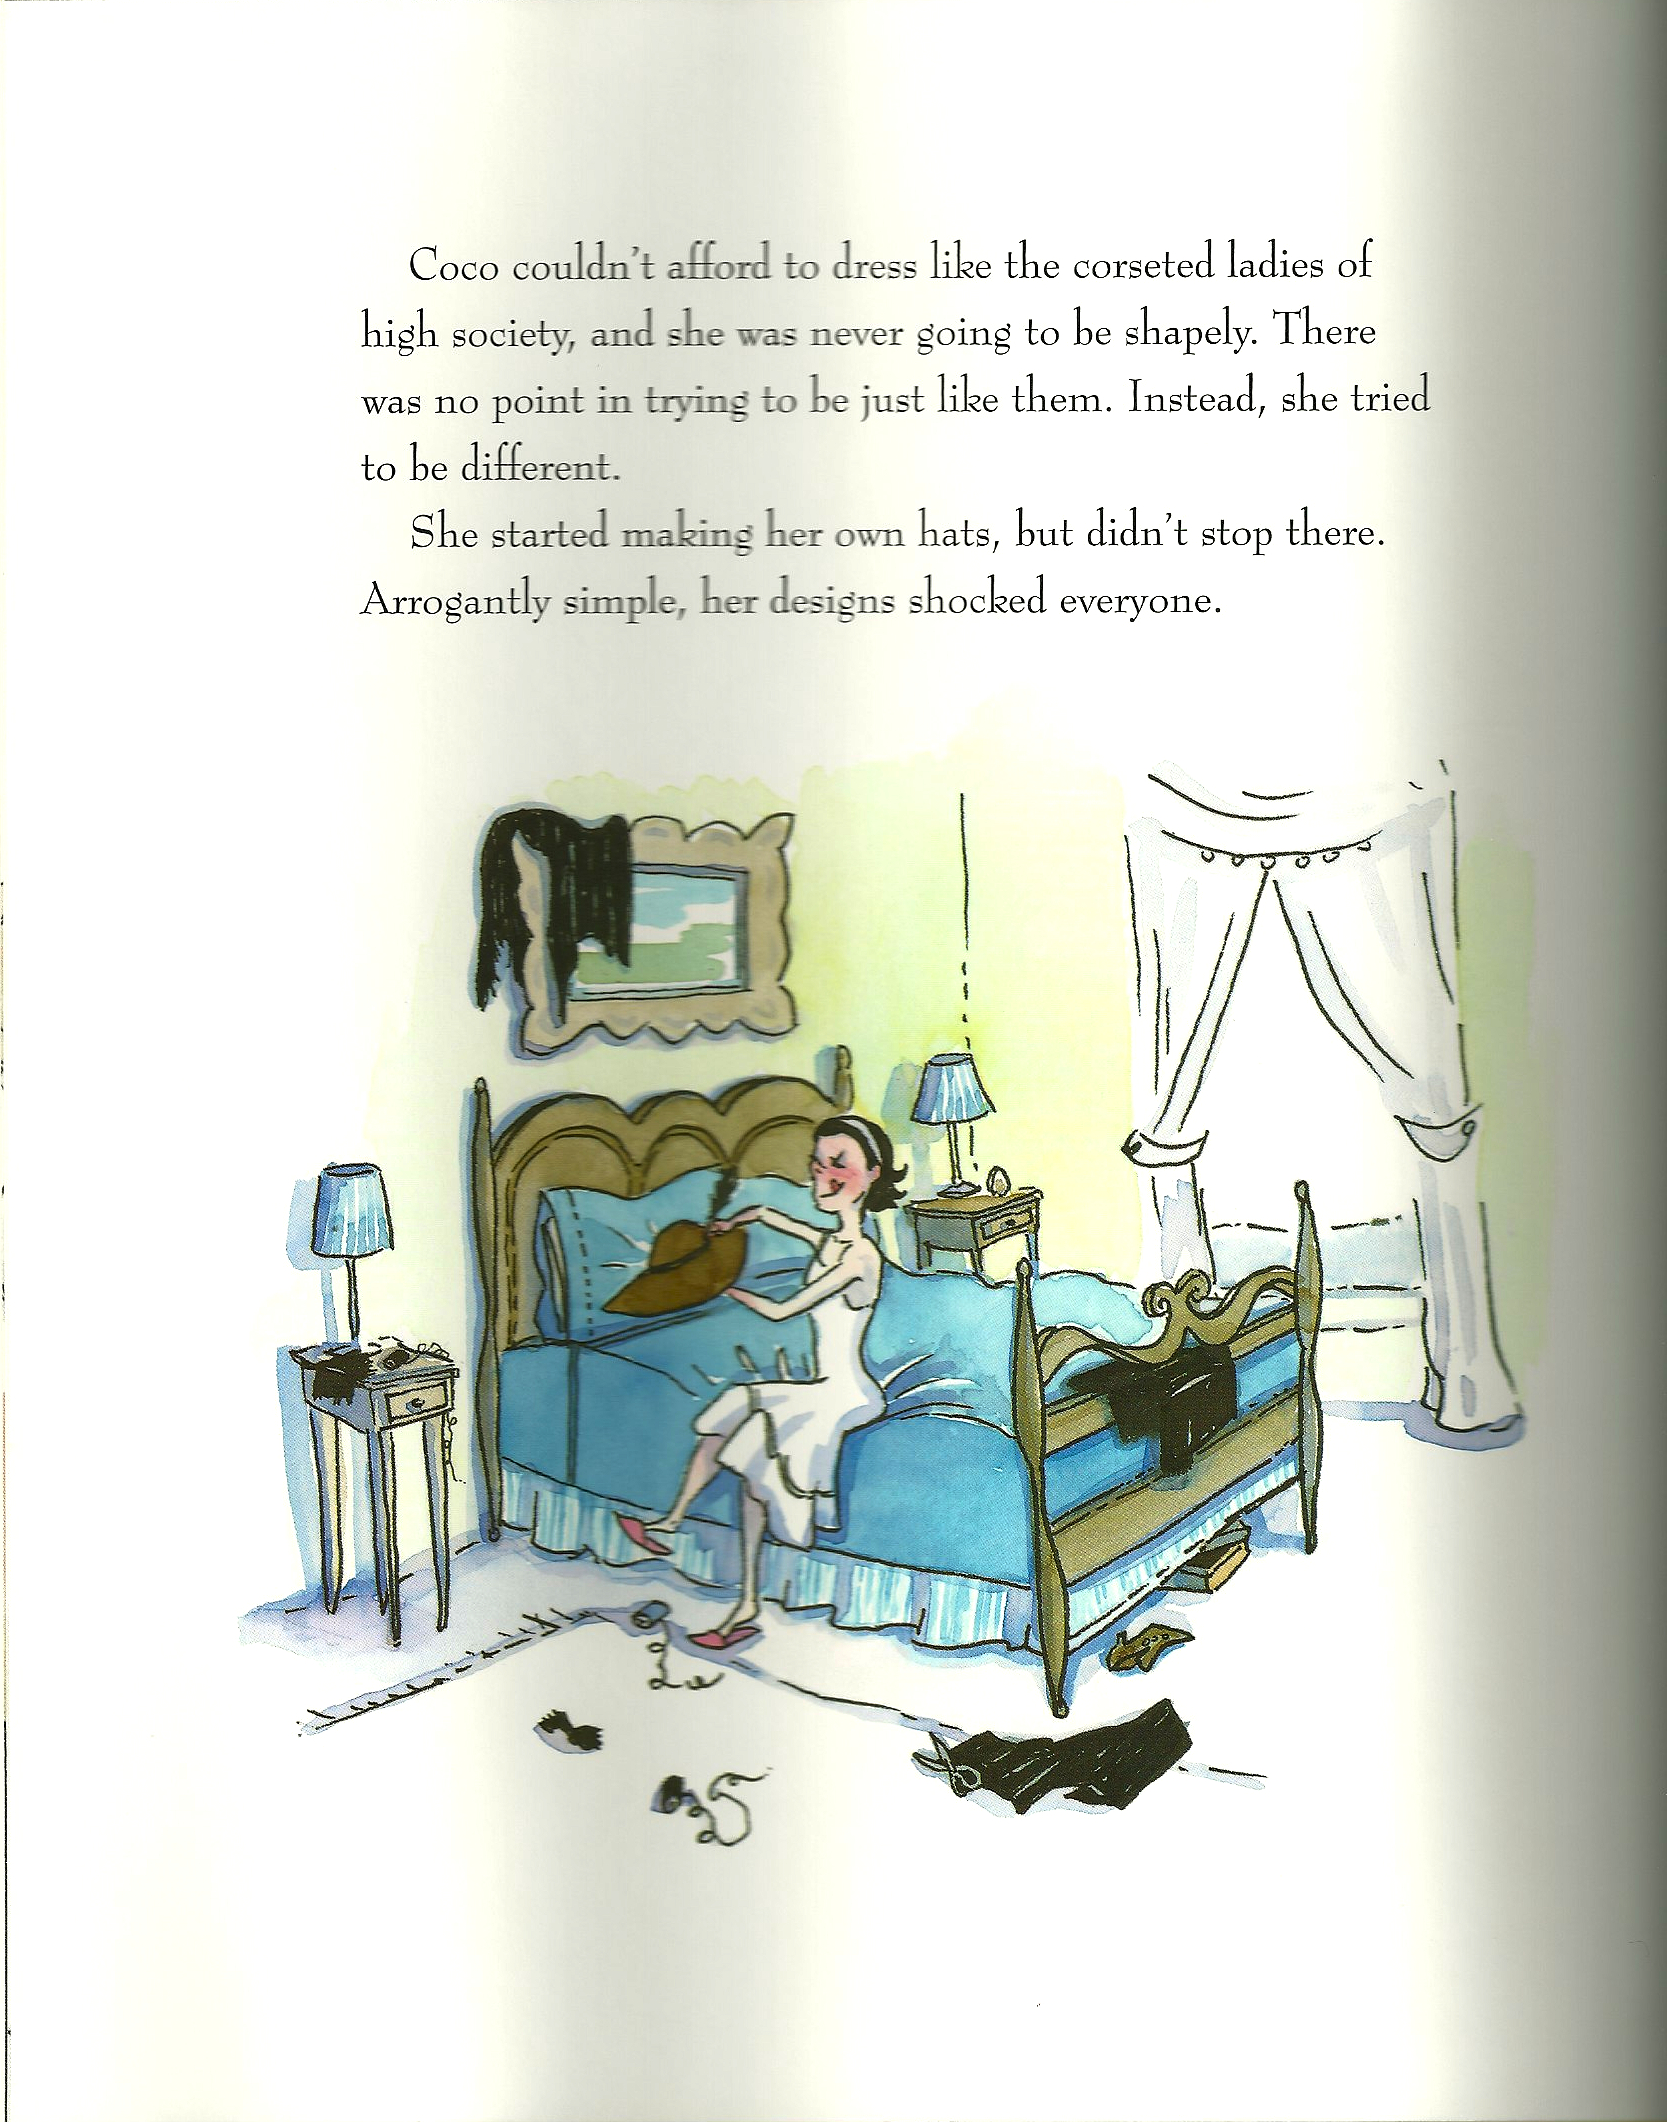
Coco’s creativity on display.

The story emphasizes these characteristics for the young readers of this book, which makes it more than a biography.  Indeed, these characteristics are treated as inspirational, which they certainly can be to children.

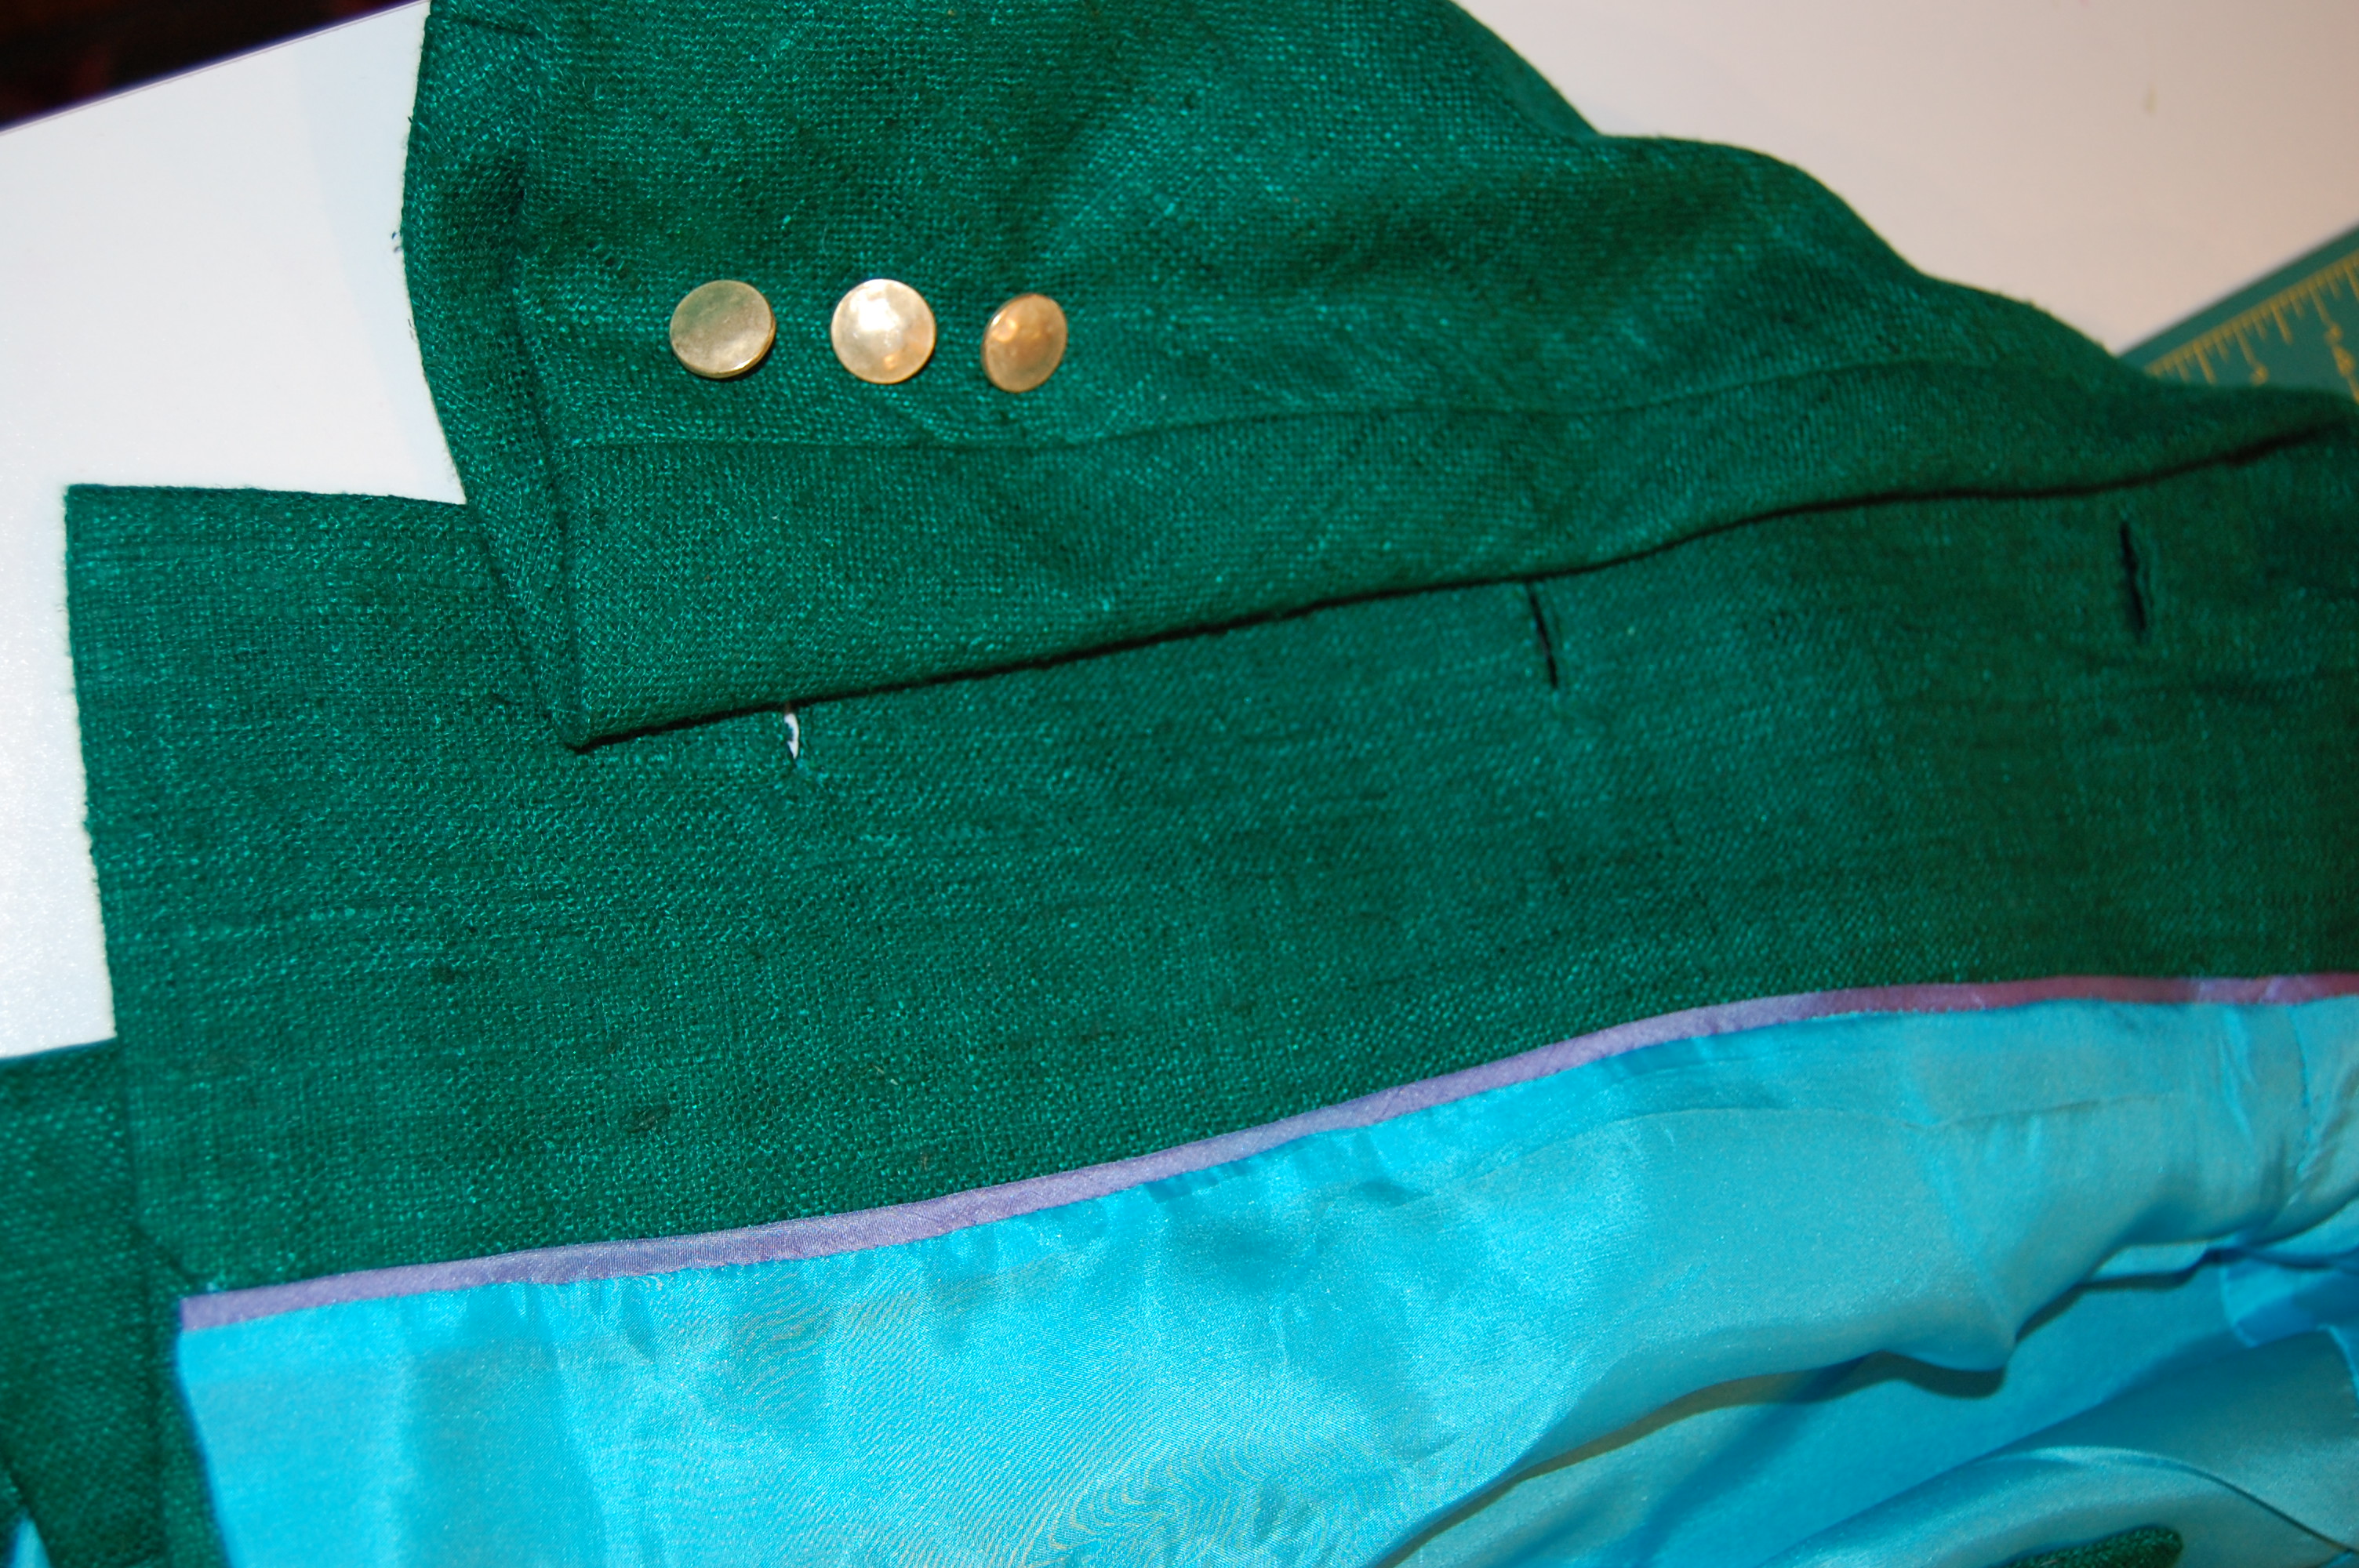
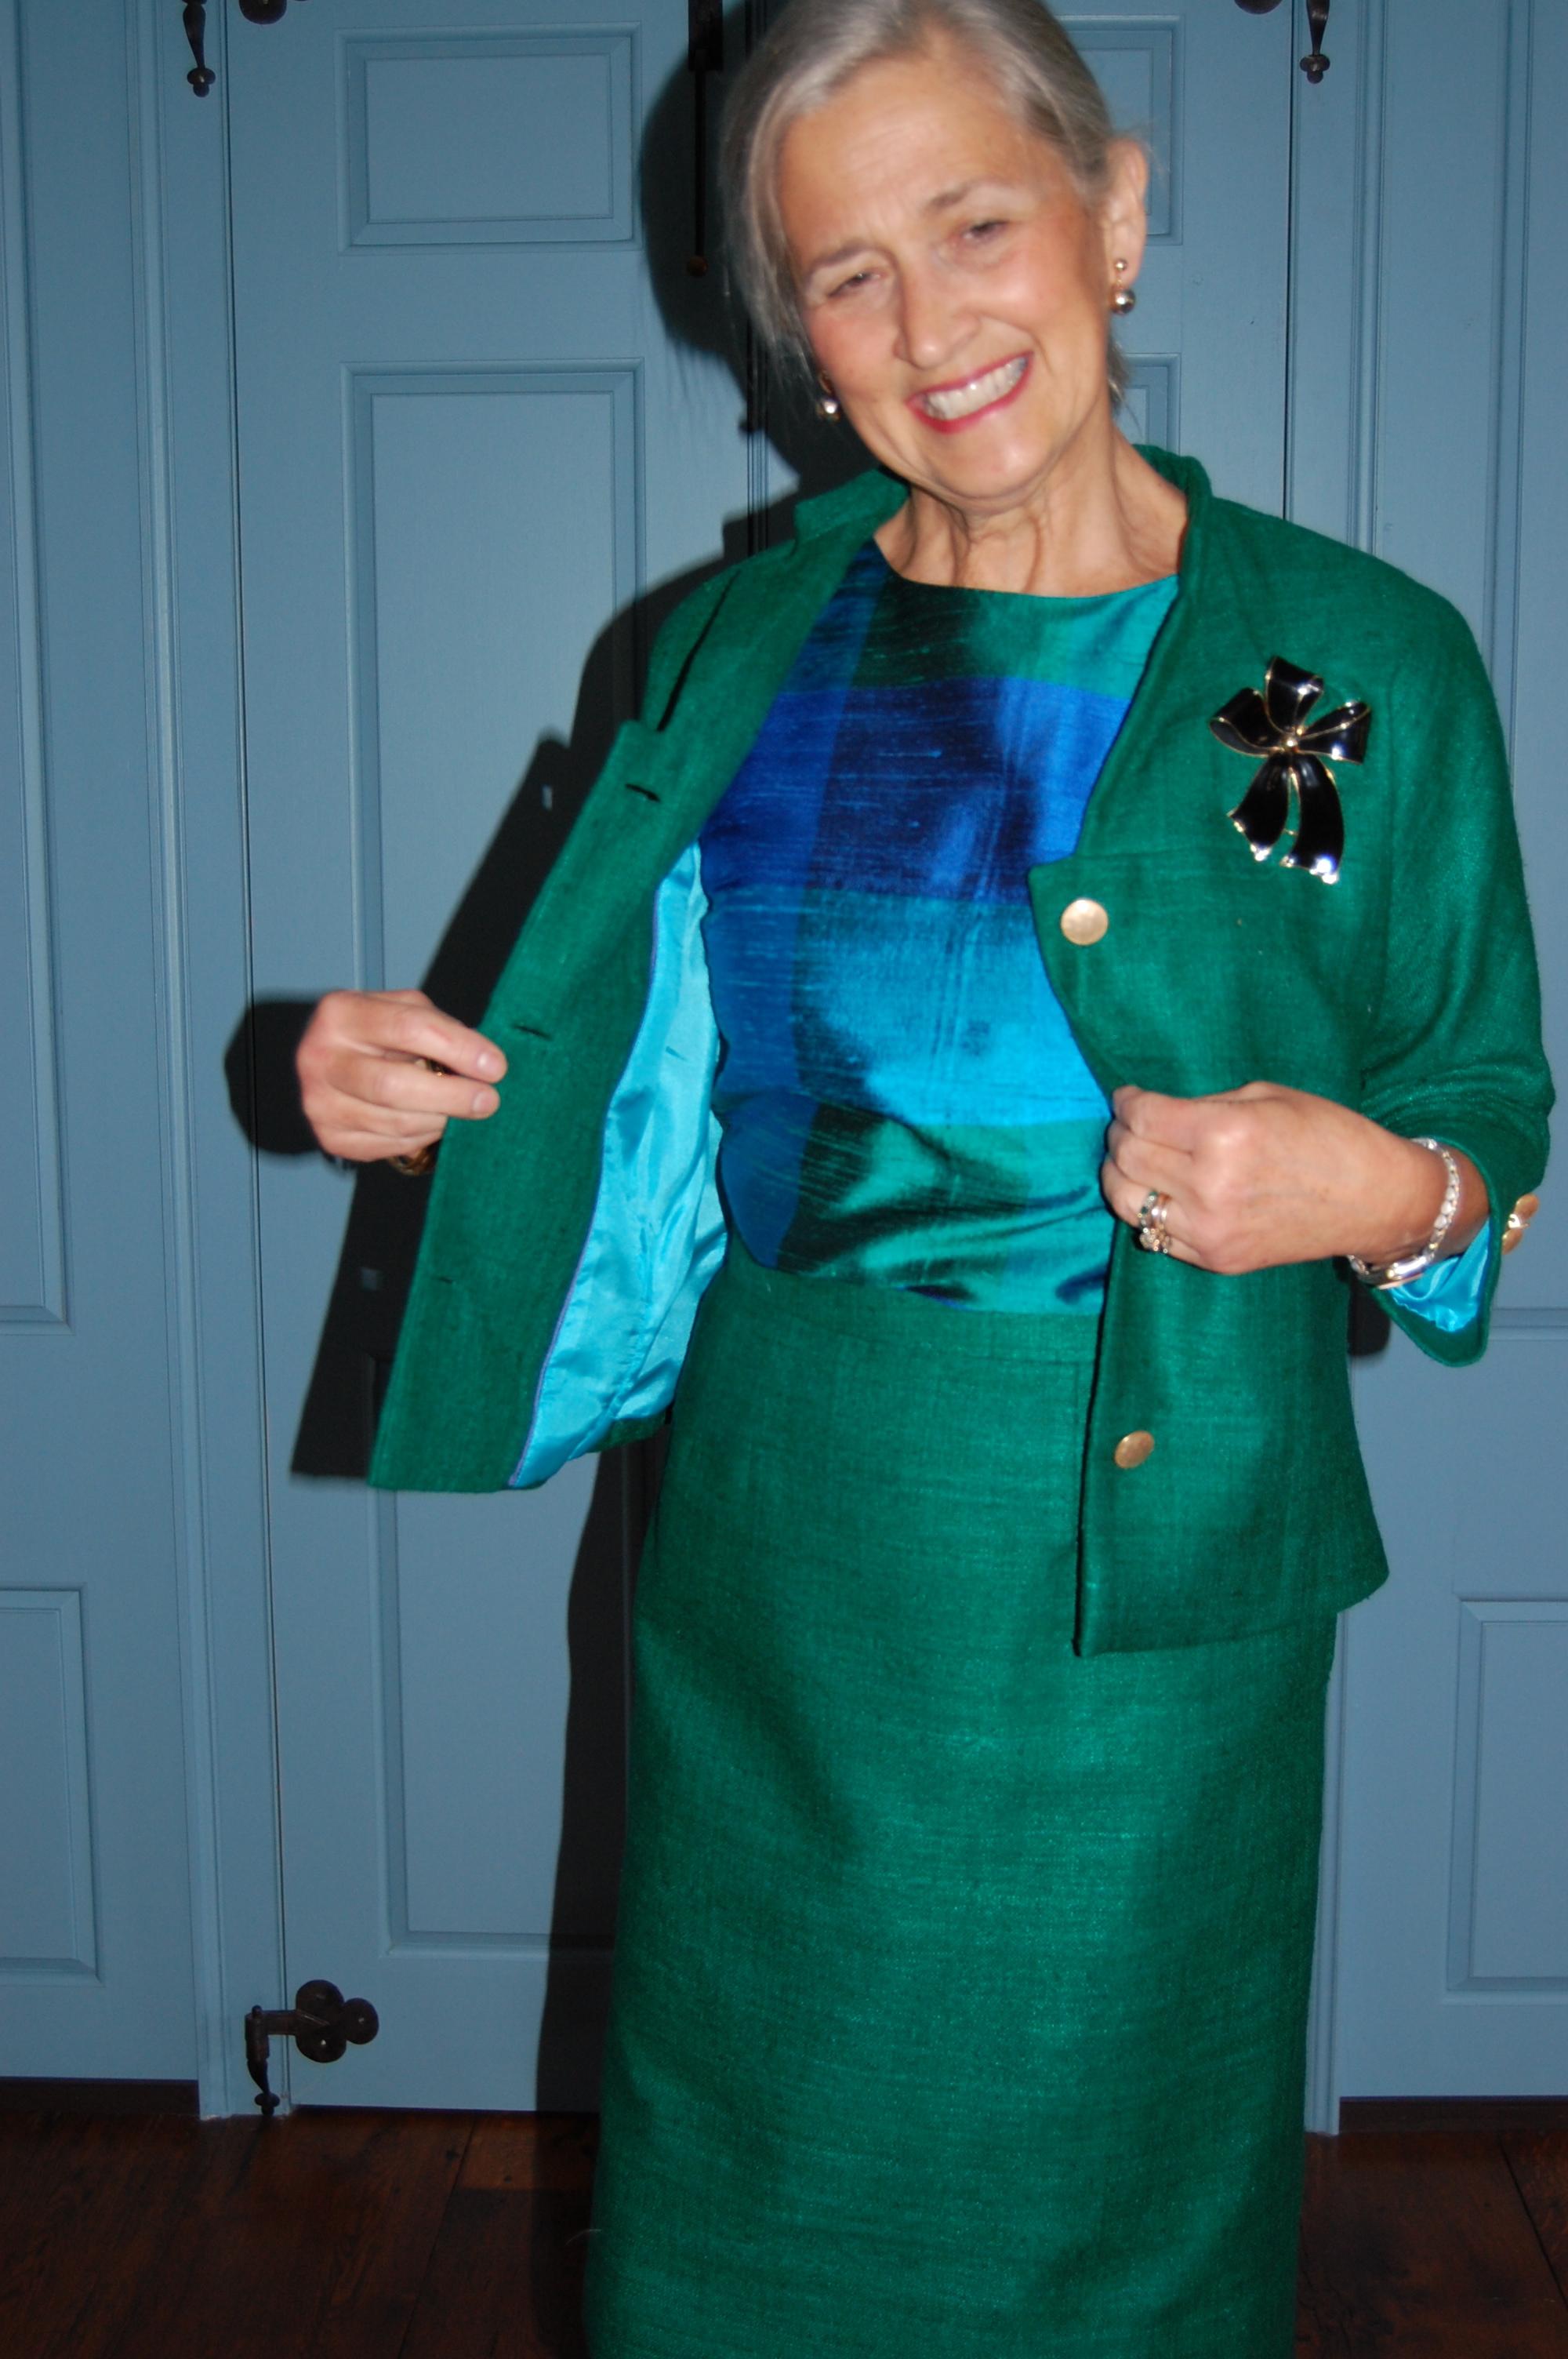
Some of the more controversial aspects of Chanel’s life are handled discreetly, so that the opening of her first shop and the creation of the classic cardigan jacket (made from one of her lover’s sweaters) are seamless chapters in her life story.

A classic created anew!

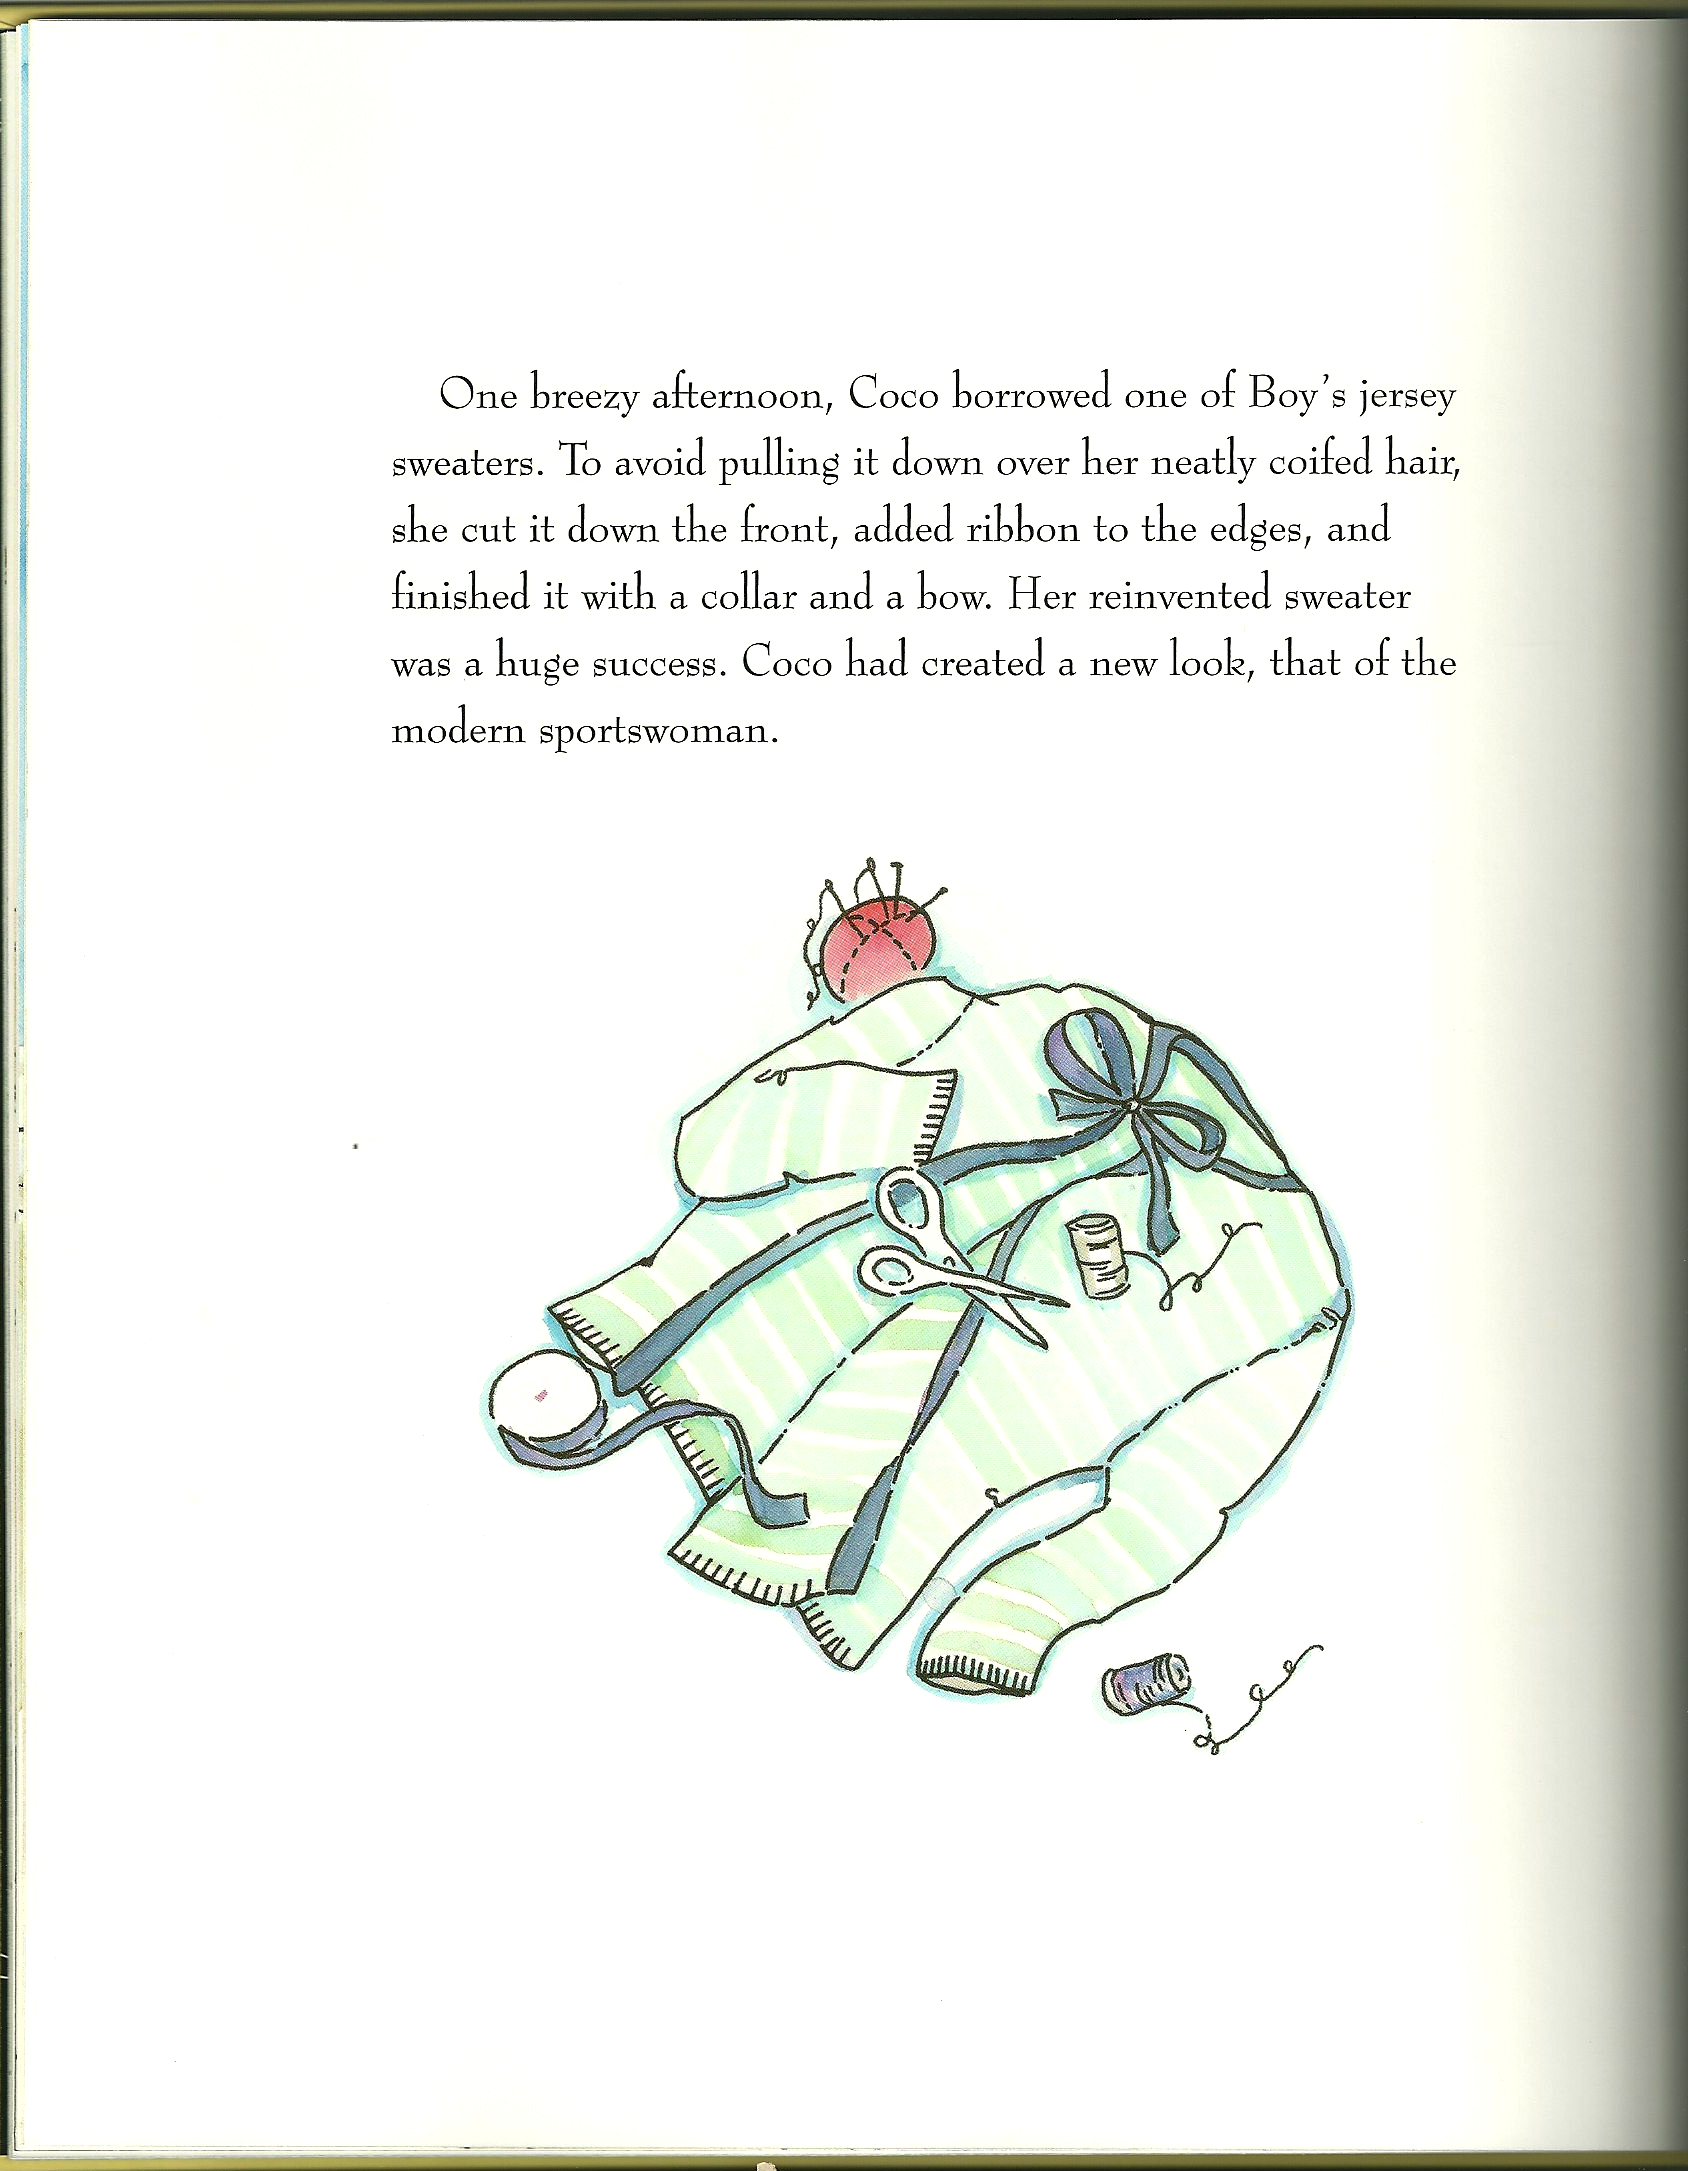
A classic, created anew!

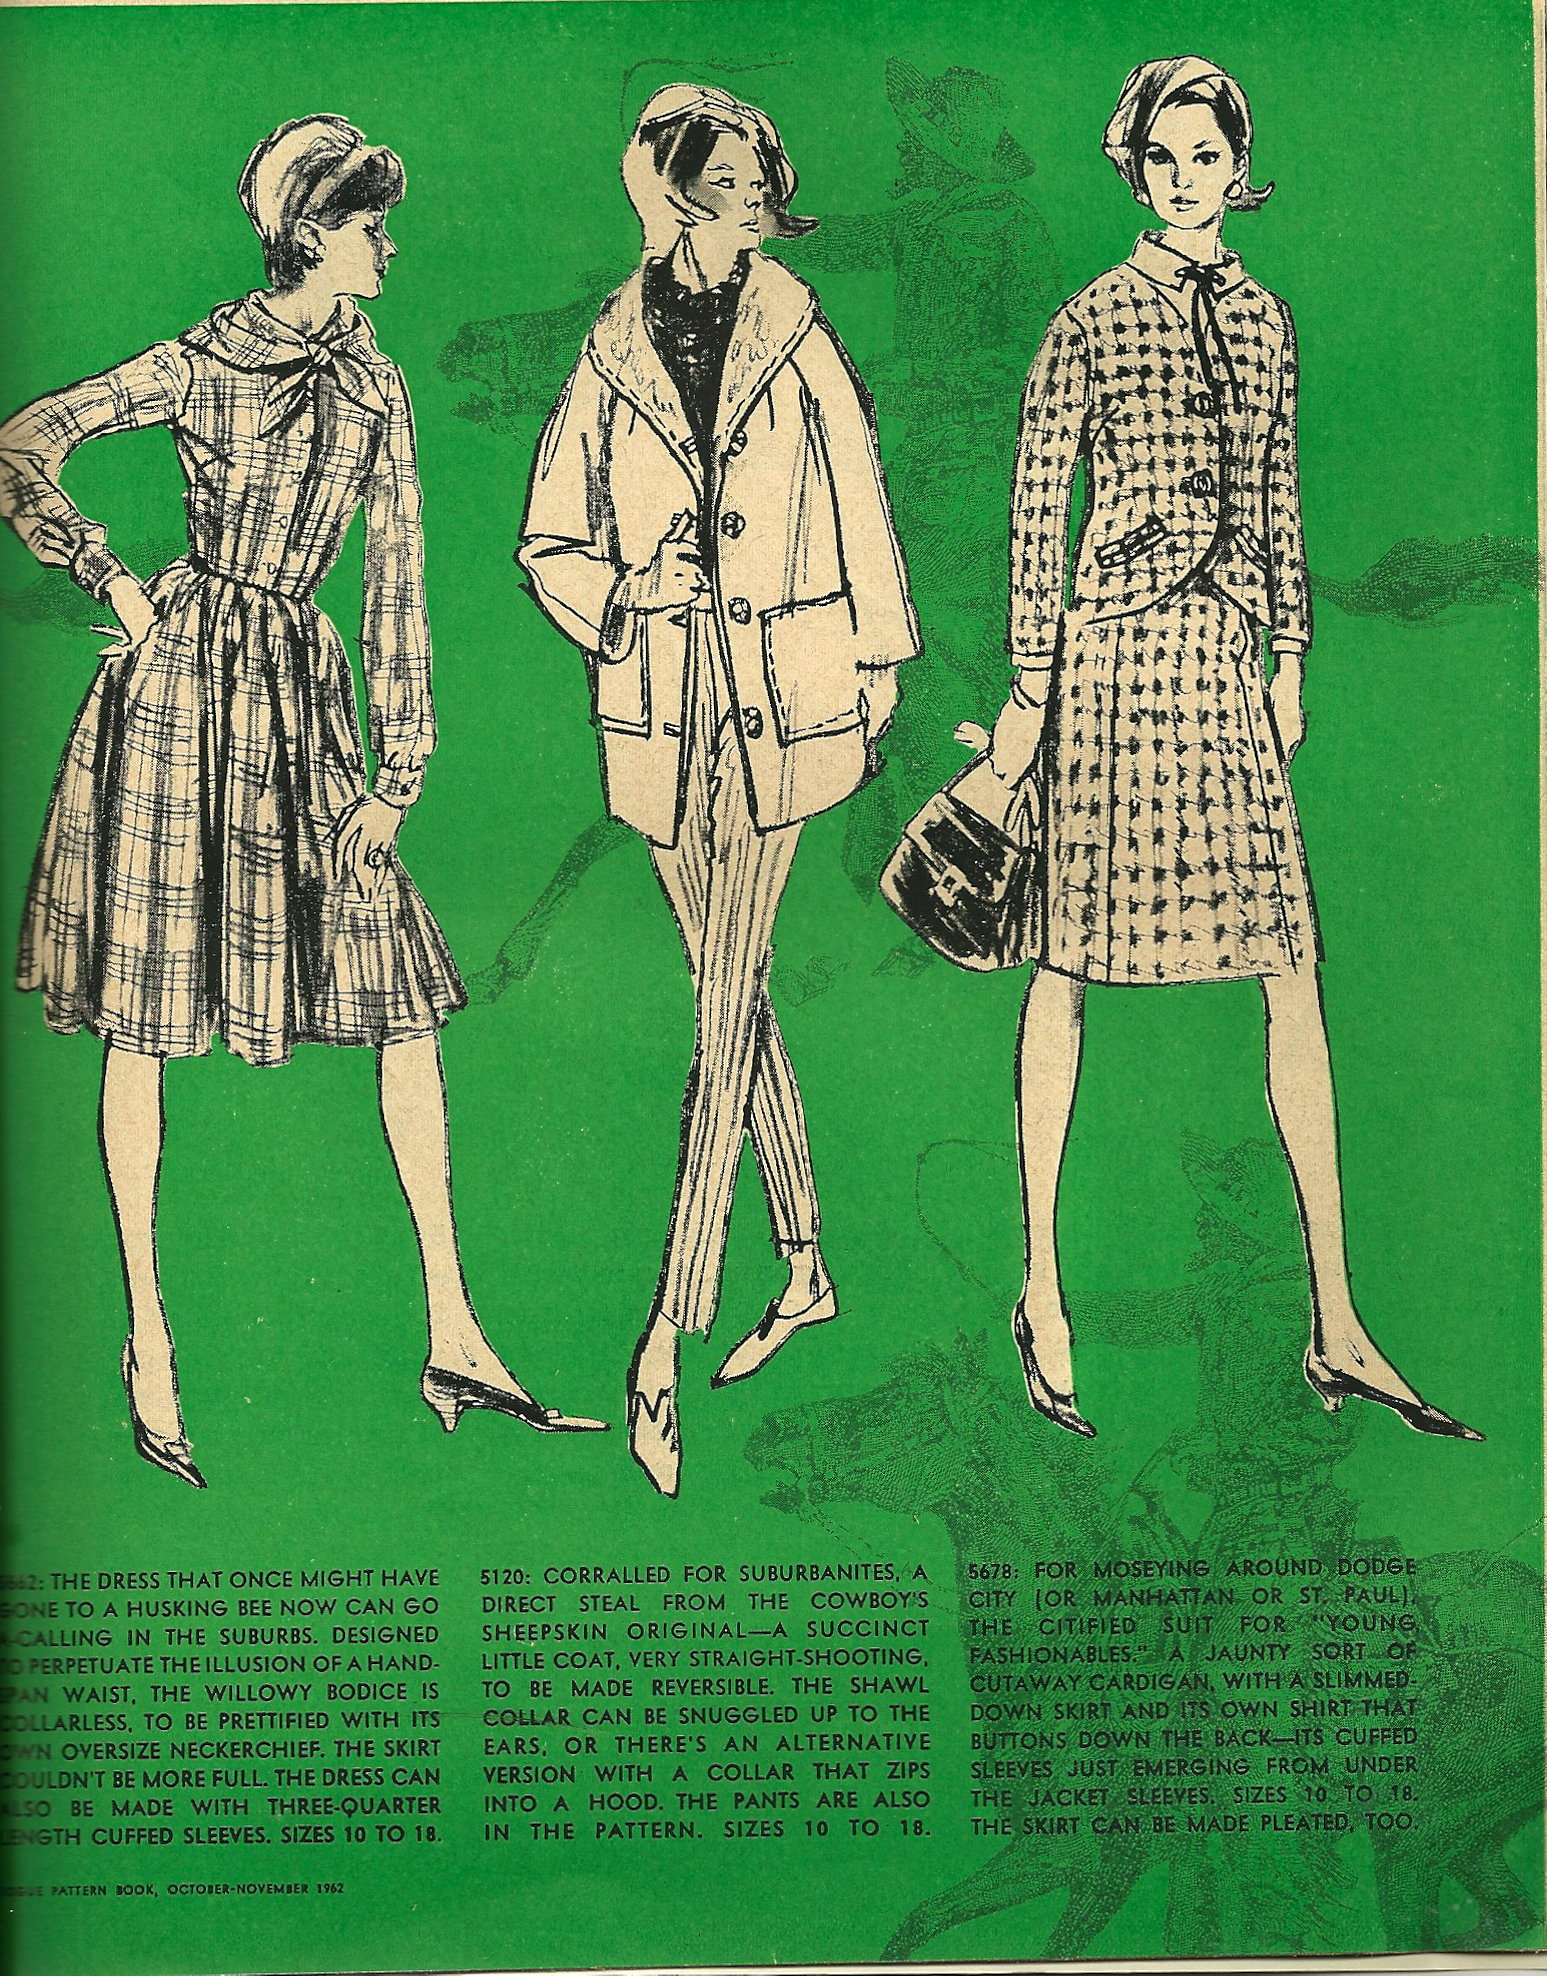
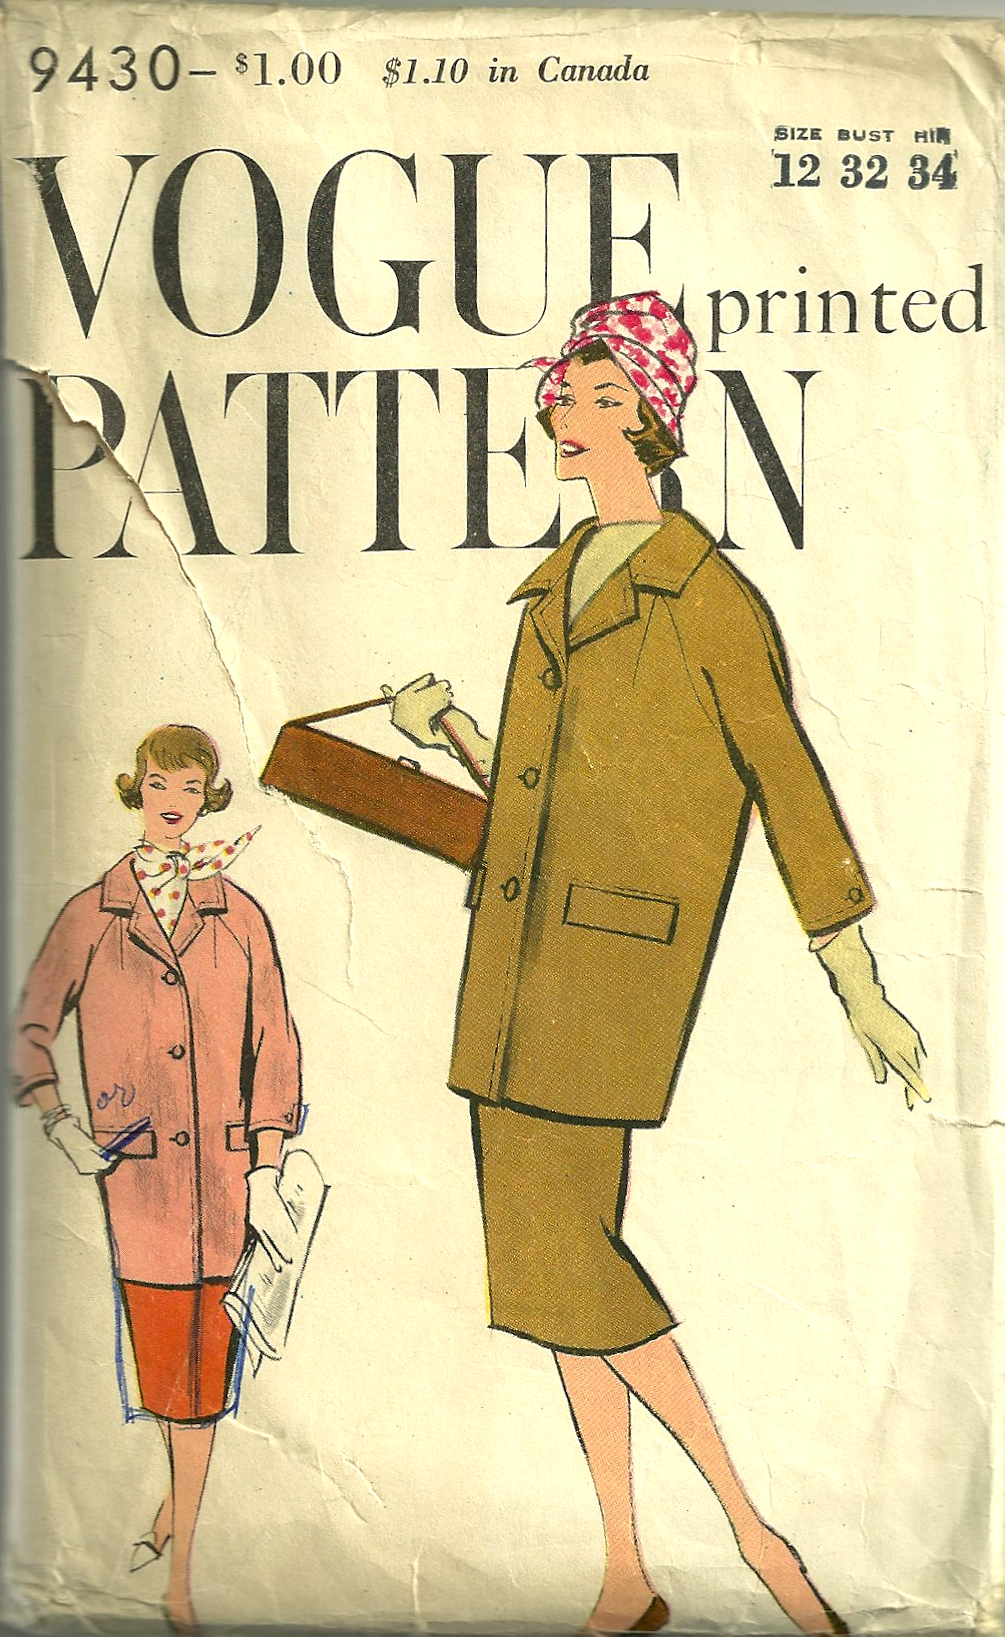
For the adult reader of this sweet book, there are two features which I guarantee will be read again and again.  One is the “Timeline” which is in the back of the book (accompanied by a bibliography, too).  All the important dates of Chanel’s life are succinctly listed, including the development of her perfume Chanel No. 5 in 1921; the afore-mentioned creation of her signature jacket, also in 1921, and her debut of the “little black dress” in 1926.

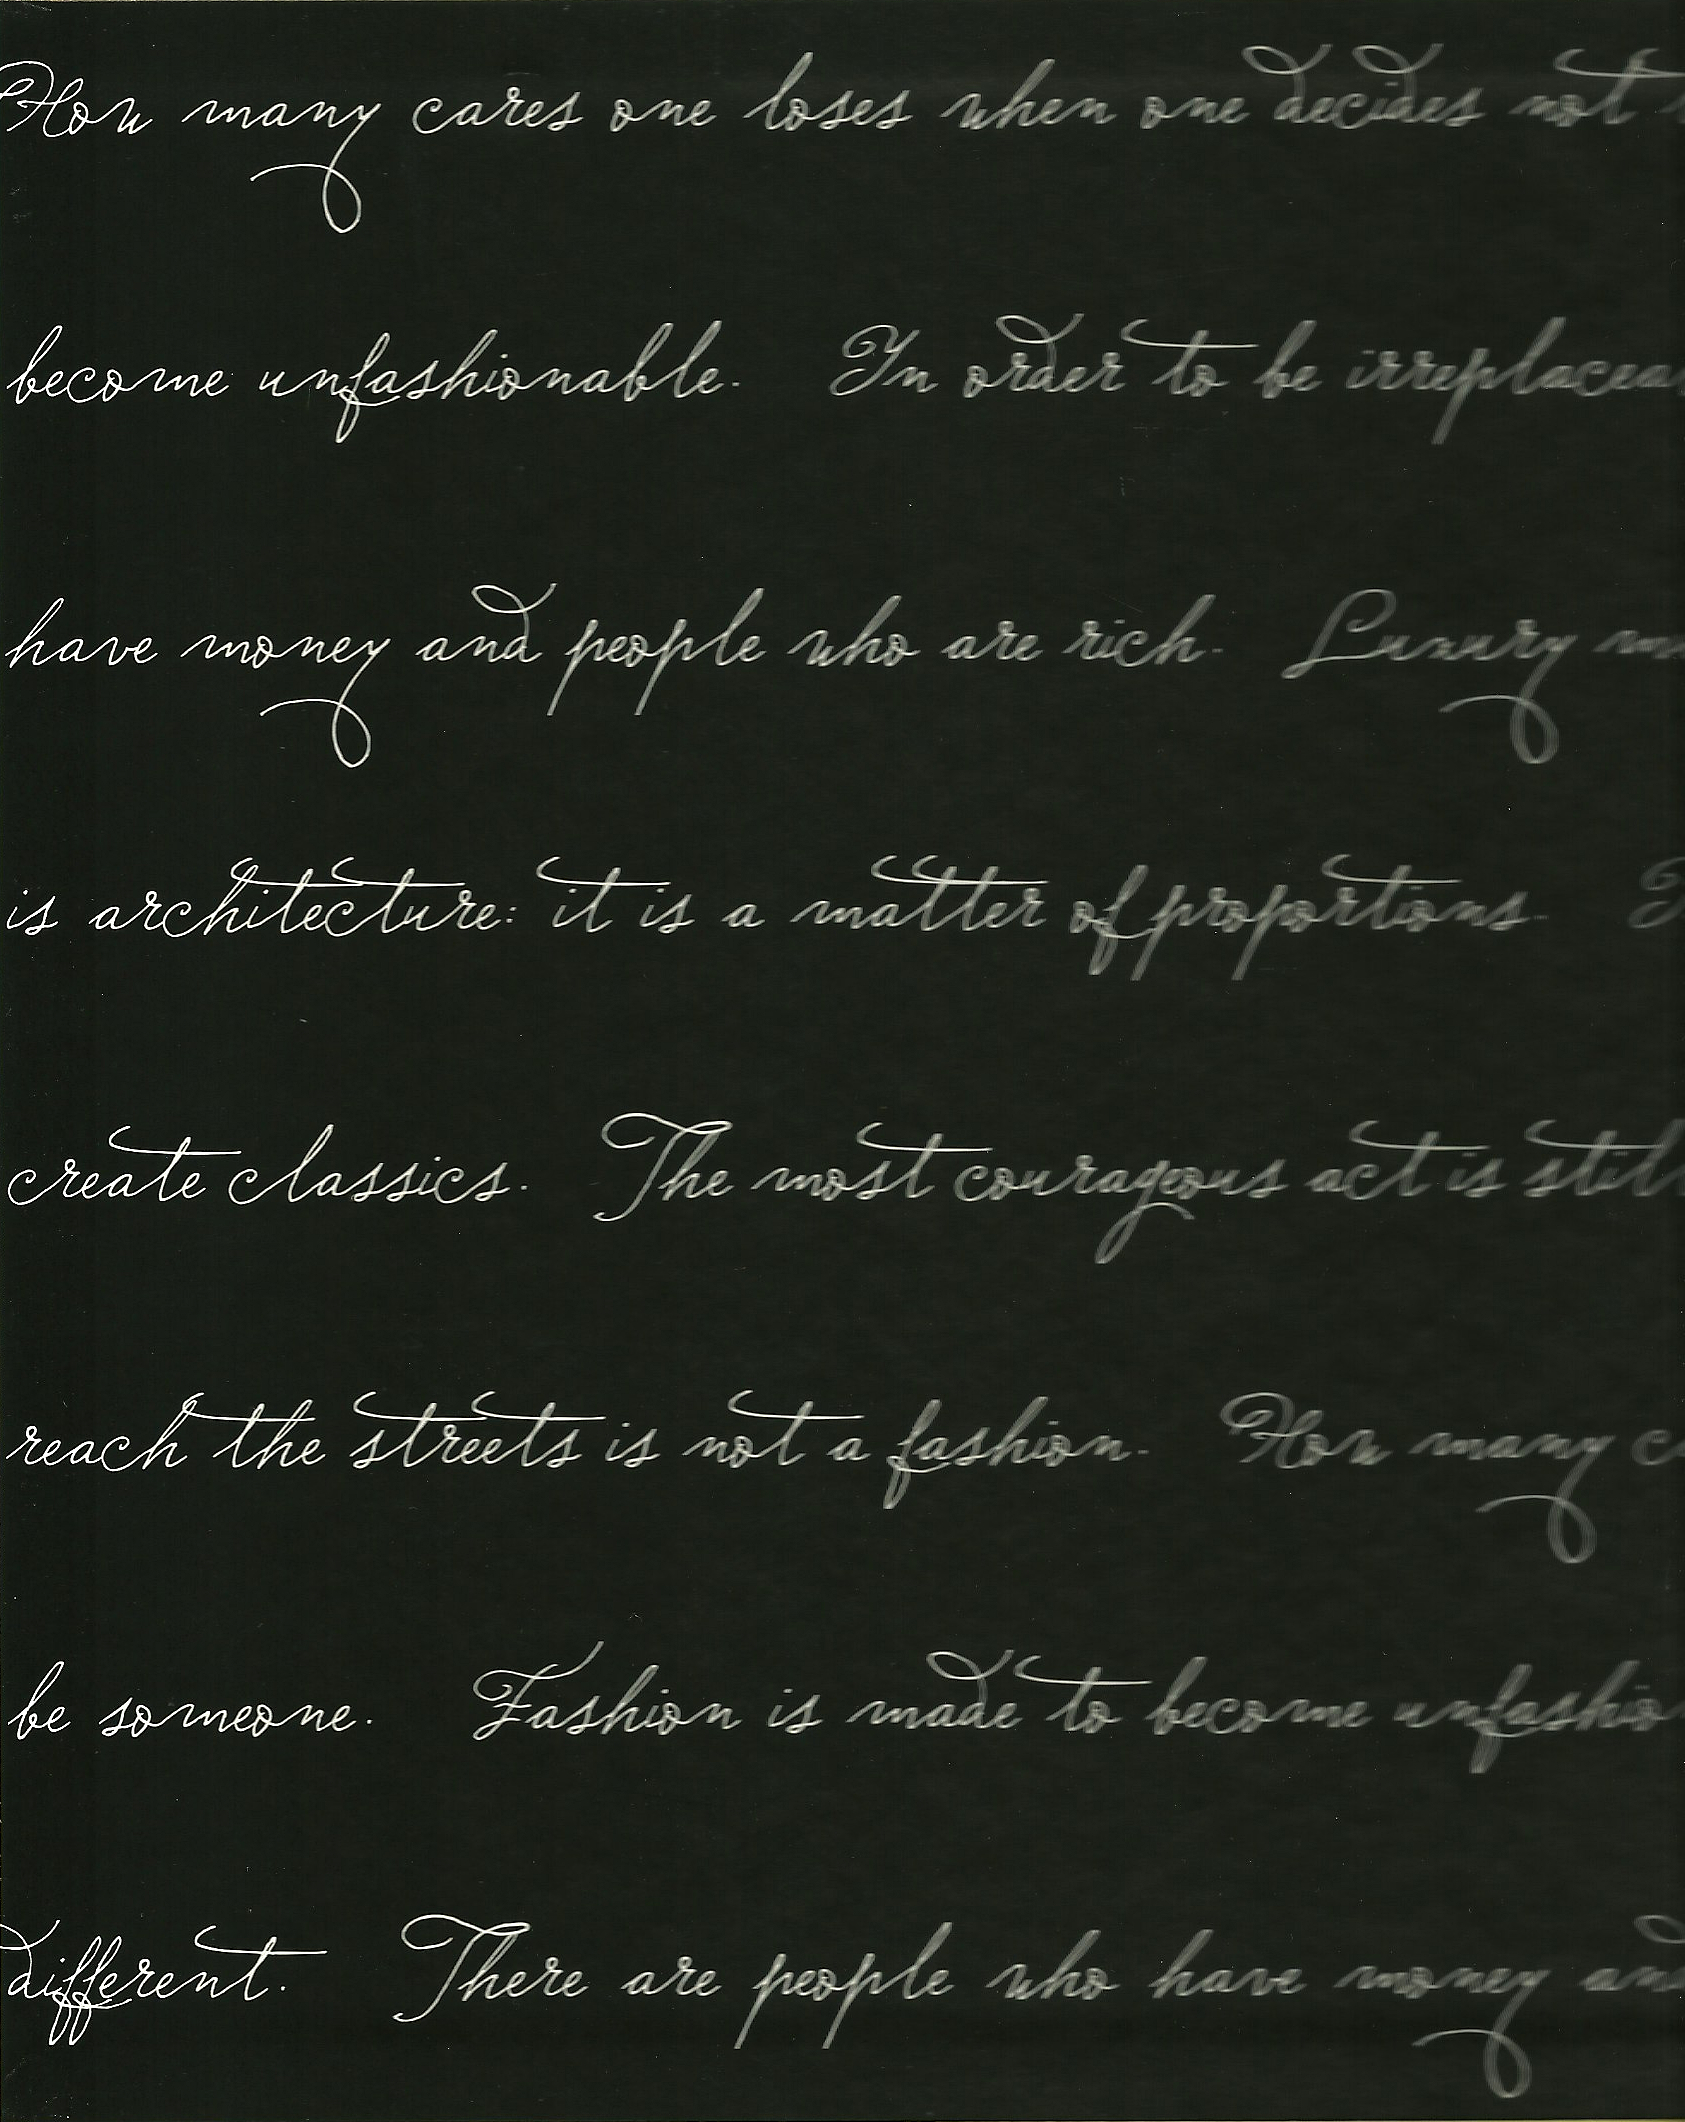
The other compelling aspect of this book is one of pure brilliance from a design point of view:  the lining pages feature a “running commentary” of some of Chanel’s famous and less-known quotes.

One side of the lining pages of the book.

One side of the lining pages of the book.

A sampling of her quotes about fashion:

“Fashion is made to become unfashionable.”

“A fashion that does not reach the streets is not a fashion.”

“Fashion is architecture: it is a matter of proportions.”

And some of her quotes about life:

“There are people who have money and people who are rich.”

“Luxury must be comfortable; otherwise it is not luxury.”

“How many cares one loses when one decides not to be something but to be someone.”

And I so appreciate that this quote is placed centermost:  “The most courageous act is still to think for yourself.  Aloud.”

I cannot close this post without a special word about the author, Elizabeth Matthews.  The book jacket has this short statement about her and her motivation to write this book:

Click on the window for an enlarged view.  PLEASE NOTE THAT ALL ILLUSTRATIONS ARE COPYRIGHT 2007, THE CANDLEWICK PRESS.

Click on the window for an enlarged view. PLEASE NOTE THAT ALL ILLUSTRATIONS ARE COPYRIGHT 2007, ELIZABETH MATTHEWS.

Thank you, Elizabeth Matthews, for making the life story of Coco Chanel an inspiring and almost magical tale for 5 to 9-ers of every age!

9 Comments

Filed under Book reviews, Chanel-type jackets, Coco Chanel, Uncategorized

Saved from the ‘70s

After reading the re-issue of Claire McCardell’s book What Shall I Wear, I determined that I needed to make myself a version of a “pop-over” dress.  Her pop-over dress was originally designed to either go over other clothing or be worn just by itself, but the intent was a “utility” dress to make yourself look presentable and even fashionable when you are doing household duties.  Well, household duties will still find me in blue jeans, but a dress to pop on quickly to go run errands, meet a friend for coffee, or go out for a casual supper – that idea was appealing to me.

My plan began to take form when I read the June/July issue of Vogue Patterns.  Page 86 features a “caftan-style” dress – or my idea of a tunic dress.

Tunic sundress - magazine photo

(I have always thought of caftans as full-length, and indeed, according to Fairchild’s Dictionary of Fashion, a caftan is a “long, full robe with a slit neckline that is often decorated with embroidery and has long or three-quarter-length sleeves that widen to the end…  adopted by American women in the 1960s and after…  ”)

Tunic sundress - 4

This is Fairchild’s diagram of a caftan; Fairchild Publications, Inc., New York, New York, copyright 2003

Although I know there is a 1970s-era Vogue pattern for a tunic dress, I have not found one to purchase, so I thought I’d go ahead and get this current one.

I like both versions of this dress.

I like both versions of this dress.

There is lots of room for individualization with this pattern, as a quick look at the line drawings illustrate.

There is lots of room for individualization with this pattern, as a quick look at the line drawings illustrate.

About the same time, I was in JoAnn’s Fabric Store to buy thread and looked at their “linen and linen-look-fabrics” (in order to get some light-weight cotton/linen blend for underlining for another planned project).  I was pleasantly surprised at the linen-cotton blends they had, including this bright orange/pink/red floral:

Tunic sundress fabric

I guess it is no surprise that fabric came home with me, and then I dug out that piece of deep pink linen pictured, which I had “saved from the ‘70s”, to use as the accent trim.  (It must have been 1974 when I purchased this pink linen in a fabric store on South Street in Philadelphia.  I made myself a suit out of it, now long gone.  But – I’m really glad I saved the left-over fabric!)

Then I doodled a bit to figure out how I wanted to treat the trimming on my tunic dress.

I quickly doodled these sketches to help me determine the look I wanted.

I quickly doodled these sketches to help me determine the look I wanted.

I decided to make it sleeveless so it’s cool and comfortable. I used my Clover bias-maker to make the bias tape I needed for the trim and the binding for the neck and armholes.  Because the linen blend was so lightweight, I underlined it with the same weight linen in off-white.

This shows a shoulder seam with a Hong kong finish to the raw edges and the pink bias binding around the armhole and neck.

This shows a shoulder seam with a Hong kong finish to the raw edges and the pink bias binding around the armhole and neck.

The front, very-low slit neckline as shown on the pattern meant one of two things:  either I would have to wear a camisole underneath it, or I would have to add two buttons and loops.  I decided to add the buttons and loops.

I forgot to add the loops before I sewed the frint neck facing in place.  Then I had to open up the seam to accomplish that little task! I turned the loops with a bodkin

I forgot to add the loops before I sewed the front neck facing in place. Then I had to re-open the seam to accomplish that little task! I turned the loops with a bodkin.

Another view of the front facing.

Another view of the front facing.

Ready to run errands!

Ready to run errands!

What a comfortable dress!

What a comfortable dress!

The back is unstructured and loose.

The back is unstructured and loose.

This is indeed a dress I can pop over my head and go!  I would definitely like to make it again, maybe with the collar and sleeves next time.  And maybe, just maybe, inspiration will come from some other fabric remnant I have tucked away, saved from the ’70s!

15 Comments

Filed under Linen, Uncategorized, underlinings, Vogue patterns

In Pursuit of My Very Own Classic Cardigan (aka Chanel) Jacket

As I eagerly anticipate the Classic French Jacket class I will be taking with Susan Khalje in June, there are several things I am doing to get ready for it.  First, of course, is doing my homework.  That includes selecting the pattern I want to use and making the muslin.  I am sticking with the old stand-by Vogue pattern #7975 (which Susan recommends), as I really do want the classic princess-seamed cardigan look that has evolved from its original “boxy” styling.

Chanel jacket pattern

The view in the lower righthand corner is the version I anticipate starting with.

I’ve prepared my thread-traced muslin pieces, as seen here –

Chanel jacket muslin

And now those pieces are sewn together as well.  We (the members of the class) will be shopping for fabric and trim(s) on the first day of class, so what I end up with is still to de determined.  Am I looking for a particular color?  Yes, sort of, but who knows what wool will entice me – other than probably the most expensive one!

Having classic “Chanel” on my mind has made me think about how enduring this style jacket has been over so many decades.  From looking through some of my Vogue Pattern Book Magazines from the 1950s and 1960s, it is obvious that this is one fashion that is always in Vogue (pardon the pun).  The October/November 1957 issue stated “The Chanel look of the easy jacket is in the news in both suits and ensembles.  Box jackets often have cropped sleeves to show cuff-linked shirt sleeves.”  Here is how that statement is llustrated:

The sketch in jade shows a "best-selling" pattern, newly available printed and perforated.

The sketch in jade shows a “best-selling” pattern, newly available printed and perforated.

Here is the opposing page to the previous illustration - more on the "Chanel look."

Here is the opposing page to the previous illustration – more on the “Chanel look.”

Shades of Chanel are obvious in this style from the August/September 1960 issue, with the statement:  “[T]he most versatile suit ever – the checked, straight jacket is buttonless and bias-trimmed…”

This suit definitely shows shades of Chanel!

This suit definitely shows shades of Chanel!  I like the suit much better than the hairstyle.

Two years later, the August/September issue included a classic Chanel-look suit in its wardrobe for Vogue’s fictional character, Mrs. Exeter.  Called “the suit of the year”, it is described as “. . . very Chanel, with its easy cardigan airs; its dark bands of braid on pale rough tweed; the silk blouse with its own flip and tier bow.  The slim skirt has a low bit of flare.”

This is the most classic Chanel image I found from the 1960s in my copies if VPB.

This is the most classic Chanel image I found from the 1960s in my copies if VPB.

The very next issue in 1962 featured a classic Chanel look on its cover.  The accompanying caption states:  “Take a clean-lined suit design (shades of Chanel) and make it shimmer:  a springy white suit wool scored with gold metallic and red braid . . .”

Chanel jacket images #9

That same issue of Vogue Pattern Book Magazine gave away this “secret” in a feature entitled VPB’s Boutigue Corner:  Couturier Flourishes:  “The secret of the suit jacket and the overblouse that hang beautifully is apt to be a “Chanel” chain.  A finishing touch by couturiers, the chain is tacked near the hemline as a weight.”

The topic figure shows the "Chanel" chain fastened to a hemline.

The topic figure shows the “Chanel” chain fastened to a hemline.

Ordering information for such chains was included in the same issue.  However, I know for a fact that these types of chains could be purchased in fabric stores, as I still have one (in its original –albeit tattered – packaging) that I purchased in the late ‘60s!

This "vintage" chain still looks new!

This “vintage” chain still looks new!

The back of the packeage shows the copyright date, 1966, and includes instructions on attaching the chain.

The back of the package shows the copyright date, 1966, and includes instructions on attaching the chain. 

Finally, an article in the February/March 1963 issue of the magazine gave some of that age-old advice on “pattern selection that can visually help to minimize your figure problem.”  The advice given “if you tend to be bosomy” seems like it could be good advice for just about every figure problem (or problem figure, depending on your point of view) as it states “In suits, the boxy Chanel-type jackets are your best bet…”

If you can get past this awful illustration, you can read the accompanying text about Chanel-type jackets!

If you can get past this awful illustration, you can read the accompanying text about Chanel-type jackets!

Gosh, I think Chanel-type jackets are just about perfect for everyone.  How else would this classic style have endured so beautifully for so long?

12 Comments

Filed under Chanel-type jackets, couture construction, The Conde Nast Publications, Uncategorized, vintage Vogue patterns from the 1950s, vintage Vogue patterns from the 1960s, Vogue patterns, woolens

The Return of the Ladylike Suit

It seems I just can’t get way from that word – ladylike.  Just as I was finishing the jacket to my emerald green silk suit, the weekend Wall Street Journal arrived with this article in the Off Duty – Style & Fashion section:  “Gran Larceny – Fashion’s latest rebellion is co-opting looks from grandma’s closet.”

This photo, copyright The Wall Street Journal, is the lead photo for the article.

This photo, copyright The Wall Street Journal, is the lead photo for the article.

To quote from this article by Alexa Brazilian:

“Is conservative the new radical?    The fashion world certainly seems to think  so  . . .    Designers are reimaging soignée staples for spring and summer – skirt suits, twin sets, below-the-knee dresses, kitten heels and frame bags – that appear anything but moth-eaten.

“ ‘A young girl now doesn’t want to dress like her mother; she finds her grandmother much cooler,’ said Nina Ricci creative director Peter Copping, who designed skirt suits inspired by his own nana.  ‘She wore little smart tweedy suits.  I always had a romantic notion of that.’ “

And then later in the article is this statement by Christopher Kane (which I might frame and put on the wall in my sewing room!):  “Ladylike is the ultimate sexiness,” said the designer.  “It’s clean, elegant and in control.  The famous saying, ‘It’s the quiet ones you need to watch,’ definitely applies to this style.”

Well, I won’t necessarily feel radical or even sexy when I wear my new green skirt suit, but I do believe it is an example of that ladylike style of the early 1960s — which actually makes sense since the pattern is indigenous to that decade.

This is the pattern from the 1960s I used for my suit.

This is the pattern from the 1960s I used for my suit.

Finally finished!

And here is the suit finally finished.

I make a few changes to the design once I made the muslin for it.  First, I added two tapering darts to the back.  It was supposed to have a boxy feel to it, but I felt a little narrower silhouette would be more flattering to me.  I also lengthened the jacket by about 1 and ½ inches.

The jacket is still "boxy" but less so with the added darts.

The jacket is still “boxy” but less so with the added darts.

I decided to make the sleeves below elbow length, so I added another inch and ½ to them.  Then I had to narrow them a bit as well to make them look proportional.

Now to the fun part:  the two dressmaker details I added.  In an earlier post, I already showed the turquoise silk lining fabric I chose.  Once I had such a dramatic contrast in the works, I thought I’d push the envelope a bit farther.  I found silk bias ribbon in a lovely periwinkle color and used it to add an edge detail to the lining in the body of the jacket.

Here is the bias silk ribbon attached to the edge of the lining.

Here is the bias silk ribbon attached to the edge of the lining…  Click on the photos to see them up close.

DSC_0804

… and one more picture of it.

This was so much fun to do and made attaching the lining to the jacket very easy, as all I had to do was “hand-stitch in the ditch” where the silk ribbon and the lining fabric were sewn together.

Here is what the finished edge looks like.

Here is what the finished edge looks like.

When I found the gold buttons for the jacket, I immediately knew that adding buttons to the sleeves would make it all look more complete.

The gold buttons added to the sleeves and another view of the lining (and the back of the bound buttonholes).

The gold buttons added to the sleeves and another view of the lining (and the back of the bound buttonholes).

And here is a close-up of the larger buttons for the front of the jacket, with their bound buttonholes.

And here is a close-up of the larger buttons for the front of the jacket, with their bound buttonholes.

The last thing I did was attach the label to the inside front of the jacket.

Emerald green suit

The silk shell I am wearing is a RTW one!  I purchased it last Spring and now have something with which to wear it!

The silk shell I am wearing is a RTW one. I purchased it last Spring and now have something with which to wear it!

Another view, without jacket.

Another view, with jacket over my shoulder.

When I found this emerald green silk matka online last Fall at Waechter’s Fine Fabrics, I envisioned a skirt suit – or dressmaker suit, as this type of dressy suit is also called – but I had not progressed beyond that in my planning.  Well, now this new grandmother is feeling pretty fortunate that, not only did I grow up with the styles from the 1960s, but they are making me feel quite fashionable now that I am in my 60s!

17 Comments

Filed under Buttons - choosing the right ones, Dressmaker details, Dressmaker suits, sewing in silk, Uncategorized, vintage Vogue patterns from the 1960s, Vogue patterns

What Comes First – the Jacket or the Skirt?

Sewing has lots of decisions with it, some more important than others.  One of the decisions I face when making a two-piece suit (my current project) is: which part do I make first – the jacket or the skirt?  Instruction sheets are divided on this, as some start with the skirt, others with the jacket.  It would make sense, I guess, to start with the more difficult or more complicated half, which would most likely be the jacket.  So why do I usually make the skirt first?  Here’s what I think:

1) If the skirt and jacket are of the same fabric, making the skirt gives me “practice” with the feel of the fabric.  This comes in handy when I’m turning facings or collars on the jacket.

2) I’ve made enough jackets to know that I’m always kind of exhausted when they’re finally finished.  I’m not sure I’d want to be facing making the matching skirt, too, at that point in the process!

3) It’s easier and just plain better to make the final fitting of the jacket if it can be viewed with its accompanying skirt.

4) And finally, well . . .   I can always wear the skirt if the jacket doesn’t get completed right away, right??

So – what about progress on my emerald green silk suit?

This is the pattern I am using (View B), as written about in a former post.

This is the pattern I am using (View B), as written about in a former post.

Yes, the skirt is finished, which allows me to give you a sneak preview.

An interior view of the waistband and lining.

An interior view of the waistband and lining.

What do you think of that turquoise china silk lining?  Failing to find a green lining fabric, which would coordinate or match, turned out to be an advantage.  I had to choose something else – and, I must say, I love this combination.

Here is a view of the hand-picked zipper.

Here is a view of the hand-picked zipper.

The jacket is still in pieces, but very controlled pieces they are!  Here they are all ready to go:

The silk organza underlining is all basted, interfacings cut, ready to go!

The silk organza underlining is all basted, interfacings cut, ready for sewing.

I am hoping that this suit will serve me similarly to the description of this green suit in the October/November 1962 Vogue Pattern Book Magazine:

"Colors to go wild about" -n 1962 and in 2013.

“Colors to go wild about” – in 1962 and in 2013.

To quote:  “… a pure green with perfect pitch for day or evening, town or country.”  This particular design is by Michael of England, but, like the Vogue pattern I am using, it has a fitted jacket with a narrow notched collar, and three-quarter sleeves.

In the same issue of VPB Magazine, a letter to the editor caught my attention.  Mrs. B. M. of the Bronx, New York, wrote:  “… When I make a suit, I always buy extra fabric and also run up a slim dress.  This lets the suit jacket do ‘double duty’ and I have both a suit and a jacket-dress, while having to make only one jacket.  This saves me time and expense, and I enjoy having a variety of costumes that I can wear almost anywhere, in a fabric I love.”

Now I wonder what she made first – the jacket – or the skirt – or the dress?  I’m exhausted just thinking about it!

13 Comments

Filed under Dressmaker suits, hand-sewn zippers, sewing in silk, Uncategorized, vintage Vogue Designer patterns, vintage Vogue patterns from the 1960s, Vogue patterns

Fifty little dresses!

Can you guess??  It’s a girl!

Our dear daughter and her wonderful husband have given us our first grandchild.  Little Aida was born on March 19th in the middle of a last-day-of-Winter New England snow storm.  She weighed 6 pounds, 12 ounces and was 19.5 inches long.  Of course, she is beautiful and dainty and looks like she will wear little dresses with delight!

Aida - one week old

Aida – one week old

I had the wonderful opportunity to spend three weeks with my daughter, Susanna, son-in-law, Jon, and baby Aida to help them over the initial hospital stay and adjustment to home.  I cooked and baked and cleaned and shopped for groceries and did laundry, and cooked and baked and cleaned and shopped for groceries and did laundry, and cooked and baked and cleaned and . . .   did all the things my daughter could not do.  (Aida was persistently in breech position while in utero and, despite heroic efforts to get her to turn, remained so, necessitating a c-section.) Sewing and blogging went unattended, but such is life in all its sweetness and toil.

I also sang silly songs to Aida, whispered in her ear about Christian Dior and Cristobal Balenciaga and about sewing from pretty Vogue patterns, and we planned tea parties and dolls’ fashion shows.  No time like the present to get these things started, right?

Aida’s birth brought back many memories of the birth of her mommy – my daughter –  almost 32 years ago.  Before Susanna was born, I bought this book as a gift to myself and took it with me to the hospital.

This beautiful book by Kitty Benton was published in 1981, by Hearst Book, New York.  It is extensively illustrated, with explicit instructions for every project.  It also has a complete section on Sewing Techniques, including smocking, embroidery stitches, hems, sewing on buttons, etc., etc.  The book is an invaluable guide for heirloom sewing.  Copies of it are available on Amazon and through a few Etsy shops.

This beautiful book by Kitty Benton was published in 1981, by Hearst Books, New York. It is extensively illustrated, with explicit instructions for every project. It also has a complete section on Sewing Techniques, including smocking, embroidery stitches, hems, sewing on buttons, etc., etc. The book is an invaluable guide for heirloom sewing. Copies of it are available on Amazon and through a few Etsy shops.

Of course, I didn’t know we were having a girl (neither did Susanna and Jon).  Then I found myself so busy and overwhelmed with my growing family (Susanna’s brother was born less than two years later), that somehow I never used the ideas in this book, preferring commercial patterns for all the sewing and smocking I did for my two.  But I never stopped looking at it, and never gave up hope of making some of the lovely clothing and gifts.

The blue gingham dress, adorned with a spray of embroidery flowers, is my favorite dress in the entire book.    Yes, I think Aida would wear this dress well!

The blue gingham dress, adorned with a spray of embroidery flowers, is my favorite dress in the entire book. Yes, I think Aida would wear this dress well!

A red dress with a white pinafore - so cute!

A red dress with a white pinafore – so cute!

Two little bishop dresses.

Two little bishop dresses.

And here is a sampling of some of the timeless gifts, instructions for which are presented in the book.  Even the teddy bear can be home-made!

And here is a sampling of some of the timeless gifts, instructions for which are presented in the book. Even the teddy bear can be home-made!

Could it be that Aida will reap the rewards of this gift to myself from so many years ago?  I hope so, I do hope so.

Little Aida in my arms, with Porter, the Bernese Mountain dog, looking on.  Such blessings!

Little Aida in my arms, with Porter, the Bernese Mountain dog, looking on. Such blessings!

26 Comments

Filed under Heirloom sewing for children, Uncategorized

Suited for Spring

Last Fall when I found emerald green matka silk on Waechter’s website, I quickly purchased 3½ yards.  At 45” wide, I knew that amount would be enough for a Spring suit although I really did not know which pattern I would be using.  It seems I often  purchase fabric and then end up not actually using it for a year – or more.  But with emerald green so front and center in fashion this year, I definitely decided to make this project a top priority.

This is the silk I ordered from Waechter's Fine Fabrics

This is the silk I ordered from Waechter’s Fine Fabrics.

I envisioned what is known as a “dressmaker suit.”  Fairchild’s Dictionary of Fashion (3rd edition, Fairchild Publications, Inc, New York, New York, 2003) gives this definition:  “Woman’s suit made with soft lines and fine details, as contrasted with man-tailored styles that have the sharply defined lines of a man’s suit made by a tailor.  Fashionable in 1950s and revived in the mid-1980s.”  Specifically, I envisioned a straight skirt (aka pencil skirt in today’s fashion parlance), a short-ish, dressy jacket with some neat detail on it, and adorned with buttons to compliment the sheen and slubby texture of the silk.

First step was to go to my pattern box, brimming over with vintage patterns (and a few new ones).  I quickly had my selection narrowed down to two possibilities, but one was actually a sheath dress with coordinating jacket, not a jacket and skirt. (Yes, there is a definition for this category as well, according to Fairchild’s:  “Suit dress:  Used in 1960s to refer to a jacket and dress ensemble that resembled a tailored suit.”)

Is it the hat that makes this ensemble so appealing - or just good styling?

Is it the hat that makes this ensemble so appealing – or just good styling?

I hashed over the two reservations I had about using this pattern:  1) I was a little short on yardage – about a quarter of a yard – and just not completely confident that I would be able to cut this pattern out with the generous seams that I have come to like so much, and 2) I have a RTW (gasp!) silk shell top which will look stunning, I think, paired with an emerald green silk skirt and matching jacket.  So in the end, I decided to go with a dressmaker suit to be made from this pattern:

I'll be making View B, which just happens to be shown in emerald green!

I’ll be making View B, which just happens to be shown in emerald green!

And then, the bonus!  Actually three of them . . .  I had forgotten that tucked inside the pattern envelope were two clippings obviously placed there by the original owner of the pattern.  She was doing some “comparison shopping” for styling.

The first clipping is for another pattern – a Spadea, available through mail order from the newspaper.  Fortunately, the date of 1964 shows up on one corner.

Dressmaker suit - 3

The second clipping is from Vogue magazine, showing a fashion from 1968.

The jacket of this suit, just like the Spadea pattern, is very similar to the Vogue pattern.

The jacket of this suit, just like the Spadea pattern, is very similar to the Vogue pattern.

Perhaps the original owner was trying to decide between a striped fabric and a plain one?  Maybe she was really undecided about making this style suit?  I’d love for her to sit down with me over a cup of coffee so we could discuss this pattern!  As it turns out, she never made the jacket, as its pieces were still in factory folds when I obtained it.  The skirt pattern shows signs of having been used, however.  I’ll never know why,  after all her thought about this suit, she never made it.  However, her decision afforded me the third bonus – the original pattern label – pristine after so many years.

I am looking forward to sewing this label into my green silk suit.

I am looking forward to sewing this label into my green silk suit.

I’ve made my initial adjustments to the pattern and am now making the muslin.  Like my “pattern predecessor” I am dreaming of a certain look.  Now it’s up to me to finish what she started.

11 Comments

Filed under Dressmaker suits, kimono sleeves, Messages from past owners of vintage patterns, sewing in silk, Uncategorized, vintage Vogue patterns from the 1960s, Vogue patterns

“The Sweetest of All the Colors…”

“… Every woman should have something pink in her wardrobe.”   Christian Dior certainly had distinct thoughts about fashion, and with this statement I concur.  Everyone looks good in pink, especially pale pink (men definitely included), and I suspect pale pink was what Monsieur Dior was thinking when he wrote this in his Little Dictionary of Fashion (First published by Cassell & Co., Ltd., 1954; 2007 edition by Abrams; Copyright Catherine Dior and Jean-Pierre Teto, 2007).   Interestingly, the lining pages of his little book are pale pink, but the divider pages feature a deep, deep raspberry pink as in – – – my newly finished “ladylike” dress!

Here is the "section"page for E from Dior's Fashion Dictionary

Here is the “section”page for E from Dior’s Fashion Dictionary

Dated 1958, this is the pattern I used for my pink dress.

Dated 1958, this is the pattern I used for my pink dress.

The finished dress!

The finished dress!

As I mentioned in my last post, I made this dress using couture construction, which means a lot of hand-sewing.  The more I use this type of construction, the more I like it, but it doesn’t get any faster.

An interior view of some "couture" construction - silk organza underlining, catch-stitched seams, hand-picked zipper.

An interior view of some “couture” construction – silk organza underlining, catch-stitched seams, hand-picked zipper.

However, couture construction gives me a lot of flexibility in changing necklines, which I really appreciate.  That is one of the changes I made to this pattern – widening the neckline to a more flattering appearance for me.

The widened neckline.

The widened neckline.

I also changed the back of the skirt by removing the box pleats and substituting a darted back.

I substituted darted back panels for the "original" box pleats

I substituted darted back panels for the “original” box pleats

The original dress had pockets hidden in side box pleats, but when I narrowed the width of the skirt, I did away with those side pleats.  I still wanted pockets, so I added pocket extensions in order to still hide them in the side seams.  It worked!

A peek at the pocket inside which shows the raspberry silk lining I used for the dress.  I understitiched the pocket edges by hand, which took no time at all and looks so much nicer than machine stitching!

A peek at the pocket inside which also shows the raspberry silk lining I used for the dress. I understitiched the pocket edges by hand, which took no time at all and looks so much nicer than machine stitching!

I added a quarter-inch to the underneath seam on each sleeve, so that each sleeve would have one-half inch extra width to it.  Those ladies in the 1950s must have had skinny arms, as I find sleeve widths on these vintage patterns are often just not quite spacious enough.

I added to the underarm seam - an adjustment which I determined from  my muslin.

I added to the underarm seam – an adjustment which I determined from my muslin.

This was the first time I had made sleeves which are half set-in and half kimono.  This is a look and fit which I love!  In fact, the shoulder fits so well, that my original thought to add an interior sleeve heading was one I decided I did not need.

The one thing I’m not sure I like is the “purchased or novelty belt” as indicated on the pattern.  I think a self-belt, a little wider than the one I show, would be more attractive.  Please comment if you have an opinion.  (I have plenty of fabric left over to make one…)

I am thinking a 2" wide self belt might be more attractive???

I am thinking a 2″ wide self belt might be more attractive???

Before I move on to my next project (to be announced soon), I want to thank Dresses and me for nominating me for the Very Inspiring Blogger award.

Very Inspiring Blogger Award

So, in accordance with the “rules” –  I am supposed to share a few facts about myself and nominate some others for the same award, so here goes:

1 – I am told I have a slight Southern accent, surely a remnant of being born and raised in North Carolina.

2 – I do most of my machine sewing on a 1940s’ Singer Featherweight and on my mother’s 1956 “306K” portable Singer.

3 – Autumn is my favorite season.

4 – I can make a very good Pumpkin pie.

5 – I enjoy reading historical fiction.

6 – I can’t sing (as in carry a tune) except for a few simple lullabies and Christmas carols.

Now – to pass on this award:  So many fellow bloggers inspire me every day that it is difficult to single out just a few (especially as many have already received this award!), but here are some worthy recipients:

For always giving me a laugh:  A Dress A Day and The Blue Gardenia.

For always teaching me something I would not have known otherwise:  The Vintage Traveler, Pattern Vault, Two Nerdy History Girls, and the FIDM Museum blog.

For sharing their sewing knowledge, design sense, and beautiful workmanship:  Custom Style, Lilacs and Lace, So Sew Lovely, and Frabjous Couture.

So now – you are IN THE KNOW and  – I am IN THE PINK!

21 Comments

Filed under couture construction, hand-sewn zippers, kimono sleeves, Uncategorized, underlinings, vintage Vogue patterns from the 1950s, woolens

Saying YES to a Ladylike Dress

What is it exactly that makes a particular dress elicit the description “ladylike”?  Is it primarily the fabric – or the color – or the style – or, as most would suggest, a combination of all these things?  And why, exactly, am I asking this question??

As one who generally is attracted to tailored, usually unfussy “frocks”, I had to answer this question for myself about this pattern, which, although still unfussy, with simple lines, just seems to be such a ladylike look:

Dated 1958, this pattern shows the influence of Christian Dior.

Dated 1958, this pattern shows the influence of Christian Dior.

This is what I’ve decided.  I definitely think you start with the style – or the pattern – and this one has it.  There are four elements which work together to make this a ladylike look: 1) a defined waist, here further delineated with a purchased belt (or, as the pattern calls it, a “novelty” belt); 2) a soft shoulder line, which in this pattern consists of a set-in sleeve on the front bodice, but kimono in the back – very clever; 3) a full skirt, this one with inverted box pleats which soften the fullness to a considerable degree (although not quite enough for me, as I will explain later); 4) three-quarter length sleeves, which are the most flattering for most women, and which provide the perfect foil for bracelets or gloves.

The middle sketch on the back of the envelope shows the kimono sleeve detail on the back of the dress.

The middle sketch on the back of the envelope shows the kimono sleeve detail on the back of the dress.

I’ve had this pattern for well over a year, but it took me a while to pair it with this fabric which I’ve had forever (well, not that long, but probably close to 10 years – which makes it seem like a baby compared to how long I’ve had some of my Moygashel linen!).

I'm not sure the fine twill weave of this fabric is visible here.

I’m not sure the fine twill weave of this fabric is visible here.

This fabric is a very beautiful wool/cotton blend, lightweight, but with a solid hand and very subtle fine twill weave to it.  It’s 60” wide and I bought three yards, so I obviously had plenty of fabric with which to work.  I’m in love with the color, a deep raspberry pink – I just cannot stay away from pinks of any shade.

Knowing that I would be making this dress in knee-length rather than mid-calf made me reconsider the fullness of the skirt.  In thinking about this, I remembered another pattern in my collection, which shows a full skirt in the front and a fitted, plain skirt in the back.

This is an unprinted pattern, which makes working with its pieces  difficult.

This is an unprinted pattern, which makes working with its pieces difficult.

So – I decided to see if I could combine the two patterns to create the same look, but with less fullness.  The second pattern has a three piece back, which obviously would not work with a center back zipper.

Here is the detail of the skirt back.

Here is the detail of the skirt back.

So I decided to combine the side back and center back pattern pieces, add two darts to achieve a similar fit, and add a center back seam to match the seaming in the first pattern.

This is how I fit the two back skirt pieces together to make one piece.  The "triangle" became two narrow darts, which seemed to work better than one wide one.

This is how I fit the two back skirt pieces together to make one piece. The “triangle” became two narrow darts, which seemed to work better than one wide one.

I took a little more fullness out of the front pattern pieces of the first dress and reconfigured the box pleats.  Then, of course, I made a muslin to see if this would all work.  It certainly seems like it will.  The width of the skirt, according to the pattern envelope, was originally supposed to be about 100”.  The width of my muslin skirt is 56” – which means I removed over a yard in the skirt width!  Sometimes things look and hang a bit differently in the fashion fabric as compared to the muslin, so I am proceeding with cautious optimism.

I am making the dress with couture techniques – and I’m ready to do some serious sewing now that I have silk organza hand-basted to all the pattern pieces.

My pile of basted pieces.

My pile of basted pieces.

In sewing, I am always reminded of this quote from Wilhela Cushman:  “Just around the corner in every woman’s mind – is a lovely dress, a wonderful suit, or an entire costume which will make an enchanting new creature of her.”  I do indeed hope this will turn out to be a lovely dress – with enchanting ladylike qualities!

6 Comments

Filed under couture construction, kimono sleeves, Uncategorized, Unprinted patterns from the 1950s, vintage Vogue patterns from the 1950s, Vogue patterns

Coats of a Certain Length

“. . .  above everything they must be practical.  Practical in color and practical in style.”  This was Christian Dior’s dictum for coats which he wrote in 1954 in The Little Dictionary of Fashion (first published by Cassell & Co., Ltd., republished by Abrahms, 2007, copyright Catherine Dior and Jean-Pierre Teto).    Beginning around this same time, Vogue Patterns began to feature more coats in shorter lengths, with slimmer profiles.  The “tunic coat” and matching skirt debuted in the October/November 1955 issue of Vogue Pattern Book Magazine, with this description:  “The tunic . . . the newest and most sophisticated of the coats. Its straight lines are highlighted by an even narrower skirt.”

This was the only three-quarter length coat in this feature entitled "The most-wanted new coats."

This was the only three-quarter length coat in this feature entitled “The most-wanted new coats.”

In 1958, a tapered coat-suit was featured in the October/November VPB Magazine, touting its “three-quarter” coat:

Shown in "boxwood green mohair," this coat would be quite stylish in 2013.

Shown in “boxwood green mohair,” this coat would be quite stylish in 2013.

And in the same issue the smock-jacket certainly caught the eye of many a busy mom, with its alluring description:   “”Enjoying suburbia’s natural tranquallizers – grass, trees, sky . . .  Triangular smock-jacket in bright blue-orange-green-red plaid.  Grey flannel slacks – who could live without them?”

This "smock" coat has a pleat in the back for ease of movement for the busy mom.

This “smock” coat has a pleat in the back for ease of movement for the busy mom.

Indeed, who could live without such a comfortable, easy-to-wear, fingertip coat?  As this style morphed into the “Car Coat”, it quickly became ubiquitous, and for good reason.  Here was (and is) a coat, which is a barometer of culture (a term I have borrowed from the little book, 101 Things I Learned in Fashion School, p.32).  An excellent definition is given in The Fairchild Dictionary of Fashion, 3rd Edition, 2010, page 89:  “Sport or utility coat made hip- to three-quarter length, which is comfortable for driving a car.  First became popular with the station-wagon set in suburbia in 1950s and 1960s [my emphasis] and has become a classic style since then.  Some of the styles in which car coats have been made include BENCHWARMER, DUFFEL COAT, RANCH COAT, MACKINAW JACKET, STADIUM COAT, TOGGLE COAT.”

Coats of certain length -4

This pattern was for a reversible coat, shown here in poplin and sham lamb. The collar can be turned into a hood.  Click on the image to see the details.

By August/September of 1962, VPB Magazine featured a pattern for a Pea Coat, which although not officially a car coat, displayed the same practical length and wearability:

According to Fairchild's Dictionary, Yves Saint Laurent used the classic U.S. Navy peacoat as inspiration for his variation of it in the 1960s.

According to Fairchild’s Dictionary, Yves Saint Laurent used the classic U.S. Navy peacoat as inspiration for his variation of it in the 1960s.

And in the next issue of the 1962 VPB Magazine, in a feature called “The Rangy Western Look for Urban and Suburban Dudes,” front and center was this coat “corralled for suburbanites”:

VPB called this coat a "direct steal from the cowboys's sheepskin original."

VPB called this coat a “direct steal from the cowboys’s sheepskin original.”  (Another wonderful example of a “sheepskin” coat – this one by an English designer – can be seen here, with thanks to my reader, Carol, who led me to the sketch of this fingertip coat.)

Far be it for me to resist such a coat!  Last year I succumbed to this pattern on Etsy, which although not dated, is most certainly from the early ‘60s:

I just may need this pattern someday!

This is a good pattern to have in my collection – I just may need it someday!

Back in the 1970s, I purchased this Christian Dior Designer pattern, with intentions of making the “below the knee” version, although a nice variation of a stadium coat is also featured.  I still love this coat, in both lengths – and someday I hope to finally make good on my intentions!

The buckles around the sleeves add a great look to this coat.

The buckles around the sleeves add a great look to this coat.

However, this coat must be my all-time favorite hip-length style:

I will definitely be doing the color blocking version when I make this coat.

I will definitely be doing the color blocking version when I make this coat.

Purchased last August,  this pattern sometimes keeps me awake at night. With Dior’s words imploring me to be practical, I wonder – – – should I make it in navy and white (as pictured), in black and white, in red and black, in gray and camel, in orange and gray, in ??? and ???

Still to be decided . . .  but you haven’t seen the last of this pattern.

12 Comments

Filed under car coats, Coats, Uncategorized, vintage Vogue Designer patterns, vintage Vogue patterns from the 1950s, vintage Vogue patterns from the 1960s, vintage Vogue patterns from the 1970s, Vogue patterns