Tag Archives: Kimono sleeves

Making a Parisian Jacket, Part 1

Another title for this post could be “Sewing with Professional Instruction – the Parisian Jacket.”  One of the advantages of having a subscription to Susan Khalje’s online Couture Sewing Club is exclusive access to videos which take the viewer, step-by-step, through the process of making one of these jackets.  

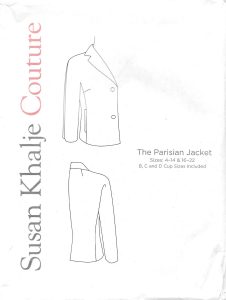
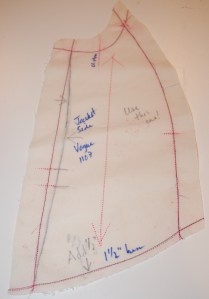
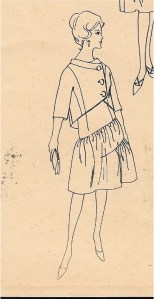
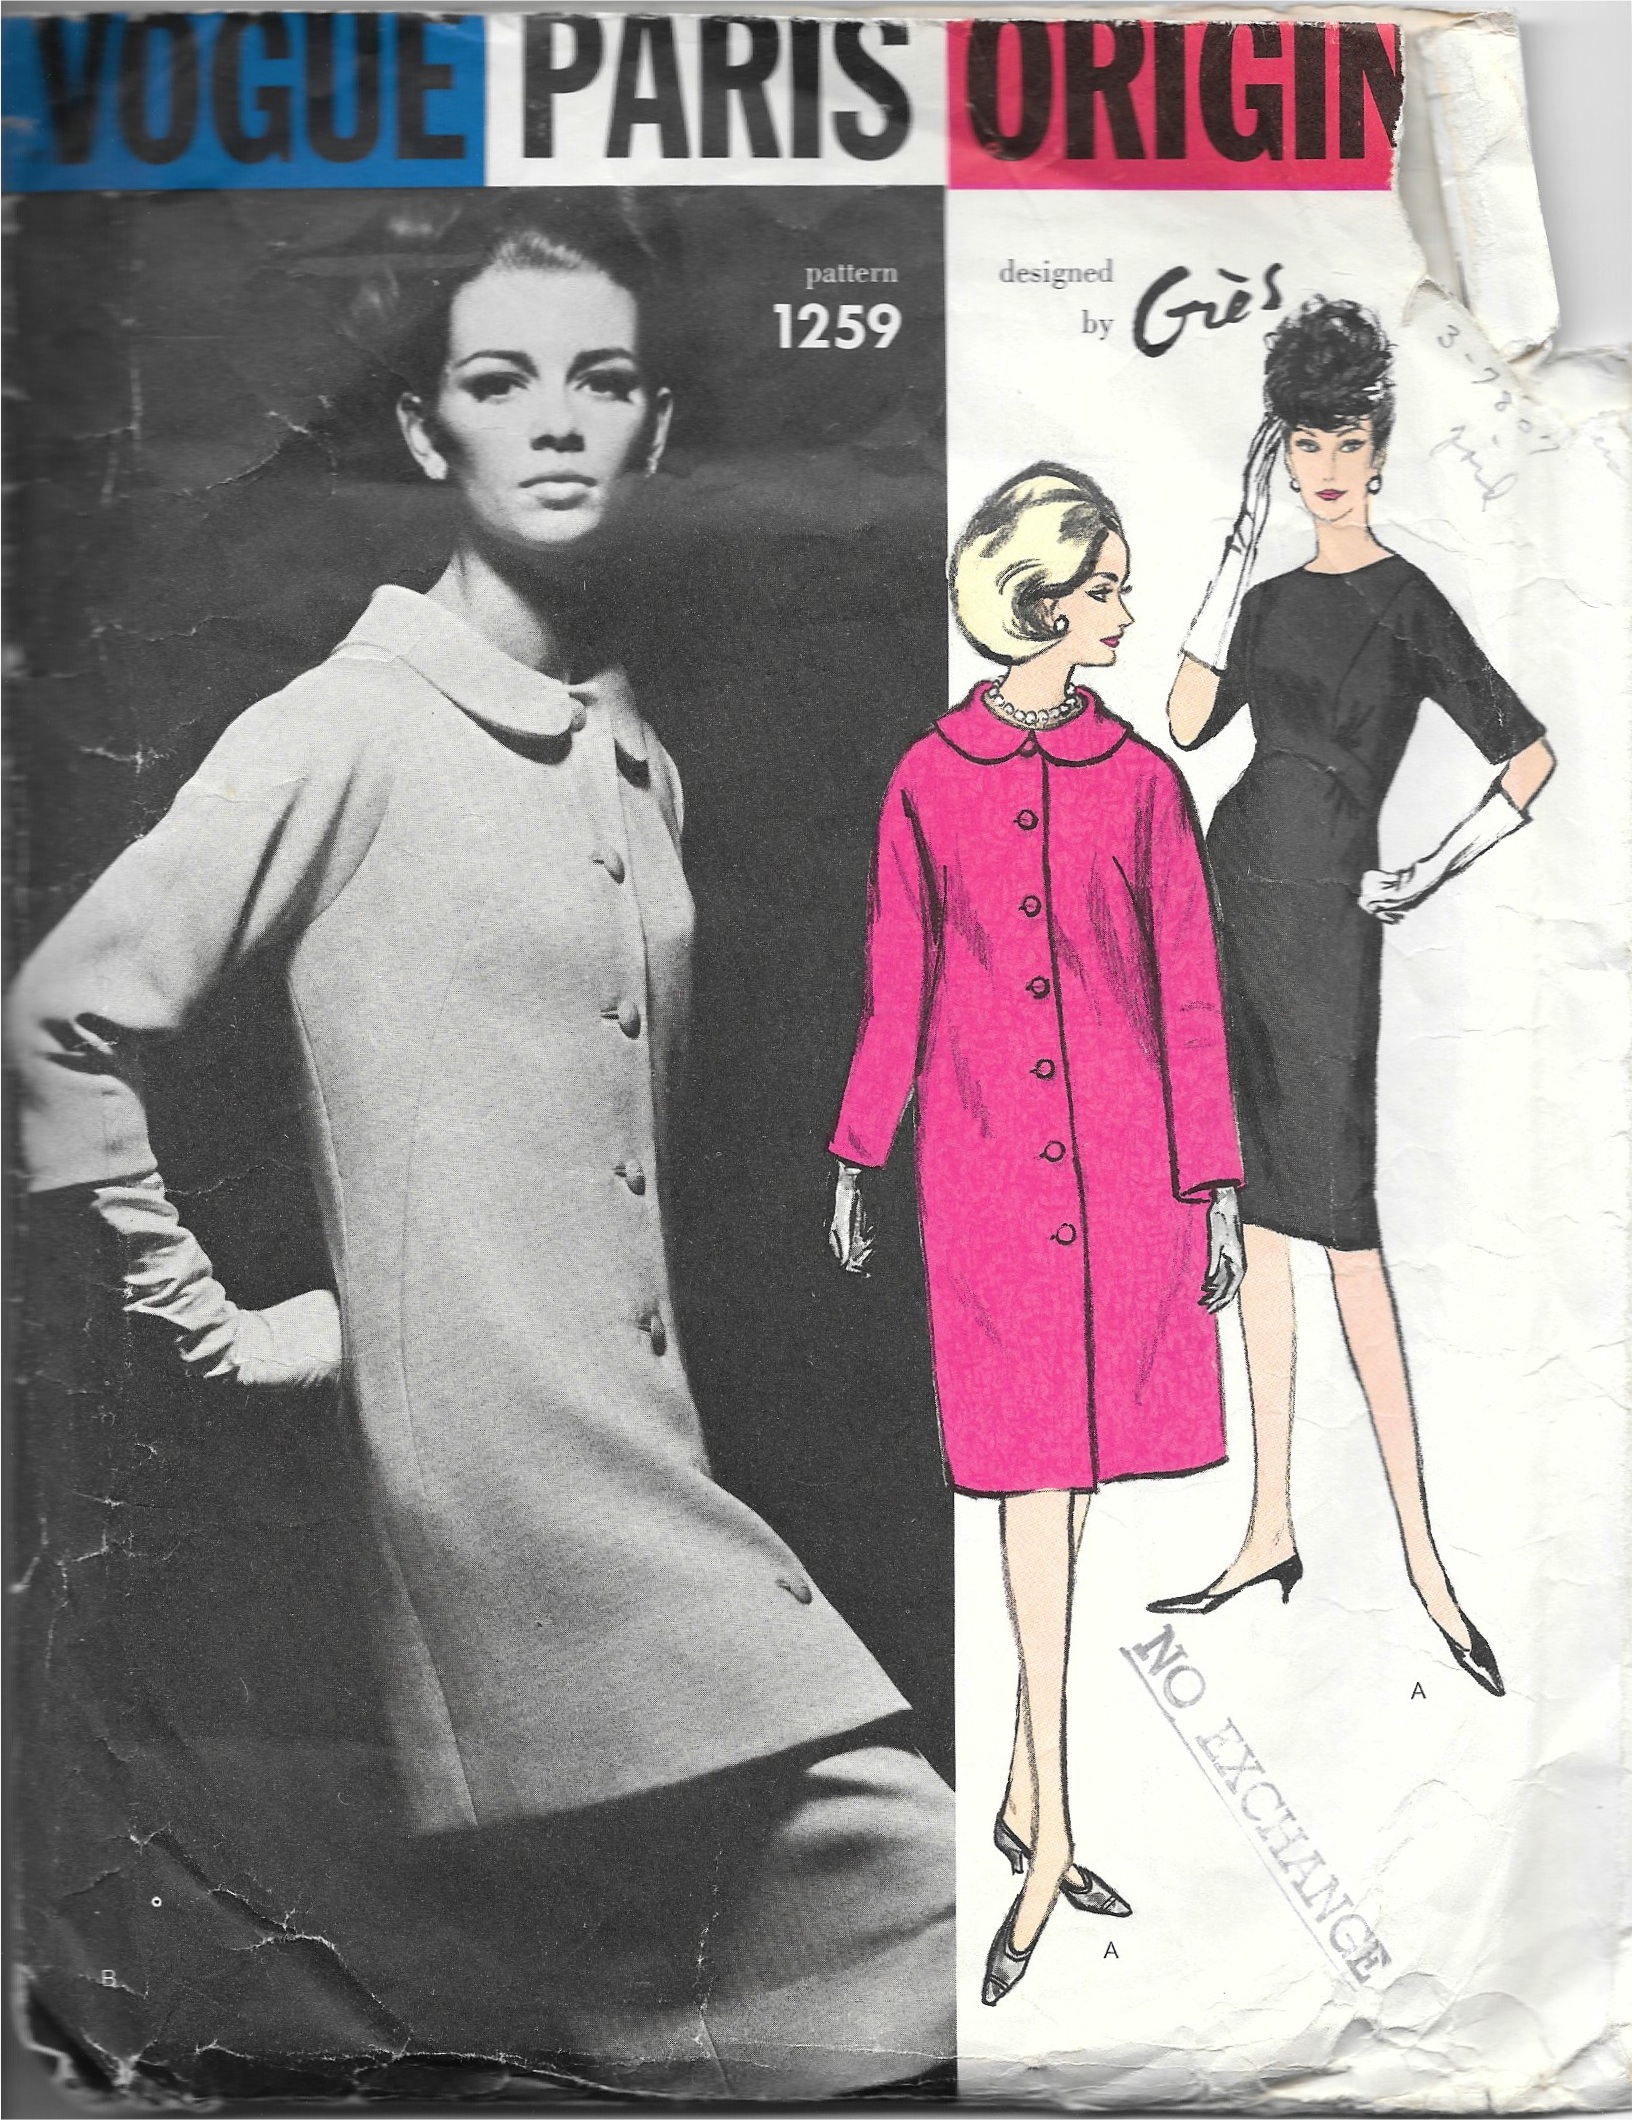
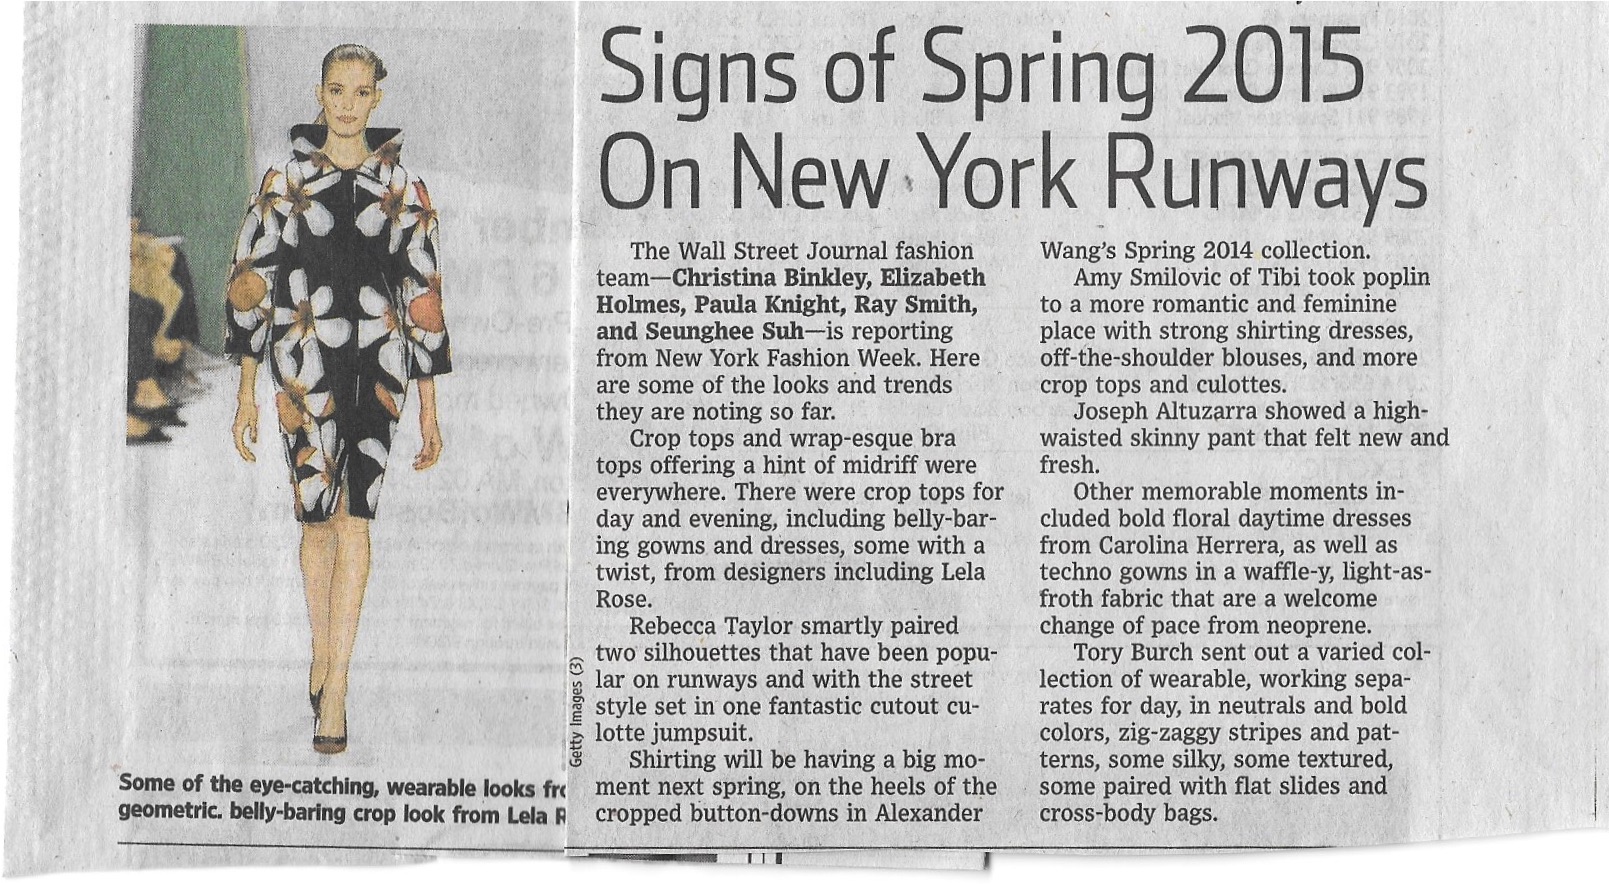
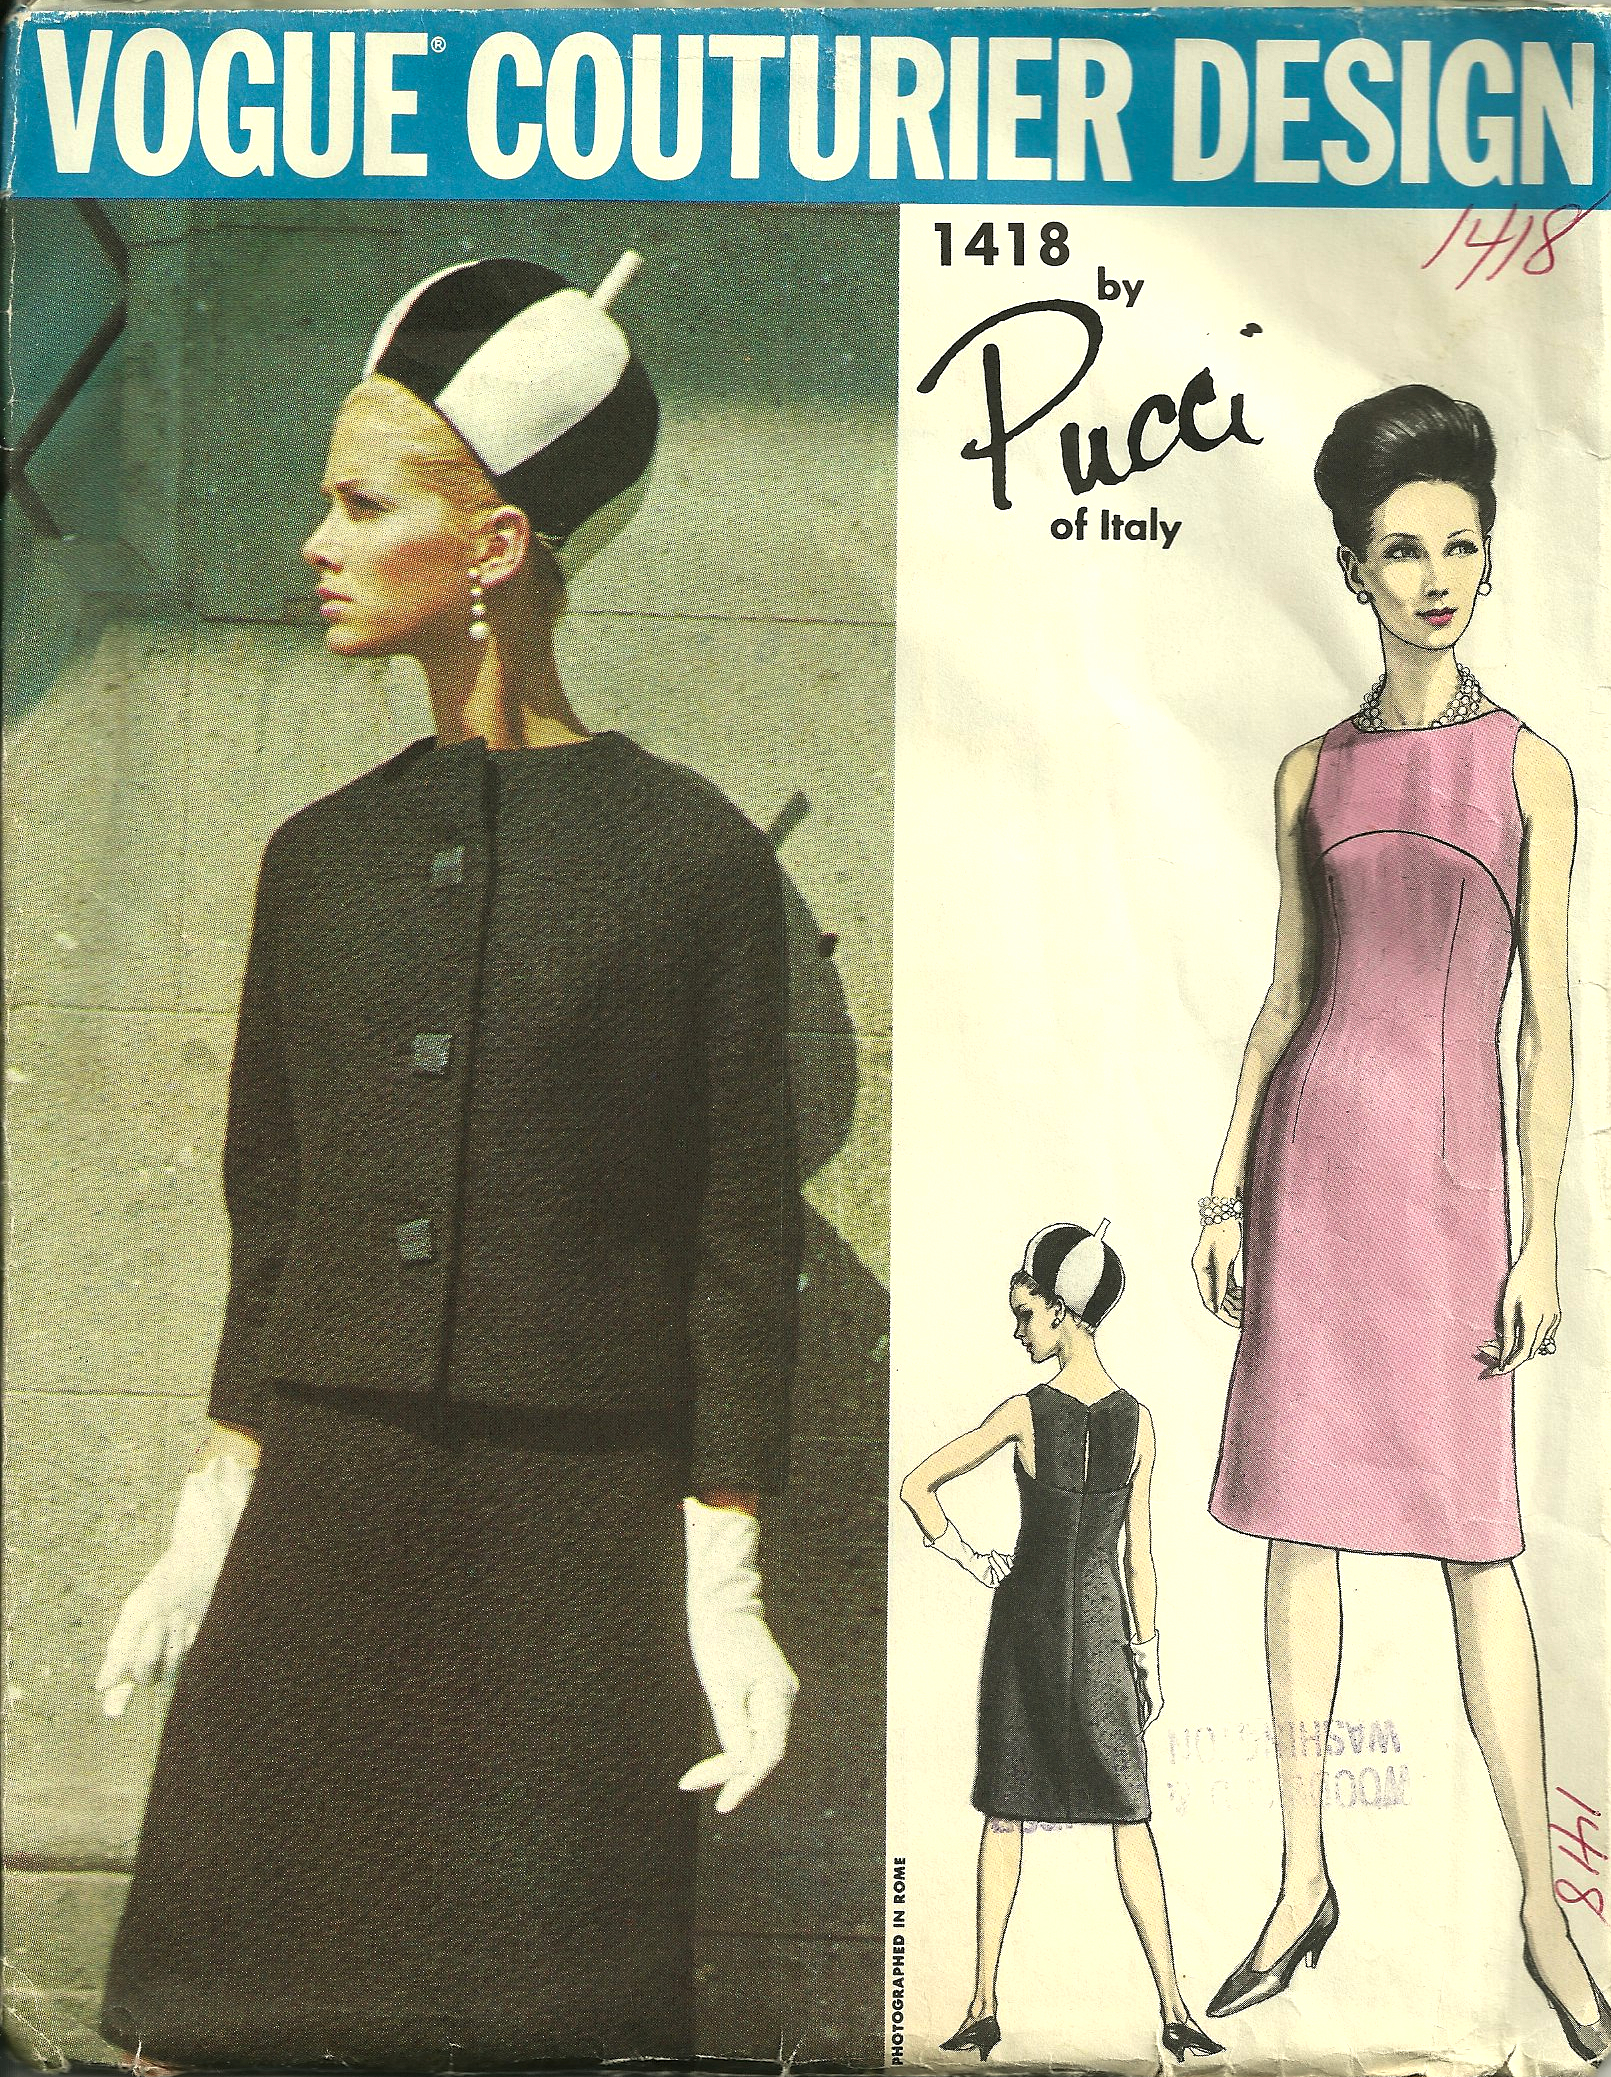
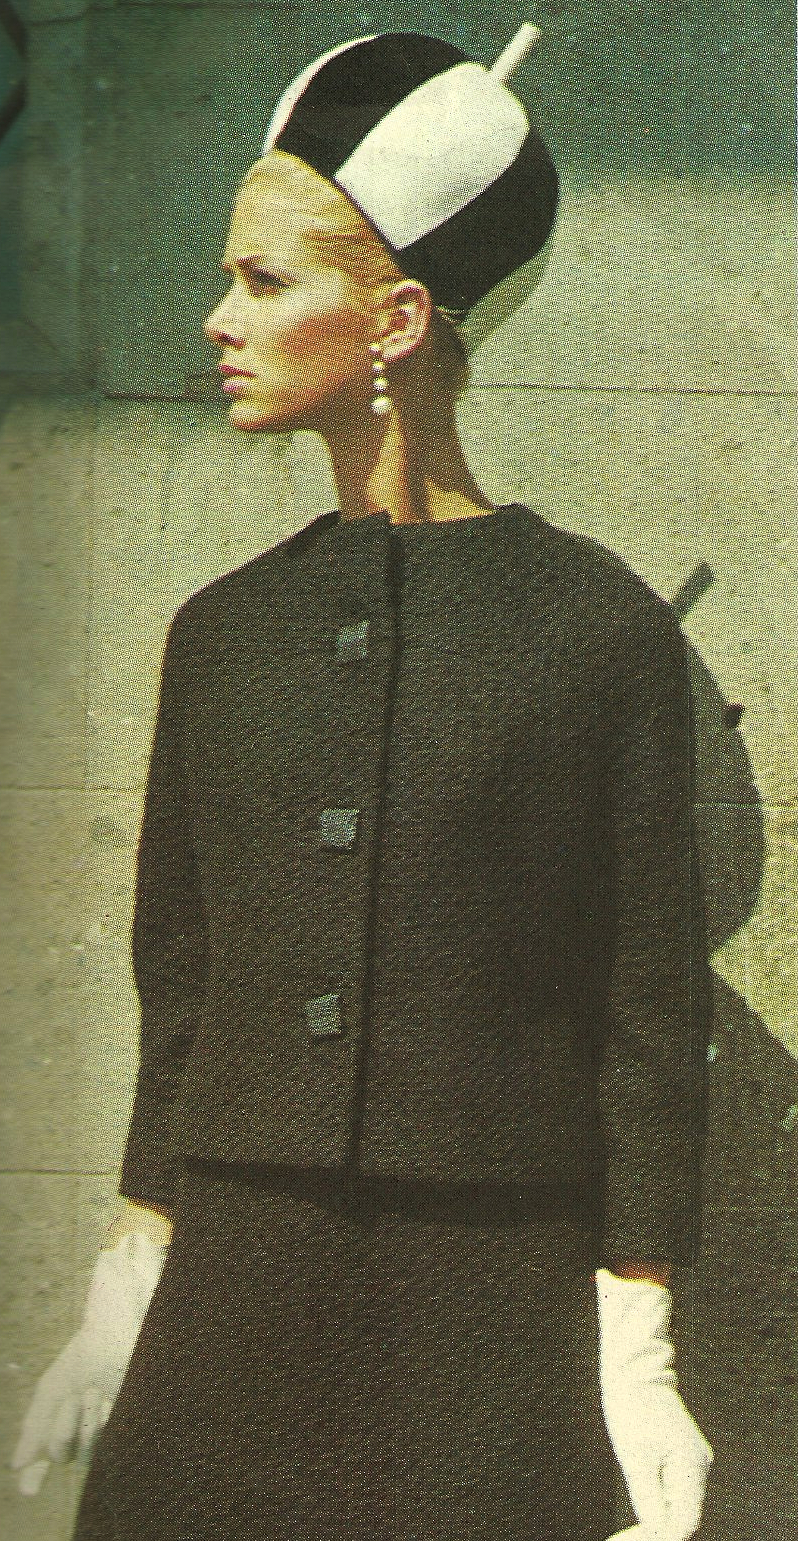
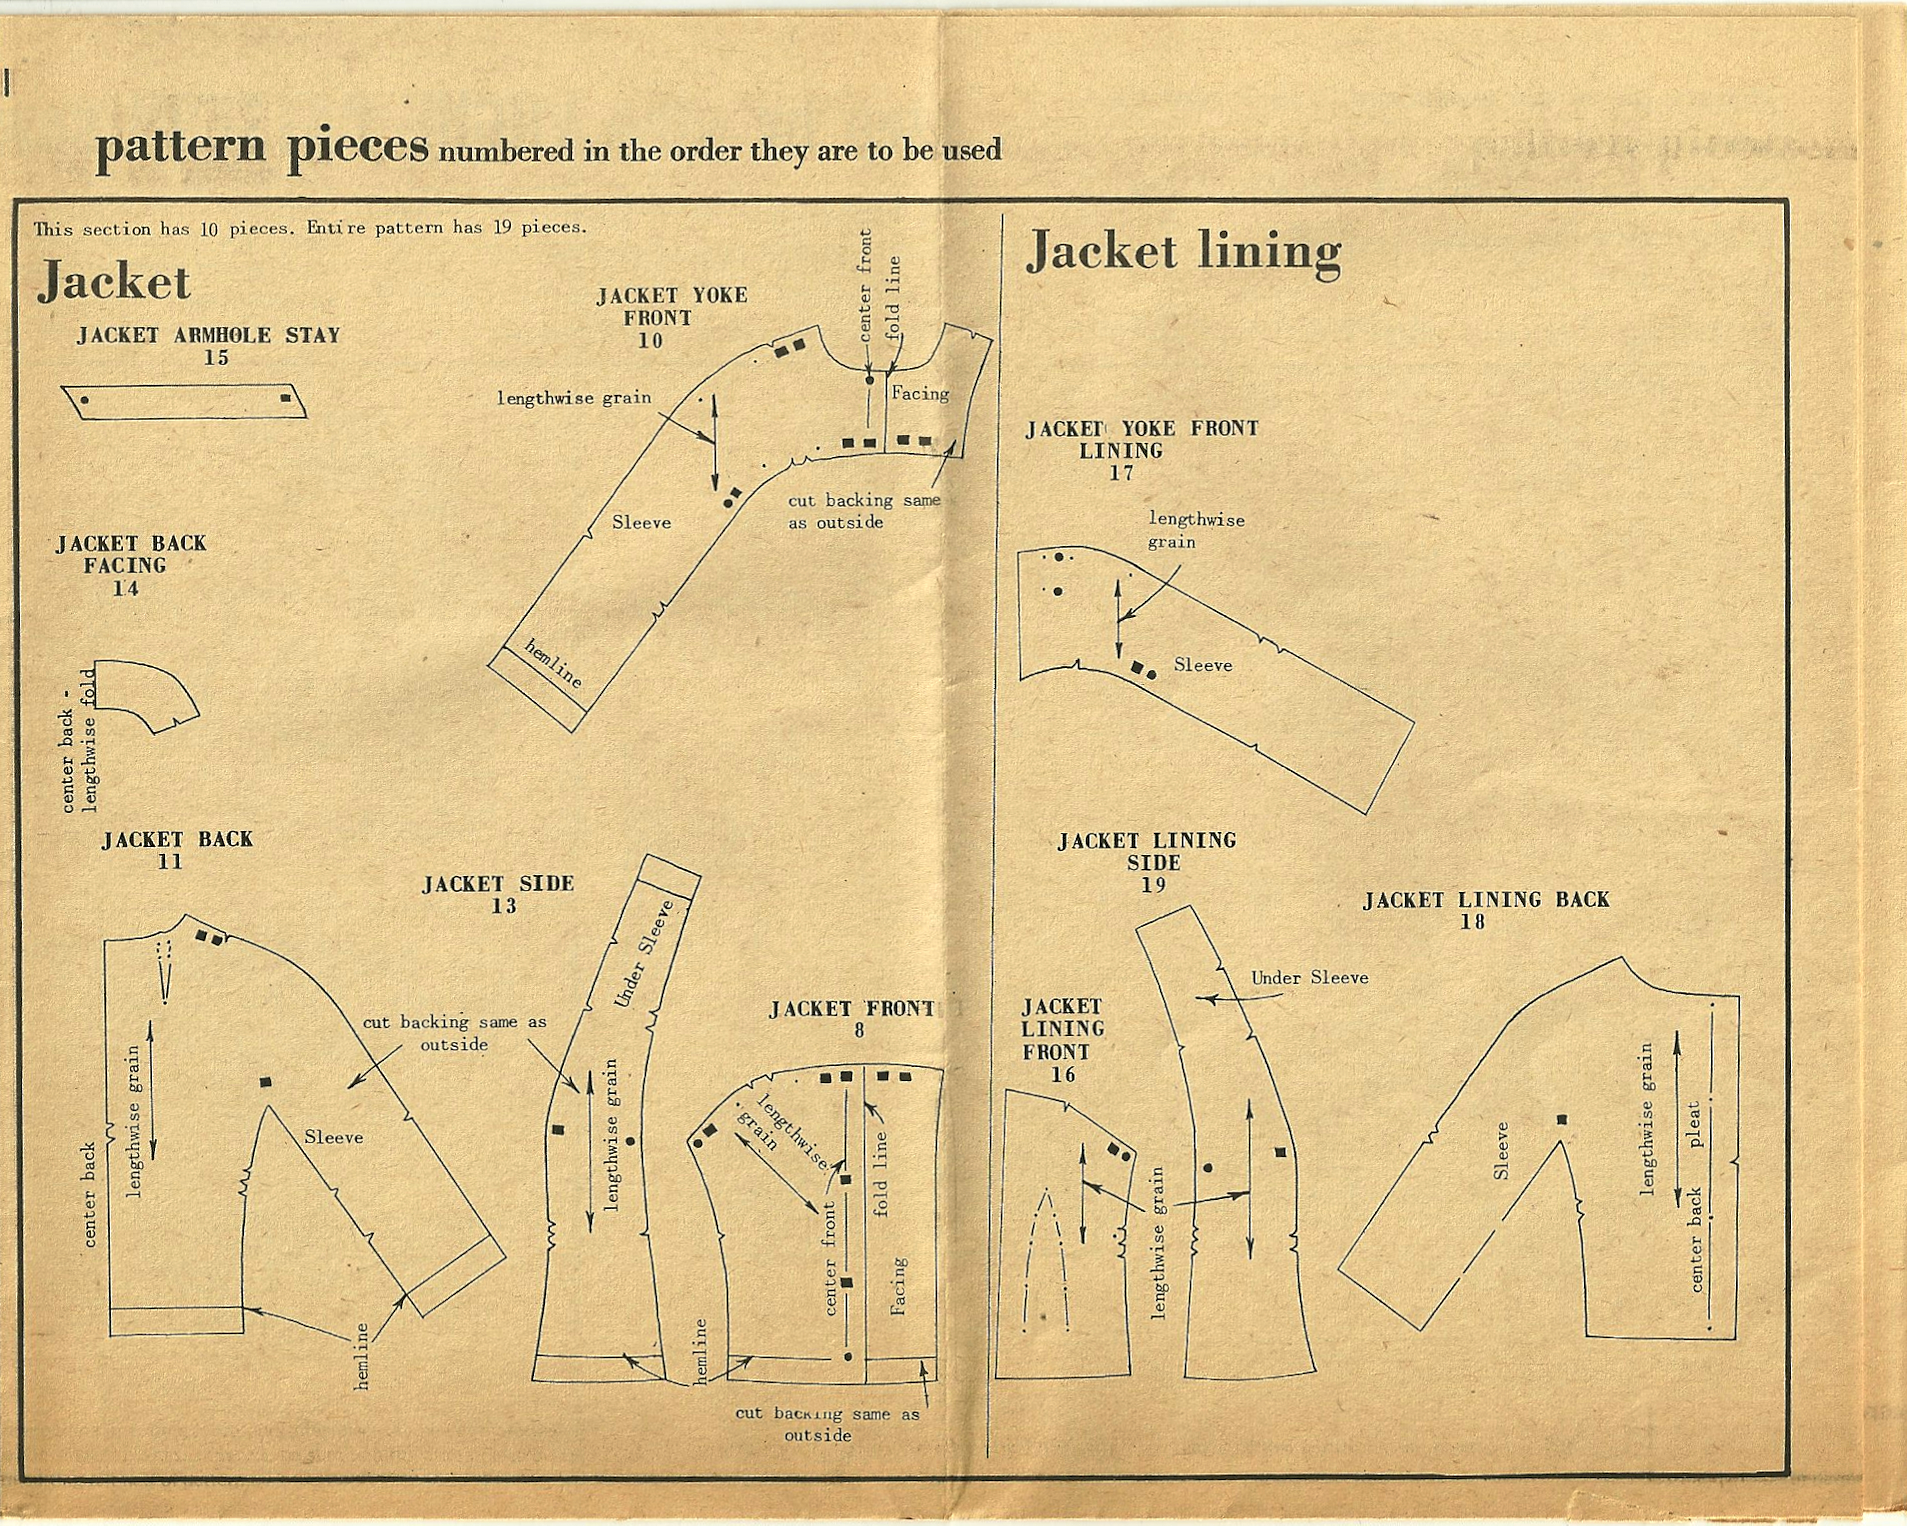
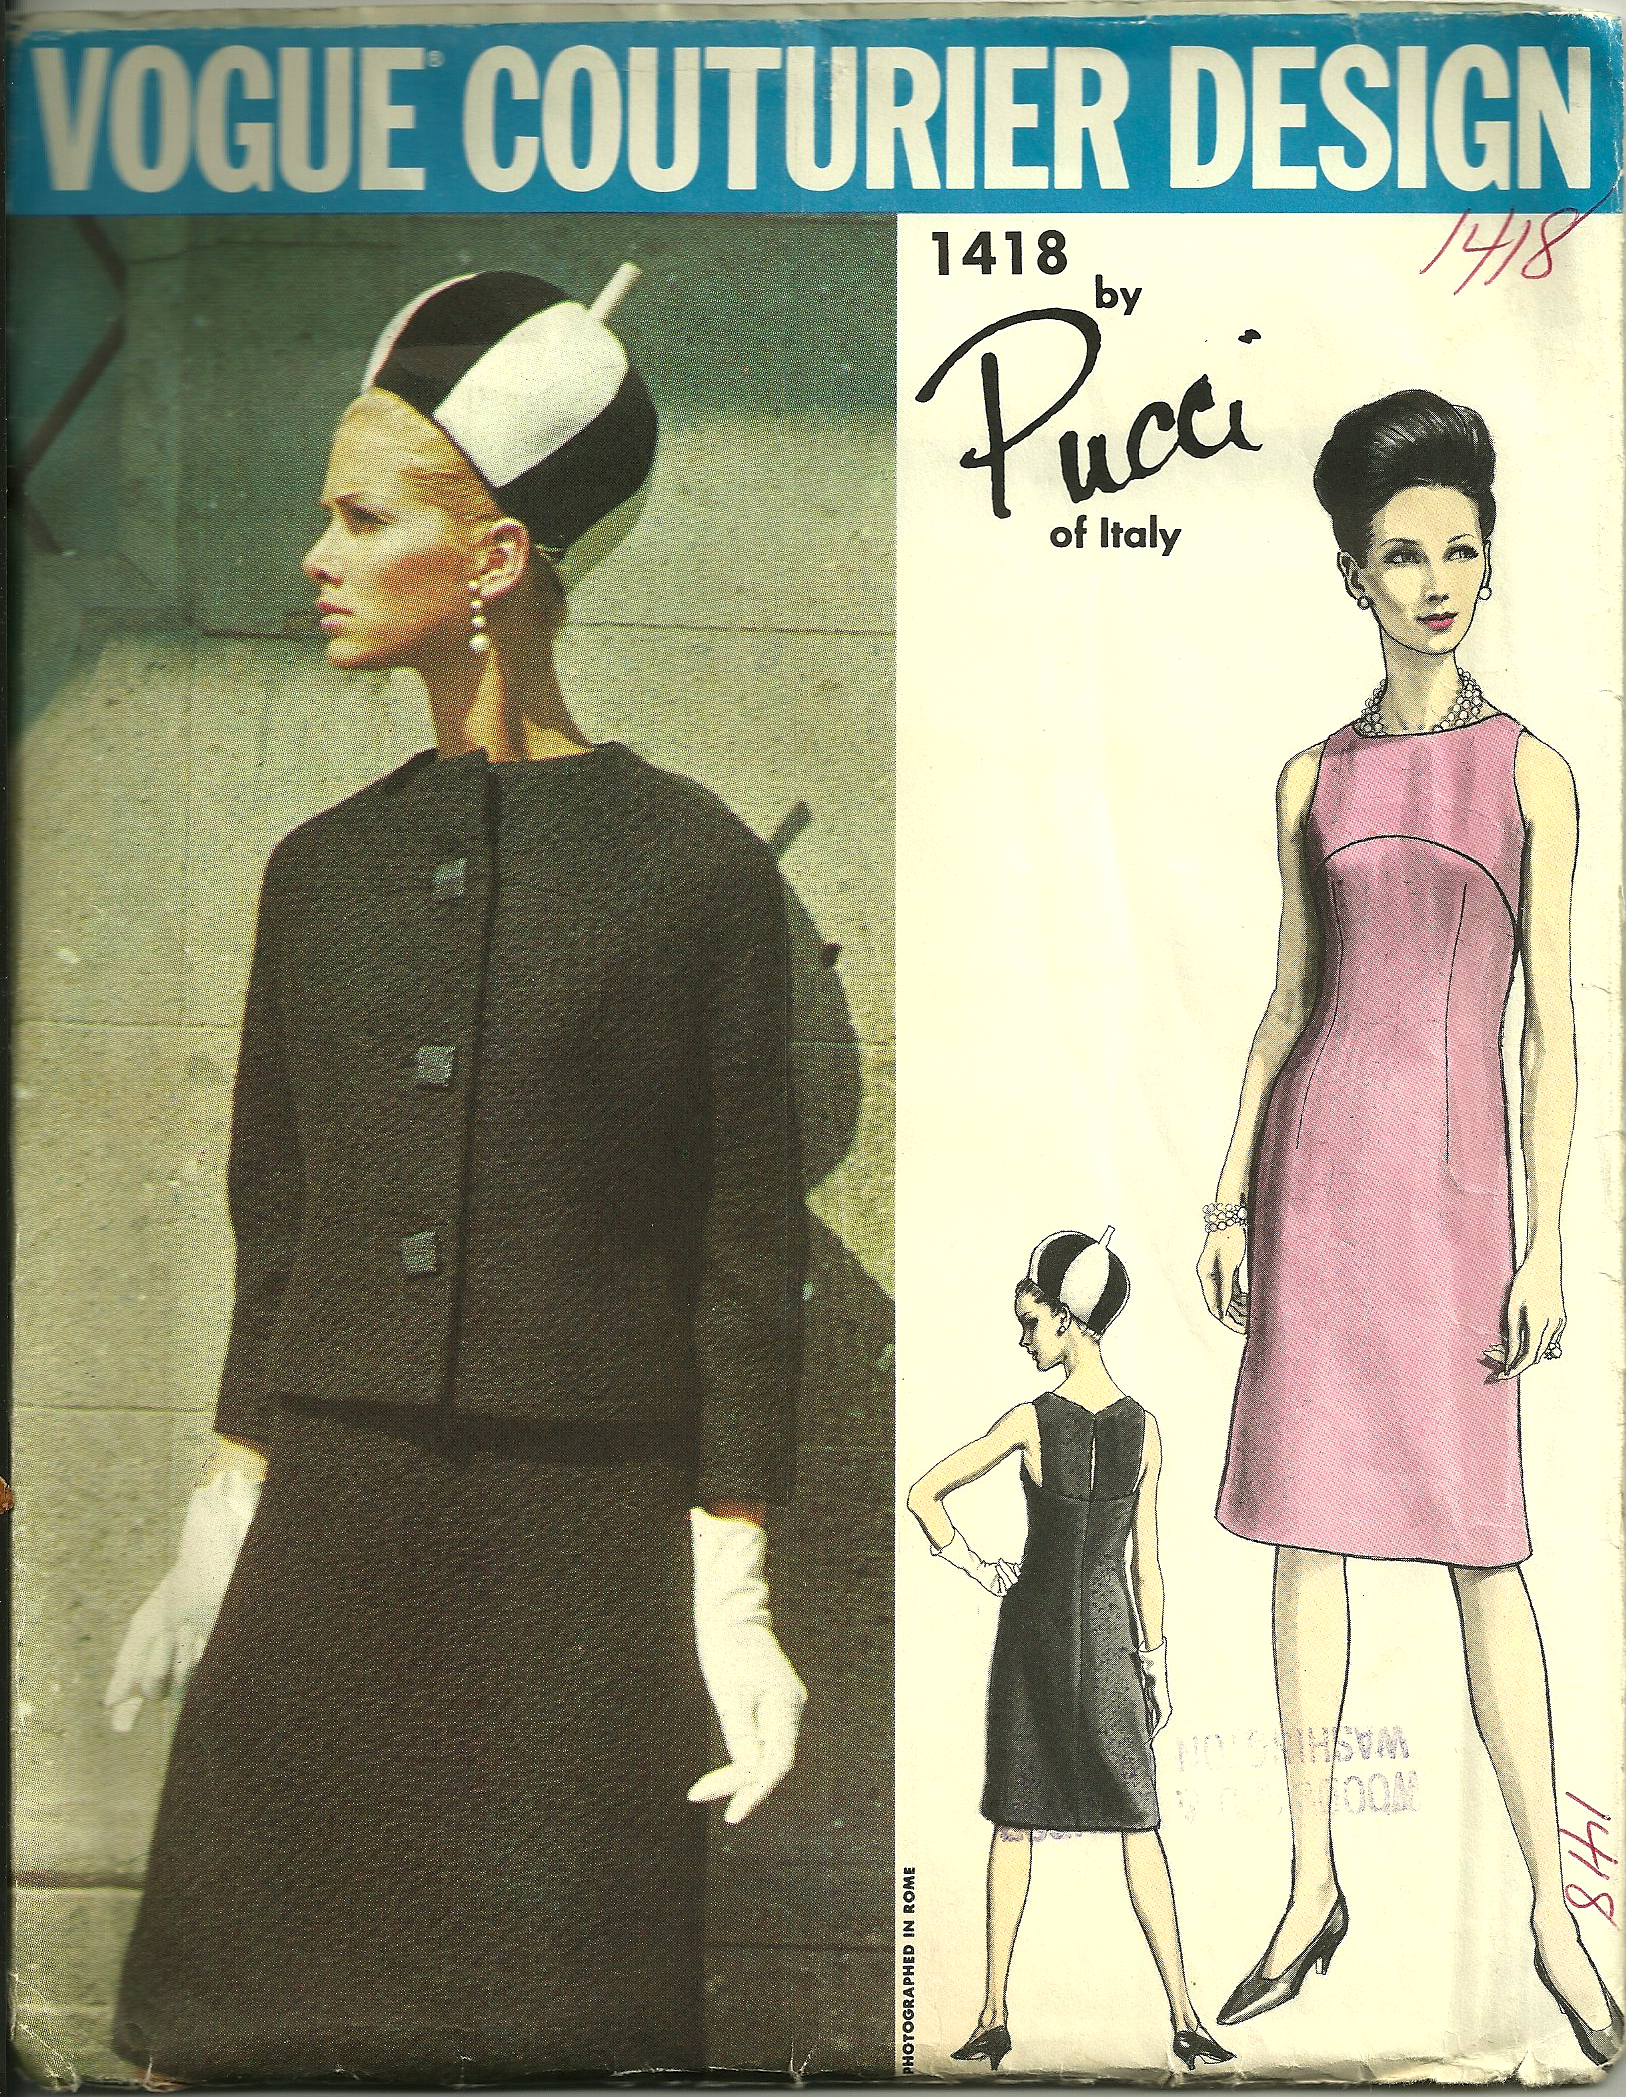
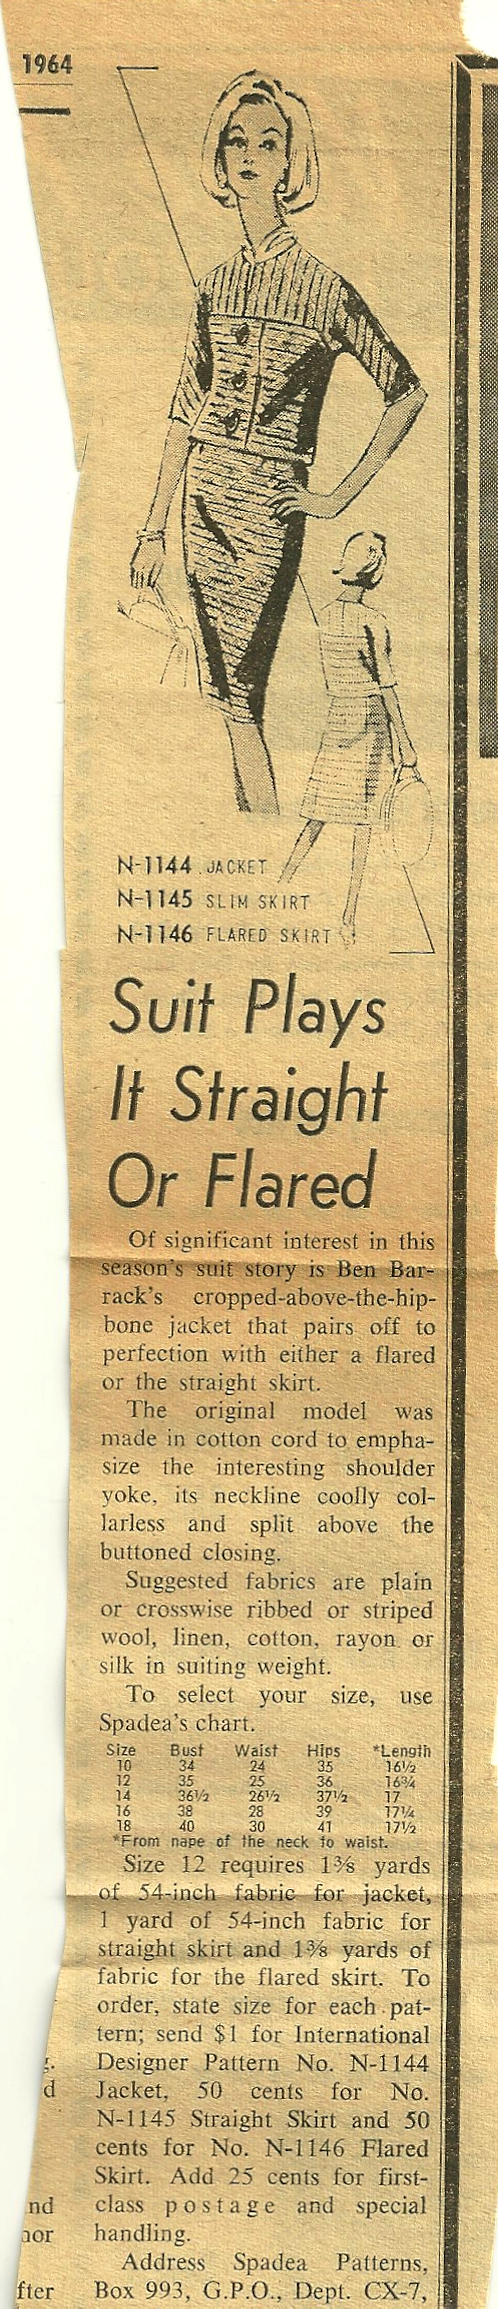
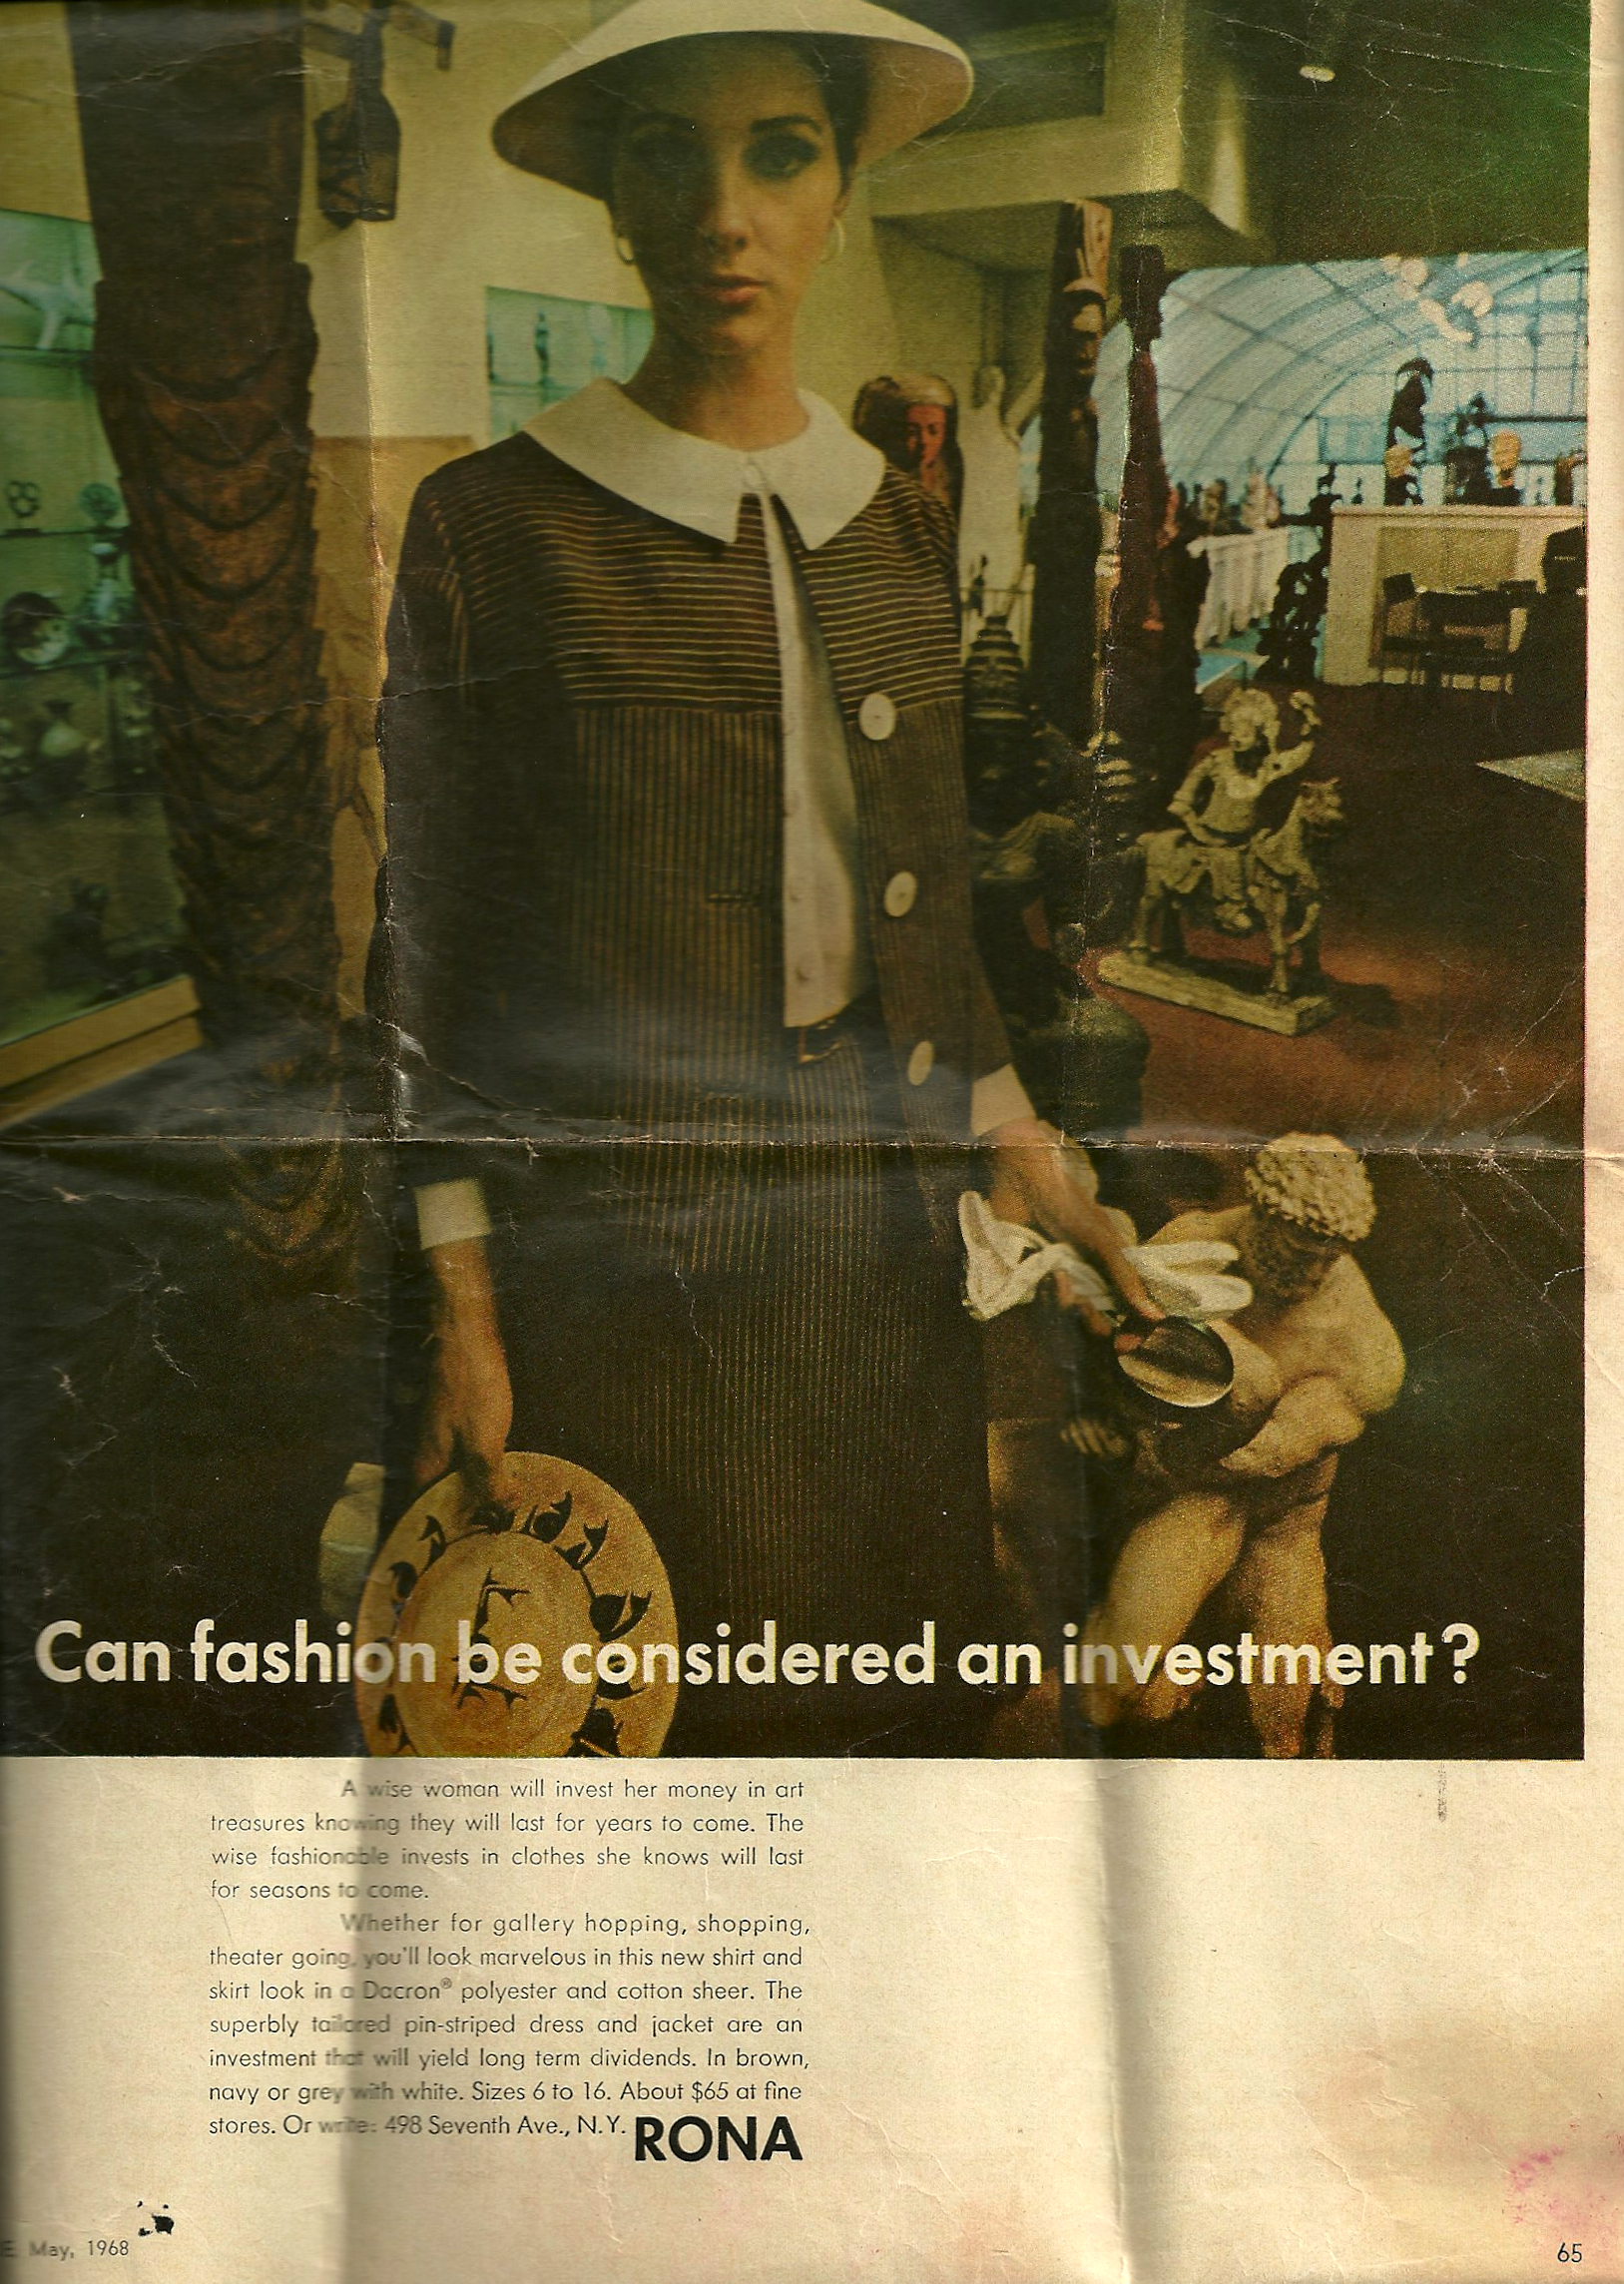
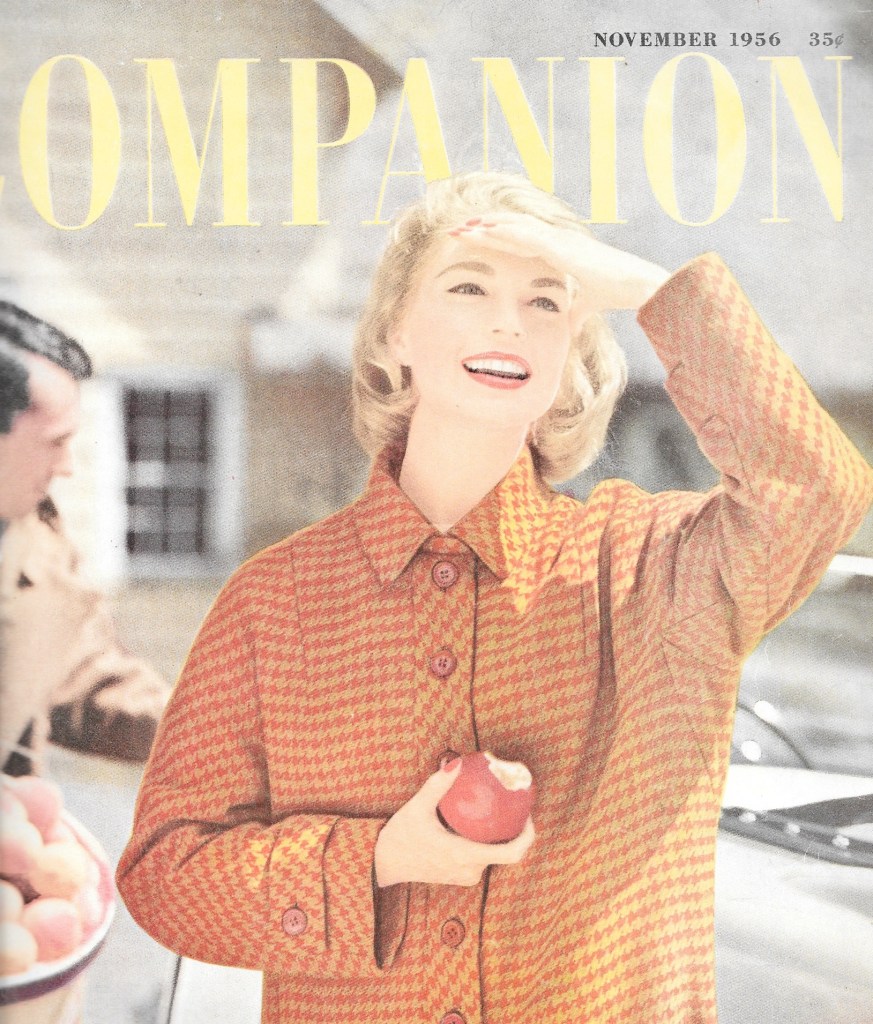
When this pattern was released a few months ago, I was immediately interested in making one.  There are several details in this jacket which I find especially appealing.  The first – and salient one – is the cut-on sleeve, also called an all-in-one sleeve. This is a design feature which was prevalent in the 1950s, but no longer often seen.   Usually sewn with an underarm gusset to enhance moveability, this sleeve forms its own crease lines below the shoulder at the front and back.  You can see that detail in the diagram on the pattern envelope above.  Take a look at this magazine cover from November 1956.  You can see both the crease line and the coat’s gusset.  

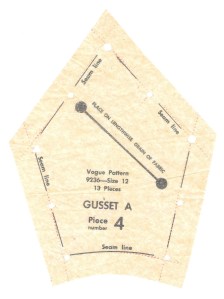
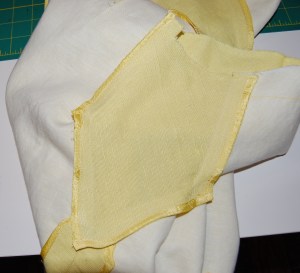
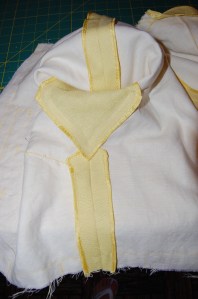
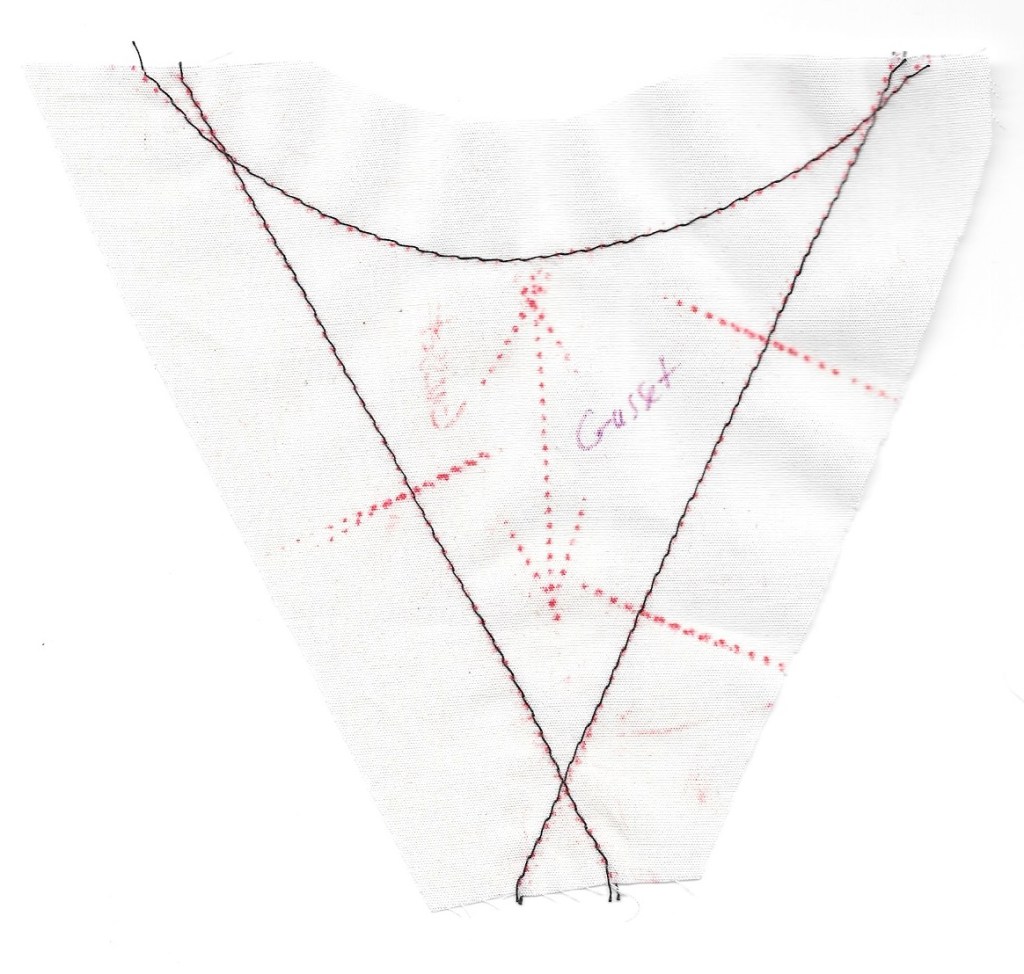
I suspect at least one of the reasons this particular type of sleeve fell out of favor is that the pattern pieces do take a sizeable amount of fabric to accommodate the width of the attached sleeve.  I also suspect sewing in those gussets demanded a certain expertise to be finished successfully, adding time to both home sewing and to ready-to-wear.  But I love the look of the cut-on sleeve.  It really is a classic style, and one which I am happy to have the opportunity to incorporate into my sewing.  It is worth mentioning here that this sleeve is similar to a “kimono” sleeve, but it is not cut as full under the arm.  (This seems like a good time to show the pattern piece for the jacket’s gusset.  Rather than diamond shaped, it is a triangle with a curved top edge.  Pretty clever!)

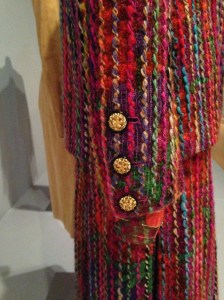
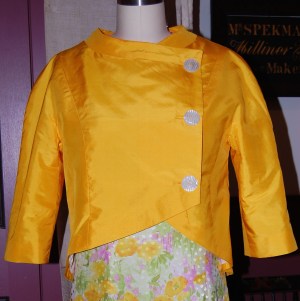
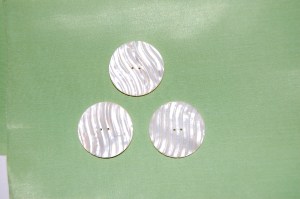
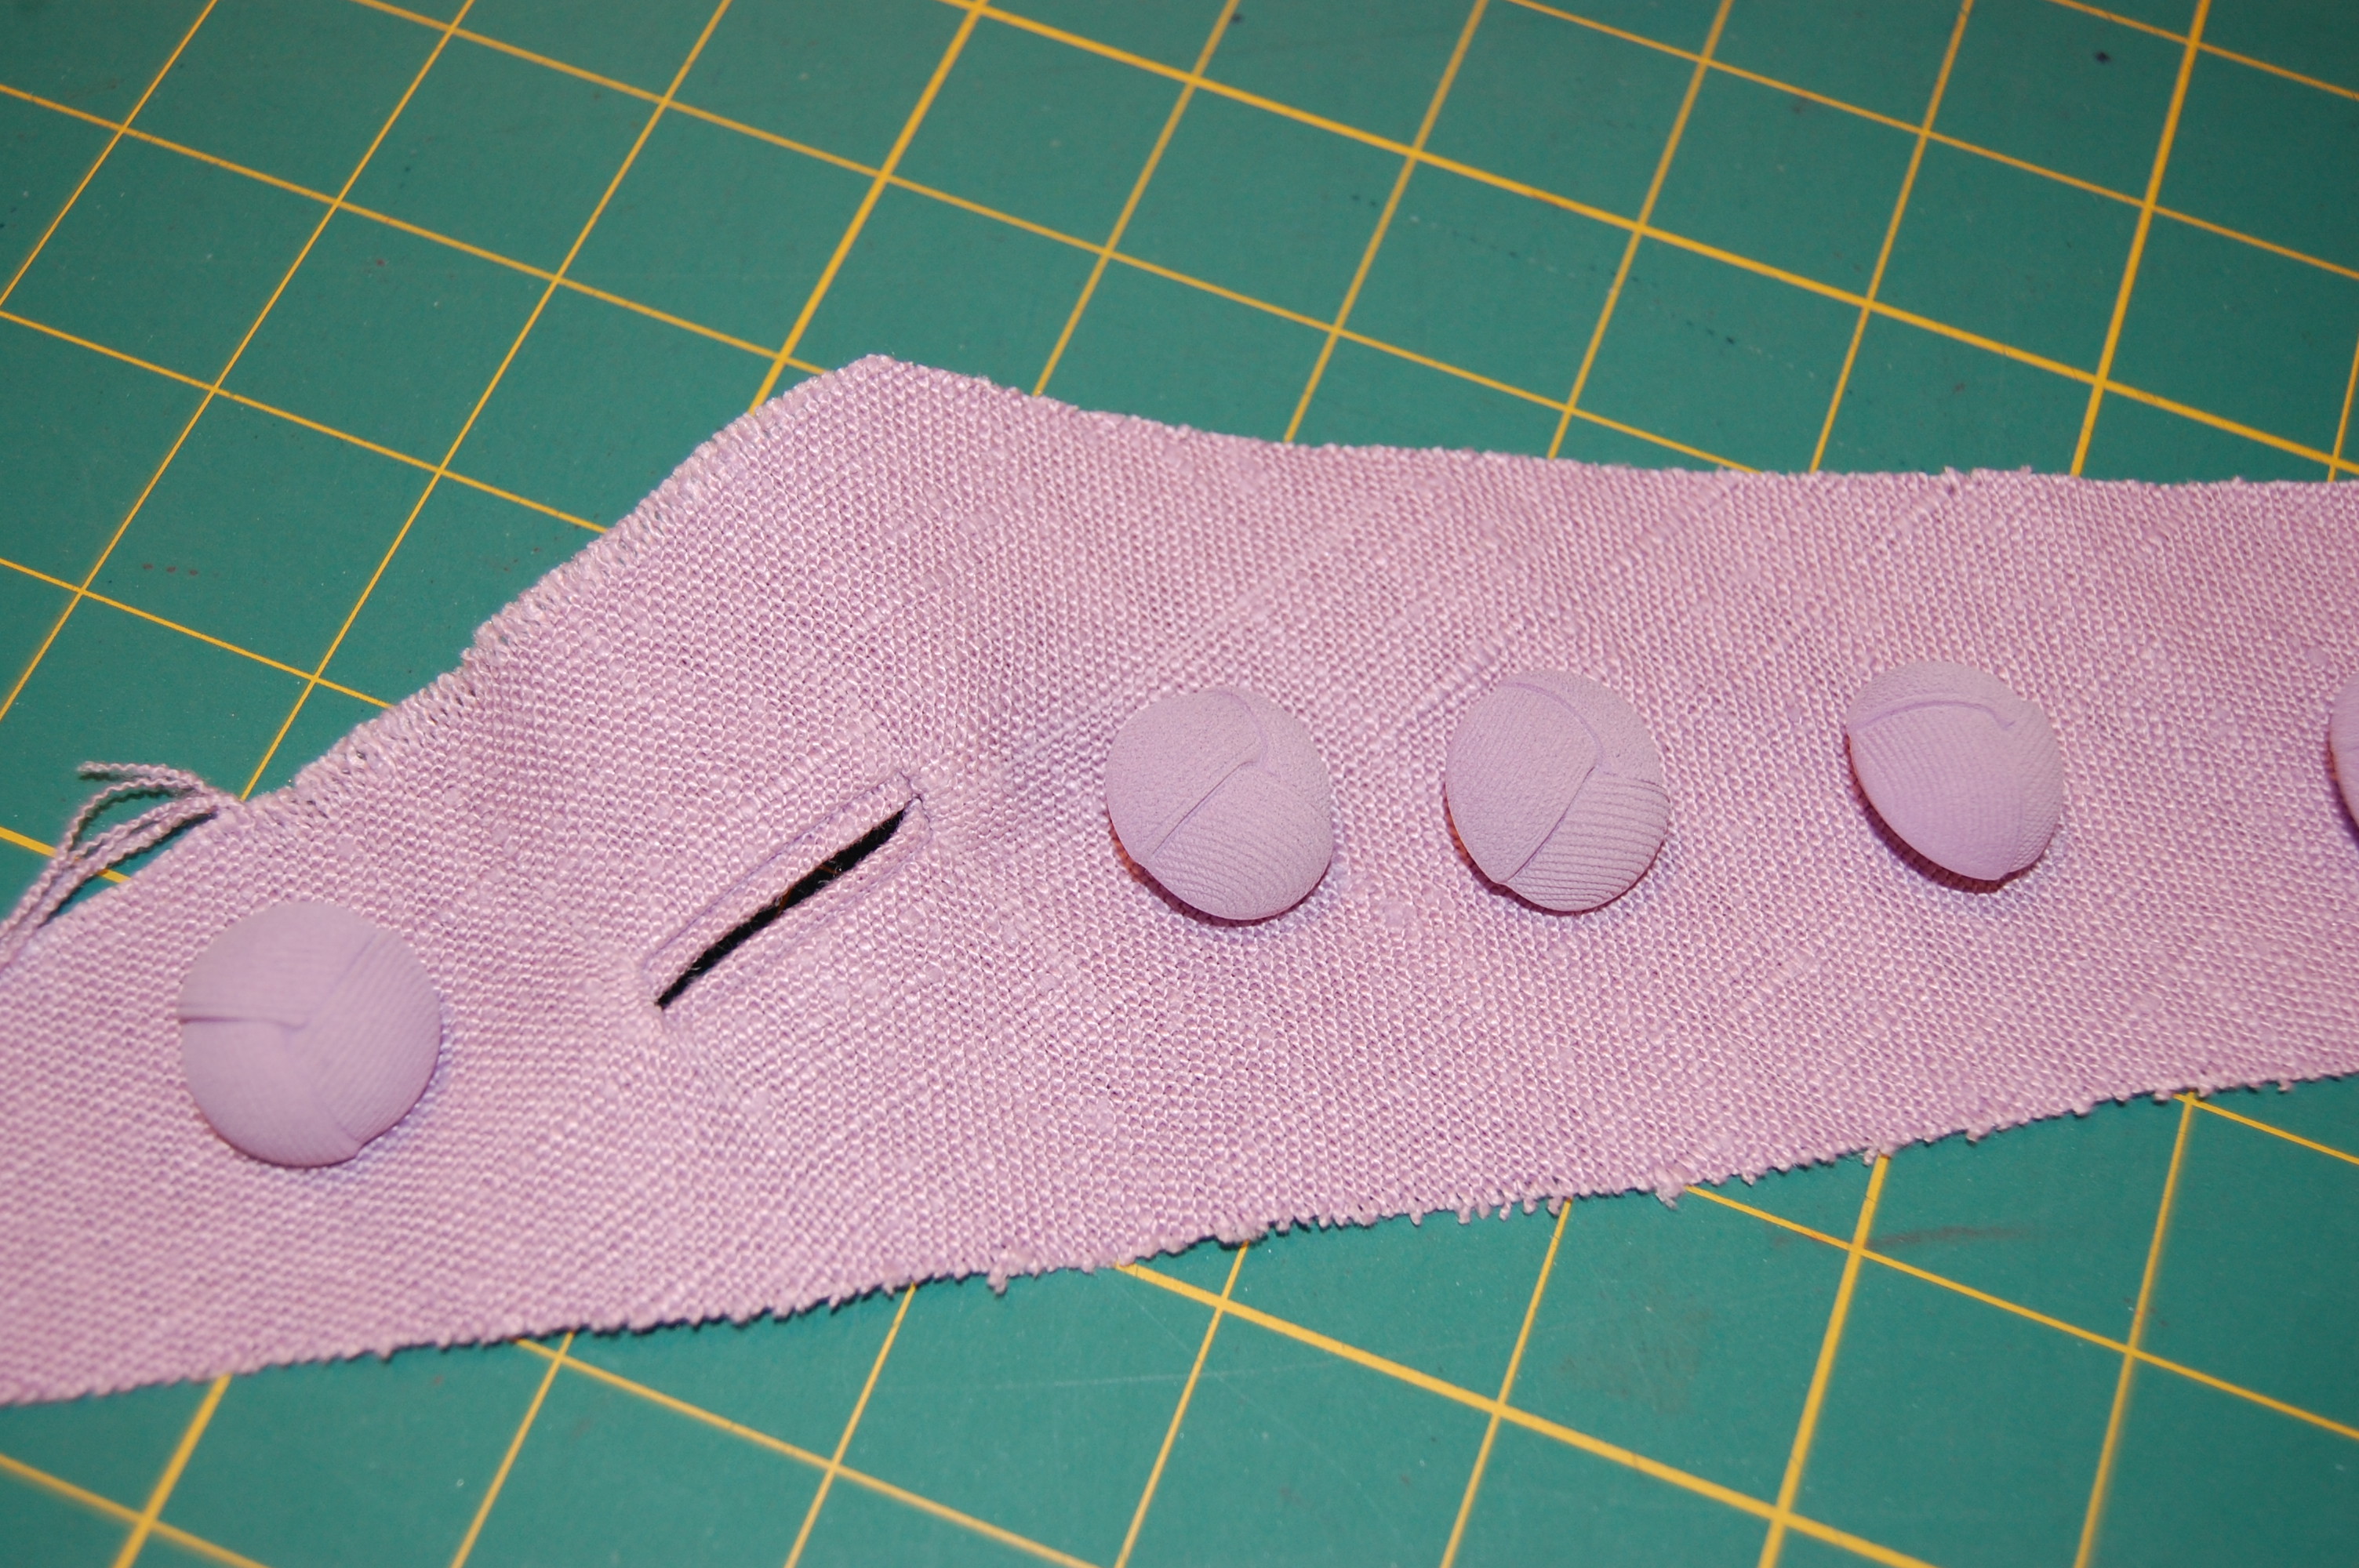
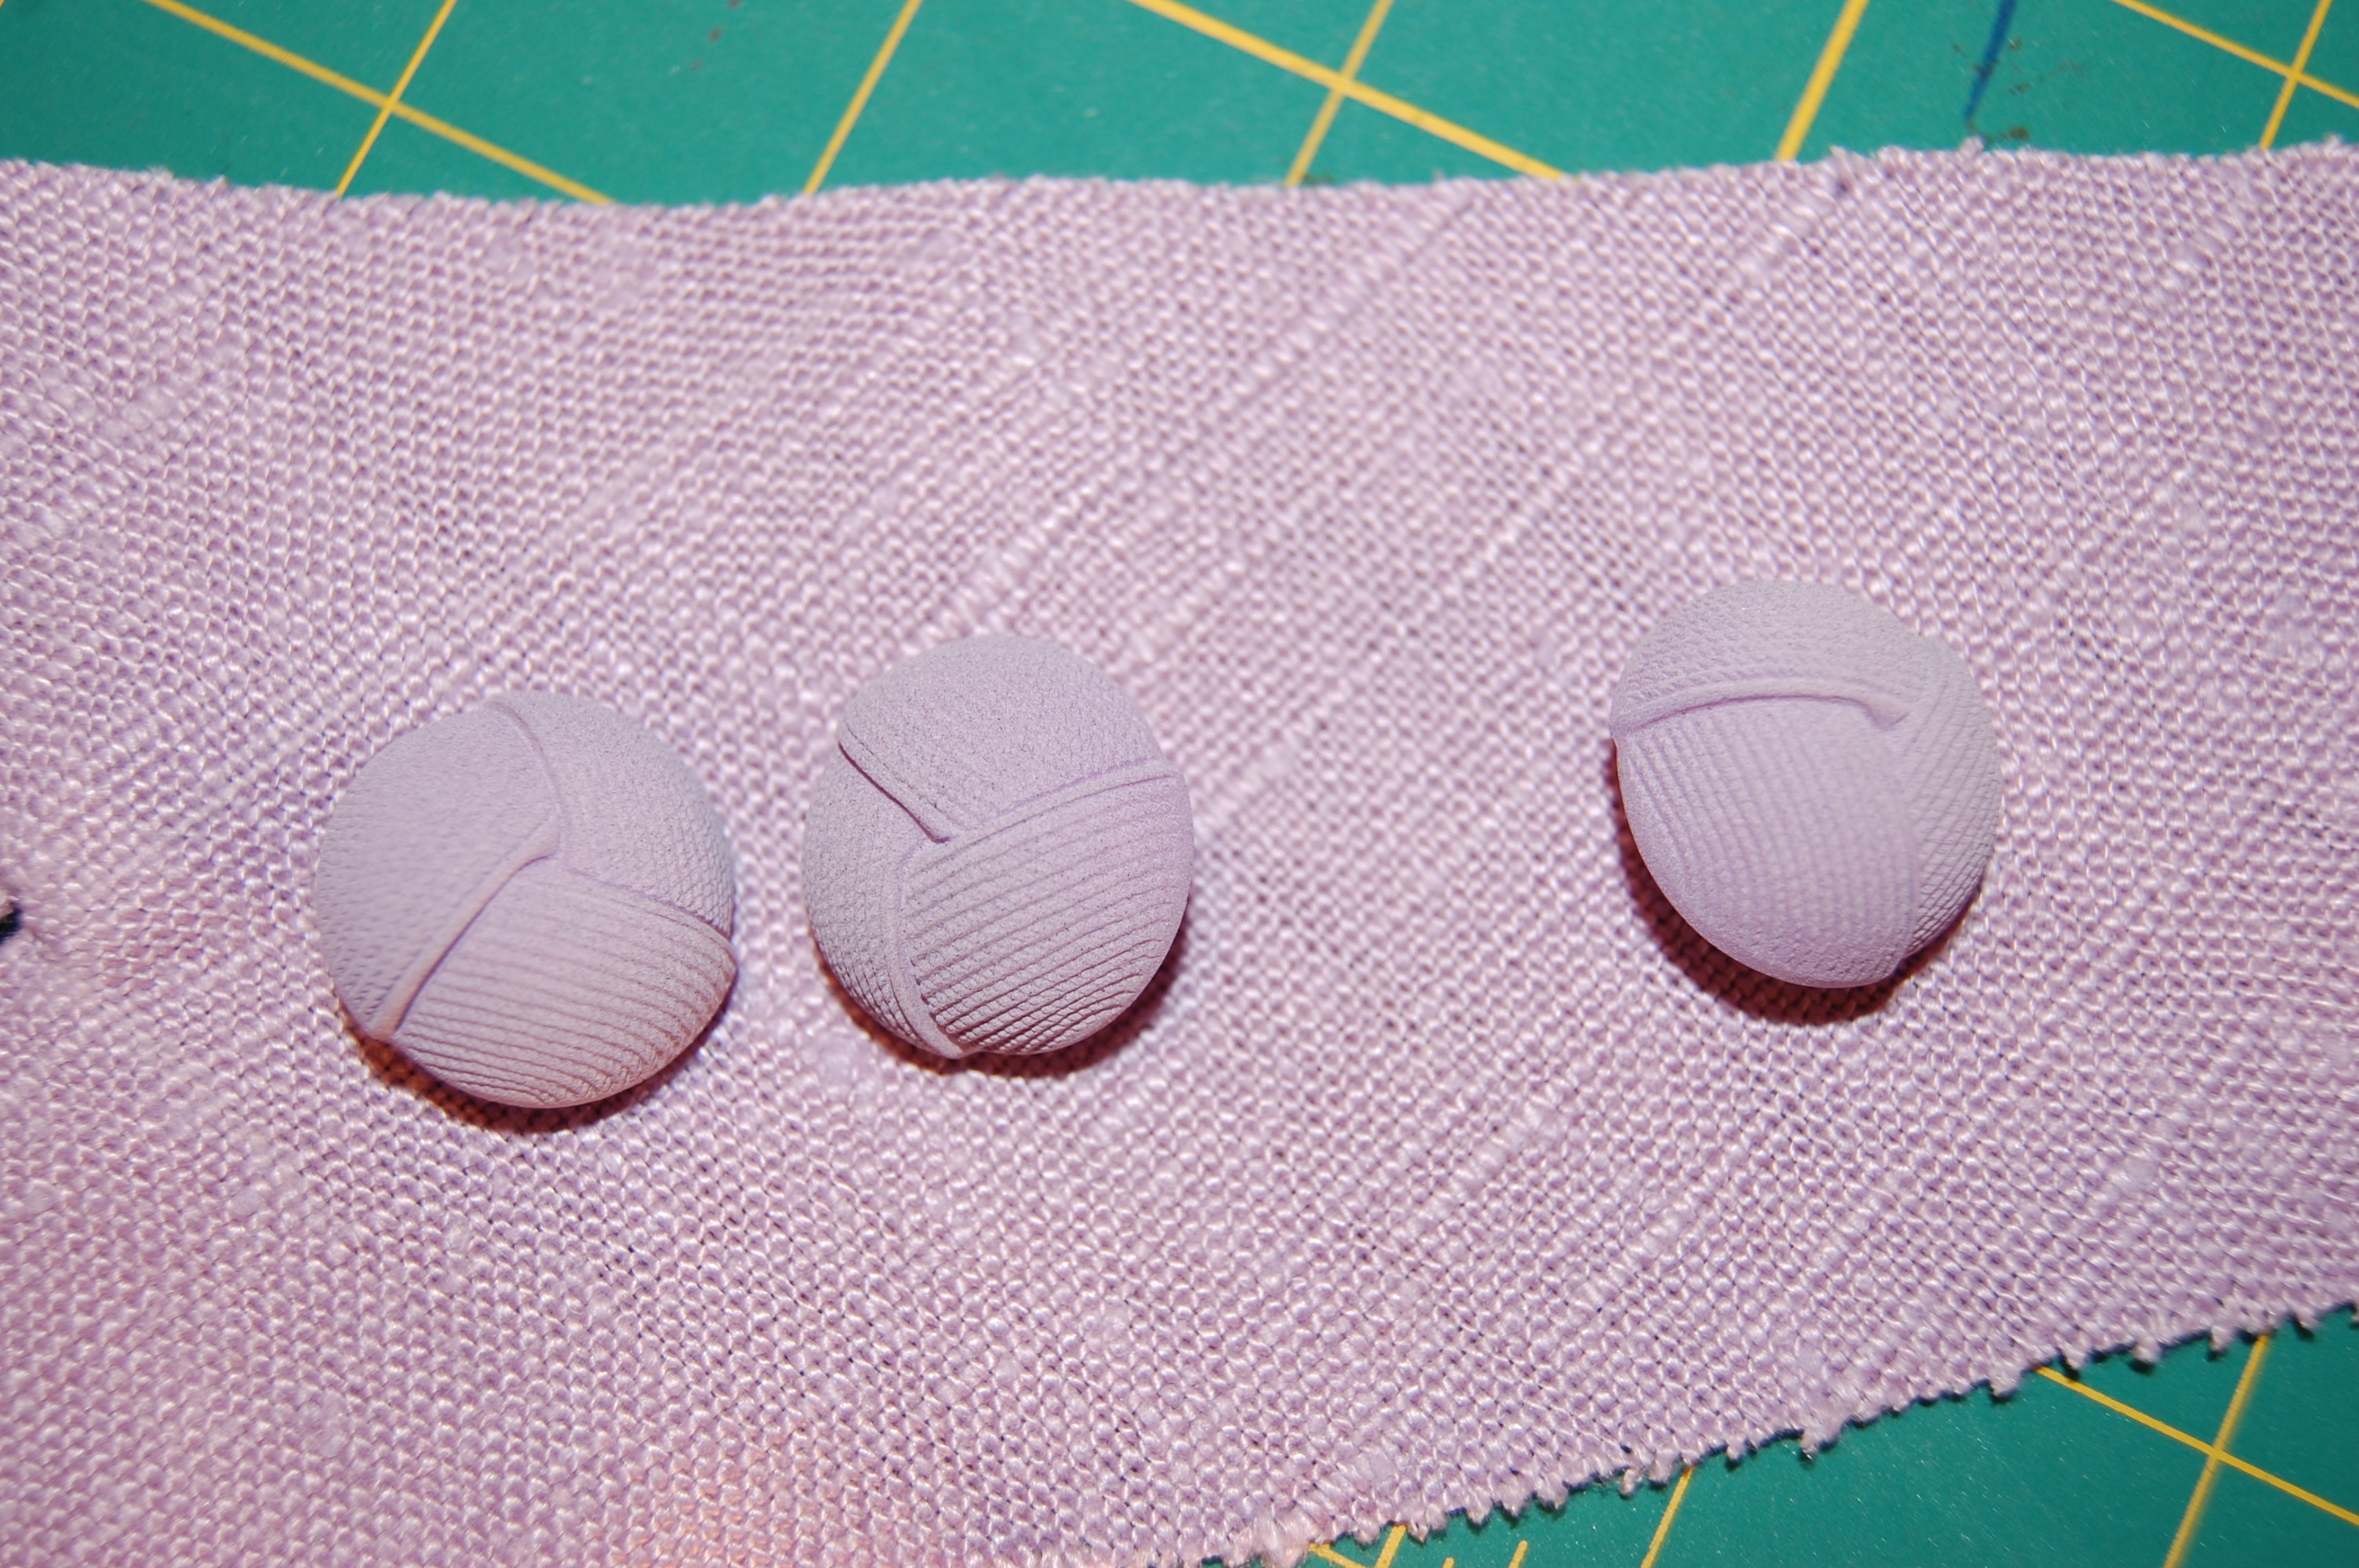
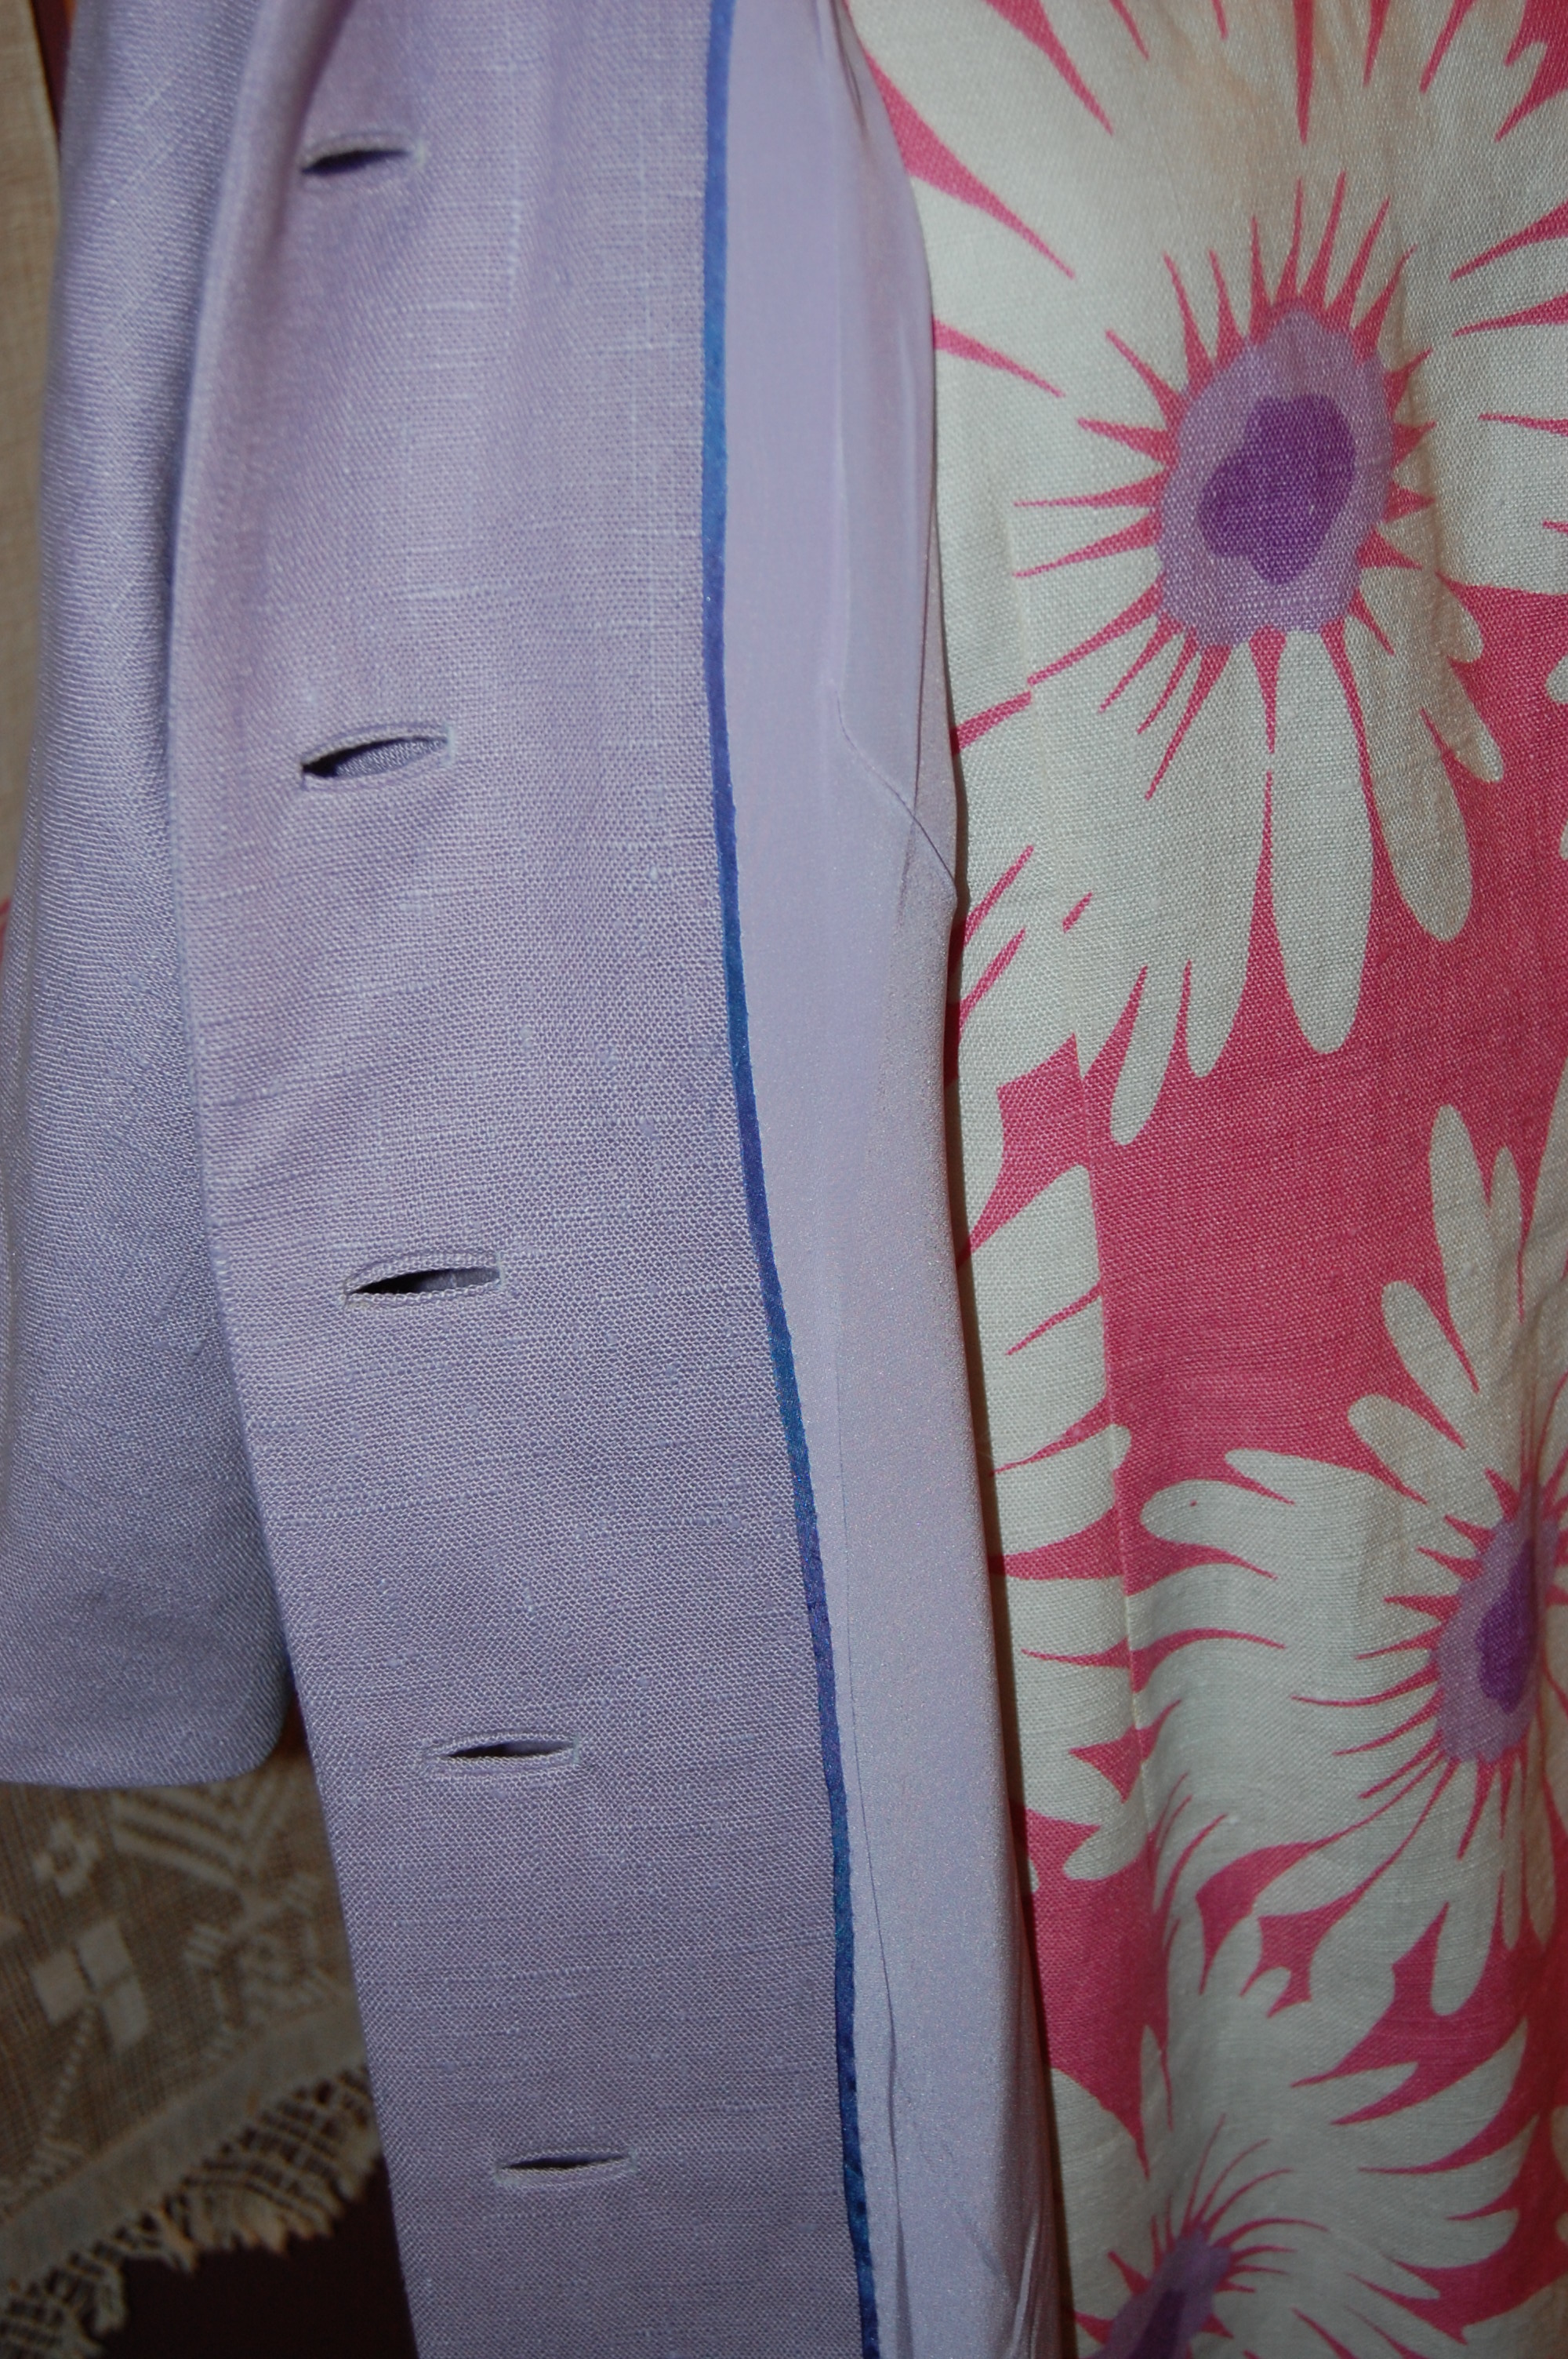
Another design feature of the jacket which appeals to me is the prominence of the buttons.  The jacket is shown with just two buttons, although certainly a third one could be added.  However, with two larger ones, it is really possible to use showcase buttons, if desired.  And if you follow my blog, you already know that vintage buttons – and unique new ones – are one of my weaknesses.  I am always looking for opportunities to use beautiful buttons.

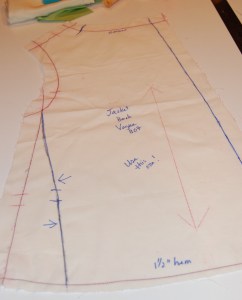
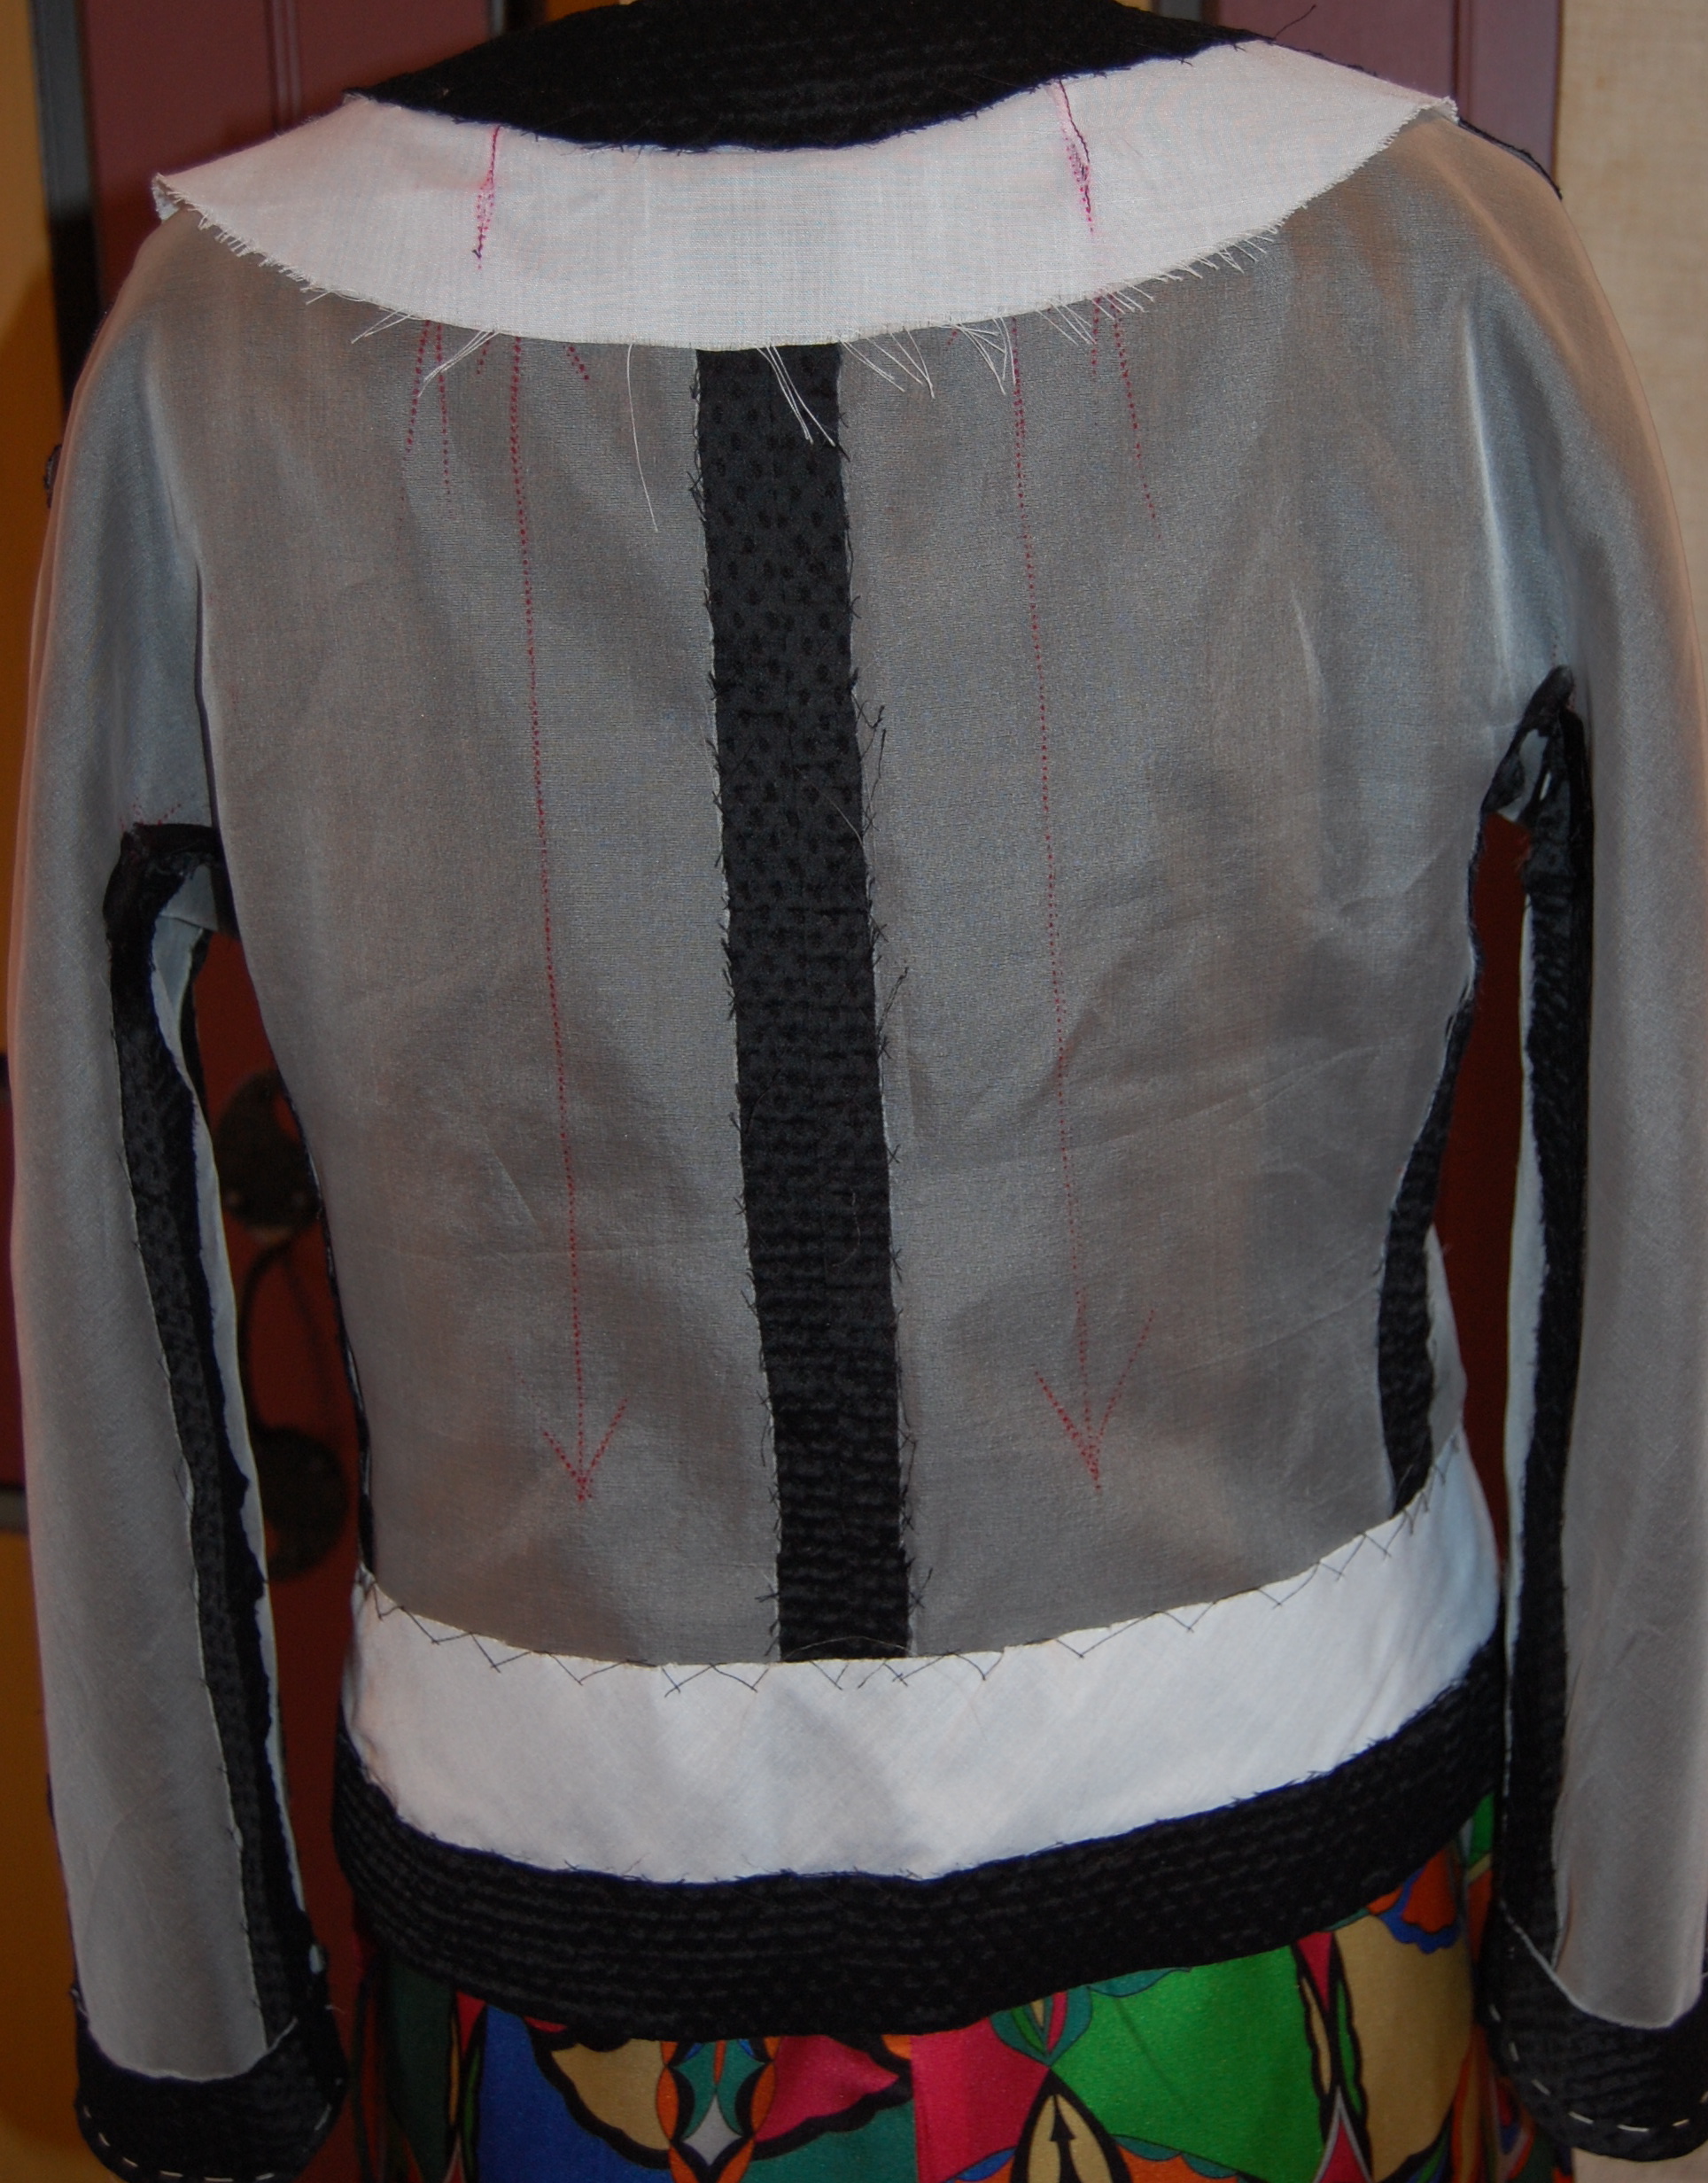
A third construction detail I find appealing is the center back seam.  This allows the opportunity for lovely shaping and more precise fitting than if the back piece were cut without a seam. 

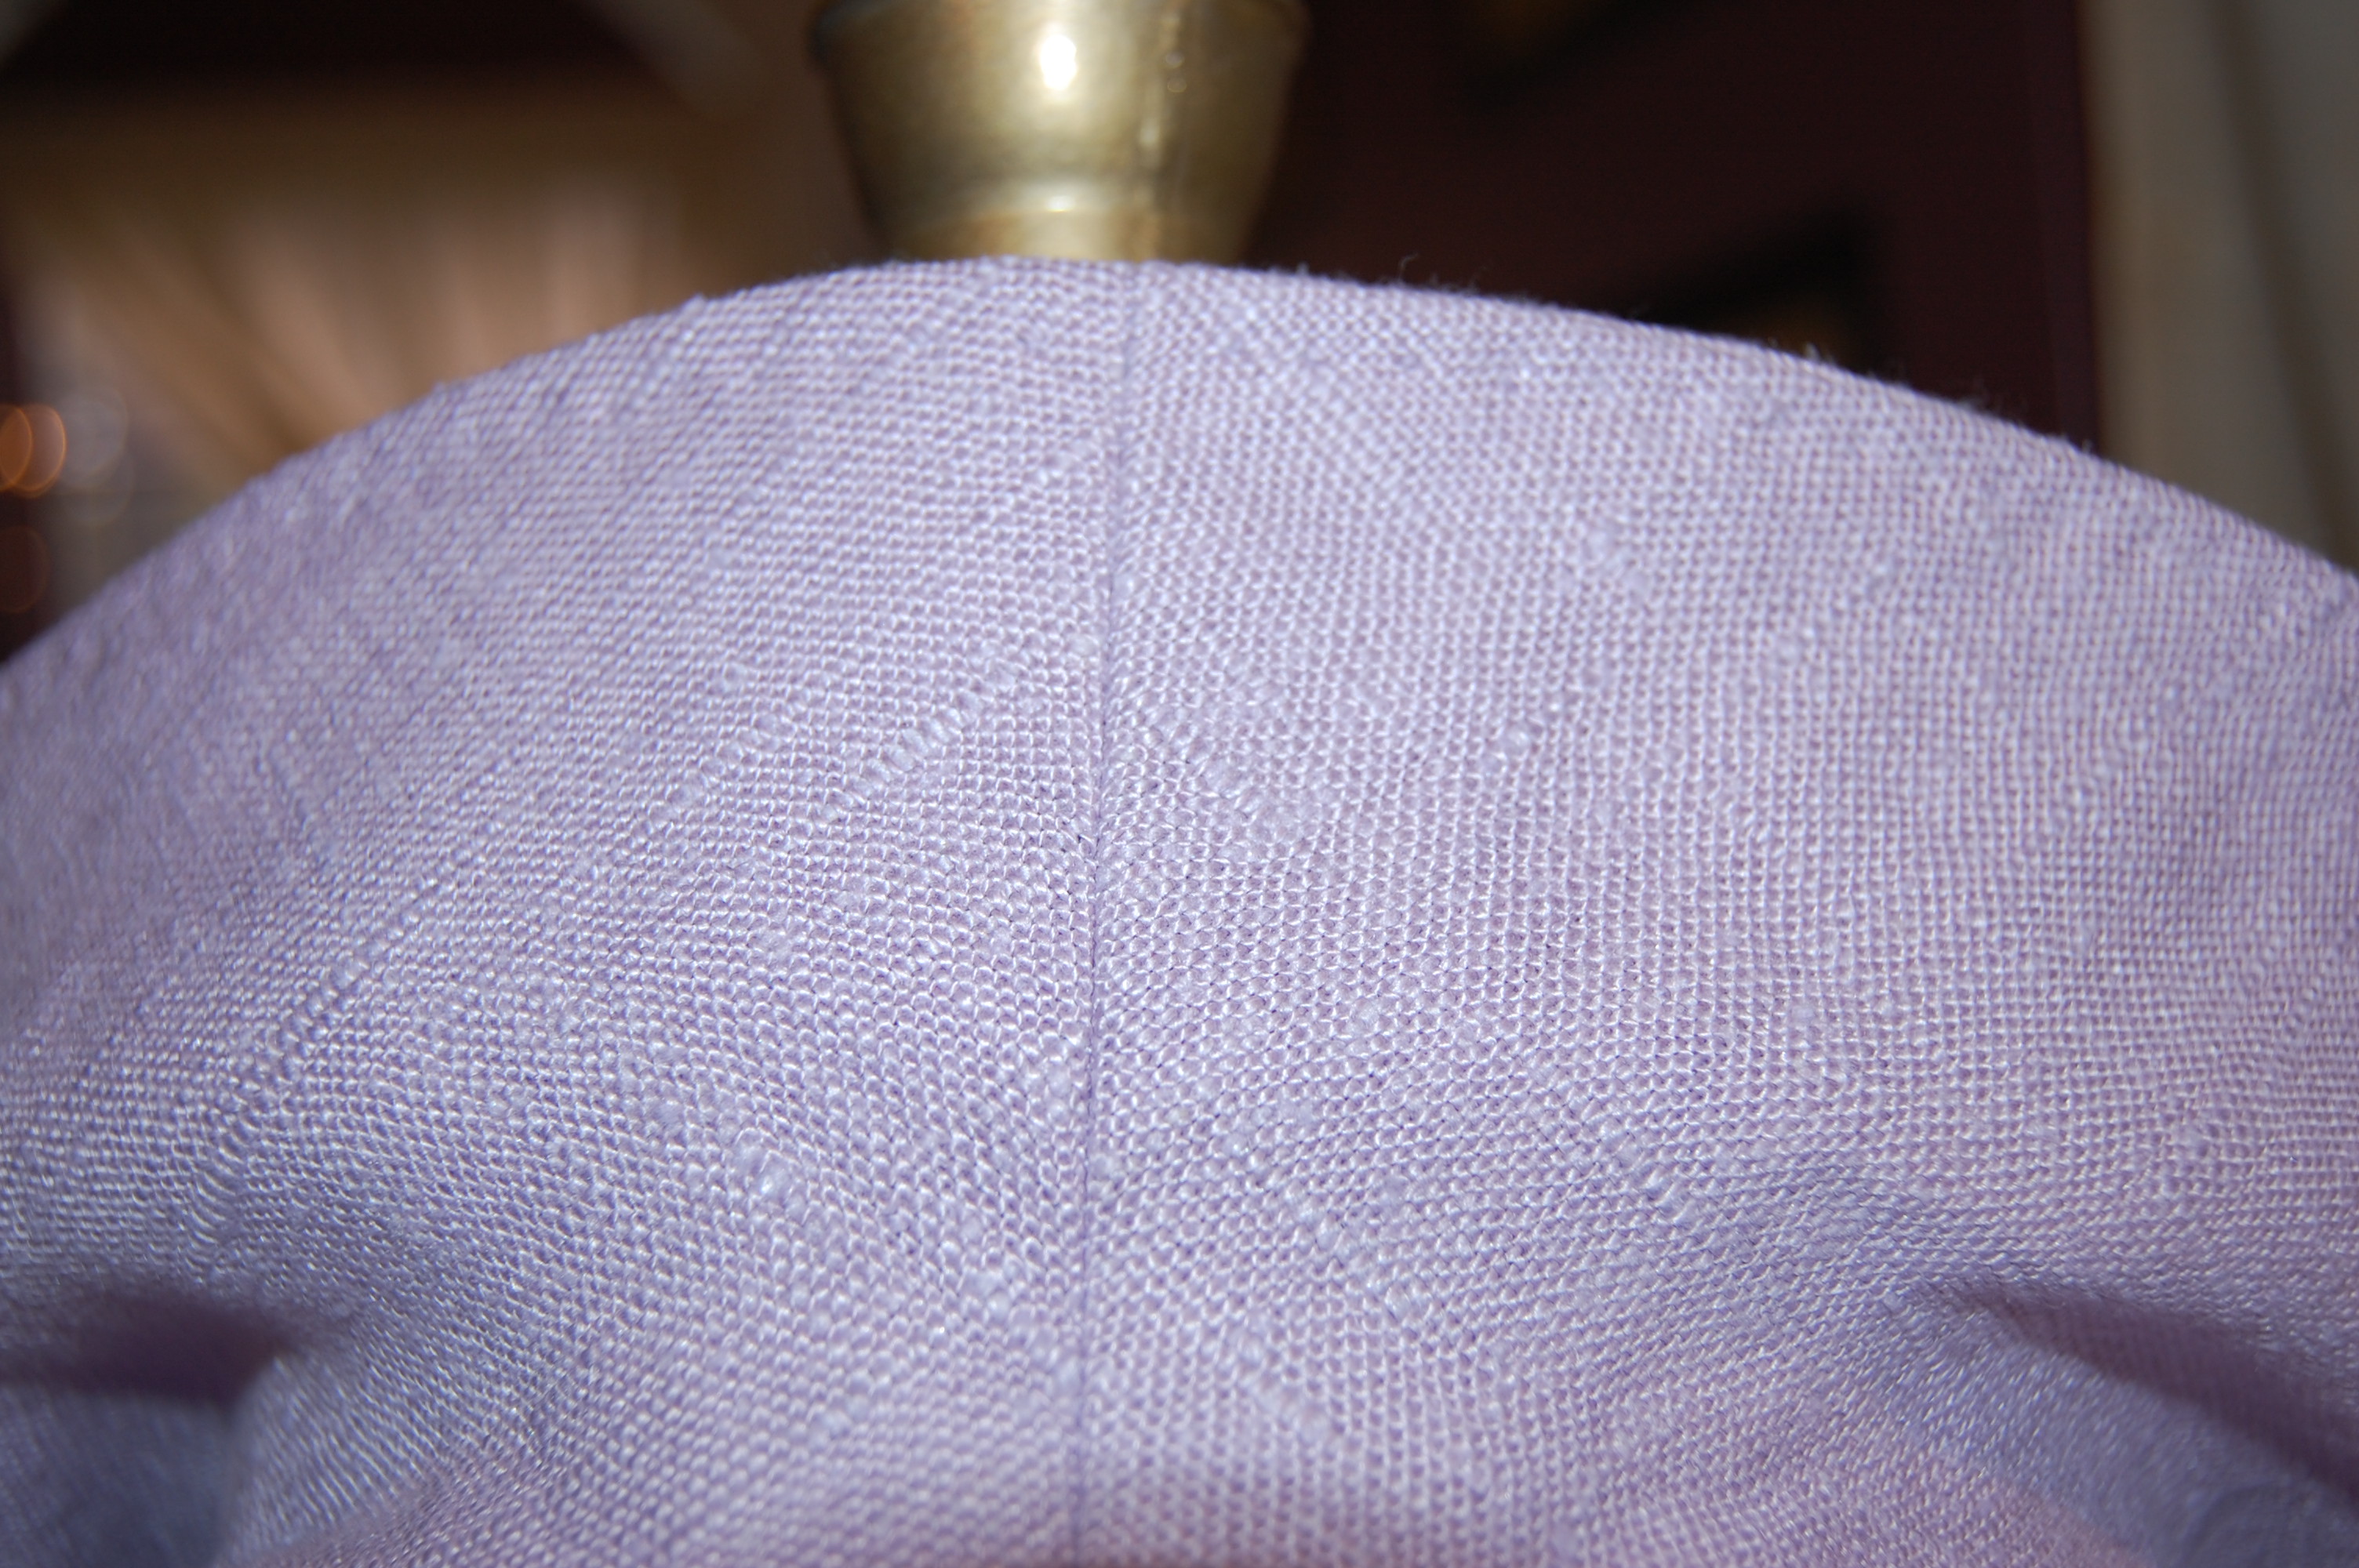
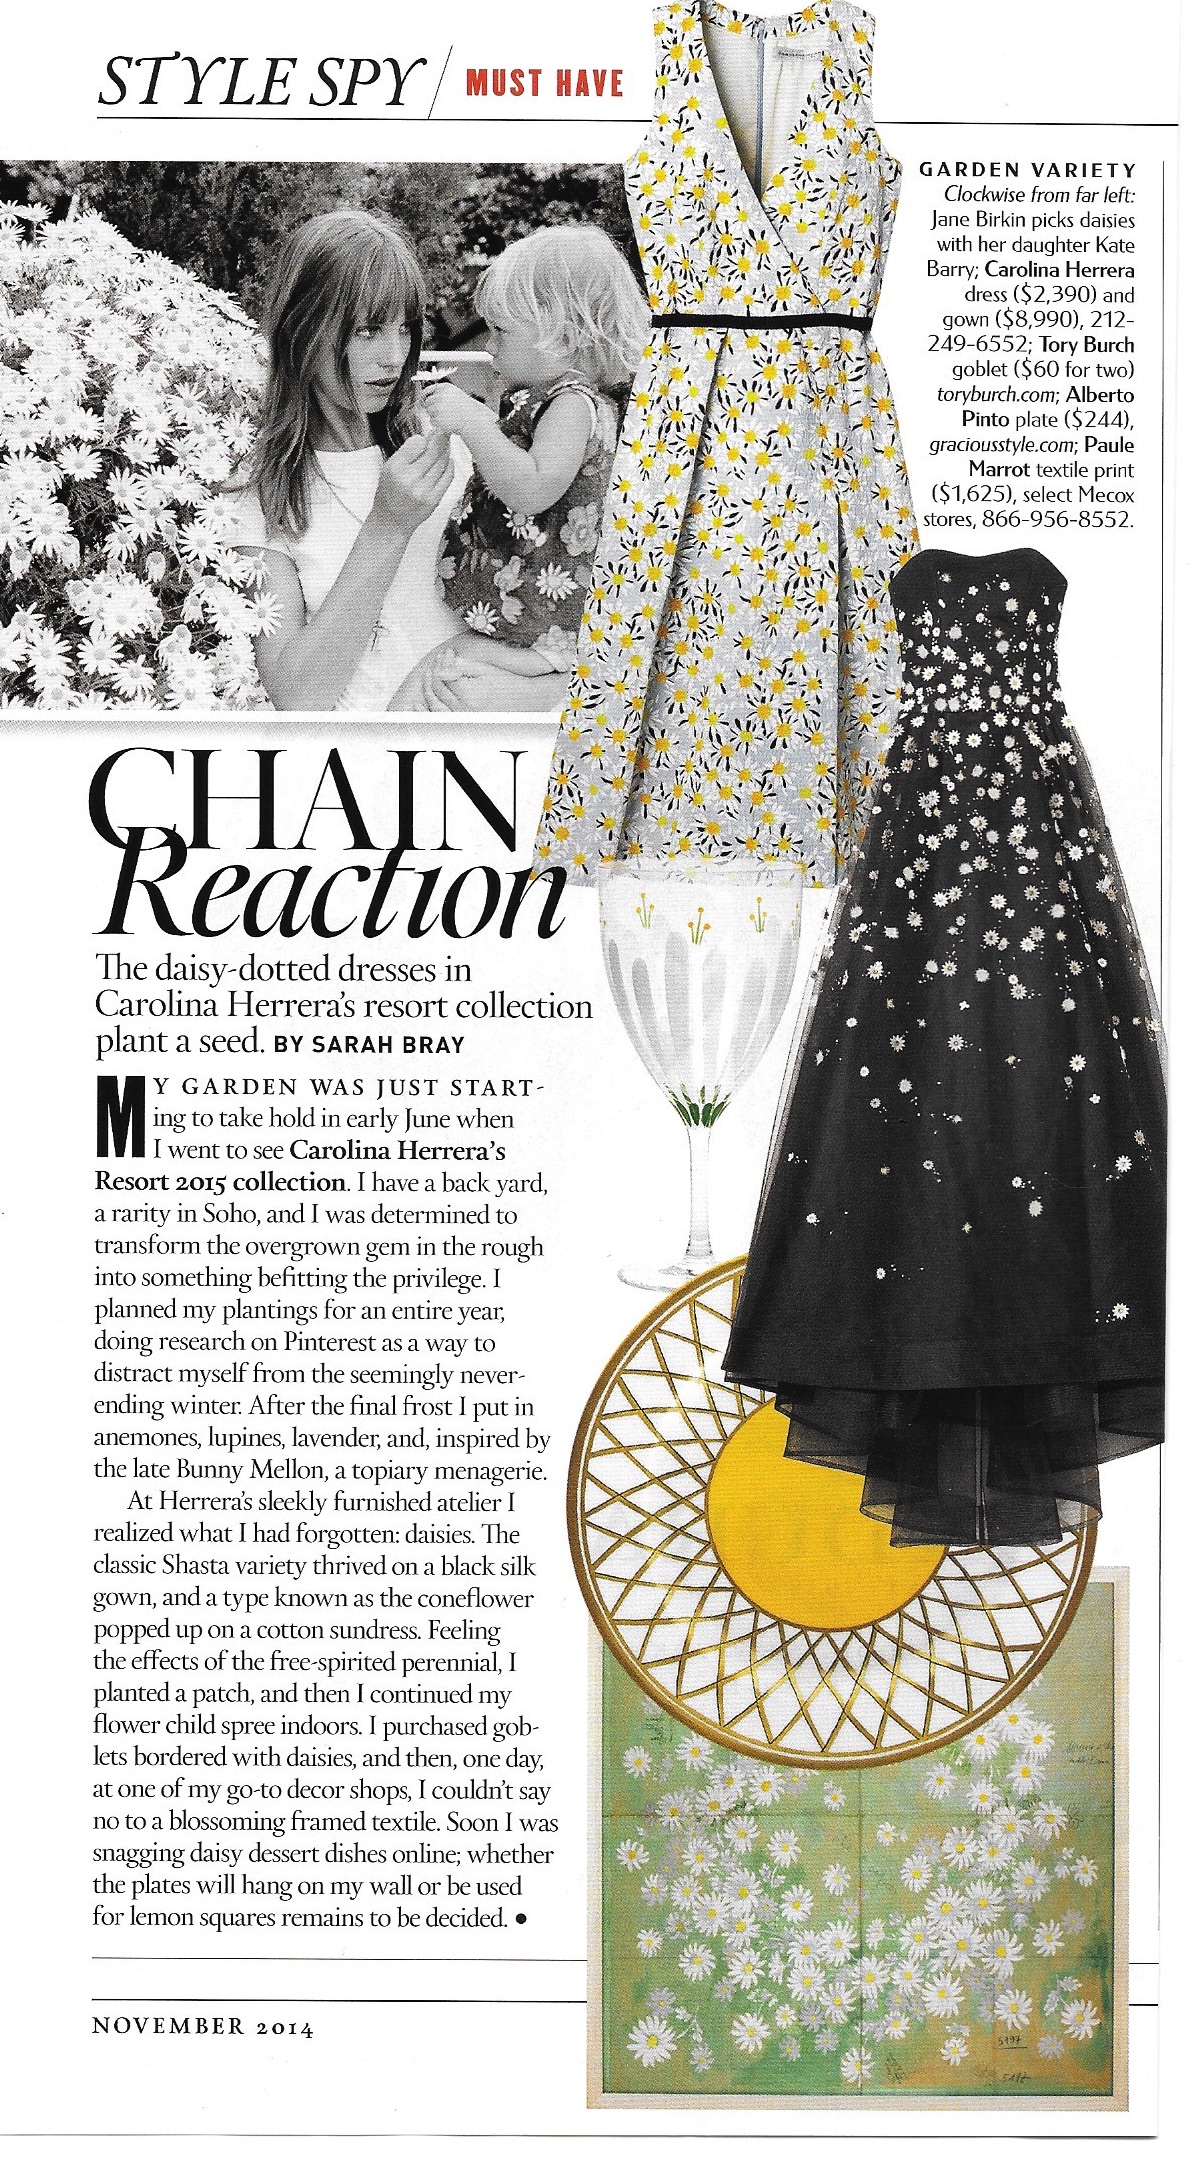
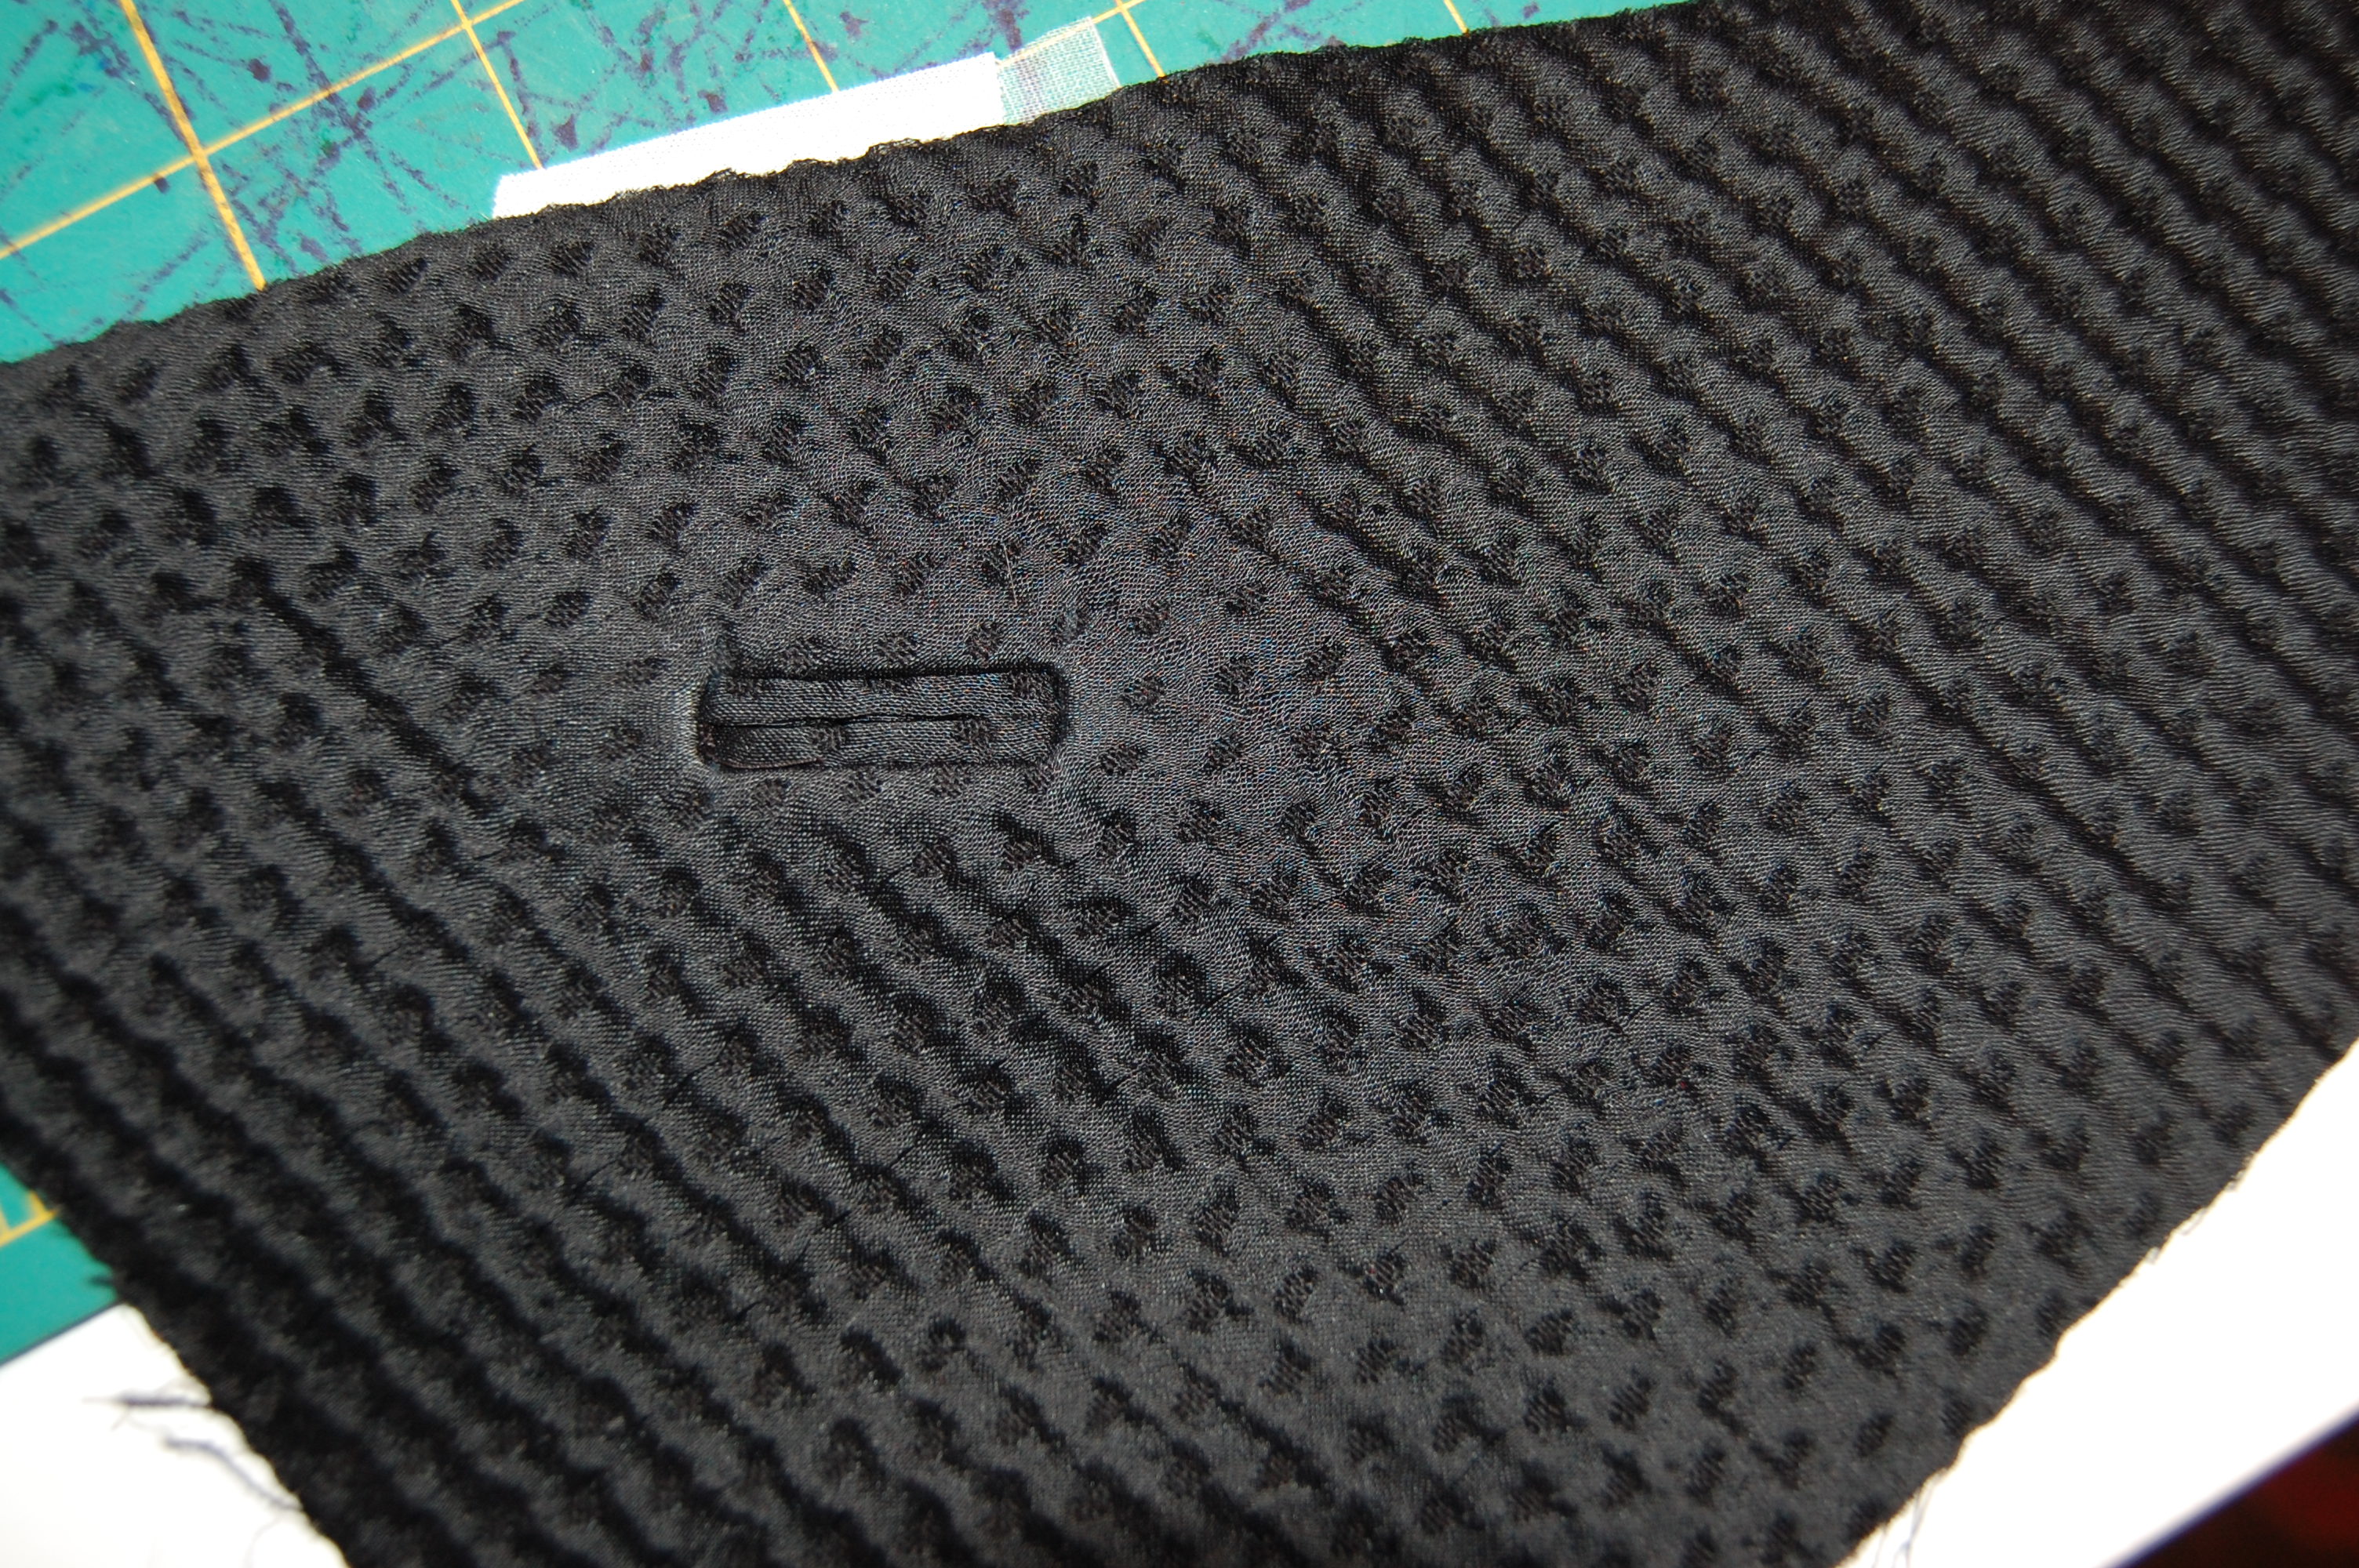
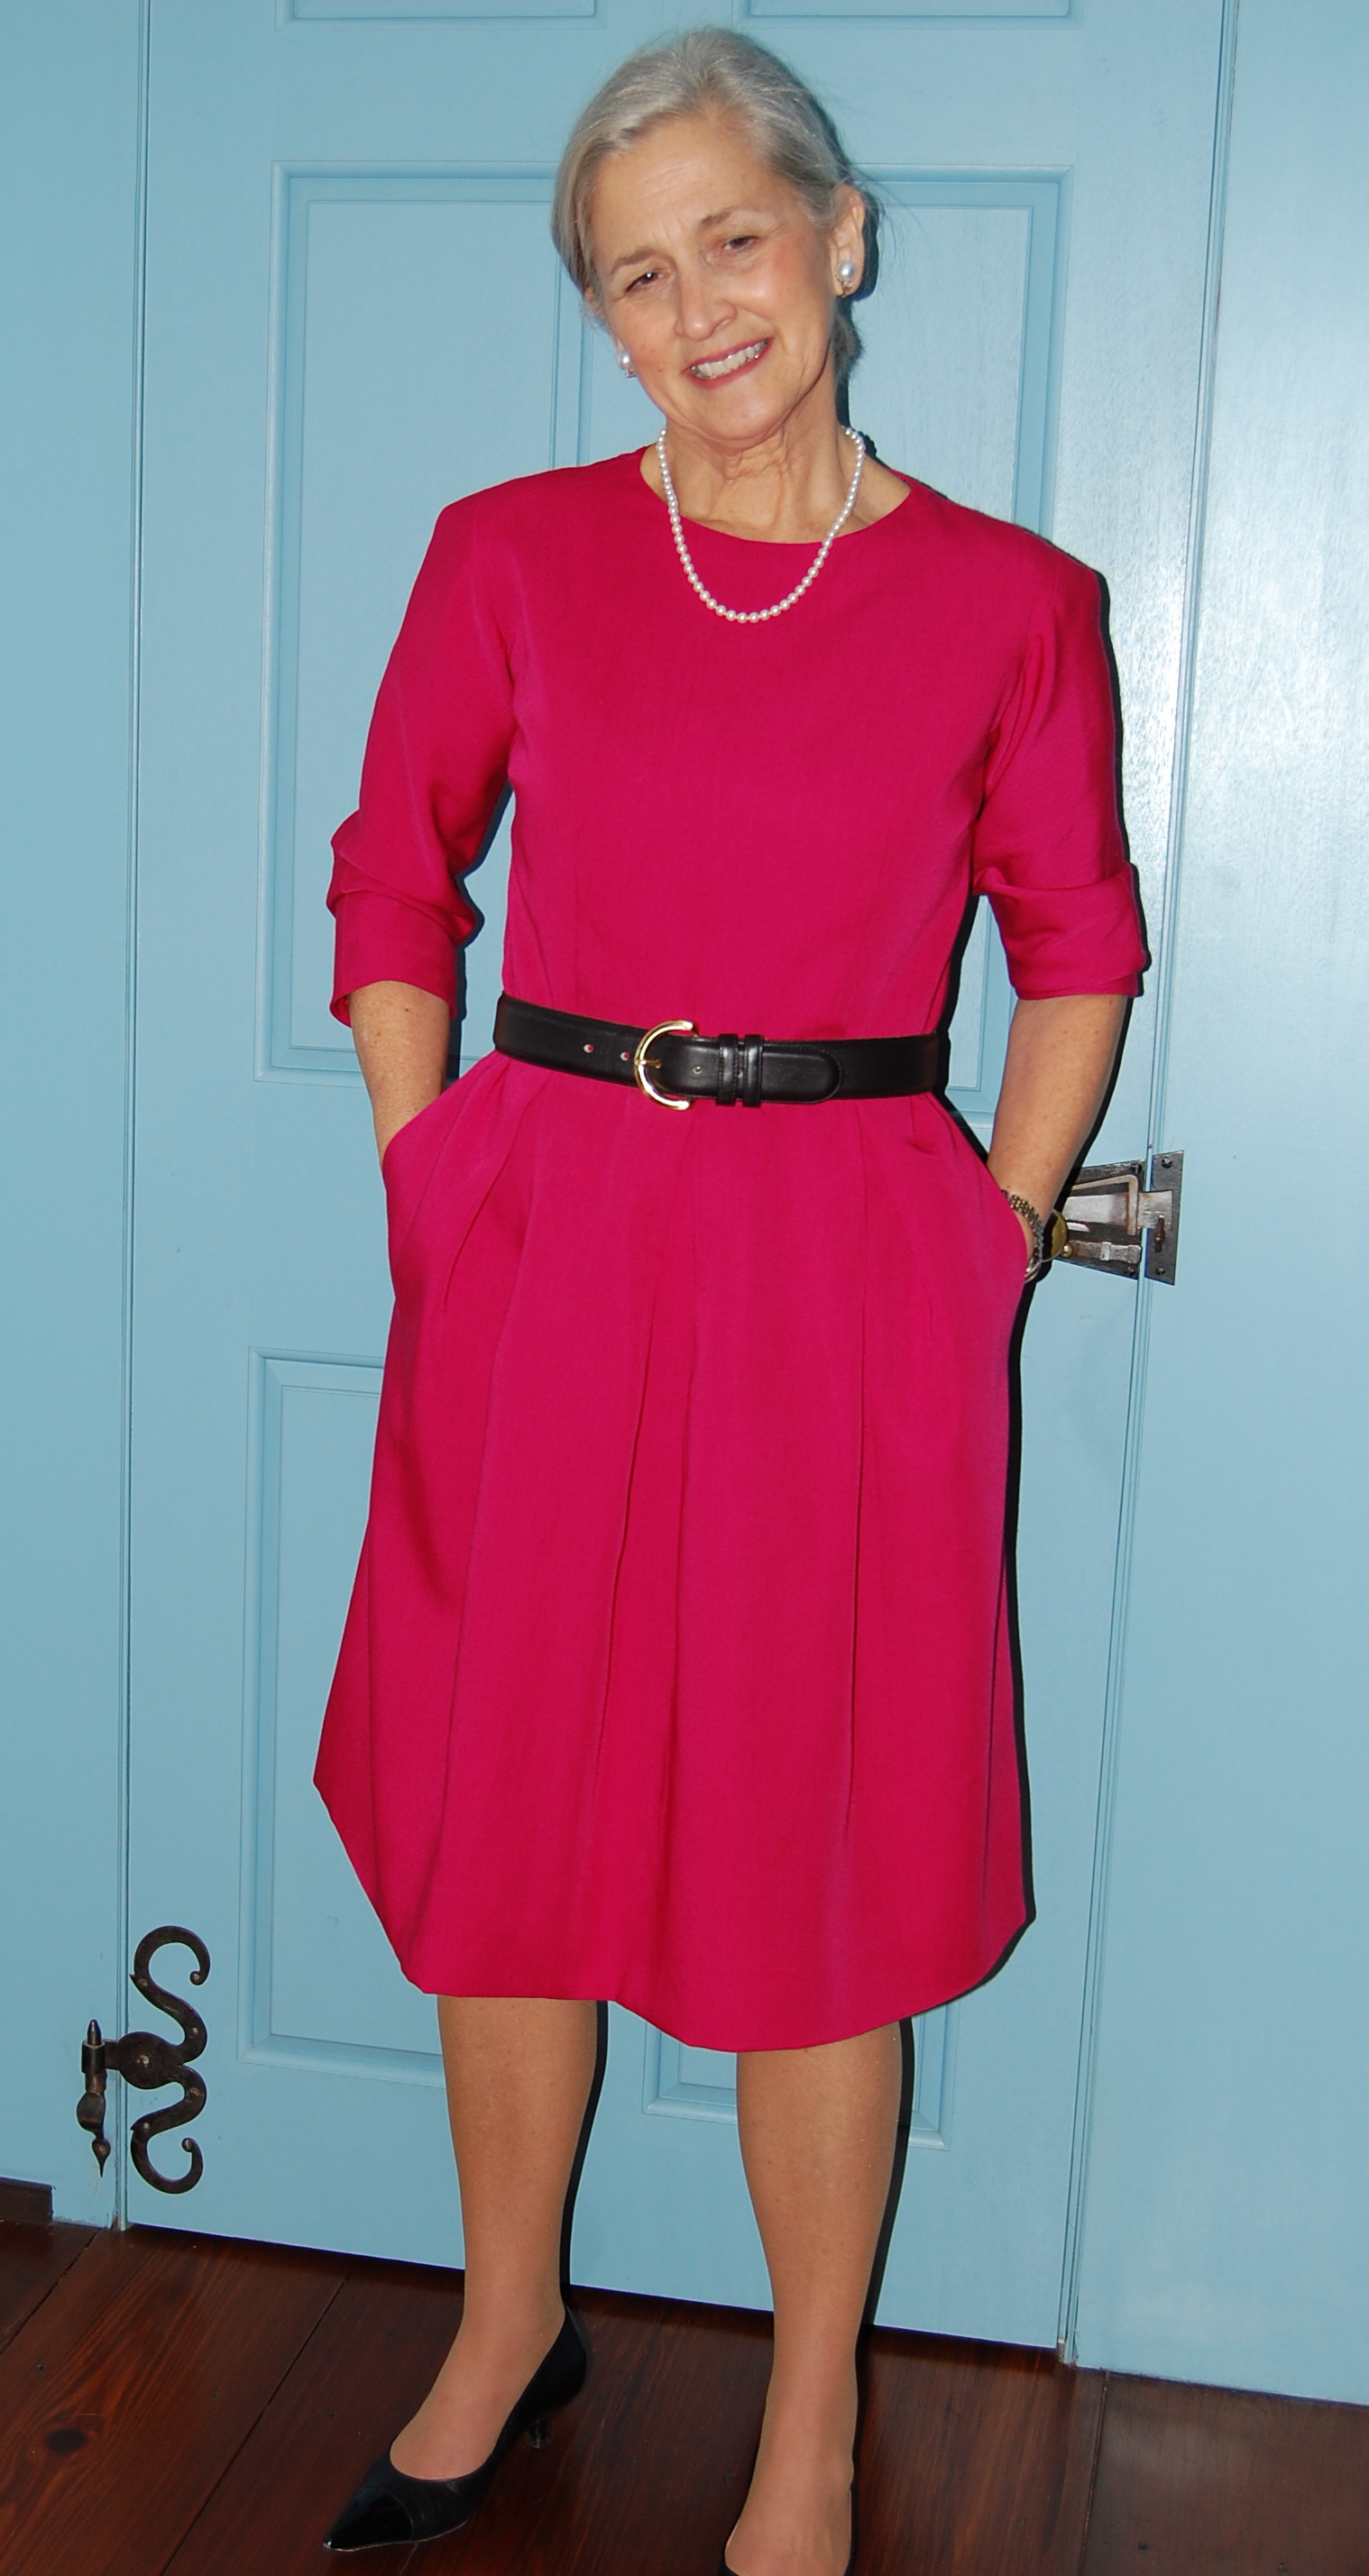
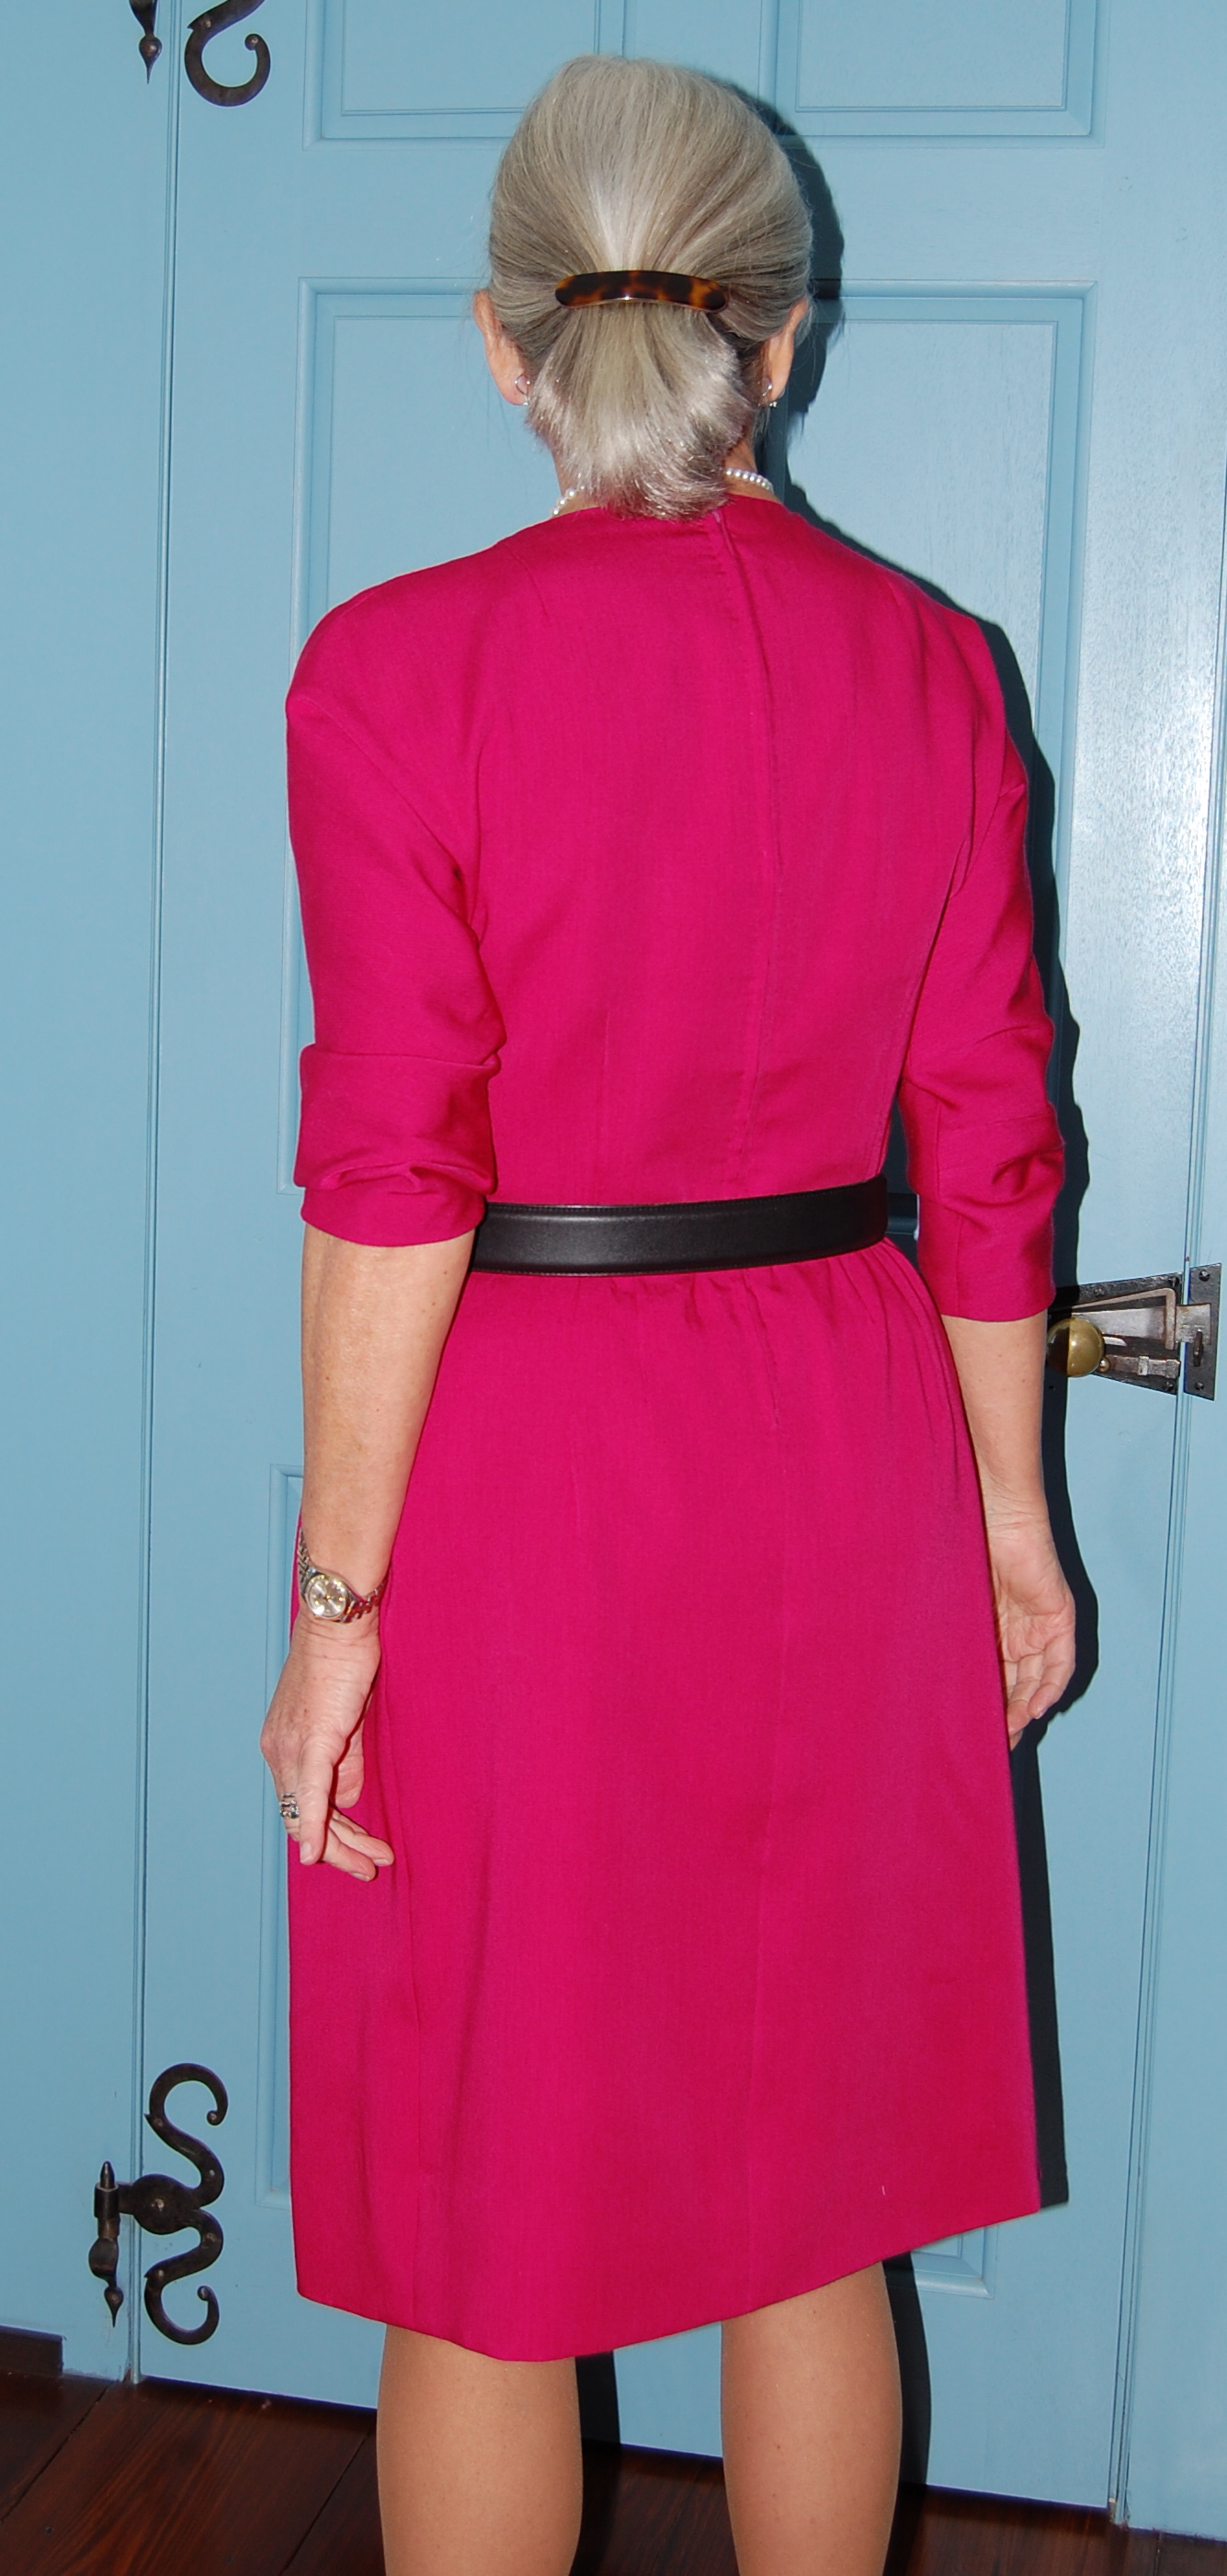
With all this in mind, I was anxious to get started on this project.  As I already had several lovely woolens waiting for their turn, I decided to use one of them rather than buy new fabric.  And my attention kept coming back to this vintage piece of Linton wool which I purchased from an Etsy shop about a year ago.  

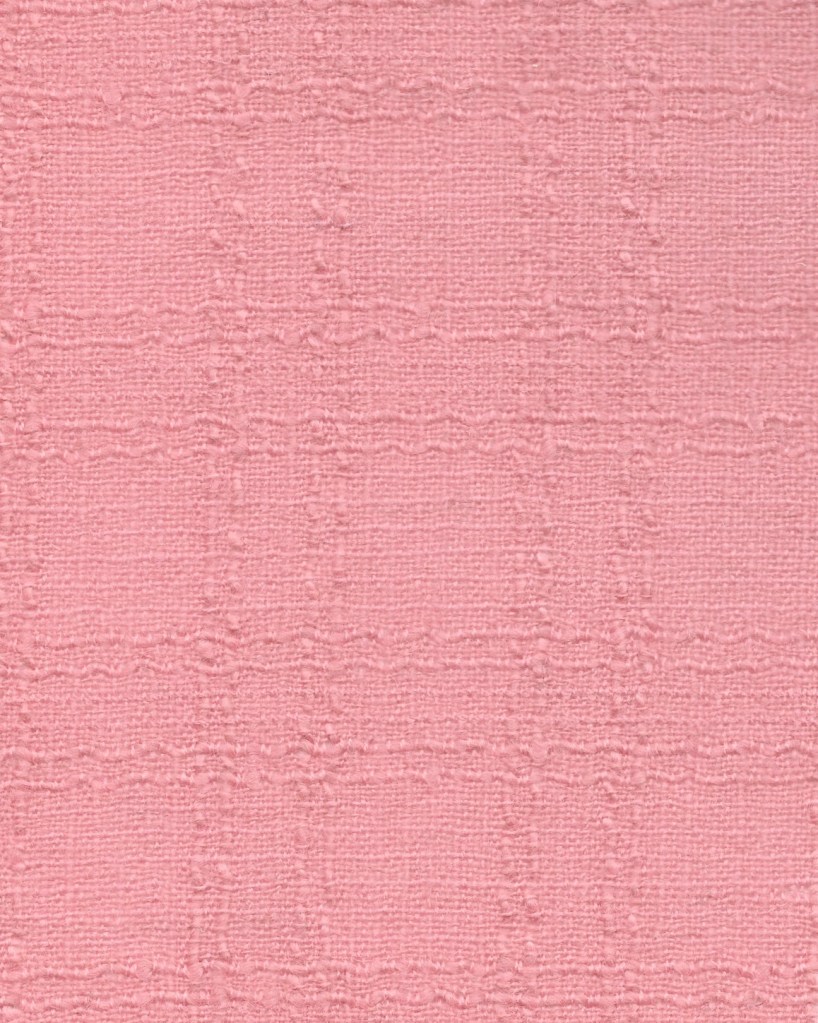
It is entirely coincidental that the jacket Susan is making in her instructional videos is also pink!  Of course, I love pink.  I would describe this particular hue of pink as a “Winter pink.”  It has a bit of a dusty appearance to it, making it ideal for a November project.  The best thing is that I have enough fabric to make a matching sheath dress to go with my jacket.  (Although I feel sure that particular project will have to wait until after the new year.) 

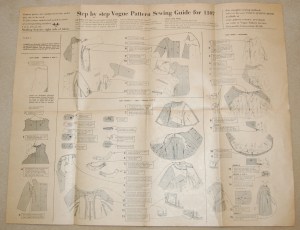
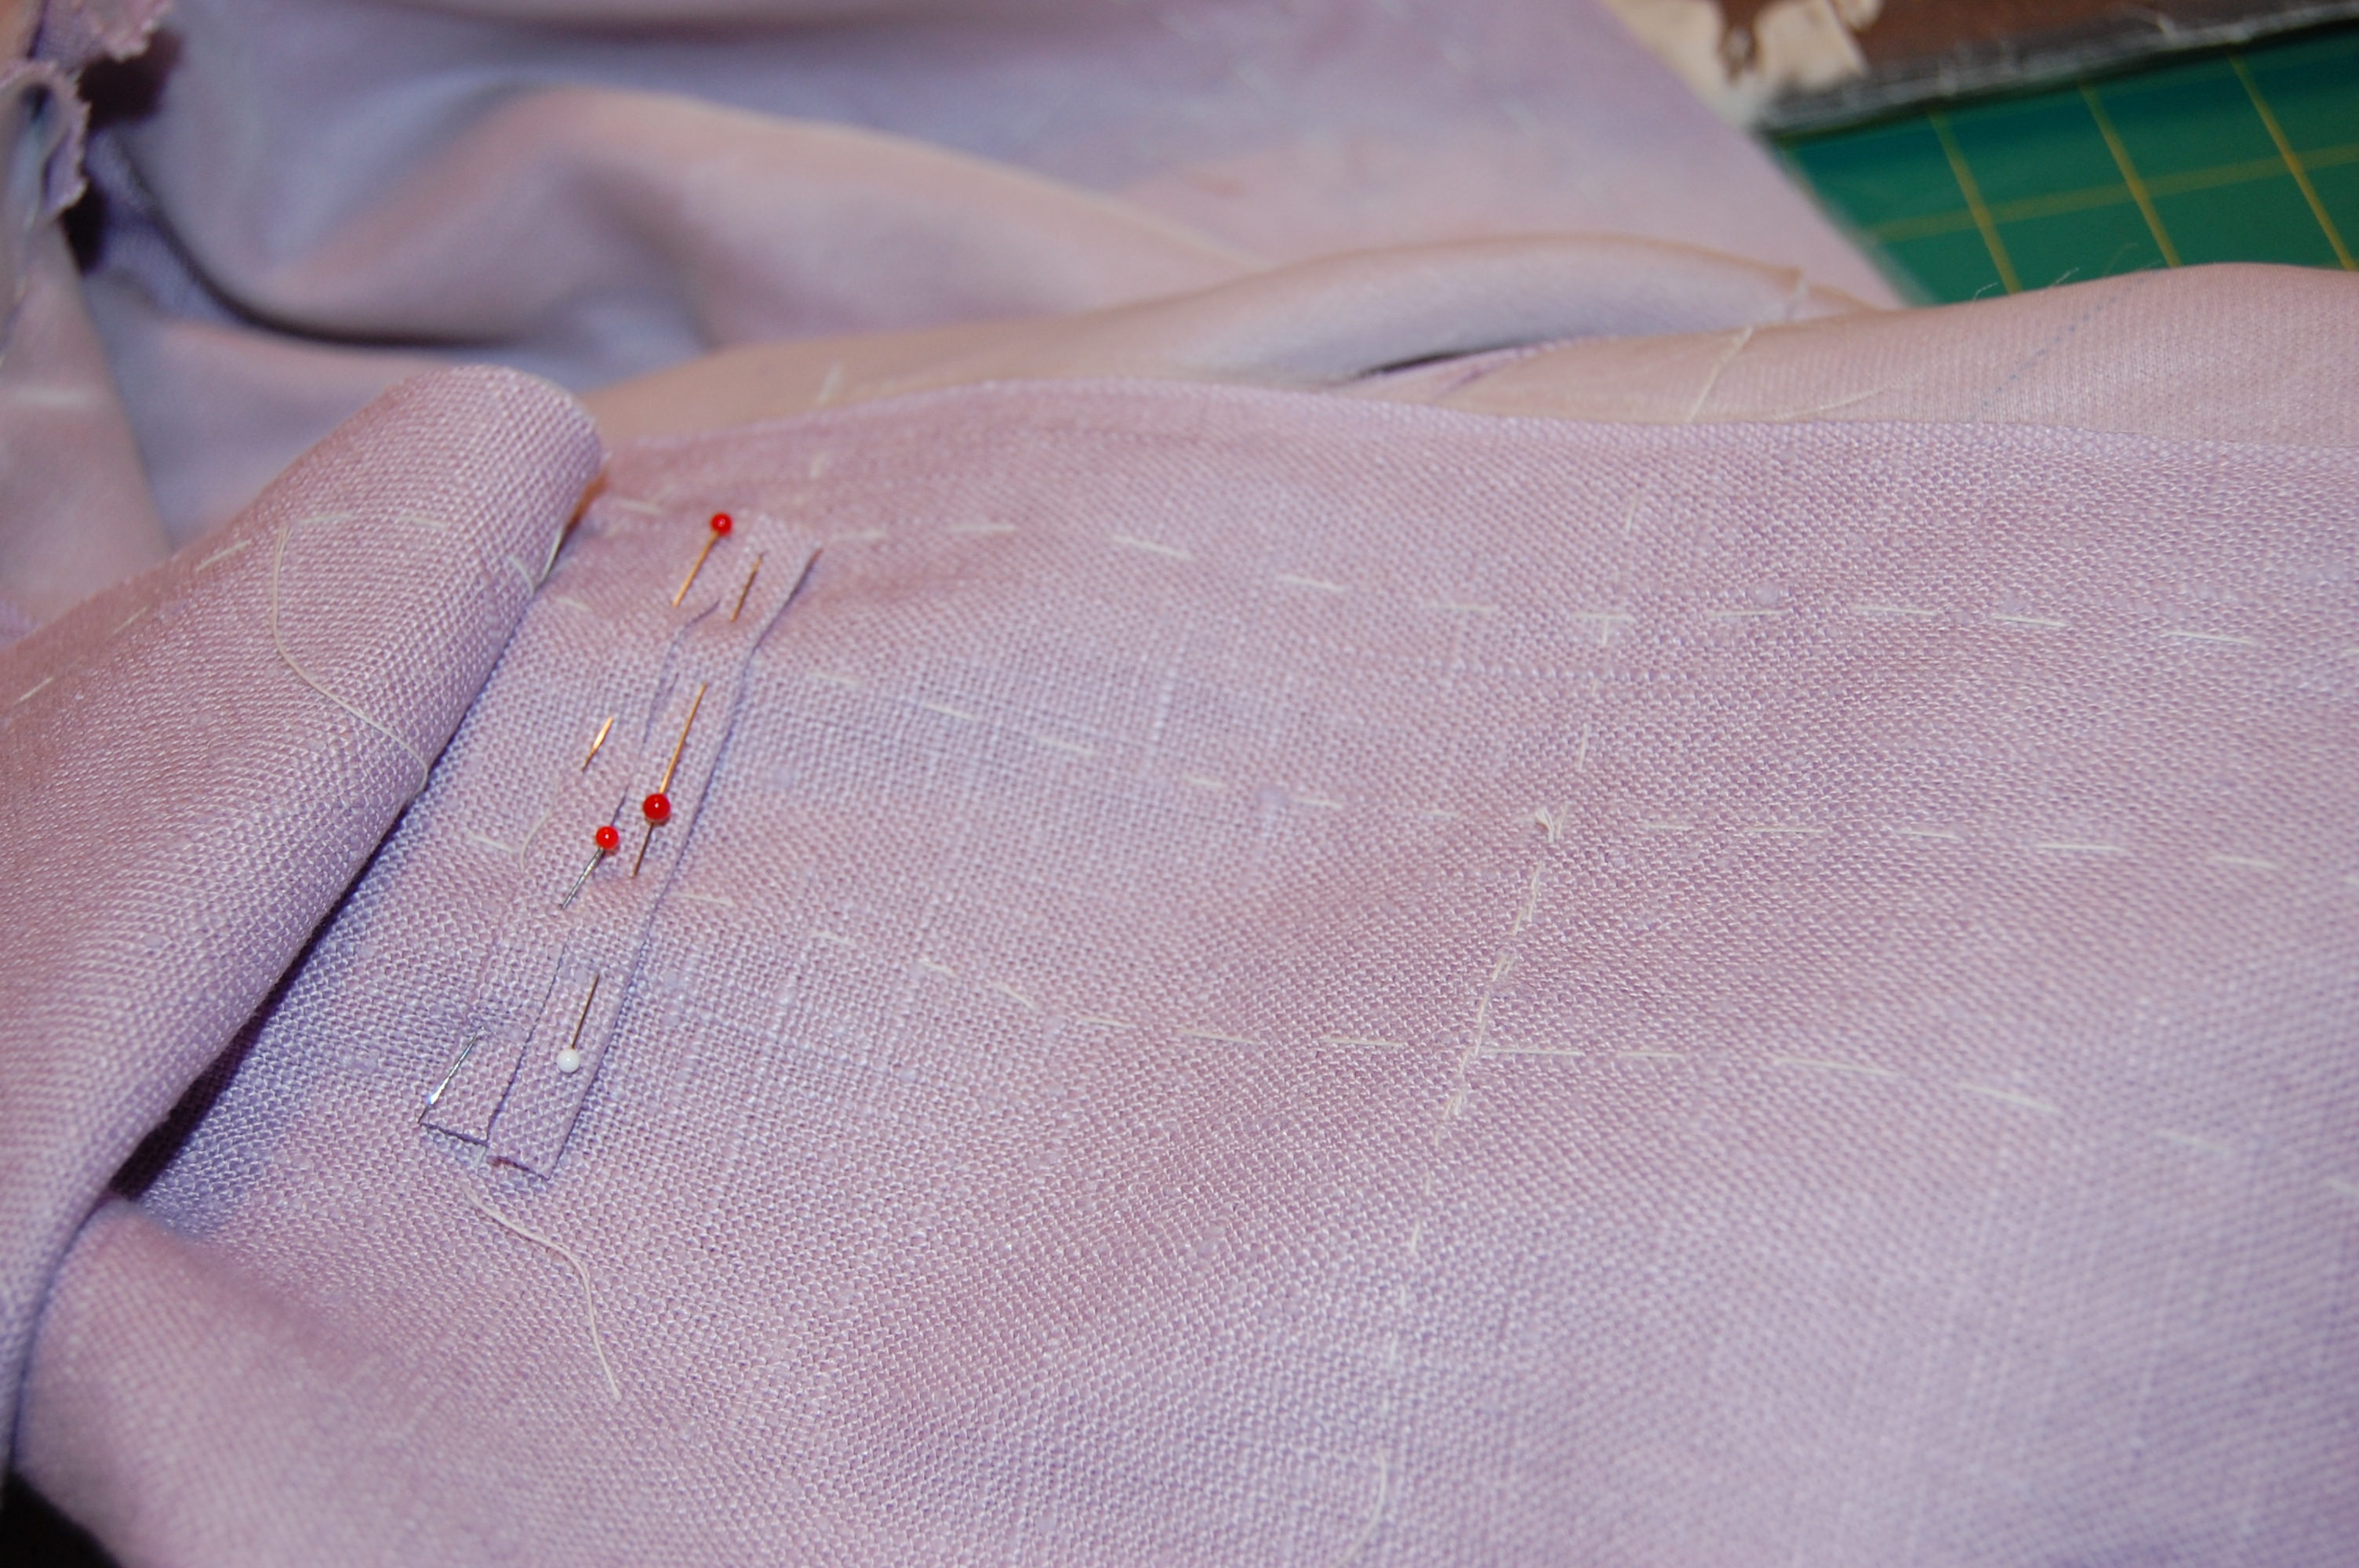
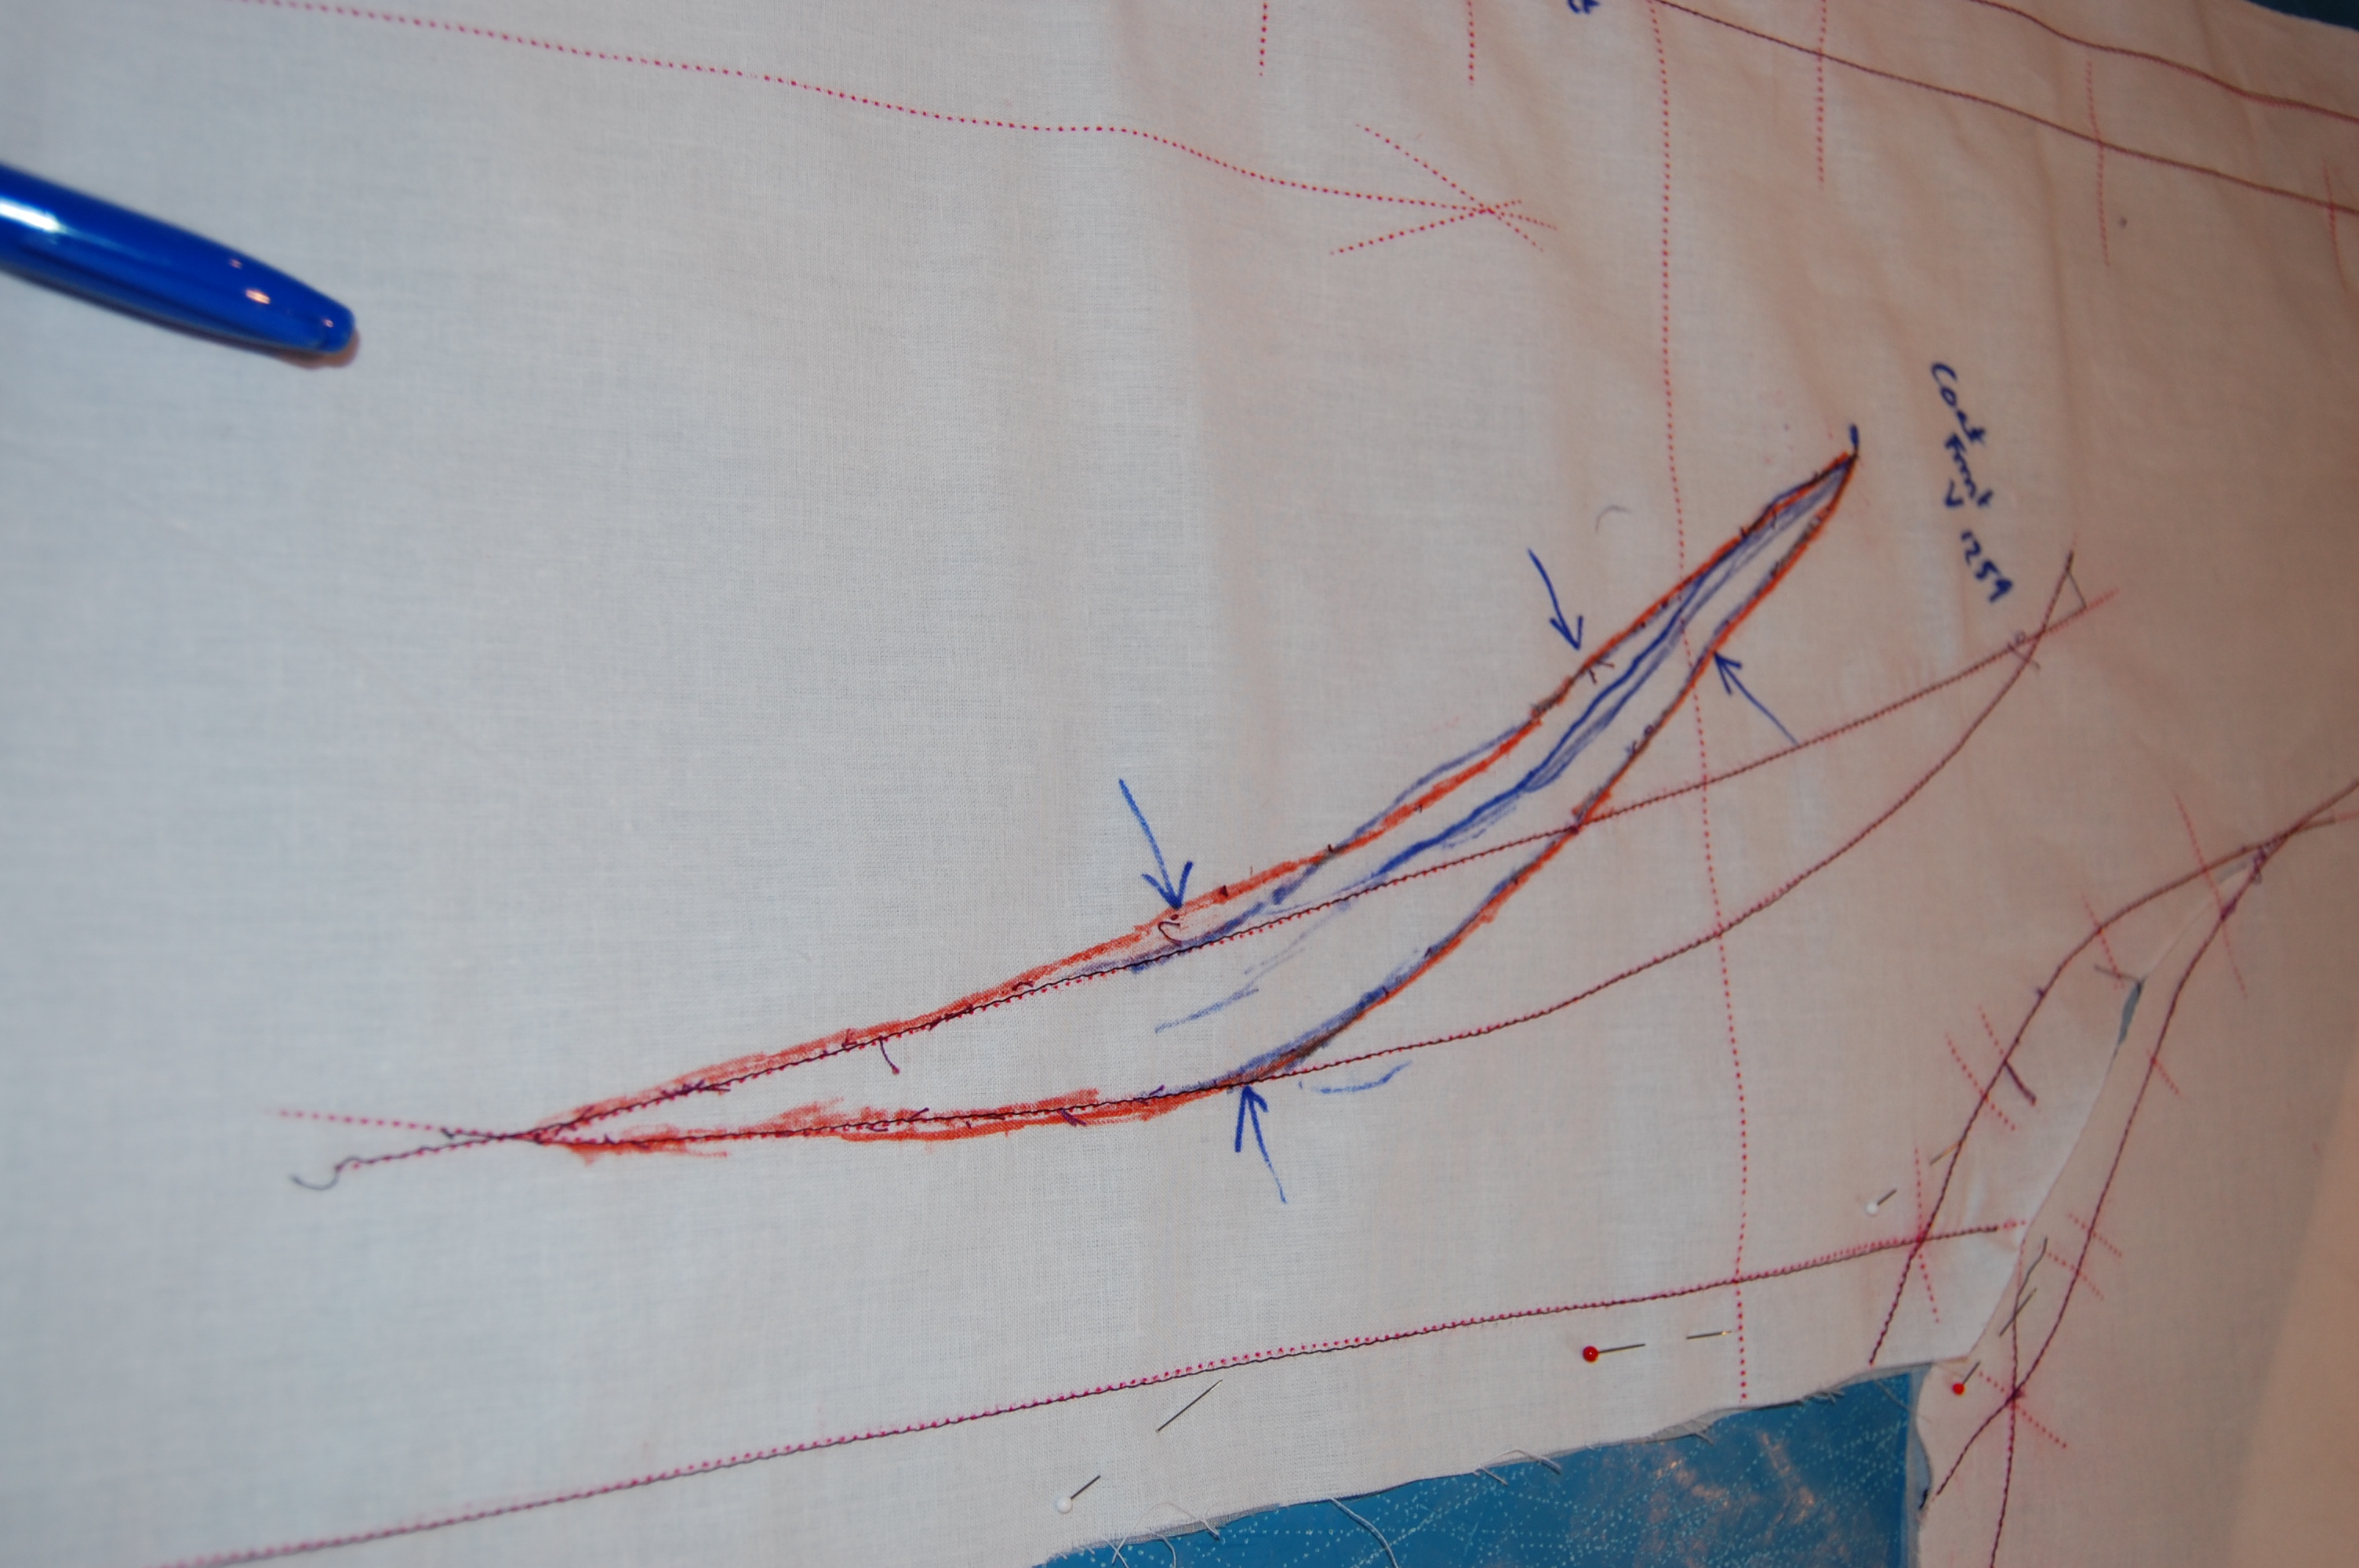
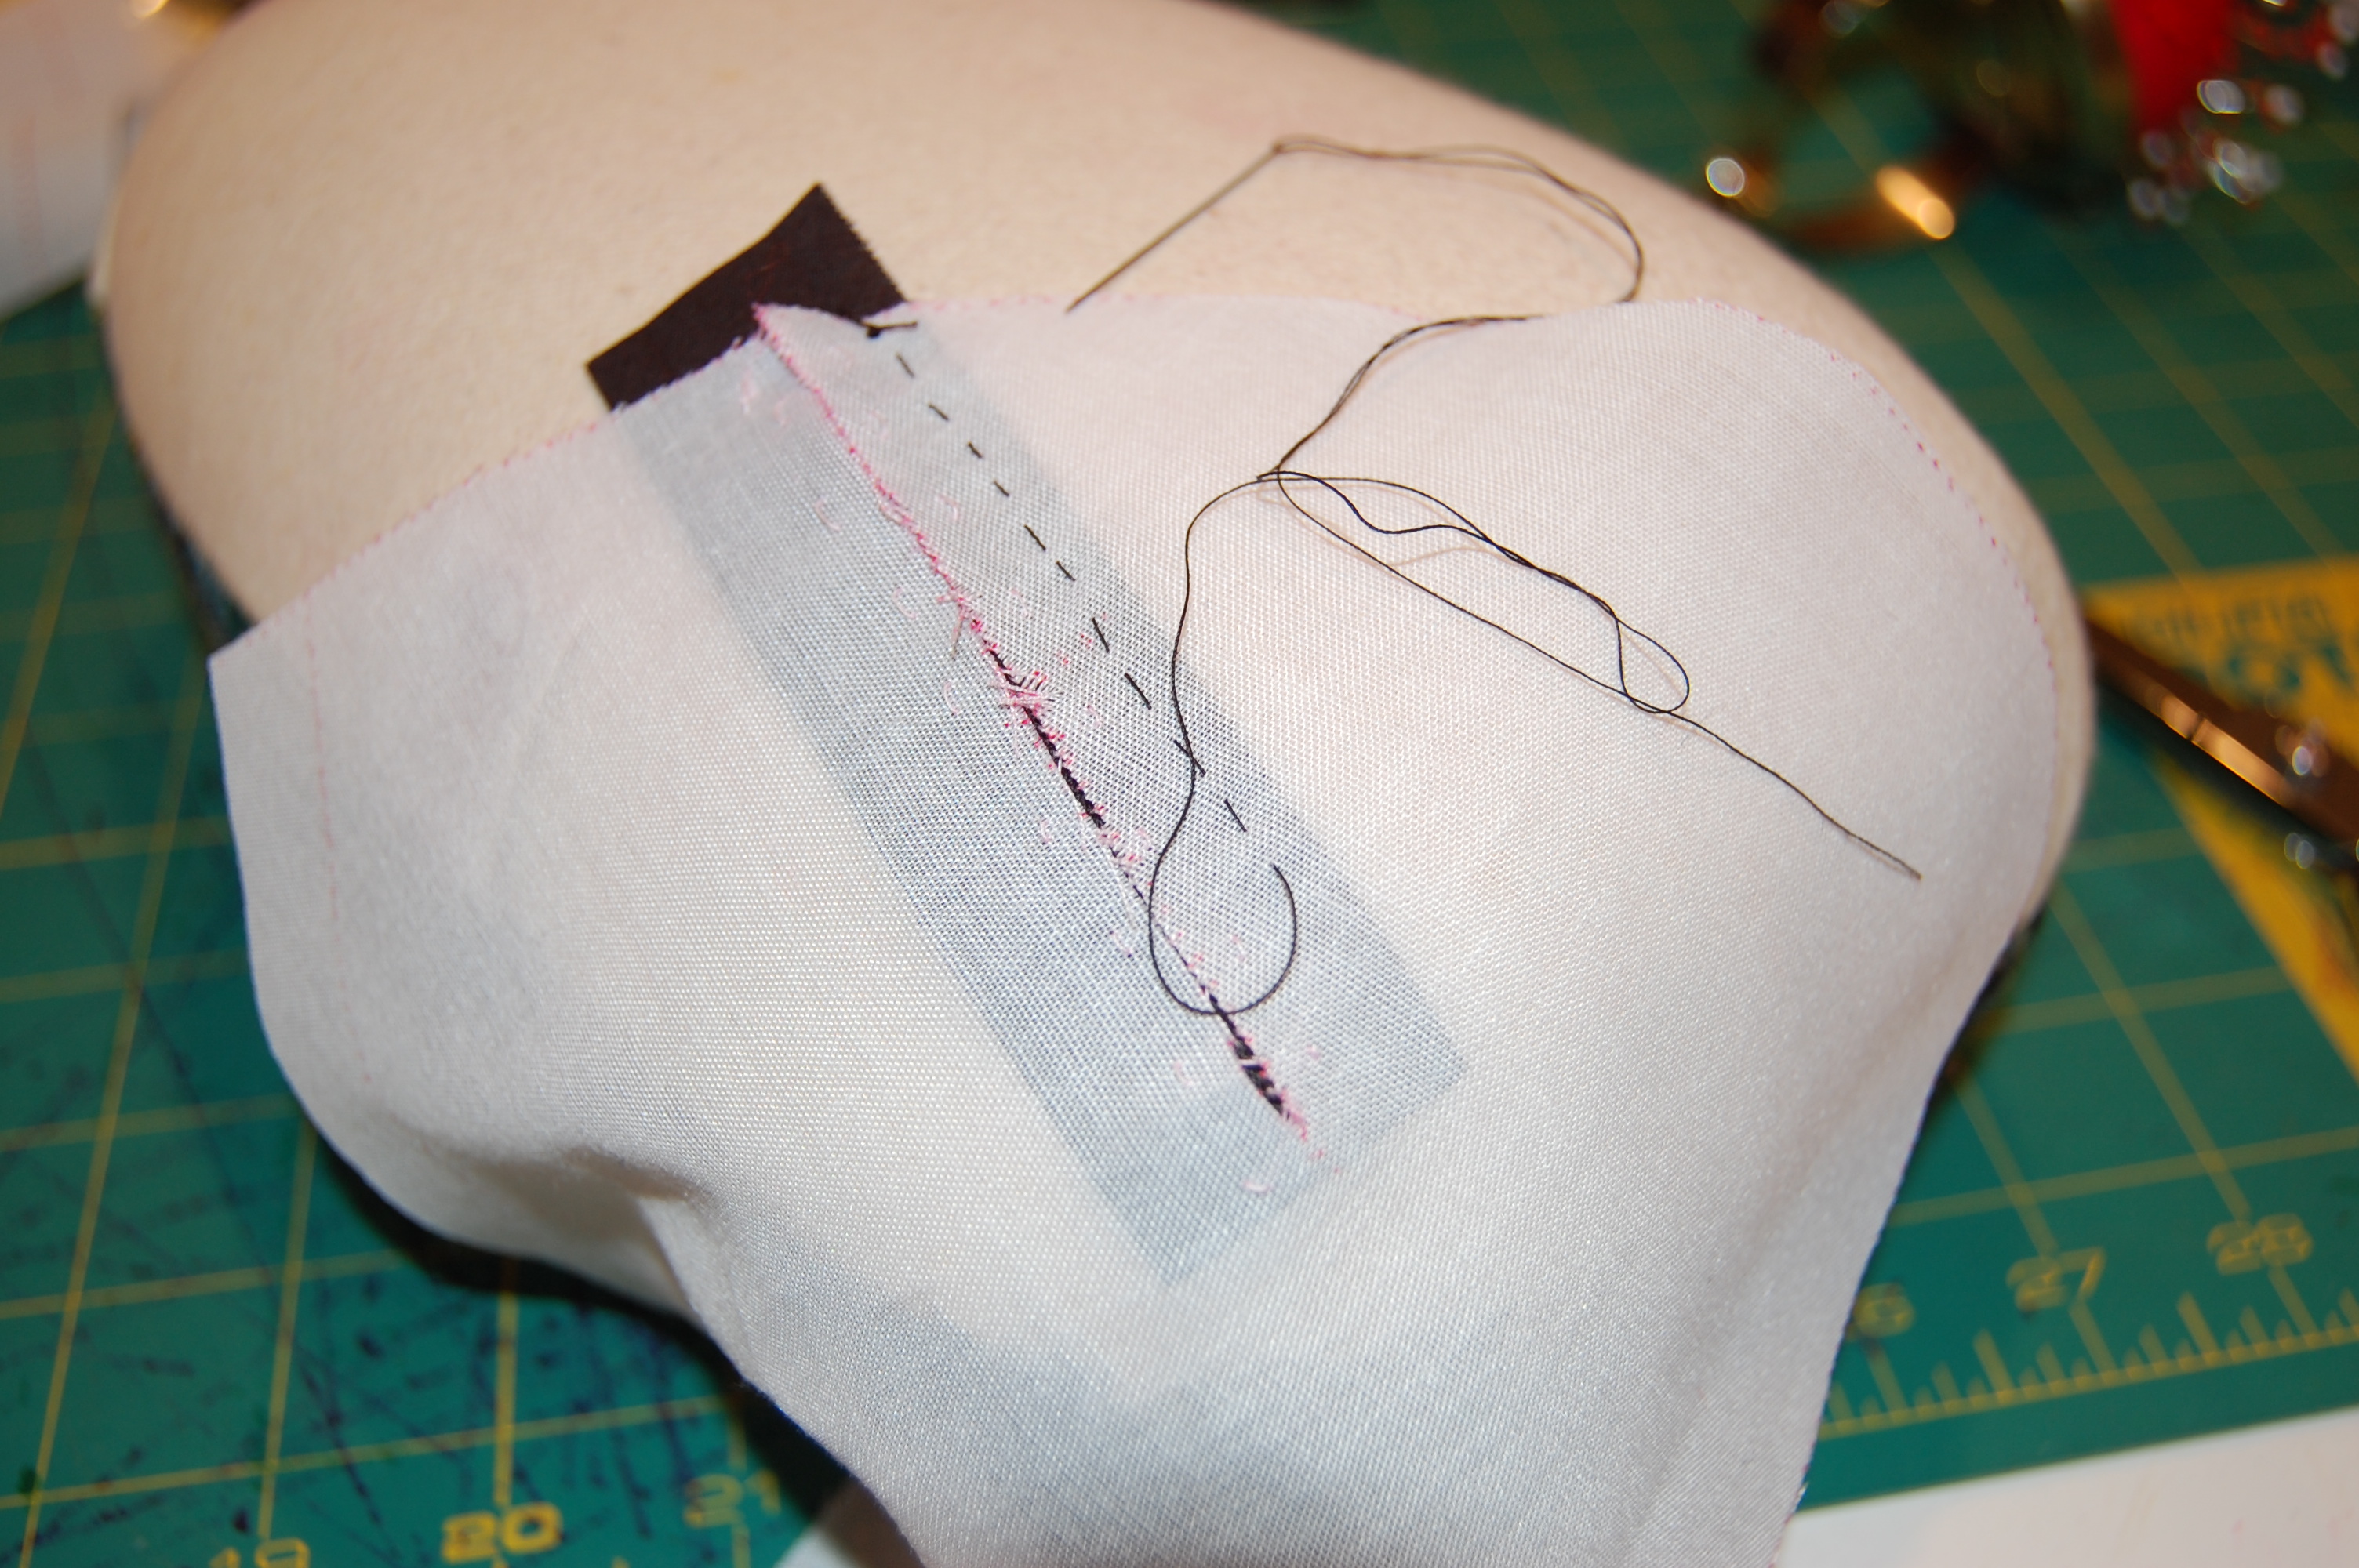
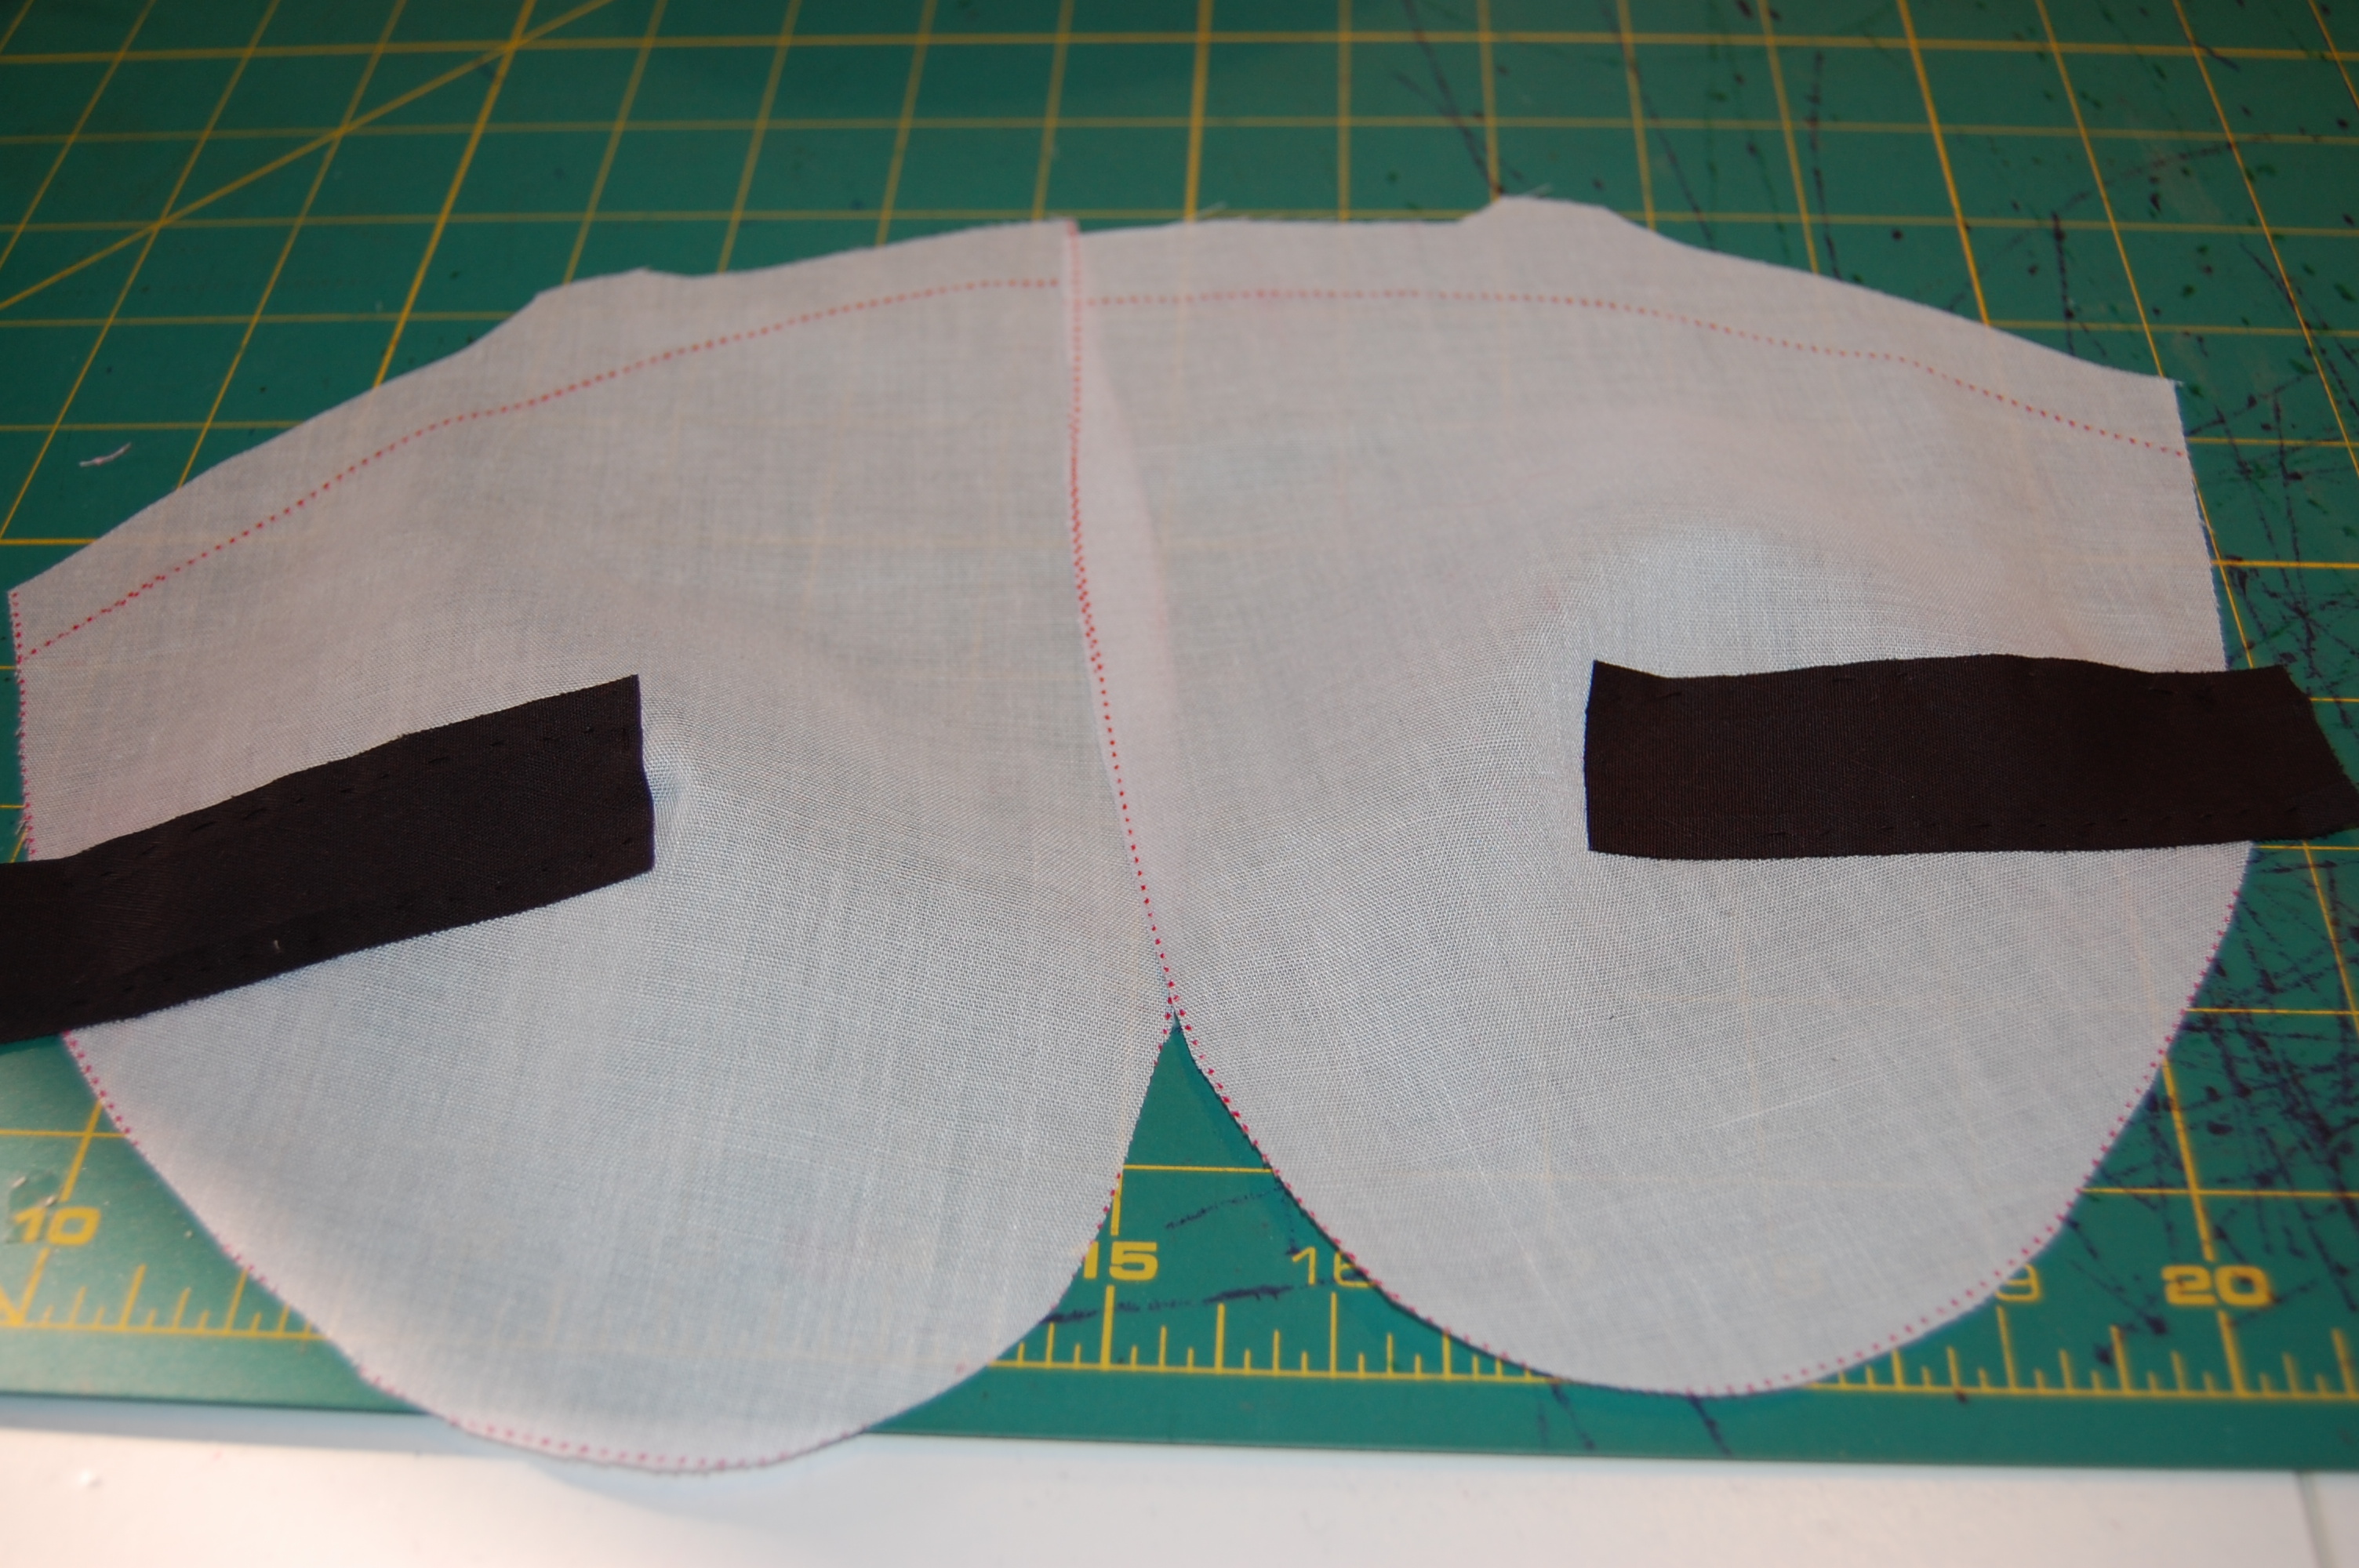
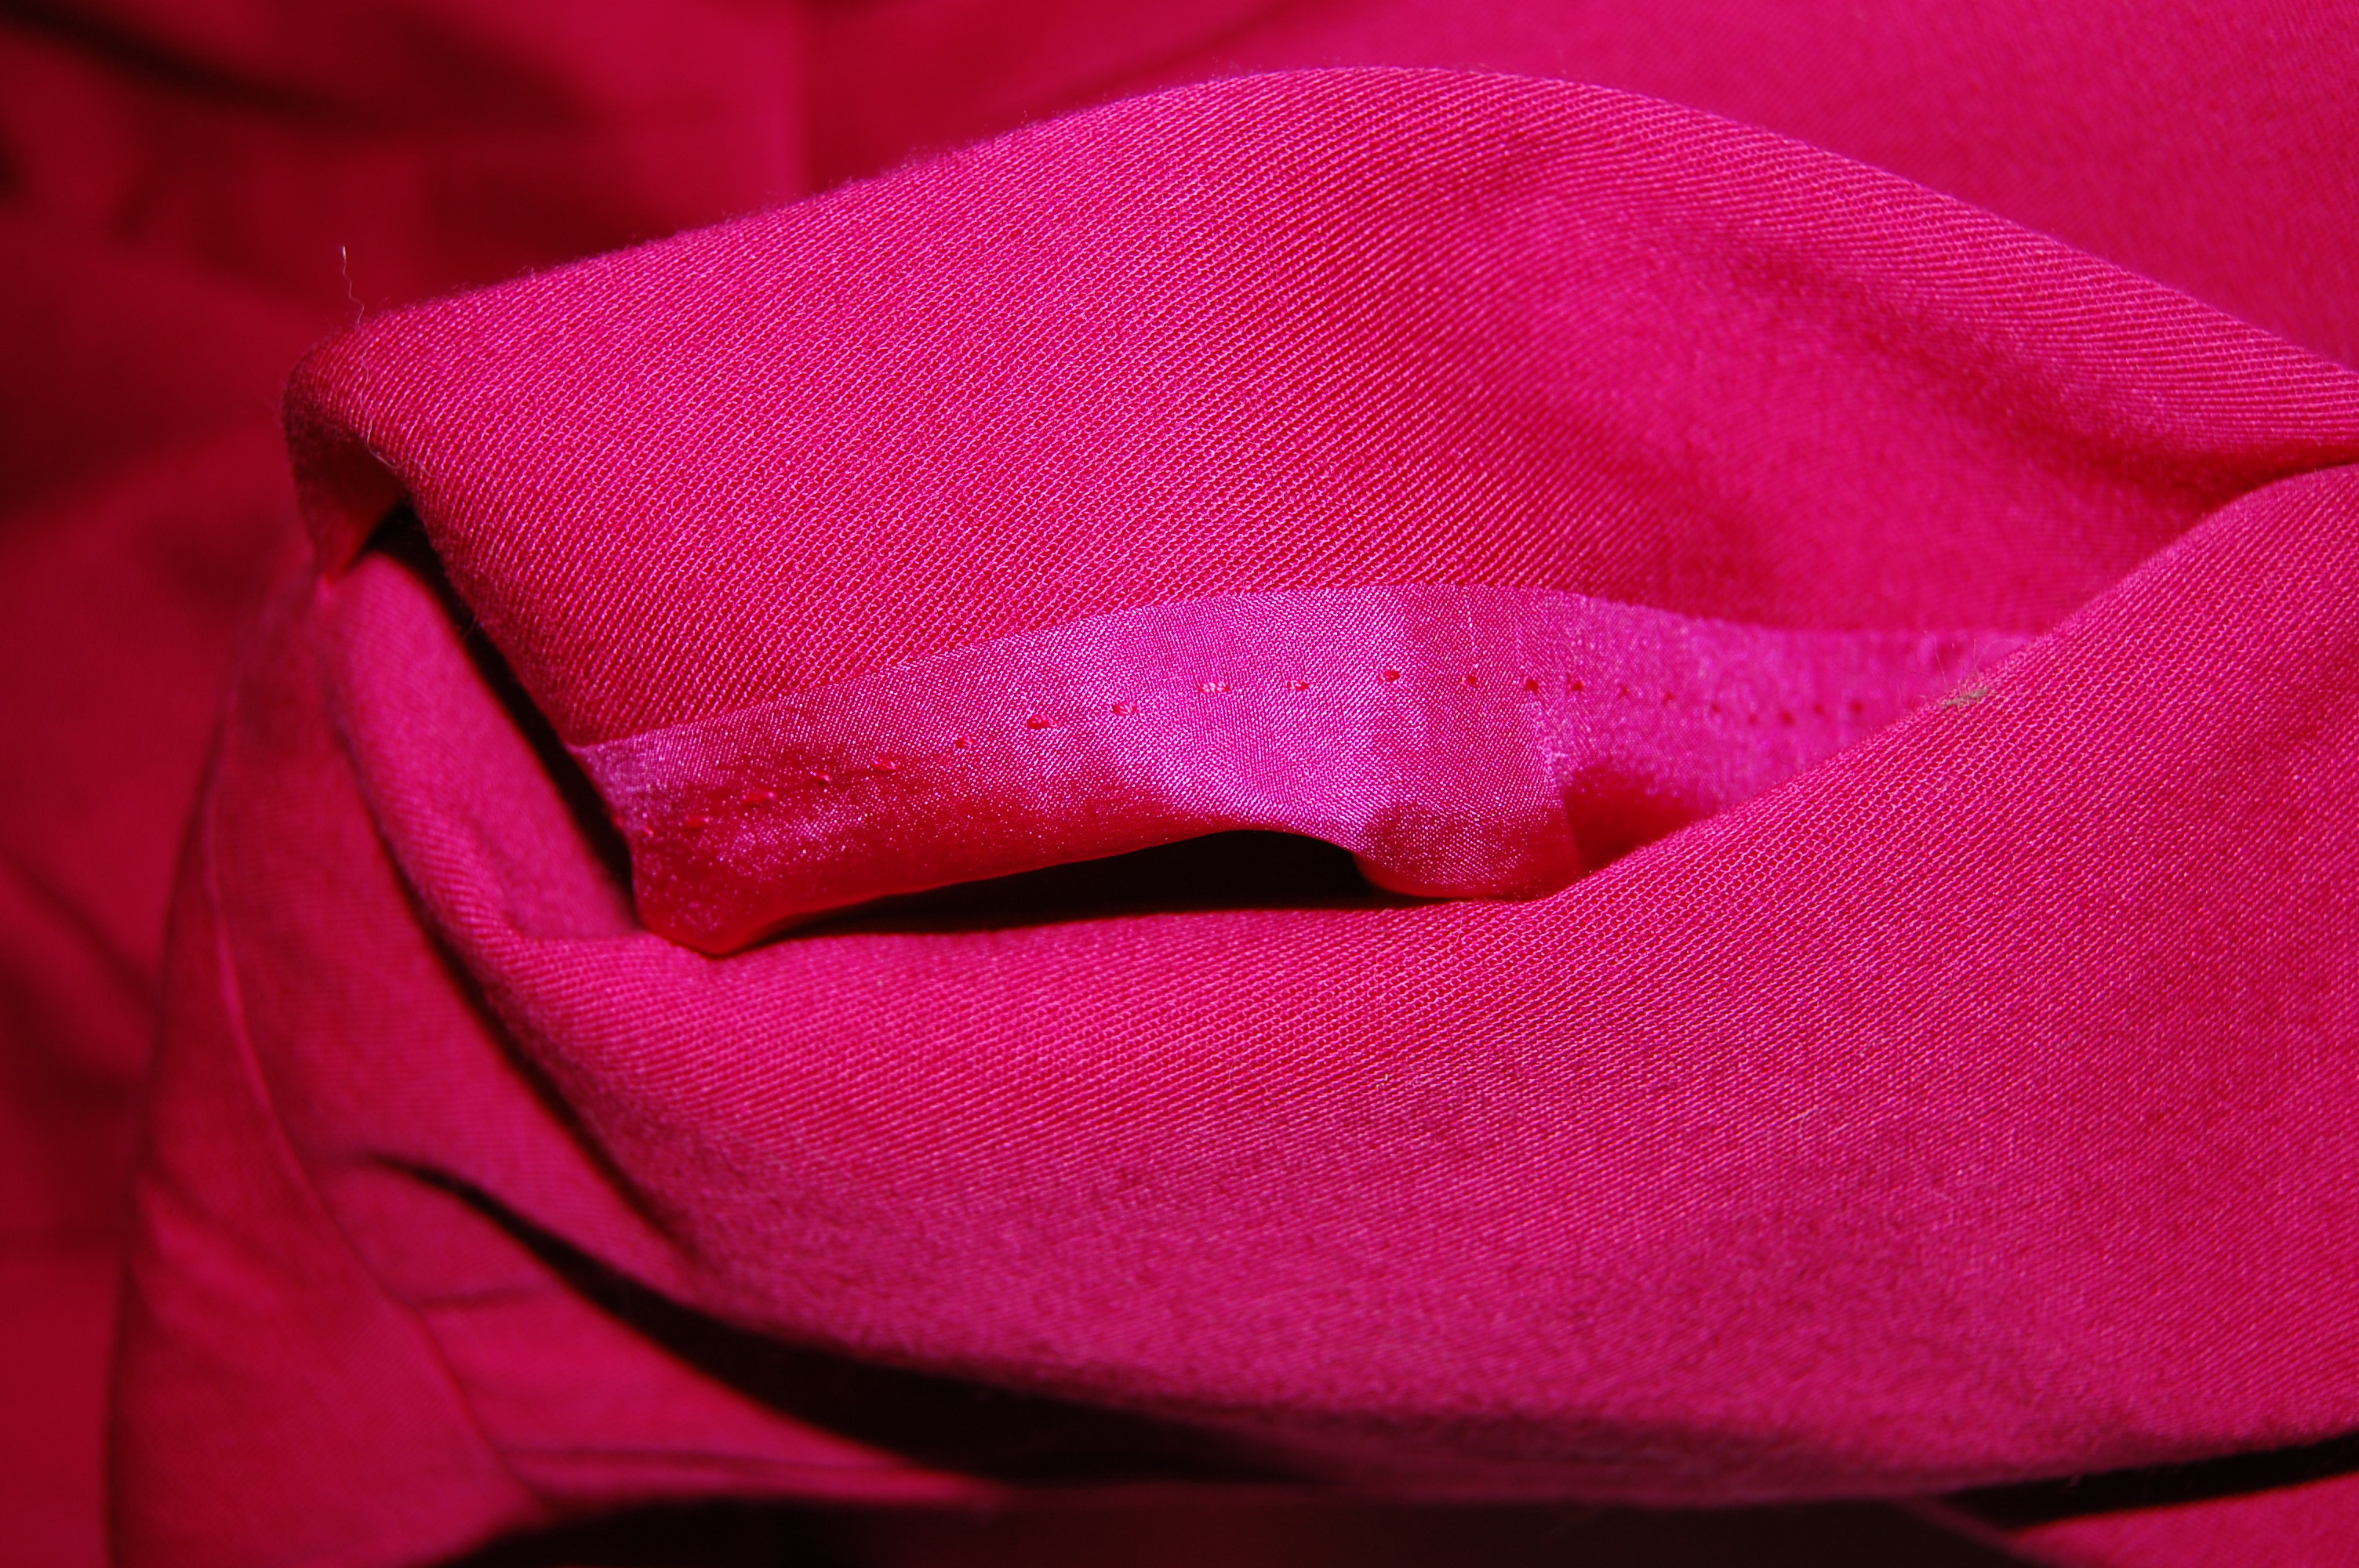
Well, back to Susan’s video instruction…  She is very thorough in what she includes, so much so, that those of us who have taken classes from her already, are able to whiz through the early lessons for the most part.  However, one suggestion she made was to use pins rather than machine sewing to fit the muslin together.  Here is what I mean by that:

The seam lines are pinned together horizontally throughout, and then the muslin is ready to try on. No stabbing occurred during the process!

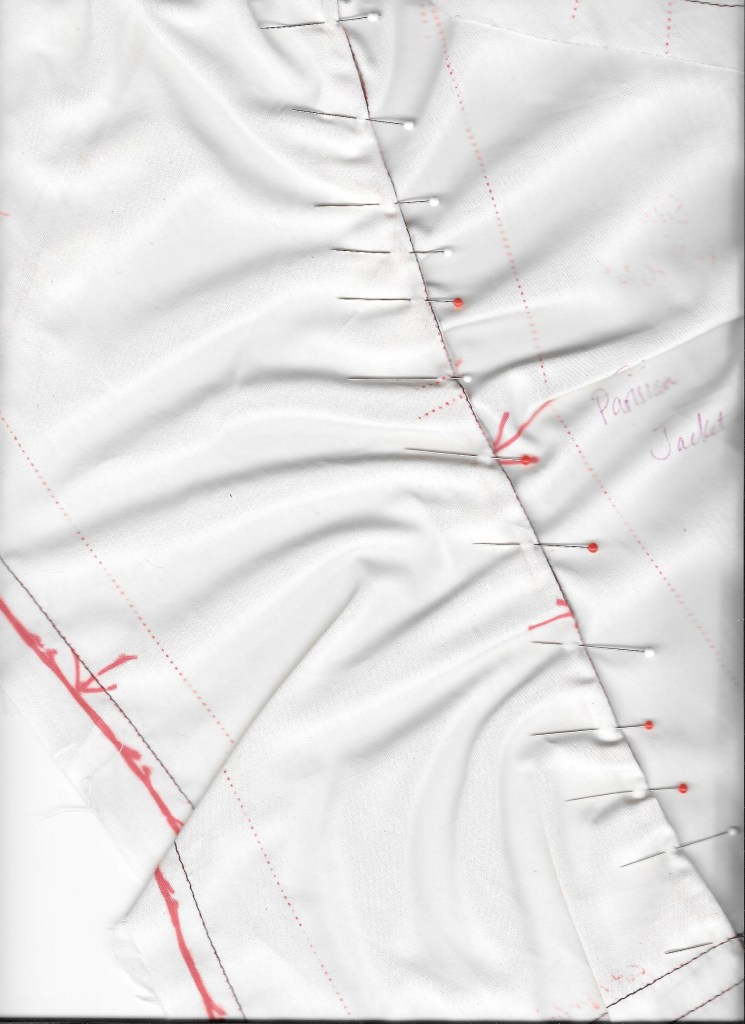
I found this method far superior to putting the muslin together by machine.  It was much easier to make changes and alterations, and I felt like the “seams” laid flatter, enabling me to ascertain the fit, on me, more precisely.  

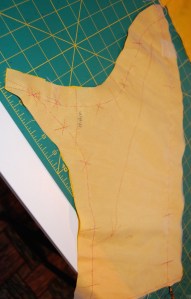
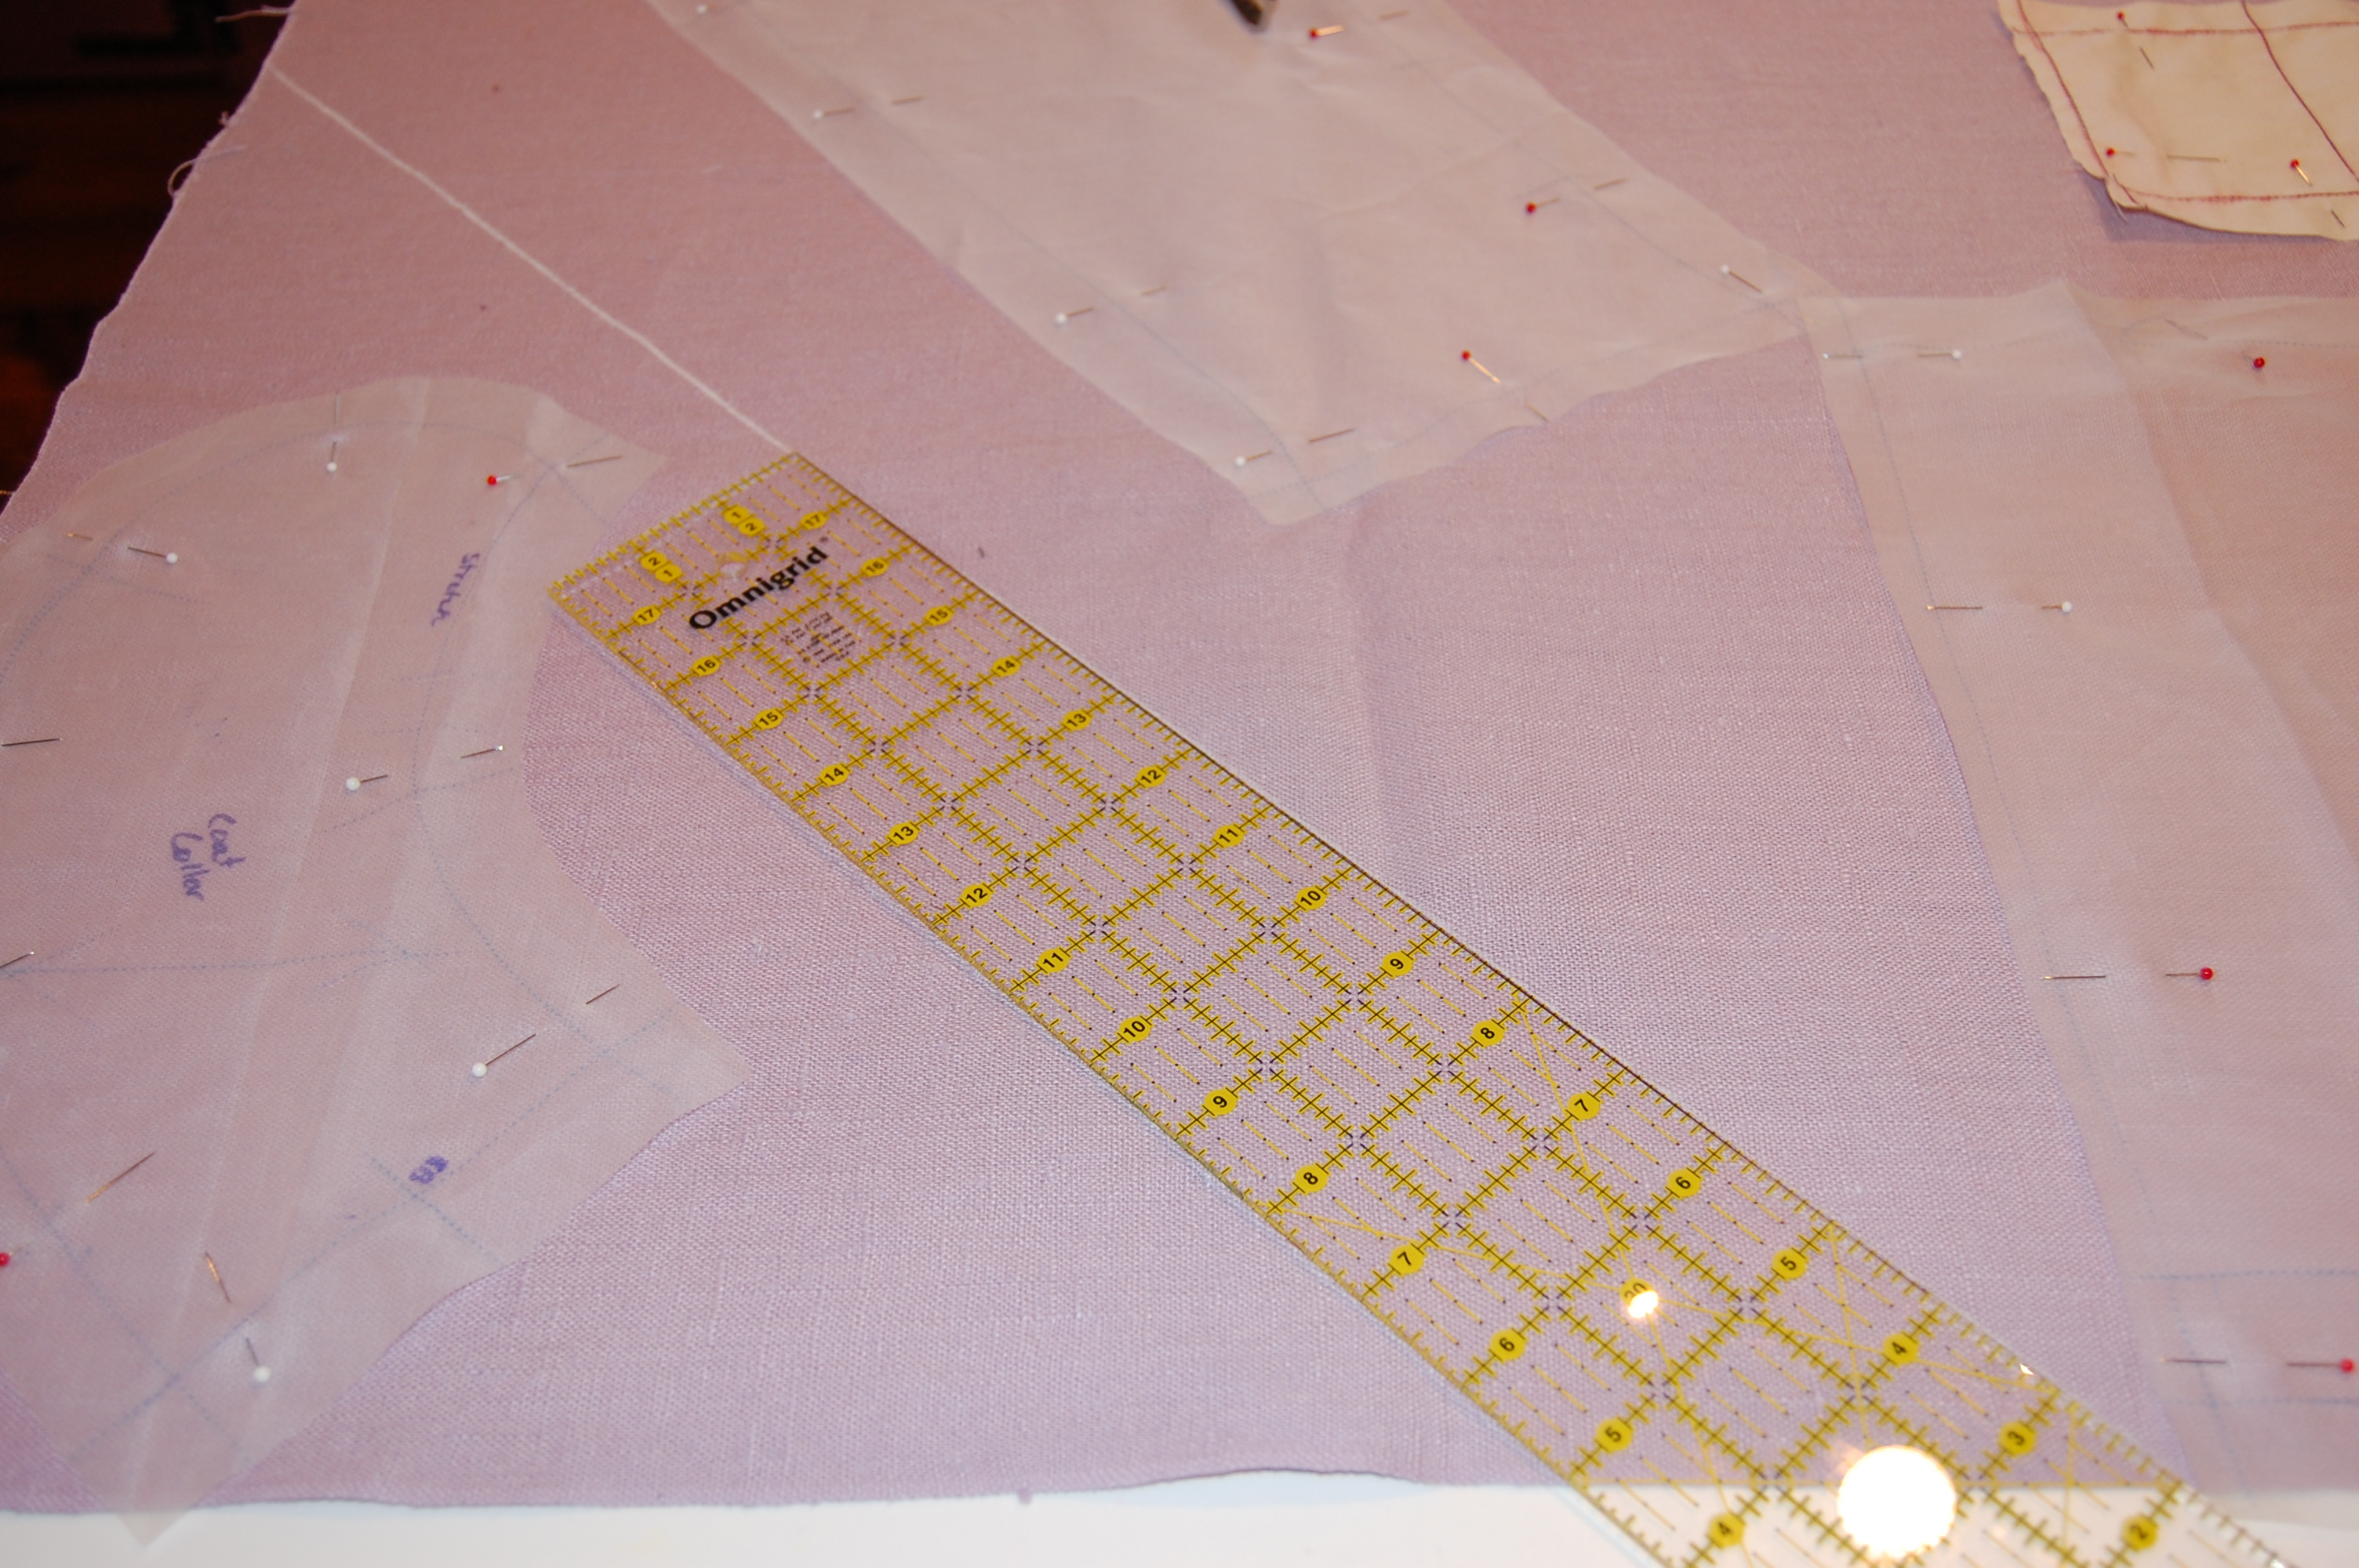
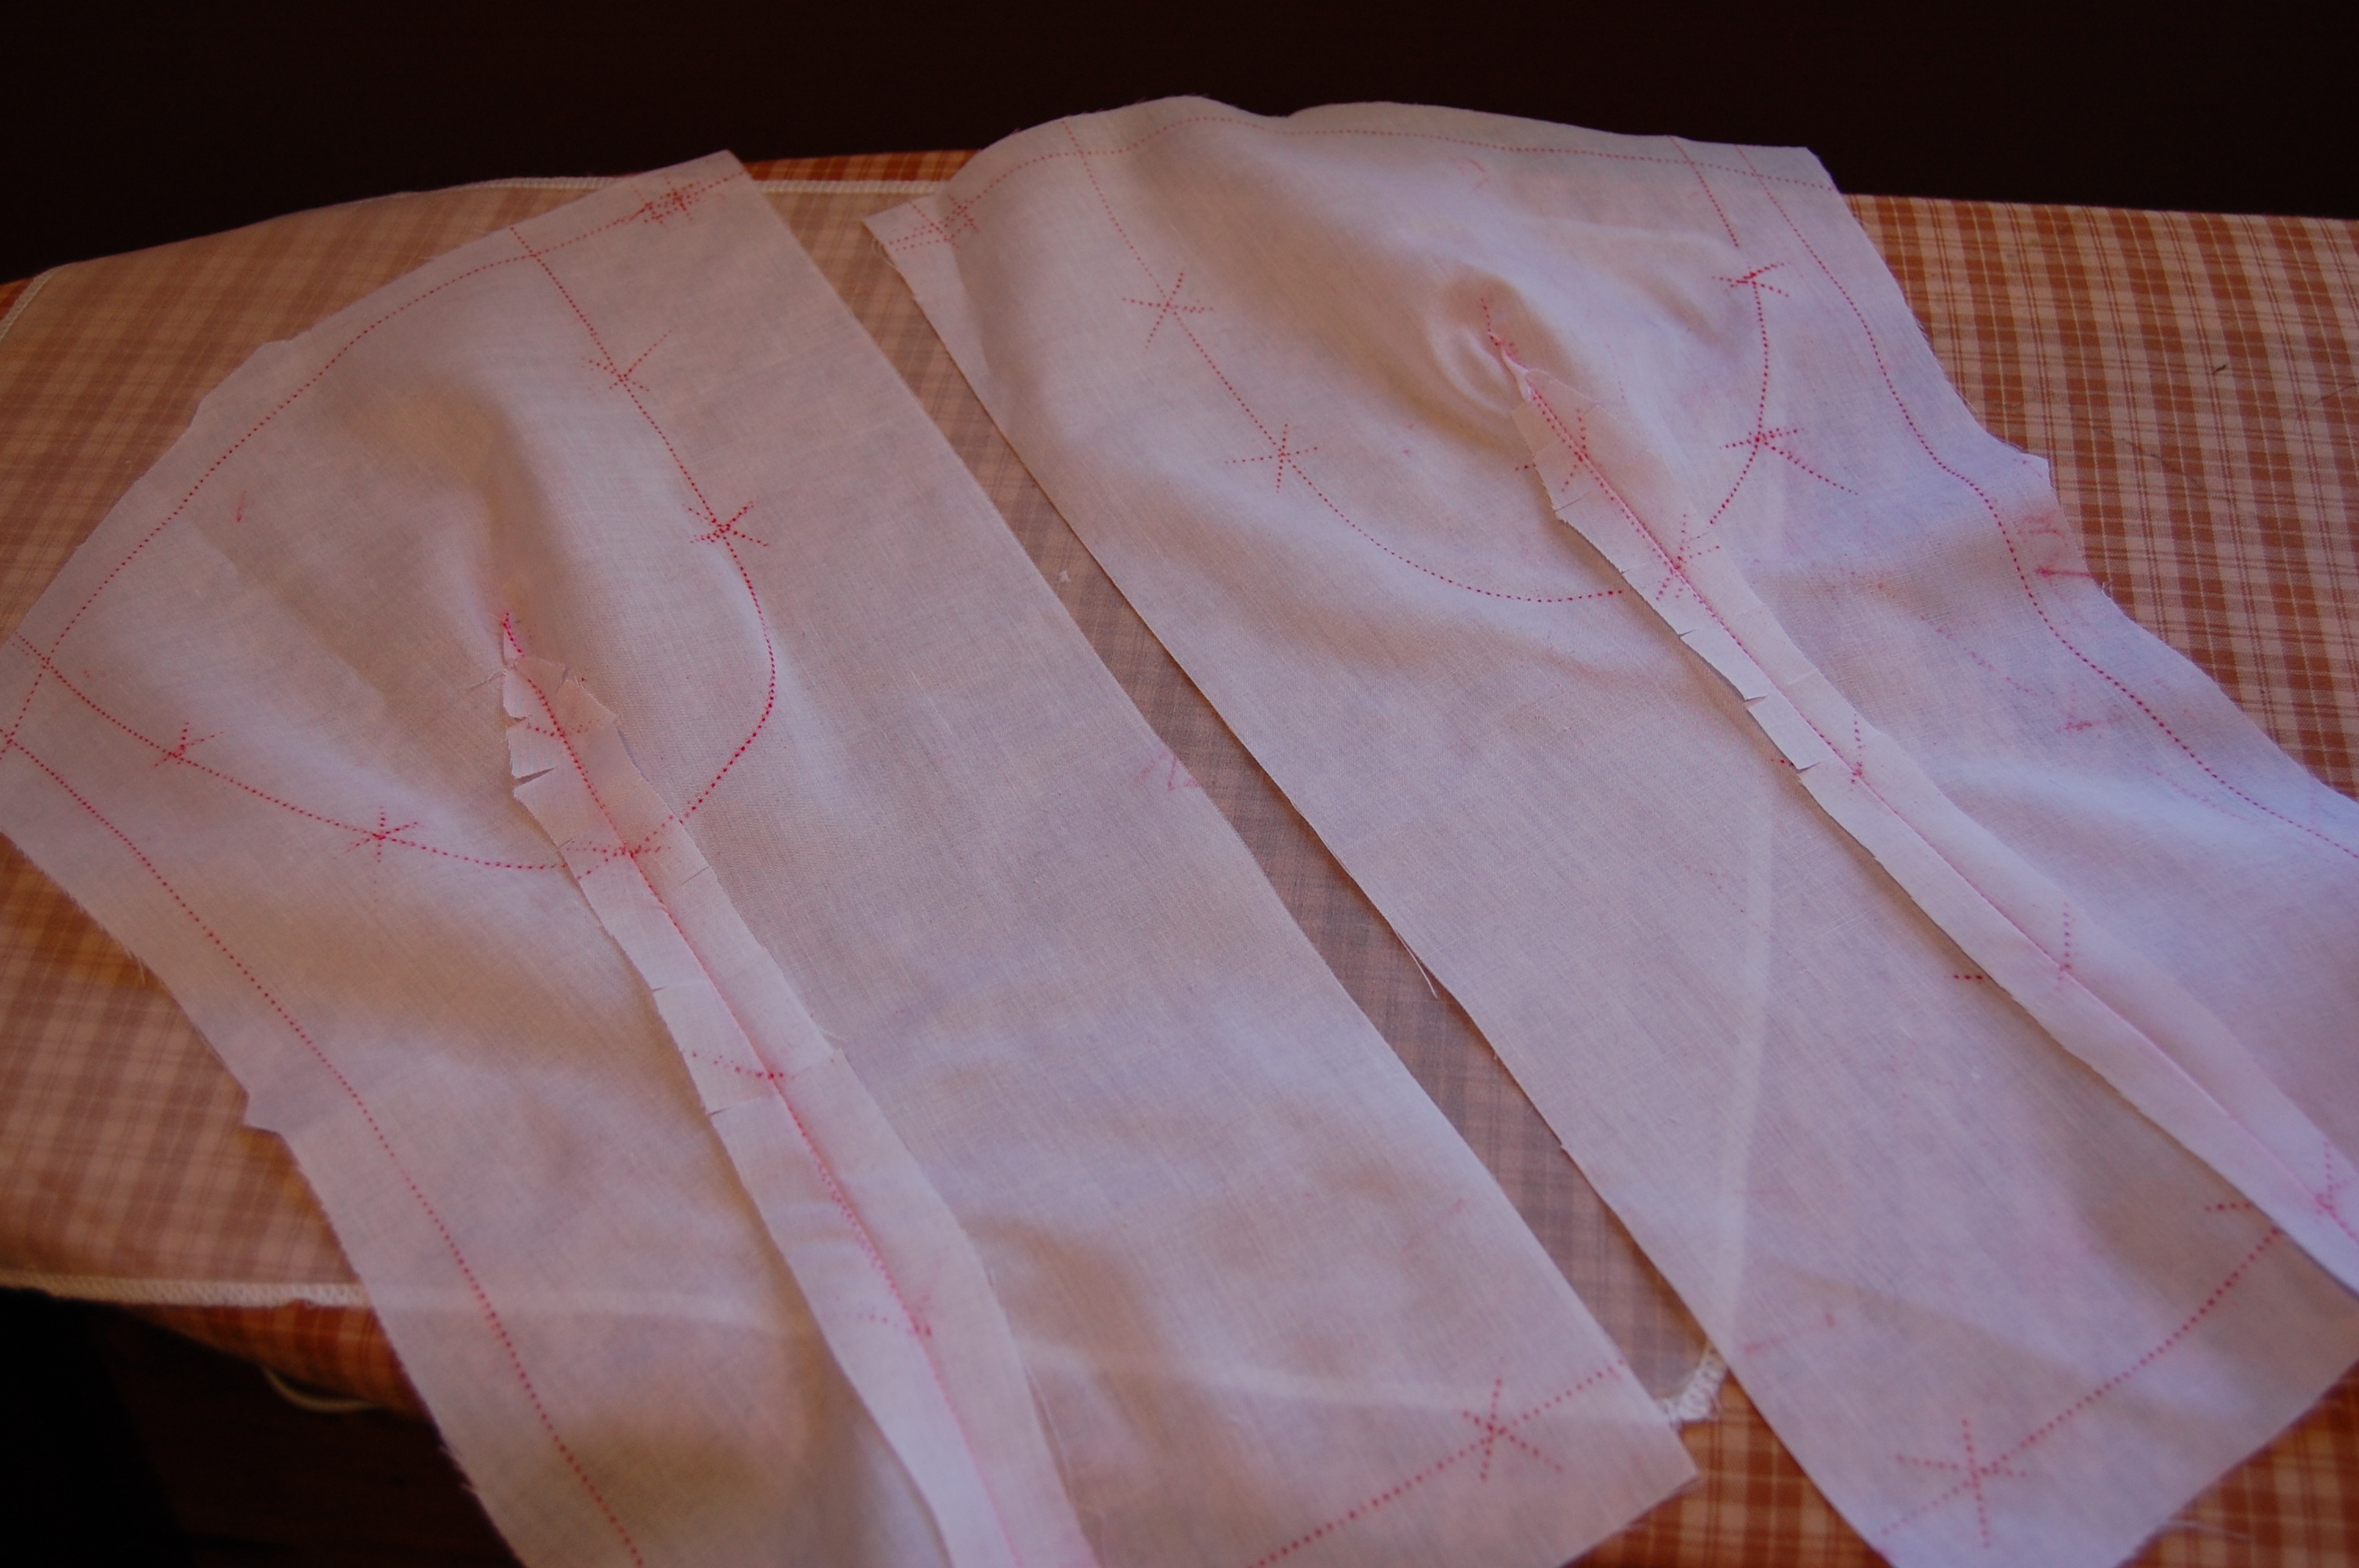
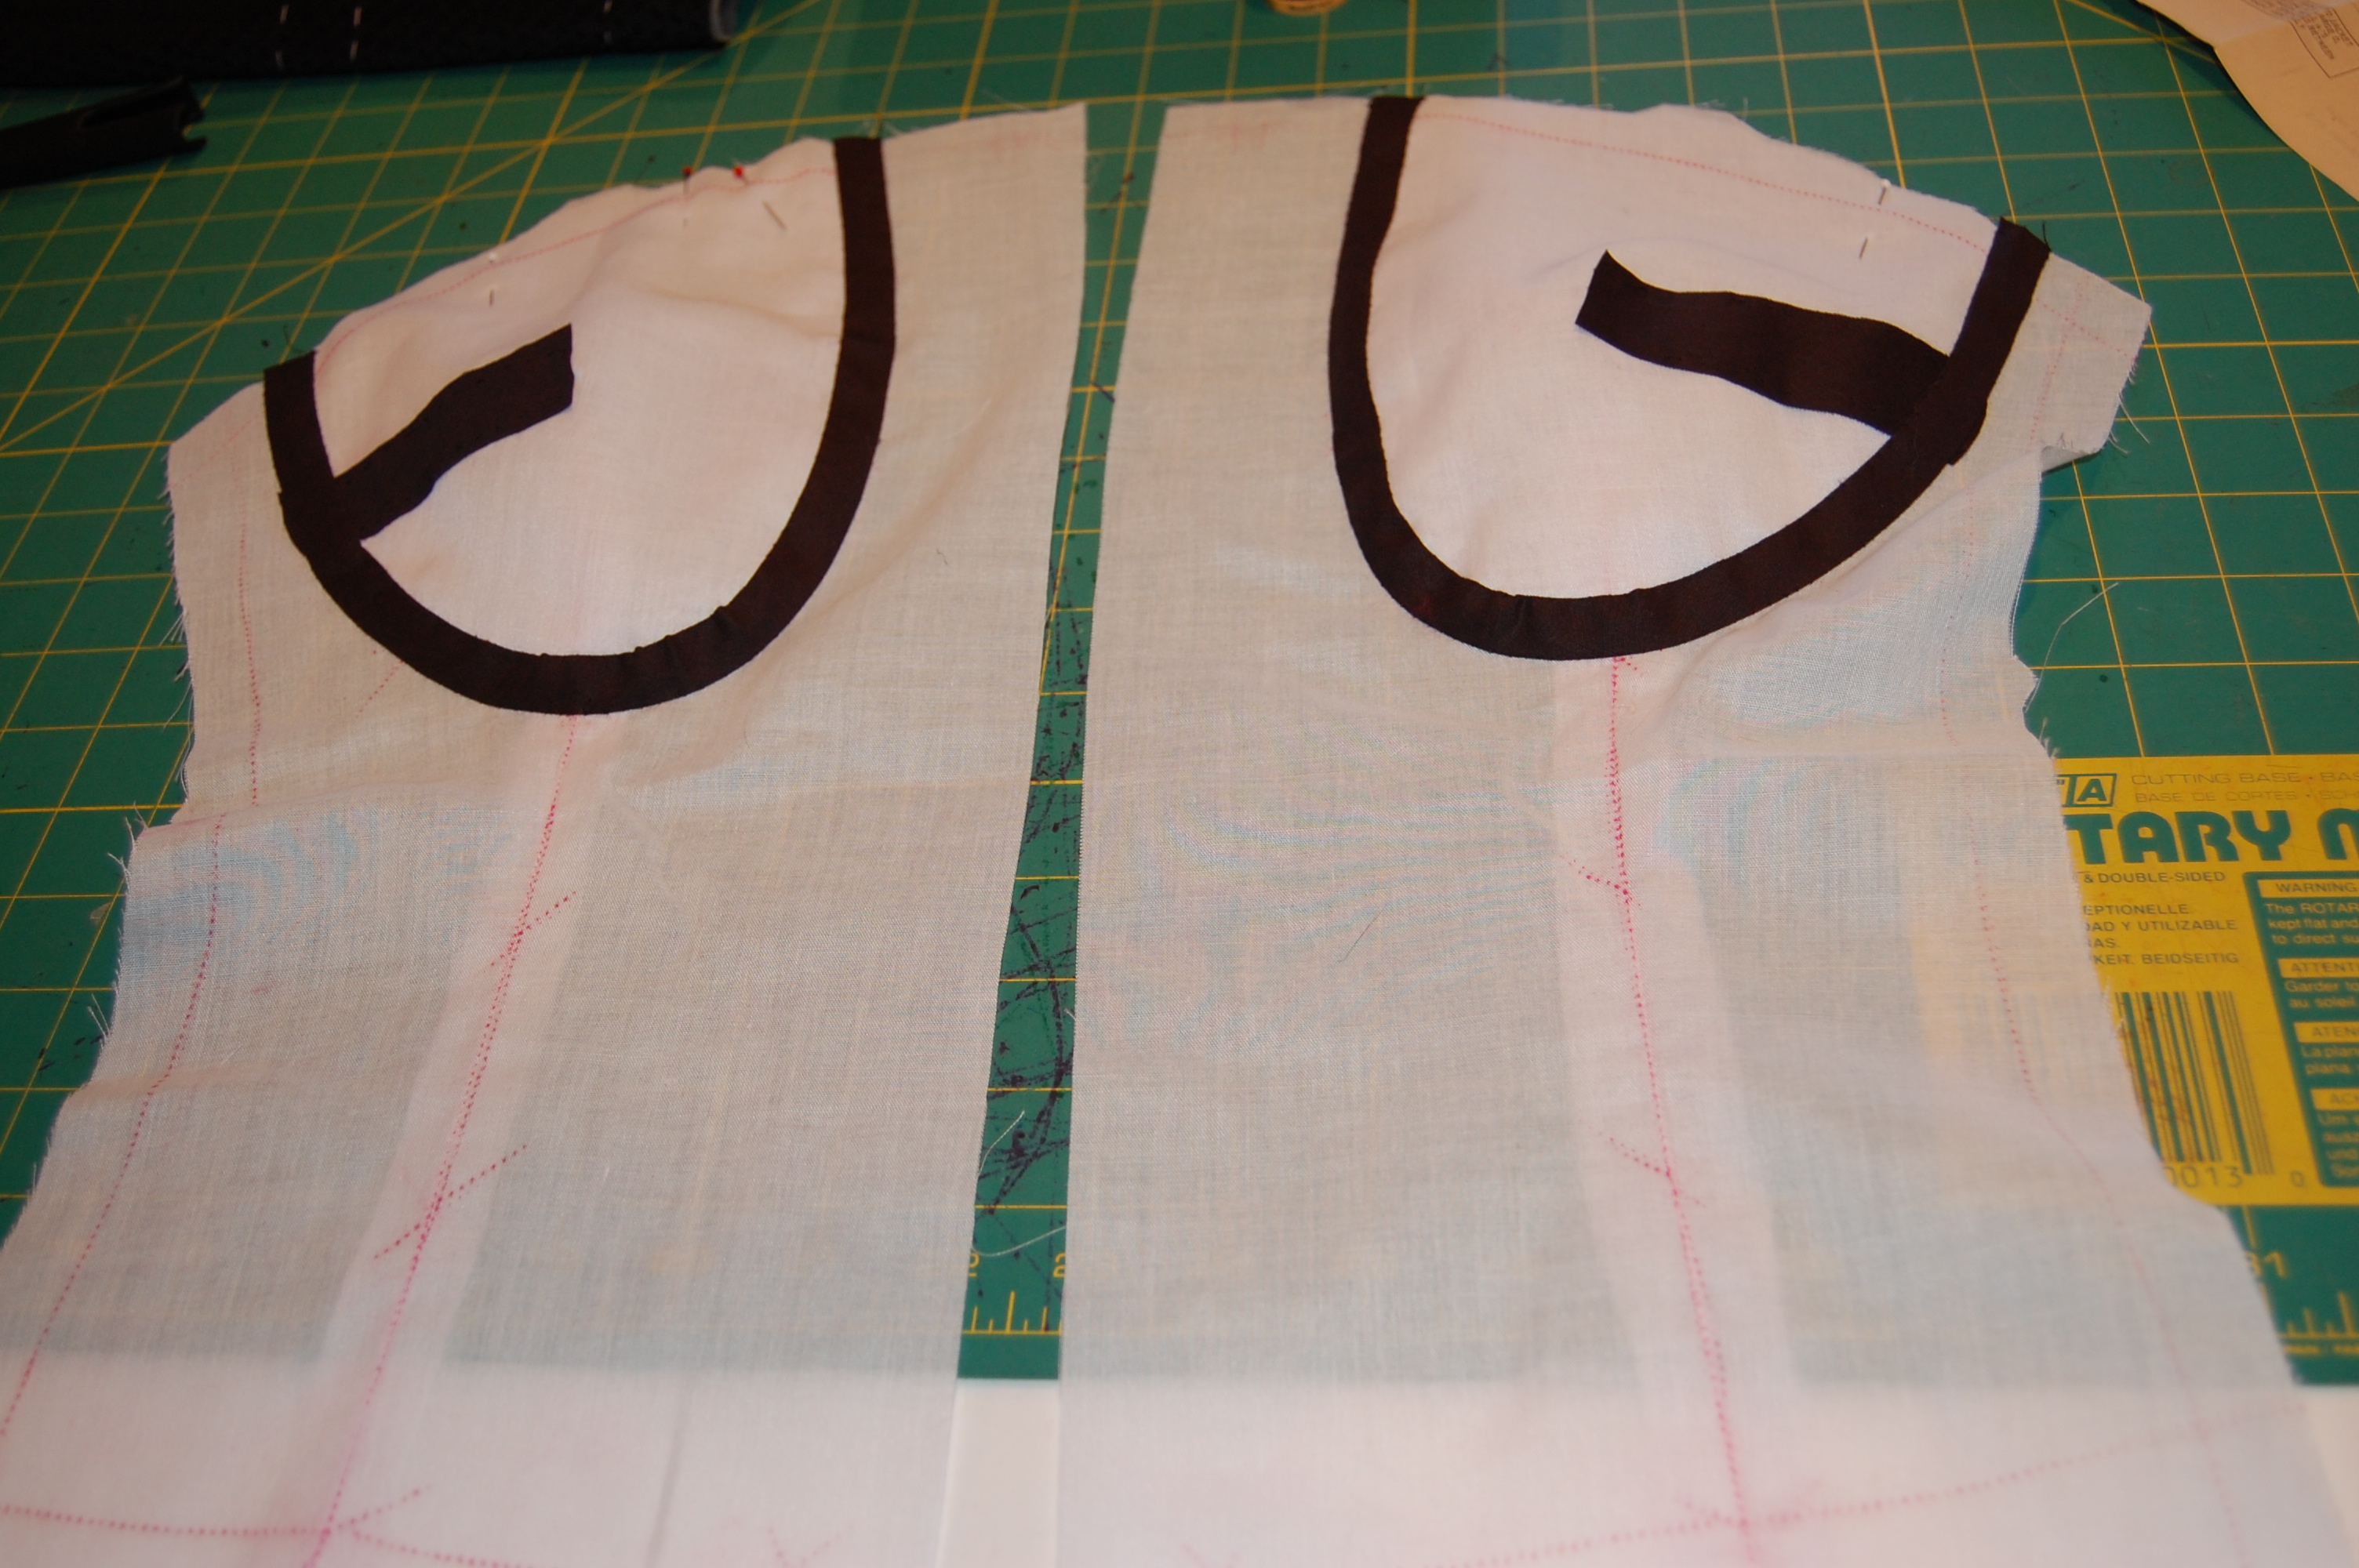
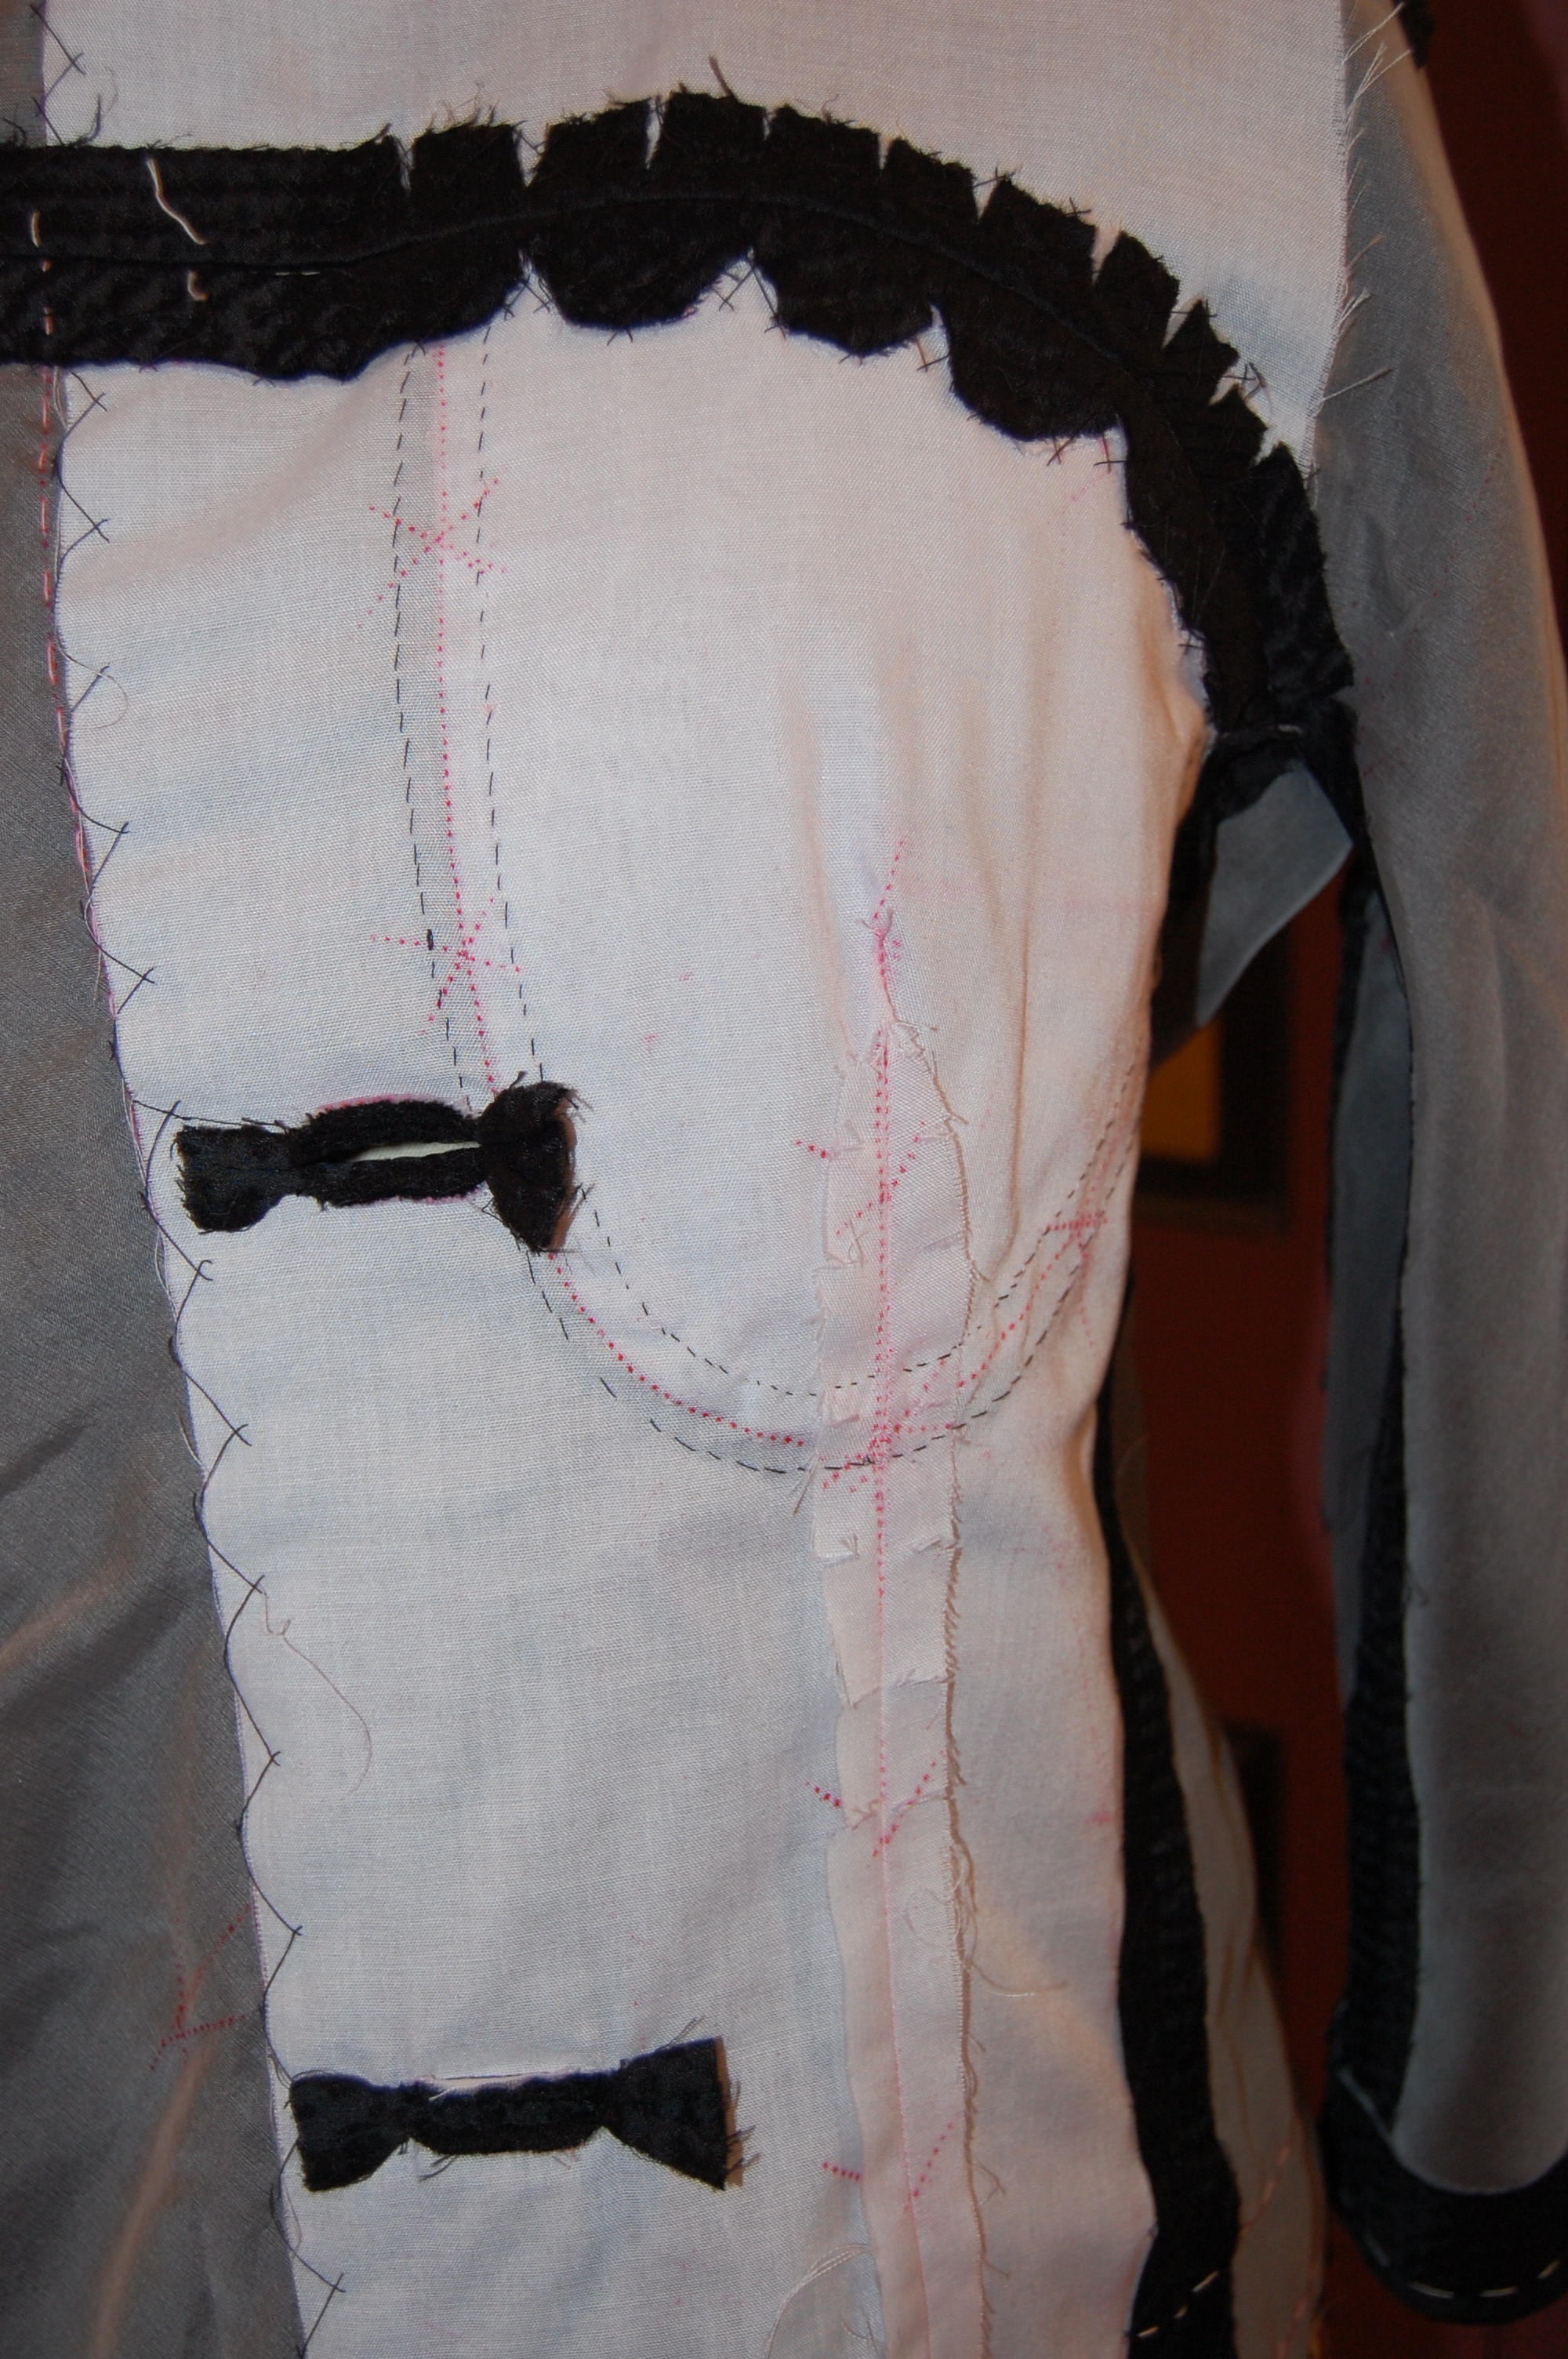
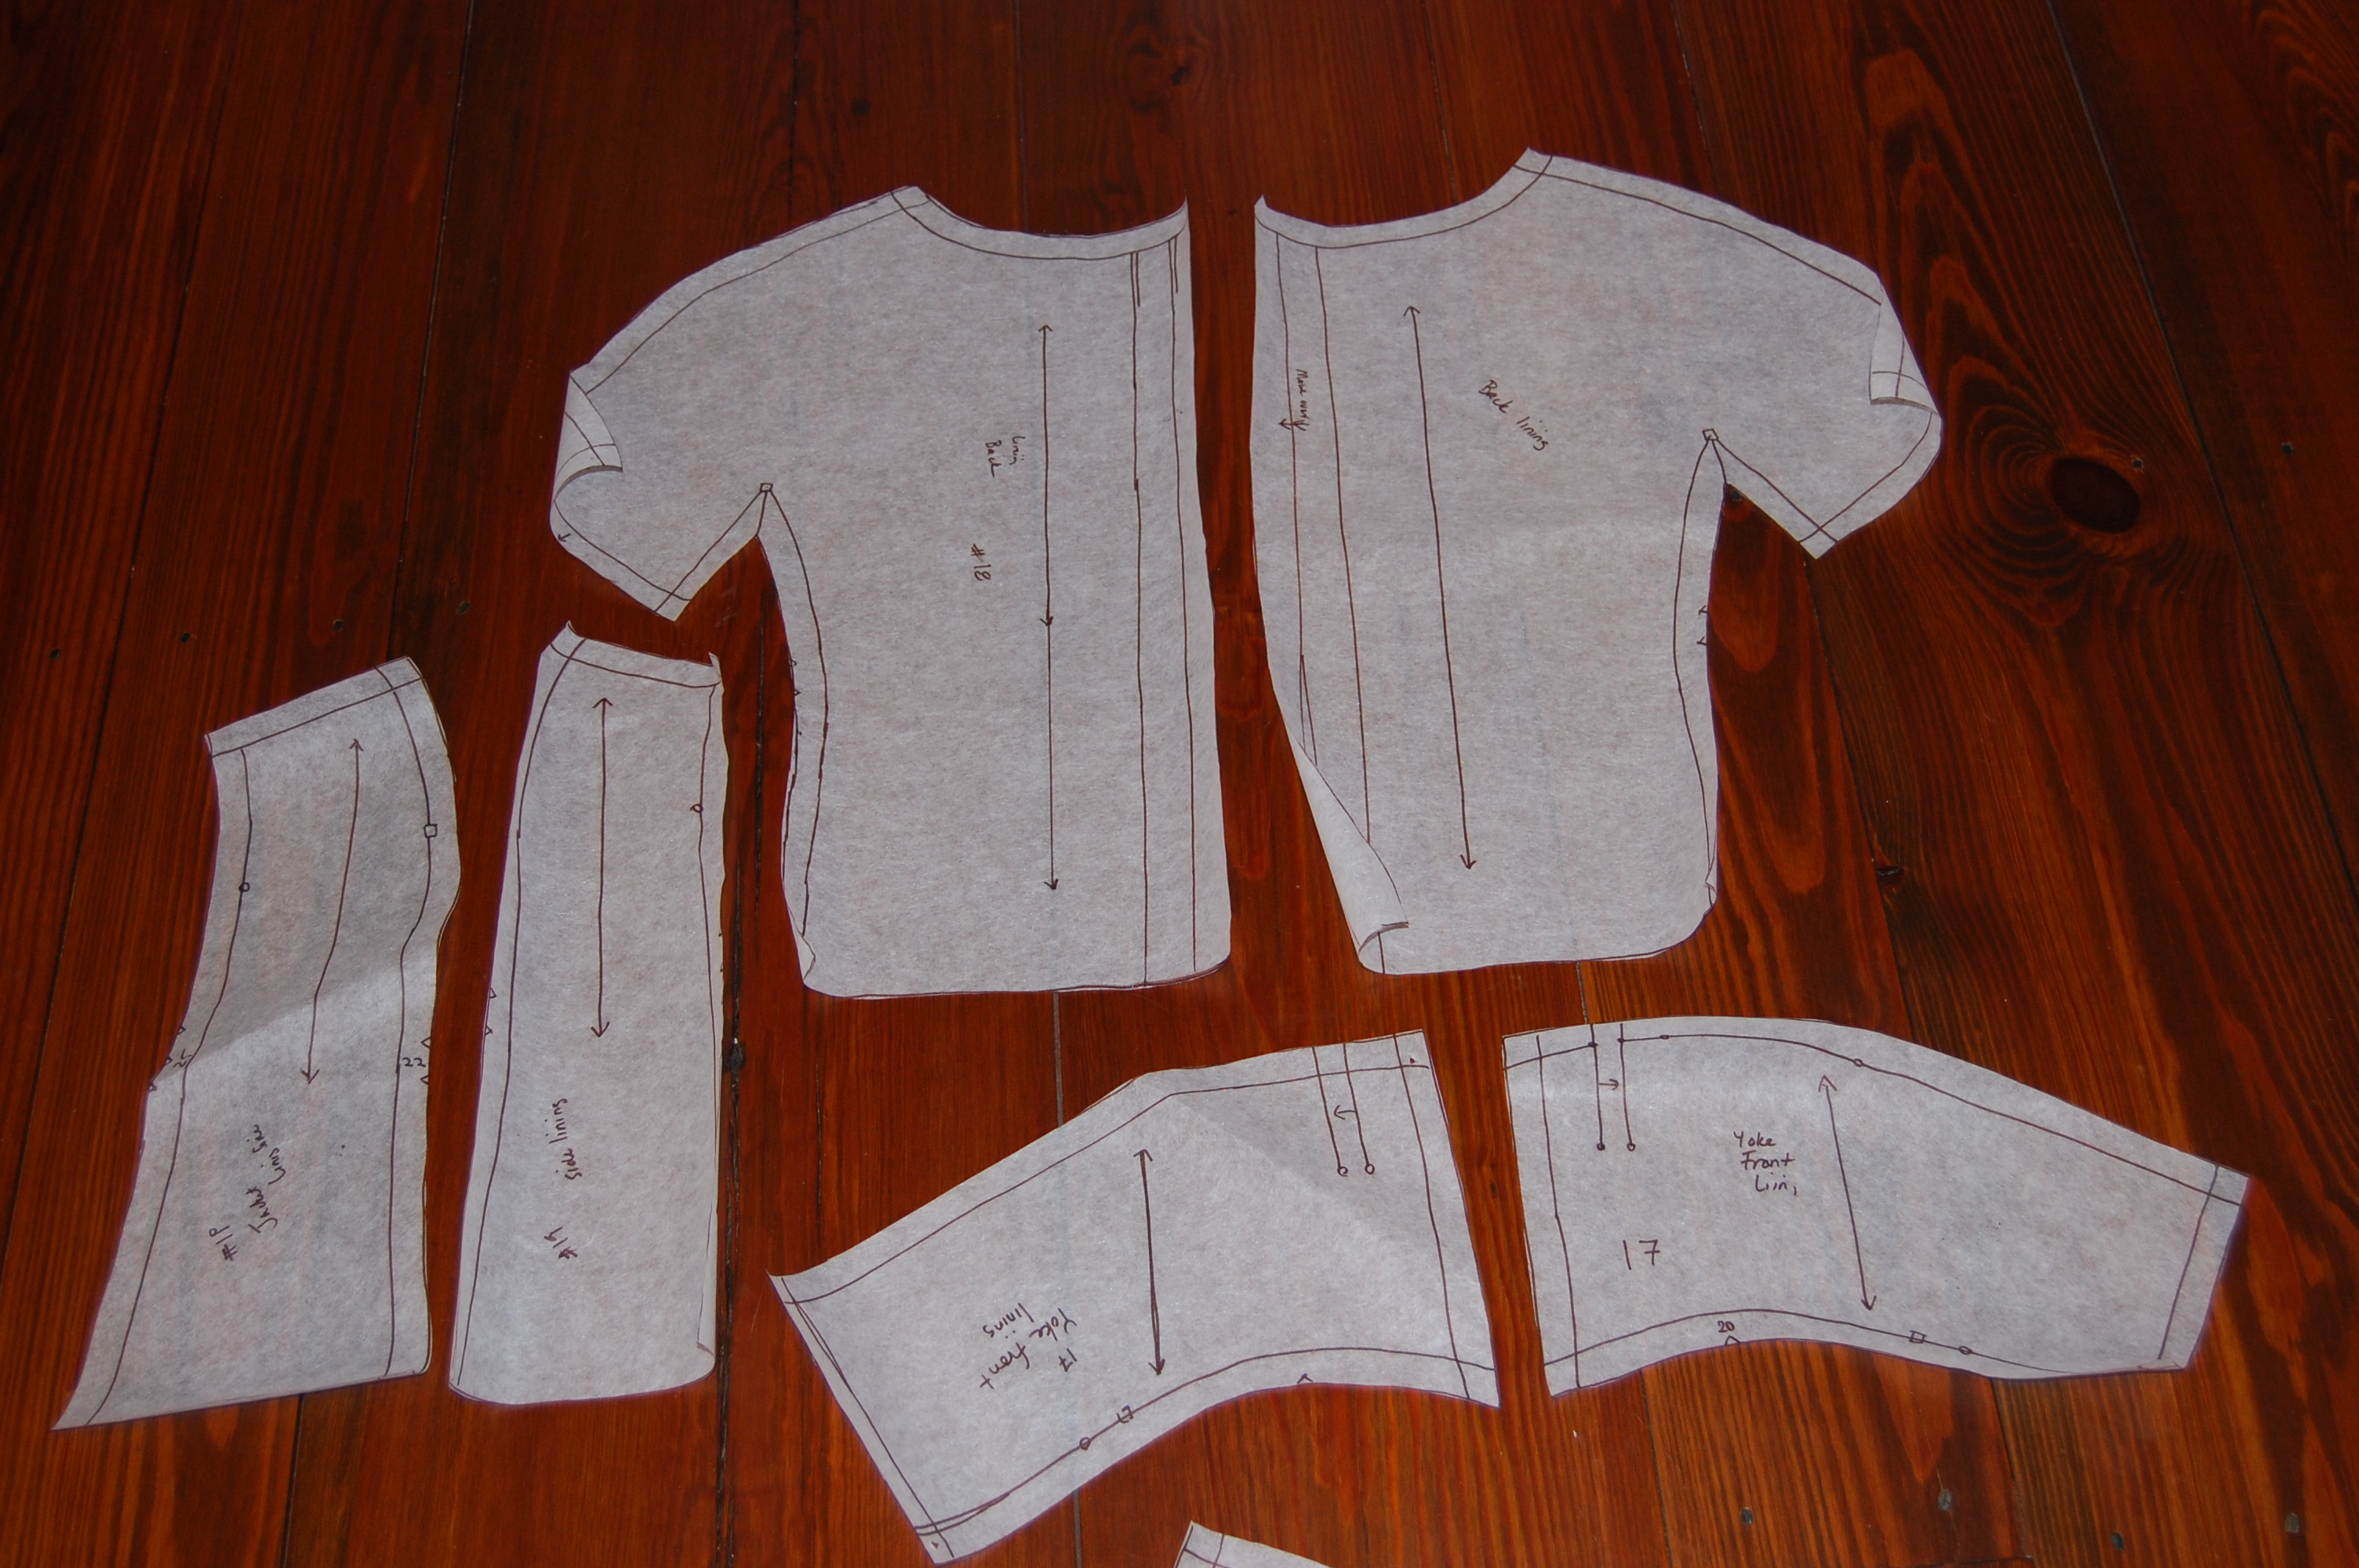
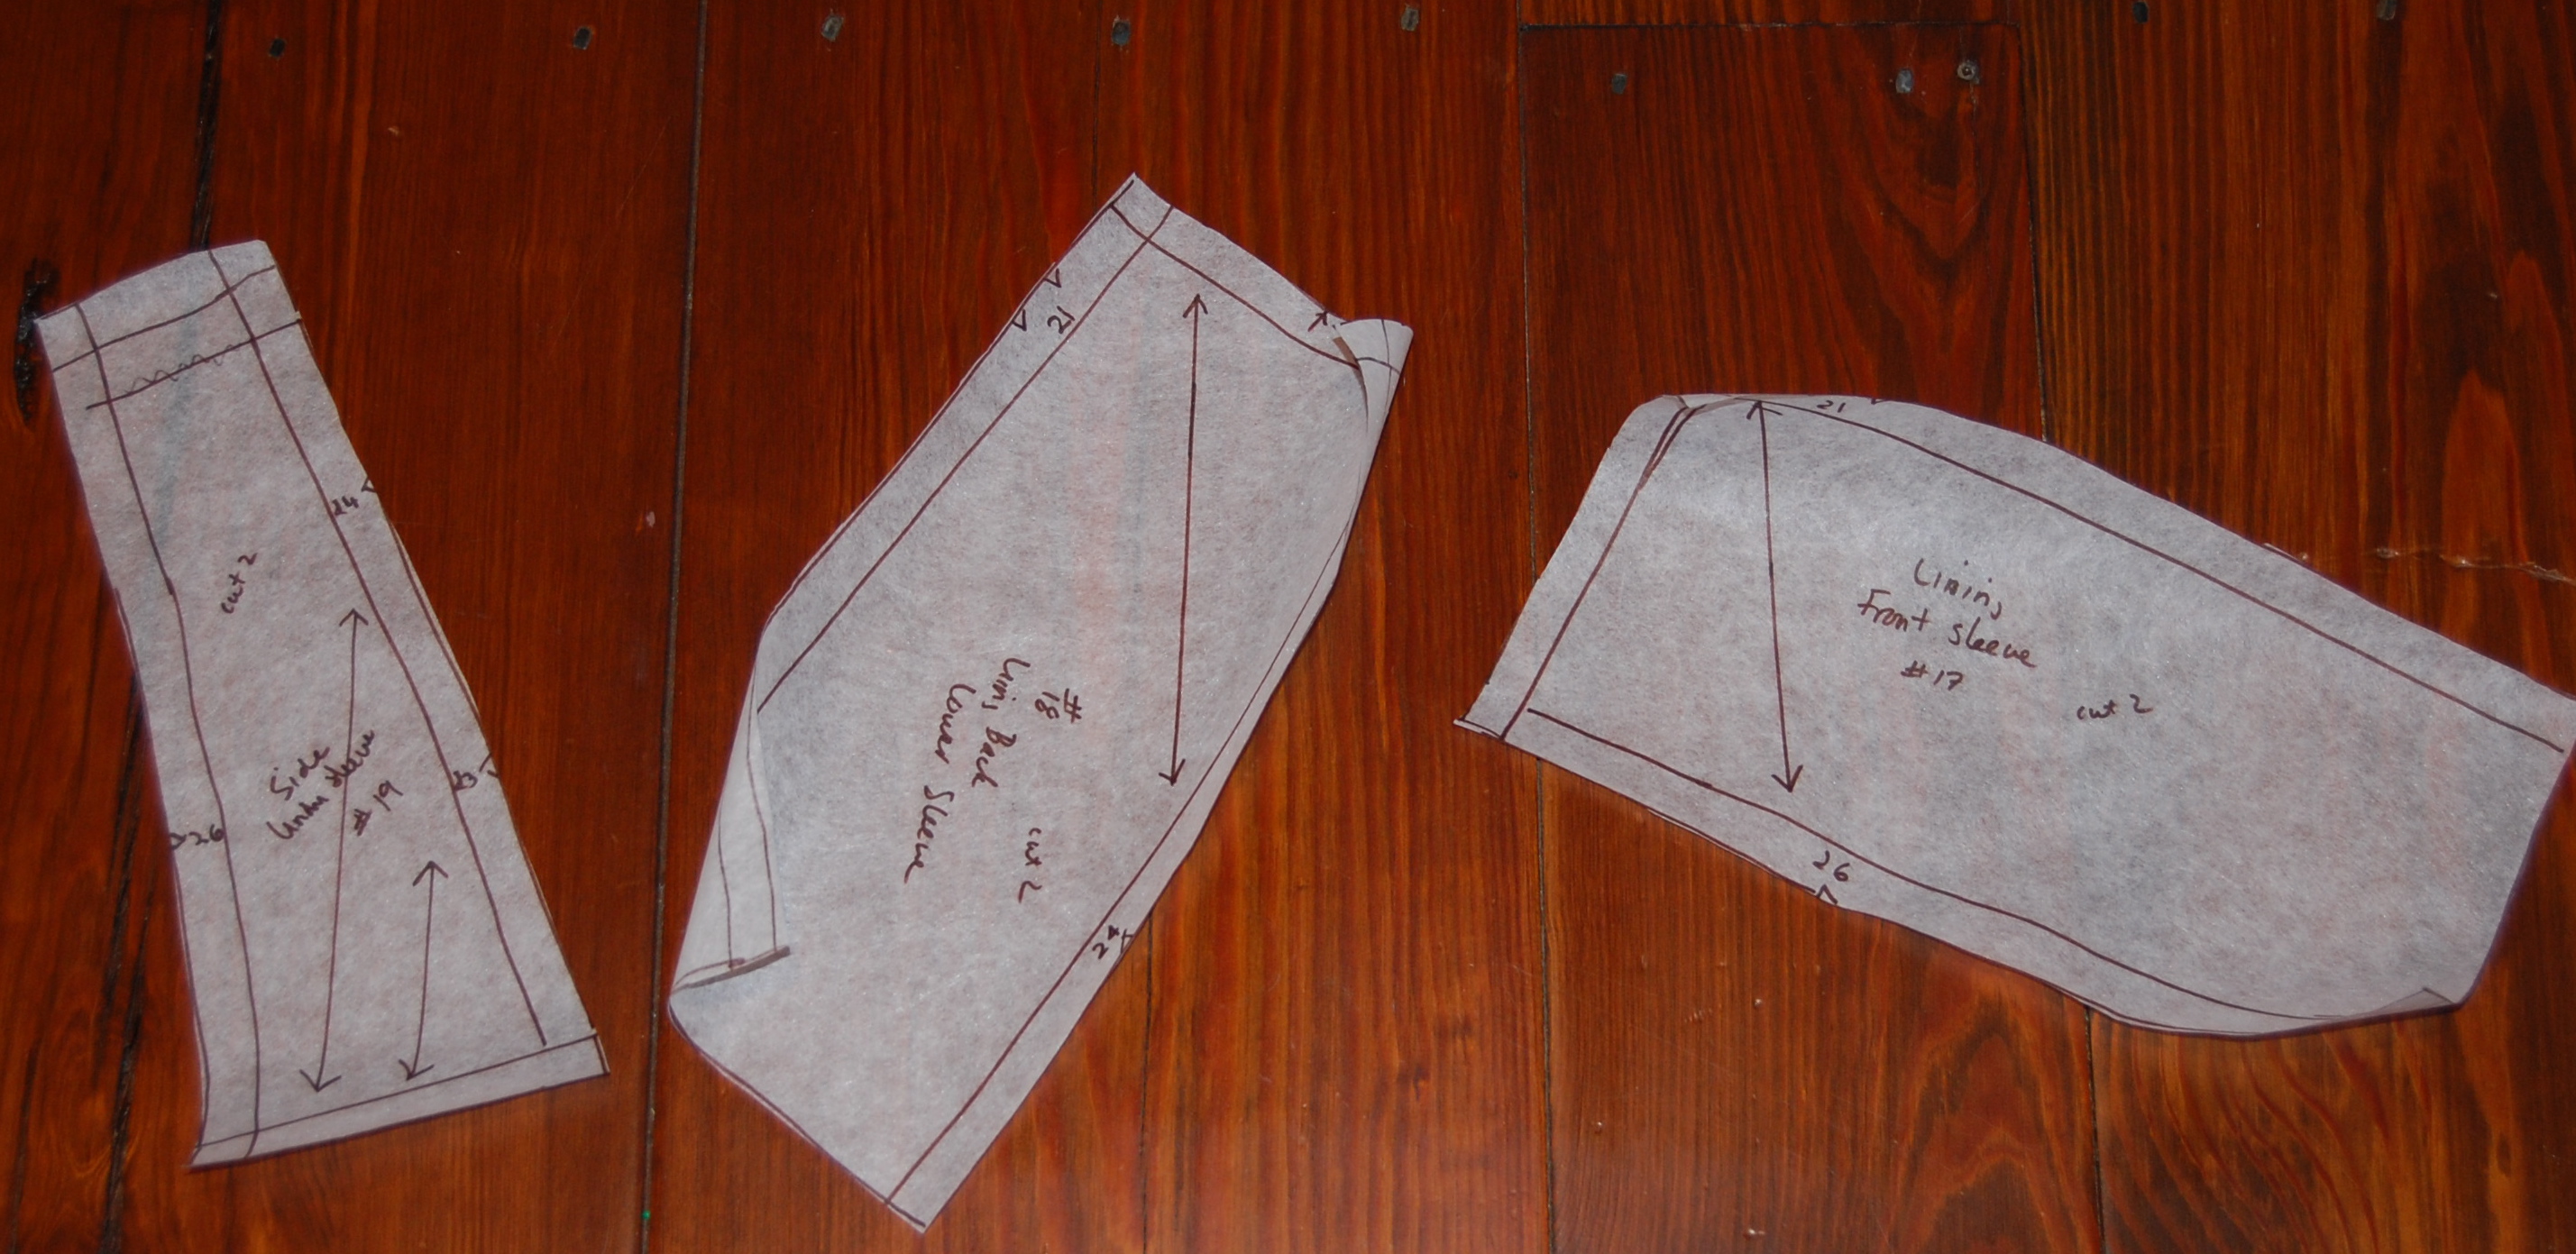
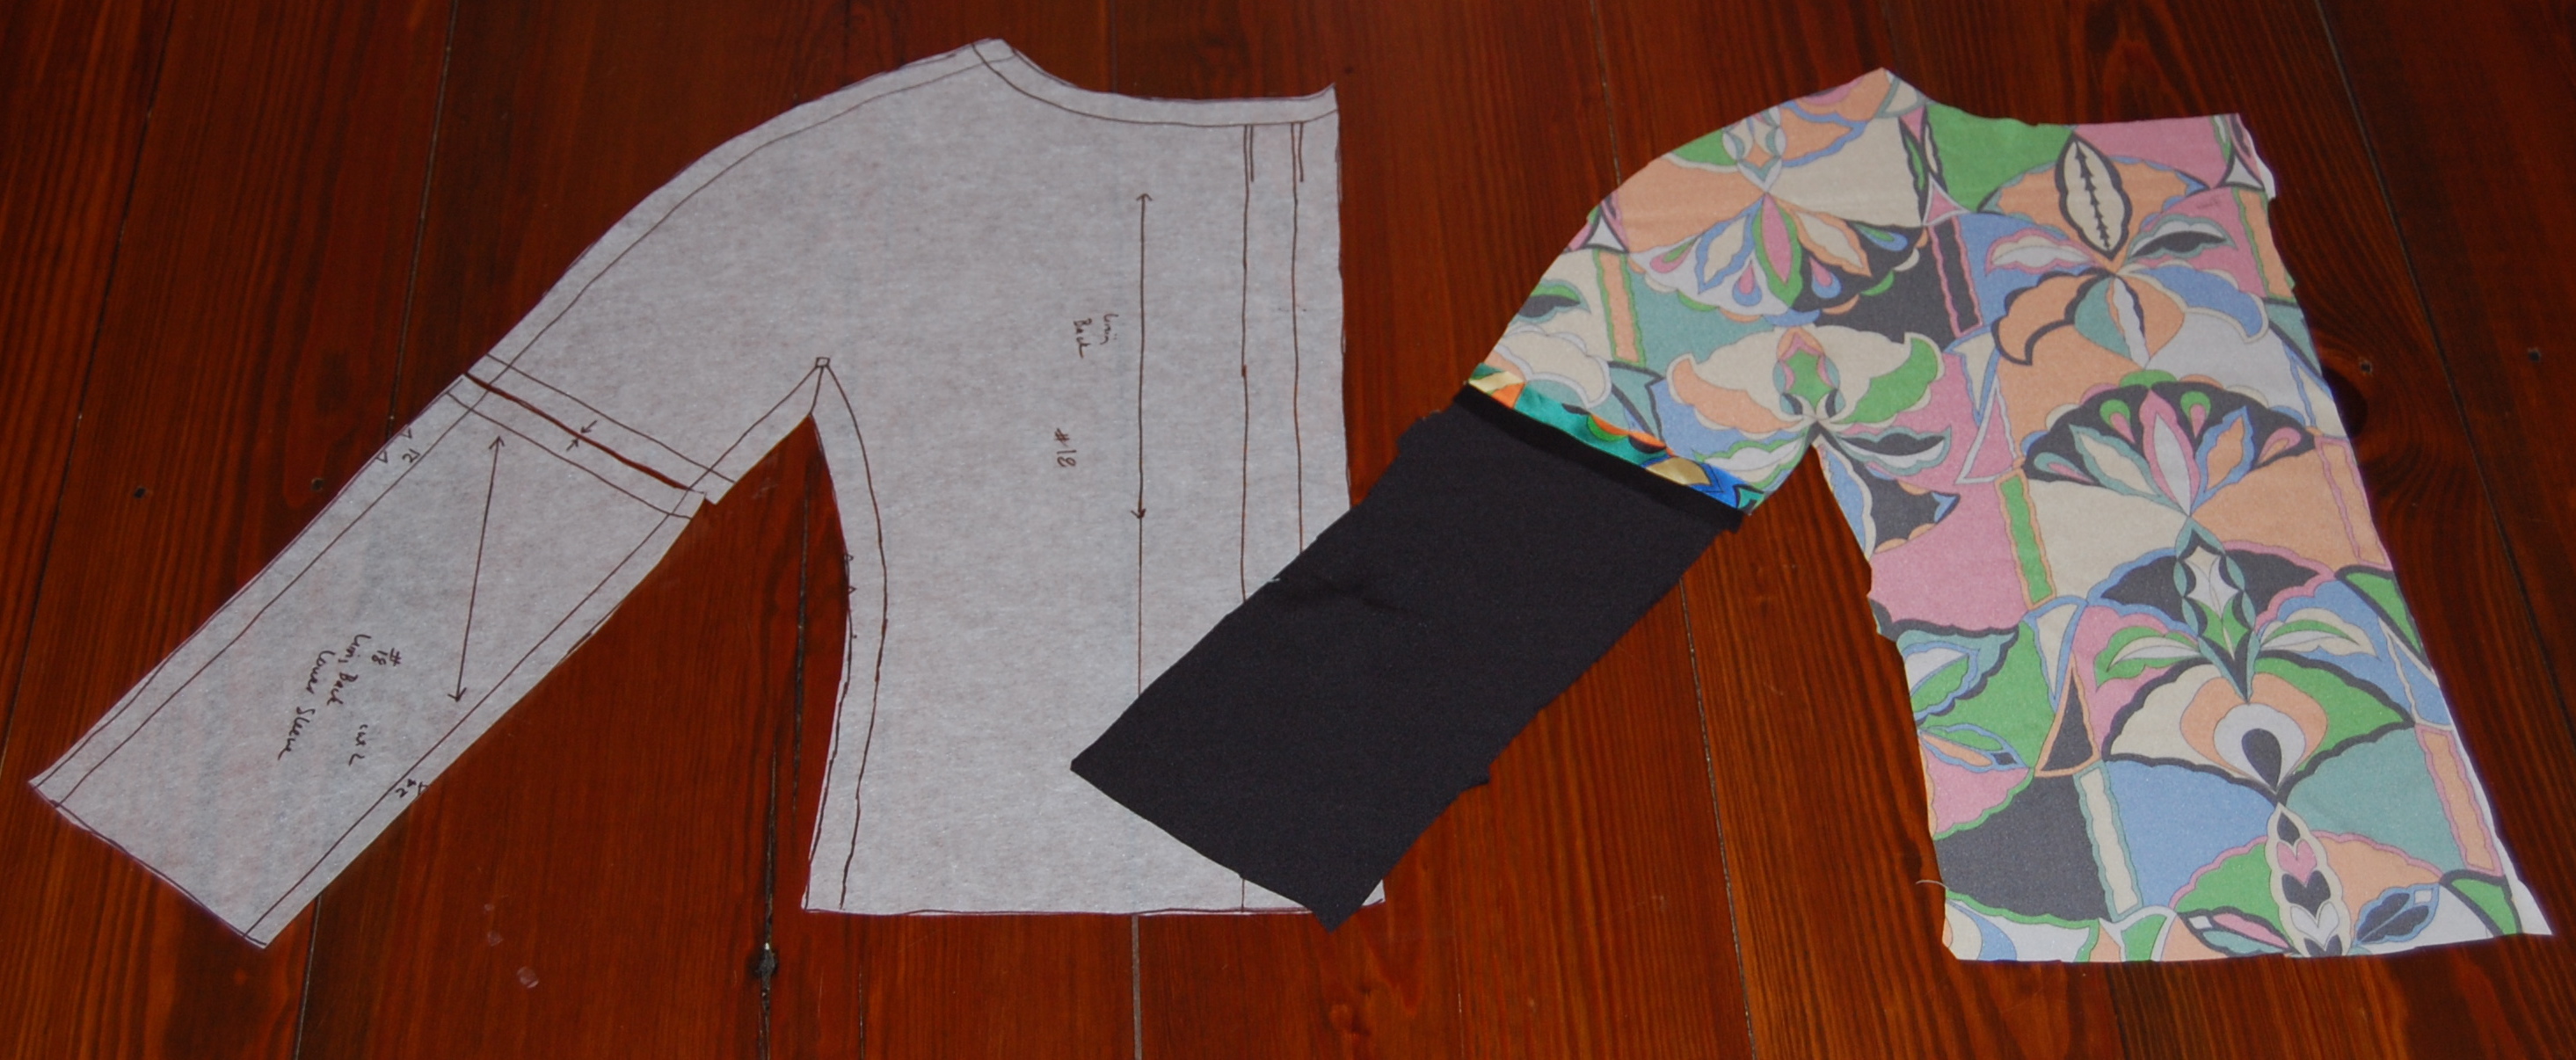
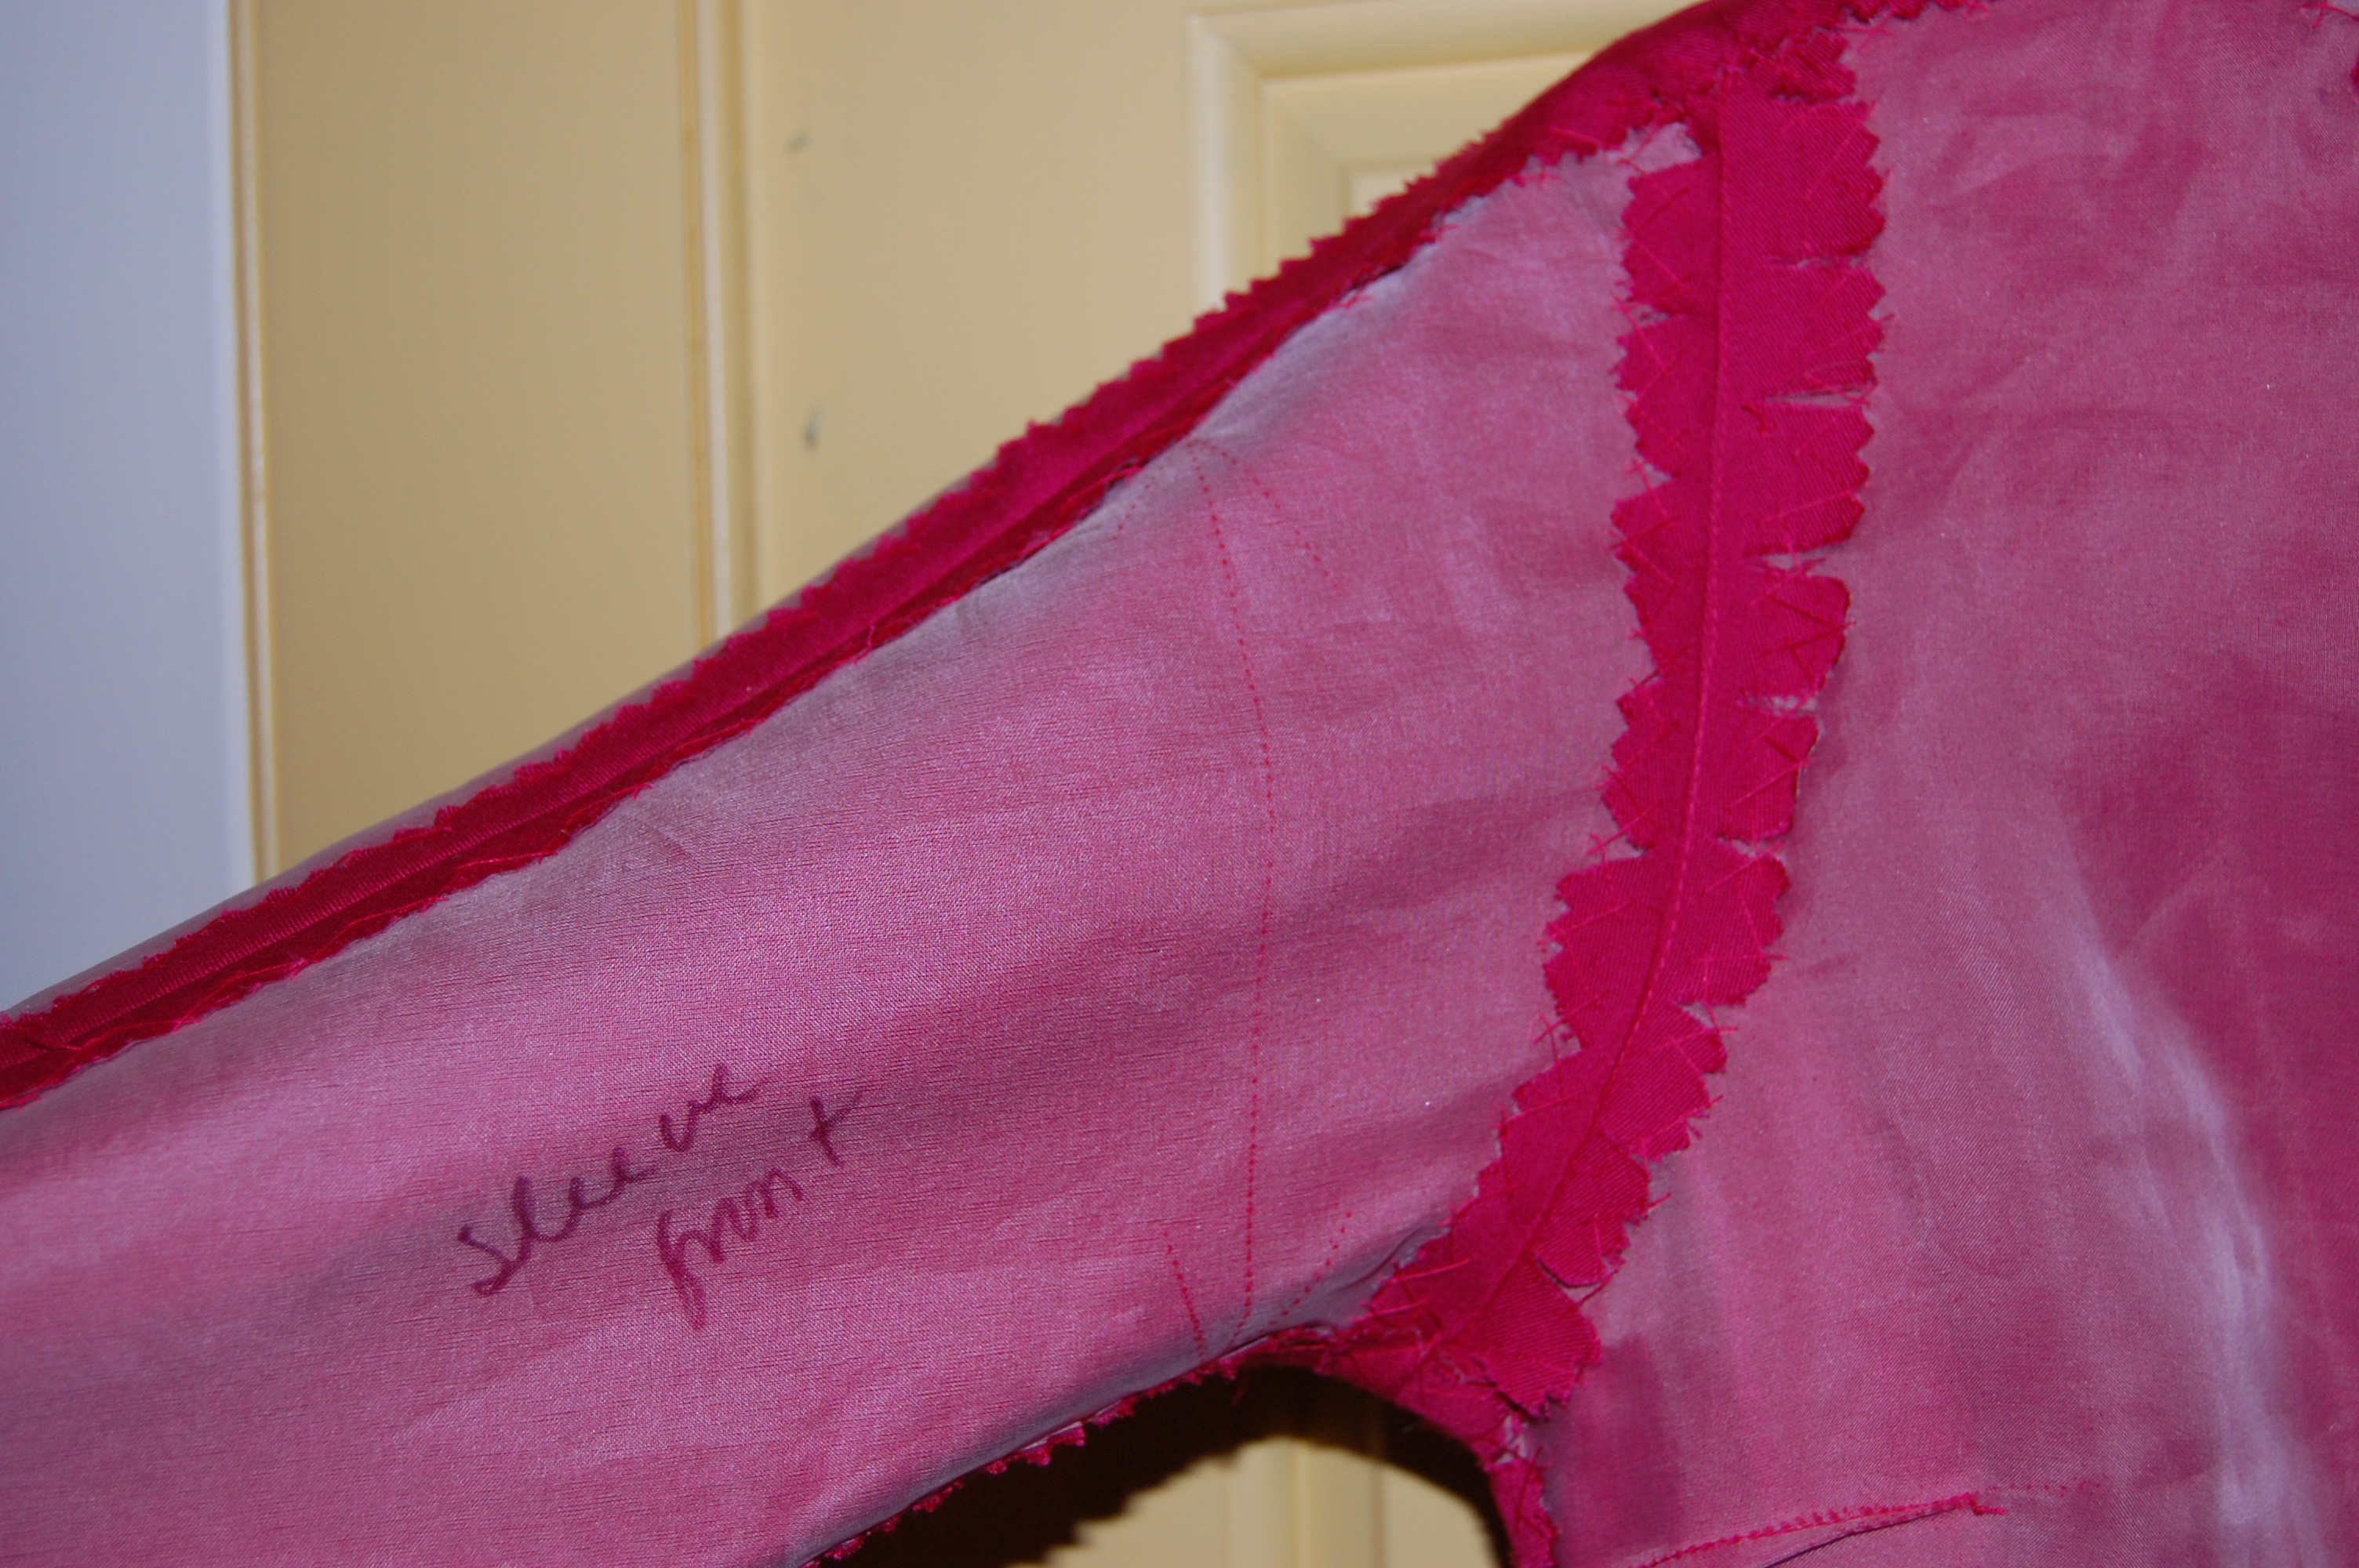
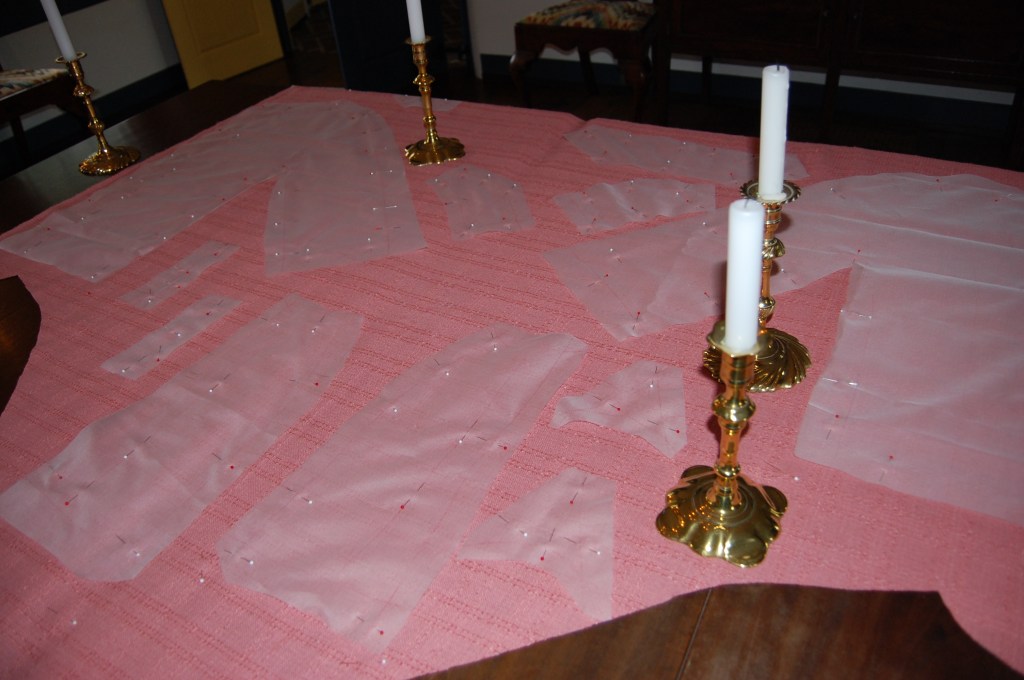
Once I had my muslin perfected (as much as possible), I transferred all the markings onto white silk organza, to be used as my underlining and also as the pattern pieces from which to cut the fashion fabric.  I had to move to my dining room table to accommodate the expanse of the wool. 

It is easy to see here the amount of fabric needed for the cut-on sleeves. (I use my candlesticks as weights to keep the fabric from slipping.)

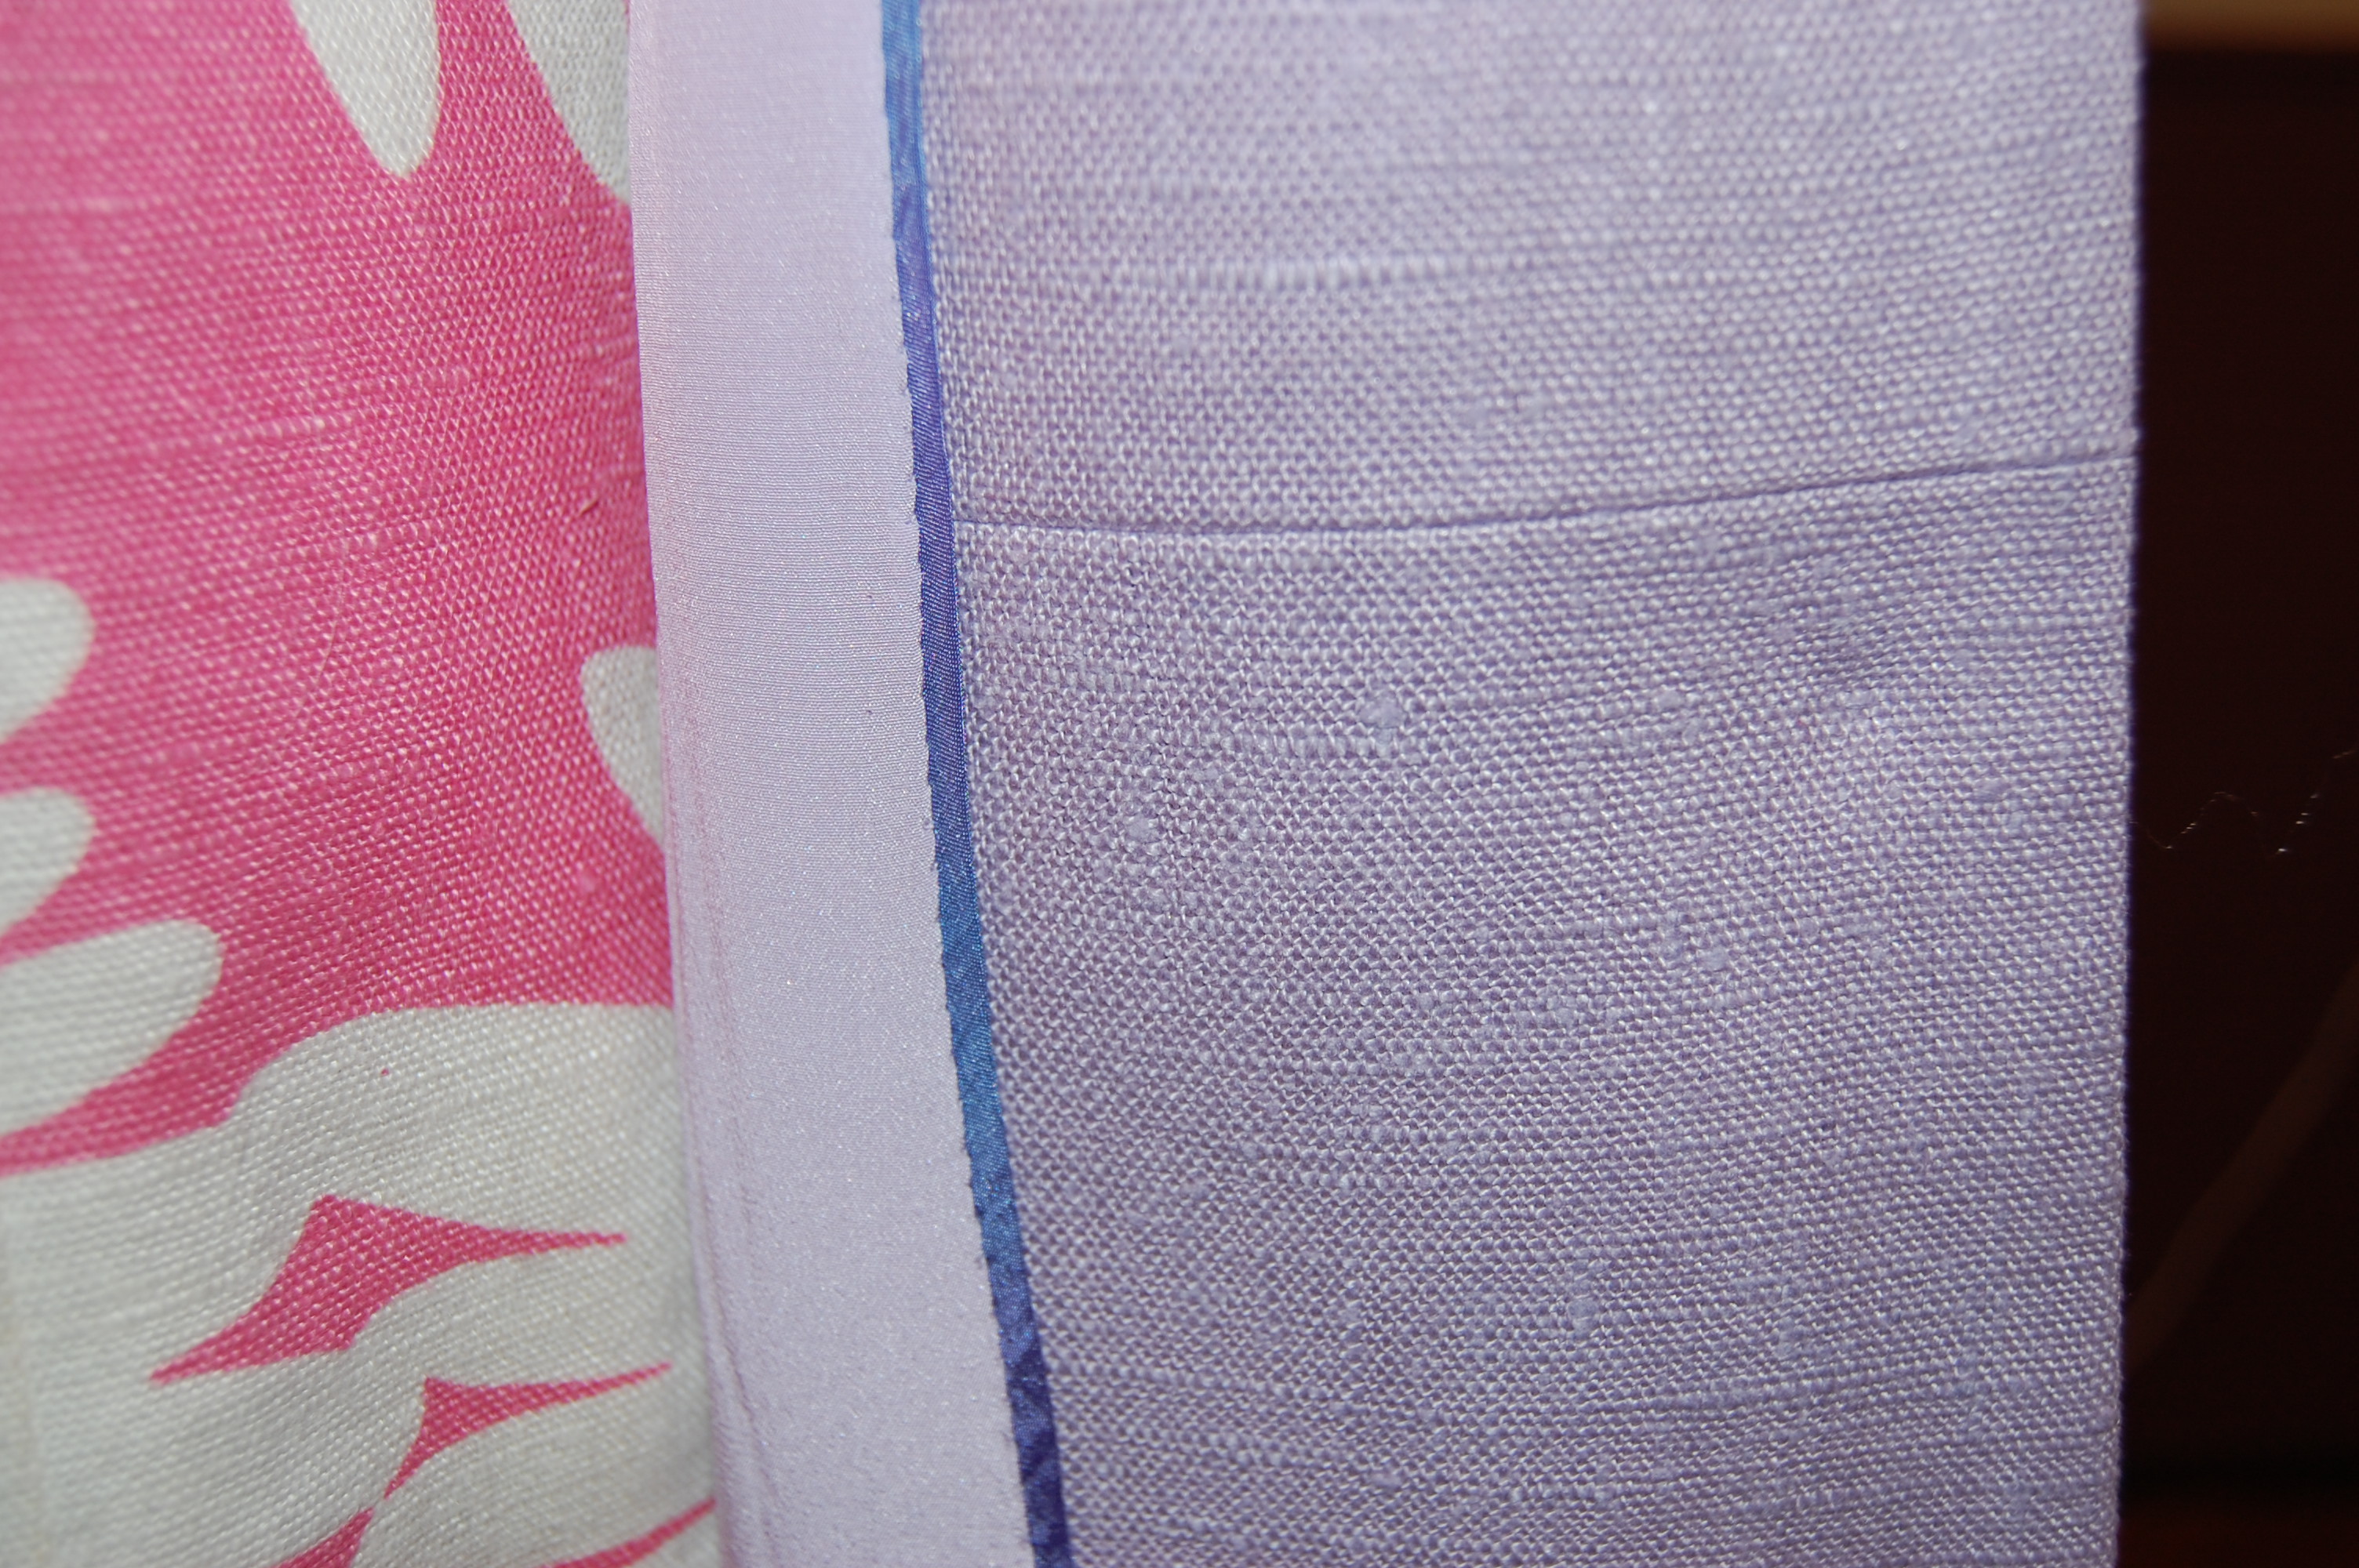
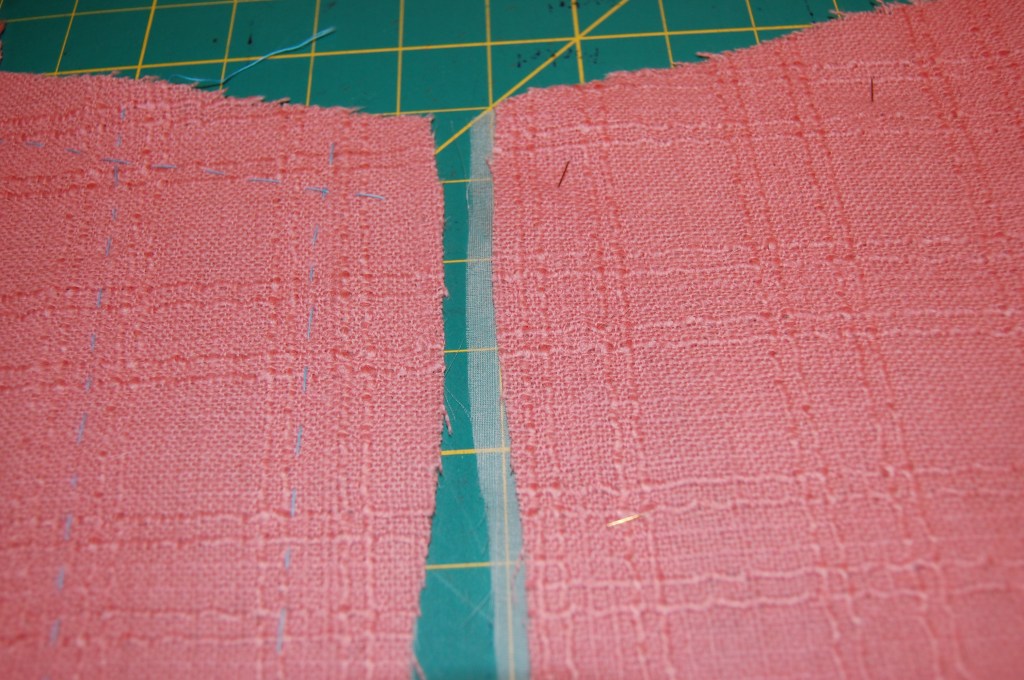
Once I started assembling some of the jacket pieces, I realized I had not perfectly matched the facings.  Although the wool is solid pink, there is that very distinct weave in it which needs to be matched.  Fortunately, because I had left such wide seam allowances, I did not need to cut a new facing.  I just needed to readjust the organza on the one facing which was a bit askew.  

You can see the organza adjusted on the righthand facing, before I had re-basted it.

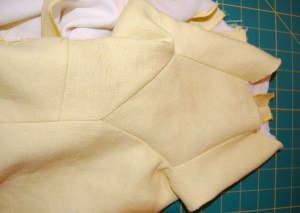
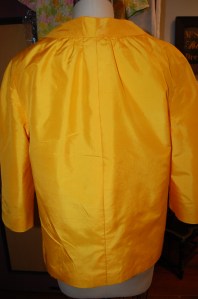
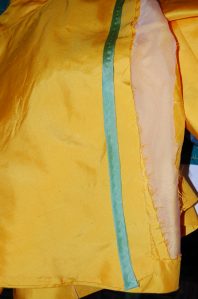
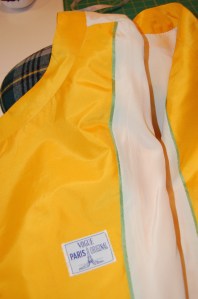
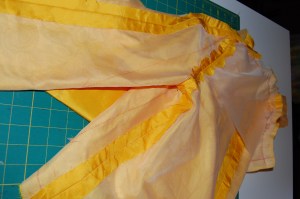
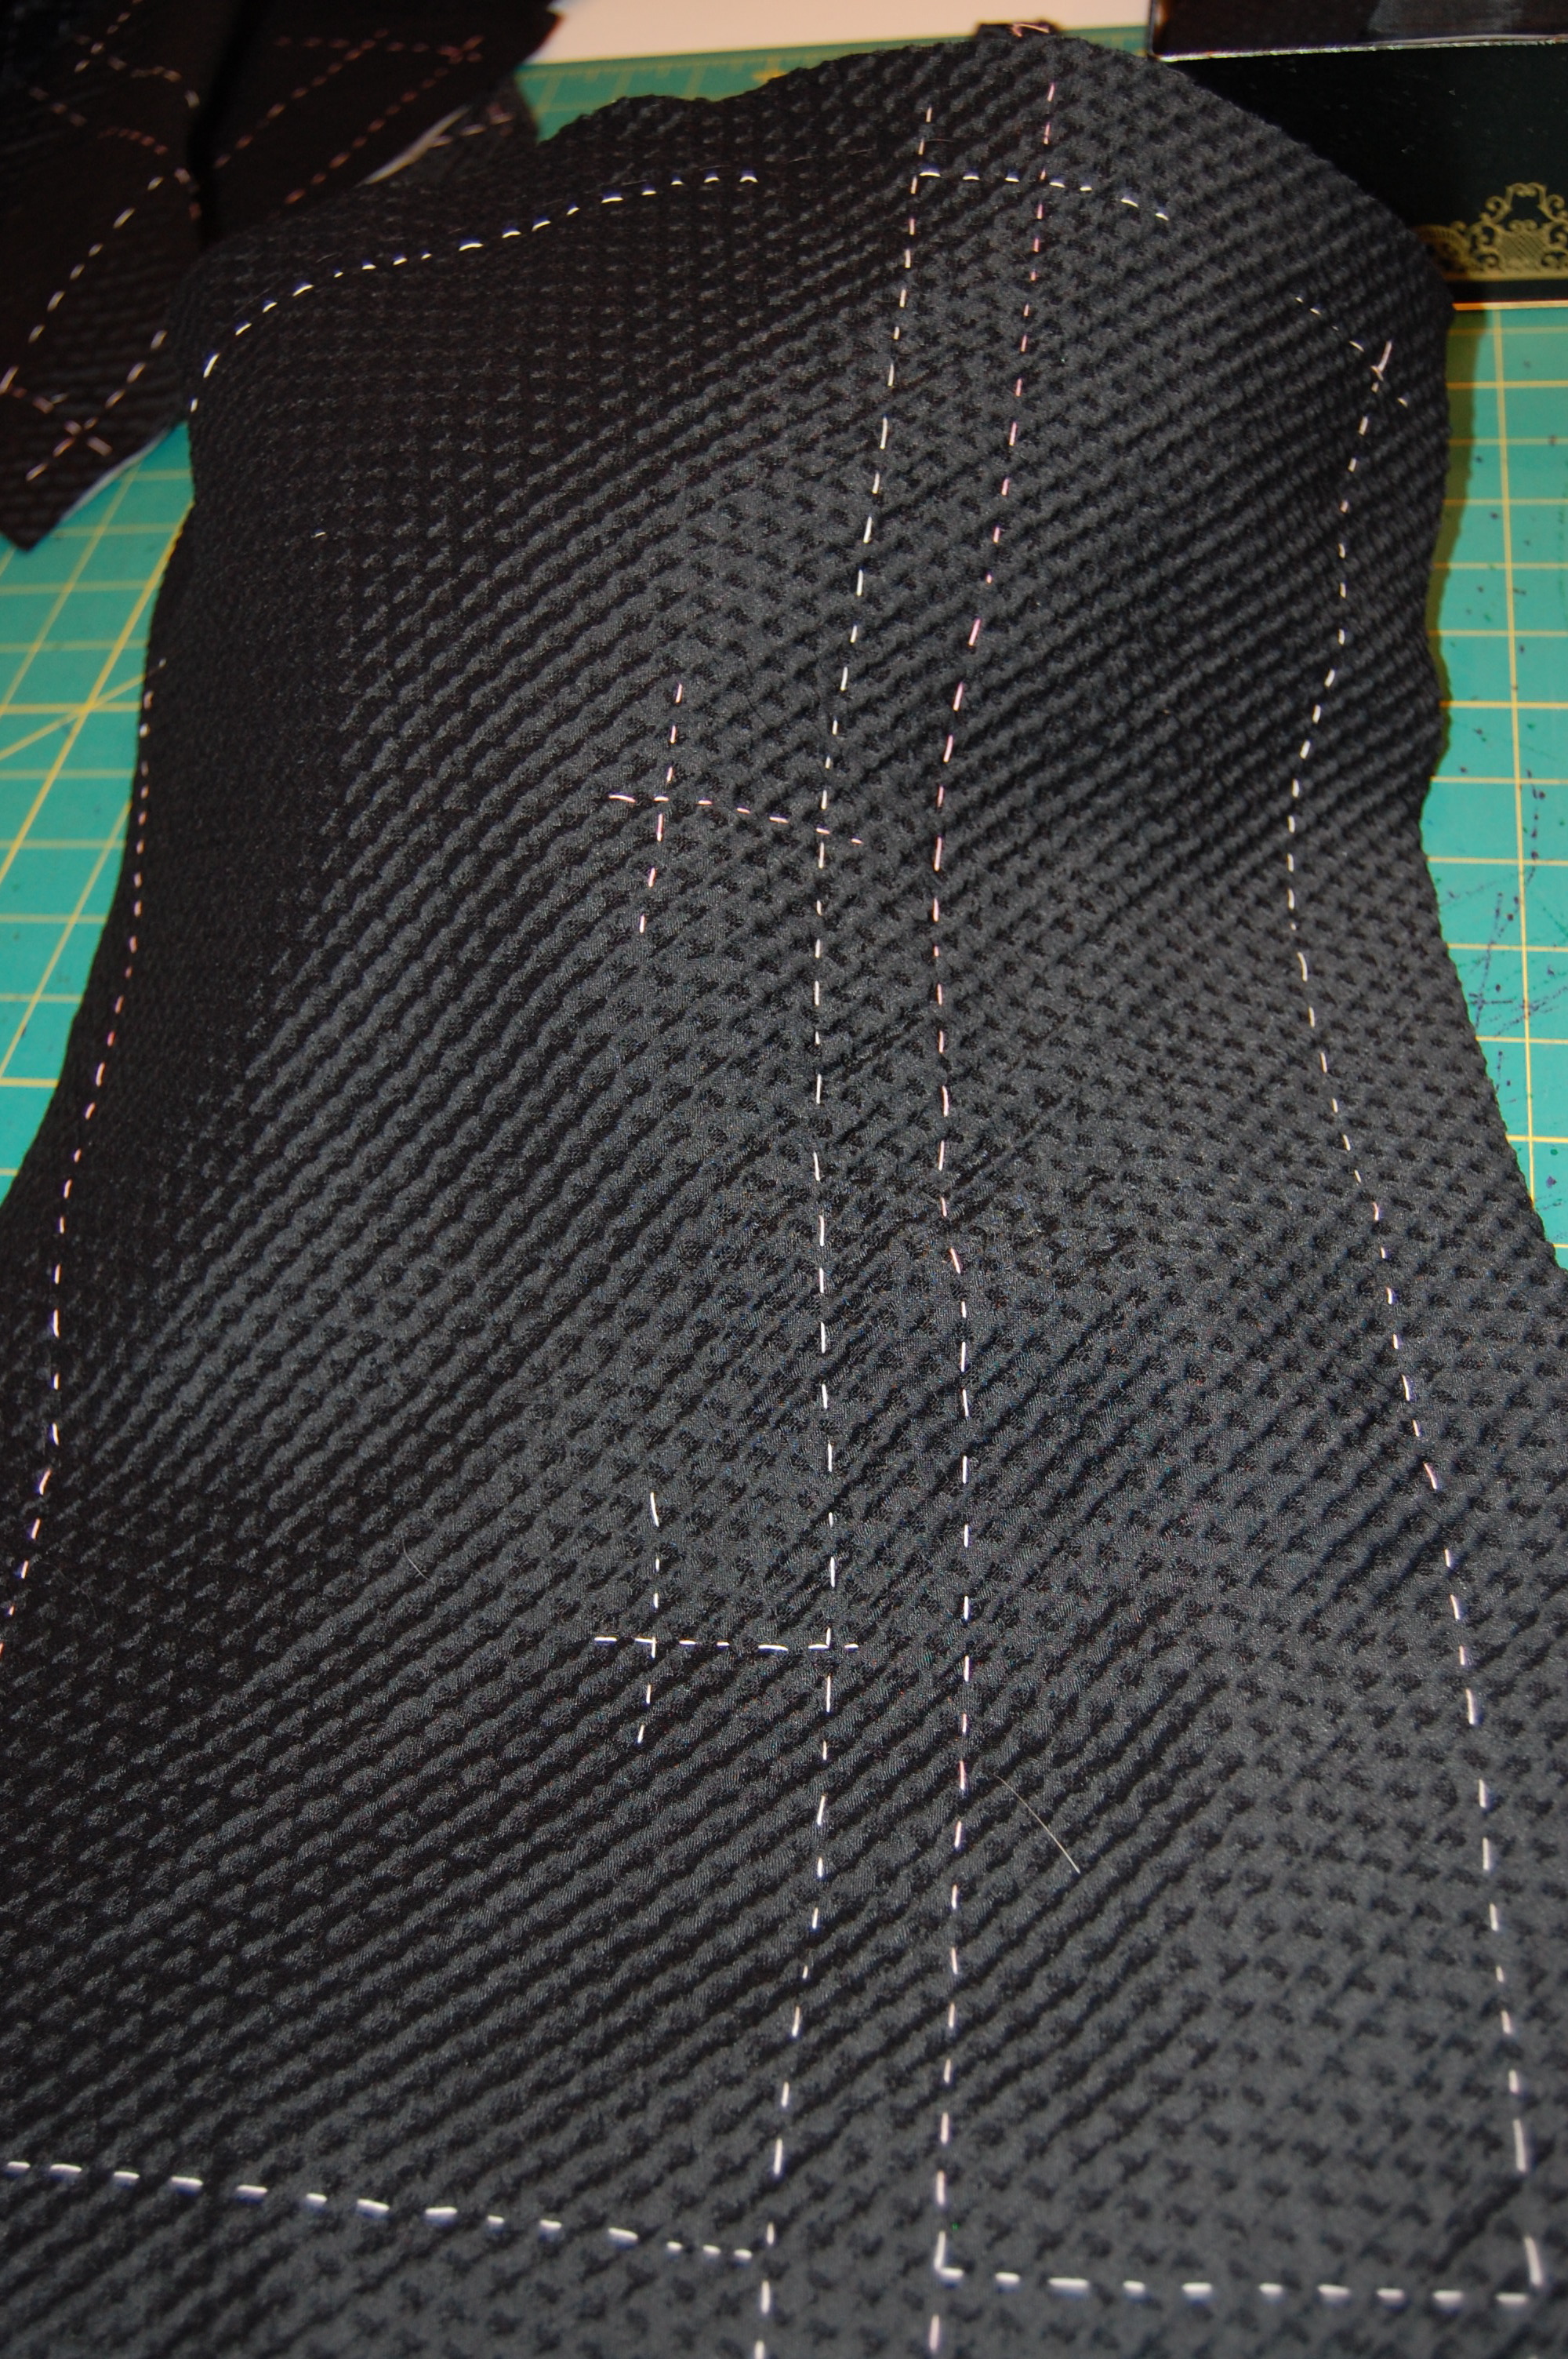
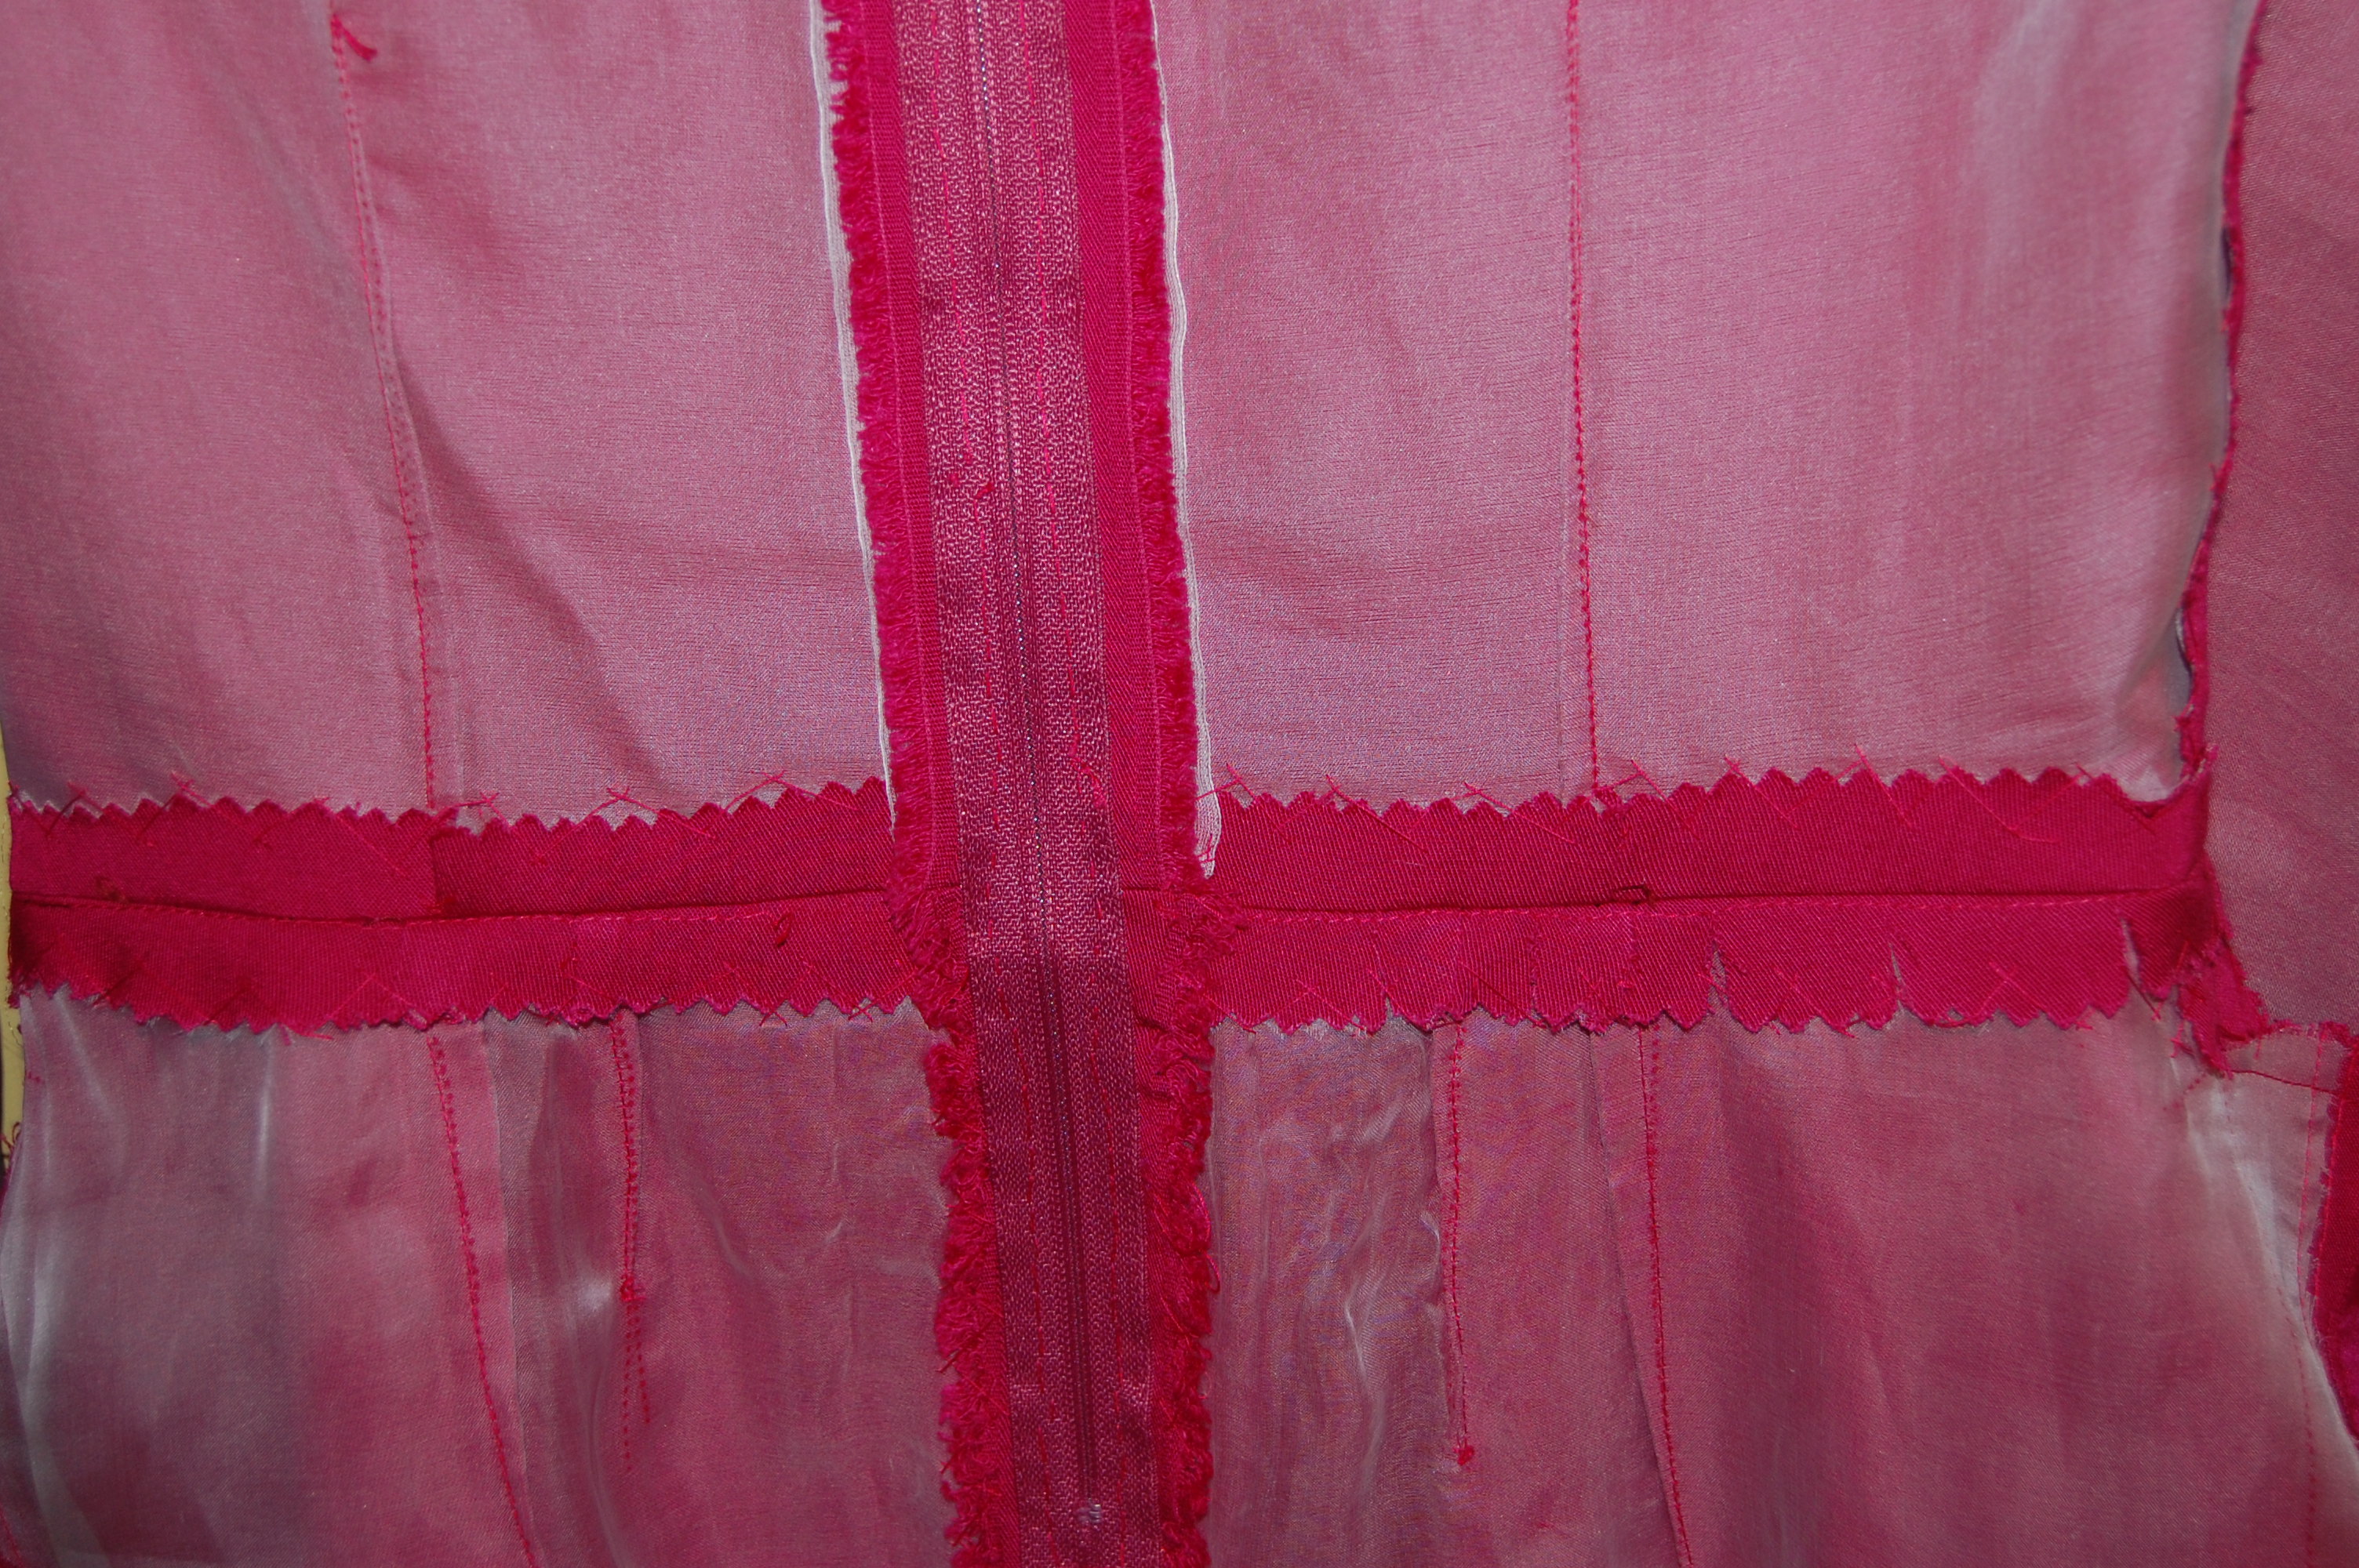
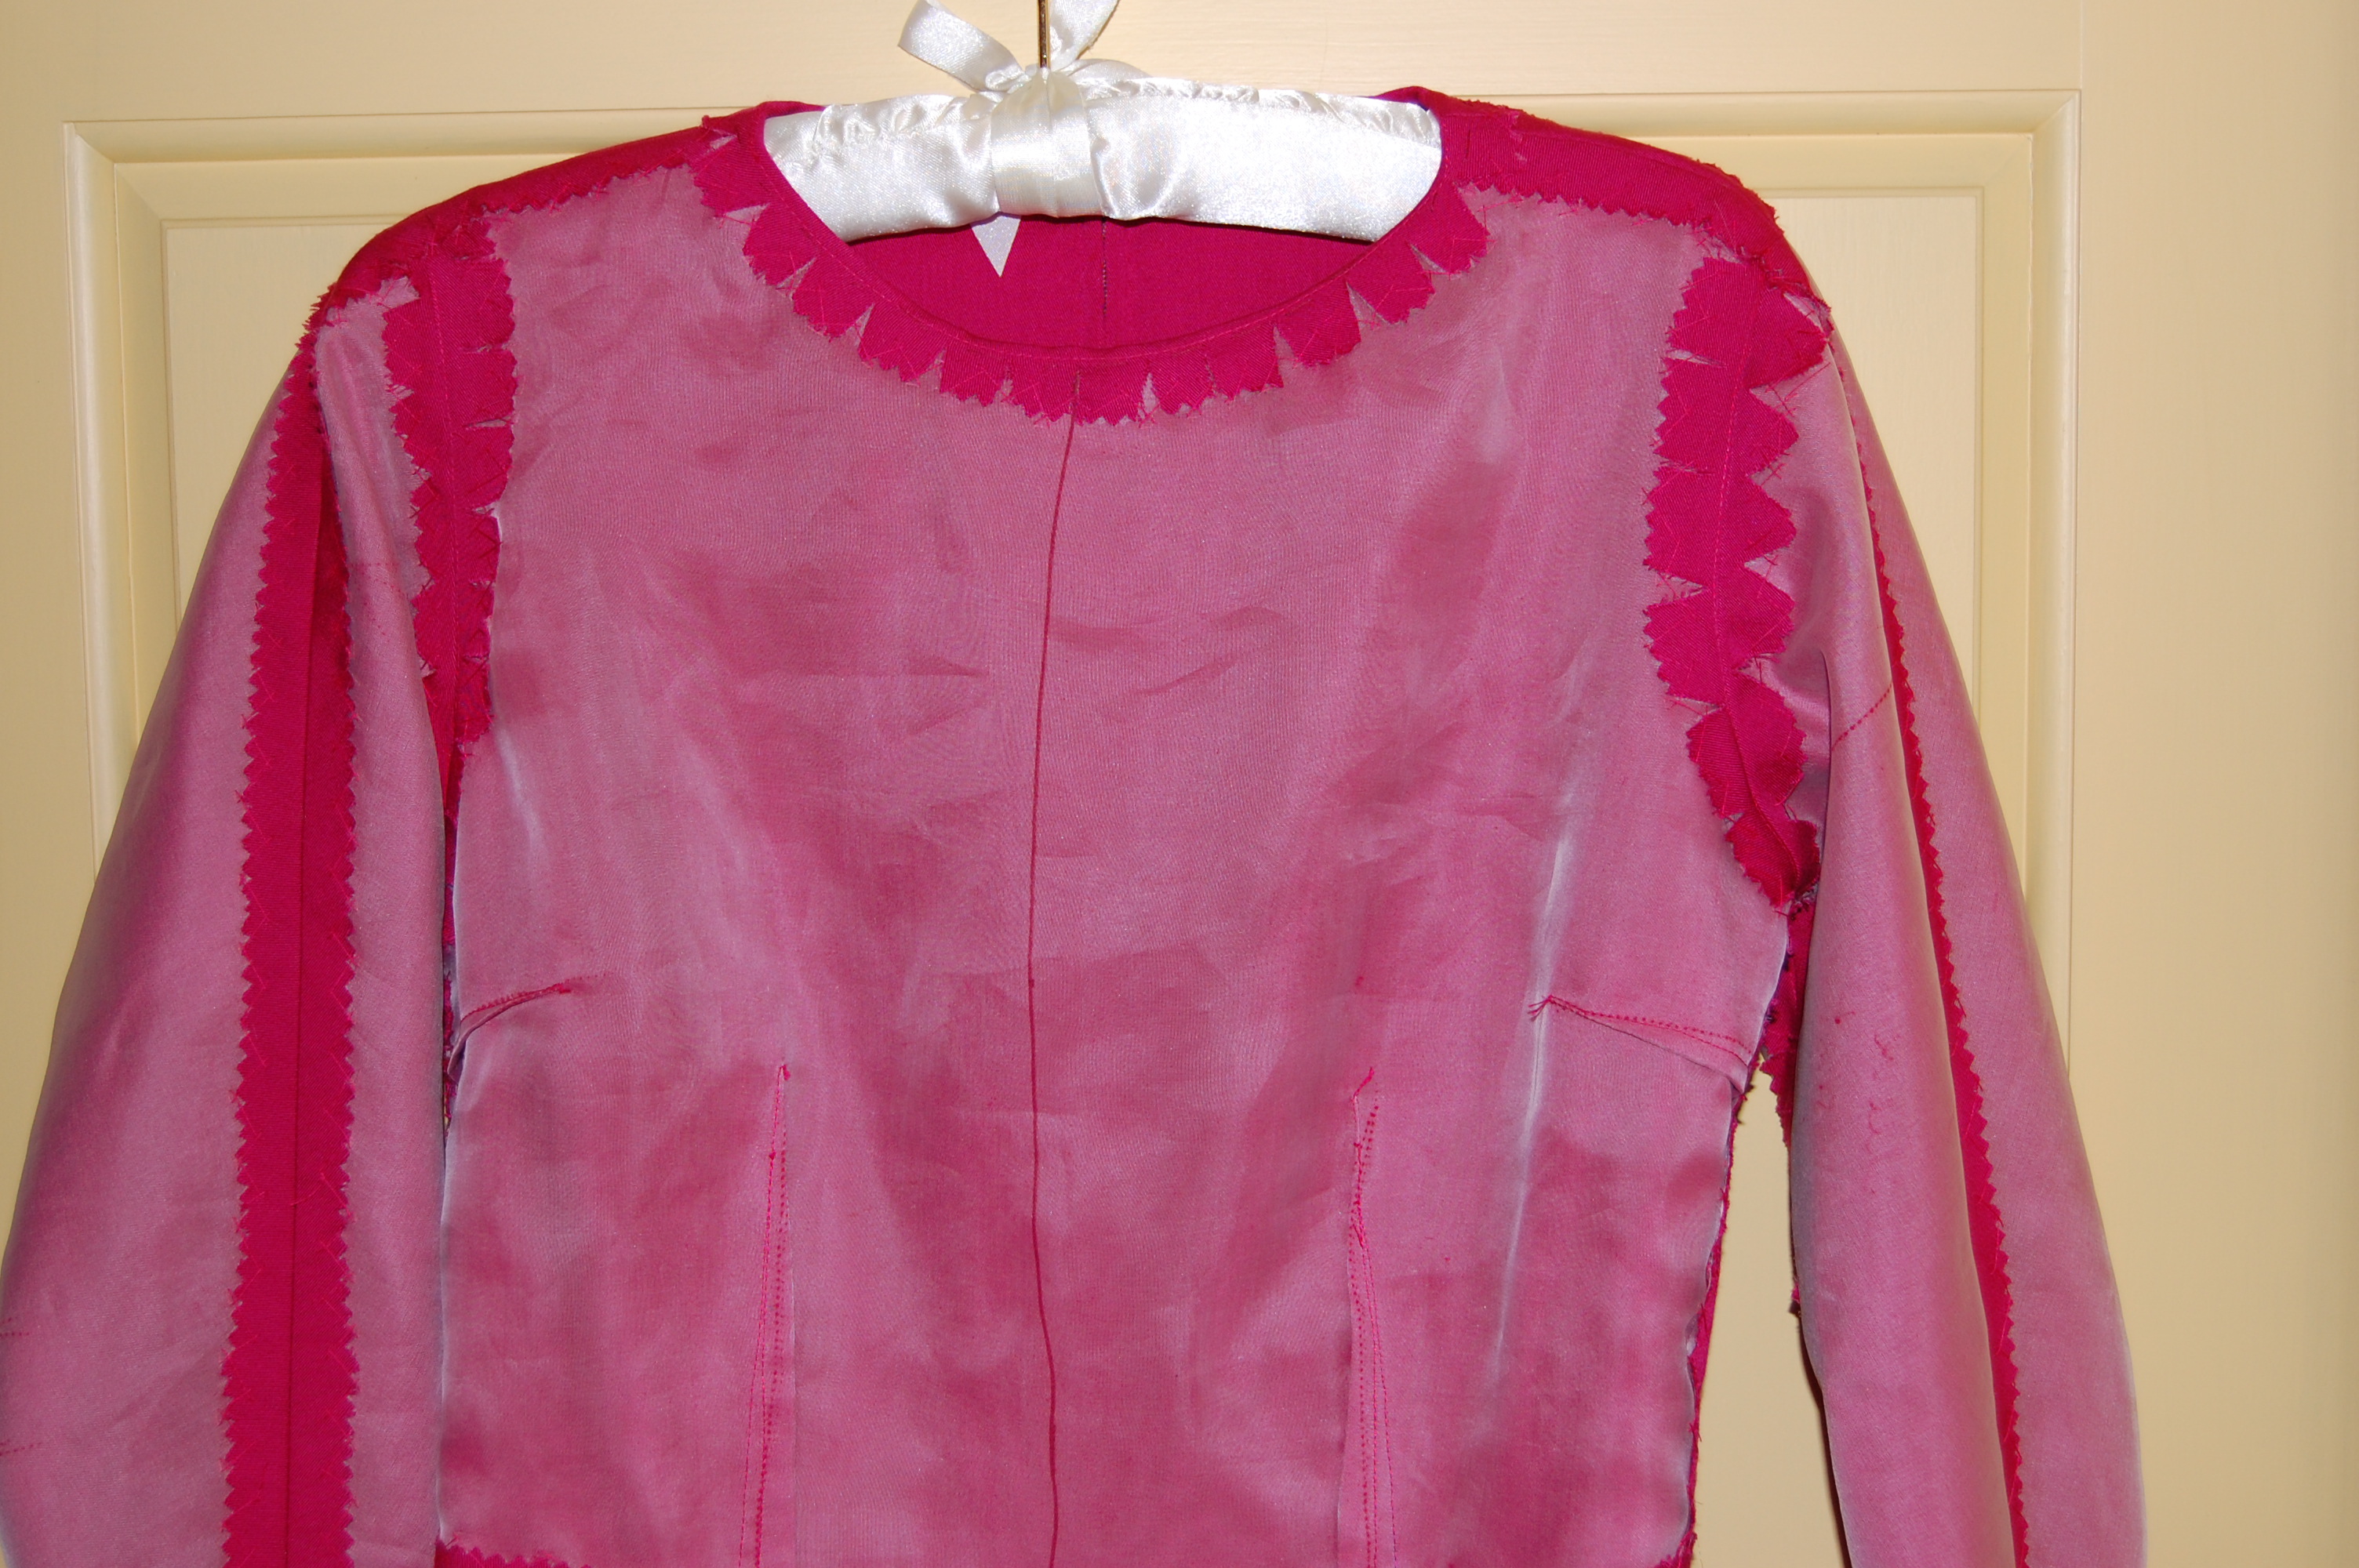
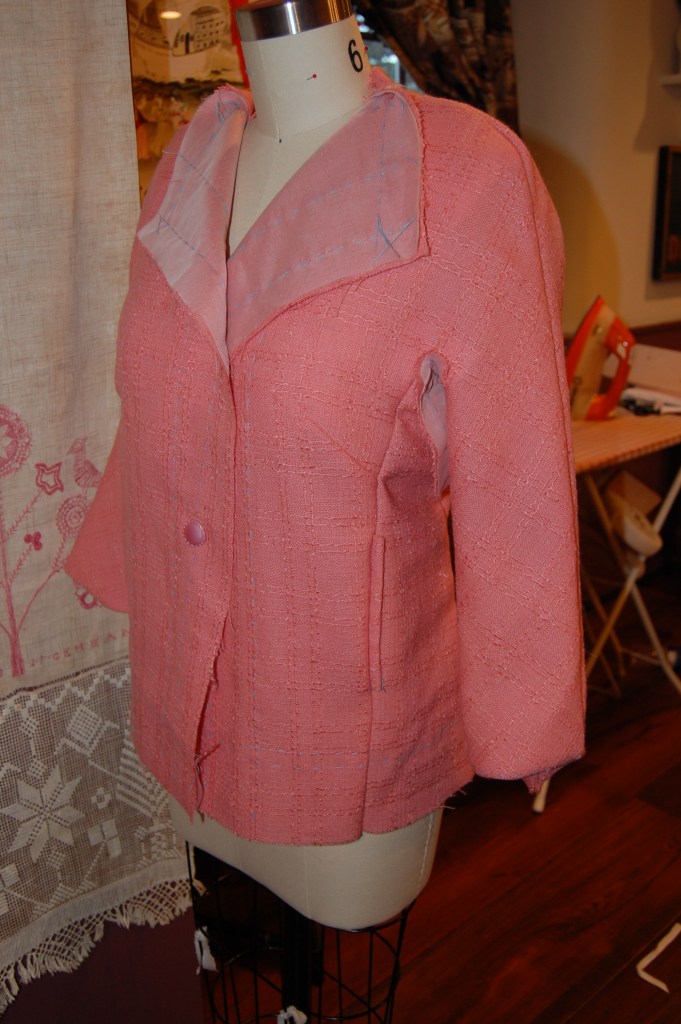
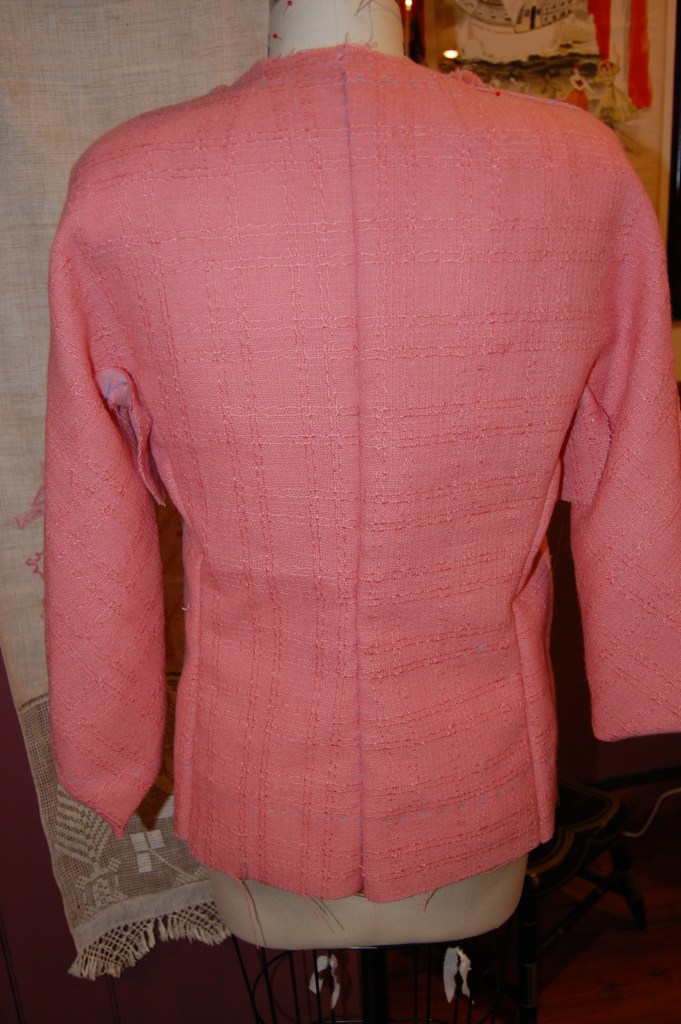
I still have a long way to go on this jacket, but here are two “work-in-progress” shots, with the seams sewn but nothing trimmed, ironed or catch-stitched yet.  It is fun to see it taking shape, however.  

I have a pink button pinned onto the front to see how it looks, but I have already decided against it.

Two more things need to take shape very soon – namely Holiday dresses for my granddaughters.  Somehow, I think they will be finished before my jacket!  

21 Comments

Filed under Buttons - choosing the right ones, Sleeves, woolens

Gazing at Gussets and Fashion Exhibits

We are almost halfway through the sewing year! Time for me to just keep plugging along, being grateful for any hours I can spend sewing – or dreaming about sewing. Lately it seems I have spent more time dreaming about it than actually accomplishing anything. But that’s not quite true. I have actually done a lot of sewing (I call it necessary sewing) – just not anything worth sharing. But that is about to change.

I am working on a yellow linen shirtdress, using this pattern:

I am making the short sleeve version - but a little shorter!

I am making the short sleeve version – but a little shorter!

I am really getting to be a fan of kimono sleeves. They were incredibly popular in the 1950s (and early ‘60s), and their construction varies according to the type of gusset used. The dress in this pattern has a gusset that forms part of the sleeve, itself.

Usually gussets are diamond shaped. However, the curved lower edge shows that this gusset incorporates part of the sleeve in it.

Usually gussets are diamond shaped. However, the curved lower edge shows that this gusset incorporates part of the sleeve in it.

The instructions for inserting the gusset are quite explicit and interesting, I think. The first step is to work a “bar” across the point on the bodice where the matching point of the gusset is placed. I have actually never seen this done, but it makes sense as it reinforces that stress point.

Gazing at Gussets 1st diagran

I also like the double stitching on the interior seams of the gusset as shown in this section:

Gazing at Gussets 2nd diagram

Here is how the finished short sleeve is diagrammed:

Gazing at Gussets 3rd diagram

And here are some photos of the finished gussets on my dress:

Gazing at Gussets

This photo clearly shows how the gusset becomes part of the underpart of the sleeve.

This photo clearly shows how the gusset becomes part of the under-section of the sleeve.

Here is an inside look. While the dress is underlined in a very light weight cotton/linen blend, I opted not to underline the gusset, in order to add to flexibility. I got this brilliant idea from Laura Mae of Lilacs and Lace sewing blog.

Here is an inside look. While the dress is underlined in a very light weight cotton/linen blend, I opted not to underline the gusset, in order to add to flexibility. I got this brilliant idea from Laura Mae of Lilacs and Lace sewing blog.

The seam you see at the top of this photo is the shoulder seam which runs down the length of the sleeve.

The seam you see at the top of this photo is the shoulder seam which runs down the length of the sleeve.

I managed to tear myself away from my sewing room for a few hours this week to go to see an exhibit at the Michener Museum in Doylestown, Pennsylvania (USA). Entitled Philadelphia In Style, the exhibit featured fashions either made, worn or purchased in Philadelphia, PA over the course of about 100 years (1880-1980).

Duskin - Exhibit title

All are part of the Robert and Penny Fox Historic Costume Collection at Drexel University in Philadelphia, a veritable treasure trove of designer, haute couture and ready-to-wear dresses, coats, ensembles, shoes, handbags, and accessories of all types. The Exhibit has special meaning for those of us with Philadelphia ties, but universal meaning for lovers of fine fashion anywhere.

Although the clothing on display was fascinating and, for the most part, lovely, it was the numerous fashion illustrations, framed and lined up one after the other, which really caught my attention. They had all been done in 1954 for a specialty ladies’ shop in Philadelphia, called Nan Duskin. The most amazing thing is that each one had a swatch of the intended fabric taped in the corner of each drawing. Here is a sampling:

Duskin sketch - purple dress

The buttons were still in question for this dress – note the line in the upper right side “buttons?”

Such a lovely coat! Note the fabric swatch, held in place with yellowing tape!

Such a lovely coat! Note the fabric swatch, held in place with yellowing tape!

So many of the illustrations were of dressmaker suits. This one is made in brown checked wool.

So many of the illustrations were of dressmaker suits. This one is made in brown checked wool.

I love the saucy pose in this sketch - and the posy perched on the shoulder!

I love the saucy pose in this sketch – and the posy perched on the shoulder!

One of my favorites: in red, of course!

One of my favorites: in red, of course!

Here are a couple of the fashions represented in the Exhibit:

This was called a Day Ensemble. It bears the table "Irene for Nan Duskin." This was Irene Lentz Gibbons, 1952-53, USA.

This was called a Day Ensemble. It bears the table “Irene for Nan Duskin.” (Irene Lentz Gibbons, 1952-53, USA)

This shirtwaist dress, Norman Norell for Trina-Norell, circa 1955, had finely done bound buttonholes. the fabric is s ilk and wool brocade.

This shirtwaist dress, Norman Norell for Trina-Norell, circa 1955, had finely done bound buttonholes. The fabric is silk and wool brocade.

The Exhibit did manage to include one of the most unattractive Chanel suits I think I have ever seen.

The Chanel suit on the left is shown with an ultra-suede shirtdress by Halston, on the right.

The Chanel suit on the left is shown with an ultra-suede shirtdress by Halston, on the right.

But it was still fascinating to look at the cuff detail:

Duskin Chanel suit detail

One of the most charming displays in the Exhibit was a collection of hat boxes from the stores in Philadelphia which were the purveyors of so many fine fashions over the decades.

Duskin - hat box display

As a lover of pretty boxes and bags, I found this vignette not only delightful, but also evocative of the thought and care inherent in buying and wearing beautiful fashions. They reminded me of the same little thrill I get when a piece of beautiful fabric which I have purchased shows up in the mail, elegantly presented in crisp tissue and tied with silky ribbons.   It makes it oh-so-easy to fall in love immediately!

23 Comments

Filed under bound buttonholes, Coco Chanel, Day dresses, Dressmaker suits, Fashion Exhibits, Gussets, kimono sleeves, Mid-Century style, Uncategorized, vintage Vogue patterns from the 1950s

An Evening Jacket for the Ages

“Very up and coming” for the Fall of 1962, according to Vogue Pattern Magazine, was “the striking medium between a straight line and a bold curve – the gentle convex ‘barrel’ shaping of this coat:”

An Evening Jacket for the Ages - picture

It is from this time period – perhaps a year or two later – that this Designer Pattern comes:

Oh the things we can learn, no 10

I don’t know many of us who want to look like they are in a barrel, so it was my intention to take the best parts of the design of the evening jacket and then adapt it to a more current look, or at least to one that did not scream 1963/64

The details I loved about it were: 1) the shaped, two-part collar, which doesn’t really look like a collar, rather as an extension of the body of the jacket, but with more definition to it:

Evening jacket for the Ages

2) the dipped back hem of the jacket:

Evening Jacket for the Ages

I purchased the yellow silk taffeta from Britex Fabrics, while the dress fabric, also silk, is from Mendel Goldberg.

Evening Jacket for the Ages

3) the below-elbow length, kimono sleeves with their clever built-in gusset, and 4) the prominent, offset buttons:

Evening Jacket for the Ages

The top buttonhole is a slot-seam one, while the other two are bound buttonholes.

Less attractive to me was the fullness of the body of the jacket.

My muslin (toile) showed me that I needed to eliminate quite a bit of that fullness from the pattern pieces. I took 2 inches right out of the back of the jacket, making for much less to be gathered into the collar:

Even with two inches removed from the center back seam, there is still enough to gather nicely into the collar.

Even with two inches removed from the center back seam, there is still enough to gather nicely into the collar.

I also took a large wedge out of the each side of the back:

The dark blue line on the left is my re-drawn seam line. the original seam line is marked in red.

The dark blue line on the left is my re-drawn seam line. The original seam line is marked in red.

Then to add a little more shaping, I re-drew the side seams in the side underarm sections:

Again, the blue line on the left is my re-drawn seam line.

Again, the blue line on the left is my re-drawn seam line.

Because the buttons are such a prominent feature of the jacket, I knew I had to find the right ones. The pattern called for them to be 1¼” in diameter. That is a big button! I also knew they had to be a bit fancy or elegant, and I envisioned mother-of-pearl as the ideal composition. It took a while, but I found these buttons on eBay, and they looked just about perfect to me: right size, beautifully carved mother-of- pearl with a swirl design which I thought would add just the right contrast to the silk taffeta of the jacket. As it turned out, they were also the right price (always a welcome surprise!), and more beautiful when they arrived than I had anticipated:

Evening Jacket for the Ages

These buttons have a substantial heft to them, making them well suited for their application on this jacket.

After getting the body of the jacket together, I tried it on to look at the length of it. Fortunately I had cut my pattern with about an extra half-inch in the length, and I used it, plus another ¼ of an inch, as it just looked better a little longer.

Another plus to lengthening the jacket is that the sleeve length lined up more attractively, something I didn't realize until I saw these photos!

Another plus to lengthening the jacket is that the sleeve length lined up more attractively, something I didn’t realize until I saw these photos.

I did my usual flat applied piping along the edge of the lining:

Here is the piping sewn in place.

Here is the piping sewn in place.

The green piping picks up the green in the dress. I opted for an off-white lining, which is a little boring but that's okay!

The green piping picks up the green in the dress. I opted for an off-white lining, which is a little boring but that’s okay.

And I added the label I had:

Evening Jacket for the Ages

Evening Jacket for the Ages

Evening Jacket for the Ages

A few wrinkles left over from the jacket’s first wearing!

Evening Jacket for the Ages

Evening Jacket for the Agea

Evening Jacket for the Ages

I have to say, I really love this evening jacket. I have decided it is going to have another life – with another dress, this one constructed with the double, slanted flounce on it (see pattern above).  It would look fairly fabulous with a black and goldenrod printed silk – or navy, white and goldenrod printed silk…   I’ll be on the search.

17 Comments

Filed under bound buttonholes, Buttons - choosing the right ones, couture construction, kimono sleeves, Mid-Century style, piping, sewing in silk, Silk taffeta, Slot-seam buttonholes, Uncategorized, vintage buttons, vintage Vogue Designer patterns, vintage Vogue patterns from the 1960s

Those Sneaky Pattern Instructions!

Is anyone else out there in Sewing Land regularly deceived by the conciseness and orderliness of pattern instructions? They look so innocent all neatly delineated on those folded sheets that fit into pattern envelopes. But lying beneath the surface are hours and hours of precise pinning, basting, stitching, and, at times, head-scratching and seam ripping!

The construction of an entire coat or jacket can fit on one side of one sheet of instructions! That which is illustrated and described on this sheet of paper, measuring approximately 19” x 15,” can take hours, days, and even weeks to plow through!

Those sneaky pattern instrucitions

As one who likes step-by-step, clearly delineated and enumerated guidelines, I relish looking at pattern instructions and innocently thinking about how straightforward and “simple” this is all going to be. And I am regularly fooled. A good example of this is my current project, a silk jacket to pair with my recently completed dress.

These small sketches included on the instruction sheets of many vintage Vogue patterns are so helpful in the visual information they provide.

These small sketches included on the instruction sheets of many vintage Vogue patterns are so helpful in the visual information they provide.

I got a good preview of the construction idiosyncrasies when I made my muslin (toile). The pattern piece for the kimono “sleeve back” struck me as unusual.

Here is that sleeve piece in the fashion fabric, with silk organza underlining basted to it.

Here is that sleeve piece in the fashion fabric, with silk organza underlining basted to it.

After reading the instructions, it still did not make sense, until I actually put the sleeve together. That little pointed end works as an underarm gusset, which is quite clever, and as it turns out, I believe it will be very flattering. Putting this part of the jacket together is delineated in steps 6 – 12:

Step 9 deals with this particular pattern piece.

Step 9 deals with this particular pattern piece.

Here is one-half of the jacket as I have it completed at this writing:

Those sneaky pattern instrucitions

It took at least 4 – 5 hours to complete just this part of the jacket, and I still have the other half to do! Granted, I regularly add effort and time onto this type of construction as I catch-stitch all the seams to the silk organza underlining. For this jacket, with all its curved seams, slashed darts, and tight corners, I am not sure it would turn out successfully without the control that catch-stitching those raw seams provides. So – it is time well spent.

But still – how can those “easy to follow guides” be so sneaky?

19 Comments

Filed under couture construction, Dressmaker coats, kimono sleeves, Mid-Century style, Silk taffeta

A Fitting Finish to Summer Sewing

Summer slipped quietly away this week with nary a peep except for the sighs coming from my sewing room. No matter how hard I tried, I could not keep up with the calendar to finish my final Summer project.  However, a few days late on “delivery” doesn’t really upset me, as I can look forward to wearing my Madame Gres-designed coat next Spring.

Vogue Gres coat and dress

DSC_0851

I am not sure I can remember a sewing project which I have enjoyed more. The coat pattern is actually quite a simple design, imaginatively shaped with unusual darts and seams. Perhaps the fact that I made it from vintage Moygashel linen helped make the sewing of it enjoyable, as the linen is so stable. Darts and seams can be crisply sewn and ironed, the grain of the fabric is so easy to see, and the fabric drapes with a fluid sturdiness, if that makes sense.

This shows the side darts which shape the coat and the dart/seam at the front of the kimono sleeve.

This shows the side darts which shape the coat and the dart/seam at the front of the kimono sleeve.

I covered the changes I made to those front darts in an earlier post; those were the only alterations I made to the final design except for lengthening the sleeves by one inch and the length of the coat by 1½ inches. Besides those shaping darts, there is one other feature of this coat which defines it. Do you know what it is?   Yes, it is the bound buttonholes and their buttons. Seven of them, to be precise.

The pattern instruction sheets call for bound buttonholes, as shown here:

I love how these vintage Vogue patterns give such precise instructions; there are various ways to make bound buttonholes, but the method described here is my favorite.

I love how these vintage Vogue patterns give such precise instructions; there are various ways to make bound buttonholes, but the method described here is my favorite.

I have made a lot of bound buttonholes in my sewing life, but seven of them lined up as the focal point of the front of my coat is still a little intimidating. First of all, I had to find buttons that were “perfect.” I found some lavender buttons on the Britex website, and although they looked like a good match in color and appearance, ordering something like that online is always imprecise. However, when they arrived, they were, indeed, “perfect!” With buttons in hand, I made a sample buttonhole, as I always do.

DSC_0819

I think this photo shows the "monkey's knot" design in the buttons, which compliments the linen weave, I think.

This photo shows the “monkey’s knot” design in the buttons, which compliments the linen weave, I think.

Then it was on to a marathon buttonhole session one afternoon.

The most important ingredient in making successful bound buttonholes is precise marking.

The most important ingredient in making successful bound buttonholes is precise marking.

I finished the underside (on the facing) of the buttonholes using organza patches, which makes a beautiful, sturdy finish.

I finished the underside (on the facing) of the buttonholes using organza patches, which makes a beautiful, sturdy finish.

Here is the underside of the buttonholes before I finished the edges.

Here is the underside of the buttonholes before I finished the edges.

And here is the facing side, finished.

And here is the facing side, finished.

Another charm of this pattern is the coat collar, which is seamed in the center back on the bias, causing it to “turn” beautifully. I under-stitched the undercollar to help keep the perimeter seam properly in line (this is a trick I learned from one of Susan Khalje’s classes):

This is the undercover, showing center back seam and the under-stitching I used to secure the perimeter seam.

This is the undercollar, showing center back seam and the under-stitching I used to secure the perimeter seam.

When it came to the lining, I knew I wanted to use silk crepe de chine. I ordered some swatches from Emma One Sock fabrics:

A Fitting finish swatches

Fortunately my sister was visiting and so I could get her opinion on which one to order. I was a bit smitten with the idea of a bright pink lining, but she wisely asked if I hoped to wear this Spring coat with dresses other than the pink flowered one which had inspired it. Well, yes, I do want that flexibility! That made the decision easy – I chose the pale lavender silk, which is just about a perfect match. I added a bias, flat piped edge to the lining, which is now something I always do with coats and jackets I make. It is so easy and adds so much!

Fitting finish

Some of you may recall that I had to piece one of the facings because I was just a little short of the fabric I needed. Here is the seam on the left facing. I really don't think anyone will ever see it! (Except all of you, of course!)

Some of you may recall that I had to piece one of the facings because I was just a little short of  fabric. Here is the seam on the left facing. I really don’t think anyone will ever see it (except all of you, of course!)

DSC_0844

This is a good look at the bound buttonholes and what they add to the overall look of the coat. If you visualize machine made buttonholes in their place, you will get an idea of how vital the bound ones are to the design of the coat.

Another thing that will add to the total look of my 2016 Spring ensemble is this Kate Spade handbag which my grown children gave to me:

Fitting finish

DSC_0855

Fitting Finish

Fitting finish

Fitting finish

DSC_0837

Now all I need are lavender pumps…

43 Comments

Filed under bound buttonholes, Buttons - choosing the right ones, Coats, couture construction, kimono sleeves, Linen, Love of sewing, Moygashel linen, Uncategorized, Vintage fabric, vintage Vogue Designer patterns, vintage Vogue patterns from the 1960s

The Domino Effect

Being totally smitten with this bold floral linen, purchased within the past year, I have had my heart set on making it into a day dress this Summer.

Big, bright daisies with lavender centers.

Big, bright daisies with lavender centers.

Not long after I purchased it, this small article on “Signs of Spring 2015 On New York Runways” appeared in the September 10, 2014 Wall Street Journal.

"Memorable moments included bold floral daytime dresses from Carolina Herrara..."

“Memorable moments included bold floral daytime dresses from Carolina Herrera…”

And then in November of 2014, more of Carolina Herrera’s Spring/Resort collection for 2015 was featured in Town & Country magazine.

Perennial daises on two lovely Carolina Herrera dresses.

Perennial daises on two lovely Carolina Herrera dresses.

It seems this vintage Moygashel linen from the late 1960s, with its bold daisy design is very much in vogue currently, both for its size and its floral motif. (The bodice of my recent fancy dress also featured a “daisy” motif in the silk embroidered organza):

The Allure of silk, pt 1

Although I am of the mind that daisies are always in vogue, nevertheless, this seems like the perfect year to fashion a dress from this linen. Such a demonstrative print begs for a simply-styled dress, such as – you guessed it – a sheath dress.   The fabric will make this dress, not the pattern. How could I, I wondered, do something a little different and still keep it simple? The answer to that question began to take shape when I found a length of pale lavender Moygashel linen this past Spring. Suddenly I envisioned a V-back to a sheath dress with a rounded neck, detailed with piping made from this lavender linen.

Then it began to get complicated. With just a few inches over 3 yards of the 35” wide lavender fabric, I knew I would have to calculate carefully when I cut bias strips for the piping, if I wanted to fashion another garment out of the lavender. And of course, I do! Actually, when I looked at the lavender fabric, and paired it with any number of my other fabrics and/or dresses, it seemed the only thing to use it for was a “Spring” coat. But would I have enough fabric for both a coat and bias strips for piping?

Obviously, I would have to find a coat pattern and lay it out leaving enough space for bias strips, to see if I could manage this minor miracle. Of all my coat patterns, this Madame Gres design is the one I decided had the best chance of working, both for my limited yardage and for the pattern’s simple, uncluttered lines:

The short version of the coat is on the left.

The short version of the coat is on the left.

The fact that it is featured with below elbow length sleeves and in a shorter version – perfect for pairing with coordinating dresses – worked in my favor. The entire coat has only 5 pattern pieces: front, back, collar, undercollar, and front facing. First I positioned the tissue pattern pieces on my fabric, strewn out on the floor selvedge to selvedge. I was heartened enough by this exercise to go ahead and make a muslin, so I could have a “real” pattern to work from. All this time, the pink flowered daisy linen lay folded, awaiting her turn.

One of the most unusual features of the coat design is the front dart, which serves both as a bust dart and as a side-shaping dart. As is so often the case with these vintage patterns, the dart sewn as indicated on the pattern was too high for me. In addition, it pulled and stretched the kimono shoulder in all the wrong ways. I lowered the apex of the dart and re-sewed it, trying to preserve its curve, and suddenly it fit like a charm.

The newly drawn dart is in orange, while its original position is in red.

The newly drawn dart is in orange, while its original position is in red.

Now that I had a workable pattern, I knew I could just eke out the coat if I “pieced” the left front facing. I could live with that! And, just as important, I would have enough of the fabric to cut bias strips for piping for my daisy sheath. Whew!

This see-through ruler helped me find a corner from which to cut the bias strips for the piping.

This see-through ruler helped me find a corner from which to cut the bias strips for the piping.

So now, the pieces for the coat, with their silk organza underlinings pinned in place, are taking their turn waiting for further attention. One project started another and now both are lined up like a circle of dominoes, ready to go down in an orderly fashion, albeit in slo-o-o-w motion.

13 Comments

Filed under kimono sleeves, Linen, Moygashel linen, piping, Uncategorized, Vintage fabric, vintage Vogue Designer patterns

A Fascinating Foundation

Vogue patterns from the 1950s, ‘60s, and ‘70s never cease to amaze me. The intricacies of construction, the detailed instructions, and the artistic styling of so many of the patterns from those three decades make sewing from them such a pleasure. Each one is like a mini sewing lesson, neatly packaged with beautiful photos and/or sketches and precise line drawings.

Such has been the Emilio Pucci Designer pattern on which I am currently working.

Happy New Sewing Year - Pucci pattern

The unusual construction of the jacket caught my attention as I was trying to lay out its lining pattern pieces along with pattern pieces for the dress.  As I mentioned before, the front of the jacket is cut on the bias. However the interfacing and the lining pieces for the front are cut on the straight of grain. How, I wondered, is that going to work? The answer to that question is one of the most fascinating construction methods I have ever come across.

The interfacing and the lining both have deep darts to form the bust line. Of course, the jacket front, cut on the bias, is going to have built-in give for the bust. But in addition to that, there was a “cup-like” pattern piece for adding to the front interfacing, clearly with the goal of enhancing the bust line, and defining it.

The "cup-like" pattern piece is in the lower right.  Notice the large dart in the piece next to it.

The “cup-like” pattern piece is in the lower right. Notice the large dart in the piece next to it.

Here is the instruction page for assembling these interfacings. In effect, it is a process for making an interior bra.

Click on the diagram to read it more easily.

Here are my front interfacing pieces with the darts sewn.

Here are my front interfacing pieces with the darts sewn.

Here I am reinforcing the darts in the bust (cup) interfacings.

Here I am reinforcing the darts in the bust (cup) interfacings.

Here they are ready to be added to the base interfacing pieces.

Here they are ready to be added to the base interfacing pieces.

And here are the front interfacings assembled and ready to be attached.  Looks kind of risque, don't you think?

And here are the front interfacings assembled and ready to be attached. Looks kind of risque, don’t you think?

Note also the detailed instructions for making the bound buttonholes on the above instruction sheet. I did a practice run on a bound buttonhole, being careful to layer the fabrics exactly as they would be layered on the front of the jacket.

My sample buttonhole.

My sample buttonhole.

The right jacket front, marked for buttonhole placement.

The right jacket front, marked for buttonhole placement.

Another detailed instruction was given for the sharp angle under the sleeve. The instructions called for a 2” x 2” square of fabric to reinforce that corner. I used black organza.

The organza patch is sewn on the right side of the jacket and pressed to the inside.

The organza patch is sewn on the right side of the jacket and pressed to the inside.

The organza patch makes a very secure and precisely sewn  corner possible.

The organza patch makes a very secure and precisely sewn corner possible.

And here are just a couple of photos of the interior of the jacket with the rest of the interfacings attached.

The right front of the jacket, with buttonholes sewn.

The right front of the jacket, with buttonholes sewn.

Thje front of the jacket.  Note the "stays" made our of seam binding.  They are loose except where they are attached at the underarm and at the collar.

Thje front of the jacket. Note the “stays” made out of seam binding. They are loose except where they are attached at the underarm and at the neckline.

The back of the jacket - simple compared to the front!

The back of the jacket – simple compared to the front!

There is something else that never ceases to amaze me either about these sophisticated vintage Vogue patterns.   That is – how stylish and current so many of them are.   Here’s an example of what I mean. Take a look at these recent jackets from current designers.

I clipped this out of The Wall Street Journal sometime within the past year, but I unfortunately forgot to note the date.  Click on the photo for a close-up.

I clipped this out of The Wall Street Journal sometime within the past year, but I unfortunately forgot to note the date. Click on the photo for a close-up.

The article rightly makes the reference to Balenciaga, but look how similar these are to the Pucci jacket on which I am working.

A Fascinating foundation -picture of Pucci jacket

These thumbnail sketches  also help to show the similarity to the current jackets.

These thumbnail sketches also help to show the similarity to the current jackets.

Well! I am looking forward to sharing some more details about this outfit when I can show it completely finished – in my next post – and answering those nagging questions, “Did piecing the lower sleeves on the jacket lining actually work? Will anyone guess my secret?”


21 Comments

Filed under bound buttonholes, couture construction, kimono sleeves, Uncategorized, underlinings, vintage Vogue Designer patterns, vintage Vogue patterns from the 1960s, Vogue patterns

Searching for Rumplestiltskin

Rarely do I not have enough fabric for a sewing project. I am one of those people who usually errs on the side of excess when I am buying fabric. Sometimes, however, I buy a piece for which I have no immediate plans, and therefore, no real idea what I will end up making. This, of course, was the case when I bought my Pucci silk. Little did I know I would be making a dress, and hoping to line its accompanying jacket in the same matching silk.

Pucci

I dutifully measured and calculated and figured there was a good chance I could eke it out. I had two things going for me: the silk was 60” wide, and I knew I would be taking about three inches off the length of the dress pattern (and still have a nice 3” hem). But I also had two things going against me: I would need to do some matching of the design on the dress, which could prove interesting with a print that seemed to change both its color and motif on a whim. More concerning was the fact that the jacket has kimono sleeves. Kimono sleeves usually require more fabric than set-in sleeves.

I wasn’t about to panic – yet. First I had to make muslins (toiles) of both the dress and the jacket. Both needed some fitting adjustments (mostly minor), which I will not go into now. One of the most helpful parts of making a muslin, at least for me, is the opportunity it gives me to get acquainted with the construction of whatever it is I am making.   In this case, the dress was very straightforward, but the jacket really intrigued me. No wonder, I thought, that the flap on the pattern envelope states “Emilio Pucci’s designs are distinguished by marvelous cut and construction.”

The vintage Vogue Designer patterns include a short statement about each featured designer on the pattern envelope flap.

The vintage Vogue Designer patterns include a short statement about each featured designer on the pattern envelope flaps.

Take a look at the pattern pieces for the jacket. The jacket front (#8) is cut on the diagonal while the accompanying lining front (#16) is cut on the straight of goods, with a deep dart to accommodate the fullness for the bust..

Click on the image for a clearer view of the pattern pieces.

Click on the image for a clearer view of the pattern pieces. Also, note the grain lines.

Now take a look at the jacket side (#13). It is both the jacket side and the under sleeve at the other end. Sewing the muslin together showed me how ingenious this construction is – and I’ll show more about this in another post.

But – back to that silk. Using my adjusted muslin as my pattern, I cut out the silk organza underling for the dress. So now I had all the dress pieces ready to place on the silk, spread out single layer on the dining room table. Then using the tissue pattern pieces for the jacket lining, I was able to eyeball my chances of having enough fabric. There was a thudding moment of truth when I knew in no uncertain terms that there was no way I was going to have enough fabric without making some change in plans.

Where was Rumplestiltskin and his magical spinning powers when I needed him? Alas, I knew I would have to make my own magic to solve this problem! And I could see only one way to make this work. I would have to piece the sleeves so that the lower half of them – the part you can’t really see – were in another fabric, the logical choice being, of course, the black crepe de chine that I would be using to line the dress.

I set about making new pattern pieces for the lining, separating each sleeve section at the “lengthen or shorten here” line and adding seam allowance for sewing the new “bottoms” on each of the three sections. Here are the new patterns for the lining, minus the sleeve ends:

DSC_1197 And here are the sleeve ends. Since I would be able to use the crepe de chine doubled for these pieces (no matching required!), I only needed to make one pattern for each lower sleeve, thus three pattern pieces instead of six:

Searching for Rumplestiltskin When I took my new “chopped off sleeve-ends” pattern back to my silk, I was able to fit everything on, including matching the dress yokes to the body of the dress. I checked and rechecked all the pieces. Then I took a leap of faith and cut it out. Although I am currently working on the dress, I wanted to see how the “new” sleeves, with their pieced ends, would look. So, here is one lining back section assembled, with its lower sleeve end added to it.

DSC_1199

Am I positive this will work and not look glaringly – like I didn’t have enough fabric? Not really.  I’ll know soon enough, however. In the meantime, I am enjoying every minute I spend with this Pucci silk.  Eat your heart out, Rumplestiltskin!


14 Comments

Filed under couture construction, kimono sleeves, sewing in silk, Uncategorized, underlinings, vintage Vogue Designer patterns, vintage Vogue patterns from the 1960s, Vogue patterns

Suited for Spring

Last Fall when I found emerald green matka silk on Waechter’s website, I quickly purchased 3½ yards.  At 45” wide, I knew that amount would be enough for a Spring suit although I really did not know which pattern I would be using.  It seems I often  purchase fabric and then end up not actually using it for a year – or more.  But with emerald green so front and center in fashion this year, I definitely decided to make this project a top priority.

This is the silk I ordered from Waechter's Fine Fabrics

This is the silk I ordered from Waechter’s Fine Fabrics.

I envisioned what is known as a “dressmaker suit.”  Fairchild’s Dictionary of Fashion (3rd edition, Fairchild Publications, Inc, New York, New York, 2003) gives this definition:  “Woman’s suit made with soft lines and fine details, as contrasted with man-tailored styles that have the sharply defined lines of a man’s suit made by a tailor.  Fashionable in 1950s and revived in the mid-1980s.”  Specifically, I envisioned a straight skirt (aka pencil skirt in today’s fashion parlance), a short-ish, dressy jacket with some neat detail on it, and adorned with buttons to compliment the sheen and slubby texture of the silk.

First step was to go to my pattern box, brimming over with vintage patterns (and a few new ones).  I quickly had my selection narrowed down to two possibilities, but one was actually a sheath dress with coordinating jacket, not a jacket and skirt. (Yes, there is a definition for this category as well, according to Fairchild’s:  “Suit dress:  Used in 1960s to refer to a jacket and dress ensemble that resembled a tailored suit.”)

Is it the hat that makes this ensemble so appealing - or just good styling?

Is it the hat that makes this ensemble so appealing – or just good styling?

I hashed over the two reservations I had about using this pattern:  1) I was a little short on yardage – about a quarter of a yard – and just not completely confident that I would be able to cut this pattern out with the generous seams that I have come to like so much, and 2) I have a RTW (gasp!) silk shell top which will look stunning, I think, paired with an emerald green silk skirt and matching jacket.  So in the end, I decided to go with a dressmaker suit to be made from this pattern:

I'll be making View B, which just happens to be shown in emerald green!

I’ll be making View B, which just happens to be shown in emerald green!

And then, the bonus!  Actually three of them . . .  I had forgotten that tucked inside the pattern envelope were two clippings obviously placed there by the original owner of the pattern.  She was doing some “comparison shopping” for styling.

The first clipping is for another pattern – a Spadea, available through mail order from the newspaper.  Fortunately, the date of 1964 shows up on one corner.

Dressmaker suit - 3

The second clipping is from Vogue magazine, showing a fashion from 1968.

The jacket of this suit, just like the Spadea pattern, is very similar to the Vogue pattern.

The jacket of this suit, just like the Spadea pattern, is very similar to the Vogue pattern.

Perhaps the original owner was trying to decide between a striped fabric and a plain one?  Maybe she was really undecided about making this style suit?  I’d love for her to sit down with me over a cup of coffee so we could discuss this pattern!  As it turns out, she never made the jacket, as its pieces were still in factory folds when I obtained it.  The skirt pattern shows signs of having been used, however.  I’ll never know why,  after all her thought about this suit, she never made it.  However, her decision afforded me the third bonus – the original pattern label – pristine after so many years.

I am looking forward to sewing this label into my green silk suit.

I am looking forward to sewing this label into my green silk suit.

I’ve made my initial adjustments to the pattern and am now making the muslin.  Like my “pattern predecessor” I am dreaming of a certain look.  Now it’s up to me to finish what she started.

11 Comments

Filed under Dressmaker suits, kimono sleeves, Messages from past owners of vintage patterns, sewing in silk, Uncategorized, vintage Vogue patterns from the 1960s, Vogue patterns

“The Sweetest of All the Colors…”

“… Every woman should have something pink in her wardrobe.”   Christian Dior certainly had distinct thoughts about fashion, and with this statement I concur.  Everyone looks good in pink, especially pale pink (men definitely included), and I suspect pale pink was what Monsieur Dior was thinking when he wrote this in his Little Dictionary of Fashion (First published by Cassell & Co., Ltd., 1954; 2007 edition by Abrams; Copyright Catherine Dior and Jean-Pierre Teto, 2007).   Interestingly, the lining pages of his little book are pale pink, but the divider pages feature a deep, deep raspberry pink as in – – – my newly finished “ladylike” dress!

Here is the "section"page for E from Dior's Fashion Dictionary

Here is the “section”page for E from Dior’s Fashion Dictionary

Dated 1958, this is the pattern I used for my pink dress.

Dated 1958, this is the pattern I used for my pink dress.

The finished dress!

The finished dress!

As I mentioned in my last post, I made this dress using couture construction, which means a lot of hand-sewing.  The more I use this type of construction, the more I like it, but it doesn’t get any faster.

An interior view of some "couture" construction - silk organza underlining, catch-stitched seams, hand-picked zipper.

An interior view of some “couture” construction – silk organza underlining, catch-stitched seams, hand-picked zipper.

However, couture construction gives me a lot of flexibility in changing necklines, which I really appreciate.  That is one of the changes I made to this pattern – widening the neckline to a more flattering appearance for me.

The widened neckline.

The widened neckline.

I also changed the back of the skirt by removing the box pleats and substituting a darted back.

I substituted darted back panels for the "original" box pleats

I substituted darted back panels for the “original” box pleats

The original dress had pockets hidden in side box pleats, but when I narrowed the width of the skirt, I did away with those side pleats.  I still wanted pockets, so I added pocket extensions in order to still hide them in the side seams.  It worked!

A peek at the pocket inside which shows the raspberry silk lining I used for the dress.  I understitiched the pocket edges by hand, which took no time at all and looks so much nicer than machine stitching!

A peek at the pocket inside which also shows the raspberry silk lining I used for the dress. I understitiched the pocket edges by hand, which took no time at all and looks so much nicer than machine stitching!

I added a quarter-inch to the underneath seam on each sleeve, so that each sleeve would have one-half inch extra width to it.  Those ladies in the 1950s must have had skinny arms, as I find sleeve widths on these vintage patterns are often just not quite spacious enough.

I added to the underarm seam - an adjustment which I determined from  my muslin.

I added to the underarm seam – an adjustment which I determined from my muslin.

This was the first time I had made sleeves which are half set-in and half kimono.  This is a look and fit which I love!  In fact, the shoulder fits so well, that my original thought to add an interior sleeve heading was one I decided I did not need.

The one thing I’m not sure I like is the “purchased or novelty belt” as indicated on the pattern.  I think a self-belt, a little wider than the one I show, would be more attractive.  Please comment if you have an opinion.  (I have plenty of fabric left over to make one…)

I am thinking a 2" wide self belt might be more attractive???

I am thinking a 2″ wide self belt might be more attractive???

Before I move on to my next project (to be announced soon), I want to thank Dresses and me for nominating me for the Very Inspiring Blogger award.

Very Inspiring Blogger Award

So, in accordance with the “rules” –  I am supposed to share a few facts about myself and nominate some others for the same award, so here goes:

1 – I am told I have a slight Southern accent, surely a remnant of being born and raised in North Carolina.

2 – I do most of my machine sewing on a 1940s’ Singer Featherweight and on my mother’s 1956 “306K” portable Singer.

3 – Autumn is my favorite season.

4 – I can make a very good Pumpkin pie.

5 – I enjoy reading historical fiction.

6 – I can’t sing (as in carry a tune) except for a few simple lullabies and Christmas carols.

Now – to pass on this award:  So many fellow bloggers inspire me every day that it is difficult to single out just a few (especially as many have already received this award!), but here are some worthy recipients:

For always giving me a laugh:  A Dress A Day and The Blue Gardenia.

For always teaching me something I would not have known otherwise:  The Vintage Traveler, Pattern Vault, Two Nerdy History Girls, and the FIDM Museum blog.

For sharing their sewing knowledge, design sense, and beautiful workmanship:  Custom Style, Lilacs and Lace, So Sew Lovely, and Frabjous Couture.

So now – you are IN THE KNOW and  – I am IN THE PINK!

21 Comments

Filed under couture construction, hand-sewn zippers, kimono sleeves, Uncategorized, underlinings, vintage Vogue patterns from the 1950s, woolens