Category Archives: Vintage fabric

A Detour through the Strawberry Patch

Sewing on more than one project at a time is, I guess, a form of multi-tasking. Although I believe I am like most women in that I am good at multi-tasking, I prefer not to do so with sewing. I like to work on one thing at a time, but sometimes, life just doesn’t lend itself to such discipline. Such has been the case with the hours I have spent sewing, not on my Classic French Jacket, but on two little dresses – birthday dresses! – for my two little granddaughters. I know they won’t always want to wear sister dresses, so I am anxious to sew such things for them while they might still think it is fun. And if that means I need to steal some hours away from my personal sewing, then that’s what happens.

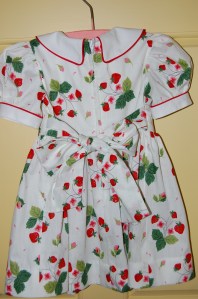
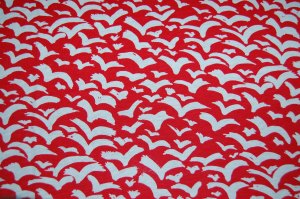
Spring birthdays are lovely as it means I get to sew with cheery cottons and make little puffed sleeve dresses with big sashes in back. I was especially inspired this year with a 5+ yard length of vintage fabric I purchased from an Etsy shop a couple of years ago.

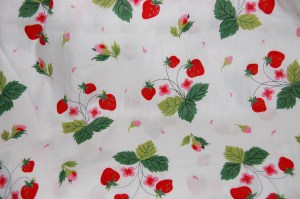
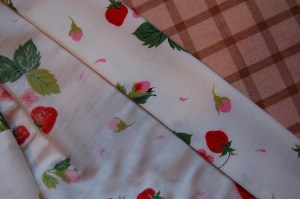
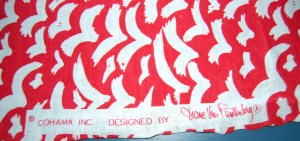
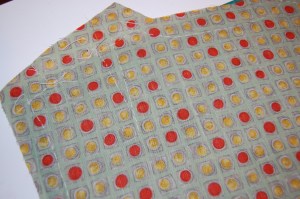
A strawberry print cotton for two little Spring sisters

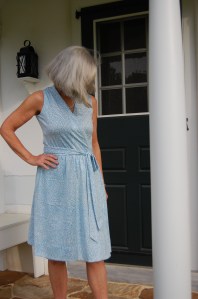
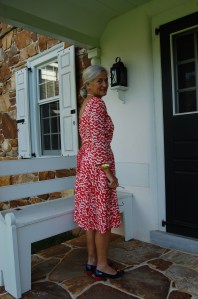
I knew this fabric was most certainly from the 1950s, as this type of print was prevalent then, as well as the fact that the fabric was only 35” wide. The more traditional width of 45” most of us are used to, did not become commonplace until about 1960. To corroborate my suspicions, I saw this dress on Pinterest:

Sold as a vintage 1950s’ dress, it is edged with rickrack.

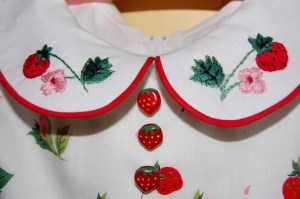
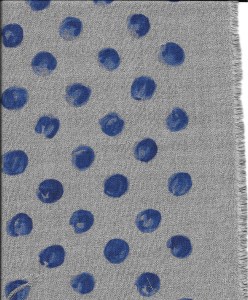
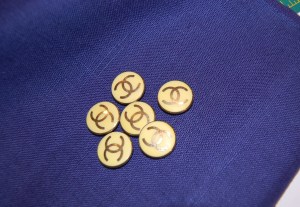
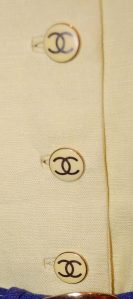
Although this fabric would probably have been used for adult fashions in the 1950s, I found it to be perfect for little girls’ dresses in 2017. Not only that, I found these vintage strawberry buttons which just seemed to be made to go with the fabric!

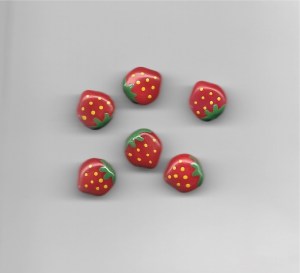
The Etsy store from which I purchased these buttons indicated they are from the 1960s. They are hand-painted and quite small.

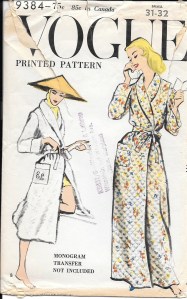
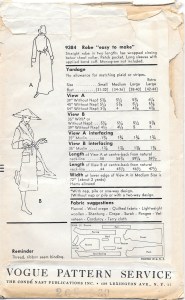
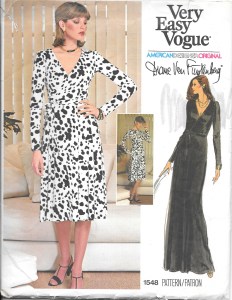
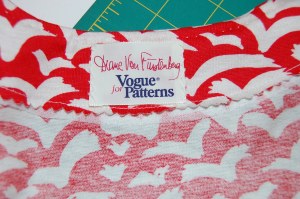
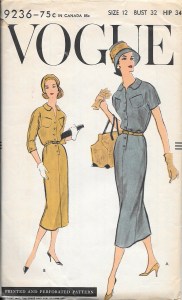
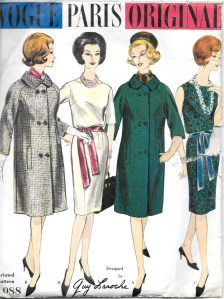
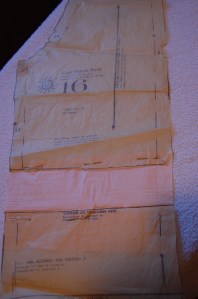
I started with a (new) pattern I have used before, and made new copies of the sizes I needed for my two little ones.

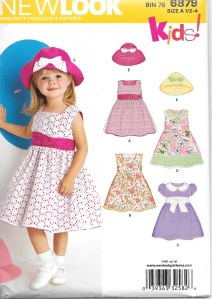
I used View C of this pattern last year for another birthday dress, but obviously made some apparent changes to it for these dresses.

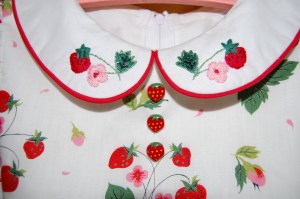
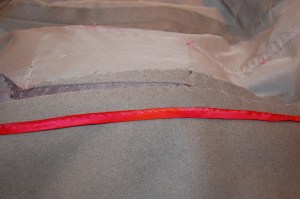
I knew I wanted to make the collars and sleeve bands out of white cotton, and pipe them in red. I made my own piping out of cotton kitchen string and some vintage all-cotton bias tape I had in my sewing supplies.

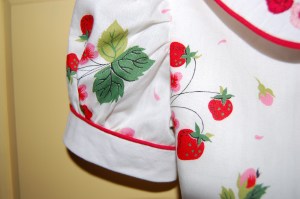
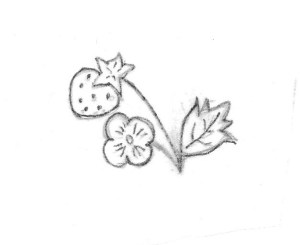
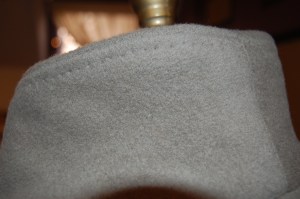
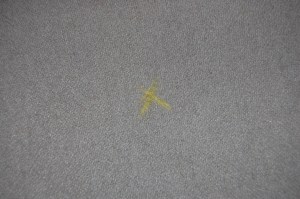
I decided to add a bit of embroidery to the collars just to make these dresses a step above ordinary. I selected a strawberry motif from the fabric and made a drawing, which I then transferred onto the collars.

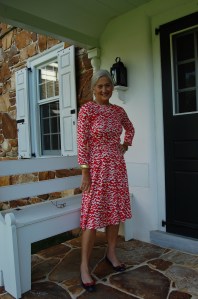
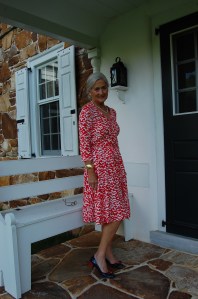
This is the dress for the 4-year-old.

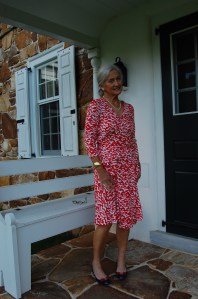
This is the dress for the two-year-old.

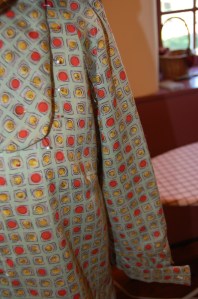
On the back of the dresses, I added snaps to the edges of the collars to make them lay flat. They can be unsnapped for ironing or to wear a sweater, but it certainly makes for a nicer appearance,

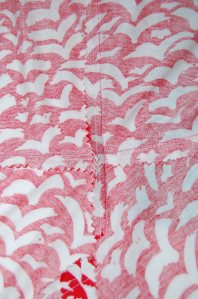
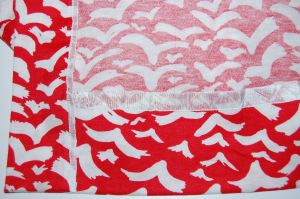
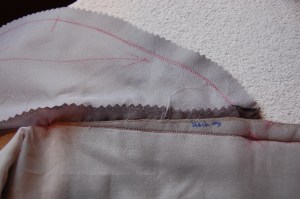
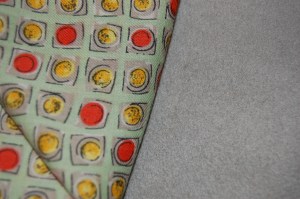
When it came to the hems, I found that I had cut the skirt length for my older granddaughter just a little too short. I was pretty irritated with myself until I realized that facing the hem in white bias cotton actually looked better than if I had just turned up the hem. The strawberry print fabric is lightweight and the design would have shown through a hem which was just turned up. You can see this happened in the dress featured on Pinterest.

When it was time to hem the dress for my younger granddaughter, I had enough length, but I decided to underline the hem with white cotton to avoid that “see-through” of the design. So my mistake on the larger dress made for a better outcome with both of the dresses. (It doesn’t always work that way, does it?)

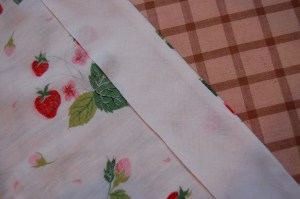
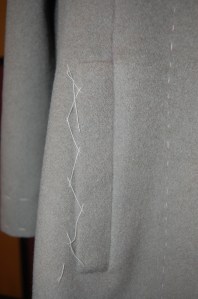
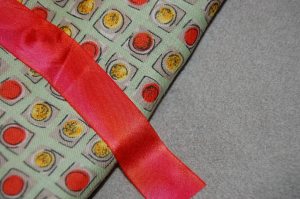
I sewed the bias strip on as if I were facing the hem, then turned it up again. This way, the dress can be easily lengthened if need be.

After doing a light running stitch by hand to secure the bias band inside the hem, I then turned up the hem and sewed it as usual.

Three little buttons at the front were the finishing touches for both dresses.
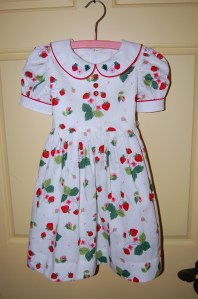
The larger dress…

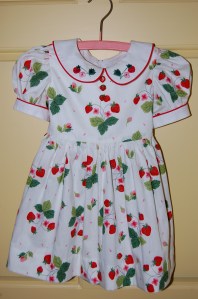
…and the smaller one.

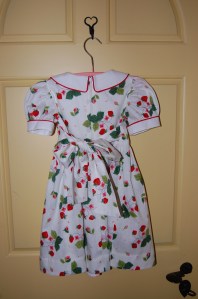
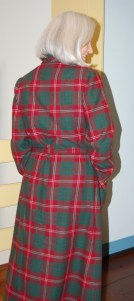
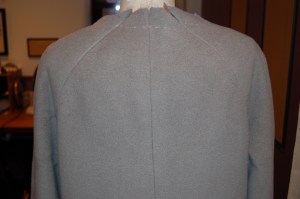
The back of the larger dress

And a back view of the smaller dress.

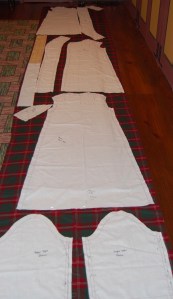
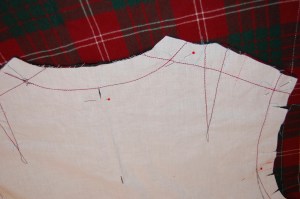
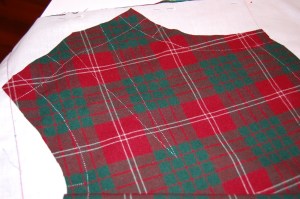
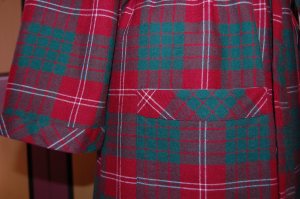
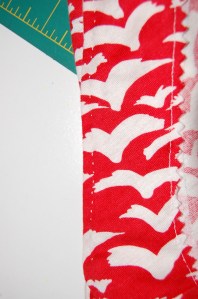
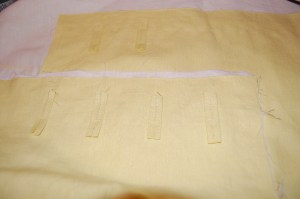
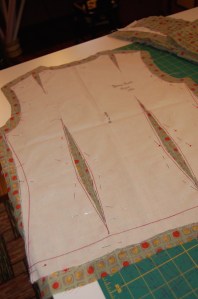
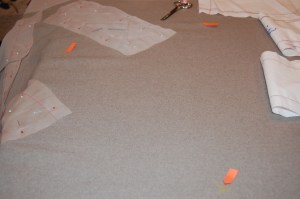
Interestingly, I had to do some strategic planning when laying out the pattern pieces on the fabric. While the design does not have an up-and-down orientation, there are spacing issues that I had to account for. For example, I wanted each bodice front to have a spray of strawberries in the center, with enough space to add the buttons above. In addition, the spacing of the strawberry sprays determined how the patterns for the skirts were arranged on the cloth, as I wanted a balanced appearance of the strawberry sprays, without any cut in half at the waistline.

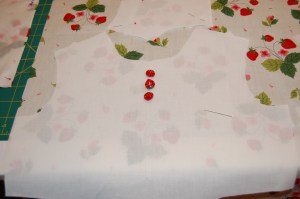
Here I am trying to find the “sweet spot” for the design on the bodices when arranging the pattern pieces.  It was easier to do on the larger dress.  The bottom button on the smaller dress is a little closer to the strawberry design than I would have liked, but in order for the design to be centered as much as possible, I opted to go this route.

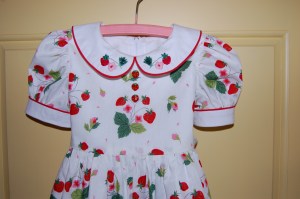
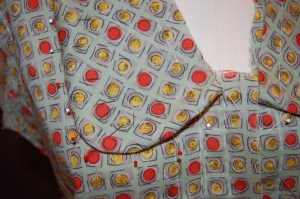
This is the front bodice of the larger dress, with a carefully placed central motif.

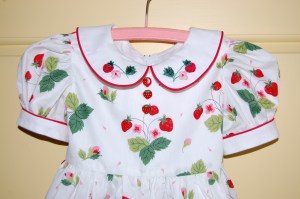
And this is the smaller dress, with a tighter fit for the placement of the buttons.

Sometimes it can get a bit boring making the same dress twice, but the quality of this silky soft fabric is such that it was an absolute joy to sew. And, of course, I was inspired by the thought of my two little girls dressed up and looking so cute! They seem to like their strawberry dresses.

39 Comments

Filed under Buttons - choosing the right ones, Heirloom sewing for children, Sewing for children, Uncategorized, vintage buttons, Vintage fabric

How Exciting Can a Bathrobe Be?

Or – Who Is That Woman in our Kitchen? After well over twenty years of wearing the same ratty old bathrobe (well, it wasn’t old or ratty when I first started wearing it, but the years took their toll on it), I now have a new one. I will admit to being almost unrecognizable in the mornings and evenings now, as I float through the house in my new attire – leading my husband to wonder if a new woman is now making the morning coffee.

I found vintage Viyella wool/cotton fabric on eBay last year. Although only 35” wide, the length available was 5 ½ yards which I determined should be enough for a ankle-length bathrobe. Viyella is a lovely blend of 40% wool and 60% cotton, and it is machine washable. It is lightweight, but warm, very soft, and such a pleasure with which to sew.

The paper labels were still attached to this length of Viyella.

From four bathrobe patterns in my collection, I chose this one for its classic styling, including a wrap front and shawl collar:

I made a muslin (toile) to check on the fit, and then I used the muslin as my pattern, marking the seam lines onto the Viyella using waxed tracing paper.

Because of the narrow width of the fabric, and the need to be precise with matching the plaid in the fabric, I laid out my muslin pattern singly. I had to do this on the floor because of the great length with which I was working. Matching the plaid, although thankfully a very even plaid, took a lot of time – and time on my knees! Ouch!

One of the pattern pieces close up.

And here is one piece with markings transferred onto it. I am used to sewing on a marked seam line, and prefer this method rather than using set seam allowances.

I am always impressed by some of the subtleties in these vintage patterns. This one includes bust darts that descend from the shoulder seams. Also, two small back darts make the fit across the shoulders so much more precise. Both are clearly shown in the diagrams on the reverse side of the pattern envelope.

Click on the picture to see the details.

Also detailed on the pattern layout diagram is the slight flare to the front edges of the robe. I didn’t really pick this up in the muslin I made, but once I was working on the robe, especially in this plaid, which makes a flared seam more apparent, I was very aware of it. It is such a nice detail, making the wrapped front closure more graceful in appearance and offering just a bit more coverage than a straight edge would do.

You can follow the flare of the front edge by looking at the descension of the plaid.

A detail of the back neck edge.

I did make a few changes to the pattern. First of all, I used a fusible interfacing instead of a “sew-in” one (typically indicated on vintage patterns form the 1950s, as this one is.) I don’t use fusible interfacings very often, but I decided this would be a good application for such. I used “Heat n Bond” woven interfacing, ordered from fabric.com, and so far, I am very pleaded with its performance. Secondly, I added another pocket, as I like two pockets on my bathrobes. I also had to lower the placement of the pocket from the lines indicated on the pattern, which were inexplicably high!

Two pockets!

A third change was the elimination of the wide self-binding on the pockets and the cuffs of the sleeves. Instead I used a 1¼ inch self-binding which I cut on the bias. With all that plaid, I thought a little bit of variety would add a nice touch.

A minor fourth change was the addition of fabric belt loops, as opposed to the thread loops called for in the pattern instructions.


I love the classic styling of this robe. The fact that I was able to use such a glorious fabric for it (contemporary with the age of the pattern, by the way!) makes it even more lovely to wear. Not only am I – yes – very excited (!) about wearing this new bathrobe, I also find it to be an unexpected, but wonderful change of persona for my early morning and late evening hours.


38 Comments

Filed under Bathrobes, Mid-Century style, Uncategorized, Vintage fabric, vintage Vogue patterns from the 1950s

Do You Do Pink?

Apparently, pink is a controversial color. Or maybe “was a controversial color” is a better statement. A recent article by Nancy MacDonnell in the Off Duty section of The Wall Street Journal (“Making Peace with Pink” February 11-12, 2017) makes a case for the appropriateness – and timeliness – of pink even for those who think they don’t like it. While I am one who thinks pink is always in fashion, it turns out that this Spring, it really is in fashion! According to Ms. MacDonnell, “On this season’s runways, pink predominated.” The different fashion houses showed varying interpretations of pink: Michael Kors was “brisk, All-American, [and] cheery.” J. Crew was “equally upbeat,” while Valentino showed pink that was “lush and romantic, with intricate appliqués and historical references…”   The list goes on and on. The unifying thread (pardon the pun), as claimed by the designers, was the lack of traditional “sweetness” associated with pink, with emphasis on the feminine power inherent in the color.

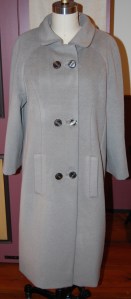
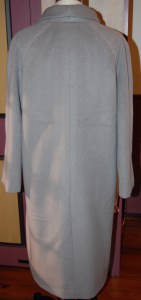
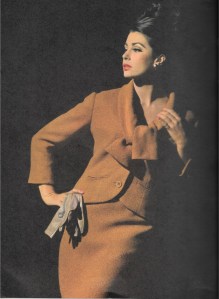
Looming large on page 58 from the November 2016 WSJ Magazine is a Valentino coat, quite traditional in design, but made very special by its stunning appliquéd pink wool.

According to Dr. Valerie Steele, the Museum Director at the Fashion Institute of Technology in New York, who was quoted frequently in Ms. MacDonnell’s article, the idea of pink as a feminine color did not take hold until the 1950s. Back in 1954 when Christian Dior wrote The Little Dictionary of Fashion, his entry on “pink” stated: “The sweetest of all the colors. Every woman should have something pink in her wardrobe. It is the color of happiness and of femininity.”   He even used pink throughout his book for illustrations, chapter headings and the title page. He recommended pink “for blouses and scarves; … for a young girl’s frock; it can be charming for suits and coats; and it is wonderful for evening frocks.” Who can argue with that, be it 1954 or 2017?

The title page of Dior’s smart little dictionary. (Harry N. Abrams, Inc., NY, NY, copyright 2007)

This page from the June/July 2013 issue of Town and Country Magazine gives an interesting timeline of the color pink, “how the color of little girls and baby dolls came of age”:

Click on the image to read it.

I particularly like this statement from Laura Vinroot Poole, the founder of boutique Capitol in Charlotte, N. C., quoted in The Wall Street Journal article: “To wear pink, you have to be an interesting and smart person… You have to have things to say. In pink, you can’t hide.”   Nor would you want to.

Personally, pink is my favorite color. I am always drawn to it, regardless of its hue. And its hue covers a huge range from palest pink to deepest fuchsia, from bubblegum pink to raspberry red. In thinking about pink for this post, I gathered this stack of pink fabrics from my collection. Just looking at it makes me happy!

From top to bottom:
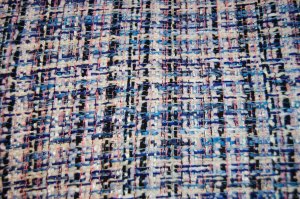
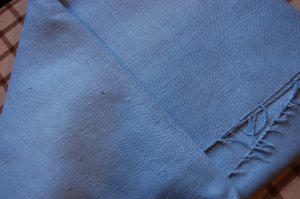
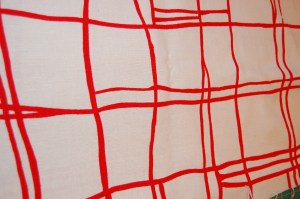
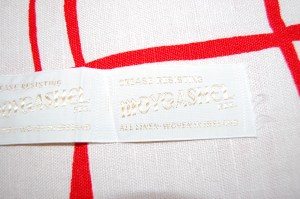
1) vintage Moygashel linen, purchased on eBay
2) silk charmeuse, purchased from Britex Fabrics
3) vintage Moygashel linen, purchased by me in the 1970s
4) linen, possibly Moygashel, purchased on etsy
5) silk jacquard purchased from Britex Fabrics
6) silk charmeuse, purchased from Mendel Goldberg Fabrics
7 & 8) coordinating silks, purchased from Mendel Goldberg Fabrics

The only controversy I have with pink is deciding which hue of it I like best.

19 Comments

Filed under Fashion commentary, Moygashel linen, silk, Uncategorized, Vintage fabric

Focus on Fabric for 2017

Every new sewing year seems to have its own personality. Some of that depends on significant events that may be happening during the year, for which certain outfits must be sewn. Other influences might be travel, or the need to add some “basics” to your wardrobe, or, better yet, sewing classes, requiring planning/ muslin-making/special purchases. For me, this new year of 2017 – it is still new, isn’t it? – is going to have a focus on fabrics. I wish I could say I am resolved not to purchase new fabrics until I use some of what I already have, but I have already made that an impossibility, and the year is a scant three-weeks-old. (Thank you, Mendel Goldberg Fabrics, for tempting me beyond any recognition of reasonable doubt!) However, back to my premise – sometimes I have patterns which are just keeping me awake at night until I use them. Not so much of that this year; it is rather some of the gorgeous fabrics in my collection which are doing their best to disrupt my sleep.

Here are some of them, starting with Winter sewing.

I purchased this fabric from Mendel Goldberg in New York City. It is a wool/silk blend, and it is my current project.

I purchased this fabric from Mendel Goldberg in New York City. It is a wool/silk blend, and it is my current project.

My current bathrobe is in desperate need of replacement. This is the fabric I want to use for this new addition to my cozy, home attire.

My current bathrobe is in desperate need of replacement. This is the fabric I want to use for this new addition to my cozy home attire.

This boucle bridges the gap between Winter and Spring. Given to me for Christmas of 2015, it is a blend of wool, cotton and silk, tightly woven and lightweight. I will be trying to devote most of March to making this into a Classic French Jacket. I will be able to wear it well into Spring and then, of course, it will be perfect for next Fall and Winter, too.

2 full yards of this glorious boucle! I purchased a variety of trims to coordinate with this fabric this past summer in NYC and in San Francisco. Now I just have to decide which one(s) to use.

2 full yards of this glorious boucle! This past summer, I purchased a variety of trims to coordinate with this fabric. Now I just have to decide which one(s) to use.

Spring and Summer sewing always poses the most difficult decisions for me. That is because I have so many gorgeous pieces of vintage linen, and trying to determine which ones to use is a frustrating exercise for me. I would love to make a simple sheath out of this baby blue Moygashel linen, as it would look so lovely with that jacket mentioned above.

Lovely, crisp, pale blue.

Crisp, pale blue linen from the 1950s.

Then there is this amazing abstract design in red and white – also Moygashel – which somehow just has to wiggle its way into the sewing queue:

Red/white abstract linen

This fabric is from the mid to late 1960s, and it arrived with the label intact.

This fabric is from the mid to late 1960s, and it arrived with the label intact.

On the other extreme is this demure flower print, an early 1950s’ Moygashel linen. I have been wanting to make a dress from this for several years. Perhaps this will be the year I get it done.

A very early 1950s' linen, petite black flower silhouettes on a pale ecru background.

Petite black flower silhouettes on a pale ecru background.

Another piece of vintage linen is this duo with lengths of plain and embroidered panels. Originally intended for an A-line shift, I envision it as a dress-length tunic, accented with the grass-green linen shown here. That would be one way I could honor the Pantone Color of the Year, Greenery, as well as make a unique and versatile dress.

Focus on Fabric

How I will ever find the time to make a blouse out of this white dotted cotton, I don’t know, but hope springs eternal for this, too:

I backed this fabric with a piece of orange paper so that the polka dot design shows. The dots are woven into this fine cotton from Britex Fabrics.

I backed this fabric with a piece of orange paper so that the polka dot design shows. The dots are woven into this fine cotton from Britex Fabrics.

With weeks of travel planned for parts of the final five months of the year, it will be folly to plan too much, but I do hope to make one more linen dress which will have wearing power into the Fall.

Navy, rust and brown - perfect for early Fall.

Navy, rust and brown – perfect for early Fall.

And can I possibly get one more Classic French Jacket completed before Thanksgiving? If so, it will be made from this boucle:

focus-on-fabric-boucle

Sprinkled among all these projects will be sewing for my two little granddaughters, too. As usual, I have much more planned than I ever can hope to accomplish, but it is fun to think of the infinite possibilities that dwell in my fabric closet – and in my head.

PS – One fashion observation for 2017:  DRESS GLOVES ARE BACK!

20 Comments

Filed under Boucle for French style jackets, Linen, Moygashel linen, Uncategorized, Vintage fabric

Classic Diane von Furstenberg

Forty years ago this month – October of 1976 – the first Diane von Furstenberg Vogue patterns were available for purchase. At the same time, Cohama (fabrics) produced Diane von Furstenberg-designed knits specifically for use with those patterns. Both were detailed in the September/October 1976 edition of Vogue Pattern Book Magazine:

One of the Diane von Furstenberg designs I long admired but never purchased when I was sewing for myself in the 1970s was this pattern:

One year at a time - DvF pattern

I never quite believed that it could really be reversible; I just especially liked the front wrapped version. So when I had the opportunity to purchase this pattern a few years ago online, I jumped at it. Then not long after, one of my blog readers contacted me with some vintage Cohama DvF fabric for sale. She so kindly gave me first choice of what she had, and I purchased two lengths from her. The first piece of fabric I made into this dress:

Easy breezy dress

The second piece was this “Birds” design, and I was fortunate enough to have over three yards available to me:

Classic DvF

The selvedge clearly states the DvF connection.

The selvedge clearly states the DvF connection.

How I waited THIS LONG to make this dress, I’ll never know, but now it is reality!

 Classic DvF

Worn with the V and wrap to the back.

Worn with the V and wrap to the front.

Worn with the V and wrap to the front.

DvF-designed Cohama knit fabric is a lovely cotton/rayon blend, very soft and surprisingly easy to sew. I am not a big fan – or any fan at all, really – of sewing with knits, so I appreciate that this fabric is so accommodating. One downside of sewing with knits that I can’t quite get around is the fact that it is almost impossible to make a muslin mock-up to try out the fit and sizing. Perhaps someone knows some trick that I don’t know, but I felt a little like I was flying blind when making adjustments to the pattern which I would need for the proper fit. These included 1) lengthening the bodice by about an inch (which I know needs to be done from other wrap dresses I have made), 2) shortening the sleeves to three-quarter length and adding a little bit of width to them so they could be pushed up comfortably, and 3) adding about an inch and a half to the diameter of the waistline. Even with the forgiving nature of a knit fabric, I am not comfortable making a dress without a proper muslin first – so I was a little bit nervous the whole way through the construction of this dress.

I followed the instructions carefully, and was fascinated to find that all the seams needed to be double-stitched, trimmed and pressed to one side. I discovered the reason for this after the dress was finished – it helps make the dress truly reversible, in some magical way.

A side and waist seam detail.

A side and waist seam detail.  Yes, this dress has pockets – two of them!

I did, however, use my trusty Snug Hug seam binding for the front skirt facings and the hem.

I did, however, use my trusty Snug Hug seam binding for the front skirt facings and the hem.

I needed an iron-on interfacing suitable for use with knits and after some research came up with Heat-n-Bond Fusible tricot (purchased from Fabrics.com.) This is the perfect interfacing for use with knits as it stretches, but also stabilizes. I used it for the neck and front facings per the pattern instructions, and I also reinforced the hems in the sleeves. The pattern called for under-stitching the front and neck facing, and I could not help myself – I did it by hand rather than machine!

Hand finishing is just so much nicer!

Hand finishing is just so much nicer!

I was fortunate enough to receive a label with the pattern! You can see a small strip of the fusible interfacing showing beyond the edge of the facing...

I was fortunate enough to receive a label with the pattern! You can see a small strip of the fusible interfacing showing beyond the edge of the facing…

In the description of this pattern in the Vogue Pattern Book Magazine, it states: “Night & Day, Diane is the one! She wraps up both scenes in one pattern! Her wizard [my emphasis] wrap (that reverses front to back)… [for] day with plunge to front and …[for] night with plunge to back.”

Plunge is right! When I tried on the dress with the wrap to the front, I decided I was going to have to add a modesty panel or a very strong snap to keep the front closed. I opted for the snap, but I’m not entirely happy with the way it looks.

I should have taken a closeup of the bodice!

I should have taken a closeup of the bodice!

There seem to be a few wrinkles across the back.

There seem to be a few wrinkles across the back.

Classic DvF

I so prefer three-quarter length sleeves rather than long sleeves, particularly in a dress like this which will be worn in the warmer months.

When I tried on the dress with the wrap to the back, I loved it, and I felt like it fit me better, especially across the shoulders.

Classic DvF

The back without the snap fastened.

The back without the snap fastened.

Classic DvF

Classic DvF

Now the dilemma: I need the snap for the front V, but I don’t need it for the back V, nor can I reach it by myself in the back to fasten it. But one half of the snap shows when the V is in the back, which obviously will not do!   If I take the snap off, I cannot wear the dress with the front V (which is a little more casual look.) If I leave the snap on, I cannot wear the dress with the back V (a little dressier look.) Maybe I should forgo the snap and make a modesty panel, which can fasten underneath and be removed when I wear the dress “backwards.”   Any thoughts, anyone??

I guess I have the advantage of time on my side to figure this out, as I probably will not, at this point, be wearing this dress until next Spring. Despite this one little gaping issue, I think this dress is beautiful, versatile, comfortable and very feminine!

Hooray for Diane von Furstenberg, vintage Vogue Patterns and vintage Cohama fabrics – some styles never get old!

22 Comments

Filed under Diane von Furstenberg Vogue patterns, Uncategorized, Vintage fabric, vintage Vogue Designer patterns, vintage Vogue patterns from the 1970s, Wrap dresses

Blame It on the Buttons

It can be a little overwhelming to look at my (growing) collection of beautiful summer linens, and then try to make a decision on which piece to select for my next project.

Fortunately, a random purchase of buttons helped me make up my mind this time around. I found these buttons at Britex Fabrics in San Francisco last year, and purchased them on a whim, not knowing when or how I would use them. I also don’t know what possessed me to purchase 6 of them, but that’s what I did.

Yes, those are interlocking "a la Chanel" Cs.

Yes, those are interlocking “a la Chanel” Cs.

When I got them home, I realized they were a perfect match with a length of vintage, pale yellow, Moygashel linen in my possession. I tucked the fabric and the buttons away together, confident that the perfect pattern would also be found amongst my many vintage Vogue patterns.

It was a bit of a trick finding a pattern that needed 6 (or fewer) ¾” buttons. This one kept surfacing as the most ideal candidate:

I am making the short sleeve version - but a little shorter!

Ideal, except for the yardage needed, that is. Many of you know by now that being a “little shy” of the prescribed fabric usually does not keep me from my desired goal! After making a fitting muslin and making the necessary adjustments, I cut out my underlining (light weight linen/cotton blend) and used that as my pattern. It was immediately evident that I did not have enough of that 35” width linen.

Or did I? I figured if I eliminated the center back box pleat and replaced it with just a slit in the back center seam, I’d save a bit of yardage requirements. I could make the sleeve hem facings out of the underlining, saving a bit more. And if I cut the collar on the horizontal straight of grain rather then the vertical, I could just fit the pattern pieces onto my yardage. It was a good thing I had already decided to eliminate the chest pockets (a little too 1950s.) And a self-belt?   Out of the question!

A belt turned out to be a perplexing question. I had been fortunate enough for a few years to have my belts and covered buttons custom made by Pat Mahoney, but since her retirement last year, I have found no replacement for her services. I was dreading the prospect of making my own belt. The only good thing was I knew I had a piece of vintage Moygashel linen in a medium navy blue (see the button photo above) which would be a good contrasting color for the yellow dress. I decided I would think about actually making the belt after I had the dress itself finished.

For a simple shirtwaist dress, there were a number of time-consuming details, like the gussets I covered in my last post. There were also six bound buttonholes to work.

It always amazes me how long these buttonholes take to make!

It always amazes me how long these buttonholes take to make!

Blame it on the buttons


There were separate front bodice facings, and a front skirt placket with separate facings. There were sleeve hem facings (as mentioned above), and lots of trimming, clipping, and grading of seams! And then the dress was done.  Except for the belt, of course.

After giving myself a pep talk, I took out one of Pat’s belts and studied it, vowing to duplicate as closely as possible her techniques and precision. Fortunately I had a belt buckle from long ago, which I had saved. It was for a 1.25” width belt, which is exactly what I wanted.  I plunged ahead and this what I made, working the eyelets by hand (which fortunately don’t show much on the dark linen!):

Blame it on the buttons

The underside, just in case you are curious!

Although not my favorite dress of all time, I think I’ll get good use out of it, and I do love its pairing with “summer” blue.

Blame it on the buttons

Blame it on the buttons

Blame it on the buttons

Blame it on the buttons

The clutch is a perfect match with the belt – how lucky is that?

Cool linen for a hot summer!

Cool linen for a hot summer!

Best of all, the buttons add just the right, somewhat mysterious, touch.

19 Comments

Filed under bound buttonholes, Day dresses, kimono sleeves, Linen, Mid-Century style, Moygashel linen, Uncategorized, Vintage fabric, vintage Vogue patterns from the 1950s

A Practical Decision

A practical decision, made out of desperation, that is! It is a rare occurrence that I stop working on a project before it is completed, but that’s what I decided to do with my cashmere coat, skirt and blouse ensemble. Quite simply, life got in the way, without asking me first! Robbed of sewing time for one reason or another, I had to make a decision: should I quietly and gently fold my unfinished skirt and blouse away for a summer sleep, and get busy on my Spring sewing? Or should I plow through and continue work on this wool ensemble as the allure and charms of Spring sewing beckoned me on? Well, Spring’s charms won, especially as I am now facing middle-to-late May deadlines for a silk dress to wear to a wedding and another fancy event.

But I had promised photos of my coat, so before everything goes in the cedar closet until next September, I thought I should share the progress I did make. Even on a cool Spring day, this Cashmere coat felt glorious to wear, even briefly.

A Practical Decision

A Practical Decision

I am very happy with the lining!

I am very happy with the lining!

A Practical Decision

A Practical Decision

This coat is very warm and buttery soft.

This coat is very warm and buttery soft. These photos confirm for me that I need to reset the working buttons, making longer thread shanks, to accommodate the bound buttonholes.

The skirt is a six-panel slight A-line style.  Because the fabric is heavier than I would normally use for a skirt, I wanted to eliminate darts and a waistband, to help control the bulk. I decided to make a waist facing made out of wool challis (used for the coat lining and the blouse), and attach it to a skirt lining made of Bemberg rayon. The skirt is completed except for the hem.

This shows the waist facing, with the Bemberg lining attached to it.

This shows the waist facing, with the Bemberg lining attached to it.

Making a blouse out of wool challis demanded some special considerations. The fabric is finely woven and lightweight, making me hesitant to use waxed tracing paper to make any markings on it. So, I decided to thread trace all the seam lines and markings. This is, of course, the process one uses for the construction of a classic French jacket, so I am comfortable with it. It sounds time-consuming, but it goes fairly fast, and is fool-proof.

This shows my muslin pattern, cut on the seam lines, and with the darts cut out, so that I could tread trace along all sewing lines.

This shows my muslin pattern (with the changes I made to it), cut on the seam lines, and with the darts cut out, so that I could tread trace along all sewing lines.

Click on this for a close-up look at the thread tracing of seam lines and darts.

Click on this for a close-up look at the thread tracing of seam lines and darts.

I got as far as having both sleeves completed, the body of the blouse put together, and the collar pinned in place. I am feeling good about my progress, and I know I can pick this up again, knowing that I really am in the home stretch on this particular project.

The pinned collar, placed along the neckline.

The pinned collar, placed along the neckline.

One of the sleeves pinned in place.

One of the sleeves pinned in place.  The sleeves are three-quarter length.

Good-bye to Winter and Hello to Spring!  Right now it feels wonderful to be focusing on silks and linens, bright colors and feminine fancy things. I am “desperately” happy with my decision!

21 Comments

Filed under Blouse patterns from the 1950's, Blouses, Coats, couture construction, Dressmaker coats, Mid-Century style, Uncategorized, Vintage fabric, vintage Vogue Designer patterns, vintage Vogue patterns from the 1960s, woolens

A Fine February Finish

Leap Year, with its extra February day, seemed to be custom made for my sewing schedule. I had hoped to have my gray cashmere coat finished by the end of the month, and thanks to those extra 24 hours, I managed to do just that – barely! I will confess to taking out basting stitches, steaming, and adding two bar tacks to the lining on March 1st (gasp), but now my coat is finished.

A Fine Feb Finish

A Fine February Finish

Photos of me in this coat will be in a future post…

Like Claire McCardell, who said “I believe in a collection of coats,” and coats are “revealing, a clue to your taste, and your knowledge of Fashion,” I also believe that one should not “make a coat too basic.” The unique aspect of fashion sewing is that one can start with a basic (or not-so-basic) coat pattern and then make it her own.

The first owner of this Vogue Designer Original pattern, designed by Guy Laroche, which I used for my coat, had obviously used it. (This isn’t always the case – many vintage patterns are still “factory-folded” and in their unused condition.)

When I purchased the pattern, I had already decided to lengthen the sleeves, which are shown on the pattern envelope as “below-elbow” or bracelet-length. I wanted full-length sleeves as a practical matter. Much to my delight, the original owner had decided the same and had added tissue paper inserts into the sleeve pattern pieces. As it turned out, the length she had decided upon was also exactly right for me.

What a nice surprise to find the sleeves already lengthened!

What a nice surprise to find the sleeves already lengthened!

There are really only a few details I chose for this coat which serve to make it “not basic.” Besides the bound buttonholes (which used to be basic but are not so much anymore!), I put emphasis on the buttons, the lining and a couple of the finishing details.

First the buttonholes and buttons: because the cashmere fabric is coat-weight, I needed to make the “lips” of the buttonholes a bit wider than normal. Once again, I used an organza patch on the underside of the buttonholes, which makes a very nice interior finish:

The line of basting stitches is the fold line - the organza patch is on the facing part of the front edge.

The line of basting stitches is the fold line – the organza patch is on the facing part of the front edge.

Here is the patch ready to be sewn onto the back of the buttonhole.

Here is the patch ready to be sewn onto the back of the buttonhole.

I found these vintage buttons in an Etsy shop. Although they appear to be gray mother-of-pearl, they are actually plastic. The iridescent strip through the middle of each one, along with the square detail on the tops, gave me the idea to arrange them on an angle. I think they add just the right amount of interest to the front of the coat.

The "square" detail on the buttons picks up the design in the lining fabric.

The “square” detail on the buttons picks up the design in the lining fabric.

A Fine February Finish

Using the printed wool challis for the lining certainly elevates this coat to a notch above ordinary. The sleeves are lined with gray rayon Bemberg for practicality’s sake.

An inside out view, trying out the lining.

An inside out view, trying out the lining.

This photo shows a good look at the finished buttonholes, too.

This photo shows a good look at the underside of the finished buttonholes, too.

Of course the detail I love the most is the flat piping I added to the front interior edges of the lining.  As I have said before, doing this is so easy and adds so much.

A Fine Feb Finish

A Fine February Finish

Here is the flat piping stitched in place - so easy!

Here is the flat piping stitched in place – so easy!

The final small detail, which helps the collar to keep its shape, is under-stitching (by hand) on its underside.

A Fine February Finish

So what else did Claire McCardell say about coats? To quote from her book, What Shall I Wear, page 69, “… you can take another step and get a coat and dress that go together—never to be separated, never to be worn with any other dress or any other coat, and always with a special feeling of satisfaction. If you take a little trouble, you may be able to manage a heavy fabric skirt to go with the coat.”  I plan to take that little bit of trouble – a skirt out of the gray cashmere, and a blouse from the printed challis – to complete the outfit, and I will hope for that “special feeling of satisfaction.”

30 Comments

Filed under bound buttonholes, Buttons - choosing the right ones, Coats, couture construction, Dressmaker coats, Mid-Century style, Quotes about sewing, Uncategorized, vintage buttons, Vintage fabric, vintage Vogue Designer patterns, vintage Vogue patterns from the 1960s, woolens

Can a Coat be Glamorous?

And what exactly is glamour? A recent quote by Carolina Herrera – “It’s important for women to feel glamorous and feminine but always themselves” – prompted me to look up the definition of the word “glamour” – and I was surprised by what I found. Here is how Webster’s defines it in its noun form: 1) the quality of fascinating, alluring, or attracting, esp. by a combination of charm and good looks 2) excitement, adventure, and unusual activity, like the glamour of being an explorer 3) magic or enchantment; spell; witchery. And then there is the definition of “glamorous”: 1) full of glamour; fascinatingly attractive; alluring 2) full of excitement, adventure , and unusual activity: to have a glamorous job.

Glamour was the last thing on my mind when I started out on my current coat project. Making a muslin (toile) can be time-consuming and tedious, especially when it shows you that some serious alterations need to be made. Fortunately, my coat muslin revealed only some small changes to the shoulder of my raglan sleeve coat, compensating for my square shoulders. My go-to book to guide me through these complexities is Fitting and Pattern Alteration, by Liechty, Rasband, and Pottberg-Steineckert (recommended to me by Susan Khalje.)

I highly recommend this book.

I highly recommend this book.

One of the things I love about this book is that it covers all sorts of situations. Square shoulders for Raglan sleeves? Not a problem.

The diagrams take the guess work out of alterations to patterns.

The diagrams take the guess work out of alterations to patterns.

Once I had my muslin adjusted, my silk organza interlining marked and cut (to be used as the pattern for the wool), I felt like I was off to the races. Not so fast. A careful steaming of my wool fabric revealed three small “thin” areas (not holes, but thin enough that I would need to work around them). This is not unusual for vintage fabric, and is one of the reasons why a careful pre-steaming or pre-pressing of any fabric is important, but especially so for vintage goods.

I marked these small imperfections with yellow chalk.

I marked these small imperfections with yellow chalk.

And then double-marked the areas with orange post-its when I was arranging the pattern pieces.

And then double-marked the areas with orange post-its when I was arranging the pattern pieces.

After untold hours of basting the layers of silk organza and fashion fabric together, I was finally ready to sew.   And this is when I think it began to get glamorous. The first major details to be completed were the pocket plackets. I thought I might faint when I had to make that first cut into one of the side panels of the coat front. But bravery saw me through!

I have the placket catch-stitched temporarily so it does not get caught on something while I finish the remainder of the coat.

I have the placket catch-stitched temporarily so it does not get caught on something while I finish the remainder of the coat.

Here is the inside of the pocket and placket.

Here is the inside of the pocket and placket.

With the first pocket and pocket placket successfully completed, the second pocket placket was simply fascinating and alluring, my progress encouraged by the charm and good looks of the first one. Definitely glamorous!

Progress - both pockets/plackets finished!

Progress – both pockets/plackets finished!

More seams ensued, each one carefully pinned, sewn, pressed and catch-stitched. Particularly rewarding were the shoulder seams of the raglan sleeves. Properly clipped, pressed and catch-stitched, the seams lie beautifully and look good, too.

The benefits of a silk organza interlining (or underlining) are manifold, but not least of which is a foundation upon which to secure the seams.

The benefits of a silk organza interlining (or underlining) are manifold, not least of which is a foundation upon which to secure the seams.

A view of the back of the coat (in progress.)

A view of the back of the coat (in progress.)

Although I have many more hours to go with the construction of this coat, I can’t help but feel that not only is this coat going to be glamorous, with its elegant gray cashmere, its vintage sensibility and all its hidden, inside secrets used to tame those seams, it is also going to be feminine and definitely me.

Perhaps the next question to ask is “Can sewing be glamorous?” It is “fascinatingly attractive, full of excitement, adventure and unusual activity.” It is magical and enchanting, too. The answer would have to be, “Yes, sewing most definitely can be very glamorous!” Even when we are in our bedroom slippers and blue jeans, covered in threads and pins, if we are sewing, I say we are glamorous.

20 Comments

Filed under Coats, couture construction, Dressmaker coats, Love of sewing, Mid-Century style, Uncategorized, underlinings, Vintage fabric, vintage Vogue Designer patterns, vintage Vogue patterns from the 1960s, woolens

Something Old, Something New – and Pulling It All together

Every once in a while, a unique opportunity comes along in the form of fabric. We all know those times – when the end of the bolt is just the amount you need, or a single bolt of one-of-a-kind designer fabric comes to your favorite store, or a long-awaited re-order makes possible your dream of owning that exact piece. For me, it was an offer from a reader of my blog. She had two pieces of vintage wool which had belonged to her aunt, dating from probably the late 1950s or very early 1960s. Once I saw swatches of both fabrics, I immediately saw the possibilities inherent in each one, and the colors were not only yummy, but also ones that I can wear well (a fact which was correctly noted by my dear reader.) I purchased both pieces well over a year ago, and ever since, I have been dreaming about sewing with them, starting with this gray (what I believe to be) coat-weight cashmere.

The top part of the photo shows the right side of the fabric. It has a soft, luscious nap to it. The contrast of the weave on the underside is hopefully discernible.

The top part of the photo shows the right side of the fabric. It has a soft, luscious nap to it. The contrast of the weave on the underside is hopefully discernible.

As luck would have it, I had already picked up some swatches of (new) wool challis and various dress-weight silks one of the last times I was at Mendel Goldberg Fabrics in New York City. It did not take me long to pair this Swiss challis with the gray wool.

The gray in each little square is a perfect match to the cashmere.

The gray in each little square is a perfect match to the cashmere.

Both fabrics lend themselves to be beautifully complimented by a further pop of color as demonstrated by this silk bias ribbon:

I will definitely be accenting my outfit with something like this.

I will definitely be accenting my outfit with something in this color.

Before I go into patterns and process, I want to share the thoughts of Christian Dior on the color “gray” as written in his The Little Dictionary of Fashion, Abrams, New York, New York, 2007, page 50:

“The most convenient, useful, and elegant neutral color. Lovely in flannel, lovely in tweed, lovely in wool. And, if it suits your complexion, there is nothing more elegant than a wonderful, gray satin evening dress. For day frocks, suits and coats, it is ideal. I would always advise it. And many people who cannot wear black, can wear a dark gray. (Remember that if you are big you must choose a dark gray and if you are petite a light gray is better for you.)

“It is the most convenient color, too, for people who live half in town and half in the country because, with different accessories, a gray suit or coat may be equally suitable for both. It is a good color for accessories, too – almost anything goes with gray. White is perhaps the freshest and sweetest contrast but it is safe to say that whatever your favorite color is, you can safely wear it with gray.”

 Armed with this send-off, I immediately began to look in earnest for a coat pattern. I did not want to purchase the wool challis before I had a pattern, but my thought was to line the coat (except for the sleeves, of course) with it, and then make a coordinating dress or blouse as well. When I found this Guy Laroche coat (and dress) pattern, it seemed to be just what I was looking for, even though when I purchased it, I knew that the pocket flap pattern piece was missing. I was confident, however, that piece would be easy to recreate.

Early Guy Laroche (1921-1989) patterns are somewhat difficult to come by. A Parisian, he worked for Jean Desses (eventually becoming his assistant) from 1949 to 1957, at which time he opened his own atelier. In 1961, his fashion house was known as Guy Laroche Couture. It seems to be about this time that Vogue Patterns began to feature his designs in their Couturier Designer line (Jean Desses designs are also in this line of Vogue patterns). He was one of the featured designers in the 1963 New Vogue Sewing Book, which included “profiles of Europe’s great designers.” This gorgeous suit by him is shown on page 128 in that book:

The collar of this jacket extends so that it can be looped.

The collar of this jacket extends so that it can be looped.

Another one of his suits was shown in Vogue Printed Pattern News from March 15, 1961:

The Laroche design is in the lower lefthand corner. I have never seen this pattern available for purchase...

The Laroche design is in the lower lefthand corner. I have never seen this pattern available for purchase…  (Click on the image to read the caption.)

And a coat and dress ensemble was part of the “French Dressing” section of Vogue Pattern Fashion News from April 1965:

The diagonal direction of the weave in the jacket is a lovely foil for the dress.

The diagonal direction of the weave in the top part of the coat is a lovely contrast for the rest of the ensemble.

I believe the pattern I am using for my gray cashmere coat is from 1962 or 1963. (The patterns from 1961 were priced at $3.00 while my pattern and the ones I have found from 1964-65 were priced at $3.50. That’s one way to help determine a date, although my intuition suggests to me that my pattern is not as late as ’64.)

Once I had my pattern, I ordered the wool challis from Mendel Goldberg (still in stock, thank goodness!) Now, at this point, I did not know exactly how much to order. The body of the coat will be lined in the challis, while the sleeves will be lined in gray Bemberg. I couldn’t go by the yardage on the envelope for the lining since I was “mixing it up.” I think I may have enough of the gray cashmere to make a skirt, but the fabric might be too heavy for a skirt. I’ll know more once I start to sew with it. The rambling on in my head told me that I needed to get enough of the challis to either make a long-sleeved blouse to go with a “maybe” skirt – or enough challis to make an entire dress, as well as the coat lining. So – I ordered PLENTY!! Now I have options.

For some reason I always find coats to be a little intimidating – at least at the beginning. However, when you look at the few pattern pieces that go into this design, it seems to look more complicated than it really is (I hope I am not jinxing or deluding myself):

The main body of the coat really has just 8 pattern pieces (the facings you see are for the dress included in the pattern.) Of course, the lining adds more, but compared to the number of pieces in the coat I made two years ago, this is minimal!

The main body of the coat really has just 8 pattern pieces (the facings you see are for the dress included in the pattern.) Of course, the lining adds more, but compared to the number of pieces in the coat I made two years ago, this is minimal!

I am currently working on my muslin, and I am so excited to be starting this project. Thank you, EG, for allowing me to purchase this beautiful vintage fabric. I feel a great responsibility to honor this “something old” wool in a coat worthy of its quality and provenance.

24 Comments

Filed under Coats, Mid-Century style, Uncategorized, Vintage fabric, vintage Vogue Designer patterns, vintage Vogue patterns from the 1960s, woolens