Tag Archives: vintage Vogue patterns

The Best Laid Plans

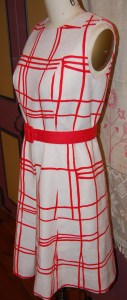
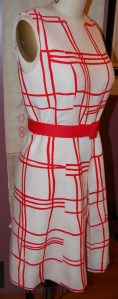
The best laid plans sometimes need revision.  As a person who likes to make careful lists and schedules, I find it difficult at times when life conspires to upset those plans.  Especially difficult is when my sewing plans go awry!

I have been dreaming about making this coat in my treasured vintage pink wool.

With new enthusiasm after seeing the Dior Exhibit in Denver, I was sure this coat would be well underway by the end of March. However, for an unexpected, albeit happy, change of events, here we are at the end of March and all I have finished is my toile.  But my enthusiasm is still on track!

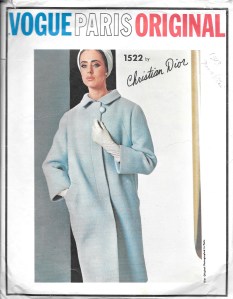
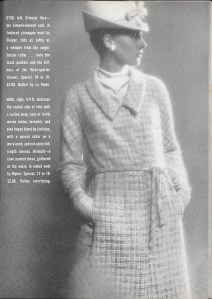
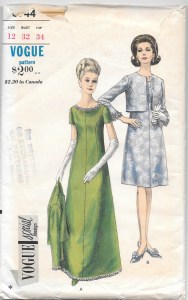
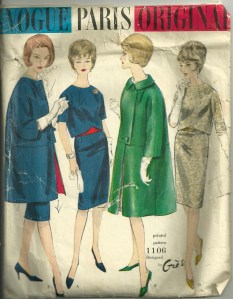
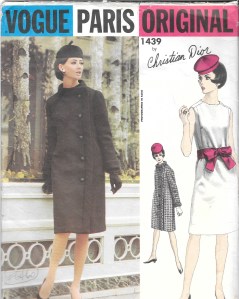
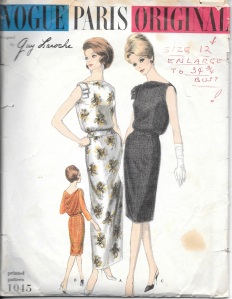
A fun part of any project in which I use a Vogue Designer pattern is devoted to finding out more about the initial debut of the pattern, and documentation of its appearance in Vogue Pattern Book Magazine.  Although I had a good hunch that this pattern was from the mid-sixties, I was quite delighted to see it included in a feature of new Designer patterns debuting in  the October/November 1965 VPBM.       .

The caption for my coat pattern, top and center, reads: “DIOR: The ensemble to wear all year – a dirndled dress and a coat that’s shaped high and narrow.”

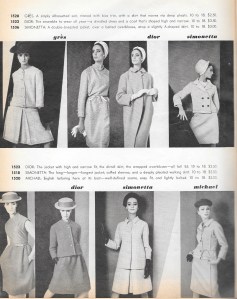
 Of course this was when Marc Bohan was the Creative Director at Christian Dior, a period of the 1960s known for its gorgeous dressmaker coats and ensembles.  Here is a sampling of some other designs appearing in the same time frame in a few Vogue Pattern Book Magazines.

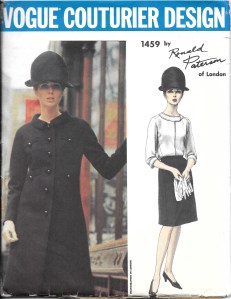
I actually own this pattern, too. I have always loved the look of this coat.  This pattern is shown in the same issue of Vogue Pattern Book Magazine as the Dior design, October/November 1965.  What a great year for coats.

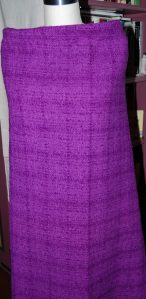
This kimono-sleeved coat was shown made in textured pineapple wool by Einiger. I made my purple coat from vintage Einiger wool, so I know what fabulous quality it is.

This coat features a spread collar on a low V-neck.  This coat and the one above are shown in the February/March 1966 Vogue Pattern Book Magazine.

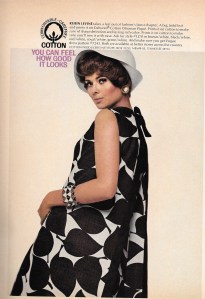
This coat is described as being “the total look of the Chanelesque tradition.” It, too, was made from “mossy-surfaced” Einiger wool.

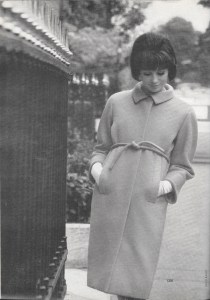
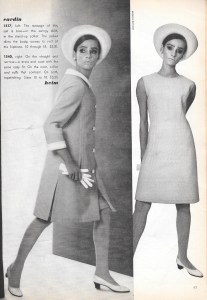
And this coat is reminiscent of the Dior design I am making, with its pointed collar, straight-shape and concealed closing. The tubular belt is a brilliant addition. This design is by Guy Laroche and both it and the pink coat shown above were included in the February/March 1964 Vogue Pattern Book Magazine.

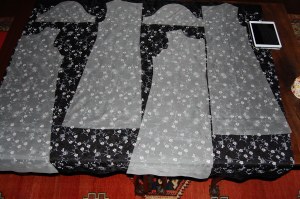
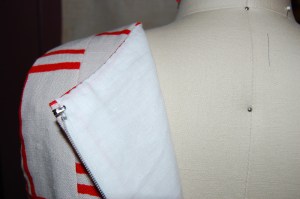
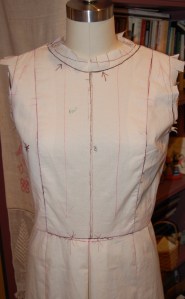
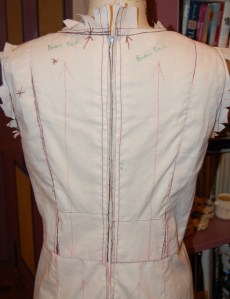
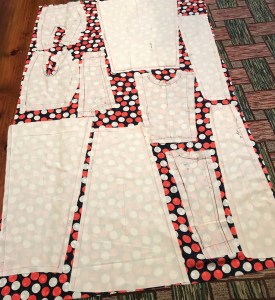
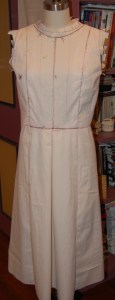
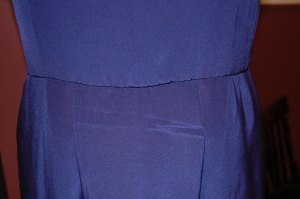
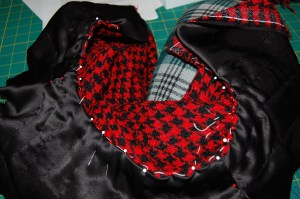
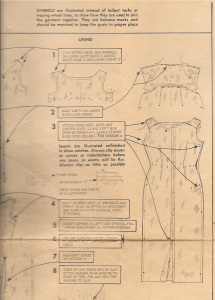
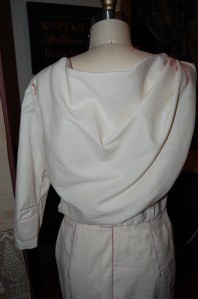
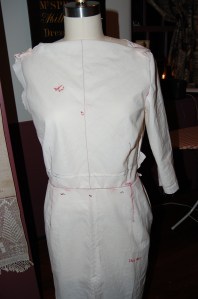
Back to my toile: I made the first one without any alterations to the pattern.  The first thing I noticed is that the horizontal seam which extends around the back and angles up on either side of the front, seemed to add extra “baggage” in the lower back.

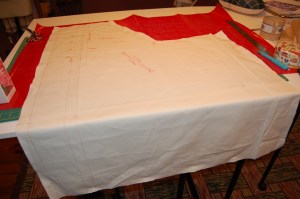
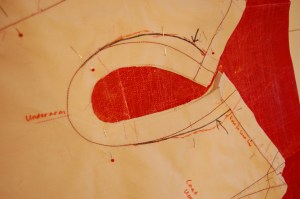
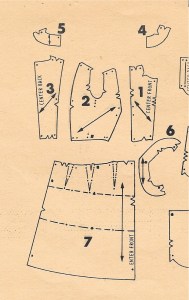
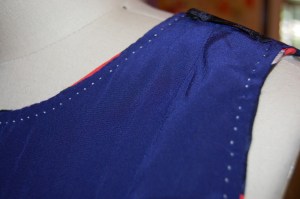
Here was my first toile atop the waxed marking paper. This shows the lower front and back piece, with its angled side seam.

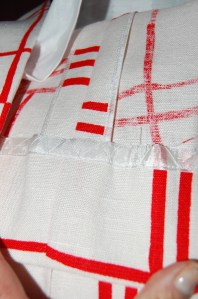
The seam was designed to be below the waistline, but I determined it might look better on me if it were reset to fall exactly on the waist.  This adjustment would keep the spirit of the design, but would be more flattering on me for some reason.

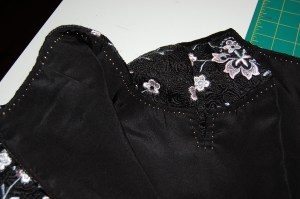
I made another slight adjustment to the shoulder line.  First I cut the shoulder line on the body of the coat back about ½ inch on either side, to reduce some excess fabric across the upper chest.  That made some pulling in the top of the sleeves. So then I added about ½ inch to the top half/curve of each sleeve.  So it was an even swap, just distributed differently.

This shows my markings on the upper shoulder.

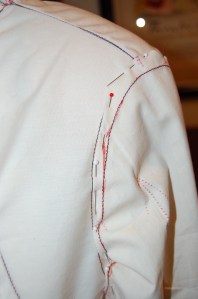
And the adjustments to the top of the sleeves.

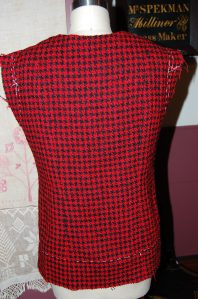
Interestingly, the sleeves have no shaping by darts or seams on this pattern.  They seemed a bit too full to me, so I tapered the seam to reduce the width of each sleeve by about 1.5 inches.  I have had to make this adjustment to other coat patterns from the same time period, so perhaps a fuller sleeve is a hallmark of that era.  I did not want to narrow the sleeves too much, as they need to be comfortable to wear over long sleeved dresses and sweaters.

I am contemplating adding a half belt, secured with buttons to the back of the coat.  That’s a decision I’ll make as the coat comes together.  The drape of the wool, as opposed to the drape of the muslin, may convince me I do not need it, but I rather like the appearance of a back belt.

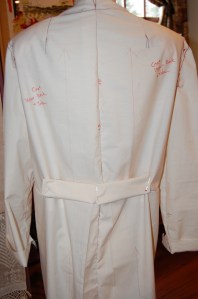
Here is a rough mock-up of a possible belt, but this needs much more thought!

I found this picture of another coat which has a high back belt, probably about the length of one which I might add. It is so helpful to find examples like this of design details.

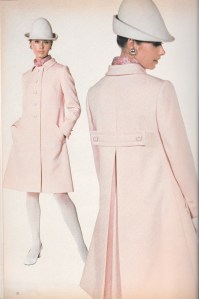
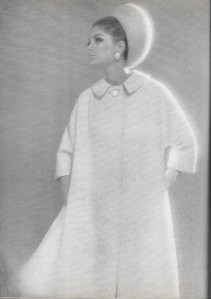
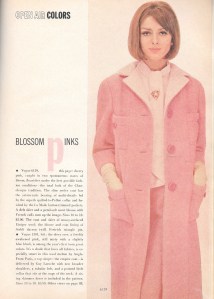
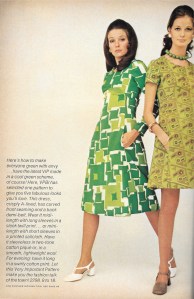
Lots of pink featured in coats from the 1960s. This design was featured in the February/March 1968 International Vogue Pattern Book.

So, I have embarrassing little to show for the past three weeks regarding this coat.  Perhaps the next three weeks may be kinder to me. We shall see!

17 Comments

Filed under Christian Dior, Coats, Dressmaker coats, Fashion history, Mid-Century style, Uncategorized, vintage Vogue Designer patterns, vintage Vogue patterns from the 1960s

More on Dior

In re-reading my last two reviews of the Dior in Denver Exhibit, I realize how very little I was able to include, when there was so much to see and learn.  Well, these reviews cannot go on forever, but there are a few other aspects and components of the Exhibit that I still want to share.

In one of the narrower passageways between Exhibit “rooms,” there was a display of Dior scarves lining each side.  From the Dior Heritage Collection in Paris, these printed silk twill scarves were designed by Alexandre Sache between about 1958-1976.

The very bright graphic ones were so eye-catching:

And this engaging one with its impressionistic rose in the center was my favorite, I think:

You may have noticed in my first two reviews how many of the fashions, especially the early ones, were made in black.  Dior considered black “the most elegant of all colors.”  While they often do not photograph as well as other colors, these fashions made in luscious black fabrics commanded attention throughout the Exhibit.

I apologize for not having the attribution on this cocktail dress.

Also spread throughout the Exhibit were quotes from the various Creative Directors.  Two especially caught my eye.  The first, from Christian Dior himself, was one I had never read before.  “The Americans are, by essence, impeccable.”  Wow!  What a lovely tribute to his stylish American clients.

And then there is this one from the current Creative Director, Maria Grazia Chiuri:  “A dress can have some impact but a woman makes the difference with her attitude.” This quote needs no further commentary…

The Exhibit included so many supporting documents and written and printed materials, it was impossible to identify the most important.  But I want to share this copy of Time Magazine from March 4, 1957, with Christian Dior on its cover.

Dior died the same year, 1957, on October 24th.

As Exhibit goers departed the exhibition space, there were paper punch-out Dior “handbags” for the taking:

Here is the reverse of this small bag, with punch-out puzzle pieces of the coat included! So clever.

After four hours nonstop in the Exhibit, I reluctantly departed from the Denver Art Museum to get a very late lunch, with intentions to return to the museum shop for a little browsing.  Here I am upon my return, standing in front of one of the displays of books:

And here is the bag (I love bags!) which housed all those lovely purchases made at the Museum Shop:

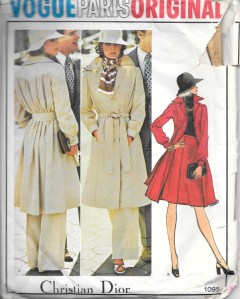
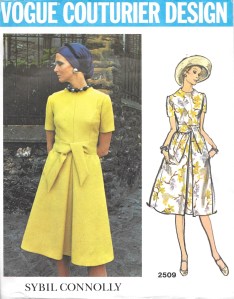
Upon my return home to Pennsylvania, I was anxious to see what Christian Dior Vogue Designer Patterns I have in my collection of vintage patterns.  Two are actually ones I purchased in the early 1970s, another time in my life when I was  actively sewing for myself :

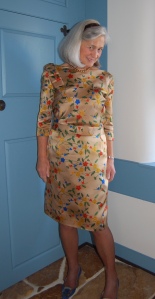
I made this coat when I was in my early twenties. I only wish I still had it!

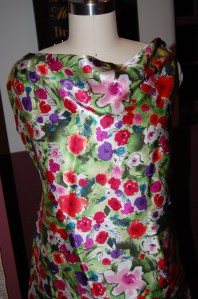
I never made this pattern, but I may still do so.

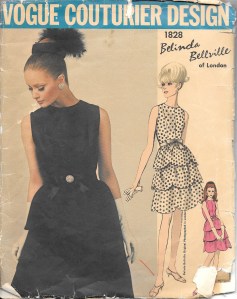
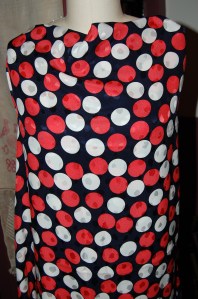
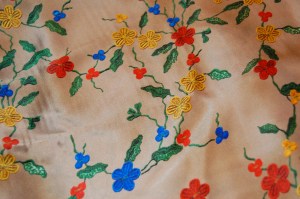
And then there are these two, somewhat recent purchases:

These two patterns are earlier than the two above.

And yes, you do see a theme emerging if you consider these four patterns.  They are all coats!  (I am obsessed with coats…) Any guess what my current project is (after I make birthday dresses for my granddaughters)?

10 Comments

Filed under Christian Dior, Coats, Fashion commentary, Fashion Exhibits, Fashion history, Uncategorized, vintage Vogue Designer patterns, vintage Vogue patterns from the 1960s, vintage Vogue patterns from the 1970s

An A-Line Cocktail Dress

The A-Line silhouette is certainly a very recognizable and common style.  Although there is nothing spectacular about it, it does have a rather interesting origin in modern fashion history.  I had lots of time to think about this style as I worked through my most recent project, and I was surprised with what I discovered.

This entry in Fairchild’s Dictionary of Fashion gives a succinct history:

“Apparel styled close and narrow at the shoulders or waist and flaring gently away from the body to the hem in a line resembling the letter A.  Introduced in 1955 by Paris couturier Christian Dior, the term is used as an adjective in describing a wide variety of apparel with this shape, including coats, dresses, jumpers, and skirts.” (The Fairchild Dictionary of Fashion, by Charlotte Mankey Calasibetta and Phyllis Tortora, Third edition, Fairchild Publications, Inc., New York, New York, c2003, page 11)

A further entry adds “…Usually made with narrow shoulders, [and] a high neckline…” (Ibid, page 11)

Dior’s “A-Line” collection in the Spring of 1955 featured a “fingertip-length flared jacket worn over a dress with a very full, pleated skirt.” (“A-Line dress,” by Susan Ward; Encyclopedia of Clothing and Fashion, by Valerie Steele; Thomson Gale, Detroit, Michigan, pages 35-36) Fairchild’s Dictionary has a depiction of this very dress which was called “the most wanted silhouette in Paris.”

Obviously the A-Line shape then evolved into a less dramatic, and more ubiquitous style during the 1960s and ‘70s, much closer to  what we recognize today as A-Line.

When I was contemplating which pattern to use for my dress (I had purchased the fabric, 1½ yards, 54” wide,  from Mendel Goldberg Fabrics in April of this year), I wanted a style which would showcase the fabric. Although I originally thought I would go with a sheath dress silhouette for this fabric, when I found this pattern, it struck a chord.

The line drawing for the shorter length shows more detail of its seaming and darts. The description on the pattern envelope reads: “Evening or street length, high shaped, slightly A-line dress has short sleeves and scoop neckline with or without slit at center front…”

I liked that center front seam with its notched neckline, even though I knew it might be a little tricky to match the embroidered vines and flowers.  However, I thought  the semi-attached appliqués would be lovely overlapping the seams.

The small slit in the center front neckline.

It took me a full week to finish my muslin.  The bust needed to be dropped so those princess-seamed darts needed a lot of adjustment.  In the shoulder area I had some gaping in the front, and I also needed to reshape the top of the shoulders.  Instead of easing the sleevecaps to fit the armscye, I decided to replace that ease with a shaping dart to the top of the sleeves.  I really liked the fluid look that gave to the shoulder line. I drafted three-quarter sleeves as I was contemplating that change to the original pattern.

It is difficult to see in this black fabric, but this is the top of the sleeve with its shaping dart.  If you look closely, you can see some loose edges of the larger appliqués.

Can you guess what is coming next?  As is often the case when I purchase fabric first and then choose a pattern, I created a challenge for myself.  It was almost immediately obvious to me that I would not be able to work on the lengthwise grain of fabric, as I could not begin to fit the pattern pieces onto the fabric and do any matching whatsoever. As luck would have it, I preferred the appearance of the meandering of the vines and flowers on the crossgrain, and I figured out how to stagger the pattern pieces to both fit the fabric, and match the seams.  But those three-quarter length sleeves?  No way were they going to happen!  I could just fit in the original short sleeves, so short they were going to be!

Here are the silk organza underlining (pattern) pieces laid out on my fabric. I had to stagger the four main pieces to fit it on the fabric. Fortunately I was still able to match the pattern of the vines and flowers. Whew! (I took pictures on my iPad to help with the matching.  You can see it in the upper right corner.)

I ended up basting by hand every single seam on this dress.  Even with great care, it was incredibly easy to catch corners of those loose appliqués by mistake, so it was much easier to make adjustments in basting rather than in the finished machine-sewn seams.  The basting also showed me I needed to take out a small bit of the width of the skirt from the waist down, about an inch total.  When is an inch more than an inch?  In this dress!  That one inch made a huge difference in its final appearance.

Because I was sewing this dress using couture techniques, the neck facing was eliminated, with the black crepe de chine lining fell-stitched to the edge of the neckline.  When I under-stitched the lining to secure it in place, I used an off-white silk buttonhole twist. It was so much easier to see light thread on the black lining, and also, I think it looks pretty.

I hand picked the zipper, which virtually disappears in this dark jacquard embroidered fabric.

I was able to arrange the hem of the skirt so the larger of the semi-attached appliqués would hang just beneath the fold-line.

This shows two of the appliqués at the hemline.

I love the graceful flow of this dress.

The simple look of this dress belies the hours and hours I spent on it!

And I am so pleased that I was unable to make three-quarter length sleeves. These short sleeves are just perfect!

I am quite happy with the way this dress turned out.  I do think its simple lines show off the fabric well – no need for anything too fussy when the fabric is so incredibly lovely!  I love that I can wear this 1960’s A-Line style and somehow feel – and hopefully look – very current.


30 Comments

Filed under Cocktail dresses, couture construction, Fashion history, Formal or fancy dresses, hand-sewn zippers, Mid-Century style, Uncategorized, underlinings, vintage Vogue patterns from the 1960s

A Definite ‘60’s Vibe

“Unexpected,” “unusual,” “fascinating,” and even “a bit magical” are words used to describe some of the fabrics, prints and designs from the late ’60s/early ’70s (The Editor’s Letter, Vogue Pattern Book International, April/ May 1970.)  Although I have no documentation, I am sure that this red and white Moygashel linen is from those last years of the 1960s or early years of the ’70s.

Of course, another clue to the age of this Moygashel linen is its width of 45″. Prior to about 1964, Moygashel was only available in 35 or 36″ width, as best as I can determine.

A quick look through some of my Vogue Pattern Book Magazines from this time period uncovered other fabric designs which have a similar feel to them.

This dress appeared in the April/May 1970 Vogue Pattern Book International, page 16.


This large, irregular leaf print was shown in the February/March 1968 issue of Vogue Pattern Book International, page 11.


Even this sewing machine ad features a dress with an abstract geometric fabric design. Again, this is from the February/March 1968 Vogue Pattern Book International, page 24.


And here is another spectacular Moygashel linen, advertised in the April/May 1970 Vogue Pattern Book International, page XXIV. Cute dresses!

Interestingly enough, these demonstrative and colorful fabric designs were often sewn from the same or similar patterns as their more demure pastel and solid counterparts. I kept that in mind as I contemplated which pattern to use for this “unusual” and “fascinating” linen. Additionally, I wanted to pair it with a red linen belt  (which I ordered several years ago when I knew that Pat Mahoney was closing her custom belt and button business.  The red linen is some I fortuitously had left over from some of my sewing in the early 1970s.)

Then, after the recent success of my fairly dramatic changes to this pattern – and knowing I had a great muslin from which to work – I went with it again.

Here is the result:

I definitely had some issues with the very uneven grid.  I took a lot of pictures of the fabric arranged on my dress form before I started to lay out the pattern.  This helped me to visualize the areas which needed some regularity (if you can call it that!)  I realized quickly, in order to achieve a semblance of matching in the critical areas, I would have to accept way less than perfect in other areas.  Because the entire geometric design is so irregular, I have, I think, made peace with this decision.  (I haven’t worn the dress yet, so the proof of this is still to be determined.)

The bodice front seemed to me to be the most critical, and I wanted that three-striped horizontal motif to follow across the upper bustline.


The back proved to be a bit more problematic, as three quarters of it lined up fairly well, with one section off on the left side.  Because the side piece wraps around the side (as in no side seam), there was only so much I could do in order to be able to “match” the front.  Additionally, I thought it was more important to have the back center seam, rather than the side back seam, positioned correctly, so that’s what I did.

Am I going to have the nerve to wear this dress?

I may end up loving it??

I lined the entire dress with a very lightweight linen cotton blend, eliminated facings for the neck and armholes, and finished those areas with a typical couture treatment.

Because the skirt lining is unattached, I finished off the seams of the linen with Hug Snug rayon tape.

I did not use a silk organza underlining, as I like my linen dresses to be washable. Without that inner layer of organza, I had to be very careful with sewing the hem, to try to make it as unnoticeable as possible.

I doubt I will have a chance to wear this dress yet this Fall.  The later it gets, the odder it will look.  That’s okay.  I’m ready to move on to something more subdued – but hopefully “a bit magical” will still be in the equation.

32 Comments

Filed under couture construction, Linen, Linings, Mid-Century style, Moygashel linen, Uncategorized, Vintage fabric, vintage Vogue Designer patterns

A Sewing Draught

The weather outside is frightful, as the popular Christmas song goes.  It has been too hot and too wet here in eastern Pennsylvania (USA) this summer.  Our family travels, however, took us to areas that were both too hot and much too dry. It was exactly those lengthy travels which helped determine the atmospheric conditions in my sewing room during the past weeks.  There has been a definite draught in that part of the house.  The sewing machines have been huddled under their covers, the fabric has lain folded and fallow, there has not been even a bubble of moisture from the steam iron, nor the slightest snip from the scissors.  It has been a place undisturbed and quite barren.

So, finally, it is time to change all that!  Now I am faced with the question – Do I try to squeeze in the making of one more summer dress (it certainly still feels like summer) – or do I forge ahead with a project which has a mid-October deadline?

If I go with one more summer dress, it will be one made from this vintage Moygashel linen, which has been in my queue for quite some time – and somehow never made it to the top.

Realistically, it would probably be wiser to focus on that mid-October dress, which is going to be a cocktail dress made from this amazing fabric, a lightweight brocade, embroidered and with with lace appliqués.  One of the perks of attending Susan Khalje’s Couture Sewing School in Baltimore (which I did last April) is the opportunity to see and purchase fabric from Mendel Goldberg Fabrics.  Alice Wildes, the proprietress, arrives at the beginning of each week-long class with a car full of her gorgeous, carefully selected yard goods, and that is where I purchased this piece.

The embroidered flower stems are a light gray, and the flowers themselves are a pale pink.

Getting this brocade was actually a last minute decision, as I already had one cotton piece selected – and I was trying to be circumspect in buying more fabric (remind me again of why I ever think this will work?) Anyway, I’m so glad I succumbed as I love it and have determined which pattern to use for its construction:

I will be making the shorter dress, without the jacket.

I like the notched neck detail on the shorter dress. I may make below elbow length sleeves – still to be determined.

Although this dress appears to be a simple silhouette, I have plans to change it up a bit, which will add to its complexity, so it certainly cannot be rushed.

With any luck, the weather will start to change for the better no matter which project I embark on.  The only question is – which one will get the nod?

13 Comments

Filed under Cocktail dresses, Formal or fancy dresses, Lace, Linen, Moygashel linen, Uncategorized, Vintage fabric, vintage Vogue patterns from the 1960s

Wearing Dots

From this …


To this…


How did that happen?

After my purchase of that pattern a couple of years ago, I definitely had second thoughts.  While I loved it when it was first available back in the 1970s – and at that time I was of the age when I probably could have actually worn it – I immediately realized it would not be appropriate for a 60-something-year-old! I tucked it away in my pattern file where I knew I would come across it occasionally and indulge a long-ago dream.  Little did I know it would play a major roll in the realization of this polka-dotted dress.

It took almost eight years for me to come up with a plan for this polka dot silk fabric.  I kept envisioning a waisted, sleeveless dress with a “flowy” skirt, but I could not find a pattern I liked, either vintage or new.  I wanted to avoid darts as much as possible (that’s a story in itself for someday), which meant I needed a princess style bodice.  Many princess line bodices have side seams, but I wanted one without side seams, and with princess line seaming on the bodice back as well.  Pondering all this, I again came across my Belinda Bellville pattern above and thought maybe it would work, with a few changes. But then I noticed that the bodice was supposed to be cut on the bias. 

This pattern detailing from the instruction sheet shows the thee bodice pieces at the top of the picture. The bias is clearly marked.

After not having any success in finding any other suitable pattern, I gave it another look.  Why not cut it on the straight of goods?  It was at least worth a try in muslin, so that’s what I did.  The changes I made to it included; 1) lowering the bust line, 2) eliminating the short-waisted front of the dress and restoring it to waist level, 3) placing the front center part of the bodice on the fold, eliminating the center seam, 4) lowering the neckline just a little, 5) making the waist larger, and 6) adding some ease across the back and shoulders.  With all those changes, I had a bodice I really liked.

But then I needed to make a skirt to complement the bodice.  When I looked at the skirt pattern, I knew I needed to divide it in thirds (for one half of the width of the skirt) and match the seam lines to the seams in the bodice.  Here is what I came up with:

On the left is the one-piece tissue pattern for the skirt. Using the dart lines on that pattern helped me determine the angles I needed for my skirt.

It was about this time I got the idea to make this dress in a longer skirt rather than knee-length, which is where I usually wear my dresses.  The only question I had was – did I have enough fabric to do this?  My silk was 45” wide, and I only had two yards.  I spent at least an hour laying out and eyeballing my muslin pieces on the silk, on the floor, just to see if I could possibly accomplish this task.  I found one combination that would allow this, and took a photo so I could remember how to do it!

It literally took an entire week to work out the pattern and perfect the muslin, but then the sewing began!

As soon as I completed the construction of the bodice, including its silk organza underlining, its catch-stitched raw seam edges, with the seam allowances around the neckline and armholes appropriately tacked in place, I knew I had a bodice which was just what I had envisioned.

Somehow the skirt seams all matched up perfectly with the bodice seams and the center front inverted box pleat, which I added, looked wonderful, I thought.  I made the lining out of navy blue crepe de chine, purchased from Emma One Sock Fabrics.

When it came to under-stitching the neckline and armholes, I decided to do it in white.  It mimics the white polka dots in the fashion fabric and also was much easier to see while doing all that handwork.

Instead of a box pleat in the lining, I did two side pleats to reduce bulk in that critical tummy region!

Fortunately, for the belt, I had silk taffeta left over from two previous projects, which turned out to be a perfect match.  I did not want the belt to take away visually from the rest of the dress, so I made it a modest 1.5 inches wide.  I think it is enough to complete the look, but not overpower it. And OF COURSE I wanted to finish it off with a tailored bow.  (I am planning a post on making this tailored bow belt, so I will not go into the details of it right now.)


An oyster-colored clutch helps to complete the look.

This is a very comfortable dress to wear!

No attempt was made to match any dots, as the pattern was completely random. This is the hand-picked zipper. I love the fact that the navy thread shows up on the white and coral dots.

And should I need a dress coat, this one matches the belt!

While this dress was firmly in my queue for summer sewing, at the time I did my planning I was not making it for any special occasion.  However, as good fortune would have it, two unforeseen occasions are now approaching in late summer for which this dress will be perfect.  I am definitely looking forward to wearing these dots!

41 Comments

Filed under Bows as design feature, Cocktail dresses, couture construction, Linings, Mid-Century style, Polka dots, sewing in silk, silk, Silk taffeta, Uncategorized, vintage Vogue Designer patterns, vintage Vogue patterns from the 1970s

Seeing Dots

Who doesn’t love a polka dotted motif?  The term “polka dot,” dating from 1880-85, is of American derivation, and of course it immediately conjures up a mental picture of a field of spots forming a pattern on a textile.

Here is what Christian Dior had to say about Dots in his Little Dictionary of Fashion, first published in 1954:  “I would say the same about dots as about checks.  They are lovely, elegant, easy, and always in fashion.  I never get tired of dots…  Dots are lovely for holiday clothes … and for accessories.  According to their color, so they can be versatile…  Black and white for elegance; soft pinks and blues for prettiness; emerald, scarlet, and yellow for gaiety; beige and gray for dignity.”  (The Little Dictionary of Fashion, by Christian Dior; Abrams, New York, New York, 2007, page 34.)

“Lovely, elegant, easy and always in fashion.”  That is quite an endorsement, and one with which I completely agree.  I also have to agree with these quotes, the first one  from Marc Jacobs: “There is never a wrong time for a polka dot,”  and this one from the American actress, Anna Kendrick, “You can’t have a bad day in polka dots.”

While images of polka-dotted dresses, blouses, ensembles, and sportswear are in abundant supply from many sources, it’s always inspiring to look at a few select examples, many from the 1950s.  The following two images were part of a feature in the February/March 1955 Vogue Pattern Book Magazine.  Although pictured in black and white the first example is described as “Tiny white polka dots on red crepe. A soft day-long dress.”

The next image is titled Gigantic Dots:  “Bold black dots on hot pink surah.  A dramatic sheathed bodice dress.”

Can you imagine how beautiful this dress was in hot pink with black dots?

The June/July 1957 VPB Magazine featured “the most romantic dress of the season – a pouf of black-and-white silk polka dots.”

Less than a year later, in the April/May 1958 VPB Magazine, an entire feature was on Polka Dots and Patent Leather:  “Exciting goings-on in polka dots: fresh new arrangements – at their most polished in black and white silk surah, spruced with gleaming black patent leather.”

Below is the dress of this description: “Dots blown up to impressive sizes – a look for relaxed but festive evenings.”

This two-piece dress could easily be worn today and look very current.

And here is the image for “Classic polka dots – square cut blouse [with] reverse-dot cummerbund:”

One of my favorite outfits from the show Mad Men was this white linen dress with a built-in silk polka dot sash. The two-color sash makes this dress a standout:

Image from The Fashion File; Advice, Tips, and Inspiration from the Costume Designer of MAD MEN, by Janie Bryant with Monica Corcoran Harel; Grand Central Life & Style, New York, New York, 2010, page 8.

This famous – and stunning – 1958 dress and coat ensemble by Arnold Scaasi, an American couturier, was featured prominently in the retrospective of his work at the Museum of Fine Arts in Boston, September 25, 2010 – June 19, 2011:

Now this is an exhibit I wish I had seen.

And finally, this is a Carolina Herrera ad which I plucked out of some magazine a while ago. The ad is for the handbag, but the polka-dotted dress, with its bright red sash steals the show:

So why all my focus on polka dots?  They have been much on my mind lately, as I have finally begun the many-step process of making a couture dress, using this vibrant silk, purchased seven or eight years ago:

This is a crepe de chine which I purchased from Britex Fabrics in San Francisco. Smaller irregular dots are woven into the design.

The background color is navy blue.

Now my hope is that one cannot have a bad sewing day when working with polka dots.


20 Comments

Filed under Cocktail dresses, Day dresses, Fashion Exhibits, Fashion history, Mid-Century style, Polka dots, The Conde Nast Publications, Uncategorized, vintage Vogue patterns from the 1950s

The Essential Coat

How many coats do you own? (Not enough?) How many do you need? (More than you know!) Putting need aside, how many should you have? (Plenty!) In your sewing and in planning your wardrobe, do you give as much thought to your coats as you do to your dresses or pants or blouses? My guess is that you do not.

In our very casual world, coats seem to have taken on the essence of “practical” or “function over form.”   To me, this is such a shame, as I believe coats have an aura to them unmatched by any other garment. They are, after all, so often a significant part of the first impression you make when arriving at an event or party – or anything for that matter. A fantastic coat can also leave a lasting impression when departing such an event.

In her iconic book, What Should I Wear, Claire McCardell devotes an entire chapter to coats. Here is just a small snippet of her thoughts on the impression that your coat can make: “…Remember that a first impression often comes when you are wearing a coat. When you are interviewed for a job, you keep your coat on. Your future employer’s first impression of you may be based on the coat you are wearing.

When you walk down the aisle of a theatre, you are wearing a coat … your audience has already judged you and the most beautiful dress in the world cannot alter that first impression. Coats ride buses and subways and taxicabs…. A coat is not something to be dismissed lightly.”   (The Rookery Press, New York, New York, 2012, pages 61- 62.)

In The Little Pink Book of Elegance: The Modern Girl’s Guide to Living with Style, by Jodi Kahn, she writes: “Many an elegant look is spoiled by throwing on a coat or a wrap that is anything but . . . [I]f you think about the most elegant women you know, or those in the pubic eye, you’ll probably realize they have fabulous outerwear. In the ‘60s, Jacqueline Kennedy asked her designer of the day, Oleg Cassini, to pay special attention to what she wore over her clothes since she was always being photographed coming and going. Even if you don’t have to worry about getting your picture snapped around every corner, a few great coats will transform almost any [look.]” (Peter Pauper Press, Inc., White Plains, New York, c2005, pages 29-30.)

A beautiful coat can also hint at what is beneath it. One of the most elegant looks one can wear (and make for herself) is a matching coat and dress ensemble, where the two pieces are intended only to ever be worn with each other. Such a coat and dress often share similar style lines.   This Vogue Couturier Design by Mattli of London is an example of this:

Another example of a coat and dress with complementary style lines is this Vogue pattern:

And although the style lines of the dress and the coat in this Vogue Paris Original by Madame Gres are not matching, clearly the coat and dress featured in blue on the pattern envelope are intended as such an ensemble:

Here is an example of a formal dress and matching coat, sharing seaming details and clearly designed to go together. Would this dress be anywhere as exciting without its matching coat?

This evening coat makes my heart skip a beat!

Not every coat needs to match a dress, however. Here is a small sampling of coats, both dressy “dressmaker” coats and classy, more tailored coats, the prototypes of which have their rightful place in your coat wardrobe:

This is my original pattern from which I made the featured coat when I was in my mid-twenties. I loved this coat and only wish I still had it!

I am very anxious to make a coat from this pattern.

This is a beautiful example of a dressmaker coat.

Another dressmaker coat.

A coat better suited for everyday wear, but still beautiful.

One of the many catalogs we receive here at our home is the catalog from the J. Peterman Company. It is so creatively conceived and presented, with each entry reading like a mini story, and often evocative of other times and places. The “Owner’s Manual” (as the company’s catalogs are called) arriving during this past holiday season was no exception. Imagine my delight when turning the page to this entry for a “French Coat with timeless Parisian style.”

Click on the image to read its story.

But what really caught my eye was the caption at the top of the page: “I want to know the woman in that coat.” In a nutshell, that sums up the power of a beautiful coat. What fun to know that, as ones who can make our coats, we can also be the woman who made that coat!

And now, in deference to some of my readers who want progress reports on my Number Four Classic French Jacket, here are a few photos – and a short quiz for those of you who have never made one of these jackets, but hope to one day.

Here is the neckline, ready to be stitched.

I call this the “vest” stage. This is the front of the jacket . . .

And this is the back of the jacket.

It is always fun to pin the sleeves on quickly just to see a jacket taking form!

As you can see, all the machine quilting is complete. I’ve finished the interior seams as much as I can at this point. The next step is to insert the sleeves. Then I can complete the finishing work on the interior seams and the hems and get to work on the trim and the pockets.

QUIZ: How much more will I be using my sewing machine to do this work?

  1. a) only for the insertion of the sleeves
  2. b) only to make the pockets
  3. c) both for the insertion of the sleeves and to make the pockets
  4. d) not for anything

Back to Coats:  Are you ready to make one after reading this post? I hope so!

30 Comments

Filed under Chanel-type jackets, Coats, Dressmaker coats, Mid-Century style, Uncategorized, vintage Vogue Designer patterns, vintage Vogue patterns from the 1960s, vintage Vogue patterns from the 1970s

The Champagne Dress

It is a fact of sewing life that the construction of some dresses is just more difficult and time-consuming than other ones. This was a difficult dress to make and at times I really wondered just how long it would take to finish.

Before I go into the making of this dress, I want to put its pattern into historical context. This pattern is one of Vogue Patterns’ “Paris Originals.”

A former owner of this pattern made the notation about the bust enlargement.

As is obvious from the envelope cover, the dress was designed by Guy Laroche (1923-1989; pronounced Ghee Lah-rush); it is copyright 1960. According to the St. James Fashion Encyclopedia, Laroche was a French couture and ready-to-wear designer who worked for Jean Desses from 1950-57. Desses was known for his intricately draped dresses, asymmetry in his designs and ornament derived from the “architecture” of the garment, according to his profile in The St. James Fashion Encyclopedia by Richard Martin, Visible Ink Press, Detroit, MI, c1997, page 100. Bingo! It appears that Laroche learned well from his time with Desses and incorporated some of the same details into his couture designs once he opened his own fashion house in 1961.

I find it interesting that this pattern is dated 1960, one year before Laroche opened his couture house. Perhaps this statement in the Vogue Sewing Book from 1963 helps to explain how Vogue Patterns managed to obtain a Guy Laroche design before he had his own eponymous line:

Please click on the image to enlarge the print.

In any event, the appeal of this pattern, for me at least, was the asymmetrical draped bodice back and the tailored bow which anchors the drape on the right shoulder of the dress. It was also these details – and others – which made it a time-consuming project.

I made some alterations to the pattern before I even got started, as I wanted to eliminate some of the blousing above the waist of the dress. I do not have enough height to carry off too much excess around the mid-section, so I pulled most of the blousing into darts. Doing this made me rethink the instructions for the lining, the waistline of which was supposed to be sewn to the waistline of the dress itself. I assume the joining of these two elements was to insure that the blousing of the dress remained at the proper “elevation.”

The series of dots around the waistline indicate the sewing line to anchor the dress to the lining.

Having removed most of the blousing, I did not need to anchor the dress to its lining, so I left the lining loose.

This photo shows the loose lining and also the back neckline. Ordinarily, in couture sewing, facings are eliminated. However, in this case, knowing that the weight of the drape would be added to the back neck, I chose to use the facing to add more stability. I finished its edge with Hug Snug tape.

As you can see from the diagram of the lining (above), the back neckline is asymmetrical, to accommodate the attached drape on the bodice. I’m not sure why, but I found this rather confusing, resulting in sewing the lining together, first correctly, then thinking I had done it wrong, redoing it in what I thought was correct – and then realizing I had it right the first time. Fortunately it was easy to remove the stitching from the crepe de chine lining silk, but really? Three times? And then guess what this is?

Yes, this is a backwards back bodice!  Apparently I had flipped (or marked incorrectly) my silk organza underlining/pattern when I placed it on the fashion fabric, cut it out incorrectly and even had the underlining and the fashion fabric all carefully basted together.  When I discovered my mistake,  you can imagine my panic until I realized I had enough of the charmeuse left to cut it out again, this time correctly. Of course, then I had to baste it to the organza underlining for a second time. Tick tock, tick tock!

Things then went along fine until I got to the front neckline, which presented a quandary to me. From the instruction sheet, it seemed there was to be no interior finishing of it. It appeared to be a draped version of a bateau neckline. When I tried the dress on, it was uncomfortable as it pulled too tightly from the shoulders (which did not show up in my muslin).  It also did not look good. I decided the only way out of this predicament was to reshape it. I carefully basted and clipped and trimmed and clipped and trimmed some more (no photos of this, I am sorry to say. I was too intent on the task at hand to even think about photos!) But it all worked out. The front neckline certainly isn’t as draped as was intended, but I love the way it fits and looks.

The lining is not supposed to be attached to the dress at the front neck, according to the instruction sheet. In order to finish the neckline without adding any bulk (which would surely show up on that wide bias expanse), I stay-stitched and then catch-stitched the raw edge to the organza underlining. Not as finished a look as I would like, but it works well.

Another section of the pattern which did not present a proper interior finish for this very particular dressmaker, was the drape. It is partially gathered as you can see from the instruction sheet.

#7 shows the gathering of the interior drape.

As I did not care for a raw edge to be hiding under the drape, I decided to bind the edge with Hug Snug tape. This worked out so well and looks nice and tidy!

Besides these time-consuming corrections and additions, there were the hours of work involved in making the bow, attaching it to the dress, and making the belt. Then when I thought I was just about finished, I remembered I needed to add lingerie keepers, due to the wide stance of the shoulders. Okay, I thought. What else??

I have decided the belt is a little loose, so I need to reset the fasteners… What else, indeed!

What a good feeling of accomplishment to finish this dress and like it!

Here is a detail of the bow. I do love a tailored bow!

I haven’t worn it yet for any occasion, but when I do, I hope there is champagne involved, as I am going to toast myself for successfully finishing this one!


46 Comments

Filed under Bows as design feature, Cocktail dresses, couture construction, Linings, Messages from past owners of vintage patterns, Mid-Century style, sewing in silk, side-placed zippers, The Conde Nast Publications, Uncategorized, underlinings, vintage Vogue Designer patterns, vintage Vogue patterns from the 1960s

A Rosy Sewing Year

It seems that every new sewing year – at least for me – does not start right on time, as I am always finishing up a project from the month of December. Such is the case in this early January of 2018. However, that does not keep me from planning and dreaming about the coats and jackets, dresses and blouses to come. I can’t help but think of the new year at hand as a “rosy sewing year,” because the fabrics that are in my queue right now share a common theme – so many are predominantly red or pink or peach or floral, a bouquet of colors and textures.

First up is this red and black “hounds tooth” boucle which I found at Mendel Goldberg. Yes, it will be a Classic French jacket, with a sheath dress to match.

I am planning some variations in detail and trim for this jacket and dress, about which I am excited. It is a big project, so I hope January gives me lots of sewing time! No doubt this will spill over into February…

As I mentioned in one of my December posts, I hope to make a coat from this vintage purple boucle I am so fortunate to own.

A few years ago I found this silk charmeuse (also at Mendel Goldberg) which I intend to use for a coordinating dress with the coat.

Other silks I would love to concentrate on this year are purchases made several years ago from Britex Fabrics in San Francisco:

This is a French crepe de chine.

This silk helps satisfy my penchant for polka dots.

Then there are two linens I never got to in 2017, one a geometric red and the other a ecru and black floral. I assume they are waiting patiently for me. Add to all this my determination to sew for my two little granddaughters and – there’s the year! (And can I possibly finish another classic French jacket next Fall?  We will see.)

But let me complete 2017 first. Whatever made me think I should start (and could possibly finish) another dress for myself in December I will never know. But that’s exactly what went through my head. I had plans to make taffeta “Cinderella” dresses for my granddaughters for Christmas presents, but thought I would sneak in some personal sewing time before I started on that project. Perhaps it was the pattern that made me do it? Or was it the fabric?

When I purchased this pattern at the end of last summer, I really had no idea when I would be using it; I just did not want to miss the opportunity to own it, knowing that I would surely use it someday. Little did I know that someday would be just a couple of months later.

Now it just so happened that I had draped this fabric, below, over my dress form so I could admire it while I worked on other things. I purchased this silk charmeuse from Mendel Goldberg fabrics in 2016 as an end cut, three yards in length.

I knew with three yards I would be able to use a dress pattern which called for more than normal yardage, and I had found a pattern in my collection which I thought I would use:

My idea was to lengthen the sleeves to three-quarter length.

But something just did not seem right. I could not get excited about that pattern in that fabric, even with three-quarter sleeves. Well, I had one of those proverbial light bulb moments when it occurred to me to use the Guy Larouche pattern for the champagne-colored, floral silk. It seems to be a perfect match. The bodice of the pattern is cut on the diagonal, and the meandering flower and vine motif in the fabric lends itself to both straight of grain and diagonal placement. I made my muslin (with quite a few alterations) and was really quite excited about the draped back, shown here in muslin:

And here is the front, minus one sleeve. The front neckline is a bit unusual and I think it will be flattering.

I got as far as transferring the markings onto the silk organza underlining, cutting out the fashion fabric, and basting the two layers together, all ready to start sewing. Then reality hit like a sledgehammer! I had to get those dresses for my granddaughters finished in time for Christmas (which I did, after some frantic sewing – and they love them, which made it all worthwhile!)

Just in case anyone would like to see these dresses, here they are. Big bows in back, and the sleeves are adorned with little bows. Very girly!

So that’s how I am now at this point, finishing up 2017, with the hope of starting the new sewing year one of these days – with my Guy Laroche dress perched in my closet, awaiting its debut. May the New Year be rosy and kind to all of us, and may it end with many sewing dreams fulfilled!

25 Comments

Filed under Boucle for French style jackets, Chanel-type jackets, Coats, Linen, Moygashel linen, Polka dots, Sewing for children, silk, Uncategorized, vintage Vogue patterns from the 1960s