Category Archives: underlinings

An A-Line Cocktail Dress

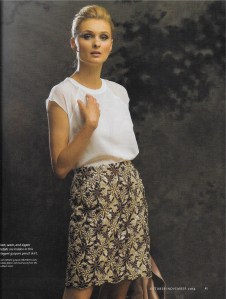
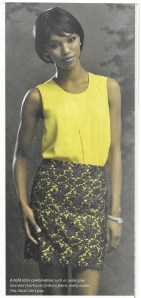
The A-Line silhouette is certainly a very recognizable and common style.  Although there is nothing spectacular about it, it does have a rather interesting origin in modern fashion history.  I had lots of time to think about this style as I worked through my most recent project, and I was surprised with what I discovered.

This entry in Fairchild’s Dictionary of Fashion gives a succinct history:

“Apparel styled close and narrow at the shoulders or waist and flaring gently away from the body to the hem in a line resembling the letter A.  Introduced in 1955 by Paris couturier Christian Dior, the term is used as an adjective in describing a wide variety of apparel with this shape, including coats, dresses, jumpers, and skirts.” (The Fairchild Dictionary of Fashion, by Charlotte Mankey Calasibetta and Phyllis Tortora, Third edition, Fairchild Publications, Inc., New York, New York, c2003, page 11)

A further entry adds “…Usually made with narrow shoulders, [and] a high neckline…” (Ibid, page 11)

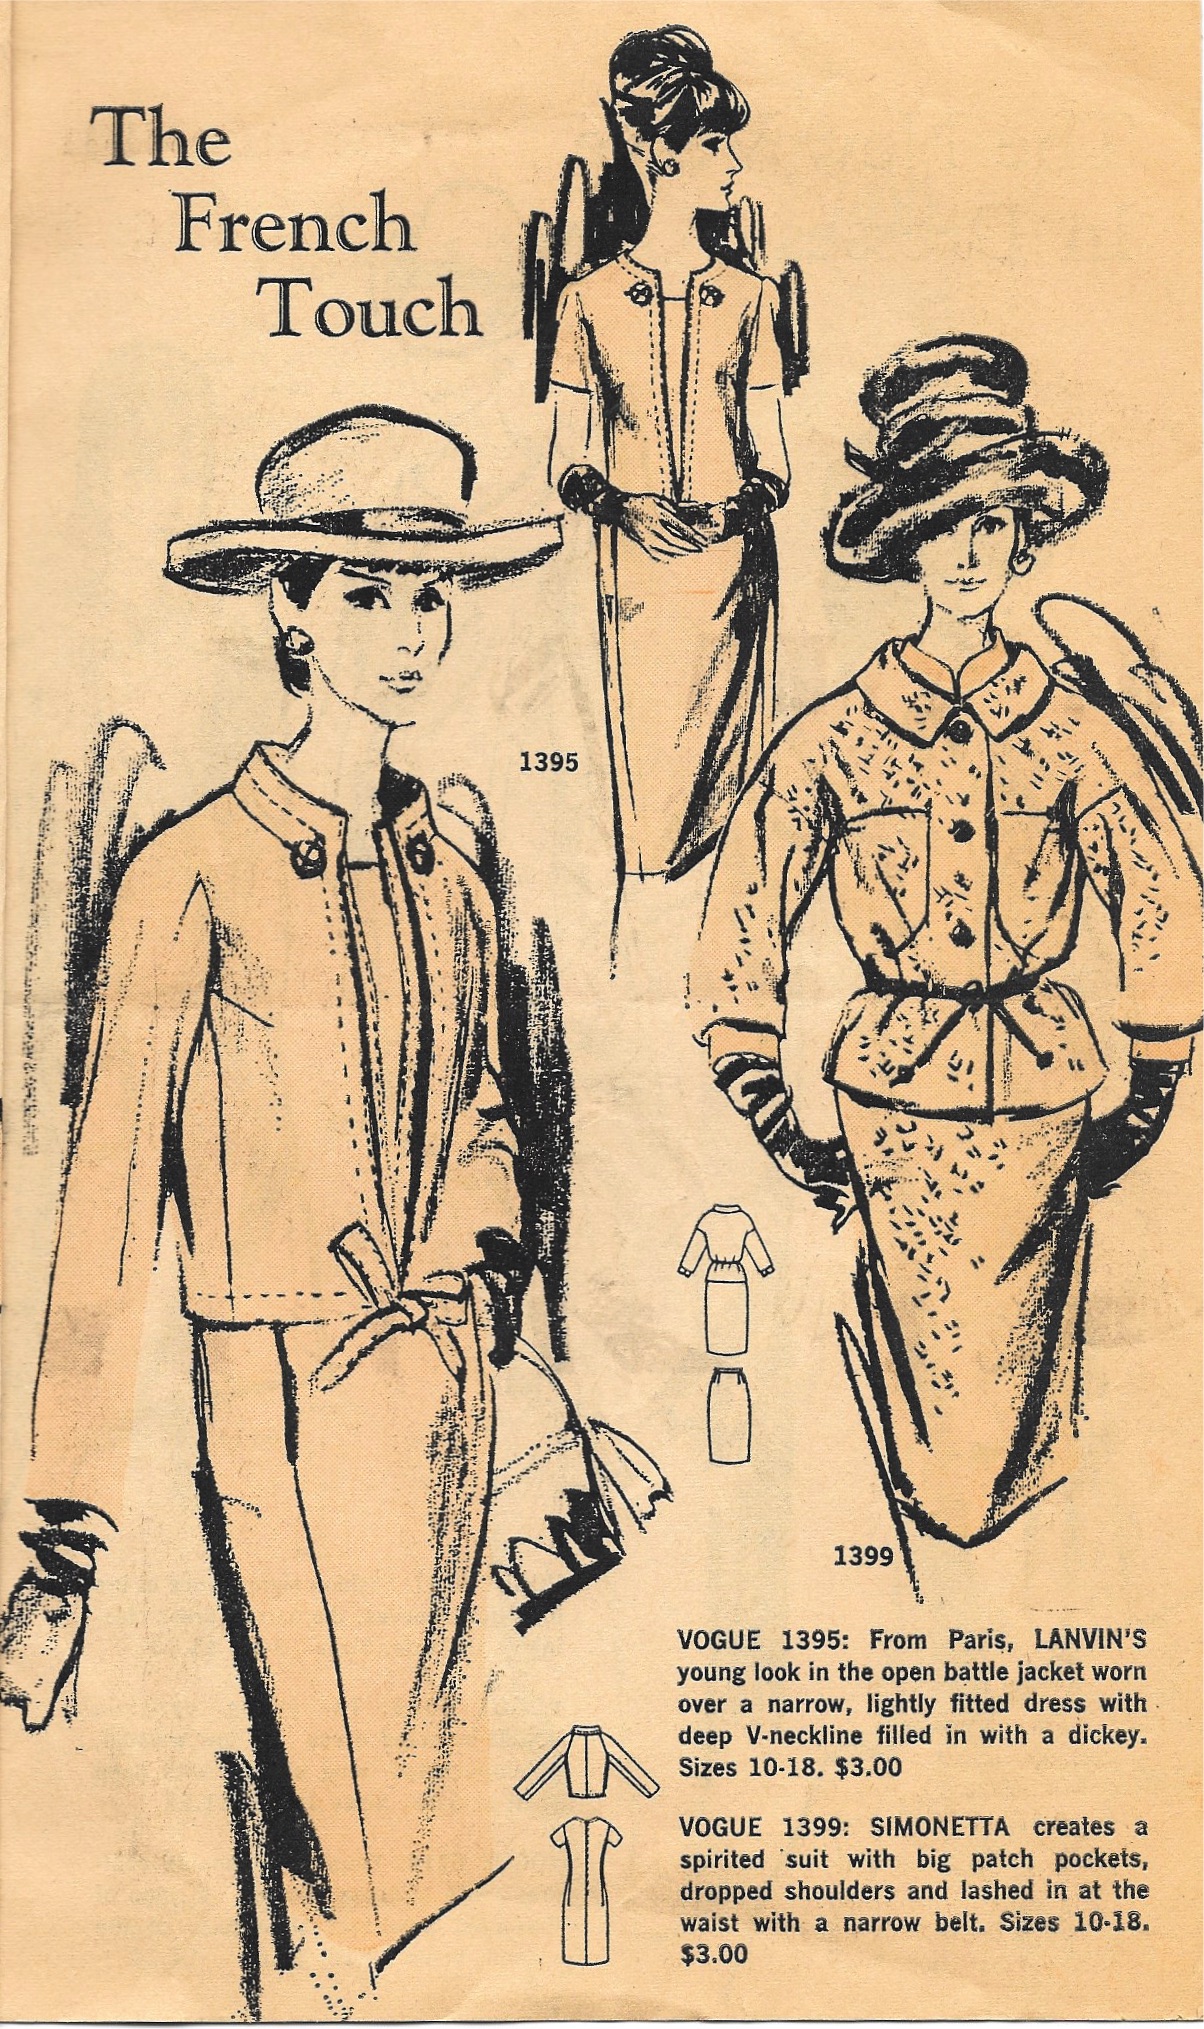
Dior’s “A-Line” collection in the Spring of 1955 featured a “fingertip-length flared jacket worn over a dress with a very full, pleated skirt.” (“A-Line dress,” by Susan Ward; Encyclopedia of Clothing and Fashion, by Valerie Steele; Thomson Gale, Detroit, Michigan, pages 35-36) Fairchild’s Dictionary has a depiction of this very dress which was called “the most wanted silhouette in Paris.”

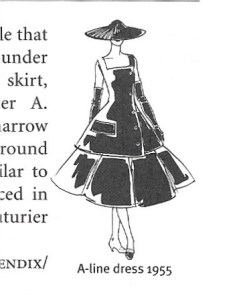
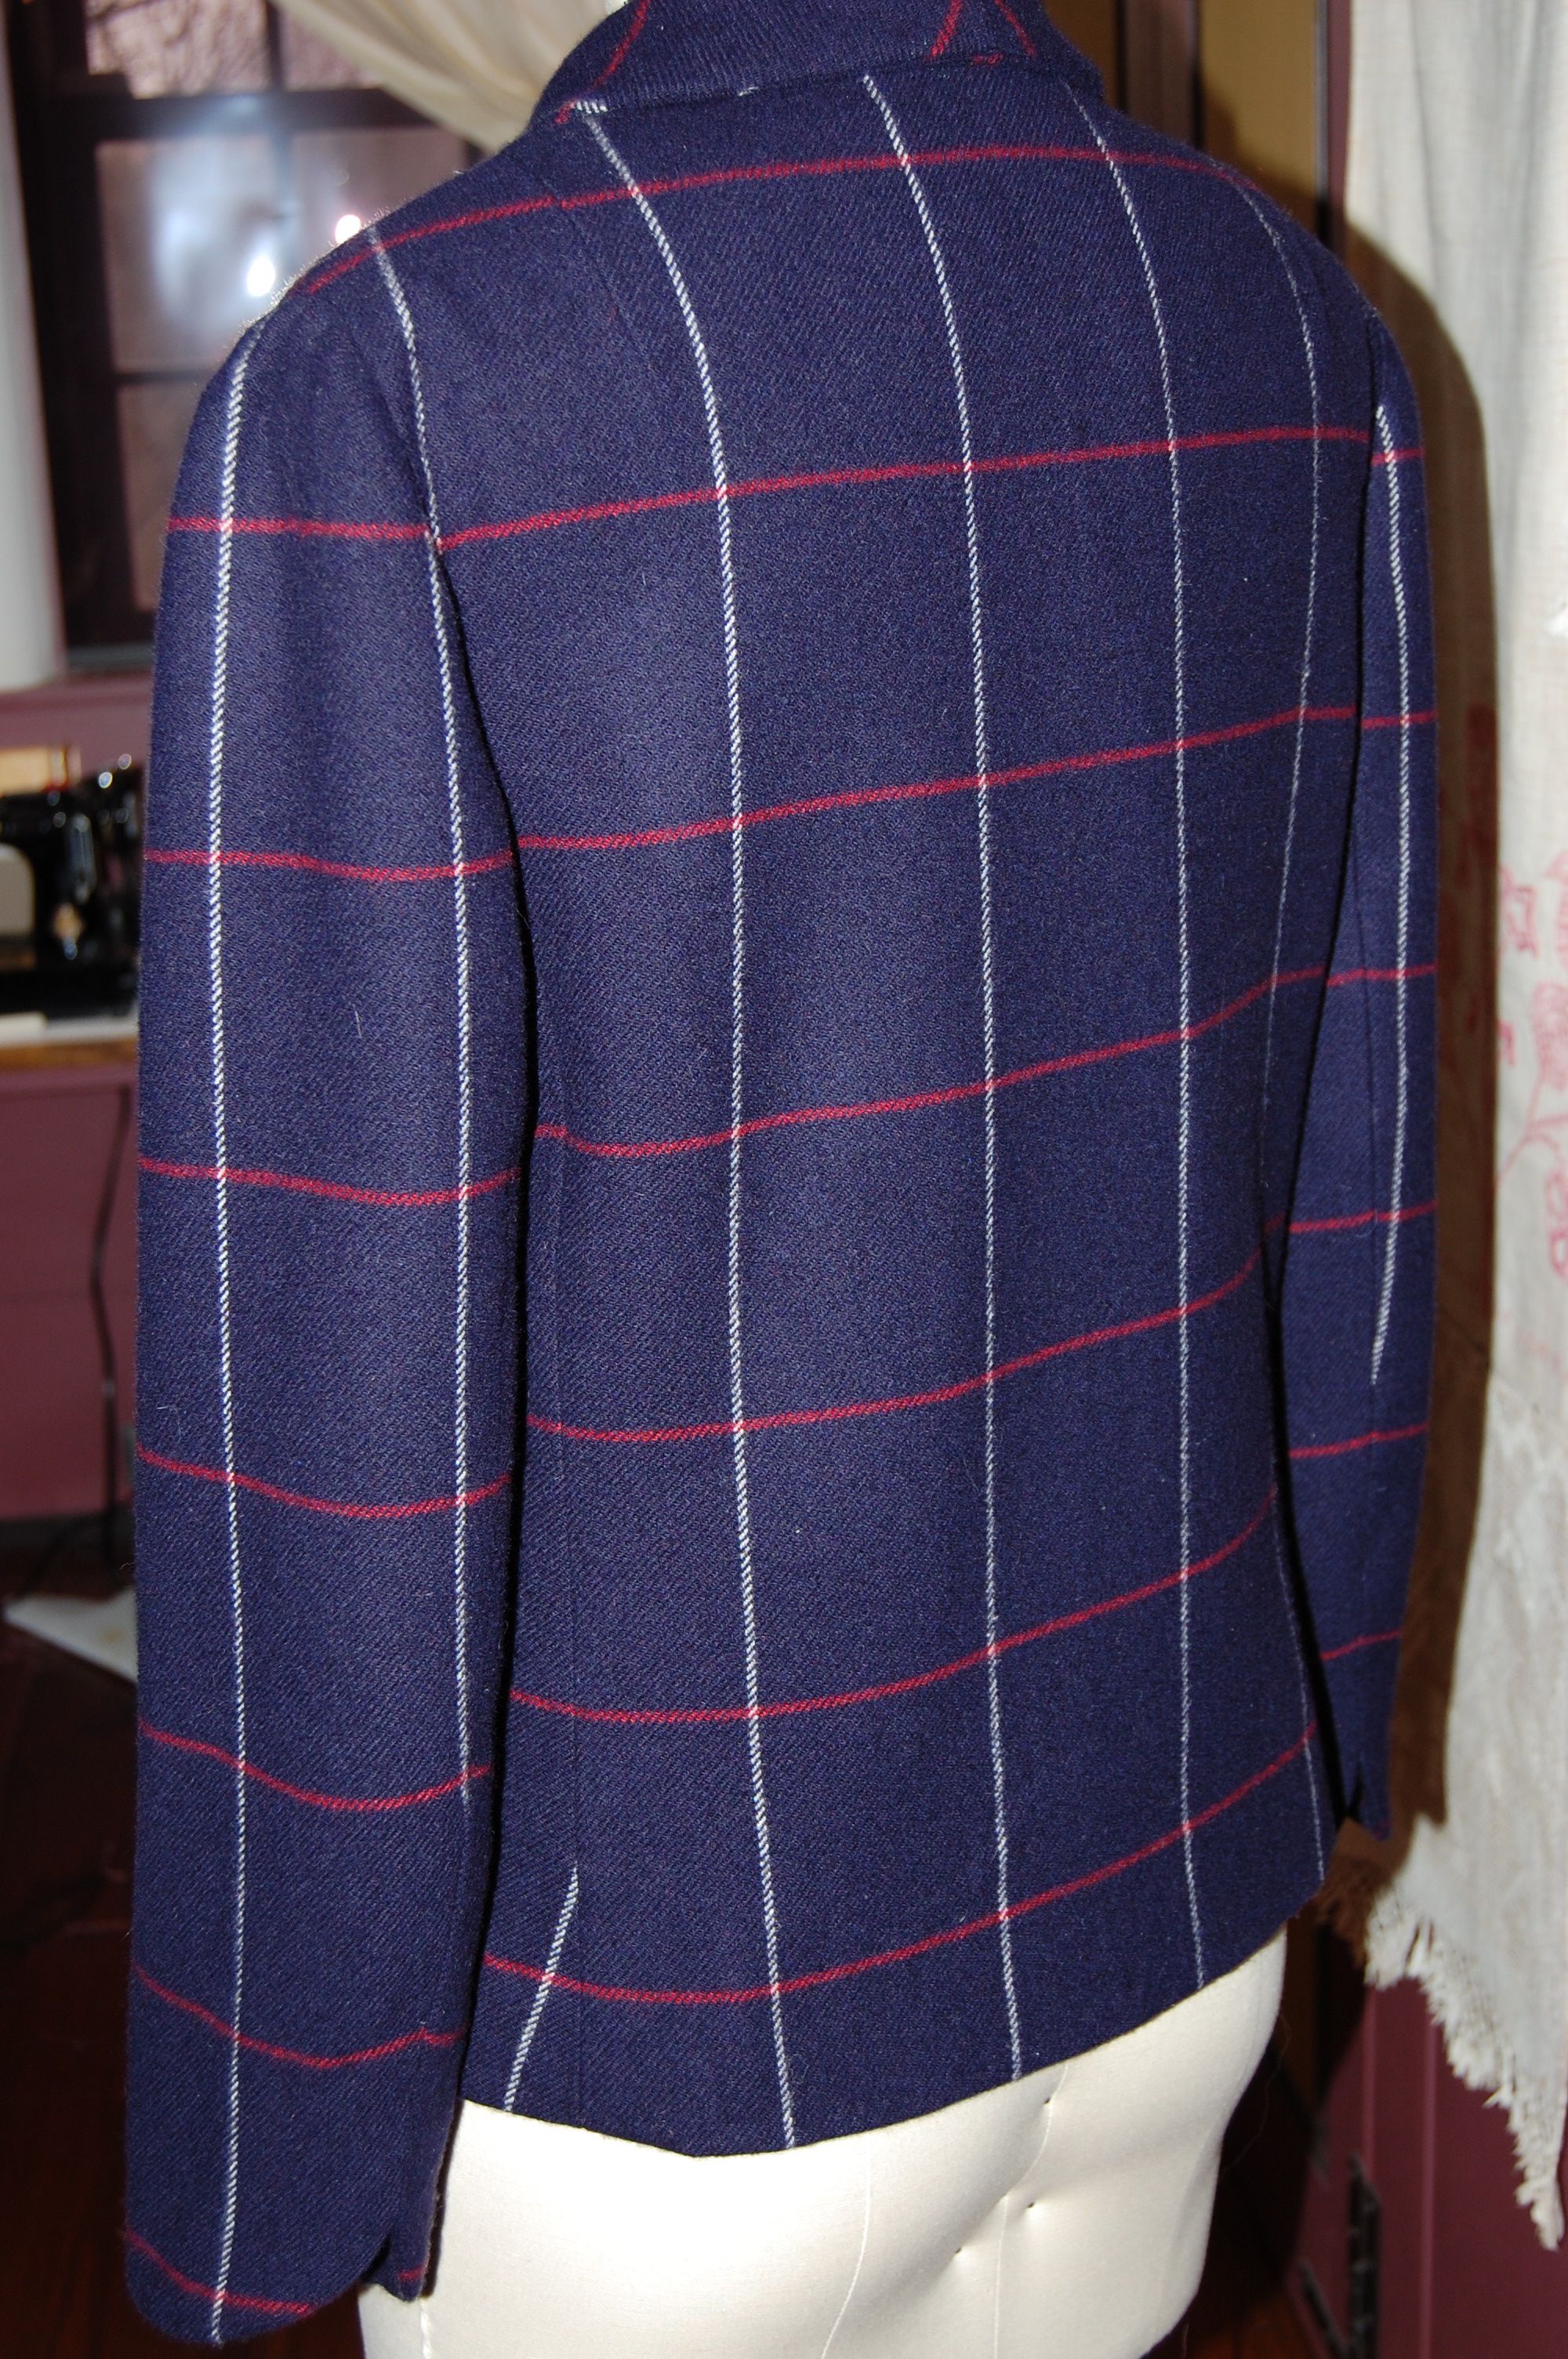
Obviously the A-Line shape then evolved into a less dramatic, and more ubiquitous style during the 1960s and ‘70s, much closer to  what we recognize today as A-Line.

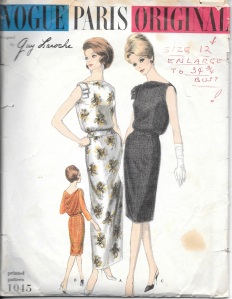
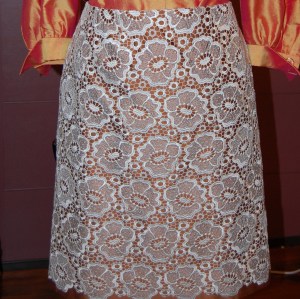
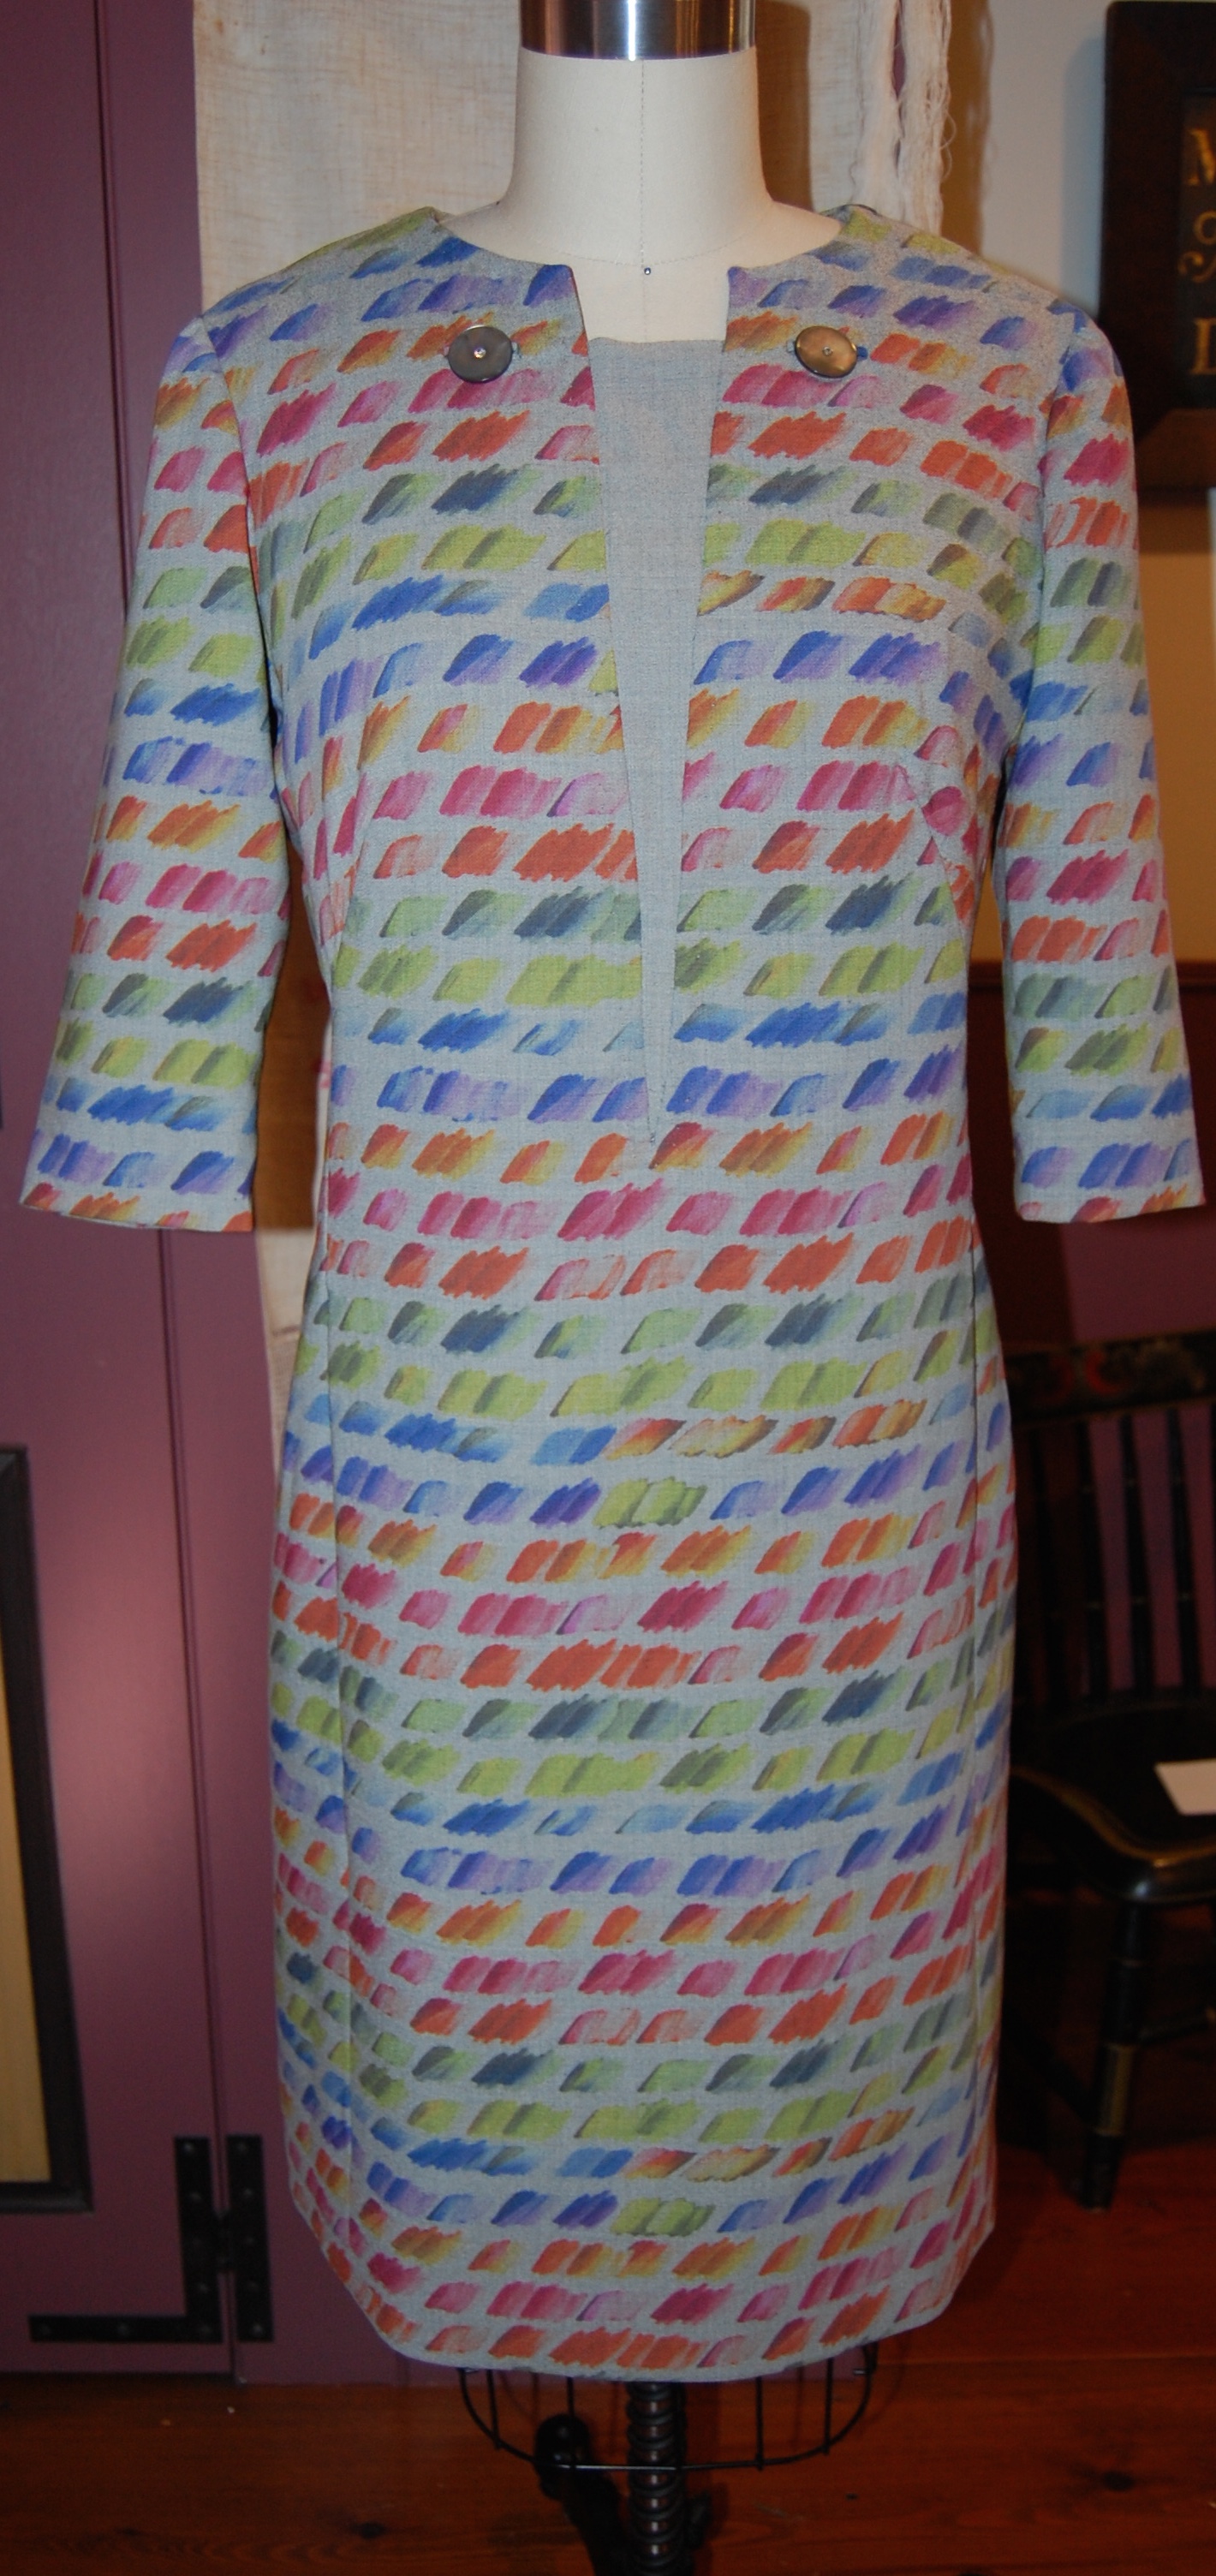
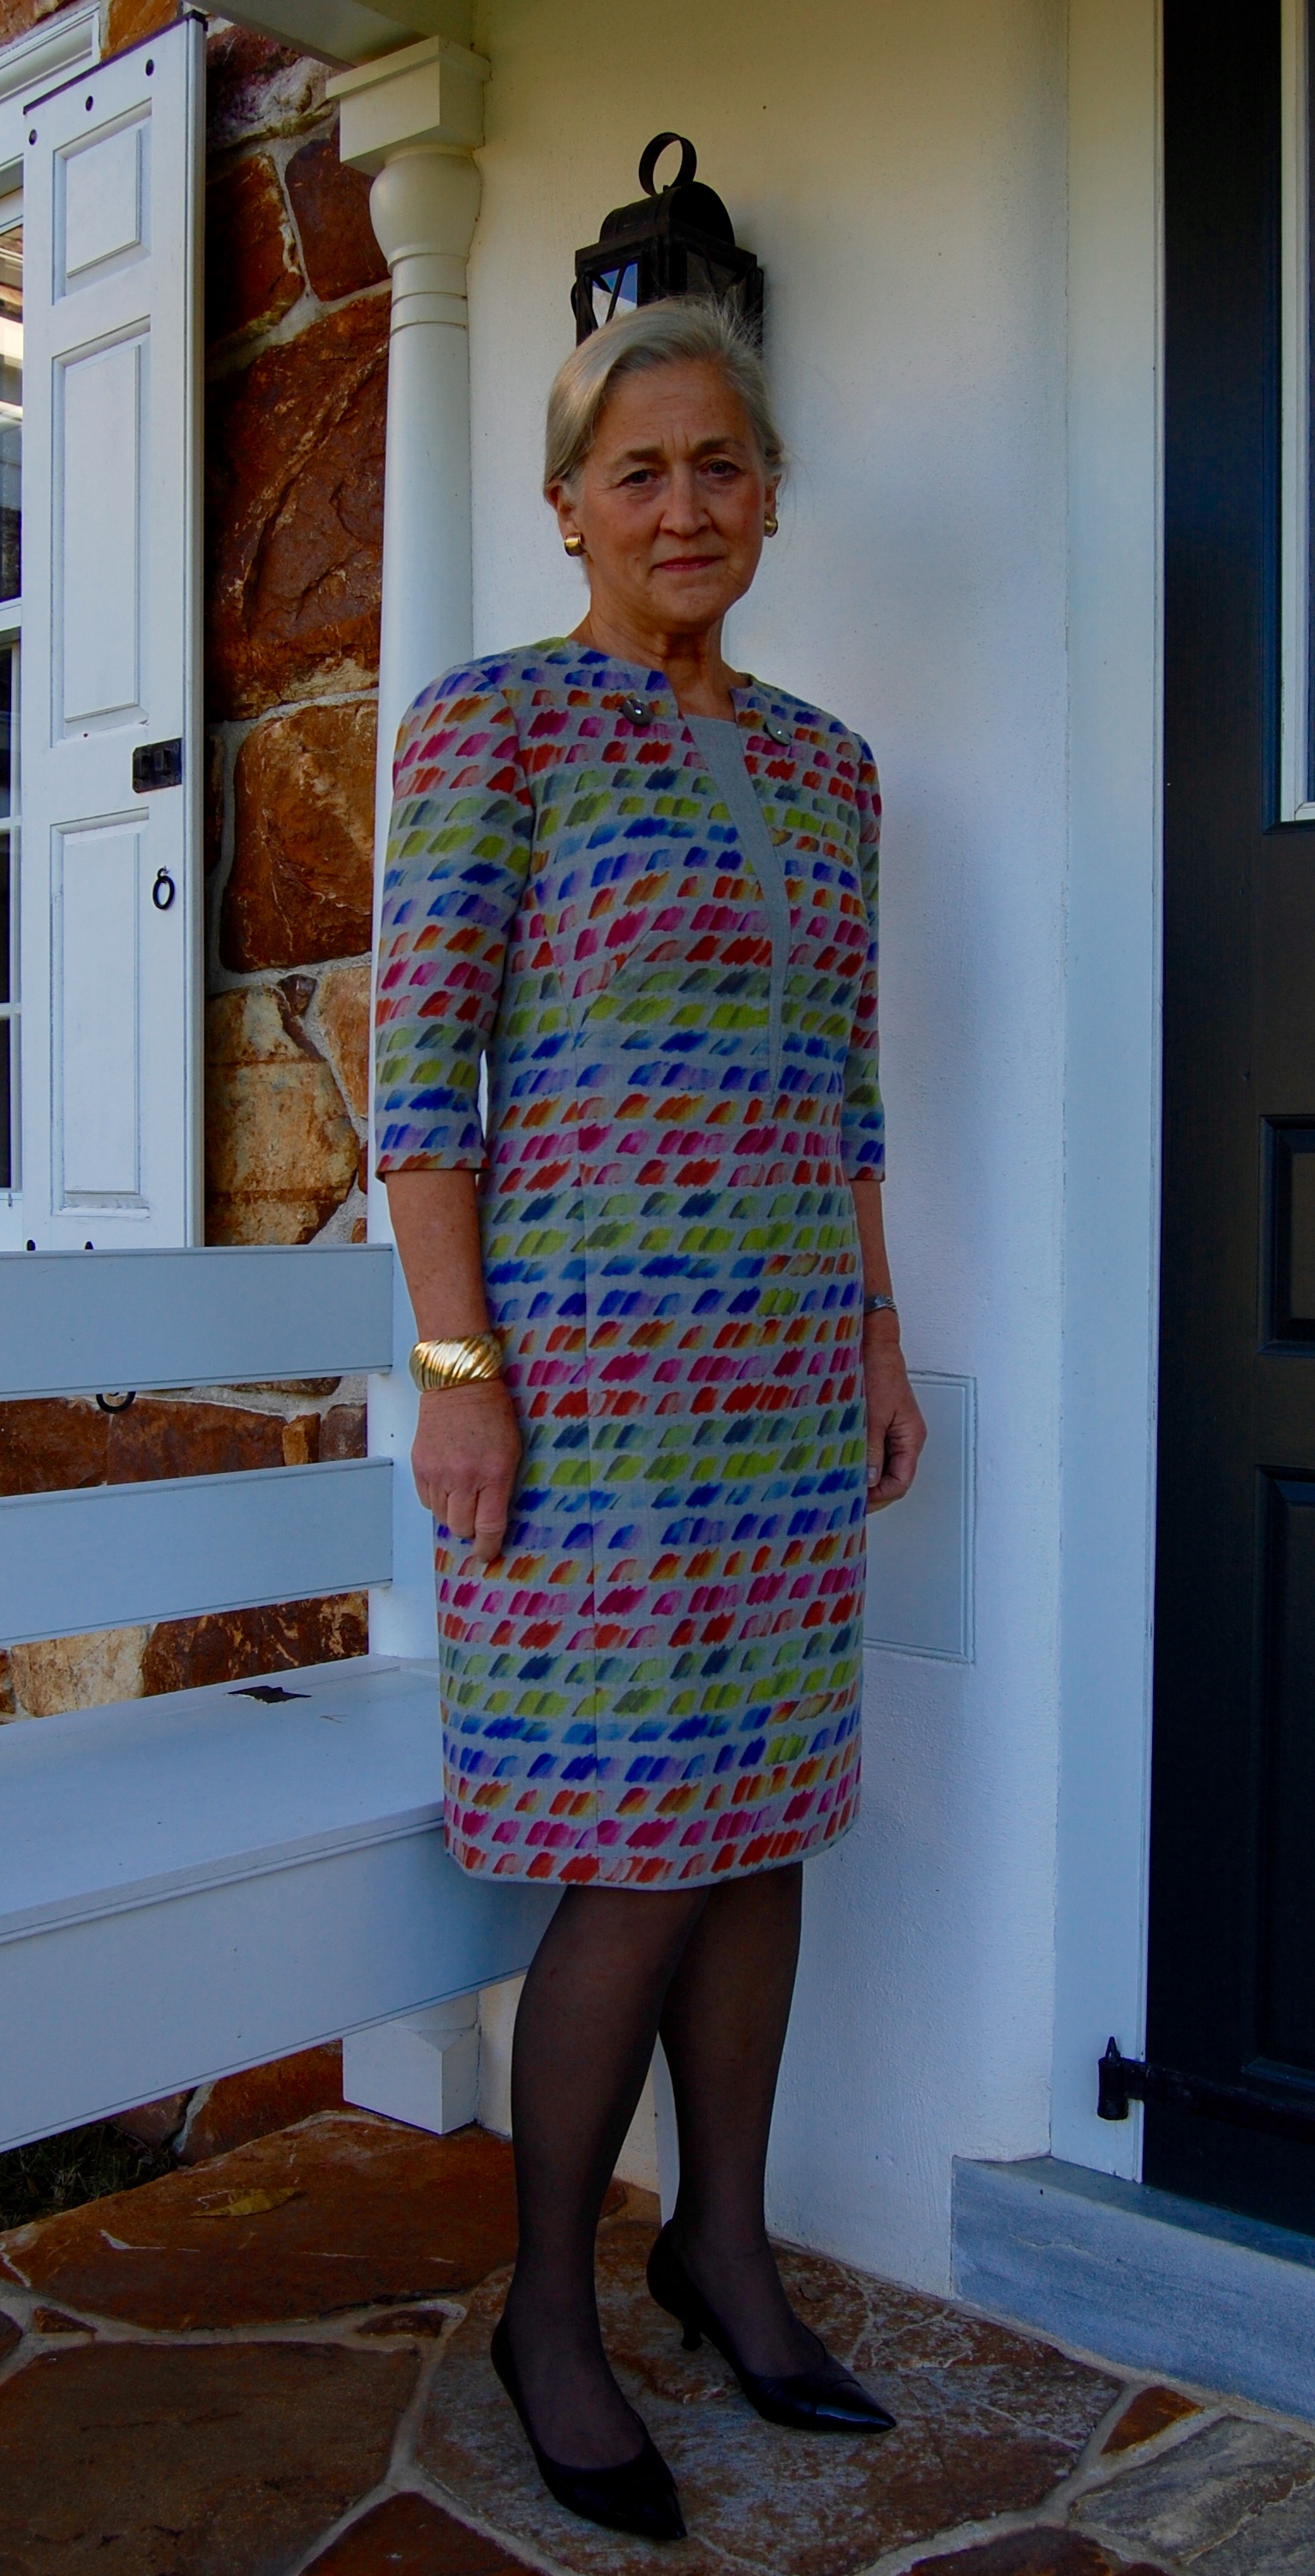
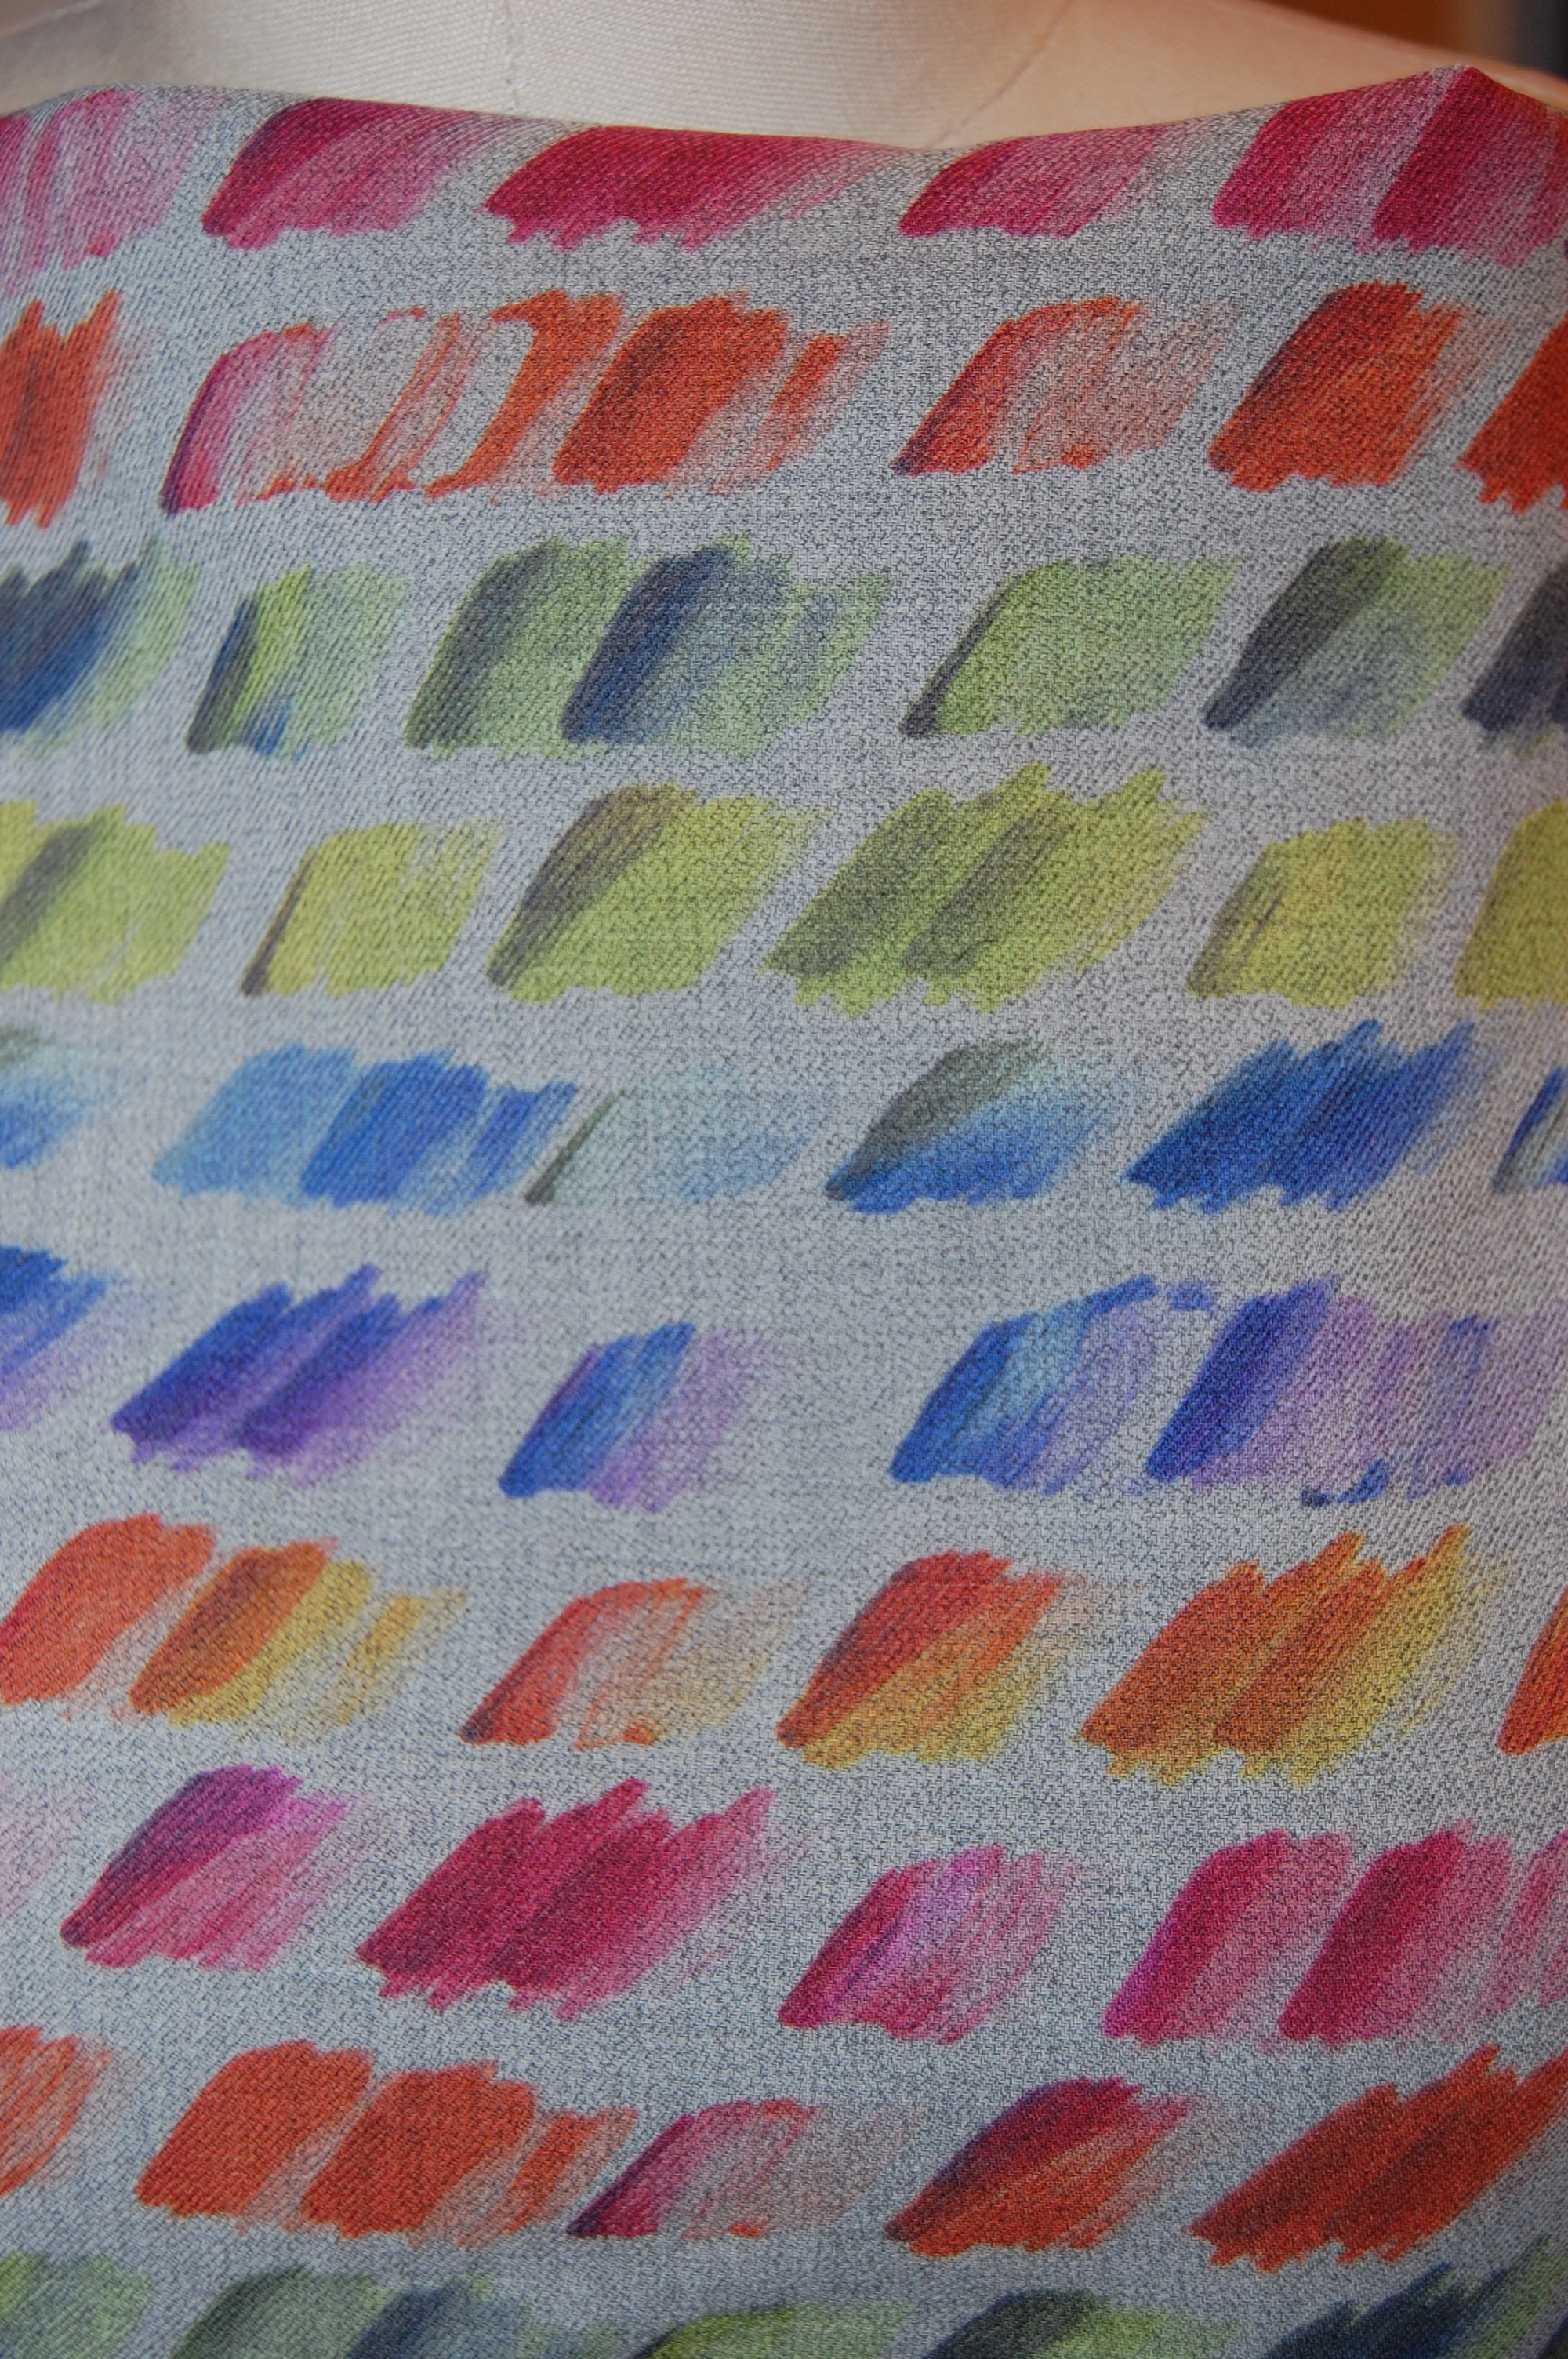
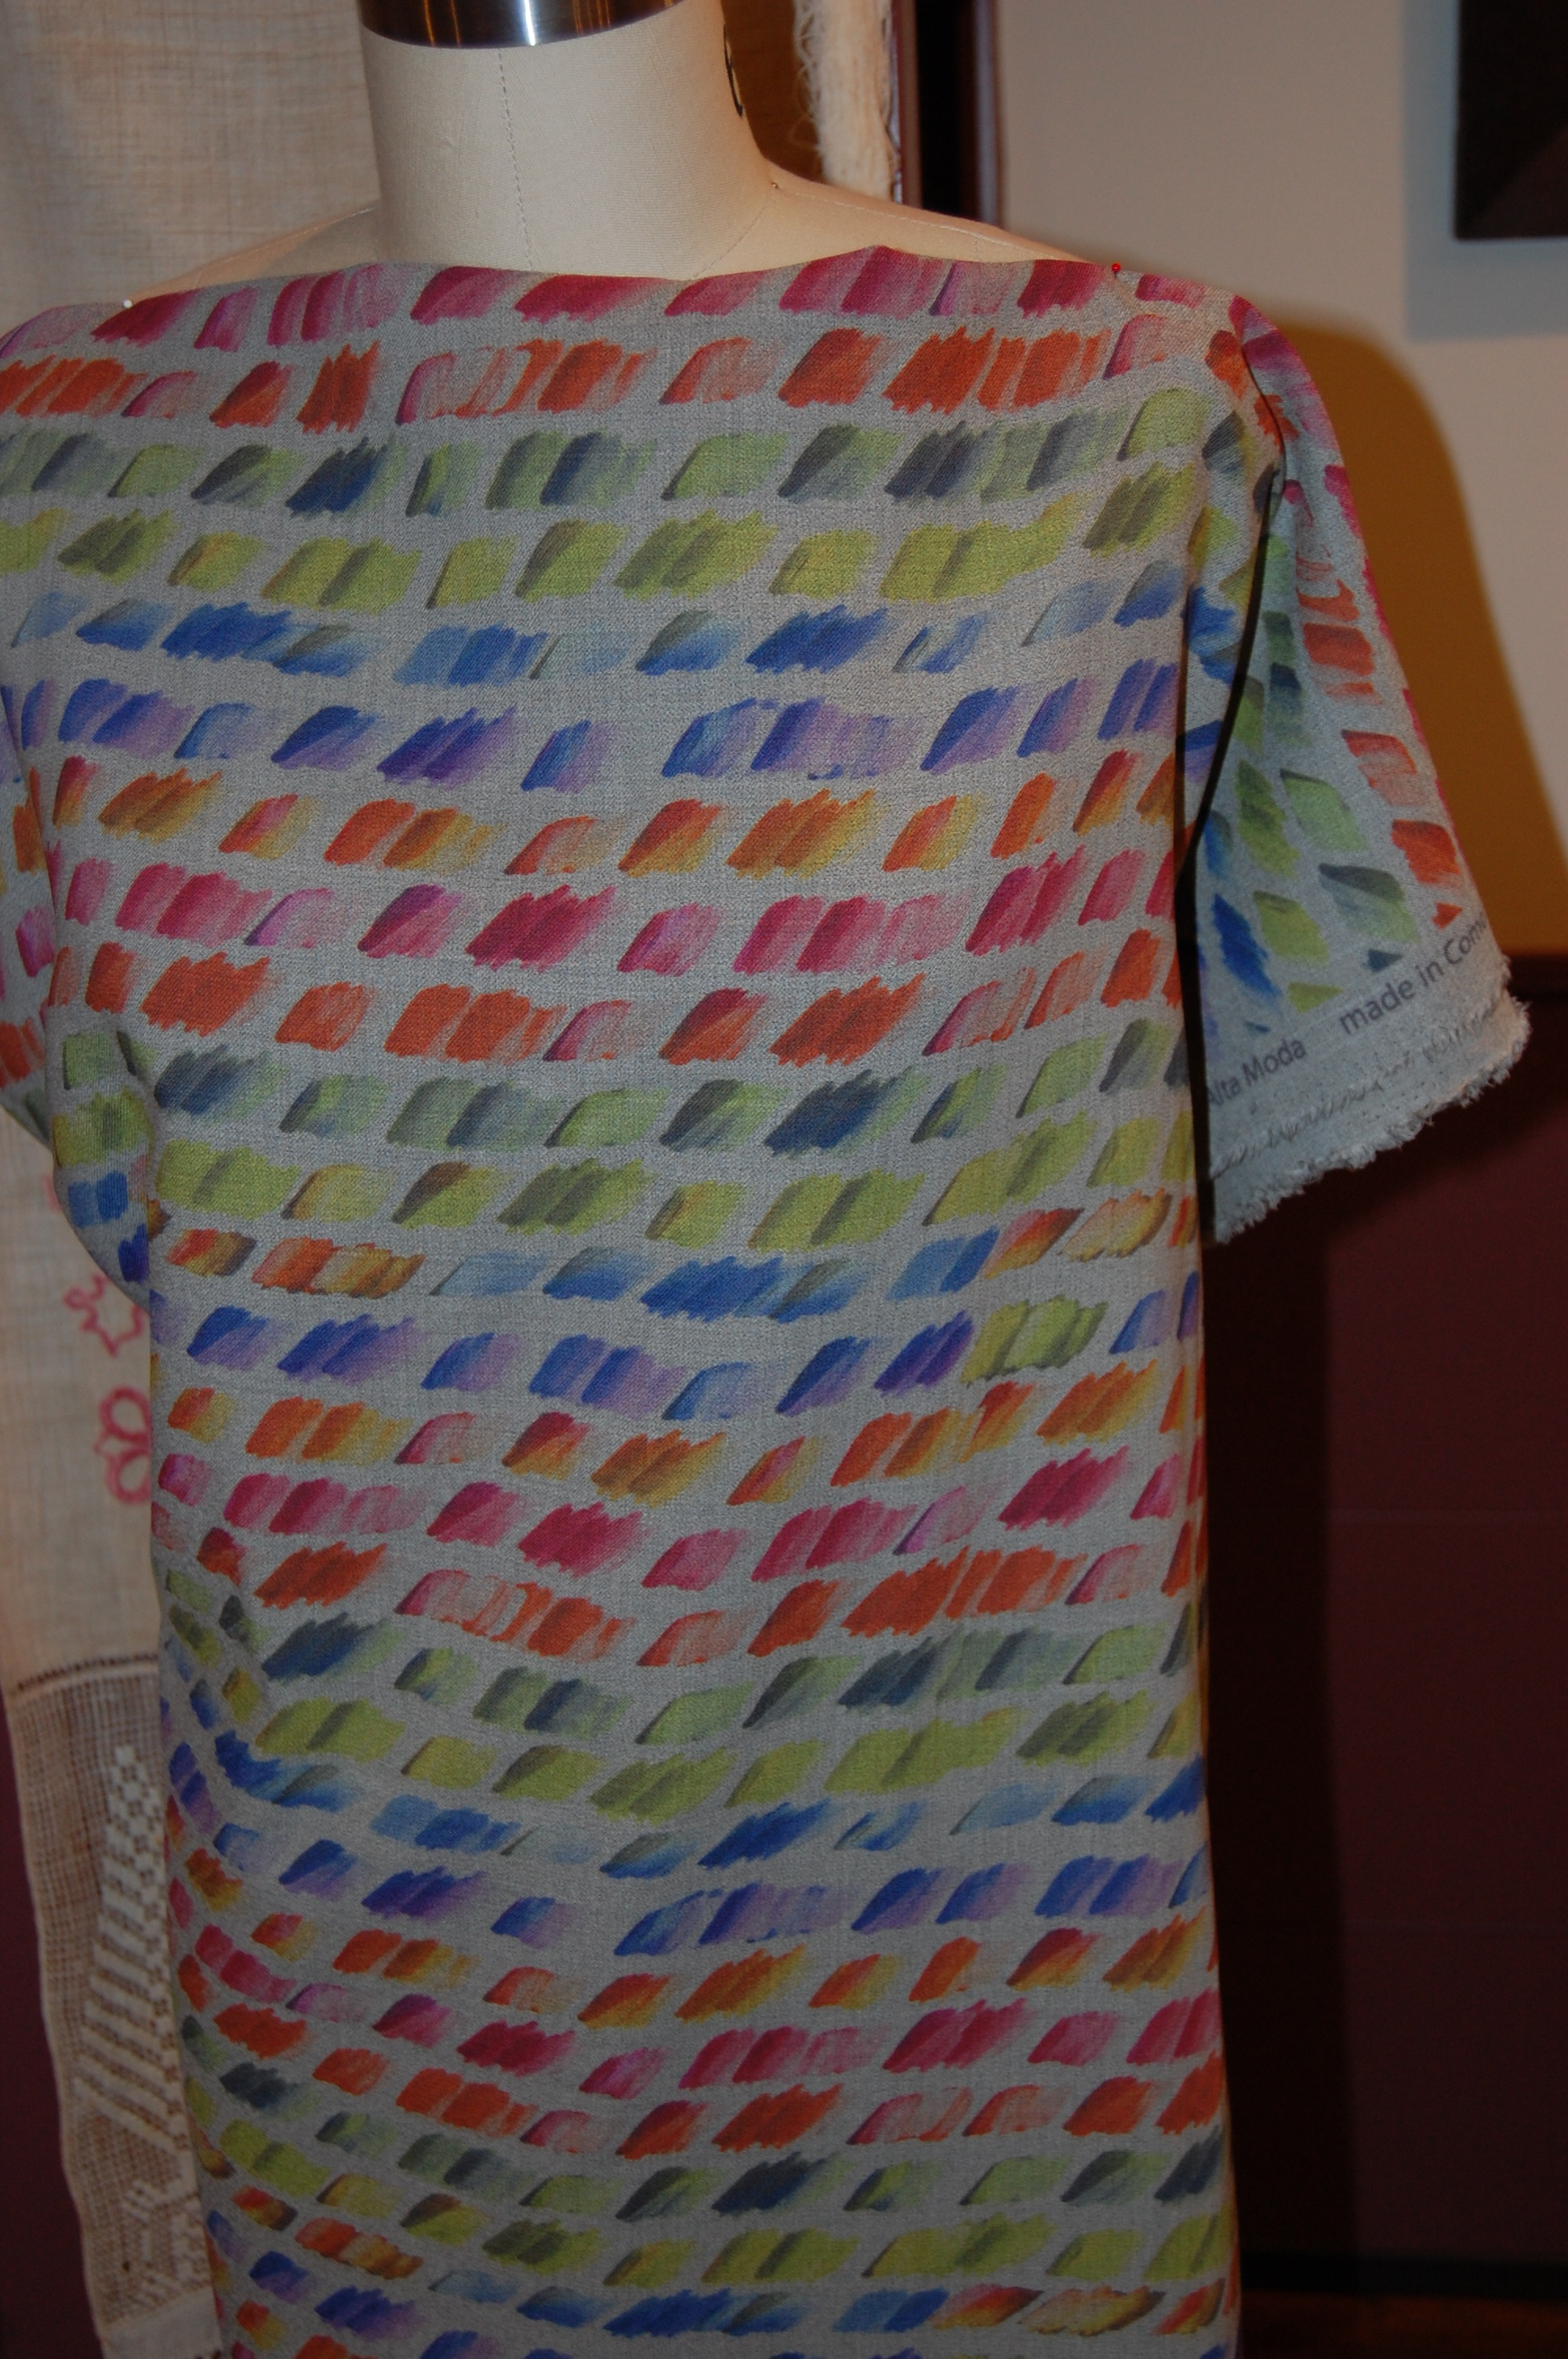
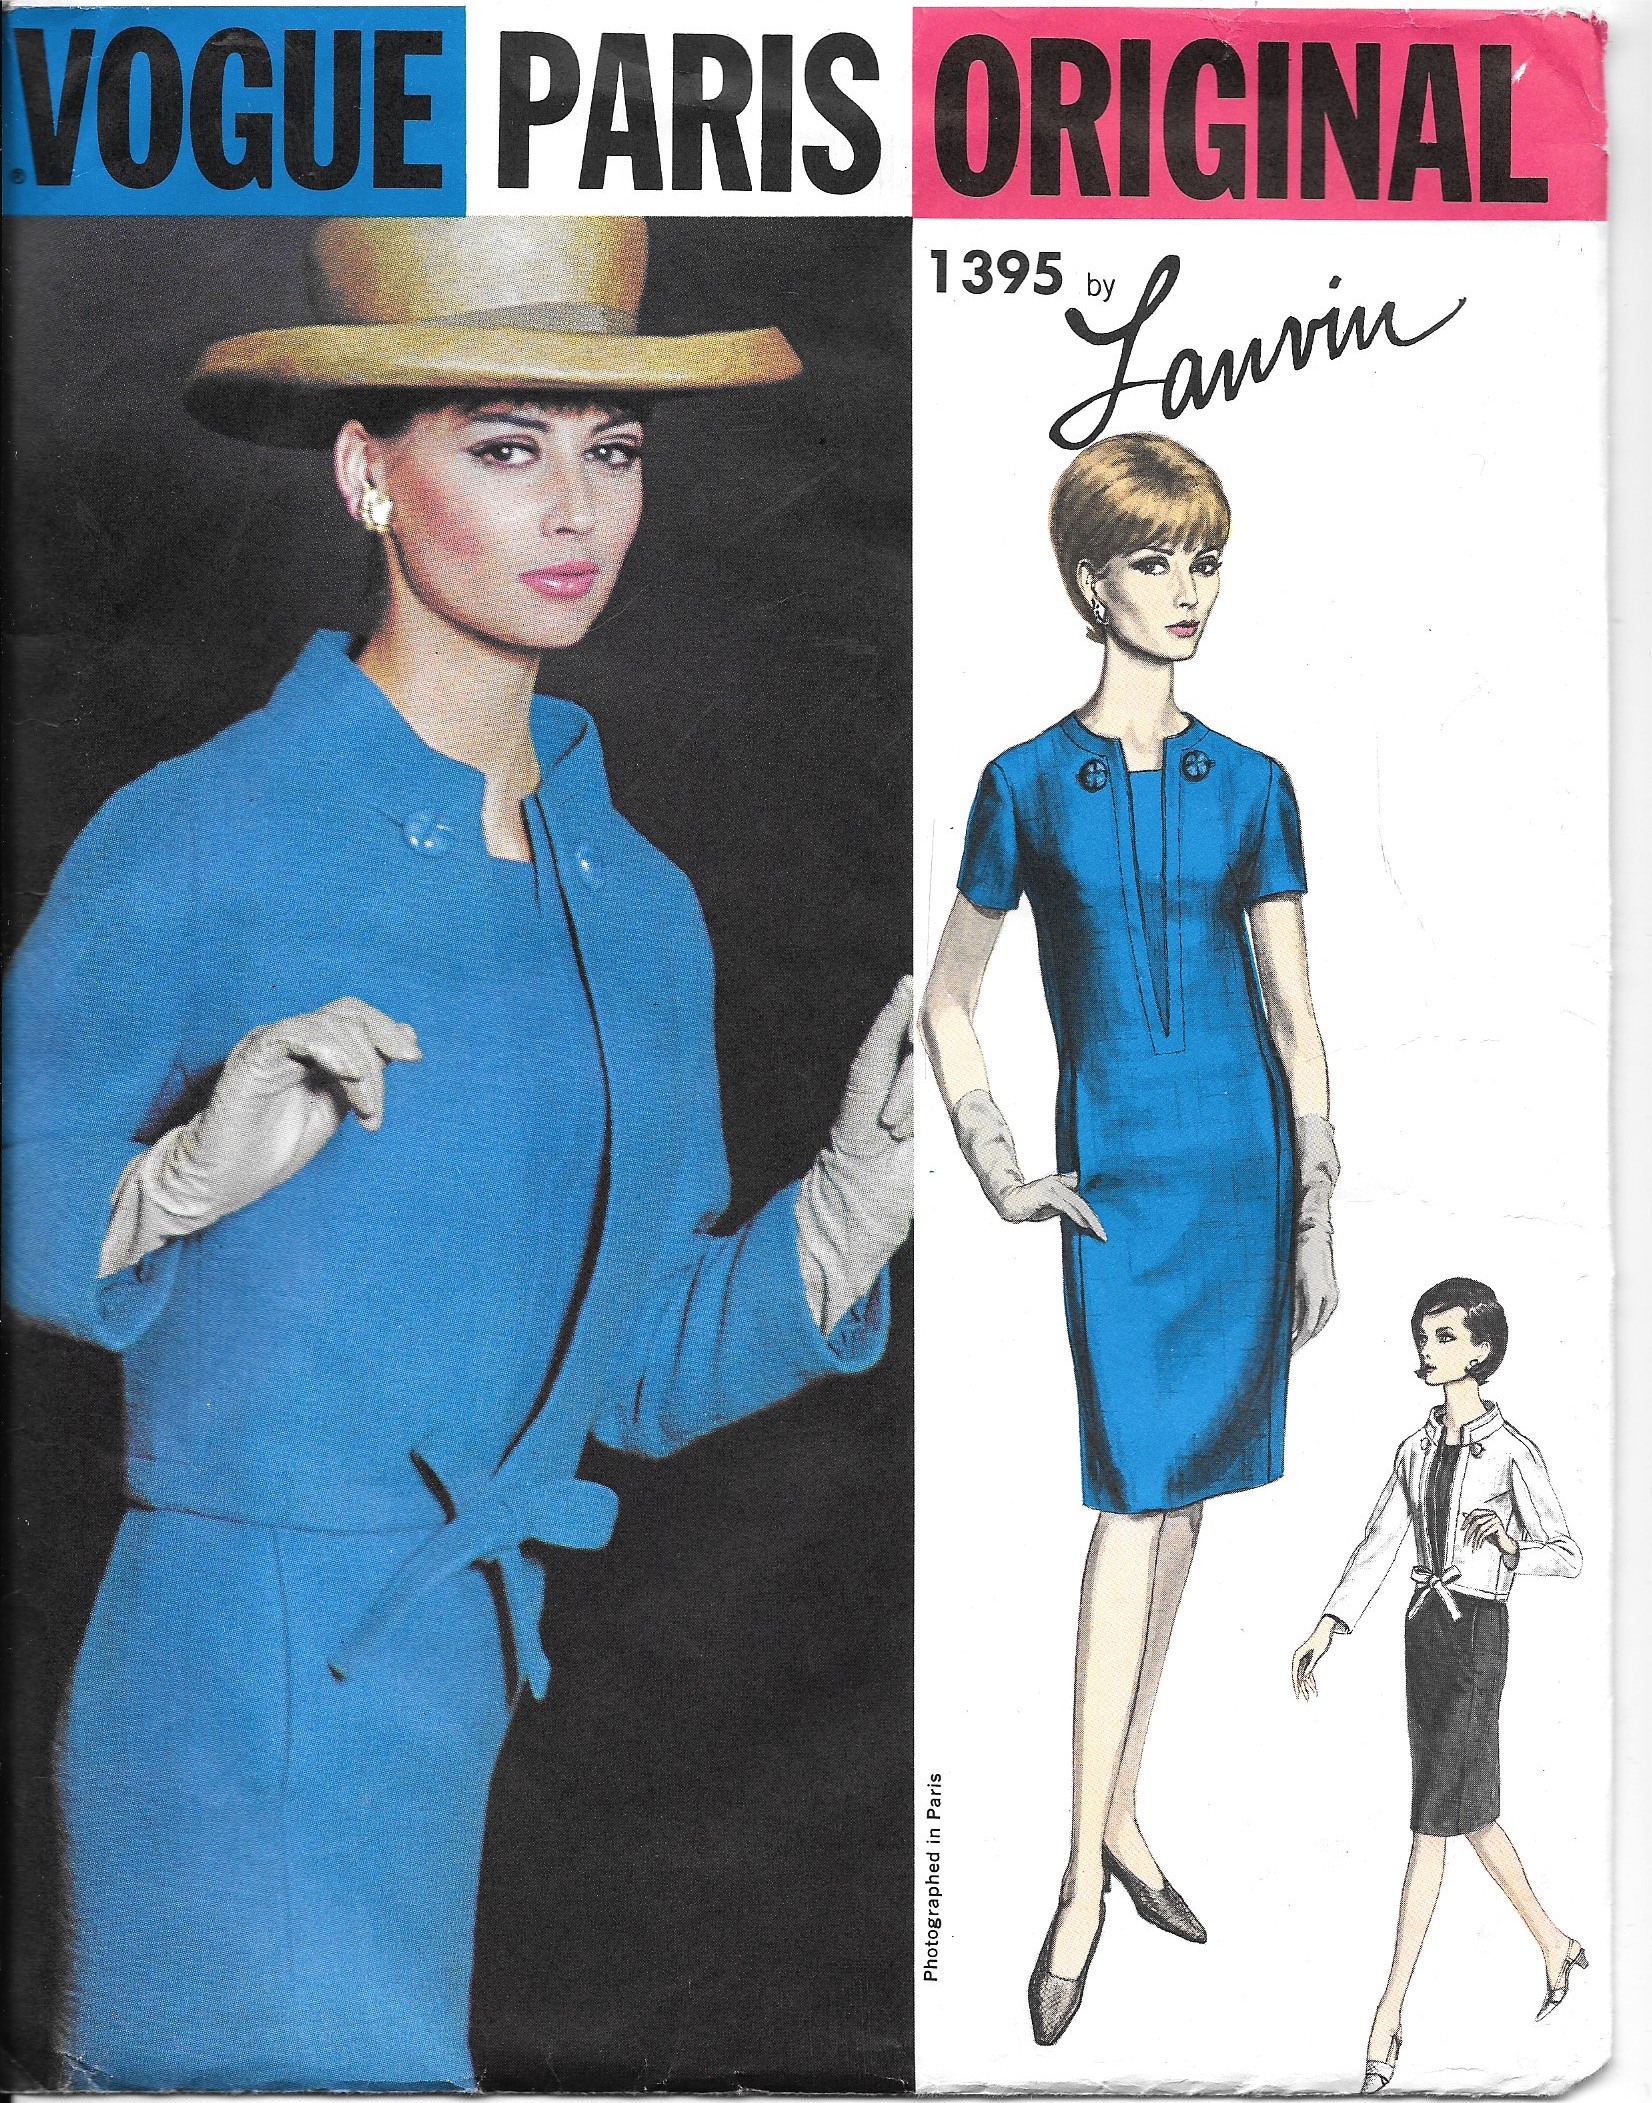
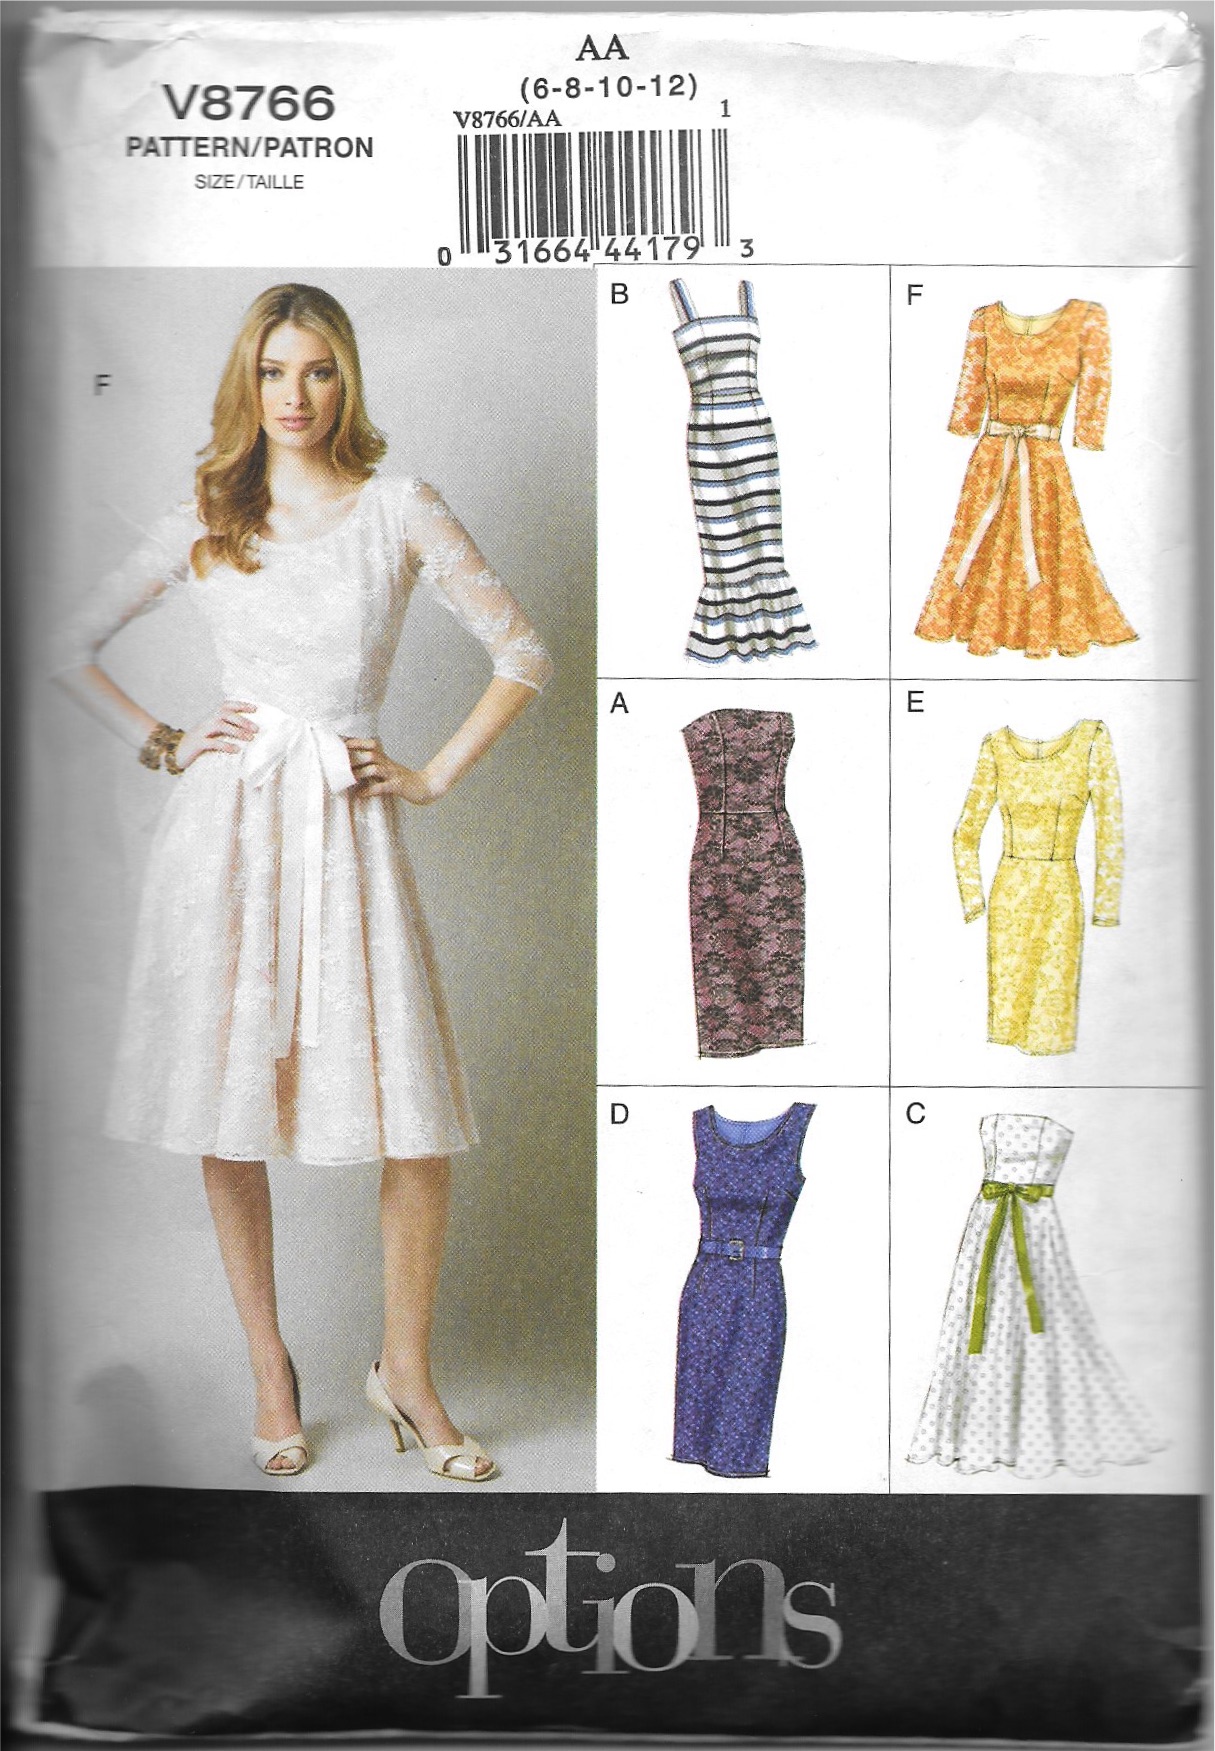
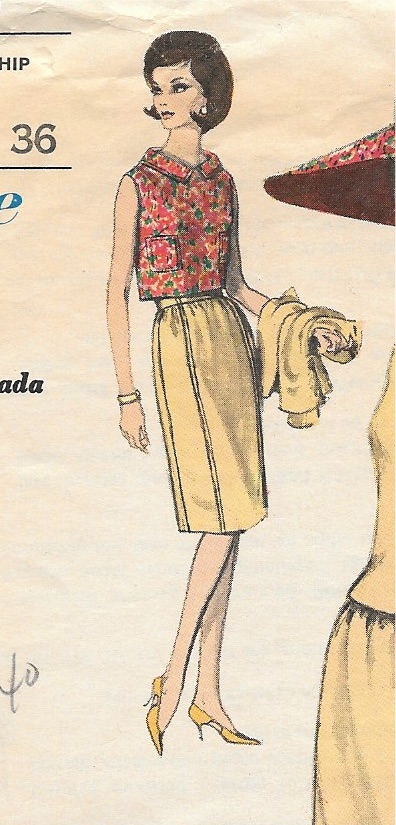
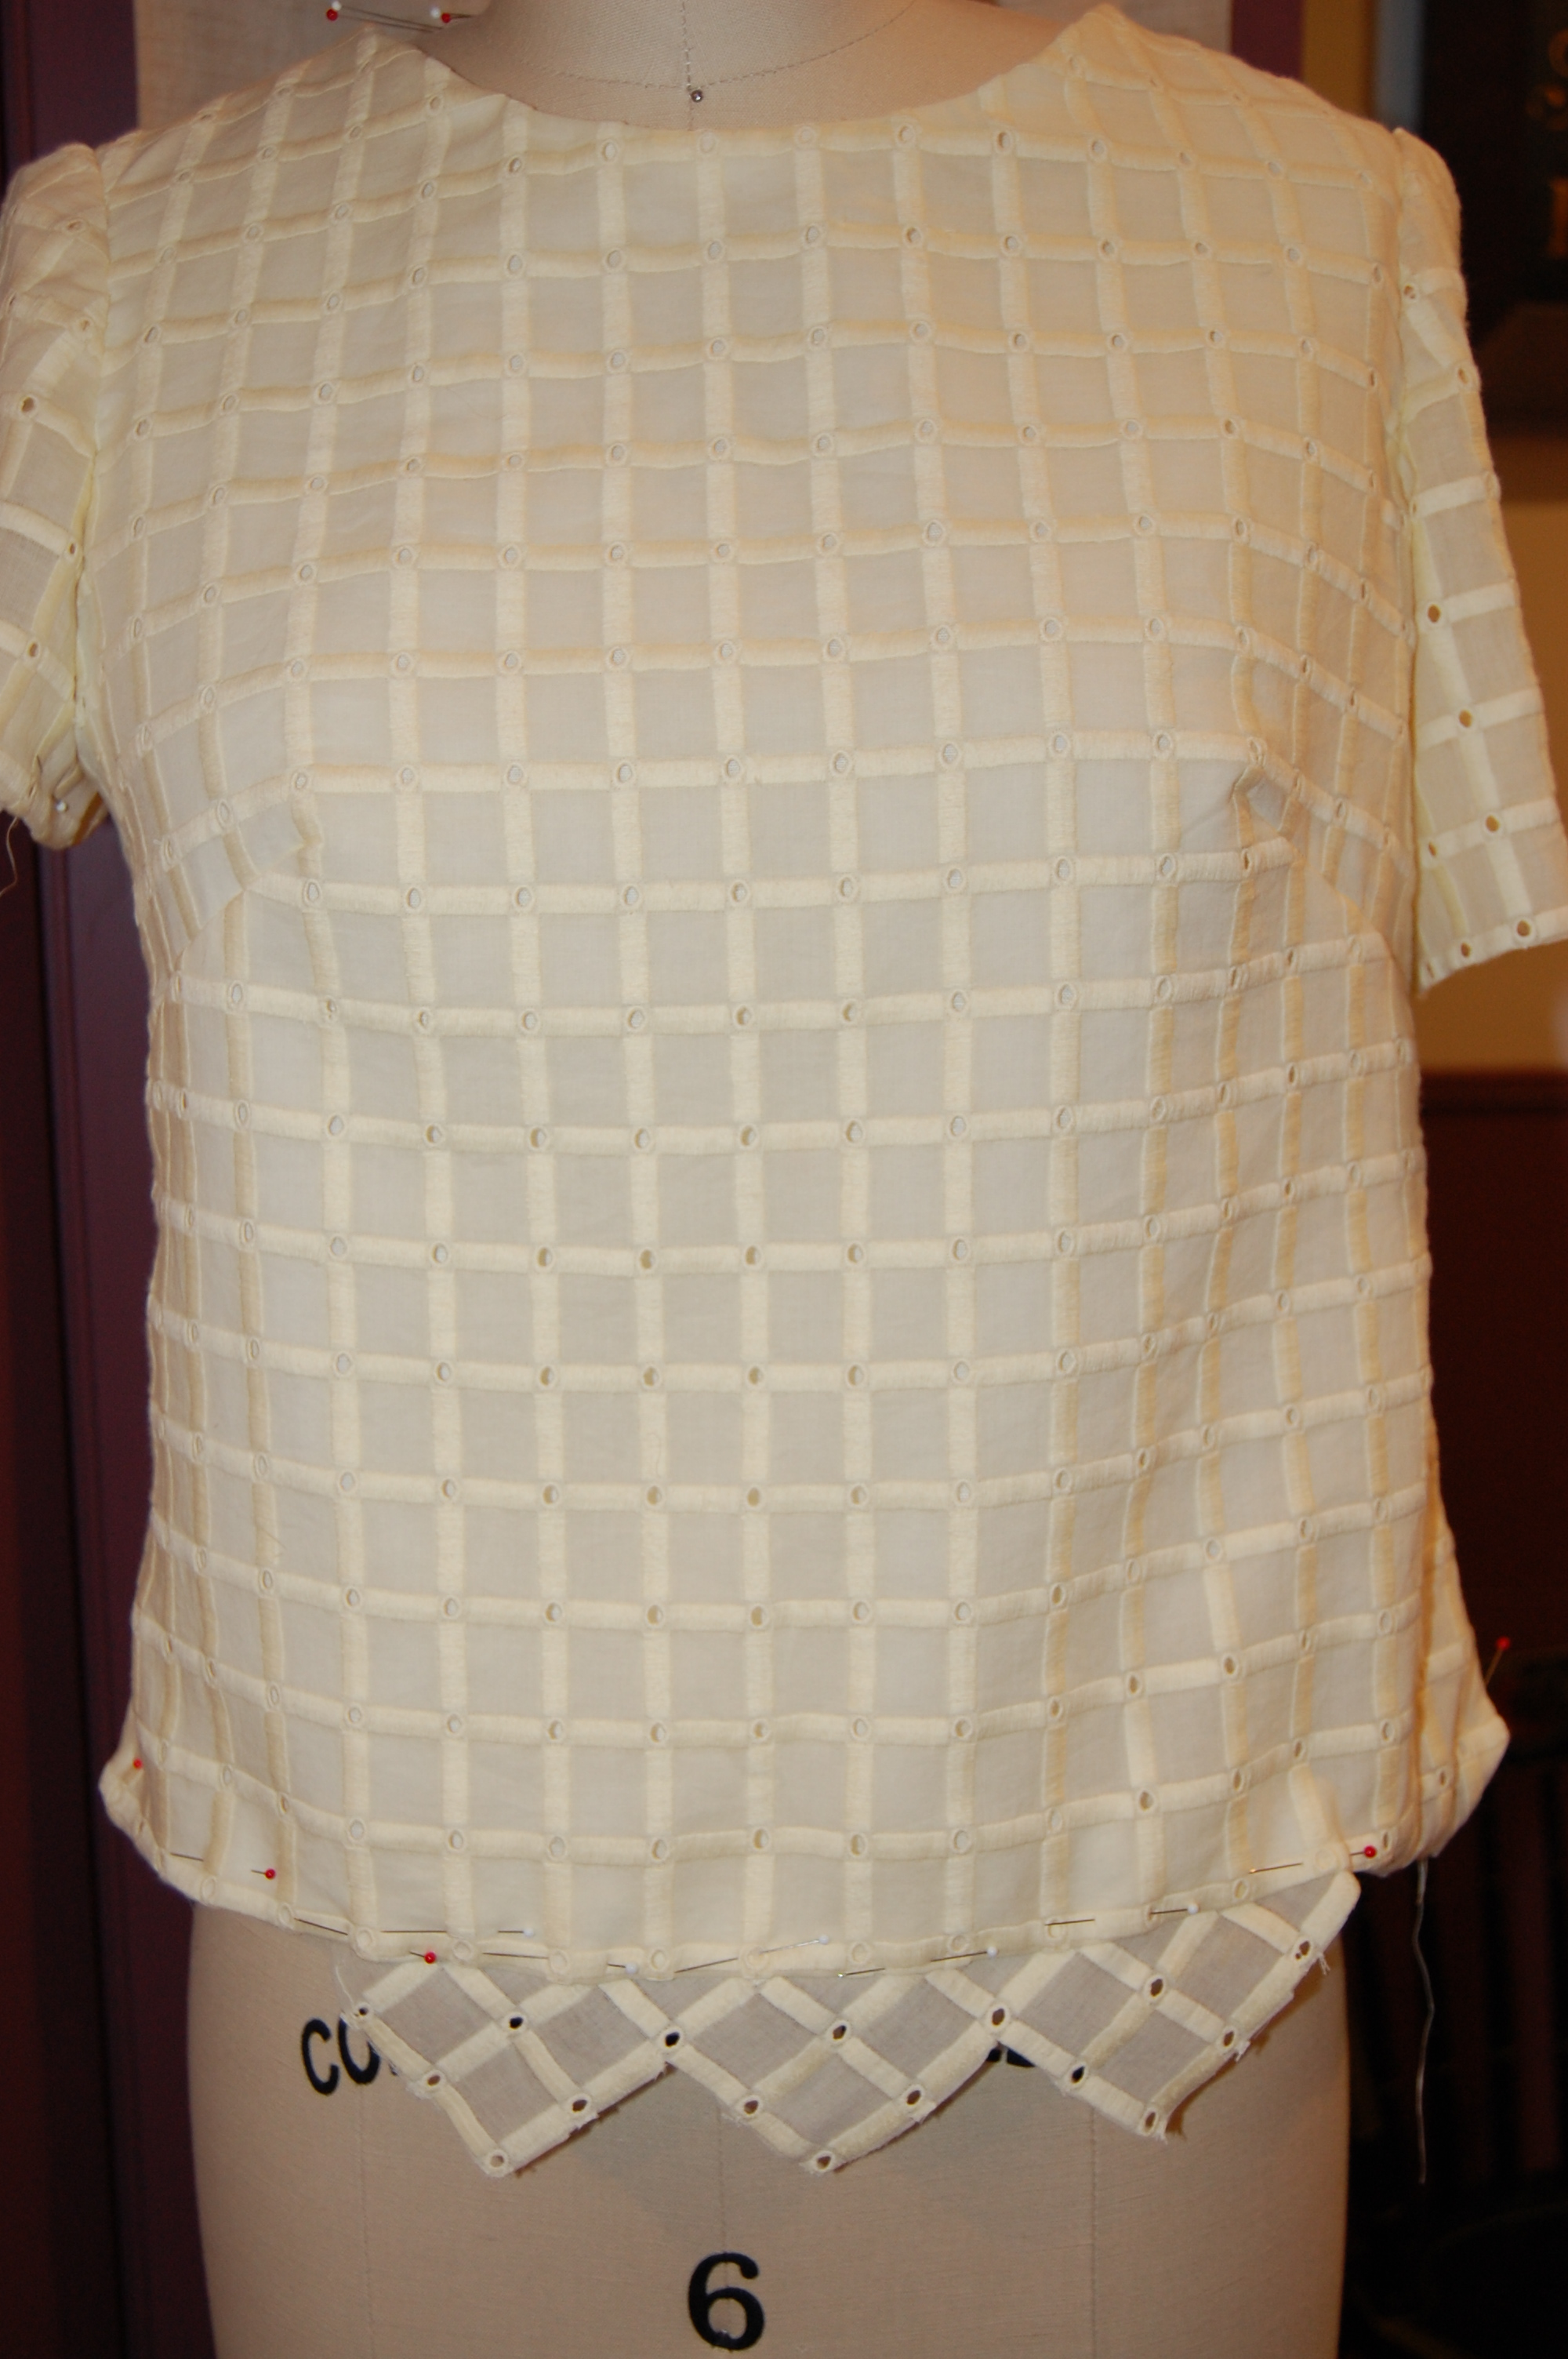
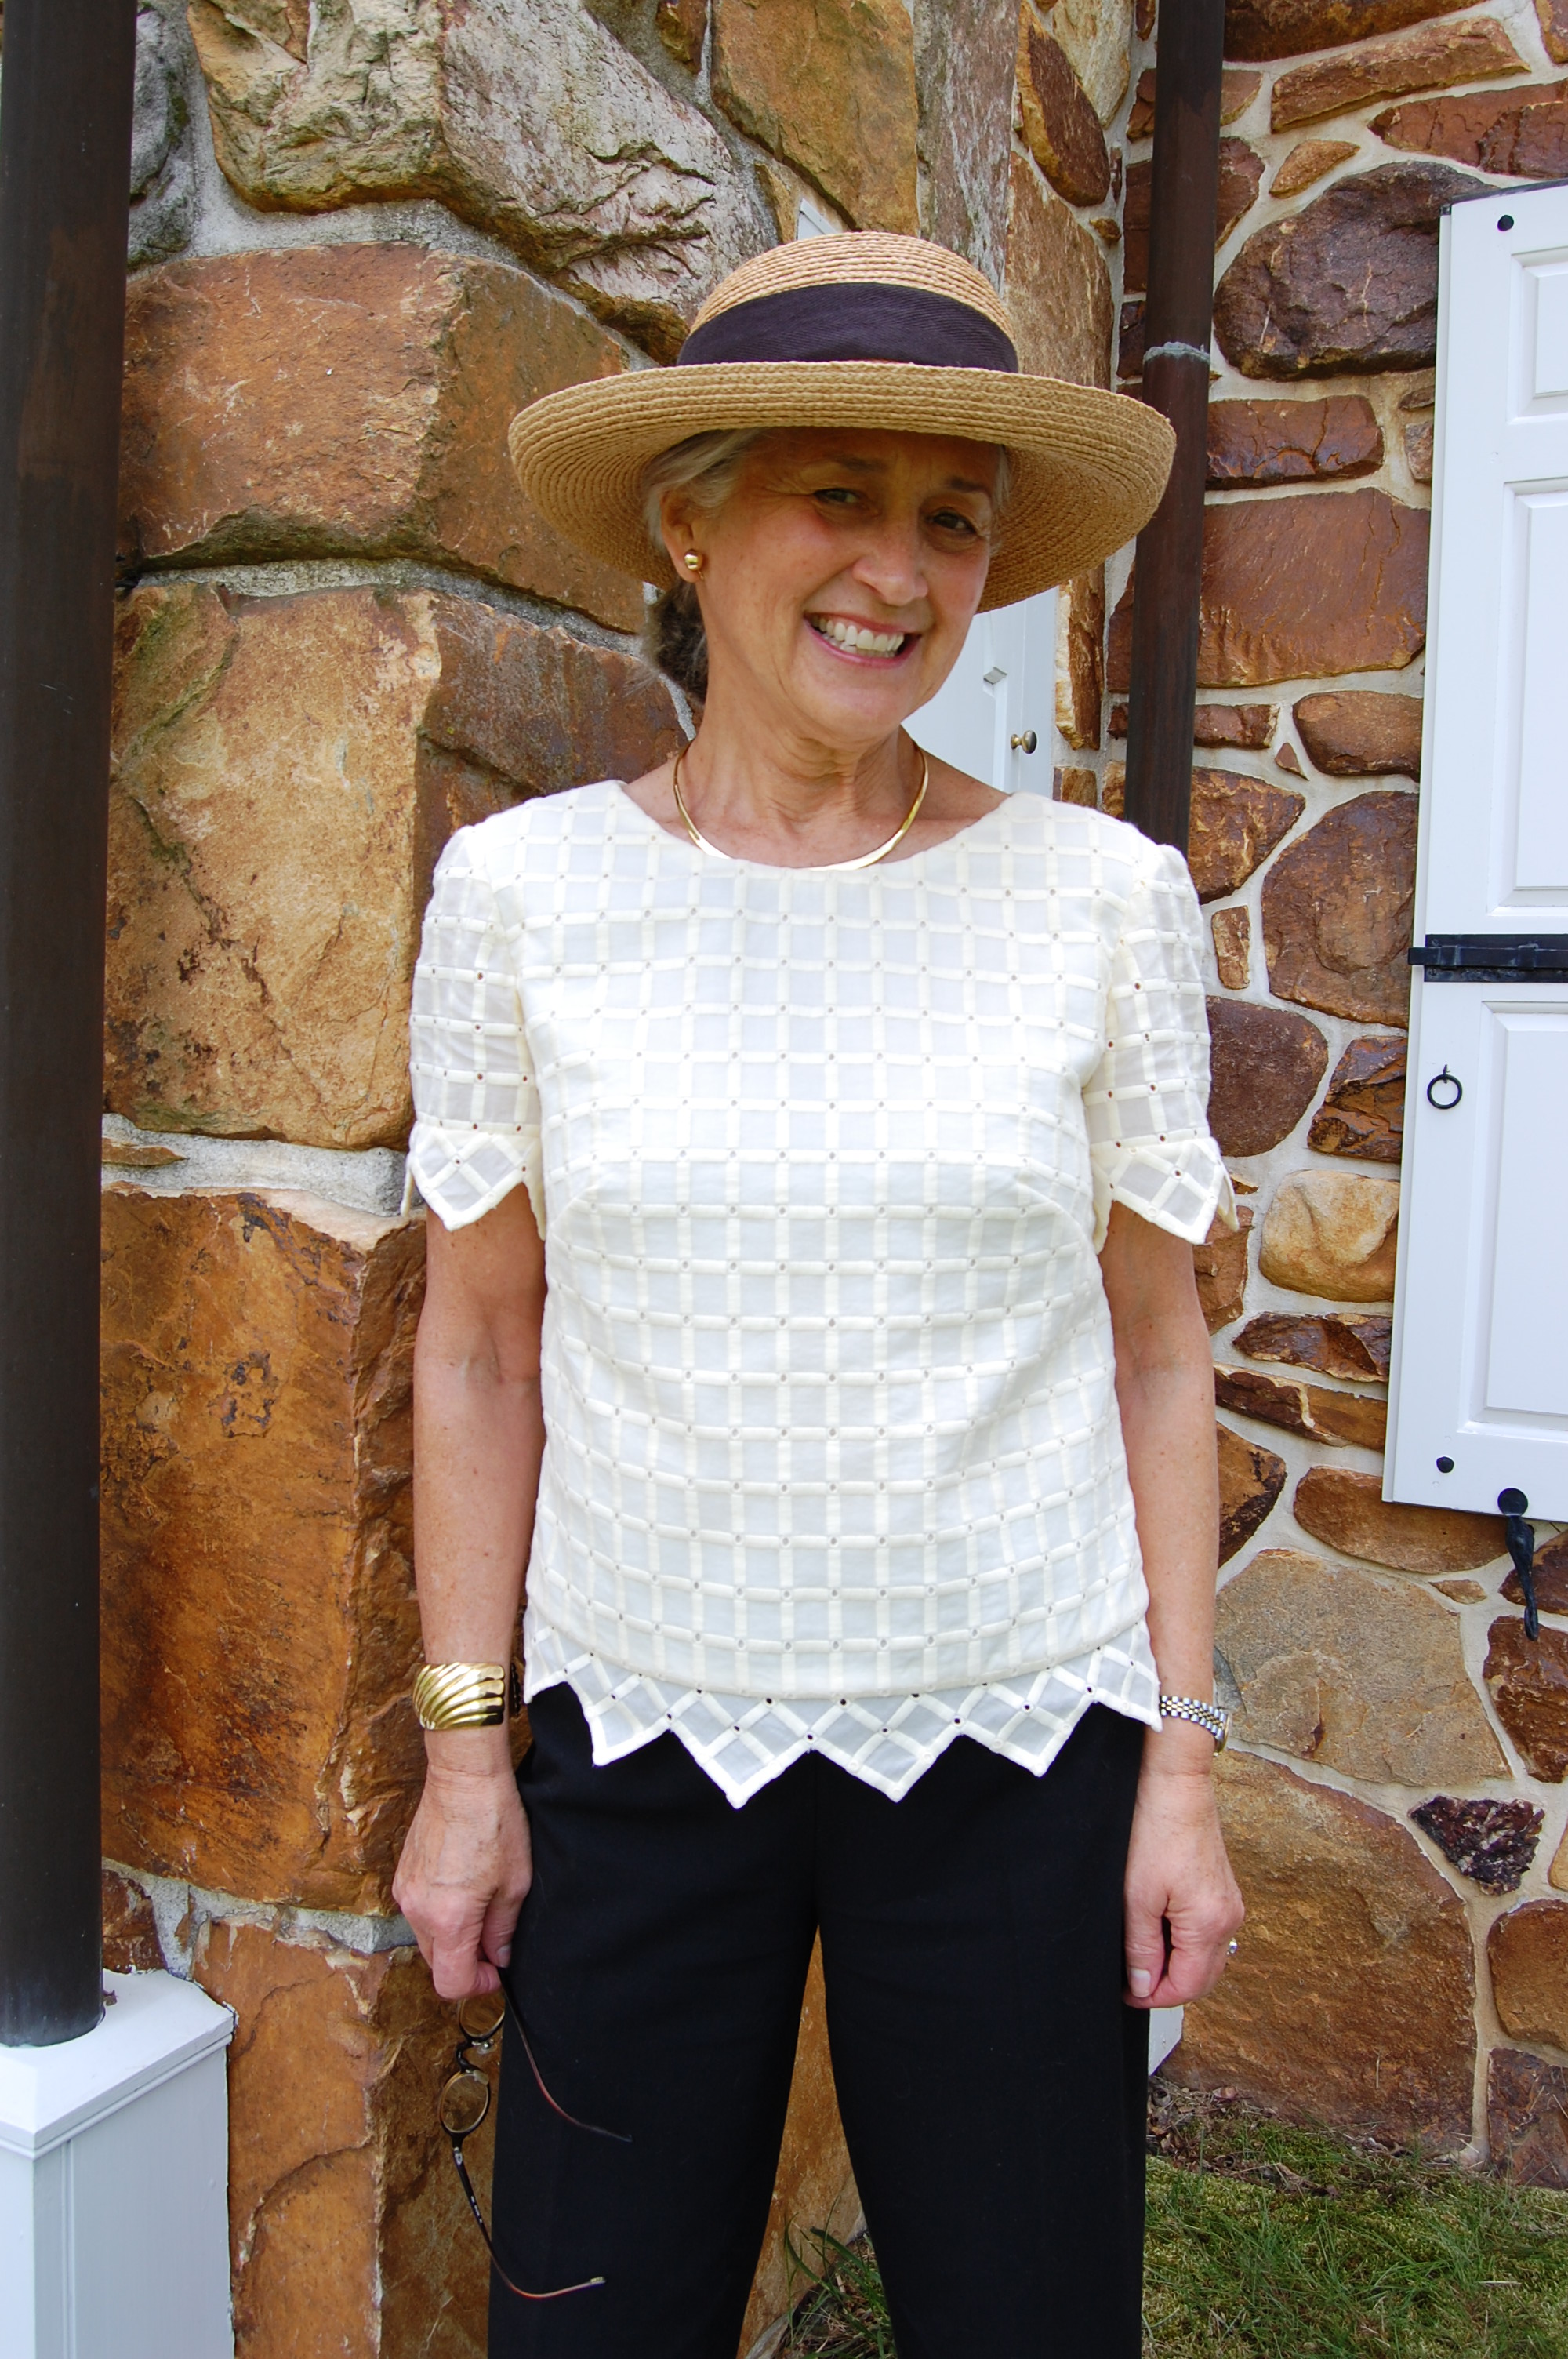
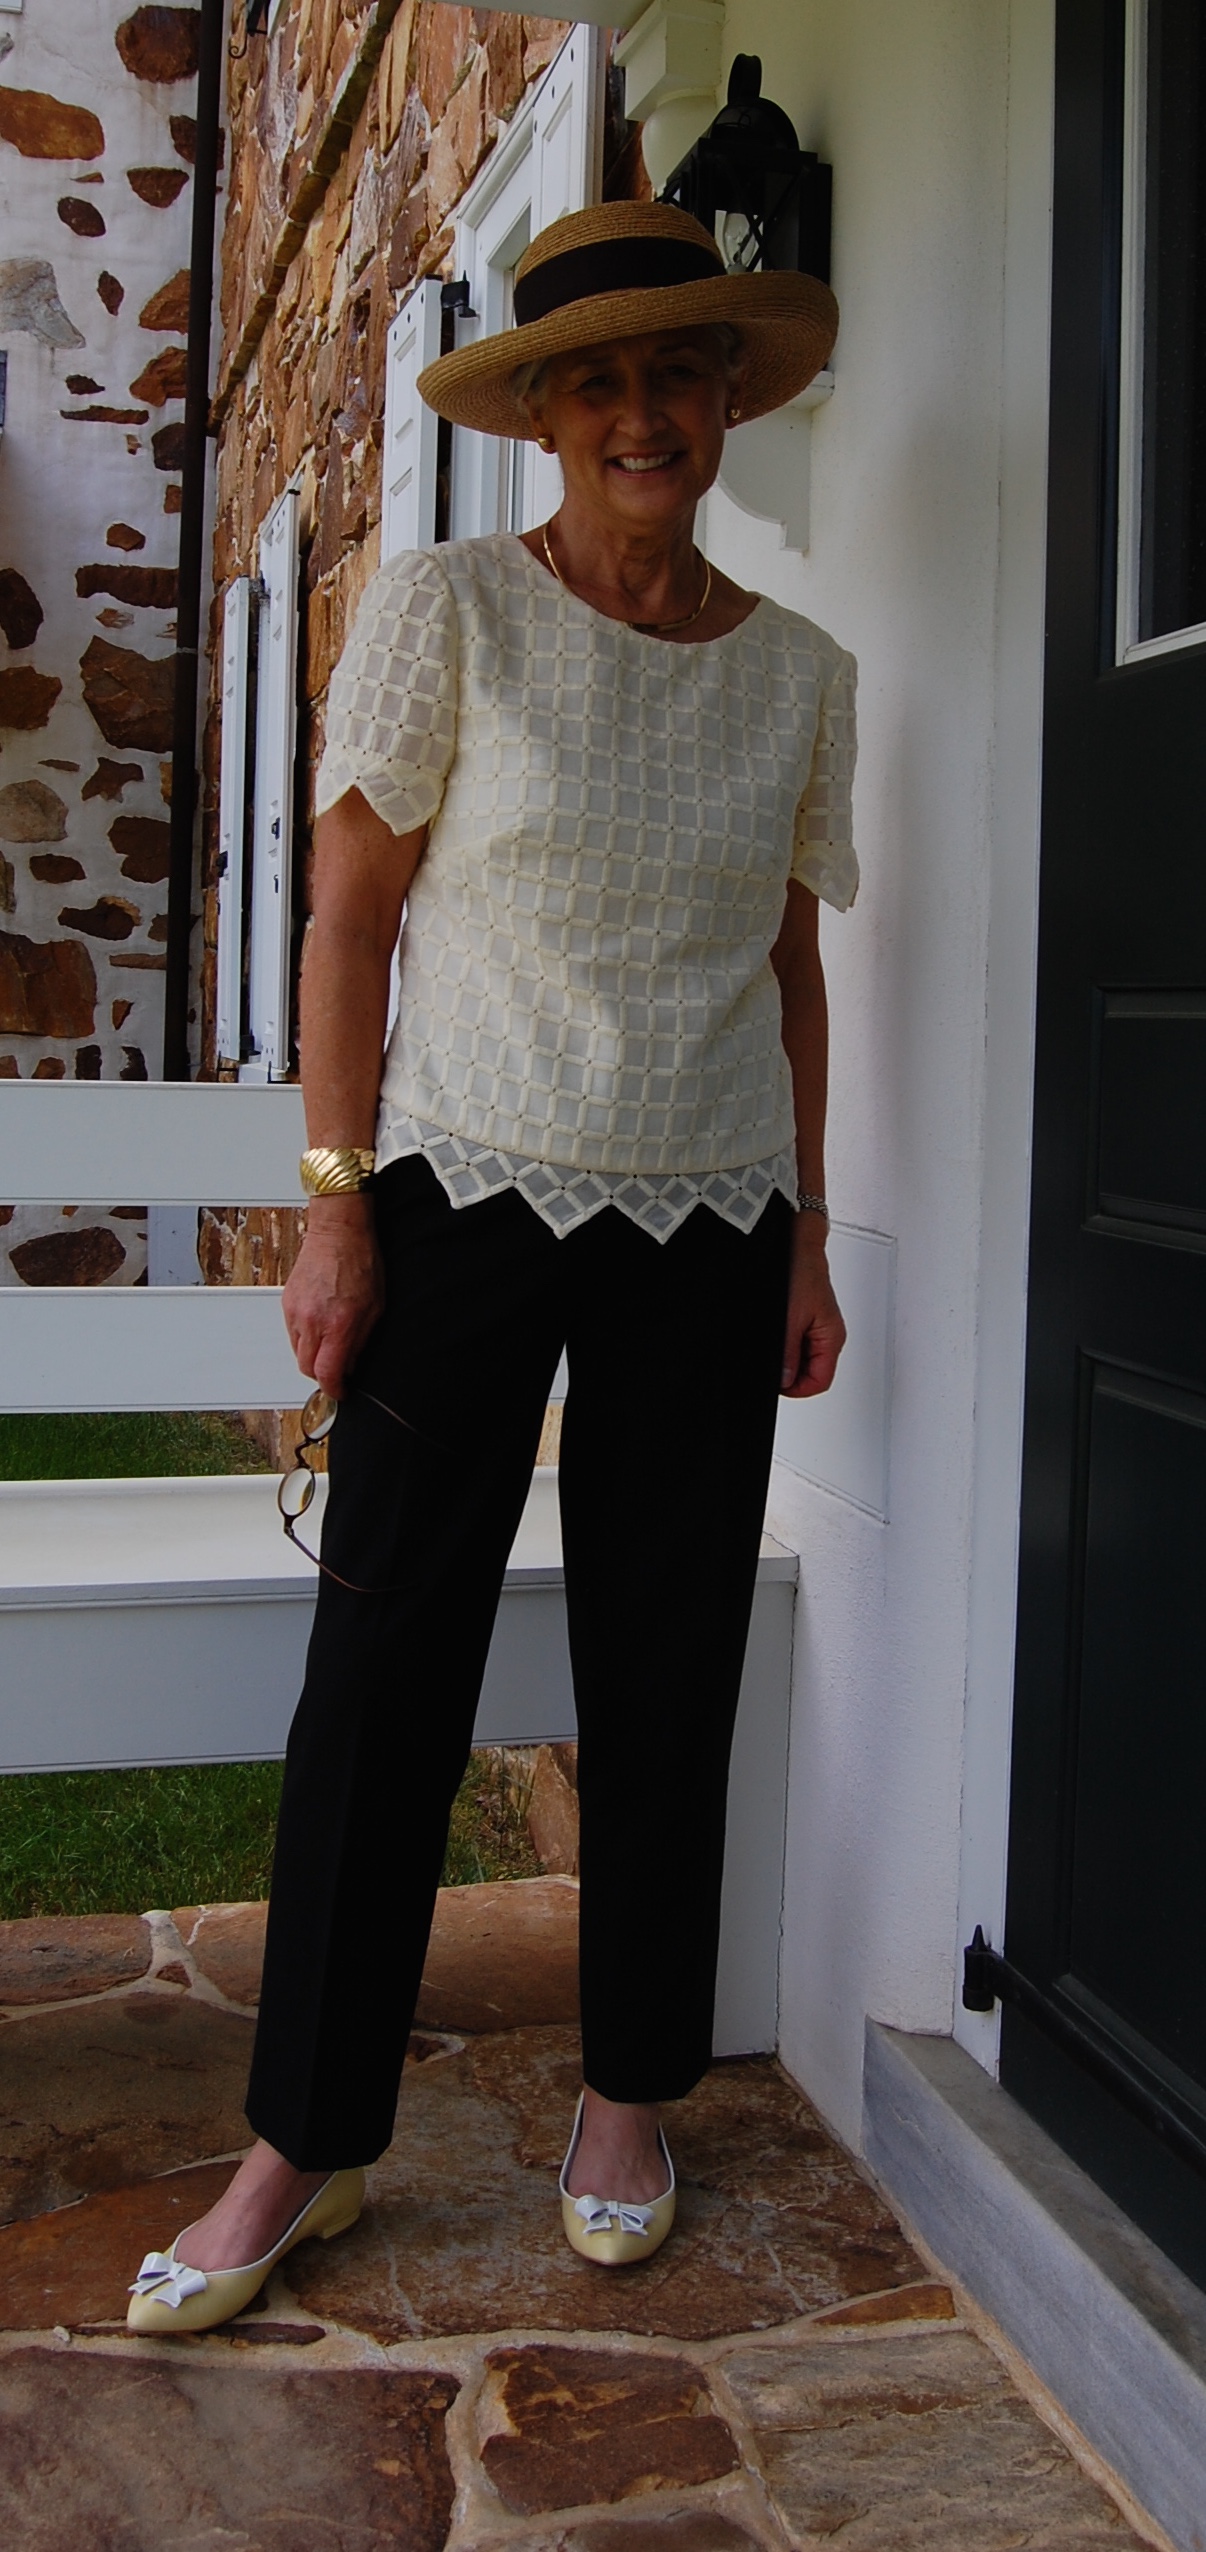
When I was contemplating which pattern to use for my dress (I had purchased the fabric, 1½ yards, 54” wide,  from Mendel Goldberg Fabrics in April of this year), I wanted a style which would showcase the fabric. Although I originally thought I would go with a sheath dress silhouette for this fabric, when I found this pattern, it struck a chord.

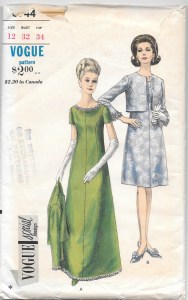
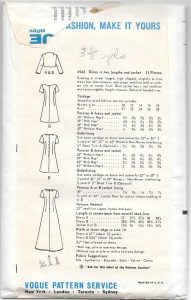
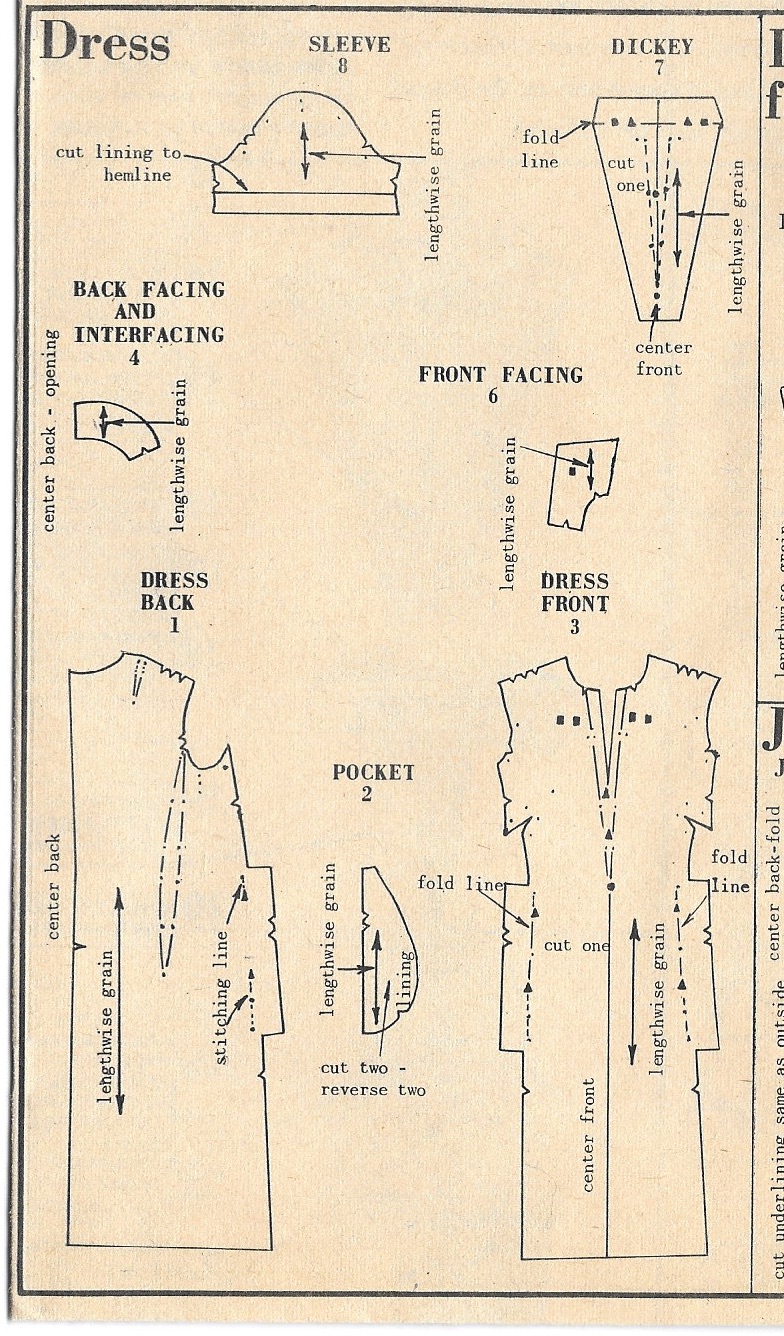
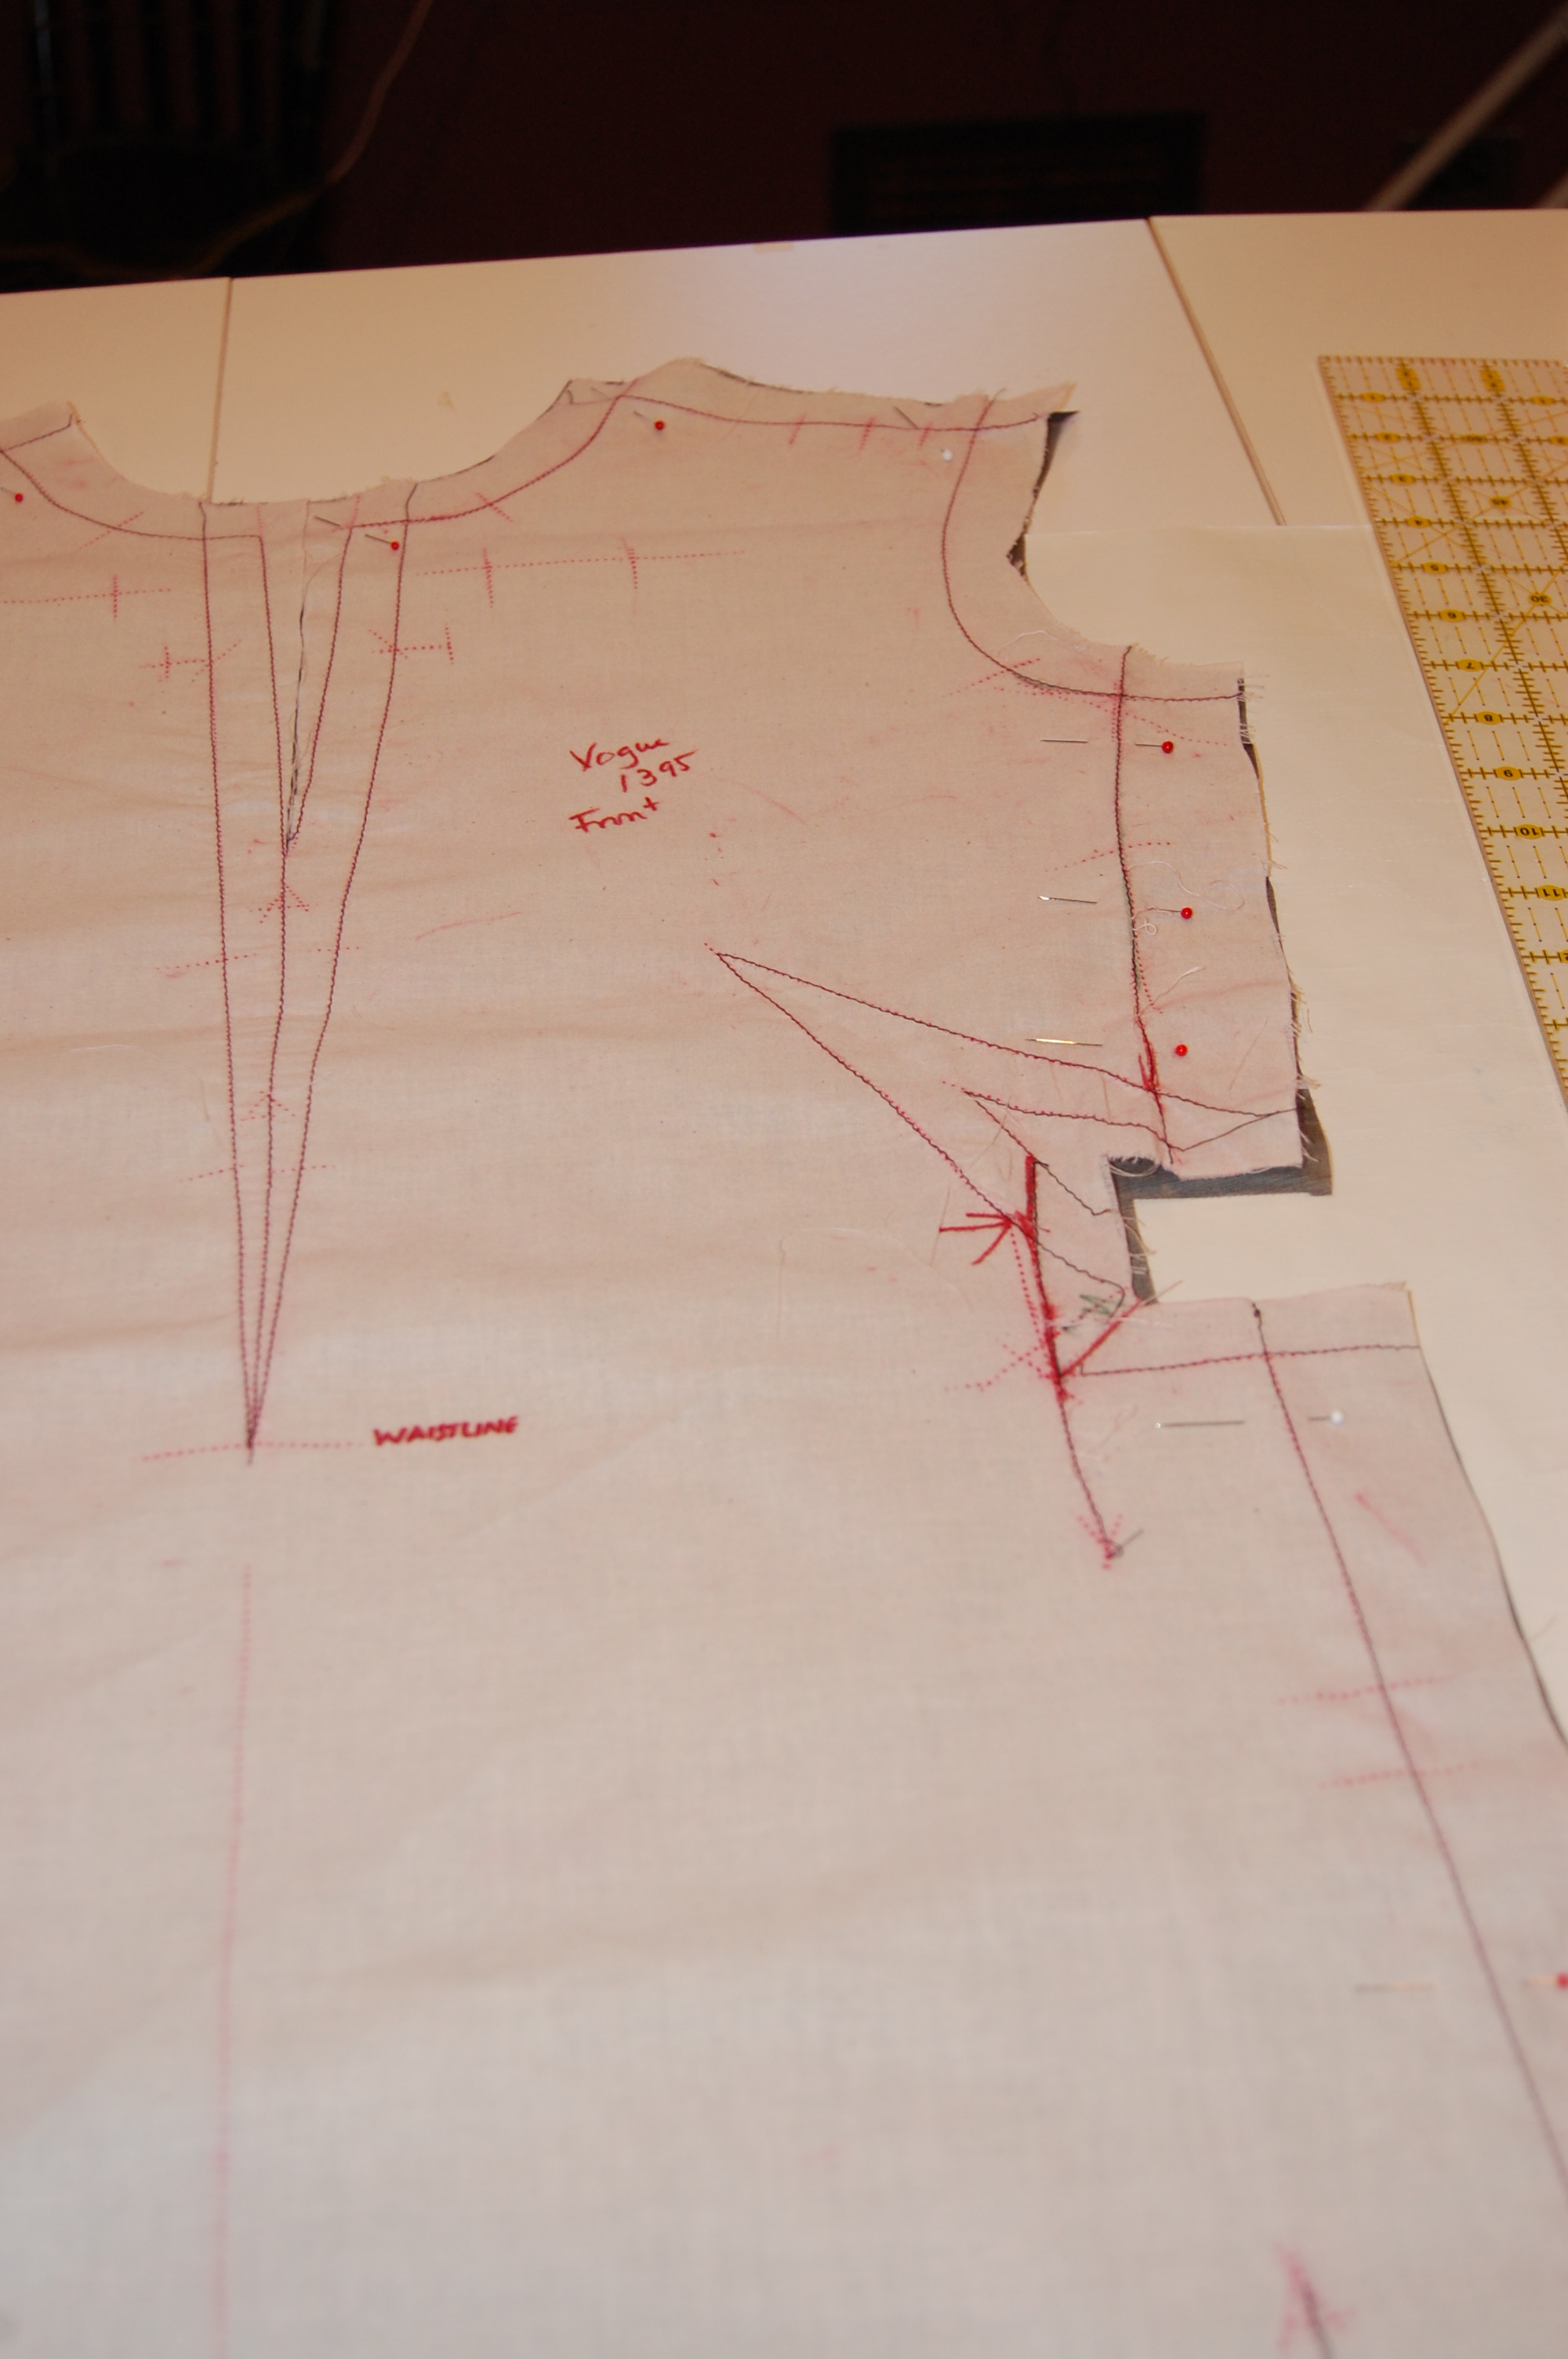
The line drawing for the shorter length shows more detail of its seaming and darts. The description on the pattern envelope reads: “Evening or street length, high shaped, slightly A-line dress has short sleeves and scoop neckline with or without slit at center front…”

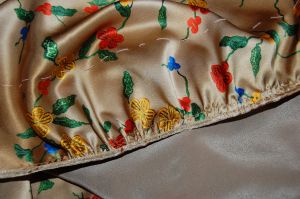
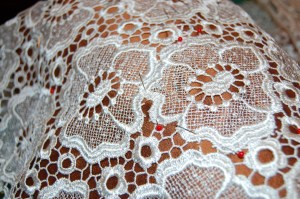
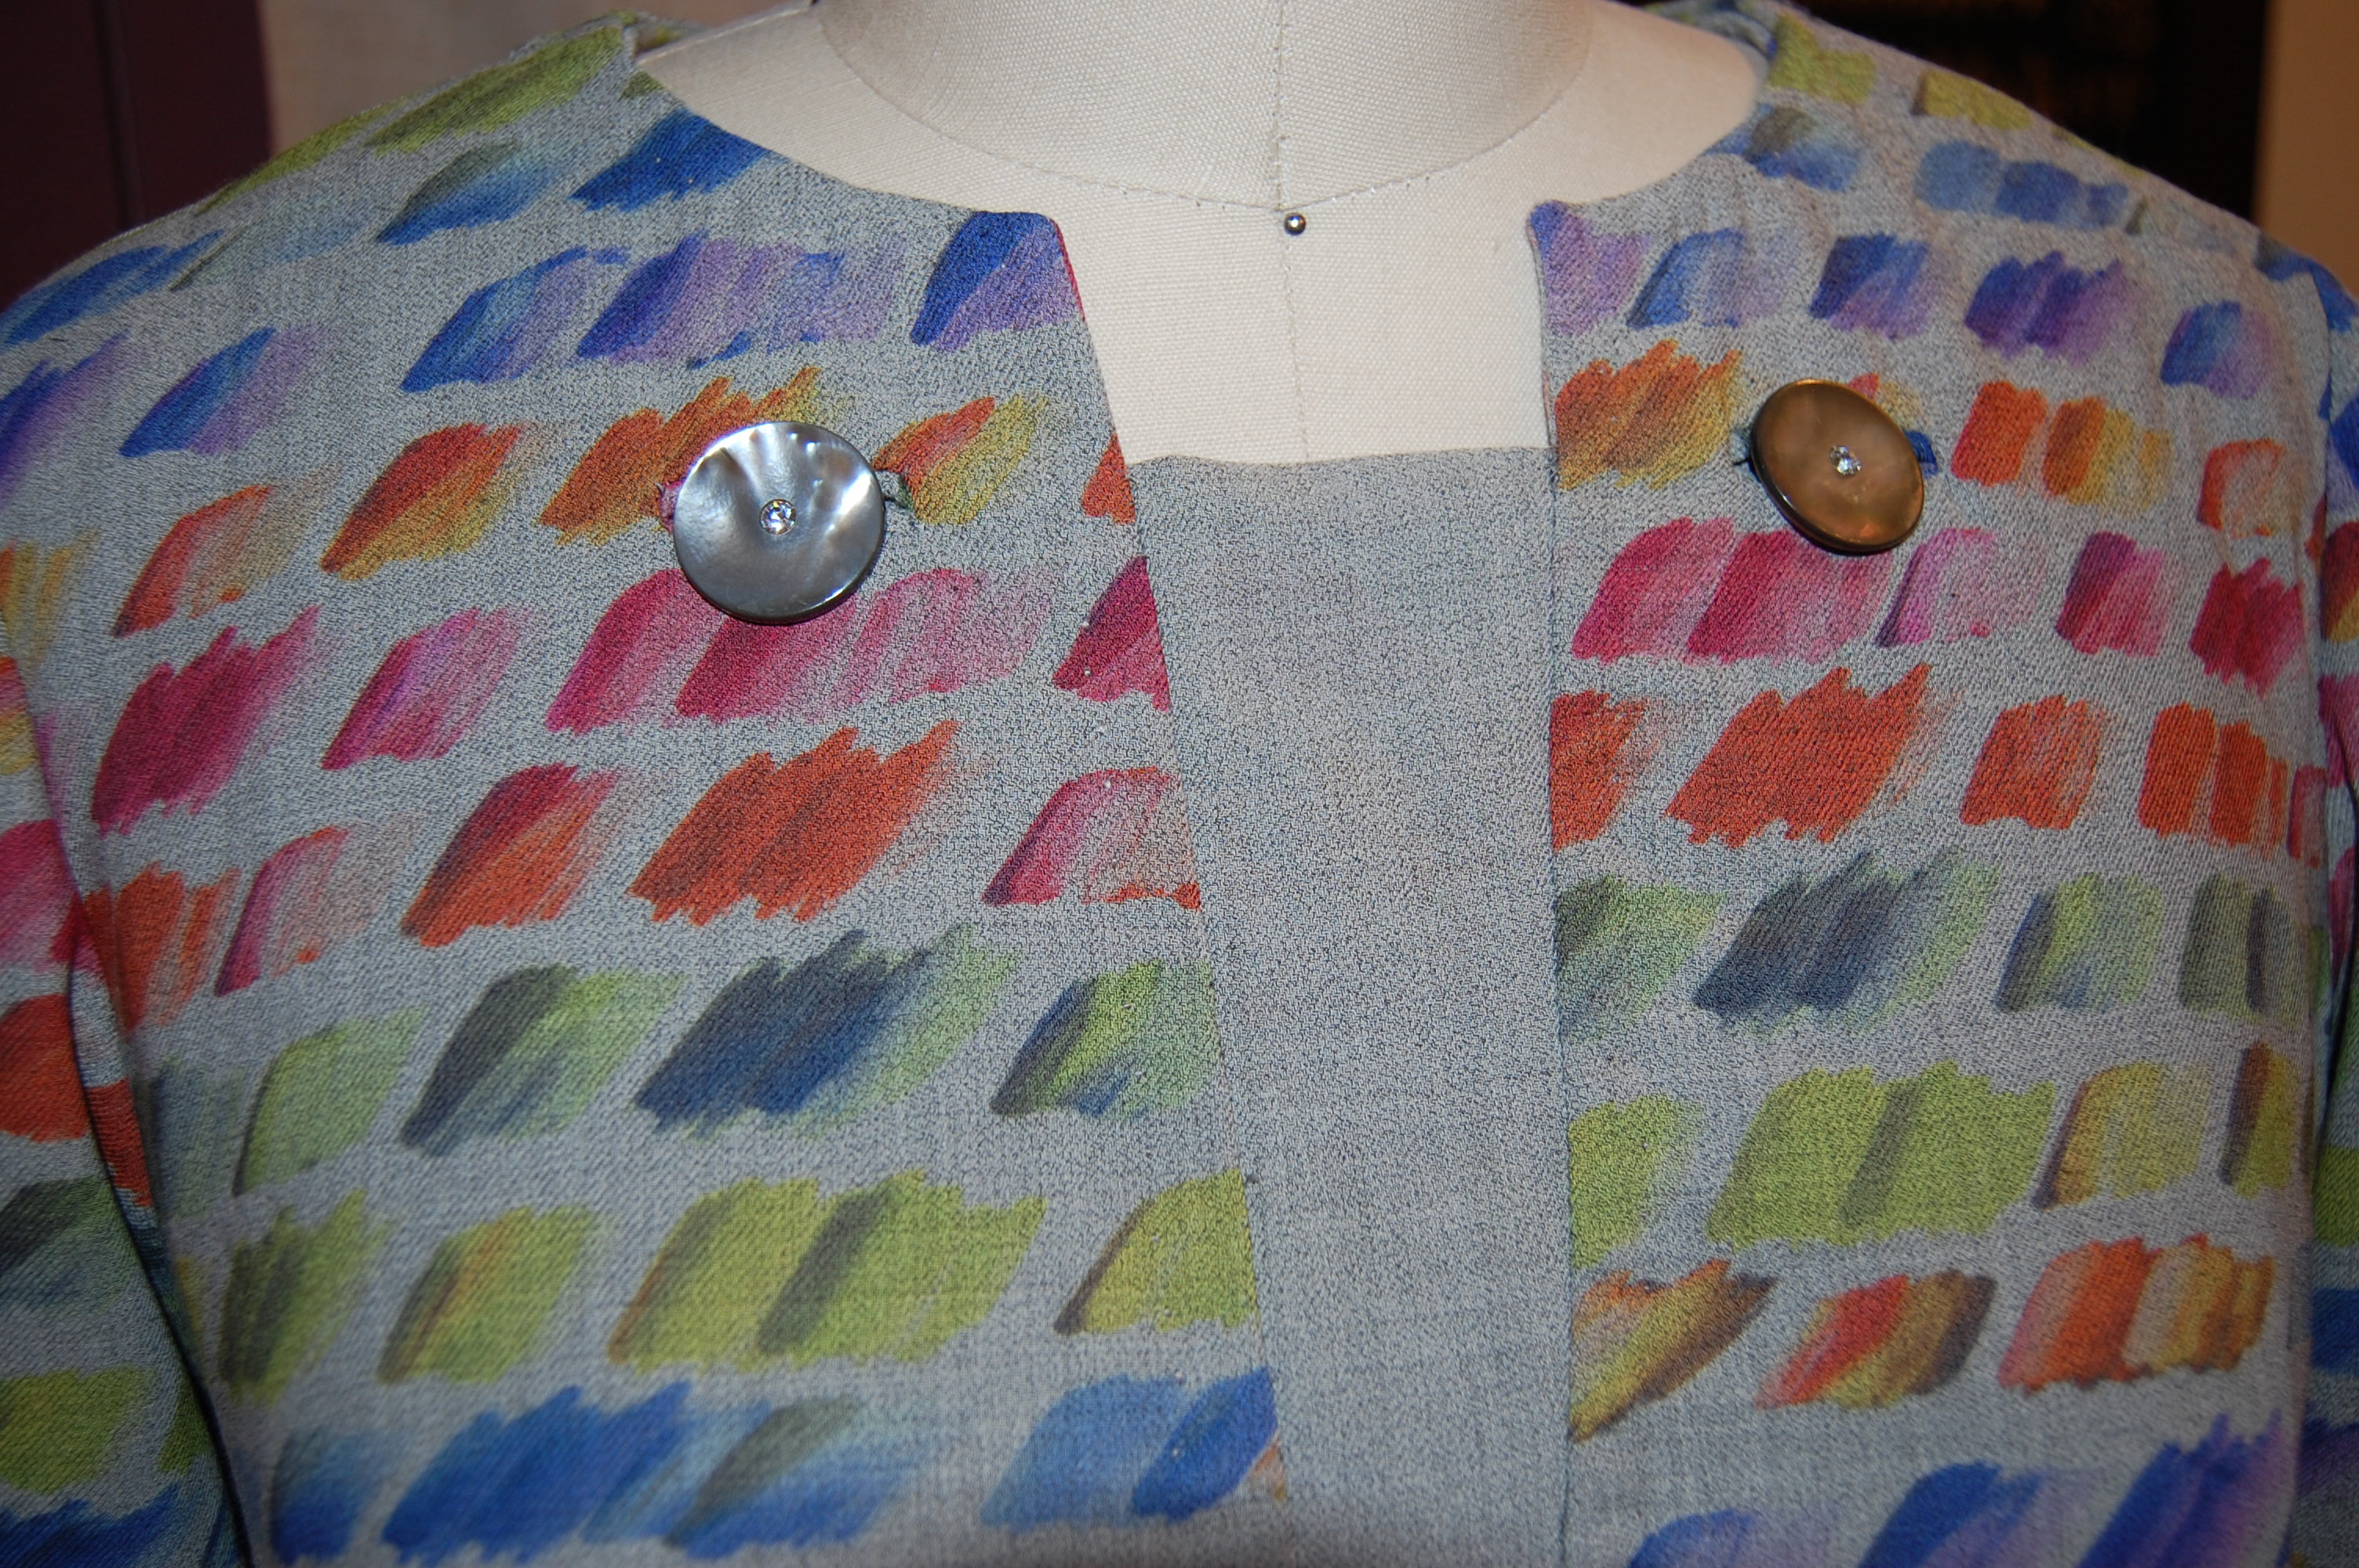
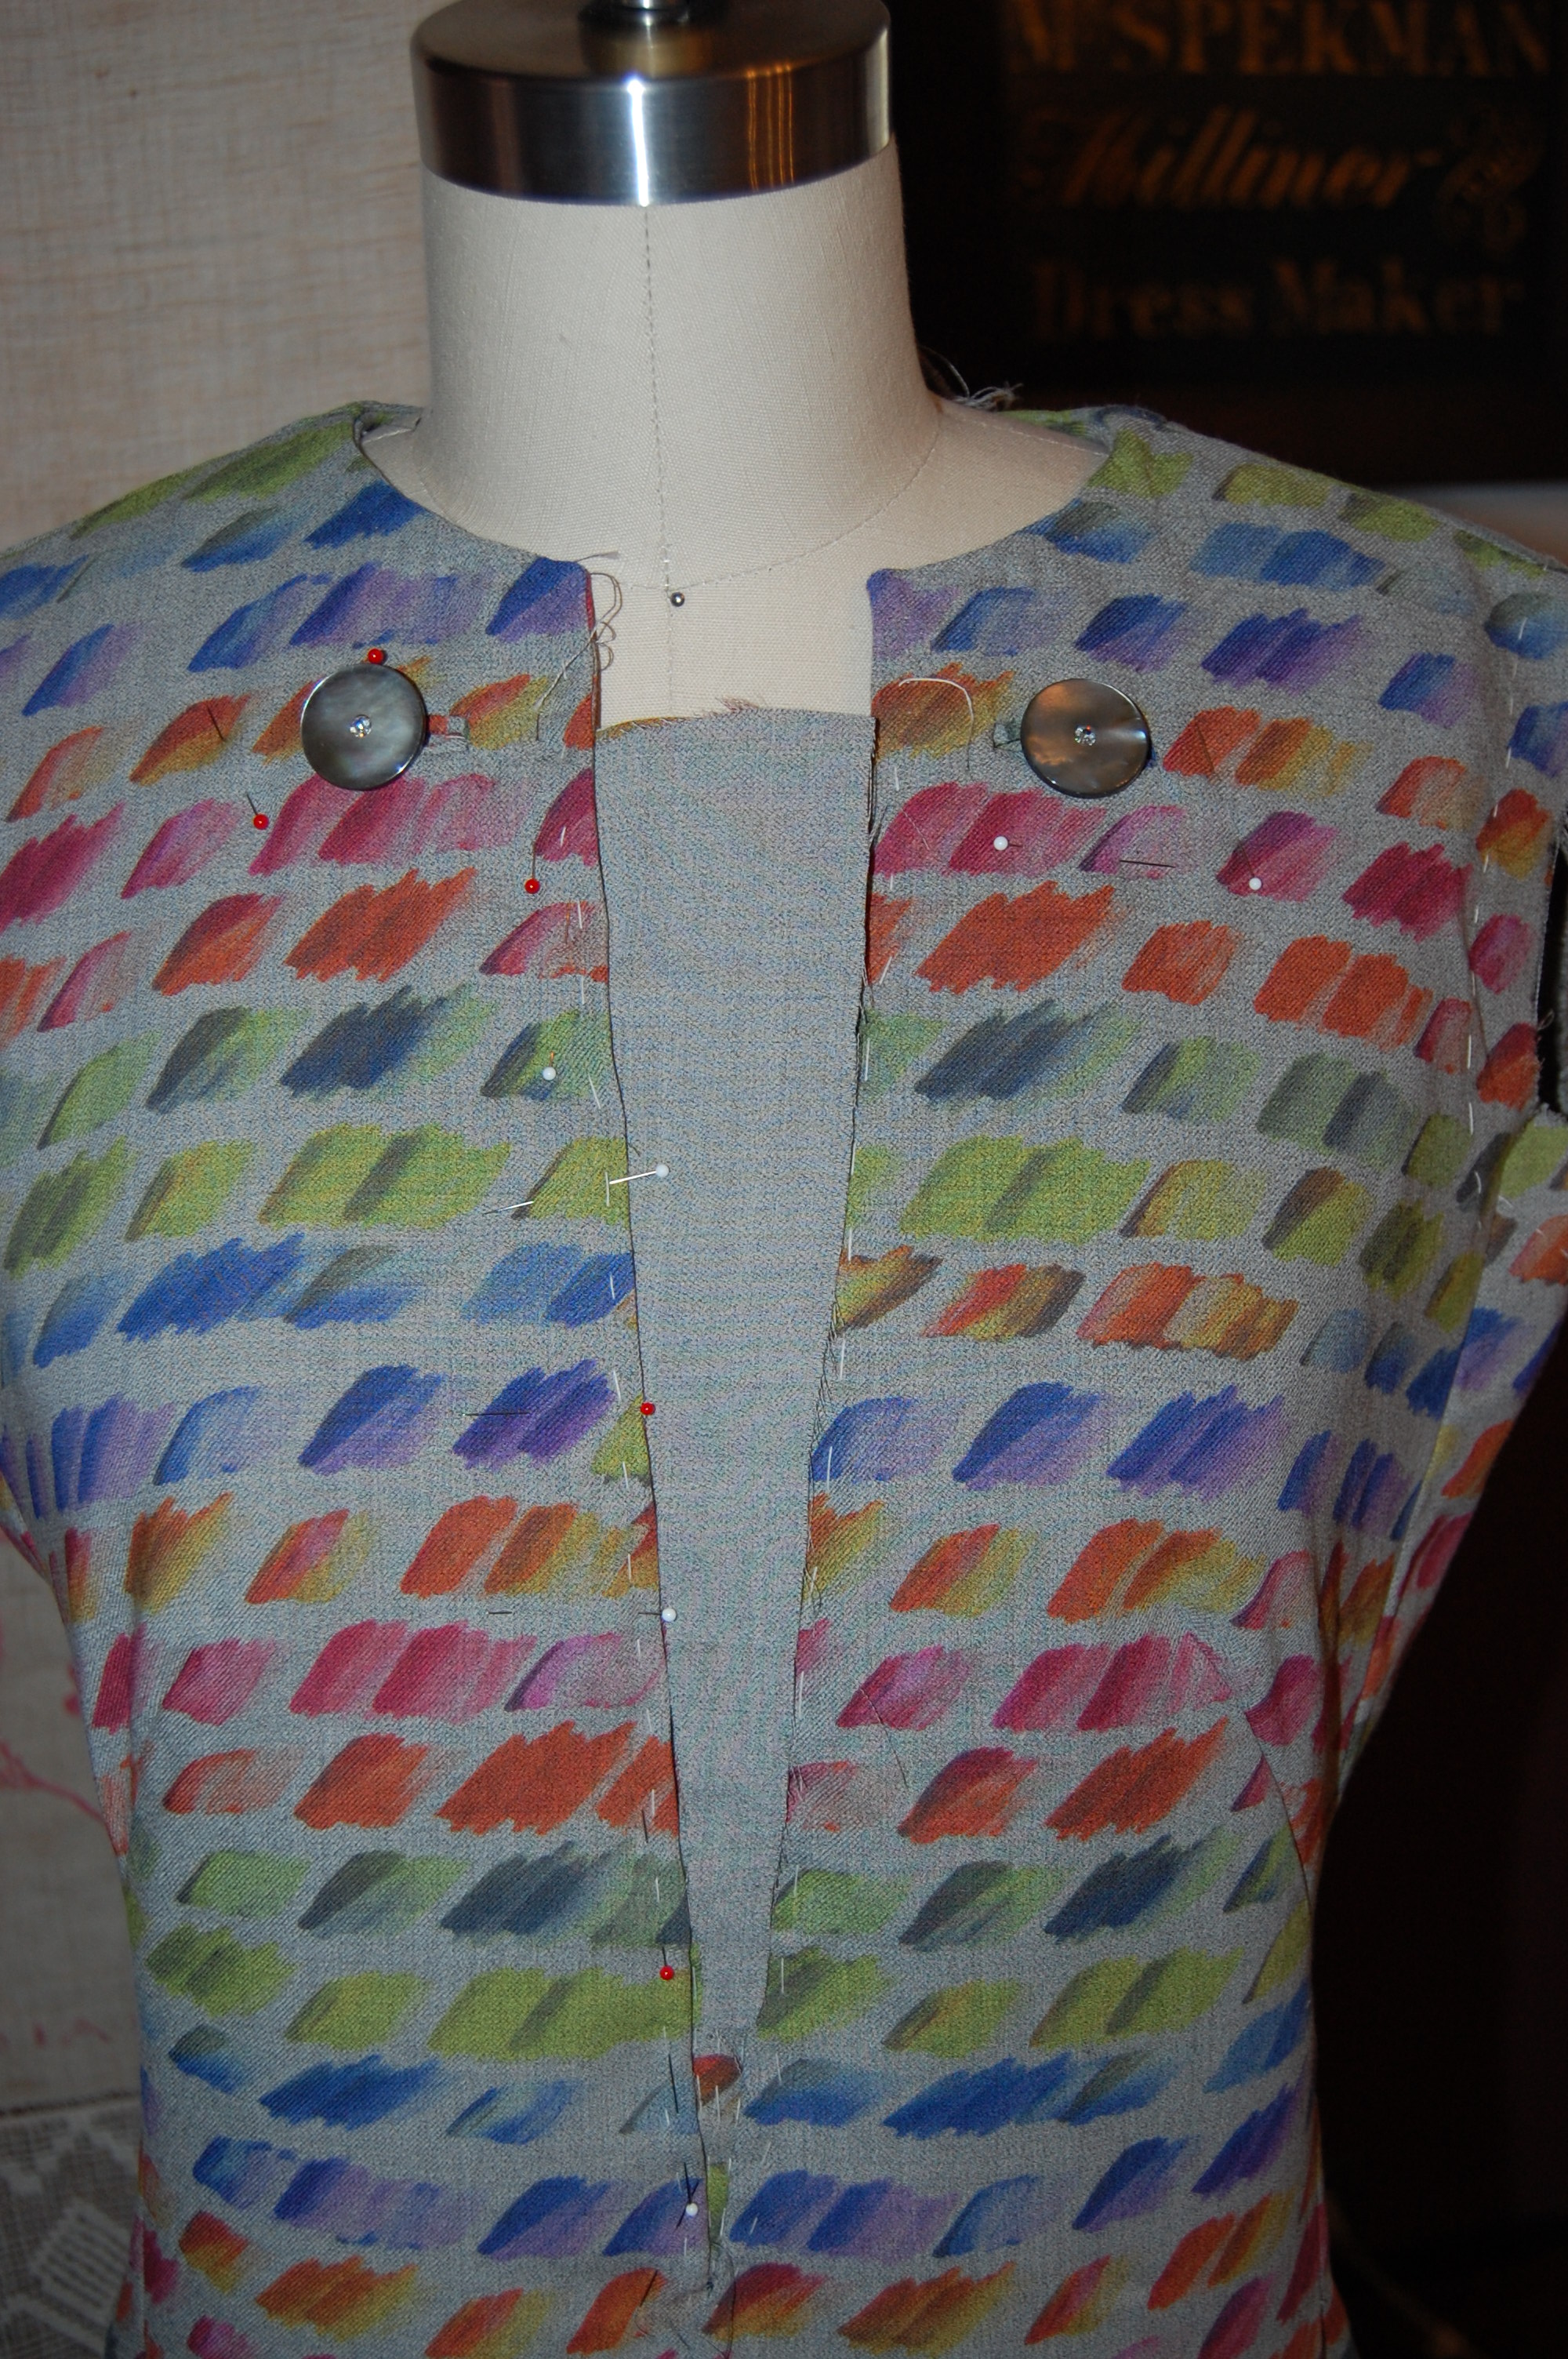
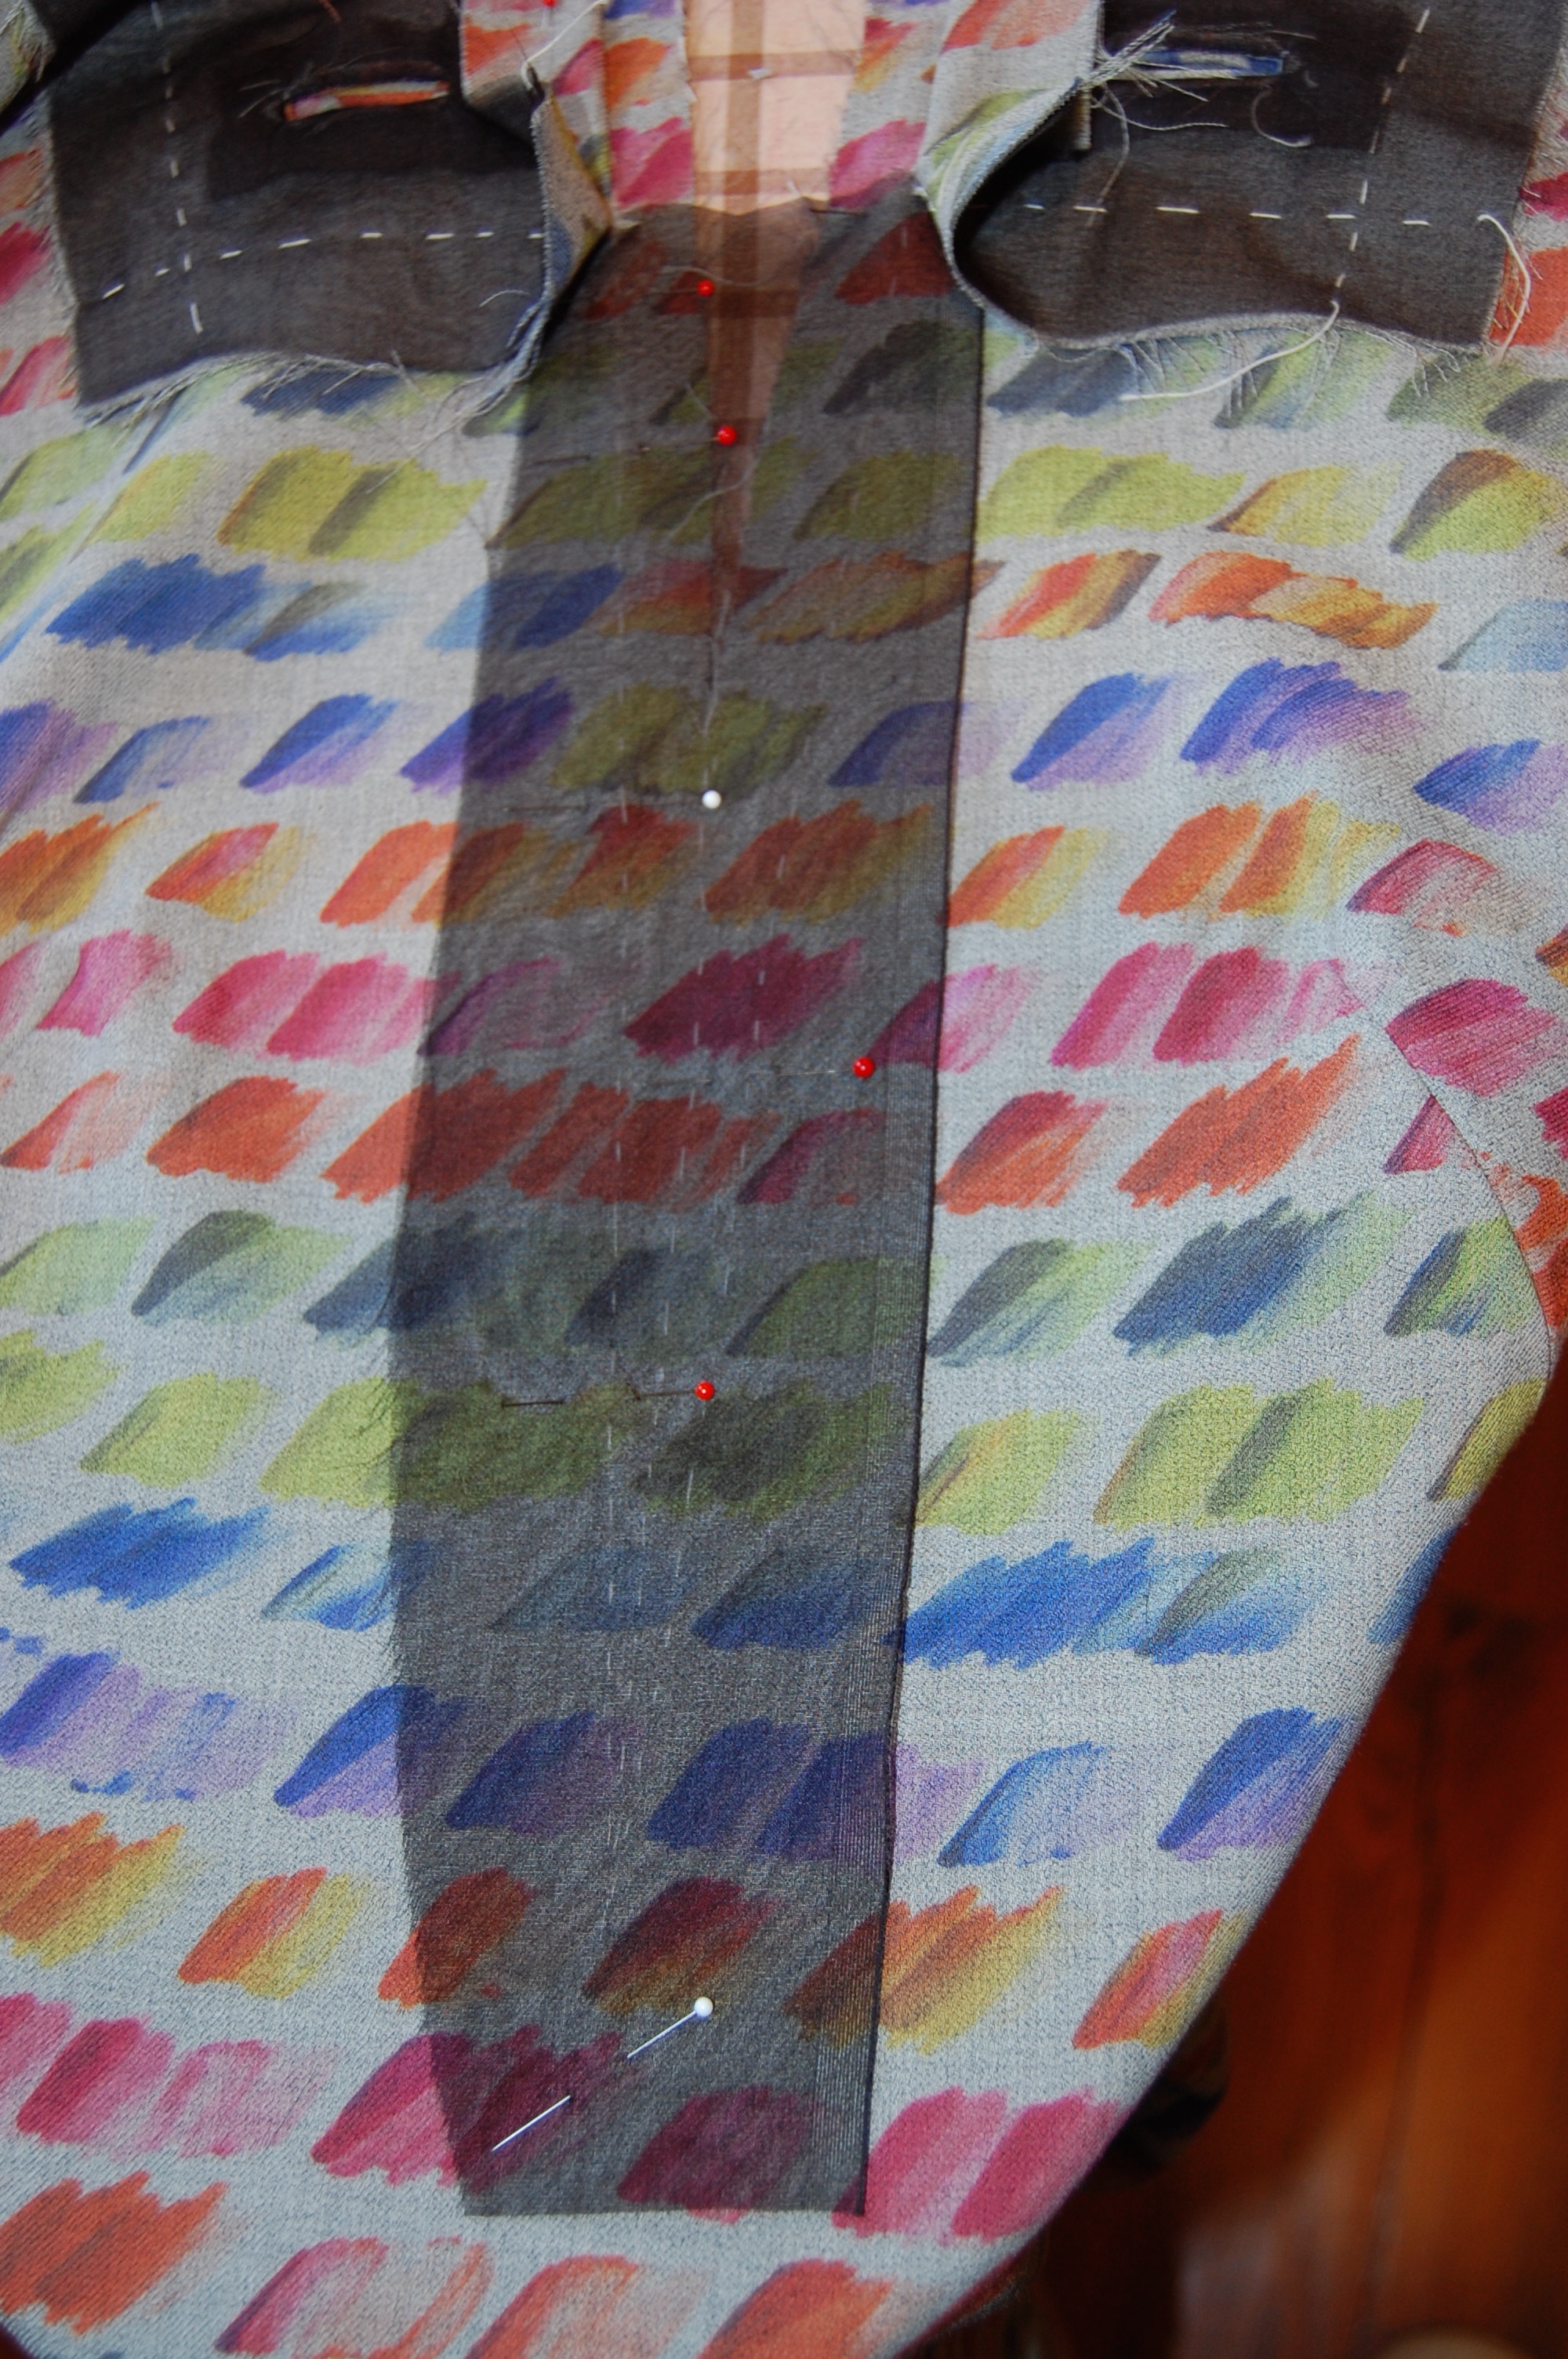
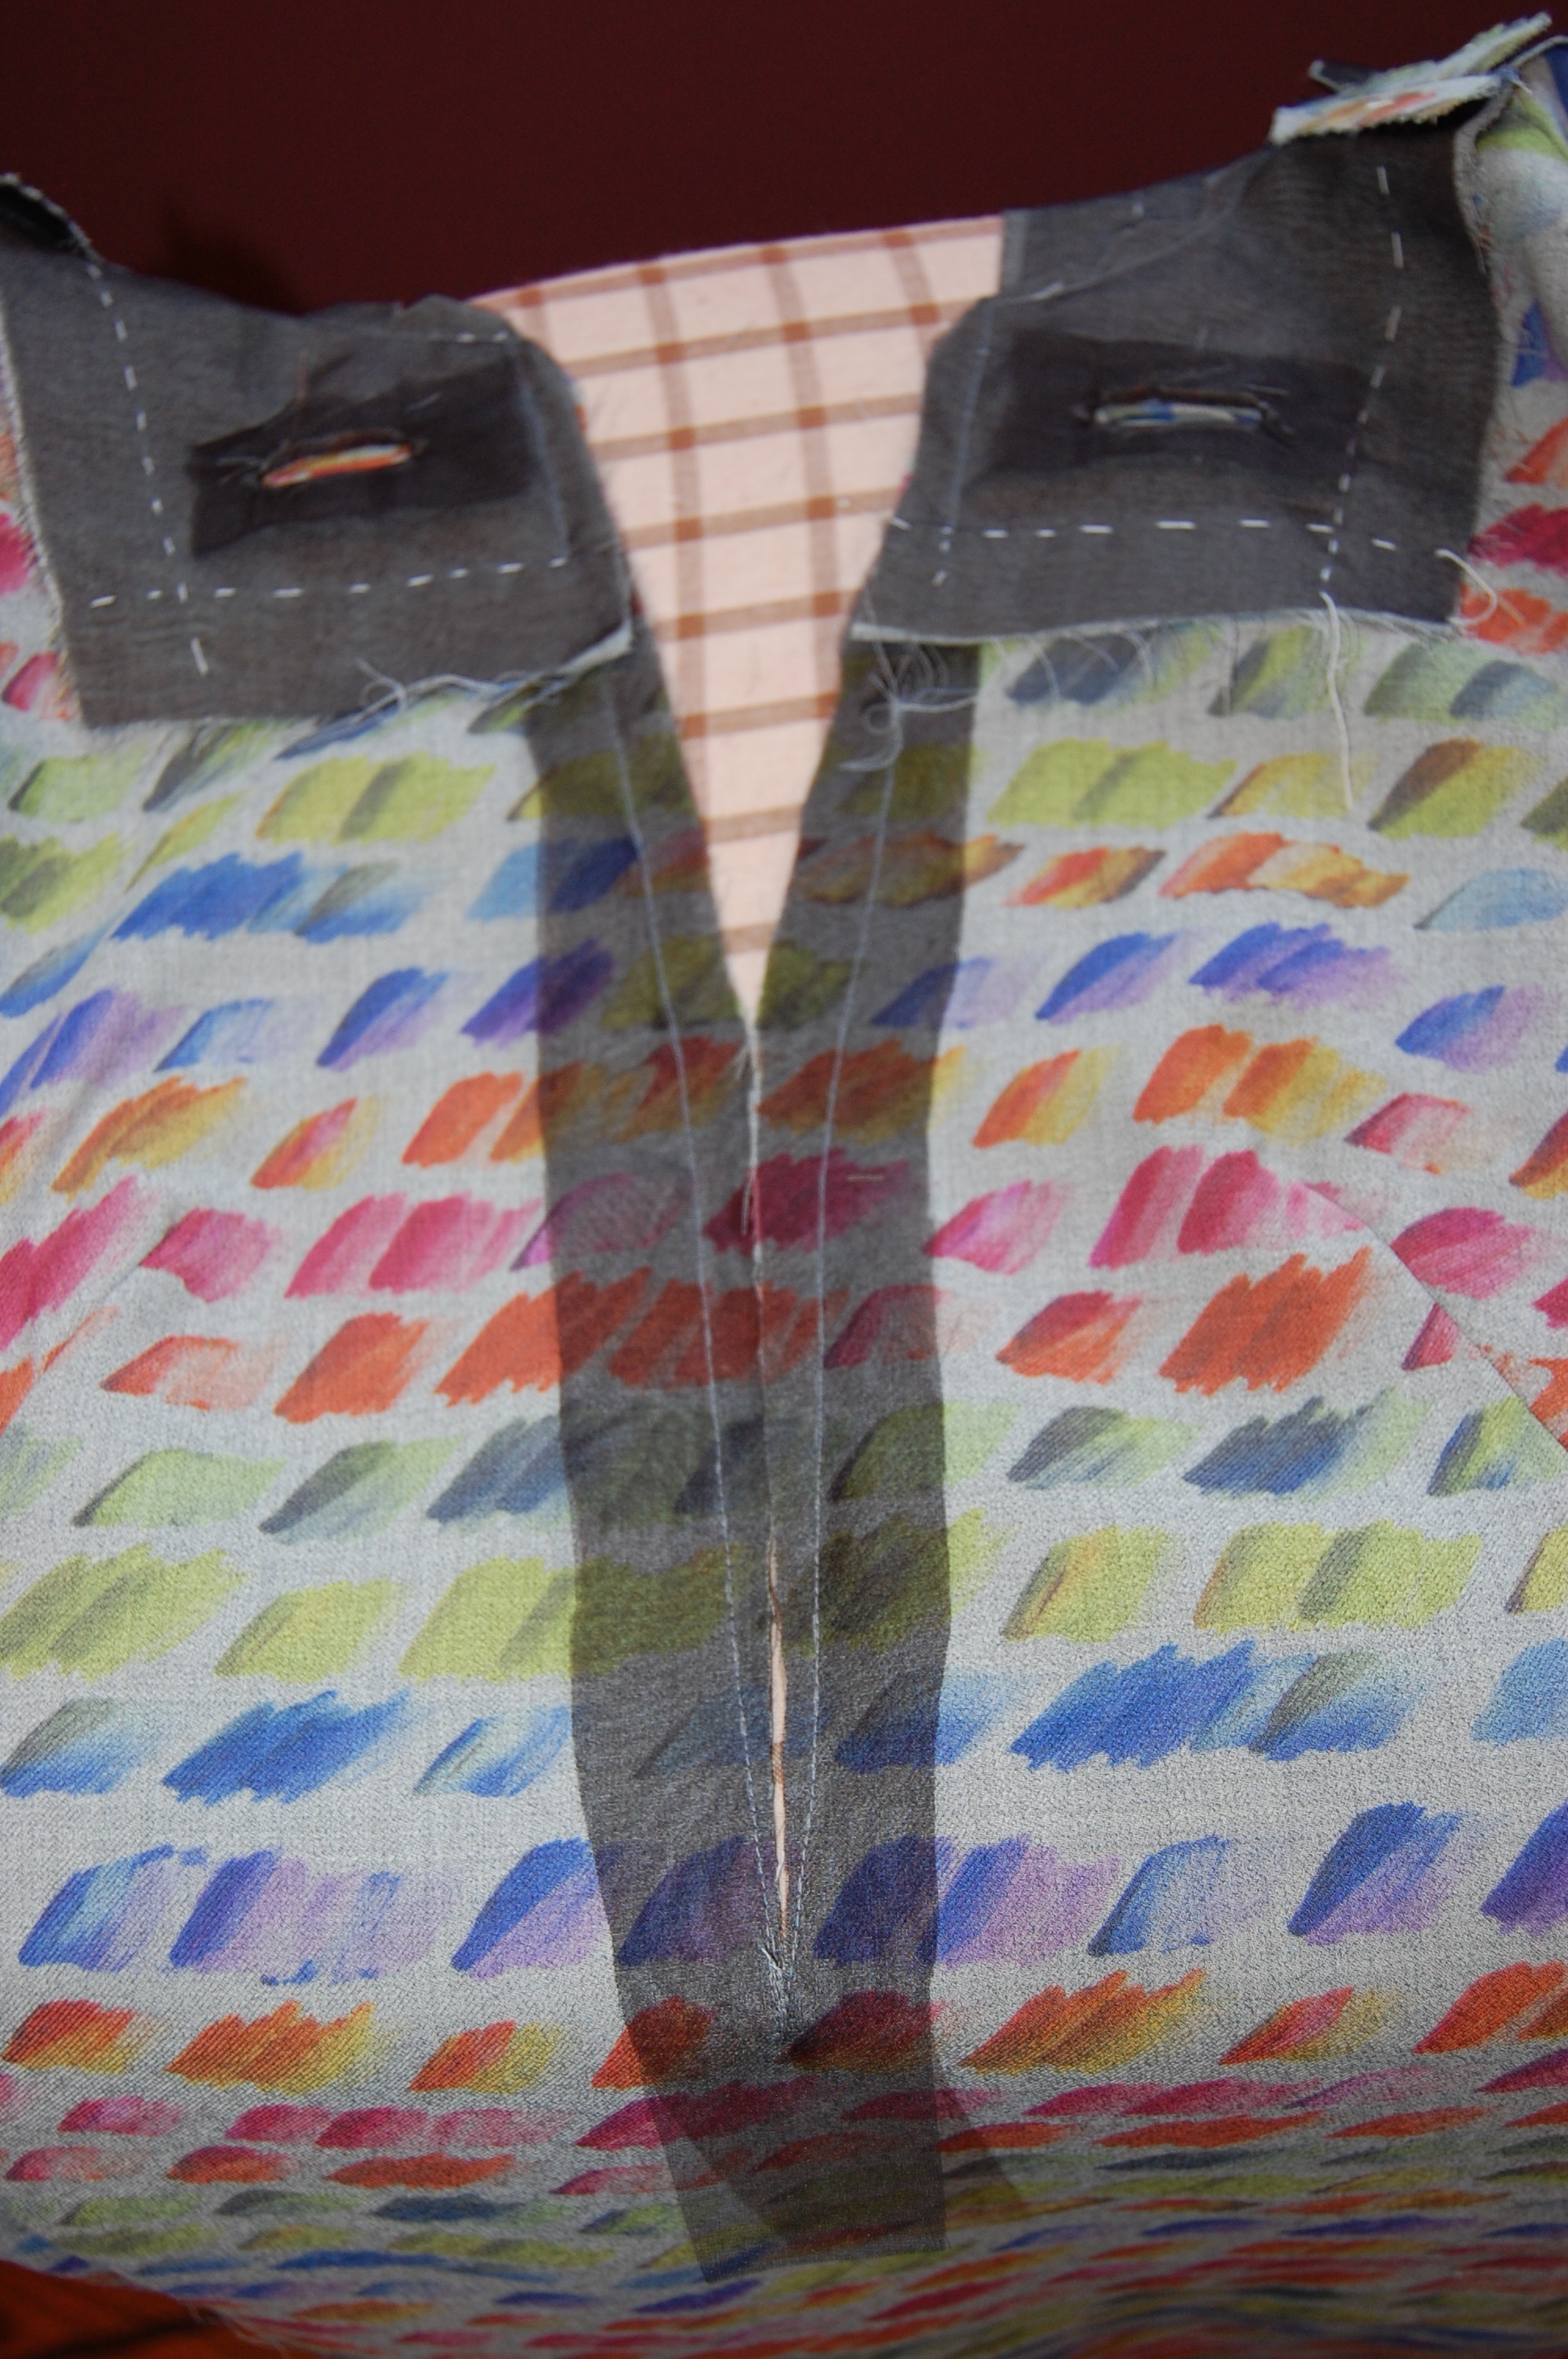
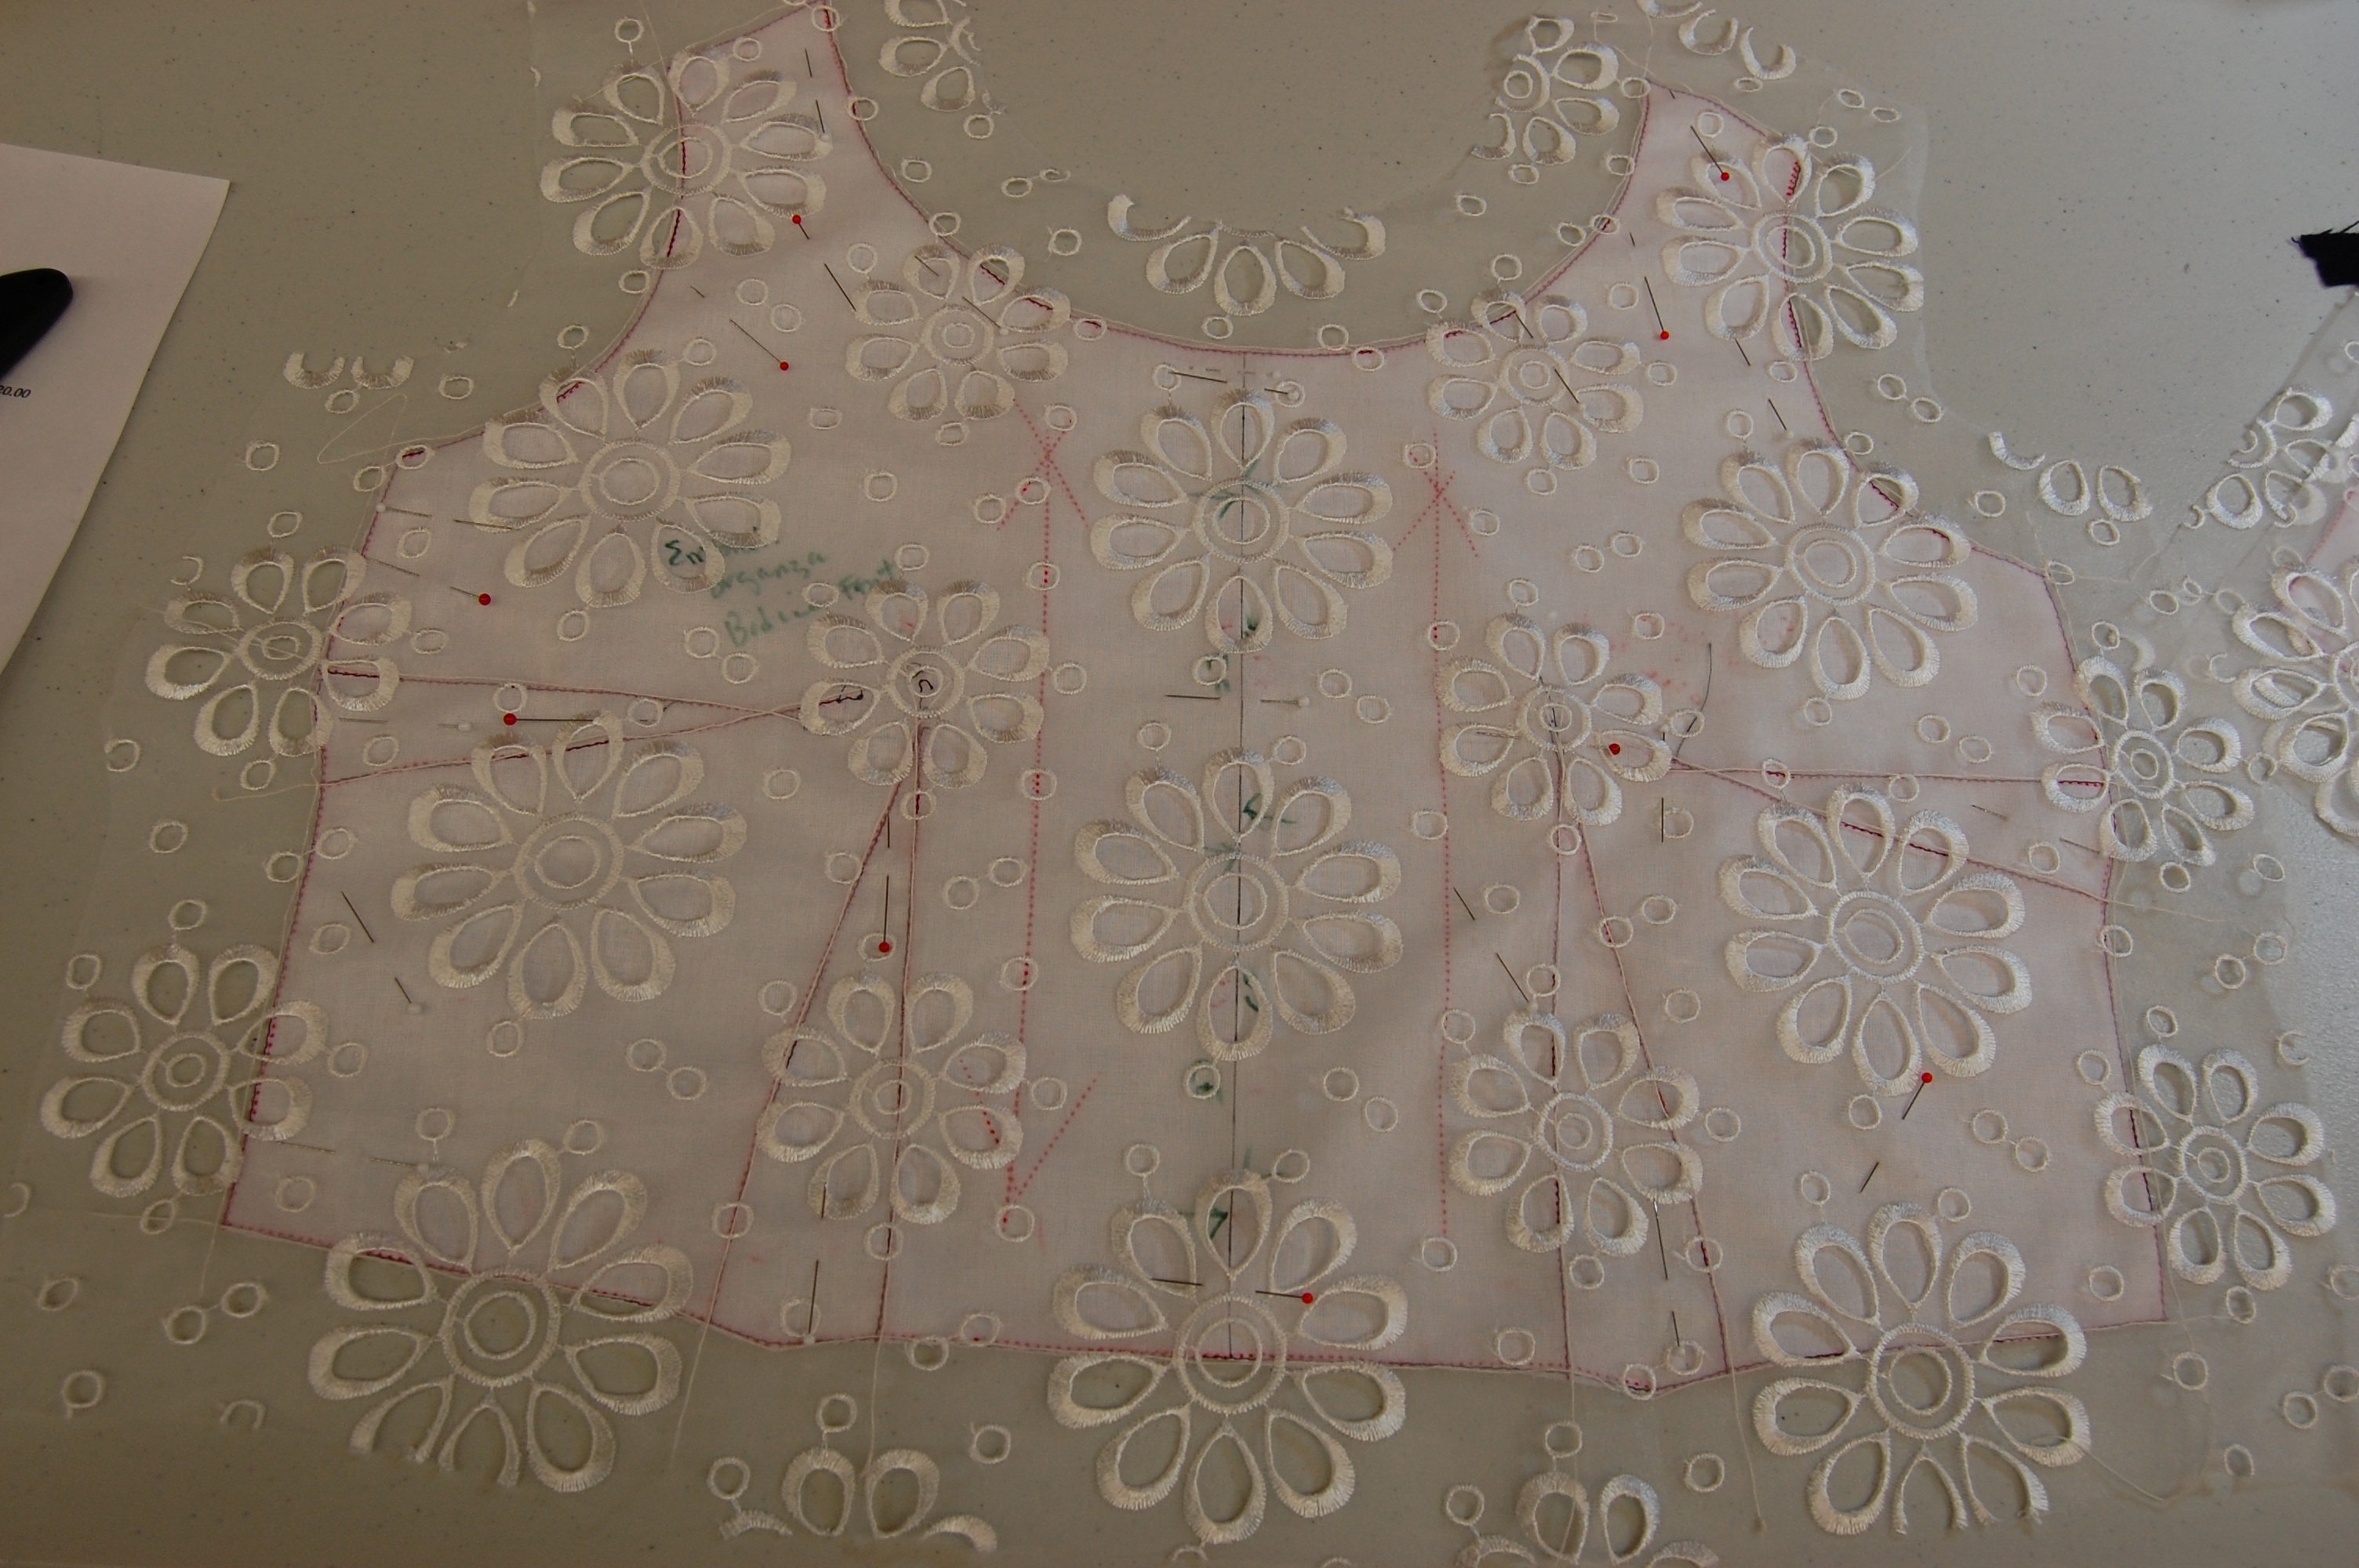
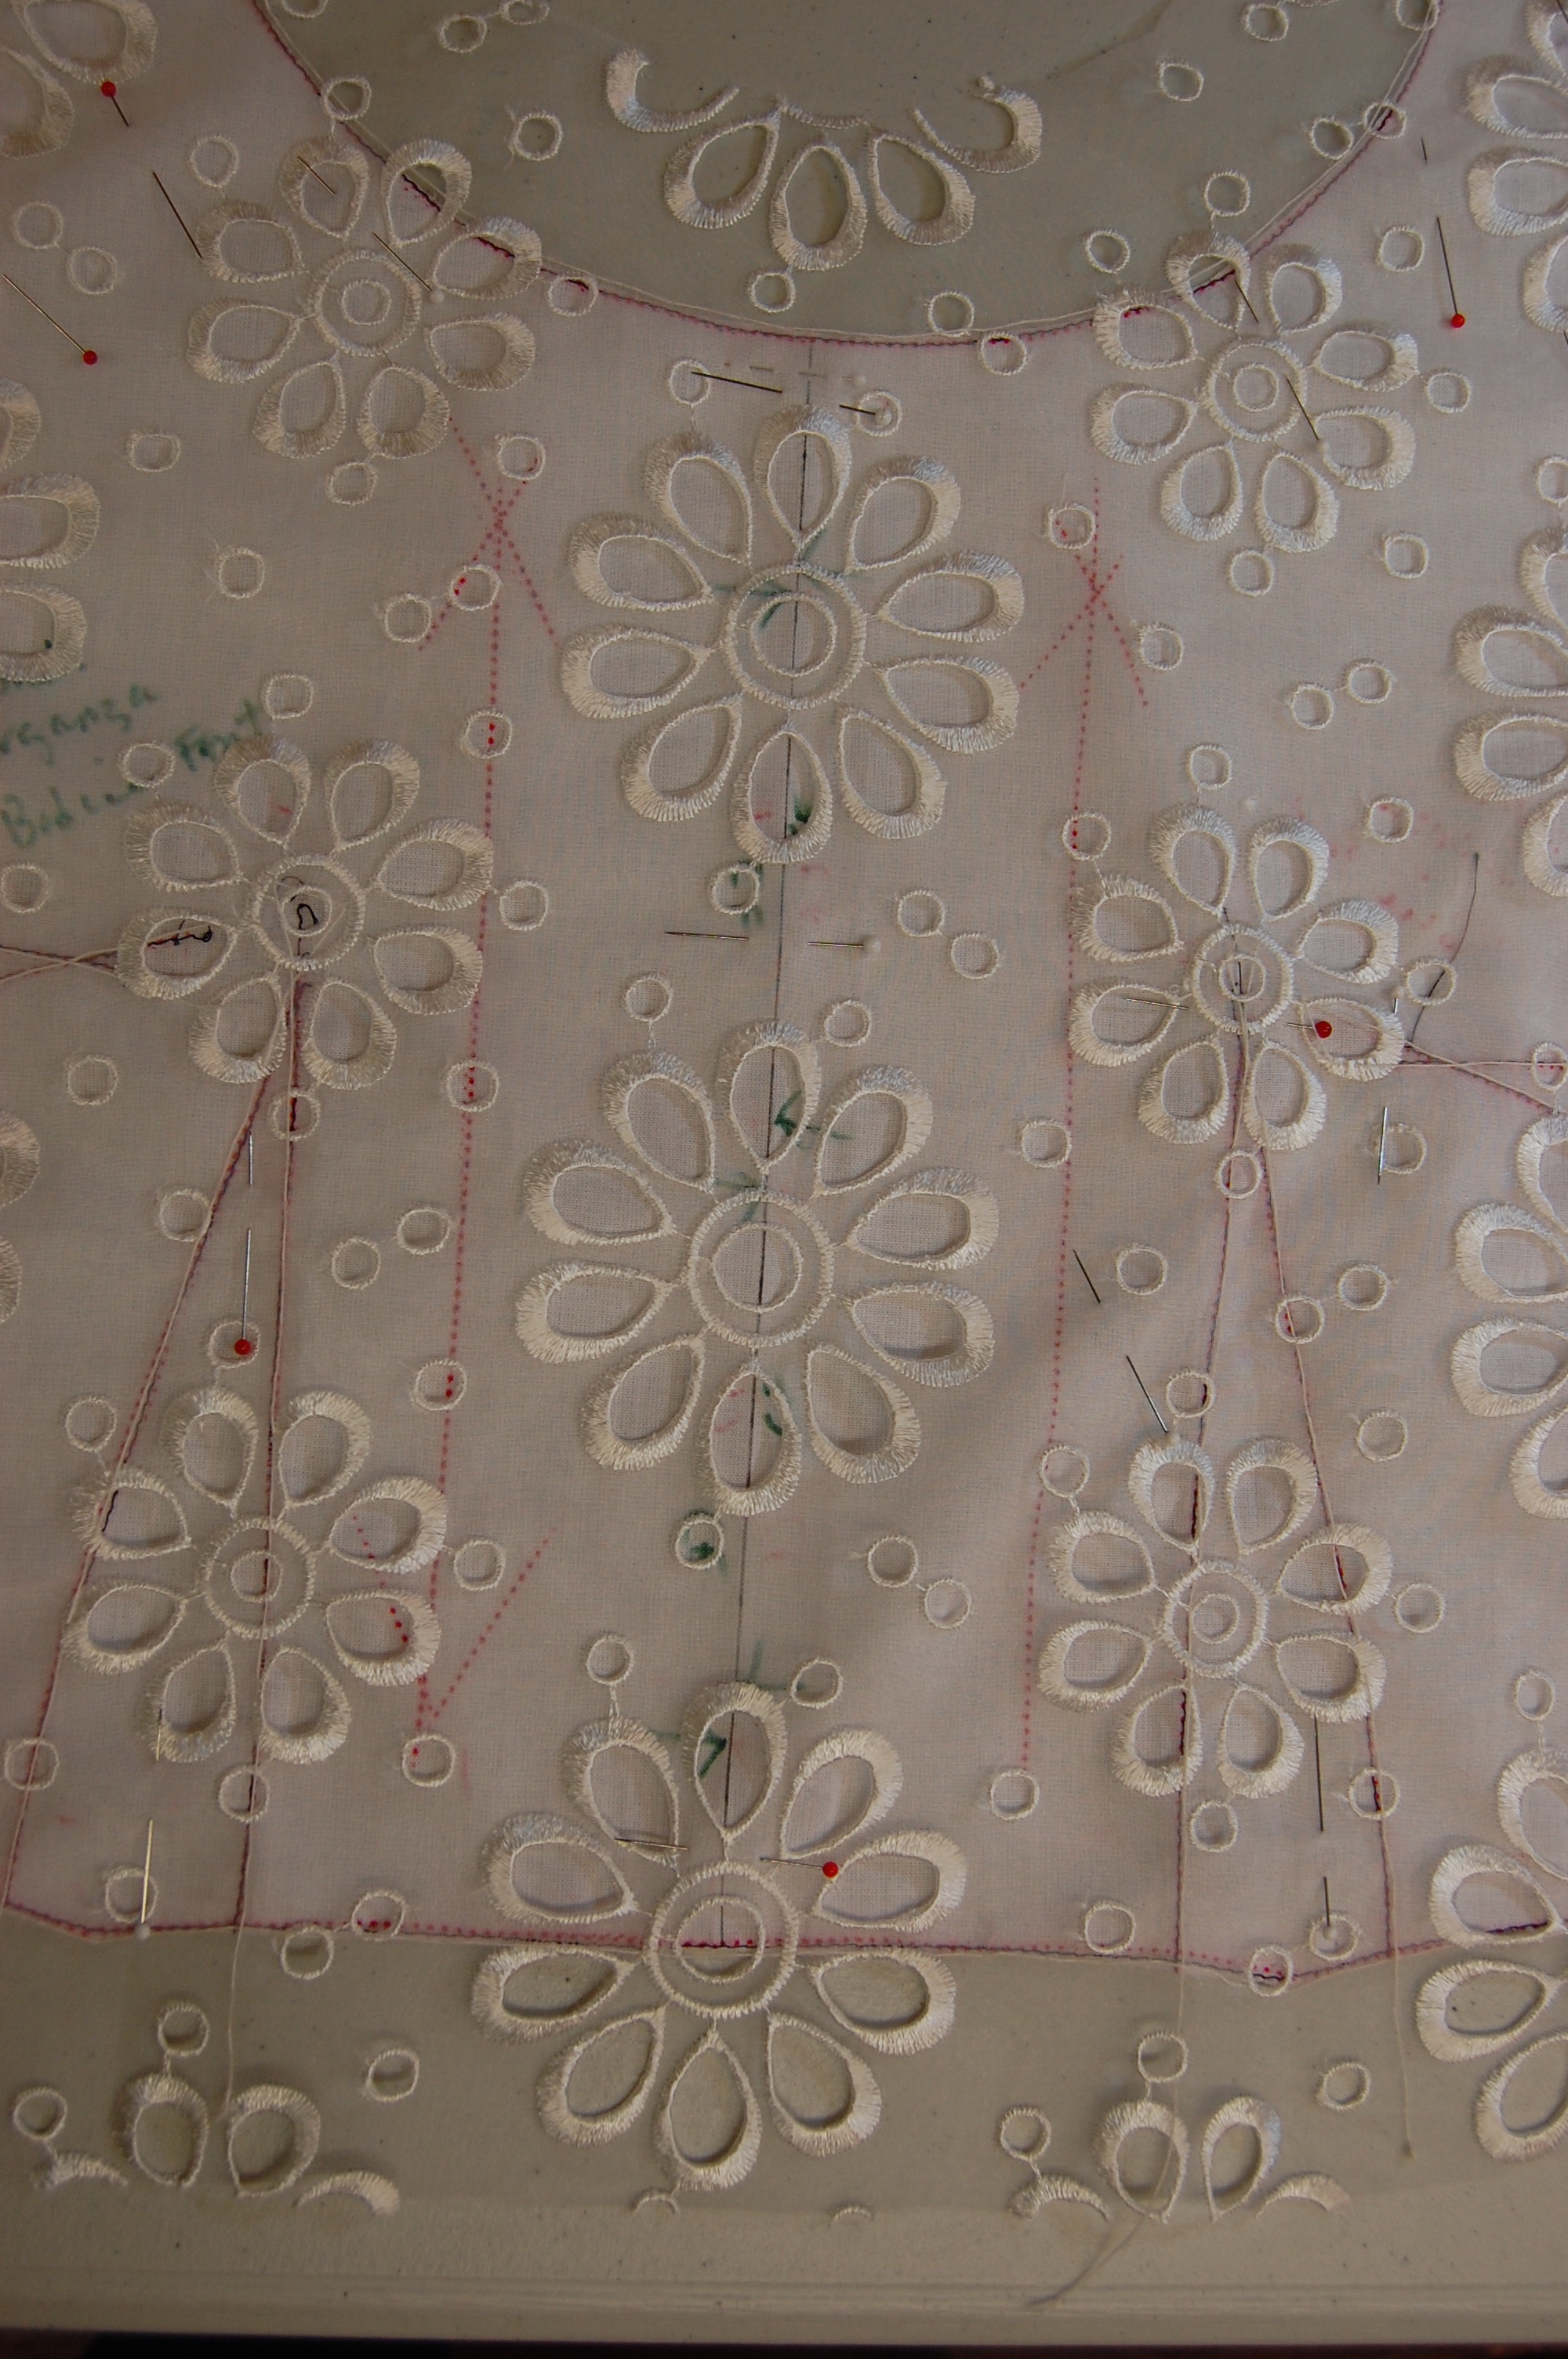
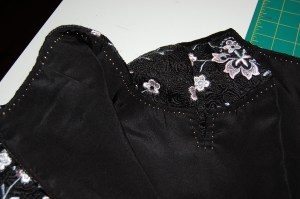
I liked that center front seam with its notched neckline, even though I knew it might be a little tricky to match the embroidered vines and flowers.  However, I thought  the semi-attached appliqués would be lovely overlapping the seams.

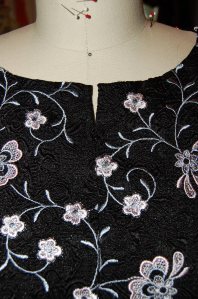
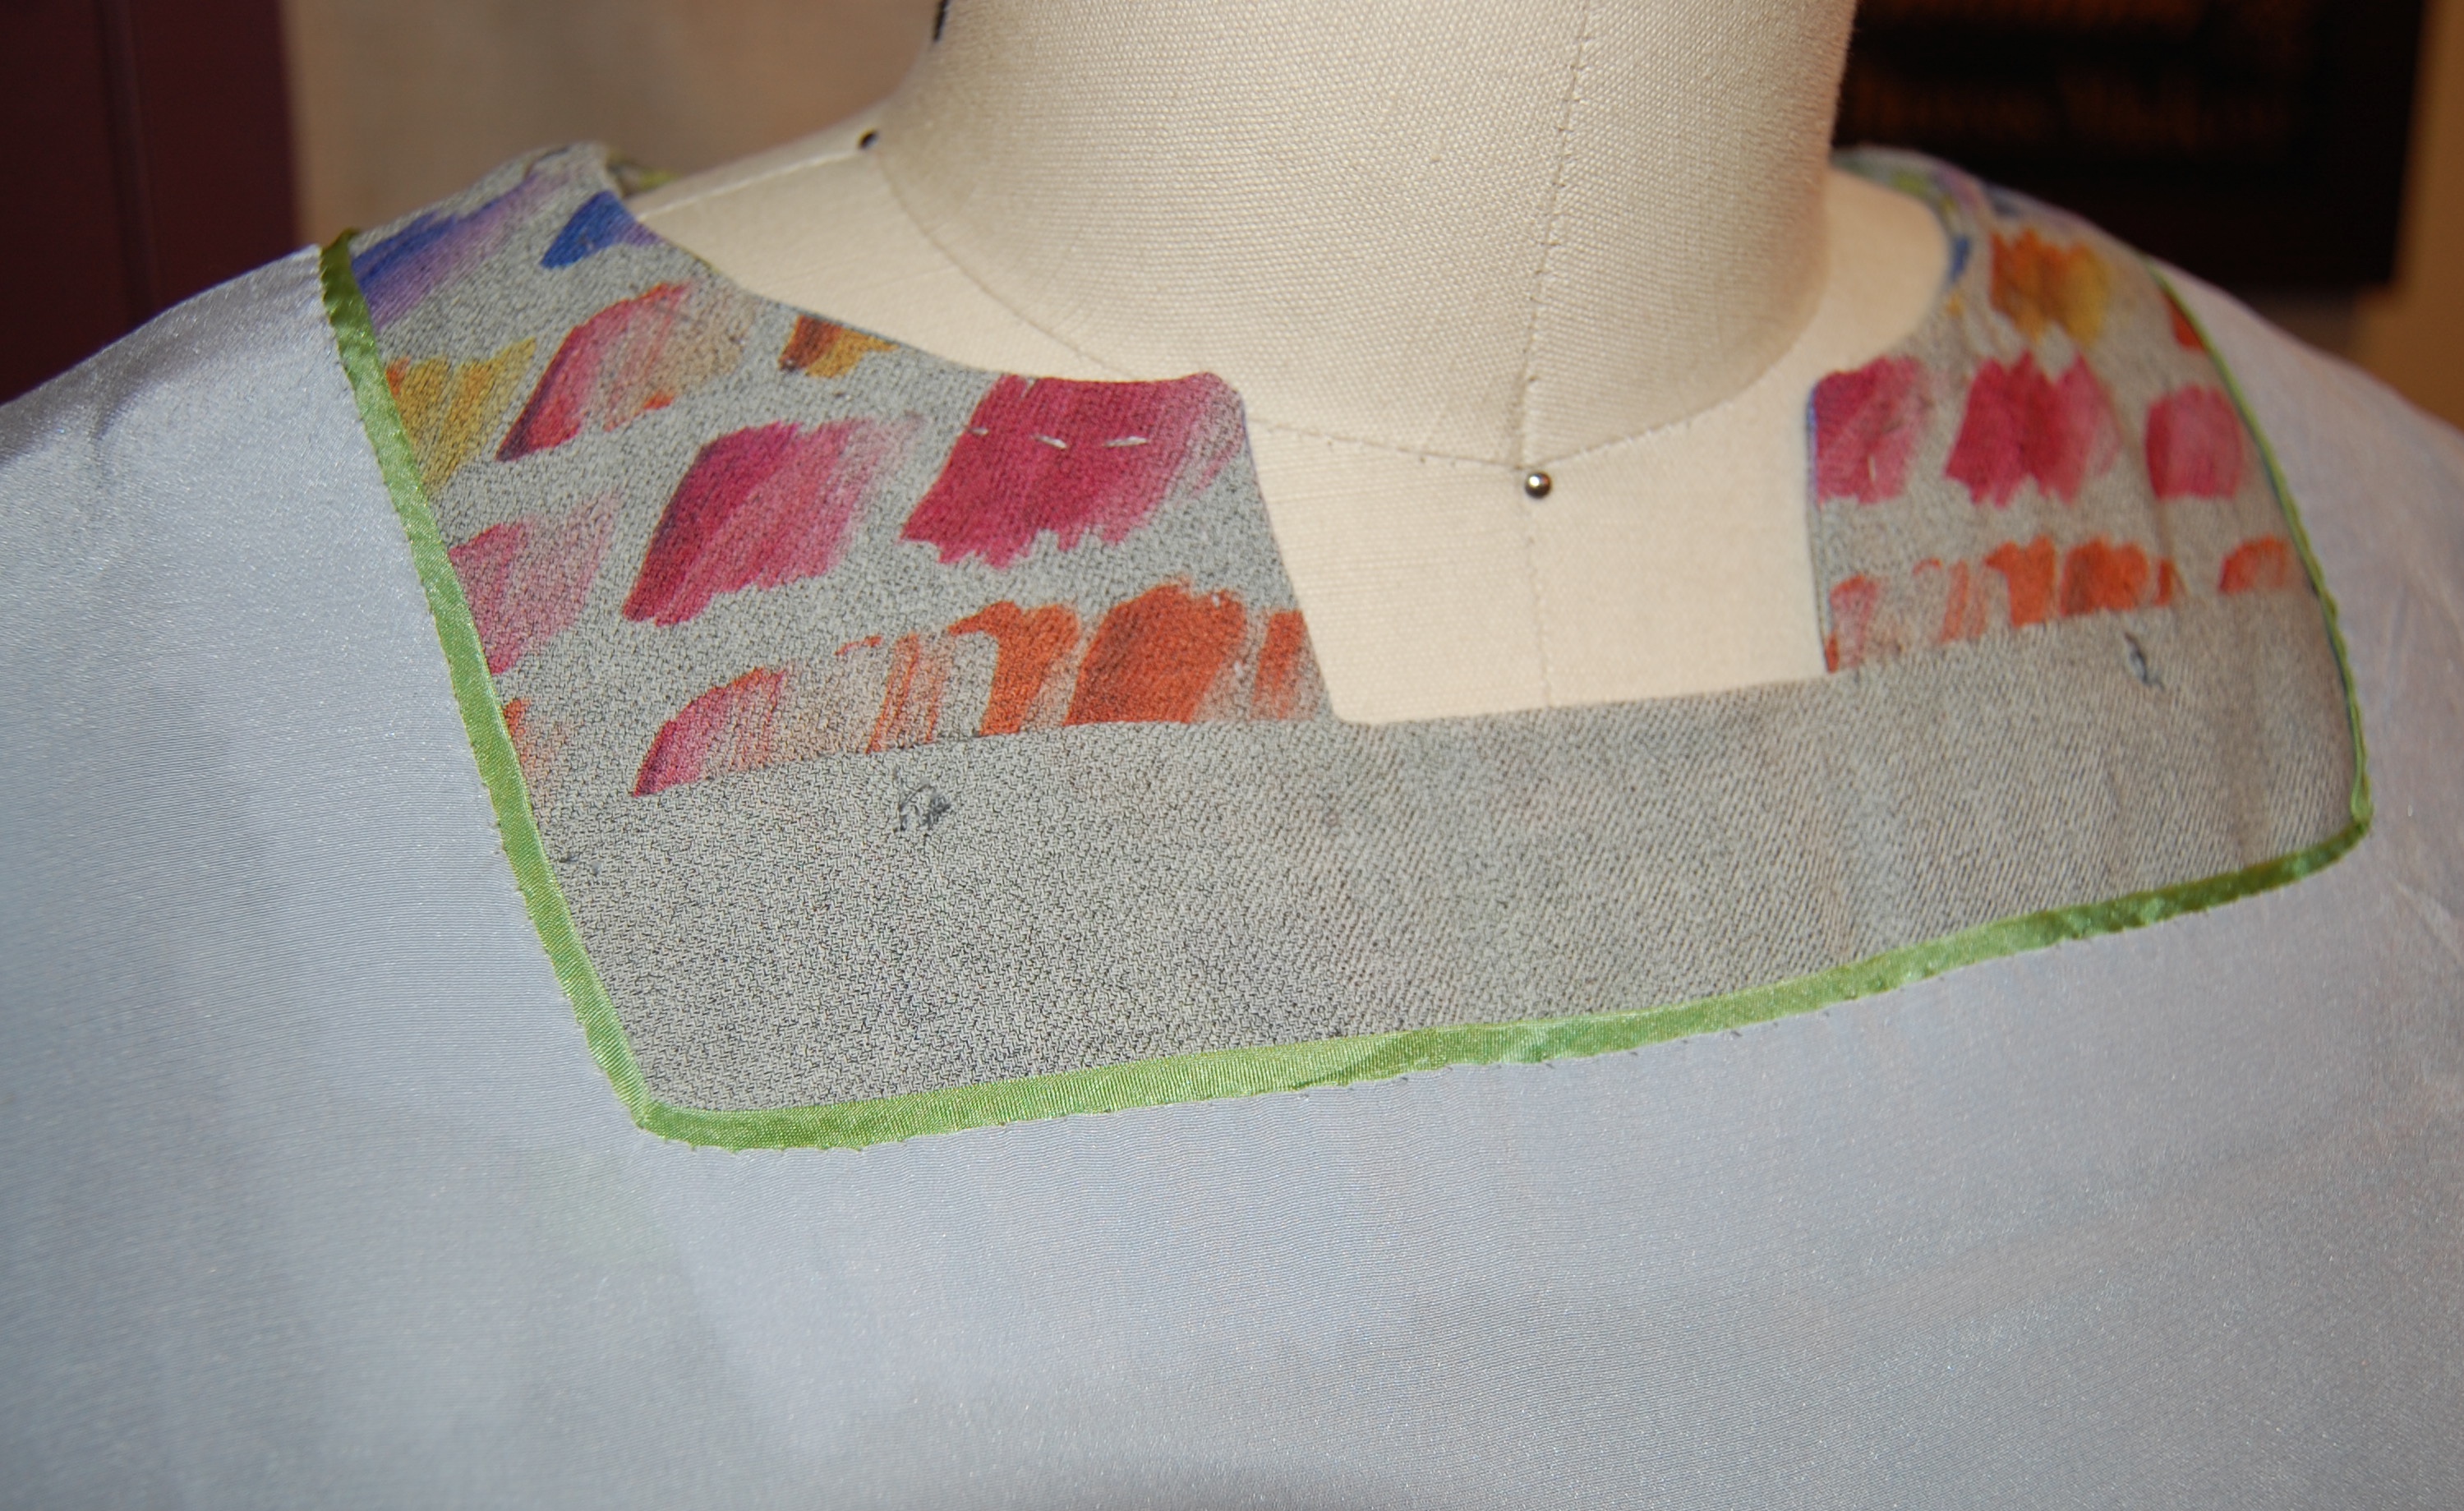
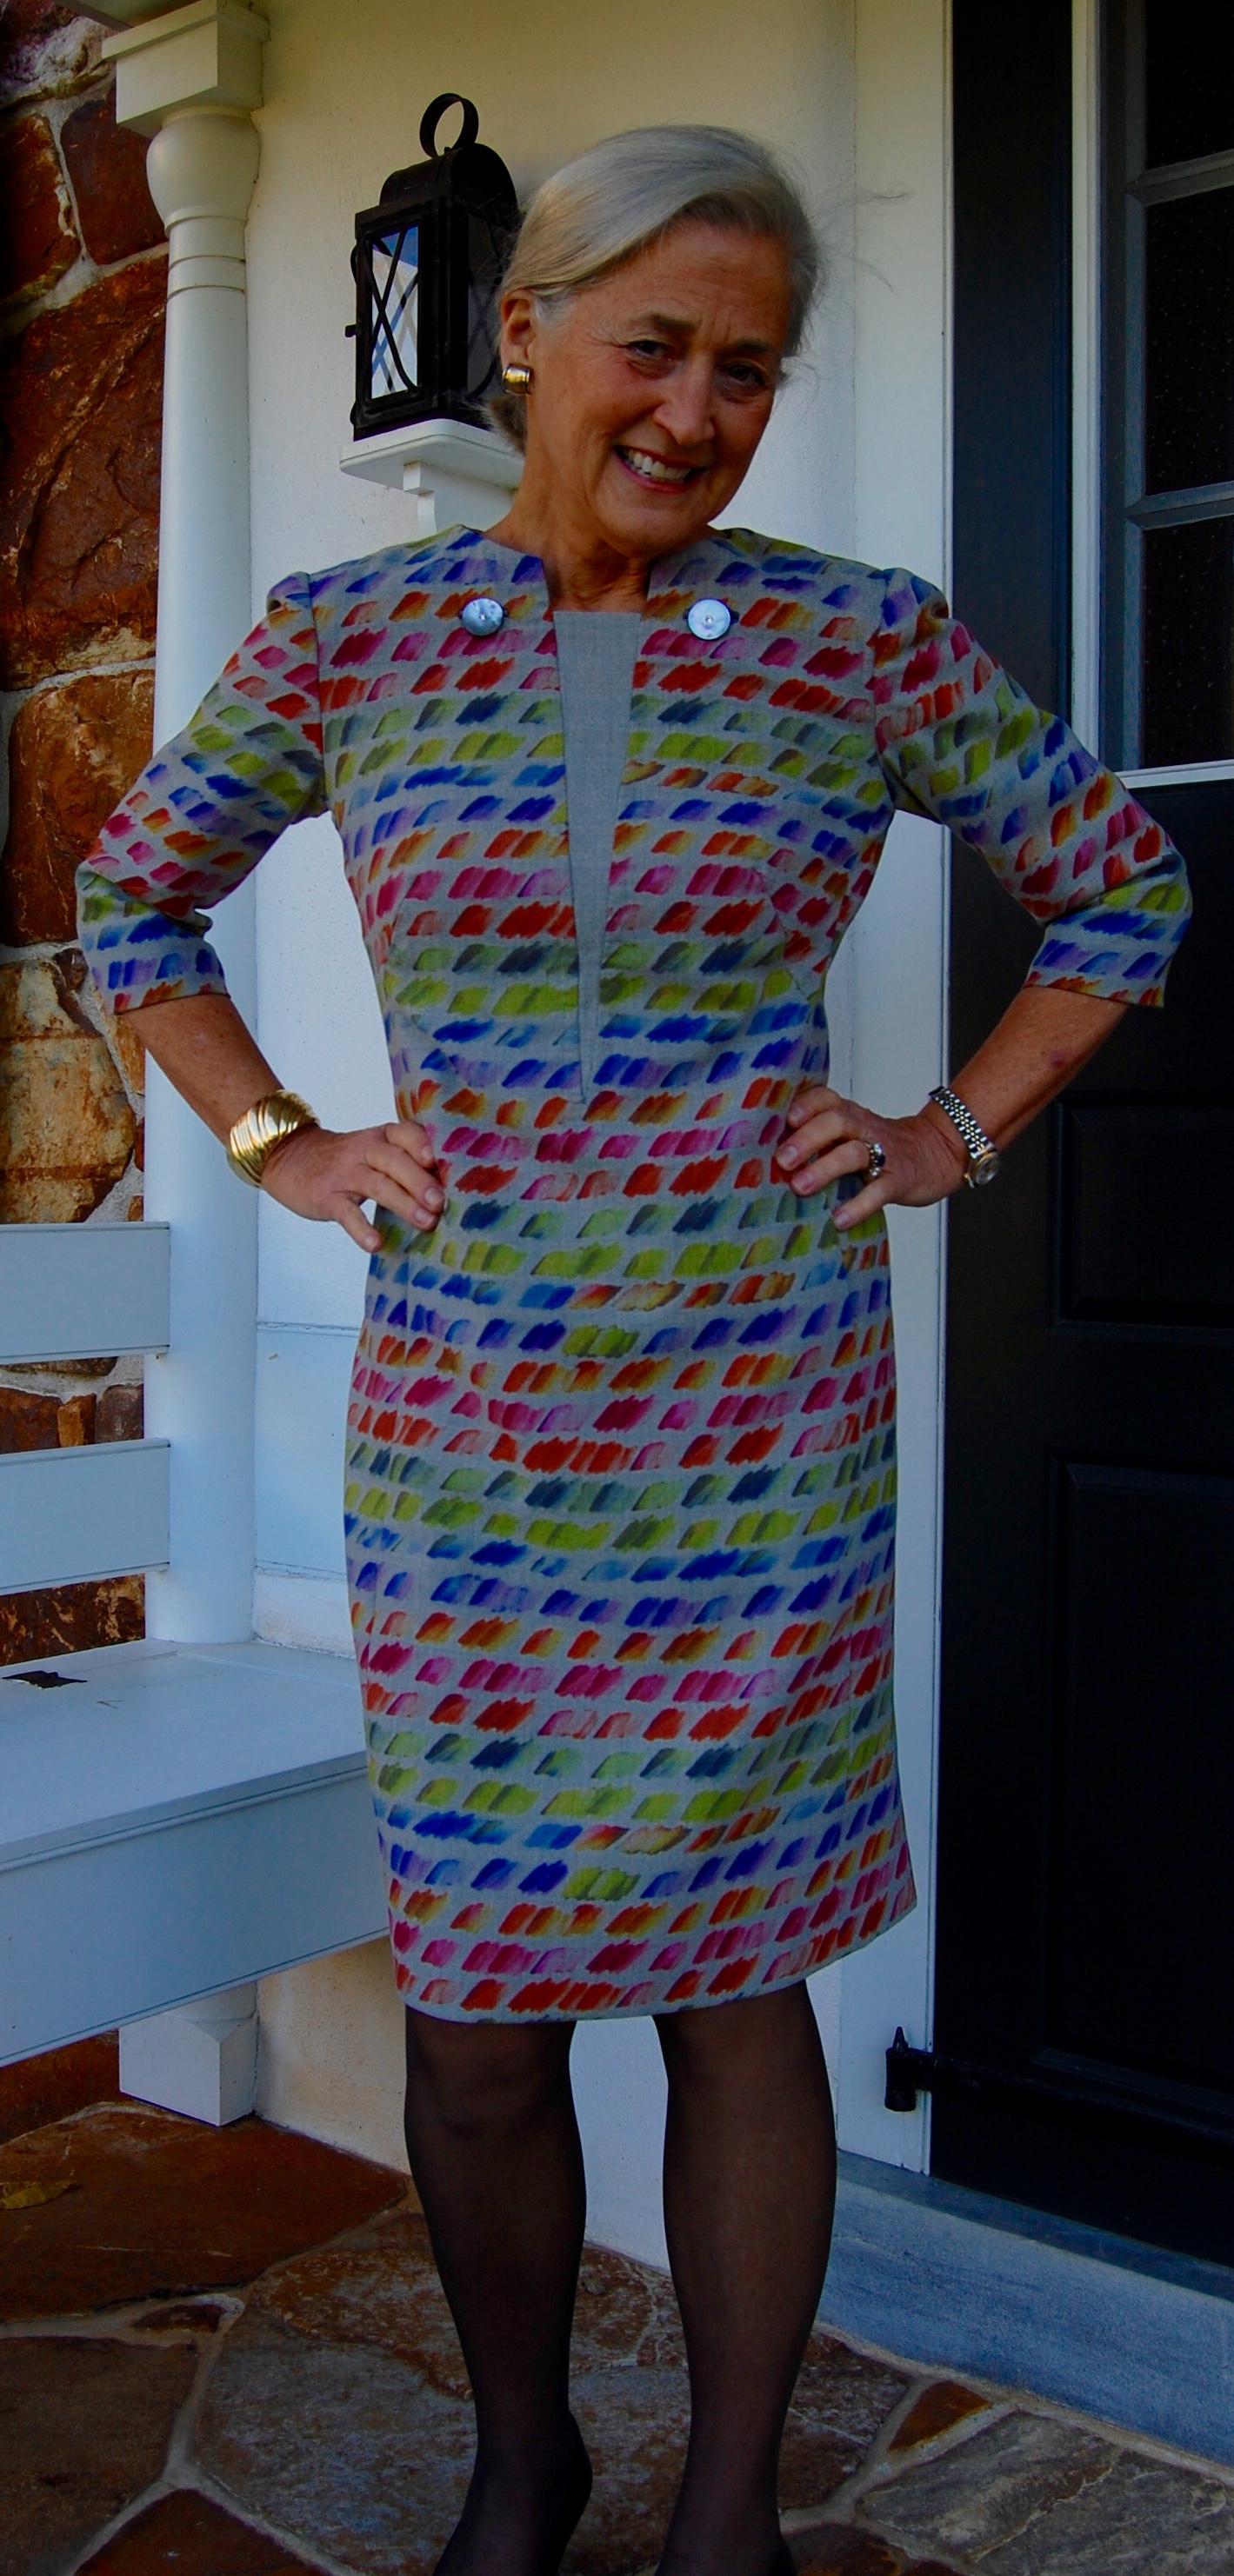
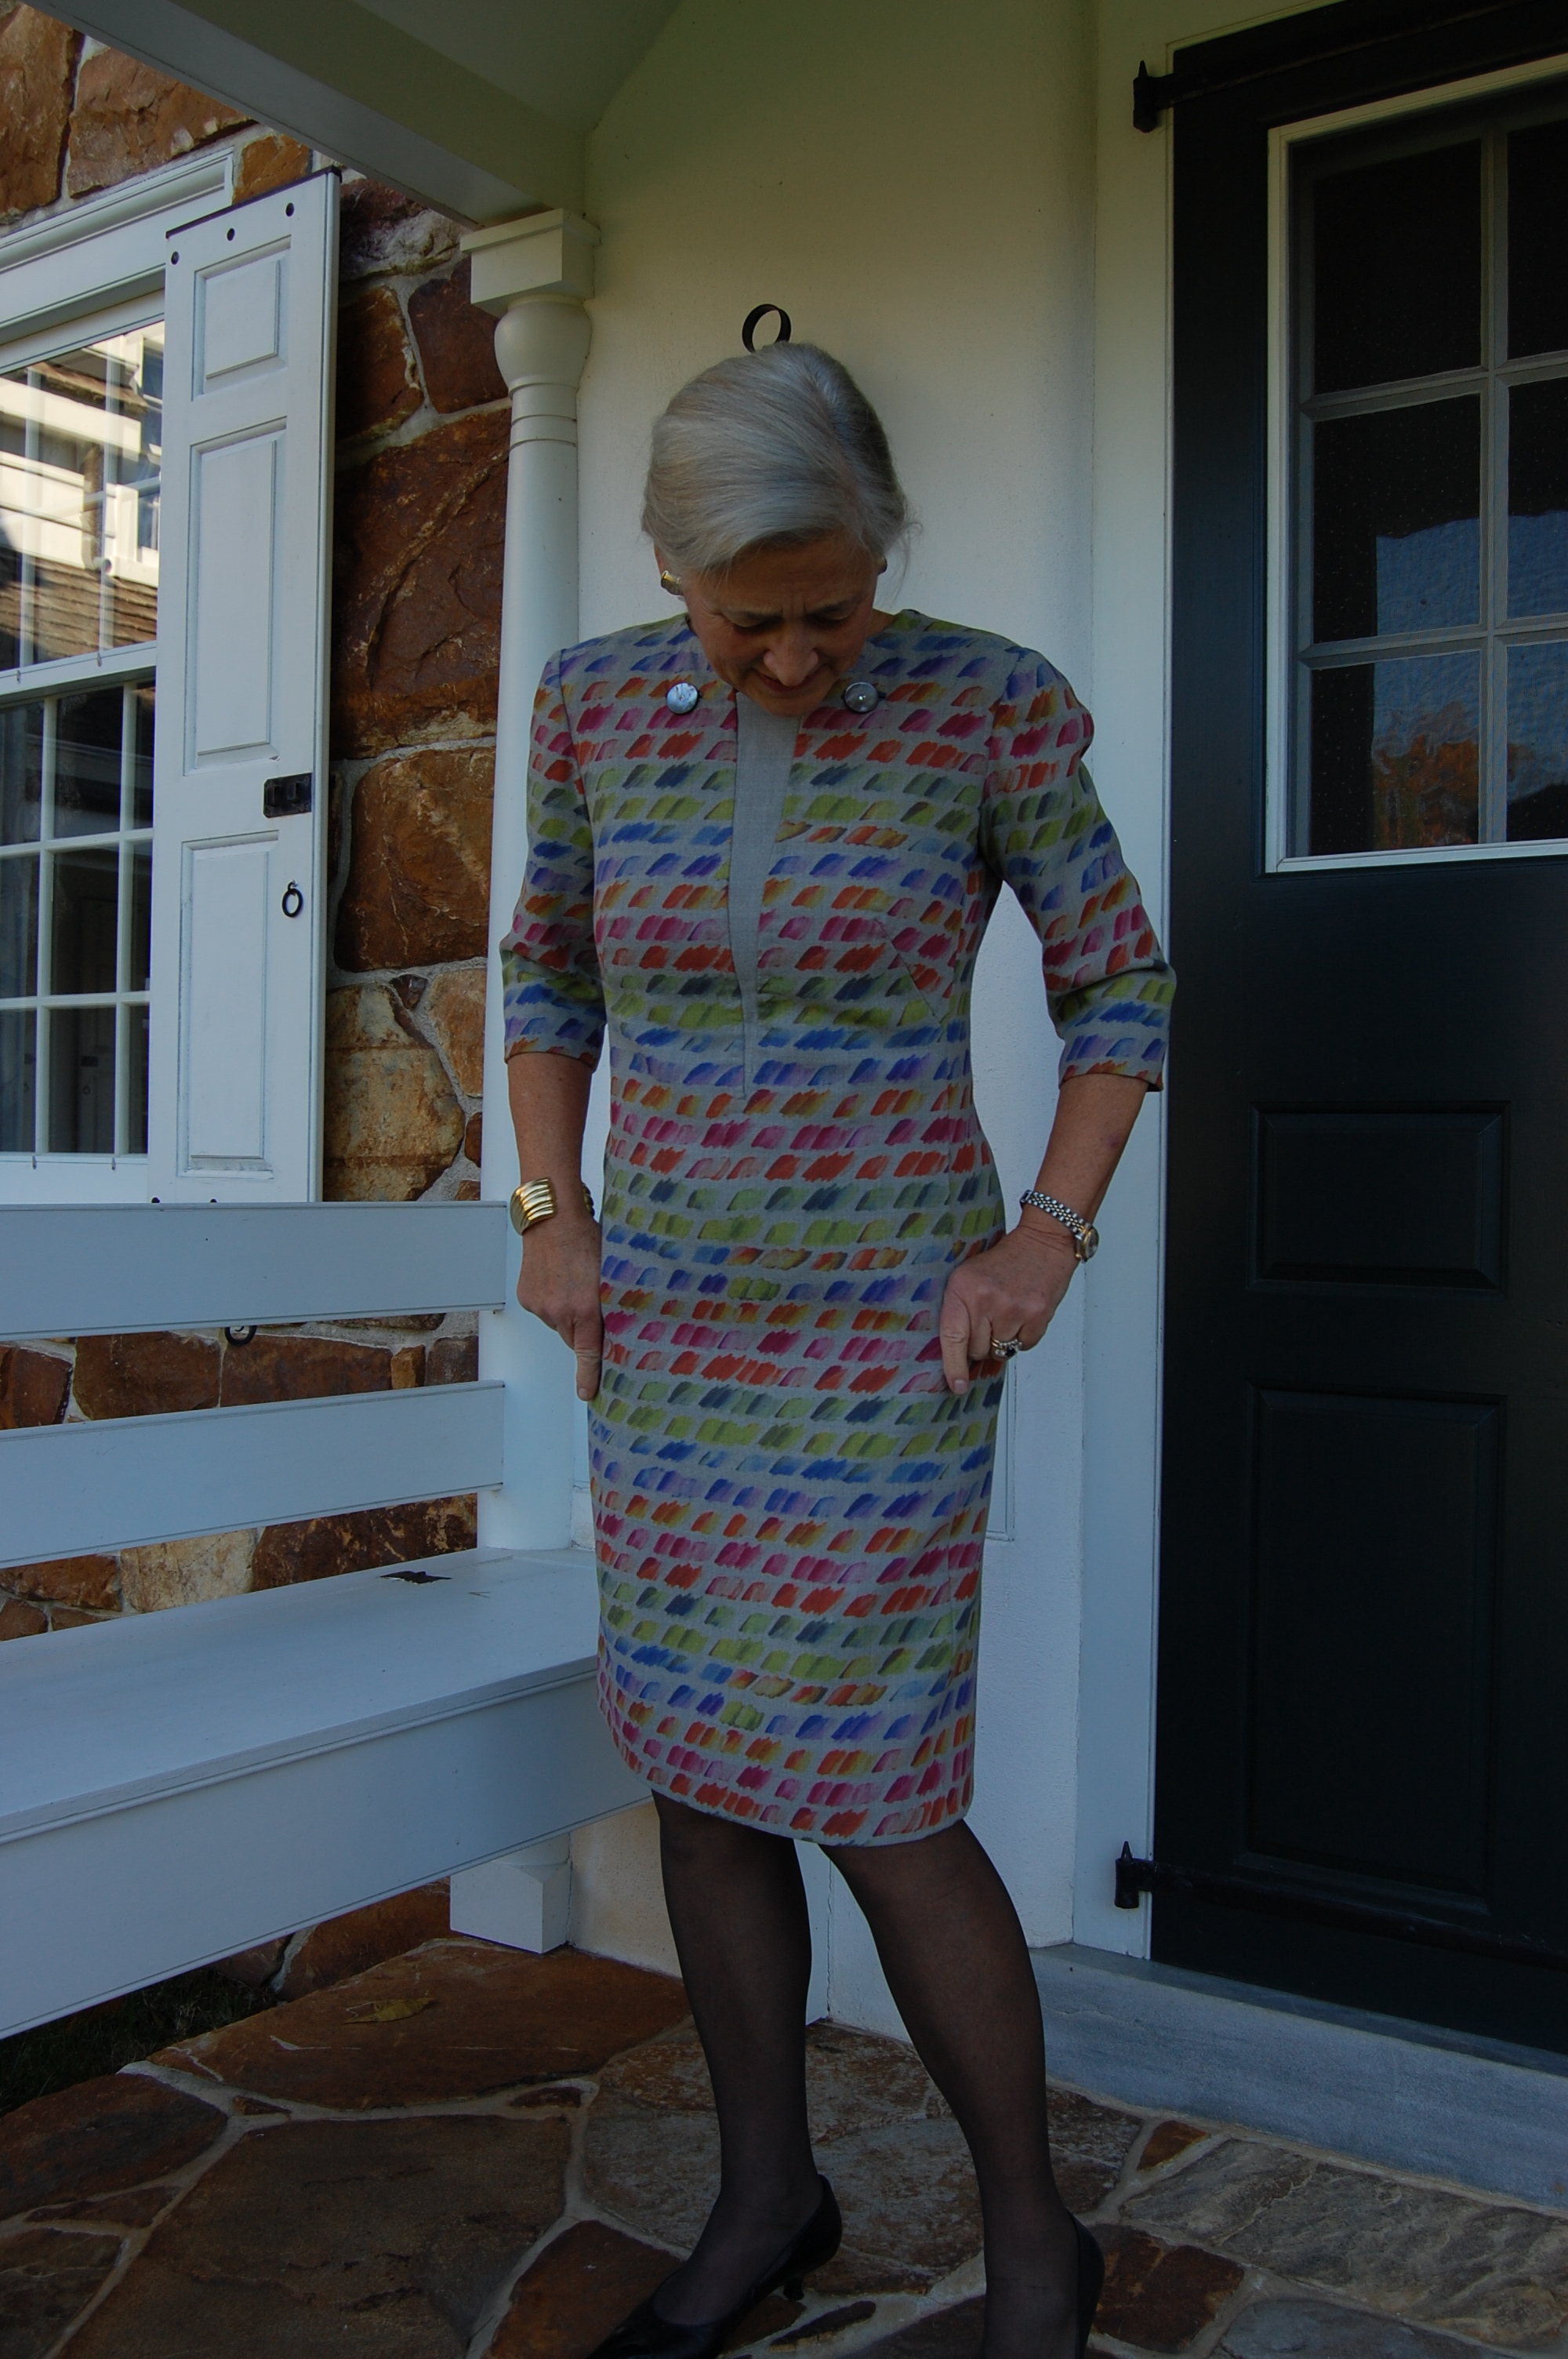
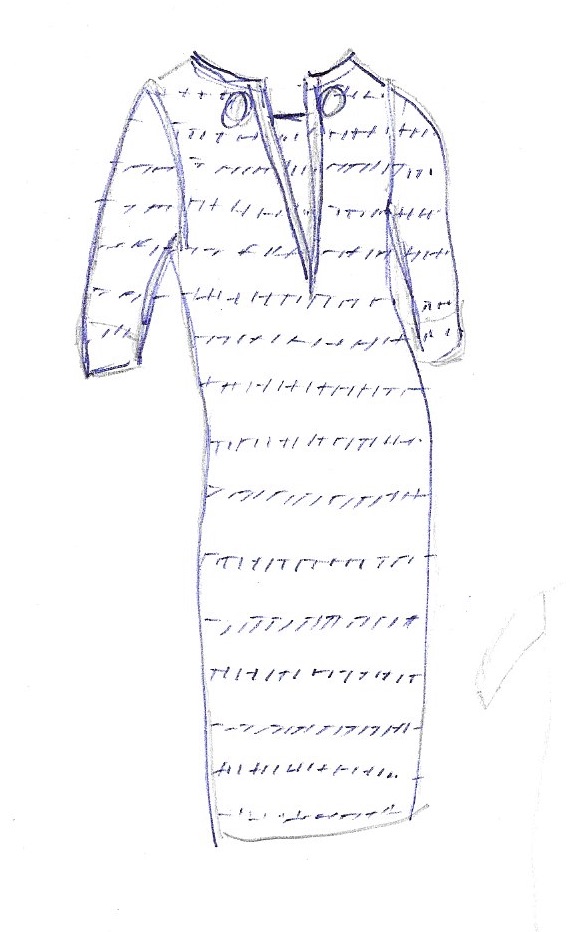
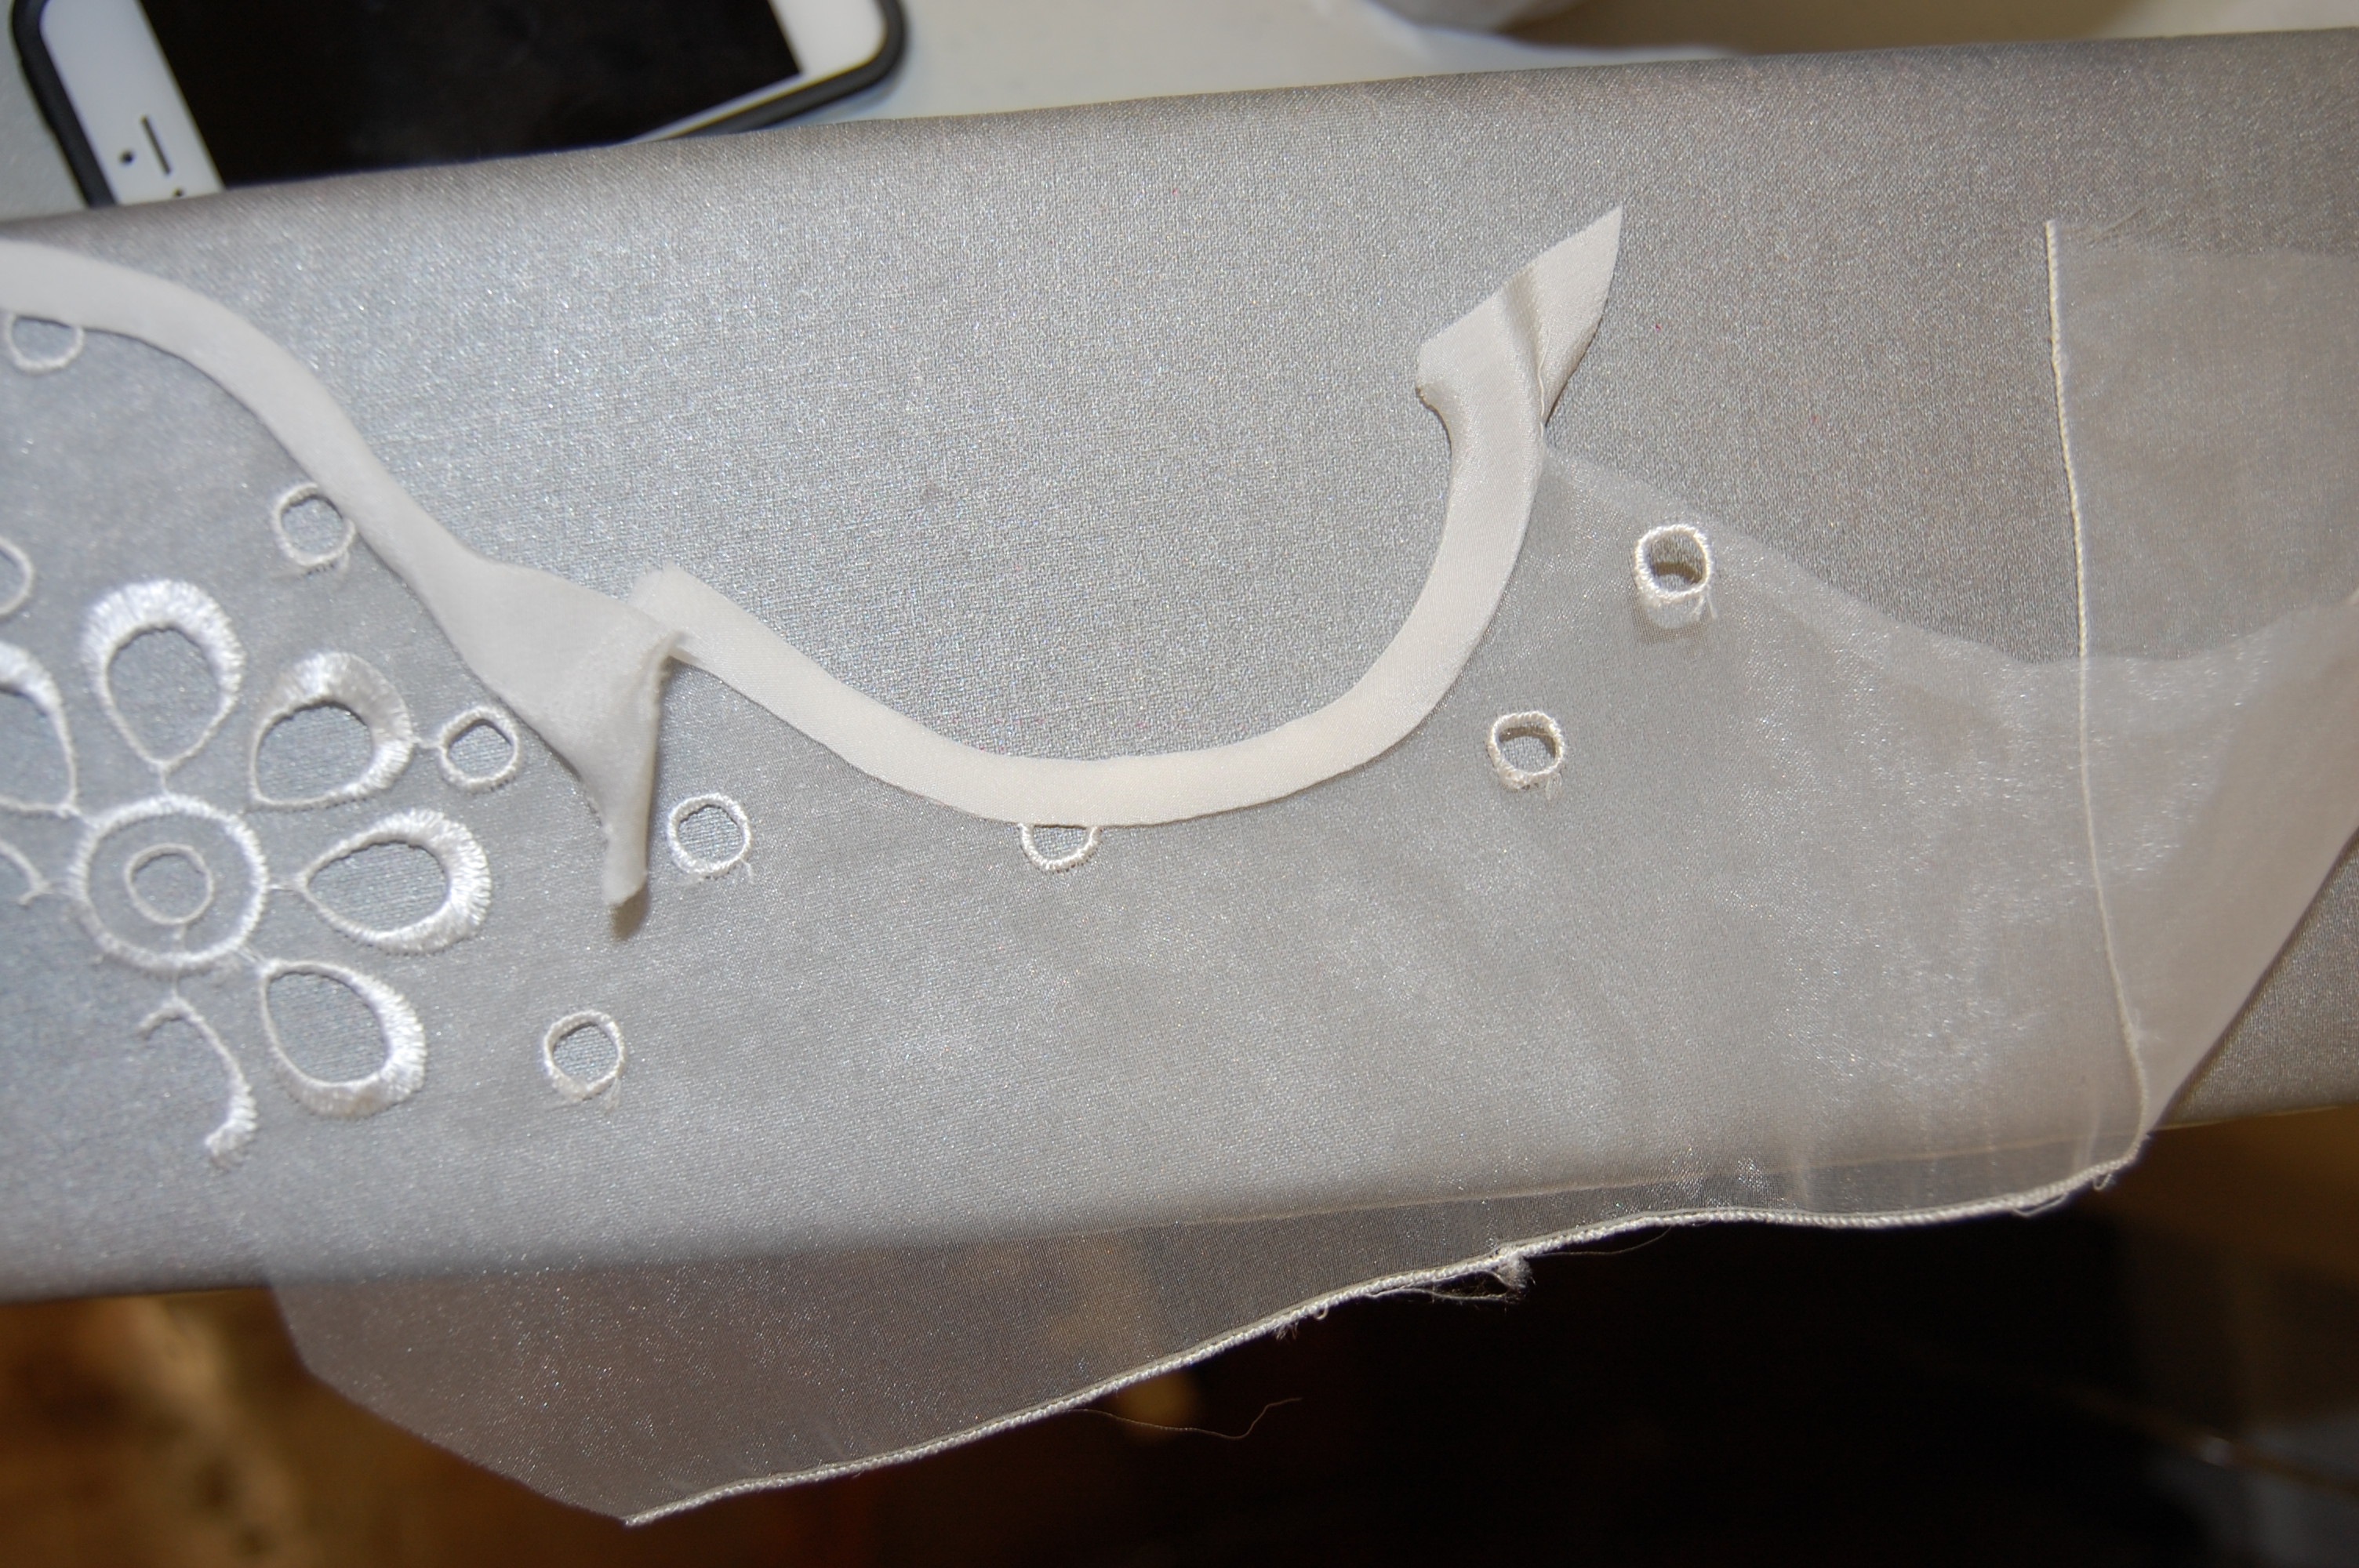
The small slit in the center front neckline.

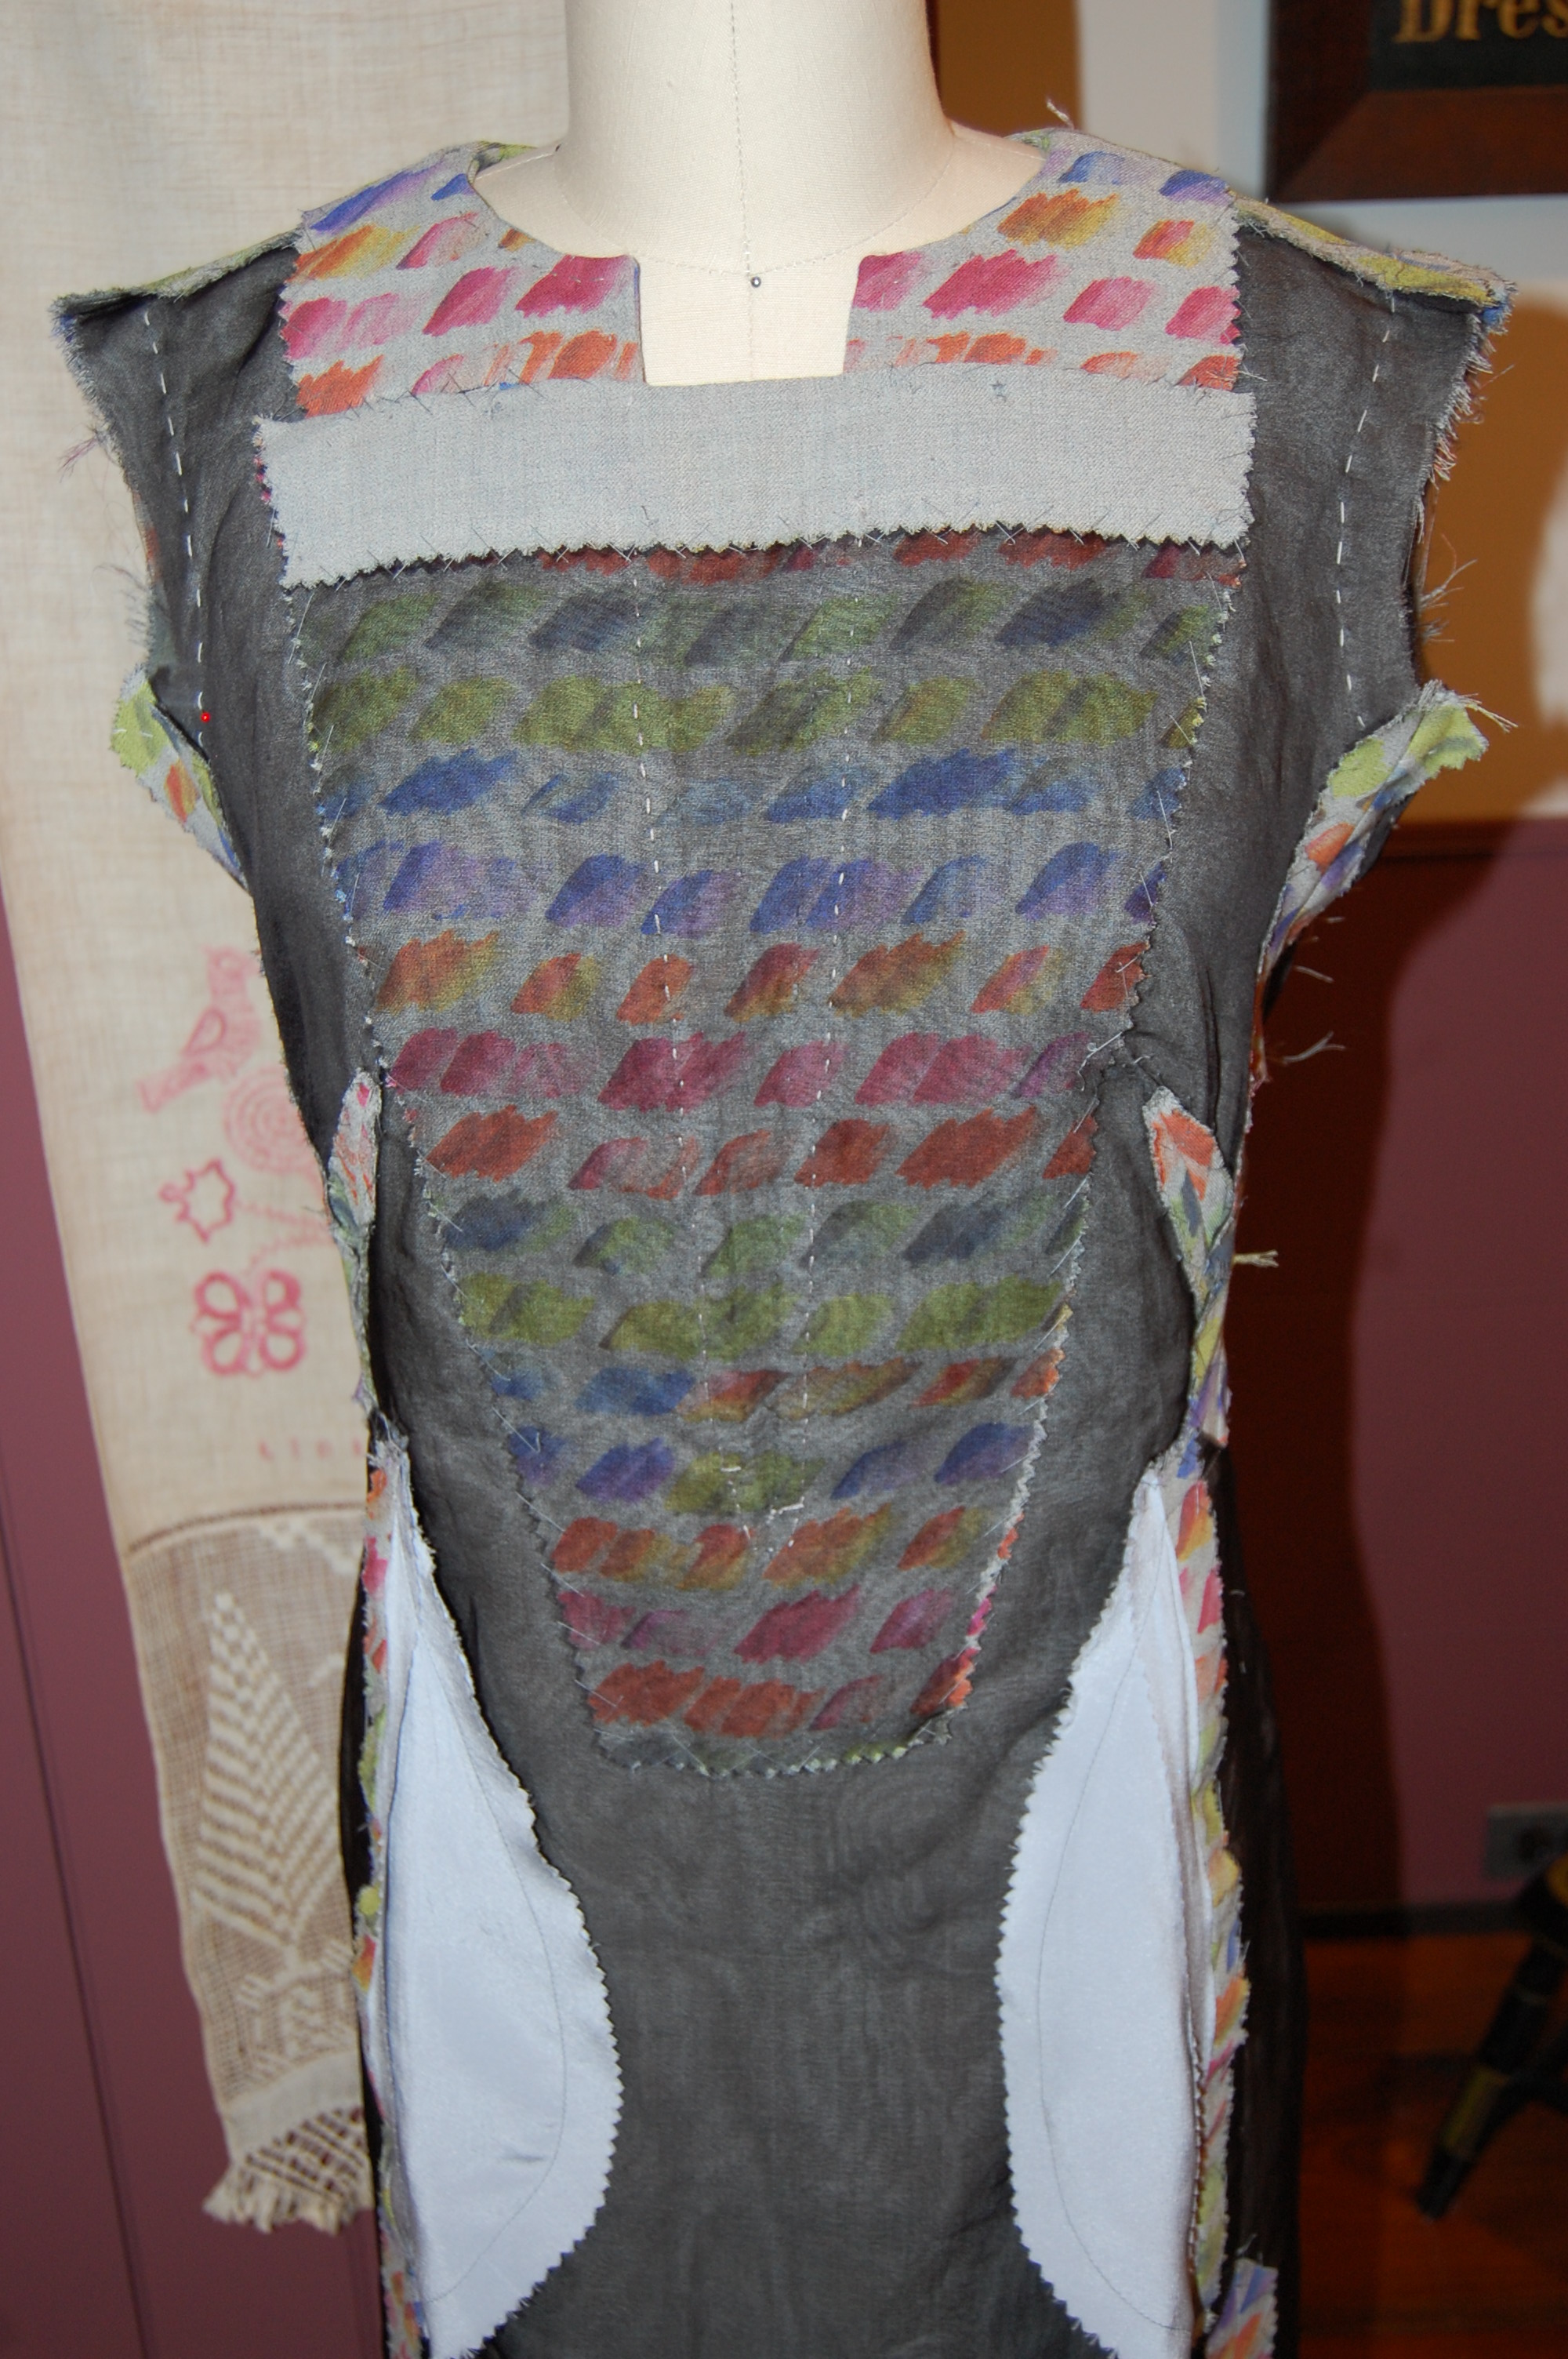
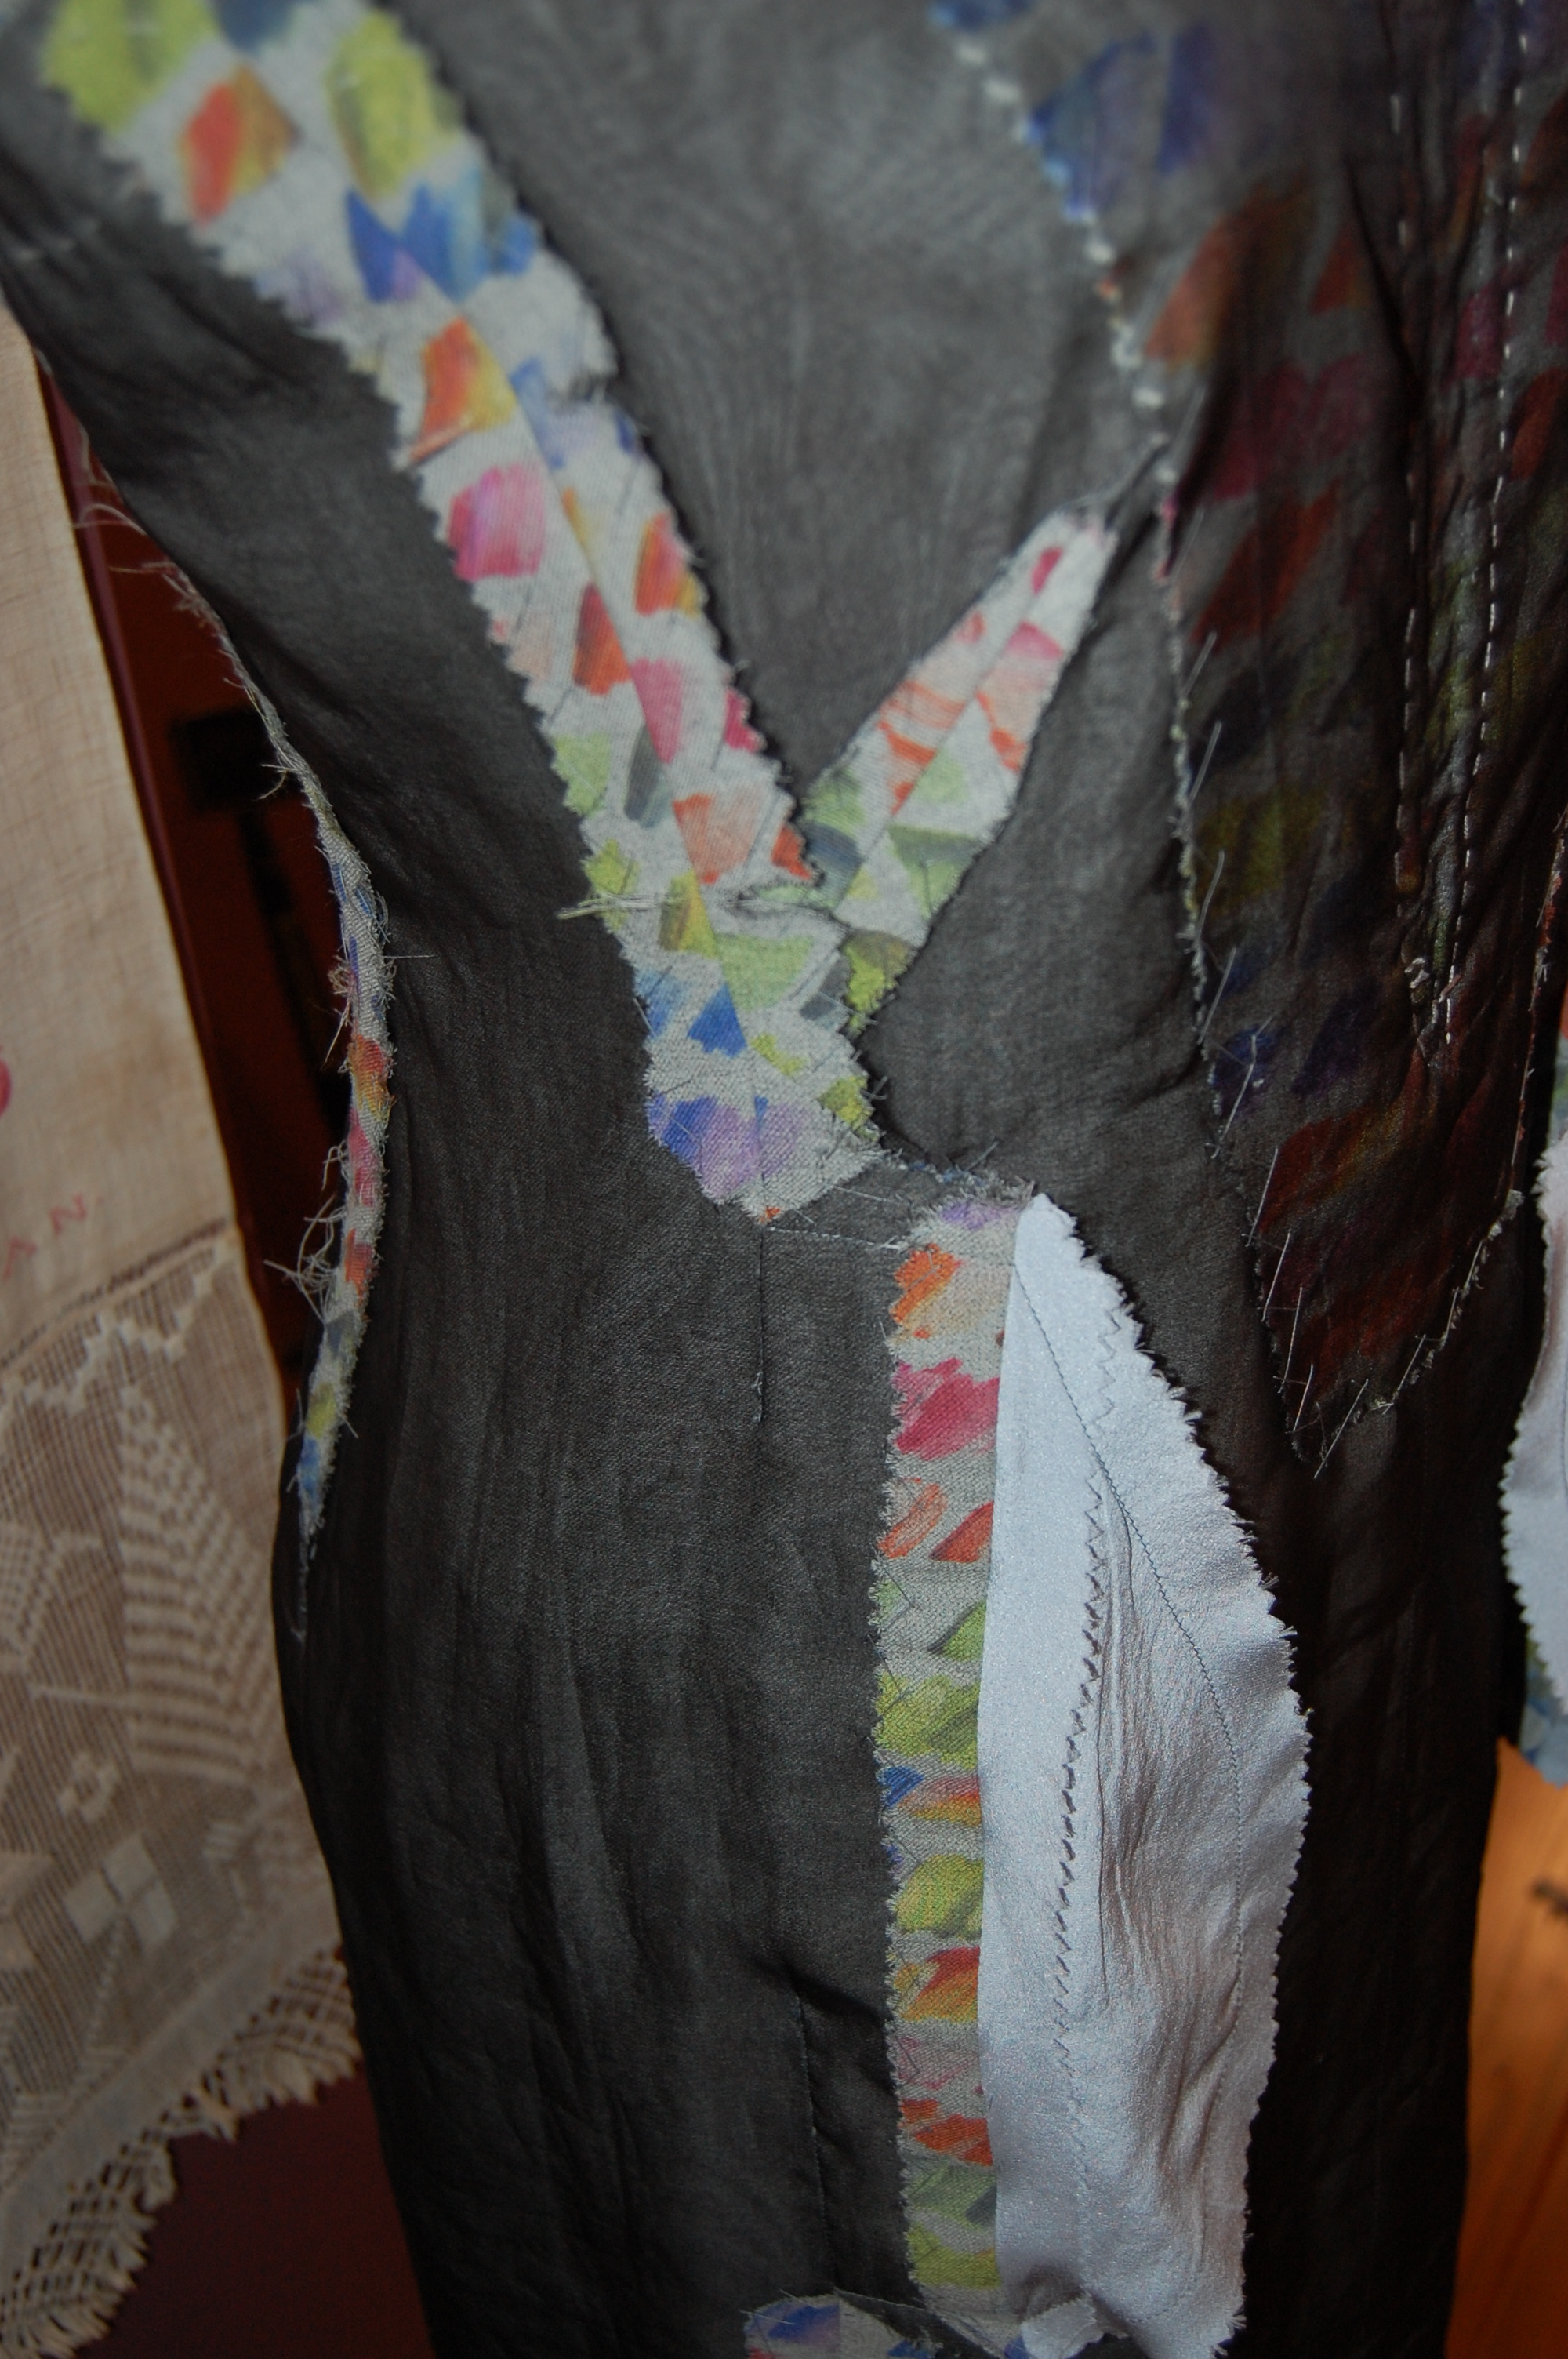
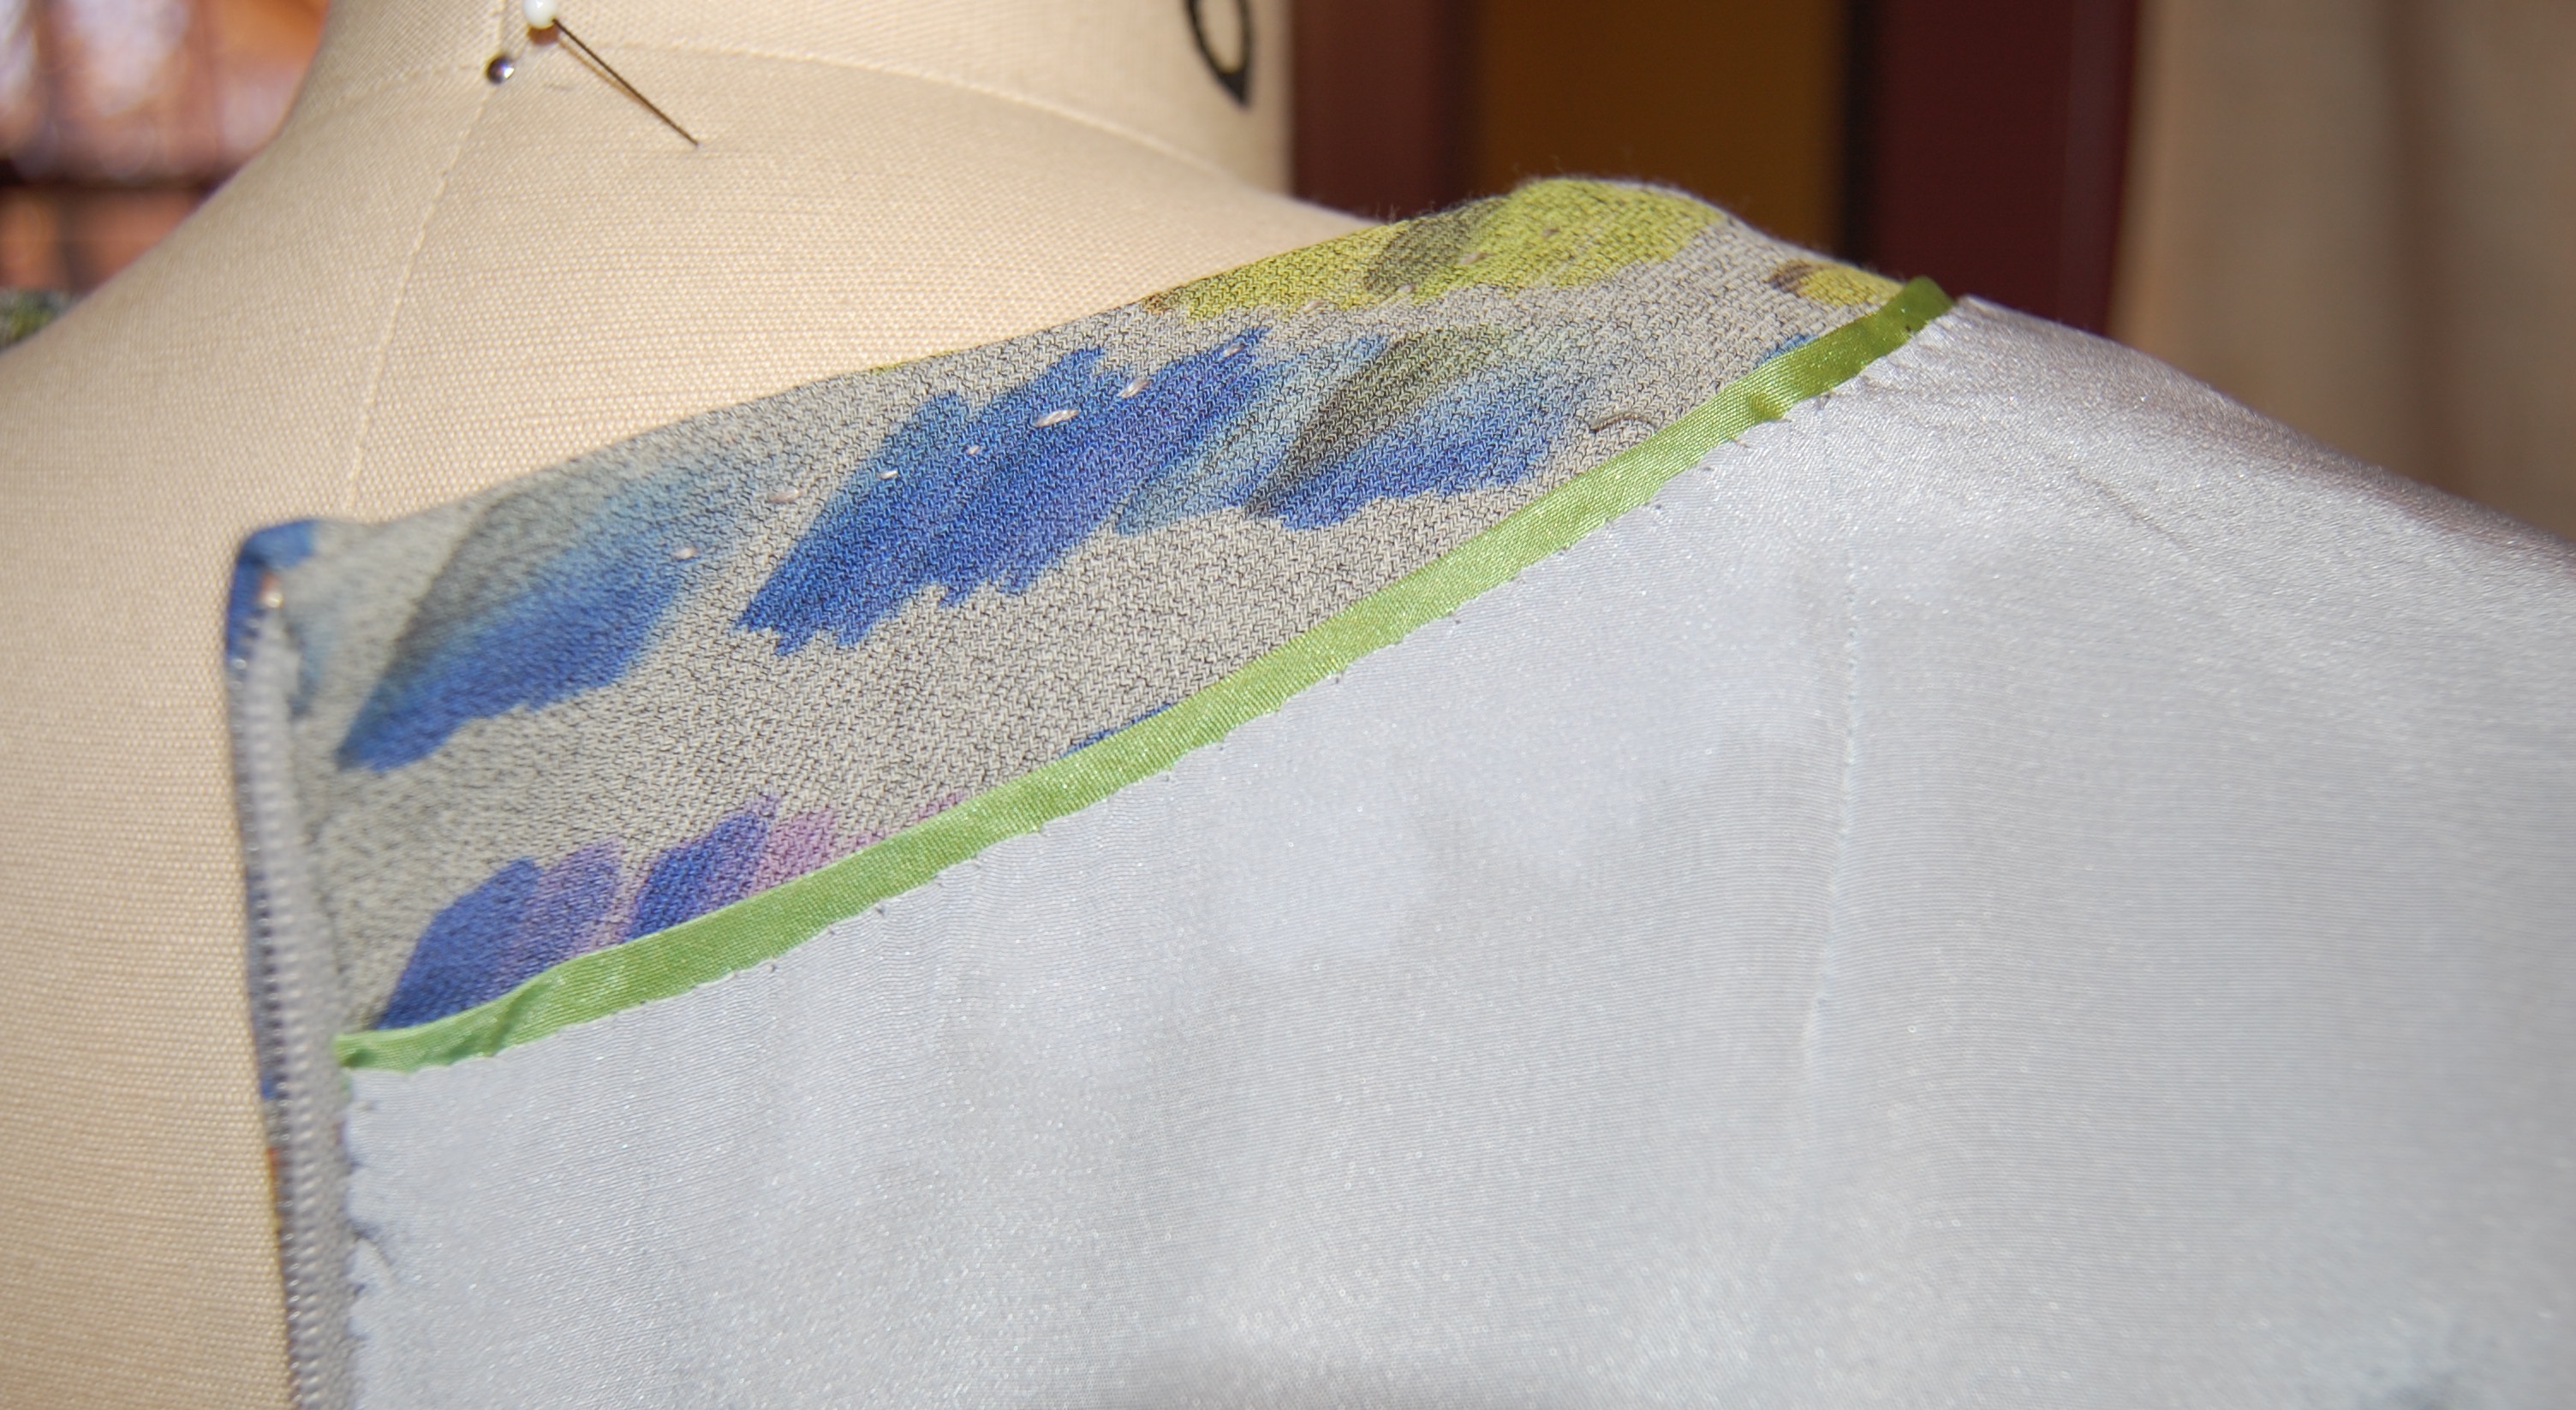
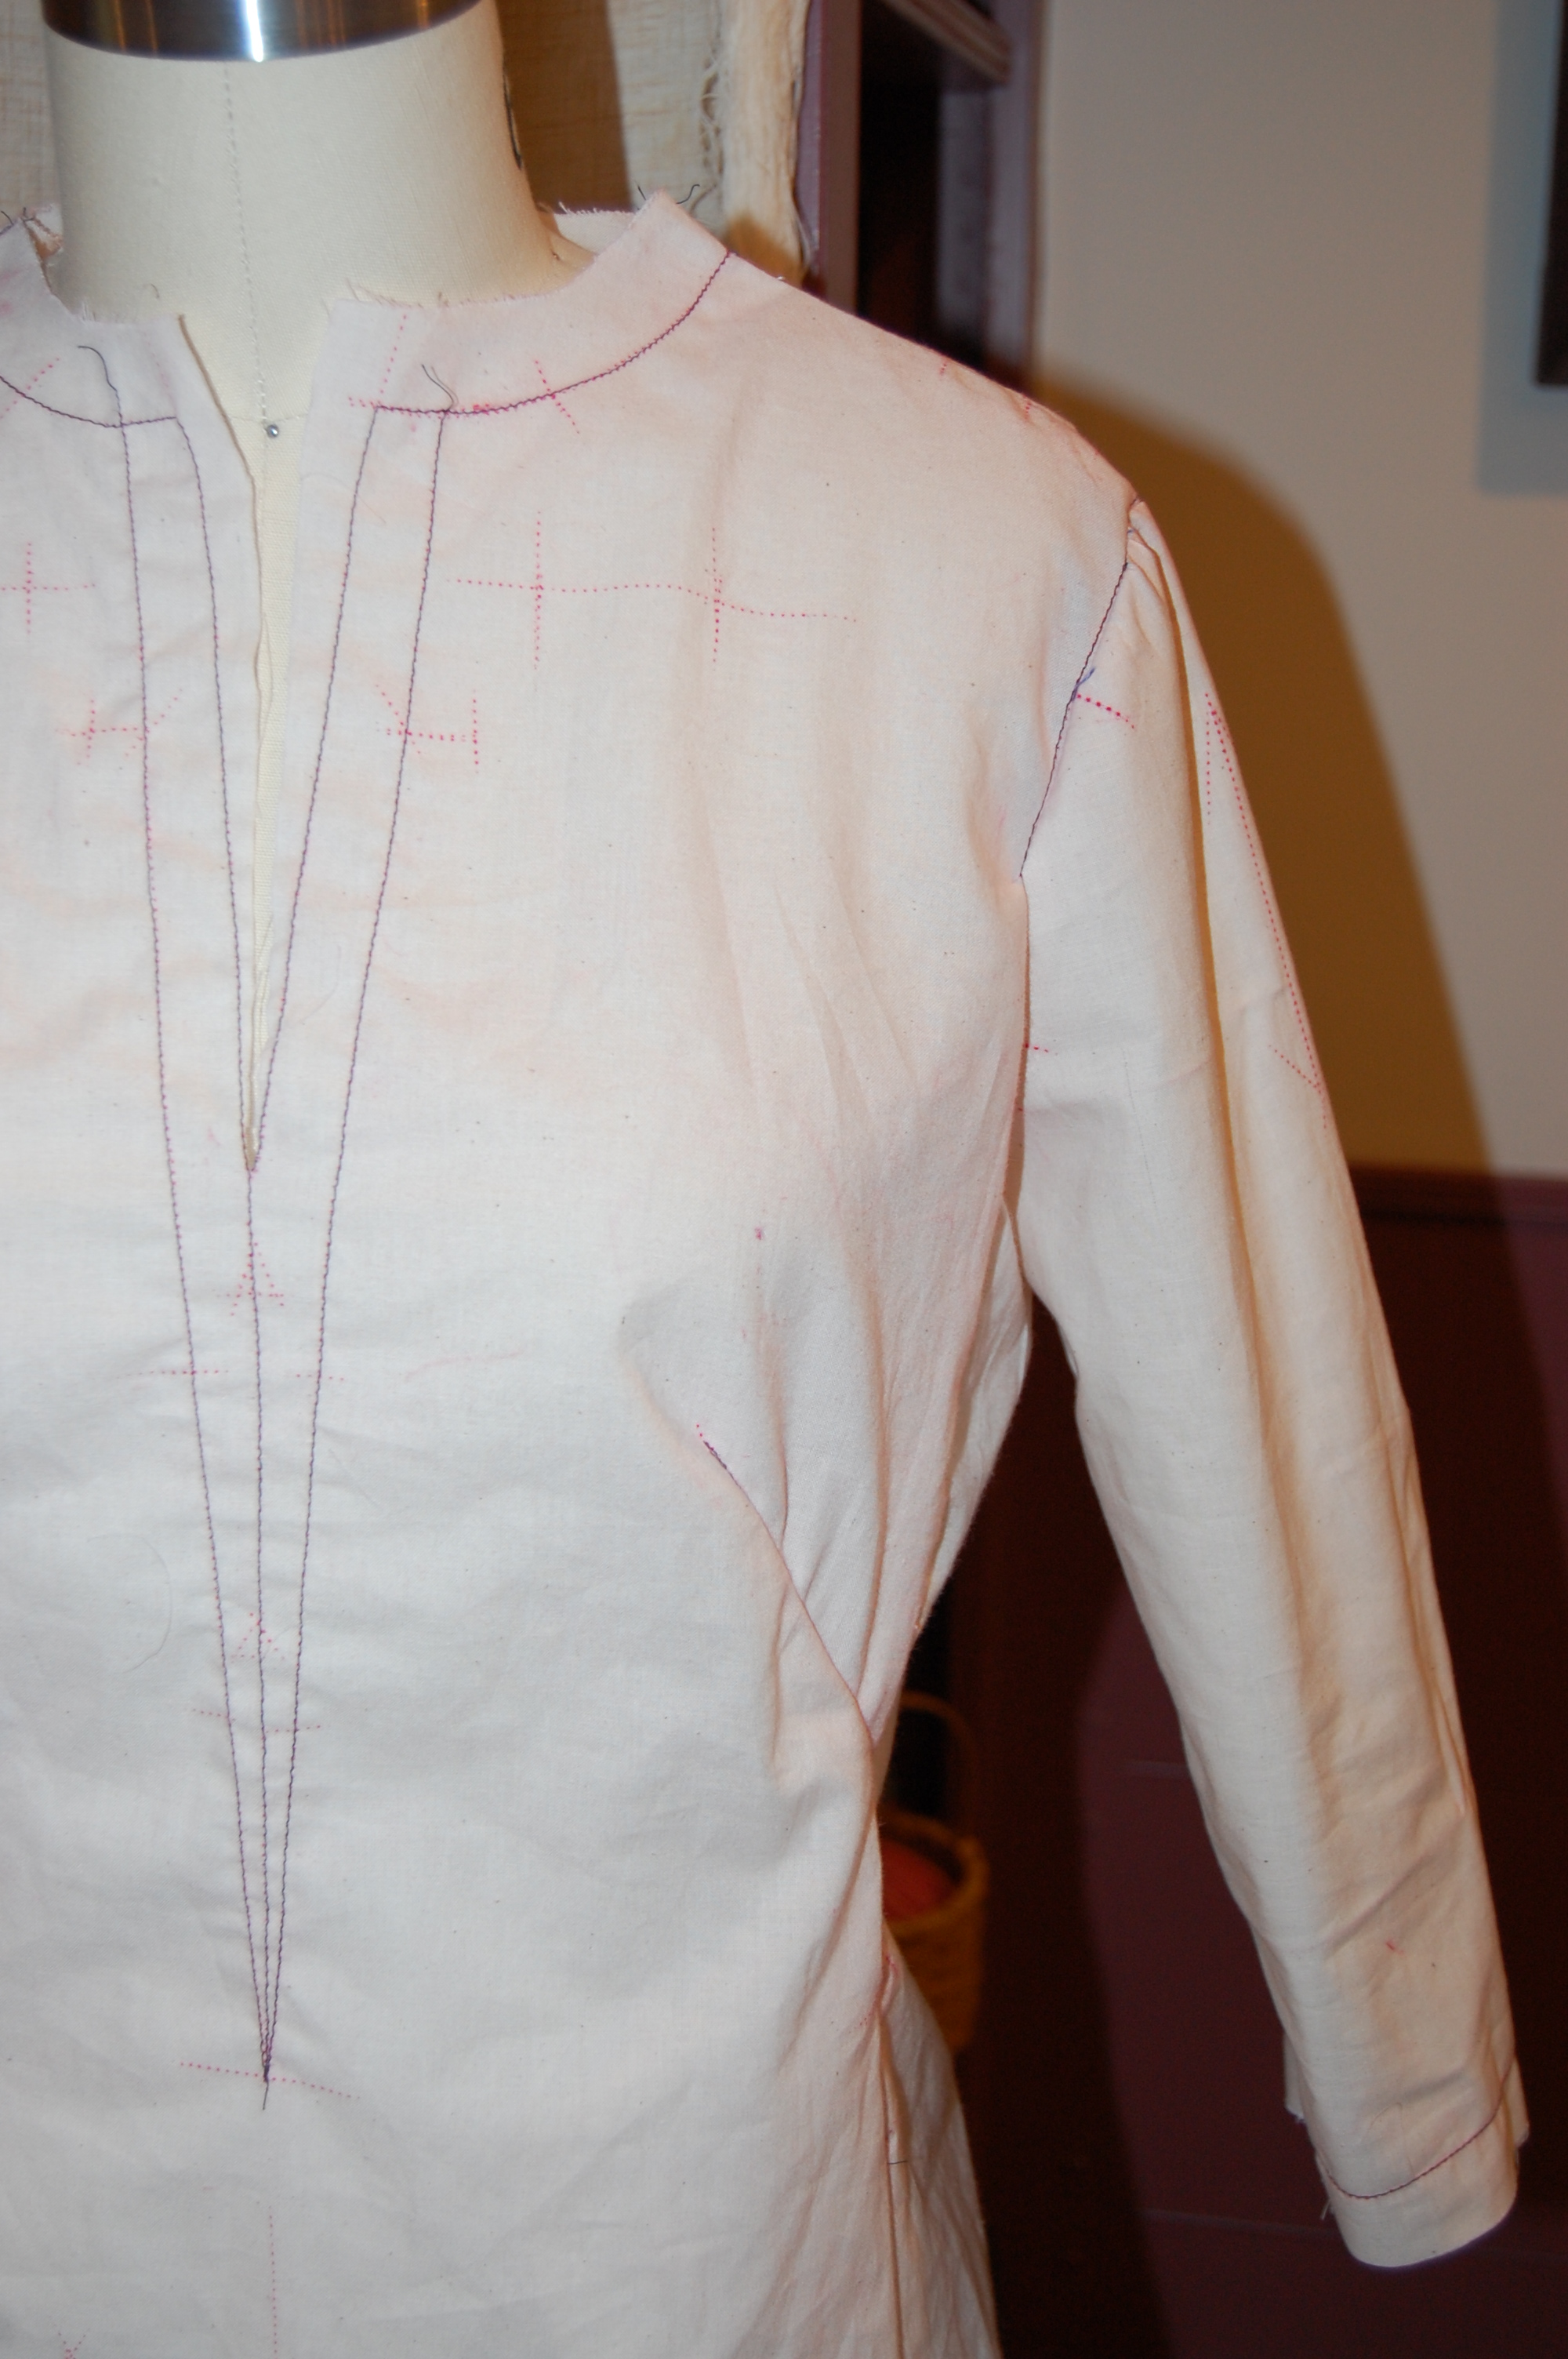
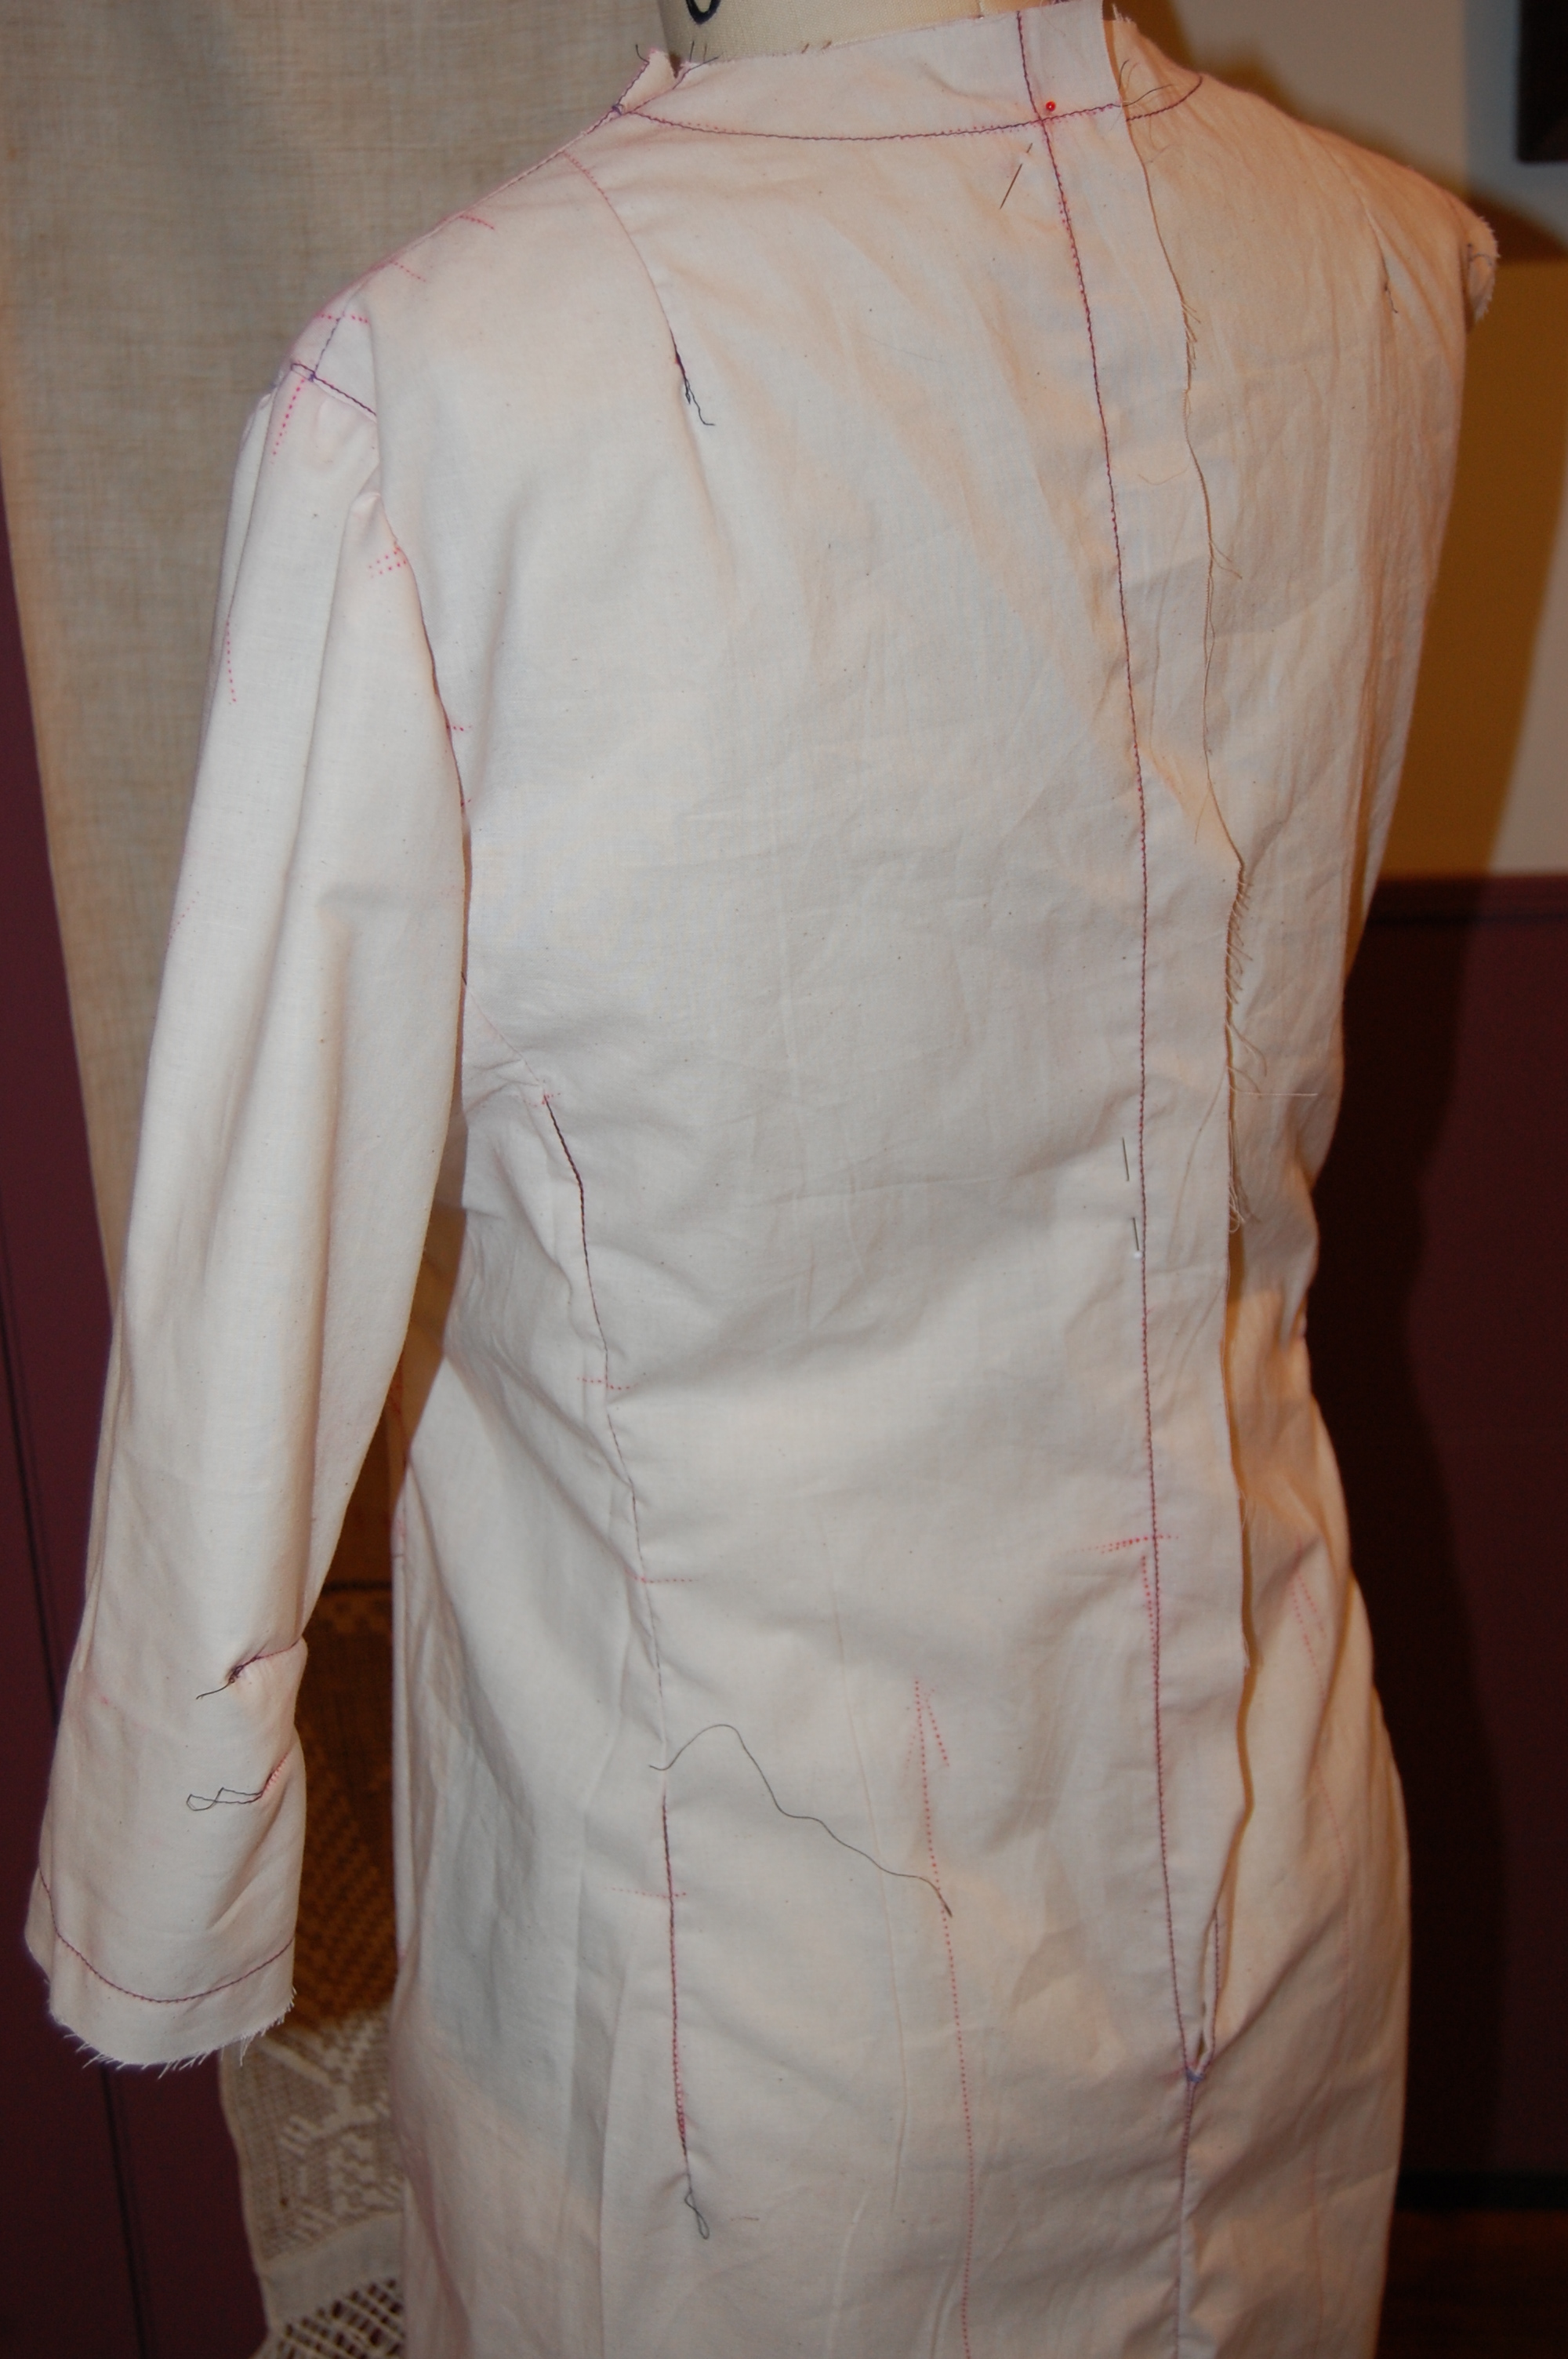
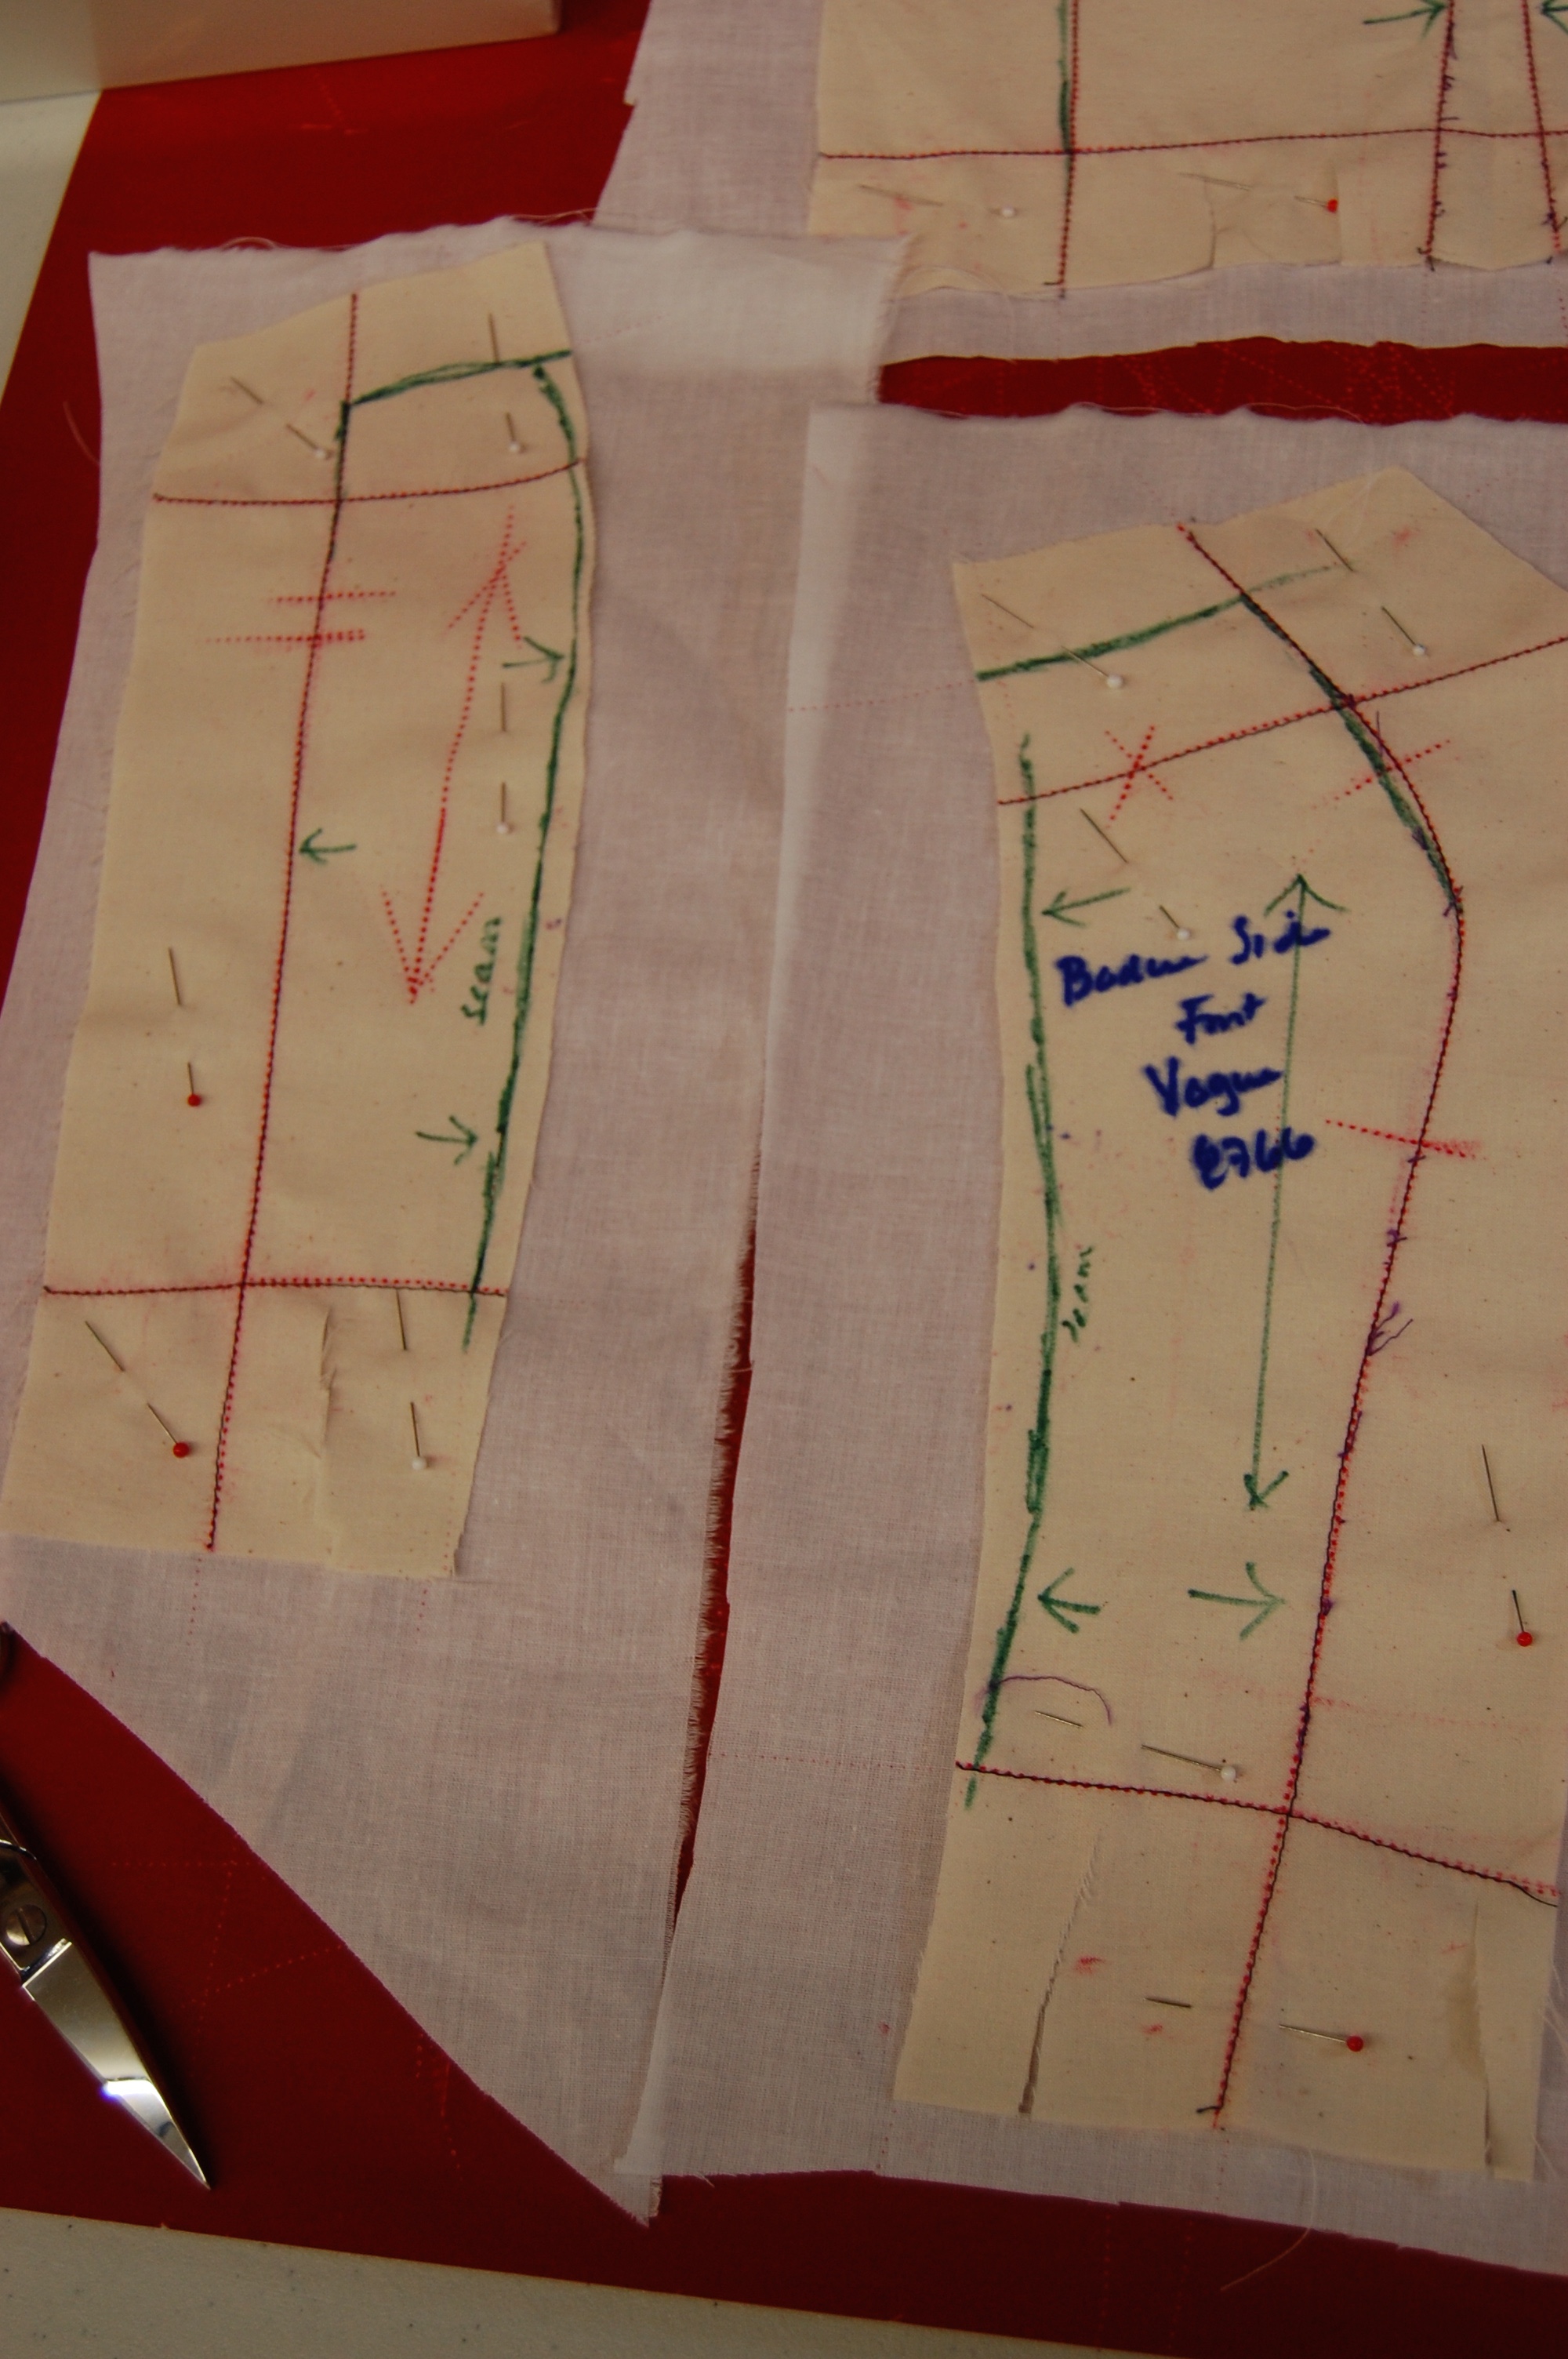
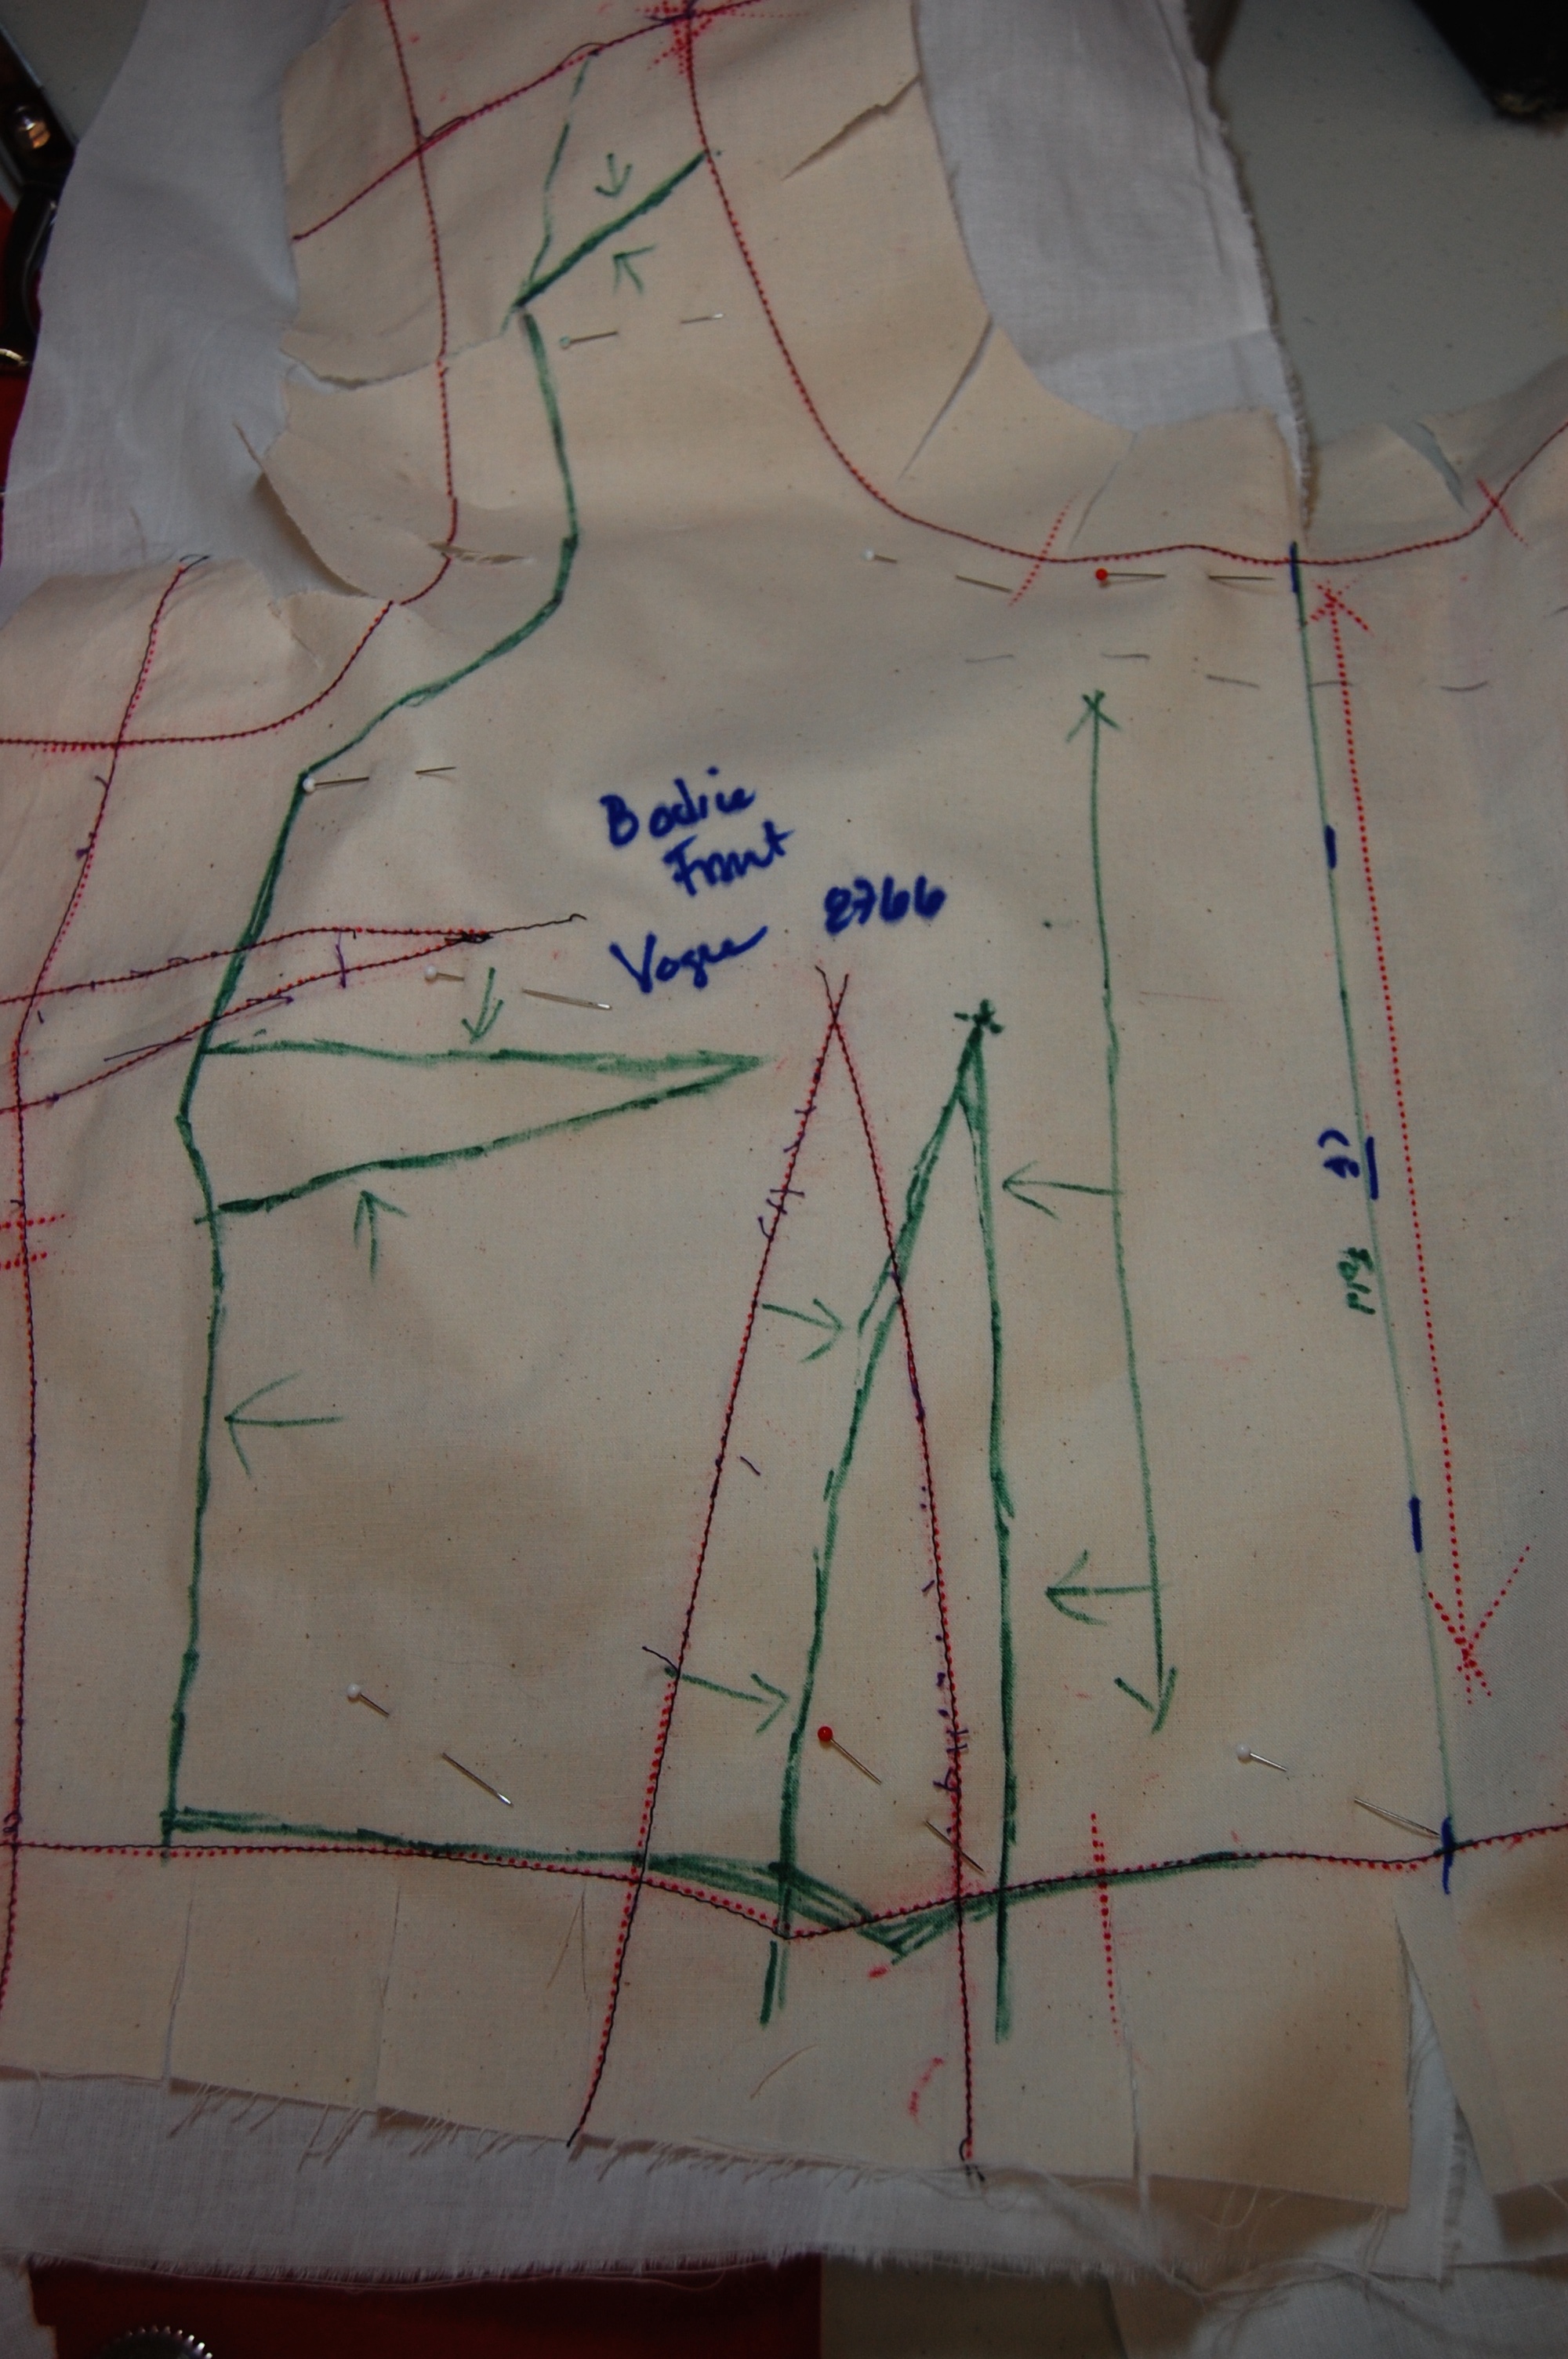
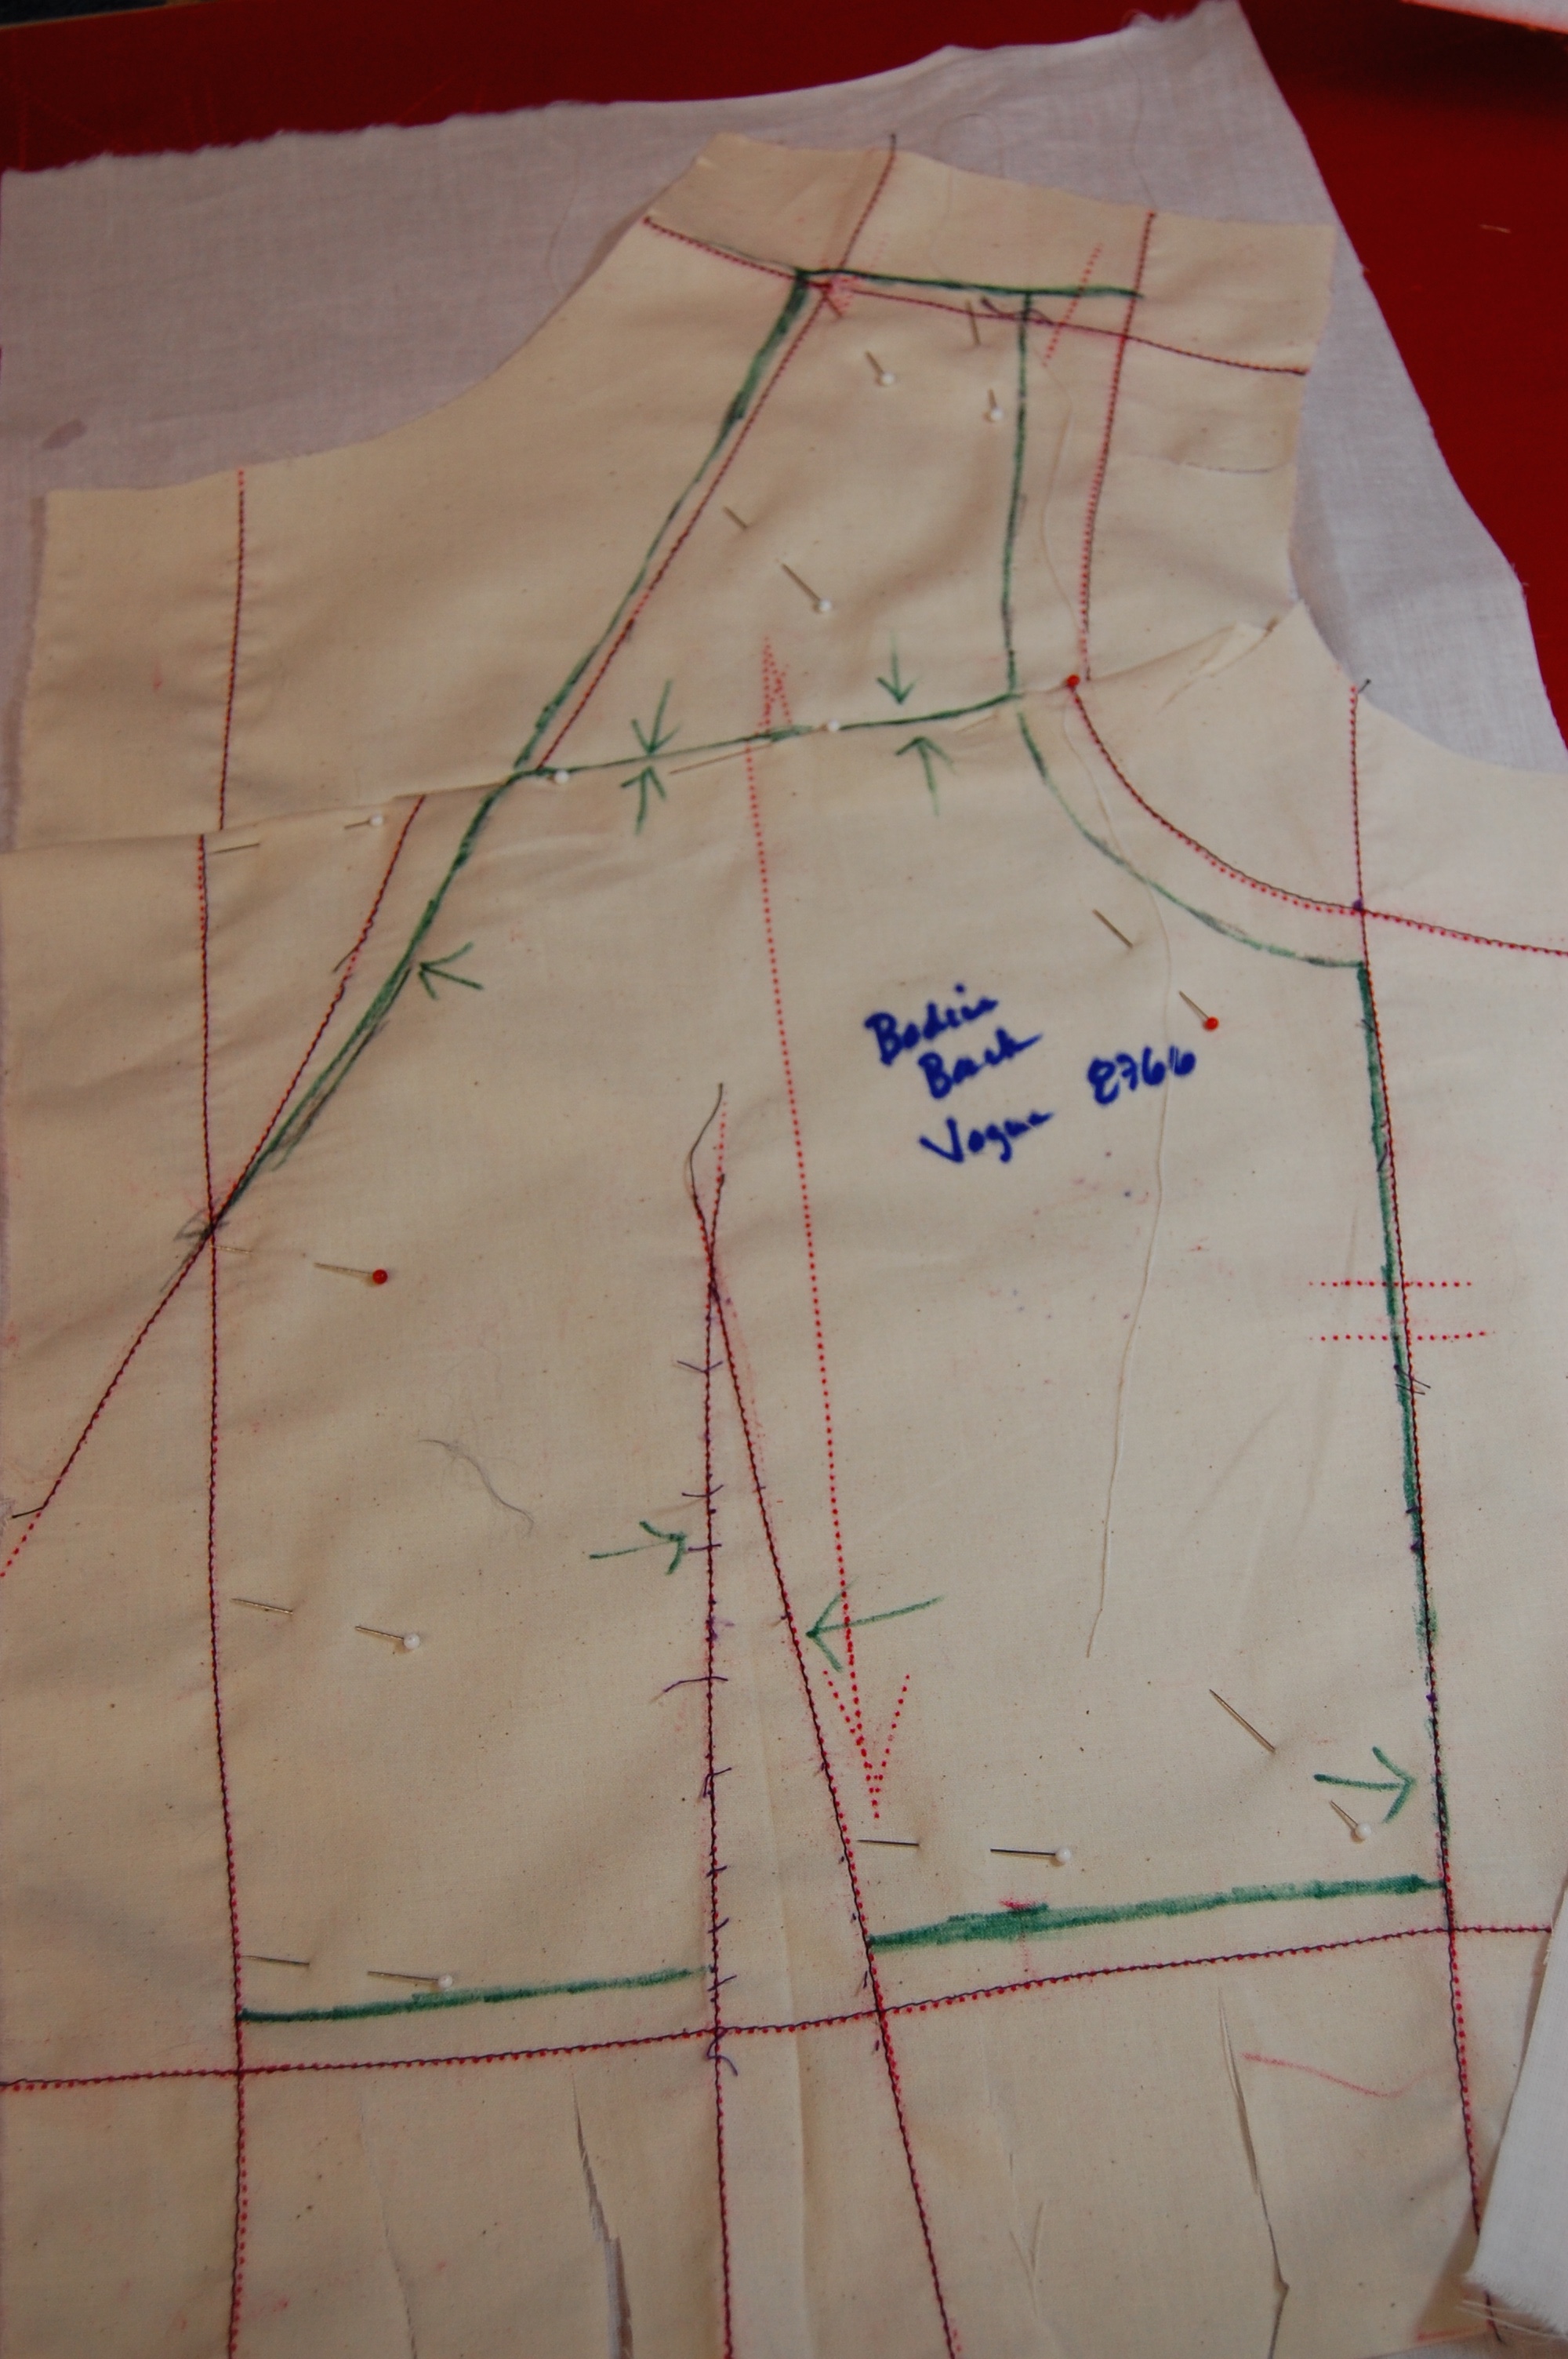
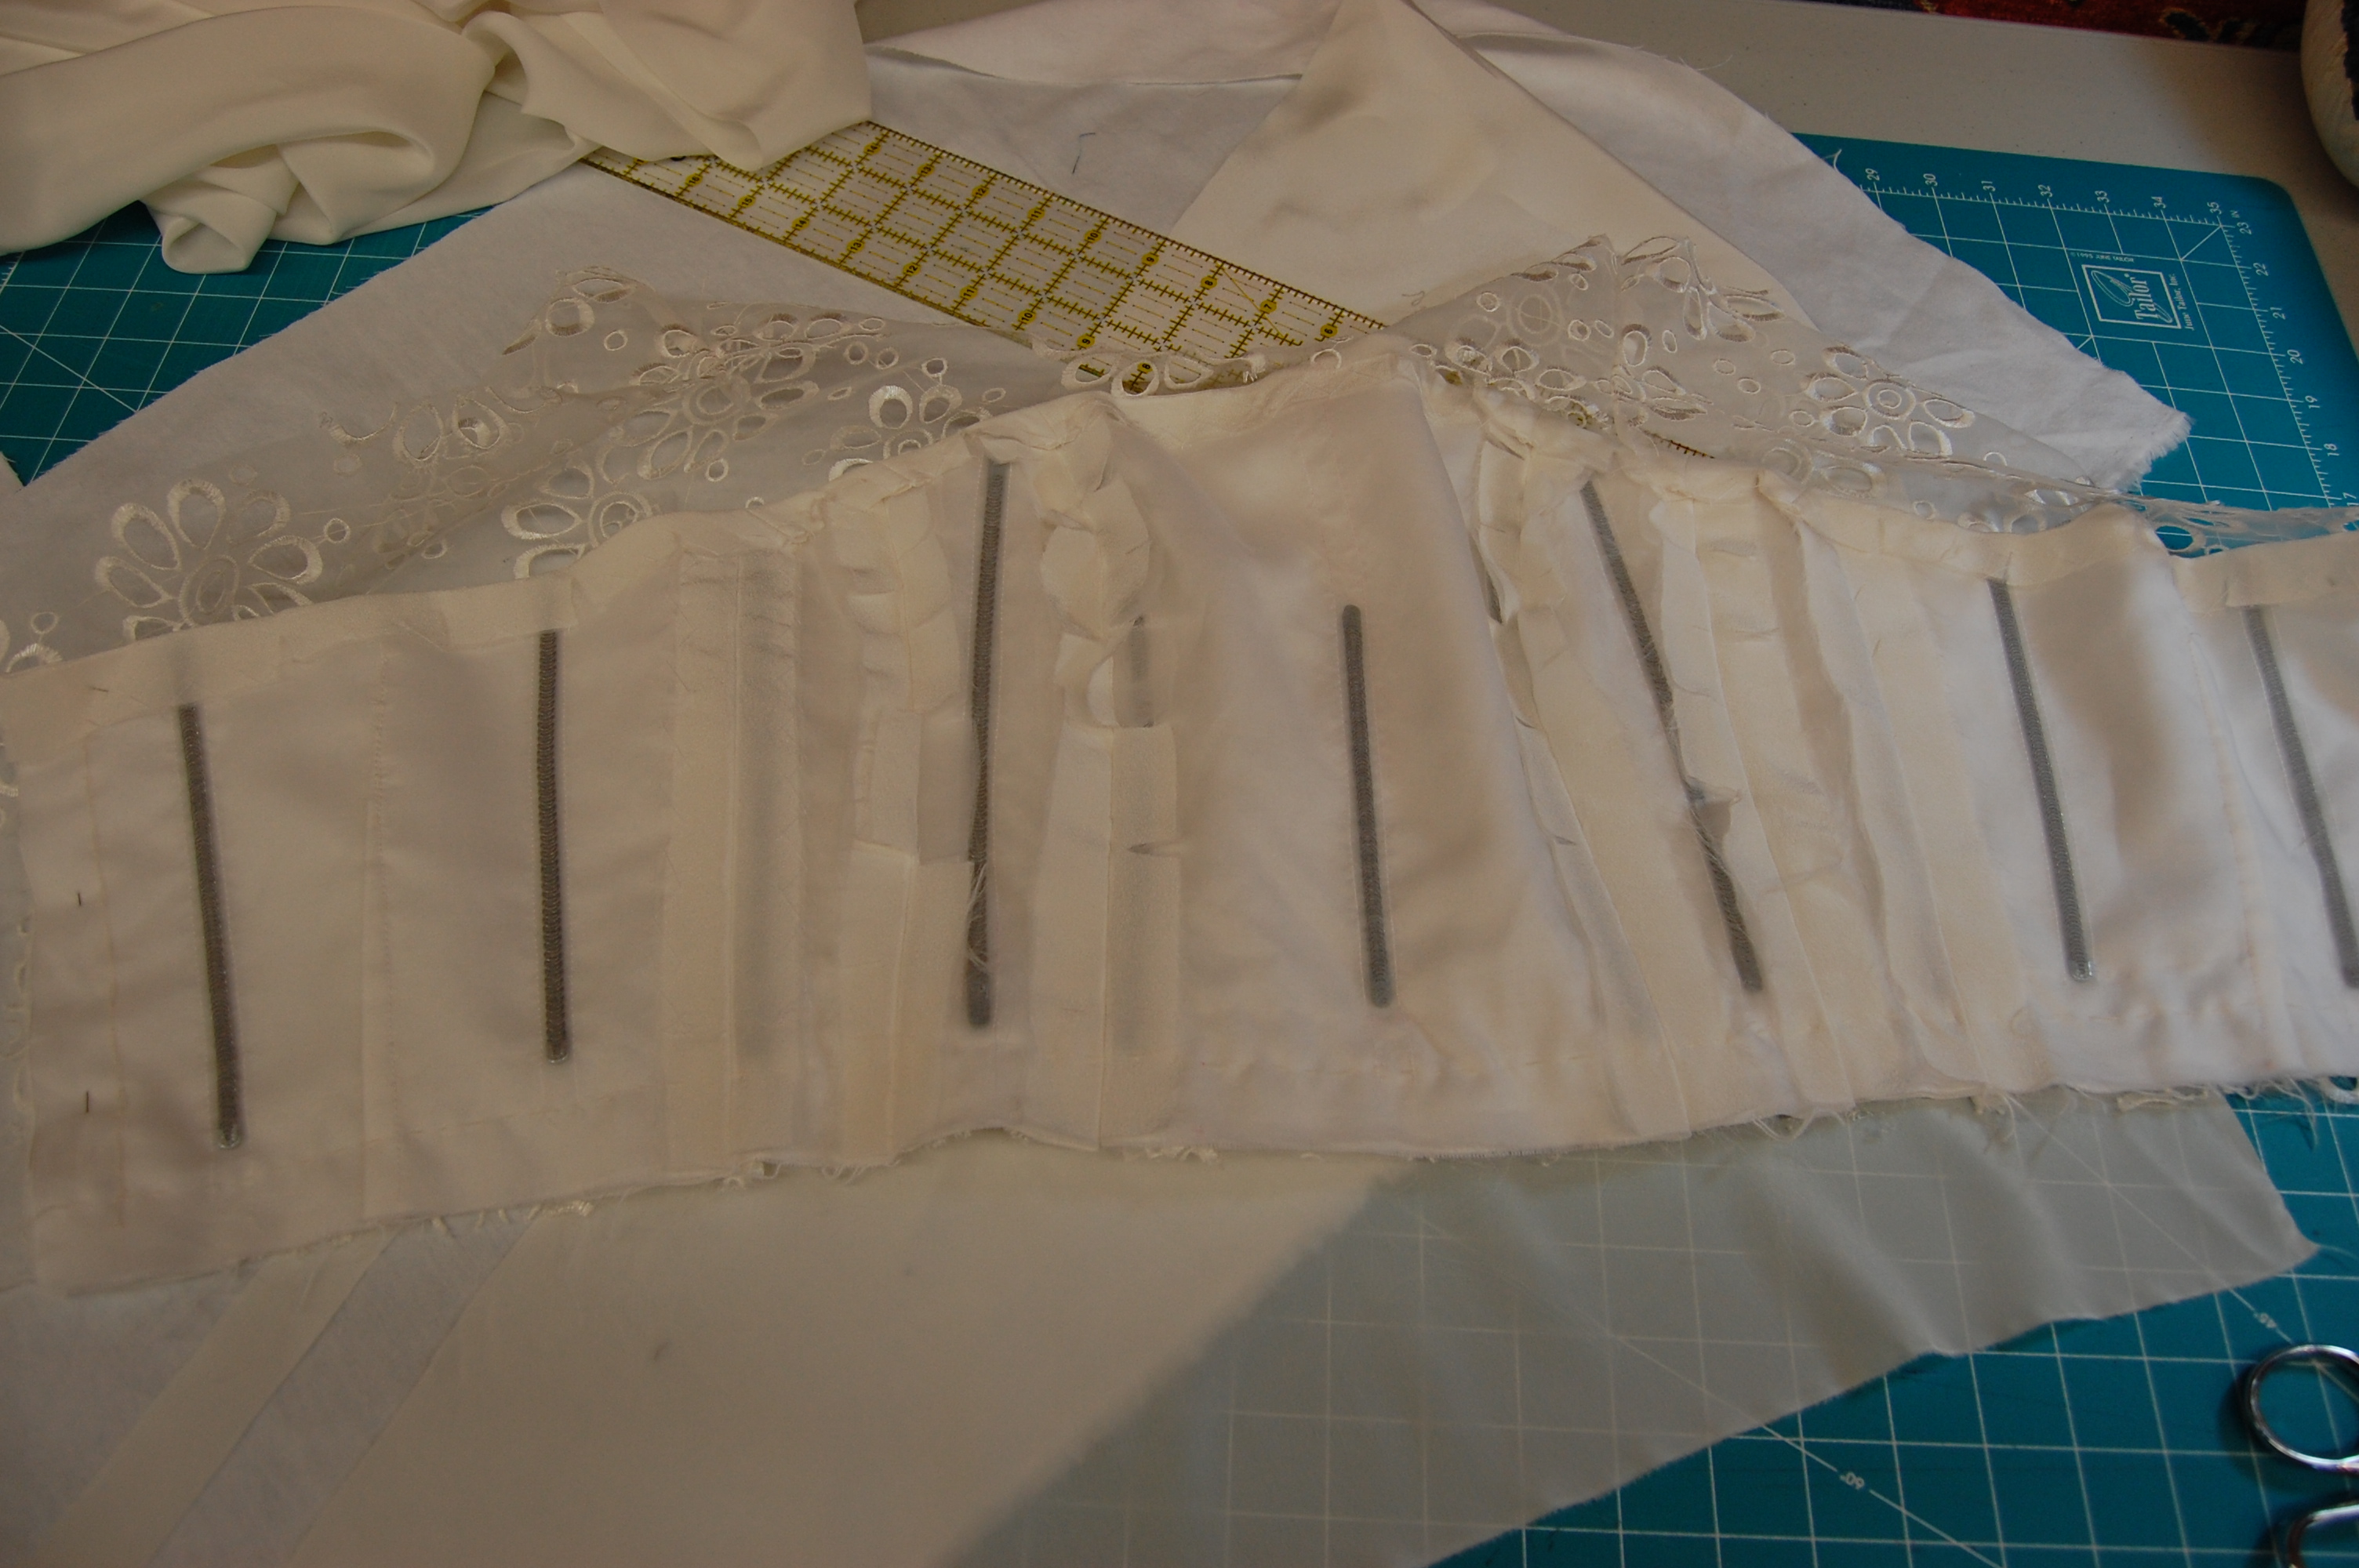
It took me a full week to finish my muslin.  The bust needed to be dropped so those princess-seamed darts needed a lot of adjustment.  In the shoulder area I had some gaping in the front, and I also needed to reshape the top of the shoulders.  Instead of easing the sleevecaps to fit the armscye, I decided to replace that ease with a shaping dart to the top of the sleeves.  I really liked the fluid look that gave to the shoulder line. I drafted three-quarter sleeves as I was contemplating that change to the original pattern.

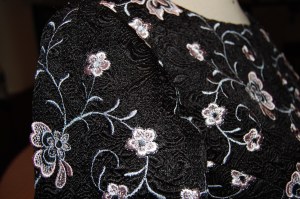
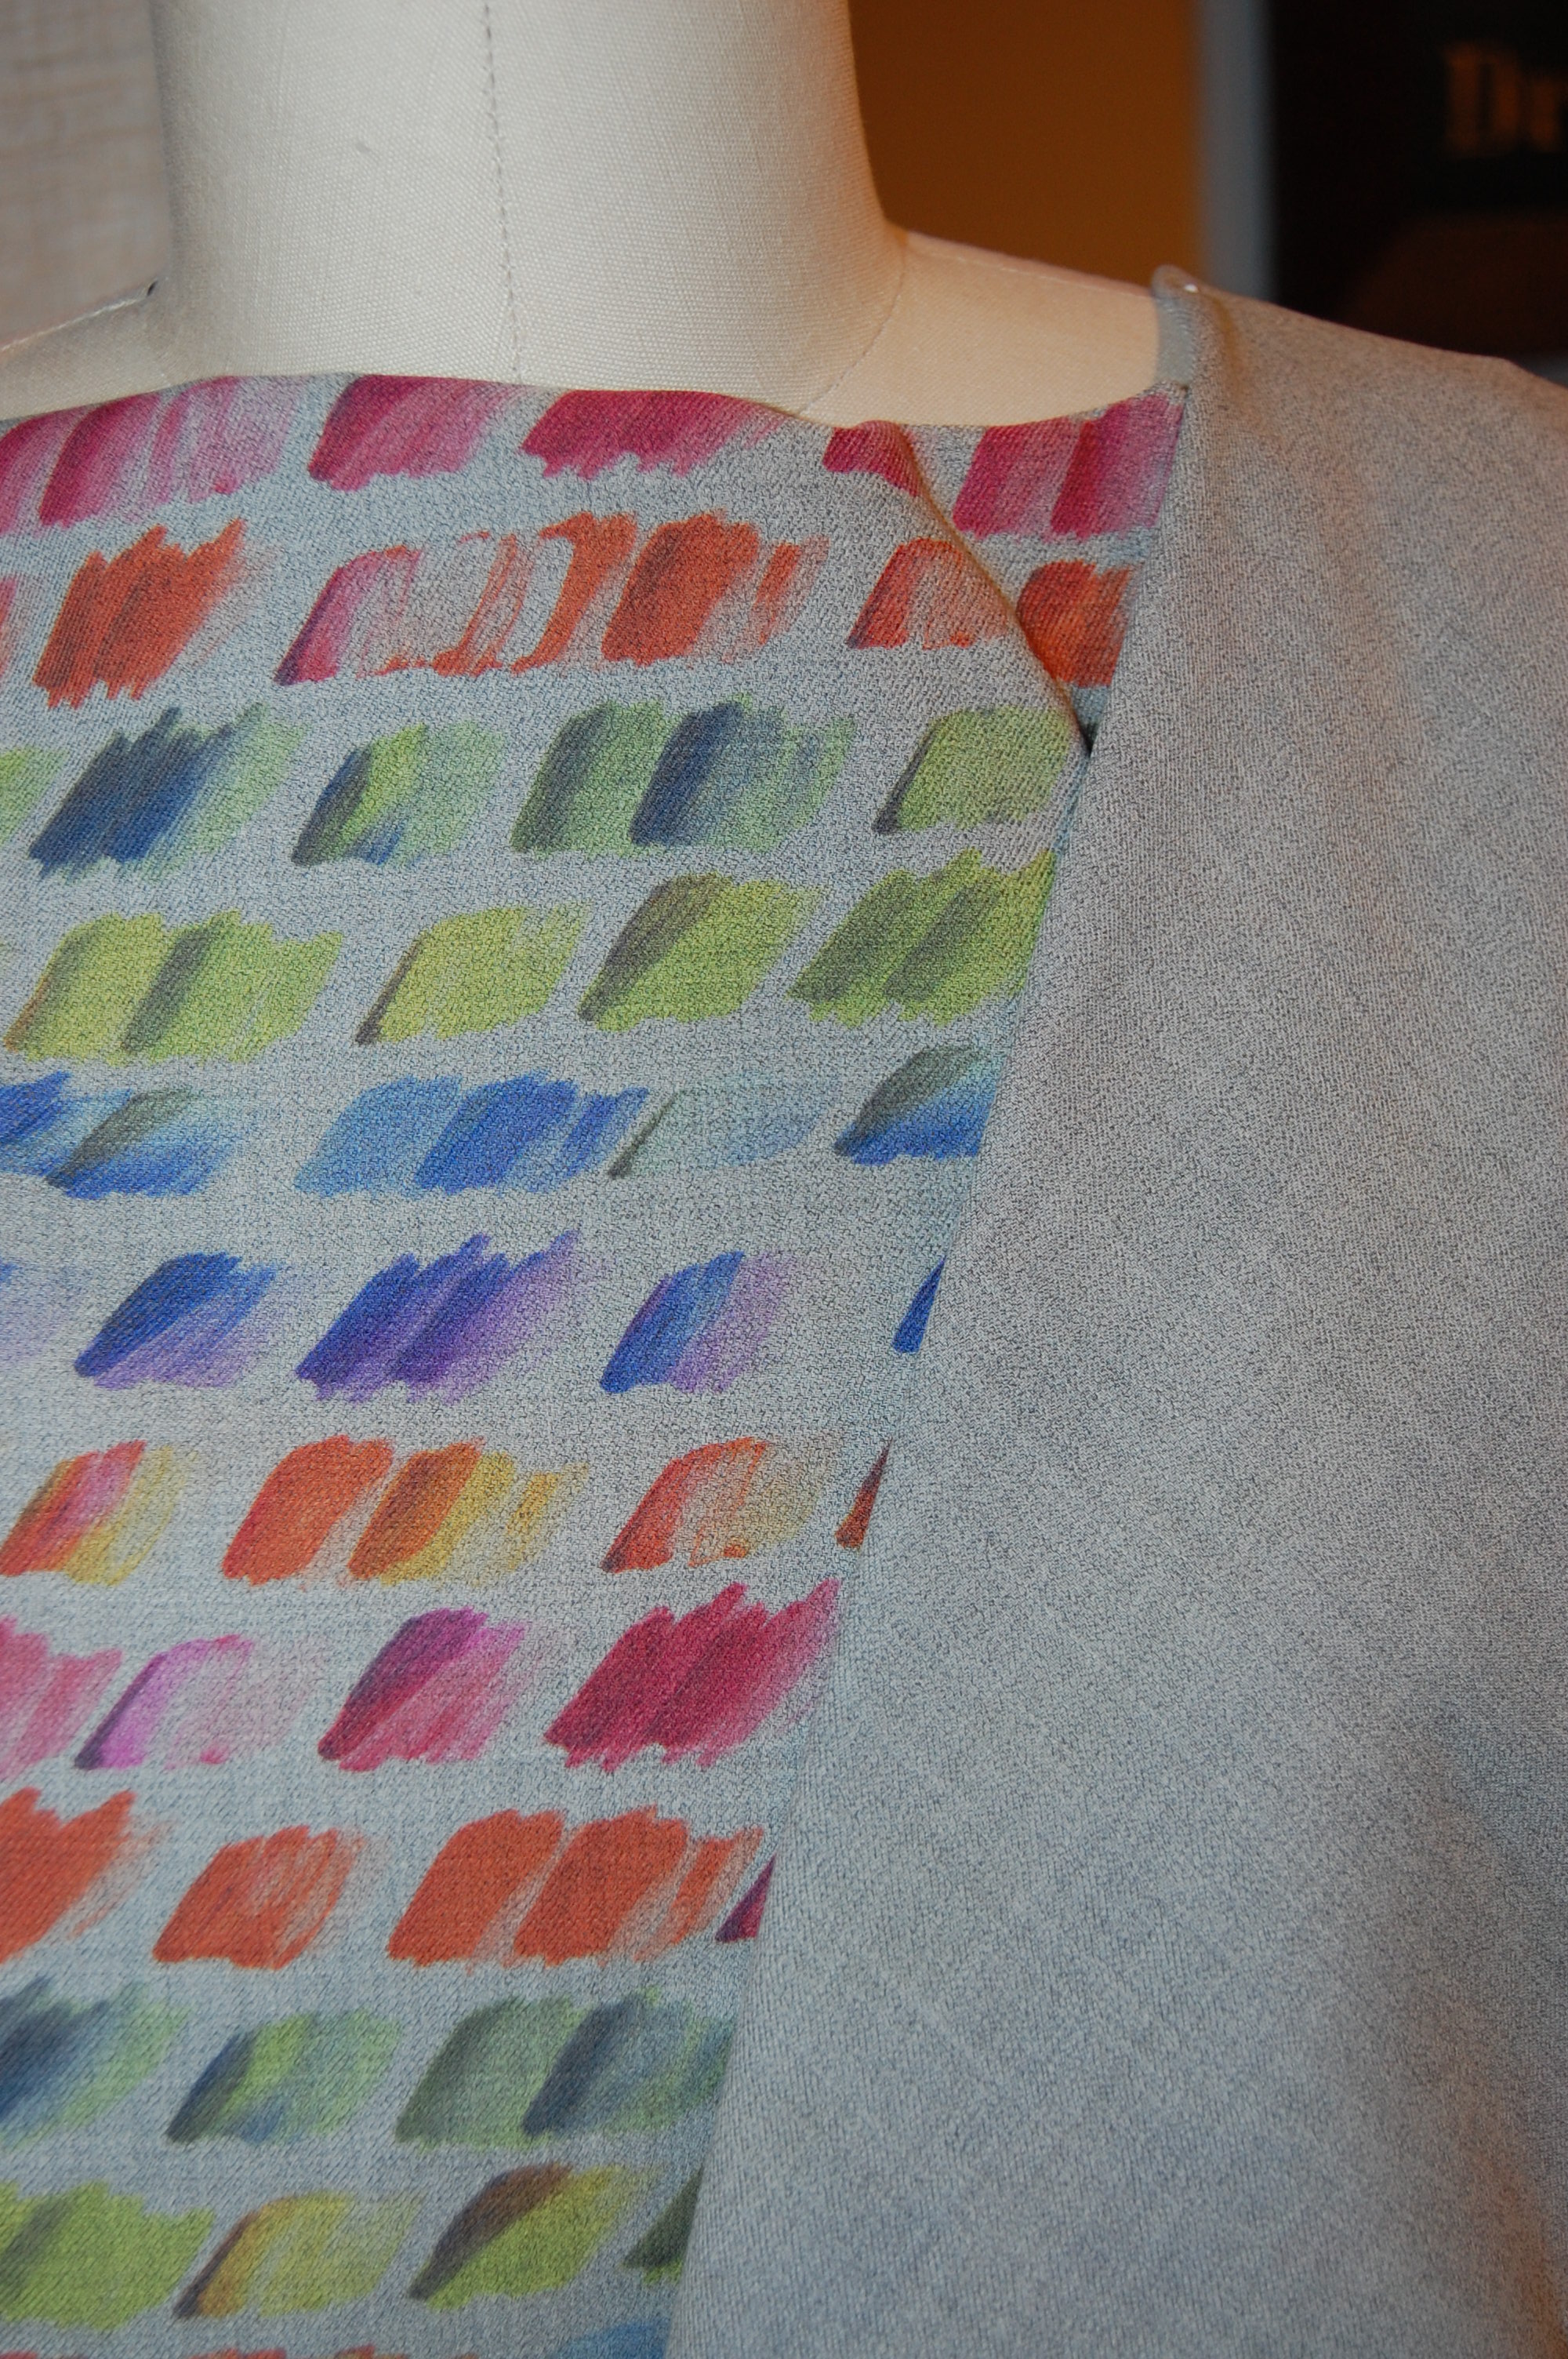
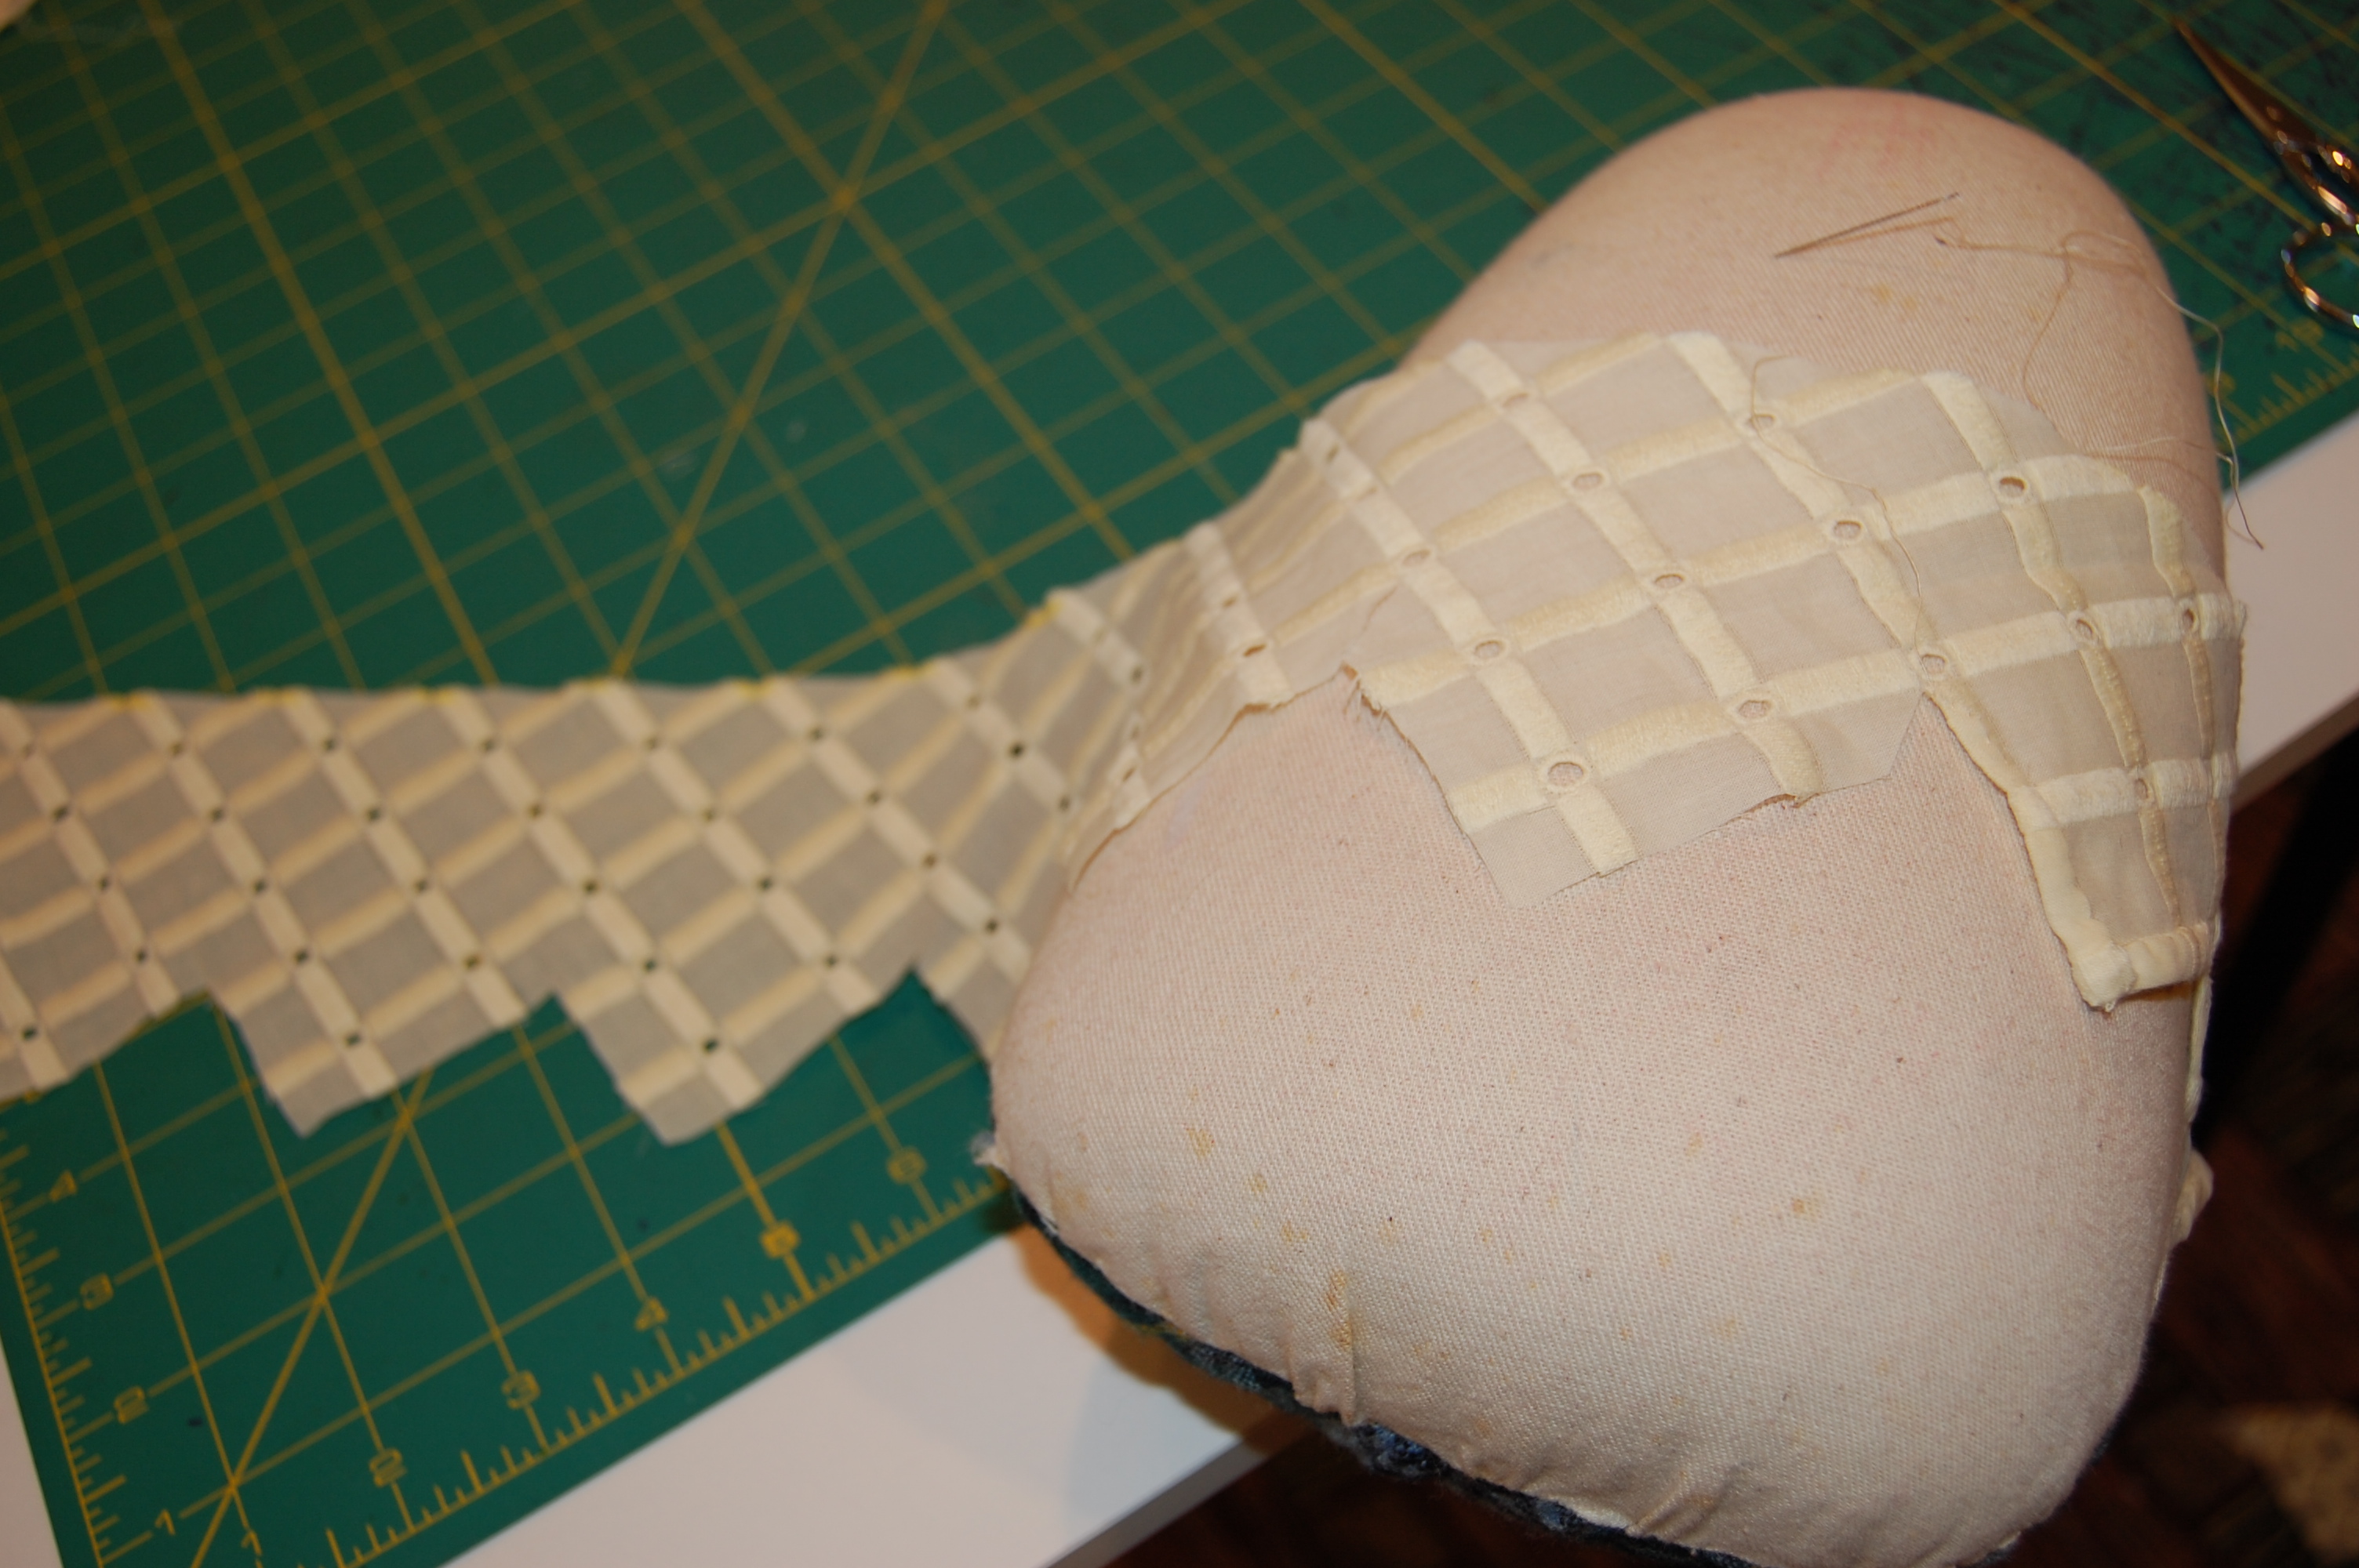
It is difficult to see in this black fabric, but this is the top of the sleeve with its shaping dart.  If you look closely, you can see some loose edges of the larger appliqués.

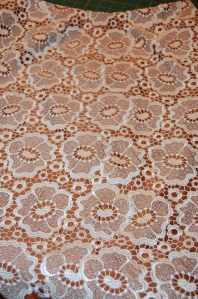
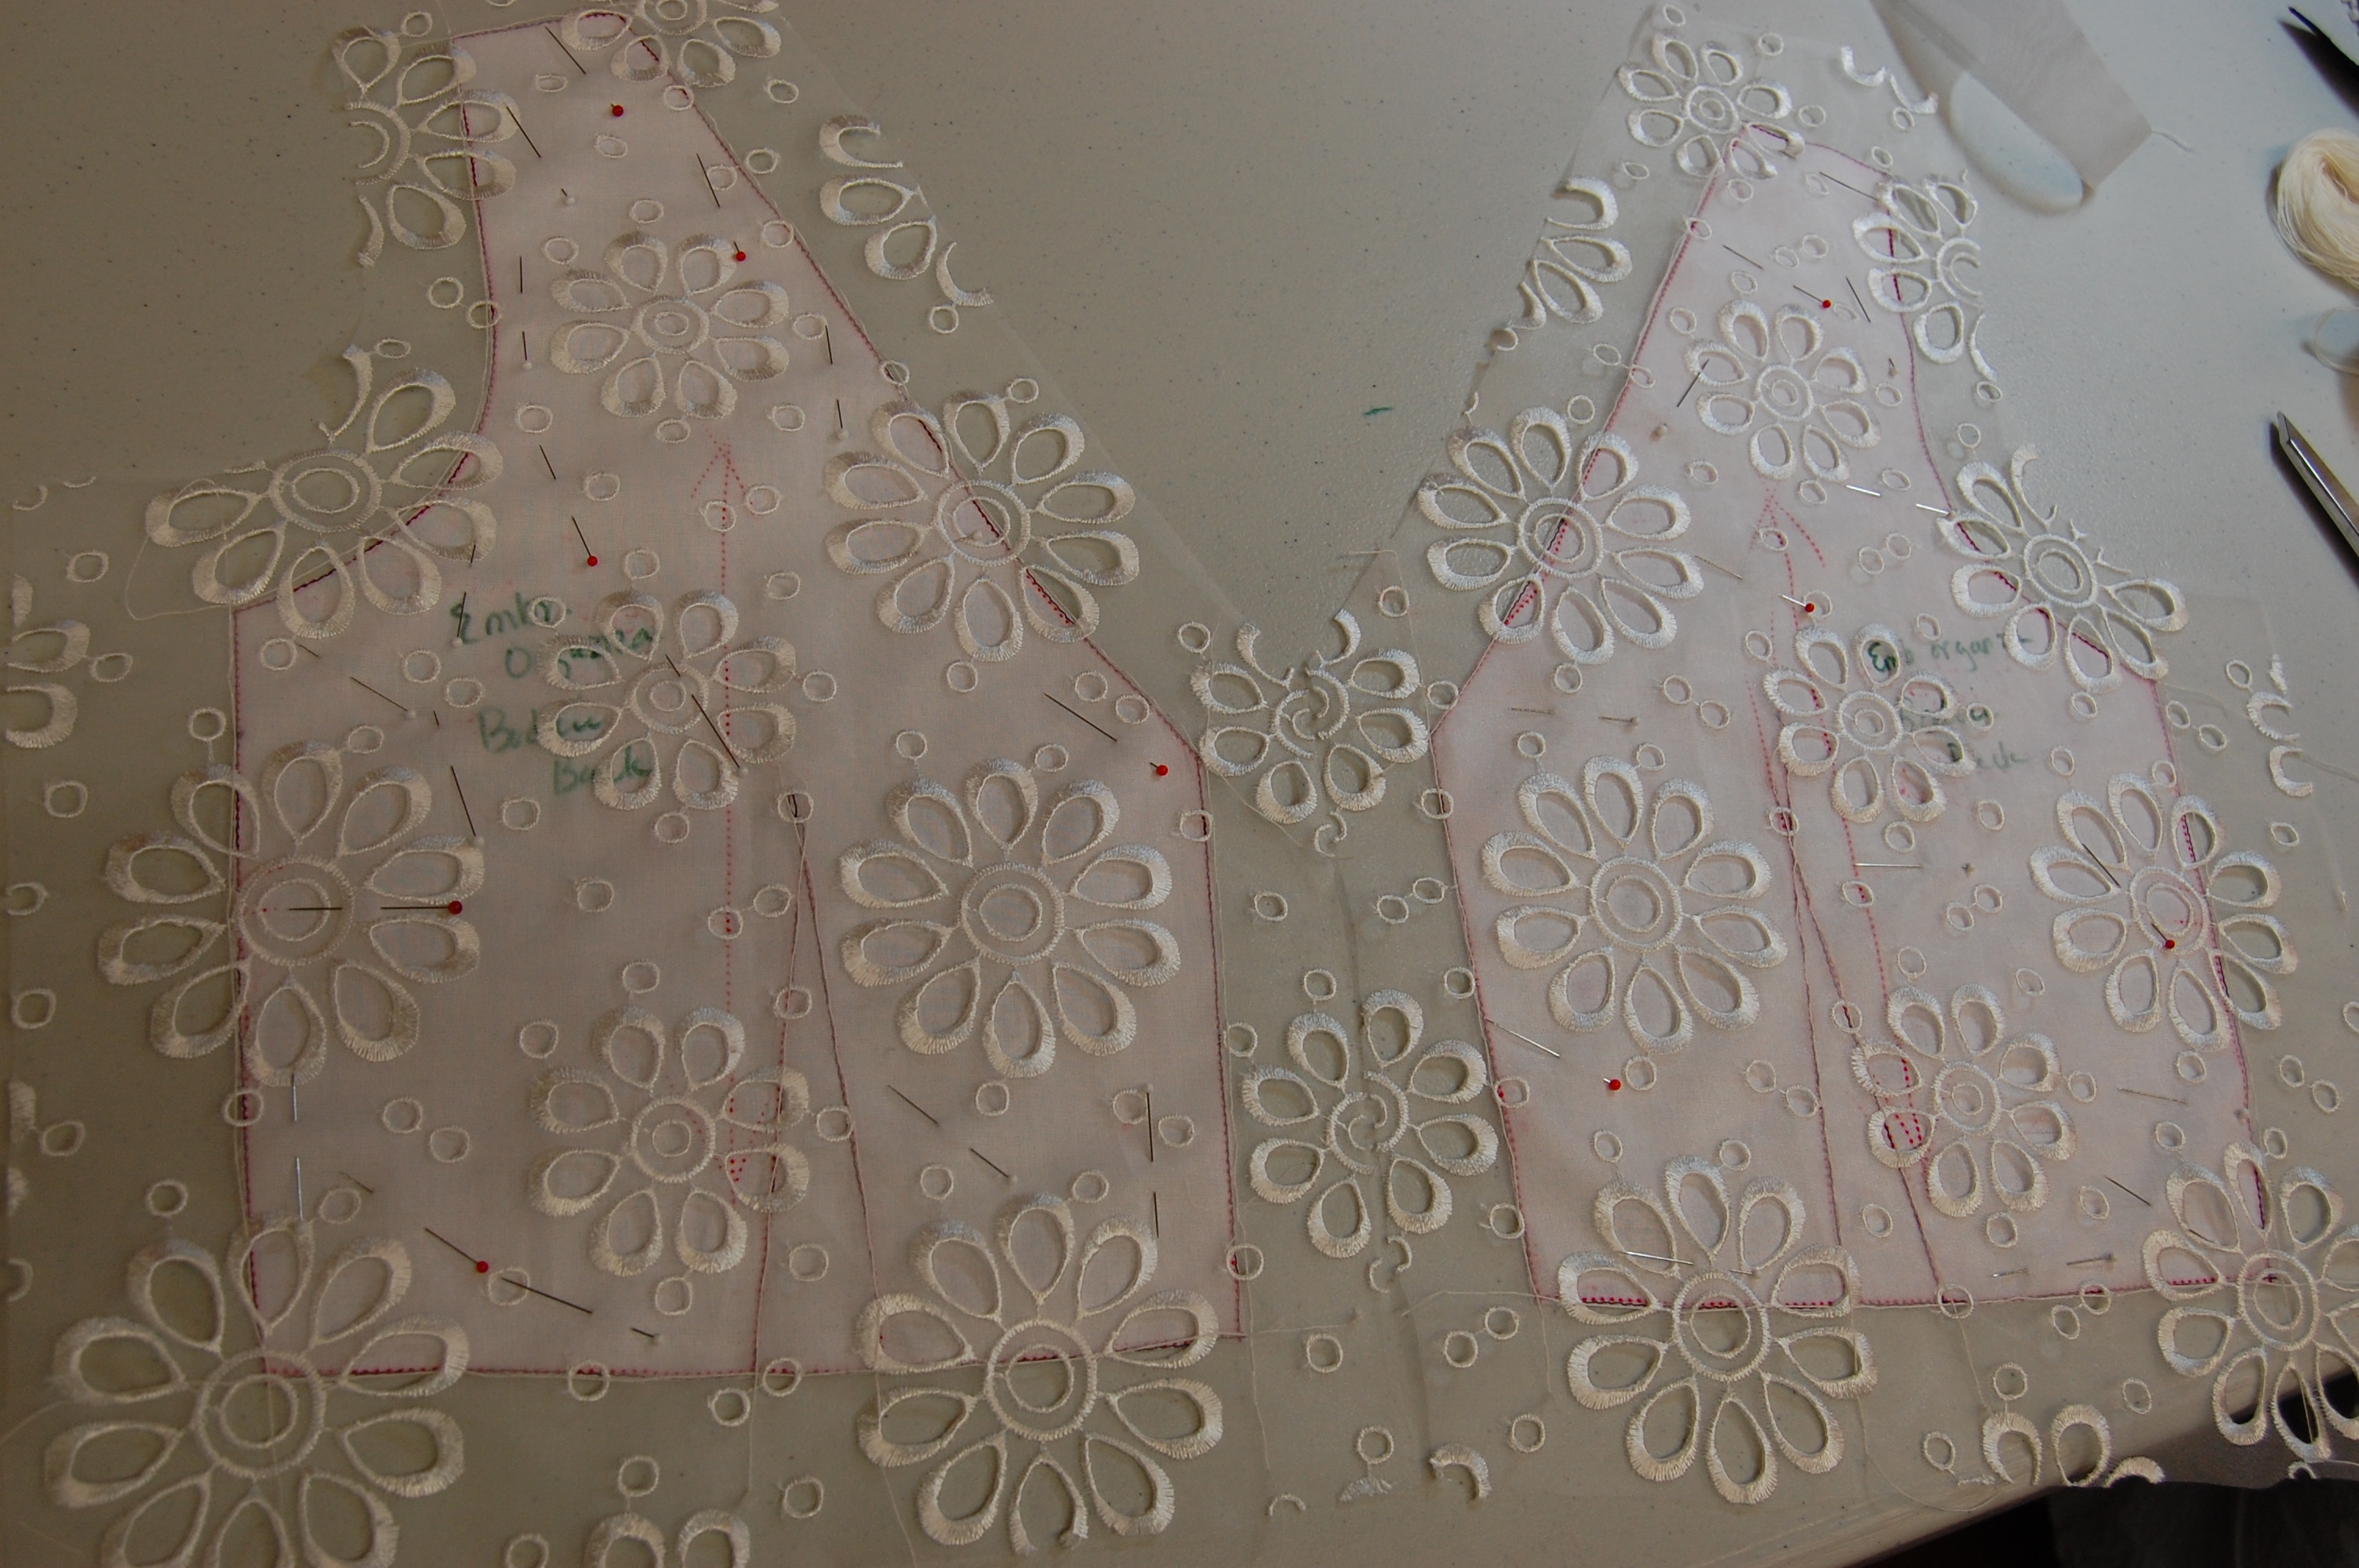
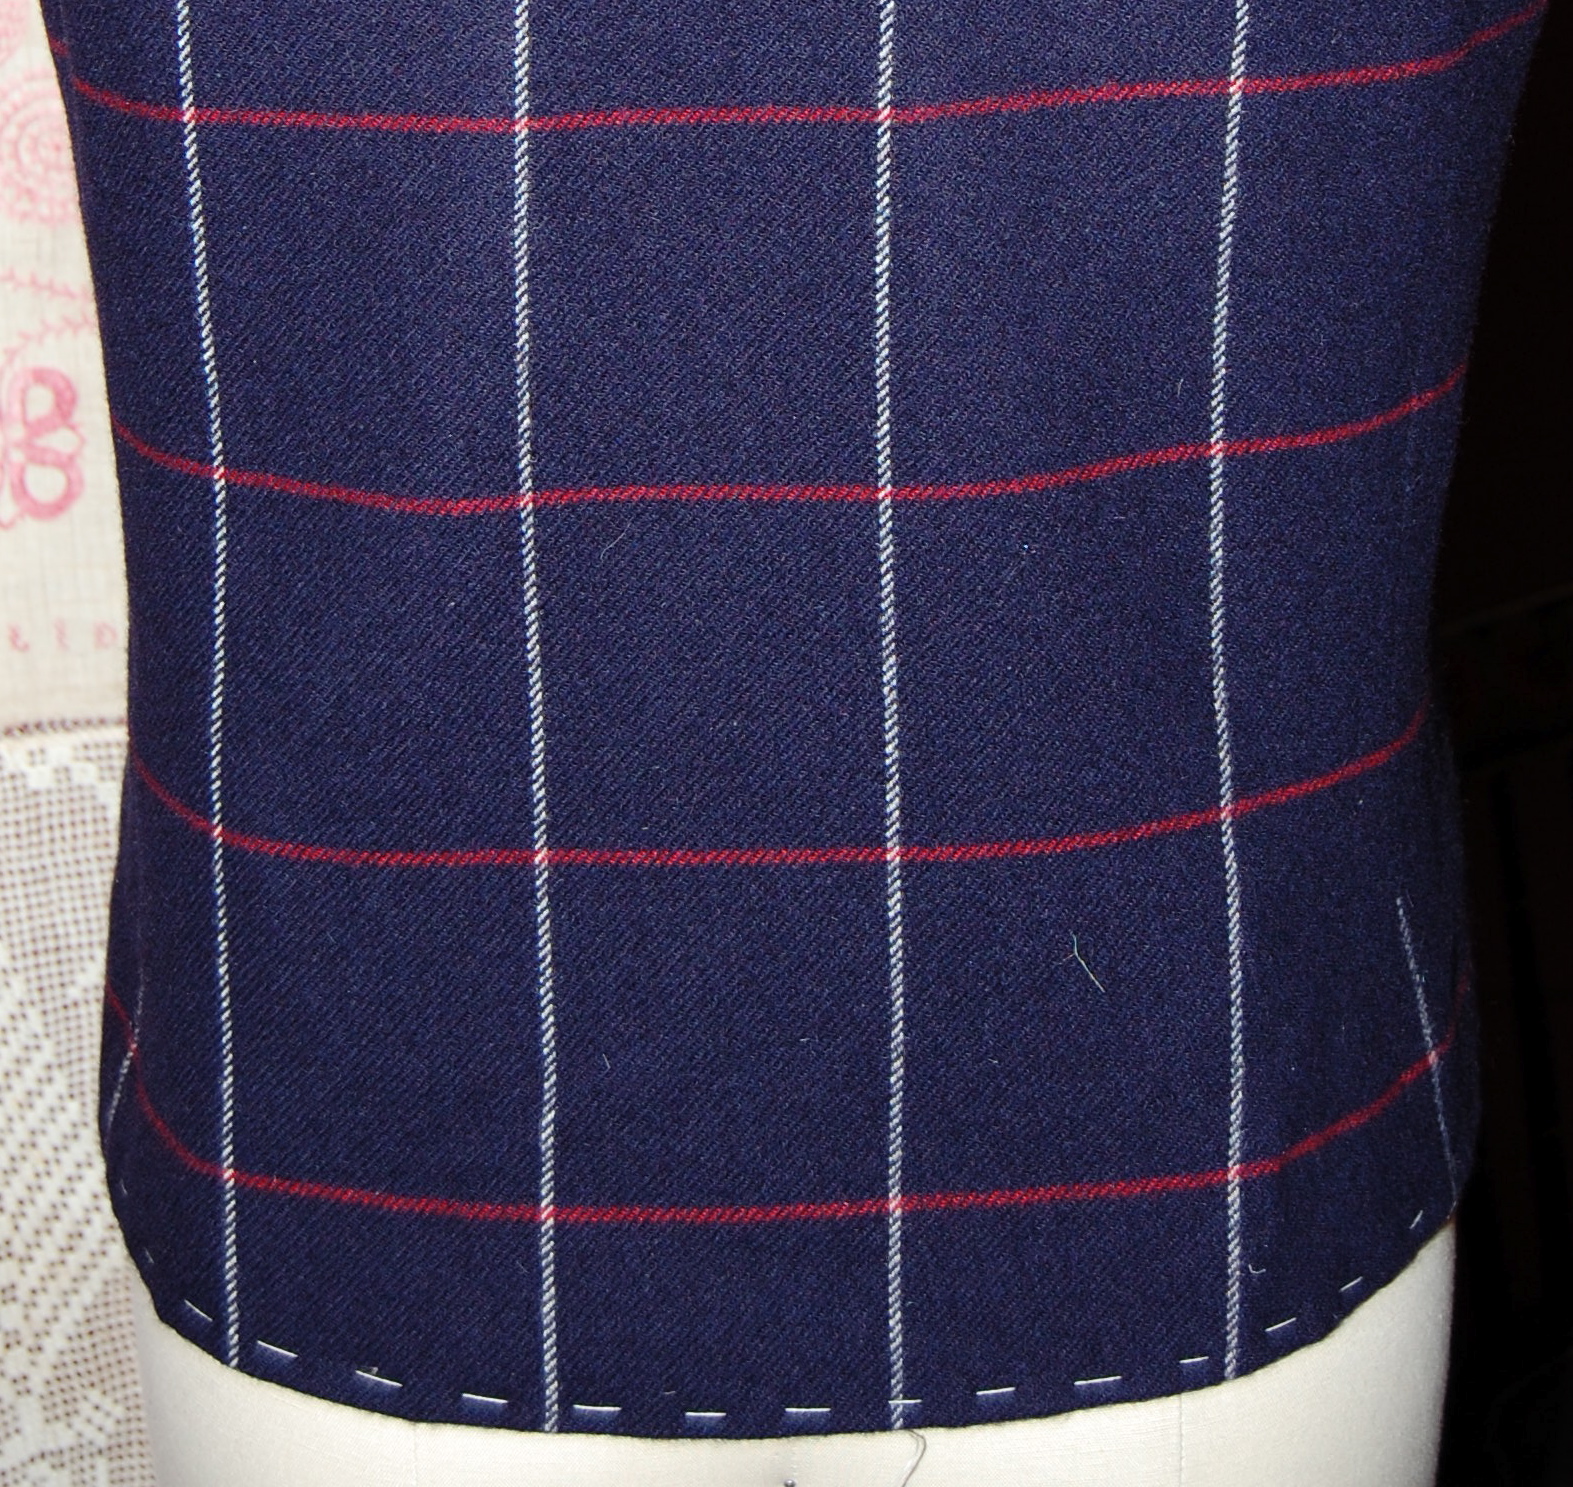
Can you guess what is coming next?  As is often the case when I purchase fabric first and then choose a pattern, I created a challenge for myself.  It was almost immediately obvious to me that I would not be able to work on the lengthwise grain of fabric, as I could not begin to fit the pattern pieces onto the fabric and do any matching whatsoever. As luck would have it, I preferred the appearance of the meandering of the vines and flowers on the crossgrain, and I figured out how to stagger the pattern pieces to both fit the fabric, and match the seams.  But those three-quarter length sleeves?  No way were they going to happen!  I could just fit in the original short sleeves, so short they were going to be!

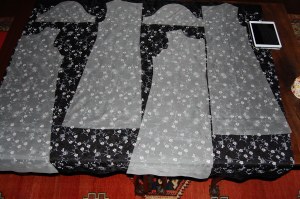
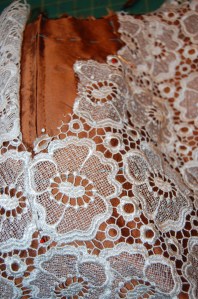
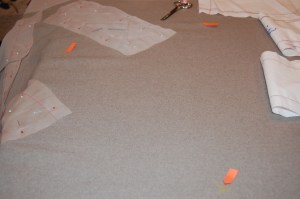
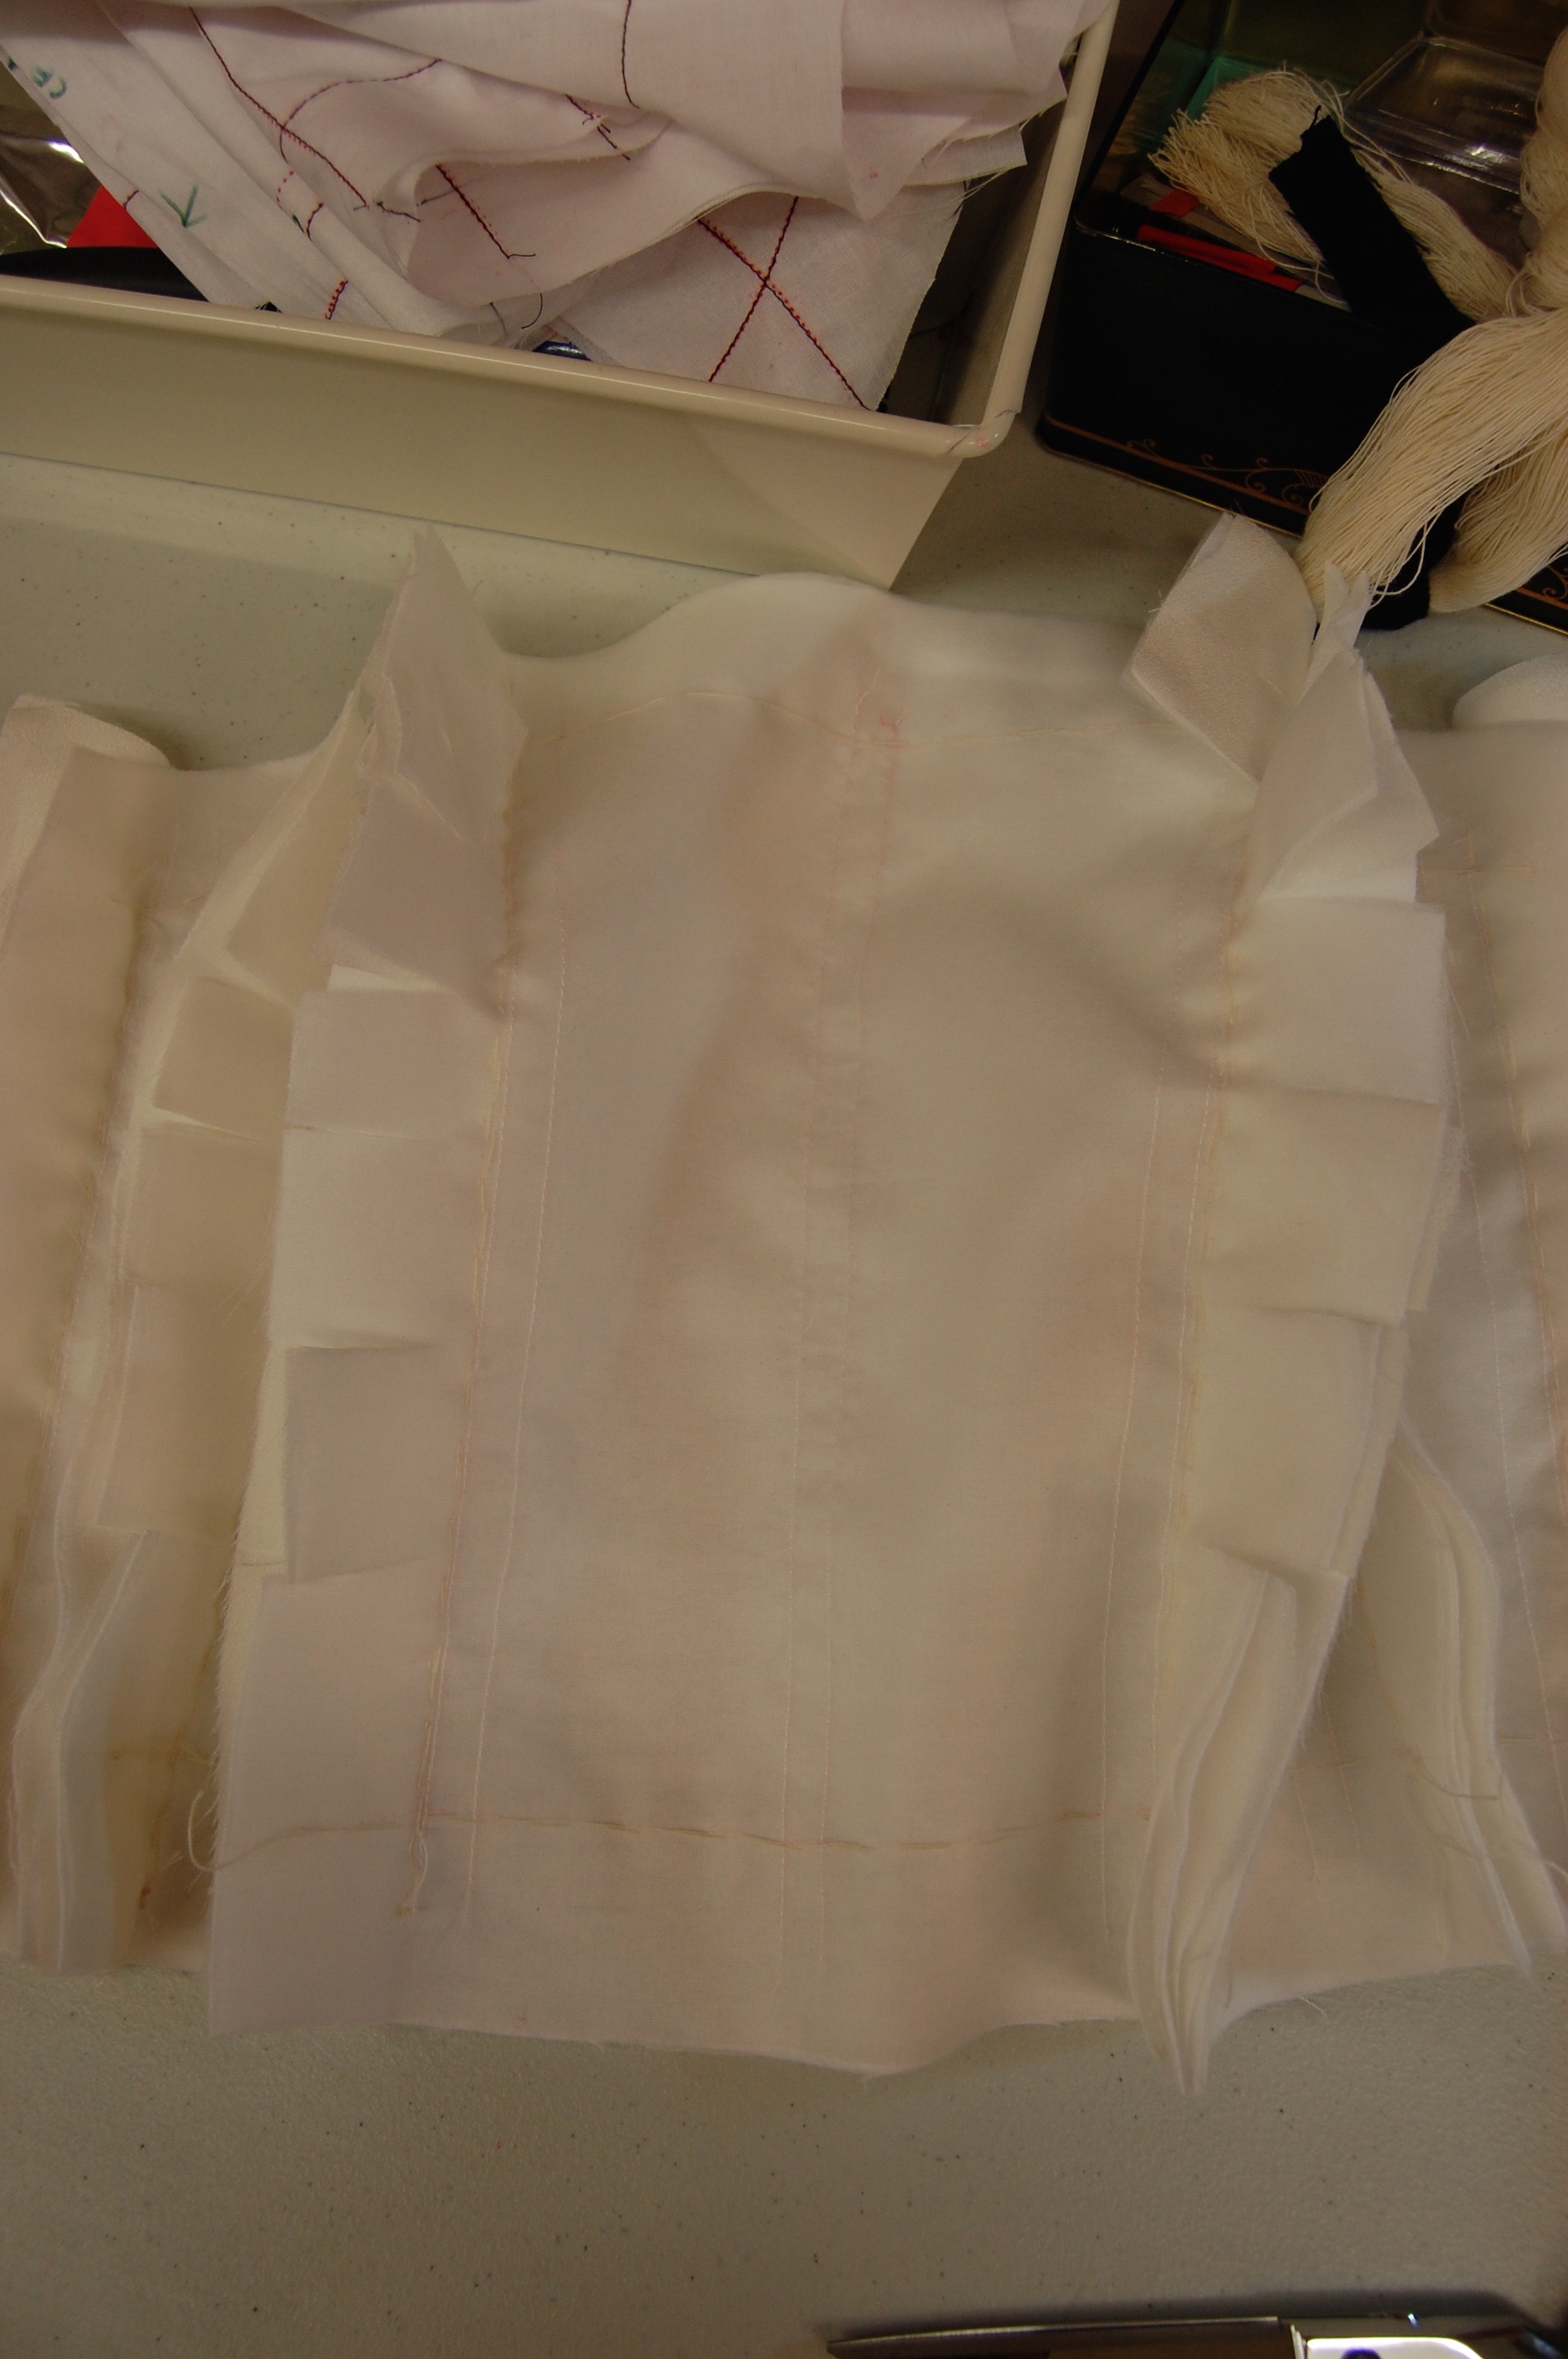
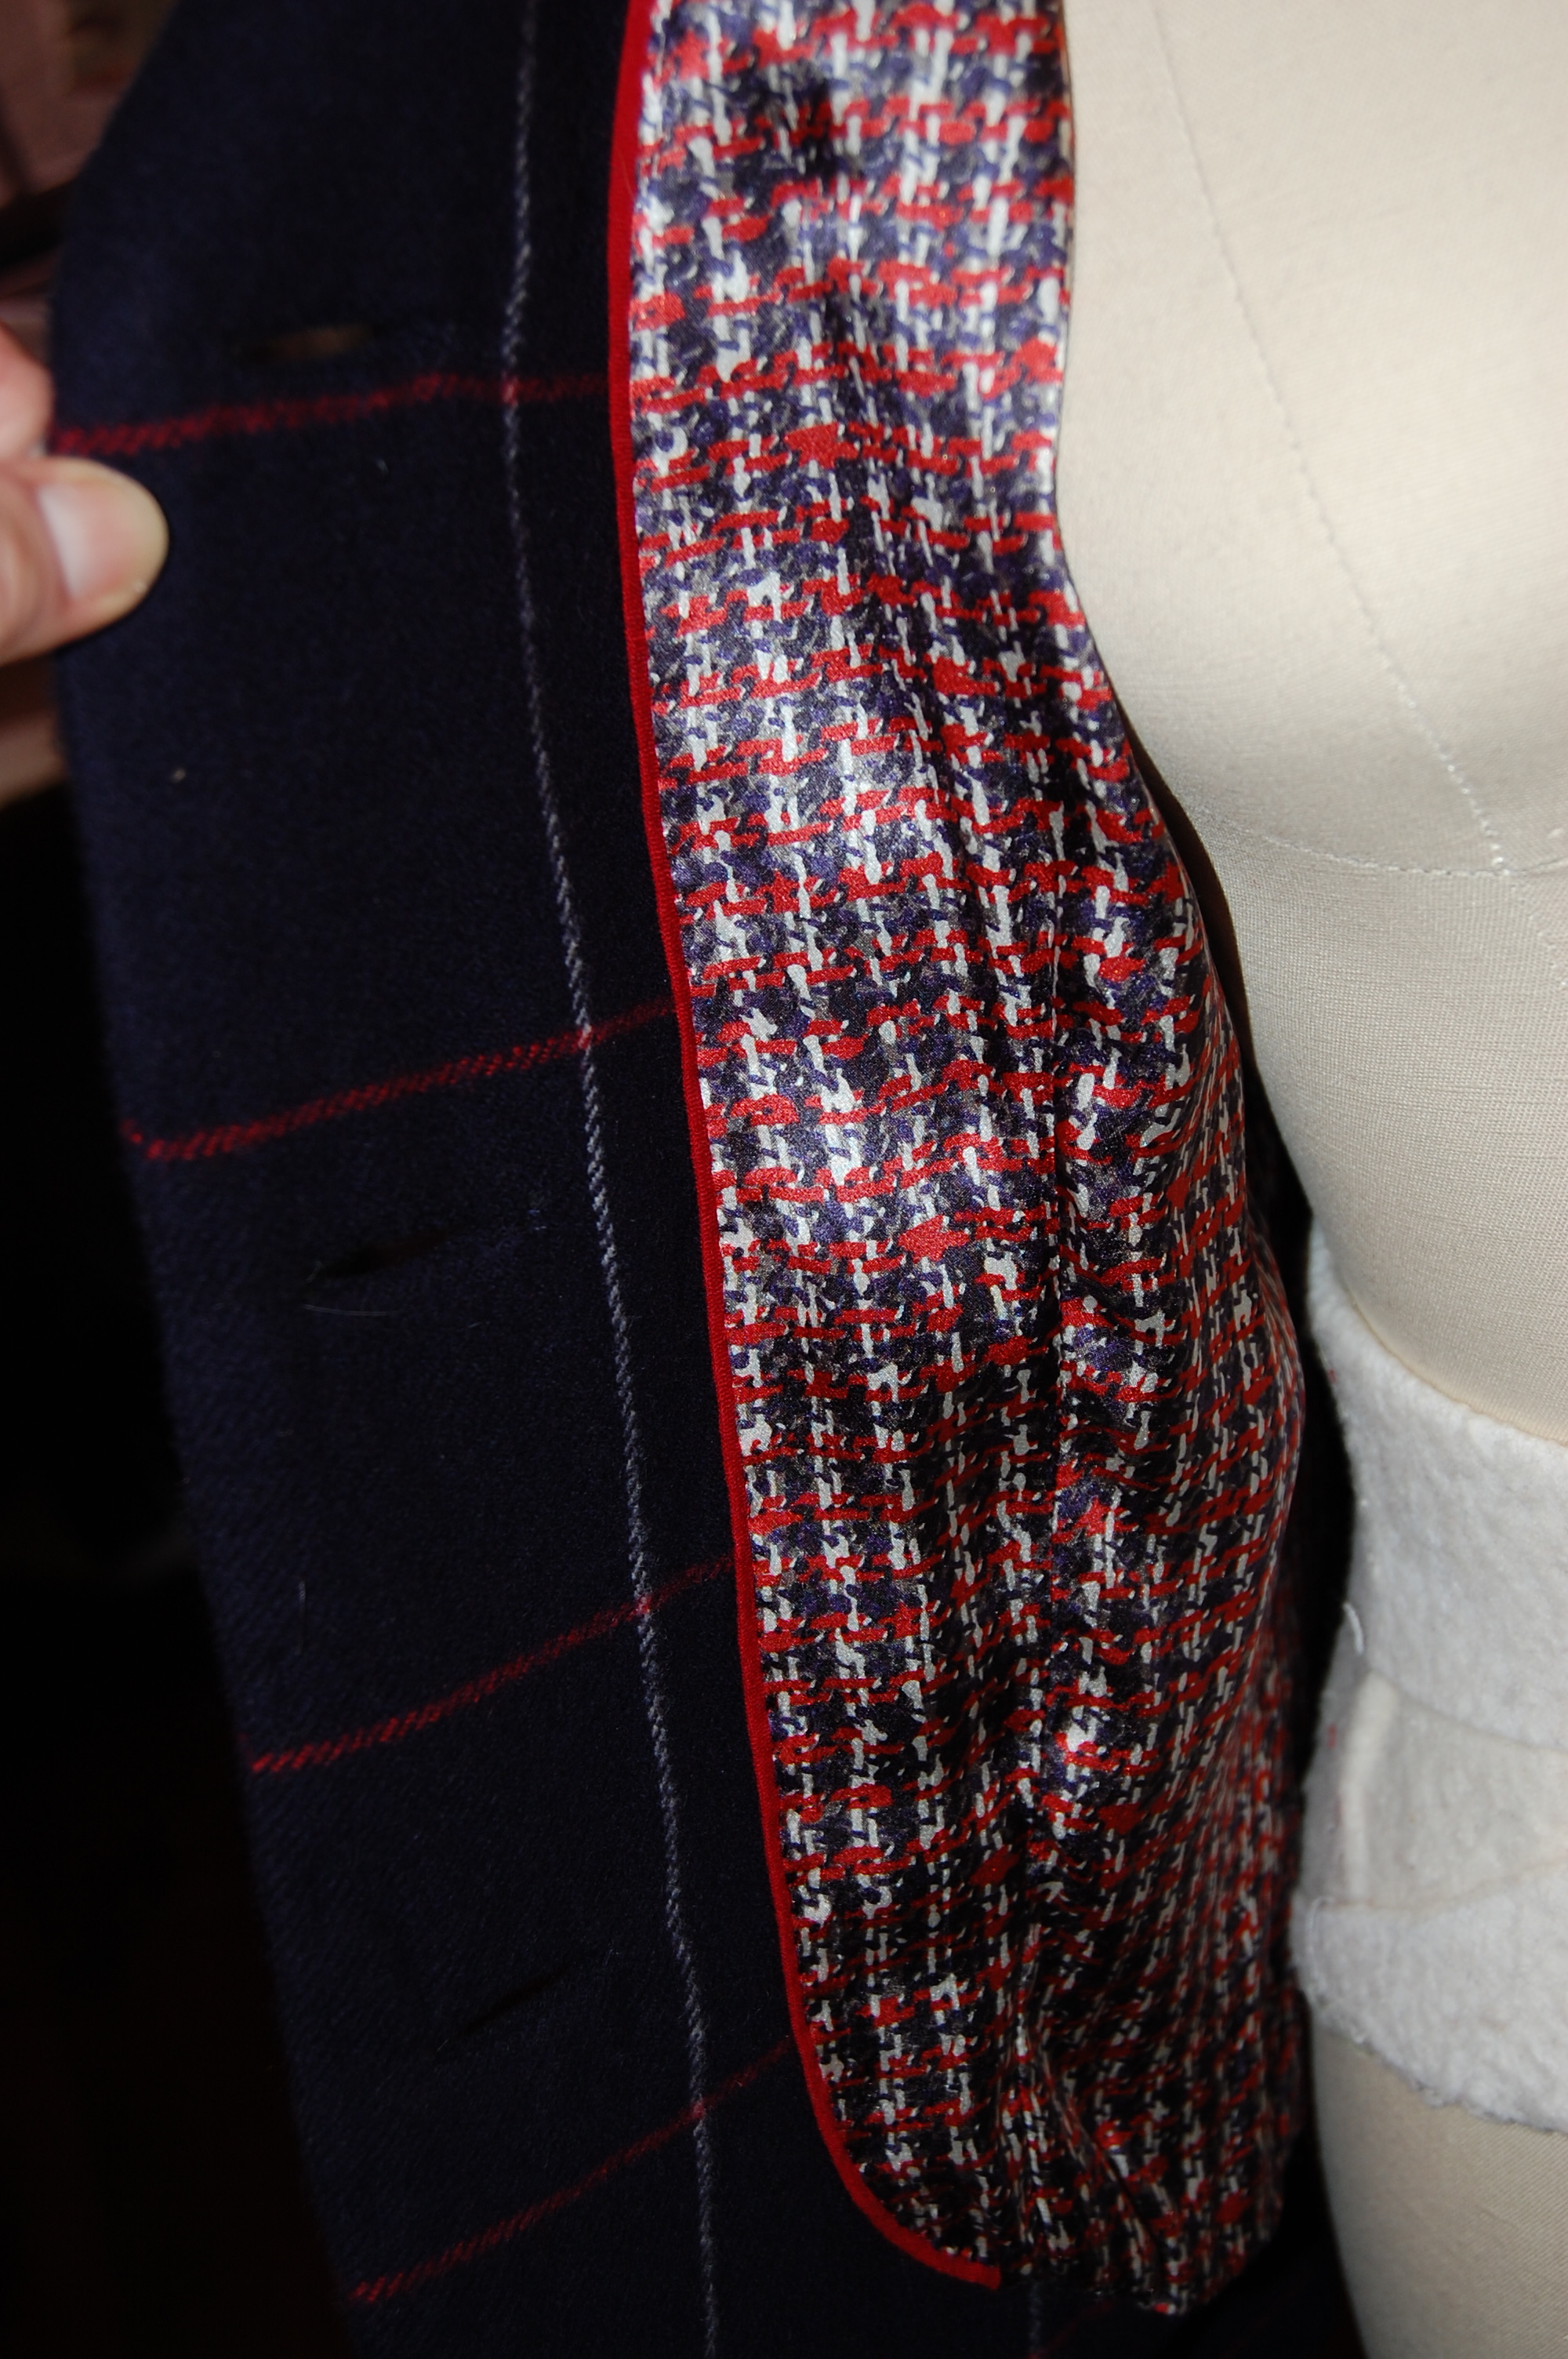
Here are the silk organza underlining (pattern) pieces laid out on my fabric. I had to stagger the four main pieces to fit it on the fabric. Fortunately I was still able to match the pattern of the vines and flowers. Whew! (I took pictures on my iPad to help with the matching.  You can see it in the upper right corner.)

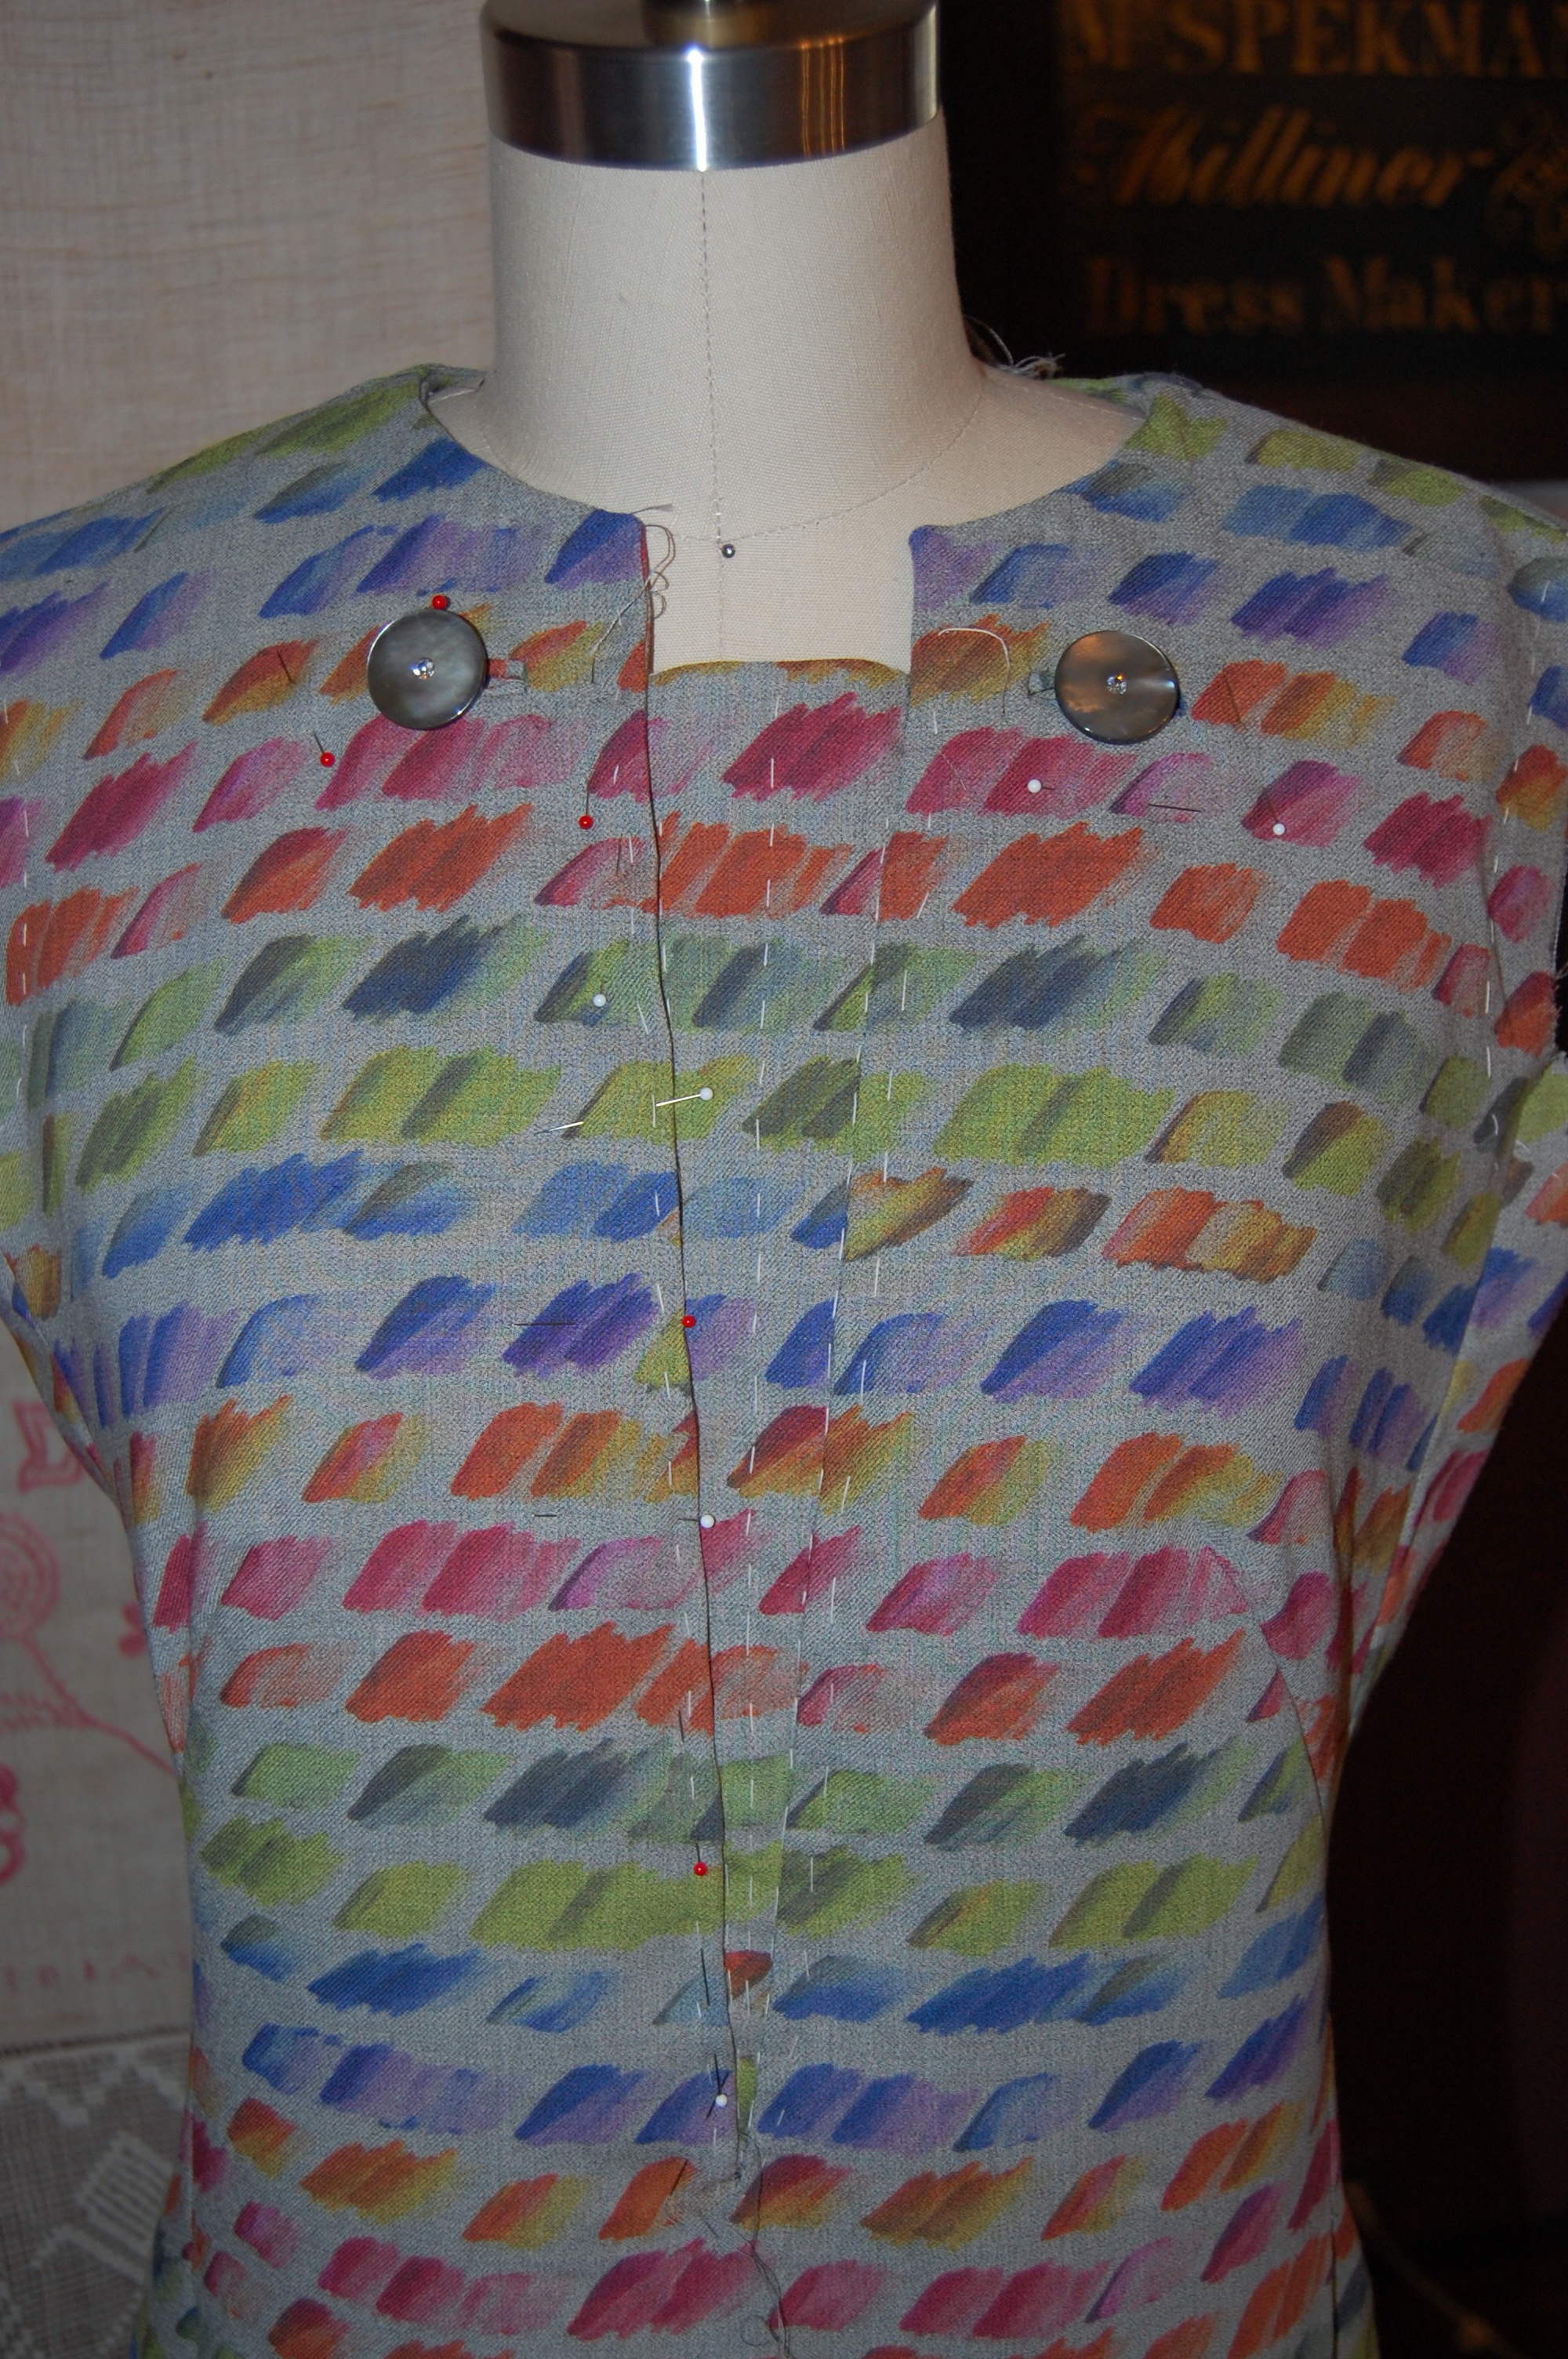
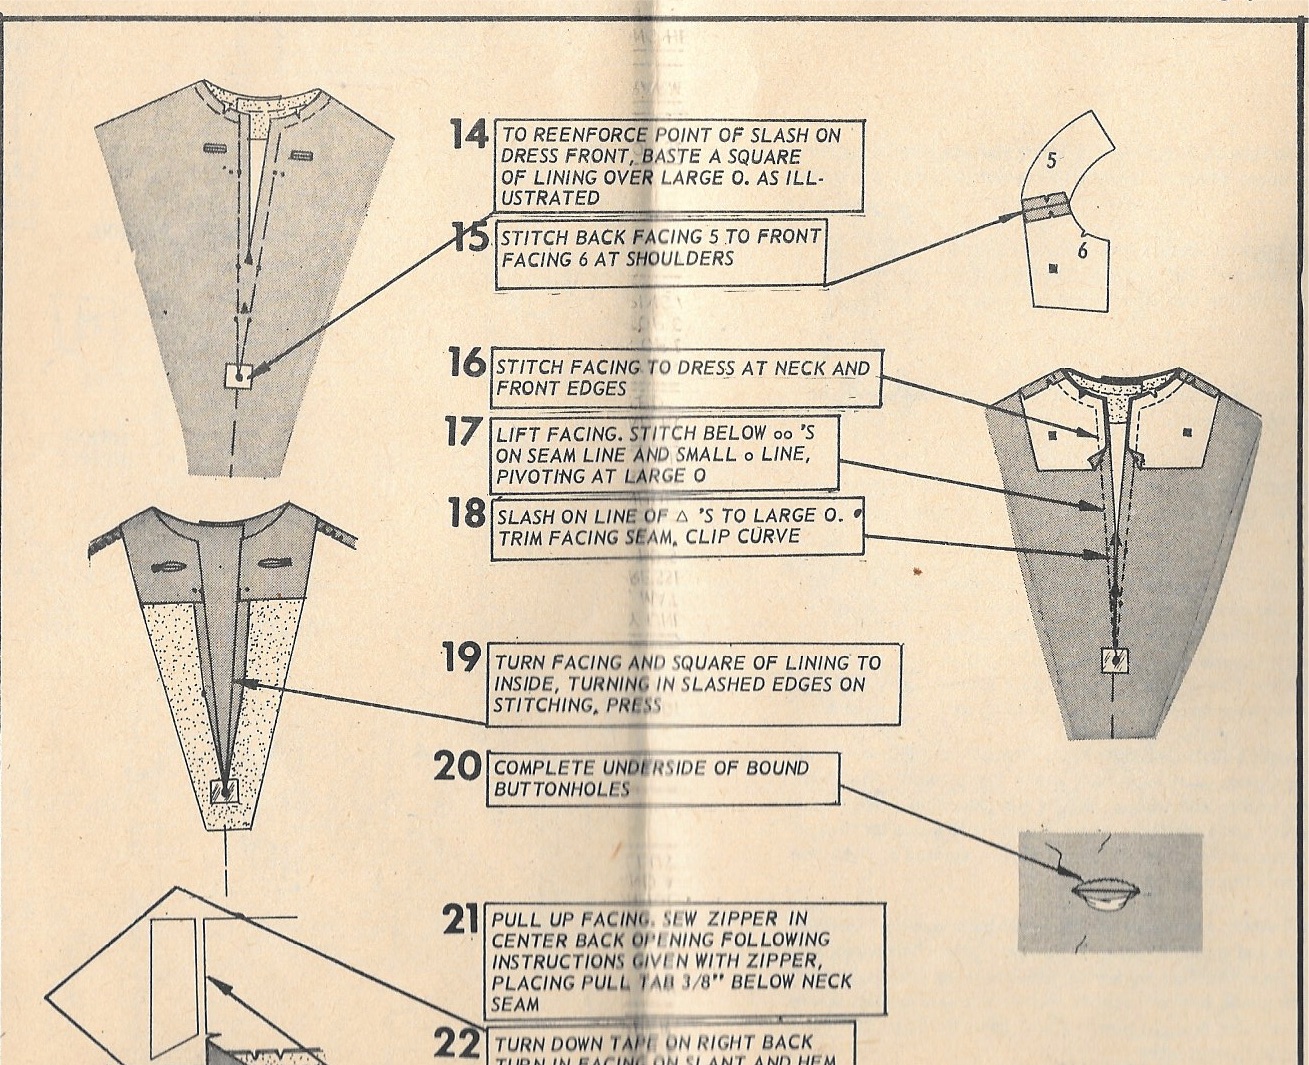
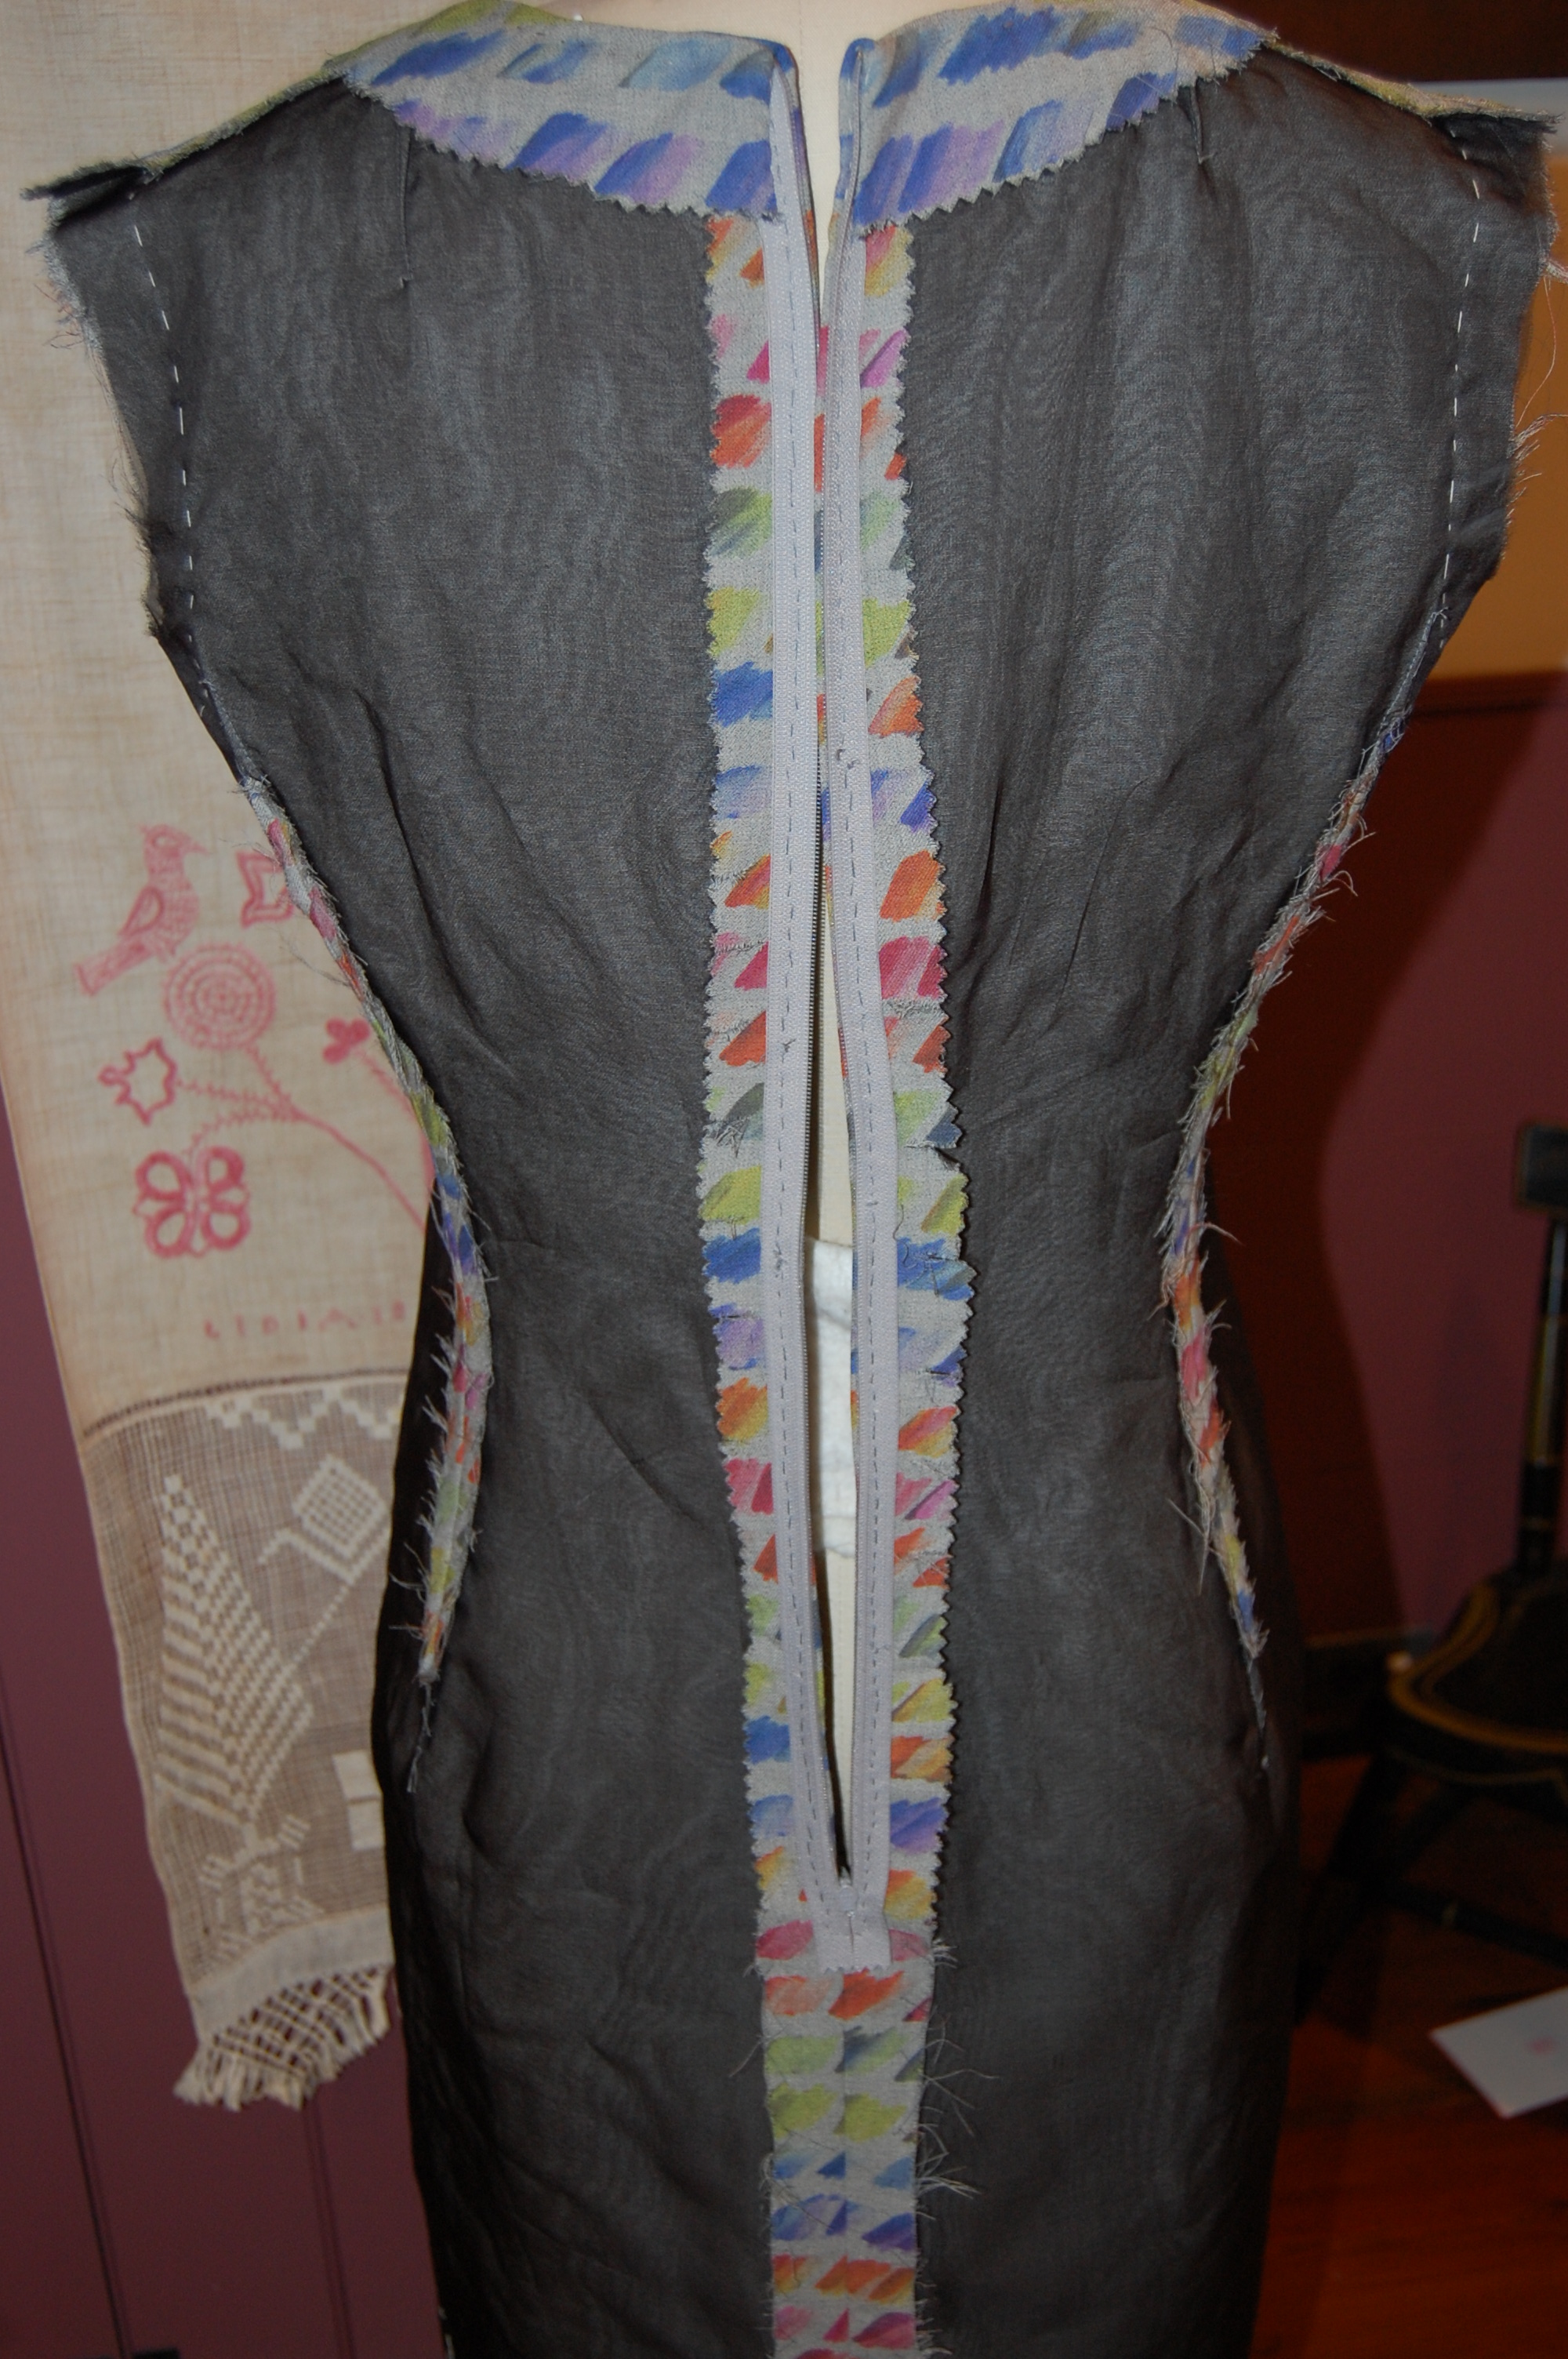
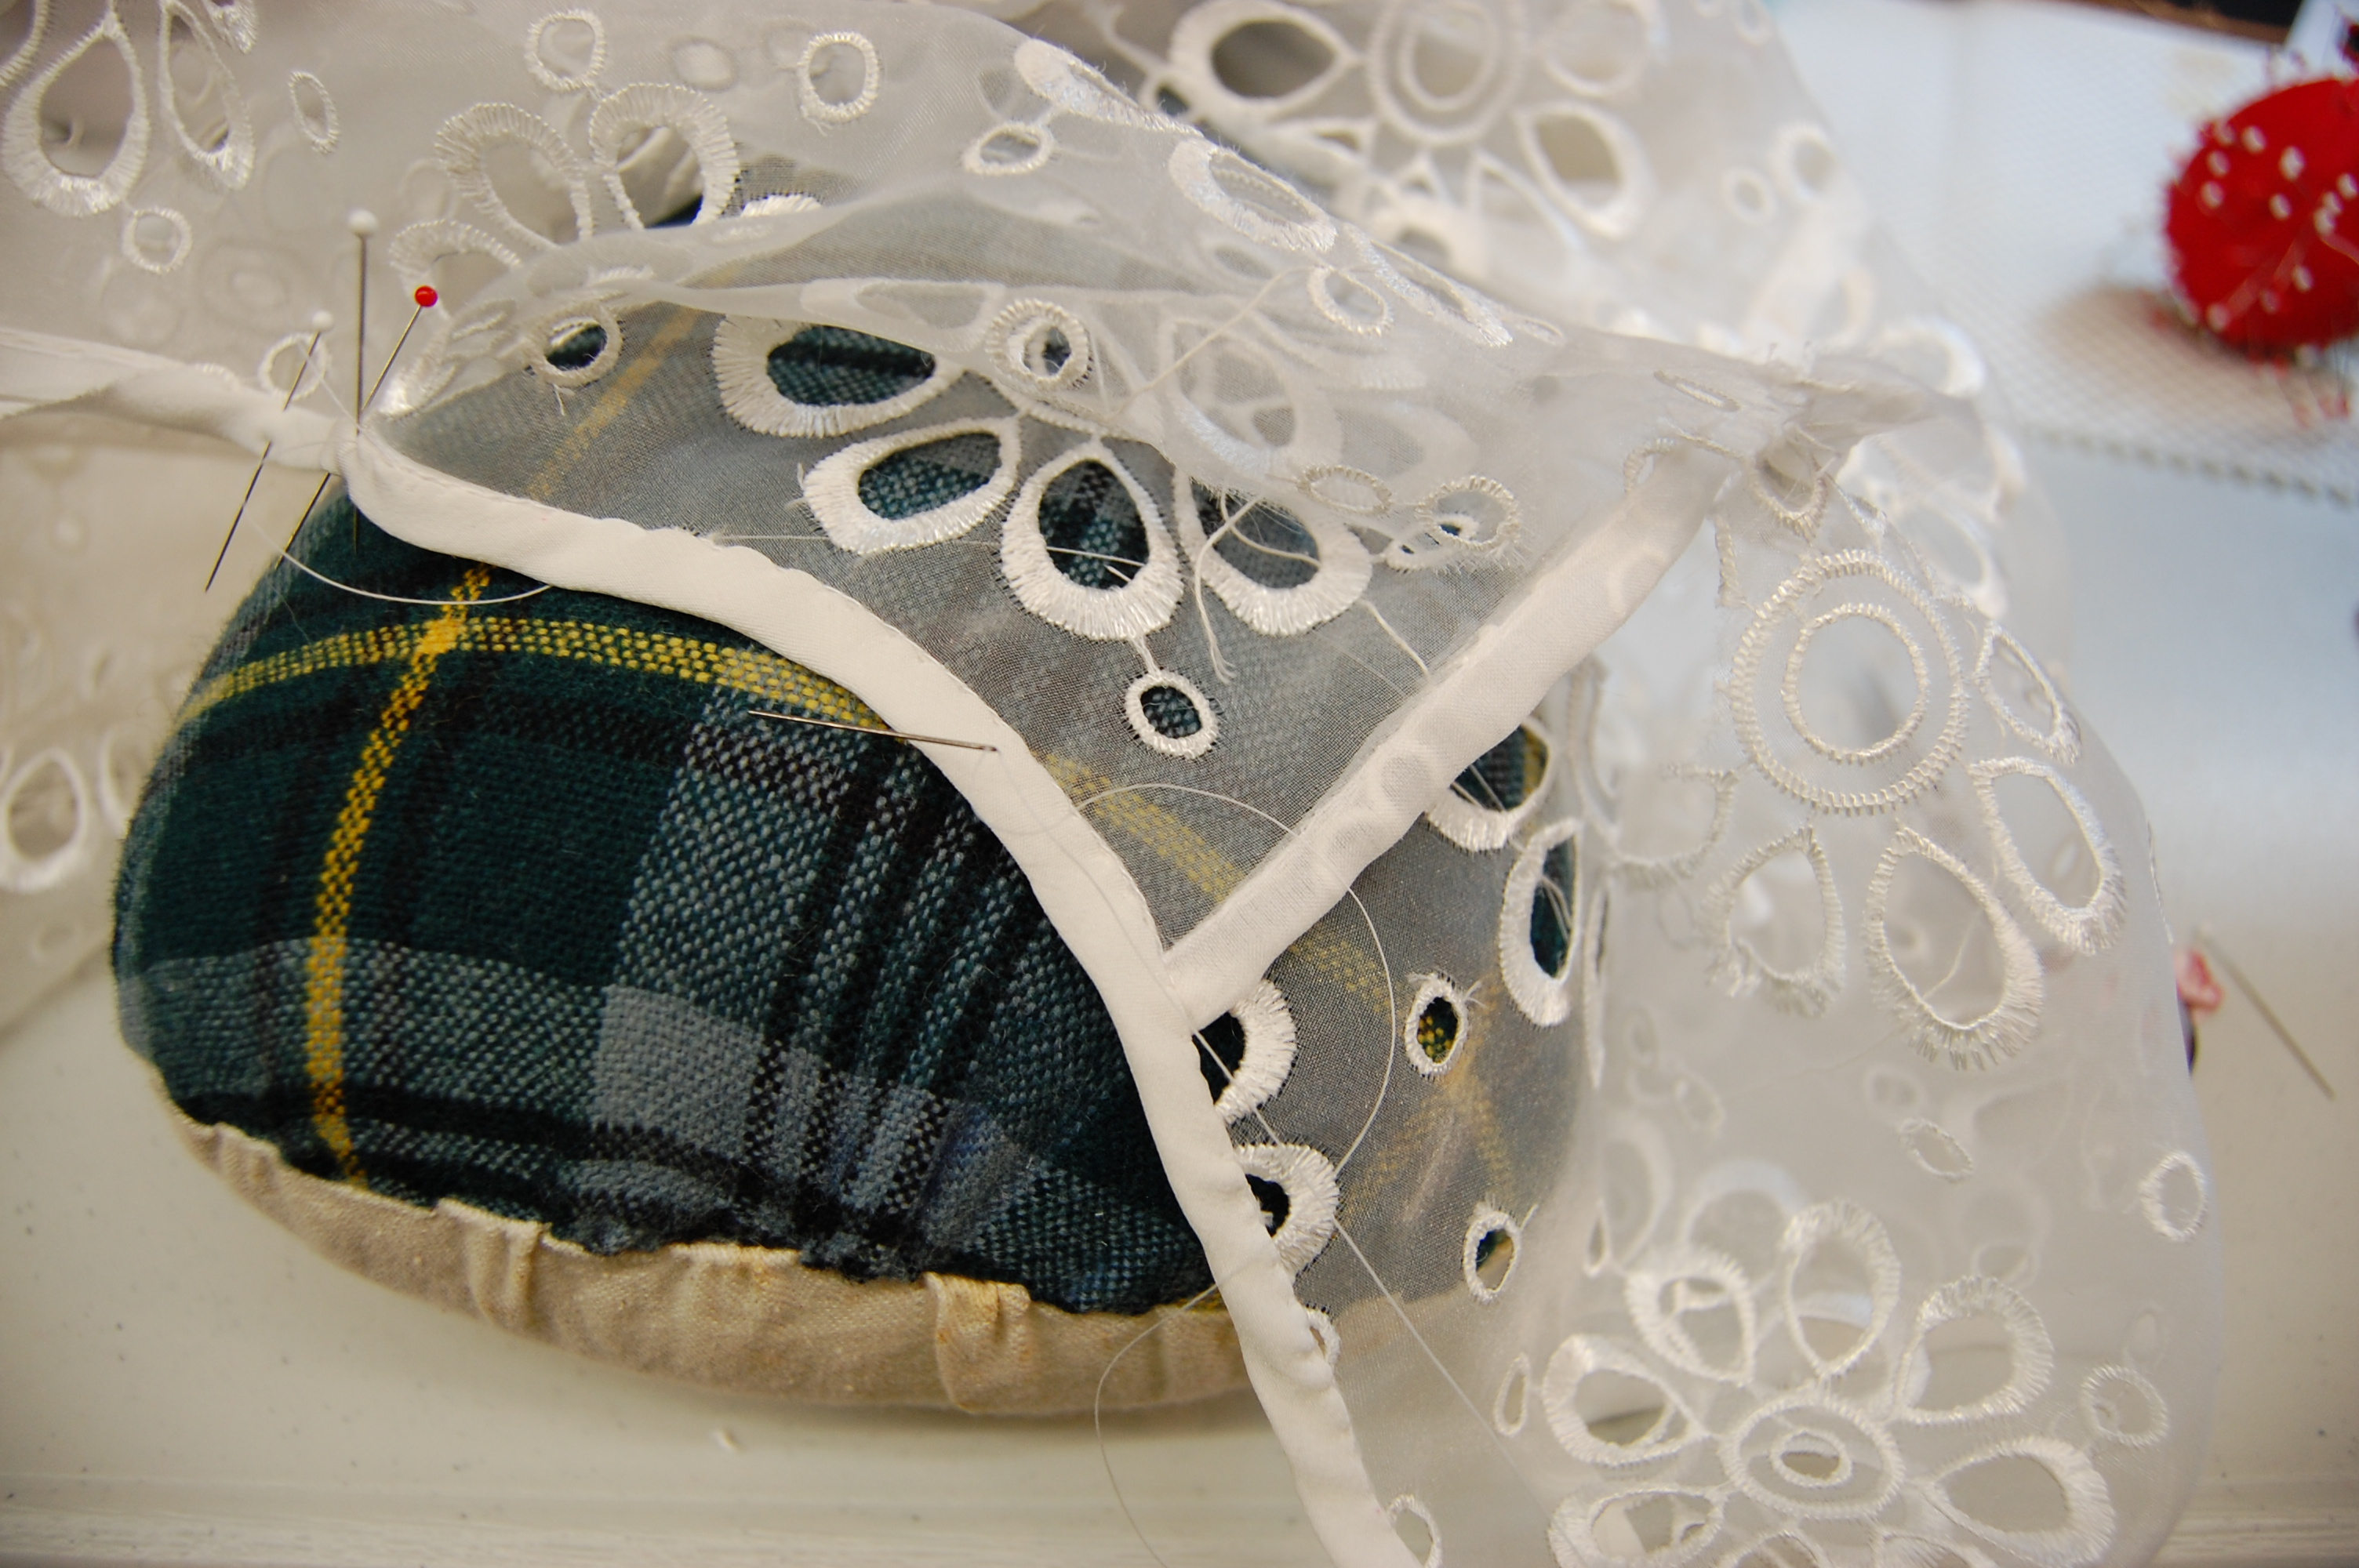
I ended up basting by hand every single seam on this dress.  Even with great care, it was incredibly easy to catch corners of those loose appliqués by mistake, so it was much easier to make adjustments in basting rather than in the finished machine-sewn seams.  The basting also showed me I needed to take out a small bit of the width of the skirt from the waist down, about an inch total.  When is an inch more than an inch?  In this dress!  That one inch made a huge difference in its final appearance.

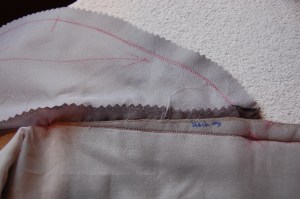
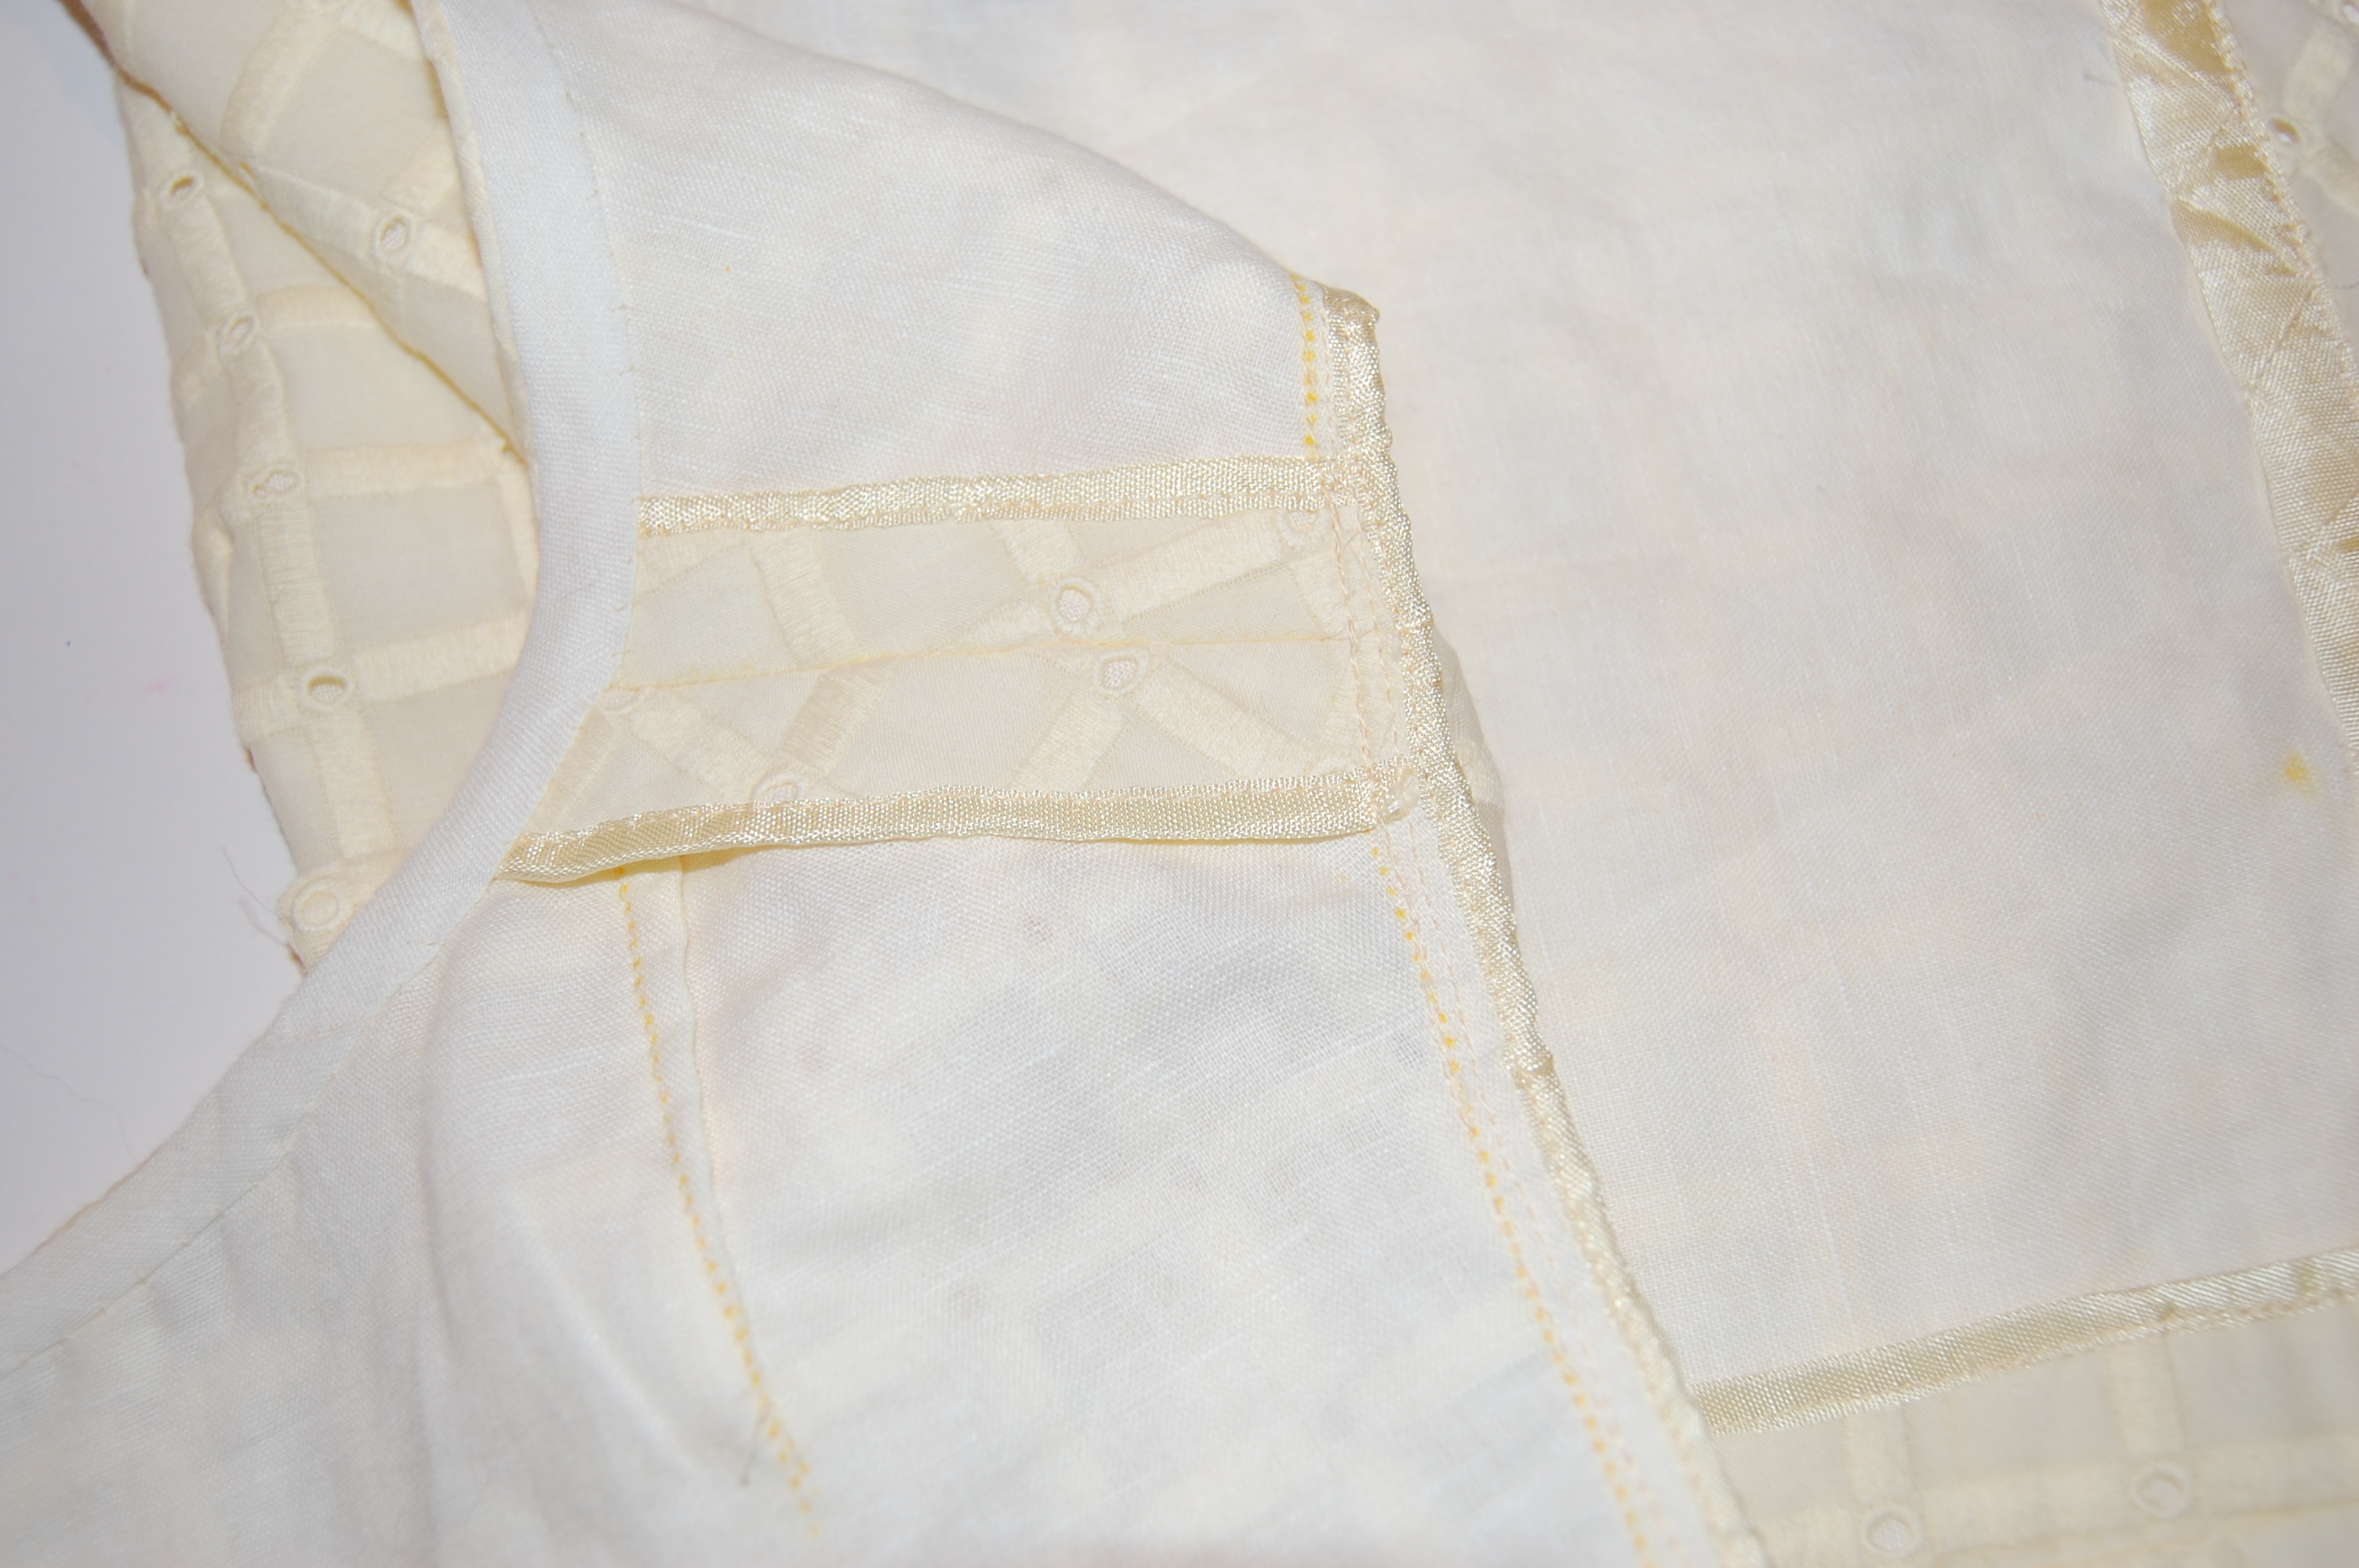
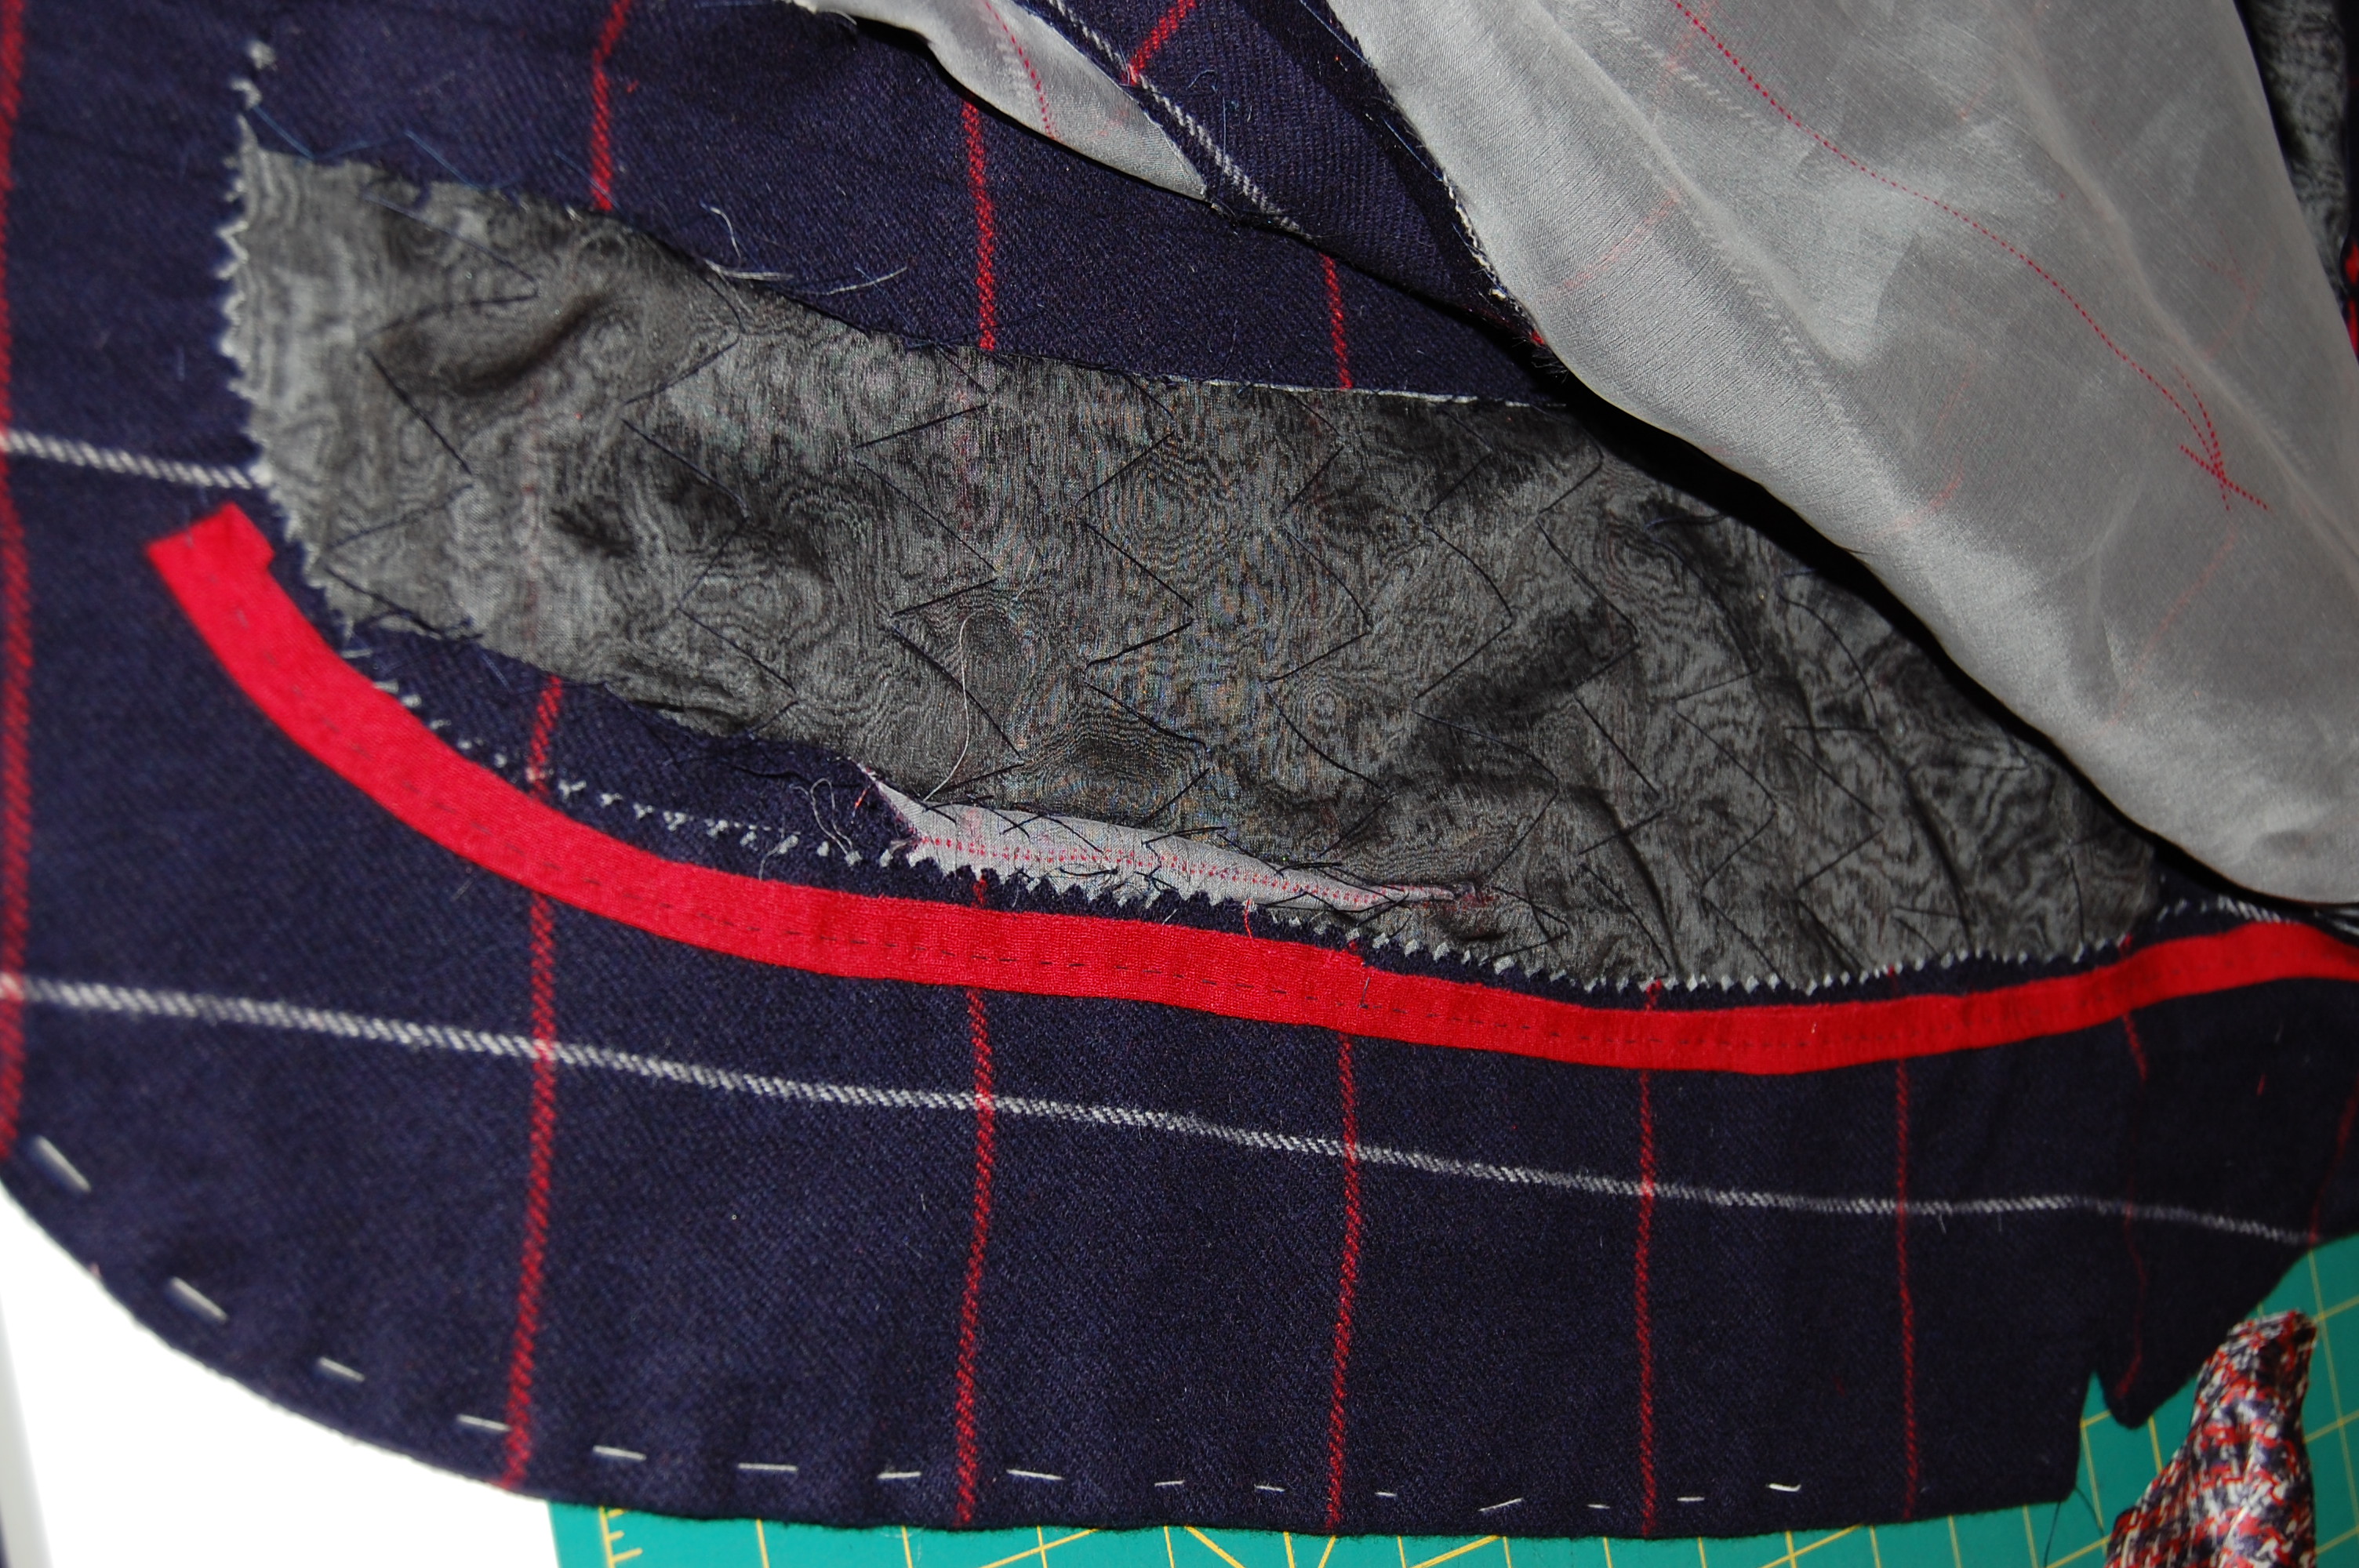
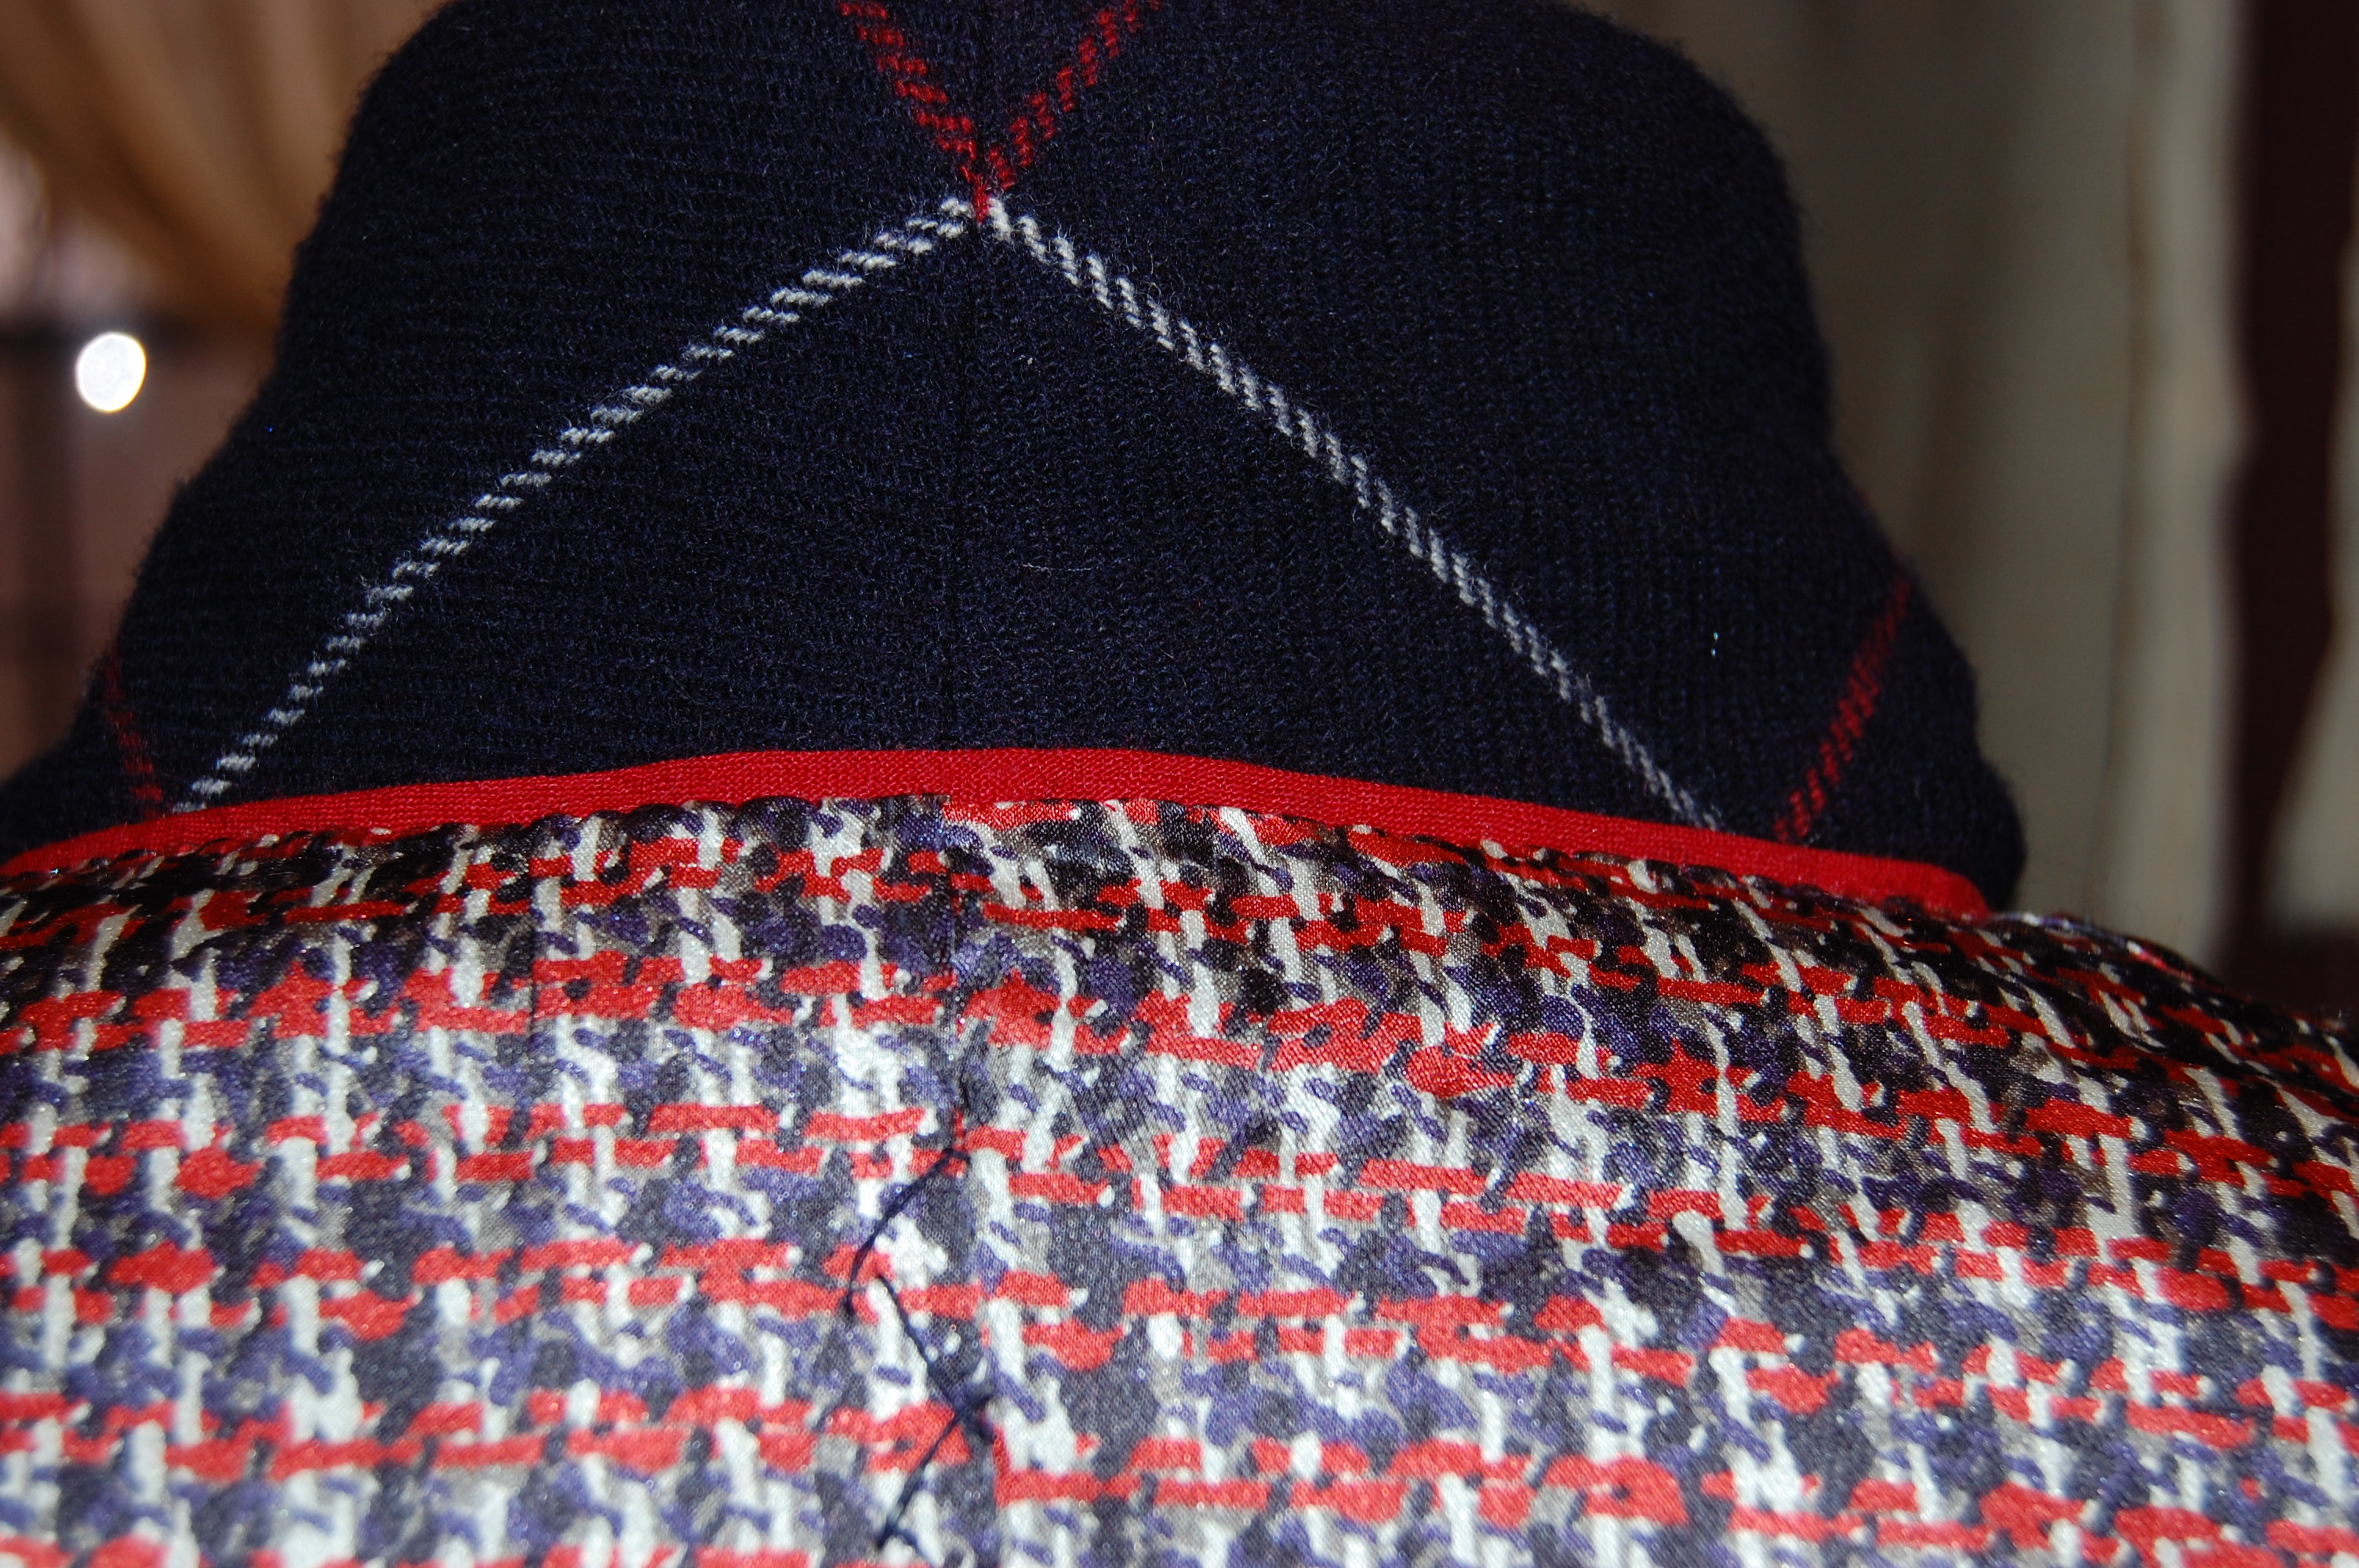
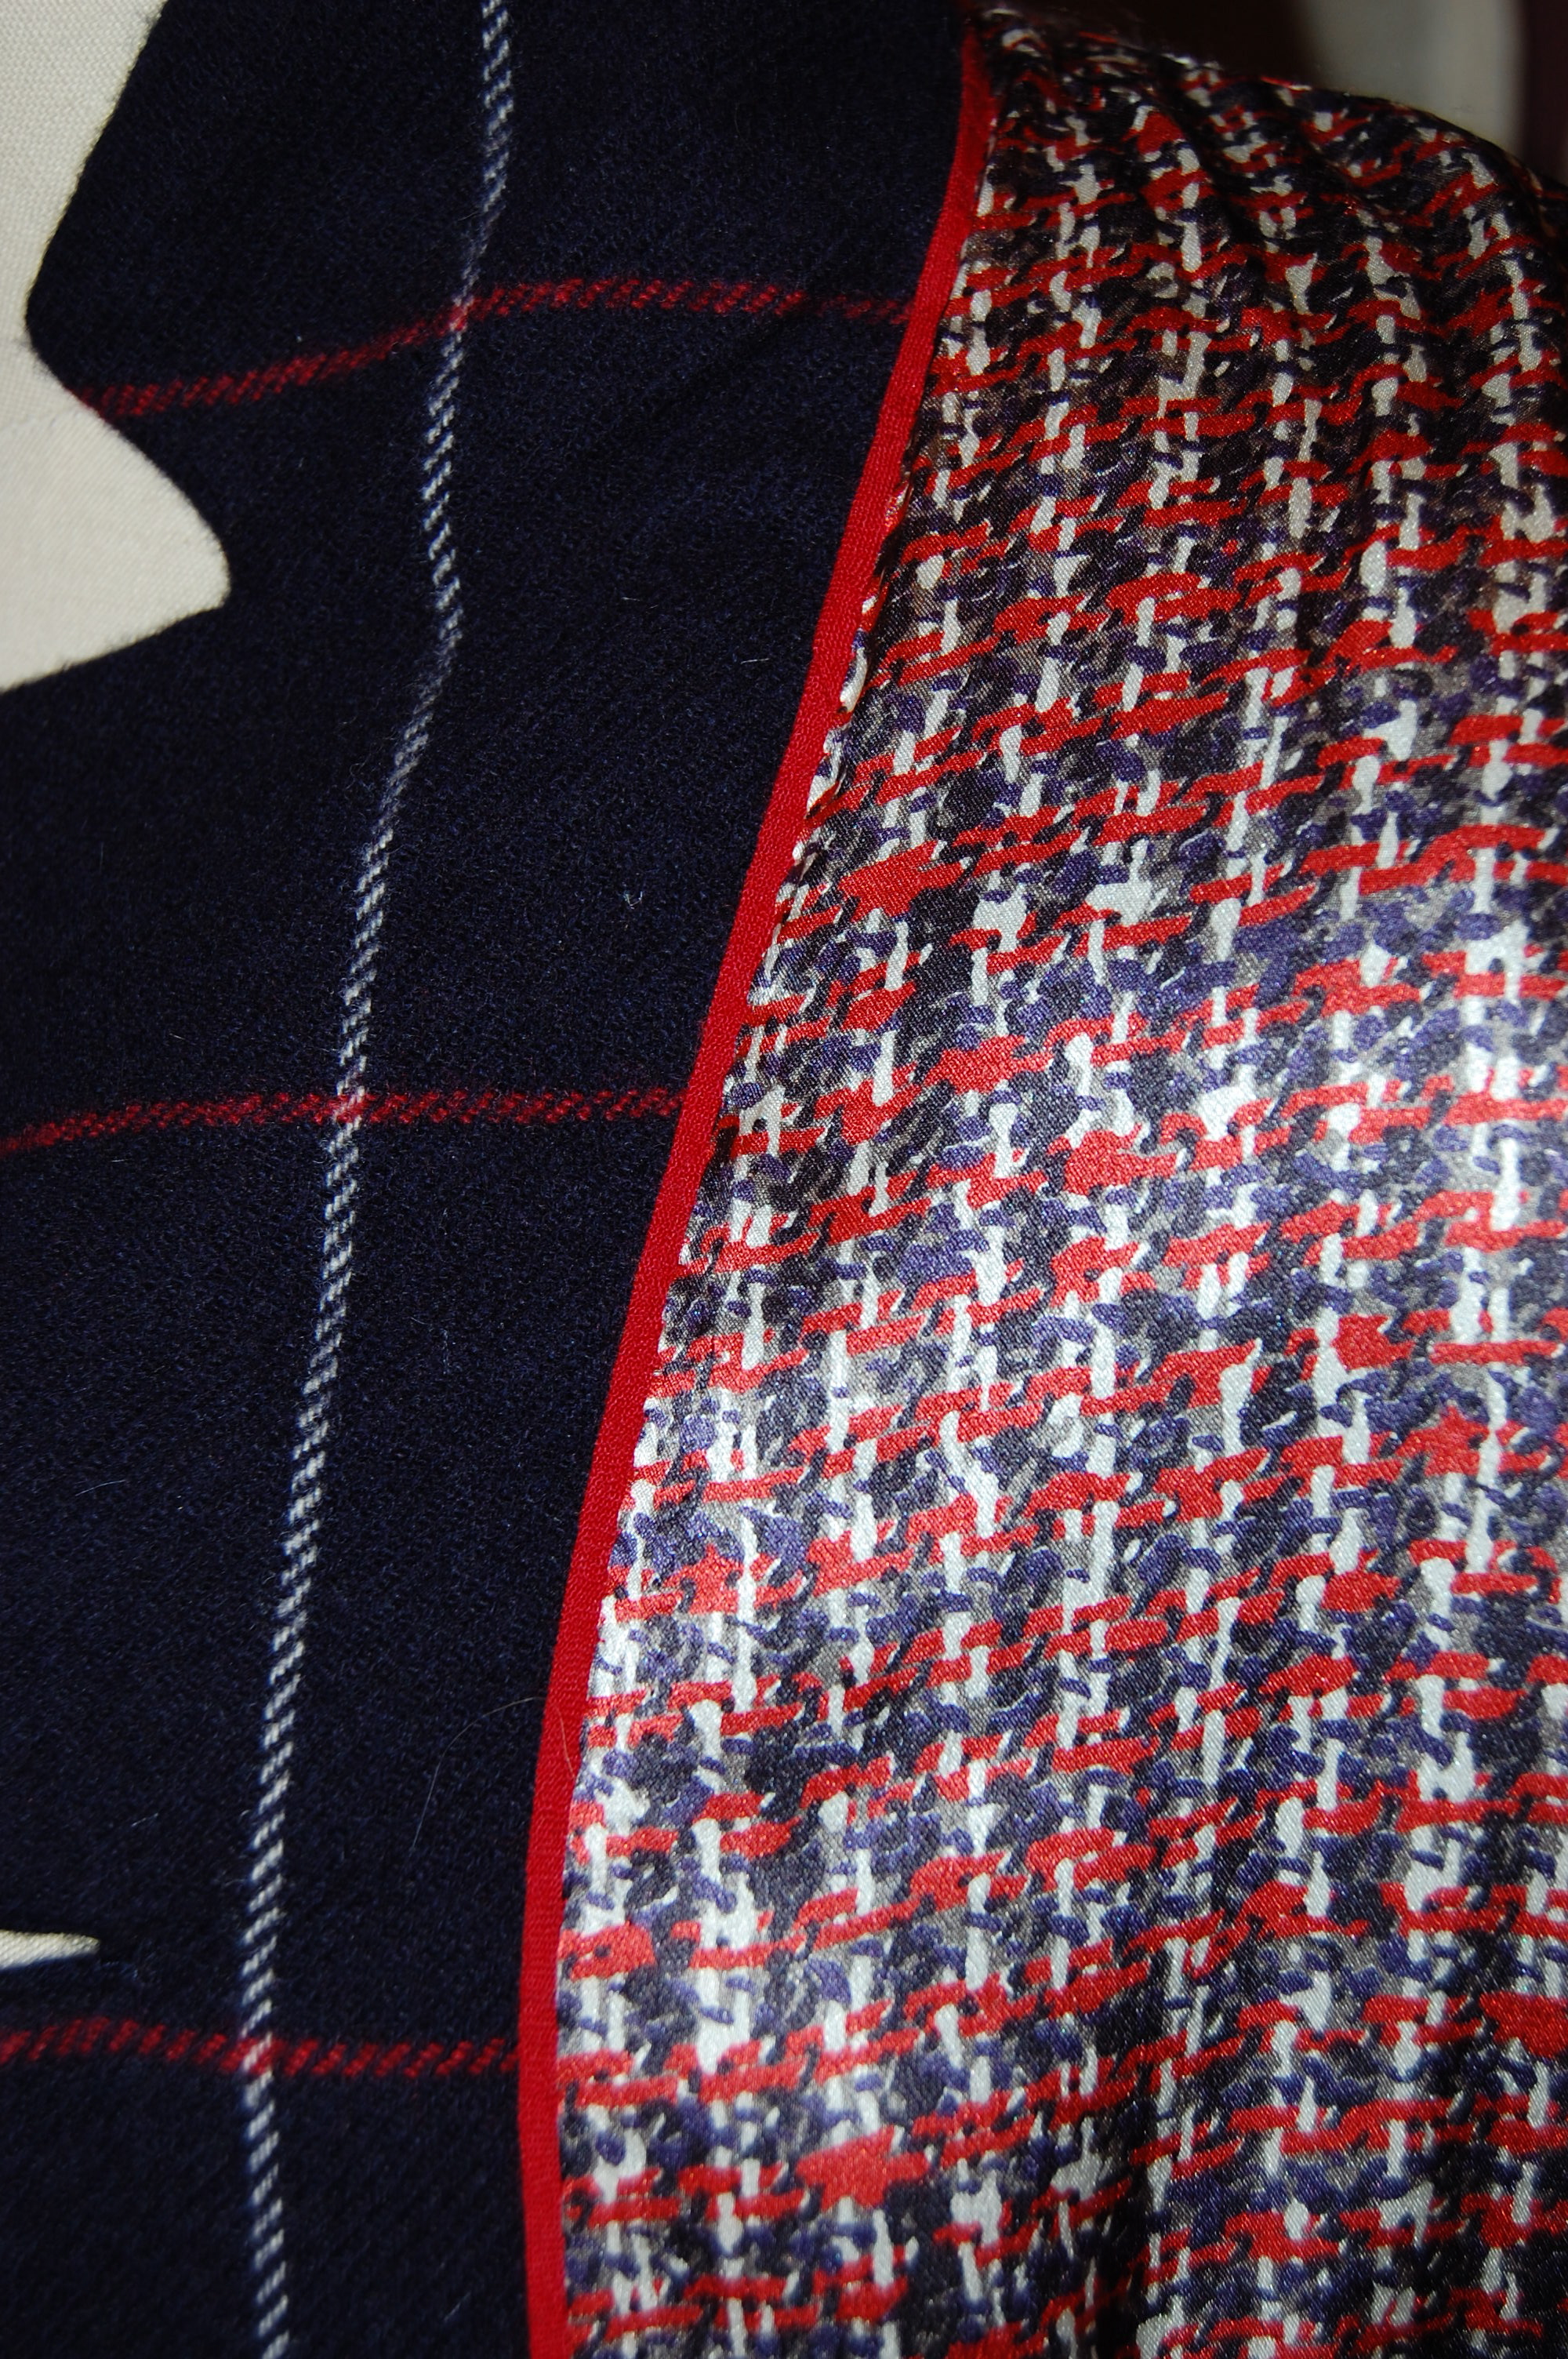
Because I was sewing this dress using couture techniques, the neck facing was eliminated, with the black crepe de chine lining fell-stitched to the edge of the neckline.  When I under-stitched the lining to secure it in place, I used an off-white silk buttonhole twist. It was so much easier to see light thread on the black lining, and also, I think it looks pretty.

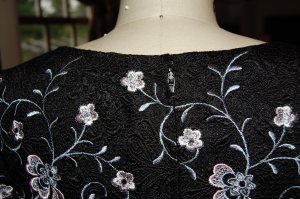
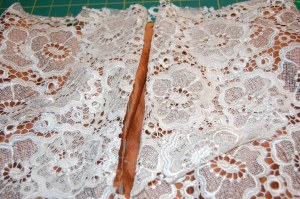
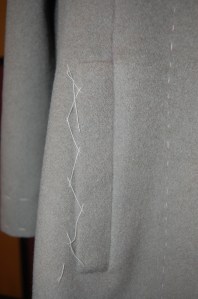
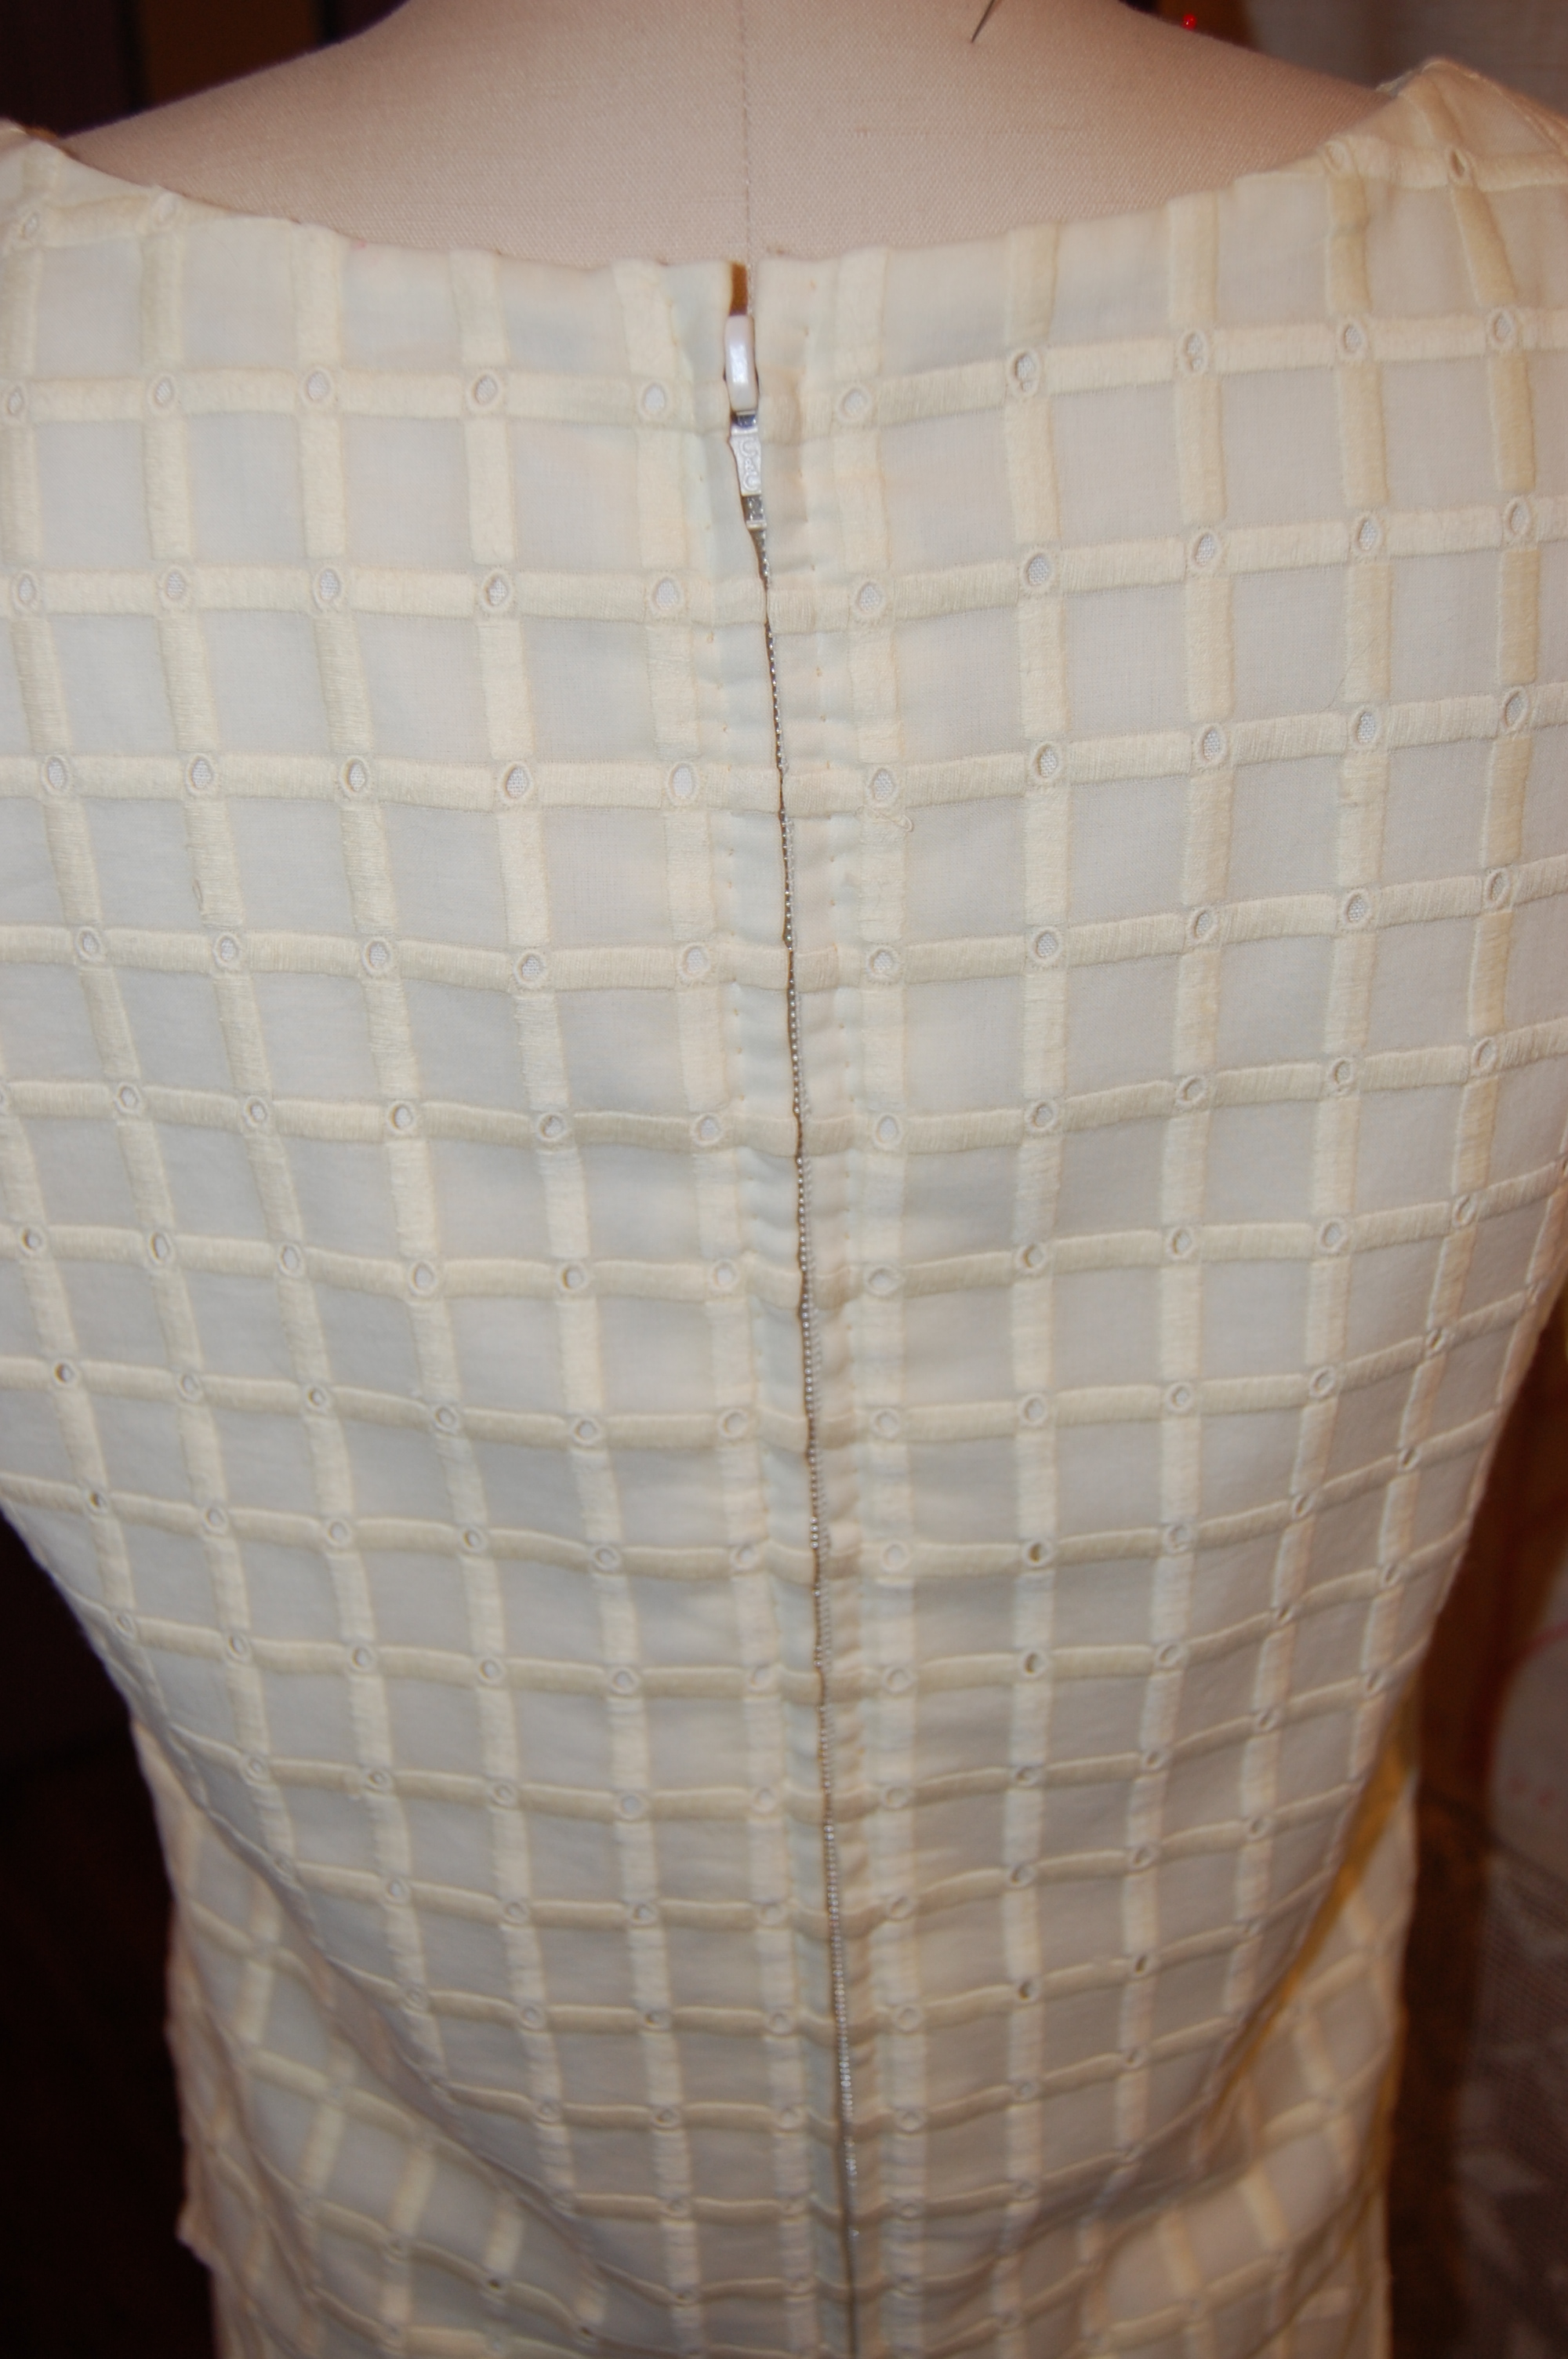
I hand picked the zipper, which virtually disappears in this dark jacquard embroidered fabric.

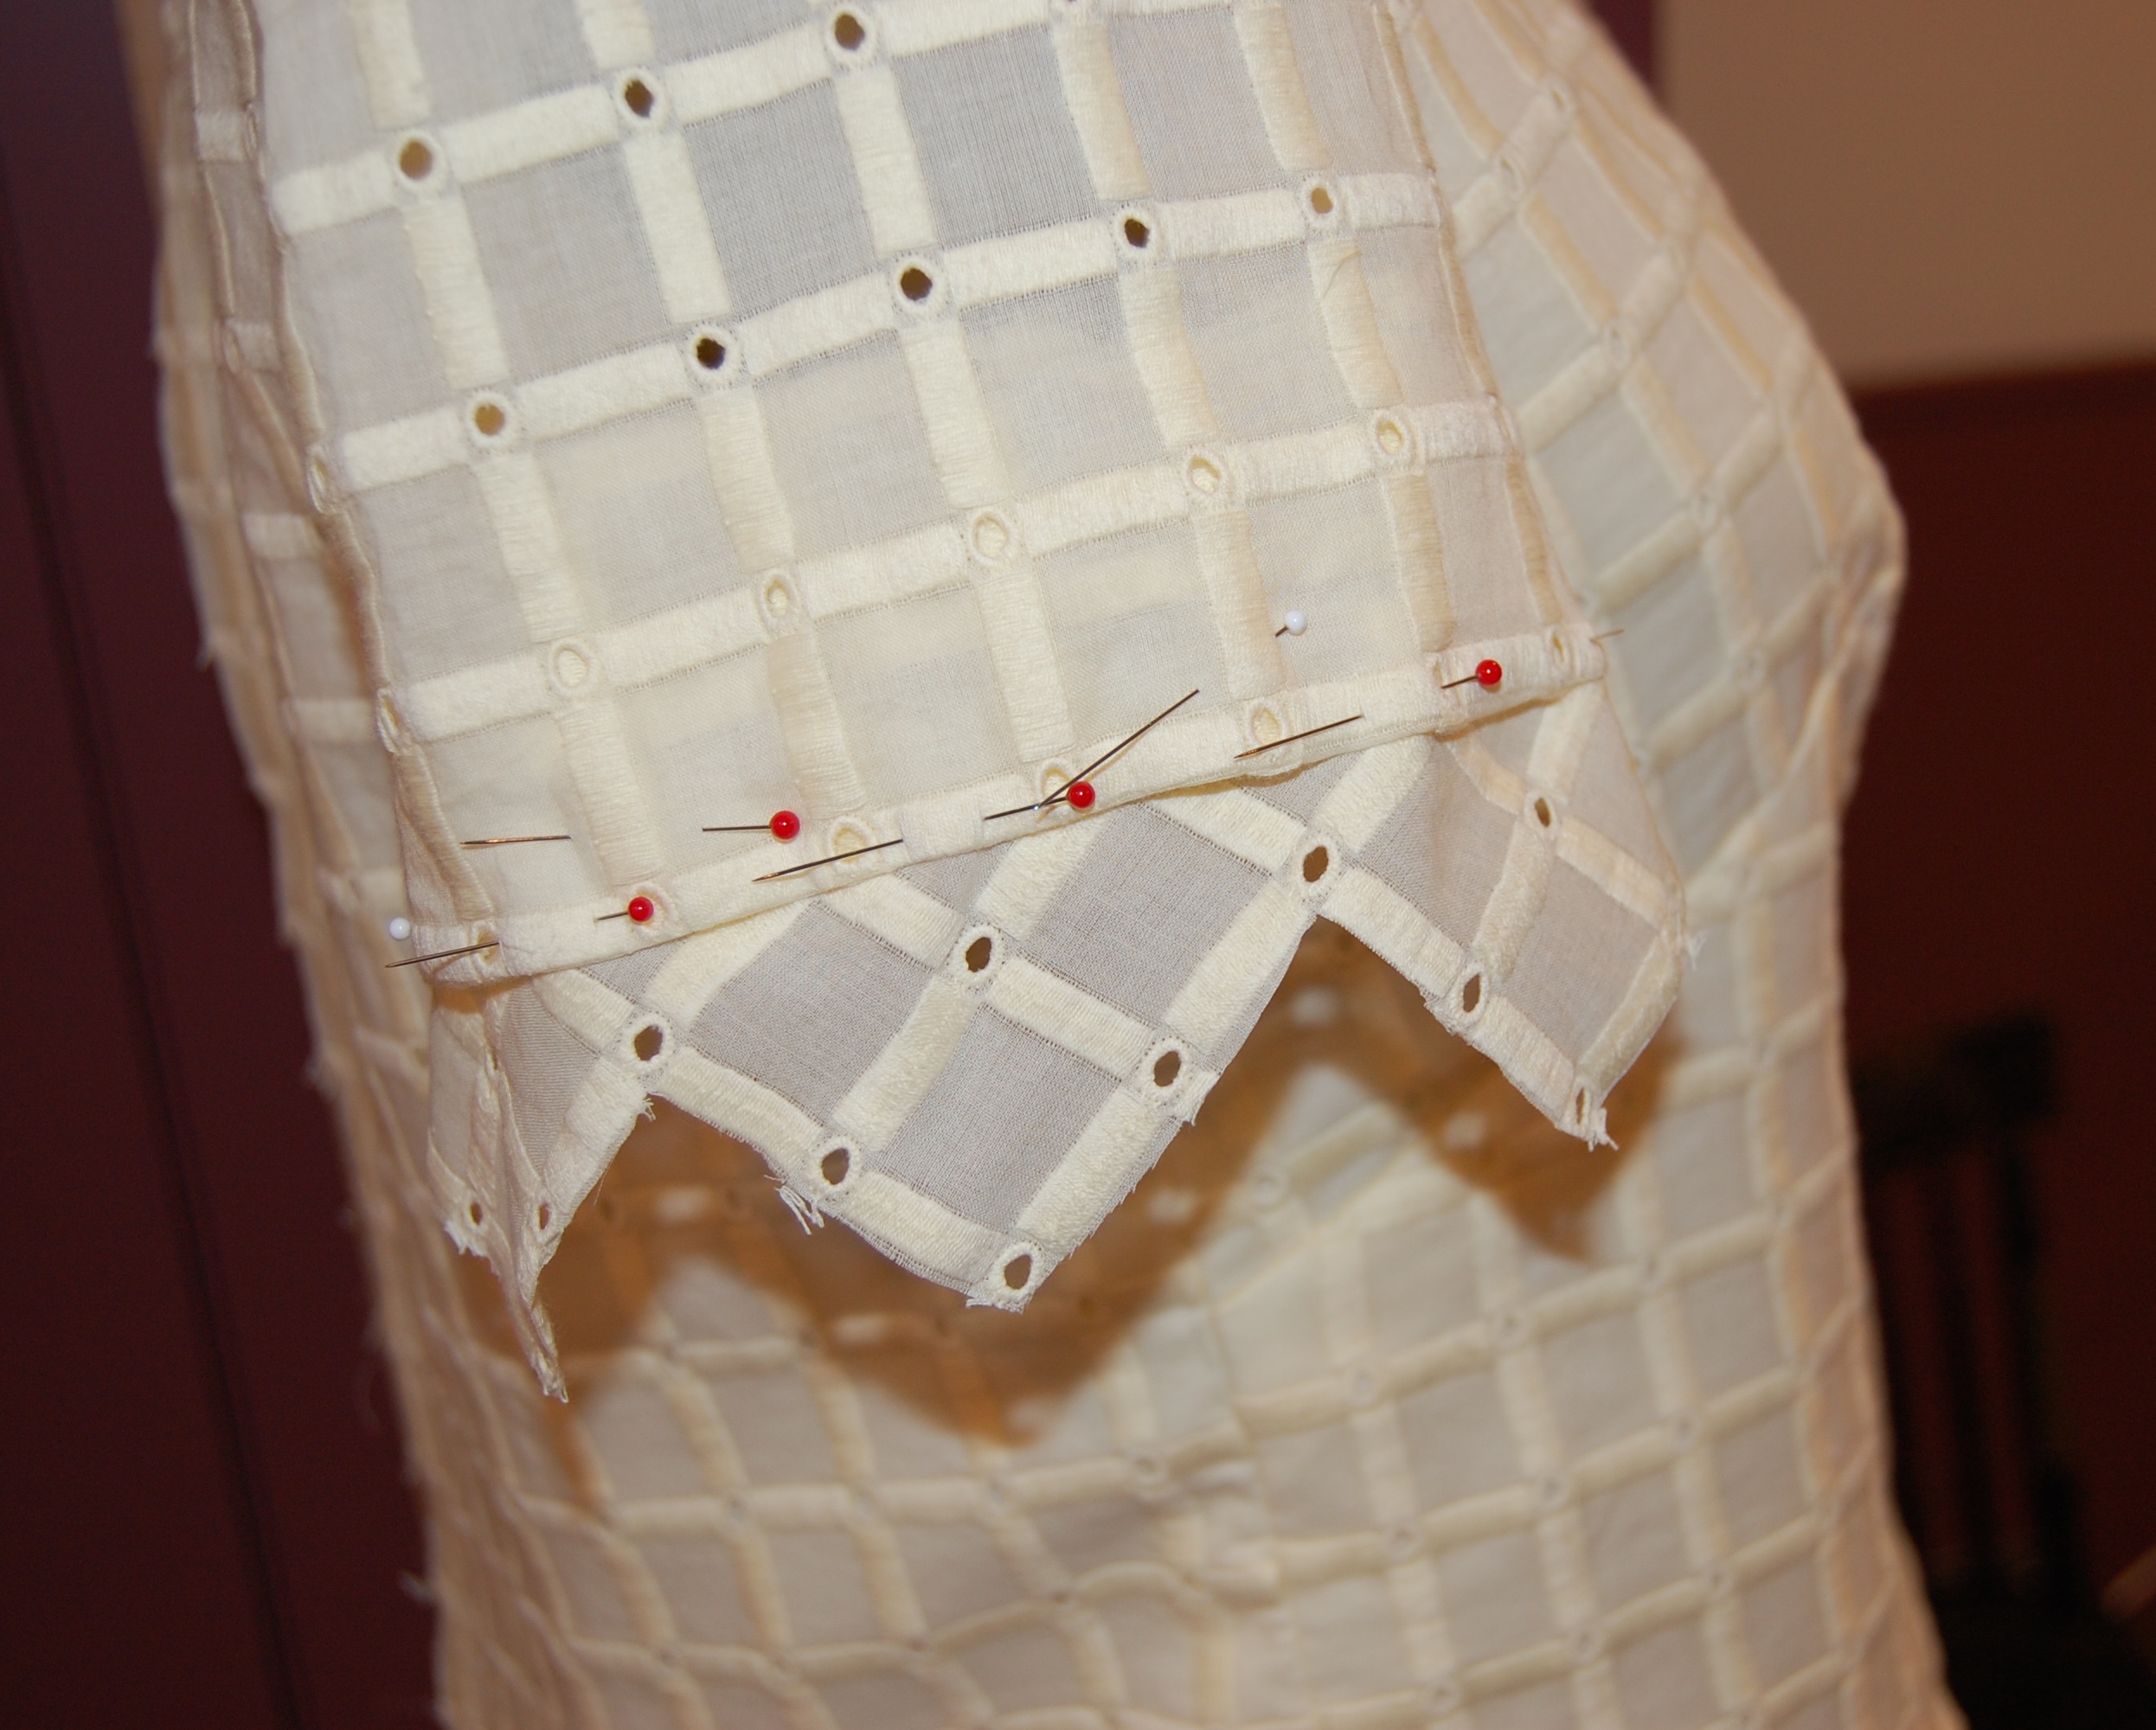
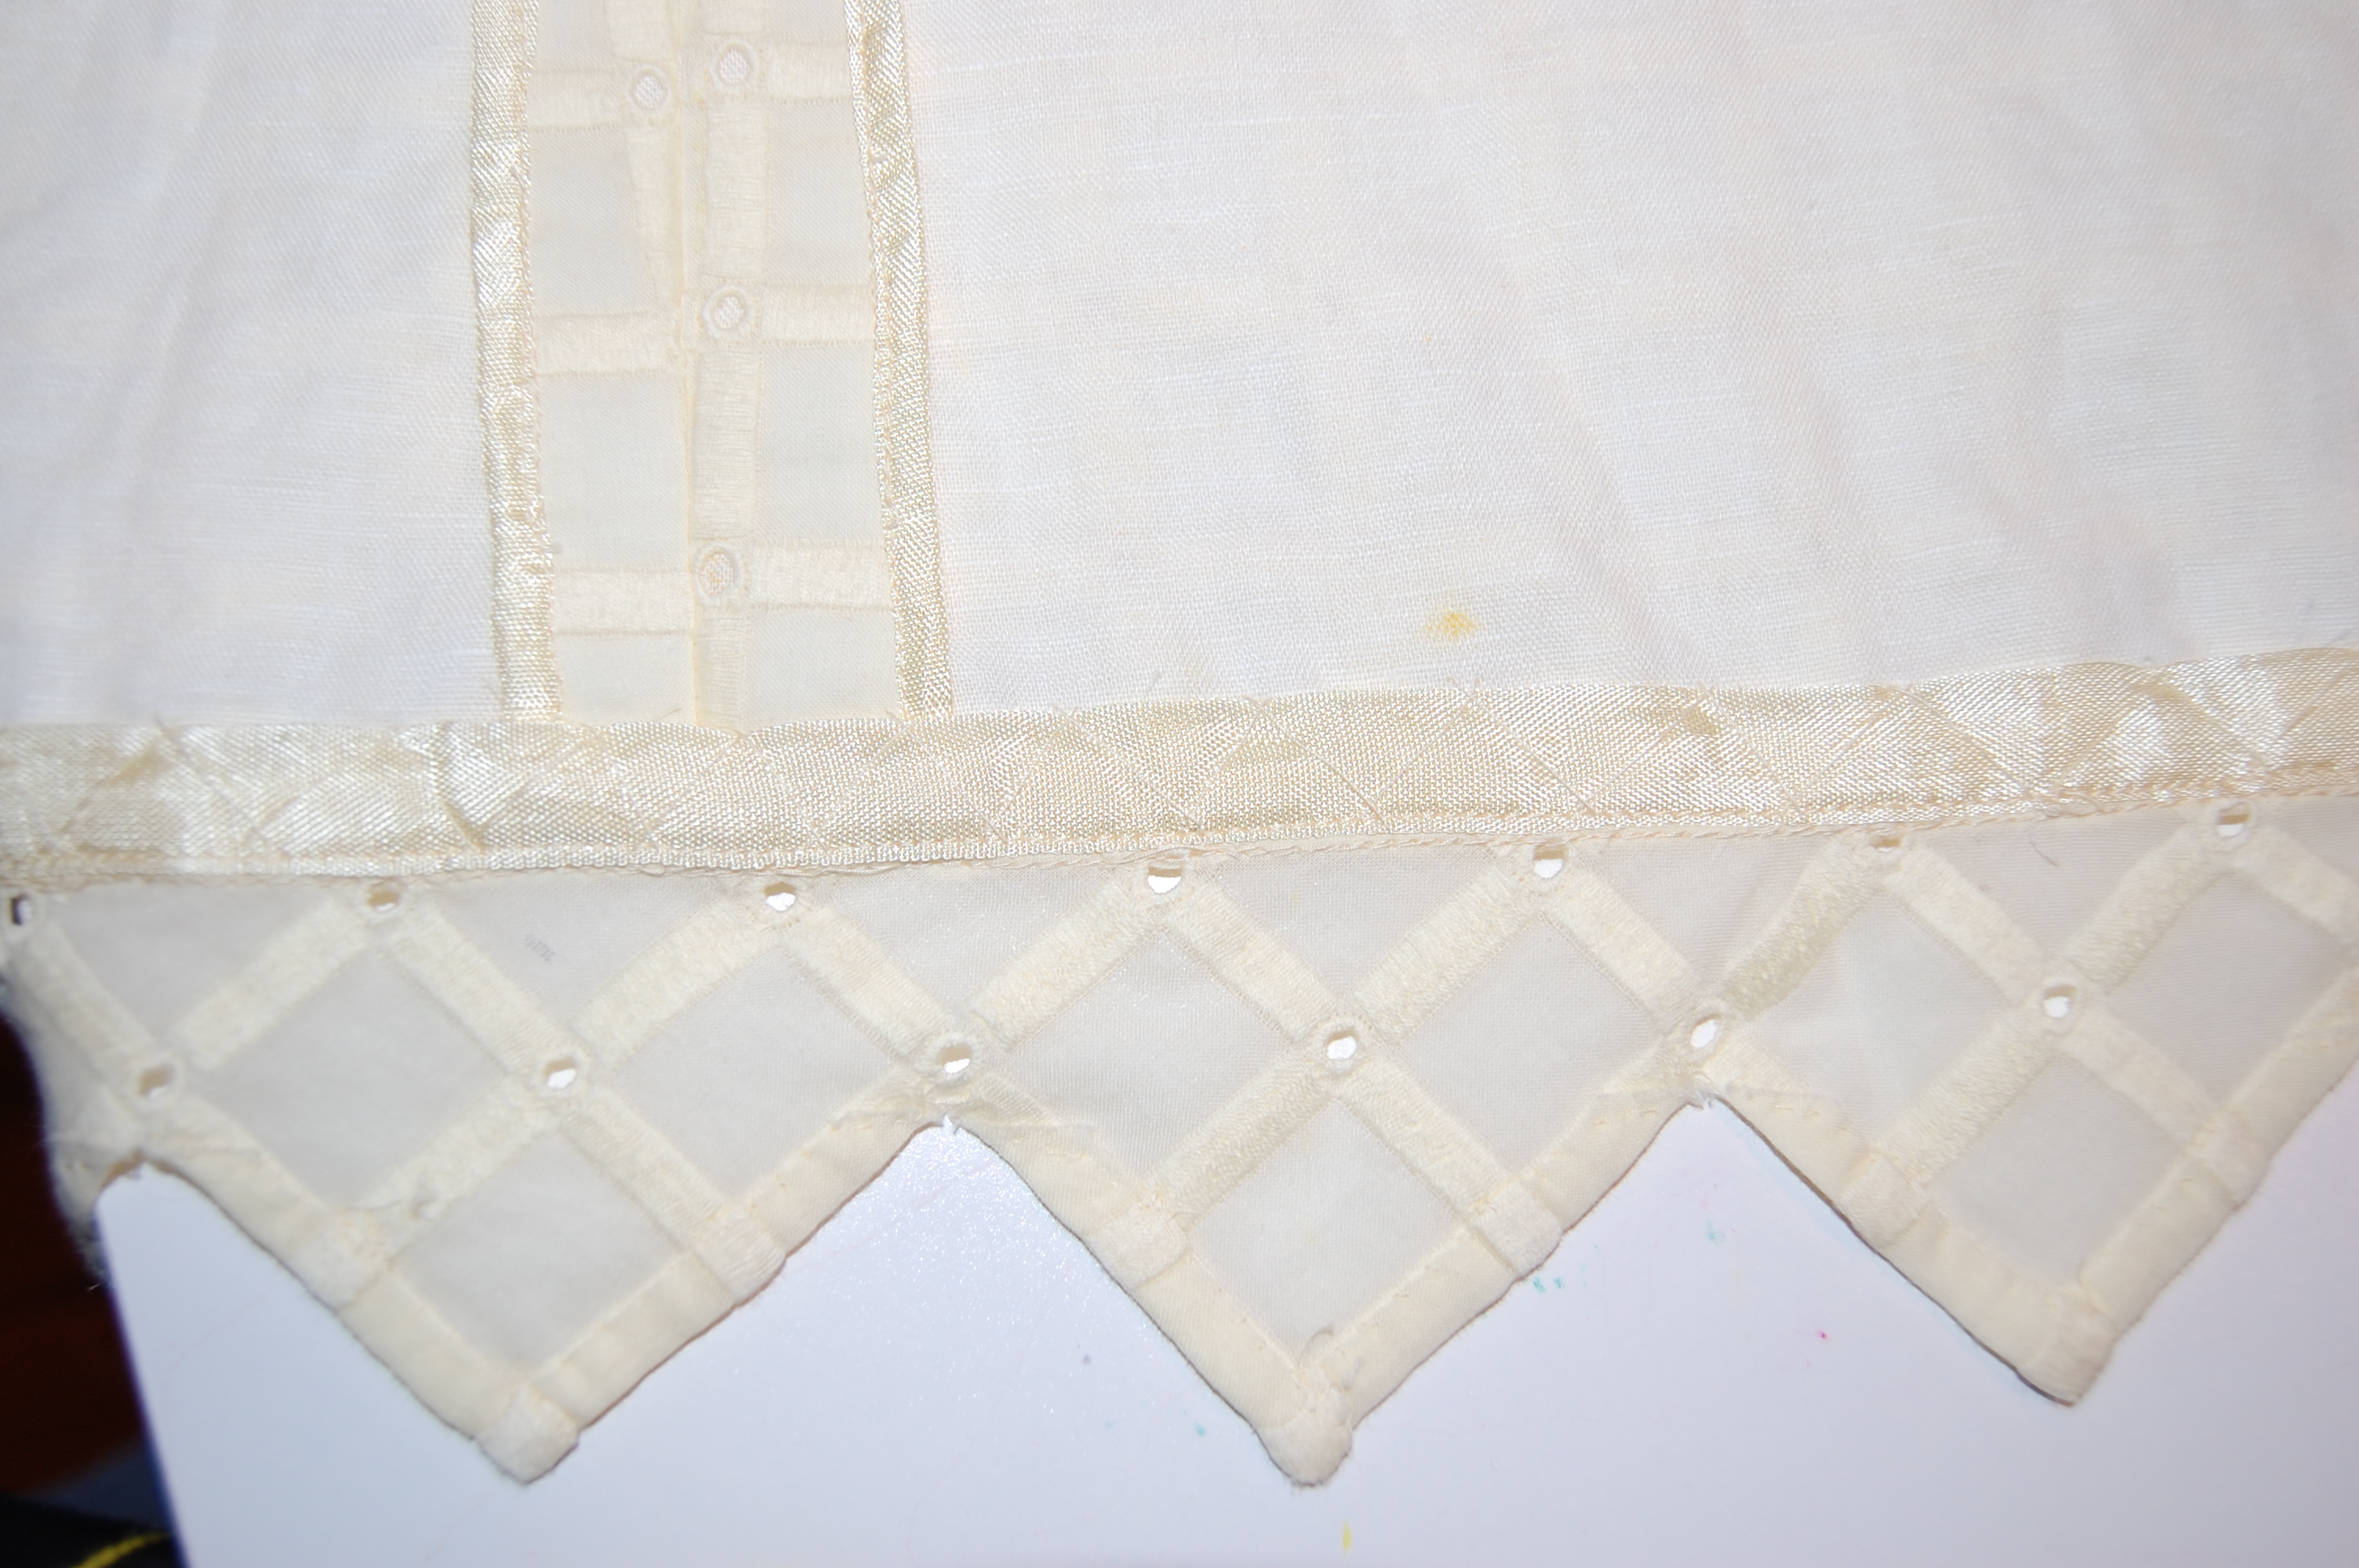
I was able to arrange the hem of the skirt so the larger of the semi-attached appliqués would hang just beneath the fold-line.

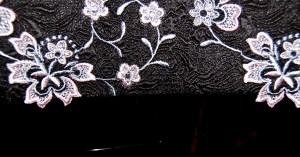
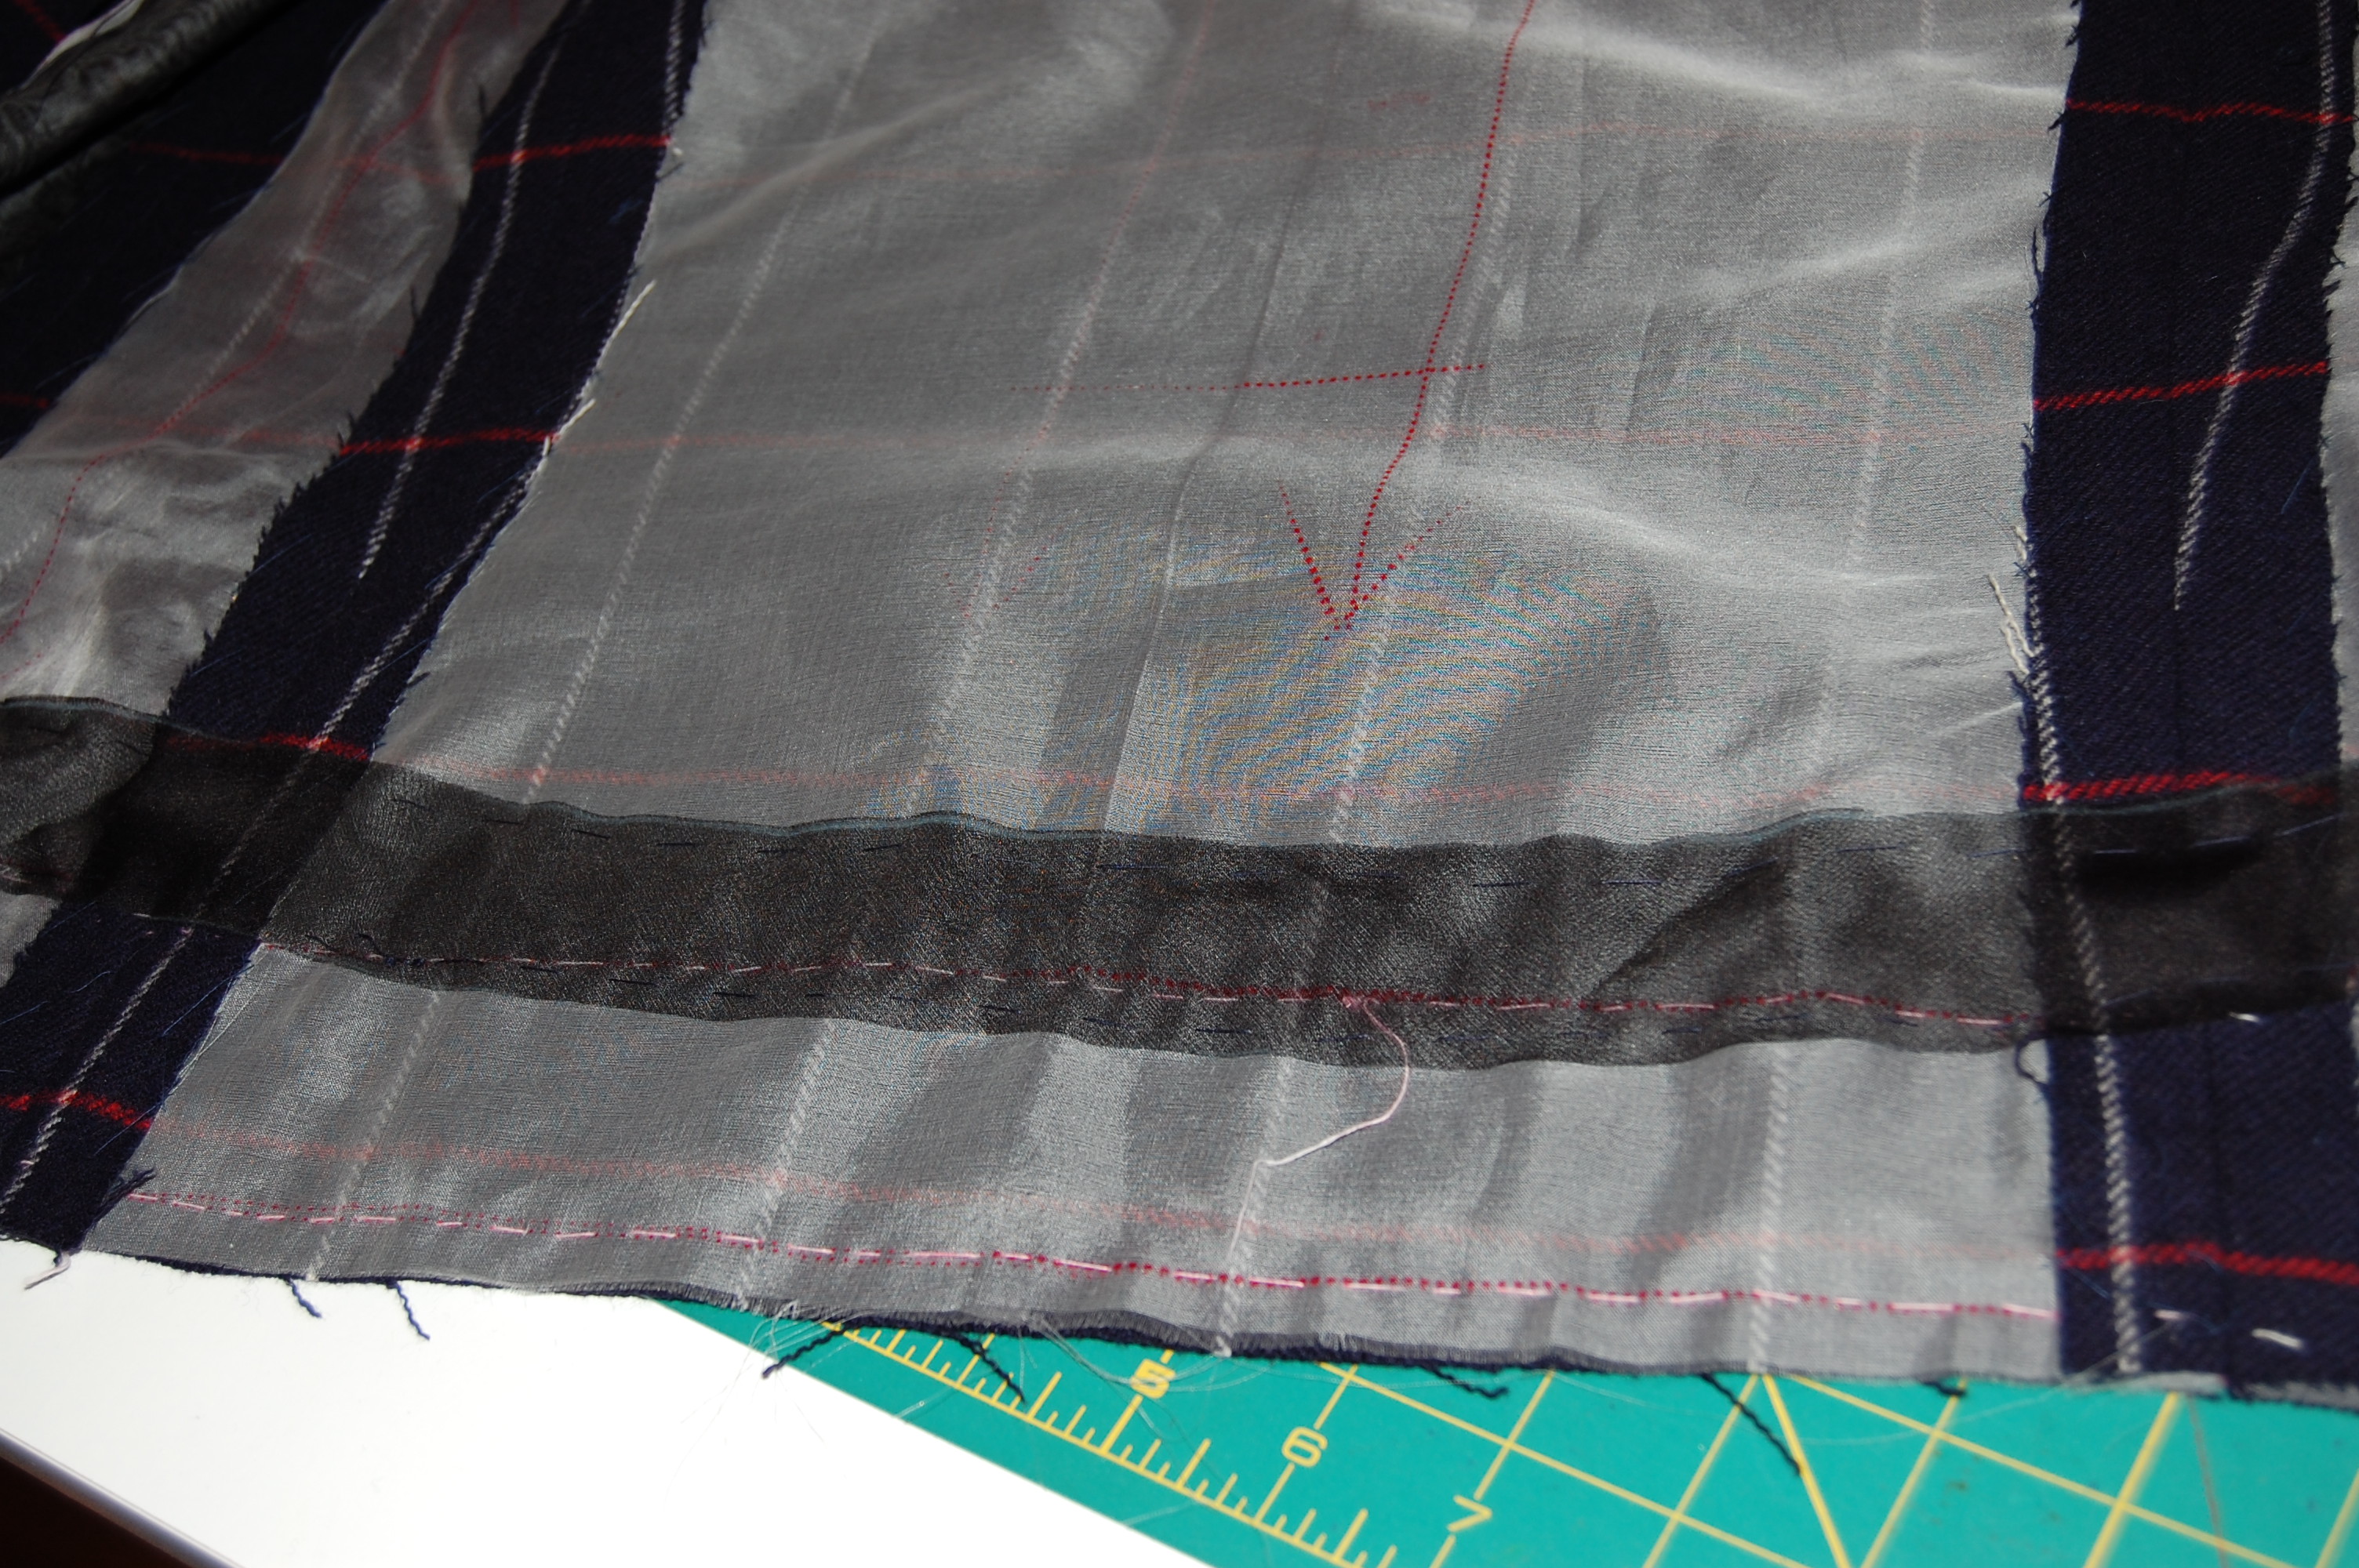
This shows two of the appliqués at the hemline.

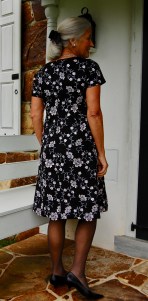
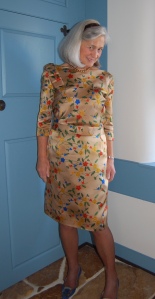
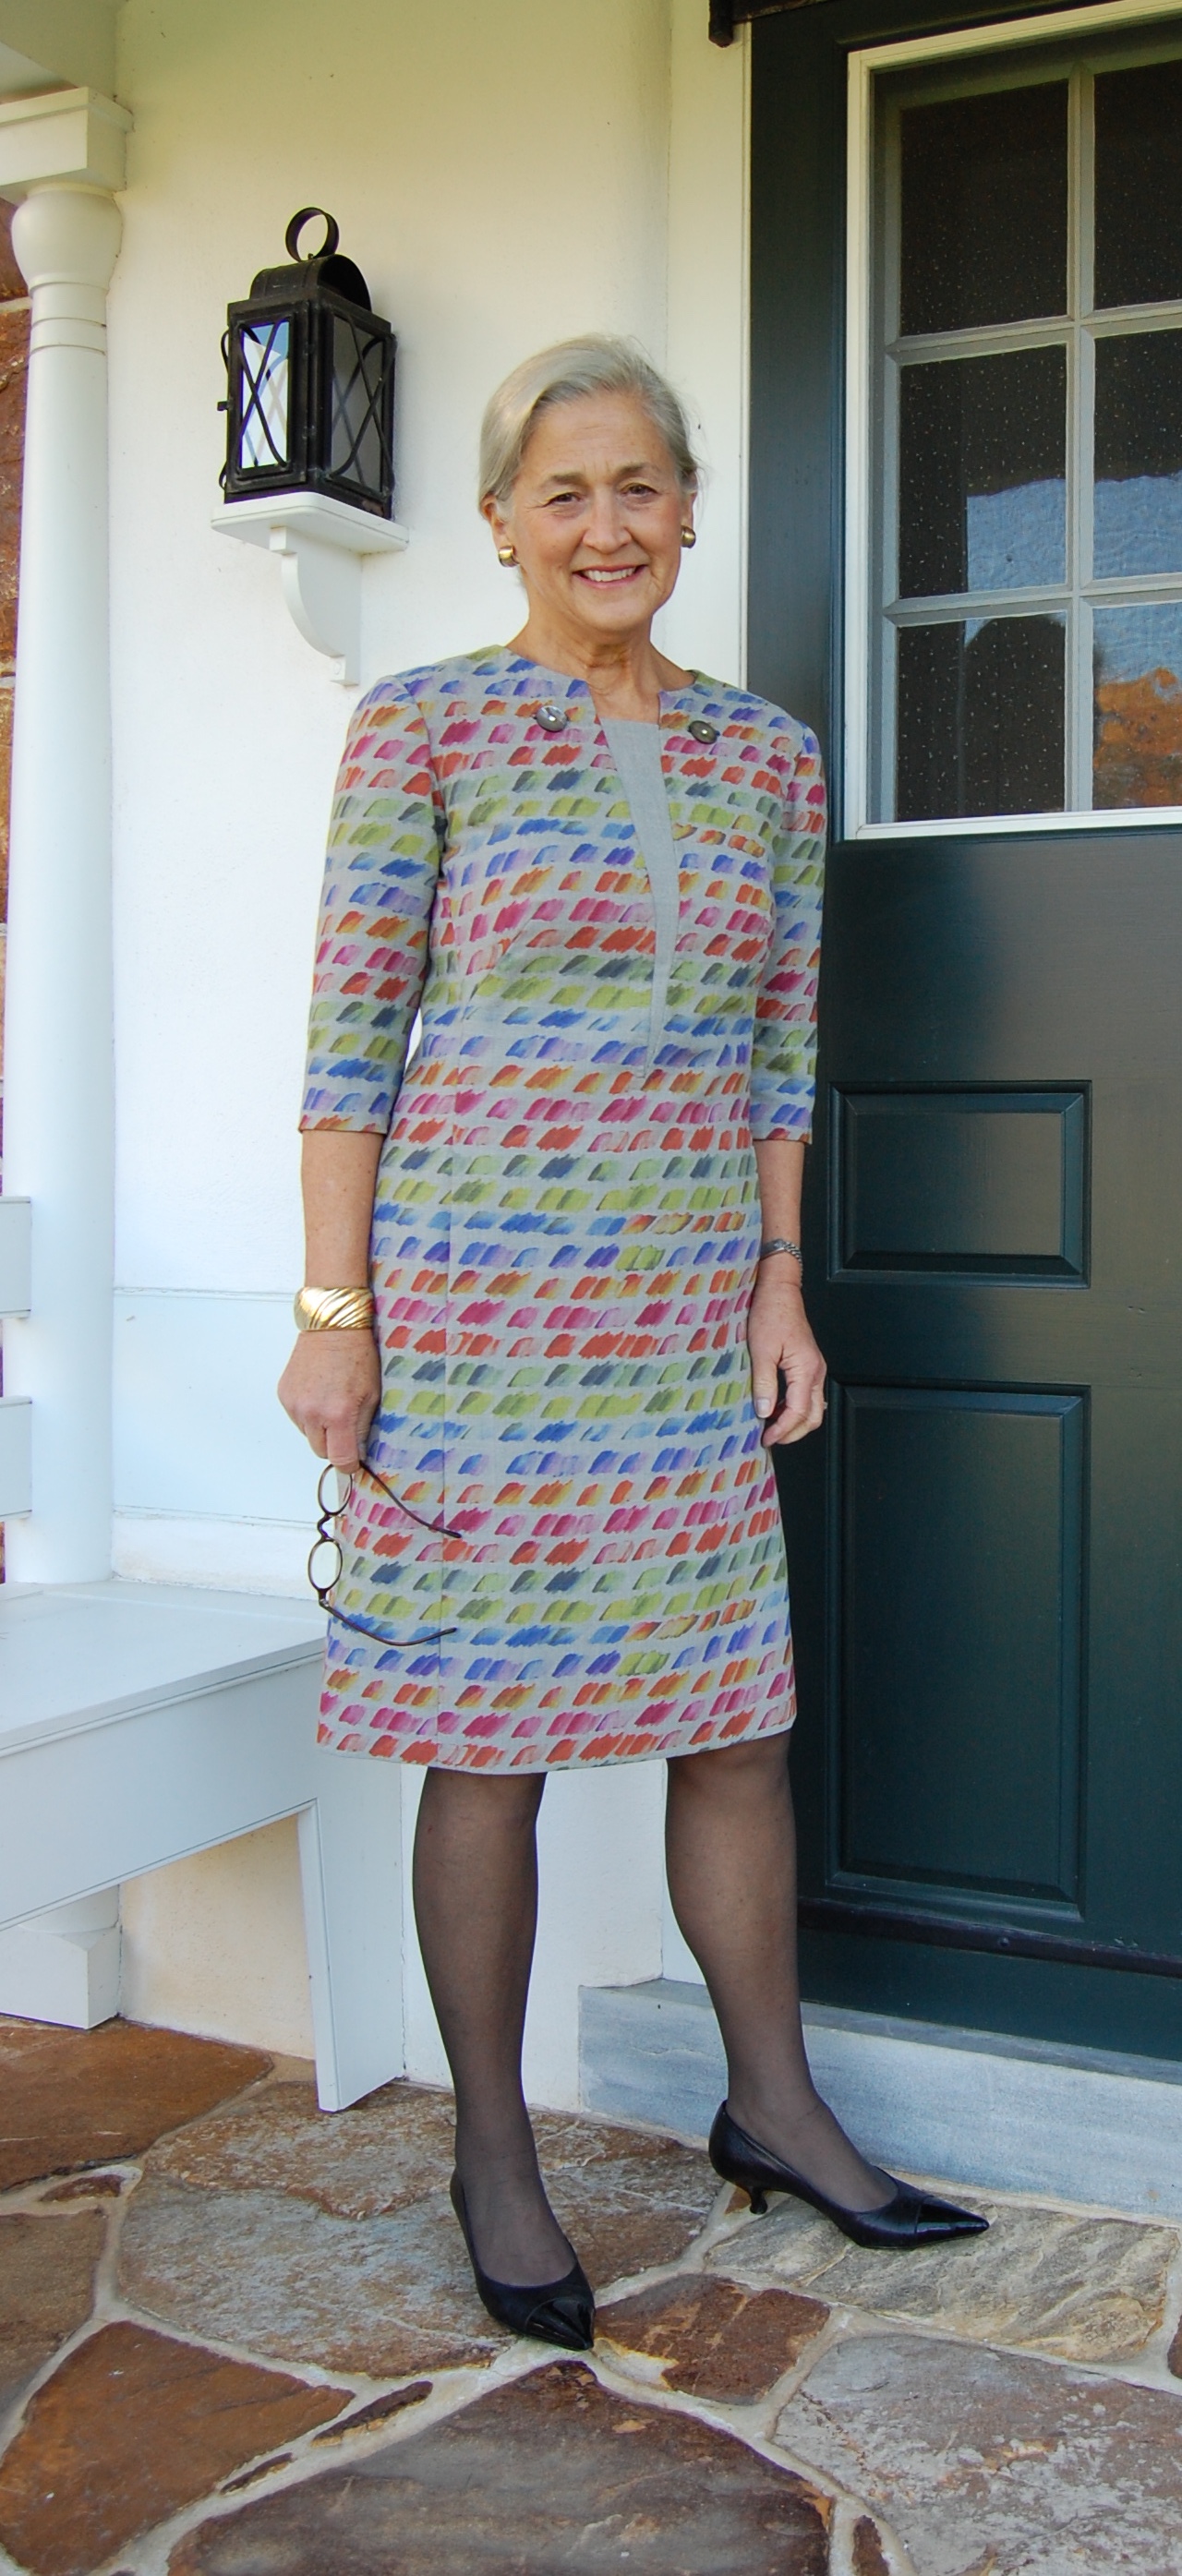
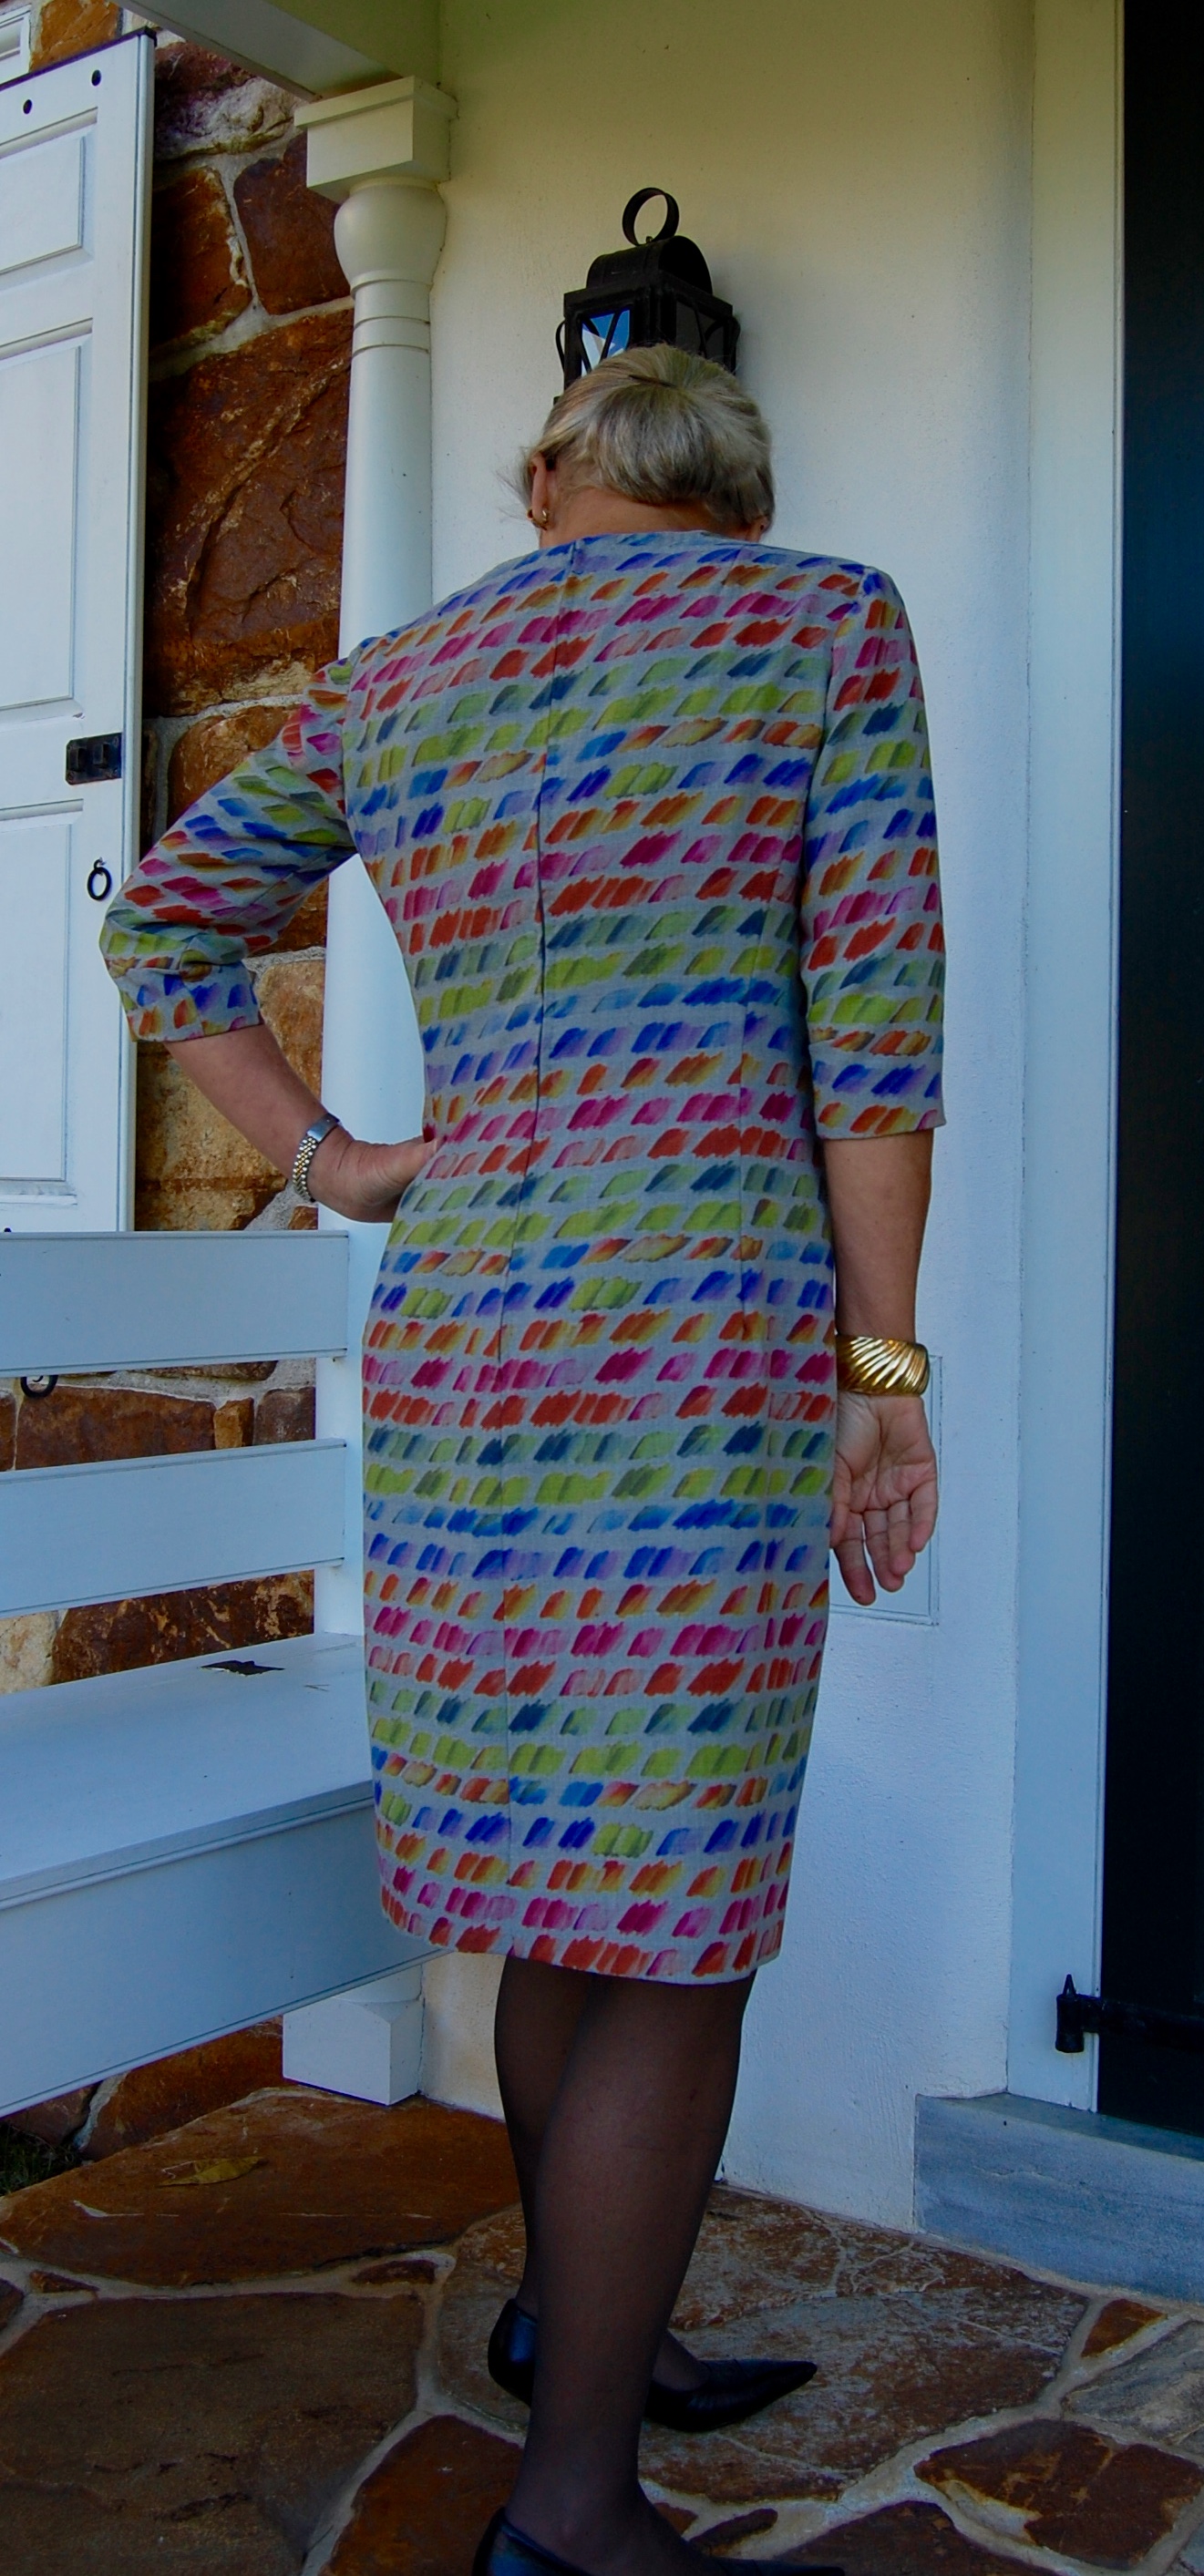
I love the graceful flow of this dress.

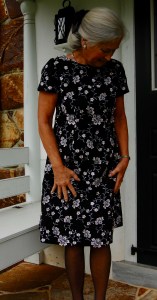
The simple look of this dress belies the hours and hours I spent on it!

And I am so pleased that I was unable to make three-quarter length sleeves. These short sleeves are just perfect!

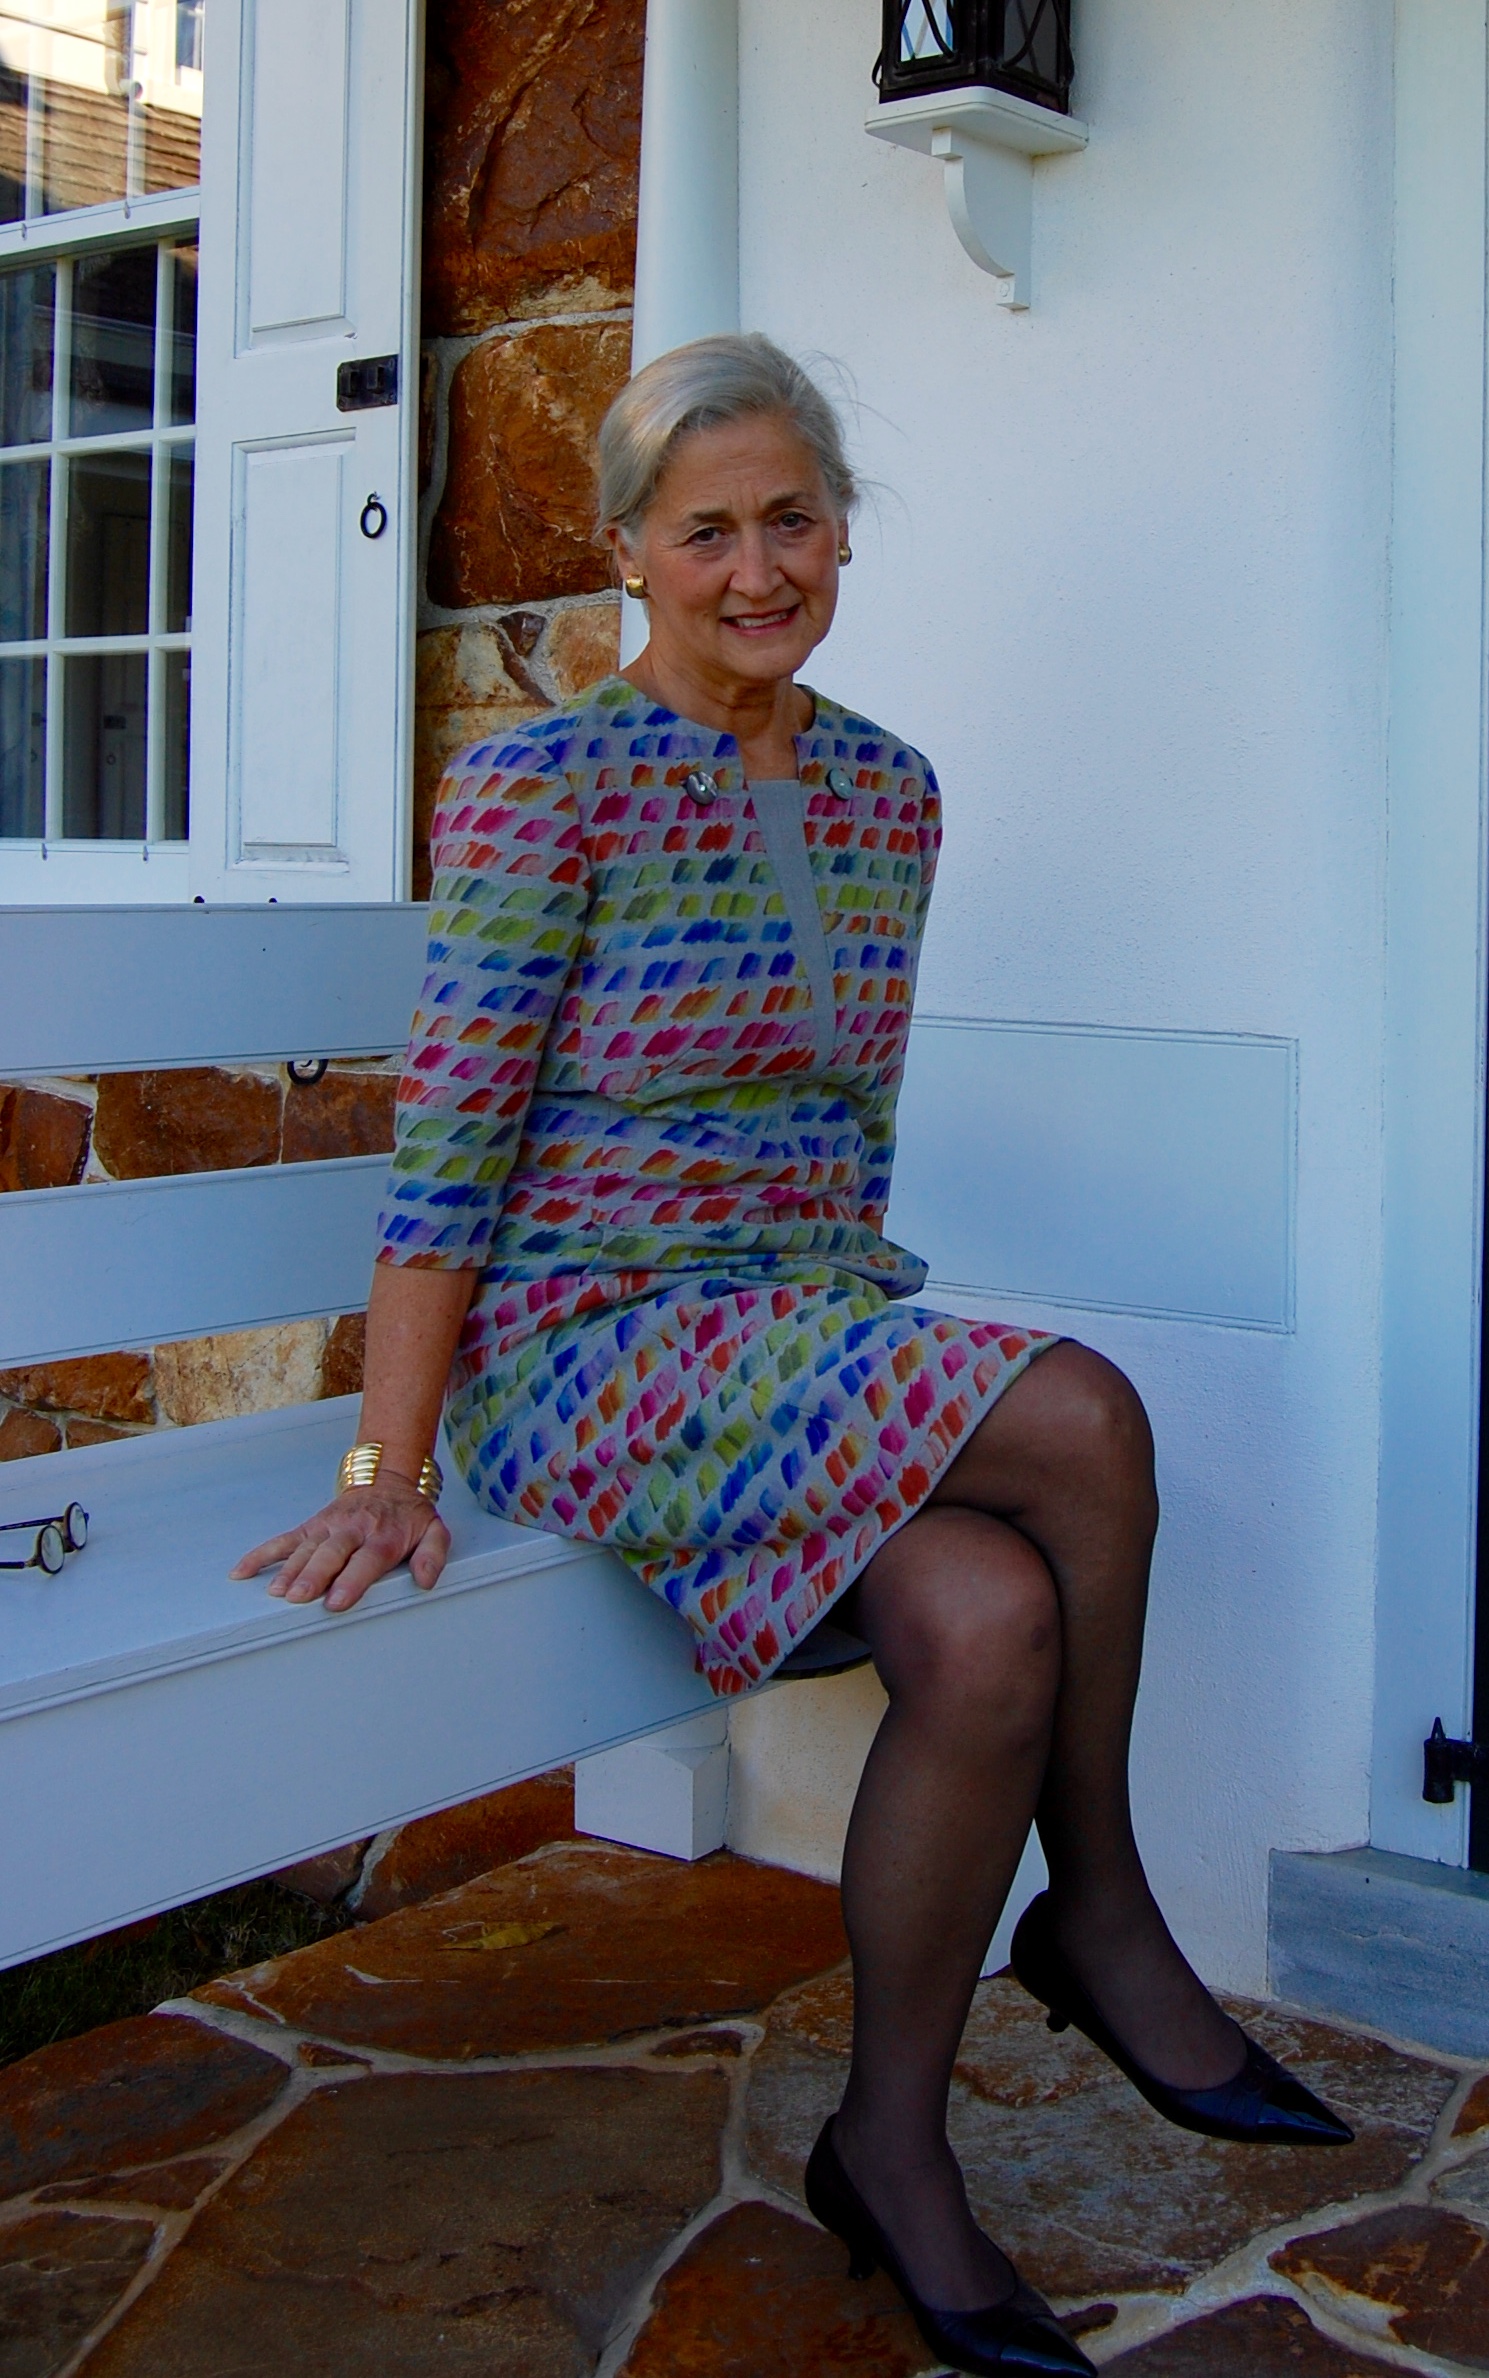
I am quite happy with the way this dress turned out.  I do think its simple lines show off the fabric well – no need for anything too fussy when the fabric is so incredibly lovely!  I love that I can wear this 1960’s A-Line style and somehow feel – and hopefully look – very current.


30 Comments

Filed under Cocktail dresses, couture construction, Fashion history, Formal or fancy dresses, hand-sewn zippers, Mid-Century style, Uncategorized, underlinings, vintage Vogue patterns from the 1960s

The Champagne Dress

It is a fact of sewing life that the construction of some dresses is just more difficult and time-consuming than other ones. This was a difficult dress to make and at times I really wondered just how long it would take to finish.

Before I go into the making of this dress, I want to put its pattern into historical context. This pattern is one of Vogue Patterns’ “Paris Originals.”

A former owner of this pattern made the notation about the bust enlargement.

As is obvious from the envelope cover, the dress was designed by Guy Laroche (1923-1989; pronounced Ghee Lah-rush); it is copyright 1960. According to the St. James Fashion Encyclopedia, Laroche was a French couture and ready-to-wear designer who worked for Jean Desses from 1950-57. Desses was known for his intricately draped dresses, asymmetry in his designs and ornament derived from the “architecture” of the garment, according to his profile in The St. James Fashion Encyclopedia by Richard Martin, Visible Ink Press, Detroit, MI, c1997, page 100. Bingo! It appears that Laroche learned well from his time with Desses and incorporated some of the same details into his couture designs once he opened his own fashion house in 1961.

I find it interesting that this pattern is dated 1960, one year before Laroche opened his couture house. Perhaps this statement in the Vogue Sewing Book from 1963 helps to explain how Vogue Patterns managed to obtain a Guy Laroche design before he had his own eponymous line:

Please click on the image to enlarge the print.

In any event, the appeal of this pattern, for me at least, was the asymmetrical draped bodice back and the tailored bow which anchors the drape on the right shoulder of the dress. It was also these details – and others – which made it a time-consuming project.

I made some alterations to the pattern before I even got started, as I wanted to eliminate some of the blousing above the waist of the dress. I do not have enough height to carry off too much excess around the mid-section, so I pulled most of the blousing into darts. Doing this made me rethink the instructions for the lining, the waistline of which was supposed to be sewn to the waistline of the dress itself. I assume the joining of these two elements was to insure that the blousing of the dress remained at the proper “elevation.”

The series of dots around the waistline indicate the sewing line to anchor the dress to the lining.

Having removed most of the blousing, I did not need to anchor the dress to its lining, so I left the lining loose.

This photo shows the loose lining and also the back neckline. Ordinarily, in couture sewing, facings are eliminated. However, in this case, knowing that the weight of the drape would be added to the back neck, I chose to use the facing to add more stability. I finished its edge with Hug Snug tape.

As you can see from the diagram of the lining (above), the back neckline is asymmetrical, to accommodate the attached drape on the bodice. I’m not sure why, but I found this rather confusing, resulting in sewing the lining together, first correctly, then thinking I had done it wrong, redoing it in what I thought was correct – and then realizing I had it right the first time. Fortunately it was easy to remove the stitching from the crepe de chine lining silk, but really? Three times? And then guess what this is?

Yes, this is a backwards back bodice!  Apparently I had flipped (or marked incorrectly) my silk organza underlining/pattern when I placed it on the fashion fabric, cut it out incorrectly and even had the underlining and the fashion fabric all carefully basted together.  When I discovered my mistake,  you can imagine my panic until I realized I had enough of the charmeuse left to cut it out again, this time correctly. Of course, then I had to baste it to the organza underlining for a second time. Tick tock, tick tock!

Things then went along fine until I got to the front neckline, which presented a quandary to me. From the instruction sheet, it seemed there was to be no interior finishing of it. It appeared to be a draped version of a bateau neckline. When I tried the dress on, it was uncomfortable as it pulled too tightly from the shoulders (which did not show up in my muslin).  It also did not look good. I decided the only way out of this predicament was to reshape it. I carefully basted and clipped and trimmed and clipped and trimmed some more (no photos of this, I am sorry to say. I was too intent on the task at hand to even think about photos!) But it all worked out. The front neckline certainly isn’t as draped as was intended, but I love the way it fits and looks.

The lining is not supposed to be attached to the dress at the front neck, according to the instruction sheet. In order to finish the neckline without adding any bulk (which would surely show up on that wide bias expanse), I stay-stitched and then catch-stitched the raw edge to the organza underlining. Not as finished a look as I would like, but it works well.

Another section of the pattern which did not present a proper interior finish for this very particular dressmaker, was the drape. It is partially gathered as you can see from the instruction sheet.

#7 shows the gathering of the interior drape.

As I did not care for a raw edge to be hiding under the drape, I decided to bind the edge with Hug Snug tape. This worked out so well and looks nice and tidy!

Besides these time-consuming corrections and additions, there were the hours of work involved in making the bow, attaching it to the dress, and making the belt. Then when I thought I was just about finished, I remembered I needed to add lingerie keepers, due to the wide stance of the shoulders. Okay, I thought. What else??

I have decided the belt is a little loose, so I need to reset the fasteners… What else, indeed!

What a good feeling of accomplishment to finish this dress and like it!

Here is a detail of the bow. I do love a tailored bow!

I haven’t worn it yet for any occasion, but when I do, I hope there is champagne involved, as I am going to toast myself for successfully finishing this one!


46 Comments

Filed under Bows as design feature, Cocktail dresses, couture construction, Linings, Messages from past owners of vintage patterns, Mid-Century style, sewing in silk, side-placed zippers, The Conde Nast Publications, Uncategorized, underlinings, vintage Vogue Designer patterns, vintage Vogue patterns from the 1960s

A Three Piece Outfit for the Holidays: Part 2, the Skirt

If I had known how lengthy a process it is to make a couture Guipure lace skirt, I would have chosen to make it before the blouse. Here I thought I was getting the more complicated part finished first. Well, I could not have been more mistaken! However, it certainly feels good to have both finished, although I may be in “skirt recovery” for a while!

The Guipure lace I used was some that I had purchased a couple of years ago. I liked the fact that the color from my fashion fabric – that coppery brown silk – would be a good contrast to the white lace. However, I did not consider if it was really the best choice for a Guipure skirt, due to the fact that part of the allure of these skirts is camouflaging the seams and darts. The light weight nature of this Guipure – and its very regular pattern – made it somewhat difficult to use for this purpose.

One of the first things I did was determine what selvedge edge of the lace I wanted to use for the hem. Once I had settled that, I had to decide how much of the fashion fabric to leave showing on the hem edge.

This selvedge edge is marked by some of the small daisy-like flowers in a horizontal line with the larger motifs.

And here the larger motifs are more prominent.I preferred this one, but I moved it up a bit to show more of the fashion fabric, in order to “ground” the lower edge.

From then on, I followed the Craftsy Class presented by Threads Magazine, with Susan Khalje teaching. Here are some pictures taken along the way:

Pinned in place, ready to stitch part of the lace covering the back seam.

In trying to camouflage the zipper, I chose to have a fairly substantial flap of lace on the left, to be snapped in place on the right. It would have been better to have smaller overlays across the zipper, which are much easier to handle.

The back of the skirt with all the lace attached and snapped in place.

All in all, the back of the skirt looks okay, I think.

And the shaping over the darts is almost imperceptible on this view of the skirt front.

I have one tip to add: when I was ready to insert the silk lining, there were many fuzzies and threads clinging onto the cotton underlining. I really did not want them encased in my skirt forever, so I quickly removed them all with a lint roller. Then the lining went in just as intended, followed by the Petersham ribbon inner waist band.

Here is the lining with its built-in drop pleat for ease of wearing.

View of the interior Petersham ribbon waist “facing.”

All in all, I am fairly pleased with how this skirt turned out. I learned so much from taking this course and making this skirt, and it probably isn’t surprising that I have a list of things to do differently the next time.

1) choose a heavier weight – or more substantial – Guipure, with a more intricate pattern. This should make it easier to hide the snaps and manipiulate the motifs in the lace to conceal all which must be concealed!

2) use a lighter weight cotton for my underlining. I felt the one I used was just a little heavier than needed. (It was some I found in my stack of quilting cottons.)

The underlining cotton. A little lighter in weight would be preferable.

3) leave 1/2” distance from the top of the zipper to the line for the Petersham ribbon. I left about 3/8” and I think the zipper is a little squashed at the waistline.

4) when I tried on the skirt midway through to doublecheck on the fit, I thought the waist was a little snug, so I added 3/8”. But once the skirt was finished, I found I really did not need the extra fullness. So next time, I’ll keep my original measurement! Hopefully I won’t need suspenders to keep the skirt from falling down.

5) next time I will definitely use a more exciting lining. I think this one is dull.

Now I have one more small thing to make for this outfit (with full pictures to come.)  But I have small on the brain right now as I need to do some sewing for my little granddaughters, making for a fierce competiton in my sewing room. I believe multi-tasking will be on the agenda.


12 Comments

Filed under couture construction, Lace, Linings, sewing in silk, Uncategorized, underlinings

C is for Couture . . .

. . . And Courage. I guess “C” could also be for Craftsy, come to think of it. Although I thought I would be writing only one post solely devoted to my guipure lace skirt (when finished!), I really feel the need to address my progress and the Craftsy course which is leading the way for me.

When, just a few months ago, Craftsy announced a new class by Susan Khalje, The Couture Lace Skirt, presented by Threads Magazine where Susan is a Contributing Editor, I jumped at it. Susan has not only written about these skirts in Threads Magazine (November 2014, number 175), she has also developed her own skirt pattern – with one view expressly intended for a guipure lace skirt – and, of course, she teaches the construction of these skirts in her own classes, too. Now with this class on Craftsy, there is ample reason to feel confident in plunging ahead with the construction of one of these elegant skirts.

View C is the version intended for use with Guipure lace. Although this looks like a simple straight skirt, there are subtle details which make it a step above ordinary. For example, the side seams are set slightly back from the front. There is slight fullness built in at the hip; not enough to be noticeable, but enough to make it more comfortable for wearing. This pattern is available on Susan’s website.

I knew I could not go wrong with this course, but it is even better than I imagined. To look at one of these skirts, one could never imagine the amount of work in something with such a simple silhouette. About halfway through the lessons, it dawned on me that there are quite a few similarities between making one of these skirts and making a classic French jacket. Both have very specific, and unusual, construction techniques. Both defy many of the normal sewing rules. Both have a tremendous amount of handwork involved. And both garments go through a really messy stage – almost chaotic! – before emerging in their final manifestation.

Here is one of the skirts illustrated in the Threads article from November 2014.

The course has ten parts, and although it is a couture sewing course, Susan’s directions can be implemented by someone with no couture construction experience. However, patience is a must. She walks you through the making and fitting of a toile, followed by preparation of the underlining and fashion fabric (the fabric which peeks through the lace, usually silk charmeuse), then the sewing of the side seams (only) and hem. I had never worked on a skirt where the back seam is not sewn until so far into the construction process, but such is necessary to provide a flat surface on which to shape and attach the lace overlay.

Another example of one of these skirts, from the Threads article.

This is where Courage comes in. Shaping the lace to lie properly on curves and darts requires a good amount of snipping and clipping and cutting of the lace! This is not for the faint of heart, but once you get into the process, it really is logical and even captivating. Besides, as Susan says, if you make a mistake, you can always patch!

A detail from my skirt, with the lace pinned and ready to attach.

This is also the part that looks somewhat chaotic, with great flaps of lace waiting to be tamed, and a crazy network of tiny stitches emerging on the underlining, but invisible on top.

One section of the underlining cotton showing the maze of stitching required to attach the lace to the top of the skirt. Leaving the basting stitches in helps to orient the lace properly.

I am about ready to insert the hand-picked zipper, which will be hidden when finished.

Ready for inserting the zipper. This is a good example of the flaps of lace which still need to be “tamed.”

What an interesting process this has been so far. Susan has so much sewing wisdom to impart, and she does it in such an engaging way, that it is like having your own personal couture teacher right by your side. If you have ever admired these skirts and thought about making one, you will find this course to be invaluable!  More on my skirt to follow in the next post on Fifty Dresses.

These opinions are my own. I purchased my subscription to the course on Craftsy and have no affiliation with the company.  


14 Comments

Filed under couture construction, Lace, sewing classes, silk, Uncategorized, underlinings

Can a Coat be Glamorous?

And what exactly is glamour? A recent quote by Carolina Herrera – “It’s important for women to feel glamorous and feminine but always themselves” – prompted me to look up the definition of the word “glamour” – and I was surprised by what I found. Here is how Webster’s defines it in its noun form: 1) the quality of fascinating, alluring, or attracting, esp. by a combination of charm and good looks 2) excitement, adventure, and unusual activity, like the glamour of being an explorer 3) magic or enchantment; spell; witchery. And then there is the definition of “glamorous”: 1) full of glamour; fascinatingly attractive; alluring 2) full of excitement, adventure , and unusual activity: to have a glamorous job.

Glamour was the last thing on my mind when I started out on my current coat project. Making a muslin (toile) can be time-consuming and tedious, especially when it shows you that some serious alterations need to be made. Fortunately, my coat muslin revealed only some small changes to the shoulder of my raglan sleeve coat, compensating for my square shoulders. My go-to book to guide me through these complexities is Fitting and Pattern Alteration, by Liechty, Rasband, and Pottberg-Steineckert (recommended to me by Susan Khalje.)

I highly recommend this book.

I highly recommend this book.

One of the things I love about this book is that it covers all sorts of situations. Square shoulders for Raglan sleeves? Not a problem.

The diagrams take the guess work out of alterations to patterns.

The diagrams take the guess work out of alterations to patterns.

Once I had my muslin adjusted, my silk organza interlining marked and cut (to be used as the pattern for the wool), I felt like I was off to the races. Not so fast. A careful steaming of my wool fabric revealed three small “thin” areas (not holes, but thin enough that I would need to work around them). This is not unusual for vintage fabric, and is one of the reasons why a careful pre-steaming or pre-pressing of any fabric is important, but especially so for vintage goods.

I marked these small imperfections with yellow chalk.

I marked these small imperfections with yellow chalk.

And then double-marked the areas with orange post-its when I was arranging the pattern pieces.

And then double-marked the areas with orange post-its when I was arranging the pattern pieces.

After untold hours of basting the layers of silk organza and fashion fabric together, I was finally ready to sew.   And this is when I think it began to get glamorous. The first major details to be completed were the pocket plackets. I thought I might faint when I had to make that first cut into one of the side panels of the coat front. But bravery saw me through!

I have the placket catch-stitched temporarily so it does not get caught on something while I finish the remainder of the coat.

I have the placket catch-stitched temporarily so it does not get caught on something while I finish the remainder of the coat.

Here is the inside of the pocket and placket.

Here is the inside of the pocket and placket.

With the first pocket and pocket placket successfully completed, the second pocket placket was simply fascinating and alluring, my progress encouraged by the charm and good looks of the first one. Definitely glamorous!

Progress - both pockets/plackets finished!

Progress – both pockets/plackets finished!

More seams ensued, each one carefully pinned, sewn, pressed and catch-stitched. Particularly rewarding were the shoulder seams of the raglan sleeves. Properly clipped, pressed and catch-stitched, the seams lie beautifully and look good, too.

The benefits of a silk organza interlining (or underlining) are manifold, but not least of which is a foundation upon which to secure the seams.

The benefits of a silk organza interlining (or underlining) are manifold, not least of which is a foundation upon which to secure the seams.

A view of the back of the coat (in progress.)

A view of the back of the coat (in progress.)

Although I have many more hours to go with the construction of this coat, I can’t help but feel that not only is this coat going to be glamorous, with its elegant gray cashmere, its vintage sensibility and all its hidden, inside secrets used to tame those seams, it is also going to be feminine and definitely me.

Perhaps the next question to ask is “Can sewing be glamorous?” It is “fascinatingly attractive, full of excitement, adventure and unusual activity.” It is magical and enchanting, too. The answer would have to be, “Yes, sewing most definitely can be very glamorous!” Even when we are in our bedroom slippers and blue jeans, covered in threads and pins, if we are sewing, I say we are glamorous.

20 Comments

Filed under Coats, couture construction, Dressmaker coats, Love of sewing, Mid-Century style, Uncategorized, underlinings, Vintage fabric, vintage Vogue Designer patterns, vintage Vogue patterns from the 1960s, woolens

Sweet November

The trickery, which defined my October sewing, finally floated away with the leaves and the goblins, leaving sweet November with her welcome reward, a new dress for Autumn and Winter.

Sweet November

So what made vintage Vogue 1395 such a tricky dress to make? I documented my efforts to get a workable muslin (toile) in a post from early October. Once I had my adjusted muslin pattern, I transferred it onto black silk organza to use as my cutting guide. It was then I realized that, because the design on the fabric, a silk and wool blend, was printed on it, not woven into it, I needed to work from the right side of the fabric in order to match the horizontal “lines.” This meant that I had to flip every piece that I cut out and then exchange the organza with its opposing side. (I hope this makes sense.) It added a bit of uncertainty to the process and I was fanatical with flipping and checking to make sure I kept the design in line. Something told me I should delay cutting out the sleeves until I had the body of the dress together – my sewing godmother at work, I guess – and I am glad I did, as I’ll detail in a bit.

I had made the decision at the beginning of the project to cover the dress’s two buttons in the plain gray “wrong” side of the fabric. But once I “semi-made” a covered button, and tried it out, it was DULL. It added nothing to the dress. I went to my button box and all I could find was a small gray pearl that was close in color. But I loved the iridescence of it and determined that gray pearl buttons were what I needed. I seem to have such good luck with buttons from Britex – even though I am ordering online – and found 1” gray pearl buttons with a rhinestone in their centers. Although I am not a rhinestone-y type of person, something about them spoke to me. I remembered what Susan Khalje said in one of the classes I have taken with her – that couture often has a bit of “whimsy” to it. Well, I ordered those buttons as as fast as I could! I think they are just what was needed!

Sweet November

I had also made the decision to make the “dickey” part of the dress out of the side of the fabric with the printed design – so that the horizontal line would be uninterrupted across the bodice. Here is what it looked like once I had it done:

Sweet November

There was not enough definition between the dress and dickey to make it interesting.

I cut some scraps to see what it would look like with a play gray insert – and it was so much better!

Sweet November

So – I took the dickey all apart and flipped it over so it would be out of the plain gray “wrong side.” By now I was enjoying the versatility of this fabric (which I bought online from Mendel Goldberg Fabrics) and appreciating the serendipity of having this fabric for this pattern, giving me options.

However, the fabric posed another challenge when I got to the point of finishing the front opening in the bodice. This fabric frays enough that I was not comfortable following the directions given in the pattern instructions:

The instructions directed me to just turn back the seam allowance, but because of the ravel-ly nature of the fabric, I was certain it would pull out with wear.

The instructions directed me to just turn back the seam allowance, but because of the ravel-ly nature of the fabric, I was certain it would pull out with wear.

Instead, I opted to make a “facing” for the opening out of black organza. It is situations like this that make me feel so fortunate to have enough “sewing sense” to be able to recognize potential difficulties and then have the ability to work out creative solutions to them.

Sweet November

Silk organza pinned in place.

And here it is sewn in place.

And here it is sewn in place.

I took some pictures at this point to show the inside of the body of the dress:

Yes, those are pockets hanging on the front.

Yes, those are pockets hanging on the front.

This shows those darts with their slanted orientation.

This shows those bust darts with their slanted orientation.

The zipper is inserted by hand, as usual! Once I had it basted in place, I tried the dress on for fit and determined I had to take it in a bit at the waistline.

Then I tackled the sleeves. I had quite a time determining how to place the sleeve patterns on the remaining fabric. Some of those horizontal lines of “paintbrush strokes” change color across the fabric! And my adapted sleeve pattern has two elbow darts, which changed the horizontal line. I had to make a decision about where I wanted the best match to be, as I determined I could not match it across and up and down as I would normally want to do. I opted for a match across the shoulders – and I now believe that was the best decision.

DSC_0924

I also added a soft “cigarette” sleeve heading to each shoulder seam.

Next to the lining – and bless those vintage Vogue patterns – the lining for this dress included separate and distinct pattern pieces. I made the sizing and dart changes to the lining (in keeping with the dress) and it went together effortlessly. When I got to the point of inserting the lining by hand, I just could not resist adding silk piping to the inside neck edge. I know I am the only one who will ever see it, but it makes me happy!

Sweet November

I used a bias strip of lightweight silk for the piping.

I used a bias strip of lightweight silk for the piping.

How wonderful to have this dress completed!

Sweet November

The buttons really show in this picture.

The buttons really show in this picture.

Sweet November

Sweet November

Sweet November

There was one more aspect of serendipity to this project. Those of you who follow my blog know that part of my fascination with vintage Vogue patterns is making connections between the past and the present. I love to “place” a pattern in its correct year – and then wonder in amazement at how classic fashions are so enduring. It was my great good fortune to have this Vogue Pattern Fashion News from November 1964 in my collection of vintage fashion magazines:

Sweet November - flyer cover

Inside on page 3 is, yes, my dress!

Sweet November - flyer illustration

Just imagine – 51 years ago this month, this dress made its debut. Happy Sweet November Everyone!

38 Comments

Filed under Buttons - choosing the right ones, couture construction, Day dresses, hand-sewn zippers, Love of sewing, Mid-Century style, Uncategorized, underlinings, vintage Vogue Designer patterns, vintage Vogue patterns from the 1960s, woolens

Scrap

This particular word seems to sum up my experience – so far – with my new project of the month. I have had to “scrap” three complete muslins – as in “throw away” and “discard.” I rather like one of the other definitions for this particular word to sum up my past week of sewing – “a fight or quarrel.”   Yes, it’s been a battle, but I believe I am winning! It all started with this fabric – a soft, lovely, light-weight wool and silk blend – from Mendel Goldberg Fabrics.

Scrap

Here it is draped over my dress form.

Here it is draped over my dress form.

Although I knew I wanted to make a dress with a slim profile – to minimize the fabric’s horizontal design – it took me a while to find the right pattern. I started with one that had curved lines in its bodice and “scraped” that idea after my muslin (toile) revealed many fitting issues. I took that as a sign that the pattern wasn’t the best one to use anyway (which I suspected all along. It’s really important to listen to one’s intuition in things like this!) After another search in my pattern collection, I settled on this dress.

Gray painterly dress - Lanvin pattern

However, I want below-elbow length sleeves so I did a little sketch to try out the look:

Gray painterly dress - sketchAfter finding a sleeve pattern from another dress which sports two elbow darts, I figured I was in business. Ah, the battle was just beginning. The first muslin I made revealed bust darts that were two inches (two!!) too high. And although I wanted a slim profile, I do have to be able to move in the dress!  I figured I needed to add two inches in total width from the lower armscye down.  Here is a diagram of the pattern pieces. The angle of the bust darts is vital to the fit of the dress so I could not just pivot the apex of the bust. I had to reposition the entire dart, which was getting it awfully close to the pocket.

Gray painterly dress - pattern diagram

Making changes in that first muslin was just a study in frustration, so I scraped it and made a new one. My second one was better, but still had some kinks in it. The armscye seemed to be off kilter, the reason for which I could not figure out. I’m telling you these are the things that keep me up at night. At this point I went to JoAnn’s and bought more muslin. I was determined to win this fight! A whole new muslin and finally I had one that fit. I was even happy with my mish-mash sleeve (after making a few minor adjustments.)

Scrap

Scrap

I have now progressed to the silk-organza underlining stage of construction.   Matching the horizontal design of the fabric across the various components of the pattern will take concentration, but that’s a task that always intrigues me.

Scrap

A decision about those two buttons, such an important focal point of the dress, is still to be made. The wrong side of the fabric is plain gray, so I might end up using that side for covered buttons. Suggestions, anyone??

DSC_0900

Other than these challenges, I am feeling fairly confident that my next post will not have to be entitled “Scrap – Continued.”

20 Comments

Filed under Buttons - choosing the right ones, Uncategorized, underlinings, vintage Vogue Designer patterns, vintage Vogue patterns from the 1960s, woolens

The Allure of Silk: Sewing with Susan Khalje, Part 1

Any week spent in one of Susan Khalje’s Couture Sewing School classes is a week filled with opportunity. This past class was my third one taken with Susan, and I have come to expect that I will learn unexpected things! My first class with her was the Classic French Jacket; the second class was when I started my color-blocked coat; and this class saw the beginning of a silk formal dress which I need for a black-tie event in early July.

She asks her students to come with a prepared muslin (toile), ready for fitting.  I have so many vintage patterns for long, lovely, fancy dresses, that it was difficult to focus on just one. As it turned out, I found myself drawn repeatedly to a dress which I had pinned to one of my Pinterest boards, and it is this dress which became my inspiration:

Blue taffeta:silk dress - originalI say “inspiration” as I knew I wanted to make certain changes. I decided I did not want to go completely strapless. Instead I envisioned a strapless underbodice, covered by a lacy, semi-transparent, sleeveless overbodice, both in white. I had already purchased a silk-embroidered organza (from Waechter’s Fabrics, before they closed their business), and I had also already purchased 3½ yards of sapphire-blue silk taffeta from Britex Fabrics. Those were my fabrics of choice for this project.

A Noisy Spring

I started with the strapless top and the sleeveless top from this current Vogue pattern:

Blue taffeta:silk dress - bodice pattern

Here’s what happened when Susan fitted the muslin on me:

The pattern for the strapless under bodice consisted of a front panel, two side princess panels, and two back panels.  However, Susan divided the side princess panels into two, giving me 7 bodice pieces rather than 5.

The pattern for the strapless under bodice consisted of a front panel, two side princess panels, and two back panels. However, Susan divided each side princess panel into two pieces, giving me 7 bodice pieces rather than 5.

The pattern for the over bodice needed major adjustments.  Here is the front . . .

The pattern for the over bodice needed major adjustments. Here is the front . . .

. . . and here is the back.  I wanted to make the back into a V-shape, which was a minor adjustment to the pattern i was using.

. . . and here is the back. I made the back into a V-shape, which was a minor adjustment to the pattern I was using.

One of the reasons I wanted to start this dress under Susan’s tutelage was for the opportunity to learn how to add boning to a structured bodice. I knew the fashion fabric for the strapless underbodice would be white silk crepe de chine. What I did not know is that the channels for the boning would be cleverly made out of two pieces of silk organza, with parallel stitching strategically placed every couple of inches – making the perfect slots for the pieces of boning.

Lotsa of seams!

Lots of seams!

Click on the photo to see the channels for the boning.

Click on the photo to see the channels for the boning.

With the boning inserted.

With the boning inserted.

Then the shocker came: in order to keep the boning from showing through to the right side, I needed to add another layer of … something. When Susan suggested white flannel – flannel! – I was skeptical, but trusting (I think!).  I kept thinking of the bulk that flannel was going to add to this very fitted underbodice, but Susan assured me it would work. She consoled me by telling me that we would be able to cut away the seam allowances of the flannel, reducing much of the added bulk. But the real surprise was the wonderful softness the flannel added to the finished underbodice. The flannel not only camouflages the boning on the right side, it also adds an amazing smoothness to the appearance of the underbodice.

Once the underbodice was complete, I set about to start the embroidered silk organza overbodice. We played around with the placement of the motifs, making sure that two big “daisies” would not be right on top of the bust.

The Allure of Silk, pt 1


Small daisies close to the bust seemed to be okay.

Small daisies close to the bust seemed to be okay.

The back of the over bodice

The back of the over bodice

And this is what the embroidered silk organza would look like over the strapless under bodice.

And I wanted to see what the embroidered silk organza would look like over the strapless under bodice.  So pretty!

Interior seams were finished by hand, and darts were left as is, with no additional finishing. The neck and armhole edges were another story, as they would need to be bound in bias-cut crepe de chine. I found this very tedious and time-consuming and appreciated Susan’s suggestions and tips to help make these delicate finished edges as even as possible. First I practiced, then I sewed, then I took out stitches and started over again, carefully clipping away noticeable bulk from the embroidery in that narrow edge.

Practice!

Practice!

Working on that narrow binding. . . .

Working on that narrow binding. . . .

Once both bodices were completed, I basted them together at the waist. The only other place they are joined is at the back seam where the zipper will be inserted.

It surprised me that no other joining of these two bodices would be needed, but once again, I have found that the unexpected often makes the most sense when it comes to couture sewing!

40 Comments

Filed under couture construction, Mid-Century style, sewing in silk, Uncategorized, underlinings

Mellow Yellow

How did I go from this . . .

A collared overblouse.

A collared overblouse.

to this?

Mellow YellowIt all started about a year ago when I saw this fabric – called Devonshire Cream Geometric Cotton Eyelet Batiste on the Britex Fabrics website. I sent off for a swatch and then ordered enough for a “blouse” although at the time, I wasn’t so sure what kind of a blouse it would be. I knew I would want sleeves in it. While the body of the blouse would need to be lined, the sleeves could be unlined to show off the gauzy design in the eyelet.

Eyelet overblouse - fabric

Inspiration finally struck a short few weeks ago when I got a small catalogue from J McLaughlin clothing company. Pictured in it was this “Lotus Blouse”:

Eyelet overblouse - JMcL #2-2

Eyelet overblouse - JMcL #2-3

As soon as I saw the “square” design in the fabric, I thought of my eyelet – and then it did not take long for me to decide to make my own version of that blouse. The construction details? Well, I knew I would have to make those up as I went along. I started with the pattern shown above, a classic early 1960s short overblouse that zipped up the back. What could be better? It really didn’t matter that the neckline would be changed, sleeves added, inches added to the length – the basics were there and so I made a muslin/toile.

I cut an underlining for the body of the blouse from a lightweight linen/cotton blend that I always keep on hand. I marked the seam lines of that underlining with waxed tracing paper and then used it as my “pattern” for the eyelet, which allowed me to make sure that all the lines and corners of the eyelet matched across seams. I hand basted the underlining and the eyelet together which made machine sewing the darts and seams very precise.

In order to put a sawtooth edge on the sleeves and the bottom of the blouse, I knew I would have to cut fabric on the bias. But first I had to decide how deep to make this self-trim. I did some experimenting to figure that out:

Should it be this narrow?

Should it be this narrow?

Or would a wider trim be   better?

Or would a wider trim be better?

I decided the wider trim was necessary to make the proper impact.  Here it is pinned onto one sleeve.

I decided the wider trim was necessary to make the proper impact. Here is a sample of it pinned onto one sleeve.

Once I decided the proper width of the trim, I set about hemming it by hand.  Here is a photo of that “hemming” process.

On the right you can see one "peak" already stitched.

On the right you can see one “peak” already stitched.

Having the trim cut on the bias gave me flexibility in attaching it to the sleeve and bottom edges. Then finishing the inside raw edges provided its own challenge. I had already used Hug Snug rayon tape to finish the interior seams. The soft, non-bulky nature of this wonder tape gave me the idea to use it for finishing the armscyes and the interior sleeve edges.

I made a bias tape out of the underlings fabric to bind the neck edge.  Seam edges are encased in Hug Snug.

I made a bias tape out of the underling fabric to bind the neck edge. Seam edges are encased in Hug Snug. Click on the photo to see more detail.

The actual hem on the blouse presented me with three edges (the fashion fabric, the underlining, and the bias trim) to control and hold together. I used Hug Snug again, this time flat and sewn with a catchstitch (a fabulous idea I just got from Lilacs and Lace blog, which I will use again and again! Thanks, Laura Mae!)

The catch stitch is done across the width of the Snug Hug tape.  It is the perfect technique for this application.

The catch stitch is done across the width of the Snug Hug tape. It is the perfect technique for this application.  Again, click on the photo for more detail.

I had some difficulty finding an 18” separating zipper that was lightweight enough for this blouse. I still think the one I finally ended up using is a bit heavy, but until I find another one, this one will have to do.

Mellow Yellow

I still need to add a hook and eye at the top!

I have always loved overblouses. They are comfortable, classic, versatile, and just a little bit different of a look. I think this one fits that description well – I like it!

I could not resist styling this blouse with a hat!

I could not resist styling this blouse with a hat!

Mellow Yellow

Mellow Yellow

Mellow Yellow

Pale yellow shoes help complete the outfit!

Pale yellow shoes help complete the outfit!

After Mellow Yellow, where do I go? My next project is anything but mellow – or yellow, for that matter.  June will find me thinking – and making – fancy, but not frilly. Details soon . . .

35 Comments

Filed under Blouses, Eyelet, Mid-Century style, Uncategorized, underlinings, vintage Vogue patterns from the 1960s

The Evolution of a Suit Dress – Part 3: Finished Jacket

It is a fairly well-known fact that making a classic French “Chanel-like” jacket takes about (or at least!) 70 dedicated hours of sewing time. I did not keep track of the hours I spent on my Jo Mattli-designed jacket, but I am guessing that it rivals – in time spent sewing – both of the classic French jackets I have made. However, I am not complaining. I would commit to it all over again. And just think – I still have to make the coordinating dress for this jacket!

Mattli jacket But it is finished, and happily so. One of the true joys of sewing is the ability it gives us to make some stylistic changes, add embellishments if desired, and use our heads to determine what works and what doesn’t work for the fabric we are using and the intended usage of our garments. While I did not make any stylistic changes to this jacket, I did add my own “dressmaker details” while stitching my way through this project. But first a few more regular details, picking up where I left off in my last post.

1) To finish the underside of the bound buttonholes, I used organza patches. I have started using this method all the time, as it makes such a neat, fool-proof finish.

The silk organza patch is sewn onto the right side.  After cutting and clipping the corners - carefully! - you turn the organza and you have a perfectly finished opening to back up to your bound buttonhole.  then it is easy to sew the two sides together very neatly.

The silk organza patch is sewn onto the right side. After cutting and clipping the corners – carefully! – you turn the organza and you have a perfectly finished opening to back up to your bound buttonhole. Then it is easy to sew the two sides together very neatly.

2) Even though the entire jacket is underlined with silk organza, I added another layer of silk organza “interfacing” to the hemline, as directed in the pattern instructions.

Mattli jacket

I always like to baste the hem along the bottom edge to stabilize it until the jacket is complete.

I always like to baste the hem along the bottom edge to stabilize it until the jacket is complete.

3) I used black “cigarette” which I purchase from Susan Khalje’s store for the sleeve headings. I doubled and graduated the two layers to achieve the correct amount of sleeve–cap cushioning. Unfortunately, no photos were able to pick up the details in this – too much black and navy blue and not enough contrast!

This is what the "cigarette" looks like.

This is what the “cigarette” looks like.

One of the interesting construction details in this design is the notched collar. Most notched collars are seamed at the “notch,”,joining the upper collar and the front facing and forming a “V”.

This diagram from The Vogue Sewing Book. c. 1970, Butterick Division, New York, New York, shows a classic notched collar.

This diagram from The Vogue Sewing Book. c. 1970, Butterick Division, New York, New York, shows a classic notched collar.

However, the collar in this Mattli design is formed by extensions of the front facing, with a center back seam on the upper-collar portion of the facings.   Hopefully these photos will explain better than words can:

You can see there is no seam at the "notch."

You can see there is no seam at the “notch.”

Here is the seam at the back upper collar.

Here is the seam at the back upper collar.

While I was contemplating the lining for the jacket, I thought it would add just a really special touch if I did a interior bias piping to set off the lining where it joins the jacket along the front edges and around the neck. Normally this is made out of silk, but I did not have any light-weight silk which was the correct color of red. However, I did find some scraps left over from a red wool challis maternity dress I made for myself over 34 years ago. (Yes, you read that correctly!) Very light in weight – and the exact color I needed – made it the perfect fabric for this detail.

I cut a bias strip one inch in width and folded it in half.  I guess this proves it pays to save scraps!?

I cut a bias strip one inch in width and folded it in half. I guess this proves it pays to save scraps!?

This is such an easy flourish to do, and it adds such a professional touch.  Adding this flat “piping” is quickly becoming a standard for me when I make jackets or coats. Once you have your bias strip cut, folded in half and pressed, all you need to do is baste it in place along the line where the lining will be hand-stitched to the jacket interior.

The bias "piping" basted in place.

The bias “piping” basted in place. Click on the photo to see it close-up.

And here’s what the finished lining looks like:

Mattli jacket

Here is the back neck edge.

Here is the back neck edge.

I really like this extra flourish.

I really like this extra flourish.

Now – true confessions!  After top-stitching the sleeve edges, the collar and most of one front, I decided I did not like it.  I thought it detracted from the windowpane of the fabric, so I took it all out.  NO top-stitching – for me – on this jacket!

Finally, I made a small change to the back hem of the jacket. Can you figure out what it is? (A previous photo of the jacket back will also give you a clue.)

Mattli jacket I used a trick I learned from my French Jacket class with Susan Khalje: I added a slight curve to the hem and lengthened it by about a half-inch, graduating it back to the prescribed hemline at the side back seams. I love this graceful detail. I believe it will be especially effective when it is paired with the dress. (This photo also shows that all the hours I spent on the layout, making sure I had matched the plaid, was time well spent!)

Speaking of the dress (and matching more plaid) . . .   I never imagined I wouldn’t have this entire ensemble completed by about now. So – it looks like I’ll still be sewing on wool when Spring arrives. Hopefully by the time Spring departs I will have moved on to something more seasonal!

26 Comments

Filed under bound buttonholes, couture construction, Dressmaker details, piping, Suit dresses, Uncategorized, underlinings, vintage Vogue Designer patterns, vintage Vogue patterns from the 1970s, woolens