Category Archives: Uncategorized

More on Making a Classic French Jacket

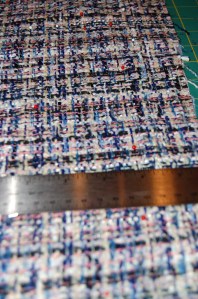
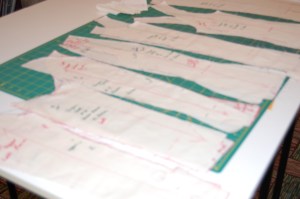
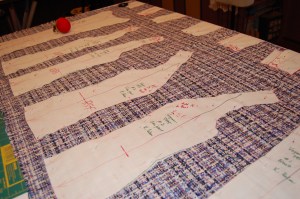
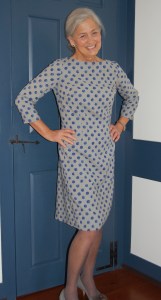
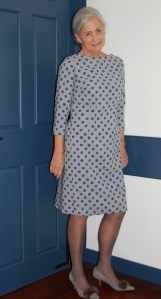
What more can be said about the process of making a classic French jacket? Well, actually, quite a lot! These jackets look deceptively simple (and elegant) when finished, but their looks belie the hours involved in their construction.

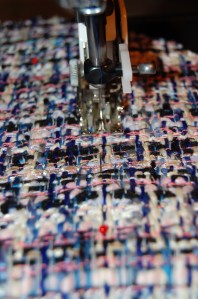
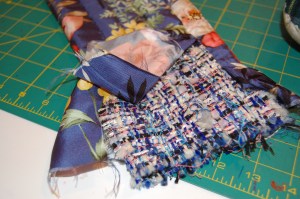
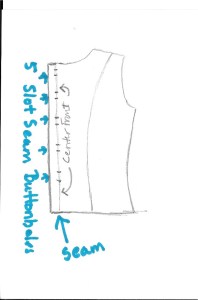
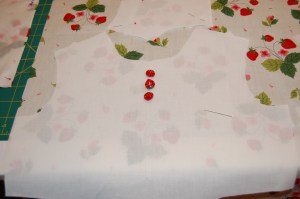
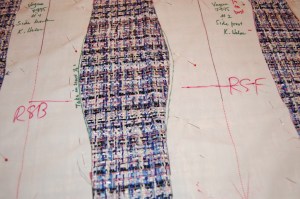
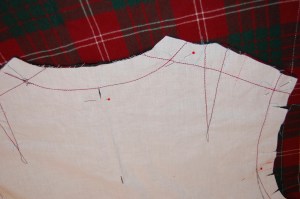
One of their sneaky little secrets is the sewing of the sleeves onto the body of the jacket. The shoulder seam is one of the few areas of the jacket which requires interior reinforcement. The selvedge edge of the lining fabric can be used for this, but I prefer to use a selvedge edge of silk organza.

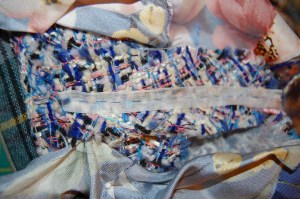
The strip of organza is sewn on the seam line by hand.

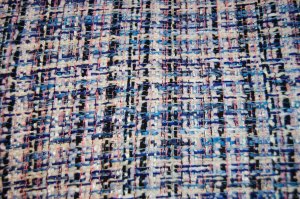
Once that is in place, the sleeve is ready to be inserted – all by hand! Pinning the sleeve in place accurately is so important, as the grainline of the boucle needs to hang perfectly both vertically and horizontally (and match, too, of course.) The top half of the sleeve is sewn from the outside with small, tight fell stitches. Then the lower half of the sleeve is sewn on the inside with small backstitches, both segments using waxed, double thread. If done correctly, the cap of the sleeve will curve nicely.

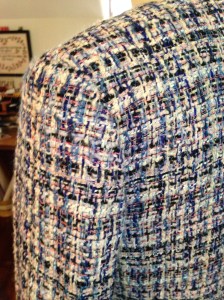
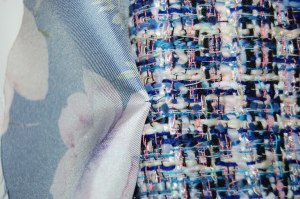
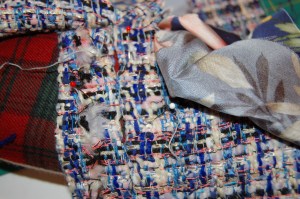
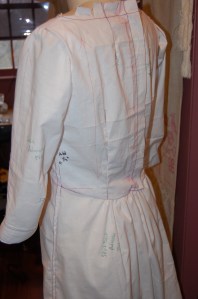
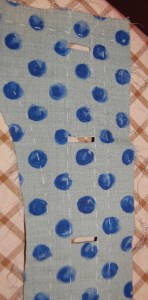
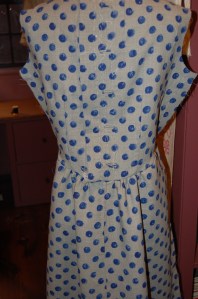
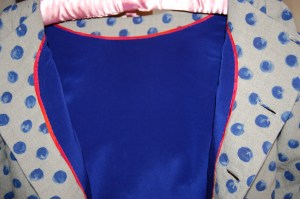
Looking at the sleeve head from the back of the jacket

And from the front.

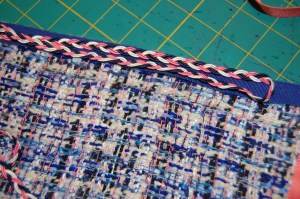
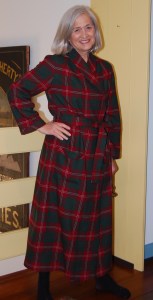
Finishing the sleeve insertion is, for me, the last big hurdle to get over before the really fun part starts. That, of course, is the trim. I deliberated quite a bit over the trim for this jacket. I originally thought I would emphasize the blue in the boucle, using pink as a small accent. When I could not find a “demonstrative, stand-alone” trim I liked, I determined to use an underlay of Petersham ribbon, with a coordinating, narrower trim on top.

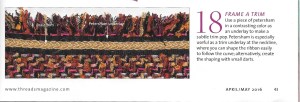
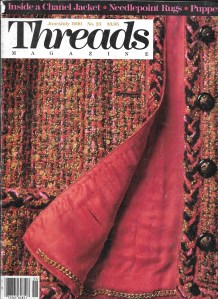
For those of you who are not familiar with Petersham ribbon, take a look at this cover from Threads Magazine, May 2016.

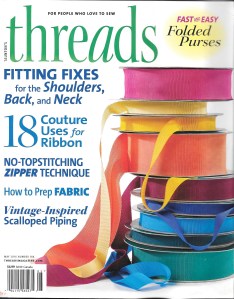
In the accompanying article by Susan Khalje, one of her suggestions is to use Petersham ribbon to frame a trim.

I used Petersham ribbon on my last French Jacket, and was really delighted with the effect.

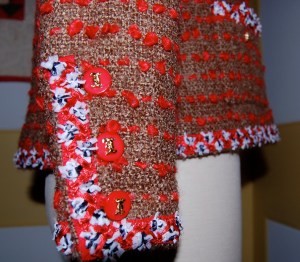
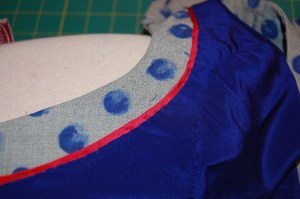
Red Petersham ribbon under the frilly trim gives it more dimension.

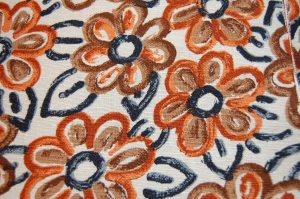
The more I looked at the blue, the more I thought it did not give the effect I wanted. I then decided to try Petersham ribbon in a pink hue.

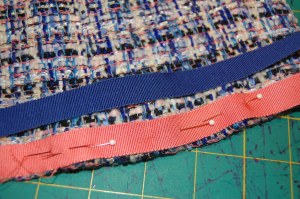
There are actually two pinks in the weave of the boucle, one peachy and one clear pink. Doing the trim this way brings out both hues, which I really like.

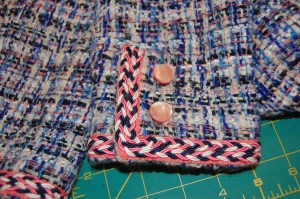
The Petersham ribbon is peachy, while the soutache trim has a clear pink intertwined with white and navy blue. The buttons take either hue!

Of course, this application of trims means four times around the perimeter of the jacket by hand to apply first the Petersham and then the double row of soutache trim. I never make things easy. Is it any wonder this jacket isn’t finished yet?

19 Comments

Filed under Boucle for French style jackets, Chanel-type jackets, couture construction, Uncategorized

Out of the Chaos …

It is not all that unusual for a big sewing projects to begin in some sort of controlled chaos, whether it is unwieldy pattern pieces, or slippery fabric, or complicated instructions – or no instructions! But nothing quite comes up to the chaos that making a classic French jacket creates.

Two main things contribute to the chaos. The first is the nature of boucle fabric, which is the building block of the jacket. Boucle is, by nature, a loosely woven, sometimes wildly variegated fabric. The loose weave is what gives it the ability to be quilted “invisibly” to its lining. But, it is also what makes the fabric fray so easily, demanding careful handling throughout the construction process.

Then there is that quilting process. To say that the construction of this type of jacket is unconventional is an understatement. Once one has her fashion fabric (boucle) pieces thread traced and cut out, the lining is cut to conform to the shape of each individual jacket and sleeve piece. Then, the lining is quilted onto the boucle following  guidelines (selected by you!), but dictated by the boucle.

A ruler and pins help me determine where my quilting lines should be, generally about an inch apart from each other and set in an inch from the side seams.

Quilting with a walking foot.

The ends of the quilting lines stop a couple of inches from the top and bottom of the marked seam lines, and the loose threads are fished into the inside and tied off, each one with three loops to secure the knot.

Although it is difficult to see, here is the tying off of one quilting line in-between the two layers.

How strange is this? Then the edges of the lining are hanging loose while you proceed to sew the seams of the boucle. I pin the edges of the lining back in order to make this process a little more orderly, but it is still kind of a mess.

One of the sleeves, quilted, with its lining pinned back.

I have a great advantage in making this jacket, in that I have a muslin pattern which I know fits me well. Knowing this allows me the option of finishing the sleeves before I do the main part of the jacket, and that is what I have done.

I have finished off two of the three sleeve seams here before sewing the final, third seam.

All the sleeve seams are now sewn, and I am about to finish attaching the lining at the cuff ends of the sleeves.

I also decided once again to make slot-seam buttonholes on the sleeves and at the center front.

Here is the extension on the sleeve cuff. Normally cut as one with that section of the sleeve, I make it a separate piece so that I can leave two openings for the buttonholes. If you look closely at this photo, you can see the slots for the buttonholes.

This shows the extensions for the buttonholes.

Two finished sleeves, except for the trim, of course.

Now, here is a diagram of what I do to make the slot-seam buttonholes for the front of the jacket.

It is important to know how much width you need for your trim and buttons before deciding the width of that extra extension piece sewn onto the front. In this case, I determined I needed a piece with a finished (not including seam allowances) width of 1¼“. Then I proceeded to sew the seams together.

The body of the jacket really looks like chaos here!

Gradually the chaos will begin to be tamed as I hand-stitch the edges of the lining in place.

Perhaps the eventual control of such chaos is what helps to make the construction of these types of jackets so appealing. It is a good thing to remember that the creative process can be messy and tedious and very time-consuming. Sometimes, as in life, you just have to see it through to the other side to be able to appreciate the journey.

24 Comments

Filed under Boucle for French style jackets, Chanel-type jackets, couture construction, Slot-seam buttonholes, Uncategorized

A Detour through the Strawberry Patch

Sewing on more than one project at a time is, I guess, a form of multi-tasking. Although I believe I am like most women in that I am good at multi-tasking, I prefer not to do so with sewing. I like to work on one thing at a time, but sometimes, life just doesn’t lend itself to such discipline. Such has been the case with the hours I have spent sewing, not on my Classic French Jacket, but on two little dresses – birthday dresses! – for my two little granddaughters. I know they won’t always want to wear sister dresses, so I am anxious to sew such things for them while they might still think it is fun. And if that means I need to steal some hours away from my personal sewing, then that’s what happens.

Spring birthdays are lovely as it means I get to sew with cheery cottons and make little puffed sleeve dresses with big sashes in back. I was especially inspired this year with a 5+ yard length of vintage fabric I purchased from an Etsy shop a couple of years ago.

A strawberry print cotton for two little Spring sisters

I knew this fabric was most certainly from the 1950s, as this type of print was prevalent then, as well as the fact that the fabric was only 35” wide. The more traditional width of 45” most of us are used to, did not become commonplace until about 1960. To corroborate my suspicions, I saw this dress on Pinterest:

Sold as a vintage 1950s’ dress, it is edged with rickrack.

Although this fabric would probably have been used for adult fashions in the 1950s, I found it to be perfect for little girls’ dresses in 2017. Not only that, I found these vintage strawberry buttons which just seemed to be made to go with the fabric!

The Etsy store from which I purchased these buttons indicated they are from the 1960s. They are hand-painted and quite small.

I started with a (new) pattern I have used before, and made new copies of the sizes I needed for my two little ones.

I used View C of this pattern last year for another birthday dress, but obviously made some apparent changes to it for these dresses.

I knew I wanted to make the collars and sleeve bands out of white cotton, and pipe them in red. I made my own piping out of cotton kitchen string and some vintage all-cotton bias tape I had in my sewing supplies.

I decided to add a bit of embroidery to the collars just to make these dresses a step above ordinary. I selected a strawberry motif from the fabric and made a drawing, which I then transferred onto the collars.

This is the dress for the 4-year-old.

This is the dress for the two-year-old.

On the back of the dresses, I added snaps to the edges of the collars to make them lay flat. They can be unsnapped for ironing or to wear a sweater, but it certainly makes for a nicer appearance,

When it came to the hems, I found that I had cut the skirt length for my older granddaughter just a little too short. I was pretty irritated with myself until I realized that facing the hem in white bias cotton actually looked better than if I had just turned up the hem. The strawberry print fabric is lightweight and the design would have shown through a hem which was just turned up. You can see this happened in the dress featured on Pinterest.

When it was time to hem the dress for my younger granddaughter, I had enough length, but I decided to underline the hem with white cotton to avoid that “see-through” of the design. So my mistake on the larger dress made for a better outcome with both of the dresses. (It doesn’t always work that way, does it?)

I sewed the bias strip on as if I were facing the hem, then turned it up again. This way, the dress can be easily lengthened if need be.

After doing a light running stitch by hand to secure the bias band inside the hem, I then turned up the hem and sewed it as usual.

Three little buttons at the front were the finishing touches for both dresses.

The larger dress…

…and the smaller one.

The back of the larger dress

And a back view of the smaller dress.

Interestingly, I had to do some strategic planning when laying out the pattern pieces on the fabric. While the design does not have an up-and-down orientation, there are spacing issues that I had to account for. For example, I wanted each bodice front to have a spray of strawberries in the center, with enough space to add the buttons above. In addition, the spacing of the strawberry sprays determined how the patterns for the skirts were arranged on the cloth, as I wanted a balanced appearance of the strawberry sprays, without any cut in half at the waistline.

Here I am trying to find the “sweet spot” for the design on the bodices when arranging the pattern pieces.  It was easier to do on the larger dress.  The bottom button on the smaller dress is a little closer to the strawberry design than I would have liked, but in order for the design to be centered as much as possible, I opted to go this route.

This is the front bodice of the larger dress, with a carefully placed central motif.

And this is the smaller dress, with a tighter fit for the placement of the buttons.

Sometimes it can get a bit boring making the same dress twice, but the quality of this silky soft fabric is such that it was an absolute joy to sew. And, of course, I was inspired by the thought of my two little girls dressed up and looking so cute! They seem to like their strawberry dresses.

39 Comments

Filed under Buttons - choosing the right ones, Heirloom sewing for children, Sewing for children, Uncategorized, vintage buttons, Vintage fabric

Timeless: The Classic French Jacket

So much has been written and illustrated about Coco Chanel’s classic cardigan jacket, it is difficult to imagine more can be said, but that won’t keep me from trying. Of course, only Chanel is Chanel, and that fashion house rightly owns the claim to the mystique and allure of its trademark design. However, interpretations of that classic French jacket – and those who are making them – have added to the jacket’s lexicon over the years. In many ways, I think the advanced (in skill level, not age) sewing community has been instrumental in adding a whole new dimension to the way we look at the jacket and then personalize it.

Interest by home dressmakers in the classic Chanel jacket has been evident for decades. This Vogue Pattern Book Magazine from October/November 1962 is a prime example. To quote precisely, the caption for the cover says: “the new after-dark dazzle involves a certain amount of alchemy. Take a clean-lined suit design (shades of Chanel) and make it shimmer: a springy white suit wool scored with gold metallic and red braid…”

The June/July 1989 issue of Threads Magazine has one of the most iconic covers ever, described above the masthead as “Inside a Chanel jacket.” The extensive article by Claire Shaeffer covers the history of the jacket, idiosyncrasies of its construction and tips for the home dressmaker wishing to make her own Chanel-inspired jacket.

In more recent years, books and instructions for making the classic French jacket have been joined by classes, most notably on Craftsy and by couture teachers such as Susan Khalje, who, in my opinion, teaches the purest jacket construction interpretation available to the sewing community. If you are unable to attend one of her Classic French Jacket classes, then by all means, subscribe to her video for the next best thing.

There are several reasons, I believe, why the classic French jacket appeals to home dressmakers, particularly to those of us who delight in couture procedures, hand work, and artistic license. It is we who have the ability to chose from such a broad array of beautiful boucles and silk charmeuses, both at select fabric shops and online. Therefore, we are not limited to the fabric selections of a particular fashion house. Furthermore, we can adapt the jacket to our own individual preferences, for example, fitted or boxy, longer or shorter, collarless or not, to mention just a few potential changes. Finally, the finishing components of trim and buttons make it unique and uniquely our own.

This quote from Oscar Wilde is an appropriate summation of how home dressmakers, privileged as we are to know the “recipe” of jacket construction, approach the making of our classic French jackets: “To look at a thing is very different from seeing a thing.” We dressmakers see the jacket from various viewpoints:

1) construction techniques; including, but not limited to, the unique method of marking seamlines, quilting the layers of boucle and lining silk together, and hand-finishing the raw interior seams.

2) as already stated, the privilege of selecting our own fabrics, trims and buttons.

3) stylistic details which enhance the ability of the jacket to flatter ones particular form, such as altering the length of the sleeves, pocket details, front neckline variations, adding bust darts in certain situations, etc.

4) an appreciation for – and knowledge of – the engineering magic of invisibly quilting two fabrics together to produce an entirely new medium.

In my opinion, it is this ability to see – and appreciate firsthand- the complexities of the jacket which makes it such a worthy undertaking.

You may ask at this point why I am thinking so much about classic French jackets. Could there be any other reason than the fact that I have started work on my third, but far from final, one? Using boucle gifted to me by my grown children a little over a year ago, I am intently working through the “process.” Because I am fortunate enough to have a fitted pattern muslin template from my class with Susan Khalje 3½ years ago, my initial progress has been speedier than normal.

Here are my muslin pattern pieces freshly ironed and ready to start.

My muslin pattern arranged on the boucle, ready to double-check and cut out.

Allowing for wide seam allowances…

Pieces cut and thread-traced.  Next step:  the lining fabric.

Stay tuned as I make further posts about my time-consuming progress on this timeless style.

23 Comments

Filed under Chanel-type jackets, Coco Chanel, couture construction, Mid-Century style, Uncategorized

How Exciting Can a Bathrobe Be?

Or – Who Is That Woman in our Kitchen? After well over twenty years of wearing the same ratty old bathrobe (well, it wasn’t old or ratty when I first started wearing it, but the years took their toll on it), I now have a new one. I will admit to being almost unrecognizable in the mornings and evenings now, as I float through the house in my new attire – leading my husband to wonder if a new woman is now making the morning coffee.

I found vintage Viyella wool/cotton fabric on eBay last year. Although only 35” wide, the length available was 5 ½ yards which I determined should be enough for a ankle-length bathrobe. Viyella is a lovely blend of 40% wool and 60% cotton, and it is machine washable. It is lightweight, but warm, very soft, and such a pleasure with which to sew.

The paper labels were still attached to this length of Viyella.

From four bathrobe patterns in my collection, I chose this one for its classic styling, including a wrap front and shawl collar:

I made a muslin (toile) to check on the fit, and then I used the muslin as my pattern, marking the seam lines onto the Viyella using waxed tracing paper.

Because of the narrow width of the fabric, and the need to be precise with matching the plaid in the fabric, I laid out my muslin pattern singly. I had to do this on the floor because of the great length with which I was working. Matching the plaid, although thankfully a very even plaid, took a lot of time – and time on my knees! Ouch!

One of the pattern pieces close up.

And here is one piece with markings transferred onto it. I am used to sewing on a marked seam line, and prefer this method rather than using set seam allowances.

I am always impressed by some of the subtleties in these vintage patterns. This one includes bust darts that descend from the shoulder seams. Also, two small back darts make the fit across the shoulders so much more precise. Both are clearly shown in the diagrams on the reverse side of the pattern envelope.

Click on the picture to see the details.

Also detailed on the pattern layout diagram is the slight flare to the front edges of the robe. I didn’t really pick this up in the muslin I made, but once I was working on the robe, especially in this plaid, which makes a flared seam more apparent, I was very aware of it. It is such a nice detail, making the wrapped front closure more graceful in appearance and offering just a bit more coverage than a straight edge would do.

You can follow the flare of the front edge by looking at the descension of the plaid.

A detail of the back neck edge.

I did make a few changes to the pattern. First of all, I used a fusible interfacing instead of a “sew-in” one (typically indicated on vintage patterns form the 1950s, as this one is.) I don’t use fusible interfacings very often, but I decided this would be a good application for such. I used “Heat n Bond” woven interfacing, ordered from fabric.com, and so far, I am very pleaded with its performance. Secondly, I added another pocket, as I like two pockets on my bathrobes. I also had to lower the placement of the pocket from the lines indicated on the pattern, which were inexplicably high!

Two pockets!

A third change was the elimination of the wide self-binding on the pockets and the cuffs of the sleeves. Instead I used a 1¼ inch self-binding which I cut on the bias. With all that plaid, I thought a little bit of variety would add a nice touch.

A minor fourth change was the addition of fabric belt loops, as opposed to the thread loops called for in the pattern instructions.


I love the classic styling of this robe. The fact that I was able to use such a glorious fabric for it (contemporary with the age of the pattern, by the way!) makes it even more lovely to wear. Not only am I – yes – very excited (!) about wearing this new bathrobe, I also find it to be an unexpected, but wonderful change of persona for my early morning and late evening hours.


38 Comments

Filed under Bathrobes, Mid-Century style, Uncategorized, Vintage fabric, vintage Vogue patterns from the 1950s

Do You Do Pink?

Apparently, pink is a controversial color. Or maybe “was a controversial color” is a better statement. A recent article by Nancy MacDonnell in the Off Duty section of The Wall Street Journal (“Making Peace with Pink” February 11-12, 2017) makes a case for the appropriateness – and timeliness – of pink even for those who think they don’t like it. While I am one who thinks pink is always in fashion, it turns out that this Spring, it really is in fashion! According to Ms. MacDonnell, “On this season’s runways, pink predominated.” The different fashion houses showed varying interpretations of pink: Michael Kors was “brisk, All-American, [and] cheery.” J. Crew was “equally upbeat,” while Valentino showed pink that was “lush and romantic, with intricate appliqués and historical references…”   The list goes on and on. The unifying thread (pardon the pun), as claimed by the designers, was the lack of traditional “sweetness” associated with pink, with emphasis on the feminine power inherent in the color.

Looming large on page 58 from the November 2016 WSJ Magazine is a Valentino coat, quite traditional in design, but made very special by its stunning appliquéd pink wool.

According to Dr. Valerie Steele, the Museum Director at the Fashion Institute of Technology in New York, who was quoted frequently in Ms. MacDonnell’s article, the idea of pink as a feminine color did not take hold until the 1950s. Back in 1954 when Christian Dior wrote The Little Dictionary of Fashion, his entry on “pink” stated: “The sweetest of all the colors. Every woman should have something pink in her wardrobe. It is the color of happiness and of femininity.”   He even used pink throughout his book for illustrations, chapter headings and the title page. He recommended pink “for blouses and scarves; … for a young girl’s frock; it can be charming for suits and coats; and it is wonderful for evening frocks.” Who can argue with that, be it 1954 or 2017?

The title page of Dior’s smart little dictionary. (Harry N. Abrams, Inc., NY, NY, copyright 2007)

This page from the June/July 2013 issue of Town and Country Magazine gives an interesting timeline of the color pink, “how the color of little girls and baby dolls came of age”:

Click on the image to read it.

I particularly like this statement from Laura Vinroot Poole, the founder of boutique Capitol in Charlotte, N. C., quoted in The Wall Street Journal article: “To wear pink, you have to be an interesting and smart person… You have to have things to say. In pink, you can’t hide.”   Nor would you want to.

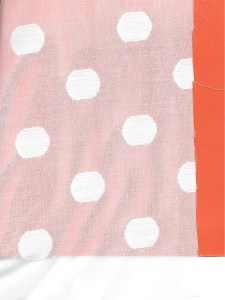
Personally, pink is my favorite color. I am always drawn to it, regardless of its hue. And its hue covers a huge range from palest pink to deepest fuchsia, from bubblegum pink to raspberry red. In thinking about pink for this post, I gathered this stack of pink fabrics from my collection. Just looking at it makes me happy!

From top to bottom:
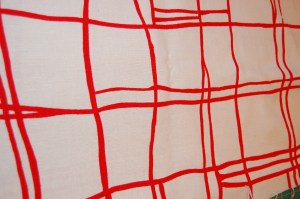
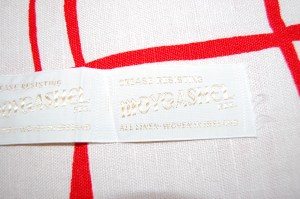
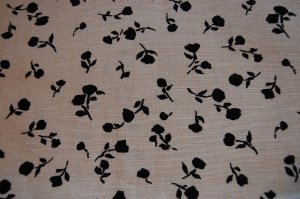
1) vintage Moygashel linen, purchased on eBay
2) silk charmeuse, purchased from Britex Fabrics
3) vintage Moygashel linen, purchased by me in the 1970s
4) linen, possibly Moygashel, purchased on etsy
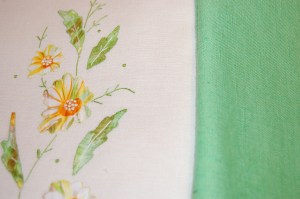
5) silk jacquard purchased from Britex Fabrics
6) silk charmeuse, purchased from Mendel Goldberg Fabrics
7 & 8) coordinating silks, purchased from Mendel Goldberg Fabrics

The only controversy I have with pink is deciding which hue of it I like best.

19 Comments

Filed under Fashion commentary, Moygashel linen, silk, Uncategorized, Vintage fabric

Sleepy Time for Two Little Valentines

Not all sewing needs to be couture-inspired. Sometimes simple pajamas are just right, especially when they are for two little granddaughters, with Valentine’s Day in mind.

Sleepy Time

I stumbled across this cozy flannel last year on Fabric.com.

Sleepy time

Designed by Riley Blake and in her “Lovey Dovey” collection, it is certainly “heart” oriented, but not so much that it is restricted just to February 14th. I bought 3 yards and tucked it away for the day when my youngest granddaughter no longer needed to be in onesies. Well, guess what? That is this year!

I picked up this Butterick pattern as I really liked view CE on the left, and set about to make matching PJs for my two little girls.

sleepy-time-pattern

One of the nice design details is the longer shirttail back of the pajama top. This makes it easier to tuck in if desired.

One of the nice design details is the longer shirttail back of the pajama top. This makes it easier to tuck in if desired.

Sleepy time

I’m very glad I have so much experience working with not enough fabric! I had to get very creative with the placement of the pattern pieces, and I was still a little short. I solved the problem by making the undercollars out of plain white flannel (which I had on hand.)

Sleepy time

I don’t own a serger, so to finish the seams and make them extra sturdy for many washings, I made flat felled seams throughout.

Sleepy time

I also added elastic to the sleeves and to the pajama pants legs, to help keep the cold air out and the warm body heat in.

Sleepy time

The fabric is so busy that I knew it did not need much embellishment, but I can never resist a little bit of rick rack, so I added a small flourish to the collars, applying it free-form.

Sleepy time

Sleepy time

When I “auditioned” the fabric for buttons, pink and red ones simply did not add any interest, so instead I chose to pick up the contrasting aqua.

Sleepy time

What fun to make something so simple, but so cute!

Wrapped up in festive paper, off they went across the miles…

Sleepy time

May your Valentine’s Day be cozy and sweet and a celebration of some of life’s simple joys!

14 Comments

Filed under Buttons - choosing the right ones, Sewing for children, Uncategorized

Coming and Going: a Split Personality Dress

Dresses – and garments in general – with back interest have always intrigued me. The addition of a simple back belt can add so much to a coat design, for example, and a yoke in the back of a dress can be the perfect place to add complimentary buttons which might not have a place on the front of the dress. Perhaps it was this reason why I was drawn to this Advance pattern, which I found in an Etsy store.

Thanks to one of my readers, I know that this pattern dates to 1964.

Thanks to one of my readers, I know that this pattern dates to 1960.

I hesitated for quite a while before buying it, as I just wasn’t so sure the gathered back skirt on this dress would look as good on me as it looked on the pattern envelope. I also did not want a “dated” or “too cutesy” look. But finally I gave in and made the purchase. The buttoned back and the dropped back waist were two details which really appealed to me, as well as the sleek sheath look of the front of the dress. I also knew that the right fabric could work wonders, and I bought the pattern with this gray and blue polka dotted wool/silk blend in mind.

I purchased this fabric from Mendel Goldberg in New York City.

I purchased this fabric from Mendel Goldberg in New York City.

Then, there is always that steadfast fall-back, as well – making a muslin (toile) and if it really doesn’t work, then just scrapping it! What could I lose besides a few yards of cheap muslin and a few hours of time?

I had never used an Advance vintage pattern before, so I was interested to see how one would make up. I was impressed! The pattern pieces went together very precisely, and, in particular, the flounce, or gathering, at the back of the skirt was not overdone. The only initial change I made to the pattern before cutting out my muslin was to lower the bust dart, which I always have to do. Once I made the muslin, it was a little snug across the front, so I added ¼” to either side seam. As it turned out, I needed the extra width just across the midriff area, and ended up taking out quite a bit of extra width from the waist down.

Some pictures of my muslin.

Some pictures of my muslin.

Coming and Going

While I was working on the muslin, I was in a quandary over the buttons. I had to have them before I could start work on the fashion fabric because of those pesky, but beautiful, bound buttonholes, which are one of the first things to go in. Nothing I had on hand was right and after a very brief dalliance with the thought of blue buttons (what was I thinking, even briefly??), I knew gray mother-of-pearl buttons were what was needed. As luck would have it I found a set of six 5/8” buttons in an Etsy shop, which were described as blue-gray mother-of-pearl. As soon as they arrived in my mailbox, I knew they were perfect.

Coming and going

By this time I had transposed the muslin onto white silk organza, made my working pattern, basted the fashion fabric and the organza together, and ordered marine blue crepe de chine from EmmaOneSock for the lining.

For those of you who asked, here is a picture of the silk organza being used as the pattern piece. when cut out, the two are basted together by hand along the seam lines, dart markings, and hem lines.

For those of you who asked, here is a picture of the silk organza being used as the pattern. When cut out, the two are basted together by hand along the seam lines, dart markings, and hem lines and then handled as one piece.

I also used silk organza patches for the facings for the bound buttonholes.

I also used silk organza patches for the facings for the bound buttonholes.

Here the facings are turned towards the inside. Proper measuring is essential for this technique to be successful.

Here the facings are turned towards the inside. Proper measuring is essential for this technique to be successful.

The back of the dress during construction.

The back of the dress during construction.

Although the pattern called for lining only the skirt back, I wanted to fully line the entire dress. The pattern for the back skirt lining is shown here in the thumbnail diagram:

coming-and-going-thumbnail-sketch

It was cut narrower than the skirt back, with darts for shaping rather than gathering. I had to make a decision about how to complete the lining – should I attach it to the waist seam at the back and somehow join the front to the back at the side seams, or should I make the lining as a completely free-falling piece? I opted for the latter, with the sleeves, of course, being inserted separately. It worked beautifully. Then, for some extra detail, I added a contrasting flat piping to the edge where the lining meets the facing.

I had this coral colored silk bias tape which I chose to use for this extra detail.

I had this coral colored silk bias tape which I chose to use for this extra detail.

Coming and going

Often facings are eliminated in couture sewing, but in this case, with the buttoned placket in the back, I decided to keep the facings so the buttonholes and buttons would have a firmer foundation.

This dress turned out to be all that I wanted – a classic slim sheath from the front, with surprise back detail which (I think?) is flattering, adding extreme comfort to its wearing, and which sets it apart from the average design.

Coming and going

Coming and Going

Coming and going


Coming and going

Coming and going

Coming and going

Coming and Going

Coming and going

coming and going

Coming and going, it feels like a good way to start off the new sewing year .

41 Comments

Filed under Advance vintage patterns, bound buttonholes, Buttons - choosing the right ones, couture construction, Day dresses, Linings, Mid-Century style, Polka dots, Uncategorized, vintage buttons

Focus on Fabric for 2017

Every new sewing year seems to have its own personality. Some of that depends on significant events that may be happening during the year, for which certain outfits must be sewn. Other influences might be travel, or the need to add some “basics” to your wardrobe, or, better yet, sewing classes, requiring planning/ muslin-making/special purchases. For me, this new year of 2017 – it is still new, isn’t it? – is going to have a focus on fabrics. I wish I could say I am resolved not to purchase new fabrics until I use some of what I already have, but I have already made that an impossibility, and the year is a scant three-weeks-old. (Thank you, Mendel Goldberg Fabrics, for tempting me beyond any recognition of reasonable doubt!) However, back to my premise – sometimes I have patterns which are just keeping me awake at night until I use them. Not so much of that this year; it is rather some of the gorgeous fabrics in my collection which are doing their best to disrupt my sleep.

Here are some of them, starting with Winter sewing.

I purchased this fabric from Mendel Goldberg in New York City. It is a wool/silk blend, and it is my current project.

I purchased this fabric from Mendel Goldberg in New York City. It is a wool/silk blend, and it is my current project.

My current bathrobe is in desperate need of replacement. This is the fabric I want to use for this new addition to my cozy, home attire.

My current bathrobe is in desperate need of replacement. This is the fabric I want to use for this new addition to my cozy home attire.

This boucle bridges the gap between Winter and Spring. Given to me for Christmas of 2015, it is a blend of wool, cotton and silk, tightly woven and lightweight. I will be trying to devote most of March to making this into a Classic French Jacket. I will be able to wear it well into Spring and then, of course, it will be perfect for next Fall and Winter, too.

2 full yards of this glorious boucle! I purchased a variety of trims to coordinate with this fabric this past summer in NYC and in San Francisco. Now I just have to decide which one(s) to use.

2 full yards of this glorious boucle! This past summer, I purchased a variety of trims to coordinate with this fabric. Now I just have to decide which one(s) to use.

Spring and Summer sewing always poses the most difficult decisions for me. That is because I have so many gorgeous pieces of vintage linen, and trying to determine which ones to use is a frustrating exercise for me. I would love to make a simple sheath out of this baby blue Moygashel linen, as it would look so lovely with that jacket mentioned above.

Lovely, crisp, pale blue.

Crisp, pale blue linen from the 1950s.

Then there is this amazing abstract design in red and white – also Moygashel – which somehow just has to wiggle its way into the sewing queue:

Red/white abstract linen

This fabric is from the mid to late 1960s, and it arrived with the label intact.

This fabric is from the mid to late 1960s, and it arrived with the label intact.

On the other extreme is this demure flower print, an early 1950s’ Moygashel linen. I have been wanting to make a dress from this for several years. Perhaps this will be the year I get it done.

A very early 1950s' linen, petite black flower silhouettes on a pale ecru background.

Petite black flower silhouettes on a pale ecru background.

Another piece of vintage linen is this duo with lengths of plain and embroidered panels. Originally intended for an A-line shift, I envision it as a dress-length tunic, accented with the grass-green linen shown here. That would be one way I could honor the Pantone Color of the Year, Greenery, as well as make a unique and versatile dress.

Focus on Fabric

How I will ever find the time to make a blouse out of this white dotted cotton, I don’t know, but hope springs eternal for this, too:

I backed this fabric with a piece of orange paper so that the polka dot design shows. The dots are woven into this fine cotton from Britex Fabrics.

I backed this fabric with a piece of orange paper so that the polka dot design shows. The dots are woven into this fine cotton from Britex Fabrics.

With weeks of travel planned for parts of the final five months of the year, it will be folly to plan too much, but I do hope to make one more linen dress which will have wearing power into the Fall.

Navy, rust and brown - perfect for early Fall.

Navy, rust and brown – perfect for early Fall.

And can I possibly get one more Classic French Jacket completed before Thanksgiving? If so, it will be made from this boucle:

focus-on-fabric-boucle

Sprinkled among all these projects will be sewing for my two little granddaughters, too. As usual, I have much more planned than I ever can hope to accomplish, but it is fun to think of the infinite possibilities that dwell in my fabric closet – and in my head.

PS – One fashion observation for 2017:  DRESS GLOVES ARE BACK!

20 Comments

Filed under Boucle for French style jackets, Linen, Moygashel linen, Uncategorized, Vintage fabric

Gifts for Thee, Gifts for Me

Part of the irony of shopping for gifts for friends and family is that I often find just as many things that I would like to see stuffed in my own stocking. Does this happen to everyone, or just me, I wonder. But I digress. Here are a few select items just right for a sewing and/or fashionable friend or relative, or maybe for a treat for yourself, as well.

Colette Patterns has come out with a Sewing Planner which is divided into two sections: Spring/Summer and Fall/Winter. There is lots of room for listing goals, priorities, and inspirations, as well as two-page layouts for individual projects. This planner makes sense to me, and I think it will finally encourage me to keep a record of fabric swatches for each of my projects – something I have been wanting to do for a long time, but never got around to doing!

gifts-for-thee-planner

The December 2016/January 2017 issue of Vogue Patterns featured, in its Must Haves section, Handy Tape II. Although I haven’t ordered this yet, I am going to (if I don’t get it in my stocking), as I think it could come in quite, well as they say, handy! It is self-adhesive repositionable tape marked in 12” repeats.

gifts-for-thee-tapeMany of you have probably already purchased a copy of The Tunic Bible, by Sarah Gunn and Julie Starr. Who doesn’t like a tunic? They really are timeless, which appeals to my penchant for clothes that transcend current trends. Once you see some of the examples in this book, you will definitely want to make one – or more. I guarantee you will love the photographs and diagrams in this book. After perusing The Tunic Bible, I discovered the perfect solution for what to make out of a piece of vintage embroidered linen which I own. Bought on a whim, its future was a mystery to me until I realized it will make a beautiful tunic dress. More on that in a future post!

gifts-for-thee-tunic-bible

For those of you who, like me, love the fashions from the 1950s, and have a preference for Vogue patterns, you really should go on eBay and find yourself one of these handkerchiefs.

Vogue handkerchief

Vogue handkerchief

The one I own still has its original tags on it.

The designer was Pat Prichard, who along with Tammis Keefe, was known for her whimsical and creative compositions for textiles (although Keefe was the better known of the two.) The colors are charming, the fabric is a beautiful handkerchief weight linen, and the design is a dressmaker’s dream. Most of us don’t use linen handkerchiefs any more, but this one, framed, would be perfect for the walls in your sewing room.

Vogue handkerchief

Vogue handkerchief

How delightful that this handkerchief features Vogue patterns!

No list of gifts is complete without something for pleasure reading (although I must admit that reading sewing books is pleasure for me, too!) If you, or a friend, is a lover of historical fiction, then “run, do not walk”, to get a copy of The Time in Between, by Maria Duenas. The heroine is a dressmaker and her profession both saves her from ruin and puts her life in jeopardy. Set during the Spanish Civil War, in the lead up to World War II, this book is also a love story, a story of redemption, and a story of resilience and bravery in the face of incredible odds. It is a wonderful, captivating read, and the descriptions of fabrics, patterns, sewing deadlines, and fashions will thrill anyone with a knowledge of fashion sewing. I read the English translation from the original Spanish. I love this story!

gifts-for-thee-time-inbetween

Perhaps you have a young girl for which to buy a special gift. I have written on this book before, but I want to again recommend Brave Irene by  William Steig. As the title implies, it is also a book about bravery, pint-sized, but every bit as meaningful, especially for a young future dressmaker. The story is charming, the illustrations unique, and the lessons implied are ones of old-fashioned values: family, love, duty, and perseverance. I love this story, too!

This book is still in print and available on Amazon, of course!

This book is still in print and available on Amazon, of course!

The title page.

The title page.

I will end my list of gifts with something that would be right only for those of you who don’t mind splurging on an occasional ready-to-wear piece. But, really, who among us who loves haute couture could possibly pass on these pajamas?

gifts-for-thee-pajamas

Featured in the Gumps (of San Francisco) Catalogue, they are called “Fashion Week in Paris” pajamas. If we can’t be in Paris for Fashion Week, then surely we can dream about doing so, right?

Right about now I am dreaming of a white Christmas, as the song goes. Whatever you may be dreaming of in this busy, happy season, I hope you find it, settled comfortably under your tree or, especially, comfortably in your heart.

14 Comments

Filed under Uncategorized